Quality of Domestic Water Supplies - WRC Home Hub Documents/Research Reports...Quality of Domestic...
37
Quality of Domestic Water Supplies Volume 2: Sampling Guide t The Department of Water tfY Affairs and Forestry *{][| First Edition 2000 Second Print 200 Third Print 2003 \ I he Department * f of Health mm W.iler Research Commission
Transcript of Quality of Domestic Water Supplies - WRC Home Hub Documents/Research Reports...Quality of Domestic...

Quality of DomesticWater SuppliesVolume 2: Sampling Guide
t
The Department of Water tfYAffairs and Forestry *{][|
First Edition 2000Second Print 200Third Print 2003
\ I he Department*f of Health
mm W.iler ResearchCommission
Quality ofdomestic water
supplies
•
Published by:
V/olume 2:
Sampling Guide
Water Research Commission No: TT 117/99
ISBN No: 1 86845 543 2
First Edition 2000Second Print 2001Third Print 2003
The Department of WaterAffairs and Forestry
\ The Department$ of Health
Water ResearchCommission

OTHER REPORT5 IN TMI5 5ERIE5
This Sampling Guide forms part of a series which is intended to provide water supplyagencies, water resource managers, workers in the field as well as communities throughoutSouth Africa, with the information they need to sample, analyse, assess and interpret thequality of domestic water supplies. An additional guide which will provide furtherinformation.on the management of domestic water supplies is also planned.
The following documents form the series:
Quality of domestic water supplies -Volume 1 Assessment Guide
Quality of domestic water supplies -Volume 2 Sampling Guide
Quality of domestic water supplies -Volume .1 Analysis Guide*
Quality of domestic water supplies -Volume 4 Treatment Guide*
Quality of domestic water supplies -Volume 5 Management Guide*
THIS GUIDE IS AVAILABLE FROM:
Director: Institute for Water Quality Studies Director: Water Services PlanningDepartment ol Water Affairs and horestry Department of Water Affairs and
ForestryPrivate Bag X313 Private Bag X313Pretoria Pretoria0001 0001Tel: 012 808 0374 Tel: 012 336 7500Fax: 012 808 0338 Fax: 012 324 3659
Director: Environmental HealthDepartment of HealthPrivate Bag X828Pretoria0001Tel:012 312 0802Fax: 012 323 0796
Water Research CommissionPO Box 824Pretoria0001Tel 012 330 0340Fax: 012 331 2565
"Still under preparation
POREWORD
In search of better health for all South Africa's people, the following three objectives are ofprimary importance: Water resource management, waste treatment and a safe public watersupply. These objectives are corner-stones of the South African Constitution and aresupported by a sound legal framework in terms of the National Water Act (Act No 36 of1998), the Water Services Act, (Act No 108 of 1997) as well as the Health Act (Act No 03of 1977).
However, [he laudable goal of ensuring that all citizens have access to a safe potable watersupply will only be achievable if reliable and timely information is made available toeffectively manage the relevant water supply systems.
With this aim in mind the Department of Health and the Department of Water Affairs andForestry, in partnership with the Water Research Commission, have embarked on a ventureto produce a series of user-friendly guidelines. The aim of these guidelines is to providewater supply agencies, water resource managers, workers in the health-related fields, aswell as consumers, with the information they need to sample, analyse, assess and interpretthe quality of domestic water supplies.
This Guide is the second in the series and is specifically aimed at explaining the conceptsrelated to correct sampling techniques. As in the case of Volume 1 (Quality of DomesticWater Supplies: Assessment Guide), particular attention has been paid to the user-,friendliness of the document.
It is hoped that this guide will contribute substantially towards building the necessarycapacity to monitor and assess the quality of domestic water supplies, and thereby provideanother stepping stone towards achieving the goal of providing safe water to all SouthAfricans.
Mr Ronnie Kasrils
Minister of Water Affairs and Forestry
Dr. M.E. Tshabalala-Msimang
Minister of Health

PROJECT TEAM
Project ManagementDr AL KiihnMr WN LesufiMs APM Oelofse
Department of Water Affairs and ForestryDepartment of HealthWater Research Commission
Technical Team
Mr AR BarnesDr PL KempsterDr AL KuhnMr WN LesufiMs APM OelofseDr A Venter
National Department of HealthDepartment of Water Affairs and ForestryDepartment of Water Affairs and ForestryDepartment of HealthWater Research CommissionBKS (Pty) Ltd/Gibb Africa (Pty) Ltd
AuthorDr A Venter BKS (Pty) Ltd/Gibb Africa (Pty) Ltd
ContributorsMs JE BadenhorslMr TT BaloyiMs S ChettyDrCCClayMr C CrawfordMr |S du PlessisProf OS FatokiMs B GenlheMr LNM MdhluliMr N McNabDr NYO MuyimaMr R ParsonsMr Nl PhupheliMr SA Pielerst1
MrTA PuleProfCF SchutteDr MC SteynbergMs E TaljaardMr R] TredwayMr W van tier MerweMr M van VeelenDr jH van Wyk
Department of Water Affairs and ForestryDepartment of HealthRand WaterUniversity of PretoriaDepartment of Water Affairs and ForestryDepartment of Health and WelfareUniversity of Fort HareCSIRDepartment of HealthUmgeni WaterUniversity ol Fort HareParsons and AssociatesDepartment of Health and WelfareCape Metropolitan CouncilDepartment of HealthUniversity of PretoriaRand WaterDepartment of HealthDepartment of HealthWater Wealth ccBKS (Pty) LtdUniversity of Stellenbosch
Editorial Team
Mr R du PlessisMs K Bloem
Exodon Interactive ccExodon Interactive cc
IV

STRUCTURE OP THI5 GUIDE
The Sampling Guide is divided into four parts
Parti
General information on the objectives and concepts ofdomestic water quality sampling
Planning of the sampling programme
Preparing for the sampling exercise
Part 4
Sample collection

TABLE OF CONTEMT5
IntroductionStructure of this Guide v
What is the purpose of this Sampling Guide? viii
Who should use this Sampling Guide? viii
Part 1: General information on the objectives and concepts ofdomestic water quality sampling i
Familiarise yourself with the objectives and concepts of water quality sampling 2
Why do we need to collect a water sample? 3
What is meant by water quality? 3
What substances must be analysed to determine the water quality? 4
Why is it important to know how to collect water samples? 4
What is a representative water sample? 4
Where must water samples be collected? 4
How often must water samples be taken? 4
How do the differences between ground and surface water sources affect sampling? 6
Part 2: Planning of the sampling programme 7
Define the objectives of the sampling exercise 8
Select the sampling points in the water supply system 8
Raw water source 8
Treatment and distribution system 9
Point of use 9
Description of the sampling point 9
Maps 9
Street addresses 9
Land surveyors/global positioning systems (GPS) 10
Photograph 10
Choose the analytical laboratory 10
Select the key substances 10
Determine the sampling frequency 11
Sampling frequency for surface and groundwater sources 1 2
Sampling frequency for a treatment works 12
Sampling frequency tor a distribution system 1 2
Sampling frequency at the point of use I 2
VI

TABLE OF CONTENTS
Part 3: Preparing for the sampling programme 13
Familiarise yourself with safety precautions 14
Prepare sample equipment 14
Assemble and check sample equipment and instruments 14
Calibrate the field instruments 14
Sample bottles 16
Sample labels ... 16
Data sheets 16
Familiarise yourself with sample preservation and transport 18
Part 4: Sample collection 19
Equipment needed 20
Equipment to collect microbiological samples . 20
Equipment for recording physical measurements 20
Equipment to collect chemical samples 20
Special precautions 20
Microbiological water samples 20
Physical quality of the water , 21
Chemical water samples . . 21
Sampling techniques 22
The following procedures should be followed when taking water samples in:
River, stream, lake dam or reservoir 22
Borehole ... 23
General field procedure lor purging boreholes 23
Sampling of borehole without pump 24
Sampling of borehole with pump .. 24
Treatment and distribution system 25
Point of use 26
Appendix A 27
Appendix B 28
VII

PURPOSE OF TME SAMPLING GUIDE
What is the purpose of this Sampling Guide?
The purpose of this Sampling Guide is to provide information on (he correct procedure thatmust be followed to collect a representative water quality sample from a wafer supplyintended for domestic use.
Information is given in the guide on why, where and how to take a sample. Guidance is alsogiven on how to plan a sampling programme.
Who should use this Sampling Guide?
The Sampling Guide is intended for use by -
• environmental health officers - who must collect samples to assess the safety of domesticwater supplies;
• water supply agencies - who must determine if the water they supply is fit for use, or iftheir treatment process needs to be adjusted;
• water resource developers - to assess whether a raw water source is suitable for supply orwhat treatment is required;
• educators - to build an understanding of the importance of collecting watersamples in the? correct manner; and
• the public - to provide the information they need on how to colled a water sample in thecorrect manner if they want to have the sample analysed in order to determine the qualityof their waler supply.
Vltl

PARTI
General information on the objectives and conceptsof domestic water quality sampling
PART1
General information on the objectives andconcepts of domestic water quality sampling
^ M
Familiarise yourself with the objectives and con-cepts of water quality sampling
PART 2
Planning of the sampling programme
IPART 3
Preparing for the sampling exercise
I
YOUAREHERE
PART 4
Sample collection

Part 1 - General information on the objectives and concepts of domestic water quality sampling
Before embarking on a water quality sampling exercise it is important to clearly understand whatneeds to be sampled as well as the concepts related to the correct water quality samplingtechniques.
Familiarise yourself with the objectives and concepts of domesticwater quality sampling
The objectives of any water quality sampling programme should be clearly formulated beforewater samples are collected and analysed. For domestic water supplies the sampling objectivesare determined by the information that is required such as -
• the level of treatment required to ensure that a water supply is suitable for domestic use;
• the efficiency of the water treatment;
• possible contamination of the water in the distribution system;
• the water quality at the point of use (this may include the quality of the water used by streetvendors for food preparation or at a tap in a housel; and
• the corrosivity of the water.
The objectives of the sampling programme in turn determine issues such as -
• which substances in the water are of interest;
• where and when are samples to be taken;
• how are samples to be taken;
• which analytical methods are to be used;
• how results are to be reported; and
• wh.it is to be done with the reported results.
Sampling can thus not be done in isolation, but needs to be integrated into the other stepsnecessary to manage the quality of domestic water supplies. Communication between thevarious role players within the water quality management cycle is crucial to ensure that the waterquality information that is generated is meaningful and correct.
Figure 1 shows the main elements of the water quality management cycle namely -
• sampling;
• analysis of the sample;
• data assessment;
• water treatment; and
• management of [he resource and supply.
This document (Volume 2 of the series) deals specifically with the sampling aspects of the waterquality management cycle. The following concepts related to correct water quality sampling areaddressed:
• Why do we need to collect a water sample?
• What is meant by water quality?
• What substances must be analysed to determine the water quality?
• Why is it important to know how to collect water samples?

Part 1 - General information on the objectives and concepts of domestic water quality sampling
What is a representative water sample?
Where must water samples be collected?
How often must water samples be taken?
How do the differences between ground- and surface water sources affect sampling?
DATAASSESSMENT
(Volume 1)
SAMPLE IANALYSIS(Volume 3)
WATERTREATMENT
(Volume 4)
SAMPLING(Volume 2)
1 MANAGEMENT(Volume 5)
Figure 1: The five main elements in the water quality management cycle of domestic water supplies
Volume 1 - Assessment GuideVolume 3 = Analysis GuideVolume 5 = Management Guide
Volume 2 = Sampling GuideVolume 4 - Treatment Guide
Why do we need to collect a water sample?
Most wtuer quality Analyses cannot be done on site (i.e. in situ). Therefore, a representativevolume of writer at a specific point of interest hris to be collected for analysis in a laboratory.
What is meant by water quality?
The term water quality is generally used to describe the microbiological, physical and chemicalproperties of water thai determine the Illness lor use of a specific water source.
Microbiological quality: Refers to the presence of organisms that cannot be individually seen bythe naked eye, such as protozoa, bacteria and viruses. Many of these microbes are associatedwith the transmission of infectious water-borne diseases such as gastroenteritis and cholera.
Faecal and total coliform bacteria are commonly used as indicator organisms to determine themicrobiological status and safety of water supplies.
Physical quality: Refers to water quality properties (such as conductivity, pH arid turbidity) thatmay be determined by physical methods. The physical quality mainly affects the aesthetic quality(taste, odour and appearance) of water.

Part 1 - General information on the objectives and concepts of domestic water quality sampling
Chemical quality: Refers to the nature and concentration of dissolved substances (such asorganic and inorganic chemicals including metals). Many chemicak in water are essential as partof a person's daily nutritional requirements, but unfortunately above a certain concentration mostchemicals (e.g. zinc, copper, manganese) may have negative health effects.
What substances must be analysed to determine the water quality?
A large number of substances are found in water. However, only a few commonly occur inconcentrations that cause adverse health, aesthetic or other problems of concern to domesticusers.
Table 1 gives information on those substances that are most relevant to the domestic user.
Why is it important to know how to collect water samples?
Wrong sampling procedures and methods will affect the accuracy and reliability of analyticalresults and lead to misleading conclusions on the quality of the water supply.
It is also important to remember that, once a water sample is taken, the substances in thesample may deteriorate or the sample may become contaminated before it reaches the laboratory.To avoid this the sampler must know all the correct sampling requirements and preservationmethods beforehand.
What is a representative water sample?
A representative water sample can be described as a sample that meets the objectives ofsampling, and that has been collected at a place that truly represents the water at the point ofconcern in the water supply system (see Figure 2).
Where must water samples be collected?
The actual sampling point in the system is determined by the objective of the samplingprogramme, for example (see higure 2) -
• the source (if the objective is to determine whether a water source is suitable for domesticpurposes, or what level of treatment is required);
• the outflow from the water treatment works (if the objective is to determine operationalcontrol and product quality);
• a distribution system (if the objective is to determine whether any changes in water qualityoccur in the distribution system); and
• a point of use (to determine if the water is tit for use).
How often must water samples be taken?
The sampling frequency depends primarily on the purpose of sampling, but also on the number ofpeople being supplied with water and the nature of the water source as well as the substance ofconcern.
The quality of a water source can change within minutes or it can remain stable for a long periodof time. Determining the correct sampling frequency is therefore a crucial water qualitymonitoring step (see Part 2 of this guide for more information). If the frequency of sampling is toolow, then results would not reflect the correct variations in water quality at a specific point.On the other hand, if the sampling frequency is too high, then money would be wasted onunnecessary sample analyses, and the results obtained would not reveal new information, butwould only confirm existing results.

Part 1 - General information on the objectives and concepts of domestic water quality sampling
Table 1: Water quality substances of key relevance to the domestic user
KEY SUBSTANCES
Faecal coliforms
Total coliforms
Free residual chlorine
Electrical conductivityTotal dissolved salts
pH
Turbidity
Arsenic
Cadmium
Calcium
Sodium and chloride
Fluoride
Iron and manganese
Total hardness
Magnesium
Nitrate and nitrite
Potassium
Zinc
Please note the list is by no meanscomprehensive list of substances to
RELEVANCE TO THE DOMESTIC USER
Microbiological quality
Indicates recent faecal pollution, and the potentialrisk of contracting infectious diseases
Indicates the general hygienic quality of the water
Indicates the adequacy of disinfection usingchlorine
Physical quality
Serves as a general indicator of change in waterquality and affects the taste and "freshness" of thewater
Affects the taste and corrosivity of the water
Indicates the cloudiness of the water, and affectsthe risk of infectious disease transmission
Chemical quality
Excessive amounts can make the water poisonousand may also cause cancer
May affect the toxicity of the water
Causes scaling in pipes; affects taste of water
May impart a salty taste to the water
Excessive amounts stain teeth and cause cripplingskeletal deformities
May discolour water; excessive amounts maybe toxic
Affects the scaling and foaming quality of the water
Excessive amounts make water bitter and maycause diarrhoea
May be toxic to infants
Imparts a bitter taste; toxic in large amounts
May affect the taste of water - makes the waterbitter
comprehensive and site-specific conditions may necessitate a morebe analysed.

Part 1 - General information on the objectives and concepts of domestic water quaiity sampling
WATER SOURCE TREATMENT ANDDISTRIBUTION SYSTEM
POINT OF USE
Sampling points
Figure 2 shows the water supply system with all possible points where water samples should becollected to assess domestic water quality.
How do the differences between ground- and surface water sources affect sam-pling?
Generally the quality of surface water is more variable than the quality of groundwater. Therefore,the surface water should be sampled more frequently (see Table 2 on p 11).
In the case of flowing surface water the quality may vary drastically over time, particularly dur-ing rainstorm events or in relation to effluent discharges. The choice of the time and date of sam-pling, therefore, has a critical effect on the representivity of the sample.
In the case of groundwater, the quality of the aquifer is typically reasonably constant over time.Lotal land-use activities may have a significant impact on the groundwater quality. If it is thepurpose to obtain a representative sample from the groundwater aquifer the stagnant water mustfirst be displaced (or purged*). However, if the actual quality of the borehole water (the water thatis directly used by the community) needs to be determined, then purging is not required. In otherwords the objective of the sampling exercise must be taken into account when collecting the
NOTE
"Purging of the borehole involves the removal of sufficient water until the general quality, asmeasured by the pH and electrical conductivity, is stable. (Also see: Weaver, J M C 1992,Groundwater Sampling: A Comprehensive Guide for Sampling Methods. WRC Project No. 339,TT 54/92.

PART 2
Planning of the sampling programme
PART1
General information on the objectives and concepts ofdomestic water quality sampling
efrne the objectives of the sampling
exercise
Select the sampling pointsTriT^isupply system
Describe the sampling point
Choose the analytical laboratffry
Select the key substances ^ |_ mDetermine the sampling frequen
YOUAREHERE
PART 3
Preparing for the sampling exercise
PART 4
Sample collection

Part 2 - Planning of the sampling programme
The previous section provided a background to the concept of water quality sampling andinformed the reader why it is important to collect water samples correctly. At this stage it shouldbe clear that the sampling exercise is an integral part of the total water quality assessmentprocess. The accuracy of water quality results obtained in the laboratory is just as dependent onthe correctness of the sampling technique as it is dependent on the accuracy of the analyticalprocedures. Therefore the sampling exercise requires careful planning beforehand.
Part 2 of the Sampling Guide will help the sampler to plan the sampling exercise.
Define the objectives of the sampling exercise
Before any sampling programme is started it is important to define clearly the objectives of thesampling programme as this will dictate issues such as -
• the substances to be sampled and analysed;
• the frequency of sampling;
• the choice of preparatory steps prior to analyses; and
• [he appropriate guidelines to evaluate the results.
Objectives or purpose for sampling may include options such as -
• assessment of the fitness for use;
• evaluation of the water treatment process to determine if disinfection of the water is adequate;
• evaluation of water in a distribution system to determine whether the water is adequatelystabilised; and
• evaluation of water quality at a tap in a house to determine if the water is safe to drink.
5elect the sampling points in the water supply system
The point where the water sample in the water supply system will be taken depends largely onthe objectives of the sampling exercise. The sampling points could thus be located at -
• the raw water source (i.e. a river, stream, dam, lake or borehole);
• the water treatment system;
• the distribution system; or
• the point of use (which can be a tap in the house, bucket in the house, or the container thevendor uses on the street).
Raw water source
River, stream, dam or lake
Surface water refers to water that is found at a source on the surface of the earth, such as a river,stream, dam or lake. It is important to remember that if a water sample is collected from one ofthese sources, the point where the sample is collected must be as near to the point of abstractionas possible. (Revisit definition of representative water sample on page 4).
Groundwater
The objective of the sampling exercise is very important when selecting sampling points forgroundwater sources.
8

Part 2 - Planning of the sampling programme
If the aim is to evaluate the water quality of the aquifer then the borehole must first be purgedbefore the sample can be collected.
If the aim is to determine the quality of the water supply from the borehole then the boreholedoes not need to be purged. The sampling point may then be placed at the first tap(or line-opening) in the system after the borehole.
Treatment and distribution system
Water samples are taken at the outlet of treatment works to check the treatment processes and/orthe quality of the water supplied to the consumer. Water within a distribution system is normallysampled to evaluate and check whether the distribution system performs correctly. If overallperformance of the distribution system needs to be evaluated it is better to take the sample from apipe with significant flow, rather than from a stagnant section of the distribution system. Forcontamination, monitoring samples must be collected down-flow of the (suspected) point ofcontamination in the distribution system.
Point of use
This is a very important sampling point as it represents the water that is actually used for domesticpurposes. To obtain the quality of this water, the sampler can collect the water at the followingpoints:
• From a tap that is used regularly outside or inside the house, shop or in the garden.
• In the case of vendors, samples must be taken directly from the vendor's water containers.
Description of the sampling point
A description of a sampling point is necessary in order to make revisits and reporting on specificsampling points easier. This applies to points in remote as well as residential areas.
The position of a sampling point can be determined by making use of -
• maps;
• street addresses;
• land surveyors to determine the geographic location in terms of coordinates (latitude andlongitude);
• global positioning systems (GPS) to determine the coordinates; or
• photographs.
Maps
When water quality data are stored in a database, the location and identification of a samplingpoint (for example, sampling points in rivers, dams or dug-wells) can be marked on a large-scalemap. A 1:10 000 map (orthophoto) is very useful in this regard.
Street addresses
Where the sampling points are situated within residential areas the name and telephone numberof the owner and street address of the premises where the water sample was collected canindicate the position of the point. This is useful for routine as well as investigation-specificsampling.

Part 2 - Planning of the sampling programme
Land surveyors/global positioning systems (GPS)
Other methods of documenting the exact geographical location of the sampling point position interms of coordinates (latitudes and longitudes) are probably more expensive but the resultsobtained are often more accurate. The first is to hire a land surveyor, the second is to digitise thelocations from a map using geographical information systems (GIS) and the third is by using aportable GPS device.
Photograph
It is always useful to have a photo record of a specific site. In this way visual identification of thesite at a later stage is much easier. Another advantage of having a photo record is that physicalchanges can easily be detected by comparing two photographs of the same site taken on differentdates.
Choose the analytical laboratory
The choice of the analytical laboratory that will conduct the water quality analyses is a crucialstep in the planning process. It is important for ihe sampler to know the locations of theclosest analytical laboratories in the area as certain of the substances have a maximum periodwithin which they have to be analysed (for example microbiological samples). If the closestanalytical laboratory can only be accessed within 48 hours, then special precautions will need tobe taken with regard to the samples thai have to be analysed within a short time period. It isimportant to contact the laboratory well in advance to determine any special requirements thelaboratory may have with regard to sample handling and transport. For example, somelaboratories prefer receiving microbiological samples only between Monday and Thursday, whileothers prefer receiving samples before 10:00 in the morning.
NOTE
The sampler mustanalyses before the
be wellsample
awareis taken
of the requirements of the laboratory that will conduct the
Select the key substances
A number of factors influence the choice of substances that should be included in a domesticwater quality assessment (see Table 1 on page 5). These are -
• the objectives of the sampling exercise;
• where in the water supply system the water is assessed (i.e. at the source, the treatmentworks, or at the point of use);
• the source of the water (i.e. river, stream, dam or rain-waler Link);
• the type of pollution problems that may occur in the area;
• environmental problems that have been experienced with similar water sources in thevicinity; MM\
• the opinion of the analytical laboratory.
10

Part 2 - Planning of the sampling programme
NOTE
Table 1 (on page 5) does not list all constituents that can be problematic at a site. Those not listed arenormally substances that are very site-specific. For example:
• If the water source is near an industrial area, then, depending on the type of industry, organiccompounds and/or metals must be included on the list of variables to be determined.
• If the water source is in an agricultural area then the possible presence of herbicides, pesticides andfertilisers must also be determined.
In these instances it is again important to consult with the analytical laboratory on specialprecautions that need to be taken before conducting a sampling survey.
Determine the sampling frequency
The sampling frequency is dictated by the characteristics of the water source and the number ofpeople supplied with water.
Table 2 i ives inlurmation on the minimum and recommended number of samples and samplingfrequencies for different points in the water supply system.
Table 2: The minimum and recommended number of samples and sampling frequencies for differ-ent points in the water supply system
SAMPLING POINT
S0URcE
River/stream/spring/dug-well
Dam
Borehole
Treatment works
Point of use
MINIMUM I
Number ofsamplesper year
4
2
1
4
4
3ER POINT
Samplingfrequency
3-month ly
6-monthly
-
3-monthly
3-monthly
RECOMMENDED PER POINT*
Number ofsamples peryear
26
12
2
12/52/365
12/52/365
Sampling frequency
2-weekly
2-monthly
6-monthly
Monthly/weekly/daily'*
Monthly/weekly/daily**
" Also refer to SABS Code of Practice, South African Bureau of Standards: Drinking Water Specifications. SABS 241-1999
"* Depends on size of trtMlmenl works, the variability in (he water quality, and the number of people supplied wiih wdtcr.
NOTE
It is the goal to collect the optimal number of samples that would provide reliable results.
If the frequency of sampling is too low, then results would not reflect the correct variations in water qualitychanges at a specific site. On the other hand, if the sampling frequency is too high, then money would bewasted on unnecessary sampling and analyses and the results obtained would not reveal new information,but would only confirm existing results.
11
Part 2 - Planning of the sampling programme
Sampling frequency for surface and groundwater sources
Surface water
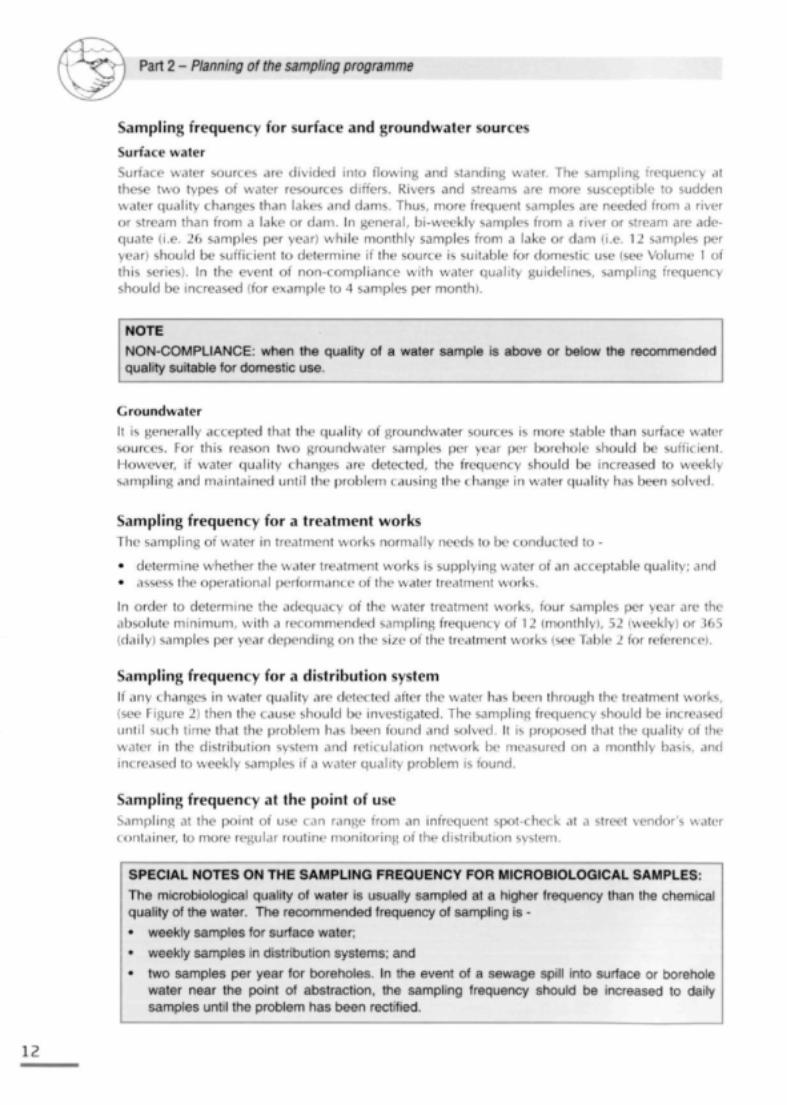
Surface water sources are divided into flowing and standing water. The sampling frequency atthese two types of water resources differs. Rivers and streams are more susceptible to suddenwater quality changes than lakes and dams. Thus, more frequent samples are needed from a riveror stream than from a lake or dam. In general, bi-weekly samples from a river or stream are ade-quate (i.e. 26 samples per year) while monthly samples from a lake or dam (i.e. 12 samples peryear) should be sufficient to determine if the source is suitable for domestic use (see Volume 1 ofthis series). In the event of non-compliance with water quality guidelines, sampling frequencyshould be increased (for example to 4 samples per month).
NOTE
NON-COMPLIANCE: whenquality suitable for domestic
theuse
quality of a water sample is above or below the recommended
Groundwater
II is generally accepted that the quality of groundwater sources is more stable than surface watersources. For this reason two groundwater samples per year per borehole should be sufficient.However, if water quality changes are detected, the frequency should be increased to weeklysampling and maintained until the problem causing the change in water quality has been solved.
Sampling frequency for a treatment worksThe sampling of water in treatment works normally needs to be conducted to -
• determine whether the water treatment works is supplying water of an acceptable quality; and• assess the operational performance of the water treatment works.
In order to determine the adequacy of the water treatment works, four samples per year are theabsolute minimum, with a recommended sampling frequency of 12 (monthly), 52 (weekly) or 365(daily) samples per year depending on the size of the treatment works (see Table I for reference).
Sampling frequency for a distribution systemIf any changes in water quality are detected after the water has been through the treatment works,(see Figure 2) then the cause should be investigated. The sampling frequency should be increaseduntil such time that the problem has been found and solved. It is proposed that the quality of thewater in the distribution system and reticulation network be measured on a monthly basis, andincreased to weekly samples if a water quality problem is found.
Sampling frequency at the point of useSampling at the point of use can range from an infrequent spot-check at a street vendor's watercontainer, to more regular routine monitoring of the distribution system.
SPECIAL NOTES ON THE SAMPLING FREQUENCY FOR MICROBIOLOGICAL SAMPLES:
The microbiological quality of water is usually sampled at a higher frequency than the chemicalquality of the water. The recommended frequency of sampling is -
• weekly samples for surface water;
• weekly samples in distribution systems; and
• two samples per year for boreholes. In the event of a sewage spill into surface or boreholewater near the point of abstraction, the sampling frequency should be increased to dailysamples until the problem has been rectified.
12

PART 3
Preparing for the sampling programme
PART1
General information on the objectives and concepts ofdomestic water quality sampling
PART 2
Planning of the sampling programme
PART 3
Preparing for the sampling exerciseYOUAREHERE
Familiarise yourself with safety precautions
Prepare sample equipment
Familiarise yourself with sample preservationand transport
PART 4
Sample collection
13

Part 3 - Preparing for the sampling exercise
This part of the document deals with the preparation the sampler has to do before embarking on awater quality sampling trip.
Familiarise yourself with safety precautions
While safety is often not considered an integral part of the sampling programme, the samplermust be aware of possible unsafe working conditions, hazards associated with the operation ofsampling gear, and other risks.
Basic good practice should be followed in the field. Always keep the following points in mind -
• If samples are collected from a river or dam, waders should preferably be worn with a beltto prevent the waders from filling with water in the case of a fall. (Not necessary for shallowwater).
• Never drink the water you are about to sample unless you are very sure about the quality andsafety of the water.
• Many hazards lie out of sight on the bottom of dams, rivers and streams. Broken glass or sharppieces of metal embedded into the substrate can cause serious injury if care is not exercisedwhen working in such environments.
Prepare sample equipment
Assemble and check sample equipment and instruments
The sampling of water to determine domestic water quality does not mean that the sampler onlyneeds a sample bottle. Other types of equipment may also be needed. Field instruments such asconductivity and pH meters are all part of sampling equipment. It is important for the sampler tobe well prepared when going out on a sampling trip as sampling is often conducted far from theoffice, which makes it difficult to replenish supplies or pick up forgotten items.
A water quality sampling equipment checklist should be drawn up by lhe sampler and checkedbefore every sampling survey. (See Table i for an example of such a checklist. Appendix B con-tains a copy of the checklist for easy photocopying).
Calibrate the field instruments
Field instruments required are normally those used to determine the physical constituents, namely -
• pH;
• electrical conductivity (FC); and
• turbidity.
Field instruments used to determine physical parameters must be calibrated before any watersample is collected. Because a wide variety of instruments is available to determine the physicalquality of the water it is not within the scope of this document to provide calibration instructionsfor any of them. It is, however, recommended that the sampler reads the manufacturer's manualand instructions carefully before using any of the equipment.
NOTE
If the manufacturer prescribes the use of distilled water and it is not readily available it can be obtainedfrom the local pharmacy or health clinic.
14

Part 3 - Preparing for the sampling exercise
Table 3: Domestic water quality sampling equipment checklist
Sampling Equipment
Stopwatch (if required for flow measurements)
pH meter and buffers or pH indicator strips
Turbidity meter
Temperature meter
Additional batteries for field apparatus
Electrical conductivity meter
Copies of manufacturers' manuals for calibrating field instruments
Map indicating all sampling locations
Field notebook
Waterproof pens, markers and pencils
Field data forms and data labels
Containers for purging the borehole (if no pumps are available)
Electric generator (if necessary)
Calibrated bucket
Sealed cooler bags
Glass sample bottles (sterile glass bottles for microbiological sampling)
Plastic sample bottles
Bags of ice or freezer ice packs
Paper towels
Disposable latex gloves (if required)
Tick
15
Part 3 - Preparing for the sampling exercise
Sample bottles
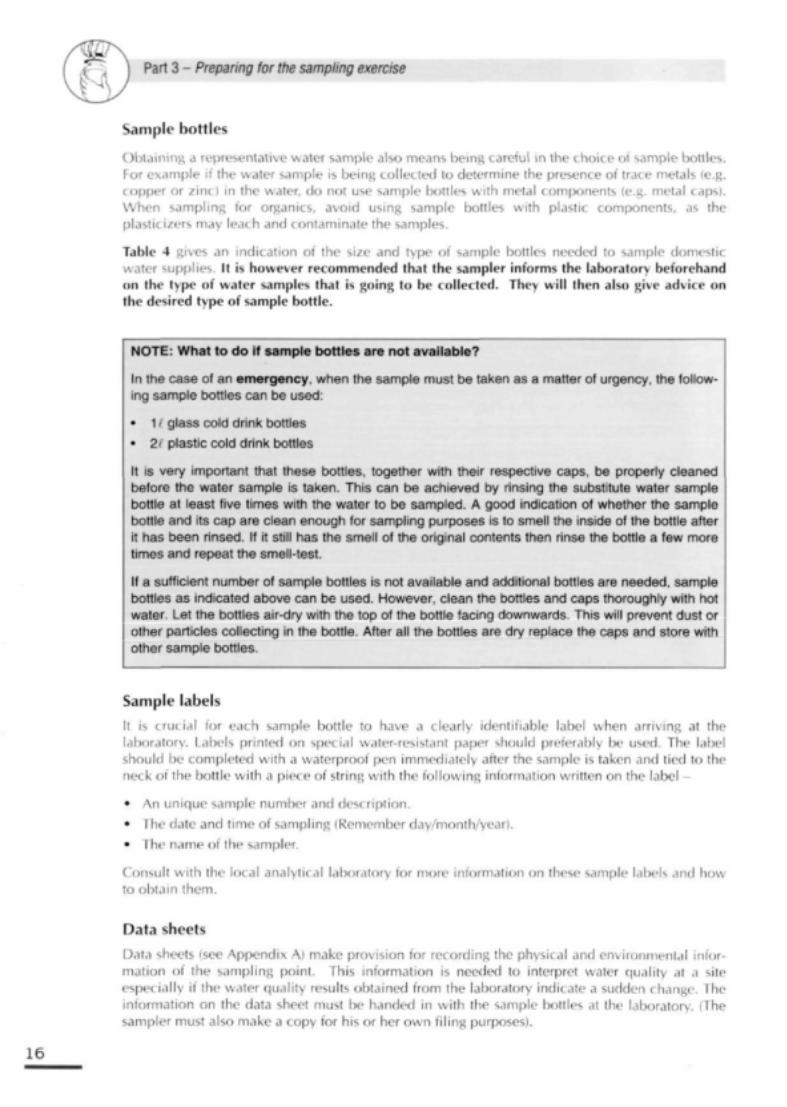
Obtaining a representative water sample also means being careful in the choice of sample bottles.For example if the water sample is being collected to determine the presence of trace metals (e.g.copper or zinc) in the water, do not use sample bottles with metal components (e.g. metal caps).When sampling for organics, avoid using sample bottles with plastic components, as theplasticizers may leach and contaminate the samples.
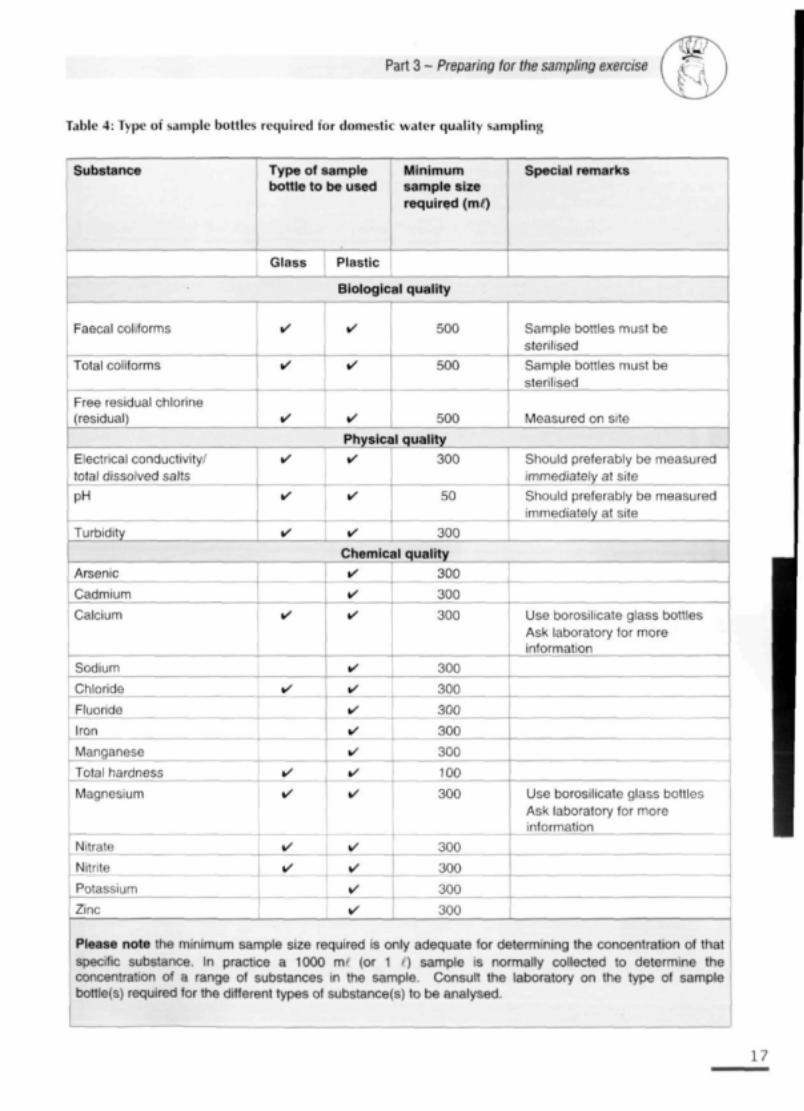
Table 4 gives an indication of the size and type of sample bottles needed to sample domesticwater supplies. It is however recommended that the sampler informs the laboratory beforehandon the type of water samples that is going to be collected. They will then also give advice onthe desired type of sample.1 bottle.
NOTE: What to do if sample bottles are not available?
In the case of an emergency, when the sample must be taken as a matter of urgency, the follow-ing sample bottles can be used:
• 1 / glass cold drink bottles
• 2/ plastic cold drink bottles
It is very important that these bottles, together with their respective caps, be properly cleanedbefore the water sample is taken. This can be achieved by rinsing the substitute water samplebottle at least five times with the water to be sampled. A good indication of whether the samplebottle and its cap are clean enough for sampling purposes is to smell the inside of the bottle afterit has been rinsed. If it still has the smell of the original contents then rinse the bottle a few moretimes and repeat the smell-test.
If a sufficient number of sample bottles is not available and additional bottles are needed, samplebottles as indicated above can be used. However, clean the bottles and caps thoroughly with hotwater. Let the bottles air-dry with the top of the bottle facing downwards. This will prevent dust orother particles collecting in the bottle. After all the bottles are dry replace the caps and store withother sample bottles.
Sample labels
It is crucial for each sample bottle to have a clearly identifiable label when arriving at thelaboratory. Labels printed on special water-resistant paper should preferably be used. The labelshould be completed with a waterproof pen immediately after the sample is taken and tied to theneck of the bonk1 with a piece of string with the following information written on the label -
• An unique sample number and description.
• The date and time of sampling (Remember day/month/year).
• The name of the sampler.
Consult with the local analytical laboratory for more information on these sample labels and howto obtain them.
Data sheets
Data sheets (see Appendix A) make provision for recording the physical and environmental infor-mation of the sampling point. This information is needed to interpret water quality at a siteespecially if the water quality results obtained from the laboratory indicate a sudden change. Theinformation on the data sheet must be handed in with the sample bottles at the laboratory. (Thesampler must also make a copy for his or her own filing purposes).
16
Part 3 - Preparing for the sampling exercise
Table 4: Type of sample bottles required for domestic water quality sampling
Substance Type of samplebottle to be used
Glass Plastic
Minimumsample sizerequired {ml)
Special remarks
Biological quality
Faecal coliforms
Total coliforms
Free residual chlorine(residual)
•
•
•
•
•
•
500
500
500
Sample bottles must besterilised
Sample bottles must besterilised
Measured on site
Physical qualityElectrical conductivity/total dissolved salts
PH
Turbidity
•
•
•
Arsenic
Cadmium
Calcium
Sodium
Chloride
Fluoride
Iron
Manganese
Total hardness
Magnesium
Nitrate
Nitrite
Potassium
Zinc
•
•
••
••
•
•
300
50
300
Should preferably be measuredimmediately at site
Should preferably be measuredimmediately at site
Chemical quality• 300••
•••••••
••••
300
300
300
300
300
300
300
100
300
300
300
300
300
Use borosilicate glass bottlesAsk laboratory for moreinformation
Use borosilicate glass bottlesAsk laboratory for moreinformation
Please note the minimum sample size required is only adequate for determining the concentration of thatspecific substance. In practice a 1000 nv (or 1 i) sample is normally collected to determine theconcentration of a range of substances in the sample. Consult the laboratory on the type of samplebottle(s) required for the different types of substance(s) to be analysed.
17

Part 3 - Preparing for the sampling exercise
Familiarise yourself with sample preservation and transport
Sample handling and sample transport are important aspects of water quality sampling that areoften neglected.
As soon as the water sample has been collected some of the chemical characteristics of the waterstart to change. For this reason some samples must be preserved to keep the quality of the watersample as stable as possible until the analysis can be carried out. It must, however, be kept inmind that the preservation technique only retards chemical and biological changes thatcontinue after sample collection and wil l not stop quality changes altogether.
The following preservation techniques are recommended:
• To minimise water quality changes between sampling and analysis it is important to keep thesamples as cool as possible, without freezing them. In general, the shorter the time betweencollection of a sample and its analysis, the more reliable the results.
• Preferably pack water samples in crushed or cubed ice during transportation (only applicableif samples will be delivered to the laboratory within 6 hours, as the ice will melt after longerperiods). This specifically applies to microbiological and nutrient samples.
• Avoid using dry ice as it will freeze the samples and may cause glass containers to break. Dryice may also effect a pH change in samples.
• As was mentioned earlier, this manual does not prescribe the use of any specific preservativesto preserve chemical samples as it is expected that the chemical samples will be kept cool andanalysed at a laboratory within 7 days of sampling. This technique excludes the physicalmeasurements that are taken on site, and microbiological samples that must be analysedwithin f) hours of sampling if not cooled, and within 24 hours if cooled.
NOTE
Preservation is normally recommended only when the water sample cannot be delivered to thelaboratory within 24 hours (1 day) after sampling. As a rule of thumb always ensure that thelaboratory has been notified of the expected time of sample delivery and ask their advice on thepreservation of the samples.
NOTE
If bacteriological samples are to be analysed after more than 6 hours from the time of sampling(24 hours for cooled samples), examination can still be carried out. It must then be stated in thereport that, because of the delay, the examination does not comply with the requirements foranalysis and results shouid be evaluated accordingly.
18

PART 4
Sample collection
PART1
General information on the objectives and concepts ofdomestic water quality sampling
PART 2
Planning of the sampling programme
PART3
Preparing for the sampling exercise
IPART 4
Sample collection
iEquipment needed
•Special precautions
ISampling techniques
YOUAREHERE
19

Part 4 - Sample collection
When all the requirements outlined in Part 1, 2 and 3 have been met, collection of the watersamples can commence.
NOTEThree major aspects must be kept in mind at all times during sample collection:
i. Personal health and safety
ii. Representative sample collection
iii. Record of all samples collected
Equipment to collect microbiological samples
• Sterile sample bottles (see Table 4 for the type of sample bottle needed)
• Sealed container or cool box which can be kept cool (preferably with ice)
Equipment for recording physical measurements
• Clean laboratory glass beaker or any well cleaned container large enough in volume for theprobes of the instruments to be lowered in (at least 250 nV' in volume)
• Electrical conductivity meter
• pH field instrument
• pH test-paper as an optional method to the pH field instrument
• Nephelometric turbidity meter (if required)
• Temperature meter - electronic or field thermometer (if required)
• Distilled water for cleaning the probes
• Field notebook/data sheet
Equipment to collect chemical samples
• Correct sample bottles (see Table 4 for the different types of sample bottles required)
• Cooler box with ice (if necessary)
Microbiological water samples
• If the water sampled contains residual chlorine then add 1 m/ of a 10% sodium thiosulphatesolution for every litre of sample taken. (See Standard Methods, AWWA (1995) or consult withthe laboratory).
• Keep sample bottle closed and in a clean condition up to the point where it has to befilled with the water to be sampled.
• Do not rinse bottle with any water prior to sampling.
• When samples for chemical and microbiological analysis are to be collected from the samelocation, the microbiological sample should be collected first to avoid the danger ofmicrobiological contamination of the sampling point.
• If the tap cleanliness of the tap at home or in a distribution system is questionable, clean the
20

Part 4 - Sample collection\
tap with a solution of sodium hypochlorite (100 mg// NaOCl) before sampling (Ask laboratorylor more detail). Let the water run for 2 to 3 minutes afterwards.
The sampler {person taking the sample) should wear gloves (if possible) or wash his/her handsthoroughly before taking each sample. Avoid h.ind contact with the neck of the samplingbottle.
NOTE
If the sample can only be analysed more than 6 hours after the time of sampling (24 hours forcooled samples) the examination can still be carried out, but then this must be stated on thesample sheet accompanying the sample. The delay does not comply with the requirements foranalyses, and results should be evaluated accordingly.
Physical quality of the water
• Field apparatus (for example the pH and electrical conductivity probes) must be cleanedthoroughly as well as being calibrated according to the manufacturer's specifications beforeany physical measurement is taken.
• Never take the reading immediately after the probe was put into the water sample; alwaysallow sufficient time for the instrument to stabilise before taking the reading.
• After taking a measurement the probe must be rinsed in distilled water and covered in itsprotective sleeve, or follow instructions in the manufacturer's manual for caring of the specificprobe.
• Try to avoid using the same water sample for determining all field measurements; rather splitthe water sample for each physical measurement.
Chemical water samples
• Some plastic caps or cap liners may cause metal contamination of the water sample. Pleaseconsult with the laboratory on the correct use of bottle caps.
• Keep sample bottle closed and in a clean condition up to the point where it has to be filledwith the water to be analysed.
• Never leave the sample bottles (empty or filled with the water sample) unprotected in the sun.
• After the sample has been collected the sample bottle should be placed directly in a cooledcontainer (e.g. portable cooler box), try and keep cooled container dust-free.
21

Part 4 - Sample collection
The following procedures should be followed when taking water samples in:
River, stream, lake dam or reservoir
Step 1
At the sampling point remove cap of sample bottle but do notcontaminate inner surface of cap and neck of sample bottle wilh hands
Step 2
Take samples by holding bottlewith hand near base and plungethe sample bottle, neck downward,below the water surface (weargloves to protect your hands fromcontact wilh the water).
Step 3
Turn botlk' until neck points slightly upward andmouth is directed toward the current (can also becreated artificially by pushing bottle forwardhorizontally in a direction away from the hand).
Step 4
• Fill sample bottle without rinsing and replace cap immediately.
• Before closing the sample bottle leave ample air space in the bottle(at least 2.5 cm) to facilitate mixing by shaking before examination.
Step 5
• Complete label and sample sheet
22

Part 4 - Sample collection
Borehole
Purging of borehole
II a borehole needs to IK- purged (see p 6) it can be done in the following ways:
• With a portable pump
• With an already installed submersible pump
• \i\ treating the borehole as a hand dug-well and by lowering a small bucket on a ropeinto the borehole
NOTE
Before opening any borehole first check for any possible trapped vapours, especially at landfill andfuel-spilled areas.
When arriving at the borehole or well to collect a water sample the first measurement that must betaken is the water level and the second is the depth of the borehole. If the borehole has been sampledbefore, the depth measurement will indicate whether borehole collapse or silting has occurred.
When samples for chemical and microbiological analyses are collected from the same borehole thesample for microbiological examination should be collected first. This precautionary measure is to avoidthe danger of contamination of the water at the sampling point.
Step 1:
Step 2:
Step 3:
Step 4:
Step 5:
Step 6:
Step 7:
Measure the water level (m)
Measure the borehole depth (m)
Calculate the height of water column (m)by subtracting the depth of the water level(1) from the borehole depth (see#2)
Surface
Step 3(e.g. 14m - 9m = 5m)
Free standing water
Calculate the standing volume of water inlitres by substituting in the followingformula:
Volume of standing water = K r' x h x 1000
r - radius of borehole in metresh - height of water column in metres
Using the calculated volume of Step 4.calculate the pumping time needed toremove three volumes (if a pump is used)
While removing the stagnant water from the borehole take continuous readings of ECand pH until the readings are stable
Once the borehole has been purged, try to collect the water sample at least 0.5 m (500 cm)below the water surface
Stepi(e.g. 9m)
Step 2(e.g. 14m)
Aquifier
23

.V f t Part 4 - Sample collection
Borehole (continued)
Sampling of borehole without pump
Step 1 Secure a weight under the sample bottle and lower a plastic sample bottle in boreholeuntil the bottle is submerged in the water.
Step
Step
Step
Step
Step
Step
Step
2
3
4
5
6
7
8
Fill bottle with groundwater.
When raising the bottle to the surface ensure that the sample bottle does not getcontaminated as a result of touching the inner walls of the borehole.
Keep sample container closed and in a clean condition up to the point where it has tobe filled with the water to be tested.
At sampling point remove cap but do not contaminate inner surface of cap and neck ofsample bottle with hands.
Do not rinse the bottle.
Fill sample with groundwater and replace the cap immediately.
leave ample air space in the bottle (at least 2.5 cm) to facilitate mixing by shaking,before examination.
Step 9 Place sample bottle in a cooled container fe.g. cool box) directly after collection. Try andkeep cooled container dust-free and out of any direct sunlight.
Sampling of borehole with pump
Step . Find the nearest tap on the line where you must collect the water quality sample.
Step 2 Open the tap and let water run to waste for at least 3 minutes. At the sampling pointremove cap but do not contaminate inner surface of cap and neck of sample bottle withhands.
Step 3 Remove cap of sample bottle, but do not contaminate inner surface of cap and neck ofsample bottle with hands.
Step 4 Fill sample bottle without rinsing.
Step 5 Replace the cap immediately.
Step 6 When the sample is collected leave ample air space in the bottle (at least 2.5 cm) tofacilitate mixing by shaking before examination.
Step 7 Place sample bottle in a cooled container (e.g. cool box) directly after collection. Trv andkeep cooled container dust-free and out of any direct sunlight.
Step 8 It may sometimes be necessary, although less desirable, to install a temporary samplingpoint in the discharge pipe to obtain a sample. This is accomplished by drilling andthreading a hole in the discharge pipe and installing a faucet or valve.

Part 4 - Sample collection
Treatment and distribution system
Step 1
• Open tap or valve and let water run to waste for at least 3 minutes.
Step 2• Remove cap of sample bottle, but do not
contaminate inner surface of cap and neckof sample bottle with hands.
Step 3• Fill sample bottle without rinsing and replace cap immediately. When the
sample is collected leave ample air space in the bottle (at least 2.5 cm) tofacilitate mixing by shaking before analysis.
Step 4• Place sample bottle in a cooled container (e.g. cool box) directly after
collection.
Step 5• Remember to close the tap!
25
Part 4 - Sample collection
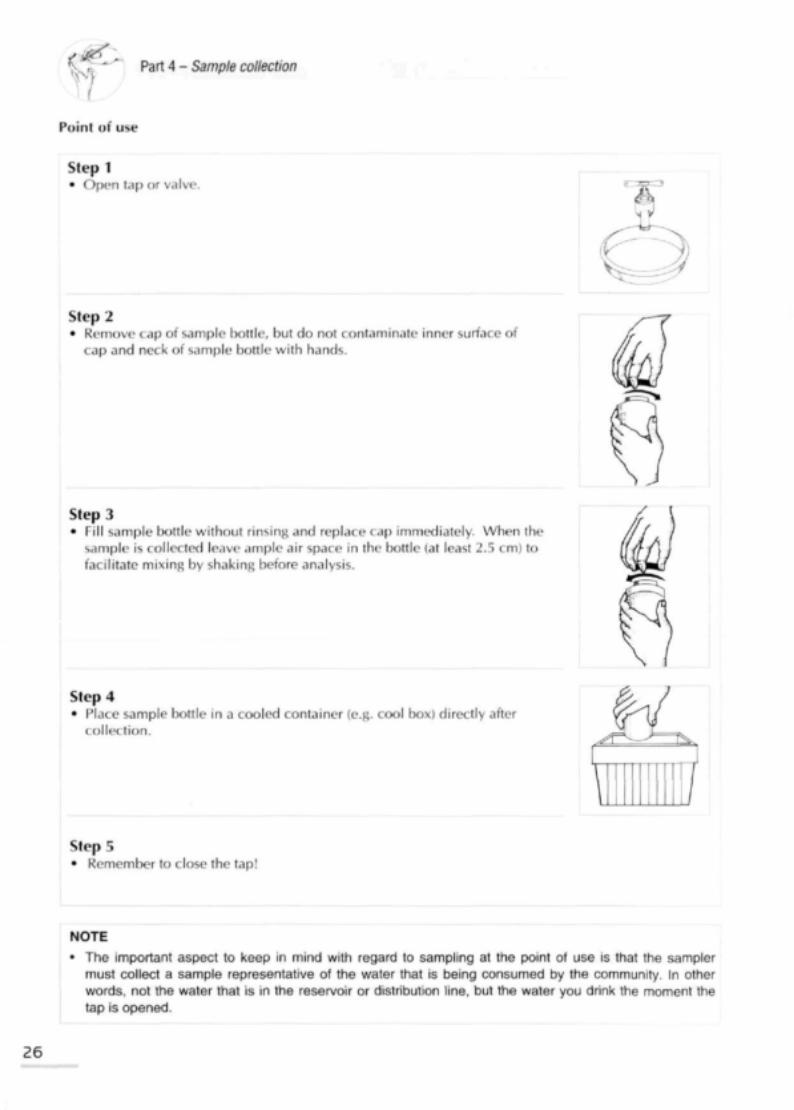
Point of use
Step 1• Open tap or valve.
Step 2• Remove cap of sample bottle, but do not contaminate inner surface of
cap and neck of sample bottle with hands.
Step 3• Fill sample bottle withoul rinsing and replace cap immediately. When Ihe
sample is collected leave ample air space in the bottle (at (east 2.5 cm) tofacilitate mixing by shaking before analysis.
Step 4• Place sample bottle in a cooled container (e.g. cool box) directly after
collection.
Step 5• Remember to close the tap!
NOTE
The important aspect to keep in mind with regard to sampling at the point of use is that the samplermust collect a sample representative of the water that is being consumed by the community. In otherwords, not the water that is in the reservoir or distribution line, but the water you drink the moment thetap is opened.

Information requirements for data sheets
NOTE: Station number and date of sampling must be indicated on sample bottle
Station number
Coordinates latitude
longitude
Date of sampling day . month • year •
Time of sampling hour EH minute EH
Contact person
Telephone number
Purpose of sampling*
Water body Borehole D
Flowing water EH
Standing water •
Distribution system EH
If flowing water:
Stream •
River •
If standing water:
Reservoir LJ
Stream D
LakeD
Dam! J
Analyses required Metais: trace EH
Major inorganic ions EH
Microbiological EH
Organic EH
Other ZH
(specify)
Sample depth belowsurface(only for surfacewater supply)
On-site observations
Odour Present EH
Absent LJ
Colour Normal EH
Abnormal D
Appearance of water
Temperature of water °C
(if required)
pH of water pH units
Conductivity of water mS/m
Preservation added yes D no D
If so, what preservative
NON-COMPULSORY INFORMATION
Water flowing yes LH no EH
Flow measurement(if flow is available)
Rainfall figures(if available)
Weather sun EH rain D clouds EH wind
General notes/other observations
refer to p 16 purpose of sampling
27

Aooendix B
Domestic water quality sampling equipment checklist
Sampling equipment
Stopwatch (if required for flow measurements)
pH meter and buffers or pH indicator strips
Tick
Turbidity meter
Temperature meter
Additional batteries for field apparatus
Conductivity meter
Copies of manufacturers' manuals for field instruments
Map indicating all sampling locations
Field notebook
Waterproof pens, markers and pencils
Field data forms and data labels
Containers for purging the borehole (if no pumps are available)
Electric generator (if necessary)
Calibrated bucket
Sealed cooler bags
Glass sample bottles {sterile glass bottles for microbiological sampling)
Plastic sample bottles
Bags of ice or freezer ice packs
Paper towels
Disposable latex gloves (if required)