PVCS Version Manager 8.4.5
94
SERENA PVCS VERSION MANAGER ™ 8.4.5 Web Client User’s Guide Serena Proprietary and Confidential Information
description
PVCS
Transcript of PVCS Version Manager 8.4.5

SERENA
PVCS VERSION MANAGER™ 8.4.5Web Client User’s Guide
Serena Proprietary and Confidential Information

Copyright © 2000–2012 Serena Software, Inc. All rights reserved.This document, as well as the software described in it, is furnished under license and may be used or copied only in accordance with the terms of such license. Except as permitted by such license, no part of this publication may be reproduced, photocopied, stored in a retrieval system, or transmitted, in any form or by any means, electronic, mechanical, recording, or otherwise, without the prior written permission of Serena. Any reproduction of such software product user documentation, regardless of whether the documentation is reproduced in whole or in part, must be accompanied by this copyright statement in its entirety, without modification.This document contains proprietary and confidential information, and no reproduction or dissemination of any information contained herein is allowed without the express permission of Serena Software.The content of this document is furnished for informational use only, is subject to change without notice, and should not be construed as a commitment by Serena. Serena assumes no responsibility or liability for any errors or inaccuracies that may appear in this document.
TrademarksSerena, TeamTrack, StarTool, PVCS, Collage, Comparex, Dimensions, RTM, Change Governance, and ChangeMan are registered trademarks of Serena Software, Inc. The Serena logo, Professional, Version Manager, Builder, Meritage, Command Center, Composer, Reviewer, Mariner, and Mover are trademarks of Serena Software, Inc.All other products or company names are used for identification purposes only, and may be trademarks of their respective owners.
U.S. Government RightsAny Software product acquired by Licensee under this Agreement for or on behalf of the U.S. Government, its agencies and instrumentalities is "commercial software" as defined by the FAR. Use, duplication, and disclosure by the U.S. Government is subject to the restrictions set forth in the license under which the Software was acquired. The manufacturer is Serena Software, Inc., 1900 Seaport Boulevard, 2nd Floor, Redwood City, California 94063-5587.
Publication date: May 2012

Table of Contents
Welcome to Version Manager . . . . . . . . . . . . . . . . . . . . . 7
Typographical Conventions . . . . . . . . . . . . . . . . . . . . . . . . . . . . . . . . . . 7
Contacting Technical Support . . . . . . . . . . . . . . . . . . . . . . . . . . . . . . . . 8
Chapter 1 Version Manager Web Client Basics . . . . . . . . . . . . . . . . . 9
Introducing the Version Manager Web Client . . . . . . . . . . . . . . . . . . . . . . 10
Version Manager Web Client Features . . . . . . . . . . . . . . . . . . . . . . . . . . 10
Version Manager Web Client Components . . . . . . . . . . . . . . . . . . . . . . . . 11
Using the Version Manager Web Client withVersion Manager . . . . . . . . . . . . . . . . . . . . . . . . . . . . . . . . . . . . . . . . . 11
Using TrackerLink (Tracker) with the Version Manager Web Client . . . . . . . 13Using TrackerLink . . . . . . . . . . . . . . . . . . . . . . . . . . . . . . . . . . . . . 13
Using SourceBridge (TeamTrack) with the Version Manager Web Client . . . 15Using SourceBridge . . . . . . . . . . . . . . . . . . . . . . . . . . . . . . . . . . . . 15
Using the Version Manager Web Client with Previous Releases . . . . . . . . . 17
System Requirements . . . . . . . . . . . . . . . . . . . . . . . . . . . . . . . . . . . . . 18
Chapter 2 Getting Started . . . . . . . . . . . . . . . . . . . . . . . . . . . . . . 19
Connecting to the Version Manager Web Client . . . . . . . . . . . . . . . . . . . . 20
Logging In to a Project Database . . . . . . . . . . . . . . . . . . . . . . . . . . . . . . 20Regular Login . . . . . . . . . . . . . . . . . . . . . . . . . . . . . . . . . . . . . . . . 21Single Sign On / Common Access Card Login . . . . . . . . . . . . . . . . . . 22
Changing Your Password. . . . . . . . . . . . . . . . . . . . . . . . . . . . . . . . . . . . 23
Switching Users . . . . . . . . . . . . . . . . . . . . . . . . . . . . . . . . . . . . . . . . . . 24
Logging Out of a Project Database . . . . . . . . . . . . . . . . . . . . . . . . . . . . . 25
Managing the Web Client Applet . . . . . . . . . . . . . . . . . . . . . . . . . . . . . . 26
Chapter 3 Navigating the Interface . . . . . . . . . . . . . . . . . . . . . . . . 27
Version Manager Web Client Panes . . . . . . . . . . . . . . . . . . . . . . . . . . . . 28Working in the Project Pane . . . . . . . . . . . . . . . . . . . . . . . . . . . . . . 28Working in the Content Pane . . . . . . . . . . . . . . . . . . . . . . . . . . . . . 29Working in the Revision Pane . . . . . . . . . . . . . . . . . . . . . . . . . . . . . 30Working in the Menu Pane . . . . . . . . . . . . . . . . . . . . . . . . . . . . . . . 32Working in the Status Pane . . . . . . . . . . . . . . . . . . . . . . . . . . . . . . 34
Selecting Items . . . . . . . . . . . . . . . . . . . . . . . . . . . . . . . . . . . . . . . . . . 35
Moving Items . . . . . . . . . . . . . . . . . . . . . . . . . . . . . . . . . . . . . . . . . . . 36
Renaming Items . . . . . . . . . . . . . . . . . . . . . . . . . . . . . . . . . . . . . . . . . 37
Web Client User’s Guide 3

Table of Contents
Deleting Items. . . . . . . . . . . . . . . . . . . . . . . . . . . . . . . . . . . . . . . . . . . 37
Reviewing Item Properties . . . . . . . . . . . . . . . . . . . . . . . . . . . . . . . . . . 38
Filtering Your View . . . . . . . . . . . . . . . . . . . . . . . . . . . . . . . . . . . . . . . . 39Viewing Files Recursively . . . . . . . . . . . . . . . . . . . . . . . . . . . . . . . . 40Filtering by Locker. . . . . . . . . . . . . . . . . . . . . . . . . . . . . . . . . . . . . 40Filtering by Wildcard Filename . . . . . . . . . . . . . . . . . . . . . . . . . . . . 41Filtering by Version Label . . . . . . . . . . . . . . . . . . . . . . . . . . . . . . . . 42Filtering by Promotion Group . . . . . . . . . . . . . . . . . . . . . . . . . . . . . 44Filtering by Comparing Two Version Labels. . . . . . . . . . . . . . . . . . . . 45Filtering by Comparing Two Promotion Groups . . . . . . . . . . . . . . . . . 47Filtering by Comparing a VersionLabel and a Promotion Group . . . . . . . . . . . . . . . . . . . . . . . . . . . . . 49Viewing All Versioned Files (No Filter) . . . . . . . . . . . . . . . . . . . . . . . 51
Chapter 4 Customizing Your Environment . . . . . . . . . . . . . . . . . . . . 53
Setting Version Manager Web Client Options. . . . . . . . . . . . . . . . . . . . . . 54Default Version Manager Web Client Options . . . . . . . . . . . . . . . . . . 54Setting Number of Items per Page . . . . . . . . . . . . . . . . . . . . . . . . . 55Specifying a Delimiter for Items Entered in Fields . . . . . . . . . . . . . . . 55Defining Check In/Check Out Options . . . . . . . . . . . . . . . . . . . . . . . 56Defining Revision Lookup Behavior . . . . . . . . . . . . . . . . . . . . . . . . . 57Including Subprojects in Project Operations . . . . . . . . . . . . . . . . . . . 57Dismissing Results Dialog Boxes after Successful Action . . . . . . . . . . 58Setting Your Default Editor . . . . . . . . . . . . . . . . . . . . . . . . . . . . . . . 58Specifying a Difference or Merge Tool . . . . . . . . . . . . . . . . . . . . . . . 59Passing Options Based on Ignore White Space . . . . . . . . . . . . . . . . . 61
Setting Workspace Properties . . . . . . . . . . . . . . . . . . . . . . . . . . . . . . . . 62Setting Your Workspace . . . . . . . . . . . . . . . . . . . . . . . . . . . . . . . . . 62Setting Your Workfile Location . . . . . . . . . . . . . . . . . . . . . . . . . . . . 63Defining the Default Revision . . . . . . . . . . . . . . . . . . . . . . . . . . . . . 64Enabling Automatic Branching. . . . . . . . . . . . . . . . . . . . . . . . . . . . . 64Defining the Default Promotion Group . . . . . . . . . . . . . . . . . . . . . . . 66
Chapter 5 Comparing Files . . . . . . . . . . . . . . . . . . . . . . . . . . . . . . 69
About Comparing Files . . . . . . . . . . . . . . . . . . . . . . . . . . . . . . . . . . . . . 70
Viewing Differences . . . . . . . . . . . . . . . . . . . . . . . . . . . . . . . . . . . . . . . 70
Interpreting Difference Results . . . . . . . . . . . . . . . . . . . . . . . . . . . . . . . 72Difference Examples . . . . . . . . . . . . . . . . . . . . . . . . . . . . . . . . . . . 73
Chapter 6 Merging Files. . . . . . . . . . . . . . . . . . . . . . . . . . . . . . . . 75
About Merging . . . . . . . . . . . . . . . . . . . . . . . . . . . . . . . . . . . . . . . . . . 76Merging Terms and Definitions . . . . . . . . . . . . . . . . . . . . . . . . . . . . 76The Merge Process . . . . . . . . . . . . . . . . . . . . . . . . . . . . . . . . . . . . 77Selecting a Base File . . . . . . . . . . . . . . . . . . . . . . . . . . . . . . . . . . . 77
Merging Files in Windows or UNIX . . . . . . . . . . . . . . . . . . . . . . . . . . . . . 77
Interpreting Difference Results in Windows . . . . . . . . . . . . . . . . . . . . . . . 81Placeholders . . . . . . . . . . . . . . . . . . . . . . . . . . . . . . . . . . . . . . . . . 81Conflicts. . . . . . . . . . . . . . . . . . . . . . . . . . . . . . . . . . . . . . . . . . . . 82
Interpreting Difference Results in UNIX . . . . . . . . . . . . . . . . . . . . . . . . . 83
4 Serena® PVCS® Version Manager™ 8.4.5

Table of Contents
Placeholders . . . . . . . . . . . . . . . . . . . . . . . . . . . . . . . . . . . . . . . . . 84
Resolving Conflicts Between Files in Windows . . . . . . . . . . . . . . . . . . . . . 84
Resolving Conflicts Between Files in UNIX. . . . . . . . . . . . . . . . . . . . . . . . 85
Appendix A: Naming Conventions and Restrictions . . . . . . . 87
General Naming Conventions and Restrictions. . . . . . . . . . . . . . . . . . . . . 88Prohibited Characters for Files and Directories . . . . . . . . . . . . . . . . . 88Naming Considerations for Cross-Platform Environments . . . . . . . . . . 88
Specific Naming Conventions and Restrictions . . . . . . . . . . . . . . . . . . . . . 89
Index. . . . . . . . . . . . . . . . . . . . . . . . . . . . . . . . . . . . . 91
Web Client User’s Guide 5

Table of Contents
6 Serena® PVCS® Version Manager™ 8.4.5

Welcome to Version ManagerThank you for choosing the Serena® PVCS® Version Manager™ web client, a powerful and versatile version control system that will revolutionize the way that you develop software. Version Manager helps you organize, manage, and protect your software development projects on every level—from storing and tracking changes to individual files, to managing and monitoring an entire development cycle.
Purpose of thismanual
This manual introduces you to browser-based interface, highlights differences between the Version Manager web client and the Version Manager desktop client, and provides instructions on how to get started using Version Manager web client. This manual supplements the Serena PVCS Version Manager User's Guide, which is designed to be the primary source of information about Version Manager features and concepts, and the Version Manager web client online help.
Once you start using the Version Manager web client, access the online help for detailed instructions on how to perform daily tasks, such as checking out files, managing version labels, and adding workfiles to projects.
For moreinformation
Refer to the Serena PVCS Version Manager Getting Started Guide for a description of the Version Manager documentation set, a summary of the ways to work with Version Manager, and instructions for accessing the online help.
Edition status The information in this edition applies to Release 8.4.5 of Version Manager Web Client or later. This edition supersedes earlier editions of this manual.
Typographical ConventionsThe following typographical conventions are used in the online manuals and online help. These typographical conventions are used to assist you when you use the documentation; they are not meant to contradict or change any standard use of typographical conventions in the various product components or the host operating system.
Convention Explanation
italics Introduces new terms that you may not be familiar with and occasionally indicates emphasis.
bold Emphasizes important information and field names.
UPPERCASE Indicates keys or key combinations that you can use. For example, press the ENTER key.
monospace Indicates syntax examples, values that you specify, or results that you receive.
monospaced italics
Indicates names that are placeholders for values you specify; for example, filename.
monospace bold
Indicates the results of an executed command.
Web Client User's Guide 7

Contacting Technical SupportRegistered customers can log in to http://support.serena.com/.
vertical rule | Separates menus and their associated commands. For example, select File | Copy means to select Copy from the File menu.Also, indicates mutually exclusive choices in a command syntax line.
brackets [] Indicates optional items. For example, in the following statement: SELECT [DISTINCT], DISTINCT is an optional keyword.
. . . Indicates command arguments that can have more than one value.
Shows you which shortcut button to click. Shortcut buttons are placed in the margin.
Convention Explanation
8 Serena® PVCS® Version Manager™ 8.4.5
Chapter 1Version Manager Web Client Basics
Introducing the Version Manager Web Client 10Version Manager Web Client Features 10Version Manager Web Client Components 11Using the Version Manager Web Client with Version Manager 11Using TrackerLink (Tracker) with the Version Manager Web Client 13Using SourceBridge (TeamTrack) with the Version Manager Web Client 15Using the Version Manager Web Client with Previous Releases 17System Requirements 18
Web Client User's Guide 9

Chapter 1 Version Manager Web Client Basics
Introducing the Version Manager Web ClientThe Serena PVCS Version Manager web client is the web-based client component of Version Manager that allows you to access Version Manager projects via the Internet or intranet. The Version Manager web client works with the Version Manager Server, the web-based server component of Version Manager.
With the Version Manager web client, you can use your web browser to view detailed information about projects and archives, and to perform such tasks as checking in and checking out files, managing locks, version labels and promotion groups, and running reports.
Because the Version Manager web client allows you to access Version Manager projects from any connected point on the Internet or intranet, it's ideally suited for remote users, mobile users and users in web-intensive environments, such as members of Internet programming and content development teams.
In addition, the lightweight web browser interface offers the benefits of a very low cost of maintenance for users and administrators in all environments.
Version Manager Web Client FeaturesThe Version Manager web client provides the essential end-user version control features of Version Manager. It is designed for users who do not need access to administrative features.
The Serena PVCS Version Manager web client online help provides detailed procedures for using these features.
The Version Manager web client provides the following features:
Add Workfiles. Add one or more workfiles to a project database or project. You can also add an entire directory with subdirectories, which becomes a project with subprojects in the project database.
Create Projects. Manually create new projects with a different directory structure than the existing workfile structure.
Check in and Check out. Check files in to and out of archives.
Get. Get copies of revisions without checking them out.
Lock and Unlock. Lock and unlock revisions of files.
Version Labels. Assign, change, and delete version labels.
Promotion Groups. Promote revisions, and to assign, change, and remove promotion groups.
History Reports. Run reports that show detailed information on archives.
Difference Reports. Compare two revisions or two workfiles, or compare a workfile and a revision.
Merge Files. Merge two revisions or two workfiles, or a workfile and a revision.
Options. Set default dialog box and display options.
10 Serena® PVCS® Version Manager™ 8.4.5

Version Manager Web Client Components
Copy and Move. Copy or move versioned files between projects in a project database.
Workspaces. Set, create, rename, and delete public or private workspaces.
Rename. Change the names of projects and Version Manager 5.3/6.0 folders in the interface.
Delete. Remove projects, Version Manager 5.3/6.0 folders, and versioned files from the interface.
Change Password. Change the password you use to log in to a project database. This also changes your password in Version Manager if an Access Control Database is in place.
Version Manager Web Client ComponentsThe combined services of the Version Manager Server component, a supported web server, and the Version Manager web client component provide access to your archives via the Internet or an intranet.
Before you can use the Version Manager web client, your Serena products administrator must install the Version Manager Server component on a system that is running a web server. Once the Version Manager Server is configured for use with Version Manager projects, you can log into the Version Manager web client interface and view detailed information about projects and perform actions from within your web browser.
Using the Version Manager Web Client withVersion Manager
You must use Version Manager to perform all administrative tasks on project databases. Administrative tasks can include creating and configuring project databases or roots, defining security, and setting up promotion models.
Most end-user tasks in the Version Manager web client, such as checking out files or adding workfiles, follow the same procedures as those in the Version Manager desktop client. These procedures are documented in the Version Manager Web Client online help. However, some differences do exist for tasks involving version labels and promotion groups.
Version Labels and Promotion Groups
When working with version labels and promotion groups in Version Manager, you choose the specific operation you want to perform from the menu. For example, you choose Actions | Version Label | Assign to assign a version label or Actions | Promotion Group | Remove to remove a promotion group.
In the Version Manager web client, you perform all operations with version labels and promotion groups by selecting the Label button or Promote button on the Actions menu. At the top of the Version Label or Promotion Group dialog box, you select which operation you want to perform. The contents of the dialog box change with your selection.
Web Client User's Guide 11

Chapter 1 Version Manager Web Client Basics
For example, if you select Actions | Label, the dialog box appears as below. By default, the Assign option is selected and the contents of the dialog box correspond to that operation.
If you select the Rename option, the contents of the dialog box change:
NOTE It is best practice to use version labels that do NOT look like revision numbers.
12 Serena® PVCS® Version Manager™ 8.4.5

Using TrackerLink (Tracker) with the Version Manager Web Client
Using TrackerLink (Tracker) with the Version Manager Web Client
You can use TrackerLink in the Version Manager web client or desktop client to associate workfiles with issues in Serena Tracker. Use TrackerLink as a tool to bridge Tracker and Version Manager. When checking in, checking out, locking, or adding workfiles, you can associate those workfiles with issues through the TrackerLink Workfile Association dialog box.
ConfiguringTrackerLink
Before you can use TrackerLink, your administrator must:
Configure TrackerLink options. See the Serena PVCS Version Manager Administrator's Guide.
Associate the servlet for your Version Manager project database with the URL of a Tracker database. See the Serena PVCS Version Manager Installation Guide.
Using TrackerLinkUse TrackerLink to associate issues with workfiles when you:
Check out a file
Check in a file
Lock a file
Add new workfiles
If your settings do not automatically log you in to Tracker, you will be prompted for your login information when you associate workfiles.
To associate an issue with a workfile on check in, check out, adding workfiles, or on locking a file:
1 Select the files you want to associate with issues.
2 Make the check in, check out, add workfiles, or lock request.
Web Client User's Guide 13

Chapter 1 Version Manager Web Client Basics
3 Click the Associate Issues button on the Check Out, Check In, Lock, or Add Workfiles dialog boxes. The TrackerLink Workfile Association dialog box appears.
4 Select a query from the Queries pane to run a query to find and select the issues to associate with your workfiles or find them in the In Tray.
5 From the Workfiles pane, select the files to associate with an issue.
6 Double-click the first issue number to associate with your workfile. This associates that issue with the workfile, and the number that appears to the left of the workfile name increases by one. You can also choose the Associate button to associate the issue and your workfile.
7 Double-click the workfile name to see the currently associated issues. If its title and description appear, the issue is currently selected.
8 If you change your mind about a particular association, you can:
• Double-click the issue number in the Workfiles pane to unassociate it.
• Select the issue and click the Unassociate button.
If a file has no associations, the current workfile will have a plus sign next to it. When you select it, it will appear with "(no associations)" below it.
NOTE You can associate several files with one issue at the same time, but you can not select a query and associate all of its matching issues with a workfile or workfiles at the same time. Issues must be selected individually.
14 Serena® PVCS® Version Manager™ 8.4.5

Using SourceBridge (TeamTrack) with the Version Manager Web Client
Launching the Tracker Web Client
You can access the Tracker web client by clicking the Tracker icon on the Actions tab.
Using SourceBridge (TeamTrack) with the Version Manager Web Client
You can use SourceBridge in the Version Manager web client or desktop client to associate workfiles with issues in Serena TeamTrack. When checking in, checking out, locking, or adding workfiles, you can associate those workfiles with issues in TeamTrack.
ConfiguringSourceBridge
Before you can use SourceBridge, your administrator must:
Configure SourceBridge options. See the Serena PVCS Version Manager Administrator's Guide.
Associate the servlet for your Version Manager project database with the URL of a TeamTrack database. See the Serena PVCS Version Manager Installation Guide.
Using SourceBridgeUse SourceBridge to associate issues with workfiles when you:
Check out a file
Check in a file
Lock a file
Add new workfiles
To associate an issue with a workfile on check in, check out, adding workfiles, or on locking a file:
1 Select the files you want to associate with issues.
2 Make the check in, check out, add workfiles, or lock request.
Web Client User's Guide 15

Chapter 1 Version Manager Web Client Basics
3 Click the Associate Issues button on the Check Out, Check In, Lock, or Add Workfiles dialog boxes. SourceBridge will opens.
Search 4 Complete any of the following fields to specify the issues you want to work with:
Project (includes Sub-Projects): Select a TeamTrack project.
Keywords: Enter keywords to search for. You may use the percent symbol (%) as a wildcard.
Show Only Items I Own: Select this check box to limit the search to items that you own.
Item ID: Enter the ID of the item(s) to search for. You may use the percent symbol (%) as a wildcard.
Append Search Results to List: Select this option to append new search results to any existing items in the Results pane. If this option is not selected, any existing results will be replaced when you run a new search.
Filter on Active/Inactive:
• Active: Select this option to search for only those items that are active.
• Inactive: Select this option to search for only those items that are inactive
NOTE To log in as a different user, click the Logon button.
16 Serena® PVCS® Version Manager™ 8.4.5

Using the Version Manager Web Client with Previous Releases
• Both: Select this option to search for items regardless of whether they are active or inactive.
5 Click the Search button. The search results appear in the Results pane.
Results 6 To view the details of a TeamTrack issue, click its ID. The issue will then open in the TeamTrack web client.
7 Select the check box next to the issue(s) that you want to associate with items under source control.
Associations 8 From the Associations pane, select the files to associate with the selected issues.
9 Click the Associate button to associate the selected issues and workfiles. The associations are then displayed in the Associations pane.
10 To remove an association, select the issue in the Associations pane and click the Unassociate button.
11 Click the Done - Continue with . . . button.
Launching the TeamTrack Web Client
You can access the TeamTrack web client by clicking the:
TeamTrack icon on the Actions tab of the Version Manager web client.
Issue ID in the Results pane of the SourceBridge associate dialog.
Using the Version Manager Web Client with Previous Releases
You should upgrade Version Manager 5.3/6.0 project roots to the current format using Version Manager. However, you can still access 5.3/6.0 project roots in the Version Manager web client without upgrading them. While most functionality is supported in this scenario, some restrictions apply to ensure compatibility with the Version Manager 5.3/6.0 GUI.
You cannot:
Create, delete, or rename projects within the Version Manager 5.3/6.0 project root. However, you can perform these actions on 5.3/6.0 folders.
Add multiple directories. You can add a single directory by selecting all of the files within it.
Automatically see newly added archives in the content pane. You must use the Update Project Folder option to update the display if archives have been added in other interfaces, such as the command-line interface.
Web Client User's Guide 17

Chapter 1 Version Manager Web Client Basics
System RequirementsThe Version Manager web client is supported on Windows and UNIX operating systems. For specific supported platform, web browser, and version information, refer to the readme file (readmevm.htm).
18 Serena® PVCS® Version Manager™ 8.4.5

Chapter 2Getting Started
Connecting to the Version Manager Web Client 20Logging In to a Project Database 20Changing Your Password 23Switching Users 24Logging Out of a Project Database 25Managing the Web Client Applet 26
Web Client User's Guide 19

Chapter 2 Getting Started
Connecting to the Version Manager Web ClientYou connect to Version Manager web client to establish a link between your web browser and Version Manager project databases or roots. You must connect to the Version Manager web client before you can log into a project.
To connect to the web client:
1 Start your web browser.
2 Open the URL of the Version Manager Web Client Project Databases page. The URL of this page is http://hostname:port/vminet.html (for non-secure web services) or https://hostname:port/vminet.html (for secure web services), where hostname is the name of the system hosting the Version Manager Server and port is the server port.
The Project Databases page appears.
3 Click the name of the project database or root to which you want to connect in the Link list.
After you have connected to the Version Manager Server, the Login page appears. Continue to the next section.
Logging In to a Project DatabaseLog in to a project database when you want to access Version Manager projects, 5.3/6.0 folders, and versioned files. To log in to a project database, you must have a valid user ID and password or Common Access Card and PIN. Typically, your administrator assigns user IDs and passwords.
The web client can present two different login screens, depending on how your project database is configure:
Regular login
Single Sign On / Common Access Card loginSee "Single Sign On / Common Access Card Login" on page 22.
TIP If you know the URL of the project database, or if you have the location bookmarked in your web browser, you can open the URL directly without connecting to the Project Databases page. Optionally, bookmarks can include the specific project you want to open. For example: http://ServerName/SampleDB/chess/client.
NOTE You can also access the online documentation and the client applet management page from the Project Databases page.
NOTE From an individual web client system, do not open more than one connection to a given Version Manager web server at a time. If you have multiple web servers, you can open a single connection to each server in its own browser tab or browser instance, but do NOT invoke more than one dialog at a time (for example, do not run Get dialogs from two tabs at the same time).
20 Serena® PVCS® Version Manager™ 8.4.5

Logging In to a Project Database
Regular LoginThis is the traditional User ID and Password login.
To log in to a project database:
1 Open the Login page by connecting to Version Manager web client as described in "Connecting to the Version Manager Web Client" on page 20. The Login page appears.
2 Enter your user ID in the User ID field.
3 Enter your password in the Password field.
NOTE If the project database is configured to use Host ID as the login source and:
A password is required, the User ID field will be prepopulated and uneditable.
A password is not required, the user will be logged in automatically and the login dialog box will not be displayed.
NOTE
If you have a password for the project database in the Version Manager desktop client, your web client password will match your desktop client password.
For security reasons, the Input Method Editor is disabled in the Password field. You will not be able to enter double-byte characters in this field.
Web Client User's Guide 21

Chapter 2 Getting Started
4 (optionally) To free licenses from any stale login sessions that you may have open, select Automatically close all other sessions for your user ID on this server.
5 Click OK.
You may also need to log in to a project if your administrator has configured an Access Control Database for it. In this case, the Login page appears when you select the project.
To log into a project:
1 Enter your user ID in the User ID field.
2 Enter your password in the Password field.
3 Select the Remember this user name/password option to store this information so that you don't have to log in to the project for future Version Manager web client sessions.
4 Click OK.
Single Sign On / Common Access Card LoginIf your project databases are configured for this login type, you can login to one project database and not be prompted when accessing another. You may also access the SBM client without logging in again. Also, in addition to User ID and Password, this login page supports Common Access Card (SmartCard) and PIN login.
To log in to a project database:
1 Open the Login page by connecting to Version Manager web client as described in "Connecting to the Version Manager Web Client" on page 20. The Login page appears.
2 Do one of the following:
For User ID and Password based SSO login, complete the User Name and Password fields and click the Log In button.
For Common Access Card and PIN based login, click the SmartCard Login button. A dialog appears from your third party SmartCard utility:
NOTE If the project database is configured to use Host ID as the login source and:
A password is required, the User ID field will be prepopulated and uneditable.
A password is not required, the user will be logged in automatically and the login dialog box will not be displayed.
NOTE
If you have a password for the project in the Version Manager desktop client, your web client password will match your desktop client password.
For security reasons, the Input Method Editor is disabled in the Password field. You will not be able to enter double-byte characters in this field.
NOTE You will see this page and these login options only if the project database you are attempting to access has been configured to support these login sources. See the Version Manager Installation guide.
22 Serena® PVCS® Version Manager™ 8.4.5

Changing Your Password
a Enter your PIN in the third-party SmartCard utility and click OK. A dialog appears with a list of user certificates available on your SmartCard.
b Select a user certificate and click OK.
Changing Your PasswordYou can change the password assigned to you by your administrator at any time. The password you change is the one that you entered in the Login page. Once you've changed your password, the new password takes effect the next time you log into the Version Manager web client.
Web Client User's Guide 23

Chapter 2 Getting Started
If security is enabled in Version Manager for this project database, changing your password in the Version Manager web client changes it in the desktop client as well (and vice-versa).
To change your password:
1 On the File menu tab, click the Change Password button. The Change Password dialog box appears.
2 Enter your current password in the Old password field.
3 Enter your new password in the New Password field, up to 29 characters.
4 Re-enter the new password in the Verify new password field.
5 Click OK.
Switching UsersYou can continue to work with an open project database or project using a different user name and password. The Switch User option provides a quick way to switch to a user ID with different privileges without having to close and reopen the project database.
This option is only available if the Administrator has configured the project database, project, or subproject using the Login dialog security option.
To switch users for a project database or project:
1 On the File menu tab, click the Switch User button.
24 Serena® PVCS® Version Manager™ 8.4.5

Logging Out of a Project Database
The Switch User dialog box appears.
2 Enter the new user ID in the User ID field.
3 Enter the password in the Password field, if required.
4 Click OK.
Logging Out of a Project DatabaseLog out of a project database when you are finished with your source control tasks or when you want to log in to a different project database. When you log out of a project database, your Version Manager web client session is immediately terminated, requiring you to re-enter your user ID and password the next time you want to access a Version Manager project database.
To log out of a project database:
Click the Logout button, located on the right side of the tabbed menus. The Logout page appears.
To log into a different project database, click the vminet.html link to view a list of project databases available on this server.
NOTE Depending on your servlet configuration, if you do not explicitly log out of a project database, a time logout based on inactivity may occur.
Web Client User's Guide 25

Chapter 2 Getting Started
Managing the Web Client AppletYou can remove existing applet installations and specify the applet installation location.
To manage web client applets:
1 Open the Version Manager Web Client Configuration page. You can click the link from the Version Manager Project Databases page, or directly enter the URL:
http://YourServer:Port/vminet_install.html
2 Do any of the following:
Uninstall an Applet: Click the Remove link for the applet you wish to uninstall.
Uninstall all Applets: Click the Uninstall All Applets link to uninstall all applets that are 8.4.5 or newer.
Apply Default Location: Click the To Default link to use the default Version Manager applet location for future installations.
Specify Custom Location:
a Select the Custom option.
b Enter or browse to the desired location for future installations.
c Click the Apply Custom link.
NOTE To uninstall pre 8.4.5 applets, use your operating system's program management utility (e.g. "Add or Remove Programs" or "Programs and Features"), or use the Add-ons/Plugins feature in FireFox or Mozilla.
NOTE If you wish to remove the currently running applet, you must close all browser instances and not open a Version Manager project before opening the Version Manager Web Client Configuration page.
26 Serena® PVCS® Version Manager™ 8.4.5

Chapter 3Navigating the Interface
Version Manager Web Client Panes 28Selecting Items 35Moving Items 36Renaming Items 37Deleting Items 37Reviewing Item Properties 38Filtering Your View 39
Web Client User's Guide 27

Chapter 3 Navigating the Interface
Version Manager Web Client PanesOnce you have logged in to a project database, navigate the Serena PVCS Version Manager web client interface to view the projects, subprojects, 5.3/6.0 folders, versioned files, and revisions contained in the project database. Five panes comprise the Version Manager web client interface: the Project pane, Content pane, Revision pane (not shown below), Menu pane, and Status pane.
Working in the Project PaneThe Project pane displays the open project database and its projects, subprojects, and 5.3/6.0 folders in a hierarchical tree. Click +/- to expand or collapse the tree. When you select a project, subproject, or 5.3/6.0 folder, its versioned files appear in the Content pane to the right.
The following icons can appear in the Project pane:
ProjectPane
ContentPane
StatusPane
MenuPane
Icon Description
The open project database displayed by its name and its location in parenthesis. A 5.3/6.0 project database displays by its location only.
A project, subproject, or folder. The icon for a 5.3/6.0 project or folder appears in blue.
28 Serena® PVCS® Version Manager™ 8.4.5

Version Manager Web Client Panes
Working in the Content PaneThe Content pane displays the versioned files contained in the project database or project that you selected in the Project pane. To:
Select versioned files for action, click the check boxes next them.
Edit or view a versioned file in the default editor or browser, click the file icon.
Open the Revision pane and view details on all of the revisions in a versioned file, click the file name.
Sort the versioned files, click the heading of the column you wish to sort by. To inverse the sort order, click the column heading again.
The Content pane contains the following fields and icons:
A project with a configuration file attached to it. These configuration settings override the project database settings. The icon for a 5.3/6.0 project appears in blue.
A project that you cannot open because you have not been defined in the Access Control Database. The icon for a 5.3/6.0 project appears in blue.
Icon Description
NOTE For information on setting the default editor, see "Setting Your Default Editor" on page 58.
Field or Icon Description
Contents of Displays the name of the project database or project in which the versioned files reside.
Workfile Location Displays the project's workfile location
Page Only displays when more items exist than can be contained on the page. Click Previous, Next, or [number] to go to the previous, next, or specific page. Click Index to go to the Page Index on the bottom, which lists the first and last files on each page.This field is duplicated at the bottom of the page, except the Index link is replaced by Top, which takes you to the top of the page.
Select/Deselect Options to select and clear all items. If more items exist than can be contained on the page, you can choose to select all items on the current page.
Name The name of the versioned file. Click to open the Revision pane.
Date Checked In The date and time the versioned file was last checked in.
Locked By The user ID that currently holds a lock on the item.
Checked Out To Location
If versioned file is checked out, displays the path the file is checked out to.
A versioned file that does not contain any locked revisions. view or edit the file in the default editor.
Web Client User's Guide 29

Chapter 3 Navigating the Interface
Working in the Revision PaneOnce you click a versioned file link, the Revision pane appears. The Revision pane displays details on all revisions of the versioned file. To:
Select a revision for action, click the check box next it.
Edit or view a revision in the default editor or browser, click the revision number.
Sort the revisions, click the heading of the column you wish to sort by. To inverse the sort order, click the column heading again.
A versioned file that contains a locked revision. view or edit the file in the default editor.
A versioned file that references an archive that cannot be found.
Page Index Only displays when more items exist than can be contained on the page. It displays the page number and first and last files on each page.
Field or Icon Description
NOTE For information on setting the default editor, see "Setting Your Default Editor" on page 58.
30 Serena® PVCS® Version Manager™ 8.4.5

Version Manager Web Client Panes
The Revision pane contains the following fields and icons:
Field or Icon Description
Revisions of Displays the name of the versioned file containing the revisions.
Workfile Location Displays the workfile location of the versioned file. Click the workfile location link to bring up the Set Workfile Location dialog box.
Page Only displays when more items exist than can be contained on the page. Click Previous, Next, or [number] to go to the previous, next, or specific page.
Return to the contents of the project
Brings you back to the Content pane.
Revision The number of the revision. The default revision is selected. Click to edit or view the revision in the default editor.
Author The original author of the revision.
Date Modified The timestamp on the file when it was last checked in.
Locked By The user ID who currently holds a lock on the revision.
Description The description added to the revision when it was checked in.
Labels If a label is assigned to the revision, the label name displays.
Promotion Groups If a promotion group is assigned to the revision, the promotion group displays.
A revision.
A locked revision.
A revision assigned a promotion group.
A locked revision assigned a promotion group.
A revision assigned a version label.
A locked revision assigned a version label.
A revision assigned a promotion group and version label.
A locked revision assigned a promotion group and version label.
Web Client User's Guide 31

Chapter 3 Navigating the Interface
Working in the Menu PaneThe Menu pane provides buttons to execute Version Manager web client commands. Click a tab to access the commands on the File, Edit, Actions, or Help menu. Click a button on the menu to execute a command.
The following menu buttons are available:
File menu button
Description
Creates a new project or 5.3/6.0 folder.
Sets or changes a workfile location for the selected project database, project, or versioned file.
Updates 5.3/6.0 project folders to display new archives added by other users.
Renames an existing project or 5.3/6.0 folder.
Deletes an existing project, 5.3/6.0 folder, or versioned file.
Displays the properties of a project database, project, 5.3/6.0 folder, or versioned file.
Sets, creates, renames, or deletes workspaces.
Switches to a different user ID for the selected project database or project.
Changes your password for logging into the selected project database or project.
Edit menu button
Description
Copies one or more versioned files to another project or 5.3/6.0 folder.
NOTE The archives remain in their original location.
Moves one or more versioned files to another project or 5.3/6.0 folder.
NOTE The archives remain in their original location.
32 Serena® PVCS® Version Manager™ 8.4.5

Version Manager Web Client Panes
Sets options for the Version Manager web client display and operations.
Actions menu button
Description
Adds workfiles to a project database, project, or 5.3/6.0 folder.
Gets a revision and makes a copy in the workfile location.
Checks out an editable revision to the workfile location.
Checks in a modified workfile to the archive.
Unlocks a revision without performing a check in.
Locks a revision without performing a check out.
Assigns, renames, or deletes a version label from a revision.
Assigns, promotes, changes, or removes a promotion group from a revision.
Creates a history report on a project database, project, versioned file, or 5.3/6.0 folder.
Launches the Merge Tool to compare (difference) revisions or workfiles.
Launches the Merge Tool to merge revisions or workfiles.
(May not appear.) Launches another web browser to bring up the SBM (TeamTrack) URL associated with the current project database. Your administrator defines this URL in the Version Manager Application Server.
Web Client User's Guide 33

Chapter 3 Navigating the Interface
Working in the Status PaneThe Status pane lets you view and modify your current filter, user ID, and workspace. It also displays the number of items that are currently selected. To:
Change the display of versioned files in the Content pane, click the Filter list.
Switch users, click the user ID.
Set a different workspace, click the Workspace name.
(May not appear.) Launches another web browser to bring up the Tracker URL associated with the current project database. Your administrator defines this URL in the Version Manager Application Server.
(May not appear.) Launches TrackerLink so that you can associate workfiles with issues in Tracker when checking out, checking in, locking, and adding workfiles.
Deployment menu button
Description
Requires Serena Mover to deploy files from Version Manager to another application.
Requires Mover. Use to set up the file deployment.
Requires Mover. Use to schedule the file deployment.
Help menu button
Description
Launches the Version Manager web client help system.
Launches the What's New page in the help system. The What's New page communicates to you what features are new in this version of Version Manager.
Brings up the Serena support page.
Displays an About box with Version Manager web client copyright and version information.
Logs you out of the project database.
34 Serena® PVCS® Version Manager™ 8.4.5

Selecting Items
The Status pane consists of the following fields and icons:
Selecting ItemsSelect items in the Version Manager web client to view information on them, or to perform actions such as check in, get, check out, lock, unlock, or assign a version label. After you have selected the items, click a menu button to perform an action.
Icon Description
Filter View all files or filter your view by filename wildcards, locker, version labels, or promotion groups. Retains the last four filters used.
Toggle between recursive and non-recursive filter modes:
Recursive: The Content pane displays all projects, subprojects, and versioned files contained within the item selected in the Project pane.
Non-recursive: The Content pane displays only the versioned files contained at the root of the item selected in the Project pane.
The current user ID displays here. Click the name to switch to another user ID for this project database.
The current workspace displays here. Click the workspace name to set a different workspace for this project database.The workspace icon indicates if the workspace is public or private.
[#] of [total] [items] selected
Displays the number of currently selected projects, folders, versioned files, or revisions. For versioned files and revisions, it also displays the total number of versioned files in the project and the number of revisions of a versioned file (for example, 4 of 50 files selected).
Public
Private
To select... Do this...
The project database Click the project database in the Project pane.
A project or folder Click the project or folder in the Project pane.
Multiple projects Press and hold the SHIFT or CTRL key while clicking the projects in the Project pane. You can only select multiple projects if they belong to the same parent project.
Web Client User's Guide 35

Chapter 3 Navigating the Interface
Moving ItemsYou can move versioned files between projects or folders within a project database. When you move versioned files, the archives that they reference do not move. The versioned files continue to reference the archives in their original location.
Use the Version Manager desktop client to move other items, such as projects and folders.
To move a versioned file:
1 Select one or more versioned files.
2 On the Edit menu tab, click the Move button. The Move File dialog box appears.
3 Select the destination project or folder in the project navigation tree. To move the file directly beneath the project database or root, select the project database or root.
4 Click OK. The versioned file moves to the destination location.
One or more versioned files Click the check boxes next to the versioned files in the Content pane. To select all of the versioned files in a project, click the Select: All link. When versioned files exist on multiple pages, you can click the Select: All on this page to select the versioned files on the current page only.If you navigate to another page after clicking Select: All, the selection is canceled.
A revision Click the radio button next to the revision in the Revision pane.
To select... Do this...
36 Serena® PVCS® Version Manager™ 8.4.5

Renaming Items
Renaming ItemsYou can rename a project or 5.3/6.0 folder in the Project pane. The new project name appears in both the Version Manager desktop and web clients, but the actual archive directory name is not changed.
NOTE You cannot rename versioned files or 5.3/6.0 projects.
If the previous workfile location matched the old project name, a new workfile location is set to match the new project name. You check out, copy, and check in files from the new workfile location. Any files checked out before you renamed a project or folder remain in the original workfile location.
To rename a project or folder:
1 Select the project or folder you want to rename.
2 On the File menu tab, click the Rename button.
The Rename Project/Folder dialog box appears.
3 Enter the new name in the Name field.
4 Click OK.
Deleting ItemsYou can delete projects, 5.3/6.0 folders, and versioned files, depending on your security privileges. You cannot delete 5.3/6.0 projects. All deleted items are removed from both the Version Manager desktop and web clients. However, the archives of the deleted items are not removed from the archives directory. The project configuration file and access control database are also retained.
Web Client User's Guide 37

Chapter 3 Navigating the Interface
If you want to recover deleted projects, 5.3/6.0 folders, or versioned files, use Version Manager to import the archives into a project database or project.
To delete a project, folder, or versioned file:
1 Select the item you want to delete. You can select one or more projects, folders, or versioned files.
2 On the File menu tab, click the Delete button.
The Confirm Delete dialog box appears.
3 Click OK to delete the item.
Reviewing Item PropertiesYou can review the properties of a project database, 5.3/6.0 project root, project, 5.3/6.0 folder, and a versioned file. Properties vary according to the item you select.
If you select a... You can...
Project database or project View its contents, configuration file, and archive location. You can also view or change the workfile location, default version, default promotion group, branch version, and base version.
5.3/6.0 project root or project View its contents and configuration file. You can also view or change the default version, default promotion group, branch version, and base version.
5.3/6.0 folder View its contents. You can also view or change the workfile location.
Versioned file View archive information. You can also view or change the workfile location.
38 Serena® PVCS® Version Manager™ 8.4.5

Filtering Your View
To view the properties of an item:
1 Select a project database, project, folder, or versioned file.
2 On the File tab, click the Properties button. The Show Properties dialog box appears.
3 View or change the default settings as necessary. See Chapter 4, "Customizing Your Environment" on page 53.
4 Click OK.
Filtering Your ViewBy default, when you select a project database, project, or folder, the Version Manager web client displays all of its associated versioned files in the Content pane. The file filter allows you to customize the Content pane so that only the versioned files that match your filter criteria appear. You can filter your view to display only versioned files that:
Are locked by specific users or by any user
Match a wildcard filename pattern
Match a specified promotion group
Match a specified version label
NOTE The appearance of the Show Properties dialog box varies depending on the type of item you selected.
Web Client User's Guide 39

Chapter 3 Navigating the Interface
Differ or match in terms of revision number, modification time, or revision contents between:
• Two version labels
• Two promotion groups
• A version label and a promotion group
Performing actionson a filtered
project
If you perform an action (such as a check out) on a project by selecting it in the Project pane, Version Manager performs the action on all files in the project, including any files not displayed by the current filter (Note, files in subprojects within the selected project are ignored). To limit an action to only the versioned files displayed by the current filter, select the versioned files in the Content pane and then select the action.
Viewing Files RecursivelyBy default, the Content pane displays only the versioned files located at the root of the item (project database, project, or subproject) you have selected in the Project pane. Unless you select the recursive view, projects, subprojects, and the files contained within nested projects and subprojects are not displayed.
To switch between recursive and non-recursive views:
1 In the Project pane, select the project database or project that you want to view.
2 Click the Recursive/Non-recursive button. The appearance of the button toggles to indicate which filter mode is in effect:
Recursive: The Content pane displays all projects, subprojects, and versioned files contained within the item selected in the Project pane.
Non-recursive: The Content pane displays only the versioned files contained at the root of the item selected in the Project pane.
Filtering by LockerUse this filter to find versioned files locked by specified users or by any user.
NOTE A filtered view remains in effect until you select a different one. To avoid confusion, you may want to clear a filtered view by returning to the All Files view before going on to other work.
40 Serena® PVCS® Version Manager™ 8.4.5

Filtering Your View
To set a Locked By filter:
1 From the Filter list on the Status pane, select Locked By. The Locked By Filter dialog box appears.
2 Do one of the following:
To display versioned files locked by specific users, select the Users option and enter one or more user IDs. Separate multiple user IDs with the delimiter character. The default delimiter is a semicolon (;). For information on setting the delimiter character, see "Specifying a Delimiter for Items Entered in Fields" on page 55.
To display all locked versioned files regardless of who has them locked, select the Any user option.
3 Click OK.
Filtering by Wildcard FilenameUse this filter to find versioned files that match specified wildcard name patterns.
Web Client User's Guide 41

Chapter 3 Navigating the Interface
To set a wildcard filter:
1 From the Filter list on the Status pane, select Wild Card. The Wild Card Filename Filter dialog box appears.
2 Enter filter criteria into the Filename pattern field.
3 Click OK.
Filtering by Version LabelUse this filter to find versioned files that include specified version labels.
Use this wild card… To search for filenames that match…
* Zero or more characters.For example, if you want to search for all versioned files with a DLL extension, you would enter *.DLL.
? One character.For example, if you want to search for versioned files that had a pattern in the filename, such as TEST01.DLL, TEST02.DLL, … TESTXX.DLL, you would enter TEST??.DLL.
[ - ] A range of characters. For example, if you want to search for all versioned files that start with A, B, C, or D, you would enter [A-D]*.
^ A negative character set matching any character not enclosed (for example, [^A-D]* for all file names that do not start with A, B, C, or D).
42 Serena® PVCS® Version Manager™ 8.4.5

Filtering Your View
To set a version label filter:
1 From the Filter list on the Status pane, select Advanced Filter. The Advanced Filter dialog box appears.
2 Enter the name of the version labels that you want to filter by in the Version label(s) field or browse to select them. Separate multiple version labels with the delimiter character. The default delimiter is a semicolon (;). For information on setting the delimiter character, see "Specifying a Delimiter for Items Entered in Fields" on page 55.
3 Select one of the following options to show versioned files that contain the specified version labels in:
Any revision: Version label.
The tip revision: Version label assigned to the tip revision.
Any revision except for the tip revision: Version label not assigned to tip revision.
4 To inverse the logic of the filter, select the Show files not matched by this filter check box.
NOTE Version labels are case sensitive. Make sure you use the correct case.
Web Client User's Guide 43

Chapter 3 Navigating the Interface
5 Click OK.
Filtering by Promotion GroupUse this filter to find files that include specified promotion groups.
To set a promotion group filter:
1 From the Filter list on the Status pane, select Advanced Filter. The Advanced Filter dialog box appears.
2 Select the Promotion Group option from the Filter by list.
3 Enter the names of the promotion groups that you want to filter by in the Promotion group(s) field or browse to select them. Separate multiple promotion groups with the delimiter character. The default delimiter is a semicolon (;). For information on setting the delimiter character, see "Specifying a Delimiter for Items Entered in Fields" on page 55.
4 If the specified promotion group is not found, the filter can search for the next highest promotion group, continuing up the promotion model hierarchy until a match is found or the highest level of the promotion model is reached. To enable this feature, select the Climb the promotion model hierarchy check box.
44 Serena® PVCS® Version Manager™ 8.4.5

Filtering Your View
5 Select one of the following options to show versioned files that contain the specified promotion groups in:
Any revision: Promotion group.
The tip revision: Promotion group assigned to the tip revision.
Any revision except for the tip revision: Promotion group not assigned to tip revision.
6 To inverse the logic of the filter, select the Show files not matched by this filter check box.
7 Click OK.
Filtering by Comparing Two Version LabelsUse this filter to find versioned files with revisions that differ or match between two specified version labels.
To set a compare filter using two version labels:
1 From the Filter list on the Status pane, select Advanced Filter. The Advanced Filter dialog box appears.
Web Client User's Guide 45

Chapter 3 Navigating the Interface
2 Select the Two Version Labels option from the Filter by list.
3 Enter the name of a version label that you want to filter by in the First version label field or browse to select one.
4 Enter the name of a version label that you want to filter by in the Second version label field or browse to select one.
5 Specify whether the files must contain:
Both labels
NOTE Version labels are case sensitive. Make sure you use the correct case.
46 Serena® PVCS® Version Manager™ 8.4.5

Filtering Your View
At least one of the labels
6 Select one of the following options to specify how the revisions are compared:
Revision number.
Modification time.
Modification time OR Revision contents: First compares the modification time of the revisions. If the modification time does not differ, then compares the revision contents. This option takes longer if many revisions have the same modification time.
Revision contents: Compares the contents of the revisions. This option takes the most time.
7 Specify whether to show files where:
The revisions are the same
The revisions are different
8 To inverse the logic of the filter, select the Show files not matched by this filter check box.
9 Click OK.
Filtering by Comparing Two Promotion GroupsUse this filter to find versioned files with revisions that differ or match between two specified promotion groups.
To set a compare filter using two promotion groups:
1 From the Filter list on the Status pane, select Advanced Filter. The Advanced Filter dialog box appears.
Web Client User's Guide 47

Chapter 3 Navigating the Interface
2 Select the Two Promotion Groups option from the Filter by list.
3 Enter the name of a promotion group that you want to filter by in the First promotion group field or browse to select one.
4 Enter the name of a promotion group that you want to filter by in the Second promotion group field or browse to select one.
5 Specify whether the files must contain:
Both groups
At least one of the groups
6 Select one of the following options to specify how the revisions are compared:
Revision number.
48 Serena® PVCS® Version Manager™ 8.4.5

Filtering Your View
Modification time.
Modification time OR Revision contents: First compares the modification time of the revisions. If the modification time does not differ, then compares the revision contents. This option takes longer if many revisions have the same modification time.
Revision contents: Compares the contents of the revisions. This option takes the most time.
7 Specify whether to show files where:
The revisions are the same
The revisions are different
8 To inverse the logic of the filter, select the Show files not matched by this filter check box.
9 Click OK.
Filtering by Comparing a VersionLabel and a Promotion GroupUse this filter to find versioned files with revisions that differ or match between a specified version label and a specified promotion group.
To set a compare filter using a version label and a promotion group:
1 From the Filter list on the Status pane, select Advanced Filter. The Advanced Filter dialog box appears.
Web Client User's Guide 49

Chapter 3 Navigating the Interface
2 Select the One Label and One Promotion Group option from the Filter by list.
3 Enter the name of the version label that you want to filter by in the Version label field or browse to select one.
4 Enter the name of the promotion group that you want to filter by in the Promotion group field or browse to select one.
NOTE Version labels are case sensitive. Make sure you use the correct case.
50 Serena® PVCS® Version Manager™ 8.4.5

Filtering Your View
5 Specify whether the files must contain:
Both the label and the group
The label and/or the group
6 If the specified promotion group is not found, the filter can search for the next highest promotion group, continuing up the promotion model hierarchy until a match is found or the highest level of the promotion model is reached. To enable this feature, select the Climb the promotion model hierarchy check box.
7 Select one of the following options to specify how the revisions are compared:
Revision number.
Modification time.
Modification time OR Revision contents: First compares the modification time of the revisions. If the modification time does not differ, then compares the revision contents. This option takes longer if many revisions have the same modification time.
Revision contents: Compares the contents of the revisions. This option takes the most time.
8 Specify whether to show files where:
The revisions are the same
The revisions are different
9 To inverse the logic of the filter, select the Show files not matched by this filter check box.
10 Click OK.
Viewing All Versioned Files (No Filter)To clear a filtered view and display all versioned files, select All Files from the Filter list on the Status pane.
Web Client User's Guide 51

Chapter 3 Navigating the Interface
52 Serena® PVCS® Version Manager™ 8.4.5

Chapter 4Customizing Your Environment
Setting Version Manager Web Client Options 54Setting Workspace Properties 62
Web Client User's Guide 53
Chapter 4 Customizing Your Environment
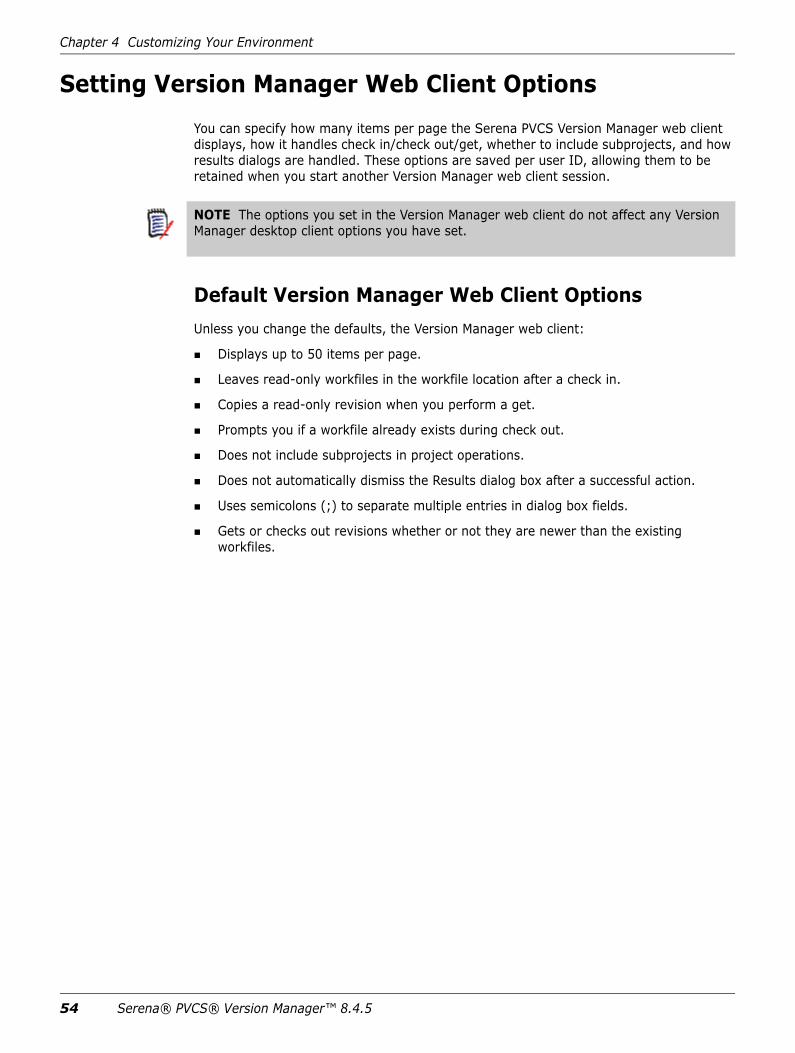
Setting Version Manager Web Client OptionsYou can specify how many items per page the Serena PVCS Version Manager web client displays, how it handles check in/check out/get, whether to include subprojects, and how results dialogs are handled. These options are saved per user ID, allowing them to be retained when you start another Version Manager web client session.
Default Version Manager Web Client OptionsUnless you change the defaults, the Version Manager web client:
Displays up to 50 items per page.
Leaves read-only workfiles in the workfile location after a check in.
Copies a read-only revision when you perform a get.
Prompts you if a workfile already exists during check out.
Does not include subprojects in project operations.
Does not automatically dismiss the Results dialog box after a successful action.
Uses semicolons (;) to separate multiple entries in dialog box fields.
Gets or checks out revisions whether or not they are newer than the existing workfiles.
NOTE The options you set in the Version Manager web client do not affect any Version Manager desktop client options you have set.
54 Serena® PVCS® Version Manager™ 8.4.5

Setting Version Manager Web Client Options
You can change these defaults in the Options dialog box (Edit | Options | General tab).
Setting Number of Items per PageYou can set the maximum number of files that appear on a Version Manager web client page at a time. If the number of files exceeds this limit, multiple pages are used to display the files. From the content pane, you can click the page number or click Previous or Next to access these pages.
To set the number of items per page:
1 On the Edit menu tab, click the Options button. The Options dialog box appears with the General tab active.
2 Enter the maximum number of files to display in the Number of items per page field. The default is 50.
3 Click OK.
Specifying a Delimiter for Items Entered in FieldsBy default, semicolons (;) are used to separate multiple entries in dialog box fields. The delimiter character is used in all fields that accept multiple entries.
Web Client User's Guide 55

Chapter 4 Customizing Your Environment
You need to change the delimiter character if you work with items that use it in their names. You can set the delimiter to be a comma (,), colon (:), or semicolon (;).
To specify a delimiter character:
1 On the Edit menu tab, click the Options button. The Options dialog box appears with the General tab active.
2 From the Delimiter list, select one of the following:
Comma
Colon
Semicolon (default)
3 Click OK.
Defining Check In/Check Out OptionsIf you find that you usually change the default options when you perform check in/check out/get operations, the Version Manager web client enables you to change these default settings to fit your working style.
To change check in/checkout/get options:
1 On the Edit menu tab, click the Options button. The Options dialog box appears with the General tab active.
2 Change the defaults as necessary:
Get read-only revision: To make workfiles writable when you perform a get, clear the this check box.
After checkin: To deternmine what to do with the workfile after checkin, select one of the following from the drop-down menu:
• Keep read only workfile (This is the default setting.)
• Delete writable workfile
• Keep writable workfile
If Workfile Exists: To determine what to do when a workfile already exists, select an option from the drop-down menu:
• Prompt: Asks you what to do. (This is the default setting.)
• Overwrite: Adds the workfile even if a duplicate workfile exists.
• Don’t Overwrite: Does not add the workfile.
Get only if revision is newer than workfile: To get or check out a revision only if it is newer than the workfile, select the this check box. This saves time by not getting revisions that have not changed.
3 Click OK.
IMPORTANT! Choose a delimiter character that is not present in the items you wish to enter into dialog box fields.
56 Serena® PVCS® Version Manager™ 8.4.5

Setting Version Manager Web Client Options
Defining Revision Lookup BehaviorSince Get operations ignore promotion groups unless you specify one in the Promotion Group field, a Get operation and a Checkout operation may not return the same revision. By defining the revision lookup behavior, you can cause a Checkout operation to behave like a Get. These settings are relevant only when a promotion model is in effect.
To configure the default revision lookup behavior for Get and Checkout operations:
1 On the Edit menu tab, click the Options button. The Options dialog box appears with the General tab active.
2 Select one of the following from the Lookup options for Get and Checkout Dialog list:
Classic lookup: For Get operations, if the user does not specify a revision, version label, or promotion group to act on, the default revision, if one is defined in the configuration file, will be retrieved. Else the Tip revision on the Trunk will be retrieved.
For Checkout operations, the revision defined by the lowest-level promotion group will be acted on. If such a revision is not found, the operation will climb the promotion model.
Lookup revision based on Revision: The revision specified by the user will be acted on. If the user selects [Default Revision] in the Revision field, the revision specified by the workspace settings or configuration file will be acted on; if no default value is found, the Tip of the Trunk will be acted on.
Lookup revision based on Promotion group: For Get operations, the revision assigned to the promotion group in the Promotion Group field of the Get dialog will be retrieved. If such a revision is not found, the operation will climb the promotion model and act on the revision assigned to the lowest currently assigned group in the promotion model.
For Checkout operations, the revision assigned to the promotion group specified in the Lowest-level promotion group field will be acted on.
If the user selects [Default Promotion Group] in the Lowest-level promotion group field, the revision currently assigned to the promotion group specified by the workspace settings or configuration file will be acted on. If a default is not defined, the lowest-level group in the promotion model will be used. If there are multiple lowest-level groups, the user will be prompted to select one. If such a revision is not found, the operation will climb the promotion model and act on the revision assigned to the lowest currently assigned group in the promotion model.
3 Click OK.
Including Subprojects in Project OperationsWhen you perform actions on project databases and projects, the Version Manager web client only performs actions on the versioned items contained directly at the project database or project level. The Version Manager web client does not include versioned files in subprojects as part of its default operation.
Web Client User's Guide 57

Chapter 4 Customizing Your Environment
If you usually include subprojects when you perform actions on project databases and projects, you can change the default to include subprojects.
To include subprojects:
1 On the Edit menu tab, click the Options button. The Options dialog box appears with the General tab active.
2 Select the Include subproject in project operations box.
3 Click OK.
Dismissing Results Dialog Boxes after Successful ActionBy default, the Results dialog box appears after an action is complete to show if the action was successful, or if any errors or warnings occurred. You must click the Close button to dismiss the Results dialog box. If you want the Results dialog box to automatically close after an action is successful, you can change the default behavior.
To automatically dismiss Results dialog box:
1 On the Edit menu tab, click the Options button. The Options dialog box appears with the General tab active.
2 Select the Automatically dismiss results dialogs when action is successful box.
3 Click OK.
If errors occur, the Results dialog box will not automatically close.
Setting Your Default EditorSetting your default editor specifies which editor Version Manager launches when you click a versioned file in the Contents pane or a revision in the Revisions pane.
Windows On Windows, Version Manager opens the file in either the editor defined by the Windows file type associations or a specific editor you have selected. By default, Version Manager uses the Windows file type associations. We recommend that you use the Windows file type associations.
UNIX On UNIX, you must define the location of an editor so that you can launch files for editing or viewing from within Version Manager. The Use default Windows associations option is not available to UNIX users.
To set your default editor:
1 On the Edit menu tab, click the Options button. The Options dialog box appears with the General tab active.
2 Select the Applications tab.
NOTE If the wrong application is launched when you double-click a file, correct the Windows file type associations using Windows Explorer (Tools | Folder Options | File Types tab).
58 Serena® PVCS® Version Manager™ 8.4.5

Setting Version Manager Web Client Options
3 (Windows only) If you want to use the Windows file type associations to launch an editor, select the Use default Windows associations check box.
4 In the Editor Location field, enter the location of the editor program executable, or click the Browse button to select it.
(UNIX only) If you specify a non-GUI editor that launches its own window (such as vi), you will need to launch the editor in an xterm or other type of window. For example, in the Editor Location field, you would enter:
xterm editor path
where editor path is the location of your editor.
(Windows only) If you specify an editor and select the Use default Windows associations check box, the editor you specified will be used only if Windows cannot find an association.
5 Click OK.
Specifying a Difference or Merge Tool By default, Version Manager uses the Serena PVCS merge tool when differencing or merging. However, you can configure Version Manager to use third-party difference and merge tools.
Administrators have the option to define the default tool for a user the vm\common\inet\props\UserID\useropt.ini file instead of selecting it through the Options | Advanced tab.
For the list of arguments, see "Argument" on page 61 in this user guide.
To specify a difference or merge tool:
1 On the Edit menu tab, click the Options button. The Options dialog box appears with the General tab active.
2 Select the Advanced tab.
CAUTION! The Administrator must be adept at making changes to the useropt.ini file as any errors could severely affect the Version Manager I-Net client for the user whose useropt.ini file is being modified.
Tool Name Sample islv.ini Configuration Information
Serena PVCS merge tool pvcs.diff.tool.cmd.win32=pvcsmerge.exe
WinMerge pvcs.diff.tool.cmd.win32=D:\VM\Setup Files\WinMerge-2.8.0-exe\winmerge.exe /dl __AncestorLabel__ /dr __Derivative1Label__ __AncestorFile__ __Derivative1File__
TkDiff pvcs.diff.tool.cmd.win32=c:/progra~1/tkdiff/tkdiff.exe __AncestorFile__ __Derivative1File__ -L __AncestorLabel__ -L __Derivative1Label__
Web Client User's Guide 59

Chapter 4 Customizing Your Environment
3 In the Diff command field and in the Merge command field, enter the location of the third party executable, or click the Browse button to select it.
The argument selection button () facilitates two types of selections:
Predefined Diff / Merge tools
Above the separator bar are names of predefined Diff/Merge tools like WinMerge, TkDiff and Version Manager PVCS Diff Tool. Select these options to replace the value of the Diff/Merge command with a set of arguments that work with these tools.
Arguments
If you want to manually construct a Diff/Merge command, you can select values (arguments) from below the separator bar. This will provide access to values in the Diff/Merge dialog as selected at run time.
NOTE Except for the PVCS Diff Tool, the arguments are provided as an example only and are not guaranteed to work on all versions of those tools.
NOTE An administrator can add, modify or delete the predefined Diff/Merge tools by changing the diffmerge.properties files. This file is stored in the directory vm/common/pvcsprop/pvcs/vm.
60 Serena® PVCS® Version Manager™ 8.4.5

Setting Version Manager Web Client Options
The following table is a list of difference and merge arguments that can be applied. The result column lists sample result values for each parameter:
4 Select the Three-way merge supported checkbox if the selected third party tool supports three way merging.
5 Click Ok.
For more information on using the diff/merge tool, see "Comparing Files" on page 69 and "Merging Files" on page 75 in this manual.
Passing Options Based on Ignore White Space Version Manager has an Ignore white space checkbox on the Show Differences dialog. It is possible to create an optional argument for the Diff tool based on the state of this checkbox.
This can be done using the parameter __IfIgnoreWhitespace__.
The syntax for this parameter is:
__IfIgnoreWhitespace__DiffArgumentIfBoxIsSelected|DiffArgumentIfBoxIsNotSelected|
For example, if your Diff tool expects the argument -b to ignore white space, you would include:
__IfIgnoreWhitespace__-b||
Argument Usage Result
_AncestorFile_ Use this parameter to select the base file (the file from which the other files were derived).
C:\DOCUME~1\Clyde~1\LOCALS~1\Temp\unuz781.tmp
_AncestorLabel_ Use this parameter to pass a label that describes the ancestor file.
Base: /Project1/islvtk.ini 1.1
_Derivative1_/_Derivative2_
Use these parameters to access the files associated with the Branch1 / Branch2 selections.
NOTE Derivative2 is applicable only for the Merge command field and is used if the tool supports three way merge functionality.
C:\DOCUME~1\Clyde~1\LOCALS~1\Temp\v6dvuw0.tmp
_Derivative1Label_/_Derivative2Label_
Use these parameters to pass labels that describe the Branch 1 / Branch 2 files (to be used as captions).
NOTE Derivative2 Label is applicable only for the Merge command field.
Branch 1: /Project1/islvtk.ini 1.0
_IsMerge_ This parameter will be replaced by true if the command is executed as part of a Merge operation, and false if it is executed as part of a Diff operation.
_TargetFile_ Use this parameter to pass the output file path specified by the user in the Show Merge dialog.
C:\DOCUME~1\Clyde~1\LOCALS~1\Temp
Web Client User's Guide 61

Chapter 4 Customizing Your Environment
in your list of arguments.
If your Diff tool enables white space handling using arguments like --ignore-white-space=true and --ignore-white-space=false, you can use:
__IfIgnoreWhitespace__-ignore-white-space=true|-ignore-white-space=false|
Setting Workspace PropertiesA workspace is a collection of work settings defined for a project database. You can define multiple workspaces so you can easily switch work settings to match your environment. Each user has one active workspace at a time. The work settings include:
The workfile locations defined for the project database and its contents.
The default version used when you do not specify a revision number or version label.
The base version and branch version used for automatic branching, if enabled.
The default promotion group used if a promotion model is in effect.
Public or privateworkspaces
Workspaces can be public or private. A public workspace is typically created by an administrator when a project database is created. Any changes made to a public workspace affect everyone using that workspace. A private workspace is typically created by a user to customize the work settings for the user's personal work environment. Any changes made to a private workspace affect only the user who created it.
Root workspaces The Root workspace is the default public workspace. It is automatically created every time your administrator creates a project database. You cannot delete or rename the Root workspace. You can only change the settings of the Root workspace if your administrator has assigned you those privileges.
If you do not create or set any other workspaces, the Root workspace is set as the default workspace.
Setting Your WorkspaceWhen start using the Version Manager web client, specify which workspace you want to use. You can also specify whether to make the workspace the default when you start another web or desktop client session.
NOTE In the above example when a user selects Ignore white space, the option -b will get passed to the specified Diff command. When it is not selected, no argument is passed.
62 Serena® PVCS® Version Manager™ 8.4.5

Setting Workspace Properties
To set your workspace:
1 On the File menu tab, click the Set Workspace button. The Set Workspace dialog box appears.
2 Select the workspace from the Workspaces list that you want to use with the project database.
3 To associate this workspace with the project database for subsequent Version Manager web or desktop client sessions, select the Make this your default workspace box. Otherwise, this workspace is only active during your current Version Manager web client session.
4 Click OK.
Setting Your Workfile LocationThe workfile location is the location where you check in and check out workfiles. It is set when the project is first created, and is stored in the workspace assigned to the project database.
You can change the workfile location for any project or versioned file in the project database. Changing the workfile location while in a public workspace changes the workfile location for all users accessing the project using that public workspace. If the workspace is private, then changing the workfile location will not affect other users.
To set a workfile location:
1 Select the project database, project, or versioned file.
2 On the File menu tab, click the Set Workfile Location button or click the Workfile Location link in the content pane.
Web Client User's Guide 63

Chapter 4 Customizing Your Environment
The Set Workfile Location dialog box appears.
3 Enter or browse to the new workfile location in the Workfile Location field.
4 Click OK.
Defining the Default RevisionBy default, the latest revision (tip) of the versioned file is used during get, check out, and lock operations. However, you can define the default revision to be a specific version label instead.
To define the default revision:
1 Set the workspace you want to edit.
2 On the File menu tab, click the Properties button. The Properties dialog box appears.
3 Enter a version label in the Default Version field and click OK.
Enabling Automatic BranchingAutomatic branching lets you create a branch automatically from a trunk revision. Then, by default, you operate on the tip revision of that branch whenever you perform an action.
To set up automatic branching, you assign two fixed version labels to the revision from which you want to branch. One version label marks where the branch starts, and the
64 Serena® PVCS® Version Manager™ 8.4.5

Setting Workspace Properties
other marks the tip of the branch. You then specify these version labels in the active workspace.
To enable automatic branching:
1 Select the versioned file(s) for which you want to enable automatic branching.
2 On the Actions menu tab, click the Label button. The Version Label dialog box appears.
3 Assign a fixed version label to the revision:
a Click the Assign option.
b Enter the name of the version label in the Assign Version Label field. For example, Rel1.0 Base.
c Enter the revision number in the To revision field.
d Click OK.
This version label becomes the Base Version.
4 Repeat steps 2 and 3 to assign another fixed version label to the revision. For example, Rel1.5 Branch.
This version label becomes the Branch Version.
5 Select the project or project database that contains the versioned file(s).
6 On the File menu tab, click the Properties button. The Properties dialog box appears.
7 On the Workspace Settings tab:
a Enter the version label for the branch version in the Default Version field. This is the label you assigned in Step 4 (for example, Rel1.5 Branch).
b Enter the version label for the branch version in the Branch Version field. This is the label you assigned in Step 4 (for example, Rel1.5 Branch).
NOTE Before you set up automatic branching, check with your administrator to make sure you have the necessary security privileges. Also make sure that you coordinate version label names with the rest of your project team.
Web Client User's Guide 65

Chapter 4 Customizing Your Environment
c Enter the version label for the base version in the Base Version field. This is the label you assigned in Step 3 (for example, Rel1.0 Base).
8 Click OK.
The Version Manager web client creates the branch when you check out the revision and then check it back in. The branch version label floats with the tip of the branch.
Defining the Default Promotion GroupYou can only check out revisions to the lowest-level promotion groups reserved for development. Regardless of what promotion level a revision has reached, when you check out and lock a revision, you must assign the revision to the lowest-level promotion group to continue development.
If you have multiple promotion groups for development, the Version Manager web client prompts you to select which promotion group you want to assign to the revision you are checking out or locking. In the following example, you would choose between Dev and Bug_fix.
If you find that you are checking out revisions to the same lowest-level promotion group each time, you can specify which lowest-level promotion group to use by default. You specify the default lowest-level promotion group in the workspace.
66 Serena® PVCS® Version Manager™ 8.4.5

Setting Workspace Properties
To define the default promotion group:
1 Set the workspace you want to edit. See "Setting Your Workspace" on page 62.
2 On the File menu tab, click the Properties button. The Properties dialog box appears.
3 Select the lowest-level promotion group from the Default Promotion Group list.
4 Click OK.
Web Client User's Guide 67

Chapter 4 Customizing Your Environment
68 Serena® PVCS® Version Manager™ 8.4.5

Chapter 5Comparing Files
About Comparing Files 70Viewing Differences 70Interpreting Difference Results 72
Web Client User's Guide 69

Chapter 5 Comparing Files
About Comparing FilesSide-by-sidecomparisons
Serena PVCS Version Manager allows you to select two text files and compare them side-by-side to see the additions, deletions, and changes made to the files. You cannot compare binary files.
Compare revisionsand workfiles
The Show Differences option (Actions | Difference) allows you to compare:
A revision and a workfile
Revisions in a single versioned file
Revisions in two different versioned files
Two workfiles
View only The Show Differences option provides a quick comparison of two files. You cannot print or save the comparison.
Viewing DifferencesTo view the differences between files:
1 Select the versioned file(s) or revision(s) that you want to compare. You can select any text files.
NOTE To compare revisions located in different projects (but within the same project database), select the project database. You cannot compare revisions located in different project databases.
70 Serena® PVCS® Version Manager™ 8.4.5

Viewing Differences
2 Select Action tab | Difference. The Show Differences dialog box appears.
3 Select the type of comparison that you want to perform in the Compare drop-down menu.
4 To change the revision (or file, if comparing workfiles) selected as the first file, edit the field or click the Browse button.
5 To change the revision (or file, if comparing workfiles) selected as the second file, edit the field or click the Browse button.
6 Select the Ignore white space check box if you want to ignore trailing, intervening, and leading white spaces, tabs, and form feeds.
NOTE The appearance of the Show Differences dialog box varies depending on the type of comparison you select.
To compare… You must specify…
A revision and a workfile A versioned file and revision number, and a workfile
Revisions in a single versioned file
A versioned file and revision number, and a second revision number
Revisions in different versioned files
Two versioned files and two revision numbers
Workfiles Two workfiles
Web Client User's Guide 71

Chapter 5 Comparing Files
7 Click OK. The Merant Merge Tool is launched with the two files side-by-side in separate panes.
8 To view the differences, scroll through the files and compare the colored text blocks.
Windows users can also click the Next Difference button ( ) to jump directly to the next difference.
Interpreting Difference ResultsTypes of
differencesFile 1 is used as the base file. File 2 is compared to File 1. Differences between the files are categorized into additions, deletions, and changes.
Additions are the lines of text that were added to File 2. These lines of text are not in File 1.
Deletions are the lines of text that were deleted from File 2. These lines of text are in File 1.
Changes are the lines of text that were modified in one of the files.
Placeholders Placeholders are the blocks of colors used to identify the types of differences between the files. Each difference type (additions, deletions, and changes) has two placeholders (or colors) assigned to it: one for selected one for unselected.
Windows users Windows users have the option of changing the colors of the placeholders. To change the colors, from the Merant Merge Tool, click the Configuration button ( ) and select the Colors tab.
72 Serena® PVCS® Version Manager™ 8.4.5

Interpreting Difference Results
Windows users also have the option of displaying a color legend to help identify what each placeholder stands for. To display the color legend, from theMerant Merge Tool, click the Color Tips button ( ). The Color Tips dialog appears.
Difference ExamplesThe following examples show how the differences between two files can vary depending on the file you select as File 1 (the base file).
Example 1 This example shows two revisions from the same versioned file. Version 1.0 was selected as File 1 (base file) and version 1.2 was selected as File 2.
Lines 4, 5, and 6 have been changed and are highlighted as one block of differences. These differences are identified by change placeholders. Line 6.5 was added to File 2 and is highlighted as another block of differences. These differences are identified by addition placeholders.
File 1 (version 1.0) File 2 (version 1.2)
Changes
Additions
Web Client User's Guide 73

Chapter 5 Comparing Files
Example 2 Using the same files above but reversing the order of the files, you get the following results.
Lines 4, 5, and 6 are still highlighted as differences and identified by change placeholders. However, the added line, line 6.5, is now in File 1 (the base file) but no longer in File 2. This difference is identified by deletion placeholders.
File 1 (version 1.2) File 2 (version 1.0)
ChangesDeletions
74 Serena® PVCS® Version Manager™ 8.4.5

Chapter 6Merging Files
About Merging 76Merging Files in Windows or UNIX 77Interpreting Difference Results in Windows 81Interpreting Difference Results in UNIX 83Resolving Conflicts Between Files in Windows 84Resolving Conflicts Between Files in UNIX 85
Web Client User's Guide 75

Chapter 6 Merging Files
About Merging What is merging? Merging is the process of comparing the differences between two (or more) text files, or
revisions of text files with a common base file, accepting or rejecting the differences between them, and combining the changes into a new text file.
You cannot compare or merge binary files.
Why merge files? Merging is useful for parallel development. It enables you to combine the work performed on a branch of development and integrate it back into the main line of development.
Types of merges Serena PVCS Version Manager allows you to perform a variety of merges. You can merge:
A revision with a workfile
Revisions within a single versioned file
Revisions in different versioned files
Workfiles
Windows users Version Manager for Windows can perform N-way (unlimited) merges. Although you can select only three files (one base and two branch files) from within Version Manager, you can perform an N-way merge once the Serena Merge Tool is launched. For information on how to perform N-way merges, please see the Serena Merge Tool online help.
UNIX users Version Manager for UNIX can perform two-way (a base file and a branch file) merges. N-way merges are not supported on UNIX.
Merging Terms and DefinitionsThe following table is a list of basic merge terms and definitions:
Term Definition
Base or Ancestor The base file from which other files are derived.
Branch or Derivative
The result obtained by making changes in the base file.
Output or Target The final merged file.
Addition A line of text added to a branch file. This line of text is not in the base file.
Deletion A line of text deleted from a branch file. This line of text is in the base file.
Change A line of text that was modified in one of the branch files. The content of this line of text differs between the branch file and the base file.
Conflict(Windows only)
A line of text that was modified in multiple branch files. The content of this line of text differs between the branch files and the base file.
NOTE In UNIX, changes are treated as conflicts and must be resolved by the user.
76 Serena® PVCS® Version Manager™ 8.4.5

Merging Files in Windows or UNIX
The Merge ProcessThe merge process consists of:
Locking the tip of the branch or trunk where you want to check in the output (target) file
Selecting a base file (ancestor) as a reference point
Selecting a revision branch file (derivative)
Entering an output (target) file name
Resolving conflicts between the base and branch files by either accepting or rejecting the changes made
Saving the changes made to the output (target) file
Checking in the output file
Selecting a Base FileA base file is the file that you want to use as your point of reference. It is usually the branch point—the revision from which a branch begins (typically off the main trunk of development).
If you are merging revisions that are located in different branches or versioned files, the base file you select should be the revision or file that is the latest file to be created which is a common ancestor to all of the revisions that you want to merge.
The closer the content of the base file is to that of the files you are merging, the fewer conflicts you will have to resolve. For example, if you want to merge the changes from revision 1.2.1.2 with revision 1.4.1.1, you would use revision 1.2 as the base file. You could use revision 1.1 or 1.0 as the base file, but we recommend using the revision that is closest to the files you are merging.
Merging Files in Windows or UNIXTo merge files:
1 Lock the tip of the branch or trunk where you want to add the results of the merge.
2 Select the versioned file(s) or revision(s) that you want to merge.
When selecting files to merge, consider the following:
The order in which you select the files determines which file will be the base and which the branch file(s). The first file that you select is the base file; the second and (on Windows only) third files that you select are the branch files.
IMPORTANT! UNIX Only:
If you are merging or comparing revisions on a branch to revisions on a trunk on UNIX, you should set the base file to the latest revision on the trunk, then select the latest revision on the branch as the branch file.
Web Client User's Guide 77

Chapter 6 Merging Files
The items you select (project, versioned file, or revision) affect the initial options that appear.
(UNIX only) To merge a trunk and branch revision, you must set the base file to the tip revision on the trunk, and the branch file to the tip revision on the branch.
To merge revisions located in different projects (but within the same project database), select the project database. You cannot merge revisions located in different project databases.
(Windows only) If you want to merge just two files, enter the same file in the Base and Branch 1 fields; use the Branch 2 field for the second file.
3 Select Actions | Merge. The Show Merge dialog box appears.
4 Select the type of merge that you want to perform from the Merge drop-down menu.
NOTE You can change the options when the Show Merge dialog box appears.
NOTE The appearance of the Show Merge dialog box varies depending on the type of merge you select.
To merge… On Windows you must specify… On UNIX you must specify…
A revision and a workfile
A base file and revision number, a branch revision number, and a branch workfile
A base file and revision number, and a branch workfile
Revisions in a single versioned file
A base file and revision number, and two branch revision numbers
A base file and revision number, and a branch revision number
78 Serena® PVCS® Version Manager™ 8.4.5

Merging Files in Windows or UNIX
5 To change the revision (or file, if merging workfiles) selected in the Base group, click the Browse button.
6 To change the revision (or file, if merging workfiles) selected in the Branch 1 (Windows) or Branch (UNIX) group, click the Browse button.
7 (Windows only) To change the revision (or file, if merging workfiles) in the Branch 2 group, click the Browse button.
8 Enter the name of the output (target) file in the Output File field, or click the Browse button to select an existing workfile.
Revisions in different versioned files
A base file and revision number, and two branch files with revision numbers
A base file and revision number, and a branch file and revision number
Workfiles A base workfile and two workfiles A base workfile and a branch workfile
To merge… On Windows you must specify… On UNIX you must specify…
NOTE UNIX Only:
To merge a trunk and branch revision on UNIX, you must set the base file to the tip revision on the trunk.
NOTE UNIX Only:
To merge a trunk and branch revision on UNIX, you must set the branch file to the tip revision on the branch.
NOTE If you enter an output filename without entering a path, the output file will be created in the BIN directory within your Version Manager installation directory. If the filename already exists in the selected location, the old file will be overwritten.
Web Client User's Guide 79

Chapter 6 Merging Files
9 Click OK. On Windows, the base file and branch files appear in the Frames window and the results of the merge appear in the Output File window.
On UNIX, the base file and branch file appear in the Merge Tool window.
10 Resolve the conflicts between the base and branch files. For information on how to resolve the conflicts, see one of the following:
"Resolving Conflicts Between Files in Windows" on page 84
"Resolving Conflicts Between Files in UNIX" on page 85
11 To save the results of the merge to an output file, do one of the following:
80 Serena® PVCS® Version Manager™ 8.4.5

Interpreting Difference Results in Windows
On Windows, select File | Save Target.
On UNIX, select File | Save As and click OK.
12 Open the output file and review it. If you are satisfied with the results of the merge, check the output file into the tip of the branch or trunk you selected in Step 1.
Interpreting Difference Results in WindowsTypes of
differencesThe file that you select as the base file is used as the basis of the output file. Branch 1 and branch 2 are compared against the base file. Differences between the base and branch files are categorized as additions, deletions, and changes.
Additions are the lines of text that were added to a branch file. These lines of text are not in the base file.
Deletions are the lines of text that were deleted from a branch file. These lines of text are in the base file.
Changes are the lines of text that were modified in one of the branch files. The content of these lines of text differ between the branch file and the base file.
Conflicts are the lines of text that were modified in multiple branch files. The content of these lines of text differ between the branch files and the base file.
PlaceholdersPlaceholders are the blocks of colors used to identify the types of differences between the files. Each difference type (additions, deletions, and changes) has two placeholders (or colors) assigned to it: one for selected and one for unselected.
NOTE You do not need to re-enter the output path or filename.
Web Client User's Guide 81

Chapter 6 Merging Files
Displaying a colorlegend
You can display a color legend to help identify what each placeholder stands for. To display the color legend, from the Serena Merge Tool, click the Color Tips button ( ). The Color Tips dialog box appears.
Changing Placeholder Colors
To change the colors of the placeholders:
1 Click the Configuration button ( ).
2 Select the Colors tab.
3 Click on the background or text color that you want to change.
4 Select a new color from the color palette and click OK.
ConflictsConflicts occur when the content of a line in multiple branch files differ from the content of the line in the base file.
Current color
Text Color
Background color
Current color
Background color
Text Color
82 Serena® PVCS® Version Manager™ 8.4.5

Interpreting Difference Results in UNIX
By default, conflicts appear as blocks of text that are shaded with slashes (/ / /). When you resolve a conflict, the slashes remain on the selected block of text while the unselected conflict blocks (which are now resolved) are shaded with Xs (XXX).
Changing Conflict Shading
To change the shading of the conflicts:
1 Click the Configuration button ( ).
2 Select the Colors tab.
3 Choose a shading pattern from the appropriate Conflicting lines drop-down menu.
Interpreting Difference Results in UNIXTypes of
differencesThe file that you select as the base file is used as the basis of the output file. The branch file is compared against the base file. Differences between the base and branch files are categorized as additions, deletions, and changes.
Additions are the lines of text that were added to the branch file. These lines of text are not in the base file.
Deletions are the lines of text that were deleted from the branch file. These lines of text are in the base file.
Changes are the lines of text that were modified in the branch file. The content of these lines of text differ between the branch file and the base file.
Unresolved conflict
Unselected (/ / /) Unselected (/ / /)Unselected (/ / /)
Resolved conflict
Selected (/ / /) Unselected (XXX)Unselected (XXX)
Unselected Selected Resolved
NOTE In UNIX, changes are treated as conflicts and must be resolved by the user.
Web Client User's Guide 83

Chapter 6 Merging Files
PlaceholdersPlaceholders are the blocks of colors used to identify the types of differences between the files. Each difference type (additions, deletions, and changes) has two placeholders (or colors) assigned to it: one for selected and one for unselected.
Displaying a colorlegend
You can display a color legend to help identify what each placeholder stands for. To display the color legend, from the Serena Merge Tool, select Help | Color Legend.
Changing Placeholder Colors
To change the colors of the placeholders, edit the Mgdiff Legend file with a text editor. This file is located in the /bin/app-defaults directory where you installed Version Manager.
Resolving Conflicts Between Files in WindowsBy default, the Serena Merge Tool automatically inserts all of the additions, deletions, and changes into the output (target) file, but not the conflicts. Before you can successfully merge revisions, you must resolve all conflicts.
On Windows, a conflict occurs when a line of text differs between multiple branch files and the base file. The Serena Merge Tool cannot determine which block to select, so you must resolve the conflict by choosing which block of text you want in the output file.
To resolve conflicts between the base and branch files:
1 From the Frames window in the Serena Merge Tool, click the Next Conflict button ( ) to jump to the next conflict block.
NOTE To resolve conflicts, you must be able to identify the differences between the base and branch files. For information on how to identify the additions, deletions, and changes between base and branch files, see "Interpreting Difference Results in Windows" on page 81.
84 Serena® PVCS® Version Manager™ 8.4.5

Resolving Conflicts Between Files in UNIX
2 Resolve conflicts by right-clicking the block of text that you want to appear in the output (target) file. The conflict block that you select changes color and the shading of the unselected files changes to resolved.
3 Repeat steps 1-2 until all conflicts have been resolved.
4 Check the contents of the output (target) file. Make sure that you have merged the appropriate content into the output file.
5 Select File | Save Target to save the output (target) file.
Resolving Conflicts Between Files in UNIXBy default, the Serena Merge Tool automatically inserts all of the additions and deletions into the output (target), but not the changes. Before you can successfully merge revisions, you must resolve all conflicts (changes).
On UNIX, a conflict occurs when a line of text has been modified in the branch file so that the content of this line of text differs between the branch file and the base file. The Serena Merge Tool cannot determine which block to select, so you must resolve the conflict by choosing which block of text you want in the output file.
NOTE On UNIX, changes are treated as conflicts and must be resolved by the user.
NOTE To resolve conflicts, you must be able to identify the differences between the base and branch file. For information on how to identify the additions, deletions, and changes between base and branch files, see "Interpreting Difference Results in UNIX" on page 83.
To resolve conflicts between the base and branch file:
1 From the Merge Tool window, scroll to a conflict block.
2 Resolve the conflict by clicking the block of text that you want to appear in the output (target) file. The conflict block that you select changes color.
3 Repeat Steps 1-2 until all conflicts have been resolved.
Unresolved
Resolved
Right-click to select a conflict block
Web Client User's Guide 85

Chapter 6 Merging Files
4 Select File | Save As and click OK to save the output (target) file. You do not need to reenter the output path or filename.
86 Serena® PVCS® Version Manager™ 8.4.5

Appendix A: Naming Conventions and Restrictions
General Naming Conventions and Restrictions 88Specific Naming Conventions and Restrictions 89
Web Client User’s Guide 87

Appendix A:
General Naming Conventions and RestrictionsYou can use most alpha, numeric, and special characters when creating or renaming Version Manager entities and paths. However, your operating system also determines the conventions that apply to file and directory names.
Prohibited Characters for Files and DirectoriesThe following characters are prohibited by Version Manager, and most operating systems, when naming files or directories:
Angle brackets (>) and (<)
Asterisk (*)
Colon (:)
Pipe (|)
Question mark (?)
Quotation mark (")
Slashes, forward (/) and backward (\)
Space ( ) as the first or last character
Tab
Naming Considerations for Cross-Platform EnvironmentsWhen working in a cross-platform environment, be aware of any incompatibilities between the systems and limit your usage to that which they have in common.
IMPORTANT! On Windows systems, files and directories (and thus Version Manager entities and paths) cannot end with a period (.).
IMPORTANT! In a cross-platform environment, you cannot place files into the same directory if they differ only be case. Such usage is possible only in UNIX-only environments.
88 Serena® PVCS® Version Manager™ 8.4.5

Specific Naming Conventions and Restrictions
Specific Naming Conventions and RestrictionsThe following table lists naming conventions and restrictions that apply to specific Version Manager entities and paths.
Restrictions
Item Type Characters Length
Archives As listed in "Prohibited Characters for Files and Directories" on page 88, plus cannot use:
Ampersand: &Brackets: [ ]Parenthesis: ( )Plus sign: +Semicolon: ;
254 (full path including the file name)
NOTE Only the first 10 characters of the archive suffix are significant in distinguishing identically named files in the same project.
Files and paths
(unless otherwise noted)
As listed in "Prohibited Characters for Files and Directories" on page 88.
254 (full path including the file name)
pvcs_bindir As listed in "Prohibited Characters for Files and Directories" on page 88.
254 (full path including the file name)
NOTE On UNIX, the name of the vconfig file and the separator character also count against the total length.
Project databases Cannot begin or end with a tab or space character. Any character can be used within the name.
Projects As listed in "Prohibited Characters for Files and Directories" on page 88, plus cannot be:
The two-character name of: ..
The one-character name of: .
The one-character name of: @
Web Client User’s Guide 89

Appendix A:
Promotion groups Ampersand: &Brackets: [ ]Comma: ,Equal sign: =Parenthesis: ( )Plus sign: +Question mark: ?Semicolon: ;Slash: /
User, group, and privilege names
Asterisk: *Colon: :Backward slash: \Single quote: 'Quotation mark: "Parenthesis: ( )
30
Version labels Ampersand: &Asterisk: *Brackets: [ ]Colon: :Equal sign: =Minus sign: -Parenthesis: ( )Plus sign: +Question mark: ?Quotation mark: "Semicolon: ;Slash: /
NOTE The backslash (\) serves as an escape character. To create or delete a label that includes a backslash, the backslash must be preceded by another backslash (\\Label would result in \Label; \\\\Label would result in \\Label).
254
Restrictions
Item Type Characters Length
90 Serena® PVCS® Version Manager™ 8.4.5

Index
Numerics5.3/6.0 folders
deleting 37renaming 37reviewing properties of 38
5.3/6.0 projectslimitations 17reviewing properties of 38
Aabout
merging 76Version Manager web client 10Version Manager web client options 54workspaces 62
adding workfiles 10ancestor file, see base file 61, 76automatic branching 64
Bbase
file 61, 76branch
file 76branching, setting up automatic 64
CCAC 22changing
passwords 23users 24
checking in 10checking out 10Common Access Card login 22comparing files 70
about 70examples 73interpreting differences 72viewing differences 70
comparing revisions 70conflict
changing shading 83types 82
conflicts
resolvingon UNIX 85on Windows 84
connecting to Version Manager web client 20contacting technical support 8content pane 29conventions, typographical 7copying versioned files 11creating projects 10
Ddefault
editor 58default promotion group 66default revision 64default workspace 62defining
default check in options 56default check out options 56default get options 56default promotion group 66default revision 64
deleting5.3/6.0 folders 37projects 37versioned files 37
delimiter character for fields 55derivative file, see branch file 76difference report 70difference report, see comparing files 70difference reports 10difference tool, specifying 59differences
interpreting 72viewing 70
dismissing Results dialog box 58
Eeditor, default 58
Ffields, description 31file
base 61, 76
Web Client User’s Guide 91

Index
branch 76output 61, 76selecting a base 77
filescomparing 70merging 76
filterby comparing a version label and promotion group
49by comparing two promotion groups 47by comparing two version labels 45recursive 40
filteringby promotion group 44by user locks 40by version label 42by wildcard filename 41
filtering versioned files 39filters
locked by 41promotion groups 44version label 43, 45, 47, 49wildcard 42
Ggetting revisions 10
Hhistory reports 10
Iicons,description 31items
deleting 37moving 36renaming 37reviewing properties of 38selecting 35
Llicenses, freeing 22locking 10locks
filtering by 40logging into
project databases 20projects 22
logging out of project databases 25login session, stale 22login, SSO/CAC 22lowest-level promotion group 66
Mmenu pane 32merge tool, specifying 59merges
about 76conflict
changing shading 83types 82
interpreting resultson UNIX 83on Windows 81
merging fileson Windows 77
merging process 77N-way 76placeholders
changing colors in Windows 82changing colors on UNIX 84on UNIX 84on Windows 81
resolving conflictson UNIX 85on Windows 84
selecting a base file 77terms and definitions 76types of 76
merging files 76moving versioned files 36
Nnumber of items per page, setting 55N-way merges 76
Oonline help
accessing 7for the command-line interface 7for the desktop client 7
output file 61, 76
Ppanes
content 29menu 32project 28revision 30status 34
passwords, changing 23placeholders
changing colors in Windows 82changing colors on UNIX 84
92 Serena® PVCS® Version Manager™ 8.4.5

Index
previous releases 17project databases
closing 25logging into 20logging out of 25opening 20reviewing properties of 38selecting 35switching users 24
project pane 28projects
creating 10deleting 37logging into 22renaming 37reviewing properties of 38selecting 35
promotion group, lookup revision based on 57promotion groups
defining default 66filtering by 44Version Manager web client vs. desktop client 11
public vs. private workspace 62
Rrecursive filtering of files 40removing
5.3/6.0 folders 37filters 51projects 37versioned files 37
renaming5.3/6.0 folders 37projects 37
reportsdifference 10, 70history 10
revision lookup behavior, defining 57revision pane 30revisions
automatic branching 64comparing 70defining default 64getting 10locking 10selecting 35unlocking 10
root workspace 62
Sselecting
project databases 35projects 35revisions 35versioned files 35
separator character for fields 55Serena Merge Tool 76Serena, contacting 8setting
number of items per page 55Version Manager web client options 54workfile location 63workspace properties 62workspaces 62
Single Sign On 22SmartCard login 22SourceBridge 15specify a difference or merge tool 59SSO login 22status pane 34subprojects, including 57system requirements 18
Ttarget file, see output file 61, 76TeamTrack 15TrackerLink 13typographical conventions 7
Uunlocking 10user locks
filtering by 40
Vversion labels 10, 11
filtering by 42, 43, 45, 47, 49Version Manager web client
and desktop client 11connecting to 20features 10options 54panes 28
Version Manager web client and previous releas-es 17
Version Manager web client vs. desktop clientpromotion groups 11version labels 11
versioned filescomparing 70copying 11deleting 37filtering 39moving 36selecting 35viewing properties of 38
viewing
Web Client User’s Guide 93

Index
differences between files 70files recursively 40
Wwildcard filename
filtering by 41workfiles
adding 10comparing 70location 63
workspacesprivate 62public 62root 62setting 62
94 Serena® PVCS® Version Manager™ 8.4.5