
Punnett DNA Stations Unit: Genetics - Marist Collegemarist.edu/... · Construct strands of DNA...
32
+ Courtney Britz Stations Unit: Genetics DNA Punnett Squares Meiosis Genetic Variation
Transcript of Punnett DNA Stations Unit: Genetics - Marist Collegemarist.edu/... · Construct strands of DNA...

+
Courtney Britz
Stations Unit: Genetics
DNA Punnett Squares
Meiosis Genetic Variation

+ Station A: DNA Objectives: Students will-
Investigate the function of DNA Construct strands of DNA using candy Label the components of DNA (Bases: Adenine, Thymine, Cytosine,
and Guanine. Deoxyribose sugar, phosphate) Match the proper base pairs
Materials: Candy DNA Activity
Red and Black licorice Gumdrops (4 different colors) Toothpicks Labels Art supplies
What is DNA? Video http://learn.genetics.utah.edu/content/begin/tour/
Build a DNA molecule website http://learn.genetics.utah.edu/content/begin/dna/builddna/
DNA reading passage Vocabulary Worksheet- used throughout all stations

+ Station A: Procedure 1. Students will read the passage about DNA to gain a background of what DNA
is and its function.
2. Students will then construct a strand of DNA using the candy at their station • The students will use different color licorice to represent Dioxyribose
sugar, and phosphate group. • The different color gumdrops will be used to represent the 4 bases • Students will thread together the licorice pieces and use toothpicks to
connect the gumdrops to the licorice and to one another. • After the DNA strand is complete, students will use toothpicks and labels to
identify what candy represents Dioxyribose sugar, and phosphate group, and each of the bases.
• Students will then draw and label the DNA strand that they have created. The drawing and the candy structure will be collected. At the end of the day students will take the candy DNA structure home.
3. Students will watch the What is DNA? Videohttp://learn.genetics.utah.edu/content/begin/tour/ (Students who struggle with reading comprehension may watch the video prior to reading the passage at the start of the lesson.)
4. Be sure to complete Vocabulary worksheet for this station • For students who struggle with remembering which bases math up will work with the
website below to increase their recall. http://learn.genetics.utah.edu/content/begin/dna/builddna/
5. Record information within your science journal

+ Materials: DNA Reading

+ Candy DNA Directions

+ Station B: Punnett Squares Objectives: Students will-
Investigate the influence of dominant and recessive traits Create Punnett Squares to determine the genotype of offspring
Based on genotype students will identify phenotype Draw connections about patterns between genotype and phenotype Identify how genotype and phenotype influence heredity Discover the difference between dominate and recessive traits
Materials Video on Punnett Squares:
http://www.youtube.com/watch?v=d4izVAkhMPQ Video
Supplement with Pardon the Punnett Packethttp://www.most.org/curriculum_project/Life_Sciences/middle/Post/Pardon_the_Punnett.pdf
Plastic Egg Genetics Activity Variety of plastic Easter eggs ½ egg one color ½ another
Colored pieces of paper in each egg to represent offspring Worksheet
Monster Genetics/Sponge Bob Genetics Coin Genotype and phenotype charts (1 male, 1 female)
Art supplies Vocabulary

+ Station B: Procedure 1. Video on Punnett Square http://www.youtube.com/watch?v=d4izVAkhMPQ
1. If more information is needed students will read and work with the Pardon the Punnett packet 1. http://www.most.org/curriculum_project/Life_Sciences/middle/Post/Pardon_the_Punnett.pdf
1. Through this packet students will learn about genotype, phenotype, homozygous, heterozygous, dominate traits, recessive traits, and F1 and F2 generations. Students will also work to complete a Punnett Square
2. Easter Egg Genetics:
1. At the station there are plastic Easter eggs. (1/2 one color, ½ another) 2. Determine the genotype based on the phenotype using the chart provided.
3. Place the genotypes of the egg on a Punnett Square and cross the genotypes to discover the possible genotypes and phenotypes of offspring. Record results.
4. Check work by opening egg and comparing the colored pieces of paper inside the egg to the phenotype you have recorded on worksheet
3. Monster Genetics Lab Read directions at the top of the packet
Read the information in the chart presented for Allele 1 and 2 Make note of which one is dominant and which one is recessive
Flip the coin to discover your monsters genotype Heads= Allele 1 Tails= Allele 2
Based on the genotype record the phenotype in the chart Complete the missing components of chart 2
Answer the accompanying questions
Students who struggle may complete the SpongeBob genetics lab. This lab is shorter and contains less traits then the monster.
Be sure to complete Vocabulary for this station

+Materials:
Easter Egg Genetics Directions

+Materials:
Easter Egg Genetics Worksheet

+ Materials: Monster Genetics Directions
2. Create Punnett Squares showing the offspring of the male and female offspring attach to the handouts. Answer the questions on your handout.

+ Materials: Monster Genetics

+ Materials: Monster Genetics Questions

+ Materials: SpongeBob Genetics Directions (Differentiation activity)
Flip a coin. Heads= dominant Tails= recessive
Record the genotype received fro each trait
Draw a picture to show the phenotype of your SpongeBob
Choose a group member to mate your SpongeBob with and create Punnett Squares to show the possible offspring.
Write a sentence describing the fraction of offspring the display each phenotype.

+ Materials: SpongeBob Genetics (Differentiation activity)

+ Station C: Meiosis Objective: Students will-
List and describe all the phases of Meiosis Depict the stages of Meiosis Relate Meiosis to genetic variation
Materials: Computer and links to videos
http://www.pbs.org/wgbh/nova/body/how-cells-divide.html
http://highered.mcgraw-hill.com/sites/0072437316/student_view0/chapter12/animations.html#
Pool noodles (already set up as chromosomes) String Vocabulary sheets Flip book template Art supplies Links to quizzes
http://www.neok12.com/quiz/CELDIV08.htm http://www.neok12.com/quiz/CELDIV07.htm
Record information within your science journal
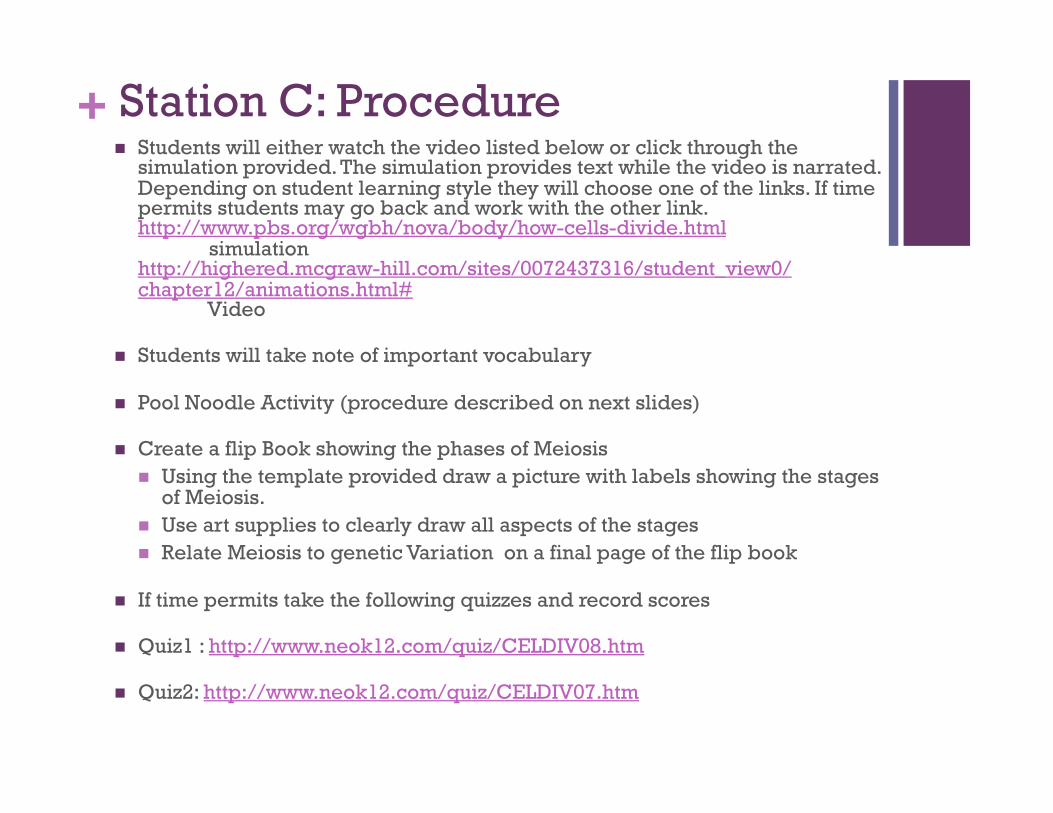
+ Station C: Procedure Students will either watch the video listed below or click through the
simulation provided. The simulation provides text while the video is narrated. Depending on student learning style they will choose one of the links. If time permits students may go back and work with the other link. http://www.pbs.org/wgbh/nova/body/how-cells-divide.html
simulation http://highered.mcgraw-hill.com/sites/0072437316/student_view0/chapter12/animations.html#
Video
Students will take note of important vocabulary
Pool Noodle Activity (procedure described on next slides)
Create a flip Book showing the phases of Meiosis Using the template provided draw a picture with labels showing the stages
of Meiosis. Use art supplies to clearly draw all aspects of the stages Relate Meiosis to genetic Variation on a final page of the flip book
If time permits take the following quizzes and record scores
Quiz1 : http://www.neok12.com/quiz/CELDIV08.htm
Quiz2: http://www.neok12.com/quiz/CELDIV07.htm
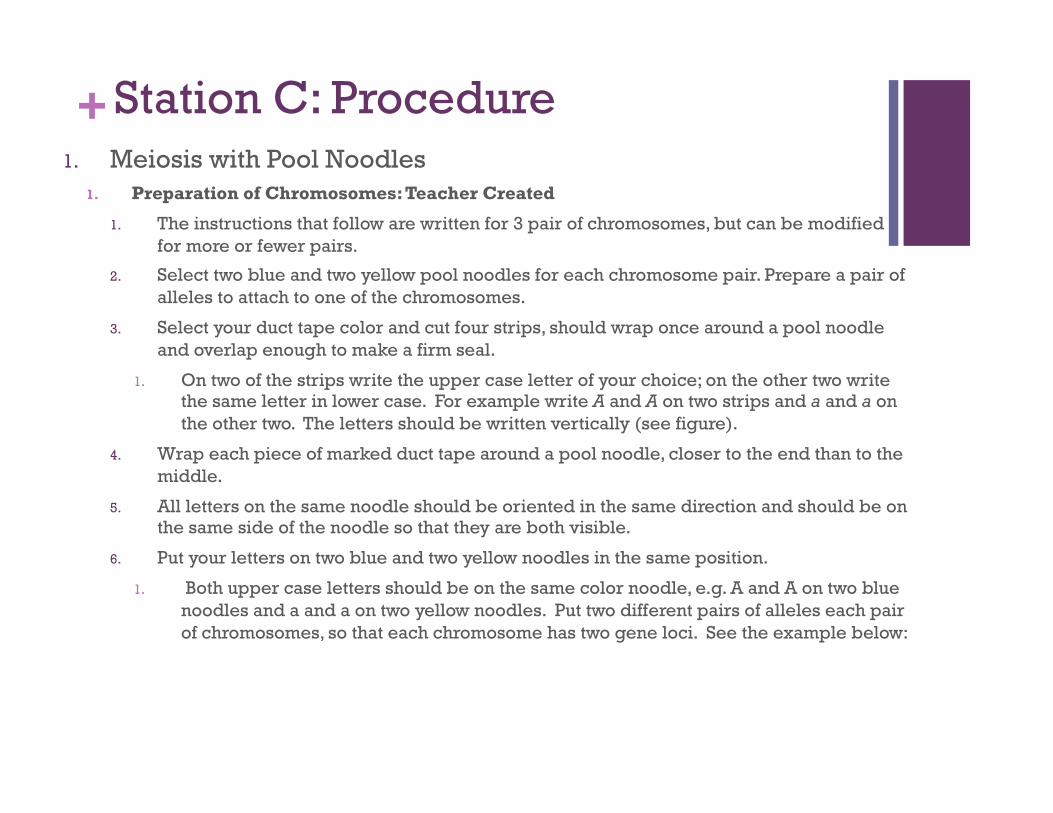
+ Station C: Procedure 1. Meiosis with Pool Noodles
1. Preparation of Chromosomes: Teacher Created
1. The instructions that follow are written for 3 pair of chromosomes, but can be modified for more or fewer pairs.
2. Select two blue and two yellow pool noodles for each chromosome pair. Prepare a pair of alleles to attach to one of the chromosomes.
3. Select your duct tape color and cut four strips, should wrap once around a pool noodle and overlap enough to make a firm seal.
1. On two of the strips write the upper case letter of your choice; on the other two write the same letter in lower case. For example write A and A on two strips and a and a on the other two. The letters should be written vertically (see figure).
4. Wrap each piece of marked duct tape around a pool noodle, closer to the end than to the middle.
5. All letters on the same noodle should be oriented in the same direction and should be on the same side of the noodle so that they are both visible.
6. Put your letters on two blue and two yellow noodles in the same position.
1. Both upper case letters should be on the same color noodle, e.g. A and A on two blue noodles and a and a on two yellow noodles. Put two different pairs of alleles each pair of chromosomes, so that each chromosome has two gene loci. See the example below:

+ Station C: Procedure Meiosis with Pool Noodles Cont.
Students will: Group members will be centromeres for 3 pair of chromosomes. Pick up either a yellow or a blue pair of homologous. The two of you should hold your chromosomes in the same location. After replication, the two copies
of each chromosome remain joined at the centromeres, so hold them close together. Meiosis 1
Use your textbook or class notes to review the events of meiosis. A diagram of Meiosis I is also attached to this document. Decide how you will represent Prophase, Metaphase, Anaphase and Telophase of Meiosis I. The longest phase will be Prophase I. Early in Prophase I, the two homologous pair. Approach your homolog and keep your chromosomes close together. Dance if you like. If you have noodles that permit crossing over, do so.
Meiosis I ends with the separation of the maternal and paternal homologous. Centrioles will approach each centromere and loop the string over the chromosome at the centromere, then return to their position at the ends of the cell. When Anaphase begins, centrioles should pull gently on their centromeres to direct them towards the two poles of the space representing the cell. Either homolog may go to either pole. Centrioles can decide which one to attach.
Meiosis 2:
Use your textbook or class notes to review the events of Meiosis II. A diagram of Meiosis II is also attached to this document. Choreograph your movements appropriately. You will have a make a decision about how to represent the separation of sister chromatids in Meiosis II. Centrioles will use their strings as in the previous section.
Answer Questions on directions sheet

+ Materials: Meiosis with Pool Noodles

+Materials:
Meiosis with Pool Noodles

+ Materials: Meiosis with Pool Noodles

+ Materials: Flip Book Template Meiosis and Genetic Variation.

+ Materials: Extra Material

+ Materials: Extra Material

+ Station D: Genetic Variation Objectives: Students will-
Draw connections between chromosomes and genetic variation
Make conclusions regarding genetic variation and sexual/asexual reproduction
Materials: Sexual/Asexual Reproduction reading
http://www.ops.org/middle/bryan/Portals/0/STAFF_FOLDERS/T_MIHAI_BARBRALEIGH/asexual-sexual%20reading.pdf
DNA determines your genetics activity
Reading
23 male and 23 female pieces of paper representing chromosome
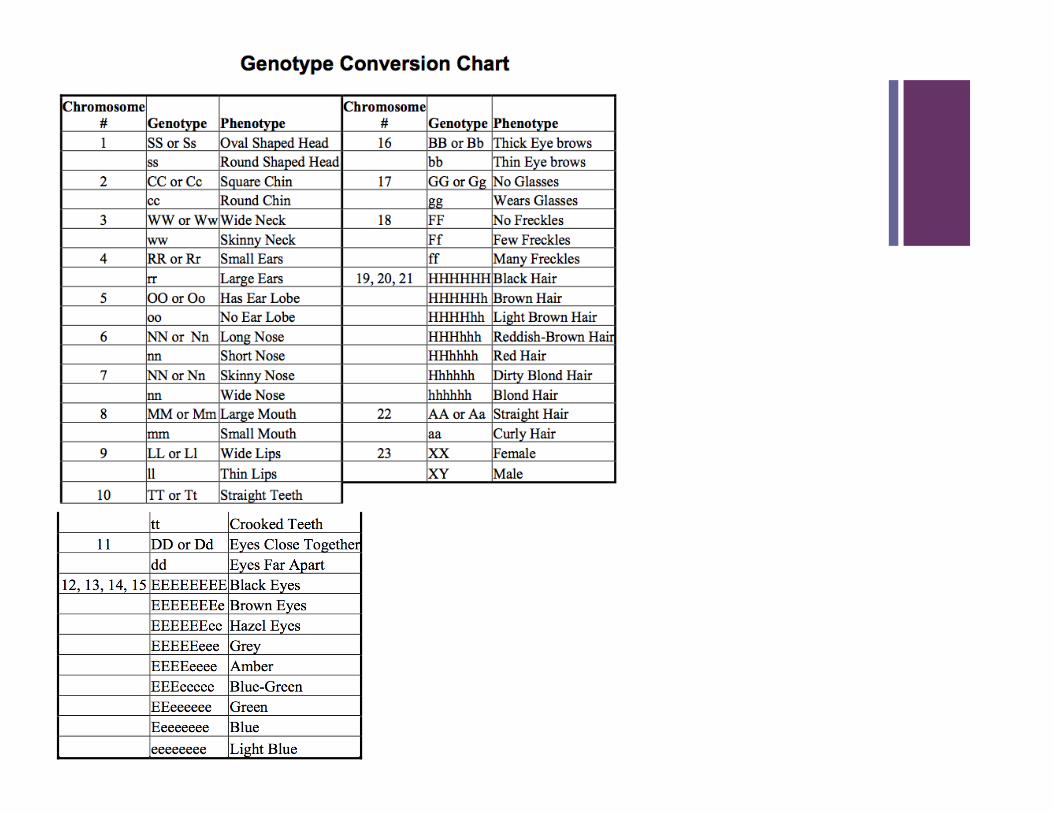
Genotype conversion chart
Large box
Chart paper
Be sure to complete vocabulary for this station

+ Station D: Procedure 1. Read passage on Sexual and Asexual Reproduction
Take notes and utilize the close reading strategy discussed in class.
2. Vocabulary
3. DNA Determines Your Appearance activity Read the summery provided about DNA and genes Cut out each of the 46 chromosomes (23 female and 23 male) Fold along the line and tape the sides together. (one side should show
the uppercase letter, and the other side should show the lowercase letter)
Place all letters in a box, shake box and dump all letters on the table (or floor if more room is needed)
The letters shown represent the genotype Using the conversion chart discover what the phenotype will be Draw the picture using large chart paper
4. Record information in science journal

+ Materials: DNA Determines Your Appearance
+
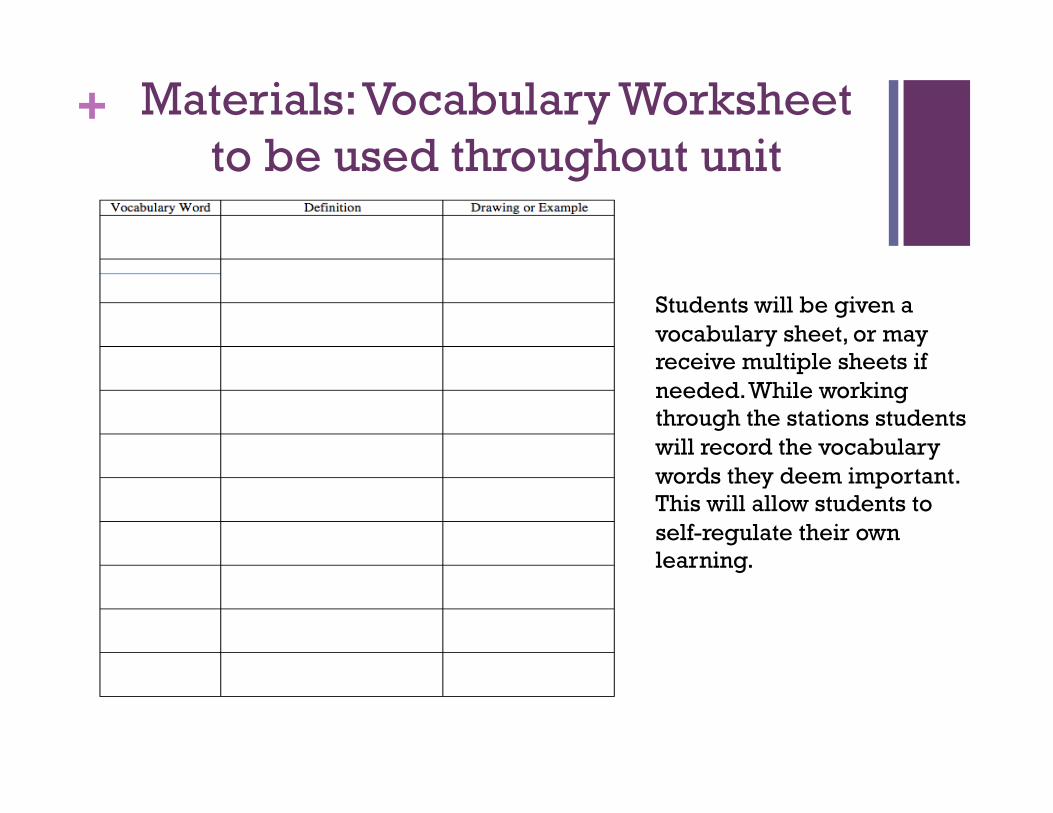
+ Materials: Vocabulary Worksheet to be used throughout unit
Students will be given a vocabulary sheet, or may receive multiple sheets if needed. While working through the stations students will record the vocabulary words they deem important. This will allow students to self-regulate their own learning.

+ Informal Formative Assessment: Observation Checklist
As students work through each of the stations I will make observations on students progress. I will make observations on how they work with their group members and the work that they produce while at the station. I will have this checklist on a clipboard and will be able to quickly write down any observations. Comments and short notes will also be included within the checklist. With this information I will be able to identify students who struggle , or students who are excelling. I will then provide these students with the necessary resources to scaffold their learning or further challenge them. The key above will also be used to make the note taking process more organized.
1. Works well in group 2. Prefers visual model 3. Prefers auditory material 4. Struggles with creating Punnett Square 5. Relies heavily on group members 6. Struggles with components of DNA 7. Difficulties identifying dominant and recessive 8. Group Leader 9. Confident with components of DNA 10. Confident with hereditary traits 11. Able to explain ideas through writing

+ Summative Assessment Write a detailed reflection relating the concepts learned
throughout the stations.
In particular refer to the labs at the genetic variation and Punnett Squares stations.
Analyze the two pictures created during the genetic variation station, are they the same? Why? What type of reproduction is represented? What do the differences represent? Discuss in terms of chromosomes.
Why is genetic variation important?
Additionally analyze the findings at the Punnett Square station. Make reference to dominant and recessive traits. What is needed for a trait to be represented within the phenotype?
The following key words should be included within your reflective essay:
Phenotype, genotype, dominant, recessive, chromosomes, DNA, Asexual, Sexual, Punnett Squares, traits, Alleles.

+ Analysis I believe that the stations unit I have created is an effective way to teach
genetics. Throughout the stations students are gaining information from a variety of means. Students watch videos, interact with online simulation, and participate in hands on activities. Furthermore, students are provided with reading or other scaffolding activities to ensure that each student who goes to the station can construct the proper knowledge. Additionally, students work through both group and individual activities allowing for collaboration, but still holding each student accountable to construct knowledge about the topic. Through this unit students become self-regulated learners and decision makers. Many of the stations provide students with a visual and auditory explanation of the concept, along with a written explanation. Students must read the written explanation and are encouraged to take notes on the document, using a strategy such as the close reading method. The students may additionally refer to the visual and auditory explanation prior to, or after reading, in order to ensure complete understanding. Lastly, students are provided with a blank vocabulary sheet. At each station the students are introduced to many new terms and through the use of the vocabulary sheet the students may record the terms and definitions they believe are important. Through providing students with this freedom I am allowing students to take ownership of their learning and in term be self-regulated.


