Publisher Table of Contents - Del Mar...
28
Publisher Table of Contents Unit 1 – Design Strategy Microsoft Publisher ................................................................................................Page 1 Unit 2 – Elements of Design Designing with Fonts ..............................................................................................Page 2 & 3 Unit 3 – Publisher Features and Functionality ........................................Page 4 Understanding the Basics – Using Color Schemes ................................................Page 5 Navigating Pages Turning Pages, Adding Pages, & Zooming In and Out ............................................Page 6 Positioning Text with Text Boxes .............................................................................Page 6-7 Going Beyond the Basics Working with Objects ...................................................................................Page 8 Grouping Objects ..........................................................................................Page 8 & 9 Positioning Objects .......................................................................................Page 10 Rotating and Flipping Objects ......................................................................Page 10 & 11 Wrapping Text Around Pictures ...................................................................Page 11 Adding Text and Images To Move, Rotate, and Resize an Image ....................................................................Page 12-13 Changing Text and Text Box Appearance ................................................................Page 14 Dividing Text into Columns .....................................................................................Page 15 Continuing a Story in Another Box .......................................................................Page 16 Graphics ...................................................................................................................Page 17 Framing Your Graphics ................................................................................Page 18 & 19 Unit 4 – Creating Newsletters, Business Cards, & Flyers Creating a Newsletter in Publisher .......................................................................Page 20 Choose Topics to Include in Your Newsletter ...............................................Page 20 To Create a Newsletter ..................................................................................Page 20 & 21 Create Business Cards Getting Started ..............................................................................................Page 22 To Print Business Cards on a Desktop Printer ..............................................Page 23 To Set Up Business Cards for a Specific Avery Sheet Number (Publisher 2003 only) ........................................................................................................................Pages 23 & 24 Creating Flyers ........................................................................................................Page 25 Using the Publisher Word Document Wizard to Enhance a Word Document.. Page 25 Unit 5 – Applying Master Pages Apply a Single Master Page to a Single page ............................................................Page 26 Apply a Master Page to Both Pages of a Two-Page Spread ......................................Page 26 Apply a Master Page to Separate Pages of a Two-Page Spread ...............................Page 26 Apply a Master Page to a Range of Pages ................................................................Page 27 i
Transcript of Publisher Table of Contents - Del Mar...

Publisher Table of Contents
Unit 1 – Design Strategy Microsoft Publisher ................................................................................................Page 1 Unit 2 – Elements of Design Designing with Fonts ..............................................................................................Page 2 & 3 Unit 3 – Publisher Features and Functionality ........................................Page 4 Understanding the Basics – Using Color Schemes ................................................Page 5 Navigating Pages Turning Pages, Adding Pages, & Zooming In and Out ............................................Page 6 Positioning Text with Text Boxes .............................................................................Page 6-7 Going Beyond the Basics
Working with Objects ...................................................................................Page 8 Grouping Objects ..........................................................................................Page 8 & 9 Positioning Objects .......................................................................................Page 10 Rotating and Flipping Objects ......................................................................Page 10 & 11 Wrapping Text Around Pictures ...................................................................Page 11
Adding Text and Images To Move, Rotate, and Resize an Image ....................................................................Page 12-13 Changing Text and Text Box Appearance ................................................................Page 14 Dividing Text into Columns .....................................................................................Page 15 Continuing a Story in Another Box .......................................................................Page 16 Graphics ...................................................................................................................Page 17
Framing Your Graphics ................................................................................Page 18 & 19 Unit 4 – Creating Newsletters, Business Cards, & Flyers Creating a Newsletter in Publisher .......................................................................Page 20
Choose Topics to Include in Your Newsletter ...............................................Page 20 To Create a Newsletter ..................................................................................Page 20 & 21
Create Business Cards Getting Started ..............................................................................................Page 22 To Print Business Cards on a Desktop Printer ..............................................Page 23 To Set Up Business Cards for a Specific Avery Sheet Number (Publisher 2003 only) ........................................................................................................................Pages 23 & 24
Creating Flyers ........................................................................................................Page 25 Using the Publisher Word Document Wizard to Enhance a Word Document..Page 25 Unit 5 – Applying Master Pages Apply a Single Master Page to a Single page ............................................................Page 26 Apply a Master Page to Both Pages of a Two-Page Spread ......................................Page 26 Apply a Master Page to Separate Pages of a Two-Page Spread ...............................Page 26 Apply a Master Page to a Range of Pages ................................................................Page 27
i

Microsoft Publisher Publisher is more than creating bulletins and brochures. Publisher features pre-designed publications, also called publication wizards, for many types of business and marketing publications. These include business cards, postcards, flyers, gift certificates, resumes, catalogs, and even Web sites. Each of these pre-designed publications is available in many different designs. You can browse through the selection of pre-designed publications by publication type or by design style. There are advantages to Publisher that word-processing programs do not have. It includes a variety of pre-designed publications so you do not have to begin on a blank page. We will learn how to start a new publication from a pre-designed one, identify the independent design elements, and modify the design to suit your style. What makes Publisher more flexible than Word is that you have the same control over text as you do over pictures. This allows you the ability to treat each one of these elements independently. When you modify and make changes to one element, it doesn’t affect any of the other elements. It does not matter if you are creating a postcard, business card, brochure, newsletter, or Web site. There is a publication type that supports a wide range of ready-made, professional designs. To create a publication, simply start Publisher and:
1. Pick the type of publication you want or Blank Publication from the Task Pane 2. Use a template to create your publication or open an existing Publication 3. Add and arrange your own text images 4. Revise using the template 5. Review your publication carefully
Note If you create a postcard or a business card by starting with a blank publication, your
publication will be a Quick Publication, and you will not be able to use any of the task pane options that are available for the Postcard Wizard or the Business Card Wizard.
1

Elements of Design Let’s briefly explore the basic elements of design which include fonts, graphics, and color. We will learn how to dress a publication so it conveys your message, in your style, for the results you want. Designing with Fonts Fonts do more than make words. You can use them as graphics. Even the amount of white space between letters of black text affects the color of the page. Here are some points to consider: Number of Fonts – Lay out the publication with two distinct fonts and stick with them. Those fonts will help establish your visual identity. In a longer publication, use a maximum of three fonts. Contrast – Mix fonts for contrast. Contrasting fonts attract the reader’s eye and help clarify the organization of a publication; don’t mix two serifs (fancy finishing Strokes). Font Color – A light font color has an easier feel and is the best choice in a long stretch of text, while a heavy or dark font is stronger and more emphatic. The color of a page is also affected by the Using Body Text Fonts – First and foremost, choose a body text that can be read easily. If not, you risk losing your audience. Consider the Font weight (not too heavy) and Font size (between 10 and 12 points for hand-held documents). Obviously this size won’t work for a poster so be selective with what you’re publishing. Shorten lines to increase readability. If you’re designing for a Web page select fonts that are commonly used, such as Times New Roman or Arial. If a Browser has to substitute a font, it could change the look of your layout. While there is no right or wrong alignment, the alignment should enhance readability and be used consistently throughout your publication. Using Impact Fonts – Impact fonts are intended for titles, headings, and headlines—command attention. They help the reader figure out where to look on a page, and when used as subheads, they pull readers along through a story. Spacing – Keep spacing between letters and lines tight within a headline. Add more spacing around (but not below) a heading so that the relationship between heading and body text is clear. Line Breaks – If you must break a headline, try to find a natural break and to balance both lines visually. If possible, the second line should be longer than the first.
2
Capitalization – If you use all caps, limit them to short headlines set in large type. Using Display Fonts – Special text like the drop cap at the beginning of a chapter gets attention. Use it with care. If you have more than one on a page, scatter them. If you use captions and callouts use a font that’s in the same family as the body text or the display font. Pull Quotes – A pull quote extracts a short statement from the text to add visual interest to the page and attract the reader’s attention. It is common to use the same font as the body text, in a larger point size—at least six points larger—and in either bold or italic. Keep a pull quote short—about five lines—and place it on the same page (or facing page) as the text from which you pulled it, but not in the same paragraph. Otherwise, readers will read the same thing twice and think you made a mistake.
3

Publisher Features and Functionality To get started let’s launch Microsoft Publisher. It will open to the New Publication menu.
You are offered four different types of Publication; Publications for Print, Web Sites and E-mail, Design Sets, and Blank Publications. Once you click the heading you want to use, Publisher will provide thumbnail views of the available designs to choose from. Once the pre-designed publication opens, you can replace the placeholder text and pictures with your own. You can delete font and color schemes in addition to adding elements, and any other changes you want so the publication reflects your specific organization or activity more accurately. Everything in a Publisher publication, including a block of text, is an independent element. This means you can place each element exactly where you want it, and you can control its size, shape, and appearance.
4

Understanding the Basics
Using Color Schemes A Color Scheme is a defined set of colors associated with a publication. Every Publisher has a color scheme. There is a wide variety to choose from. Color schemes make it easy to change all the colors in a publication to give it a new look. When selecting the color of an object in your publication, you will need to decide whether you want it to change if you switch to another color scheme. A scheme color is one of the pre-defined colors in a particular color scheme. The element of an object that is assigned a scheme color will change when you switch to another color scheme. A non-scheme color is any color other than those of the Scheme Colors palette of the current publication. For example, you may want your logo colors to always remain the same.
To change a color scheme use either:
The Color Scheme command on the task pane
The Color Scheme command on the Format menu
Each scheme is assigned a position in the color scheme. For each scheme, there is a main color and several accent colors with a numbered position. If you fill an object with the Accent #1 color in the scheme, for example, it will be assigned to whatever color is Accent #1 if you switch to the Sunrise color scheme. Just click the Color Scheme you want to use. Therefore, when you switch color schemes, the object with a scheme color change, while the objects with non-scheme colors remain the same. Select the Custom Color Scheme link at the bottom of the color palette to personalize a set of colors. Click the New arrow on the Color Schemes dialog box to customize your colors.
5

Navigating Pages
In Publisher you focus on one page at a time for adding, adjusting, and moving design elements to get the layout you want. You don’t scroll to move to another page because that takes you to the top or bottom of the current page. To get to another page you turn to it. For a close up view of the text or objects as you work with them, you zoom in. Turning Pages The page navigation control consists of representations of he pages in your publication and of arrows for scrolling to the beginning and end. They are located in the lower-left corner of the Publisher window. To display a specific page of your publication, click its representation in the page navigation control. The page you click becomes highlighted as the number four indicates in the graphic above. If there is not enough room to display representations of all pages, arrows become available for scrolling. Adding Pages To add new pages to your publication:
1. Turn to where you want to insert the new page.
2. On the Insert menu, click Page.
3. In the dialog box, choose the options you want. If you’re in two-page spread view, it’s best to add an even number of pages. 4. Click OK. Each page you add will have the layout guides you’ve set and any objects you’ve placed on the background.
Zooming In and Out To move to a tighter or wider view of your page, use the Zoom box on the toolbar. Click the Zoom box and then click Selected Objects to fill the window with the selected object(s), or click Whole Page to see the full page. Or, click the plus or minus zoom button next to the Zoom box on the toolbar. Choose a percentage between 10% and 400%. Positioning Text with Text Boxes In Publisher, you not only type text like Word, you also position it on the page. You do this by creating a text box, typing the text, and then, if necessary, move or resize the text box. If all the text won’t fit within the text box, Publisher can automatically fit the text. To continue the text elsewhere in the publication, you can also connect the text box to another text box.
6

Overflowing Text When you connect text boxes, you can start typing a story in one place, automatically continue it in another place on the same page, and then complete it on a different page of your publication. Ordinarily, as you type, your text fills the text box; any text that doesn’t fit in the text box goes into the “overflow area,” where you can’t see it. The Text In Overflow indicator , means there’s more text that you can’t see. You can connect as many text boxes as you like, forming a chain of connecting text boxes. The text within the connected text box is called a “story.” Using Autoflow If you import a text file and all of the text does not fit into the text box, Publisher will ask you if you would like to use autoflow. If you respond by clicking the Yes button, Publisher will flow the text throughout your publication, connecting the text boxes for you. Disconnecting and Jumping between Text Boxes To disconnect two text boxes from each other, click to select the first text box. On the Connect Text toolbar, click the
Break Forward Link . To jump to the previous text box in the chain, click Previous Text Box. To jump to the next text box in the chain, click Next Text Box.
7

Going Beyond the Basics
Working with Objects In Publisher an object is anything in a frame; it can be text or a graphic. Your page layout depends on how you arrange the objects on each page. We will discuss:
Grouping objects
Layering objects
Positioning objects
Rotating and flipping objects
Wrapping text around pictures
Grouping Objects Grouping objects makes several objects behave as one so you can move, resize, or rotate them all at the same time. Grouping objects also preserves your arrangement of the objects. Determine if objects are grouped You can tell if an object is part of a group by clicking the object. Grouped objects have one set of handles joined for several objects and the Group selection objects line up with the boxes.
Ungrouped objects have selection handles for each part of the group and the selection handles are separated in the boxes.
8

Grouping and Ungrouping Objects To group and ungroup objects: 1. Click the Selection tool , and then drag the selection box around everything you want in the group. 2. In the lower-right corner of the selection box, click the Group button. Now you can easily resize or rotate everything together. You can still change the shading, border, and text of an individual object in the group just as you would any other object. 3. To ungroup objects, click the group to select, and then click the Group button again.
9

Positioning Objects Publisher provides various tools for placing the pieces of your publication exactly where you want them. Snapping objects into place If you’re laying out a page, and you want to align the separated objects, you can use the ruler or layout guides to do so. By using the Snap To commands, you can set rulers, guides, or objects to exert a magnet-like pull on nearby objects. To align the objects with a ruler guide:
1. Place the mouse pointer on the left ruler. 2. Hold down SHIFT. 3. Drag a ruler guide to where you want to align the objects. 4. On the Arrange menu, click Snap To Ruler Marks to snap objects into place
automatically. 5. Drag the objects to the ruler guide.
They will snap into position exactly where you want them. Nudging an object into position Imagine a logo you’ve added to a flyer is a bit too low. To nudge it exactly where you want it, first, click the logo. Then hold down Alt and press the appropriate arrow keys until the log is where you want it. You could also select the option from the Arrange menu. Keeping track of an object’s position and size You can use the Object Position and Object Size boxes as an alternative to using ruler guidelines for sizing and lining up an object from the left and top margins. The Object Position and Object Size boxes are located on the status bar.
Rotating and Flipping Objects You can rotate any text or object. For example, you can turn your newsletter’s title on its side. Rotating objects by degrees There are several ways to rotate an object:
To rotate an object in 5-degree increments or to set a precise angle of rotation by .1-degree increments, use the Custom Rotate dialog box. Double Click object and select size tab. Type in the degree of rotation in the “size and rotate” area. Or, select the object and click the Arrange menu and select rotate.
To constrain the rotation to 15-degree increments, hold down the ALT and CTRL keys while dragging one handle of the object.
To rotate an object freely, hold down the ALT key and drag one handle of the object.
10

Rotating a group of objects You can group objects, such as a picture and its caption, and then rotate them together. Flipping Objects You can also flip a drawn object, basic shape, or WordArt to create its mirror image.
Note Text and table can be rotated, but not flipped. Wrapping Text around Pictures When you place a picture or WordArt on top of text, the text wraps around the frame. This creates a rectangle of blank space around the picture.
For a different effect, you can customize the way text wraps You can also change the contour of the blank space around your picture, add a border to the contour you create, or crop (trim) your picture. Changing the way text wraps To change the way text wraps around a picture or WordArt, click the picture and then click Arrange menu, select Text Wrapping and Edit Wrap Points. Position the mouse pointer over the handle that you want to move until the pointer becomes a . Drag the point handle to change the outline of the picture or customize the outline.
If you need to add a handle, hold your Ctrl button down and click the red outline. To remove a point handle, hold the Ctrl button down and
select the handle you want removed.
11
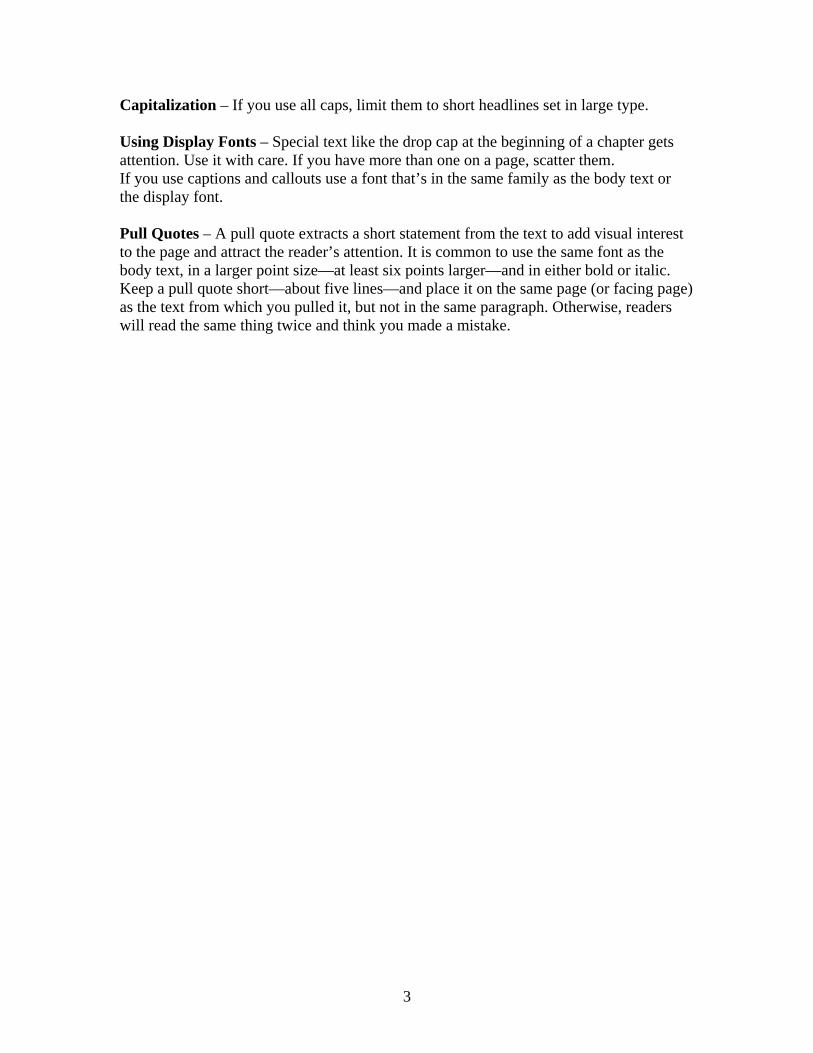
Adding Text and Images Once you launch a design, you simply replace the publication’s placeholder text with your own. Every object in your publication must be in a frame. Click a frame to change any object, or you can add new objects in frames you create. Each type of frame is crated by clicking one of the tools on the Objects toolbar. Click the Text Box tool on the Objects toolbar. (By default, when you open Publisher, the Objects toolbar extends vertically along the left side of the Publisher window.)
In most cases, you drag diagonally to set the frame size. Position the mouse pointer where you want one corner of the frame to appear, click and hold down the mouse button, and then drag to create a rectangle on the page.
Use a text frame for most text in the resulting text box (surrounded by round handles).
12

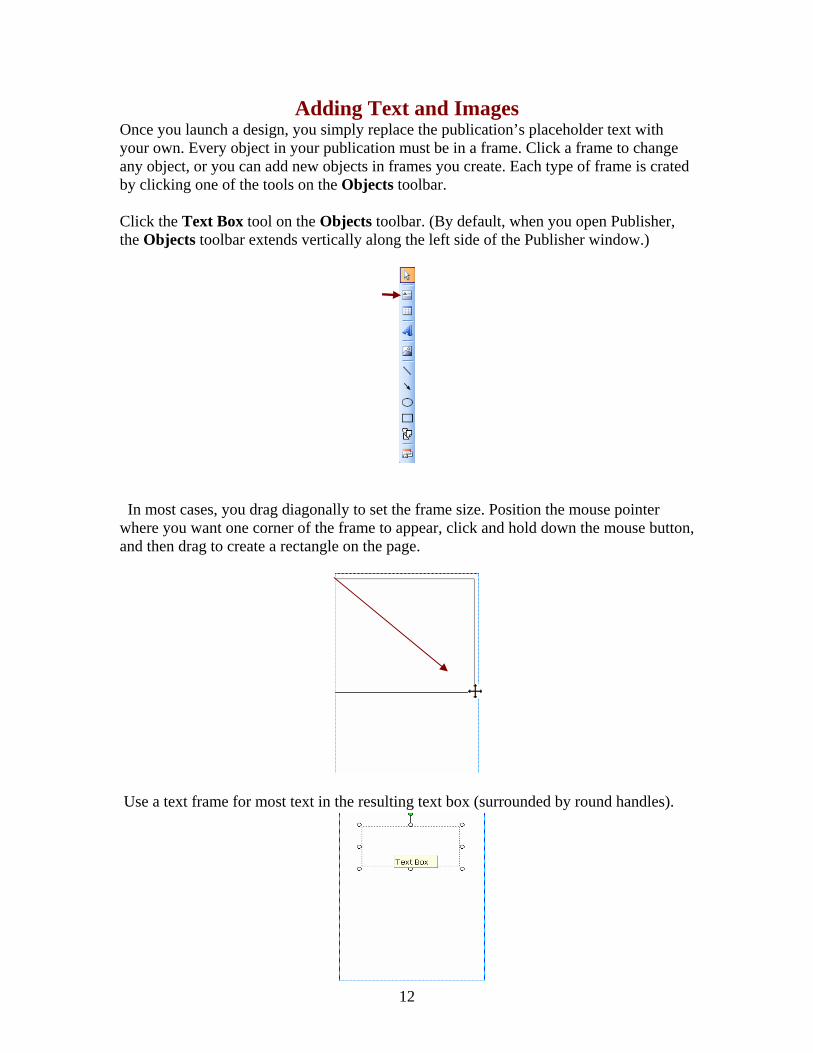
Lorem Ipsum Do You Xxx
Int
Yyy 230 355 900
Zzz 360 360 765
Use a table frame for text in rows and columns
You can always move a text box anywhere you want on (or off) the page, and change the size at any time. So don’t be concerned where it’s placed when you first create it, or what size it is. Once a text box is on a page you may want to modify it. Below is listed three ways to do so: To Move a Text Box Position the pointer over the text box boundary. When the cursor becomes a four-headed arrow , click and drag. Resize a Text Box Click the text box and position the pointer over one of the round handles. When the cursor becomes a two-headed arrow , click and drag. Rotate a Text Box Click the text box and position the pointer over the green rotation handle. When the cursor becomes a circle , click and drag in the direction you want the text to rotate. Note When you resize a text box, some of the text may no longer fit there. Publisher can automatically change text size so it all remains visible as you resize text boxes in your publication. Go to Format menu, point to AutoFit Text, and then click Best Fit.
13

Change Text and Textbox Appearance To customize the look of a publication, there are several things you can do to change the appearance of text and the text box that contains it. For example, to change the appearance of a text selection, on the Format menu, you can click:
Font to change the font, font size, font color, or style. Paragraph to change the alignment, indentation, line spacing, and line and paragraph breaks. Bullets and Numbering to add or change the style of bullets and
numbers.
To change the appearance of a text box, you can use the Text Box command (on the Format menu or right click and select Format Text Box).
You can:
Add a border around the text box. Change the background or border color. Rotate the text box. Change the margin between the text and text box
boundary. Note If you base your publication on one of Publisher's pre-designed ones, you don't have to worry about formatting individual text boxes unless you want to create a special effect.
14

Dividing Text Box into Columns In Publisher, it's easy to turn any text box into equally-spaced columns of the same size.
When you add text to columns that you create by dividing a text box, if the text fills one column, it automatically flows into the next column.
To divide a text box into columns, you would click
Text Box on the Format menu, click the Text Box
tab, and then click the Columns button.
You can then choose the number of columns
to divide a text box into, and control the spacing
between the text and the column boundary.
You can also make columns by creating a
separate text box for each column. In this case,
text will not flow automatically from one
column to the next unless you link the text
boxes.
Note If there is any possibility that you might convert a print publication for use on the Web, it's best to make each column a separate text box.
15

To Continue a Story in Another Box
In publications such as newsletters or brochures, you often start a story on one page and continue it on another. In Publisher, you can easily continue a story by:
Linking the text box where the story starts to the text box where it continues.
Adding "Continued" notices that update automatically if you move text boxes around.
To link one text box to another, first click the text box you want to link from, and then
click the Create Text Box Link tool . The cursor becomes a little pitcher . When you click anywhere inside an empty text box you want to link to, any overflow text “pours” into the second text box.
To add a "Continued" notice to a text box, click the text
box. On the Format menu, click Text Box, and then
click the Text Box tab. You can choose to include either
"Continued on page…" or "Continued from page…”.
The Go To Next Text Box button indicates that text finishes
in another text box.
The Go To Previous Text Box button indicates that text starts in
another text box and the arrow will point to the left.
16

Graphics
Publisher offer many options for enhancing a publication with graphics. You can use photographs, clip art, shapes, and charts to illustrate a point or to clarify an idea. To add a graphic on the Insert menu, click Picture. That's when things can start to seem complicated. What does "From File" mean? If you've got a particular graphic on hand that you want to use, such as a photographic image, you click From File on the Picture submenu. Then you locate the graphic at its location, and insert it directly from there. What's the difference between Clip Art and a New Drawing? This lesson aims to demystify that menu, first by describing the two major categories of images that Word can accommodate—pictures and drawing objects—and then by delving into the specifics of each type.
1. On the Objects toolbar, click Design Gallery Object . 2. In the Design Gallery dialog box, and then select a category or click the object
that you want. 3. Click the Insert Object button.
Once you get beyond the Picture submenu, the way you insert and manipulate different types of graphics may vary slightly, depending on whether it's a drawing or a picture, as well as other graphic-specific attributes. You can change a graphic from inline (acting as a text character) to floating by changing the text-wrapping style; any wrapping style other than In line with text will create a floating graphic. First, position the graphic where you want it. Then you can fine-tune its position within the surrounding text:
1. Right-click the image, and then click the appropriate Format command, such as Format Picture or Format AutoShape (the specific command on the shortcut menu will vary depending on the type of graphic).
2. On the Layout tab, use the Wrapping style options to specify how the image and text work around each other.
3. With a floating graphic, you can also specify the Horizontal alignment.
17

Framing Your Graphics We’ve already learned all text in Publisher exists within containers called text boxes. Similarly, each picture exists within a container called a frame. Frames give you the same control over pictures that text boxes give you with text. You can place a picture anywhere on a page, even in a text box and change its size and appearance. The term picture refers to a variety of graphic formats and sources, including:
Rectangles, circles, arrow, lines, or AutoShape. Independent Graphic files in formats such as Graphics Interchange Format (GIF),
Joint Photographic Experts Group (JPEG), Bitmap (BMP), Windows Metafile Format (WMF), Tagged Image File Format (TIF), or Portable Network Graphics (PNG).
Scanned photographs or a picture taken with a digital camera. Clip art.
We will learn how to add pictures to publications, move and resize them, change the way pictures look, and control the way text wraps around them. There are two ways to add a new picture to a publication:
Replace a placeholder picture in an existing frame, using the Change Picture command.
Create a new frame with the Picture Frame tool , and put a picture in it.
In both cases, you will choose the source of the new picture.
18

If you choose Then Clip Art The Clip Art task pane opens, where you can
search for the clip art, photograph, movie, or sound that you want.
From File The Insert Picture dialog box opens, where you can locate the graphic file that you want to add.
From Scanner or Camera If a TWAIN or WIA-compatible scanner or digital camera is connected to your computer, you can add an image directly from the device into your publication.
If you don't know yet exactly which picture you want to use, you can add a picture placeholder to a publication by inserting an empty picture frame. On the Insert menu, point to Picture, and then click Empty Picture Frame.
19

Create a Newsletter in Publisher
A successful newsletter should offer important information, and ought to be short and to the point. Newsletters should provide just enough information to encourage your readers to contact you to learn more.
Try to provide something for everyone in your newsletters. Include a variety of short articles in each issue to increases the chances that at least one article will be of great interest to your audience.
Choose Topics to Include in Your Newsletter Write from your reader’s point of view. Newsletter points of interest come not from writing about what you want to tell, but what your readers want to know. When planning, think in terms of categories. Make a list of the types of information your reader base would find most useful. Then try to include an article from each category in each issue. For example, your list might include:
Editorial about a topic of recent interest Tips or how-to articles on getting more out of your products or services Reviews of new products or announcements of new services Special promotions Customer news or success stories Employee profile or interview with an expert
Once you've developed your content, it's time to create your newsletter.
To Create a Newsletter
1. Start Publisher. In the New Publication task pane, under New from a design, click Publications for Print, and then click Newsletters. Scroll through the list of newsletter designs and click the design you want. 2. In the Newsletter Options task pane:
Under One- or two-sided printing, click 1 or 2 depending on how your newsletter will be printed.
Under Customer address, click None if you are going to mail your newsletter in an envelope. Click Include if your newsletter is going to be a self-mailer.
Click Page Content to choose the number of columns and the types of information you want on each page. On inside pages, the Select a page to modify box appears. Select Left inside page or Right inside page, and then, for each page, choose one of the following formats: 3 stories, Calendar, Order form, Response form, or Sign-up form.
20

Click Publication Designs if you want to choose a different design. Click Color Schemes to choose the color scheme you want. Click Font Schemes to choose the typeface designs you want.
3. Replace placeholder text with your own text:
Click the placeholder text, and then type your own text. To insert text from another file, right-click to select the placeholder text, point to
Change Text, click Text File, choose your file, and then click OK.
Note In most cases, such as article headlines, the text resizes automatically to fit within the text block. If you have already created a personal information set, your business contact information and logo will automatically replace some of the placeholder text.
4. Replace placeholder pictures with your own pictures:
Right-click the placeholder picture and then click Change Picture. (If you don't see Change Picture when you right-click, click the placeholder picture once until you see the white circles surrounding the picture's frame. Click the picture again until you see gray circles with x's in them surrounding the picture itself, and then right-click the picture.)
Choose the source of the new picture, choose the file, and then click Insert.
When your newsletter looks the way you want, on the File menu, click Save.
21

Creating Business Cards
Publisher makes it easy to produce effective business cards, whether you create your own design or use one of the Publisher designs. It's helpful to select your printing method at the beginning of the design process, so you can plan ahead for any printing issues that may affect your design decisions. The business cards that you design in Publisher can be printed on your desktop printer or taken to a commercial printer, depending on your needs. Most office supply stores carry pre-scored card sheets in a range of colors, as well as specialty papers with preprinted designs on them. No matter how you choose to print your business cards, remember to include these basic elements:
Your company name and logo Your name and title Your mailing address and phone and fax numbers Your e-mail address Your Web site address (URL)
To get started:
1. In the New Publication task pane, click Publications for Print, and then click Business Cards.
2. Click the design you want from the Design Gallery. 3. In the Business Cards Options task pane, format your business card 4. Under Copies per sheet, click One or Multiple.
Note If you choose the Multiple copies option, Publisher will print 10 copies per sheet by default. The Multiple copies option is recommended if you are using scored business card sheets, such as Avery card stock.
5. In the Publication Designs task pane, click Color Schemes and Font Schemes to choose colors and fonts that match the rest of your marketing materials.
6. To replace placeholder text with your own text, click the placeholder text and then type. In most cases, the text is resized automatically to fit within the text box.
Tip If you've stored your business contact information in a personal information set, it will appear automatically. To store your contact information, click Personal Information on the Edit menu.
22

To Print Business Cards on a Desktop Printer
1. Open the business card document that you want to print. 2. In the Business Card Options task pane, under Copies per sheet, click One or Multiple.
Note If you choose the Multiple copies option, Publisher will print 10 copies per sheet by default.
3. Load the printer with the paper that you want to print on. 4. On the File menu, click Print. 5. In the Print dialog box, choose the printer that you want to print to, and then click OK.
Tip You can test the printing orientation of the paper by loading a sheet of inexpensive or recycled paper into the paper tray. Draw a letter, such as R, P, or D on the top of the paper with a marker. Print the Publisher document onto the marked page. Based on the alignment of the printed sheet to the letter you drew, load the higher quality printing paper stock into the tray with the orientation corrected.
Notes If your cards have portrait orientation, Publisher will automatically set them up to be printed correctly. Unless you customized the size of your card, Publisher defaults to the standard business card size of 2 by 3.5 inches.
To Set Up Business Cards for a Specific Avery Sheet Number (applies to Publisher 2003 only)
For best results, you should finalize your publication design before you follow this procedure.
1. On the File menu, click Page Setup. 2. On the Layout tab, under Publication type, click Label. 3. Under Page size, click the scroll arrows at the top or bottom of the list box to locate the Avery product number that you want. Select either Avery 8373 - Business Card (8 business cards per page) or Avery 8871 - Business Card (10 business cards per page).
Note If the Avery product that you have is not in the list, check the information that came with your Avery product. Other Avery product numbers that are available in Publisher may be equivalent in size and layout to the product that you have purchased. For example, to print to Avery 8763, you can select either Avery 5163 or Avery 8163 in Publisher.
4. Click OK.
23

Important
You should avoid using any of the design and layout options in the Business Card Options task pane after you set up your publication with an Avery product size. Selecting these options will reset your publication size to the default size for the Business Card Wizard, and your cards might not be printed properly on the Avery product that you are using.
If you created a card with a portrait orientation by using a Business Card Wizard, selecting an Avery product size in the Page Setup dialog box will change your card to a landscape orientation if you allow Publisher to automatically adjust all wizard-created design elements after you select your Avery publication size. To print cards with portrait orientation on an Avery product, you need to manually adjust your business card content to fit the page.
After selecting the Avery product that you want in the Page Setup dialog box, click No when Publisher asks “Do you want Publisher to adjust the wizard created design elements?”
Your card will be displayed in portrait orientation, while the paper will be displayed in landscape orientation. You may need to click Zoom Out a few times to see your entire publication.
1. On the Objects tool bar, click the Select Objects tool , and then drag the selection box around the content of your business card. 2. Click the Group button that appears. 3. To rotate the business card, point to the green rotation handle, and rotate the publication until it fits on the page. 5. Load the printer with the Avery card stock that you want to print on.
Note Before you print on the Avery card stock, practice with some plain test sheets to make sure your business cards are printed the way that you want.
6. On the File menu, click Print. 7. In the Print dialog box, choose the printer that you want to print to, and then click OK.
24

Creating Flyers
To start a new flyer in Publisher:
1. On the File menu, click New.
2. In the New Publication task pane, under New from Design, click Publications.
for Print Under Publications for Print, click Flyer
3. In the Preview Gallery, select the design you want to use.
4. Use the option you want to use in the Flyer Options task pane to format your
flyer.
Use the Publisher Word Document Wizard
To Enhance a Word Document Boost the Impact of Your Word Document by using the Microsoft Publisher Word Document Wizard. The Publisher Word Wizard formats an imported Microsoft Word document as a publication.
1. On the File menu, click New.
2. In the New Publication task pane , under New from a design, click Publications
for Print.
3. Under Publications for Print, click Import Word Documents.
4. In the Preview Gallery, select the design you want.
5. In the Import Word Document dialog box, click the Word document you want,
and then click OK.
If you do not see the name of the document you want, you may need to change the
folder or drive by selecting from existing publication link.
6. Use the options in the Word Import Options task pane to format your
publication.
25

Apply Master Pages to Publication Pages Master pages can be a single or a two-page master (as for facing pages in a book). Master pages can be applied to a single page, to both pages in a two-page spread, to separate pages in a two-page spread, or to a range of pages.
Note If you are working on a Web publication, you can view only single pages and can create only single-page master pages.
Apply a Single Master Page to a Single Page
1. On the Format menu, click Apply Master Page. 2. Navigate to the page where you want to apply the master page. 3. In the Apply Master Pages task pane, in the box below the page icon, select the
master page you want to apply. This applies the master page to the current publication page.
Apply a Master Page to Both Pages of a Two-Page Spread To use these steps, you must have your publication set up for viewing as a two-page spread.
1. On the Format menu, click Apply Master Page. 2. Navigate to the page spread where you want to apply the master page. 3. In the Apply Master Pages task pane, select Use the same master page for both
facing pages. 4. In the box below the page icons, select the master page you want to apply. This
applies the master page to the current two-page spread.
Apply a Master Page to Separate Pages of a Two-Page Spread To use these steps, you must have your publication set up for viewing as a two-page spread.
1. On the Format menu, click Apply Master Page. 2. Navigate to the page spread where you want to apply the master page. 3. In the Apply Master Page task pane, clear Use the same master page for both
facing pages. 4. In the box below the left page icon, select the master page you want to apply. This
applies the master page to the left page of the current two-page spread. 5. In the box below the right page icon, select the master page you want to apply.
This applies the master page to the right page of the current two-page spread.
26

Apply a Master Page to a Range of Pages You can use these steps whether you have a single-page master or a two-page master.
1. On the Format menu, click Apply Master Page. 2. Click Apply to Page Range. 3. In the Apply Master Page dialog box, in the Select a master page box, select the
master page you want to apply. 4. Under Apply to, do one of the following:
• Select All pages to apply the master page to all pages in your publication. • Select Page, type a page number in the from box, and then type a page number
in the to box, to apply the master page to a continuous range of pages. • Select Current page(s) to apply the master page to the current single-page or
two-page spread.
Click OK.
27