Pressure Injectable PICC Product - TeleflexPressure Injectable PICC Product Product Description The...
24
Venous Access | Critical Care Pressure Injectable PICC Product
Transcript of Pressure Injectable PICC Product - TeleflexPressure Injectable PICC Product Product Description The...
Venous Access | Critical Care
Pressure Injectable PICC Product
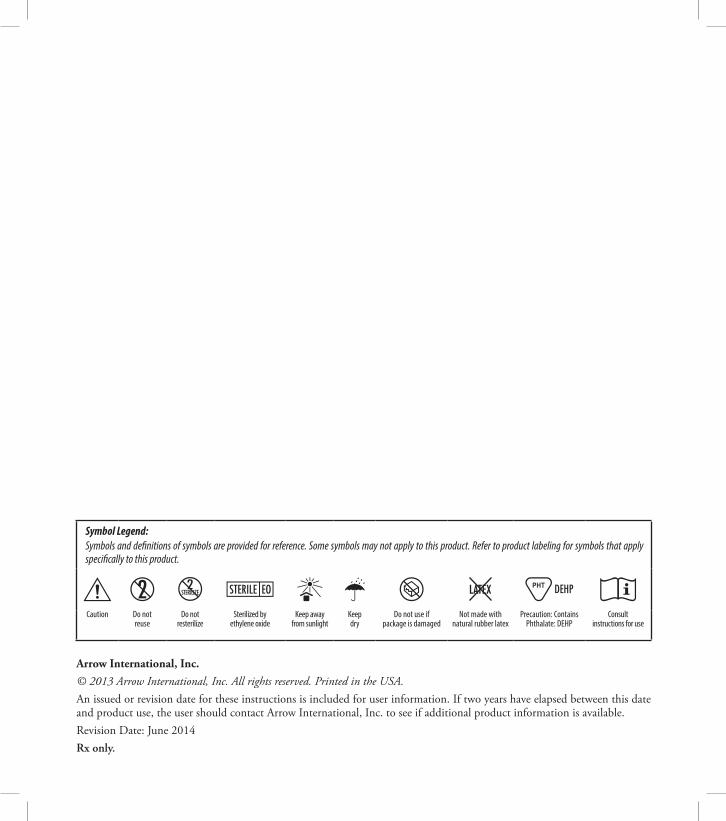
Arrow International, Inc.© 2013 Arrow International, Inc. All rights reserved. Printed in the USA. An issued or revision date for these instructions is included for user information. If two years have elapsed between this date and product use, the user should contact Arrow International, Inc. to see if additional product information is available.Revision Date: June 2014Rx only.
Symbol Legend:Symbols and definitions of symbols are provided for reference. Some symbols may not apply to this product. Refer to product labeling for symbols that apply specifically to this product.
Caution Do not reuse
Do not resterilize
Sterilized by ethylene oxide
Keep away from sunlight
Keep dry
Do not use if package is damaged
Not made with natural rubber latex
Precaution: Contains Phthalate: DEHP
Consult instructions for use
PRESSURE INJECTABLE PICC | iii
Table of Contents
Product Description 1Indications/Contraindications . . . . . . . . . . . . . . . . . . . . . . . . 1
Peripherally Inserted Central Catheter Warnings and Precautions 2General . . . . . . . . . . . . . . . . . . . . . . . . . . . . . . . . . . 2Catheter . . . . . . . . . . . . . . . . . . . . . . . . . . . . . . . . . . 3Peel-Away Sheath over Tissue Dilator . . . . . . . . . . . . . . . . . . . . . 4Placement Wire and Guidewire . . . . . . . . . . . . . . . . . . . . . . . . 4Pressure Injection . . . . . . . . . . . . . . . . . . . . . . . . . . . . . . 4VPS® Stylet . . . . . . . . . . . . . . . . . . . . . . . . . . . . . . . . . 5Possible Complications . . . . . . . . . . . . . . . . . . . . . . . . . . . 5
Accessory Component Instructions 6Catheter Clamp and Fastener . . . . . . . . . . . . . . . . . . . . . . . . . 6Catheter Stabilization Device . . . . . . . . . . . . . . . . . . . . . . . . . 6Catheter Trimmer . . . . . . . . . . . . . . . . . . . . . . . . . . . . . . 6Dressing . . . . . . . . . . . . . . . . . . . . . . . . . . . . . . . . . . 7Echogenic Needle . . . . . . . . . . . . . . . . . . . . . . . . . . . . . . 8Filter Straw/Filter Needle . . . . . . . . . . . . . . . . . . . . . . . . . . 8Maximal Barrier Drape . . . . . . . . . . . . . . . . . . . . . . . . . . . . 8Protected Needle . . . . . . . . . . . . . . . . . . . . . . . . . . . . . . 9Safety Introducer Needle . . . . . . . . . . . . . . . . . . . . . . . . . . . 9SharpsAway II™ Locking Disposal Cup . . . . . . . . . . . . . . . . . . . . . 10
Pre-PICC Insertion & Patient Assessment Activities 10Procedural Pause . . . . . . . . . . . . . . . . . . . . . . . . . . . . . . 11Preparing for PICC Insertion . . . . . . . . . . . . . . . . . . . . . . . . . 11
Prep Puncture Site . . . . . . . . . . . . . . . . . . . . . . . . . . . . 11Prepare Catheter . . . . . . . . . . . . . . . . . . . . . . . . . . . . 12Trim Catheter . . . . . . . . . . . . . . . . . . . . . . . . . . . . . . 12Flush Catheter . . . . . . . . . . . . . . . . . . . . . . . . . . . . . . 13Prepare Catheter with VPS® Stylet for Insertion . . . . . . . . . . . . . . . 13
Catheter Insertion Instructions 13Gain Initial Venous Access . . . . . . . . . . . . . . . . . . . . . . . . . . 13Place Peel-Away Sheath . . . . . . . . . . . . . . . . . . . . . . . . . . . 14Advance Catheter . . . . . . . . . . . . . . . . . . . . . . . . . . . . . . 14
Catheter Insertion with an 80 cm Guidewire . . . . . . . . . . . . . . . . 14Catheter Insertion with a 130 cm Guidewire . . . . . . . . . . . . . . . . 14
For reference information concerning patient assessment, clinical education, potential complications, and specific techniques for this procedure, consult standard textbooks, medical literature, and Arrow International, Inc. website: www.arrow vascular.com
For convenience, procedural and general Warnings and Precautions are listed at the beginning of the instructions. Please review all content before performing the procedure.
iv |
Catheter Insertion with a Placement Wire . . . . . . . . . . . . . . . . . 15Catheter Insertion with a VPS® Stylet . . . . . . . . . . . . . . . . . . . 15
Complete Catheter Insertion . . . . . . . . . . . . . . . . . . . . . . . . . 16
Documentation 16
Pressure Injection Instructions 17
Central Venous Pressure (CVP) Monitoring 17
Care and Maintenance 17Dressing . . . . . . . . . . . . . . . . . . . . . . . . . . . . . . . . . . 17Catheter Patency . . . . . . . . . . . . . . . . . . . . . . . . . . . . . . 18
Catheter Removal Instructions 18
| 1
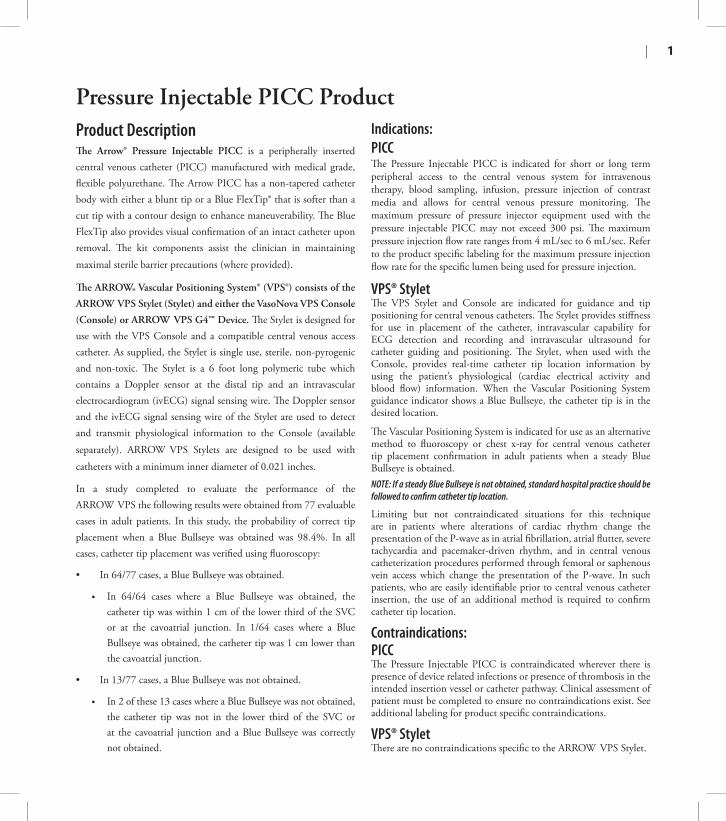
Pressure Injectable PICC ProductProduct DescriptionThe Arrow® Pressure Injectable PICC is a peripherally inserted central venous catheter (PICC) manufactured with medical grade, flexible polyurethane. The Arrow PICC has a non-tapered catheter body with either a blunt tip or a Blue FlexTip® that is softer than a cut tip with a contour design to enhance maneuverability. The Blue FlexTip also provides visual confirmation of an intact catheter upon removal. The kit components assist the clinician in maintaining maximal sterile barrier precautions (where provided).
The ARROW® Vascular Positioning System® (VPS®) consists of the
ARROW VPS Stylet (Stylet) and either the VasoNova VPS Console
(Console) or ARROW VPS G4™ Device. The Stylet is designed for use with the VPS Console and a compatible central venous access catheter. As supplied, the Stylet is single use, sterile, non-pyrogenic and non-toxic. The Stylet is a 6 foot long polymeric tube which contains a Doppler sensor at the distal tip and an intravascular electrocardiogram (ivECG) signal sensing wire. The Doppler sensor and the ivECG signal sensing wire of the Stylet are used to detect and transmit physiological information to the Console (available separately). ARROW VPS Stylets are designed to be used with catheters with a minimum inner diameter of 0.021 inches.
In a study completed to evaluate the performance of the ARROW VPS the following results were obtained from 77 evaluable cases in adult patients. In this study, the probability of correct tip placement when a Blue Bullseye was obtained was 98.4%. In all cases, catheter tip placement was verified using fluoroscopy:
• In 64/77 cases, a Blue Bullseye was obtained.
• In 64/64 cases where a Blue Bullseye was obtained, the catheter tip was within 1 cm of the lower third of the SVC or at the cavoatrial junction. In 1/64 cases where a Blue Bullseye was obtained, the catheter tip was 1 cm lower than the cavoatrial junction.
• In 13/77 cases, a Blue Bullseye was not obtained.
• In 2 of these 13 cases where a Blue Bullseye was not obtained, the catheter tip was not in the lower third of the SVC or at the cavoatrial junction and a Blue Bullseye was correctly not obtained.
Indications:PICCThe Pressure Injectable PICC is indicated for short or long term peripheral access to the central venous system for intravenous therapy, blood sampling, infusion, pressure injection of contrast media and allows for central venous pressure monitoring. The maximum pressure of pressure injector equipment used with the pressure injectable PICC may not exceed 300 psi. The maximum pressure injection flow rate ranges from 4 mL/sec to 6 mL/sec. Refer to the product specific labeling for the maximum pressure injection flow rate for the specific lumen being used for pressure injection.
VPS® Stylet The VPS Stylet and Console are indicated for guidance and tip positioning for central venous catheters. The Stylet provides stiffness for use in placement of the catheter, intravascular capability for ECG detection and recording and intravascular ultrasound for catheter guiding and positioning. The Stylet, when used with the Console, provides real-time catheter tip location information by using the patient’s physiological (cardiac electrical activity and blood flow) information. When the Vascular Positioning System guidance indicator shows a Blue Bullseye, the catheter tip is in the desired location.
The Vascular Positioning System is indicated for use as an alternative method to fluoroscopy or chest x-ray for central venous catheter tip placement confirmation in adult patients when a steady Blue Bullseye is obtained.NOTE: If a steady Blue Bullseye is not obtained, standard hospital practice should be followed to confirm catheter tip location.
Limiting but not contraindicated situations for this technique are in patients where alterations of cardiac rhythm change the presentation of the P-wave as in atrial fibrillation, atrial flutter, severe tachycardia and pacemaker-driven rhythm, and in central venous catheterization procedures performed through femoral or saphenous vein access which change the presentation of the P-wave. In such patients, who are easily identifiable prior to central venous catheter insertion, the use of an additional method is required to confirm catheter tip location.
Contraindications:PICCThe Pressure Injectable PICC is contraindicated wherever there is presence of device related infections or presence of thrombosis in the intended insertion vessel or catheter pathway. Clinical assessment of patient must be completed to ensure no contraindications exist. See additional labeling for product specific contraindications.
VPS® Stylet There are no contraindications specific to the ARROW VPS Stylet.
2 |
Peripherally Inserted Central Catheter Warnings and Precautions:
The decision to confirm tip position with fluoroscopy or chest x-ray in addition to a VPS steady Blue Bullseye should be in accordance with standard hospital/institutional practice and the best judgment of the clinician which should take into account the patient’s condition, the experience of the clinician with VPS or similar devices, and the liquid to be infused through the catheter.
General Warnings and PrecautionsWarnings: 1. Sterile, Single use: Do not reuse, reprocess or resterilize.
Reuse of device creates a potential risk of serious injury and/or infection which may lead to death.
2. Read all package insert warnings, precautions, and instructions prior to use. Failure to do so may result in severe patient injury or death.
3. Practitioners must be aware of complications associated with peripherally inserted central catheters including but not limited to: cardiac tamponade secondary to vessel, atrial or ventricular perforation, pleural (i.e., pneumothorax) and mediastinal injuries, air embolism, catheter embolism, catheter occlusion, thoracic duct laceration, bacteremia, septicemia, thrombosis, inadvertent arterial puncture, nerve damage, hematoma, hemorrhage, and dysrhythmias.
4. Practitioners must be aware of clinical conditions that may limit use of PICCs including but not limited to: dermatitis, cellulitis, and burns at or about the insertion site, previous ipsilateral venous thrombosis, radiation therapy at or about insertion site, contractures, mastectomy, surgical procedures and potential use for AV fistula.
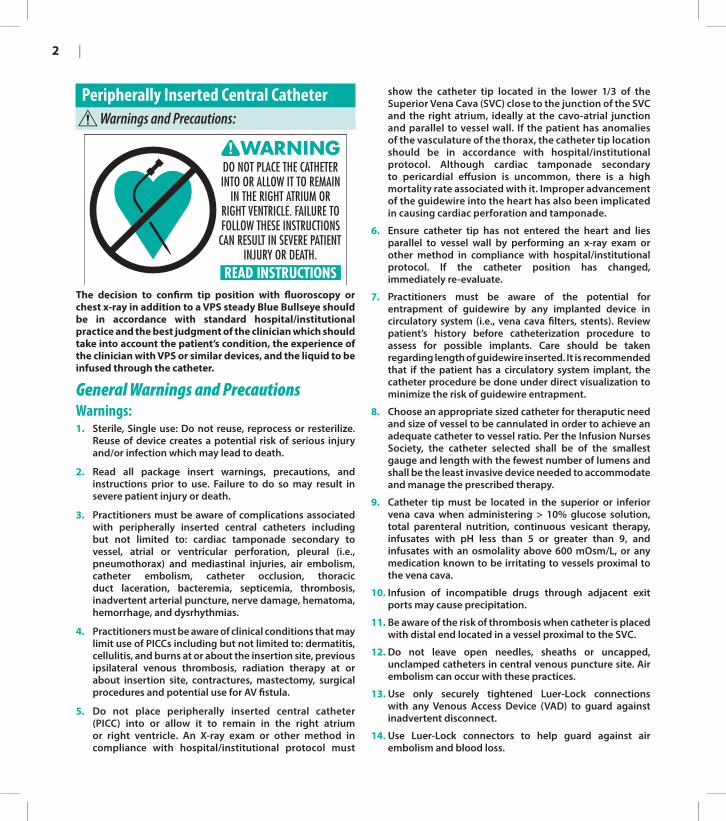
5. Do not place peripherally inserted central catheter (PICC) into or allow it to remain in the right atrium or right ventricle. An X-ray exam or other method in compliance with hospital/institutional protocol must
show the catheter tip located in the lower 1/3 of the Superior Vena Cava (SVC) close to the junction of the SVC and the right atrium, ideally at the cavo-atrial junction and parallel to vessel wall. If the patient has anomalies of the vasculature of the thorax, the catheter tip location should be in accordance with hospital/institutional protocol. Although cardiac tamponade secondary to pericardial effusion is uncommon, there is a high mortality rate associated with it. Improper advancement of the guidewire into the heart has also been implicated in causing cardiac perforation and tamponade.
6. Ensure catheter tip has not entered the heart and lies parallel to vessel wall by performing an x-ray exam or other method in compliance with hospital/institutional protocol. If the catheter position has changed, immediately re-evaluate.
7. Practitioners must be aware of the potential for entrapment of guidewire by any implanted device in circulatory system (i.e., vena cava filters, stents). Review patient’s history before catheterization procedure to assess for possible implants. Care should be taken regarding length of guidewire inserted. It is recommended that if the patient has a circulatory system implant, the catheter procedure be done under direct visualization to minimize the risk of guidewire entrapment.
8. Choose an appropriate sized catheter for theraputic need and size of vessel to be cannulated in order to achieve an adequate catheter to vessel ratio. Per the Infusion Nurses Society, the catheter selected shall be of the smallest gauge and length with the fewest number of lumens and shall be the least invasive device needed to accommodate and manage the prescribed therapy.
9. Catheter tip must be located in the superior or inferior vena cava when administering > 10% glucose solution, total parenteral nutrition, continuous vesicant therapy, infusates with pH less than 5 or greater than 9, and infusates with an osmolality above 600 mOsm/L, or any medication known to be irritating to vessels proximal to the vena cava.
10. Infusion of incompatible drugs through adjacent exit ports may cause precipitation.
11. Be aware of the risk of thrombosis when catheter is placed with distal end located in a vessel proximal to the SVC.
12. Do not leave open needles, sheaths or uncapped, unclamped catheters in central venous puncture site. Air embolism can occur with these practices.
13. Use only securely tightened Luer-Lock connections with any Venous Access Device (VAD) to guard against inadvertent disconnect.
14. Use Luer-Lock connectors to help guard against air embolism and blood loss.
PRESSURE INJECTABLE PICC | 3
15. Pulsatile flow is usually an indicator of inadvertent arterial puncture.
16. Do not alter the catheter, guidewire, or any other kit/set component during insertion, use, or removal (except as instructed).
17. Keep hands behind the needle at all times during use and disposal.
Cautions: 1. Do not use if package has been previously opened
or damaged.
2. Procedure must be performed by trained personnel well versed in anatomical landmarks, safe technique, and potential complications.
3. Assess patient for sensitivity if heparin will be used for flushing. Heparin-Induced Thrombocytopenia (HIT) has been reported with the use of heparin flush solutions.
4. Do not routinely apply prophylactic topical antimicrobial or antiseptic ointment or cream to the insertion site of peripheral venous catheters because of the potential risk to promote of fungal infections and antimicrobial resistance.
5. Temporarily stop infusions in other lumens prior to blood withdrawal from multiple lumen catheter.
6. The color of blood is not always a reliable indicator of venous access.
7. Do not reinsert needle into introducer catheter (where provided) to reduce the risk of catheter embolism.
8. Maintain insertion site with regular meticulous redressing using aseptic technique.
9. Engage safety and/or locking feature of scalpel (where provided) when not in use to reduce the risk of sharps injury.
10. Perform hand hygiene:• before and immediately after all clinical procedures• before donning and after removal of gloves
11. Use all needles in accordance with OSHA and hospital/institutional safety protocols.
12. Discard in an approved sharps collector in accordance with applicable regulations and hospital/institutional policy.
13. Use universal blood and body-fluid precautions in the care of all patients due to the risk of exposure to Human Immunodeficiency Virus (HIV) or other blood borne pathogens.
Catheter Warnings and PrecautionsWarnings: 1. Only utilize catheters indicated for high pressure injection
applications for such applications. Utilizing catheters not indicated for high pressure applications can result in inter-lumen crossover or rupture with potential for injury.
2. Do not apply excessive force in placing or removing catheter. Excessive force can cause catheter breakage. If placement or withdrawal cannot be easily accomplished, an x-ray should be obtained and further consultation requested.
3. Do not secure, staple, and/or suture directly to outside diameter of catheter body or extension lines to reduce the risk of cutting or damaging the catheter or impeding catheter flow. Secure only at indicated stabilization locations.
4. Do not cut catheter to alter catheter length unless procedure requires it.
5. Do not attach catheter clamp and fastener (if provided and used) until either guidewire, placement wire or VPS Stylet is removed.
6. Do not use scissors to remove dressing to reduce the risk of cutting the catheter.
7. Open catheter clamp prior to infusion through lumen to reduce risk of damage to extension line(s) from excessive pressure.
8. Do not attempt to advance or reinsert placement wire (where provided) into catheter, through the septum.
9. Do not clamp extension line(s) when VPS Stylet is in catheter to reduce the risk of VPS Stylet kinking.
10. Do not clamp extension line(s) when placement wire is in catheter to reduce the risk of placement wire kinking.
11. Slide clamp(s), where provided, may be inadvertently removed and aspirated by children or confused adults. In such situations, practitioners should remove slide clamp(s) when not in use.
12. Residual catheter track remains an air entry point until completely sealed; occlusive dressings should remain in place for at least 24 to 72 hours dependent upon amount of time catheter was indwelling.
Cautions: 1. Check ingredients of prep sprays and swabs before using.
Some disinfectants used at catheter insertion site contain solvents which can attack the catheter material. Allow insertion site to dry completely prior to applying dressing.
4 |
2. Alcohol and acetone can weaken the structure of polyurethane materials. These agents may also weaken the adhesive bond between catheter stabilization device and skin.• Acetone: Do not use acetone on catheter surface.• Alcohol: Do not use alcohol to soak catheter surface or
to restore catheter patency.Take care when instilling drugs containing high concentration of alcohol.
3. Ensure catheter patency prior to use. Do not use syringes smaller than 10 mL (a fluid filled 1 mL syringe can exceed 300 psi), to reduce the risk of intraluminal leakage or catheter rupture.
4. Remove catheter clamp and fastener (where provided) prior to attempting a catheter exchange procedure.
5. Do not use guidewire techniques to replace catheters in patients suspected of having catheter-related infection.
6. Continuously monitor indwelling catheters for:• desired flow rate• security of dressing• adherence of stabilization device to skin and
connection to catheter• correct catheter position; use centimeter markings to
identify if catheter position has changed• secure Luer-Lock connection(s)
7. Minimize catheter manipulation after procedure to maintain proper catheter tip position.
8. Inject a small amount of radiopaque dye to locate catheter tip if difficulty is encountered in visualizing the catheter tip.
9. Avoid tearing the sheath at the insertion site which opens the surrounding tissue creating a gap between the PICC and the dermis.
Peel-Away Sheath over Tissue Dilator Warnings and PrecautionsWarnings:1. Do not leave tissue dilator in place as an indwelling
catheter. Leaving tissue dilator in place puts patient at risk for possible vessel wall perforation.
2. Do not use excessive force when introducing guidewire, peel-away sheath over tissue dilator or tissue dilator as this can lead to vessel perforation and bleeding.
3. Do not leave open dilators or sheaths uncapped in venous puncture site. Air embolism can occur with these practices.
Caution: 1. Do not withdraw tissue dilator until the sheath is well
within vessel to reduce the risk of damage to sheath tip.
Placement Wire and Guidewire Warnings and PrecautionsWarnings: 1. Do not cut guidewire to alter length.
2. Do not insert stiff end of guidewire into vessel as this may result in vessel damage.
3. Do not withdraw guidewire against needle bevel to reduce the risk of possible severing or damaging of guidewire.
4. Do not apply excessive force in removing guidewire. If withdrawal cannot be easily accomplished, a visual image should be obtained and further consultation requested.
5. Passage of guidewire into the right heart can cause dysrhythmias or perforation of vessel, atrial, or ventricular wall.
6. Do not apply undue force on guidewire to reduce the risk of possible breakage.
7. Do not cut guidewire with scalpel.• Position cutting edge of scalpel away from guidewire.• Engage safety and/or locking feature of scalpel (where
provided) once cutaneous puncture site is enlarged, to reduce the risk of cutting the guidewire.
8. Remove placement wire and Luer-Lock sidearm assembly as a unit. Failure to do so may result in wire breakage.
Caution: 1. Maintain a firm grip on guidewire at all times. Keep
sufficient guidewire length exposed at hub for handling purposes. A non-controlled guidewire can lead to guidewire embolism.
Pressure Injection Warnings and PrecautionsWarnings: 1. Assess each patient for appropriateness of a pressure
injection procedure.
2. Pressure injection procedures must be performed by trained personnel well versed in safe technique and potential complications.
3. Use an appropriate method to confirm catheter tip position prior to each pressure injection per hospital/institutional policy.
PRESSURE INJECTABLE PICC | 5
3. Do not cut Stylet.
4. Do not advance the device if unusual resistance is encountered.
5. Do not insert or withdraw the Stylet forcibly from the catheter. The device may break.
6. If the Stylet and/or catheter are damaged, the catheter and Stylet must be removed together.
7. Avoid placement in the right atrium. Monitor catheter placement per institutional policy.
Cautions:1. Do not use sharp instruments near the Stylet.
2. Avoid clamping the Stylet.
3. Be careful that a tripping hazard is not created when the Stylet is connected to the Console. Tripping over the Stylet might cause malfunction of the Stylet, detachment of the Stylet connectors from the Console or injuries to the user.
4. Never use force to remove the Stylet. Pulling against resistance can damage the catheter or cause tip displacement.
5. If resistance or bunching of the catheter is observed, discontinue Stylet withdrawal and allow the catheter to return to its normal shape. Flush the lumen. Repeat this procedure until the Stylet is easily removed. If great resistance is experienced, withdraw both the catheter and Stylet together.
Possible Complications (but not limited to): ♦ cardiac tamponade secondary to vessel, atrial or
ventricular perforation
♦ catheter embolism ♦ air embolism
♦ SVC syndrome ♦ bleeding/hemorrhage
♦ catheter occlusion ♦ bacteremia
♦ septicemia ♦ thrombosis
♦ hematoma ♦ inadvertent arterial puncture
♦ dysrhythmias ♦ phlebitis
♦ exit site infection ♦ fibrin sheath formation
♦ catheter tip malposition ♦ vessel erosion
♦ nerve injury ♦ thoracic duct laceration
♦ pleural (i.e. pheumothorax) and mediastinal injuries
4. Ensure patency of intended pressure injectable lumen of catheter prior to pressure injection to reduce the risk of catheter failure and/or patient complications.
5. Discontinue pressure injections at first sign of infiltration/extravasation. Follow hospital/institutional protocol for appropriate medical intervention.
6. Use only lumen(s) labeled “Pressure Injectable” for pressure injection to reduce the risk of catheter failure and/or patient complications.
Cautions: 1. Do not exceed ten (10) injections or the maximum pressure
of 300 psi on power injector equipment to reduce the risk of catheter failure and/or tip displacement.
2. Do not exceed ten (10) injections or the catheter’s maximum recommended flow rate located on product labeling to reduce the risk of catheter failure and/or tip displacement.
3. Warm contrast media to body temperature prior to pressure injection to reduce the risk of catheter failure.
4. Pressure limit settings on power injector equipment may not prevent over pressurizing an occluded or partially occluded catheter.
5. Use appropriate administration set tubing between catheter and power injector equipment to reduce the risk of catheter failure.
6. Follow the contrast media manufacturer’s specified instructions for use, contraindications, warnings and precautions.
VPS® Stylet Warnings and PrecautionsWarnings - General: 1. Use aseptic technique during insertion and use.
2. If the hub or connector separates from any component during insertion or use, take all necessary steps and precautions to prevent blood loss or air embolism.
3. Inspect package and Stylet carefully before use. Do not use Stylet if damaged.
4. Stylets are SINGLE USE ONLY.
Warnings - Placement: 1. Carefully tighten Tuohy-Borst adapter.* Use care to
minimize blood loss and risk of air embolism.
* Precaution: Contains Phthalate: DEHP.
2. Place the Stylet in the trimmed catheter, being careful not to kink the Stylet.
6 |
Accessory Component InstructionsKits/Sets may not contain all accessory components detailed in these instructions for use. Become familiar with instructions for individual component(s) before beginning the actual procedure.
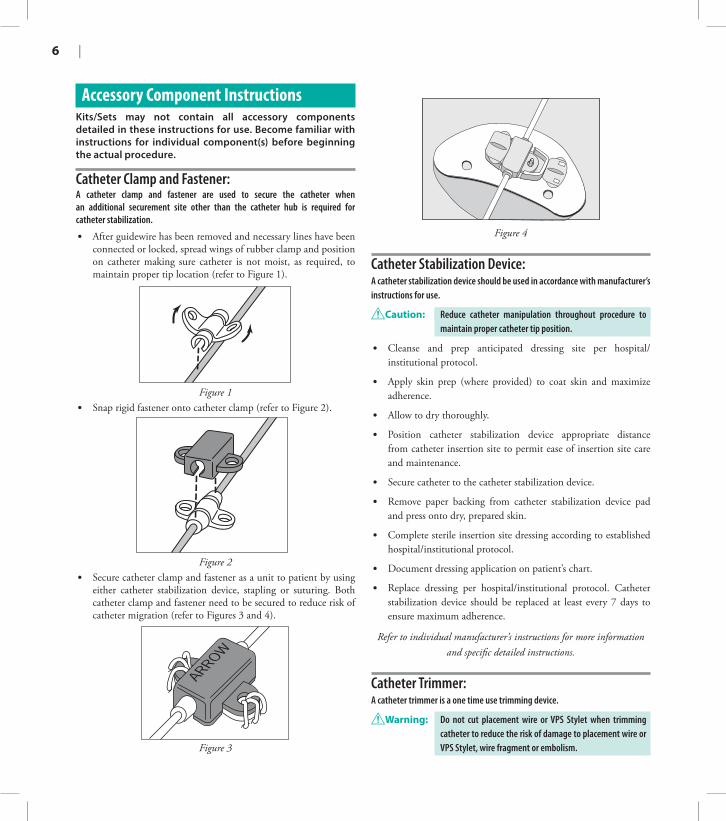
Catheter Clamp and Fastener: A catheter clamp and fastener are used to secure the catheter when an additional securement site other than the catheter hub is required for catheter stabilization.
• After guidewire has been removed and necessary lines have been connected or locked, spread wings of rubber clamp and position on catheter making sure catheter is not moist, as required, to maintain proper tip location (refer to Figure 1).
Figure 1• Snap rigid fastener onto catheter clamp (refer to Figure 2).
Figure 2• Secure catheter clamp and fastener as a unit to patient by using
either catheter stabilization device, stapling or suturing. Both catheter clamp and fastener need to be secured to reduce risk of catheter migration (refer to Figures 3 and 4).
Figure 3
Figure 4
Catheter Stabilization Device:A catheter stabilization device should be used in accordance with manufacturer’s instructions for use.
Caution: Reduce catheter manipulation throughout procedure to maintain proper catheter tip position.
• Cleanse and prep anticipated dressing site per hospital/institutional protocol.
• Apply skin prep (where provided) to coat skin and maximize adherence.
• Allow to dry thoroughly.
• Position catheter stabilization device appropriate distance from catheter insertion site to permit ease of insertion site care and maintenance.
• Secure catheter to the catheter stabilization device.
• Remove paper backing from catheter stabilization device pad and press onto dry, prepared skin.
• Complete sterile insertion site dressing according to established hospital/institutional protocol.
• Document dressing application on patient’s chart.
• Replace dressing per hospital/institutional protocol. Catheter stabilization device should be replaced at least every 7 days to ensure maximum adherence.
Refer to individual manufacturer’s instructions for more information and specific detailed instructions.
Catheter Trimmer:A catheter trimmer is a one time use trimming device.
Warning: Do not cut placement wire or VPS Stylet when trimming catheter to reduce the risk of damage to placement wire or VPS Stylet, wire fragment or embolism.
PRESSURE INJECTABLE PICC | 7
Caution: Check that there is no wire in cut catheter segment after trimming the catheter. If there is any evidence that placement wire or VPS Stylet has been cut or damaged, the catheter, placement wire or VPS Stylet should not be used.
NOTE: There should be very limited resistance when cutting the catheter with supplied trimmer. Continued resistance is likely to be caused by the placement wire or VPS Stylet which has not been sufficiently retracted. If placement wire or VPS Stylet has not been retracted, do not use catheter.
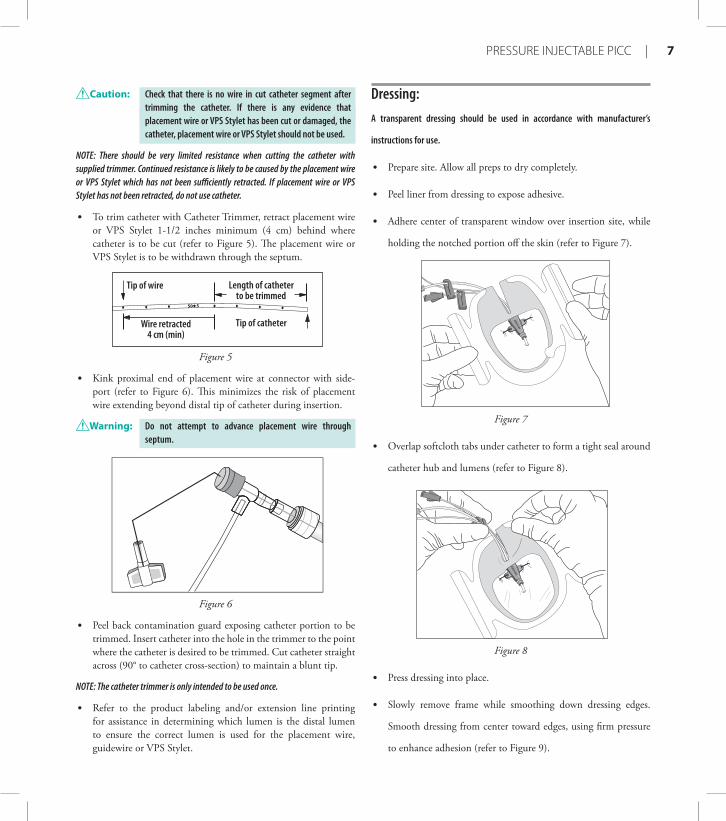
• To trim catheter with Catheter Trimmer, retract placement wire or VPS Stylet 1-1/2 inches minimum (4 cm) behind where catheter is to be cut (refer to Figure 5). The placement wire or VPS Stylet is to be withdrawn through the septum.
Tip of wire
Tip of catheter
Length of catheterto be trimmed
Wire retracted4 cm (min)
Figure 5
• Kink proximal end of placement wire at connector with side-port (refer to Figure 6). This minimizes the risk of placement wire extending beyond distal tip of catheter during insertion.
Warning: Do not attempt to advance placement wire through septum.
Figure 6
• Peel back contamination guard exposing catheter portion to be trimmed. Insert catheter into the hole in the trimmer to the point where the catheter is desired to be trimmed. Cut catheter straight across (90° to catheter cross-section) to maintain a blunt tip.
NOTE: The catheter trimmer is only intended to be used once.
• Refer to the product labeling and/or extension line printing for assistance in determining which lumen is the distal lumen to ensure the correct lumen is used for the placement wire, guidewire or VPS Stylet.
Dressing:A transparent dressing should be used in accordance with manufacturer’s
instructions for use.
• Prepare site. Allow all preps to dry completely.
• Peel liner from dressing to expose adhesive.
• Adhere center of transparent window over insertion site, while
holding the notched portion off the skin (refer to Figure 7).
Figure 7
• Overlap softcloth tabs under catheter to form a tight seal around
catheter hub and lumens (refer to Figure 8).
Figure 8
• Press dressing into place.
• Slowly remove frame while smoothing down dressing edges.
Smooth dressing from center toward edges, using firm pressure
to enhance adhesion (refer to Figure 9).
8 |
Figure 9
• Use sterile tape strips to secure hub, lumens, and/or tubing (refer to Figure 10).
Figure 10
• Label dressing according to hospital/institutional protocol.
Refer to individual manufacturer’s instructions for more information and specific detailed instructions for dressing removal (not included).
Echogenic Needle:An echogenic needle is used to provide greater needle visibility under ultrasound. The needle tip is enhanced for approximately 1 cm for clinician to identify exact needle tip location when puncturing the vessel under ultrasound.
Filter Straw/Filter Needle:A filter straw/filter needle (5 micron) is utilized to aspirate solution from a glass ampule and reduce the risk of glass particulate from entering the syringe.
.
• Open the glass ampule using appropriate sterile and sharps protection technique.
• Attach the filter straw/filter needle to the syringe.
• Insert the filter straw/filter needle into the ampule.
• Aspirate contents from the ampule.
• Remove and discard the filter straw/filter needle.
• Attach appropriate needleless connector or cannula to the
syringe.
• Purge air from the syringe.
• Label the syringe appropriately.
Maximal Barrier Drape: Drape(s) provide a maximal sterile barrier. Follow the CDC Category 1A
Recommendation.
• Drape provided is either:
• Single extra-large drape with fenestration.
• Two-piece drape consisting of an arm drape with fenestration
and a body drape. The body drape is used to appropriately
drape torso and upper-lower extremities.
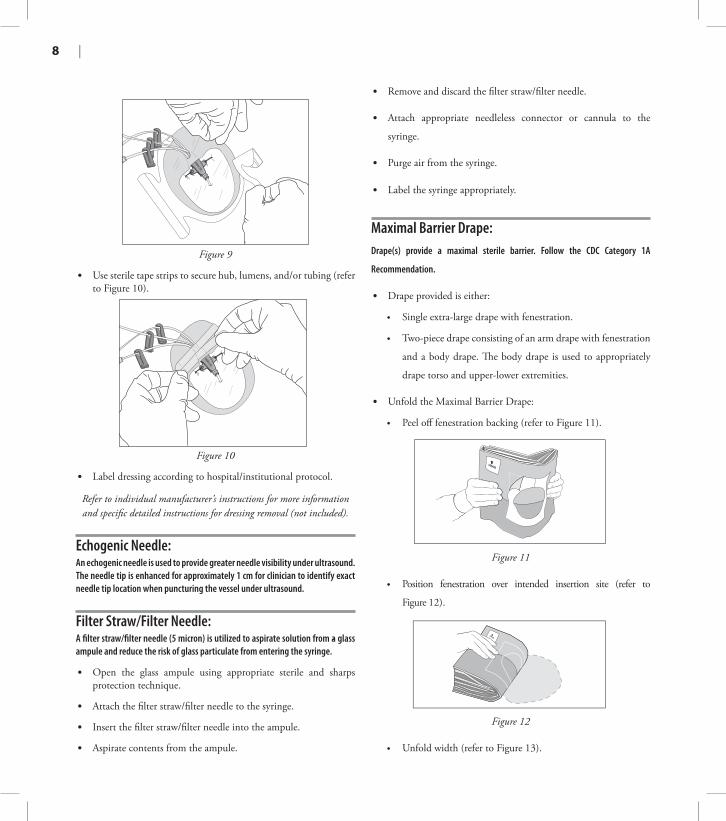
• Unfold the Maximal Barrier Drape:
• Peel off fenestration backing (refer to Figure 11).
Figure 11
• Position fenestration over intended insertion site (refer to
Figure 12).
Figure 12
• Unfold width (refer to Figure 13).

PRESSURE INJECTABLE PICC | 9
ba
Figure 13
• Unfold towards head (refer to Figure 14).
Figure 14
• Unfold towards hand (refer to Figure 15).
Figure 15
• Perform sterile procedure.
• Tear along seam to remove drape (refer to Figure 16).
TO R
EMO
VE DRA
PE
TEAR A
LON
G SEA
M
Figure 16
Protected Needle:A protected needle should be used in accordance with manufacturer’s instructions for use.
Warning: Keep hands behind needle at all times during use and disposal.
Caution: Use all needles in accordance with OSHA and hospital/institutional safety protocols.
Caution: Do not attempt to override or defeat the safety locking mechanism of a protected needle.
Caution: Discard in an approved sharps collector in accordance with applicable regulations and hospital/institutional policy.
General Guidelines for Protected Needle Use:• Aspirate medication into syringe using aseptic technique.
• Administer injection following established technique.
• Immediately activate needle protection device upon withdrawal from patient. For greatest safety, use a one-handed technique and activate away from self and others (refer to Figure 17).
Figure 17
• Visually confirm needle tip is completely covered. If unable to activate, discard immediately into approved sharps collector.
• Activation of protective mechanism may cause minimal splatter of fluid that may remain on needle after injection.
• Discard after single use.
NOTE: Use passive recapping technique to cover needle before transport to point of use.
Safety Introducer Needle:A safety introducer needle should be used in accordance with manufacturer’s instructions for use.
Warning: Keep hands behind needle at all times during use and disposal.
Caution: Use all needles in accordance with OSHA and hospital/institutional safety protocols.
Caution: Do not activate safety clip before removing the needle from guidewire.
10 |
Caution: Do not attempt to override or defeat the safety locking mechanism of a protected needle.
Caution: Discard in an approved sharps collector in accordance with applicable regulations and hospital/institutional policy.
General Guidelines for Safety Introducer Needle Use:• After the guidewire is inserted to the desired length through the
safety introducer needle, remove the needle over the wire, while holding the wire in place.
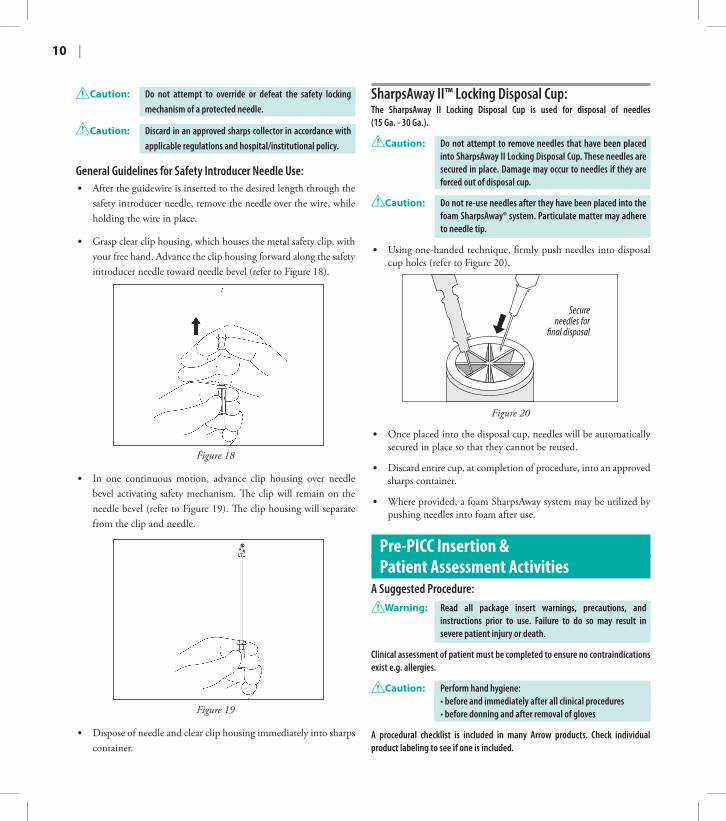
• Grasp clear clip housing, which houses the metal safety clip, with your free hand. Advance the clip housing forward along the safety introducer needle toward needle bevel (refer to Figure 18).
Figure 18
• In one continuous motion, advance clip housing over needle bevel activating safety mechanism. The clip will remain on the needle bevel (refer to Figure 19). The clip housing will separate from the clip and needle.
Figure 19
• Dispose of needle and clear clip housing immediately into sharps container.
SharpsAway II™ Locking Disposal Cup:The SharpsAway II Locking Disposal Cup is used for disposal of needles (15 Ga. - 30 Ga.).
Caution: Do not attempt to remove needles that have been placed into SharpsAway II Locking Disposal Cup. These needles are secured in place. Damage may occur to needles if they are forced out of disposal cup.
Caution: Do not re-use needles after they have been placed into the foam SharpsAway® system. Particulate matter may adhere to needle tip.
• Using one-handed technique, firmly push needles into disposal cup holes (refer to Figure 20).
Secureneedles for
�nal disposal
Figure 20
• Once placed into the disposal cup, needles will be automatically secured in place so that they cannot be reused.
• Discard entire cup, at completion of procedure, into an approved sharps container.
• Where provided, a foam SharpsAway system may be utilized by pushing needles into foam after use.
Pre-PICC Insertion & Patient Assessment Activities
A Suggested Procedure:Warning: Read all package insert warnings, precautions, and
instructions prior to use. Failure to do so may result in severe patient injury or death.
Clinical assessment of patient must be completed to ensure no contraindications exist e.g. allergies.
Caution: Perform hand hygiene: • before and immediately after all clinical procedures • before donning and after removal of gloves
A procedural checklist is included in many Arrow products. Check individual product labeling to see if one is included.
PRESSURE INJECTABLE PICC | 11
◊ Check manufacturer recommendations for any length to be added to catheter measurement if a catheter stabilization device will be used.
◊ Measure from an anatomical point and record for consistency in measurement if using upper arm circumference assessment.
7. Position patient as appropriate for insertion site: • Extend arm laterally 45 to 90 degrees from trunk.
8. Prepare work area.
9. If using VPS Stylet:• Position VPS Console within about 4 feet (1.22 meters)
of the insertion site without compromising the intended sterile field.
• Prepare skin at the appropriate locations for proper placement of ECG electrodes according to hospital/institutional protocol. This may include removal of hair to ensure secure attachment, alcohol swabbing to remove any skin oil at the site and careful drying. Using the ECG Leads supplied with the Console, connect the distal end of the cable to each electrode (used for ECG measurement), place the electrodes on the patient and connect the proximal end of the cable to the Console. Please refer to the Console Operator’s Manual for details.
Preparing for PICC Insertion:• Use sterile technique and maximal sterile barrier precautions
throughout the procedure, and dress in protective clothing:
• mask • eye protection
• sterile gown • sterile gloves
• hair cover
Caution: Perform hand hygiene: • before and immediately after all clinical procedures • before donning and after removal of gloves
Caution: Use universal blood and body-fluid precautions in the care of all patients due to the risk of exposure to Human Immunodeficiency Virus (HIV) or other blood borne pathogens.
Prep Puncture Site: 1. Prep peripheral puncture site with appropriate antiseptic/agent.
2. Drape puncture site.See unfolding instructions for Maximal Barrier Drape (where provided) under Accessory Component Instructions section.
3. Perform a skin wheal using desired needle and local anesthetic.
4. Dispose of needle.
Procedural Pause: 1. Verify physician order:
• Confirm correct patient.• Confirm correct diagnosis.• Confirm correct procedure. Physician order must include post placement assessment of catheter tip placement (x-ray, VPS System Blue Bullseye or other method in compliance with hospital/institutional protocol).
2. Educate patient: Explain procedure to patient. Make sure information is presented with respect to patient’s level of understanding, culture, and language.
3. Have informed consent signed, if required.
4. Identify appropriate vein for insertion: • Apply tourniquet above anticipated insertion vein. • Use direct visualization technologies, e.g. ultrasound or
fluoroscopy, if available.• Assess vein health.
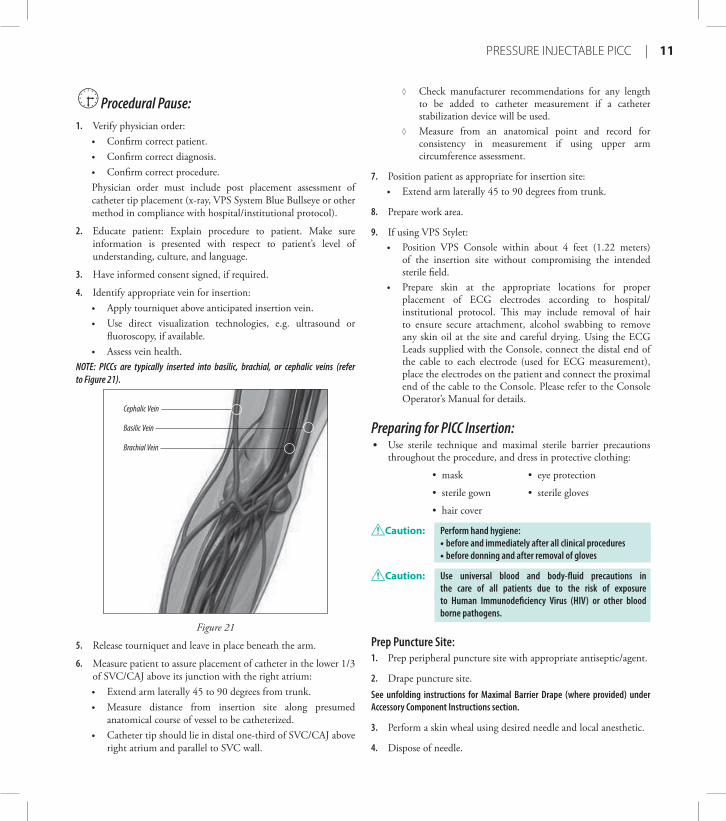
NOTE: PICCs are typically inserted into basilic, brachial, or cephalic veins (refer to Figure 21).
Basilic Vein
Brachial Vein
Cephalic Vein
Figure 21
5. Release tourniquet and leave in place beneath the arm.
6. Measure patient to assure placement of catheter in the lower 1/3 of SVC/CAJ above its junction with the right atrium:• Extend arm laterally 45 to 90 degrees from trunk. • Measure distance from insertion site along presumed
anatomical course of vessel to be catheterized. • Catheter tip should lie in distal one-third of SVC/CAJ above
right atrium and parallel to SVC wall.
12 |
Caution: Use all needles in accordance with OSHA and hospital/institutional safety protocols.
Caution: Discard in an approved sharps collector in accordance with applicable regulations and hospital/institutional policy.
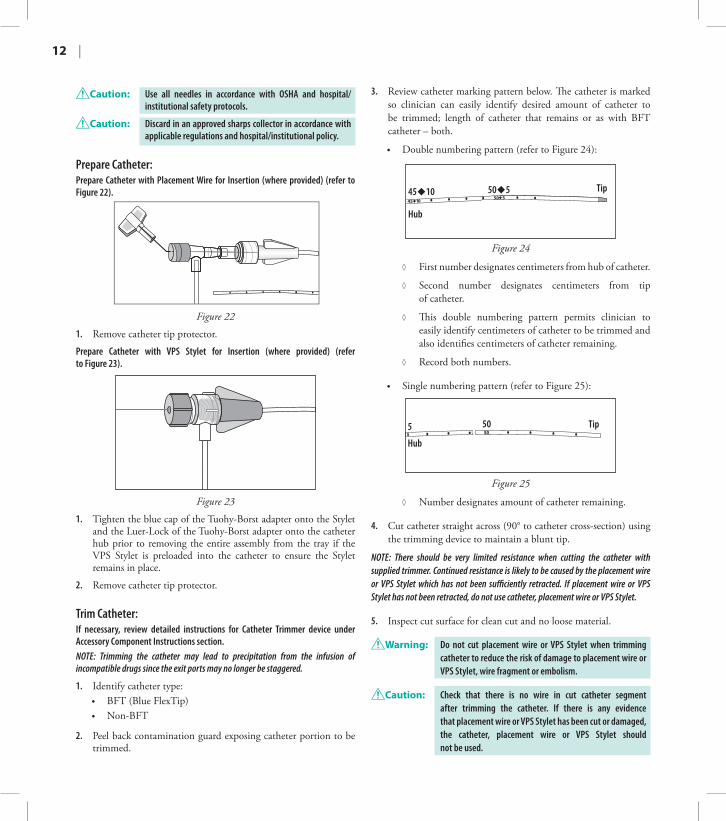
Prepare Catheter: Prepare Catheter with Placement Wire for Insertion (where provided) (refer to Figure 22).
Figure 22
1. Remove catheter tip protector.
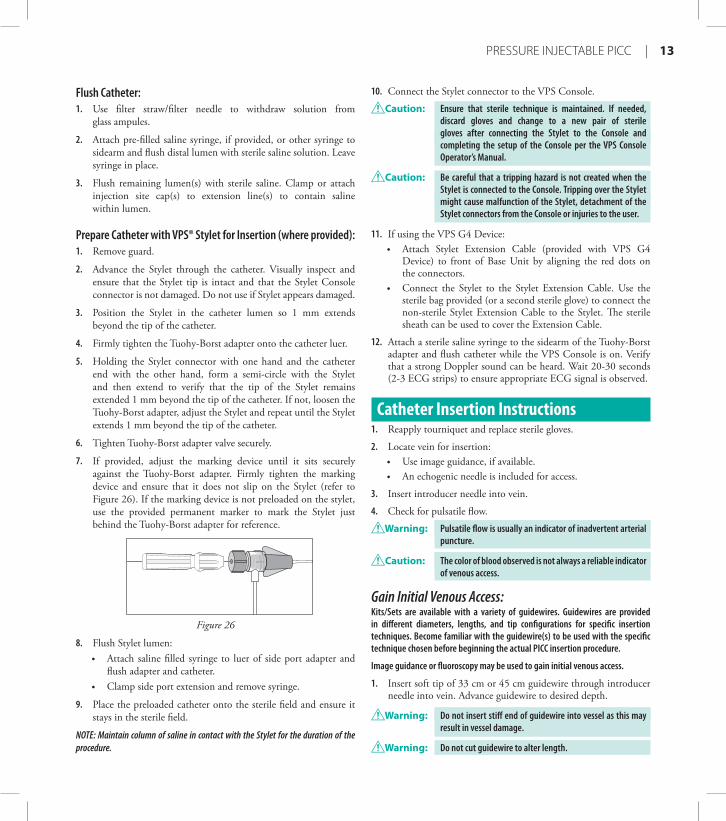
Prepare Catheter with VPS Stylet for Insertion (where provided) (refer to Figure 23).
Figure 23
1. Tighten the blue cap of the Tuohy-Borst adapter onto the Stylet and the Luer-Lock of the Tuohy-Borst adapter onto the catheter hub prior to removing the entire assembly from the tray if the VPS Stylet is preloaded into the catheter to ensure the Stylet remains in place.
2. Remove catheter tip protector.
Trim Catheter:If necessary, review detailed instructions for Catheter Trimmer device under Accessory Component Instructions section.NOTE: Trimming the catheter may lead to precipitation from the infusion of incompatible drugs since the exit ports may no longer be staggered.
1. Identify catheter type:• BFT (Blue FlexTip)• Non-BFT
2. Peel back contamination guard exposing catheter portion to be trimmed.
3. Review catheter marking pattern below. The catheter is marked so clinician can easily identify desired amount of catheter to be trimmed; length of catheter that remains or as with BFT catheter – both.
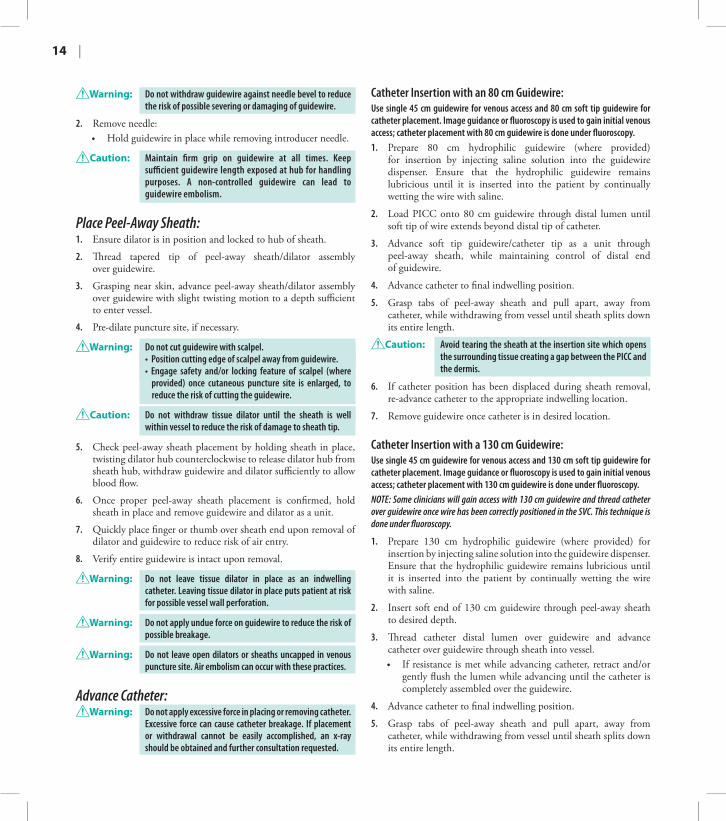
• Double numbering pattern (refer to Figure 24):
Tip
Hub
45�10 50�5
Figure 24
◊ First number designates centimeters from hub of catheter.
◊ Second number designates centimeters from tip of catheter.
◊ This double numbering pattern permits clinician to easily identify centimeters of catheter to be trimmed and also identifies centimeters of catheter remaining.
◊ Record both numbers.
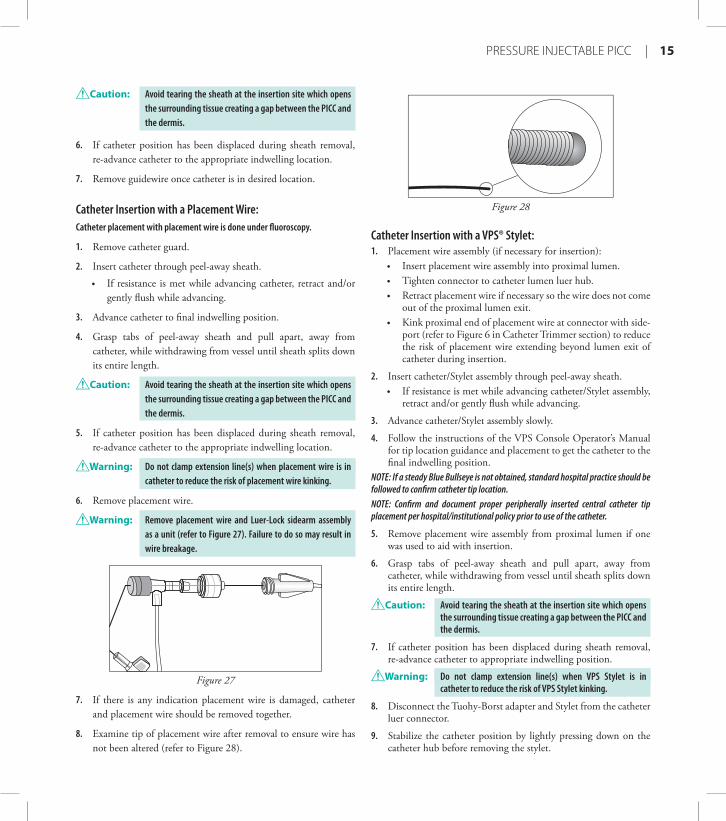
• Single numbering pattern (refer to Figure 25):
Tip505
Hub
Figure 25
◊ Number designates amount of catheter remaining.
4. Cut catheter straight across (90° to catheter cross-section) using the trimming device to maintain a blunt tip.
NOTE: There should be very limited resistance when cutting the catheter with supplied trimmer. Continued resistance is likely to be caused by the placement wire or VPS Stylet which has not been sufficiently retracted. If placement wire or VPS Stylet has not been retracted, do not use catheter, placement wire or VPS Stylet.
5. Inspect cut surface for clean cut and no loose material.
Warning: Do not cut placement wire or VPS Stylet when trimming catheter to reduce the risk of damage to placement wire or VPS Stylet, wire fragment or embolism.
Caution: Check that there is no wire in cut catheter segment after trimming the catheter. If there is any evidence that placement wire or VPS Stylet has been cut or damaged, the catheter, placement wire or VPS Stylet should not be used.
PRESSURE INJECTABLE PICC | 13
Flush Catheter:1. Use filter straw/filter needle to withdraw solution from
glass ampules.
2. Attach pre-filled saline syringe, if provided, or other syringe to sidearm and flush distal lumen with sterile saline solution. Leave syringe in place.
3. Flush remaining lumen(s) with sterile saline. Clamp or attach injection site cap(s) to extension line(s) to contain saline within lumen.
Prepare Catheter with VPS® Stylet for Insertion (where provided):1. Remove guard.
2. Advance the Stylet through the catheter. Visually inspect and ensure that the Stylet tip is intact and that the Stylet Console connector is not damaged. Do not use if Stylet appears damaged.
3. Position the Stylet in the catheter lumen so 1 mm extends beyond the tip of the catheter.
4. Firmly tighten the Tuohy-Borst adapter onto the catheter luer.
5. Holding the Stylet connector with one hand and the catheter end with the other hand, form a semi-circle with the Stylet and then extend to verify that the tip of the Stylet remains extended 1 mm beyond the tip of the catheter. If not, loosen the Tuohy-Borst adapter, adjust the Stylet and repeat until the Stylet extends 1 mm beyond the tip of the catheter.
6. Tighten Tuohy-Borst adapter valve securely.
7. If provided, adjust the marking device until it sits securely against the Tuohy-Borst adapter. Firmly tighten the marking device and ensure that it does not slip on the Stylet (refer to Figure 26). If the marking device is not preloaded on the stylet, use the provided permanent marker to mark the Stylet just behind the Tuohy-Borst adapter for reference.
Figure 26
8. Flush Stylet lumen: • Attach saline filled syringe to luer of side port adapter and
flush adapter and catheter. • Clamp side port extension and remove syringe.
9. Place the preloaded catheter onto the sterile field and ensure it stays in the sterile field.
NOTE: Maintain column of saline in contact with the Stylet for the duration of the procedure.
10. Connect the Stylet connector to the VPS Console.
Caution: Ensure that sterile technique is maintained. If needed, discard gloves and change to a new pair of sterile gloves after connecting the Stylet to the Console and completing the setup of the Console per the VPS Console Operator’s Manual.
Caution: Be careful that a tripping hazard is not created when the Stylet is connected to the Console. Tripping over the Stylet might cause malfunction of the Stylet, detachment of the Stylet connectors from the Console or injuries to the user.
11. If using the VPS G4 Device:• Attach Stylet Extension Cable (provided with VPS G4
Device) to front of Base Unit by aligning the red dots on the connectors.
• Connect the Stylet to the Stylet Extension Cable. Use the sterile bag provided (or a second sterile glove) to connect the non-sterile Stylet Extension Cable to the Stylet. The sterile sheath can be used to cover the Extension Cable.
12. Attach a sterile saline syringe to the sidearm of the Tuohy-Borst adapter and flush catheter while the VPS Console is on. Verify that a strong Doppler sound can be heard. Wait 20-30 seconds (2-3 ECG strips) to ensure appropriate ECG signal is observed.
Catheter Insertion Instructions1. Reapply tourniquet and replace sterile gloves.
2. Locate vein for insertion: • Use image guidance, if available. • An echogenic needle is included for access.
3. Insert introducer needle into vein.
4. Check for pulsatile flow.
Warning: Pulsatile flow is usually an indicator of inadvertent arterial puncture.
Caution: The color of blood observed is not always a reliable indicator of venous access.
Gain Initial Venous Access:Kits/Sets are available with a variety of guidewires. Guidewires are provided in different diameters, lengths, and tip configurations for specific insertion techniques. Become familiar with the guidewire(s) to be used with the specific technique chosen before beginning the actual PICC insertion procedure.
Image guidance or fluoroscopy may be used to gain initial venous access.
1. Insert soft tip of 33 cm or 45 cm guidewire through introducer needle into vein. Advance guidewire to desired depth.
Warning: Do not insert stiff end of guidewire into vessel as this may result in vessel damage.
Warning: Do not cut guidewire to alter length.
14 |
Warning: Do not withdraw guidewire against needle bevel to reduce the risk of possible severing or damaging of guidewire.
2. Remove needle: • Hold guidewire in place while removing introducer needle.
Caution: Maintain firm grip on guidewire at all times. Keep sufficient guidewire length exposed at hub for handling purposes. A non-controlled guidewire can lead to guidewire embolism.
Place Peel-Away Sheath:1. Ensure dilator is in position and locked to hub of sheath.
2. Thread tapered tip of peel-away sheath/dilator assembly over guidewire.
3. Grasping near skin, advance peel-away sheath/dilator assembly over guidewire with slight twisting motion to a depth sufficient to enter vessel.
4. Pre-dilate puncture site, if necessary.
Warning: Do not cut guidewire with scalpel. • Position cutting edge of scalpel away from guidewire. • Engage safety and/or locking feature of scalpel (where
provided) once cutaneous puncture site is enlarged, to reduce the risk of cutting the guidewire.
Caution: Do not withdraw tissue dilator until the sheath is well within vessel to reduce the risk of damage to sheath tip.
5. Check peel-away sheath placement by holding sheath in place, twisting dilator hub counterclockwise to release dilator hub from sheath hub, withdraw guidewire and dilator sufficiently to allow blood flow.
6. Once proper peel-away sheath placement is confirmed, hold sheath in place and remove guidewire and dilator as a unit.
7. Quickly place finger or thumb over sheath end upon removal of dilator and guidewire to reduce risk of air entry.
8. Verify entire guidewire is intact upon removal.
Warning: Do not leave tissue dilator in place as an indwelling catheter. Leaving tissue dilator in place puts patient at risk for possible vessel wall perforation.
Warning: Do not apply undue force on guidewire to reduce the risk of possible breakage.
Warning: Do not leave open dilators or sheaths uncapped in venous puncture site. Air embolism can occur with these practices.
Advance Catheter: Warning: Do not apply excessive force in placing or removing catheter.
Excessive force can cause catheter breakage. If placement or withdrawal cannot be easily accomplished, an x-ray should be obtained and further consultation requested.
Catheter Insertion with an 80 cm Guidewire:Use single 45 cm guidewire for venous access and 80 cm soft tip guidewire for catheter placement. Image guidance or fluoroscopy is used to gain initial venous access; catheter placement with 80 cm guidewire is done under fluoroscopy. 1. Prepare 80 cm hydrophilic guidewire (where provided)
for insertion by injecting saline solution into the guidewire dispenser. Ensure that the hydrophilic guidewire remains lubricious until it is inserted into the patient by continually wetting the wire with saline.
2. Load PICC onto 80 cm guidewire through distal lumen until soft tip of wire extends beyond distal tip of catheter.
3. Advance soft tip guidewire/catheter tip as a unit through peel-away sheath, while maintaining control of distal end of guidewire.
4. Advance catheter to final indwelling position.
5. Grasp tabs of peel-away sheath and pull apart, away from catheter, while withdrawing from vessel until sheath splits down its entire length.
Caution: Avoid tearing the sheath at the insertion site which opens the surrounding tissue creating a gap between the PICC and the dermis.
6. If catheter position has been displaced during sheath removal, re-advance catheter to the appropriate indwelling location.
7. Remove guidewire once catheter is in desired location.
Catheter Insertion with a 130 cm Guidewire:Use single 45 cm guidewire for venous access and 130 cm soft tip guidewire for catheter placement. Image guidance or fluoroscopy is used to gain initial venous access; catheter placement with 130 cm guidewire is done under fluoroscopy.NOTE: Some clinicians will gain access with 130 cm guidewire and thread catheter over guidewire once wire has been correctly positioned in the SVC. This technique is done under fluoroscopy.
1. Prepare 130 cm hydrophilic guidewire (where provided) for insertion by injecting saline solution into the guidewire dispenser. Ensure that the hydrophilic guidewire remains lubricious until it is inserted into the patient by continually wetting the wire with saline.
2. Insert soft end of 130 cm guidewire through peel-away sheath to desired depth.
3. Thread catheter distal lumen over guidewire and advance catheter over guidewire through sheath into vessel.• If resistance is met while advancing catheter, retract and/or
gently flush the lumen while advancing until the catheter is completely assembled over the guidewire.
4. Advance catheter to final indwelling position.
5. Grasp tabs of peel-away sheath and pull apart, away from catheter, while withdrawing from vessel until sheath splits down its entire length.
PRESSURE INJECTABLE PICC | 15
Caution: Avoid tearing the sheath at the insertion site which opens the surrounding tissue creating a gap between the PICC and the dermis.
6. If catheter position has been displaced during sheath removal, re-advance catheter to the appropriate indwelling location.
7. Remove guidewire once catheter is in desired location.
Catheter Insertion with a Placement Wire:Catheter placement with placement wire is done under fluoroscopy.
1. Remove catheter guard.
2. Insert catheter through peel-away sheath.
• If resistance is met while advancing catheter, retract and/or gently flush while advancing.
3. Advance catheter to final indwelling position.
4. Grasp tabs of peel-away sheath and pull apart, away from catheter, while withdrawing from vessel until sheath splits down its entire length.
Caution: Avoid tearing the sheath at the insertion site which opens the surrounding tissue creating a gap between the PICC and the dermis.
5. If catheter position has been displaced during sheath removal, re-advance catheter to the appropriate indwelling location.
Warning: Do not clamp extension line(s) when placement wire is in catheter to reduce the risk of placement wire kinking.
6. Remove placement wire.
Warning: Remove placement wire and Luer-Lock sidearm assembly as a unit (refer to Figure 27). Failure to do so may result in wire breakage.
Figure 27
7. If there is any indication placement wire is damaged, catheter and placement wire should be removed together.
8. Examine tip of placement wire after removal to ensure wire has not been altered (refer to Figure 28).
Figure 28
Catheter Insertion with a VPS® Stylet:1. Placement wire assembly (if necessary for insertion):
• Insert placement wire assembly into proximal lumen.• Tighten connector to catheter lumen luer hub. • Retract placement wire if necessary so the wire does not come
out of the proximal lumen exit.• Kink proximal end of placement wire at connector with side-
port (refer to Figure 6 in Catheter Trimmer section) to reduce the risk of placement wire extending beyond lumen exit of catheter during insertion.
2. Insert catheter/Stylet assembly through peel-away sheath.• If resistance is met while advancing catheter/Stylet assembly,
retract and/or gently flush while advancing.
3. Advance catheter/Stylet assembly slowly.
4. Follow the instructions of the VPS Console Operator’s Manual for tip location guidance and placement to get the catheter to the final indwelling position.
NOTE: If a steady Blue Bullseye is not obtained, standard hospital practice should be followed to confirm catheter tip location.NOTE: Confirm and document proper peripherally inserted central catheter tip placement per hospital/institutional policy prior to use of the catheter.
5. Remove placement wire assembly from proximal lumen if one was used to aid with insertion.
6. Grasp tabs of peel-away sheath and pull apart, away from catheter, while withdrawing from vessel until sheath splits down its entire length.
Caution: Avoid tearing the sheath at the insertion site which opens the surrounding tissue creating a gap between the PICC and the dermis.
7. If catheter position has been displaced during sheath removal, re-advance catheter to appropriate indwelling position.
Warning: Do not clamp extension line(s) when VPS Stylet is in catheter to reduce the risk of VPS Stylet kinking.
8. Disconnect the Tuohy-Borst adapter and Stylet from the catheter luer connector.
9. Stabilize the catheter position by lightly pressing down on the catheter hub before removing the stylet.
16 |
Warning: Slide clamp(s), where provided, may be inadvertently removed and aspirated by children or confused adults. In such situations, practitioners should remove slide clamp(s) when not in use.
4. Prepare insertion site per hospital/institutional dressing protocol.
Caution: Do not routinely apply prophylactic topical antimicrobial or antiseptic ointment or cream to the insertion site of peripheral venous catheters because of the potential risk to promote fungal infections and antimicrobial resistance.
5. Ensure insertion site is dry before applying dressing. Apply skin protectant as needed.
6. Secure catheter. Where provided, a catheter clamp and fastener, antimicrobial dressing, catheter stabilization device or adhesive strip may be used.
Warning: Do not attach catheter clamp and fastener (if provided and used) until either guidewire, placement wire or VPS Stylet is removed.
7. Assess placement of catheter tip in compliance with hospital/institutional protocol.
8. If a VPS Stylet was utilized, disconnect all three ECG electrodes from the ECG cable and remove the ECG electrodes from the patient to avoid the risk of incompatibility between the ECG electrodes and MRI.
DocumentationHospitals/Institutions must establish a permanent medical record that documents the entire procedure, based upon their policy, procedures, and Best Practices. The actual format can differ from institution to institution. Report any product defects/failures to organization risk management, manufacturers, and appropriate regulatory agencies.
Documentation generally includes (but is not limited to) the following information:• Device specifics:
• type, brand and lot number• length and size of Vascular Access Device (VAD)• internal/external catheter length• antimicrobial or not• whether catheter is trimmed
• Procedure specifics:• time out or procedural pause• informed consent, as required• date, time of insertion, insertion site, number and site
attempts, inserter’s identification• use of visualization and guidance technologies• site preparation and technique
• Patient assessment and response:• pertinent history, assessment, vital signs
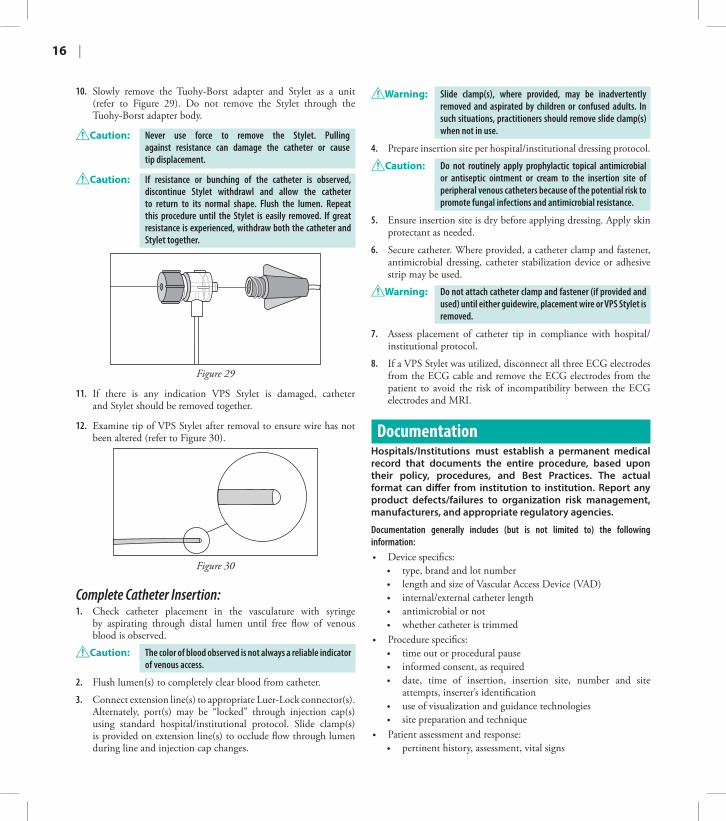
10. Slowly remove the Tuohy-Borst adapter and Stylet as a unit (refer to Figure 29). Do not remove the Stylet through the Tuohy-Borst adapter body.
Caution: Never use force to remove the Stylet. Pulling against resistance can damage the catheter or cause tip displacement.
Caution: If resistance or bunching of the catheter is observed, discontinue Stylet withdrawl and allow the catheter to return to its normal shape. Flush the lumen. Repeat this procedure until the Stylet is easily removed. If great resistance is experienced, withdraw both the catheter and Stylet together.
Figure 29
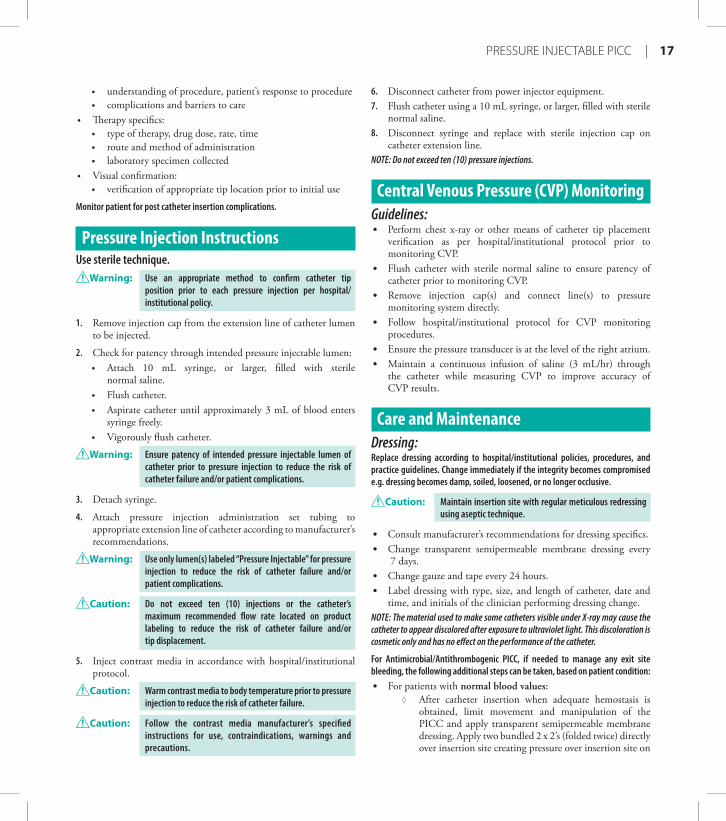
11. If there is any indication VPS Stylet is damaged, catheter and Stylet should be removed together.
12. Examine tip of VPS Stylet after removal to ensure wire has not been altered (refer to Figure 30).
Figure 30
Complete Catheter Insertion:1. Check catheter placement in the vasculature with syringe
by aspirating through distal lumen until free flow of venous blood is observed.
Caution: The color of blood observed is not always a reliable indicator of venous access.
2. Flush lumen(s) to completely clear blood from catheter.
3. Connect extension line(s) to appropriate Luer-Lock connector(s). Alternately, port(s) may be “locked” through injection cap(s) using standard hospital/institutional protocol. Slide clamp(s) is provided on extension line(s) to occlude flow through lumen during line and injection cap changes.
PRESSURE INJECTABLE PICC | 17
6. Disconnect catheter from power injector equipment.7. Flush catheter using a 10 mL syringe, or larger, filled with sterile
normal saline.8. Disconnect syringe and replace with sterile injection cap on
catheter extension line.NOTE: Do not exceed ten (10) pressure injections.
Central Venous Pressure (CVP) Monitoring Guidelines:• Perform chest x-ray or other means of catheter tip placement
verification as per hospital/institutional protocol prior to monitoring CVP.
• Flush catheter with sterile normal saline to ensure patency of catheter prior to monitoring CVP.
• Remove injection cap(s) and connect line(s) to pressure monitoring system directly.
• Follow hospital/institutional protocol for CVP monitoring procedures.
• Ensure the pressure transducer is at the level of the right atrium.• Maintain a continuous infusion of saline (3 mL/hr) through
the catheter while measuring CVP to improve accuracy of CVP results.
Care and MaintenanceDressing:Replace dressing according to hospital/institutional policies, procedures, and practice guidelines. Change immediately if the integrity becomes compromised e.g. dressing becomes damp, soiled, loosened, or no longer occlusive.
Caution: Maintain insertion site with regular meticulous redressing using aseptic technique.
• Consult manufacturer’s recommendations for dressing specifics.• Change transparent semipermeable membrane dressing every
7 days.• Change gauze and tape every 24 hours.• Label dressing with type, size, and length of catheter, date and
time, and initials of the clinician performing dressing change. NOTE: The material used to make some catheters visible under X-ray may cause the catheter to appear discolored after exposure to ultraviolet light. This discoloration is cosmetic only and has no effect on the performance of the catheter.
For Antimicrobial/Antithrombogenic PICC, if needed to manage any exit site bleeding, the following additional steps can be taken, based on patient condition:• For patients with normal blood values:
◊ After catheter insertion when adequate hemostasis is obtained, limit movement and manipulation of the PICC and apply transparent semipermeable membrane dressing. Apply two bundled 2 x 2’s (folded twice) directly over insertion site creating pressure over insertion site on
• understanding of procedure, patient’s response to procedure• complications and barriers to care
• Therapy specifics:• type of therapy, drug dose, rate, time• route and method of administration• laboratory specimen collected
• Visual confirmation: • verification of appropriate tip location prior to initial use
Monitor patient for post catheter insertion complications.
Pressure Injection InstructionsUse sterile technique.
Warning: Use an appropriate method to confirm catheter tip position prior to each pressure injection per hospital/institutional policy.
1. Remove injection cap from the extension line of catheter lumen to be injected.
2. Check for patency through intended pressure injectable lumen:• Attach 10 mL syringe, or larger, filled with sterile
normal saline.• Flush catheter.• Aspirate catheter until approximately 3 mL of blood enters
syringe freely.• Vigorously flush catheter.
Warning: Ensure patency of intended pressure injectable lumen of catheter prior to pressure injection to reduce the risk of catheter failure and/or patient complications.
3. Detach syringe.
4. Attach pressure injection administration set tubing to appropriate extension line of catheter according to manufacturer’s recommendations.
Warning: Use only lumen(s) labeled “Pressure Injectable” for pressure injection to reduce the risk of catheter failure and/or patient complications.
Caution: Do not exceed ten (10) injections or the catheter’s maximum recommended flow rate located on product labeling to reduce the risk of catheter failure and/or tip displacement.
5. Inject contrast media in accordance with hospital/institutional protocol.
Caution: Warm contrast media to body temperature prior to pressure injection to reduce the risk of catheter failure.
Caution: Follow the contrast media manufacturer’s specified instructions for use, contraindications, warnings and precautions.
18 |
top of transparent dressing. Apply sterile tape strip in a criss-cross X fashion to secure dressing in place, creating pressure over insertion site. Remove 2 x 2 dressings from top of transparent dressing in 24 hours and inspect dressing and change per hospital/institutional protocol.
• For patients with low platelet count (<100), high INR (>3), or participating in strenuous activity such as over the bed trapeze or using a walker:
◊ After catheter insertion when adequate hemostasis is obtained, limit movement and manipulation of the PICC and apply two bundled 2 x 2’s (folded twice) directly over insertion site on top of antimicrobial dressing (if provided) and secure with sterile tape strips. Apply transparent semipermeable membrane dressing, creating pressure over insertion site. Cover site with two to three 2 x 2’s (folded twice), then secure with tape in a criss-cross X fashion, which will provide compression and support over insertion site. Avoid circumferential dressing on extremity. Remove 2 x 2 dressings from top of transparent dressing in 24 hours and inspect dressing and change per hospital/institutional protocol.
Caution: Avoid using elastic dressing material less than 2 inches wide which may create a tourniquet effect. Pressurized dressing should not inhibit arterial flow. Assess for adequate tissue perfusion distal to dressing at established intervals assessing for any venous compromise.
Catheter Patency:Maintain peripherally inserted central catheter patency in accordance with hospital/institutional policies, procedures and practice guidelines. All personnel who care for patients with peripherally inserted central catheters must be knowledgeable about effective management to prolong catheter’s dwell time and prevent injury.
Caution: Perform hand hygiene: • before and immediately after all clinical procedures • before donning and after removal of gloves
• Solution and frequency of flushing a venous access catheter should be established in hospital/institutional policy.
• Establish and maintain catheter patency by:• flushing intermittently via syringe with heparinized saline or
preservative-free 0.9% sodium chloride (USP)• continuous drip• positive or neutral pressure device
• The amount of heparin depends on:• physician preference• hospital/institutional protocol• patient condition
Caution: Assess patient for sensitivity if heparin will be used for flushing. Heparin-Induced Thrombocytopenia (HIT) has been reported with the use of heparin flush solutions.
• Per the Infusion Nurses Society, the recommended volume of flush solution should be a minimum of twice the internal volume of the catheter system; however, a larger volume may be needed after blood sampling or blood transfusion procedures. If twice the internal volume of the catheter system is less than 5 mL, a flushing volume of at least 5 mL is recommended.
NOTE: Catheter priming volumes are printed on product packaging.
Warning: Open catheter clamp prior to infusion through lumen to reduce the risk of damage to extension line from excessive pressure.
• When using any peripherally inserted central catheter for intermittent infusion therapy, proper flushing with heparinized saline or preservative-free 0.9% sodium chloride (USP) using a positive-pressure flushing technique may help prevent occlusion. Neutral as well as positive displacement valve systems have also been shown to help prevent occlusion.
• Properly cleanse all injection caps or needleless connectors with an appropriate antiseptic before being accessed.
• The SASH or SAS method of flushing will help eliminate occlusions due to incompatible solutions:
• Saline • Administer drug • Saline • Heparin (if used)
Catheter Removal Instructions1. Perform PICC removal:
• following order of authorized prescriber • in accordance with hospital/institutional policies, procedures,
and practice guidelines
2. Remove PICC immediately upon patient assessment for:• suspected contamination i.e. when catheters are inserted
during a medical emergency or if adherence to aseptic technique cannot be ensured
• unresolved complication(s)• discontinuation of therapy• source of infection
Caution: Do not use guidewire techniques to replace catheters in patients suspected of having catheter-related infection.
3. Place patient in supine position, as clinically indicated, to reduce the risk of potential air embolism.
4. Remove dressing.
Warning: Do not use scissors to remove dressing to reduce the risk of cutting the catheter.
5. Remove sutures or open catheter stabilization device retainer wings and remove catheter from catheter stabilization device posts.
PRESSURE INJECTABLE PICC | 19
6. Apply alcohol swab to catheter stabilization device adhesive and gently lift pad off of skin (if applicable).
7. Place sterile gauze pad over insertion site and catheter.
8. Remove catheter by slowly pulling it parallel to skin. If resistance is met when removing the catheter, catheter should not be forcibly removed and the physician should be notified.
Warning: Do not apply excessive force in placing or removing the catheter. Excessive force can cause catheter breakage. If placement or withdrawal cannot be easily accomplished, an x-ray should be obtained and further consultation requested.
9. Apply direct pressure to site until hemostasis is achieved.
10. Upon removal of catheter:• measure and inspect • ensure entire catheter length has been removed
11. Apply antiseptic ointment to insertion site. Dress insertion site. Assess site every 24 hours until site is epithelialized.
Warning: Residual catheter track remains an air entry point until completely sealed; occlusive dressings should remain in place for at least 24 to 72 hours dependent upon amount of time catheter was indwelling.
12. Document catheter removal procedure on patient’s chart per hospital/institutional protocol.
Include:
• catheter condition• length of catheter removed• patient’s tolerance of the procedure• any nursing interventions needed for removal
For reference information concerning patient assessment, clinical education, potential complications, and specific techniques for this procedure, consult standard textbooks, medical literature, and Arrow International, Inc. website: www.arrowvascular.com
B-35552-101A, Rev. 1 (6/14)
2400 Bernville Road Reading, PA 19605 USA
1-800-523-8446 | 1-610-378-0131www.arrowvascular.com
Teleflex Medical IDA Business and Technology Park Dublin Road, Athlone, Co. Westmeath, Ireland