Practical Docker with Python - بهروز منصوریbmansoori.ir/book/Practical Docker with...
195
Practical Docker with Python Build, Release and Distribute your Python App with Docker — Sathyajith Bhat
Transcript of Practical Docker with Python - بهروز منصوریbmansoori.ir/book/Practical Docker with...
Practical Docker with Python
Build, Release and Distribute your Python App with Docker—Sathyajith Bhat

Practical Docker with Python
Build, Release and Distribute your Python App with Docker
Sathyajith Bhat
Practical Docker with Python
ISBN-13 (pbk): 978-1-4842-3783-0 ISBN-13 (electronic): 978-1-4842-3784-7https://doi.org/10.1007/978-1-4842-3784-7
Library of Congress Control Number: 2018952361
Copyright © 2018 by Sathyajith Bhat
This work is subject to copyright. All rights are reserved by the Publisher, whether the whole or part of the material is concerned, specifically the rights of translation, reprinting, reuse of illustrations, recitation, broadcasting, reproduction on microfilms or in any other physical way, and transmission or information storage and retrieval, electronic adaptation, computer software, or by similar or dissimilar methodology now known or hereafter developed.
Trademarked names, logos, and images may appear in this book. Rather than use a trademark symbol with every occurrence of a trademarked name, logo, or image we use the names, logos, and images only in an editorial fashion and to the benefit of the trademark owner, with no intention of infringement of the trademark.
The use in this publication of trade names, trademarks, service marks, and similar terms, even if they are not identified as such, is not to be taken as an expression of opinion as to whether or not they are subject to proprietary rights.
While the advice and information in this book are believed to be true and accurate at the date of publication, neither the authors nor the editors nor the publisher can accept any legal responsibility for any errors or omissions that may be made. The publisher makes no warranty, express or implied, with respect to the material contained herein.
Managing Director, Apress Media LLC: Welmoed SpahrAcquisitions Editor: Nikhil KarkalDevelopment Editor: Matthew MoodieCoordinating Editor: Divya Modi
Cover designed by eStudioCalamar
Cover image designed by Freepik (www.freepik.com)
Distributed to the book trade worldwide by Springer Science+Business Media New York, 233 Spring Street, 6th Floor, New York, NY 10013. Phone 1-800-SPRINGER, fax (201) 348-4505, e-mail [email protected], or visit www.springeronline.com. Apress Media, LLC is a California LLC and the sole member (owner) is Springer Science + Business Media Finance Inc (SSBM Finance Inc). SSBM Finance Inc is a Delaware corporation.
For information on translations, please e-mail [email protected], or visit http://www.apress.com/rights-permissions.
Apress titles may be purchased in bulk for academic, corporate, or promotional use. eBook versions and licenses are also available for most titles. For more information, reference our Print and eBook Bulk Sales web page at http://www.apress.com/bulk-sales.
Any source code or other supplementary material referenced by the author in this book is available to readers on GitHub via the book's product page, located at www.apress.com/978-1-4842-3783-0. For more detailed information, please visit http://www.apress.com/source-code.
Printed on acid-free paper
Sathyajith BhatBangalore, Karnataka, India

To my parents, Jayakar and Jyothika Bhat, who have unconditionally supported me
throughout my entire life.
v
About the Author ���������������������������������������������������������������������������������ix
About the Technical Reviewer �������������������������������������������������������������xi
Acknowledgments �����������������������������������������������������������������������������xiii
Introduction ���������������������������������������������������������������������������������������xv
Table of Contents
Chapter 1: Introduction to Containerization ����������������������������������������1
What Is Docker? ����������������������������������������������������������������������������������������������������1
Docker the Company ���������������������������������������������������������������������������������������1
Docker the Software Technology ���������������������������������������������������������������������2
Understanding Problems that Docker Solves ��������������������������������������������������2
Containerization Through the Years ����������������������������������������������������������������������4
1979 : chroot ����������������������������������������������������������������������������������������������������4
2000 : FreeBSD Jails ����������������������������������������������������������������������������������������4
2005 : OpenVZ ��������������������������������������������������������������������������������������������������4
2006 : cgroups ��������������������������������������������������������������������������������������������������5
2008 : LXC���������������������������������������������������������������������������������������������������������5
Knowing the Difference Between Containers and Virtual Machines ���������������������5
Summary���������������������������������������������������������������������������������������������������������������8
Chapter 2: Docker 101 ��������������������������������������������������������������������������9
Installing Docker ���������������������������������������������������������������������������������������������������9
Installing Docker on Windows �����������������������������������������������������������������������10
Installing on MacOS ���������������������������������������������������������������������������������������12
vi
Installing on Linux �����������������������������������������������������������������������������������������13
Understanding Jargon Around Docker �����������������������������������������������������������16
Hands-On Docker ������������������������������������������������������������������������������������������24
Summary �������������������������������������������������������������������������������������������������������38
Chapter 3: Building the Python App����������������������������������������������������39
About the Project ������������������������������������������������������������������������������������������������39
Setting Up Telegram Messenger ��������������������������������������������������������������������40
BotFather: Telegram’s Bot Creation Interface ������������������������������������������������42
Newsbot: The Python App ������������������������������������������������������������������������������46
Summary �������������������������������������������������������������������������������������������������������51
Chapter 4: Understanding the Dockerfile��������������������������������������������53
Dockerfile ������������������������������������������������������������������������������������������������������������53
Build Context �������������������������������������������������������������������������������������������������54
Dockerignore �������������������������������������������������������������������������������������������������55
Building Using Docker Build ��������������������������������������������������������������������������56
Dockerfile Instructions ����������������������������������������������������������������������������������59
Guidelines and Recommendations for Writing Dockerfiles ���������������������������79
Multi-Stage Builds �����������������������������������������������������������������������������������������80
Dockerfile Exercises ��������������������������������������������������������������������������������������81
Summary �������������������������������������������������������������������������������������������������������89
Chapter 5: Understanding Docker Volumes ����������������������������������������91
Data Persistence �������������������������������������������������������������������������������������������������91
Example of Data Loss Within Docker Container���������������������������������������������92
Docker Volume Exercises ����������������������������������������������������������������������������107
Summary �����������������������������������������������������������������������������������������������������118
Table of ConTenTsTable of ConTenTs
vii
Chapter 6: Understanding Docker Networks ������������������������������������119
Why Do We Need Container Networking? ���������������������������������������������������������119
Default Docker Network Drivers ������������������������������������������������������������������120
Working with Docker Networks �������������������������������������������������������������������123
Docker Networking Exercises ���������������������������������������������������������������������������142
Summary�����������������������������������������������������������������������������������������������������������150
Chapter 7: Understanding Docker Compose �������������������������������������151
Overview of Docker Compose ���������������������������������������������������������������������������151
Installing Docker Compose ��������������������������������������������������������������������������153
Docker Compose Basics ������������������������������������������������������������������������������154
Docker Compose File Reference �����������������������������������������������������������������159
Docker Compose CLI Reference ������������������������������������������������������������������166
Docker Volume Exercises ����������������������������������������������������������������������������167
Summary �����������������������������������������������������������������������������������������������������182
Index �������������������������������������������������������������������������������������������������183
Table of ConTenTsTable of ConTenTs
ix
About the Author
Sathyajith Bhat is a seasoned DevOps/SRE
professional currently working as a DevOps
engineer on Adobe I/O, which is Adobe’s
developer ecosystem and community. Prior
to this, he was the lead Ops/SRE at Styletag.
com. He transitioned to Ops/SRE after being
a lead analyst at CGI, working primarily on
Oracle Fusion stack (Oracle DB/PL/SQL/
Oracle Forms and other related middleware)
designing, architecting, and implementing complete end-to-end solutions
for a major insurance provider in the Nordics.
In his free time, Sathya is part of the Barcamp Bangalore planning team,
handling DevOps and Social Media for BCB. Sathya is also a co-organizer
of the AWS Users Group Bangalore, organizing monthly meetups and
workshops and occasionally speaking at them. He is also a volunteer
Community Moderator at Super User and Web Apps Stack Exchange,
keeps the servers for the Indian Video Gamer forums up and running, and
was previously a moderator for Chip-India and Tech 2 forums.
You can reach out to Sathya from these links:
Email: [email protected]
Blog: https://sathyasays.com
Twitter: https://twitter.com/sathyabhat
LinkedIn: https://linkedin.com/in/sathyabhat
xi
About the Technical Reviewer
Swapnil Kulkarni is a cloud architect and
open source enthusiast with experience in
Blockchain, cloud native solutions, containers,
and enterprise software product architectures.
He has diverse experiences in different private,
hybrid cloud architectures with Amazon Web
Services, Azure, OpenStack, CloudStack, and
IBM Cloud, to name a few. He is an Active
Technology Contributor (ATC) in OpenStack,
spanning across multiple projects. He’s also
core reviewer in the OpenStack Kolla and
OpenStack Requirements Project. He has contributed to different open
source communities, including OpenStack, Docker, and Kubernetes,
and has multiple upcoming open source platforms for containerization.
Swapnil has also presented at multiple OpenStack summits—LinuxCon
and ContainerCon to name a few. Swapnil shares his tech views and
experiments on his blog mentioned here. He is also a technical reviewer
for multiple publication houses in emerging technologies and has a
passion for learning and implementing different concepts. You can reach
out to him via email or connect with him on his social media handles.
Email: [email protected]
Blog: https://cloudnativetech.wordpress.com
Twitter: https://twitter.com/coolsvap
LinkedIn: https://www.linkedin.com/in/coolsvap
xiii
Acknowledgments
Thank you to my wife, Jyothsna, for being patient and supporting me in my
career and while writing this book.
I would like to thank Nikhil Karkal, Siddhi Chavan, and Divya Modi
from Apress for helping me immensely through all stages of the book.
I would like to thank my technical reviewer, Swapnil Kulkarni, for
providing pertinent feedback.
I would also like to acknowledge the immense support provided by
Saurabh Minni, Ninad Pundalik, Prashanth H. N., Mrityunjay Iyer, and
Abhijith Gopal over the past couple of years.
xv
Introduction
Docker has exploded in popularity and has become the de facto target as a
containerization image format as well as a containerization runtime. With
modern applications getting more and more complicated, the increased
focus on microservices has led to adoption of Docker, as it allows for
applications along with their dependencies to be packaged into a file as
a container that can run on any system. This allows for faster turnaround
times in application deployment and less complexity and it negates the
chances of the “it-works-on-my-server-but-not-on-yours” problem.
Practical Docker with Python covers the fundamentals of
containerization, gets you acquainted with Docker, breaks down
terminology like Dockerfile and Docker Volumes, and takes you on
a guided tour of building a chatbot using Python. You’ll learn how to
package a traditional application as a Docker Image.
Book StructureThis book is divided into seven chapters—we start the first chapter with
a brief introduction to Docker and containerization. We then take a 101
class of Docker, including installing, configuring, and understanding some
Docker jargon. In Chapter 3, we take a look at our project and look at how
to configure our chatbot.
In Chapters 4 to 6, we dive into the meat of Docker, focusing on
Dockerfiles, Docker Networks, and Docker Volumes. These chapters
include practical exercises on how to incorporate each of these into the
project. Finally, we take a look at Docker Compose and see how we can
run multi-container applications.
1© Sathyajith Bhat 2018 S. Bhat, Practical Docker with Python, https://doi.org/10.1007/978-1-4842-3784-7_1
CHAPTER 1
Introduction to ContainerizationIn this chapter, we look at what Docker is, as well as what containerization
is and how it is different from virtualization.
What Is Docker?When we answer this question, we need to clarify the word “docker,”
because Docker has become synonymous with containers.
Docker the CompanyDocker Inc. is the company behind Docker. Docker Inc. was founded
as dotCloud Inc. in 2010 by Solomon Hykes. dotCloud engineers built
abstraction and tooling for Linux Containers and used the Linux Kernel
features cgroups and namespaces with the intention of reducing
complexity around using Linux containers. dotCloud made their tooling
open source and changed the focus from the PaaS business to focus on
containerization. Docker Inc. sold dotCloud to cloudControl, which
eventually filed for bankruptcy.
2
Docker the Software TechnologyDocker is the technology that provides for operating system level
virtualization known as containers. It is important to note that this is
not the same as hardware virtualization. We will explore this later in the
chapter. Docker uses the resource isolation features of the Linux kernel
such as cgroups, kernel namespaces, and OverlayFS, all within the same
physical or virtual machine. OverlayFS is a union-capable filesystem that
combines several files and directories into one in order to run multiple
applications that are isolated and contained from one other, all within the
same physical or virtual machine.
Understanding Problems that Docker SolvesFor the longest period, setting up a developer’s workstation was a highly
troublesome task for sysadmins. Even with complete automation of the
installation of developer tools, when you have a mix of different operating
systems, different versions of operating systems, and different versions
of libraries and programming languages, setting up a workspace that is
consistent and provides a uniform experience is nearly impossible. Docker
solves much of this problem by reducing the moving parts. Instead of
targeting operating systems and programming versions, the target is now
the Docker engine and the runtime. The Docker engine provides a uniform
abstraction from the underlying system, making it very easy for developers
to test their code
Things get even more complicated on the production landscape.
Assume that we have a Python web application that is running on
Python 2.7 on Amazon Web Services EC2 instance. In an effort to
modernize the codebase, the application had some major upgrades,
including a change in Python version from 2.7 to version 3.5. Assume that
this version of Python is not available in the packages offered by the Linux
Chapter 1 IntroduCtIon to ContaInerIzatIon
3
distribution currently running the existing codebases. Now to deploy this
new application, we have the choice of either of the following:
• Replace the existing instance
• Set up the Python Interpreter by
• Changing the Linux distribution version to one that
includes the newer Python packages
• Adding a third-party channel that offers a packaged
version of the newer Python version
• Doing an in-place upgrade, keeping the existing
version of the Linux distribution
• Compiling Python 3.5 from sources, which brings
in additional dependencies
• Or using something like virtualenv, which has its
own set of tradeoffs
Whichever way you look at it, a new version deployment for
application code brings about lots of uncertainty. As an operations
engineer, limiting the changes to the configuration is critical. Factoring
in an operating system change, a Python version change, and a change in
application code results in a lot of uncertainty.
Docker solves this issue by dramatically reducing the surface area of
the uncertainty. Your application is being modernized? No problem. Build
a new container with the new application code and dependencies and
ship it. The existing infrastructure remains the same. If the application
doesn’t behave as expected, then rolling back is as simple as redeploying
the older container—it is not uncommon to have all the generated Docker
images stored in a Docker registry. Having an easy way to roll back without
messing with the current infrastructure dramatically reduces the time
required to respond to failures.
Chapter 1 IntroduCtIon to ContaInerIzatIon

4
Containerization Through the YearsWhile containerization has picked up in pace and has exploded in
popularity over the past couple of years, the concept of containerization
goes back to the 1970s.
1979: chrootThe chroot system call was introduced in Version 7 UNIX in 1979. The
premise of chroot was that it changed the apparent root directory for
the current running process and its children. A process initiated within
a chroot cannot access files outside the assigned directory tree. This
environment was known as the chroot jail.
2000: FreeBSD JailsExpanding on the chroot concept, FreeBSD added support for a
feature that allowed for partitioning of the FreeBSD system into several
independent, isolated systems called jails. Each jail is a virtual environment
on the host system with its own set of files, processes, and user accounts.
While chroot only restricted processes to a view of the filesystem, FreeBSD
jails restricted activities of the jailed process to the whole system, including
the IP addresses that were bound to it. This made FreeBSD jails the ideal
way to test out new configurations of Internet-connected software, making
it easy to experiment with different configurations while not allowing for
changes from the jail to affect the main system outside.
2005: OpenVZOpenVZ was quite popular in providing operating system virtualization
for low-end Virtual Private Server (VPS) providers. OpenVZ allowed for a
physical server to run multiple isolated operating system instances, known
Chapter 1 IntroduCtIon to ContaInerIzatIon
5
as containers. OpenVZ uses a patched Linux kernel, sharing it with all the
containers. Each container acts as a separate entity and has its own virtualized
set of files, users, groups, process trees, and virtual network devices.
2006: cgroupsOriginally known as process containers, cgroups (short for control groups)
was started by Google engineers. cgroups is a Linux kernel feature that
limits and isolates resource usage (such as CPU, memory, disk I/O, and
network) to a collection of processes. cgroups have been redesigned
multiple times, each redesign accounting for its growing number of use
cases and required features.
2008: LXCLXC provides operating-system level virtualization by combining Linux
kernel’s cgroups and support for isolated namespaces to provide an
isolated environment for applications. Docker initially used LXC for
providing the isolation features, but then switched to its own library.
Knowing the Difference Between Containers and Virtual MachinesMany people assume that since containers isolate the applications, they
are the same as virtual machines. At first glance it looks like it, but the
fundamental difference is that containers share the same kernel as the host.
Docker only isolates a single process (or a group of processes,
depending on how the image is built) and all the containers run on the
same host system. Since the isolation is applied at the kernel level, running
containers does not impose a heavy overhead on the host as compared
to virtual machines. When a container is spun up, the selected process
Chapter 1 IntroduCtIon to ContaInerIzatIon
6
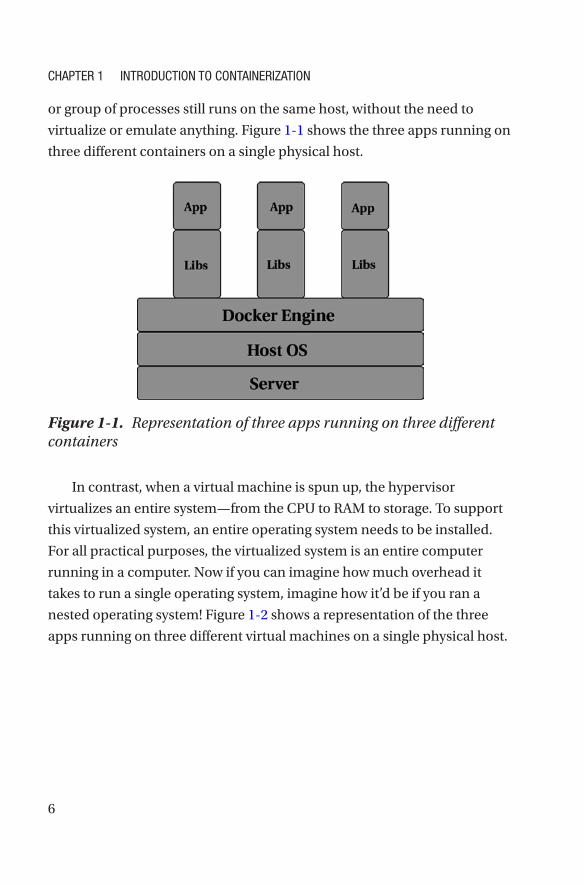
or group of processes still runs on the same host, without the need to
virtualize or emulate anything. Figure 1-1 shows the three apps running on
three different containers on a single physical host.
In contrast, when a virtual machine is spun up, the hypervisor
virtualizes an entire system—from the CPU to RAM to storage. To support
this virtualized system, an entire operating system needs to be installed.
For all practical purposes, the virtualized system is an entire computer
running in a computer. Now if you can imagine how much overhead it
takes to run a single operating system, imagine how it’d be if you ran a
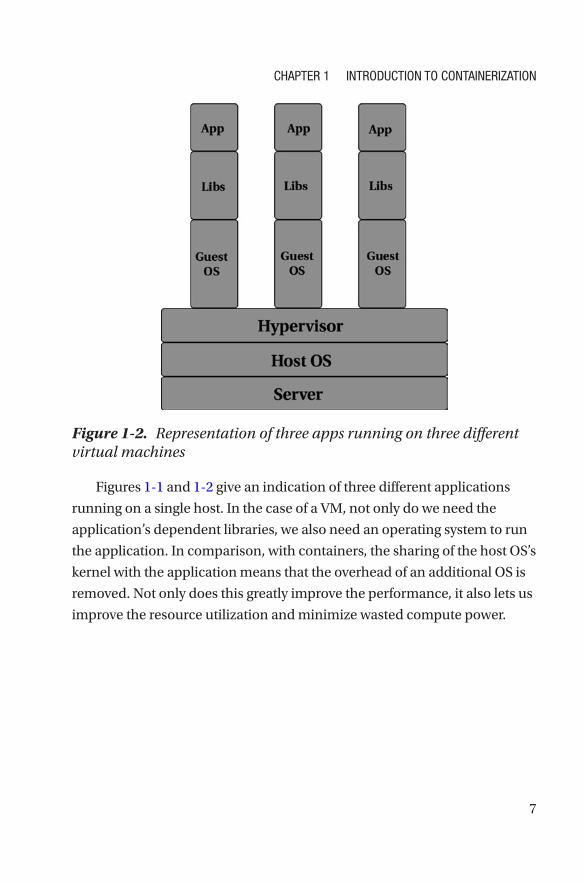
nested operating system! Figure 1-2 shows a representation of the three
apps running on three different virtual machines on a single physical host.
Figure 1-1. Representation of three apps running on three different containers
Chapter 1 IntroduCtIon to ContaInerIzatIon
7
Figures 1-1 and 1-2 give an indication of three different applications
running on a single host. In the case of a VM, not only do we need the
application’s dependent libraries, we also need an operating system to run
the application. In comparison, with containers, the sharing of the host OS’s
kernel with the application means that the overhead of an additional OS is
removed. Not only does this greatly improve the performance, it also lets us
improve the resource utilization and minimize wasted compute power.
Figure 1-2. Representation of three apps running on three different virtual machines
Chapter 1 IntroduCtIon to ContaInerIzatIon
8
SummaryIn this chapter, you learned a bit about Docker the company, Docker
Containers, and containers compared to virtual machines. You also
learned a bit about the real-world problems that containers are trying
to solve. In the upcoming chapter, you take an introductory tour of
Docker and run a couple of hands-on sessions on building and running
containers.
Chapter 1 IntroduCtIon to ContaInerIzatIon
9© Sathyajith Bhat 2018 S. Bhat, Practical Docker with Python, https://doi.org/10.1007/978-1-4842-3784-7_2
CHAPTER 2
Docker 101Now that you understand what Docker is and why its popularity has
exploded, this chapter covers some basics about the different terminology
associated with Docker. In this chapter, you will learn how to install Docker
and learn Docker terms such as images, containers, Dockerfiles, and
Docker Compose. You will also work with some simple Docker commands
for creating, running, and stopping Docker containers.
Installing DockerDocker supports Linux, MacOS, and Windows platforms. It’s
straightforward to install Docker on most platforms and we’ll get to that
in a bit. Docker Inc. provides Community and Enterprise editions of
the Docker platform. The Enterprise edition has the same features as
the Community edition, but it provides additional support and certified
containers, plugins, and infrastructure. For the purpose of this book and
for most general development and production use, the Community edition
is suitable, thus we will be using that in this book.

10
Installing Docker on WindowsYou need to meet certain prerequisites before you can install Docker on
Windows. These include the following:
• Hyper-V support
• Hardware virtualization support, typically be enabled
from your system BIOS
• Only 64-bit editions of Windows 10 (Pro/Education/
Enterprise editions having the Anniversary Update
v1607) are supported at the moment
Notice that this looks like what a virtualization setup would require,
and you learned in the previous chapter that Docker is not virtualization.
So why does Docker for Windows require features required for
virtualization?
The short answer is that Docker relies on numerous features, such as
namespaces and cgroups, and these are not available on Windows. To get
around this limitation, Docker for Windows creates a lightweight Hyper-V
container running a Linux kernel.
At the time of writing, Docker includes experimental support for Native
containers that allow for creation of containers without the need for Hyper-V.
Let’s focus on installing Docker CE for Windows. This section assumes
that all prerequisites have been met and that Hyper-V is enabled. Head
over to https://store.docker.com/editions/community/docker-ce-
desktop-windows to download Docker CE.
Note Make sure you select the Stable channel and click on the Get Docker CE button.
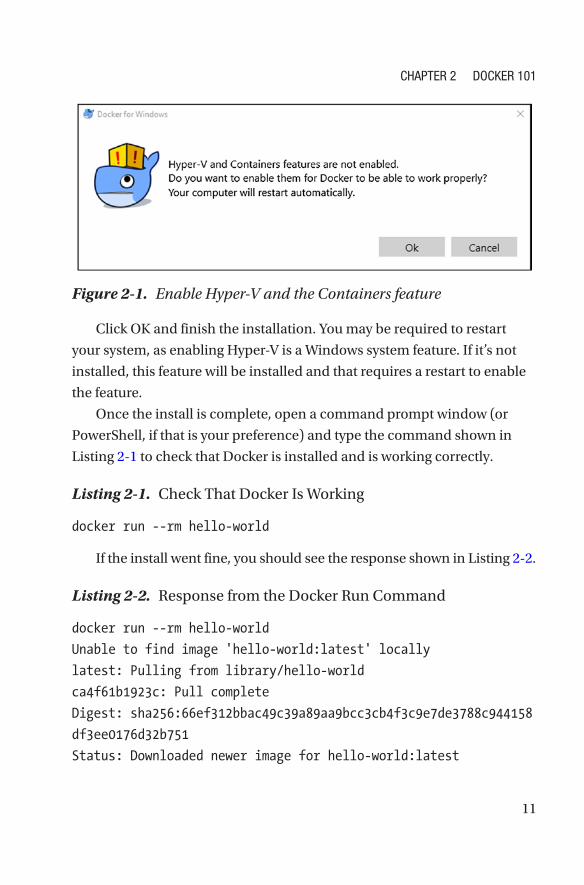
You may be prompted to enable Hyper-V and container support as part
of the install, as shown in Figure 2-1.
ChaptEr 2 DoCkEr 101
11
Click OK and finish the installation. You may be required to restart
your system, as enabling Hyper-V is a Windows system feature. If it’s not
installed, this feature will be installed and that requires a restart to enable
the feature.
Once the install is complete, open a command prompt window (or
PowerShell, if that is your preference) and type the command shown in
Listing 2-1 to check that Docker is installed and is working correctly.
Listing 2-1. Check That Docker Is Working
docker run --rm hello-world
If the install went fine, you should see the response shown in Listing 2-2.
Listing 2-2. Response from the Docker Run Command
docker run --rm hello-world
Unable to find image 'hello-world:latest' locally
latest: Pulling from library/hello-world
ca4f61b1923c: Pull complete
Digest: sha256:66ef312bbac49c39a89aa9bcc3cb4f3c9e7de3788c944158
df3ee0176d32b751
Status: Downloaded newer image for hello-world:latest
Figure 2-1. Enable Hyper-V and the Containers feature
ChaptEr 2 DoCkEr 101
12
Hello from Docker!
This message shows that your installation appears to be working
correctly.
...
We will take a deeper look later into what the commands mean, so do
not worry about understanding them. If we see the message "Installation
appears to be working correctly", you should be good for now.
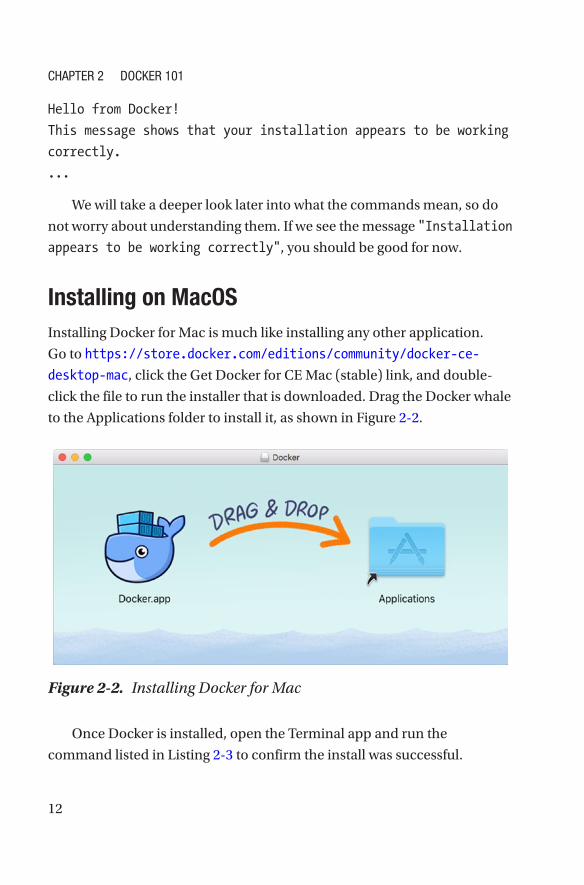
Installing on MacOSInstalling Docker for Mac is much like installing any other application.
Go to https://store.docker.com/editions/community/docker-ce-
desktop-mac, click the Get Docker for CE Mac (stable) link, and double-
click the file to run the installer that is downloaded. Drag the Docker whale
to the Applications folder to install it, as shown in Figure 2-2.
Once Docker is installed, open the Terminal app and run the
command listed in Listing 2-3 to confirm the install was successful.
Figure 2-2. Installing Docker for Mac
ChaptEr 2 DoCkEr 101
13
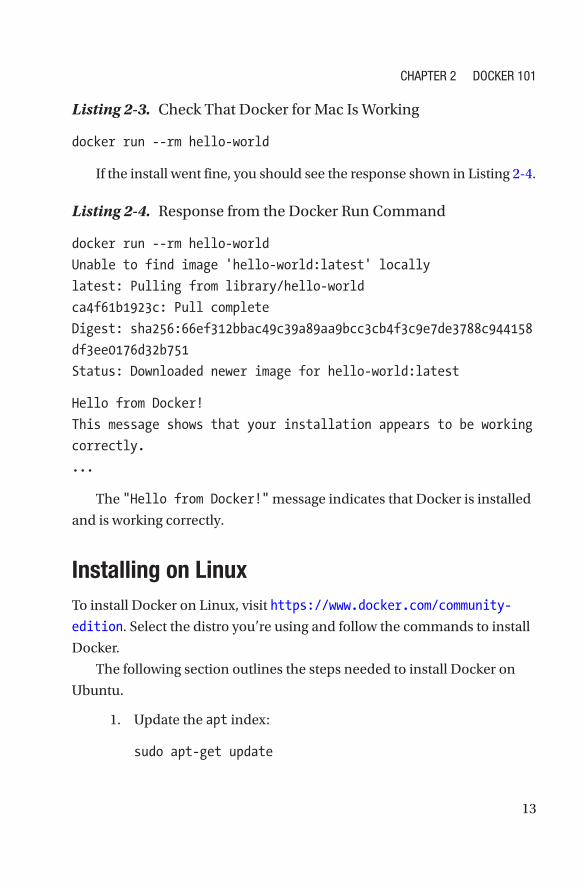
Listing 2-3. Check That Docker for Mac Is Working
docker run --rm hello-world
If the install went fine, you should see the response shown in Listing 2-4.
Listing 2-4. Response from the Docker Run Command
docker run --rm hello-world
Unable to find image 'hello-world:latest' locally
latest: Pulling from library/hello-world
ca4f61b1923c: Pull complete
Digest: sha256:66ef312bbac49c39a89aa9bcc3cb4f3c9e7de3788c944158
df3ee0176d32b751
Status: Downloaded newer image for hello-world:latest
Hello from Docker!
This message shows that your installation appears to be working
correctly.
...
The "Hello from Docker!" message indicates that Docker is installed
and is working correctly.
Installing on LinuxTo install Docker on Linux, visit https://www.docker.com/community-
edition. Select the distro you’re using and follow the commands to install
Docker.
The following section outlines the steps needed to install Docker on
Ubuntu.
1. Update the apt index:
sudo apt-get update
ChaptEr 2 DoCkEr 101
14
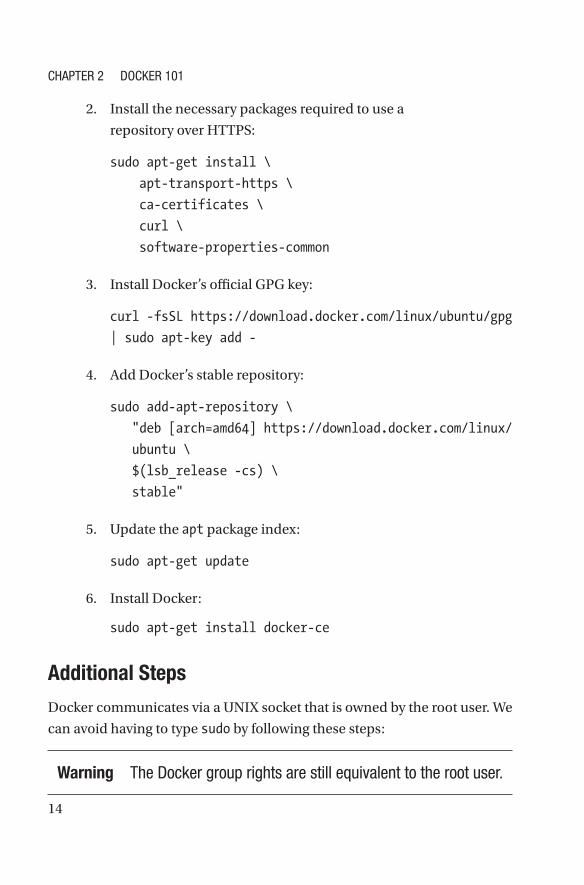
2. Install the necessary packages required to use a
repository over HTTPS:
sudo apt-get install \
apt-transport-https \
ca-certificates \
curl \
software-properties-common
3. Install Docker’s official GPG key:
curl -fsSL https://download.docker.com/linux/ubuntu/gpg
| sudo apt-key add -
4. Add Docker’s stable repository:
sudo add-apt-repository \
"deb [arch=amd64] https://download.docker.com/linux/
ubuntu \
$(lsb_release -cs) \
stable"
5. Update the apt package index:
sudo apt-get update
6. Install Docker:
sudo apt-get install docker-ce
Additional Steps
Docker communicates via a UNIX socket that is owned by the root user. We
can avoid having to type sudo by following these steps:
Warning the Docker group rights are still equivalent to the root user.
ChaptEr 2 DoCkEr 101
15
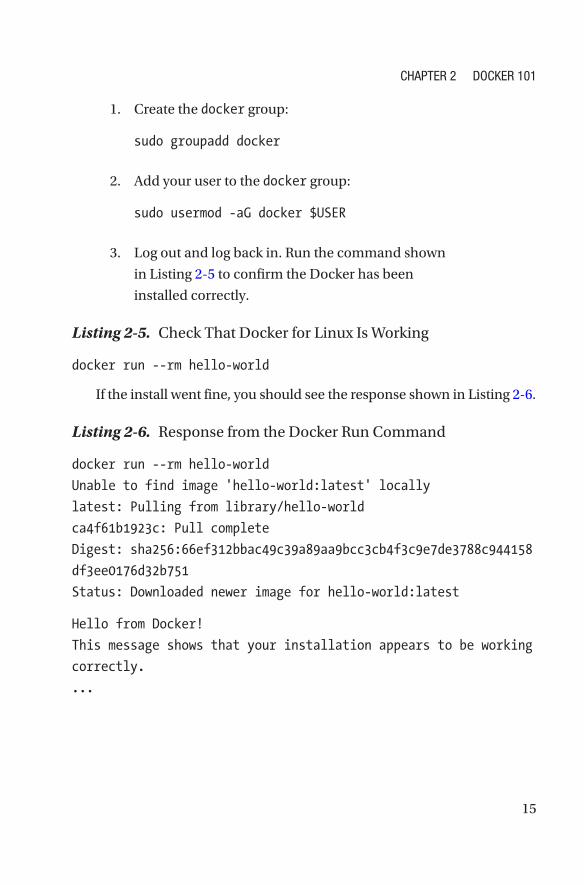
1. Create the docker group:
sudo groupadd docker
2. Add your user to the docker group:
sudo usermod -aG docker $USER
3. Log out and log back in. Run the command shown
in Listing 2-5 to confirm the Docker has been
installed correctly.
Listing 2-5. Check That Docker for Linux Is Working
docker run --rm hello-world
If the install went fine, you should see the response shown in Listing 2-6.
Listing 2-6. Response from the Docker Run Command
docker run --rm hello-world
Unable to find image 'hello-world:latest' locally
latest: Pulling from library/hello-world
ca4f61b1923c: Pull complete
Digest: sha256:66ef312bbac49c39a89aa9bcc3cb4f3c9e7de3788c944158
df3ee0176d32b751
Status: Downloaded newer image for hello-world:latest
Hello from Docker!
This message shows that your installation appears to be working
correctly.
...
ChaptEr 2 DoCkEr 101
16
Understanding Jargon Around DockerNow that we have Docker installed and running, let’s understand the
different terminologies that are associated with Docker.
Layers
A layer is a modification applied to a Docker image as represented by an
instruction in a Dockerfile. Typically, a layer is created when a base image
is changed—for example, consider a Dockerfile that looks like this:
FROM ubuntu
Run mkdir /tmp/logs
RUN apt-get install vim
RUN apt-get install htop
Now in this case, Docker will consider Ubuntu image as the base image
and add three layers:
• One layer for creating /tmp/logs
• One other layer that installs vim
• A third layer that installs htop
When Docker builds the image, each layer is stacked on the next and
merged into a single layer using the union filesystem. Layers are uniquely
identified using sha256 hashes. This makes it easy to reuse and cache
them. When Docker scans a base image, it scans for the IDs of all the layers
that constitute the image and begins to download the layers. If a layer
exists in the local cache, it skips downloading the cached image.
ChaptEr 2 DoCkEr 101
17
Docker Image
Docker image is a read-only template that forms the foundation of your
application. It is very much similar to, say, a shell script that prepares a
system with the desired state. In simpler terms, it’s the equivalent of a
cooking recipe that has step-by-step instructions for making the final dish.
A Docker image starts with a base image—typically the one selected is
that of an operating system are most familiar with, such as Ubuntu. On top
of this image, we can add build our application stack adding the packages
as and when required.
There are many pre-built images for some of the most common
application stacks, such as Ruby on Rails, Django, PHP-FPM with nginx,
and so on. On the advanced scale, to keep the image size as low as possible,
we can also start with slim packages, such as Alpine or even Scratch, which
is Docker’s reserved, minimal starting image for building other images.
Docker images are created using a series of commands, known as
instructions, in the Dockerfile. The presence of a Dockerfile in the root
of a project repository is a good indicator that the program is container-
friendly. We can build our own images from the associated Dockerfile
and the built image is then published to a registry. We will take a deeper
look at Dockerfile in later chapters. For now, consider the Docker image
as the final executable package that contains everything to run an
application. This includes the source code, the required libraries, and any
dependencies.
Docker Container
A Docker image, when it’s run in a host computer, spawns a process with
its own namespace, known as a Docker container. The main difference
between a Docker image and a container is the presence of a thin read/
write layer known as the container layer. Any changes to the filesystem of a
container, such as writing new files or modifying existing files, are done to
this writable container layer than the lower layers.
ChaptEr 2 DoCkEr 101
18
An important aspect to grasp is that when a container is running,
the changes are applied to the container layer and when the container is
stopped/killed, the container layer is not saved. Hence, all changes are
lost. This aspect of containers is not understood very well and for this
reason, stateful applications and those requiring persistent data were
initially not recommended as containerized applications. However, with
Docker Volumes, there are ways to get around this limitation. We discuss
Docker Volumes more in Chapter 5, “Understanding Docker Volumes”.
Bind Mounts and Volumes
We mentioned previously that when a container is running, any changes
to the container are present in the container layer of the filesystem.
When a container is killed, the changes are lost and the data is no longer
accessible. Even when a container is running, getting data out of it is not
very straightforward. In addition, writing into the container’s writable
layer requires a storage driver to manage the filesystem. The storage driver
provides an abstraction on the filesystem available to persist the changes
and this abstraction often reduces performance.
For these reasons, Docker provides different ways to mount data into
a container from the Docker host: volumes, bind mounts, and tmpfs
volumes. While tmpfs volumes are stored in the host system’s memory
only, bind mounts and volumes are stored in the host filesystem.
We explore Docker Volumes in detail in Chapter 5, “Understanding
Docker Volumes”.
Docker Registry
We mentioned earlier that you can leverage existing images of common
application stacks—have you ever wondered where these are and how you
can use them in building your application? A Docker Registry is a place
where you can store Docker images so that they can be used as the basis
ChaptEr 2 DoCkEr 101
19
for an application stack. Some common examples of Docker registries
include the following:
• Docker Hub
• Google Container Registry
• Amazon Elastic Container Registry
• JFrog Artifactory
Most of these registries also allow for the visibility level of the images that
you have pushed to be set as public/private. Private registries will prevent
your Docker images from being accessible to the public, allowing you to set
up access control so that only authorized users can use your Docker image.
Dockerfile
A Dockerfile is a set of instructions that tells Docker how to build an image.
A typical Dockerfile is made up of the following:
• A FROM instruction that tells Docker what the base
image is
• An ENV instruction to pass an environment variable
• A RUN instruction to run some shell commands (for
example, install-dependent programs not available in
the base image)
• A CMD or an ENTRYPOINT instruction that tells Docker
which executable to run when a container is started
As you can see, the Dockerfile instruction set has clear and simple
syntax, which makes it easy to understand. We take a deeper look at
Dockerfiles later in the book.
ChaptEr 2 DoCkEr 101
20
Docker Engine
Docker Engine is the core part of Docker. Docker Engine is a client-server
application that provides the platform, the runtime, and the tooling for
building and managing Docker images, Docker containers, and more.
Docker Engine provides the following:
• Docker daemon
• Docker CLI
• Docker API
Docker Daemon
• The Docker daemon is a service that runs in the
background of the host computer and handles the
heavy lifting of most of the Docker commands.
The daemon listens for API requests for creating
and managing Docker objects, such as containers,
networks, and volumes. Docker daemon can also
talk to other daemons for managing and monitoring
Docker containers. Some examples of inter-daemon
communication include communication Datadog for
container metrics monitoring and Aqua for container
security monitoring.
Docker CLI
Docker CLI is the primary way that you will interact with Docker. Docker
CLI exposes a set of commands that you can provide. The Docker CLI
forwards the request to Docker daemon, which then performs the
necessary work.
ChaptEr 2 DoCkEr 101
21
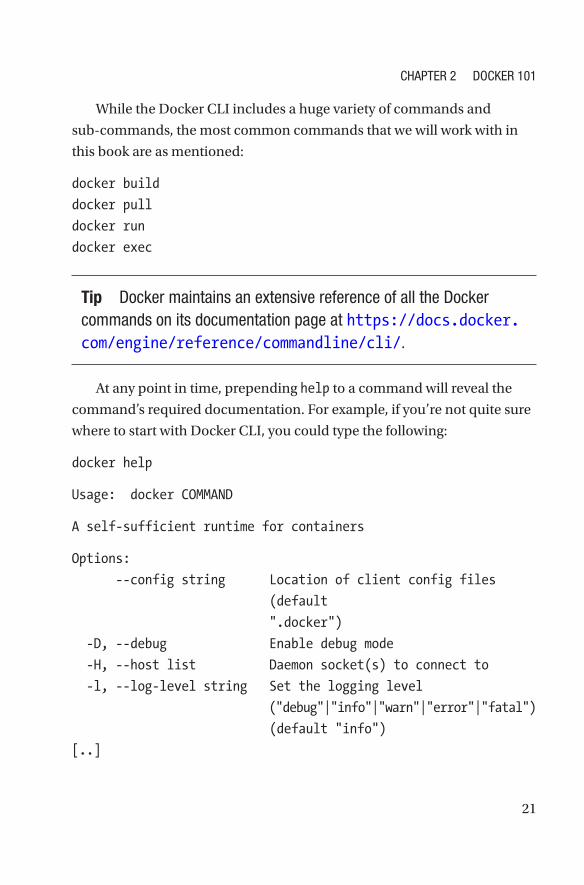
While the Docker CLI includes a huge variety of commands and
sub-commands, the most common commands that we will work with in
this book are as mentioned:
docker build
docker pull
docker run
docker exec
Tip Docker maintains an extensive reference of all the Docker commands on its documentation page at https://docs.docker.com/engine/reference/commandline/cli/.
At any point in time, prepending help to a command will reveal the
command’s required documentation. For example, if you’re not quite sure
where to start with Docker CLI, you could type the following:
docker help
Usage: docker COMMAND
A self-sufficient runtime for containers
Options:
--config string Location of client config files
(default
".docker")
-D, --debug Enable debug mode
-H, --host list Daemon socket(s) to connect to
-l, --log-level string Set the logging level
("debug"|"info"|"warn"|"error"|"fatal")
(default "info")
[..]
ChaptEr 2 DoCkEr 101
22
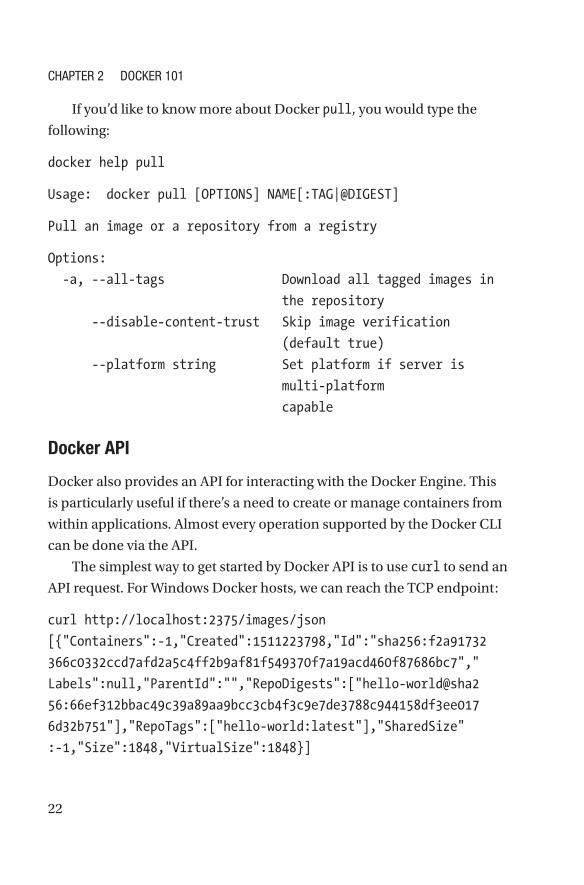
If you’d like to know more about Docker pull, you would type the
following:
docker help pull
Usage: docker pull [OPTIONS] NAME[:TAG|@DIGEST]
Pull an image or a repository from a registry
Options:
-a, --all-tags Download all tagged images in
the repository
--disable-content-trust Skip image verification
(default true)
--platform string Set platform if server is
multi-platform
capable
Docker API
Docker also provides an API for interacting with the Docker Engine. This
is particularly useful if there’s a need to create or manage containers from
within applications. Almost every operation supported by the Docker CLI
can be done via the API.
The simplest way to get started by Docker API is to use curl to send an
API request. For Windows Docker hosts, we can reach the TCP endpoint:
curl http://localhost:2375/images/json
[{"Containers":-1,"Created":1511223798,"Id":"sha256:f2a91732
366c0332ccd7afd2a5c4ff2b9af81f549370f7a19acd460f87686bc7","
Labels":null,"ParentId":"","RepoDigests":["hello-world@sha2
56:66ef312bbac49c39a89aa9bcc3cb4f3c9e7de3788c944158df3ee017
6d32b751"],"RepoTags":["hello-world:latest"],"SharedSize"
:-1,"Size":1848,"VirtualSize":1848}]
ChaptEr 2 DoCkEr 101
23
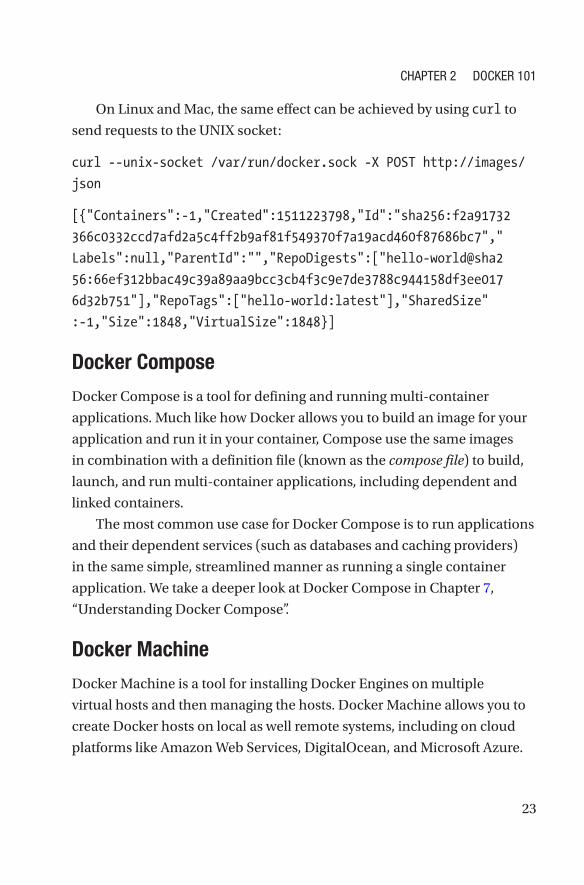
On Linux and Mac, the same effect can be achieved by using curl to
send requests to the UNIX socket:
curl --unix-socket /var/run/docker.sock -X POST http://images/
json
[{"Containers":-1,"Created":1511223798,"Id":"sha256:f2a91732
366c0332ccd7afd2a5c4ff2b9af81f549370f7a19acd460f87686bc7","
Labels":null,"ParentId":"","RepoDigests":["hello-world@sha2
56:66ef312bbac49c39a89aa9bcc3cb4f3c9e7de3788c944158df3ee017
6d32b751"],"RepoTags":["hello-world:latest"],"SharedSize"
:-1,"Size":1848,"VirtualSize":1848}]
Docker Compose
Docker Compose is a tool for defining and running multi-container
applications. Much like how Docker allows you to build an image for your
application and run it in your container, Compose use the same images
in combination with a definition file (known as the compose file) to build,
launch, and run multi-container applications, including dependent and
linked containers.
The most common use case for Docker Compose is to run applications
and their dependent services (such as databases and caching providers)
in the same simple, streamlined manner as running a single container
application. We take a deeper look at Docker Compose in Chapter 7,
“Understanding Docker Compose”.
Docker Machine
Docker Machine is a tool for installing Docker Engines on multiple
virtual hosts and then managing the hosts. Docker Machine allows you to
create Docker hosts on local as well remote systems, including on cloud
platforms like Amazon Web Services, DigitalOcean, and Microsoft Azure.
ChaptEr 2 DoCkEr 101
24
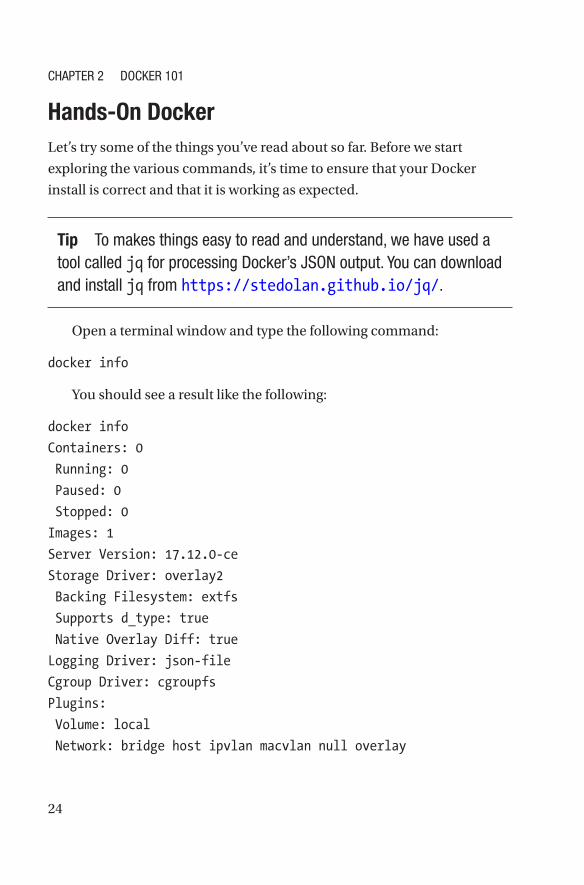
Hands-On DockerLet’s try some of the things you’ve read about so far. Before we start
exploring the various commands, it’s time to ensure that your Docker
install is correct and that it is working as expected.
Tip to makes things easy to read and understand, we have used a tool called jq for processing Docker’s JSoN output. You can download and install jq from https://stedolan.github.io/jq/.
Open a terminal window and type the following command:
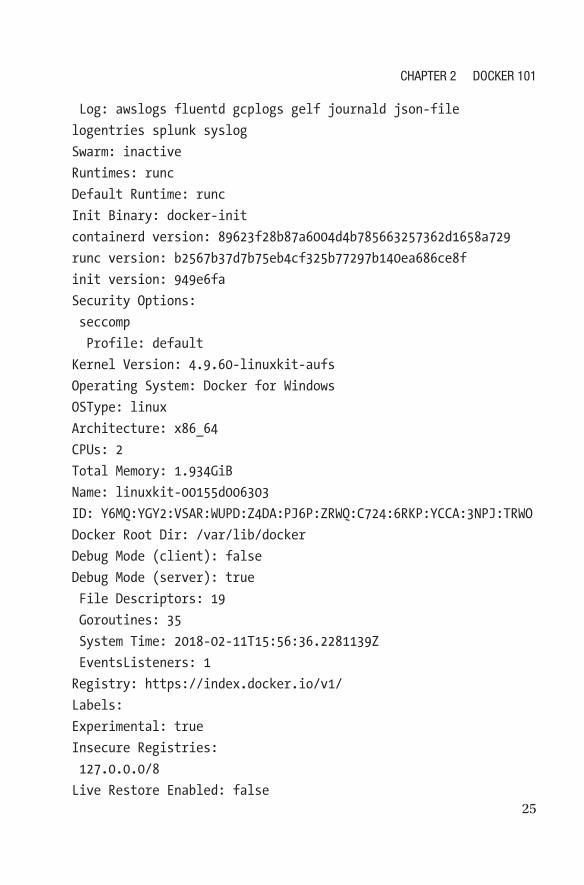
docker info
You should see a result like the following:
docker info
Containers: 0
Running: 0
Paused: 0
Stopped: 0
Images: 1
Server Version: 17.12.0-ce
Storage Driver: overlay2
Backing Filesystem: extfs
Supports d_type: true
Native Overlay Diff: true
Logging Driver: json-file
Cgroup Driver: cgroupfs
Plugins:
Volume: local
Network: bridge host ipvlan macvlan null overlay
ChaptEr 2 DoCkEr 101
25
Log: awslogs fluentd gcplogs gelf journald json-file
logentries splunk syslog
Swarm: inactive
Runtimes: runc
Default Runtime: runc
Init Binary: docker-init
containerd version: 89623f28b87a6004d4b785663257362d1658a729
runc version: b2567b37d7b75eb4cf325b77297b140ea686ce8f
init version: 949e6fa
Security Options:
seccomp
Profile: default
Kernel Version: 4.9.60-linuxkit-aufs
Operating System: Docker for Windows
OSType: linux
Architecture: x86_64
CPUs: 2
Total Memory: 1.934GiB
Name: linuxkit-00155d006303
ID: Y6MQ:YGY2:VSAR:WUPD:Z4DA:PJ6P:ZRWQ:C724:6RKP:YCCA:3NPJ:TRWO
Docker Root Dir: /var/lib/docker
Debug Mode (client): false
Debug Mode (server): true
File Descriptors: 19
Goroutines: 35
System Time: 2018-02-11T15:56:36.2281139Z
EventsListeners: 1
Registry: https://index.docker.io/v1/
Labels:
Experimental: true
Insecure Registries:
127.0.0.0/8
Live Restore Enabled: false
ChaptEr 2 DoCkEr 101
26
If you do not see this message or something similar, refer to the
previous sections to install and validate your Docker install.
Working with Docker Images
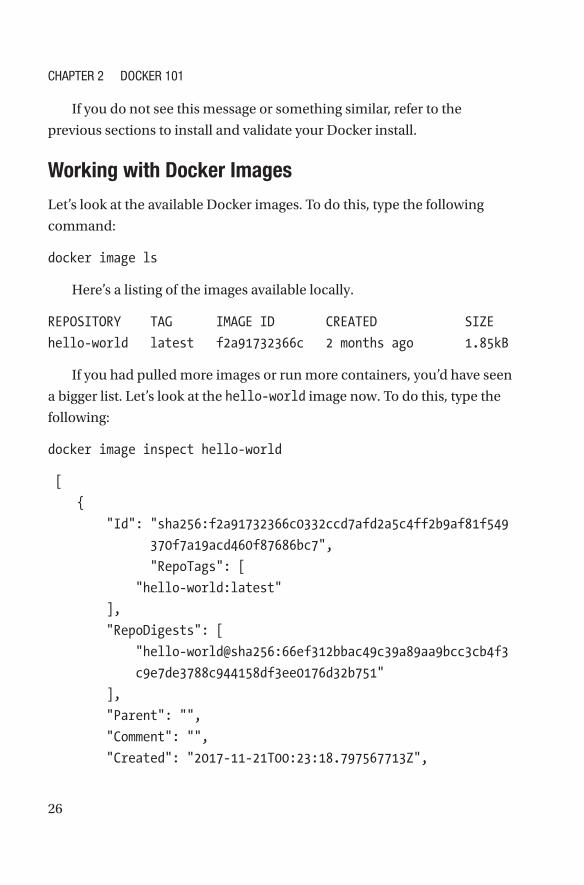
Let’s look at the available Docker images. To do this, type the following
command:
docker image ls
Here’s a listing of the images available locally.
REPOSITORY TAG IMAGE ID CREATED SIZE
hello-world latest f2a91732366c 2 months ago 1.85kB
If you had pulled more images or run more containers, you’d have seen
a bigger list. Let’s look at the hello-world image now. To do this, type the
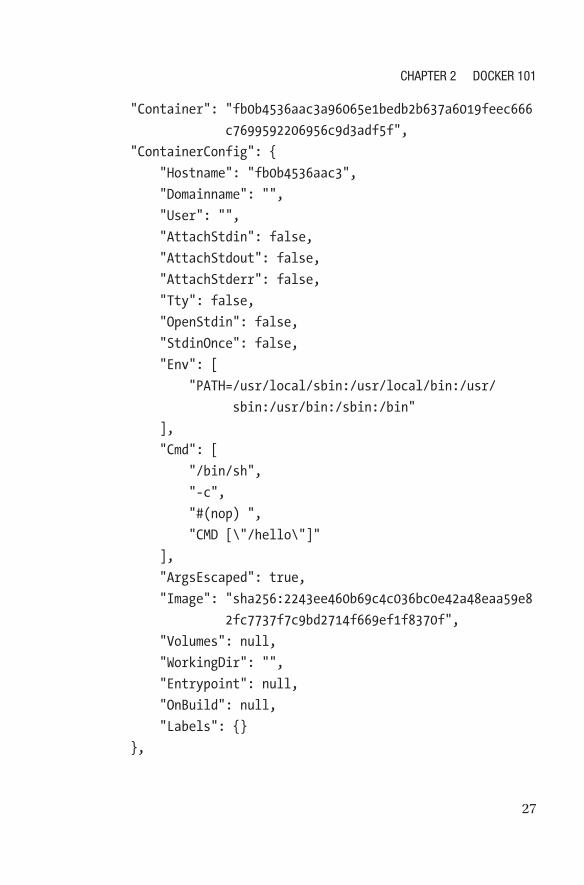
following:
docker image inspect hello-world
[
{
"Id": "sha256:f2a91732366c0332ccd7afd2a5c4ff2b9af81f549
370f7a19acd460f87686bc7",
"RepoTags": [
"hello-world:latest"
],
"RepoDigests": [
"hello-world@sha256:66ef312bbac49c39a89aa9bcc3cb4f3
c9e7de3788c944158df3ee0176d32b751"
],
"Parent": "",
"Comment": "",
"Created": "2017-11-21T00:23:18.797567713Z",
ChaptEr 2 DoCkEr 101
27
"Container": "fb0b4536aac3a96065e1bedb2b637a6019feec666
c7699592206956c9d3adf5f",
"ContainerConfig": {
"Hostname": "fb0b4536aac3",
"Domainname": "",
"User": "",
"AttachStdin": false,
"AttachStdout": false,
"AttachStderr": false,
"Tty": false,
"OpenStdin": false,
"StdinOnce": false,
"Env": [
"PATH= /usr/local/sbin:/usr/local/bin:/usr/
sbin:/usr/bin:/sbin:/bin"
],
"Cmd": [
"/bin/sh",
"-c",
"#(nop) ",
"CMD [\"/hello\"]"
],
"ArgsEscaped": true,
"Image": "sha256:2243ee460b69c4c036bc0e42a48eaa59e8
2fc7737f7c9bd2714f669ef1f8370f",
"Volumes": null,
"WorkingDir": "",
"Entrypoint": null,
"OnBuild": null,
"Labels": {}
},
ChaptEr 2 DoCkEr 101
28
"DockerVersion": "17.06.2-ce",
"Author": "",
"Config": {
"Hostname": "",
"Domainname": "",
"User": "",
"AttachStdin": false,
"AttachStdout": false,
"AttachStderr": false,
"Tty": false,
"OpenStdin": false,
"StdinOnce": false,
"Env": [
"PATH= /usr/local/sbin:/usr/local/bin:/usr/
sbin:/usr/bin:/sbin:/bin"
],
"Cmd": [
"/hello"
],
"ArgsEscaped": true,
"Image": "sha256:2243ee460b69c4c036bc0e42a48eaa59e8
2fc7737f7c9bd2714f669ef1f8370f",
"Volumes": null,
"WorkingDir": "",
"Entrypoint": null,
"OnBuild": null,
"Labels": null
},
"Architecture": "amd64",
"Os": "linux",
"Size": 1848,
"VirtualSize": 1848,
ChaptEr 2 DoCkEr 101
29
"GraphDriver": {
"Data": {
"MergedDir": "/var/lib/docker/overlay2/5855bd20
ab2f521c39e1157f98f235b46d7c12c9d8
f69e252f0ee8b04ac73d33/merged",
"UpperDir": "/var/lib/docker/overlay2/5855bd20a
b2f521c39e1157f98f235b46d7c12c9d8f6
9e252f0ee8b04ac73d33/diff",
"WorkDir": "/var/lib/docker/overlay2/5855bd20ab
2f521c39e1157f98f235b46d7c12c9d8f69e
252f0ee8b04ac73d33/work"
},
"Name": "overlay2"
},
"RootFS": {
"Type": "layers",
"Layers": [
"sha256: f999ae22f308fea973e5a25b57699b5daf6b
0f1150ac2a5c2ea9d7fecee50fdf"
]
},
"Metadata": {
"LastTagTime": "0001-01-01T00:00:00Z"
}
}
]
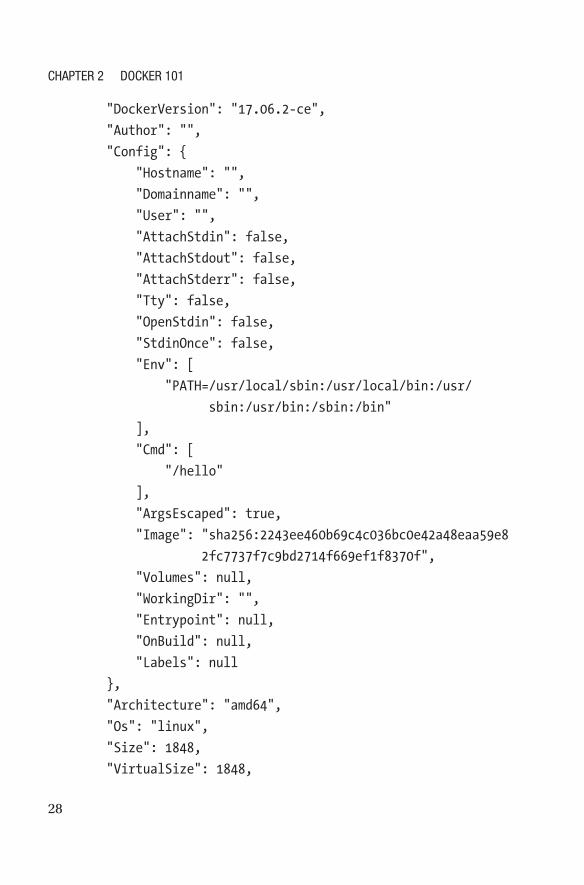
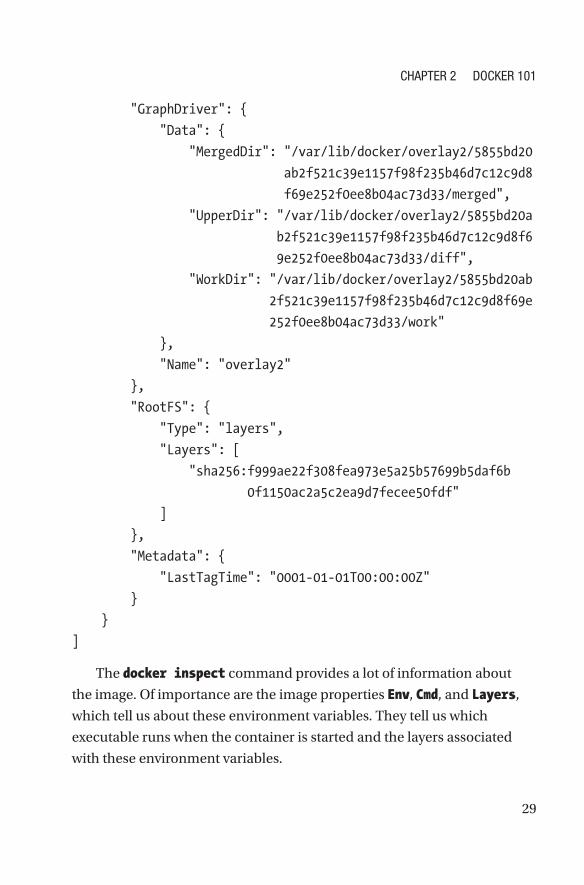
The docker inspect command provides a lot of information about
the image. Of importance are the image properties Env, Cmd, and Layers,
which tell us about these environment variables. They tell us which
executable runs when the container is started and the layers associated
with these environment variables.
ChaptEr 2 DoCkEr 101
30
docker image inspect hello-world | jq .[].Config.Env
[
"PATH=/usr/local/sbin:/usr/local/bin:/usr/sbin:/usr/bin:/
sbin:/bin"
]
Here’s the startup command on the container:
docker image inspect hello-world | jq .[].Config.Cmd
[
"/hello"
]
Here are the layers associated with the image:
docker image inspect hello-world | jq .[].RootFS.Layers
[
"sha256:f999ae22f308fea973e5a25b57699b5daf6b0f1150ac2a5c2ea9d
7fecee50fdf"
]
Working with a Real-World Docker Images
Let’s look at a more complex image now. Nginx is a very popular reverse
proxy server for HTTP/S (among others), as well as a load balancer and a
webserver.
To pull down the nginx image, type the following:
docker pull nginx
Using default tag: latest
latest: Pulling from library/nginx
e7bb522d92ff: Pull complete
6edc05228666: Pull complete
cd866a17e81f: Pull complete
ChaptEr 2 DoCkEr 101
31
Digest: sha256:285b49d42c703fdf257d1e2422765c4ba9d3e37768d6ea83
d7fe2043dad6e63d
Status: Downloaded newer image for nginx:latest
Notice the first line:
Using default tag: latest
Every Docker image has an associated tag. Tags typically include names
and version labels. While it is not mandatory to associate a version tag with
a Docker image name, these tags make it easier to roll back to previous
versions. Without a tag name, Docker must fetch the image with the latest
tag. You can also provide a tag name to force-fetch a tagged image.
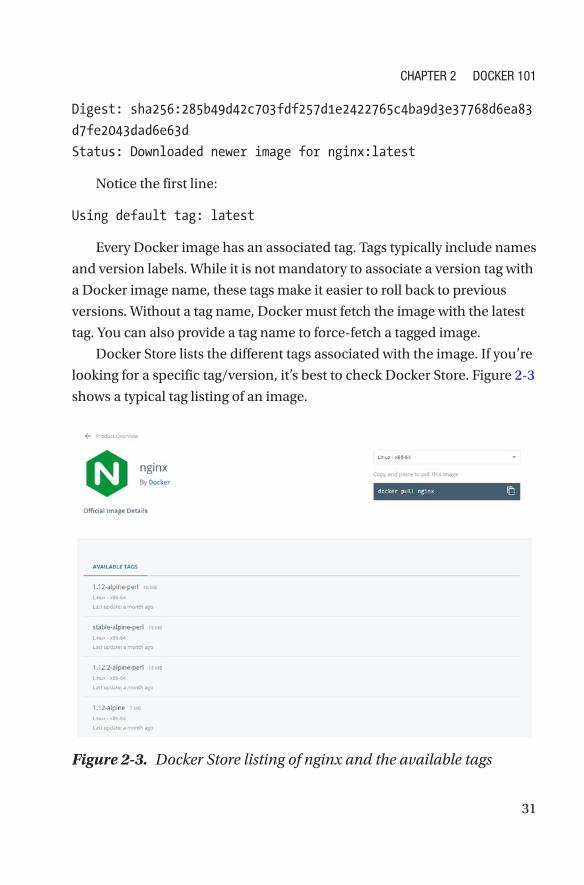
Docker Store lists the different tags associated with the image. If you’re
looking for a specific tag/version, it’s best to check Docker Store. Figure 2-3
shows a typical tag listing of an image.
Figure 2-3. Docker Store listing of nginx and the available tags
ChaptEr 2 DoCkEr 101
32
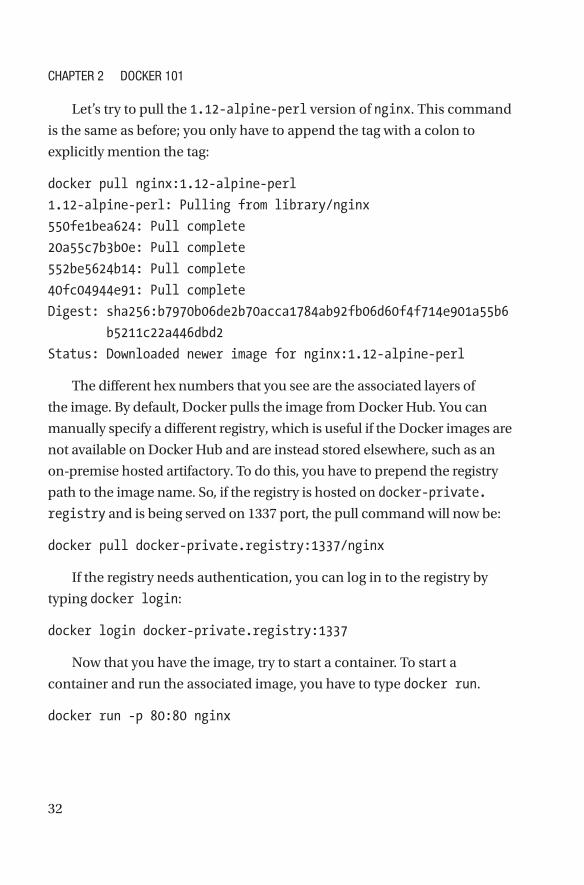
Let’s try to pull the 1.12-alpine-perl version of nginx. This command
is the same as before; you only have to append the tag with a colon to
explicitly mention the tag:
docker pull nginx:1.12-alpine-perl
1.12-alpine-perl: Pulling from library/nginx
550fe1bea624: Pull complete
20a55c7b3b0e: Pull complete
552be5624b14: Pull complete
40fc04944e91: Pull complete
Digest: sha256:b7970b06de2b70acca1784ab92fb06d60f4f714e901a55b6
b5211c22a446dbd2
Status: Downloaded newer image for nginx:1.12-alpine-perl
The different hex numbers that you see are the associated layers of
the image. By default, Docker pulls the image from Docker Hub. You can
manually specify a different registry, which is useful if the Docker images are
not available on Docker Hub and are instead stored elsewhere, such as an
on-premise hosted artifactory. To do this, you have to prepend the registry
path to the image name. So, if the registry is hosted on docker-private.
registry and is being served on 1337 port, the pull command will now be:
docker pull docker-private.registry:1337/nginx
If the registry needs authentication, you can log in to the registry by
typing docker login:
docker login docker-private.registry:1337
Now that you have the image, try to start a container. To start a
container and run the associated image, you have to type docker run.
docker run -p 80:80 nginx
ChaptEr 2 DoCkEr 101
33
Let’s try making a curl request to see if the nginx webserver is running:
curl http://localhost:80
<!DOCTYPE html>
<html>
<head>
<title>Welcome to nginx!</title>
<style>
body {
width: 35em;
margin: 0 auto;
font-family: Tahoma, Verdana, Arial, sans-serif;
}
</style>
</head>
<body>
<h1>Welcome to nginx!</h1>
<p>If you see this page, the nginx web server is successfully
installed and working. Further configuration is required.</p>
<p>For online documentation and support please refer to
<a href="http://nginx.org/">nginx.org</a>.<br/>
Commercial support is available at
<a href="http://nginx.com/">nginx.com</a>.</p>
<p><em>Thank you for using nginx.</em></p>
</body>
</html>
This confirms that our nginx container is indeed up and running. In
this, we see an extra flag called -p. This flag tells Docker to publish the
exposed port from the Docker container to the host.
ChaptEr 2 DoCkEr 101
34
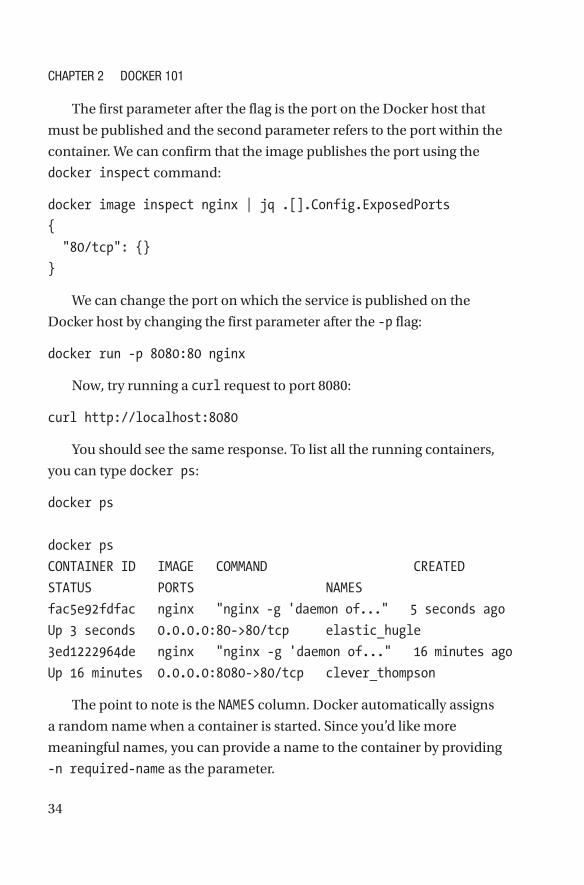
The first parameter after the flag is the port on the Docker host that
must be published and the second parameter refers to the port within the
container. We can confirm that the image publishes the port using the
docker inspect command:
docker image inspect nginx | jq .[].Config.ExposedPorts
{
"80/tcp": {}
}
We can change the port on which the service is published on the
Docker host by changing the first parameter after the -p flag:
docker run -p 8080:80 nginx
Now, try running a curl request to port 8080:
curl http://localhost:8080
You should see the same response. To list all the running containers,
you can type docker ps:
docker ps
docker ps
CONTAINER ID IMAGE COMMAND CREATED
STATUS PORTS NAMES
fac5e92fdfac nginx "nginx -g 'daemon of..." 5 seconds ago
Up 3 seconds 0.0.0.0:80->80/tcp elastic_hugle
3ed1222964de nginx "nginx -g 'daemon of..." 16 minutes ago
Up 16 minutes 0.0.0.0:8080->80/tcp clever_thompson
The point to note is the NAMES column. Docker automatically assigns
a random name when a container is started. Since you’d like more
meaningful names, you can provide a name to the container by providing
-n required-name as the parameter.
ChaptEr 2 DoCkEr 101
35
Tip Docker names are of the format adjective_surname and are randomly generated, with the exception that if the adjective selected is boring and the surname is Wozniak, Docker retries the name generation.
Another point to note is that when we created a second container with
port publishing to port 8080, the other container continues to run. To stop
the container, you have to type docker stop:
docker stop <container-id>
where container-id is available from the list. If the stop was successful,
Docker will echo the container ID back. If the container refuses to stop,
you can issue a kill command to force stop and kill the container:
docker stop <container-id>
Let’s try stopping a container. Type the following:
docker stop fac5e92fdfac
fac5e92fdfac
Now, let’s try killing the other container:
docker kill 3ed1222964de
3ed1222964de
Let’s confirm that the containers are no longer running. For this, type
the following:
docker ps
CONTAINER ID IMAGE COMMAND CREATED STATUS PORTS NAMES
ChaptEr 2 DoCkEr 101
36
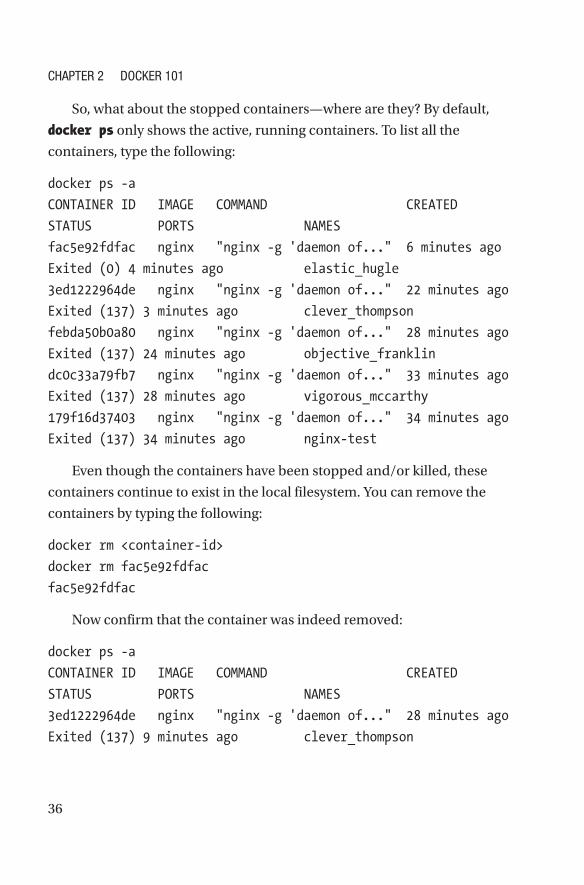
So, what about the stopped containers—where are they? By default,
docker ps only shows the active, running containers. To list all the
containers, type the following:
docker ps -a
CONTAINER ID IMAGE COMMAND CREATED
STATUS PORTS NAMES
fac5e92fdfac nginx "nginx -g 'daemon of..." 6 minutes ago
Exited (0) 4 minutes ago elastic_hugle
3ed1222964de nginx "nginx -g 'daemon of..." 22 minutes ago
Exited (137) 3 minutes ago clever_thompson
febda50b0a80 nginx "nginx -g 'daemon of..." 28 minutes ago
Exited (137) 24 minutes ago objective_franklin
dc0c33a79fb7 nginx "nginx -g 'daemon of..." 33 minutes ago
Exited (137) 28 minutes ago vigorous_mccarthy
179f16d37403 nginx "nginx -g 'daemon of..." 34 minutes ago
Exited (137) 34 minutes ago nginx-test
Even though the containers have been stopped and/or killed, these
containers continue to exist in the local filesystem. You can remove the
containers by typing the following:
docker rm <container-id>
docker rm fac5e92fdfac
fac5e92fdfac
Now confirm that the container was indeed removed:
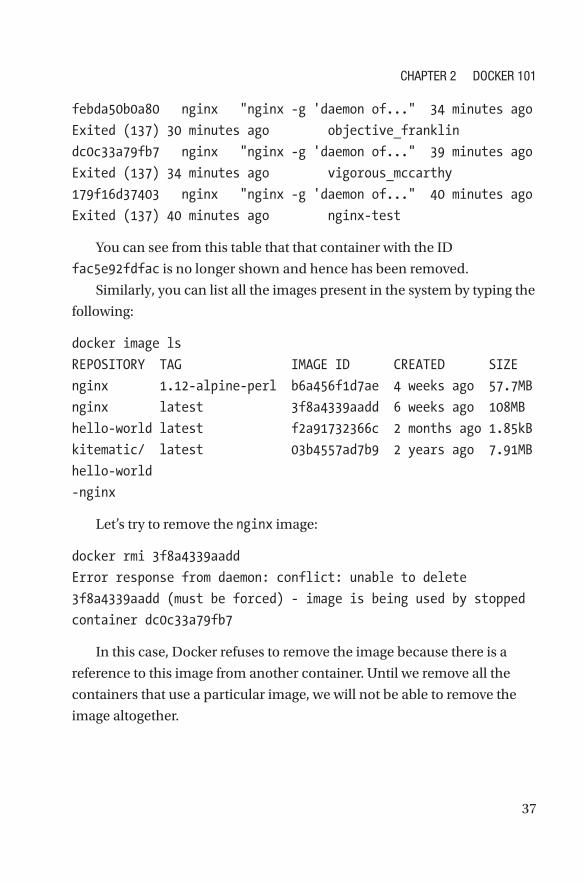
docker ps -a
CONTAINER ID IMAGE COMMAND CREATED
STATUS PORTS NAMES
3ed1222964de nginx "nginx -g 'daemon of..." 28 minutes ago
Exited (137) 9 minutes ago clever_thompson
ChaptEr 2 DoCkEr 101
37
febda50b0a80 nginx "nginx -g 'daemon of..." 34 minutes ago
Exited (137) 30 minutes ago objective_franklin
dc0c33a79fb7 nginx "nginx -g 'daemon of..." 39 minutes ago
Exited (137) 34 minutes ago vigorous_mccarthy
179f16d37403 nginx "nginx -g 'daemon of..." 40 minutes ago
Exited (137) 40 minutes ago nginx-test
You can see from this table that that container with the ID
fac5e92fdfac is no longer shown and hence has been removed.
Similarly, you can list all the images present in the system by typing the
following:
docker image ls
REPOSITORY TAG IMAGE ID CREATED SIZE
nginx 1.12-alpine-perl b6a456f1d7ae 4 weeks ago 57.7MB
nginx latest 3f8a4339aadd 6 weeks ago 108MB
hello-world latest f2a91732366c 2 months ago 1.85kB
kitematic/ latest 03b4557ad7b9 2 years ago 7.91MB
hello-world
-nginx
Let’s try to remove the nginx image:
docker rmi 3f8a4339aadd
Error response from daemon: conflict: unable to delete
3f8a4339aadd (must be forced) - image is being used by stopped
container dc0c33a79fb7
In this case, Docker refuses to remove the image because there is a
reference to this image from another container. Until we remove all the
containers that use a particular image, we will not be able to remove the
image altogether.
ChaptEr 2 DoCkEr 101
38
SummaryIn this chapter, you learned about how to install Docker on various
operating systems. We also learned how to validate that Docker is installed
and working correctly and learned about some commonly used terms
associated with Docker. Finally, you run through few practical exercises
using Docker, including how to pull an image, run a container, list the
running containers, and stop and remove a container.
In the next chapter, we take a brief look at Telegram, including how
to create and register a bot with Telegram and understand how to run a
Python-based Telegram Messaging bot that will fetch posts from Reddit.
ChaptEr 2 DoCkEr 101
39© Sathyajith Bhat 2018 S. Bhat, Practical Docker with Python, https://doi.org/10.1007/978-1-4842-3784-7_3
CHAPTER 3
Building the Python AppFor many people getting into programming, one of their first problems
is not understanding the language syntax, rather the problem starts with
“what can I build?”. Programming is seldom learned by just reading. Many
people will read couple of definitive guides and look at the syntax, while
rarely diving into the actual practical aspects. This is a mistake.
For this reason, this book provides you with a sample Python project.
The project is not very complicated for those getting started with Python,
but at the same time it’s easy to continue working further on the project,
extending and customizing it as required.
About the Project
Note This book assumes you have basic knowledge of Python and have Python 3.0 and above installed.
To help you get acquainted with Docker, the book will teach you how
to take an existing Python app, run it using the Python command line,
introduce different Docker components, and transition the app into a
Dockerized image.
40
The Python app is a simple application with a bot interface using
Telegram Messenger to fetch the latest 10 stories from Reddit. Using
Telegram, we will be able to subscribe to a list of subreddits. The web
application will check the subscribed subreddits for new posts and if it
finds new topics, will publish the topics to the bot interface, which will then
deliver the message to Telegram Messenger, when requested by the user.
Initially, we will not be saving the preferences (i.e., subreddit
subscriptions) and will focus on getting the bot up and running. Once
things are working fine, we will save the preferences to a text file, and
eventually, to a database.
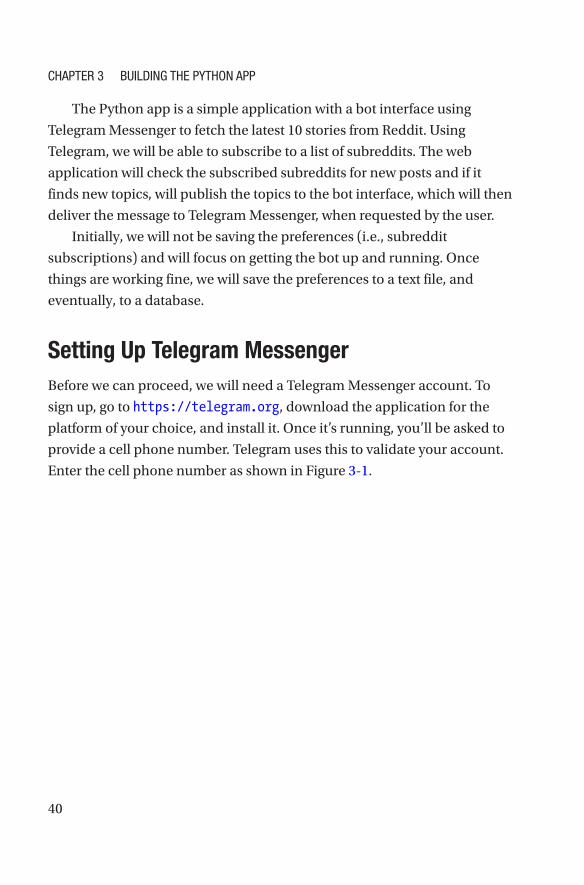
Setting Up Telegram MessengerBefore we can proceed, we will need a Telegram Messenger account. To
sign up, go to https://telegram.org, download the application for the
platform of your choice, and install it. Once it’s running, you’ll be asked to
provide a cell phone number. Telegram uses this to validate your account.
Enter the cell phone number as shown in Figure 3-1.
ChaPTer 3 Building The PyThon aPP
41
Figure 3-1. Telegram Messenger signup page
ChaPTer 3 Building The PyThon aPP
42
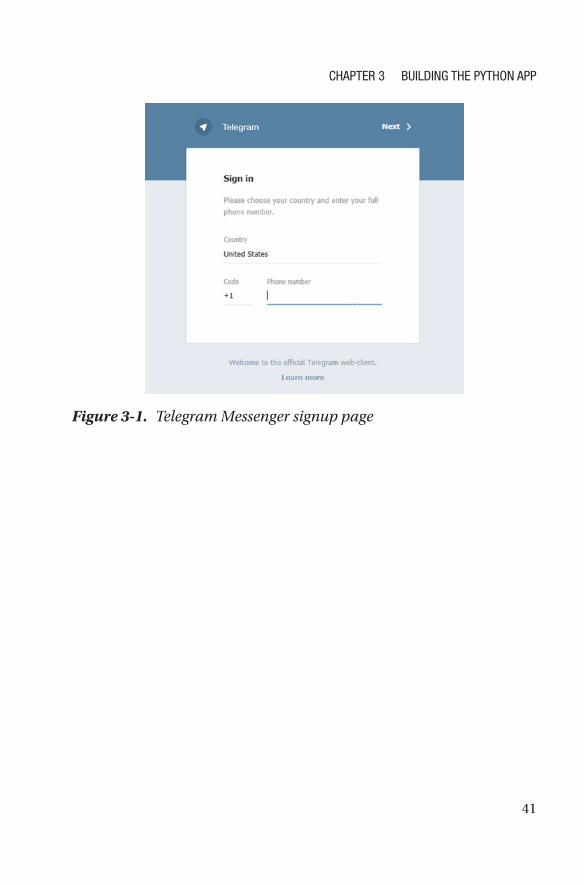
Once we’ve entered our number, we should be getting a one-time
password to log in. Enter the one-time password and sign in, as shown in
Figure 3-2.
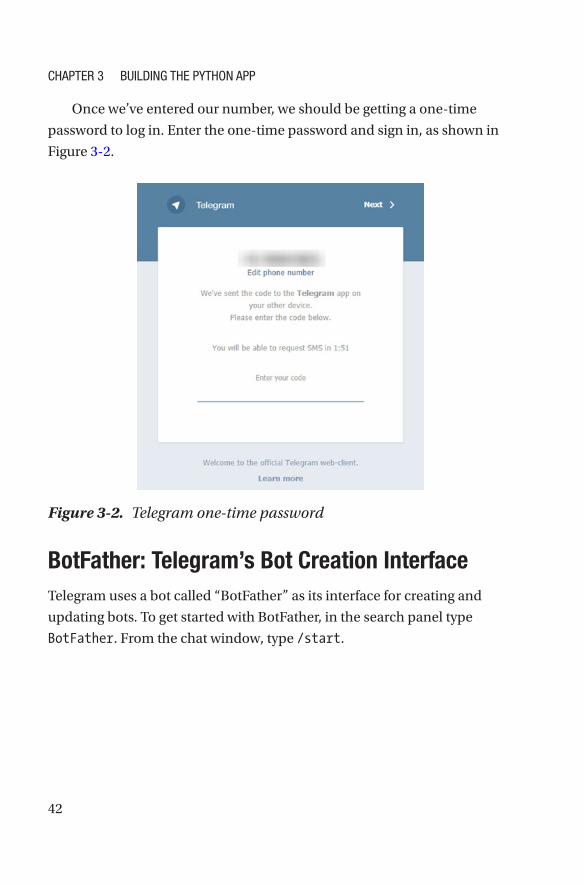
BotFather: Telegram’s Bot Creation InterfaceTelegram uses a bot called “BotFather” as its interface for creating and
updating bots. To get started with BotFather, in the search panel type
BotFather. From the chat window, type /start.
Figure 3-2. Telegram one-time password
ChaPTer 3 Building The PyThon aPP
43
This will trigger BotFather to provide an introductory set of messages,
as shown in Figure 3-3.
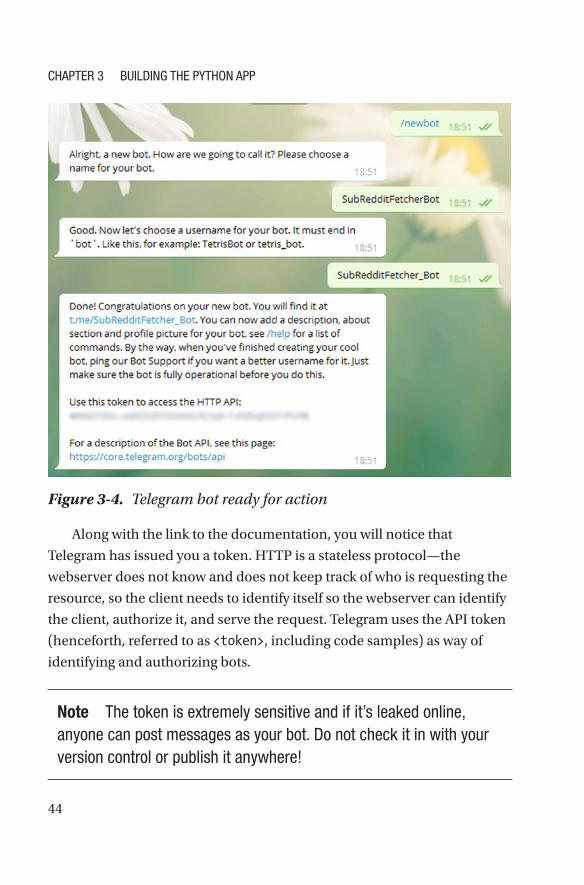
Creating the Bot with BotFather
We will be using BotFather to generate a new bot. Start by typing /newbot
in Telegram Messenger. This will trigger a series of questions that you
need to answer (most of them are straightforward). Due to Telegram’s
restrictions, the username for a bot must always end with bot. This means
that you might not get your desired username—just keep this in mind. See
Figure 3-4.
Figure 3-3. BotFather options
ChaPTer 3 Building The PyThon aPP
44
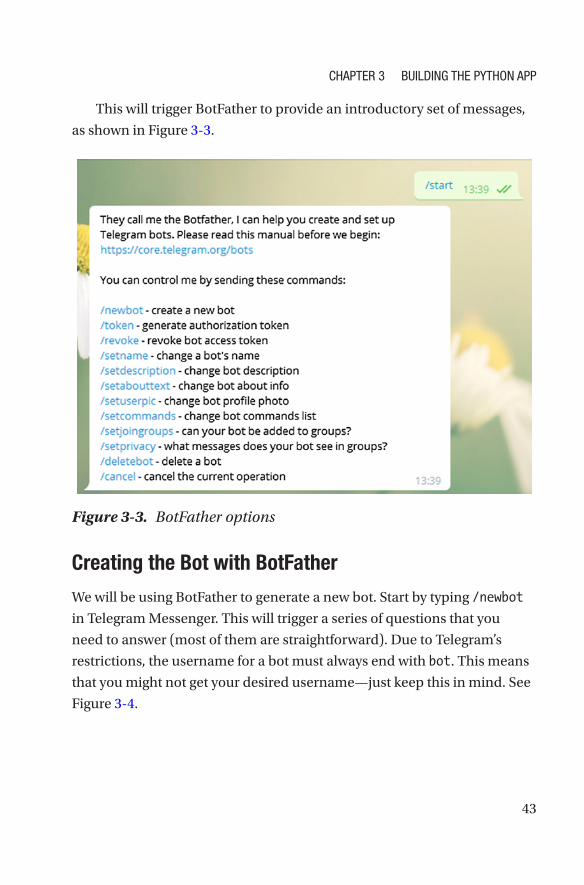
Along with the link to the documentation, you will notice that
Telegram has issued you a token. HTTP is a stateless protocol—the
webserver does not know and does not keep track of who is requesting the
resource, so the client needs to identify itself so the webserver can identify
the client, authorize it, and serve the request. Telegram uses the API token
(henceforth, referred to as <token>, including code samples) as way of
identifying and authorizing bots.
Note The token is extremely sensitive and if it’s leaked online, anyone can post messages as your bot. do not check it in with your version control or publish it anywhere!
Figure 3-4. Telegram bot ready for action
ChaPTer 3 Building The PyThon aPP
45
When you’re working with APIs you are not familiar with, it’s always
a good idea to use a tool to test and explore the endpoints instead of
typing the code right away. Some examples of REST API test tools include
Insomnia, Postman, and curl.
Telegram’s Bot API documentation is available at https://core.
telegram.org/bots/api. To make a request, you’ll have to include the
<token> as part of the request. The general URL is:
https://api.telegram.org/bot<token>/METHOD_NAME
Let’s try a sample API request that confirms the token is working as
expected. Telegram Bot API provides a /getMe endpoint for testing the
auth token. Let’s try it out, first without the token:
curl https://api.telegram.org/bot/getMe
{
"ok": false,
"error_code": 404,
"description": "Not Found"
}
We can see that without the bot token, Telegram doesn’t honor our
request. Let’s try it with the token:
curl https://api.telegram.org/bot<token>/getMe
{
"ok": true,
"result": {
"id": 495637361,
"is_bot": true,
"first_name": "SubRedditFetcherBot",
"username": "SubRedditFetcher_Bot"
}
}
ChaPTer 3 Building The PyThon aPP
46
We can see with the proper token, Telegram identified and authorized
our bot. This confirms that our bot token is proper and we can go ahead
with the app.
Newsbot: The Python AppNewsbot is a Python script that interacts with our bot with the help of
Telegram Bot API. Newsbot does the following things:
• Continuously polls the Telegram API for new updates
being posted to the bot.
• If the keyword for fetching new updates was detected,
fetches the news from the selected subreddits.
Behind the scenes, Newsbot also handles these scenarios:
• If there’s a new message starting with /start or /help,
it shows a simple help text explaining what to do.
• If there’s a message starting with /sources followed by
a list of subreddits, it accepts them as the subreddits
from where the Reddit posts must be fetched.
Newsbot depends on a couple of Python libraries:
• Praw or Python Reddit API Wrapper, for fetching posts
from subreddits.
• Requests, one of the most popular Python libraries
for providing a simpler, cleaner API for making HTTP
requests.
Installing Dependencies of Newsbot
To get started with this bot, let’s install the dependencies. To do this, type this:
pip3 install -r requirements.txt
ChaPTer 3 Building The PyThon aPP
47
Note pip (the acronym for Pip installs packages) is a package manager for installing Python libraries. Pip is included with Python 2.7.9 and later, and Python 3.4 and later. pip3 indicates that we are installing libraries for Python 3. if pip is not installed, install it before proceeding.
The -r flag tells pip to install the required packages from requirements.txt.
pip will check, download, and install the dependencies. If all goes well, it
should show the following output:
Collecting praw==3.6.0 (from -r requirements.txt (line 1))
Downloading praw-3.6.0-py2.py3-none-any.whl (74kB)
Collecting requests==2.18.4 (from -r requirements.txt (line 2))
[...]
Installing collected packages: requests, update-checker,
decorator, six, praw
Successfully installed decorator-4.0.11 praw-3.6.0
requests-2.18.4 six-1.10.0 update-checker-0.16
If there were some packages already installed, then pip will not
reinstall the package and will inform us that the dependency is installed
with a "Requirement already satisfied" message.
Running Newsbot
Let’s start the bot. The bot requires the <token> to be passed an
environment variable to the script named NBT_ACCESS_TOKEN, so prepend
this and run as follows:
NBT_ACCESS_TOKEN=<token> python newsbot.py
If all’s well, you should be seeing periodic OK messages like shown here.
This means that Newsbot is running and is actively listening for updates.
ChaPTer 3 Building The PyThon aPP
48
python newsbot.py
INFO: get_updates - received response: {'ok': True, 'result': []}
INFO: get_updates - received response: {'ok': True, 'result': []}
INFO: get_updates - received response: {'ok': True, 'result': []}
INFO: get_updates - received response: {'ok': True, 'result': []}
INFO: get_updates - received response: {'ok': True, 'result': []}
INFO: get_updates - received response: {'ok': True, 'result': []}
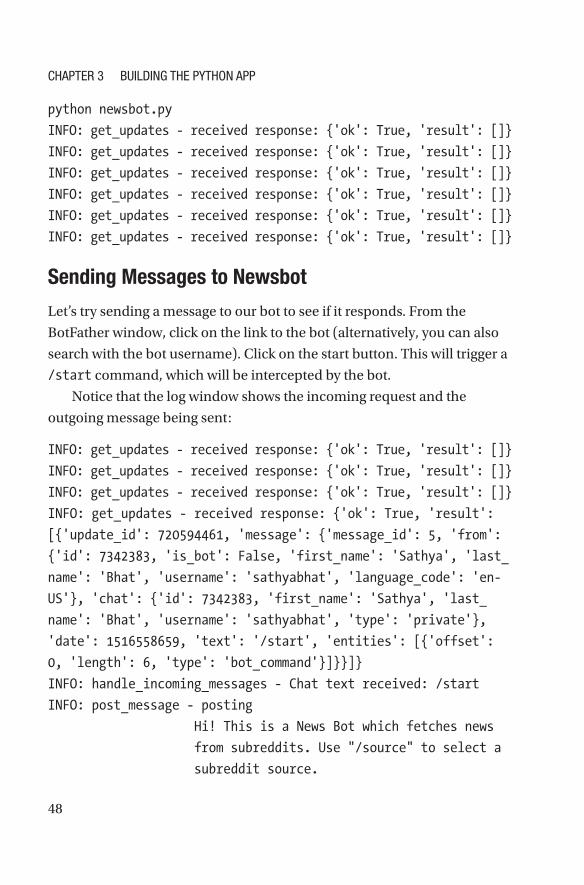
Sending Messages to Newsbot
Let’s try sending a message to our bot to see if it responds. From the
BotFather window, click on the link to the bot (alternatively, you can also
search with the bot username). Click on the start button. This will trigger a
/start command, which will be intercepted by the bot.
Notice that the log window shows the incoming request and the
outgoing message being sent:
INFO: get_updates - received response: {'ok': True, 'result': []}
INFO: get_updates - received response: {'ok': True, 'result': []}
INFO: get_updates - received response: {'ok': True, 'result': []}
INFO: get_updates - received response: {'ok': True, 'result':
[{'update_id': 720594461, 'message': {'message_id': 5, 'from':
{'id': 7342383, 'is_bot': False, 'first_name': 'Sathya', 'last_
name': 'Bhat', 'username': 'sathyabhat', 'language_code': 'en-
US'}, 'chat': {'id': 7342383, 'first_name': 'Sathya', 'last_
name': 'Bhat', 'username': 'sathyabhat', 'type': 'private'},
'date': 1516558659, 'text': '/start', 'entities': [{'offset':
0, 'length': 6, 'type': 'bot_command'}]}}]}
INFO: handle_incoming_messages - Chat text received: /start
INFO: post_message - posting
Hi! This is a News Bot which fetches news
from subreddits. Use "/source" to select a
subreddit source.
ChaPTer 3 Building The PyThon aPP
49
Example "/source programming, games" fetches news from r/
programming, r/games.
Use "/fetch" for the bot to go ahead and fetch the news.
At the moment, bot will fetch total of 10 posts from all
subreddits
to 7342383
INFO: get_updates - received response: {'ok': True, 'result':
[]}
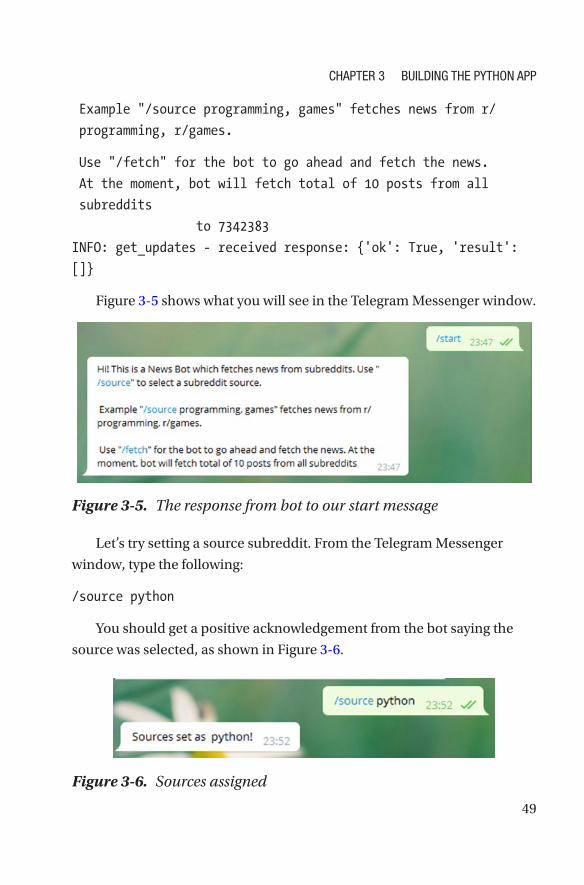
Figure 3-5 shows what you will see in the Telegram Messenger window.
Let’s try setting a source subreddit. From the Telegram Messenger
window, type the following:
/source python
You should get a positive acknowledgement from the bot saying the
source was selected, as shown in Figure 3-6.
Figure 3-5. The response from bot to our start message
Figure 3-6. Sources assigned
ChaPTer 3 Building The PyThon aPP
50
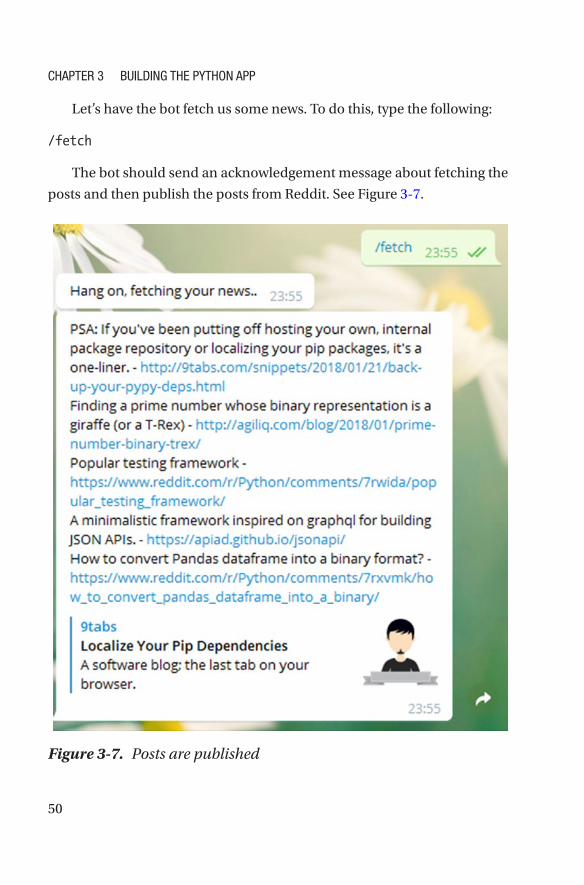
Let’s have the bot fetch us some news. To do this, type the following:
/fetch
The bot should send an acknowledgement message about fetching the
posts and then publish the posts from Reddit. See Figure 3-7.
Figure 3-7. Posts are published
ChaPTer 3 Building The PyThon aPP
51
The bot works by fetching the top posts as expected. In the next series
of chapters, you learn how to move the application to Docker.
SummaryIn this chapter, you learned about the Python project, which is a chatbot.
You also learned how to install and configure Telegram Messenger using
Telegram’s BotFather to create the bot, how to install the dependencies for
the bot, and finally, how to run the bot and ensure that it works correctly.
In the next chapter, we dive deep into Docker, learn more about the
Dockerfile, and Dockerize our Newsbot by writing a Dockerfile for it.
ChaPTer 3 Building The PyThon aPP
53© Sathyajith Bhat 2018 S. Bhat, Practical Docker with Python, https://doi.org/10.1007/978-1-4842-3784-7_4
CHAPTER 4
Understanding the DockerfileNow that you have a better understanding of Docker and its associated
terminology, let’s convert the project into a Dockerized application. In this
chapter, you take a look at a Dockerfile, including its syntax, and learn how
to write a sample Dockerfile.
By understanding the Dockerfile, you are working toward the first step
in writing a Dockerfile for the project.
DockerfileFor a traditionally deployed application, building and packaging an
application was often quite tedious. With the aim to automate the building
and packaging of the application, people turned to different utilities,
such as GNU Make, maven, gradle, etc., to build the application package.
Similarly, in the Docker world, a Dockerfile is an automated way to build
your Docker images.
The Dockerfile contains special instructions, which tell the Docker
Engine about the steps required to build an image. To invoke a build using
Docker, you issue the Docker build command.
54
A typical Dockerfile looks like this:
FROM ubuntu:latest
LABEL author="sathyabhat"
LABEL description="An example Dockerfile"
RUN apt-get install python
COPY hello-world.py
CMD python hello-world.py
Looking at the Dockerfile, it’s easy to comprehend what we’re telling
the Docker Engine to build. However, don’t let the simplicity fool you—the
Dockerfile lets you build complex conditions when generating your Docker
image. When a Docker build command is issued, it builds the Docker
images from the Dockerfile within context.
Build ContextA build context is a file or set of files available at a specific path or URL. To
understand this better, we might have some supporting files that we need
during a Docker image build—for instance, an application specific config
file that was been generated earlier and needs to be part of the container.
The build context can be local or remote—we can even set the build
context to the URL of a Git repository, which can come in handy if the
source files are not located on the same host as the Docker daemon or
if we’d like to test out feature branches. We simply set the context to the
branch. The build command looks like this:
docker build https://github.com/sathyabhat/sample-repo.
git#mybranch
Similarly, to build images based on your Git tags, the build command
would look like this:
docker build https://github.com/sathyabhat/sample-repo.
git#mytag
Chapter 4 Understanding the doCkerfile
55
Working on a feature via a pull request? Want to try out that pull request?
Not a problem; you can even set the context to a pull request as follows:
docker build https://github.com/sathyabhat/sample-repo.
git#pull/1337/head
The build command sets the context to the path or URL provided,
uploading the files to the Docker daemon and allowing it to build the
image. You are not limited to the build context of the URL or path. If you
pass an URL to a remote tarball, the tarball at the URL is downloaded onto
the Docker daemon and the build command is issued with that as the
build context.
Caution if you provide the dockerfile on the root (/) directory and set that as the context, this will transfer your hard disk contents to the docker daemon.
DockerignoreYou should now understand that the build context transfers the contents of
the current directory to the Docker daemon during the build. Consider the
case where the context directory has a lot of files/directories that are not
relevant to the build process. Uploading these files can cause a significant
increase in traffic. Dockerignore, much like gitignore, allows you to define
files which are exempt from being transferred during the build process.
The ignore list is provided by a file known as .dockerignore and
when the Docker CLI finds this file, it modifies the context to exclude
the files/patterns provided in the file. Anything starting with a hash (#)
is considered a comment and ignored. Here’s a sample .dockerignore
file that excludes a temp directory, a .git directory, and the .DS_Store
directory:
Chapter 4 Understanding the doCkerfile
56
.dockerignore Listing
*/temp*
.DS_Store
.git
Building Using Docker BuildWe’ll return to the sample Dockerfile a bit later. Let’s try a simple
Dockerfile first. Copy the following contents to a file and save it as a
Dockerfile:
Dockerfile Listing
FROM ubuntu:latest
CMD echo Hello World!
Now build this image:
docker build .
You should see a response like this:
Sending build context to Docker daemon 2.048kB
Step 1/2 : FROM ubuntu:latest
latest: Pulling from library/ubuntu
22dc81ace0ea: Pull complete
1a8b3c87dba3: Pull complete
91390a1c435a: Pull complete
07844b14977e: Pull complete
b78396653dae: Pull complete
Digest: sha256:e348fbbea0e0a0e73ab0370de151e7800684445c509d4619
5aef73e090a49bd6
Status: Downloaded newer image for ubuntu:latest
---> f975c5035748
Step 2/2 : CMD echo Hello World!
Chapter 4 Understanding the doCkerfile
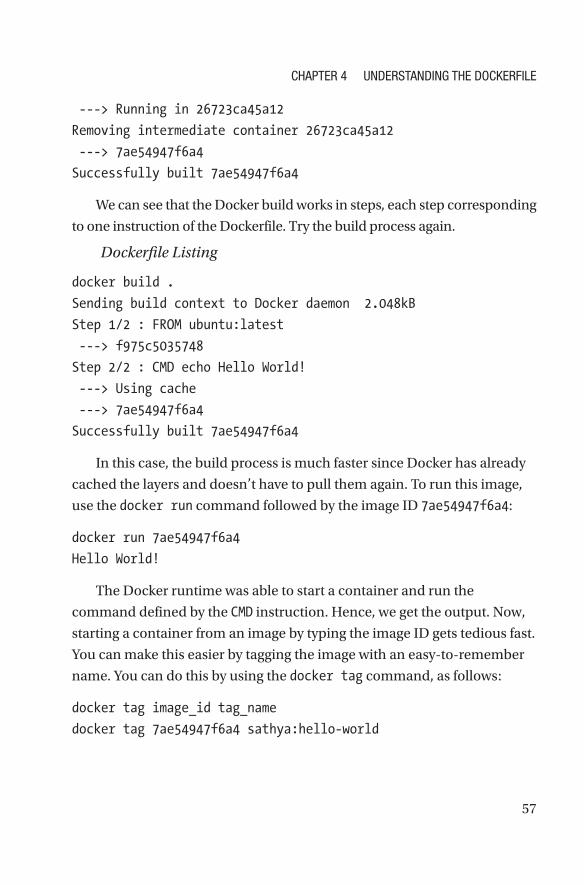
57
---> Running in 26723ca45a12
Removing intermediate container 26723ca45a12
---> 7ae54947f6a4
Successfully built 7ae54947f6a4
We can see that the Docker build works in steps, each step corresponding
to one instruction of the Dockerfile. Try the build process again.
Dockerfile Listing
docker build .
Sending build context to Docker daemon 2.048kB
Step 1/2 : FROM ubuntu:latest
---> f975c5035748
Step 2/2 : CMD echo Hello World!
---> Using cache
---> 7ae54947f6a4
Successfully built 7ae54947f6a4
In this case, the build process is much faster since Docker has already
cached the layers and doesn’t have to pull them again. To run this image,
use the docker run command followed by the image ID 7ae54947f6a4:
docker run 7ae54947f6a4
Hello World!
The Docker runtime was able to start a container and run the
command defined by the CMD instruction. Hence, we get the output. Now,
starting a container from an image by typing the image ID gets tedious fast.
You can make this easier by tagging the image with an easy-to-remember
name. You can do this by using the docker tag command, as follows:
docker tag image_id tag_name
docker tag 7ae54947f6a4 sathya:hello-world
Chapter 4 Understanding the doCkerfile
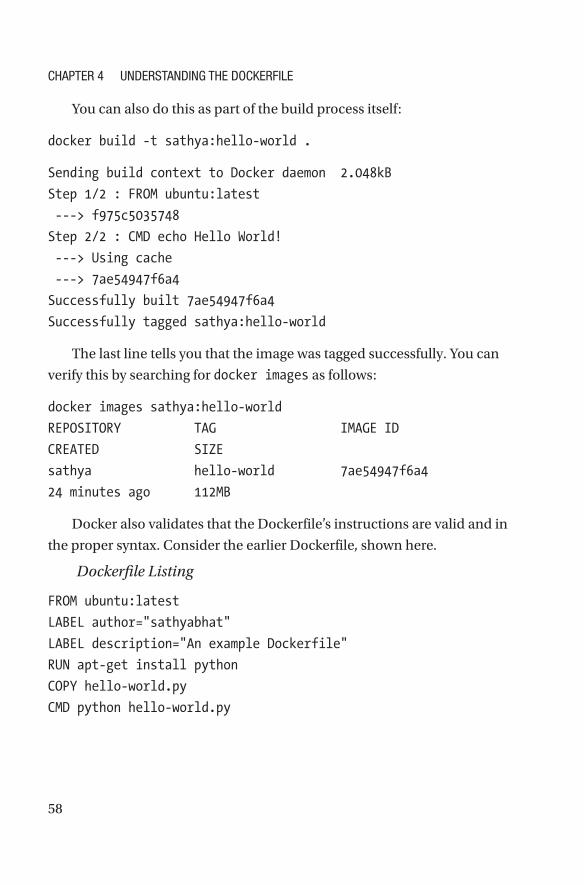
58
You can also do this as part of the build process itself:
docker build -t sathya:hello-world .
Sending build context to Docker daemon 2.048kB
Step 1/2 : FROM ubuntu:latest
---> f975c5035748
Step 2/2 : CMD echo Hello World!
---> Using cache
---> 7ae54947f6a4
Successfully built 7ae54947f6a4
Successfully tagged sathya:hello-world
The last line tells you that the image was tagged successfully. You can
verify this by searching for docker images as follows:
docker images sathya:hello-world
REPOSITORY TAG IMAGE ID
CREATED SIZE
sathya hello-world 7ae54947f6a4
24 minutes ago 112MB
Docker also validates that the Dockerfile’s instructions are valid and in
the proper syntax. Consider the earlier Dockerfile, shown here.
Dockerfile Listing
FROM ubuntu:latest
LABEL author="sathyabhat"
LABEL description="An example Dockerfile"
RUN apt-get install python
COPY hello-world.py
CMD python hello-world.py
Chapter 4 Understanding the doCkerfile
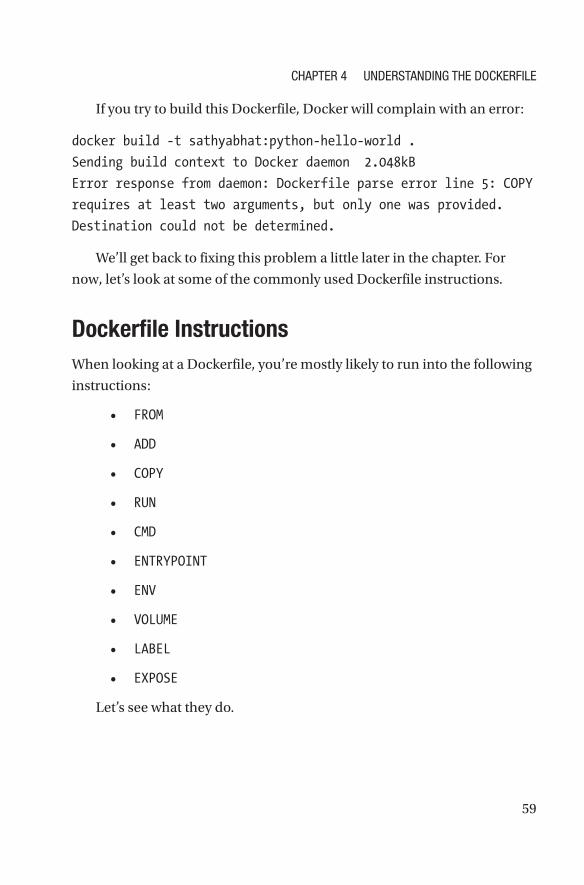
59
If you try to build this Dockerfile, Docker will complain with an error:
docker build -t sathyabhat:python-hello-world .
Sending build context to Docker daemon 2.048kB
Error response from daemon: Dockerfile parse error line 5: COPY
requires at least two arguments, but only one was provided.
Destination could not be determined.
We’ll get back to fixing this problem a little later in the chapter. For
now, let’s look at some of the commonly used Dockerfile instructions.
Dockerfile InstructionsWhen looking at a Dockerfile, you’re mostly likely to run into the following
instructions:
• FROM
• ADD
• COPY
• RUN
• CMD
• ENTRYPOINT
• ENV
• VOLUME
• LABEL
• EXPOSE
Let’s see what they do.
Chapter 4 Understanding the doCkerfile
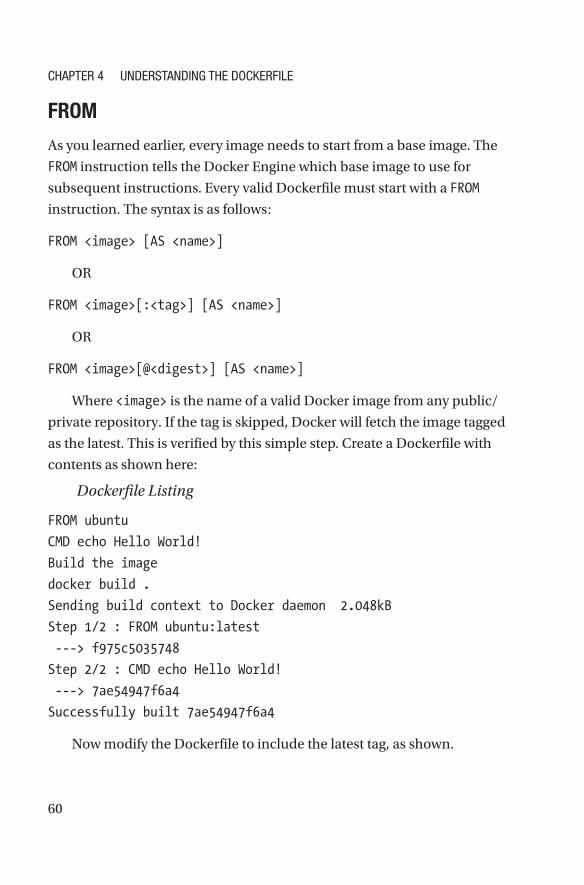
60
FROM
As you learned earlier, every image needs to start from a base image. The
FROM instruction tells the Docker Engine which base image to use for
subsequent instructions. Every valid Dockerfile must start with a FROM
instruction. The syntax is as follows:
FROM <image> [AS <name>]
OR
FROM <image>[:<tag>] [AS <name>]
OR
FROM <image>[@<digest>] [AS <name>]
Where <image> is the name of a valid Docker image from any public/
private repository. If the tag is skipped, Docker will fetch the image tagged
as the latest. This is verified by this simple step. Create a Dockerfile with
contents as shown here:
Dockerfile Listing
FROM ubuntu
CMD echo Hello World!
Build the image
docker build .
Sending build context to Docker daemon 2.048kB
Step 1/2 : FROM ubuntu:latest
---> f975c5035748
Step 2/2 : CMD echo Hello World!
---> 7ae54947f6a4
Successfully built 7ae54947f6a4
Now modify the Dockerfile to include the latest tag, as shown.
Chapter 4 Understanding the doCkerfile
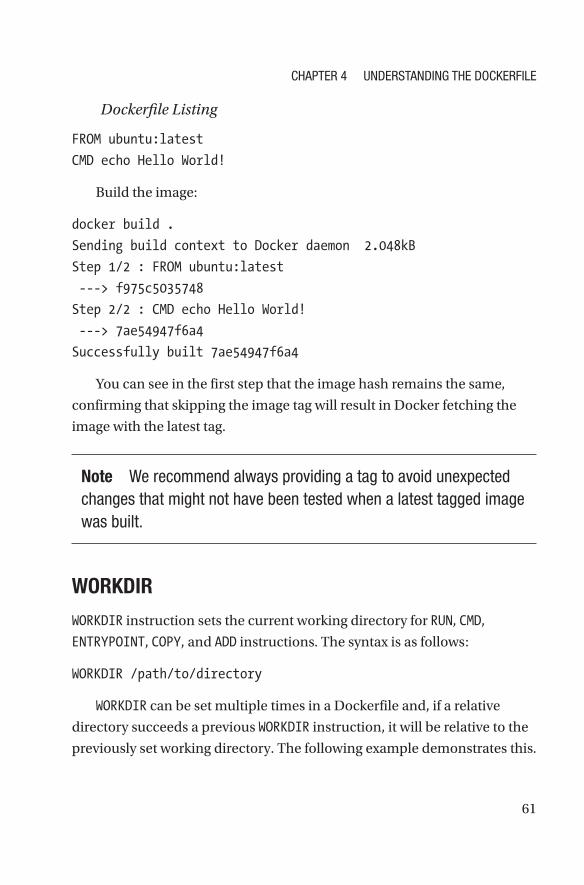
61
Dockerfile Listing
FROM ubuntu:latest
CMD echo Hello World!
Build the image:
docker build .
Sending build context to Docker daemon 2.048kB
Step 1/2 : FROM ubuntu:latest
---> f975c5035748
Step 2/2 : CMD echo Hello World!
---> 7ae54947f6a4
Successfully built 7ae54947f6a4
You can see in the first step that the image hash remains the same,
confirming that skipping the image tag will result in Docker fetching the
image with the latest tag.
Note We recommend always providing a tag to avoid unexpected changes that might not have been tested when a latest tagged image was built.
WORKDIR
WORKDIR instruction sets the current working directory for RUN, CMD,
ENTRYPOINT, COPY, and ADD instructions. The syntax is as follows:
WORKDIR /path/to/directory
WORKDIR can be set multiple times in a Dockerfile and, if a relative
directory succeeds a previous WORKDIR instruction, it will be relative to the
previously set working directory. The following example demonstrates this.
Chapter 4 Understanding the doCkerfile
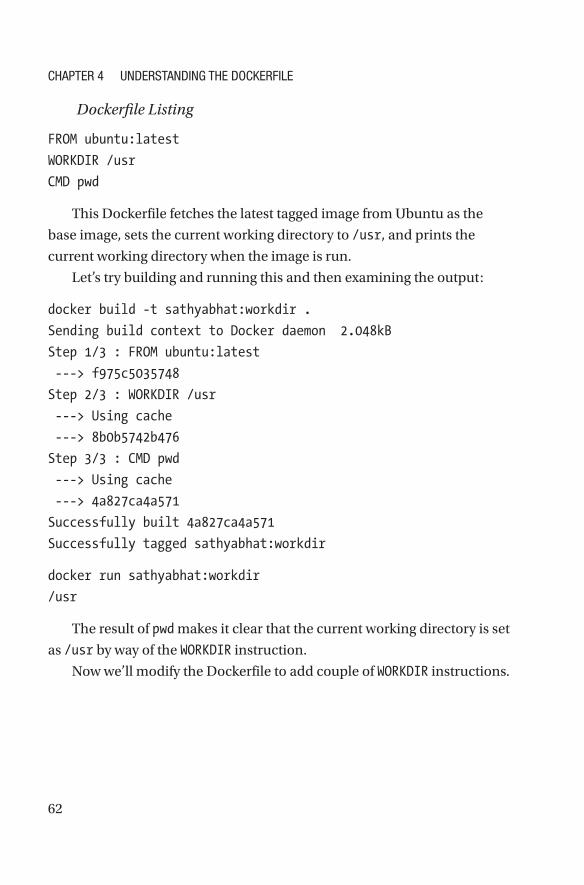
62
Dockerfile Listing
FROM ubuntu:latest
WORKDIR /usr
CMD pwd
This Dockerfile fetches the latest tagged image from Ubuntu as the
base image, sets the current working directory to /usr, and prints the
current working directory when the image is run.
Let’s try building and running this and then examining the output:
docker build -t sathyabhat:workdir .
Sending build context to Docker daemon 2.048kB
Step 1/3 : FROM ubuntu:latest
---> f975c5035748
Step 2/3 : WORKDIR /usr
---> Using cache
---> 8b0b5742b476
Step 3/3 : CMD pwd
---> Using cache
---> 4a827ca4a571
Successfully built 4a827ca4a571
Successfully tagged sathyabhat:workdir
docker run sathyabhat:workdir
/usr
The result of pwd makes it clear that the current working directory is set
as /usr by way of the WORKDIR instruction.
Now we’ll modify the Dockerfile to add couple of WORKDIR instructions.
Chapter 4 Understanding the doCkerfile
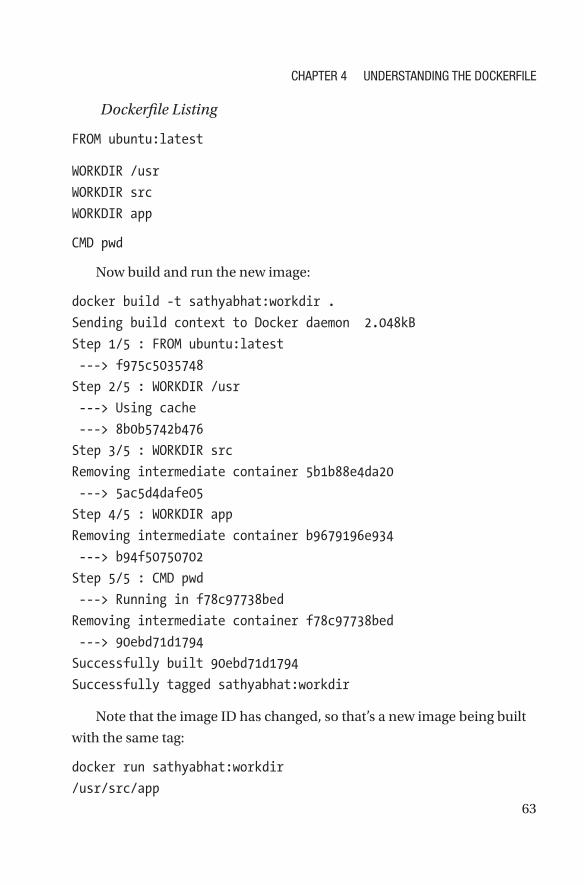
63
Dockerfile Listing
FROM ubuntu:latest
WORKDIR /usr
WORKDIR src
WORKDIR app
CMD pwd
Now build and run the new image:
docker build -t sathyabhat:workdir .
Sending build context to Docker daemon 2.048kB
Step 1/5 : FROM ubuntu:latest
---> f975c5035748
Step 2/5 : WORKDIR /usr
---> Using cache
---> 8b0b5742b476
Step 3/5 : WORKDIR src
Removing intermediate container 5b1b88e4da20
---> 5ac5d4dafe05
Step 4/5 : WORKDIR app
Removing intermediate container b9679196e934
---> b94f50750702
Step 5/5 : CMD pwd
---> Running in f78c97738bed
Removing intermediate container f78c97738bed
---> 90ebd71d1794
Successfully built 90ebd71d1794
Successfully tagged sathyabhat:workdir
Note that the image ID has changed, so that’s a new image being built
with the same tag:
docker run sathyabhat:workdir
/usr/src/app
Chapter 4 Understanding the doCkerfile
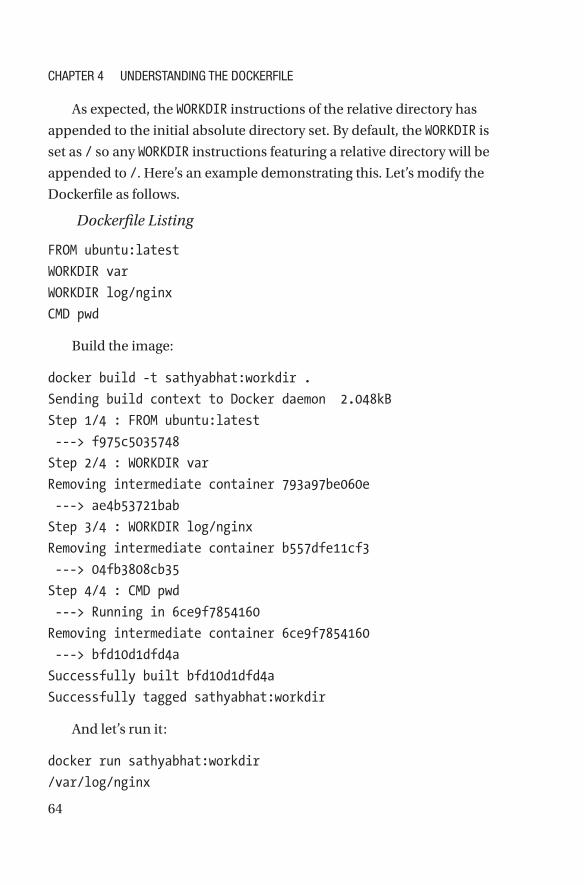
64
As expected, the WORKDIR instructions of the relative directory has
appended to the initial absolute directory set. By default, the WORKDIR is
set as / so any WORKDIR instructions featuring a relative directory will be
appended to /. Here’s an example demonstrating this. Let’s modify the
Dockerfile as follows.
Dockerfile Listing
FROM ubuntu:latest
WORKDIR var
WORKDIR log/nginx
CMD pwd
Build the image:
docker build -t sathyabhat:workdir .
Sending build context to Docker daemon 2.048kB
Step 1/4 : FROM ubuntu:latest
---> f975c5035748
Step 2/4 : WORKDIR var
Removing intermediate container 793a97be060e
---> ae4b53721bab
Step 3/4 : WORKDIR log/nginx
Removing intermediate container b557dfe11cf3
---> 04fb3808cb35
Step 4/4 : CMD pwd
---> Running in 6ce9f7854160
Removing intermediate container 6ce9f7854160
---> bfd10d1dfd4a
Successfully built bfd10d1dfd4a
Successfully tagged sathyabhat:workdir
And let’s run it:
docker run sathyabhat:workdir
/var/log/nginx
Chapter 4 Understanding the doCkerfile
65
Notice that we did not set any absolute working directory in the
Dockerfile. The relative directories were appended to the default.
ADD and COPY
At first glance, the ADD and COPY instructions seem to do the same—they
allow you to transfer files from the host to the container’s filesystem. COPY
supports basic copying of files to the container, while ADD has support for
features like tarball auto extraction and remote URL support.
Syntax for both is quite similar:
ADD <source> <destination>
COPY <source> <destination>
For Dockerfiles used to build Linux containers, both of these
instructions let you change the owner/group of the files being added to the
container. This is done with the --chown flag, as follows:
ADD --chown=<user>:<group> <source> <destination>
COPY --chown=<user>:<group> <source> <destination>
For example, if you want to move the requirements.txt file from the
current working directory to the /usr/share/app directory, the instruction
would be as follows:
ADD requirements.txt /usr/share/app
COPY requirements.txt /usr/share/app
Both ADD and COPY support wildcards while specifying patterns. For
example, having the following instructions in your Dockerfile will copy all
files with the .py extension to the /apps/ directory of the image.
ADD *.py /apps/
COPY *.py /apps/
Chapter 4 Understanding the doCkerfile
66
Docker recommends using COPY over ADD, especially when it’s a local
file that’s being copied. There are a few gotchas to be considered when
using COPY versus ADD and the behavior of COPY/ADD instructions:
• If the <destination> does not exist in the image, it will
be created.
• All new files/directories are created with UID and
GID as 0, i.e., as the root user. To change this, use the
--chown flag.
• If the files/directories contain special characters, they
will need to be escaped.
• The <destination> can be an absolute or relative
path. In case of relative paths, the relativeness will be
inferred from the path set by the WORKDIR instruction.
• If the <destination> doesn’t end with a trailing slash,
it will be considered a file and the contents of the
<source> will be written into <destination>.
• If the <source> is specified as a wildcard pattern, the
<destination> must be a directory and must end with
a trailing slash; otherwise, the build process will fail.
• The <source> must be within the build context—it
cannot be a file/directory outside of the build context
because the first step of a Docker build process involves
sending the context directory to the Docker daemon.
• In case of the ADD instruction:
• If the <source> is a URL and the <destination> is
not a directory and doesn’t end with a trailing slash,
the file is downloaded from the URL and copied
into <destination>.
Chapter 4 Understanding the doCkerfile
67
• If the <source> is a URL and the <destination>
is a directory and ends with a trailing slash,
the filename is inferred from the URL
and the file is downloaded and copied to
<destination>/<filename>.
• If the <source> is a local tarball of a known
compression format, the tarball is unpacked as
a directory. Remote tarballs, however, are not
uncompressed.
RUN
The RUN instruction will execute any commands in a new layer on top of
the current image and create a new layer that is available for the next steps
in the Dockerfile.
RUN has two forms:
RUN <command> (known as the shell form)
RUN ["executable", "parameter 1", " parameter 2"] (known as the
exec form)
In shell form, the command is run in a shell with the command
as a parameter. This form provides for a shell where shell variables,
subcommands, and commanding piping and chaining is possible.
Consider a scenario where you’d like to embed the kernel release
version into the home directory of the Docker image. With the shell form,
it’s easy enough:
RUN echo `uname -rv` > $HOME/kernel-info
This wouldn’t be possible with the exec form. RUN is a build-time
command and, as such, is run when a Docker image is built, rather than
when it’s run. The resultant layer is then cached. It’s important to note that
Docker uses the command string of a RUN instruction to build the cache,
rather than the actual contents of the RUN instruction.
Chapter 4 Understanding the doCkerfile
68
Consider the following Dockerfile.
Dockerfile Listing
FROM ubuntu:16.04
RUN apt-get update
When the image is built, Docker will cache all the layers of this command.
However, consider when we build another Dockerfile, shown here.
Dockerfile Listing
FROM ubuntu:18.04
RUN apt-get update
In this case, Docker reuses the cache of the previous image and, as a
result, the image build can contain outdated packages. The cache for the
RUN instructions can be invalidated by using the --no-cache flag. Every RUN
instruction creates a new layer. This can be a good or a bad thing—it’s good
because the resulting cache means that future builds can reuse the cache layer.
It can be bad because the cached layer might not be compatible with
future builds and increases the size of the Docker image. Docker recommends
chaining multiple RUN commands into a single command. For example,
installing or using multiple RUN commands to install the required packages:
RUN apt-get update
RUN apt-get install foo
RUN apt-get install bar
RUN apt-get install baz
It’s better to wrap them in a single RUN command:
RUN apt-get update && apt-get install -y \
foo \
bar \
baz
This reduces the number of layers and makes for a leaner Docker image.
Chapter 4 Understanding the doCkerfile
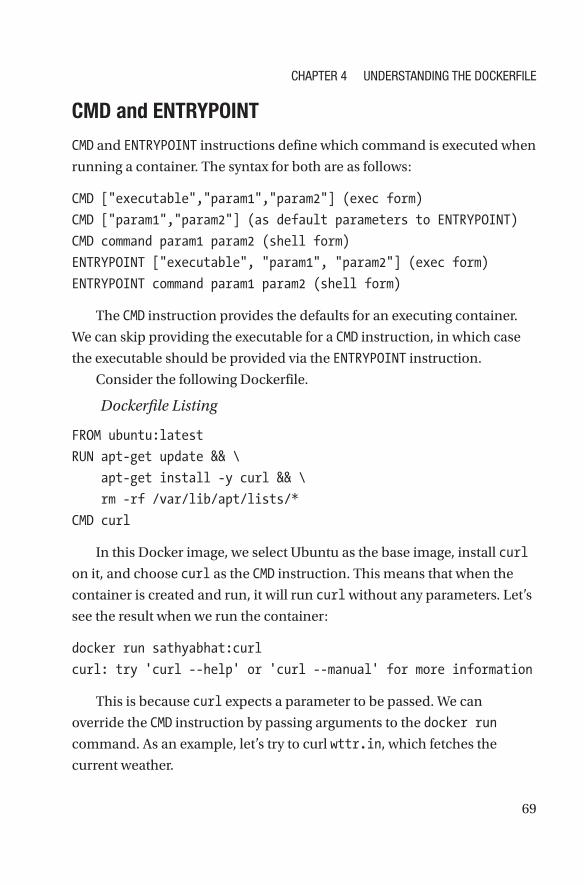
69
CMD and ENTRYPOINT
CMD and ENTRYPOINT instructions define which command is executed when
running a container. The syntax for both are as follows:
CMD ["executable","param1","param2"] (exec form)
CMD ["param1","param2"] (as default parameters to ENTRYPOINT)
CMD command param1 param2 (shell form)
ENTRYPOINT ["executable", "param1", "param2"] (exec form)
ENTRYPOINT command param1 param2 (shell form)
The CMD instruction provides the defaults for an executing container.
We can skip providing the executable for a CMD instruction, in which case
the executable should be provided via the ENTRYPOINT instruction.
Consider the following Dockerfile.
Dockerfile Listing
FROM ubuntu:latest
RUN apt-get update && \
apt-get install -y curl && \
rm -rf /var/lib/apt/lists/*
CMD curl
In this Docker image, we select Ubuntu as the base image, install curl
on it, and choose curl as the CMD instruction. This means that when the
container is created and run, it will run curl without any parameters. Let’s
see the result when we run the container:
docker run sathyabhat:curl
curl: try 'curl --help' or 'curl --manual' for more information
This is because curl expects a parameter to be passed. We can
override the CMD instruction by passing arguments to the docker run
command. As an example, let’s try to curl wttr.in, which fetches the
current weather.
Chapter 4 Understanding the doCkerfile
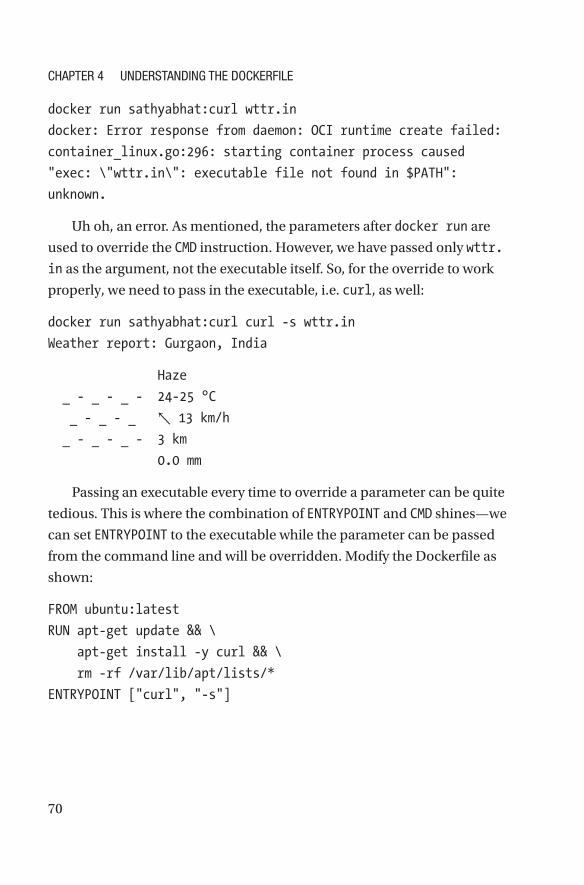
70
docker run sathyabhat:curl wttr.in
docker: Error response from daemon: OCI runtime create failed:
container_linux.go:296: starting container process caused
"exec: \"wttr.in\": executable file not found in $PATH":
unknown.
Uh oh, an error. As mentioned, the parameters after docker run are
used to override the CMD instruction. However, we have passed only wttr.
in as the argument, not the executable itself. So, for the override to work
properly, we need to pass in the executable, i.e. curl, as well:
docker run sathyabhat:curl curl -s wttr.in
Weather report: Gurgaon, India
Haze
_ - _ - _ - 24-25 °C
_ - _ - _ ↖ 13 km/h
_ - _ - _ - 3 km
0.0 mm
Passing an executable every time to override a parameter can be quite
tedious. This is where the combination of ENTRYPOINT and CMD shines—we
can set ENTRYPOINT to the executable while the parameter can be passed
from the command line and will be overridden. Modify the Dockerfile as
shown:
FROM ubuntu:latest
RUN apt-get update && \
apt-get install -y curl && \
rm -rf /var/lib/apt/lists/*
ENTRYPOINT ["curl", "-s"]
Chapter 4 Understanding the doCkerfile
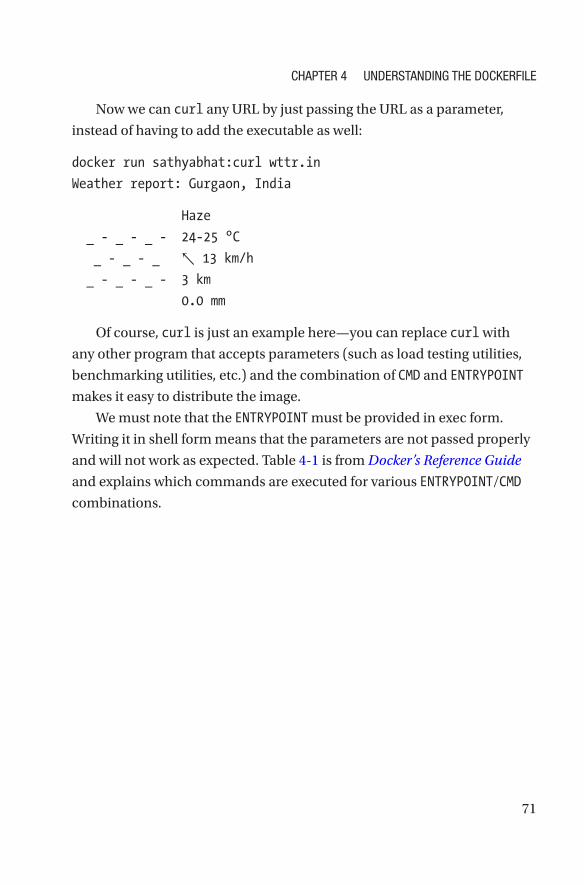
71
Now we can curl any URL by just passing the URL as a parameter,
instead of having to add the executable as well:
docker run sathyabhat:curl wttr.in
Weather report: Gurgaon, India
Haze
_ - _ - _ - 24-25 °C
_ - _ - _ ↖ 13 km/h
_ - _ - _ - 3 km
0.0 mm
Of course, curl is just an example here—you can replace curl with
any other program that accepts parameters (such as load testing utilities,
benchmarking utilities, etc.) and the combination of CMD and ENTRYPOINT
makes it easy to distribute the image.
We must note that the ENTRYPOINT must be provided in exec form.
Writing it in shell form means that the parameters are not passed properly
and will not work as expected. Table 4-1 is from Docker’s Reference Guide
and explains which commands are executed for various ENTRYPOINT/CMD
combinations.
Chapter 4 Understanding the doCkerfile

72
Table 4-1. Commands for ENTRYPOINT/CMD Combinations
No ENTRYPOINT ENTRYPOINT exec_entry p1_entry
ENTRYPOINT ["exec_entry", "p1_entry"]
No CMD error, not
allowed
/bin/sh -c exec_
entry p1_entry
exec_entry p1_
entry
CMD
["exec_
cmd", "p1_
cmd"]
exec_cmd p1_
cmd
/bin/sh -c exec_
entry p1_entry
exec_entry p1_
entry exec_cmd
p1_cmd
CMD ["p1_
cmd", "p2_
cmd"]
p1_cmd p2_cmd /bin/sh -c exec_
entry p1_entry
exec_entry
p1_entry p1_cmd
p2_cmd
CMD exec_
cmd p1_cmd
/bin/sh -c
exec_cmd p1_
cmd
/bin/sh -c exec_
entry p1_entry
exec_entry p1_
entry /bin/sh -c
exec_cmd p1_cmd
Gotchas About Shell and Exec Form
As mentioned earlier, you can specify RUN, CMD, and ENTRYPOINT in shell
form and exec form. What should be used will entirely depend on what the
requirements are. But as a general guide:
• In shell form, the command is run in a shell with the
command as a parameter. This form provides for a shell
where shell variables, subcommands, commanding
piping, and chaining is possible.
• In exec form, the command does not invoke a
command shell. This means that normal shell
processing (such as $VARIABLE substitution, piping,
etc.) will not work.
Chapter 4 Understanding the doCkerfile
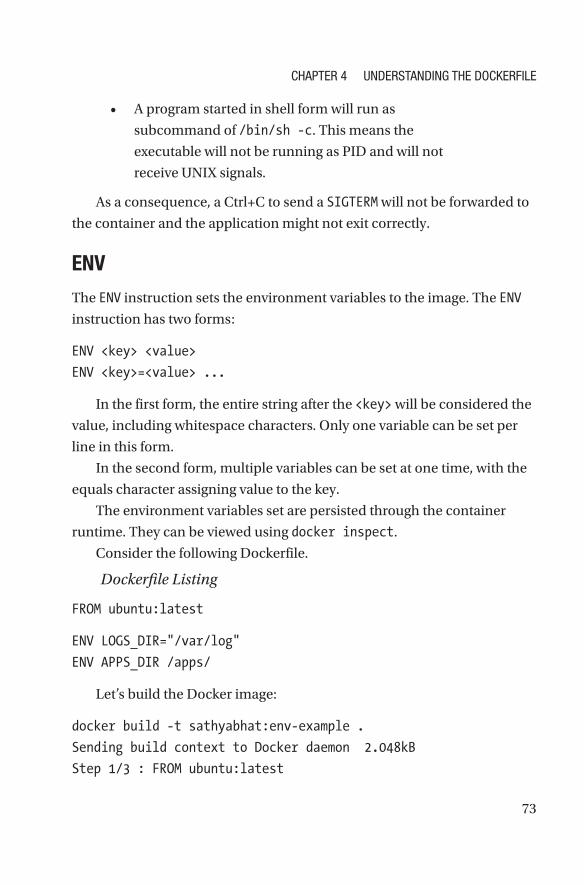
73
• A program started in shell form will run as
subcommand of /bin/sh -c. This means the
executable will not be running as PID and will not
receive UNIX signals.
As a consequence, a Ctrl+C to send a SIGTERM will not be forwarded to
the container and the application might not exit correctly.
ENV
The ENV instruction sets the environment variables to the image. The ENV
instruction has two forms:
ENV <key> <value>
ENV <key>=<value> ...
In the first form, the entire string after the <key> will be considered the
value, including whitespace characters. Only one variable can be set per
line in this form.
In the second form, multiple variables can be set at one time, with the
equals character assigning value to the key.
The environment variables set are persisted through the container
runtime. They can be viewed using docker inspect.
Consider the following Dockerfile.
Dockerfile Listing
FROM ubuntu:latest
ENV LOGS_DIR="/var/log"
ENV APPS_DIR /apps/
Let’s build the Docker image:
docker build -t sathyabhat:env-example .
Sending build context to Docker daemon 2.048kB
Step 1/3 : FROM ubuntu:latest
Chapter 4 Understanding the doCkerfile
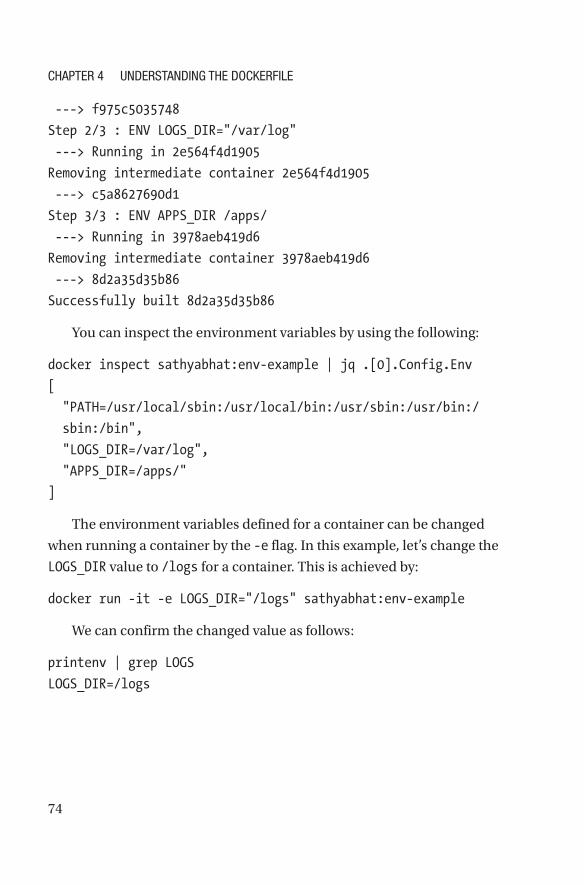
74
---> f975c5035748
Step 2/3 : ENV LOGS_DIR="/var/log"
---> Running in 2e564f4d1905
Removing intermediate container 2e564f4d1905
---> c5a8627690d1
Step 3/3 : ENV APPS_DIR /apps/
---> Running in 3978aeb419d6
Removing intermediate container 3978aeb419d6
---> 8d2a35d35b86
Successfully built 8d2a35d35b86
You can inspect the environment variables by using the following:
docker inspect sathyabhat:env-example | jq .[0].Config.Env
[
"PATH=/usr/local/sbin:/usr/local/bin:/usr/sbin:/usr/bin:/
sbin:/bin",
"LOGS_DIR=/var/log",
"APPS_DIR=/apps/"
]
The environment variables defined for a container can be changed
when running a container by the -e flag. In this example, let’s change the
LOGS_DIR value to /logs for a container. This is achieved by:
docker run -it -e LOGS_DIR="/logs" sathyabhat:env-example
We can confirm the changed value as follows:
printenv | grep LOGS
LOGS_DIR=/logs
Chapter 4 Understanding the doCkerfile

75
VOLUME
The VOLUME instruction tells Docker to create a directory on the host and
mount it to a path specified in the instruction.
For instance, an instruction like this:
VOLUME /var/logs/nginx
Tells Docker to create a directory on the Docker host (typically within the
Docker root path) and point to the named directory, within the container to
the host directory. We look at volumes in a later chapter in the book.
EXPOSE
The EXPOSE instruction tells Docker that the container listens for the
specified network ports at runtime. The syntax follows:
EXPOSE <port> [<port>/<protocol>...]
For example, if you want to expose port 80, the EXPOSE instruction will be:
EXPOSE 80
If you want to expose port 53 on TCP and UDP, the Dockerfile
instruction would be:
EXPOSE 53/tcp
EXPOSE 53/udp
We can also mention the port number and whether the port listens on
TCP/UDP or both. If it’s not specified, Docker assumes the protocol to be TCP.
Note an EXPOSE instruction doesn’t publish the port. for the port to be published to the host, you need to use the -p flag when you do a docker run to publish and map the ports.
Chapter 4 Understanding the doCkerfile
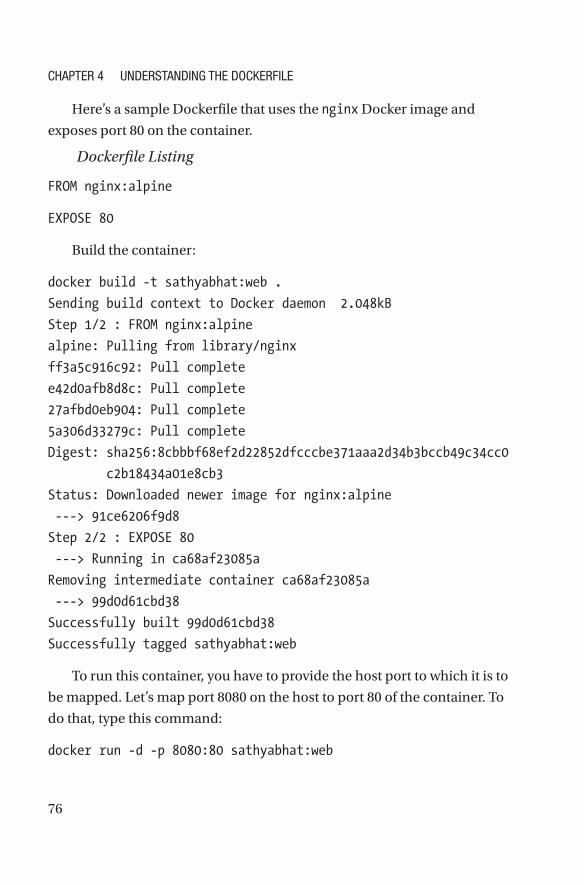
76
Here’s a sample Dockerfile that uses the nginx Docker image and
exposes port 80 on the container.
Dockerfile Listing
FROM nginx:alpine
EXPOSE 80
Build the container:
docker build -t sathyabhat:web .
Sending build context to Docker daemon 2.048kB
Step 1/2 : FROM nginx:alpine
alpine: Pulling from library/nginx
ff3a5c916c92: Pull complete
e42d0afb8d8c: Pull complete
27afbd0eb904: Pull complete
5a306d33279c: Pull complete
Digest: sha256:8cbbbf68ef2d22852dfcccbe371aaa2d34b3bccb49c34cc0
c2b18434a01e8cb3
Status: Downloaded newer image for nginx:alpine
---> 91ce6206f9d8
Step 2/2 : EXPOSE 80
---> Running in ca68af23085a
Removing intermediate container ca68af23085a
---> 99d0d61cbd38
Successfully built 99d0d61cbd38
Successfully tagged sathyabhat:web
To run this container, you have to provide the host port to which it is to
be mapped. Let’s map port 8080 on the host to port 80 of the container. To
do that, type this command:
docker run -d -p 8080:80 sathyabhat:web
Chapter 4 Understanding the doCkerfile
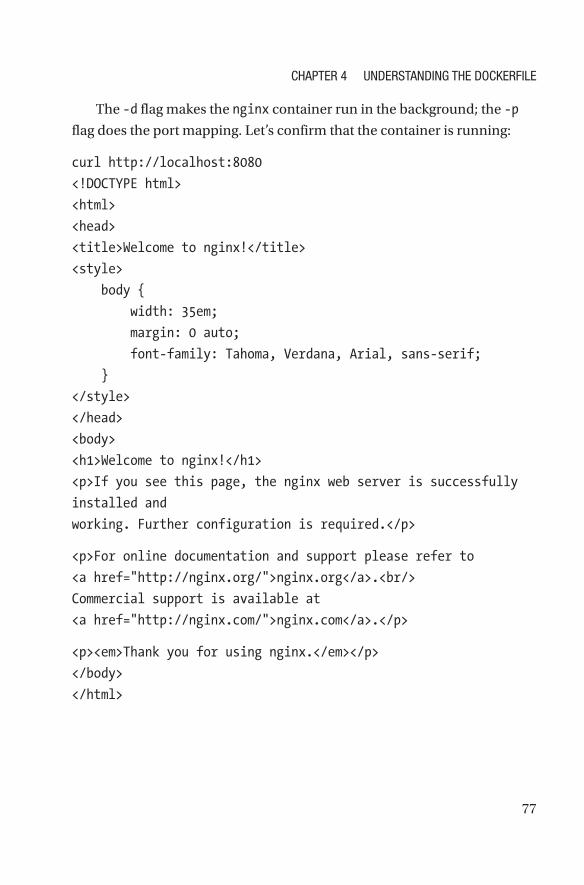
77
The -d flag makes the nginx container run in the background; the -p
flag does the port mapping. Let’s confirm that the container is running:
curl http://localhost:8080
<!DOCTYPE html>
<html>
<head>
<title>Welcome to nginx!</title>
<style>
body {
width: 35em;
margin: 0 auto;
font-family: Tahoma, Verdana, Arial, sans-serif;
}
</style>
</head>
<body>
<h1>Welcome to nginx!</h1>
<p>If you see this page, the nginx web server is successfully
installed and
working. Further configuration is required.</p>
<p>For online documentation and support please refer to
<a href="http://nginx.org/">nginx.org</a>.<br/>
Commercial support is available at
<a href="http://nginx.com/">nginx.com</a>.</p>
<p><em>Thank you for using nginx.</em></p>
</body>
</html>
Chapter 4 Understanding the doCkerfile
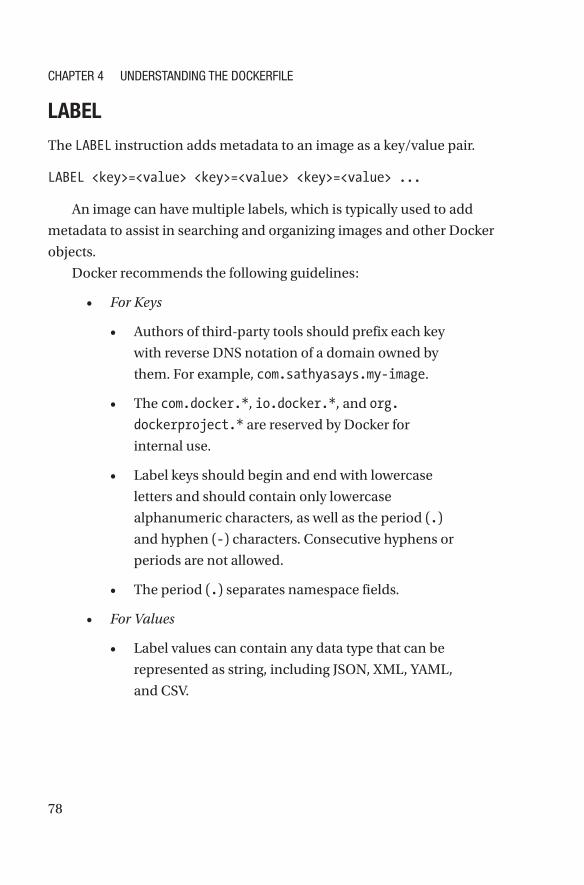
78
LABEL
The LABEL instruction adds metadata to an image as a key/value pair.
LABEL <key>=<value> <key>=<value> <key>=<value> ...
An image can have multiple labels, which is typically used to add
metadata to assist in searching and organizing images and other Docker
objects.
Docker recommends the following guidelines:
• For Keys
• Authors of third-party tools should prefix each key
with reverse DNS notation of a domain owned by
them. For example, com.sathyasays.my-image.
• The com.docker.*, io.docker.*, and org.
dockerproject.* are reserved by Docker for
internal use.
• Label keys should begin and end with lowercase
letters and should contain only lowercase
alphanumeric characters, as well as the period (.)
and hyphen (-) characters. Consecutive hyphens or
periods are not allowed.
• The period (.) separates namespace fields.
• For Values
• Label values can contain any data type that can be
represented as string, including JSON, XML, YAML,
and CSV.
Chapter 4 Understanding the doCkerfile

79
Guidelines and Recommendations for Writing DockerfilesFollowing are some of the guidelines and best practices for writing
Dockerfiles as recommended by Docker.
• Containers should be ephemeral
Docker recommends that the image generated by
Dockerfile should be as ephemeral as possible. By
this, we should be able stop, destroy, and restart
the container at any point with minimal setup and
configuration to the container.
• Keep the build context minimal
We discussed build context earlier in this chapter.
It’s important to keep the build context as minimal
as possible to reduce the build times and image size.
This can be done by using the .dockerignore file
effectively.
• Use multi-stage builds
Multi-stage builds help drastically reduce the size
of the image without having to write complicated
scripts to transfer/keep the required artifacts. Multi-
stage builds are described in the next section.
• Skip unwanted packages
Having unwanted or nice-to-have packages
increases the size of the image, introduces
unwanted dependent packages, and increases the
surface area for attacks.
Chapter 4 Understanding the doCkerfile
80
• Minimize the number of layers
While not as big of a concern as they used to be, it’s
still important to reduce the number of layers in
the image. As of Docker 1.10 and above, only RUN,
COPY, and ADD instructions create layers. With these
in mind, having minimal instruction or combining
many lines of the respective instructions will reduce
the number of layers, ultimately reducing the size of
the image.
Multi-Stage BuildsAs of version 17.05 and above, Docker added support for multi-stage
builds, allowing for complex image builds to be performed without
the Docker image being unnecessarily bloated. Multi-stage builds are
especially useful for building images of applications that require some
additional build-time dependencies but are not needed during runtime.
Most common examples are applications written using programming
languages such as Go or Java, where prior to multi-stage builds, it was
common to have two different Dockerfiles, one for build and the other for
release. The orchestration of the artifacts from the build time image to the
runtime image could be done via shell scripts.
With multi-stage builds, a single Dockerfile can be leveraged for build
and deploy images—the build images can contain the build tools required
for generating the binary or the artifact and in the second stage, the artifact
can be copied to the runtime image, thereby reducing considerably the size
of the runtime image. For a typical multi-stage build, a build stage has several
layers—each layer for installing tools required to build the application,
generating the dependencies, and generating the application. In the final
layer, the application built from the build stages would be copied over to the
final layer and only that layer is considered for building the image—the build
layers are discarded, drastically reducing the size of the final image.
Chapter 4 Understanding the doCkerfile
81
While this book doesn’t focus on multi-stage builds in detail, we do
include an exercise on how to create a multi-stage build. We demonstrate
the difference that using a slim image with a multi-stage build makes to the
final image.
Note More details about multi-stage builds are available on docker’s website at https://docs.docker.com/develop/develop-images/multistage-build/.
Dockerfile ExercisesYou have learned a fair bit about Dockerfiles, so it’s time to try some
exercises to better understand them.
BUILDING A SIMPLE HELLO WORLD DOCKER IMAGE
at the start of the chapter, we introduced a simple dockerfile that did not
build due to syntax errors. here, you’ll fix the dockerfile and add some of the
instructions that you learned about in this chapter.
Tip the source code and dockerfile associated with this are available as docker-hello-world.zip.
the original dockerfile is shown here.
Dockerfile Listing
FROM ubuntu:latest
LABEL author="sathyabhat"
LABEL description="An example Dockerfile"
RUN apt-get install python
Chapter 4 Understanding the doCkerfile
82
COPY hello-world.py
CMD python hello-world.py
trying to build this will result in an error since hello-world.py is missing.
let’s fix the build error. to do this, you will add a hello-world.py file, which
reads an environment variable, NAME, and prints "Hello, $NAME!. if the
environment variable is not defined, then it will print "Hello, World!"
the contents of hello-world.py are as follows:
#!/usr/bin/env python3
from os import getenv
if getenv('NAME') is None:
name = 'World!'
else:
name = getenv('NAME')
print("Hello {}".format(name))
the corrected dockerfile follows.
Corrected Dockerfile Listing
FROM python:3-alpine
LABEL author="sathyabhat"
LABEL description="Dockerfile for Python script which prints
Hello, Name"
COPY hello-world.py /app/
ENV NAME=Sathya
CMD python3 /app/hello-world.py
Build the dockerfile:
docker build -t sathyabhat:hello-python .
Sending build context to Docker daemon 3.072kB
Step 1/6 : FROM python:3-alpine
Chapter 4 Understanding the doCkerfile

83
---> 4fcaf5fb5f2b
Step 2/6 : LABEL author="sathyabhat"
---> 29e08fa6b4c2
Step 3/6 : LABEL description="Dockerfile for Python script which
prints Hello, Name"
---> Running in bbabe9d8322a
Removing intermediate container bbabe9d8322a
---> abf1d06444ca
Step 4/6 : COPY hello-world.py /app/
---> 19454b206b46
Step 5/6 : ENV NAME=Sathya
---> Running in 83b5ff92f771
Removing intermediate container 83b5ff92f771
---> 839197bb6542
Step 6/6 : CMD python3 /app/hello-world.py
---> Running in 6dbdd98d868b
Removing intermediate container 6dbdd98d868b
---> 2410783edf5d
Successfully built 2410783edf5d
Successfully tagged sathyabhat:hello-python
Confirm the image name and the size:
docker images sathyabhat:hello-python
REPOSITORY TAG IMAGE ID CREATED SIZE
sathyabhat hello- python 2410783edf5d Less than 90MB
a second ago
run the docker image:
docker run sathyabhat:hello-python
Hello, Sathya!
Chapter 4 Understanding the doCkerfile
84
try overriding the environment variable at runtime. You can do this by
providing the -e parameter to the docker run command:
docker run -e NAME=John sathyabhat:hello-python
Hello, John!
Congrats! You have successfully written your first dockerfile and built your first
docker image.
A LOOK AT SLIM DOCKER RELEASE IMAGE (USING MULTI-STAGE BUILDS)
in this exercise, you will build two docker images, the first one using a
standard build process using python:3 as the base image.
Tip the source code and dockerfiles associated with both builds are available as docker-multi-stage.zip.
Building the Docker Image Using a Standard Build
Create a requirements.txt file with the following content:
praw
now create a dockerfile with the following content.
Dockerfile Listing
FROM python:3
COPY requirements.txt .
RUN pip install -r requirements.txt
now build the docker image:
docker build -t sathyabhat:base-build .
Sending build context to Docker daemon 3.072kB
Chapter 4 Understanding the doCkerfile
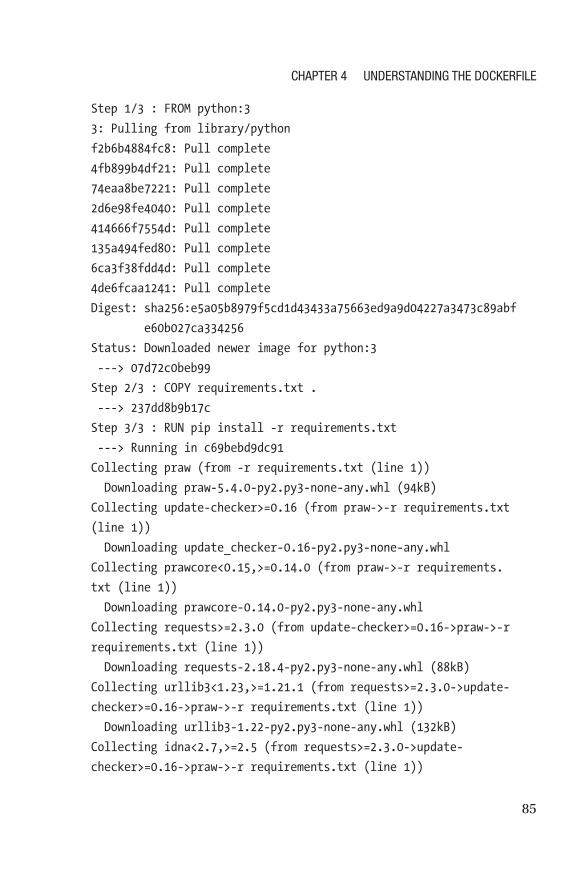
85
Step 1/3 : FROM python:3
3: Pulling from library/python
f2b6b4884fc8: Pull complete
4fb899b4df21: Pull complete
74eaa8be7221: Pull complete
2d6e98fe4040: Pull complete
414666f7554d: Pull complete
135a494fed80: Pull complete
6ca3f38fdd4d: Pull complete
4de6fcaa1241: Pull complete
Digest: sha256:e5a05b8979f5cd1d43433a75663ed9a9d04227a3473c89abf
e60b027ca334256
Status: Downloaded newer image for python:3
---> 07d72c0beb99
Step 2/3 : COPY requirements.txt .
---> 237dd8b9b17c
Step 3/3 : RUN pip install -r requirements.txt
---> Running in c69bebd9dc91
Collecting praw (from -r requirements.txt (line 1))
Downloading praw-5.4.0-py2.py3-none-any.whl (94kB)
Collecting update-checker>=0.16 (from praw->-r requirements.txt
(line 1))
Downloading update_checker-0.16-py2.py3-none-any.whl
Collecting prawcore<0.15,>=0.14.0 (from praw->-r requirements.
txt (line 1))
Downloading prawcore-0.14.0-py2.py3-none-any.whl
Collecting requests>=2.3.0 (from update-checker>=0.16->praw->-r
requirements.txt (line 1))
Downloading requests-2.18.4-py2.py3-none-any.whl (88kB)
Collecting urllib3<1.23,>=1.21.1 (from requests>=2.3.0->update-
checker>=0.16->praw->-r requirements.txt (line 1))
Downloading urllib3-1.22-py2.py3-none-any.whl (132kB)
Collecting idna<2.7,>=2.5 (from requests>=2.3.0->update-
checker>=0.16->praw->-r requirements.txt (line 1))
Chapter 4 Understanding the doCkerfile
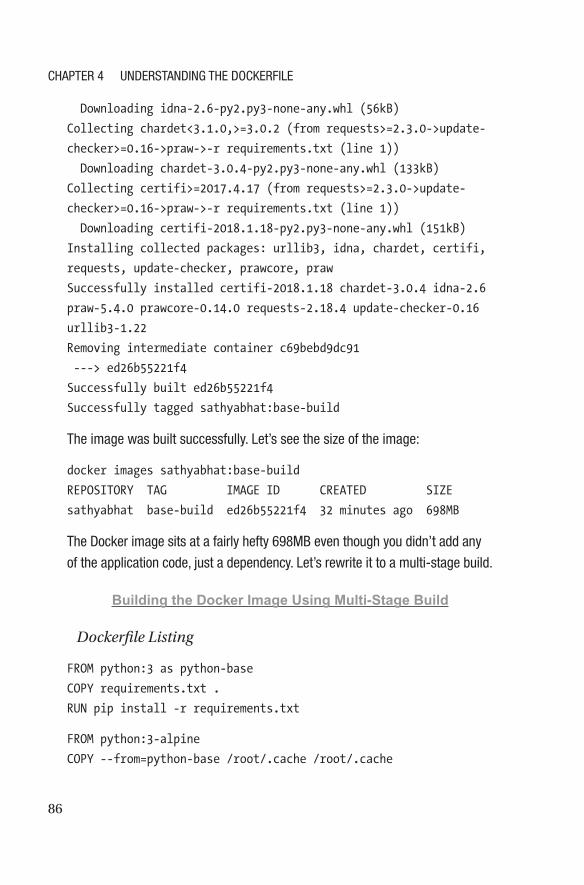
86
Downloading idna-2.6-py2.py3-none-any.whl (56kB)
Collecting chardet<3.1.0,>=3.0.2 (from requests>=2.3.0->update-
checker>=0.16->praw->-r requirements.txt (line 1))
Downloading chardet-3.0.4-py2.py3-none-any.whl (133kB)
Collecting certifi>=2017.4.17 (from requests>=2.3.0->update-
checker>=0.16->praw->-r requirements.txt (line 1))
Downloading certifi-2018.1.18-py2.py3-none-any.whl (151kB)
Installing collected packages: urllib3, idna, chardet, certifi,
requests, update-checker, prawcore, praw
Successfully installed certifi-2018.1.18 chardet-3.0.4 idna-2.6
praw-5.4.0 prawcore-0.14.0 requests-2.18.4 update-checker-0.16
urllib3-1.22
Removing intermediate container c69bebd9dc91
---> ed26b55221f4
Successfully built ed26b55221f4
Successfully tagged sathyabhat:base-build
the image was built successfully. let’s see the size of the image:
docker images sathyabhat:base-build
REPOSITORY TAG IMAGE ID CREATED SIZE
sathyabhat base-build ed26b55221f4 32 minutes ago 698MB
the docker image sits at a fairly hefty 698MB even though you didn’t add any
of the application code, just a dependency. let’s rewrite it to a multi-stage build.
Building the Docker Image Using Multi-Stage Build
Dockerfile Listing
FROM python:3 as python-base
COPY requirements.txt .
RUN pip install -r requirements.txt
FROM python:3-alpine
COPY --from=python-base /root/.cache /root/.cache
Chapter 4 Understanding the doCkerfile
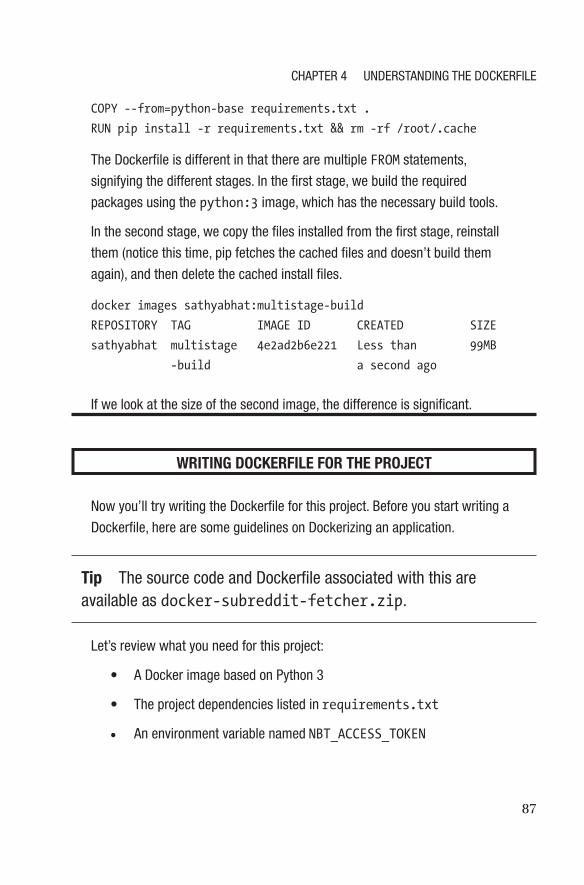
87
COPY --from=python-base requirements.txt .
RUN pip install -r requirements.txt && rm -rf /root/.cache
the dockerfile is different in that there are multiple FROM statements,
signifying the different stages. in the first stage, we build the required
packages using the python:3 image, which has the necessary build tools.
in the second stage, we copy the files installed from the first stage, reinstall
them (notice this time, pip fetches the cached files and doesn’t build them
again), and then delete the cached install files.
docker images sathyabhat:multistage-build
REPOSITORY TAG IMAGE ID CREATED SIZE
sathyabhat multistage 4e2ad2b6e221 Less than 99MB
- build a second ago
if we look at the size of the second image, the difference is significant.
WRITING DOCKERFILE FOR THE PROJECT
now you’ll try writing the dockerfile for this project. Before you start writing a
dockerfile, here are some guidelines on dockerizing an application.
Tip the source code and dockerfile associated with this are available as docker-subreddit-fetcher.zip.
let’s review what you need for this project:
• a docker image based on python 3
• the project dependencies listed in requirements.txt
• an environment variable named NBT_ACCESS_TOKEN
Chapter 4 Understanding the doCkerfile
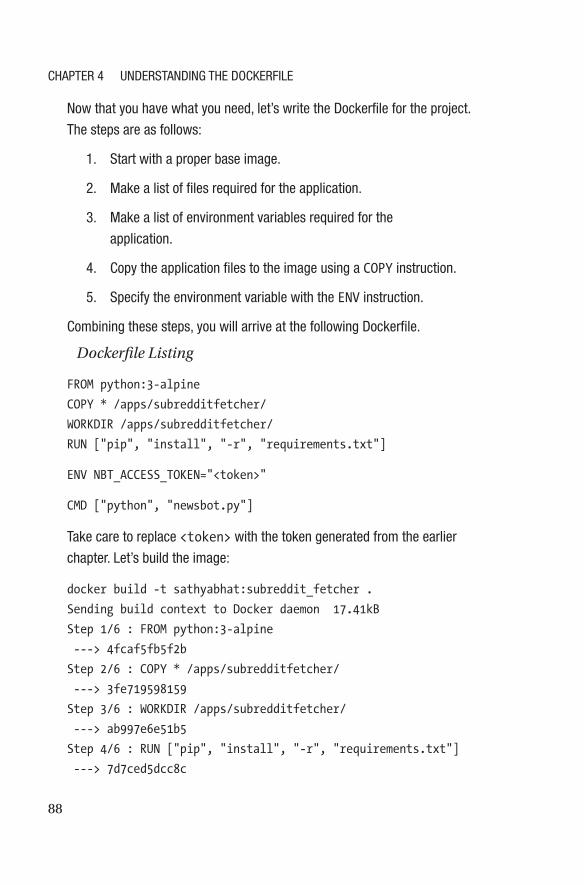
88
now that you have what you need, let’s write the dockerfile for the project.
the steps are as follows:
1. start with a proper base image.
2. Make a list of files required for the application.
3. Make a list of environment variables required for the
application.
4. Copy the application files to the image using a COPY instruction.
5. specify the environment variable with the ENV instruction.
Combining these steps, you will arrive at the following dockerfile.
Dockerfile Listing
FROM python:3-alpine
COPY * /apps/subredditfetcher/
WORKDIR /apps/subredditfetcher/
RUN ["pip", "install", "-r", "requirements.txt"]
ENV NBT_ACCESS_TOKEN="<token>"
CMD ["python", "newsbot.py"]
take care to replace <token> with the token generated from the earlier
chapter. let’s build the image:
docker build -t sathyabhat:subreddit_fetcher .
Sending build context to Docker daemon 17.41kB
Step 1/6 : FROM python:3-alpine
---> 4fcaf5fb5f2b
Step 2/6 : COPY * /apps/subredditfetcher/
---> 3fe719598159
Step 3/6 : WORKDIR /apps/subredditfetcher/
---> ab997e6e51b5
Step 4/6 : RUN ["pip", "install", "-r", "requirements.txt"]
---> 7d7ced5dcc8c
Chapter 4 Understanding the doCkerfile

89
Step 5/6 : ENV NBT_ACCESS_TOKEN="495637361:AAHIhiDTX1UeX17KJy0-
FsMZEqEtCFYfcP8"
---> c6db29f52053
Step 6/6 : CMD ["python", "newsbot.py"]
---> 8aa4ff615bac
Successfully built 8aa4ff615bac
Successfully tagged sathyabhat:subreddit_fetcher
and run the container:
docker run --name subreddit_fetcher_bot sathyabhat:subreddit_
fetcher
You should be seeing logs from the bot to ensure it’s running:
INFO: get_updates - received response: {'ok': True, 'result': []}
INFO: get_updates - received response: {'ok': True, 'result': []}
INFO: get_updates - received response: {'ok': True, 'result': []}
INFO: get_updates - received response: {'ok': True, 'result': []}
INFO: get_updates - received response: {'ok': True, 'result': []}
INFO: get_updates - received response: {'ok': True, 'result': []}
Congrats! You have successfully dockerized the project.
SummaryIn this chapter, you learned about Dockerfiles, the significance of the
build context, and about dockerignore. You also took a deep dive into
some commonly used Dockerfile instructions, a brief glimpse of multi-
stage builds, and learned about some guidelines on writing Dockerfiles.
You completed the chapter with some exercises on writing Dockerfiles,
including how to write Dockerfiles for multi-stage builds. You also
proceeded to Dockerize the Newsbot project. In the next chapter, we
look at how you can persist data generated by containers using Docker
Volumes.
Chapter 4 Understanding the doCkerfile
91© Sathyajith Bhat 2018 S. Bhat, Practical Docker with Python, https://doi.org/10.1007/978-1-4842-3784-7_5
CHAPTER 5
Understanding Docker VolumesIn the previous chapters, we learned about Docker and its associated
terminologies and took a deeper look into how we can build Docker
images using the Dockerfile.
In this chapter, we look at data persistency strategies for Docker
containers and learn why we need special strategies for data persistence.
Data PersistenceTraditionally, most compute solutions come with associated ways to
persist and save the data. In case of virtual machines, a virtual disk is
emulated and the data saved to this virtual disk is saved as a file on the host
computer. In the case of cloud providers such as Amazon Web Services
(AWS), they provide us with a root volume for persisting data and block
storage (Elastic Block Store—EBS) for persisting data.
When it comes to containers, the story is different. Containers
were meant and designed for stateless workloads and the design of the
container layers shows that. In Chapter 2, we understood that a Docker
image is a read-only template consisting of various layers and when the
image is run as a container, the container contains a small write-only layer
of the data. This means that:
92
• The data is locked tightly to the host and makes
running applications that share data across multiple
containers and applications difficult.
• The data doesn’t persist when the container is
terminated and extracting the data out of the container
is difficult.
• Writing to the container’s write layer requires a storage
driver to manage the filesystem. Storage drivers do not
provide an acceptable level of performance in terms of
read/write speeds. Large amounts of data written to the
container’s write layer can lead of the container and the
Docker daemon running out of memory.
Example of Data Loss Within Docker ContainerTo demonstrate the features of the write layer, let’s use a container from an
Ubuntu base image. We will create a file in the Docker container, stop the
container, and note the behavior of the container.
1. Start by creating an nginx container:
docker run -d --name nginx-test nginx
2. Open a terminal within the container:
docker exec -t nginx-test bash
3. Create a copy of nginx’s default.conf to a new
config:
cd /etc/nginx/conf.d
cp default.conf nginx-test.conf
Chapter 5 Understanding doCker VolUmes
93
4. We won’t be modifying the contents of nginx-
test.conf since it’s immaterial. Now we’ll stop the
container. From the Docker host terminal, type:
docker stop nginx-test
5. Start the container again:
docker start nginx-test
6. Open a terminal within the container:
docker exec -it nginx-test bash
7. Now, see if the changes are still around:
cd /etc/nginx/conf.d
ls
default.conf nginx-test.conf
8. Since the container was only stopped, the data
persists. Let’s stop, remove the container, and then
bring up a new one and observe what happens.
docker stop nginx-test
docker rm nginx-test
9. Start a new container:
docker run -d --name nginx-test nginx
10. Now that a new container is up and running, let’s
connect to the container’s terminal:
docker exec -it nginx-test bash
Chapter 5 Understanding doCker VolUmes
94
11. Examine contents of the conf.d directory of nginx:
cd /etc/nginx/conf.d
ls
default.conf
Since the container was removed, the write-only layer associated with
the container was also removed and the files are no longer accessible. For
a containerized stateful application, such as an application that requires a
database, the data from the previous container will no longer be accessible
when an existing container is removed or a new container is added.
To mitigate this issue, Docker offers various strategies to persist the data.
• tmpfs mounts
• Bind mounts
• Volumes
tmpfs Mounts
As the name suggests, a tmpfs creates a mount in tmpfs, which is a
temporary file storage facility. The directories mounted in tmpfs appear as
a mounted filesystem but are stored in memory, not to persistent storage
such as a disk drive.
tmpfs mounts are limited to Docker containers on Linux. A tmpfs
mount is temporary and the data is stored in Docker’s hosts memory. Once
the container is stopped, the tmpfs mount is removed and the files written
to tmpfs mount are lost.
To create a tmpfs mount, you can use the --mount or --tmpfs flag
when running a container, as shown here:
docker run -it --name tmpfs-test --mount type=tmpfs, target=/
tmpfs-mount ubuntu bash
docker run -it --name tmpfs-test --tmpfs /tmpfs-mount ubuntu bash
Chapter 5 Understanding doCker VolUmes
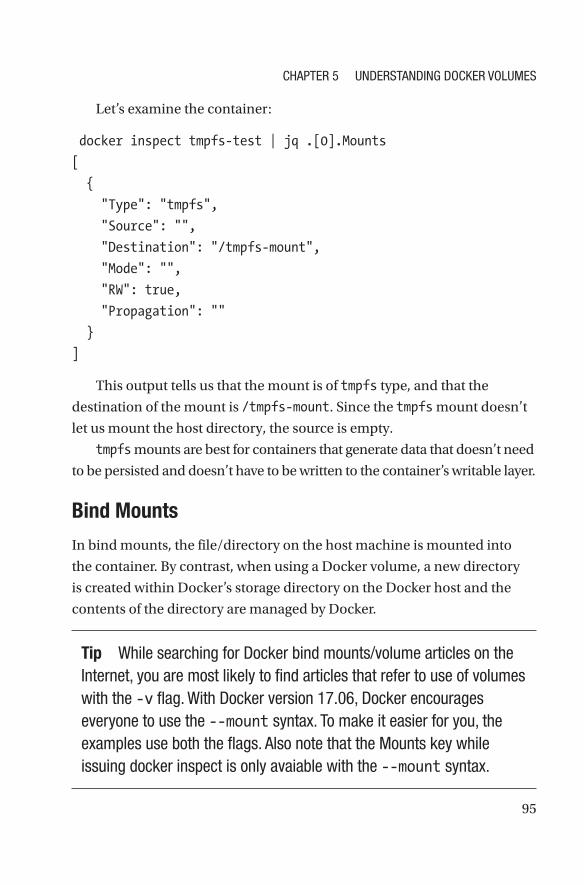
95
Let’s examine the container:
docker inspect tmpfs-test | jq .[0].Mounts
[
{
"Type": "tmpfs",
"Source": "",
"Destination": "/tmpfs-mount",
"Mode": "",
"RW": true,
"Propagation": ""
}
]
This output tells us that the mount is of tmpfs type, and that the
destination of the mount is /tmpfs-mount. Since the tmpfs mount doesn’t
let us mount the host directory, the source is empty.
tmpfs mounts are best for containers that generate data that doesn’t need
to be persisted and doesn’t have to be written to the container’s writable layer.
Bind Mounts
In bind mounts, the file/directory on the host machine is mounted into
the container. By contrast, when using a Docker volume, a new directory
is created within Docker’s storage directory on the Docker host and the
contents of the directory are managed by Docker.
Tip While searching for docker bind mounts/volume articles on the internet, you are most likely to find articles that refer to use of volumes with the -v flag. With docker version 17.06, docker encourages everyone to use the --mount syntax. to make it easier for you, the examples use both the flags. also note that the mounts key while issuing docker inspect is only avaiable with the --mount syntax.
Chapter 5 Understanding doCker VolUmes
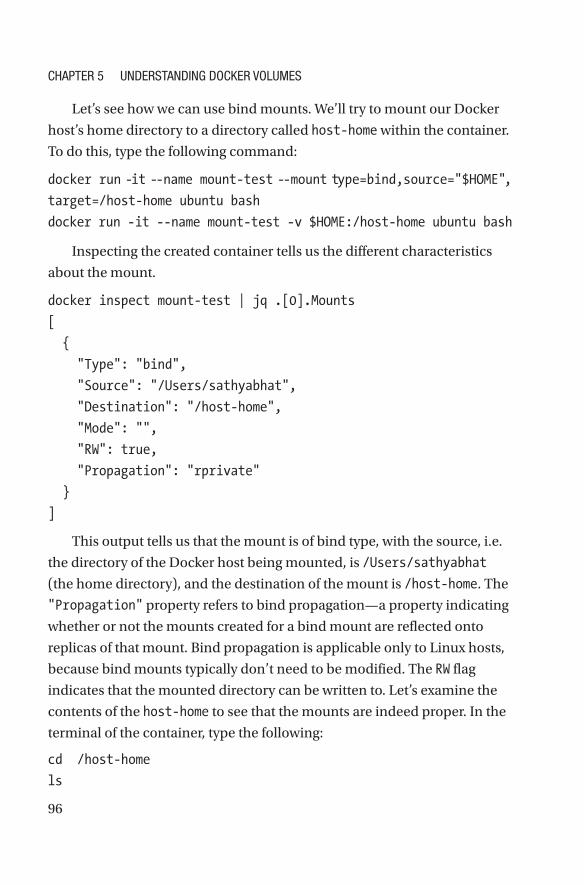
96
Let’s see how we can use bind mounts. We’ll try to mount our Docker
host’s home directory to a directory called host-home within the container.
To do this, type the following command:
docker run -it --name mount-test --mount type=bind,source="$HOME",
target=/host-home ubuntu bash
docker run -it --name mount-test -v $HOME:/host-home ubuntu bash
Inspecting the created container tells us the different characteristics
about the mount.
docker inspect mount-test | jq .[0].Mounts
[
{
"Type": "bind",
"Source": "/Users/sathyabhat",
"Destination": "/host-home",
"Mode": "",
"RW": true,
"Propagation": "rprivate"
}
]
This output tells us that the mount is of bind type, with the source, i.e.
the directory of the Docker host being mounted, is /Users/sathyabhat
(the home directory), and the destination of the mount is /host-home. The
"Propagation" property refers to bind propagation—a property indicating
whether or not the mounts created for a bind mount are reflected onto
replicas of that mount. Bind propagation is applicable only to Linux hosts,
because bind mounts typically don’t need to be modified. The RW flag
indicates that the mounted directory can be written to. Let’s examine the
contents of the host-home to see that the mounts are indeed proper. In the
terminal of the container, type the following:
cd /host-home
ls
Chapter 5 Understanding doCker VolUmes
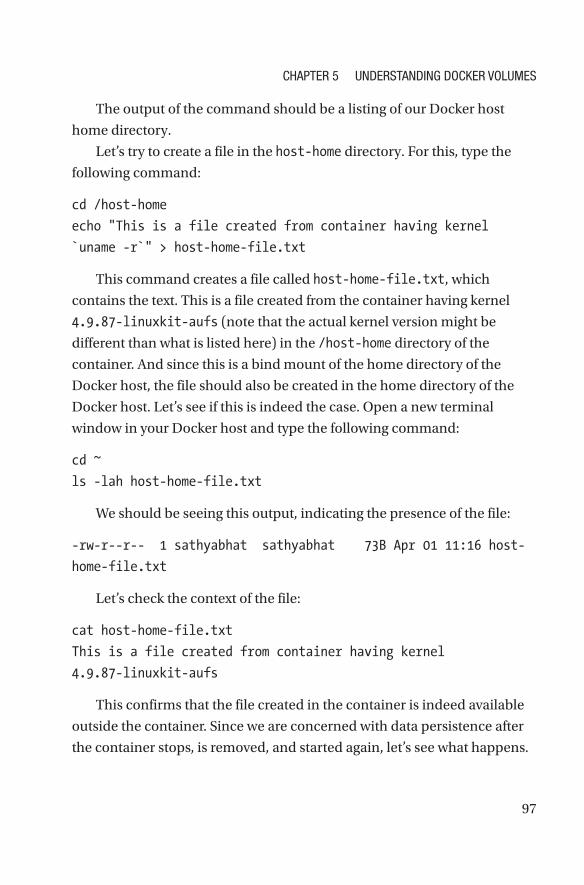
97
The output of the command should be a listing of our Docker host
home directory.
Let’s try to create a file in the host-home directory. For this, type the
following command:
cd /host-home
echo "This is a file created from container having kernel
`uname -r`" > host-home-file.txt
This command creates a file called host-home-file.txt, which
contains the text. This is a file created from the container having kernel
4.9.87-linuxkit-aufs (note that the actual kernel version might be
different than what is listed here) in the /host-home directory of the
container. And since this is a bind mount of the home directory of the
Docker host, the file should also be created in the home directory of the
Docker host. Let’s see if this is indeed the case. Open a new terminal
window in your Docker host and type the following command:
cd ~
ls -lah host-home-file.txt
We should be seeing this output, indicating the presence of the file:
-rw-r--r-- 1 sathyabhat sathyabhat 73B Apr 01 11:16 host-
home- file.txt
Let’s check the context of the file:
cat host-home-file.txt
This is a file created from container having kernel
4.9.87-linuxkit-aufs
This confirms that the file created in the container is indeed available
outside the container. Since we are concerned with data persistence after
the container stops, is removed, and started again, let’s see what happens.
Chapter 5 Understanding doCker VolUmes
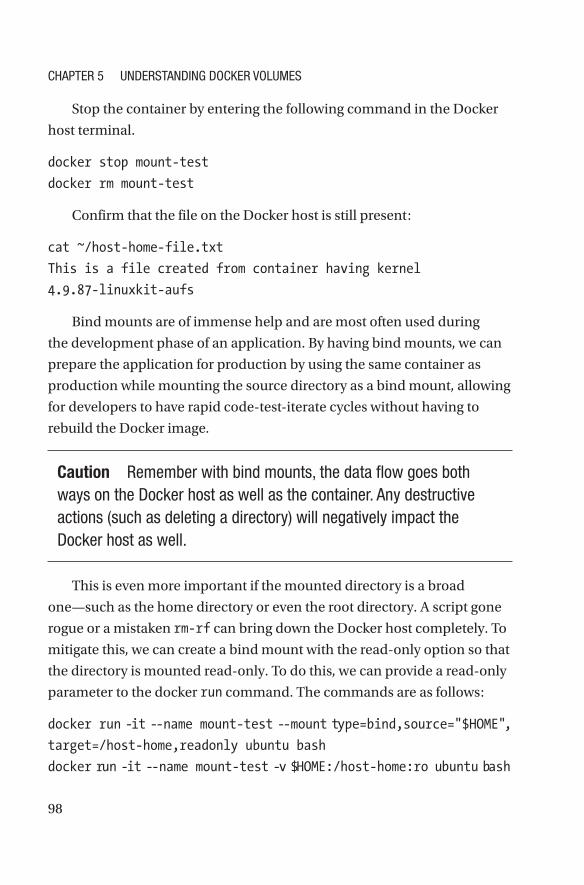
98
Stop the container by entering the following command in the Docker
host terminal.
docker stop mount-test
docker rm mount-test
Confirm that the file on the Docker host is still present:
cat ~/host-home-file.txt
This is a file created from container having kernel
4.9.87-linuxkit-aufs
Bind mounts are of immense help and are most often used during
the development phase of an application. By having bind mounts, we can
prepare the application for production by using the same container as
production while mounting the source directory as a bind mount, allowing
for developers to have rapid code-test-iterate cycles without having to
rebuild the Docker image.
Caution remember with bind mounts, the data flow goes both ways on the docker host as well as the container. any destructive actions (such as deleting a directory) will negatively impact the docker host as well.
This is even more important if the mounted directory is a broad
one—such as the home directory or even the root directory. A script gone
rogue or a mistaken rm-rf can bring down the Docker host completely. To
mitigate this, we can create a bind mount with the read-only option so that
the directory is mounted read-only. To do this, we can provide a read-only
parameter to the docker run command. The commands are as follows:
docker run -it --name mount-test --mount type=bind,source="$HOME",
target=/host-home,readonly ubuntu bash
docker run -it --name mount-test -v $HOME:/host-home:ro ubuntu bash
Chapter 5 Understanding doCker VolUmes
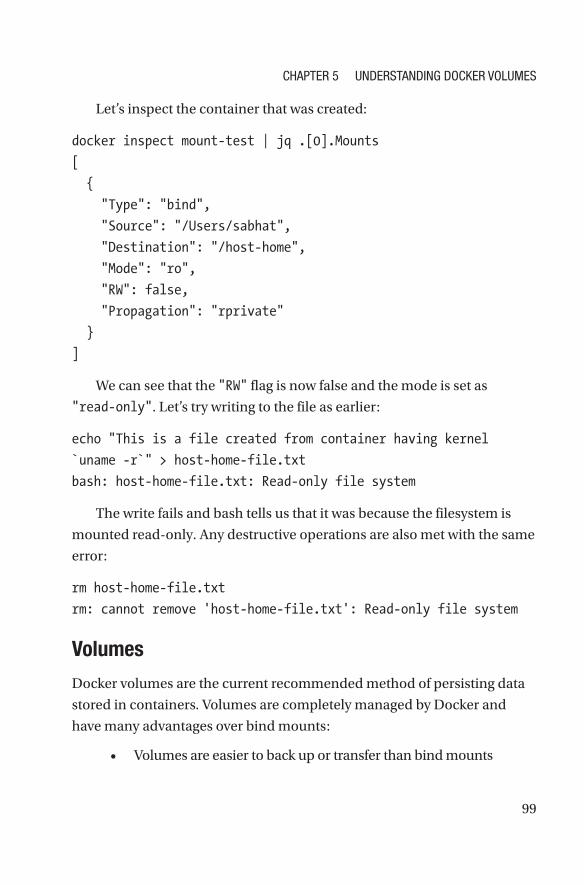
99
Let’s inspect the container that was created:
docker inspect mount-test | jq .[0].Mounts
[
{
"Type": "bind",
"Source": "/Users/sabhat",
"Destination": "/host-home",
"Mode": "ro",
"RW": false,
"Propagation": "rprivate"
}
]
We can see that the "RW" flag is now false and the mode is set as
"read- only". Let’s try writing to the file as earlier:
echo "This is a file created from container having kernel
`uname -r`" > host-home-file.txt
bash: host-home-file.txt: Read-only file system
The write fails and bash tells us that it was because the filesystem is
mounted read-only. Any destructive operations are also met with the same
error:
rm host-home-file.txt
rm: cannot remove 'host-home-file.txt': Read-only file system
Volumes
Docker volumes are the current recommended method of persisting data
stored in containers. Volumes are completely managed by Docker and
have many advantages over bind mounts:
• Volumes are easier to back up or transfer than bind mounts
Chapter 5 Understanding doCker VolUmes
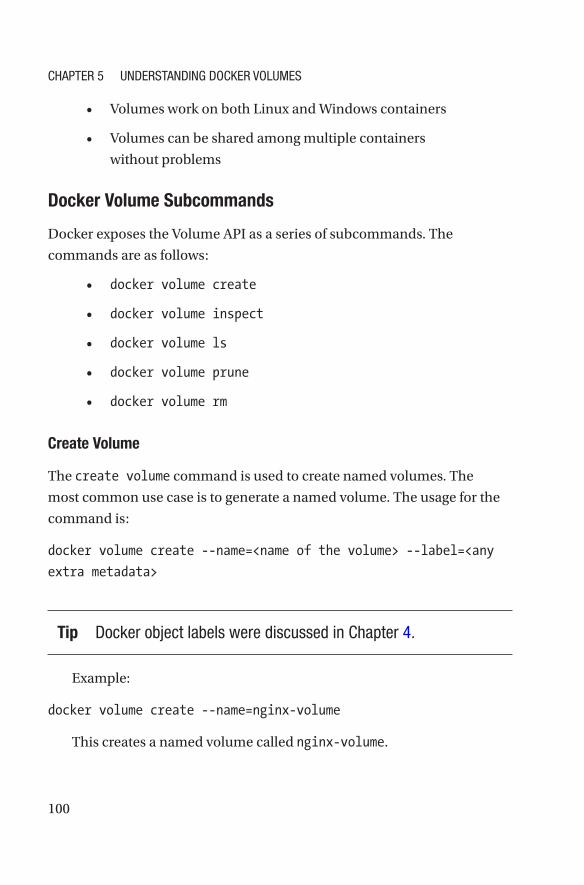
100
• Volumes work on both Linux and Windows containers
• Volumes can be shared among multiple containers
without problems
Docker Volume Subcommands
Docker exposes the Volume API as a series of subcommands. The
commands are as follows:
• docker volume create
• docker volume inspect
• docker volume ls
• docker volume prune
• docker volume rm
Create Volume
The create volume command is used to create named volumes. The
most common use case is to generate a named volume. The usage for the
command is:
docker volume create --name=<name of the volume> --label=<any
extra metadata>
Tip docker object labels were discussed in Chapter 4.
Example:
docker volume create --name=nginx-volume
This creates a named volume called nginx-volume.
Chapter 5 Understanding doCker VolUmes
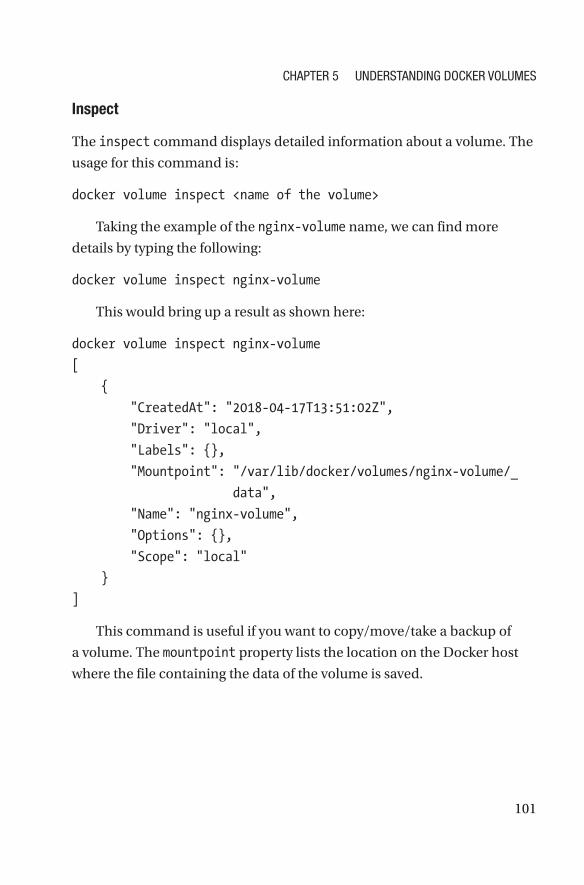
101
Inspect
The inspect command displays detailed information about a volume. The
usage for this command is:
docker volume inspect <name of the volume>
Taking the example of the nginx-volume name, we can find more
details by typing the following:
docker volume inspect nginx-volume
This would bring up a result as shown here:
docker volume inspect nginx-volume
[
{
"CreatedAt": "2018-04-17T13:51:02Z",
"Driver": "local",
"Labels": {},
"Mountpoint": "/var/lib/docker/volumes/nginx-volume/_
data",
"Name": "nginx-volume",
"Options": {},
"Scope": "local"
}
]
This command is useful if you want to copy/move/take a backup of
a volume. The mountpoint property lists the location on the Docker host
where the file containing the data of the volume is saved.
Chapter 5 Understanding doCker VolUmes
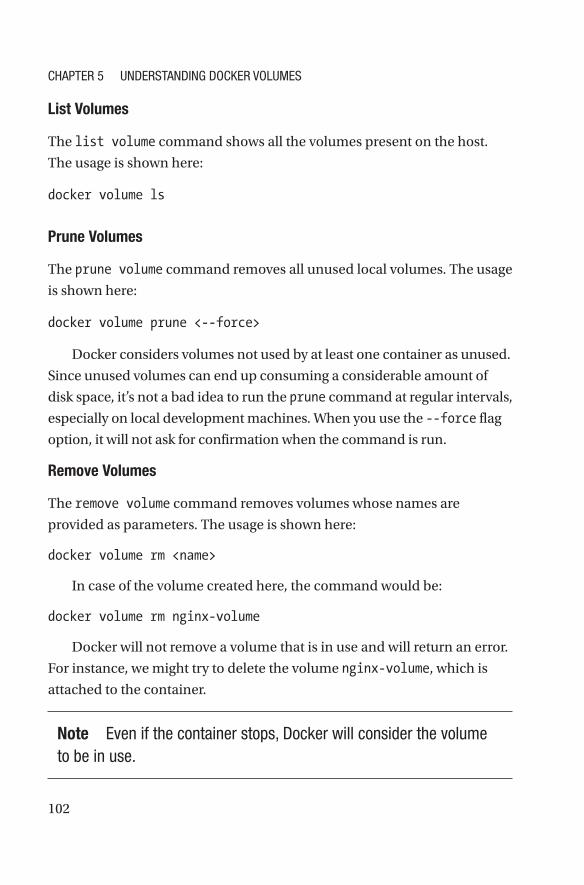
102
List Volumes
The list volume command shows all the volumes present on the host.
The usage is shown here:
docker volume ls
Prune Volumes
The prune volume command removes all unused local volumes. The usage
is shown here:
docker volume prune <--force>
Docker considers volumes not used by at least one container as unused.
Since unused volumes can end up consuming a considerable amount of
disk space, it’s not a bad idea to run the prune command at regular intervals,
especially on local development machines. When you use the --force flag
option, it will not ask for confirmation when the command is run.
Remove Volumes
The remove volume command removes volumes whose names are
provided as parameters. The usage is shown here:
docker volume rm <name>
In case of the volume created here, the command would be:
docker volume rm nginx-volume
Docker will not remove a volume that is in use and will return an error.
For instance, we might try to delete the volume nginx-volume, which is
attached to the container.
Note even if the container stops, docker will consider the volume to be in use.
Chapter 5 Understanding doCker VolUmes
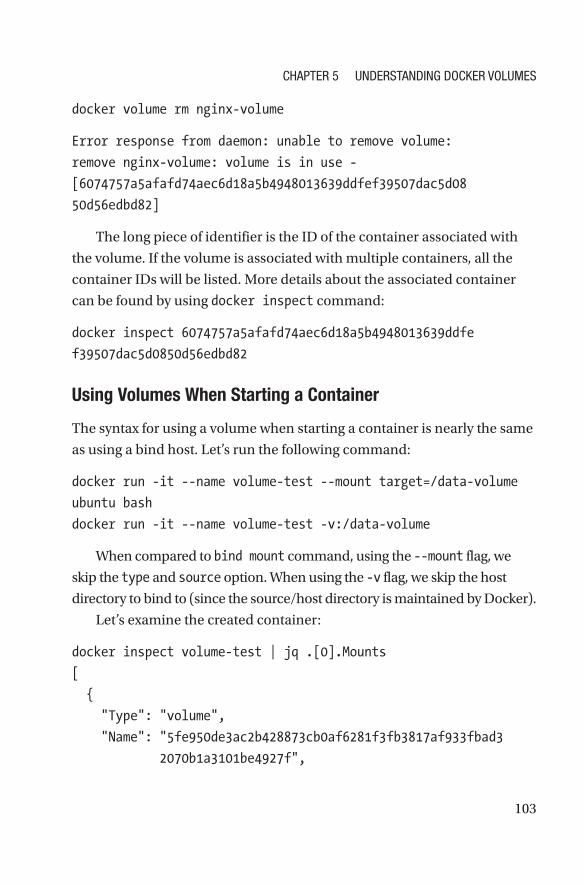
103
docker volume rm nginx-volume
Error response from daemon: unable to remove volume:
remove nginx-volume: volume is in use -
[6074757a5afafd74aec6d18a5b4948013639ddfef39507dac5d08
50d56edbd82]
The long piece of identifier is the ID of the container associated with
the volume. If the volume is associated with multiple containers, all the
container IDs will be listed. More details about the associated container
can be found by using docker inspect command:
docker inspect 6074757a5afafd74aec6d18a5b4948013639ddfe
f39507dac5d0850d56edbd82
Using Volumes When Starting a Container
The syntax for using a volume when starting a container is nearly the same
as using a bind host. Let’s run the following command:
docker run -it --name volume-test --mount target=/data-volume
ubuntu bash
docker run -it --name volume-test -v:/data-volume
When compared to bind mount command, using the --mount flag, we
skip the type and source option. When using the -v flag, we skip the host
directory to bind to (since the source/host directory is maintained by Docker).
Let’s examine the created container:
docker inspect volume-test | jq .[0].Mounts
[
{
"Type": "volume",
"Name": "5fe950de3ac2b428873cb0af6281f3fb3817af933fbad3
2070b1a3101be4927f",
Chapter 5 Understanding doCker VolUmes
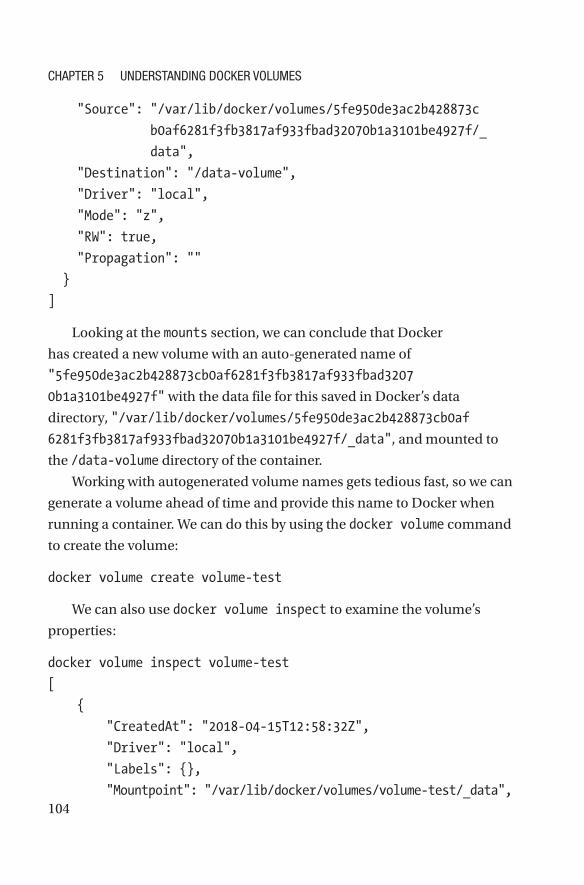
104
"Source": "/var/lib/docker/volumes/5fe950de3ac2b428873c
b0af6281f3fb3817af933fbad32070b1a3101be4927f/_
data",
"Destination": "/data-volume",
"Driver": "local",
"Mode": "z",
"RW": true,
"Propagation": ""
}
]
Looking at the mounts section, we can conclude that Docker
has created a new volume with an auto-generated name of
"5fe950de3ac2b428873cb0af6281f3fb3817af933fbad3207
0b1a3101be4927f" with the data file for this saved in Docker’s data
directory, "/var/lib/docker/volumes/5fe950de3ac2b428873cb0af
6281f3fb3817af933fbad32070b1a3101be4927f/_data", and mounted to
the /data-volume directory of the container.
Working with autogenerated volume names gets tedious fast, so we can
generate a volume ahead of time and provide this name to Docker when
running a container. We can do this by using the docker volume command
to create the volume:
docker volume create volume-test
We can also use docker volume inspect to examine the volume’s
properties:
docker volume inspect volume-test
[
{
"CreatedAt": "2018-04-15T12:58:32Z",
"Driver": "local",
"Labels": {},
"Mountpoint": "/var/lib/docker/volumes/volume-test/_data",
Chapter 5 Understanding doCker VolUmes
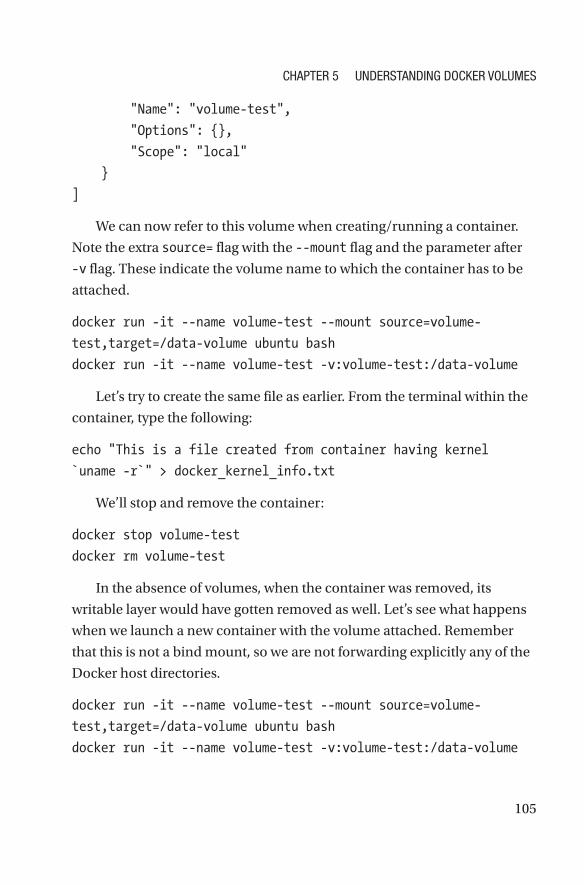
105
"Name": "volume-test",
"Options": {},
"Scope": "local"
}
]
We can now refer to this volume when creating/running a container.
Note the extra source= flag with the --mount flag and the parameter after
-v flag. These indicate the volume name to which the container has to be
attached.
docker run -it --name volume-test --mount source=volume-
test,target=/data-volume ubuntu bash
docker run -it --name volume-test -v:volume-test:/data-volume
Let’s try to create the same file as earlier. From the terminal within the
container, type the following:
echo "This is a file created from container having kernel
`uname -r`" > docker_kernel_info.txt
We’ll stop and remove the container:
docker stop volume-test
docker rm volume-test
In the absence of volumes, when the container was removed, its
writable layer would have gotten removed as well. Let’s see what happens
when we launch a new container with the volume attached. Remember
that this is not a bind mount, so we are not forwarding explicitly any of the
Docker host directories.
docker run -it --name volume-test --mount source=volume-
test,target=/data-volume ubuntu bash
docker run -it --name volume-test -v:volume-test:/data-volume
Chapter 5 Understanding doCker VolUmes

106
Now we examine the contents of the /data-volume directory of the
container:
cd /data-volume/
ls
docker-kernel-info.txt
Now we examine the contents of docker-kernel-info.txt:
cat docker_kernel_info.txt
This is a file created from container having kernel
4.9.87-linuxkit-aufs.
However, with volumes, we are directing Docker to store the data in
a volume file that is managed by Docker itself. When we launch a new
container, providing the volume name along with the run command
attaches the volume to the container, making previously saved data
available to the newly launched container.
VOLUME Instruction in Dockerfile
The VOLUME instruction marks the path mentioned succeeding the
instruction as an externally stored data volume, managed by Docker. The
syntax is as follows:
VOLUME ["/data-volume"]
The paths mentioned after the instruction can be a JSON array or an
array of paths separated by spaces.
Note the VOLUME instruction in a dockerfile doesn’t support named volumes and, as a result, when the container is run, the volume name will be an autogenerated name.
Chapter 5 Understanding doCker VolUmes
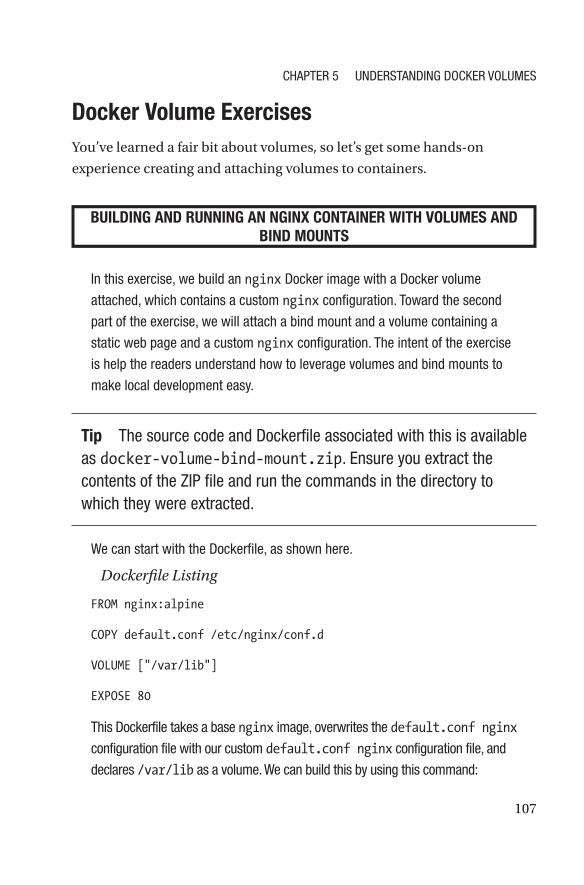
107
Docker Volume ExercisesYou’ve learned a fair bit about volumes, so let’s get some hands-on
experience creating and attaching volumes to containers.
BUILDING AND RUNNING AN NGINX CONTAINER WITH VOLUMES AND BIND MOUNTS
in this exercise, we build an nginx docker image with a docker volume
attached, which contains a custom nginx configuration. toward the second
part of the exercise, we will attach a bind mount and a volume containing a
static web page and a custom nginx configuration. the intent of the exercise
is help the readers understand how to leverage volumes and bind mounts to
make local development easy.
Tip the source code and dockerfile associated with this is available as docker-volume-bind-mount.zip. ensure you extract the contents of the Zip file and run the commands in the directory to which they were extracted.
We can start with the dockerfile, as shown here.
Dockerfile Listing
FROM nginx:alpine
COPY default.conf /etc/nginx/conf.d
VOLUME ["/var/lib"]
EXPOSE 80
this dockerfile takes a base nginx image, overwrites the default.conf nginx
configuration file with our custom default.conf nginx configuration file, and
declares /var/lib as a volume. We can build this by using this command:
Chapter 5 Understanding doCker VolUmes
108
docker build -t sathyabhat:nginx-volume.
Sending build context to Docker daemon 3.616MB
Step 1/4 : FROM nginx:alpine
---> 91ce6206f9d8
Step 2/4 : COPY default.conf /etc/nginx/conf.d
---> Using cache
---> d131f1bbdeae
Step 3/4 : VOLUME ["/var/lib"]
---> Running in fa7d936e3456
Removing intermediate container fa7d936e3456
---> 0c94600d506d
Step 4/4 : EXPOSE 80
---> Running in 3e42c1c3558a
Removing intermediate container 3e42c1c3558a
---> 3ea0e5dafe64
Successfully built 3ea0e5dafe64
Successfully tagged sathyabhat:nginx-volume
Before we run this image, let’s look at our custom nginx default.conf
contents:
server {
listen 80;
server_name localhost;
location / {
root /srv/www/starter;
index index.html index.htm;
}
access_log /var/log/nginx/access.log;
access_log /var/log/nginx/error.log;
error_page 500 502 503 504 /50x.html;
location = /50x.html {
Chapter 5 Understanding doCker VolUmes
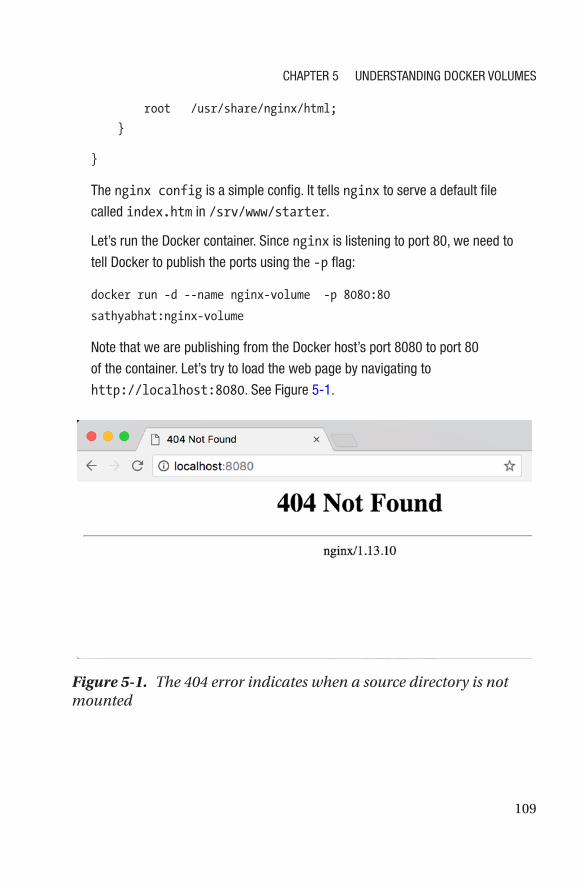
109
root /usr/share/nginx/html;
}
}
the nginx config is a simple config. it tells nginx to serve a default file
called index.htm in /srv/www/starter.
let’s run the docker container. since nginx is listening to port 80, we need to
tell docker to publish the ports using the -p flag:
docker run -d --name nginx-volume -p 8080:80
sathyabhat:nginx- volume
note that we are publishing from the docker host’s port 8080 to port 80
of the container. let’s try to load the web page by navigating to
http://localhost:8080. see Figure 5-1.
Figure 5-1. The 404 error indicates when a source directory is not mounted
Chapter 5 Understanding doCker VolUmes
110
however, when we load the website, we see a HTTP 404 - Page Not
Found. this is because in the nginx config file, we directed nginx to server
index.html. however, we have not copied the index.html file to the
container, neither have we mounted the location of the index.html to the
container as a bind mount. as a result, nginx cannot find the index.html file.
We can correct this by copying the website files to the container as we did
in the previous chapter. in this chapter, we will leverage the bind mount
feature we learned about earlier and mount the entire directory containing the
sources. all that is needed is to use pass the bind mount flag that we learned
about earlier.
the dockerfile remains the same. the docker run command is shown here:
docker run -d --name nginx-volume-bind -v "$(pwd)"/:/srv/www -p
8080:80 sathyabhat:nginx-volume
Confirm that the container is running:
CONTAINER ID IMAGE COMMAND
CREATED STATUS PORTS NAMES
54c857ca065b sathyabhat:nginx-volume "nginx -g 'daemon of..."
6 minutes ago Up 6 minutes 0.0.0.0:8080->80/tcp hopeful_meitner
Confirm that the volumes and mounts are correct:
[
{
"Type": "bind",
"Source": "/home/sathyabhat/docker-volume-bind-mount",
"Destination": "/srv/www",
"Mode": "",
"RW": true,
"Propagation": "rprivate"
},
Chapter 5 Understanding doCker VolUmes
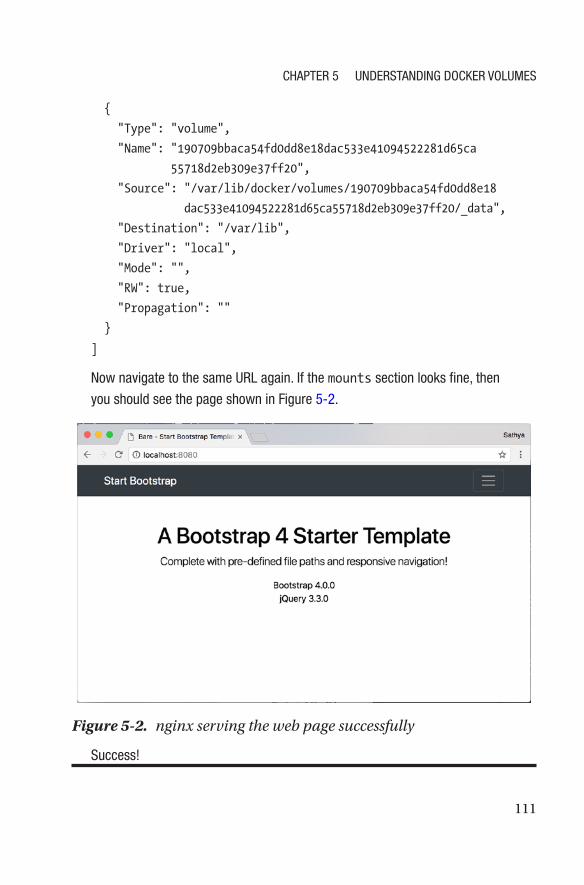
111
{
"Type": "volume",
"Name": "190709bbaca54fd0dd8e18dac533e41094522281d65ca
55718d2eb309e37ff20",
"Source": "/var/lib/docker/volumes/190709bbaca54fd0dd8e18
dac533e41094522281d65ca55718d2eb309e37ff20/_data",
"Destination": "/var/lib",
"Driver": "local",
"Mode": "",
"RW": true,
"Propagation": ""
}
]
now navigate to the same Url again. if the mounts section looks fine, then
you should see the page shown in Figure 5-2.
success!
Figure 5-2. nginx serving the web page successfully
Chapter 5 Understanding doCker VolUmes

112
ADDING VOLUMES TO OUR PROJECT
in the previous chapters’ exercises, we wrote a dockerfile for our project.
however, as you might have noticed, killing the container would reset the state
and we need to customize our bot all over again.
For this exercise, we will be working on a slightly modified codebase that
has support for saving the preferences to a sQlite dB. We would use docker
Volumes to persist the database across containers.
let’s modify the existing dockerfile.
Tip the source code and dockerfile associated with this are available as docker-subreddit-fetcher-volume.zip.
Dockerfile Listing
FROM python:3-alpine
COPY * /apps/subredditfetcher/
WORKDIR /apps/subredditfetcher/
VOLUME [ "/apps/subredditfetcher" ]
RUN ["pip", "install", "-r", "requirements.txt"]
RUN ["python", "one_time.py"]
ENV NBT_ACCESS_TOKEN=<token>
CMD ["python", "newsbot.py"]
take care to replace <token> with the token generated from the earlier
chapter. let’s build the image. note the extra RUN step, which runs one_
time.py. this script creates the necessary database and tables required
for our application. another notable change is the addition of the VOLUME
instruction. as we learned earlier, this is to tell docker to mark the directory
specified to be managed as a volume, even if we did not specify the required
volume name in the docker run command. let’s build the image.
Chapter 5 Understanding doCker VolUmes
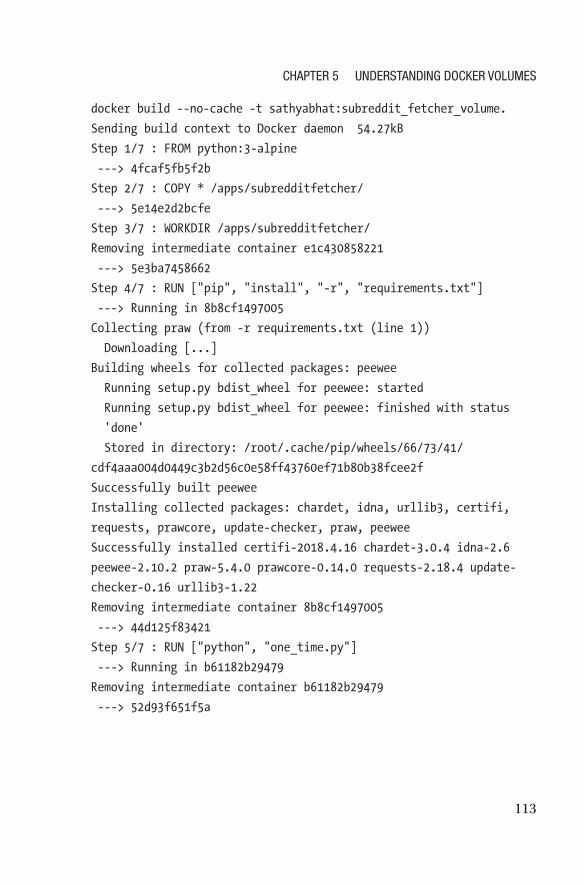
113
docker build --no-cache -t sathyabhat:subreddit_fetcher_volume.
Sending build context to Docker daemon 54.27kB
Step 1/7 : FROM python:3-alpine
---> 4fcaf5fb5f2b
Step 2/7 : COPY * /apps/subredditfetcher/
---> 5e14e2d2bcfe
Step 3/7 : WORKDIR /apps/subredditfetcher/
Removing intermediate container e1c430858221
---> 5e3ba7458662
Step 4/7 : RUN ["pip", "install", "-r", "requirements.txt"]
---> Running in 8b8cf1497005
Collecting praw (from -r requirements.txt (line 1))
Downloading [...]
Building wheels for collected packages: peewee
Running setup.py bdist_wheel for peewee: started
Running setup.py bdist_wheel for peewee: finished with status
'done'
Stored in directory: /root/.cache/pip/wheels/66/73/41/
cdf4aaa004d0449c3b2d56c0e58ff43760ef71b80b38fcee2f
Successfully built peewee
Installing collected packages: chardet, idna, urllib3, certifi,
requests, prawcore, update-checker, praw, peewee
Successfully installed certifi-2018.4.16 chardet-3.0.4 idna- 2.6
peewee-2.10.2 praw-5.4.0 prawcore-0.14.0 requests-2.18.4 update-
checker-0.16 urllib3-1.22
Removing intermediate container 8b8cf1497005
---> 44d125f83421
Step 5/7 : RUN ["python", "one_time.py"]
---> Running in b61182b29479
Removing intermediate container b61182b29479
---> 52d93f651f5a
Chapter 5 Understanding doCker VolUmes
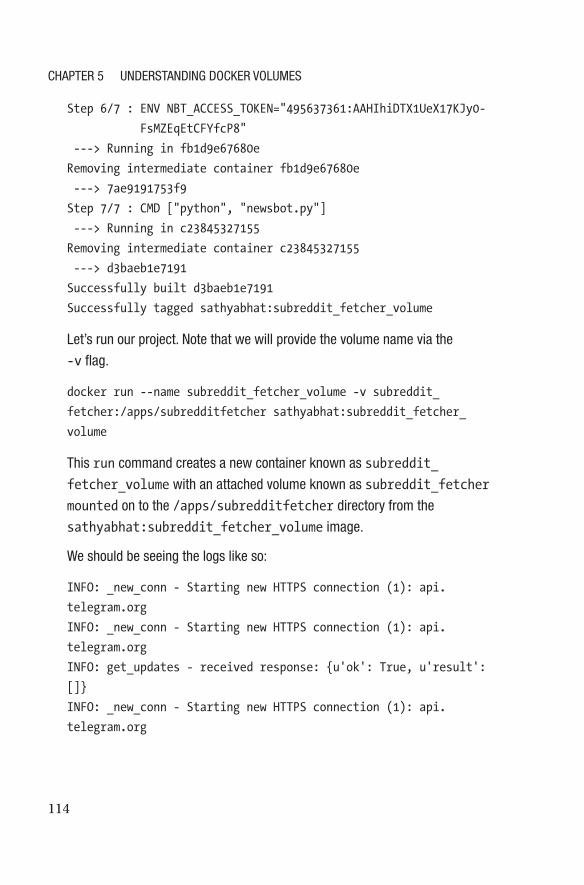
114
Step 6/7 : ENV NBT_ACCESS_TOKEN="495637361:AAHIhiDTX1UeX17KJy0-
FsMZEqEtCFYfcP8"
---> Running in fb1d9e67680e
Removing intermediate container fb1d9e67680e
---> 7ae9191753f9
Step 7/7 : CMD ["python", "newsbot.py"]
---> Running in c23845327155
Removing intermediate container c23845327155
---> d3baeb1e7191
Successfully built d3baeb1e7191
Successfully tagged sathyabhat:subreddit_fetcher_volume
let’s run our project. note that we will provide the volume name via the
-v flag.
docker run --name subreddit_fetcher_volume -v subreddit_
fetcher:/apps/subredditfetcher sathyabhat:subreddit_fetcher_
volume
this run command creates a new container known as subreddit_
fetcher_volume with an attached volume known as subreddit_fetcher
mounted on to the /apps/subredditfetcher directory from the
sathyabhat:subreddit_fetcher_volume image.
We should be seeing the logs like so:
INFO: _new_conn - Starting new HTTPS connection (1): api.
telegram.org
INFO: _new_conn - Starting new HTTPS connection (1): api.
telegram.org
INFO: get_updates - received response: {u'ok': True, u'result':
[]}
INFO: _new_conn - Starting new HTTPS connection (1): api.
telegram.org
Chapter 5 Understanding doCker VolUmes
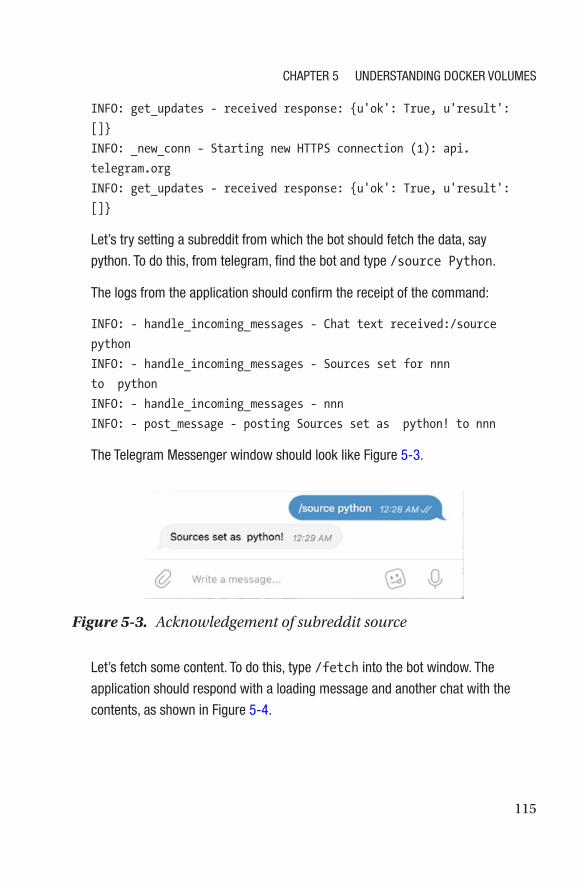
115
INFO: get_updates - received response: {u'ok': True, u'result':
[]}
INFO: _new_conn - Starting new HTTPS connection (1): api.
telegram.org
INFO: get_updates - received response: {u'ok': True, u'result':
[]}
let’s try setting a subreddit from which the bot should fetch the data, say
python. to do this, from telegram, find the bot and type /source Python.
the logs from the application should confirm the receipt of the command:
INFO: - handle_incoming_messages - Chat text received:/source
python
INFO: - handle_incoming_messages - Sources set for nnn
to python
INFO: - handle_incoming_messages - nnn
INFO: - post_message - posting Sources set as python! to nnn
the telegram messenger window should look like Figure 5-3.
let’s fetch some content. to do this, type /fetch into the bot window. the
application should respond with a loading message and another chat with the
contents, as shown in Figure 5-4.
Figure 5-3. Acknowledgement of subreddit source
Chapter 5 Understanding doCker VolUmes
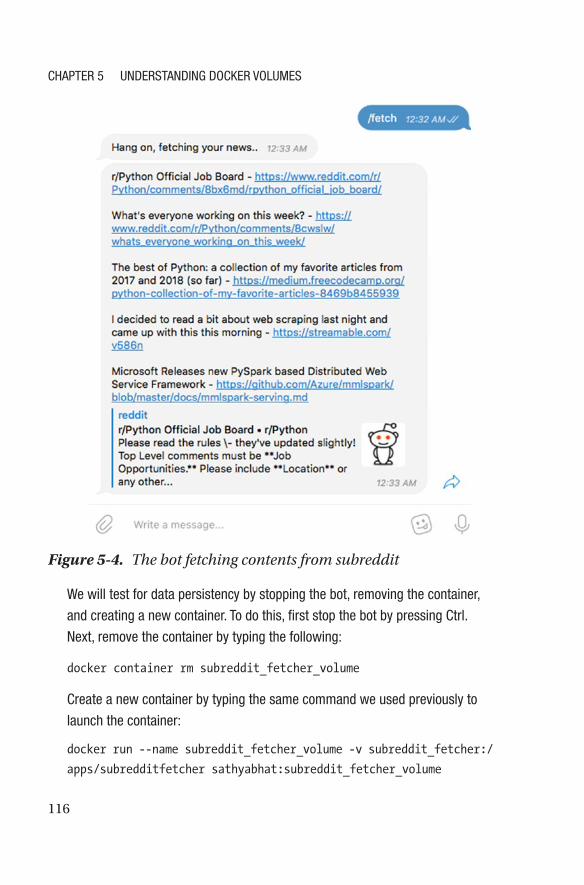
116
We will test for data persistency by stopping the bot, removing the container,
and creating a new container. to do this, first stop the bot by pressing Ctrl.
next, remove the container by typing the following:
docker container rm subreddit_fetcher_volume
Create a new container by typing the same command we used previously to
launch the container:
docker run --name subreddit_fetcher_volume -v subreddit_fetcher:/
apps/subredditfetcher sathyabhat:subreddit_fetcher_volume
Figure 5-4. The bot fetching contents from subreddit
Chapter 5 Understanding doCker VolUmes
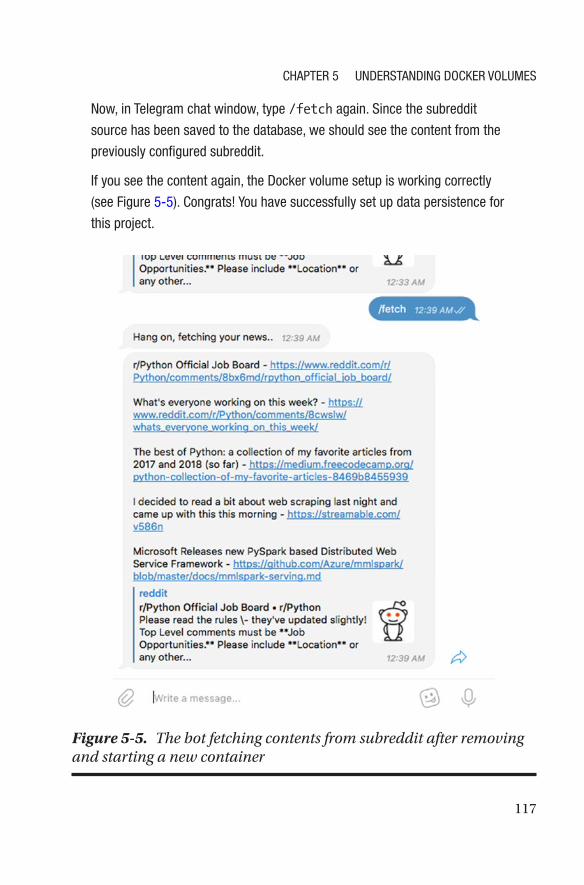
117
now, in telegram chat window, type /fetch again. since the subreddit
source has been saved to the database, we should see the content from the
previously configured subreddit.
if you see the content again, the docker volume setup is working correctly
(see Figure 5-5). Congrats! You have successfully set up data persistence for
this project.
Figure 5-5. The bot fetching contents from subreddit after removing and starting a new container
Chapter 5 Understanding doCker VolUmes
118
SummaryIn this chapter, you learned about why data persistence is a problem in
containers and the different strategies Docker offers for managing data
persistence in containers. You also did a deep dive into configuring
volumes and how they differ from bind mounts. Finally, you went through
some hands-on exercises on how to work with bind mounts and volumes,
and you added volumes support for the Newsbot project. In the next
chapter, you learn more about Docker networking and learn how and why
the containers cannot connect to each other.
Chapter 5 Understanding doCker VolUmes
119© Sathyajith Bhat 2018 S. Bhat, Practical Docker with Python, https://doi.org/10.1007/978-1-4842-3784-7_6
CHAPTER 6
Understanding Docker NetworksIn the previous chapters, we learned about Docker and its associated
terminologies, took a deeper look into how we can build Docker images
using the Dockerfile, and learned about how we can persist data generated
by containers.
In this chapter, we look at networking in Docker and how containers
can talk to each other with the help of Docker’s networking features.
Why Do We Need Container Networking?Traditionally, most compute solutions are thought of as single-purpose
solutions. It is not often we come across a single host (or a Virtual
Machine) hosting multiple workloads, especially production workloads.
With containers, the scenario changes. With lightweight containers and the
presence of advanced orchestration platforms such as Kubernetes or DC/
OS, it is very common to have multiple containers of different workloads
running on the same host with different instances of the application
distributed across multiple hosts. In such cases, container networking
helps in allowing (or limiting) cross container talk. To facilitate Docker, it
also comes with different modes of networks.
120
Tip Docker’s networking subsystem is implemented by pluggable drivers. Docker comes with four drivers out of the box, with more and more drivers being available from Docker Store. It is available at https://store.docker.com/search?category=network&q=&type=plugin.
It is important to note that all of Docker’s networking modes are
achieved via Software Defined Networking (SDN). Specifically, on Linux
systems, Docker modifies iptables rules to provide the required level of
access/isolation.
Default Docker Network DriversWith a standard install of Docker, the following network drivers are available:
• bridge
• host
• overlay
• macvlan
• none
Bridge Network
A bridge network is a user-defined network that allows for all containers
connected on the same network to communicate. The benefit is that the
containers on the same bridge network are able to connect, discover,
and talk to each other, while those not on the same bridge cannot
communicate directly with each other. Bridge networks are useful when
we have containers running on the same host that need to talk to each
other. If the containers that need to communicate are on different Docker
hosts, the overlay network would be needed.
Chapter 6 UnDerStanDIng DoCker networkS

121
When Docker is installed and started, a default bridge network is
created and newly started containers connect to it. However, it is always
better if you create a bridge network yourself. The reasons for this are
outlined here:
• Better isolation across containers. As you have
learned, containers on the same bridge network
are discoverable and can talk to each other. They
automatically expose all ports to each other and
no ports are exposed to the outside world. Having
a separate user-defined bridged network for each
application provides better isolation between
containers of different applications.
• Easy name resolution across containers. For services
joining the same bridged network, containers can
connect to each other by name. For containers on the
default bridged network, the only way for containers to
connect to each other is via IP addresses or by using the
--link flag, which has been deprecated.
• Easy attachment/detachment of containers on user-
defined networks. For containers on the default
network, the only way to detach them is to stop the
running container and recreate it on the new network.
Host Network
As the name suggests, with a host network, a container is attached to the
Docker host. This means that any traffic coming to the host is routed to the
container. Since all of containers’ ports are directly attached to the host, in
this mode, the concept of publishing ports doesn’t make sense. Host mode
is perfect if we have only one container running on the Docker host.
Chapter 6 UnDerStanDIng DoCker networkS
122
Overlay Network
The overlay network creates a network spanning multiple docker hosts. It’s
called an overlay because it overlays the existing host network, allowing
containers connected to the overlay network to communicate across
multiple posts. Overlay networks are an advanced topic and are primarily
used when a cluster of Docker hosts is set up in Swarm mode. Overlay
networks also let you encrypt the application data traffic across the overlay
network.
Macvlan Networks
Macvlan networks are a fairly recent introduction to the Docker
networking stack. Macvlan networks leverage the Linux kernel’s ability
to assign multiple logical addresses based on MAC to a single physical
interface. This means that you can assign a MAC address to a container’s
virtual network interface, making it appear as if the container has a
physical network interface connected to the network. This introduces
unique opportunities, especially for legacy applications that expect a
physical interface to be present and connected to the physical network.
Macvlan networks have an additional dependency on the Network
Interface Card (NIC) to support what is known as promiscuous mode. This
is a special mode that allows for a NIC to receive all traffic and direct it to
a controller, instead of receiving only the traffic that the NIC expects to
receive.
None Networking
As the name suggests, none networking is where the container isn’t
connected to any network interface and does not receive any network
traffic. In this networking mode, only the loopback interface is created,
allowing the container to talk to itself, but not to the outside world or with
the other containers.
Chapter 6 UnDerStanDIng DoCker networkS
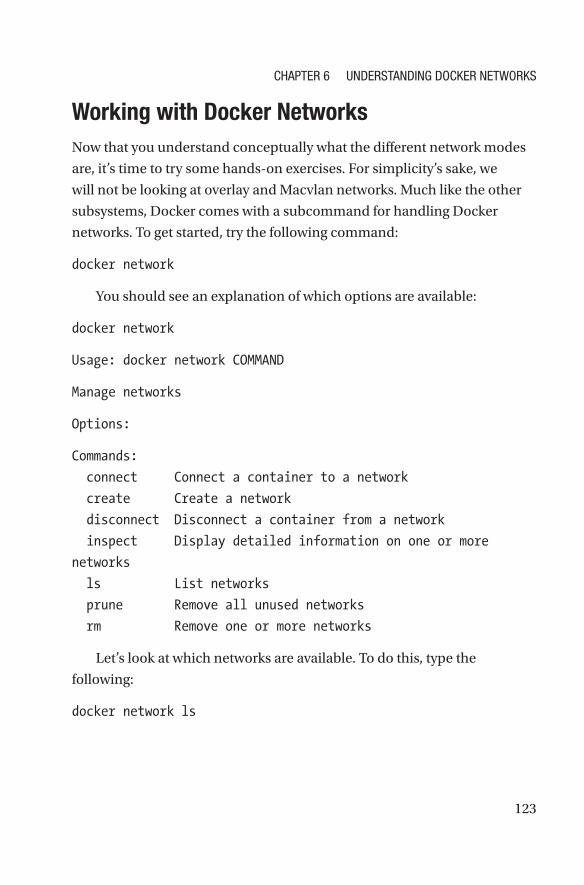
123
Working with Docker NetworksNow that you understand conceptually what the different network modes
are, it’s time to try some hands-on exercises. For simplicity’s sake, we
will not be looking at overlay and Macvlan networks. Much like the other
subsystems, Docker comes with a subcommand for handling Docker
networks. To get started, try the following command:
docker network
You should see an explanation of which options are available:
docker network
Usage: docker network COMMAND
Manage networks
Options:
Commands:
connect Connect a container to a network
create Create a network
disconnect Disconnect a container from a network
inspect Display detailed information on one or more
networks
ls List networks
prune Remove all unused networks
rm Remove one or more networks
Let’s look at which networks are available. To do this, type the
following:
docker network ls
Chapter 6 UnDerStanDIng DoCker networkS
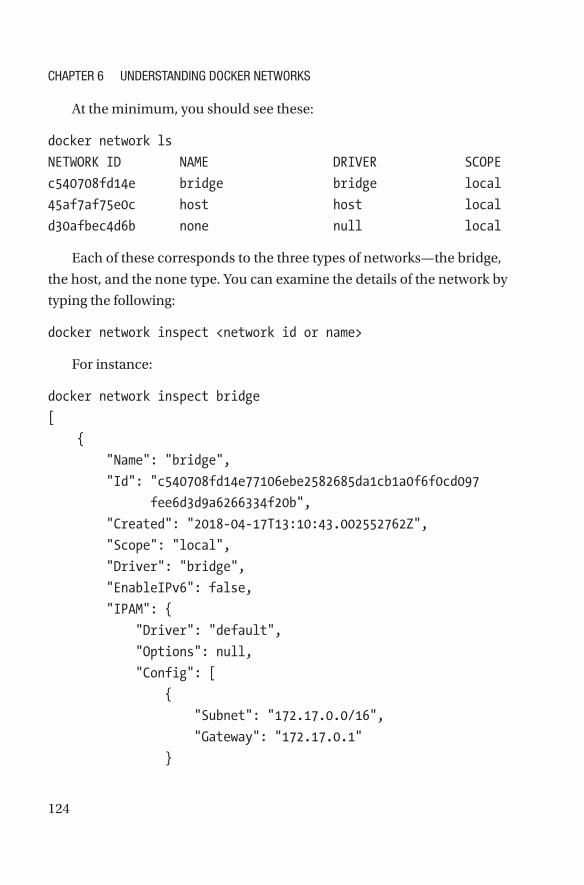
124
At the minimum, you should see these:
docker network ls
NETWORK ID NAME DRIVER SCOPE
c540708fd14e bridge bridge local
45af7af75e0c host host local
d30afbec4d6b none null local
Each of these corresponds to the three types of networks—the bridge,
the host, and the none type. You can examine the details of the network by
typing the following:
docker network inspect <network id or name>
For instance:
docker network inspect bridge
[
{
"Name": "bridge",
"Id": "c540708fd14e77106ebe2582685da1cb1a0f6f0cd097
fee6d3d9a6266334f20b",
"Created": "2018-04-17T13:10:43.002552762Z",
"Scope": "local",
"Driver": "bridge",
"EnableIPv6": false,
"IPAM": {
"Driver": "default",
"Options": null,
"Config": [
{
"Subnet": "172.17.0.0/16",
"Gateway": "172.17.0.1"
}
Chapter 6 UnDerStanDIng DoCker networkS
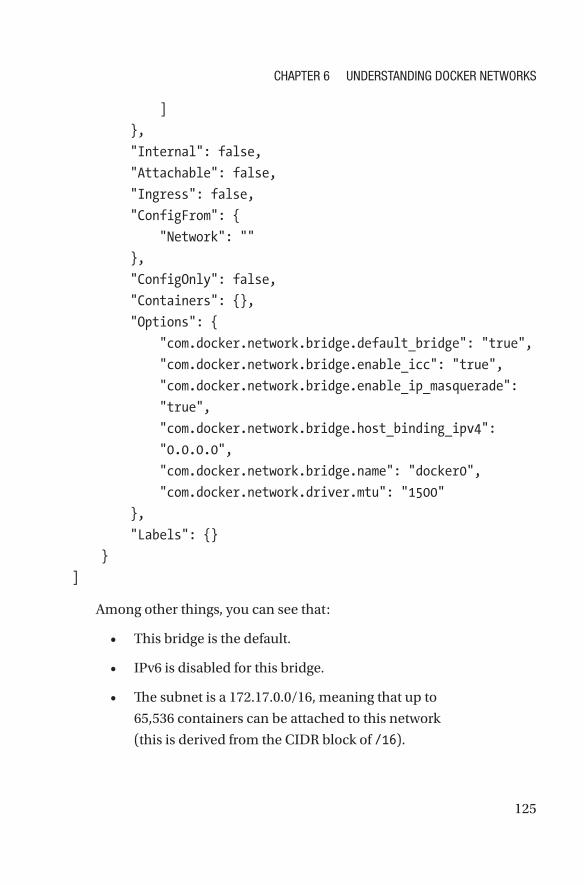
125
]
},
"Internal": false,
"Attachable": false,
"Ingress": false,
"ConfigFrom": {
"Network": ""
},
"ConfigOnly": false,
"Containers": {},
"Options": {
"com.docker.network.bridge.default_bridge": "true",
"com.docker.network.bridge.enable_icc": "true",
"com.docker.network.bridge.enable_ip_masquerade":
"true",
"com.docker.network.bridge.host_binding_ipv4":
"0.0.0.0",
"com.docker.network.bridge.name": "docker0",
"com.docker.network.driver.mtu": "1500"
},
"Labels": {}
}
]
Among other things, you can see that:
• This bridge is the default.
• IPv6 is disabled for this bridge.
• The subnet is a 172.17.0.0/16, meaning that up to
65,536 containers can be attached to this network
(this is derived from the CIDR block of /16).
Chapter 6 UnDerStanDIng DoCker networkS
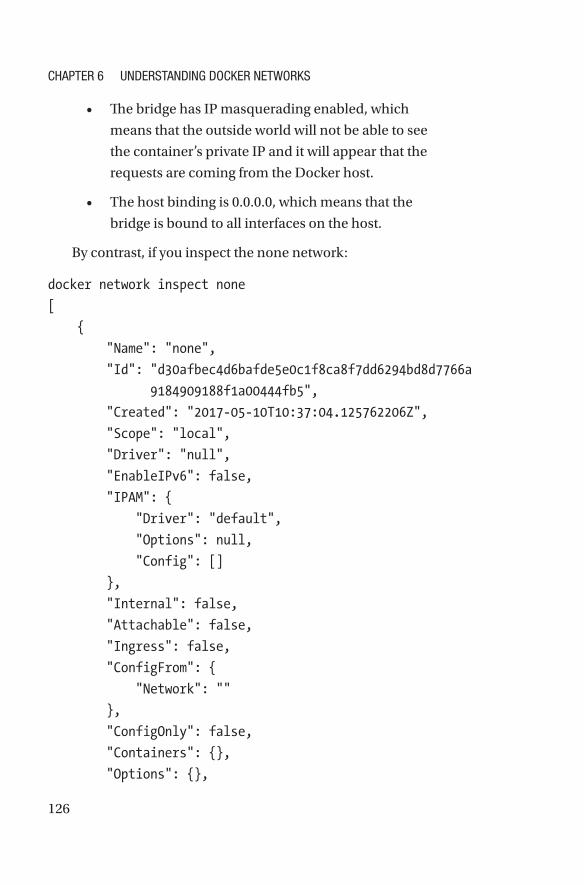
126
• The bridge has IP masquerading enabled, which
means that the outside world will not be able to see
the container’s private IP and it will appear that the
requests are coming from the Docker host.
• The host binding is 0.0.0.0, which means that the
bridge is bound to all interfaces on the host.
By contrast, if you inspect the none network:
docker network inspect none
[
{
"Name": "none",
"Id": "d30afbec4d6bafde5e0c1f8ca8f7dd6294bd8d7766a
9184909188f1a00444fb5",
"Created": "2017-05-10T10:37:04.125762206Z",
"Scope": "local",
"Driver": "null",
"EnableIPv6": false,
"IPAM": {
"Driver": "default",
"Options": null,
"Config": []
},
"Internal": false,
"Attachable": false,
"Ingress": false,
"ConfigFrom": {
"Network": ""
},
"ConfigOnly": false,
"Containers": {},
"Options": {},
Chapter 6 UnDerStanDIng DoCker networkS
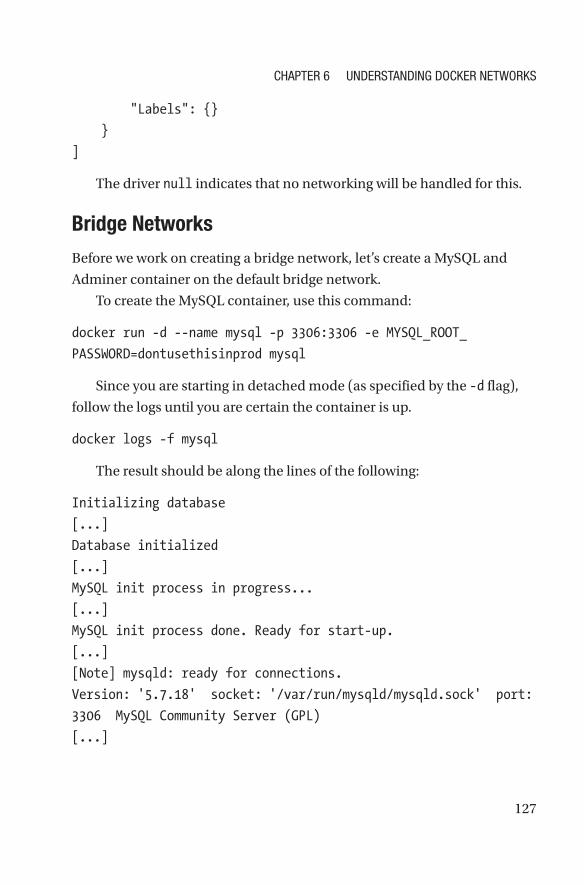
127
"Labels": {}
}
]
The driver null indicates that no networking will be handled for this.
Bridge Networks
Before we work on creating a bridge network, let’s create a MySQL and
Adminer container on the default bridge network.
To create the MySQL container, use this command:
docker run -d --name mysql -p 3306:3306 -e MYSQL_ROOT_
PASSWORD=dontusethisinprod mysql
Since you are starting in detached mode (as specified by the -d flag),
follow the logs until you are certain the container is up.
docker logs -f mysql
The result should be along the lines of the following:
Initializing database
[...]
Database initialized
[...]
MySQL init process in progress...
[...]
MySQL init process done. Ready for start-up.
[...]
[Note] mysqld: ready for connections.
Version: '5.7.18' socket: '/var/run/mysqld/mysqld.sock' port:
3306 MySQL Community Server (GPL)
[...]
Chapter 6 UnDerStanDIng DoCker networkS
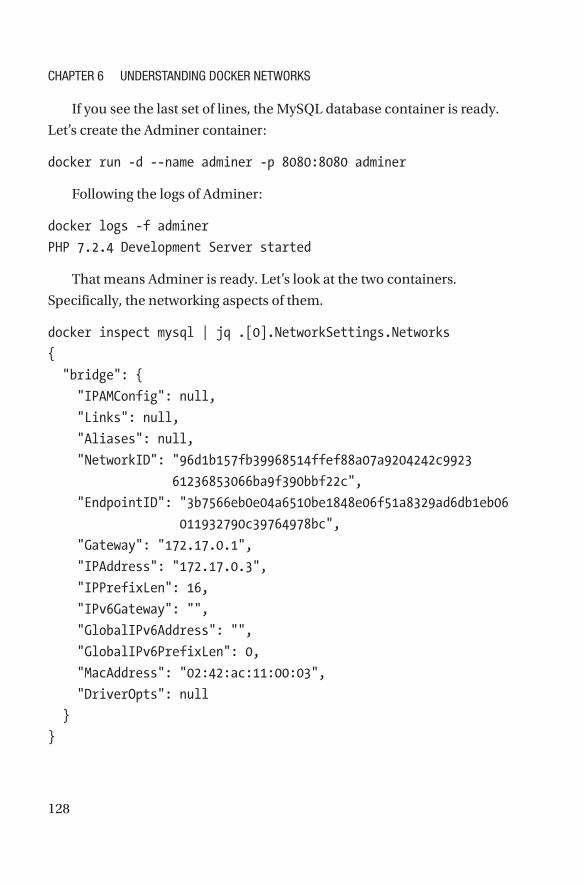
128
If you see the last set of lines, the MySQL database container is ready.
Let’s create the Adminer container:
docker run -d --name adminer -p 8080:8080 adminer
Following the logs of Adminer:
docker logs -f adminer
PHP 7.2.4 Development Server started
That means Adminer is ready. Let’s look at the two containers.
Specifically, the networking aspects of them.
docker inspect mysql | jq .[0].NetworkSettings.Networks
{
"bridge": {
"IPAMConfig": null,
"Links": null,
"Aliases": null,
"NetworkID": "96d1b157fb39968514ffef88a07a9204242c9923
61236853066ba9f390bbf22c",
"EndpointID": "3b7566eb0e04a6510be1848e06f51a8329ad6db1eb06
011932790c39764978bc",
"Gateway": "172.17.0.1",
"IPAddress": "172.17.0.3",
"IPPrefixLen": 16,
"IPv6Gateway": "",
"GlobalIPv6Address": "",
"GlobalIPv6PrefixLen": 0,
"MacAddress": "02:42:ac:11:00:03",
"DriverOpts": null
}
}
Chapter 6 UnDerStanDIng DoCker networkS
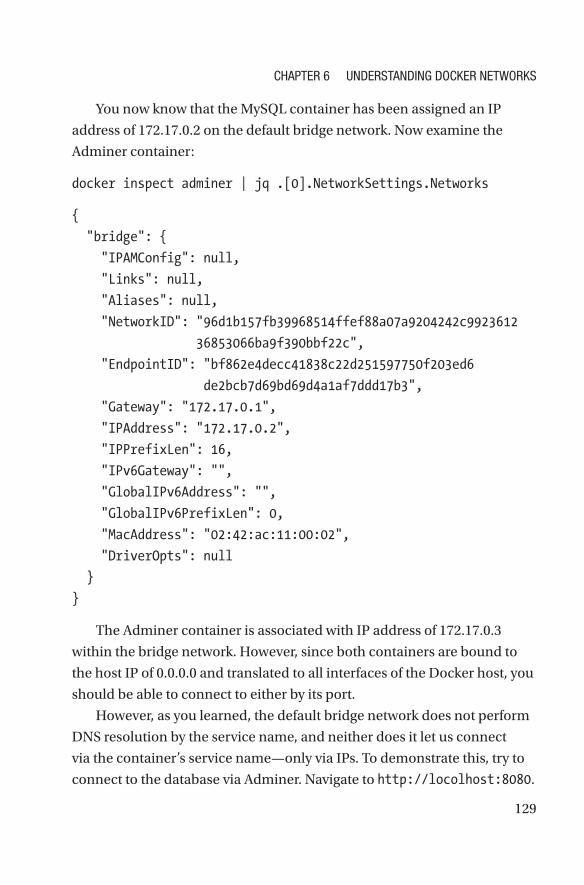
129
You now know that the MySQL container has been assigned an IP
address of 172.17.0.2 on the default bridge network. Now examine the
Adminer container:
docker inspect adminer | jq .[0].NetworkSettings.Networks
{
"bridge": {
"IPAMConfig": null,
"Links": null,
"Aliases": null,
"NetworkID": "96d1b157fb39968514ffef88a07a9204242c9923612
36853066ba9f390bbf22c",
"EndpointID": "bf862e4decc41838c22d251597750f203ed6
de2bcb7d69bd69d4a1af7ddd17b3",
"Gateway": "172.17.0.1",
"IPAddress": "172.17.0.2",
"IPPrefixLen": 16,
"IPv6Gateway": "",
"GlobalIPv6Address": "",
"GlobalIPv6PrefixLen": 0,
"MacAddress": "02:42:ac:11:00:02",
"DriverOpts": null
}
}
The Adminer container is associated with IP address of 172.17.0.3
within the bridge network. However, since both containers are bound to
the host IP of 0.0.0.0 and translated to all interfaces of the Docker host, you
should be able to connect to either by its port.
However, as you learned, the default bridge network does not perform
DNS resolution by the service name, and neither does it let us connect
via the container’s service name—only via IPs. To demonstrate this, try to
connect to the database via Adminer. Navigate to http://locolhost:8080.
Chapter 6 UnDerStanDIng DoCker networkS
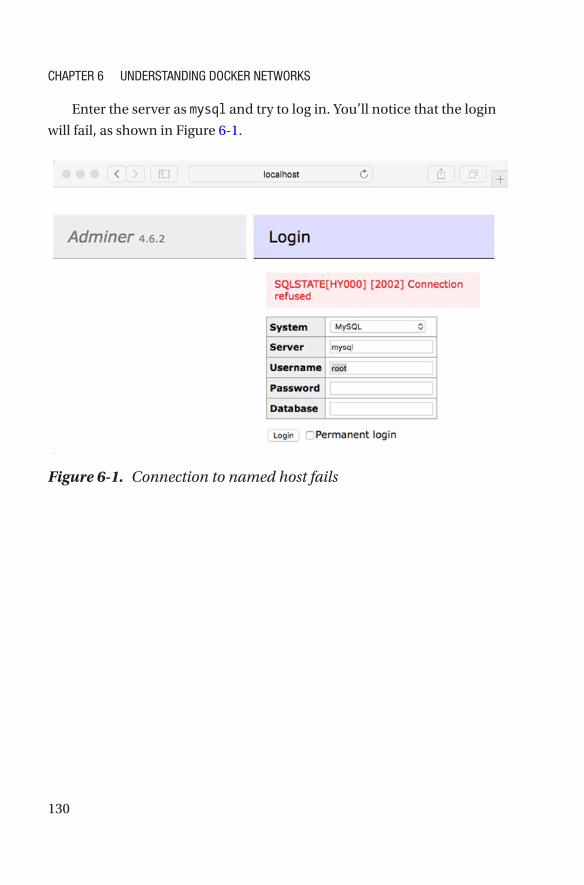
130
Enter the server as mysql and try to log in. You’ll notice that the login
will fail, as shown in Figure 6-1.
Figure 6-1. Connection to named host fails
Chapter 6 UnDerStanDIng DoCker networkS
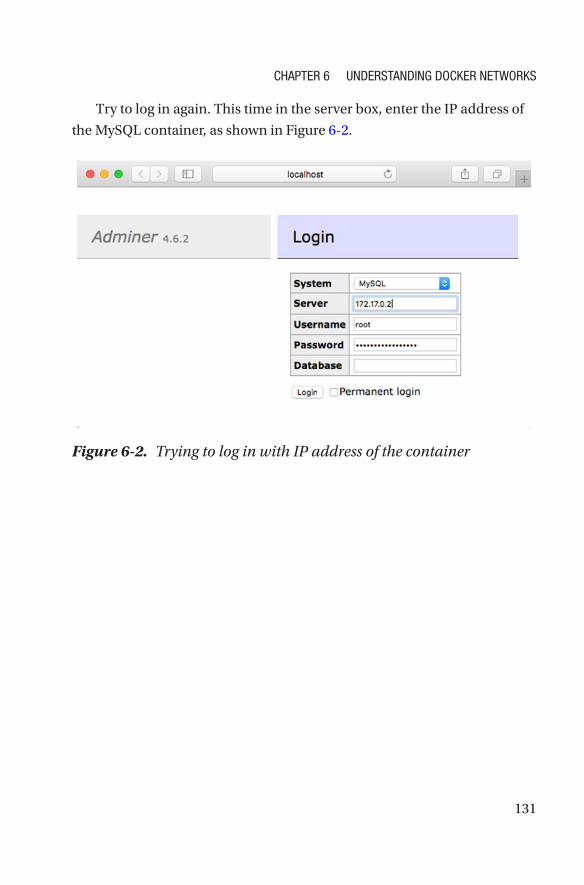
131
Try to log in again. This time in the server box, enter the IP address of
the MySQL container, as shown in Figure 6-2.
Figure 6-2. Trying to log in with IP address of the container
Chapter 6 UnDerStanDIng DoCker networkS
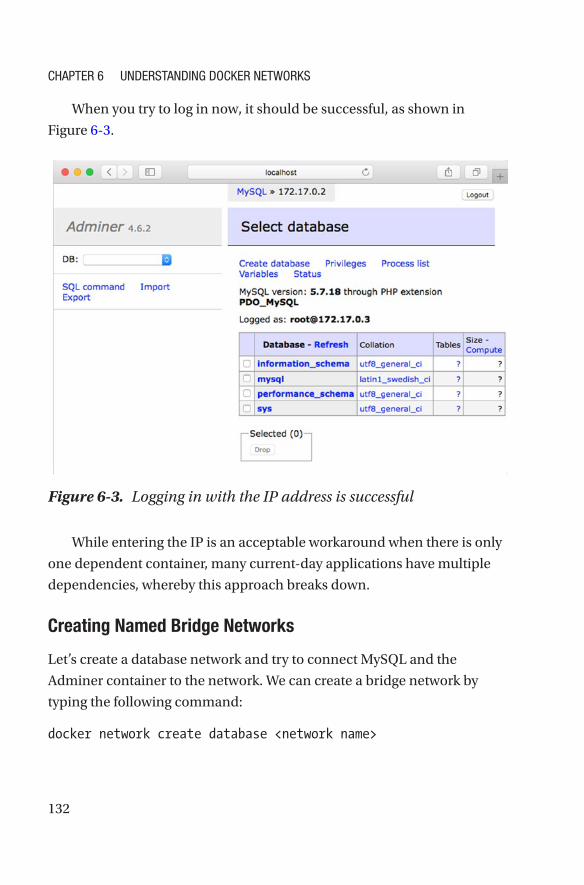
132
When you try to log in now, it should be successful, as shown in
Figure 6-3.
While entering the IP is an acceptable workaround when there is only
one dependent container, many current-day applications have multiple
dependencies, whereby this approach breaks down.
Creating Named Bridge Networks
Let’s create a database network and try to connect MySQL and the
Adminer container to the network. We can create a bridge network by
typing the following command:
docker network create database <network name>
Figure 6-3. Logging in with the IP address is successful
Chapter 6 UnDerStanDIng DoCker networkS
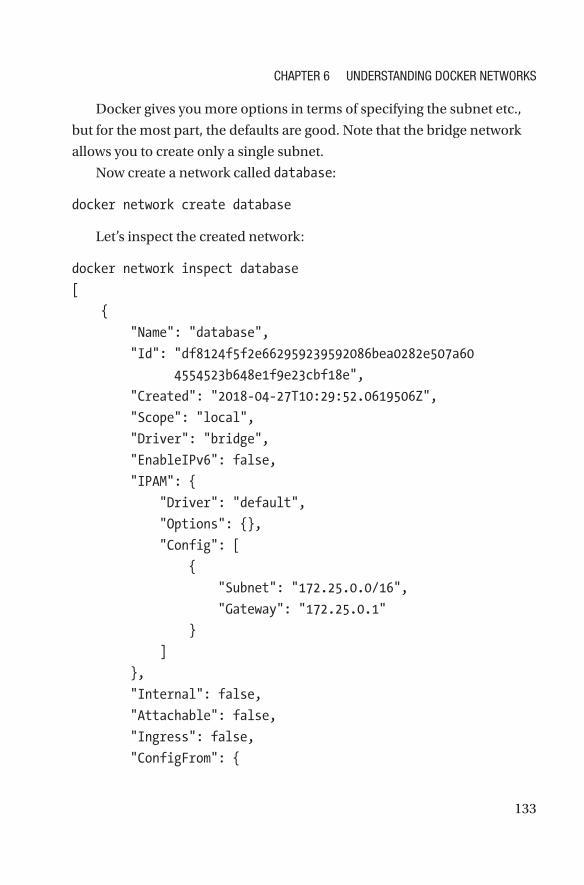
133
Docker gives you more options in terms of specifying the subnet etc.,
but for the most part, the defaults are good. Note that the bridge network
allows you to create only a single subnet.
Now create a network called database:
docker network create database
Let’s inspect the created network:
docker network inspect database
[
{
"Name": "database",
"Id": "df8124f5f2e662959239592086bea0282e507a60
4554523b648e1f9e23cbf18e",
"Created": "2018-04-27T10:29:52.0619506Z",
"Scope": "local",
"Driver": "bridge",
"EnableIPv6": false,
"IPAM": {
"Driver": "default",
"Options": {},
"Config": [
{
"Subnet": "172.25.0.0/16",
"Gateway": "172.25.0.1"
}
]
},
"Internal": false,
"Attachable": false,
"Ingress": false,
"ConfigFrom": {
Chapter 6 UnDerStanDIng DoCker networkS
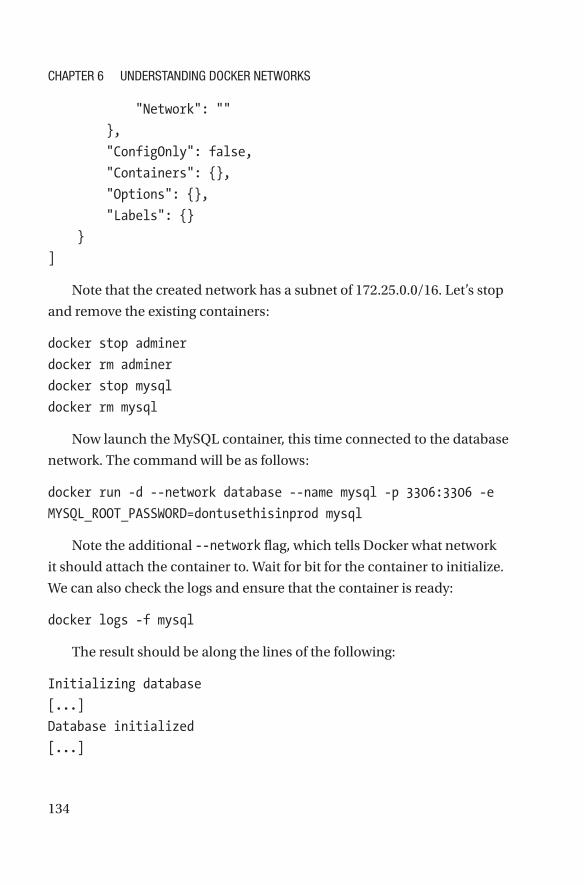
134
"Network": ""
},
"ConfigOnly": false,
"Containers": {},
"Options": {},
"Labels": {}
}
]
Note that the created network has a subnet of 172.25.0.0/16. Let’s stop
and remove the existing containers:
docker stop adminer
docker rm adminer
docker stop mysql
docker rm mysql
Now launch the MySQL container, this time connected to the database
network. The command will be as follows:
docker run -d --network database --name mysql -p 3306:3306 -e
MYSQL_ROOT_PASSWORD=dontusethisinprod mysql
Note the additional --network flag, which tells Docker what network
it should attach the container to. Wait for bit for the container to initialize.
We can also check the logs and ensure that the container is ready:
docker logs -f mysql
The result should be along the lines of the following:
Initializing database
[...]
Database initialized
[...]
Chapter 6 UnDerStanDIng DoCker networkS
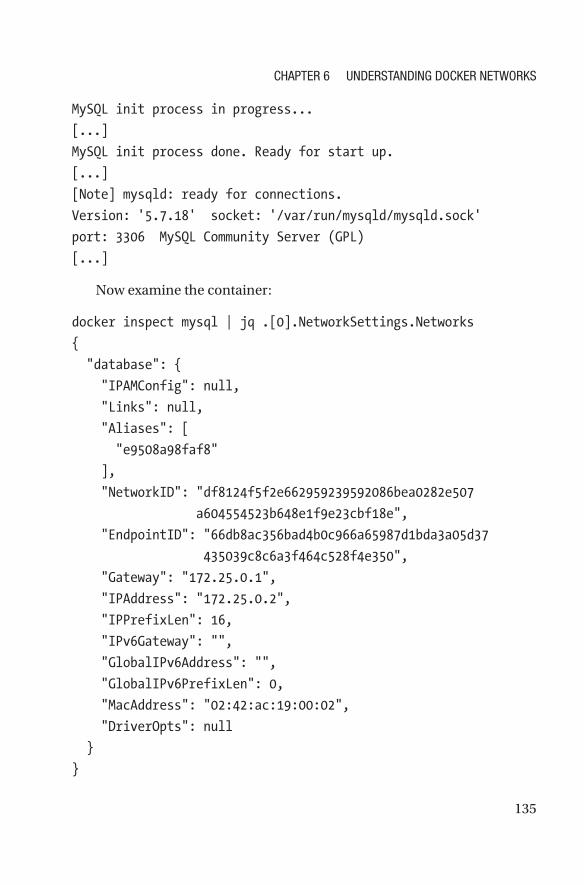
135
MySQL init process in progress...
[...]
MySQL init process done. Ready for start up.
[...]
[Note] mysqld: ready for connections.
Version: '5.7.18' socket: '/var/run/mysqld/mysqld.sock'
port: 3306 MySQL Community Server (GPL)
[...]
Now examine the container:
docker inspect mysql | jq .[0].NetworkSettings.Networks
{
"database": {
"IPAMConfig": null,
"Links": null,
"Aliases": [
"e9508a98faf8"
],
"NetworkID": "df8124f5f2e662959239592086bea0282e507
a604554523b648e1f9e23cbf18e",
"EndpointID": "66db8ac356bad4b0c966a65987d1bda3a05d37
435039c8c6a3f464c528f4e350",
"Gateway": "172.25.0.1",
"IPAddress": "172.25.0.2",
"IPPrefixLen": 16,
"IPv6Gateway": "",
"GlobalIPv6Address": "",
"GlobalIPv6PrefixLen": 0,
"MacAddress": "02:42:ac:19:00:02",
"DriverOpts": null
}
}
Chapter 6 UnDerStanDIng DoCker networkS
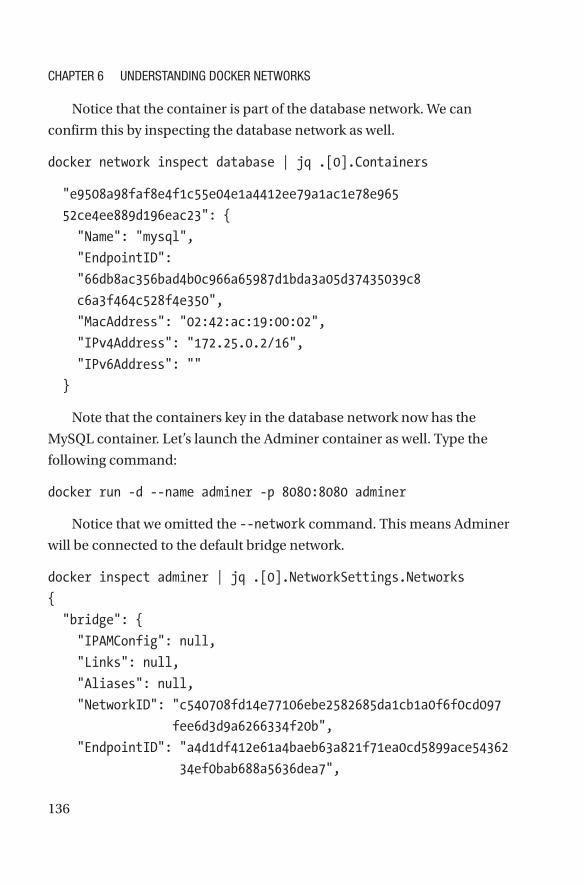
136
Notice that the container is part of the database network. We can
confirm this by inspecting the database network as well.
docker network inspect database | jq .[0].Containers
"e9508a98faf8e4f1c55e04e1a4412ee79a1ac1e78e965
52ce4ee889d196eac23": {
"Name": "mysql",
"EndpointID":
"66db8ac356bad4b0c966a65987d1bda3a05d37435039c8
c6a3f464c528f4e350",
"MacAddress": "02:42:ac:19:00:02",
"IPv4Address": "172.25.0.2/16",
"IPv6Address": ""
}
Note that the containers key in the database network now has the
MySQL container. Let’s launch the Adminer container as well. Type the
following command:
docker run -d --name adminer -p 8080:8080 adminer
Notice that we omitted the --network command. This means Adminer
will be connected to the default bridge network.
docker inspect adminer | jq .[0].NetworkSettings.Networks
{
"bridge": {
"IPAMConfig": null,
"Links": null,
"Aliases": null,
"NetworkID": "c540708fd14e77106ebe2582685da1cb1a0f6f0cd097
fee6d3d9a6266334f20b",
"EndpointID": "a4d1df412e61a4baeb63a821f71ea0cd5899ace54362
34ef0bab688a5636dea7",
Chapter 6 UnDerStanDIng DoCker networkS
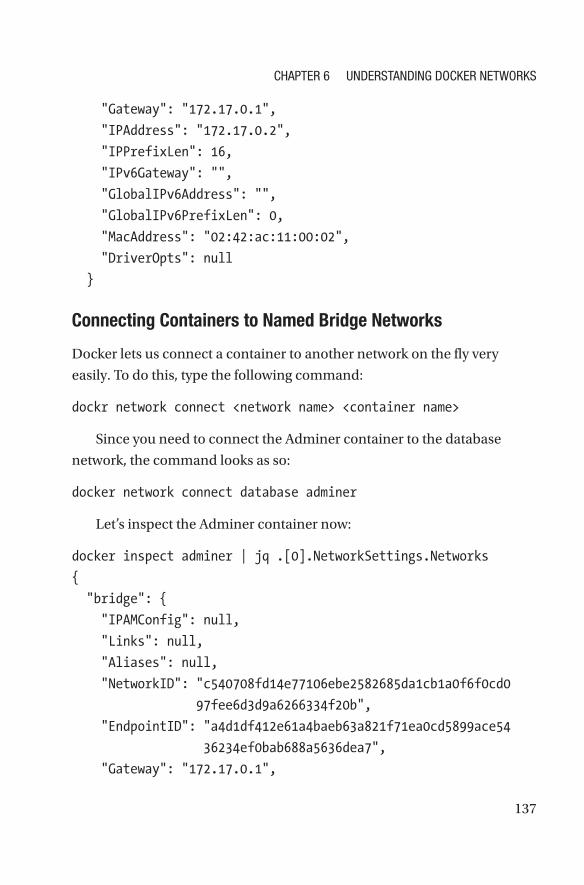
137
"Gateway": "172.17.0.1",
"IPAddress": "172.17.0.2",
"IPPrefixLen": 16,
"IPv6Gateway": "",
"GlobalIPv6Address": "",
"GlobalIPv6PrefixLen": 0,
"MacAddress": "02:42:ac:11:00:02",
"DriverOpts": null
}
Connecting Containers to Named Bridge Networks
Docker lets us connect a container to another network on the fly very
easily. To do this, type the following command:
dockr network connect <network name> <container name>
Since you need to connect the Adminer container to the database
network, the command looks as so:
docker network connect database adminer
Let’s inspect the Adminer container now:
docker inspect adminer | jq .[0].NetworkSettings.Networks
{
"bridge": {
"IPAMConfig": null,
"Links": null,
"Aliases": null,
"NetworkID": "c540708fd14e77106ebe2582685da1cb1a0f6f0cd0
97fee6d3d9a6266334f20b",
"EndpointID": "a4d1df412e61a4baeb63a821f71ea0cd5899ace54
36234ef0bab688a5636dea7",
"Gateway": "172.17.0.1",
Chapter 6 UnDerStanDIng DoCker networkS
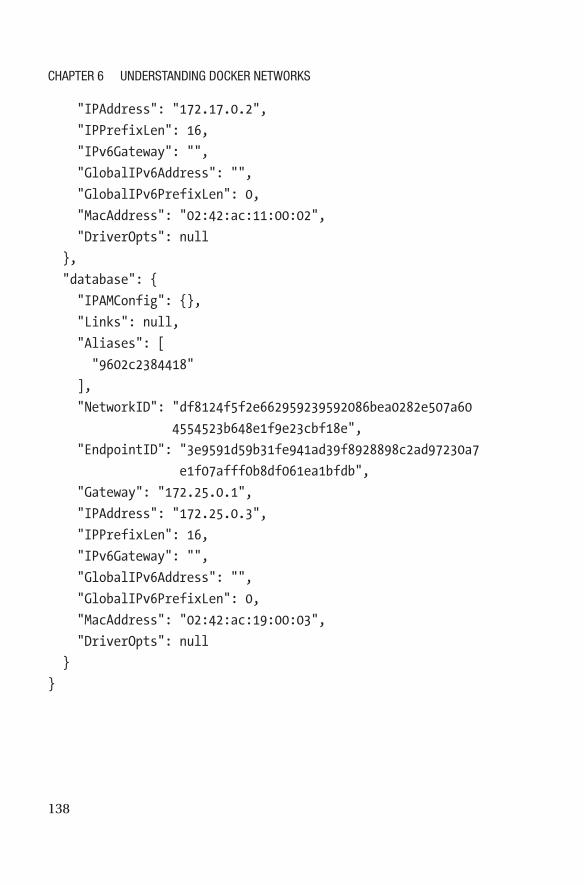
138
"IPAddress": "172.17.0.2",
"IPPrefixLen": 16,
"IPv6Gateway": "",
"GlobalIPv6Address": "",
"GlobalIPv6PrefixLen": 0,
"MacAddress": "02:42:ac:11:00:02",
"DriverOpts": null
},
"database": {
"IPAMConfig": {},
"Links": null,
"Aliases": [
"9602c2384418"
],
"NetworkID": "df8124f5f2e662959239592086bea0282e507a60
4554523b648e1f9e23cbf18e",
"EndpointID": "3e9591d59b31fe941ad39f8928898c2ad97230a7
e1f07afff0b8df061ea1bfdb",
"Gateway": "172.25.0.1",
"IPAddress": "172.25.0.3",
"IPPrefixLen": 16,
"IPv6Gateway": "",
"GlobalIPv6Address": "",
"GlobalIPv6PrefixLen": 0,
"MacAddress": "02:42:ac:19:00:03",
"DriverOpts": null
}
}
Chapter 6 UnDerStanDIng DoCker networkS
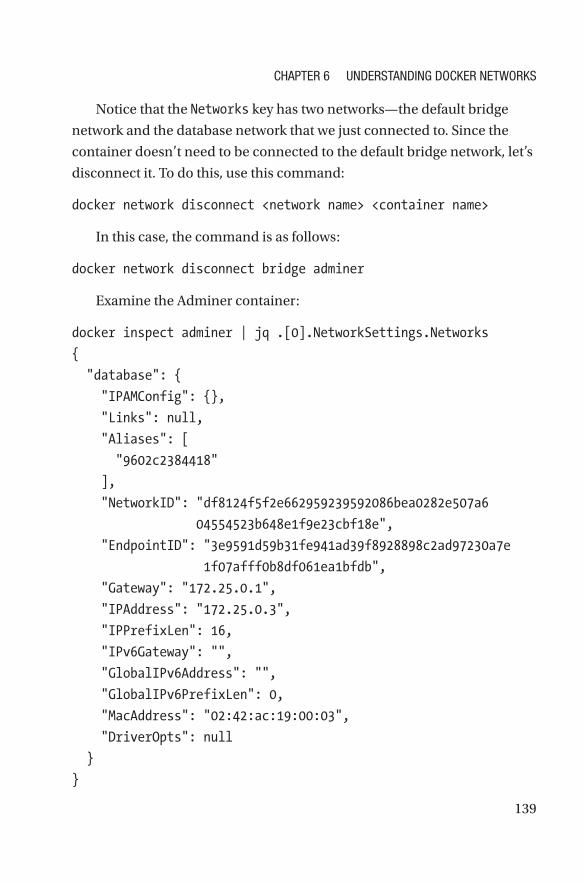
139
Notice that the Networks key has two networks—the default bridge
network and the database network that we just connected to. Since the
container doesn’t need to be connected to the default bridge network, let’s
disconnect it. To do this, use this command:
docker network disconnect <network name> <container name>
In this case, the command is as follows:
docker network disconnect bridge adminer
Examine the Adminer container:
docker inspect adminer | jq .[0].NetworkSettings.Networks
{
"database": {
"IPAMConfig": {},
"Links": null,
"Aliases": [
"9602c2384418"
],
"NetworkID": "df8124f5f2e662959239592086bea0282e507a6
04554523b648e1f9e23cbf18e",
"EndpointID": "3e9591d59b31fe941ad39f8928898c2ad97230a7e
1f07afff0b8df061ea1bfdb",
"Gateway": "172.25.0.1",
"IPAddress": "172.25.0.3",
"IPPrefixLen": 16,
"IPv6Gateway": "",
"GlobalIPv6Address": "",
"GlobalIPv6PrefixLen": 0,
"MacAddress": "02:42:ac:19:00:03",
"DriverOpts": null
}
}
Chapter 6 UnDerStanDIng DoCker networkS
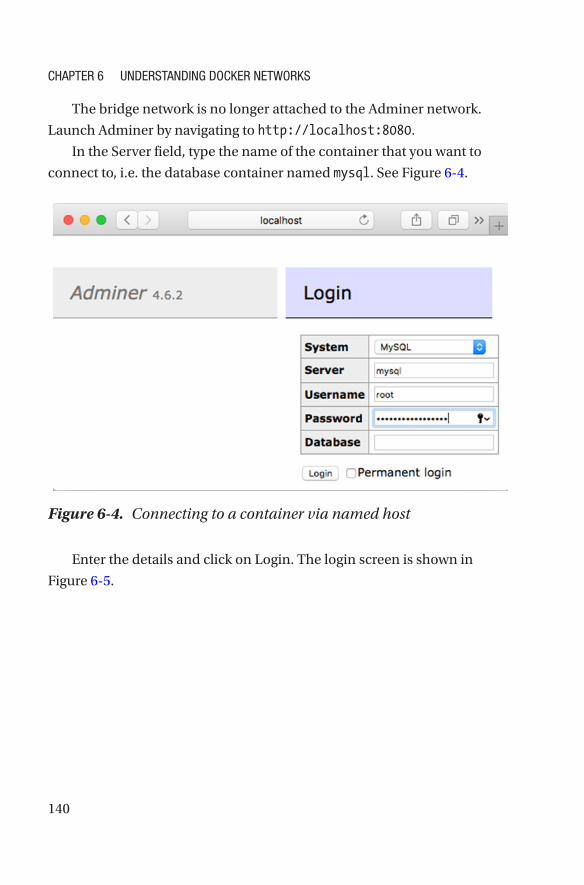
140
The bridge network is no longer attached to the Adminer network.
Launch Adminer by navigating to http://localhost:8080.
In the Server field, type the name of the container that you want to
connect to, i.e. the database container named mysql. See Figure 6-4.
Enter the details and click on Login. The login screen is shown in
Figure 6-5.
Figure 6-4. Connecting to a container via named host
Chapter 6 UnDerStanDIng DoCker networkS
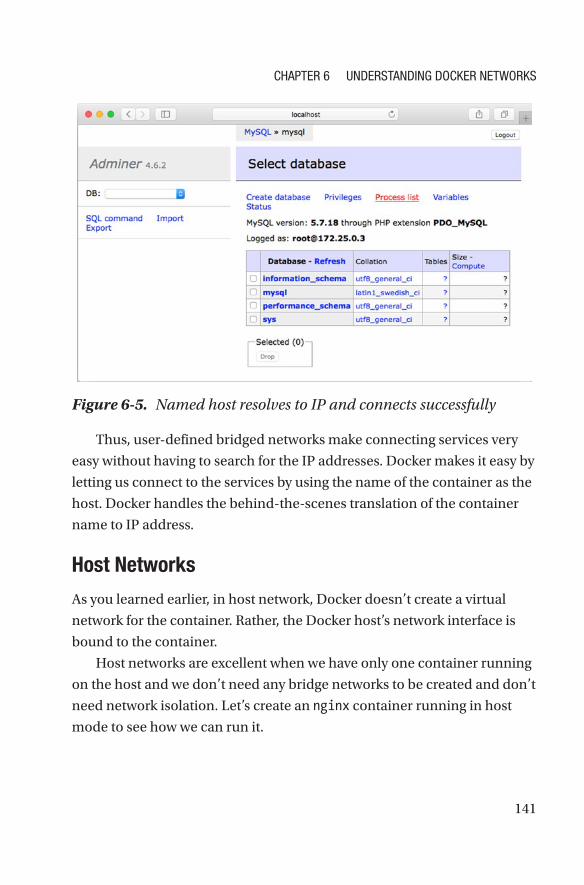
141
Thus, user-defined bridged networks make connecting services very
easy without having to search for the IP addresses. Docker makes it easy by
letting us connect to the services by using the name of the container as the
host. Docker handles the behind-the-scenes translation of the container
name to IP address.
Host Networks
As you learned earlier, in host network, Docker doesn’t create a virtual
network for the container. Rather, the Docker host’s network interface is
bound to the container.
Host networks are excellent when we have only one container running
on the host and we don’t need any bridge networks to be created and don’t
need network isolation. Let’s create an nginx container running in host
mode to see how we can run it.
Figure 6-5. Named host resolves to IP and connects successfully
Chapter 6 UnDerStanDIng DoCker networkS
142
Earlier you saw that there already exists a network called host. It’s not
the name that governs whether or not the network is a host network, it’s the
driver. We noticed that the host network has a host driver, and hence any
container connected to the host network will run in host network mode.
To start the container, you just have to pass the parameter --network
host. Try the following command to start an nginx container and publish
port 80 of the container to the host’s 8080 port.
docker run -d --network host -p 8080:80 nginx:alpine
WARNING: Published ports are discarded when using host network
mode
Notice that Docker warns you that the port publishing isn’t being
used. Since the container’s ports are directly bound to the Docker post, the
concept of a published port doesn’t arise. The actual command should be
as follows:
docker run -d --network host -p 8080:80 nginx:alpine
Docker Networking ExercisesYou’ve have learned a fair bit about Docker networks, so it’s time to get
some hands-on experience creating and attaching a network to your
project.
CONNECTING THE MYSQL CONTAINER TO THE PROJECT CONTAINER
In the previous chapter exercises, you wrote a Dockerfile for this project and
built the container. You then used Docker Volumes to persist the database
across containers. In this exercise, you will modify the project so that the data,
instead of saving to a SQLite database, persists to a MySQL database.
You will then create a custom bridge network to connect the project container
and the MySQL container.
Chapter 6 UnDerStanDIng DoCker networkS
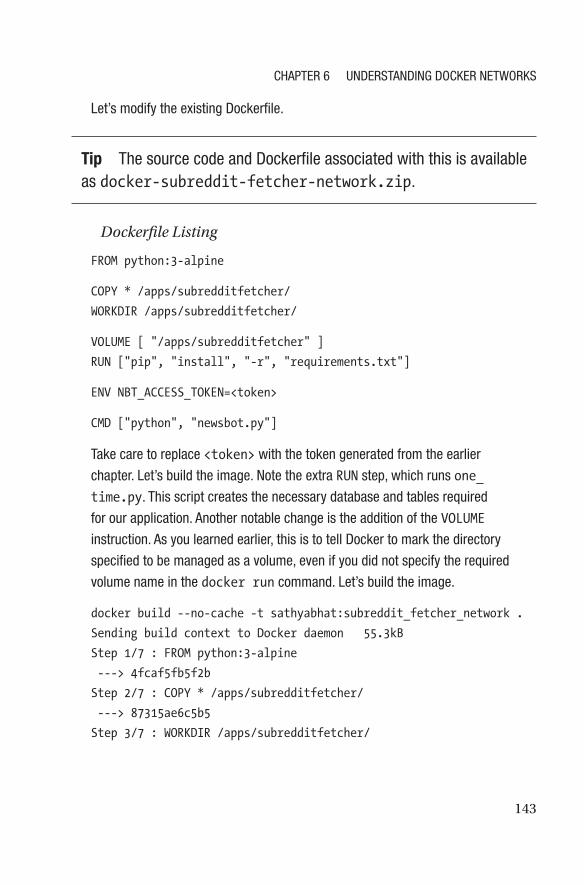
143
Let’s modify the existing Dockerfile.
Tip the source code and Dockerfile associated with this is available as docker-subreddit-fetcher-network.zip.
Dockerfile Listing
FROM python:3-alpine
COPY * /apps/subredditfetcher/
WORKDIR /apps/subredditfetcher/
VOLUME [ "/apps/subredditfetcher" ]
RUN ["pip", "install", "-r", "requirements.txt"]
ENV NBT_ACCESS_TOKEN=<token>
CMD ["python", "newsbot.py"]
take care to replace <token> with the token generated from the earlier
chapter. Let’s build the image. note the extra RUN step, which runs one_
time.py. this script creates the necessary database and tables required
for our application. another notable change is the addition of the VOLUME
instruction. as you learned earlier, this is to tell Docker to mark the directory
specified to be managed as a volume, even if you did not specify the required
volume name in the docker run command. Let’s build the image.
docker build --no-cache -t sathyabhat:subreddit_fetcher_network .
Sending build context to Docker daemon 55.3kB
Step 1/7 : FROM python:3-alpine
---> 4fcaf5fb5f2b
Step 2/7 : COPY * /apps/subredditfetcher/
---> 87315ae6c5b5
Step 3/7 : WORKDIR /apps/subredditfetcher/
Chapter 6 UnDerStanDIng DoCker networkS
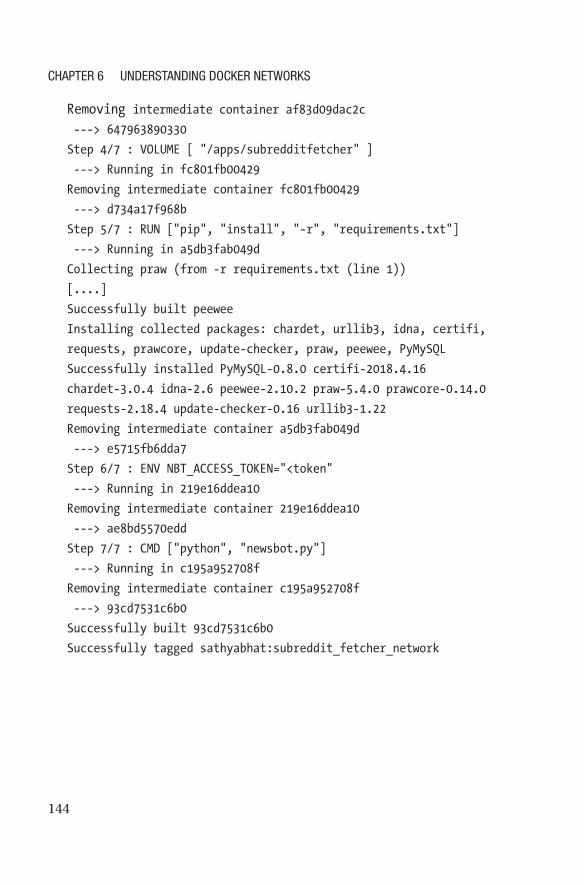
144
Removing intermediate container af83d09dac2c ---> 647963890330
Step 4/7 : VOLUME [ "/apps/subredditfetcher" ]
---> Running in fc801fb00429
Removing intermediate container fc801fb00429
---> d734a17f968b
Step 5/7 : RUN ["pip", "install", "-r", "requirements.txt"]
---> Running in a5db3fab049d
Collecting praw (from -r requirements.txt (line 1))
[....]
Successfully built peewee
Installing collected packages: chardet, urllib3, idna, certifi,
requests, prawcore, update-checker, praw, peewee, PyMySQL
Successfully installed PyMySQL-0.8.0 certifi-2018.4.16
chardet-3.0.4 idna-2.6 peewee-2.10.2 praw-5.4.0 prawcore-0.14.0
requests-2.18.4 update-checker-0.16 urllib3-1.22
Removing intermediate container a5db3fab049d
---> e5715fb6dda7
Step 6/7 : ENV NBT_ACCESS_TOKEN="<token"
---> Running in 219e16ddea10
Removing intermediate container 219e16ddea10
---> ae8bd5570edd
Step 7/7 : CMD ["python", "newsbot.py"]
---> Running in c195a952708f
Removing intermediate container c195a952708f
---> 93cd7531c6b0
Successfully built 93cd7531c6b0
Successfully tagged sathyabhat:subreddit_fetcher_network
Chapter 6 UnDerStanDIng DoCker networkS
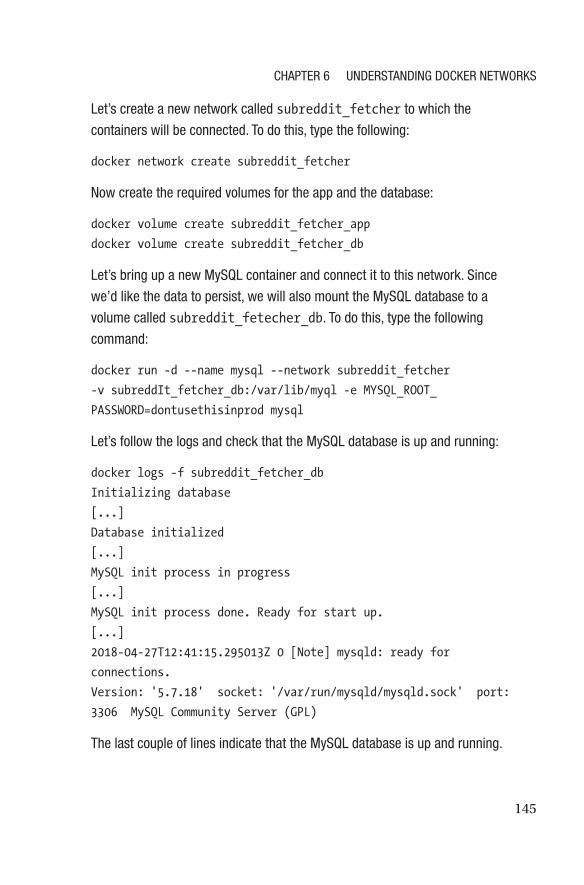
145
Let’s create a new network called subreddit_fetcher to which the
containers will be connected. to do this, type the following:
docker network create subreddit_fetcher
now create the required volumes for the app and the database:
docker volume create subreddit_fetcher_app
docker volume create subreddit_fetcher_db
Let’s bring up a new MySQL container and connect it to this network. Since
we’d like the data to persist, we will also mount the MySQL database to a
volume called subreddit_fetecher_db. to do this, type the following
command:
docker run -d --name mysql --network subreddit_fetcher
-v subreddIt_fetcher_db:/var/lib/myql -e MYSQL_ROOT_
PASSWORD=dontusethisinprod mysql
Let’s follow the logs and check that the MySQL database is up and running:
docker logs -f subreddit_fetcher_db
Initializing database
[...]
Database initialized
[...]
MySQL init process in progress
[...]
MySQL init process done. Ready for start up.
[...]
2018-04-27T12:41:15.295013Z 0 [Note] mysqld: ready for
connections.
Version: '5.7.18' socket: '/var/run/mysqld/mysqld.sock' port:
3306 MySQL Community Server (GPL)
the last couple of lines indicate that the MySQL database is up and running.
Chapter 6 UnDerStanDIng DoCker networkS
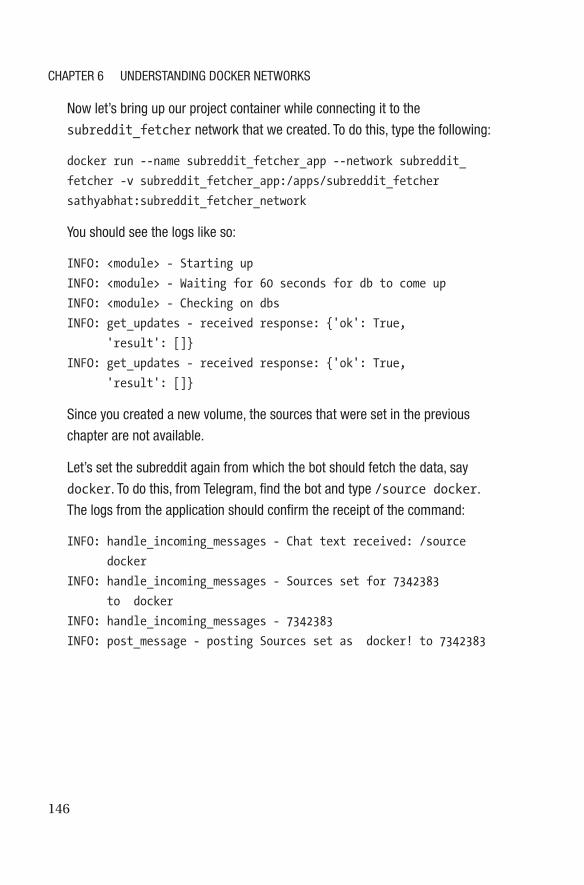
146
now let’s bring up our project container while connecting it to the
subreddit_fetcher network that we created. to do this, type the following:
docker run --name subreddit_fetcher_app --network subreddit_
fetcher -v subreddit_fetcher_app:/apps/subreddit_fetcher
sathyabhat:subreddit_fetcher_network
You should see the logs like so:
INFO: <module> - Starting up
INFO: <module> - Waiting for 60 seconds for db to come up
INFO: <module> - Checking on dbs
INFO: get_updates - received response: {'ok': True,
'result': []}
INFO: get_updates - received response: {'ok': True,
'result': []}
Since you created a new volume, the sources that were set in the previous
chapter are not available.
Let’s set the subreddit again from which the bot should fetch the data, say
docker. to do this, from telegram, find the bot and type /source docker.
the logs from the application should confirm the receipt of the command:
INFO: handle_incoming_messages - Chat text received: /source
docker
INFO: handle_incoming_messages - Sources set for 7342383
to docker
INFO: handle_incoming_messages - 7342383
INFO: post_message - posting Sources set as docker! to 7342383
Chapter 6 UnDerStanDIng DoCker networkS
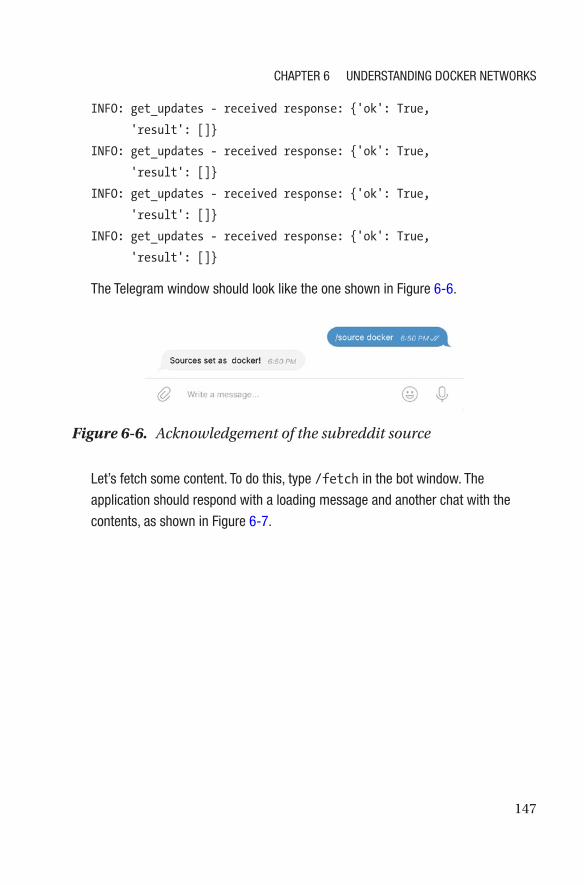
147
INFO: get_updates - received response: {'ok': True,
'result': []}
INFO: get_updates - received response: {'ok': True,
'result': []}
INFO: get_updates - received response: {'ok': True,
'result': []}
INFO: get_updates - received response: {'ok': True,
'result': []}
the telegram window should look like the one shown in Figure 6-6.
Let’s fetch some content. to do this, type /fetch in the bot window. the
application should respond with a loading message and another chat with the
contents, as shown in Figure 6-7.
Figure 6-6. Acknowledgement of the subreddit source
Chapter 6 UnDerStanDIng DoCker networkS
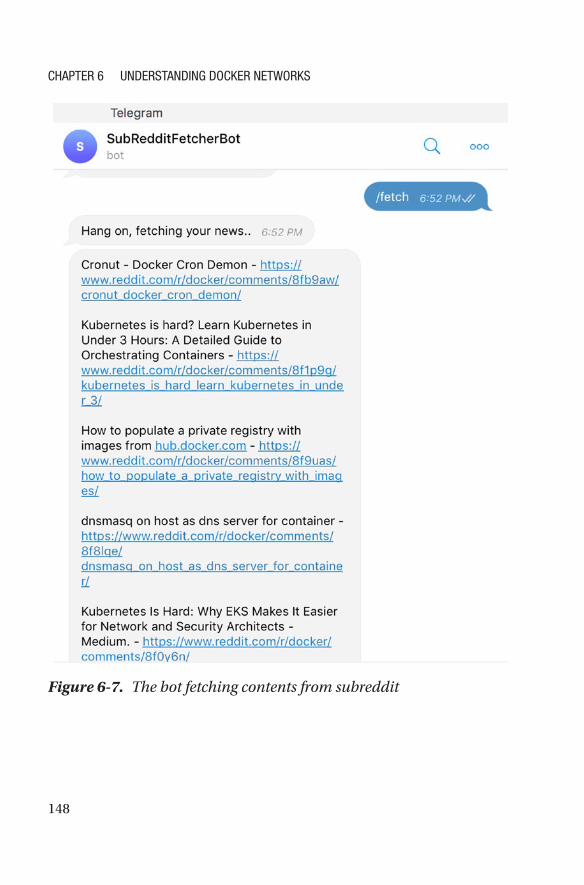
148
Figure 6-7. The bot fetching contents from subreddit
Chapter 6 UnDerStanDIng DoCker networkS
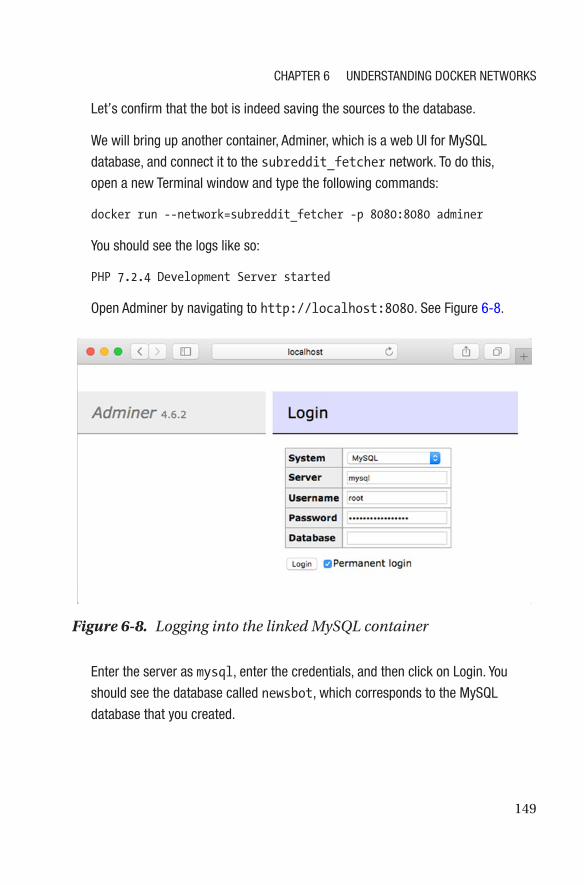
149
Let’s confirm that the bot is indeed saving the sources to the database.
we will bring up another container, adminer, which is a web UI for MySQL
database, and connect it to the subreddit_fetcher network. to do this,
open a new terminal window and type the following commands:
docker run --network=subreddit_fetcher -p 8080:8080 adminer
You should see the logs like so:
PHP 7.2.4 Development Server started
open adminer by navigating to http://localhost:8080. See Figure 6-8.
enter the server as mysql, enter the credentials, and then click on Login. You
should see the database called newsbot, which corresponds to the MySQL
database that you created.
Figure 6-8. Logging into the linked MySQL container
Chapter 6 UnDerStanDIng DoCker networkS
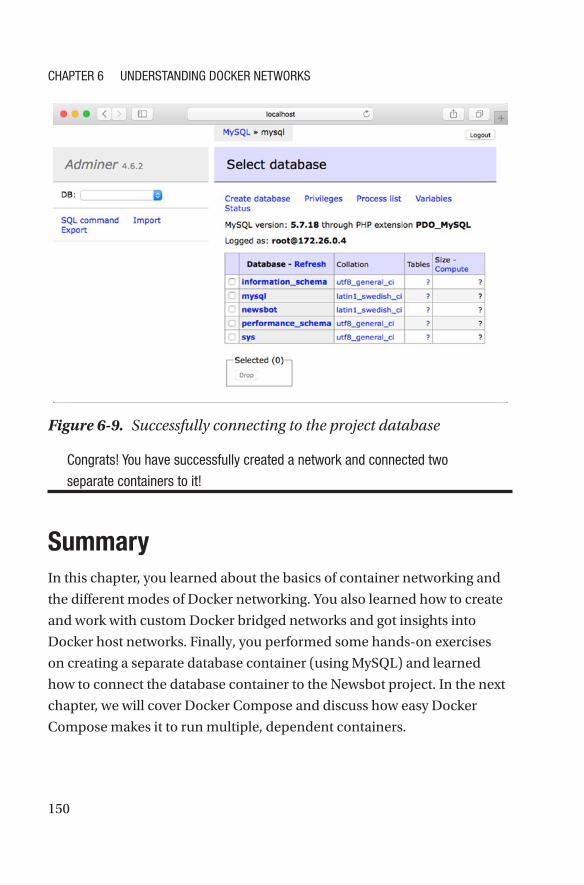
150
Congrats! You have successfully created a network and connected two
separate containers to it!
SummaryIn this chapter, you learned about the basics of container networking and
the different modes of Docker networking. You also learned how to create
and work with custom Docker bridged networks and got insights into
Docker host networks. Finally, you performed some hands-on exercises
on creating a separate database container (using MySQL) and learned
how to connect the database container to the Newsbot project. In the next
chapter, we will cover Docker Compose and discuss how easy Docker
Compose makes it to run multiple, dependent containers.
Figure 6-9. Successfully connecting to the project database
Chapter 6 UnDerStanDIng DoCker networkS
151© Sathyajith Bhat 2018 S. Bhat, Practical Docker with Python, https://doi.org/10.1007/978-1-4842-3784-7_7
CHAPTER 7
Understanding Docker ComposeIn the previous chapters, you learned about Docker and its associated
terminology, took a deeper look into how to build Docker images using the
Dockerfile, learned how to persist data generated by containers, and linked
various running containers with the help of Docker’s network features.
In this chapter, we look at Docker Compose, which is a tool for running
multi-container applications, bringing up various linked, dependent
containers, and more—all with help of just one config file and a command.
Overview of Docker ComposeAs software gets more complicated and as we move toward the
microservices architecture, the number of components that need to be
deployed increases considerably as well. While microservices might
help in keeping the overall system fluid by encouraging loosely coupled
services, from an operations point of view, things get more complicated.
This is especially challenging when you have dependent applications—for
instance, for a web application to start working correctly, it would need its
database to be working before the web tier can start responding to requests.

152
Docker makes it easy to tie each microservice to a container, and
Docker Compose makes orchestration of all of these containers very
easy. Without Docker Compose, our container orchestration steps would
involve building the various images, creating the required networks, and
then running the application by a series of Docker run commands in the
necessary order. As and when the number of containers increases and as
the deployment targets increase, running these steps manually becomes
infeasible and we need to go toward automation.
From a local development point of view, bringing up multiple,
linked services manually gets very tedious and painful. Docker Compose
simplifies this a lot. By just providing a YAML file describing the containers
required and the relation between the containers, Docker Compose lets us
bring up all the containers with a single command.
It’s not just about bringing up the containers; Docker Compose lets
you do the following as well:
• Build, stop, and start the containers associated with the
application
• Tail the logs of the running containers, saving us the
trouble of having to open multiple terminal sessions for
each container
• View the status of each container
Docker Compose helps you enable continuous integration. By
providing multiple, disposable, reproducible environments, Docker
compose lets you run integration tests in isolation, allowing for a clean-
room approach to the automated test cases. This enables you to run the
tests, validate the results, and then tear down the environment cleanly.
Chapter 7 Understanding doCker Compose
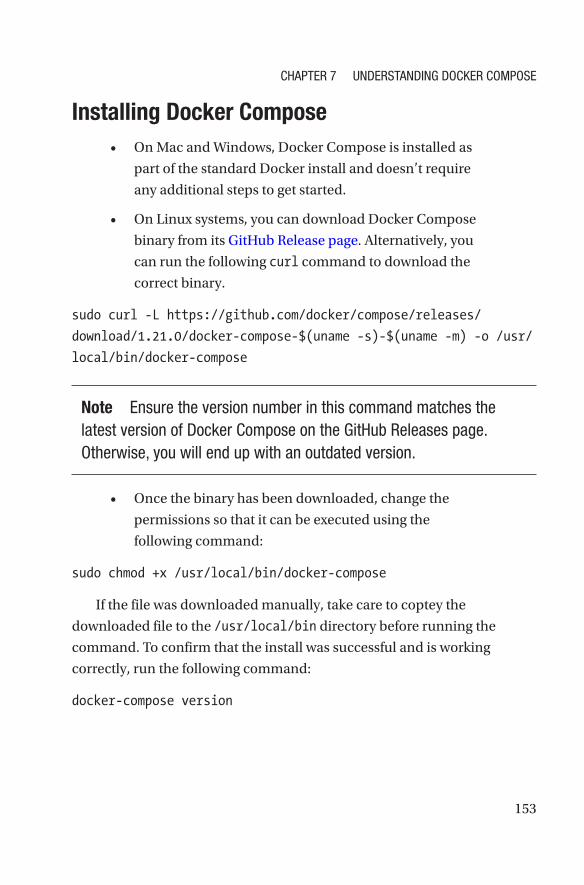
153
Installing Docker Compose• On Mac and Windows, Docker Compose is installed as
part of the standard Docker install and doesn’t require
any additional steps to get started.
• On Linux systems, you can download Docker Compose
binary from its GitHub Release page. Alternatively, you
can run the following curl command to download the
correct binary.
sudo curl -L https://github.com/docker/compose/releases/
download/1.21.0/docker-compose-$(uname -s)-$(uname -m) -o /usr/
local/bin/docker-compose
Note ensure the version number in this command matches the latest version of docker Compose on the github releases page. otherwise, you will end up with an outdated version.
• Once the binary has been downloaded, change the
permissions so that it can be executed using the
following command:
sudo chmod +x /usr/local/bin/docker-compose
If the file was downloaded manually, take care to coptey the
downloaded file to the /usr/local/bin directory before running the
command. To confirm that the install was successful and is working
correctly, run the following command:
docker-compose version
Chapter 7 Understanding doCker Compose

154
The result should be versions of Docker Compose, something similar
to the following:
docker-compose version 1.20.1, build 5d8c71b
docker-py version: 3.1.4
CPython version: 3.6.4
OpenSSL version: OpenSSL 1.0.2n 7 Dec 2017
Docker Compose BasicsUnlike the Dockerfile, which is a set of instructions to the Docker engine about
how to build the Docker image, the Compose file is a YAML configuration
file that defines the services, networks, and volumes that are required for the
application to be started. Docker expects the compose file to be present in
the same path into which the docker-compose command is invoked having
a file name of docker-compose.yaml (or docker- compose.yml). This can be
overridden by using the -f flag followed by the path to the compose filename.
Compose File Versioning
Although the compose file is a YAML file, Docker uses the version key at
the start of the file to determine which features of the Docker Engine are
supported. Currently, there are three versions of the Compose file format:
• Version 1: Version 1 is considered a legacy format. If a
Docker Compose file doesn’t have a version key at the
start of the YAML file, Docker considers it to be version
1 format.
• Version 2.x: Version 2.x identified by the version: 2.x key
at the start of the YAML file.
• Version 3.x: Version 3.x identified by the version: 2.x key
at the start of the YAML file.
The differences between the three major versions are described next.
Chapter 7 Understanding doCker Compose
155
Version 1
Docker Compose files that do not have a version key at the root of the
YAML file are considered to be Version 1 compose files. Version 1 will
be deprecated and removed in a future version of Docker Compose
and, as such, we do not recommend writing Version 1 files. Besides the
deprecation, Version 1 has the following major drawbacks:
• Version 1 files cannot declare named services, volumes,
or build arguments
• Container discovery is enabled only by using the links flag
Version 2
Docker Compose Version 2 files has a version key with value 2 or 2.x.
Version 2 introduces a few changes that make version 2 incompatible with
previous versions of Compose files. These include:
• All services must be present under the services key.
• All containers are located on an application-specific
default network and the containers can be discovered
by the hostname specified by the service name.
• Links is made redundant.
• The depends_on flag is introduced, allowing us to
specify dependent containers and the order in which
the containers are brought up.
Version 3
Docker Compose Version 3 is the current major version of Compose
having a version key with value 3 or 3.x. Version 3 removes several
deprecated options, including volume_driver, volumes_from, and many
more. Version 3 also adds a deploy key, which is used for deployment and
running of services on Docker Swarm.
Chapter 7 Understanding doCker Compose
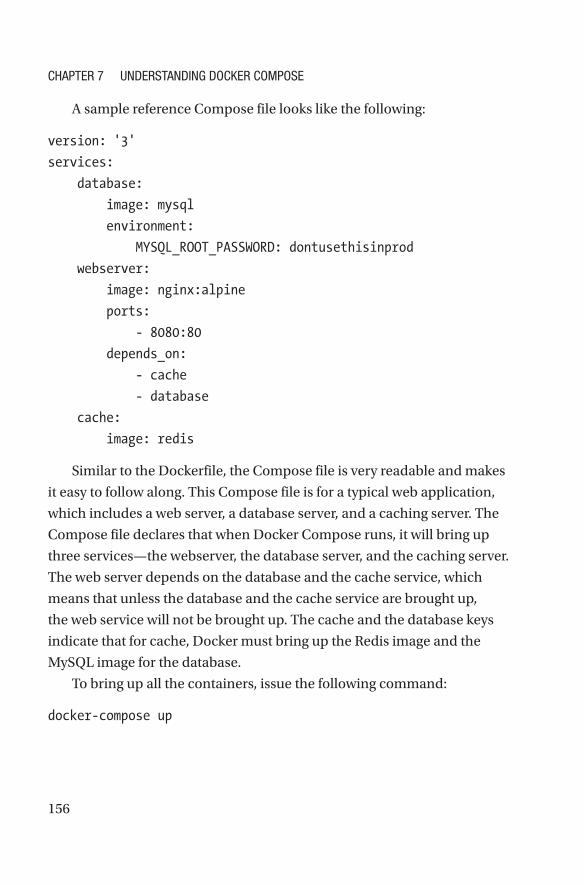
156
A sample reference Compose file looks like the following:
version: '3'
services:
database:
image: mysql
environment:
MYSQL_ROOT_PASSWORD: dontusethisinprod
webserver:
image: nginx:alpine
ports:
- 8080:80
depends_on:
- cache
- database
cache:
image: redis
Similar to the Dockerfile, the Compose file is very readable and makes
it easy to follow along. This Compose file is for a typical web application,
which includes a web server, a database server, and a caching server. The
Compose file declares that when Docker Compose runs, it will bring up
three services—the webserver, the database server, and the caching server.
The web server depends on the database and the cache service, which
means that unless the database and the cache service are brought up,
the web service will not be brought up. The cache and the database keys
indicate that for cache, Docker must bring up the Redis image and the
MySQL image for the database.
To bring up all the containers, issue the following command:
docker-compose up
Chapter 7 Understanding doCker Compose
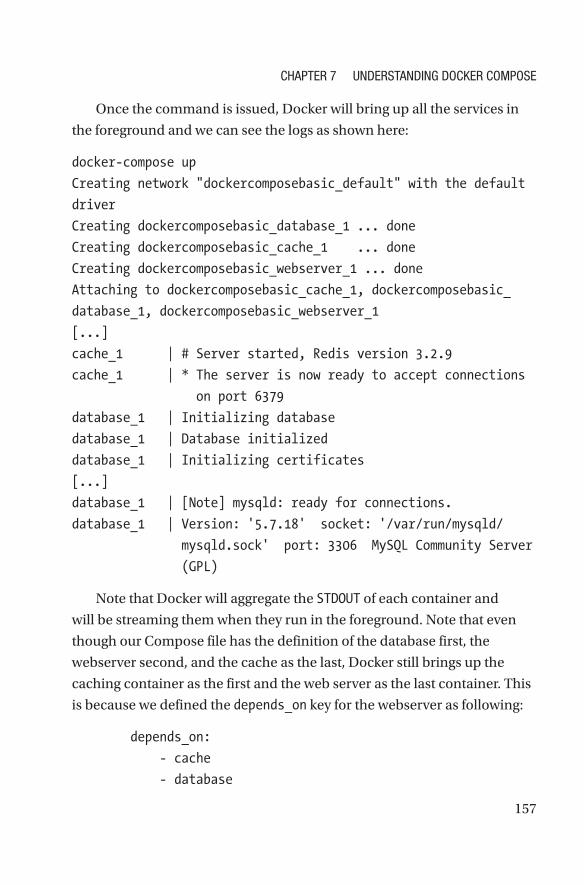
157
Once the command is issued, Docker will bring up all the services in
the foreground and we can see the logs as shown here:
docker-compose up
Creating network "dockercomposebasic_default" with the default
driver
Creating dockercomposebasic_database_1 ... done
Creating dockercomposebasic_cache_1 ... done
Creating dockercomposebasic_webserver_1 ... done
Attaching to dockercomposebasic_cache_1, dockercomposebasic_
database_1, dockercomposebasic_webserver_1
[...]
cache_1 | # Server started, Redis version 3.2.9
cache_1 | * The server is now ready to accept connections
on port 6379
database_1 | Initializing database
database_1 | Database initialized
database_1 | Initializing certificates
[...]
database_1 | [Note] mysqld: ready for connections.
database_1 | Version: '5.7.18' socket: '/var/run/mysqld/
mysqld.sock' port: 3306 MySQL Community Server
(GPL)
Note that Docker will aggregate the STDOUT of each container and
will be streaming them when they run in the foreground. Note that even
though our Compose file has the definition of the database first, the
webserver second, and the cache as the last, Docker still brings up the
caching container as the first and the web server as the last container. This
is because we defined the depends_on key for the webserver as following:
depends_on:
- cache
- database
Chapter 7 Understanding doCker Compose
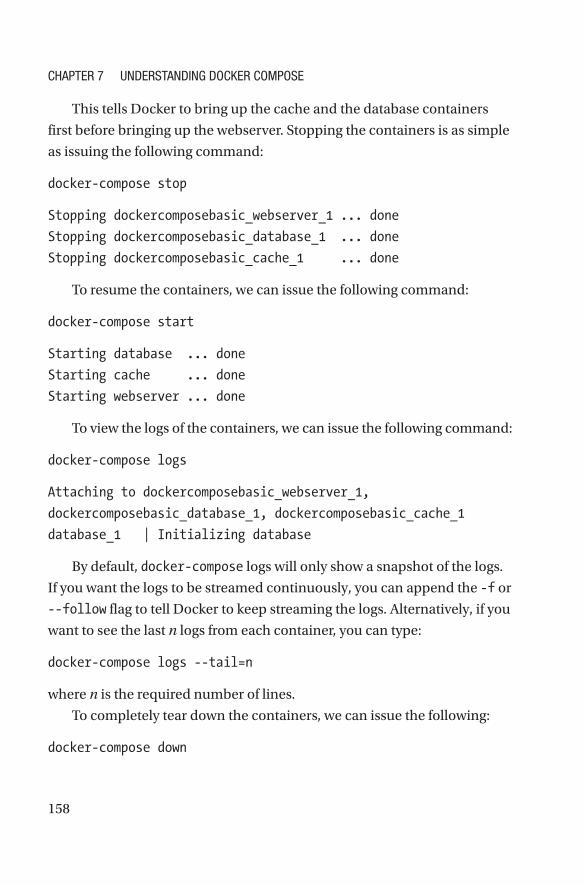
158
This tells Docker to bring up the cache and the database containers
first before bringing up the webserver. Stopping the containers is as simple
as issuing the following command:
docker-compose stop
Stopping dockercomposebasic_webserver_1 ... done
Stopping dockercomposebasic_database_1 ... done
Stopping dockercomposebasic_cache_1 ... done
To resume the containers, we can issue the following command:
docker-compose start
Starting database ... done
Starting cache ... done
Starting webserver ... done
To view the logs of the containers, we can issue the following command:
docker-compose logs
Attaching to dockercomposebasic_webserver_1,
dockercomposebasic_database_1, dockercomposebasic_cache_1
database_1 | Initializing database
By default, docker-compose logs will only show a snapshot of the logs.
If you want the logs to be streamed continuously, you can append the -f or
--follow flag to tell Docker to keep streaming the logs. Alternatively, if you
want to see the last n logs from each container, you can type:
docker-compose logs --tail=n
where n is the required number of lines.
To completely tear down the containers, we can issue the following:
docker-compose down
Chapter 7 Understanding doCker Compose
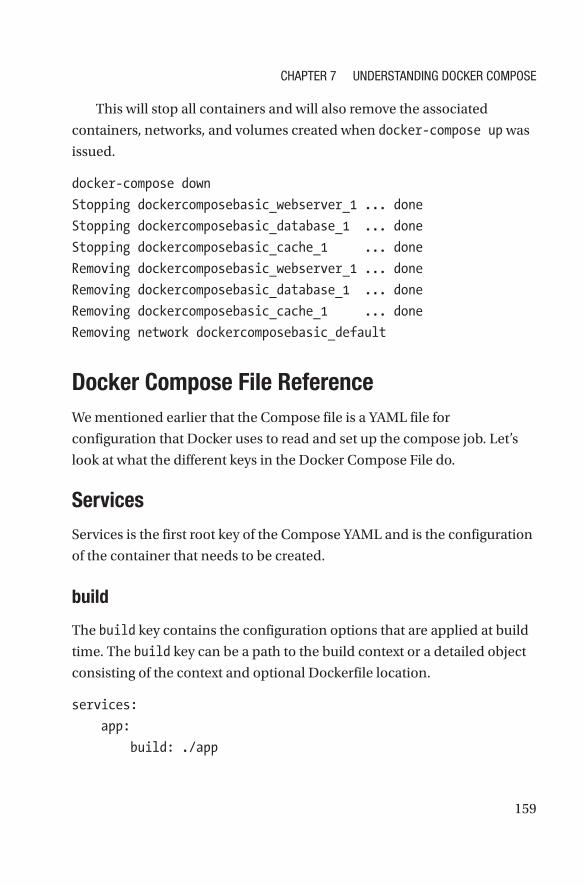
159
This will stop all containers and will also remove the associated
containers, networks, and volumes created when docker-compose up was
issued.
docker-compose down
Stopping dockercomposebasic_webserver_1 ... done
Stopping dockercomposebasic_database_1 ... done
Stopping dockercomposebasic_cache_1 ... done
Removing dockercomposebasic_webserver_1 ... done
Removing dockercomposebasic_database_1 ... done
Removing dockercomposebasic_cache_1 ... done
Removing network dockercomposebasic_default
Docker Compose File ReferenceWe mentioned earlier that the Compose file is a YAML file for
configuration that Docker uses to read and set up the compose job. Let’s
look at what the different keys in the Docker Compose File do.
Services
Services is the first root key of the Compose YAML and is the configuration
of the container that needs to be created.
build
The build key contains the configuration options that are applied at build
time. The build key can be a path to the build context or a detailed object
consisting of the context and optional Dockerfile location.
services:
app:
build: ./app
Chapter 7 Understanding doCker Compose
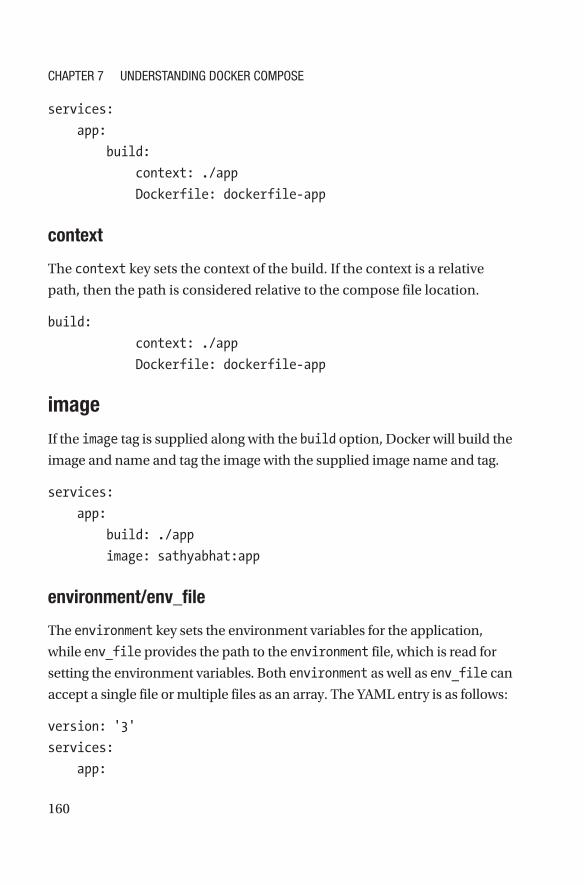
160
services:
app:
build:
context: ./app
Dockerfile: dockerfile-app
context
The context key sets the context of the build. If the context is a relative
path, then the path is considered relative to the compose file location.
build:
context: ./app
Dockerfile: dockerfile-app
image
If the image tag is supplied along with the build option, Docker will build the
image and name and tag the image with the supplied image name and tag.
services:
app:
build: ./app
image: sathyabhat:app
environment/env_file
The environment key sets the environment variables for the application,
while env_file provides the path to the environment file, which is read for
setting the environment variables. Both environment as well as env_file can
accept a single file or multiple files as an array. The YAML entry is as follows:
version: '3'
services:
app:
Chapter 7 Understanding doCker Compose
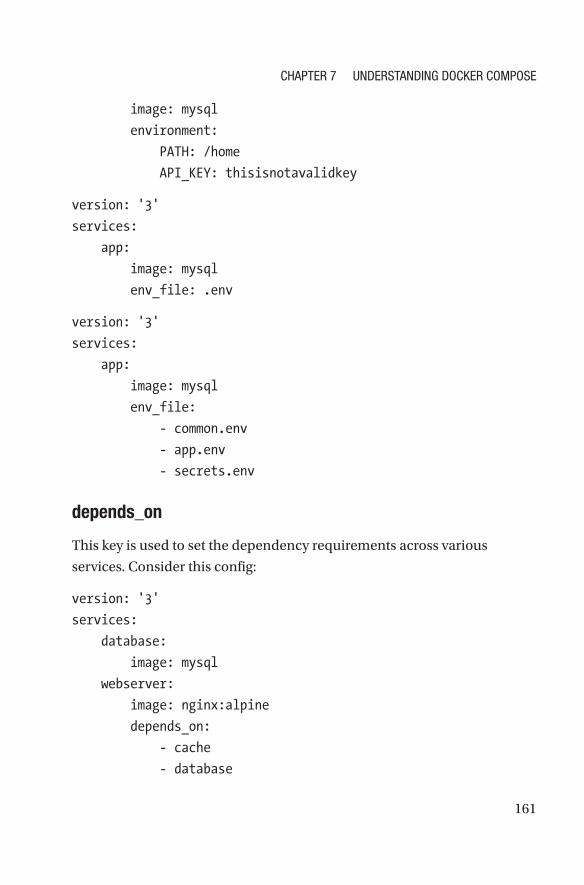
161
image: mysql
environment:
PATH: /home
API_KEY: thisisnotavalidkey
version: '3'
services:
app:
image: mysql
env_file: .env
version: '3'
services:
app:
image: mysql
env_file:
- common.env
- app.env
- secrets.env
depends_on
This key is used to set the dependency requirements across various
services. Consider this config:
version: '3'
services:
database:
image: mysql
webserver:
image: nginx:alpine
depends_on:
- cache
- database
Chapter 7 Understanding doCker Compose
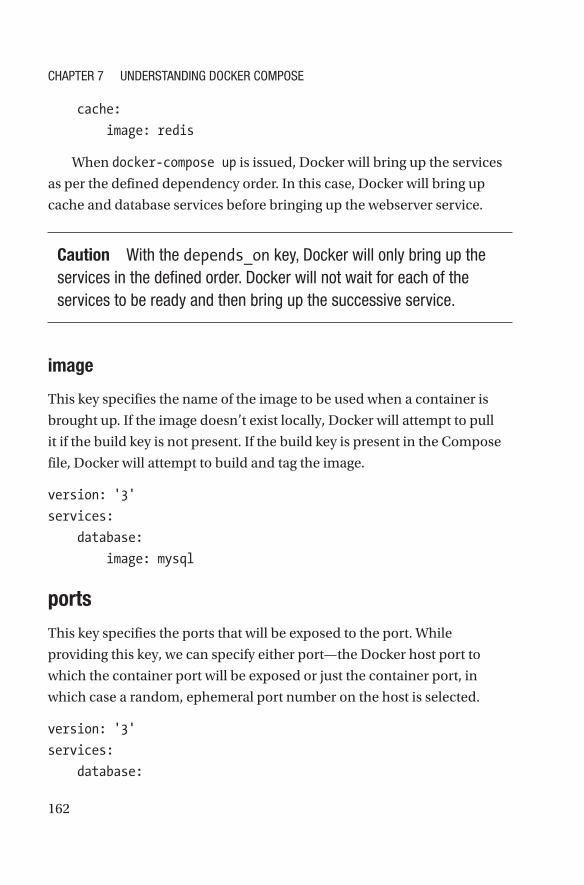
162
cache:
image: redis
When docker-compose up is issued, Docker will bring up the services
as per the defined dependency order. In this case, Docker will bring up
cache and database services before bringing up the webserver service.
Caution With the depends_on key, docker will only bring up the services in the defined order. docker will not wait for each of the services to be ready and then bring up the successive service.
image
This key specifies the name of the image to be used when a container is
brought up. If the image doesn’t exist locally, Docker will attempt to pull
it if the build key is not present. If the build key is present in the Compose
file, Docker will attempt to build and tag the image.
version: '3'
services:
database:
image: mysql
ports
This key specifies the ports that will be exposed to the port. While
providing this key, we can specify either port—the Docker host port to
which the container port will be exposed or just the container port, in
which case a random, ephemeral port number on the host is selected.
version: '3'
services:
database:
Chapter 7 Understanding doCker Compose
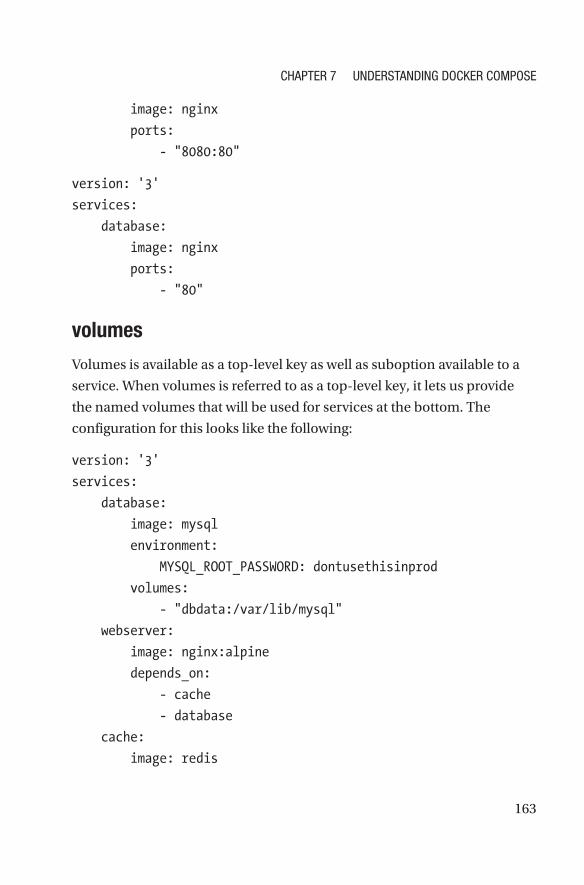
163
image: nginx
ports:
- "8080:80"
version: '3'
services:
database:
image: nginx
ports:
- "80"
volumes
Volumes is available as a top-level key as well as suboption available to a
service. When volumes is referred to as a top-level key, it lets us provide
the named volumes that will be used for services at the bottom. The
configuration for this looks like the following:
version: '3'
services:
database:
image: mysql
environment:
MYSQL_ROOT_PASSWORD: dontusethisinprod
volumes:
- "dbdata:/var/lib/mysql"
webserver:
image: nginx:alpine
depends_on:
- cache
- database
cache:
image: redis
Chapter 7 Understanding doCker Compose
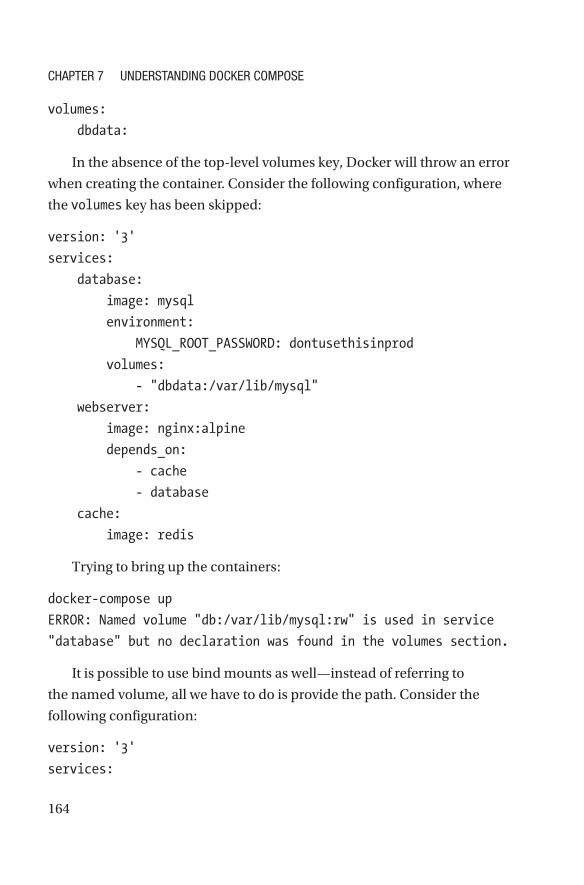
164
volumes:
dbdata:
In the absence of the top-level volumes key, Docker will throw an error
when creating the container. Consider the following configuration, where
the volumes key has been skipped:
version: '3'
services:
database:
image: mysql
environment:
MYSQL_ROOT_PASSWORD: dontusethisinprod
volumes:
- "dbdata:/var/lib/mysql"
webserver:
image: nginx:alpine
depends_on:
- cache
- database
cache:
image: redis
Trying to bring up the containers:
docker-compose up
ERROR: Named volume "db:/var/lib/mysql:rw" is used in service
"database" but no declaration was found in the volumes section.
It is possible to use bind mounts as well—instead of referring to
the named volume, all we have to do is provide the path. Consider the
following configuration:
version: '3'
services:
Chapter 7 Understanding doCker Compose
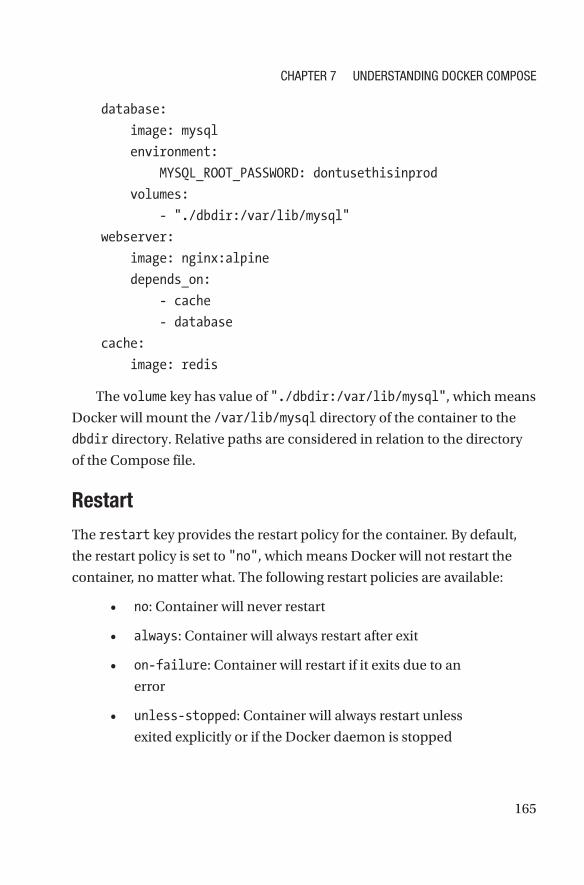
165
database:
image: mysql
environment:
MYSQL_ROOT_PASSWORD: dontusethisinprod
volumes:
- "./dbdir:/var/lib/mysql"
webserver:
image: nginx:alpine
depends_on:
- cache
- database
cache:
image: redis
The volume key has value of "./dbdir:/var/lib/mysql", which means
Docker will mount the /var/lib/mysql directory of the container to the
dbdir directory. Relative paths are considered in relation to the directory
of the Compose file.
Restart
The restart key provides the restart policy for the container. By default,
the restart policy is set to "no", which means Docker will not restart the
container, no matter what. The following restart policies are available:
• no: Container will never restart
• always: Container will always restart after exit
• on-failure: Container will restart if it exits due to an
error
• unless-stopped: Container will always restart unless
exited explicitly or if the Docker daemon is stopped
Chapter 7 Understanding doCker Compose
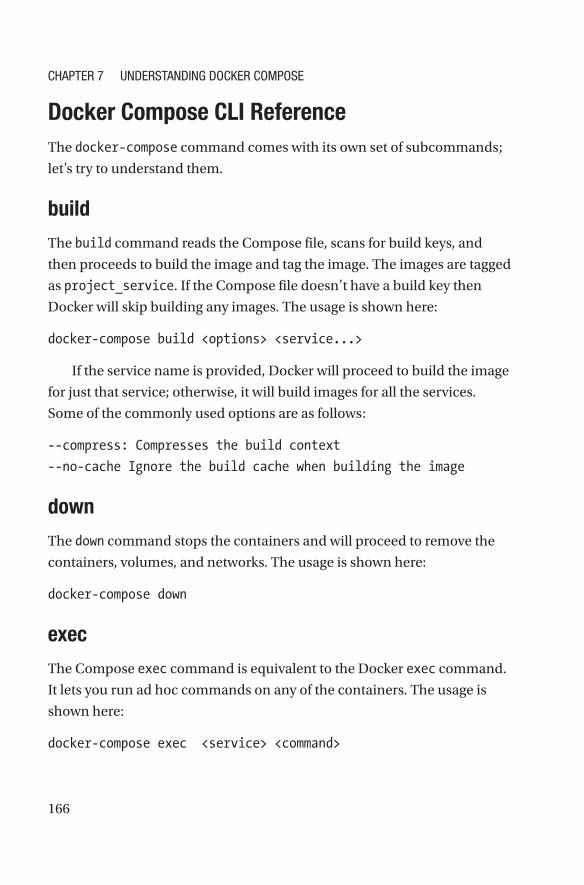
166
Docker Compose CLI ReferenceThe docker-compose command comes with its own set of subcommands;
let’s try to understand them.
build
The build command reads the Compose file, scans for build keys, and
then proceeds to build the image and tag the image. The images are tagged
as project_service. If the Compose file doesn’t have a build key then
Docker will skip building any images. The usage is shown here:
docker-compose build <options> <service...>
If the service name is provided, Docker will proceed to build the image
for just that service; otherwise, it will build images for all the services.
Some of the commonly used options are as follows:
--compress: Compresses the build context
--no-cache Ignore the build cache when building the image
down
The down command stops the containers and will proceed to remove the
containers, volumes, and networks. The usage is shown here:
docker-compose down
exec
The Compose exec command is equivalent to the Docker exec command.
It lets you run ad hoc commands on any of the containers. The usage is
shown here:
docker-compose exec <service> <command>
Chapter 7 Understanding doCker Compose
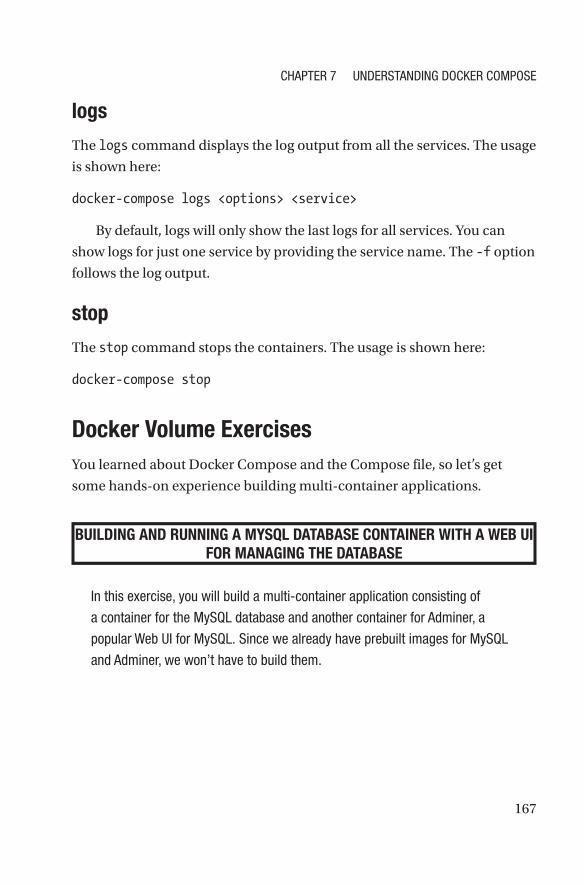
167
logs
The logs command displays the log output from all the services. The usage
is shown here:
docker-compose logs <options> <service>
By default, logs will only show the last logs for all services. You can
show logs for just one service by providing the service name. The -f option
follows the log output.
stop
The stop command stops the containers. The usage is shown here:
docker-compose stop
Docker Volume ExercisesYou learned about Docker Compose and the Compose file, so let’s get
some hands-on experience building multi-container applications.
BUILDING AND RUNNING A MYSQL DATABASE CONTAINER WITH A WEB UI FOR MANAGING THE DATABASE
in this exercise, you will build a multi-container application consisting of
a container for the mysQL database and another container for adminer, a
popular Web Ui for mysQL. since we already have prebuilt images for mysQL
and adminer, we won’t have to build them.
Chapter 7 Understanding doCker Compose

168
Tip the docker-compose.yml file associated with this is available as docker-compose-adminer.zip. Be sure to extract the contents of the Zip file and run the commands in the directory to which they were extracted.
We can start with the docker Compose file, as shown here.
The docker-compose.yaml Listing
version: '3'
services:
mysql:
image: mysql
environment:
MYSQL_ROOT_PASSWORD: dontusethisinprod
ports:
- "3306:3306"
volumes:
- "dbdata:/var/lib/mysql"
adminer:
image: adminer
ports:
- "8080:8080"
volumes:
dbdata:
this Compose file uses everything that we have learned in this book in one
concise file. at the start of the Compose file, we define that we will be using
version 3 of the Compose api. Under services, we define two services—
one for the database that pulls in a docker image called mysql. When the
container is created, an environment variable called MYSQL_ROOT_PASSWORD
sets the root password for the database and port 3306 from the container is
published to the host. the data of the mysQL database is stored in a volume
Chapter 7 Understanding doCker Compose

169
known as dbdata, which is mounted onto the directory /var/lib/mysql
of the container. this is where mysQL stores the data. in other words, any
data saved to the database in the container is handled by the volume named
dbdata.
the other service, called adminer, pulls in a docker image called adminer and
publishes port 8080 from the container to the host.
Let’s validate the Compose file by typing the following:
docker-compose config
if everything is okay, docker will print the Compose file as it as parsed. it
should look like this:
services:
adminer:
image: adminer
ports:
- 8080:8080/tcp
mysql:
environment:
MYSQL_ROOT_PASSWORD: dontusethisinprod
image: mysql
ports:
- 3306:3306/tcp
volumes:
- dbdata:/var/lib/mysql:rw
version: '3.0'
volumes:
dbdata: {}
Chapter 7 Understanding doCker Compose
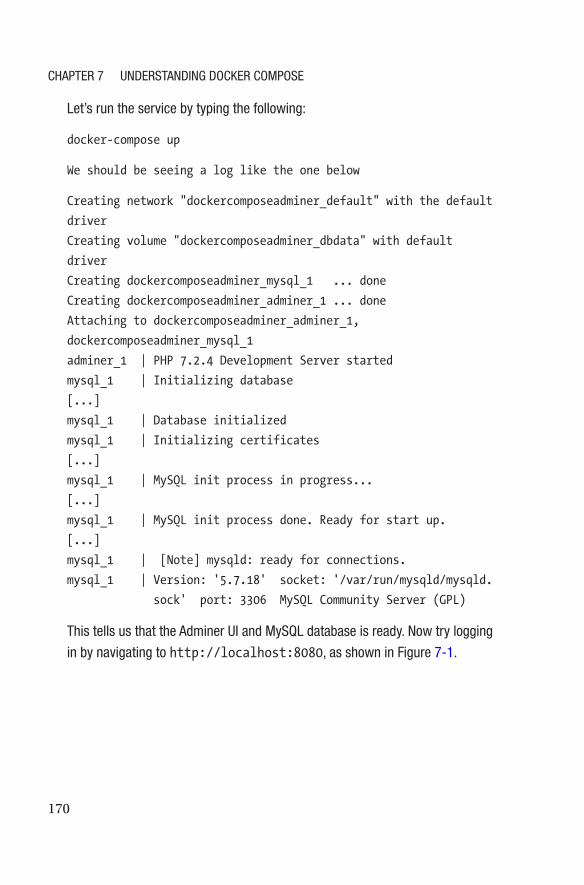
170
Let’s run the service by typing the following:
docker-compose up
We should be seeing a log like the one below
Creating network "dockercomposeadminer_default" with the default
driver
Creating volume "dockercomposeadminer_dbdata" with default
driver
Creating dockercomposeadminer_mysql_1 ... done
Creating dockercomposeadminer_adminer_1 ... done
Attaching to dockercomposeadminer_adminer_1,
dockercomposeadminer_mysql_1
adminer_1 | PHP 7.2.4 Development Server started
mysql_1 | Initializing database
[...]
mysql_1 | Database initialized
mysql_1 | Initializing certificates
[...]
mysql_1 | MySQL init process in progress...
[...]
mysql_1 | MySQL init process done. Ready for start up.
[...]
mysql_1 | [Note] mysqld: ready for connections.
mysql_1 | Version: '5.7.18' socket: '/var/run/mysqld/mysqld.
sock' port: 3306 MySQL Community Server (GPL)
this tells us that the adminer Ui and mysQL database is ready. now try logging
in by navigating to http://localhost:8080, as shown in Figure 7- 1.
Chapter 7 Understanding doCker Compose
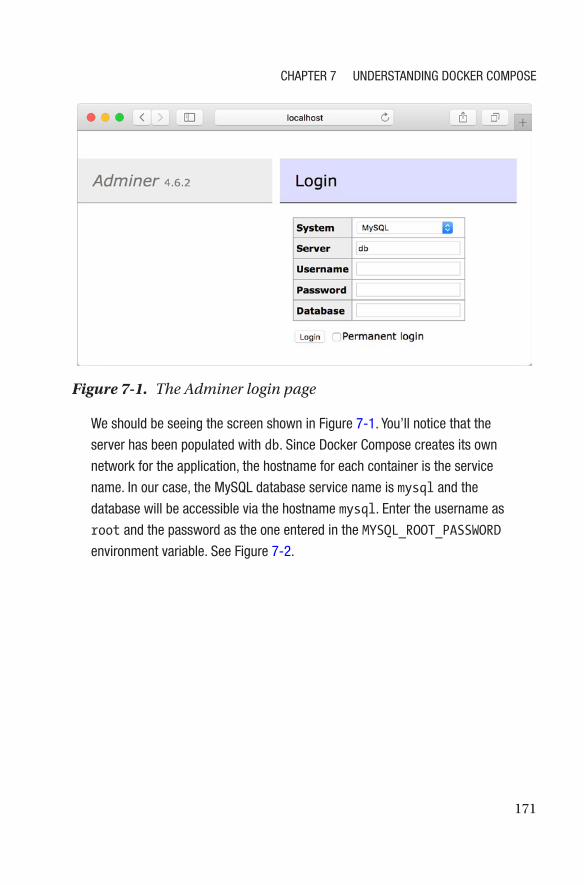
171
We should be seeing the screen shown in Figure 7-1. You’ll notice that the
server has been populated with db. since docker Compose creates its own
network for the application, the hostname for each container is the service
name. in our case, the mysQL database service name is mysql and the
database will be accessible via the hostname mysql. enter the username as
root and the password as the one entered in the MYSQL_ROOT_PASSWORD
environment variable. see Figure 7-2.
Figure 7-1. The Adminer login page
Chapter 7 Understanding doCker Compose
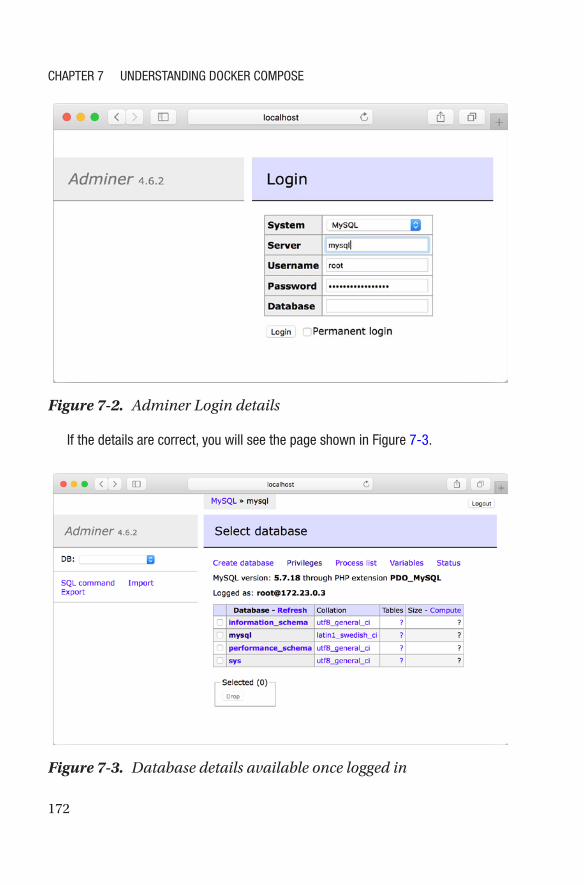
172
if the details are correct, you will see the page shown in Figure 7-3.
Figure 7-2. Adminer Login details
Figure 7-3. Database details available once logged in
Chapter 7 Understanding doCker Compose
173
CONVERTING THE PROJECT TO DOCKER COMPOSE
in the previous chapter’s exercises, you wrote a dockerfile for your project.
Later, you added volumes and the data was persisted to sQLite. in this
exercise, you change the project to use mysQL instead of sQLite.
For this exercise, you will be working on a slightly modified codebase, which
has support for saving the preferences to a sQLite dB. We would use docker
Volumes to persist the database across containers.
Let’s modify the existing docker Compose file
Tip the source code, the dockerfile, and the docker Compose file associated with this are available as subreddit-fetcher- compose.zip.
The docker-compose.yaml Listing
version: '3'
services:
app:
build: .
depends_on:
- mysql
restart: "on-failure"
volumes:
- "appdata:/apps/subredditfetcher"
mysql:
image: mysql
volumes:
- "dbdata:/var/lib/mysql"
environment:
- MYSQL_ROOT_PASSWORD=dontusethisinprod
Chapter 7 Understanding doCker Compose
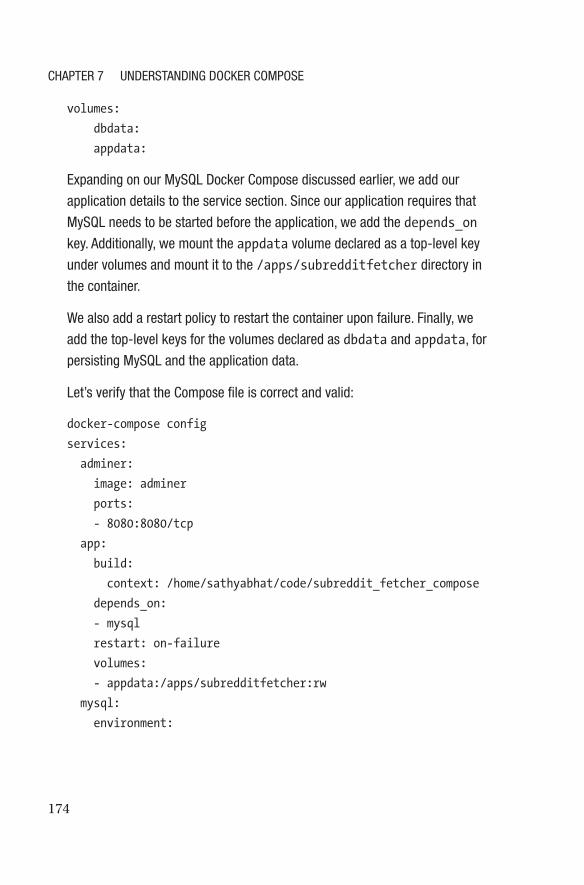
174
volumes:
dbdata:
appdata:
expanding on our mysQL docker Compose discussed earlier, we add our
application details to the service section. since our application requires that
mysQL needs to be started before the application, we add the depends_on
key. additionally, we mount the appdata volume declared as a top-level key
under volumes and mount it to the /apps/subredditfetcher directory in
the container.
We also add a restart policy to restart the container upon failure. Finally, we
add the top-level keys for the volumes declared as dbdata and appdata, for
persisting mysQL and the application data.
Let’s verify that the Compose file is correct and valid:
docker-compose config
services:
adminer:
image: adminer
ports:
- 8080:8080/tcp
app:
build:
context: /home/sathyabhat/code/subreddit_fetcher_compose
depends_on:
- mysql
restart: on-failure
volumes:
- appdata:/apps/subredditfetcher:rw
mysql:
environment:
Chapter 7 Understanding doCker Compose

175
MYSQL_ROOT_PASSWORD: dontusethisinprod
image: mysql
volumes:
- dbdata:/var/lib/mysql:rw
version: '3.0'
volumes:
appdata: {}
dbdata: {}
Let’s run the Compose application:
docker-compose up --build
the --build flag forces docker to rebuild the images even if nothing has
changed, and it can be skipped. We should see a result like so:
docker-compose up --build
Creating network "subredditfetchercompose_default" with the
default driver
Creating volume "subredditfetchercompose_dbdata" with default
driver
Creating volume "subredditfetchercompose_appdata" with default
driver
Building app
Step 1/7 : FROM python:3-alpine
---> 4fcaf5fb5f2b
Step 2/7 : COPY * /apps/subredditfetcher/
---> a1ae719d8b90
Step 3/7 : WORKDIR /apps/subredditfetcher/
Removing intermediate container f6c4e85952ff
---> 7702ecd8eec6
Step 4/7 : VOLUME [ "/apps/subredditfetcher" ]
---> Running in 69fedd2fffe5
Removing intermediate container 69fedd2fffe5
Chapter 7 Understanding doCker Compose
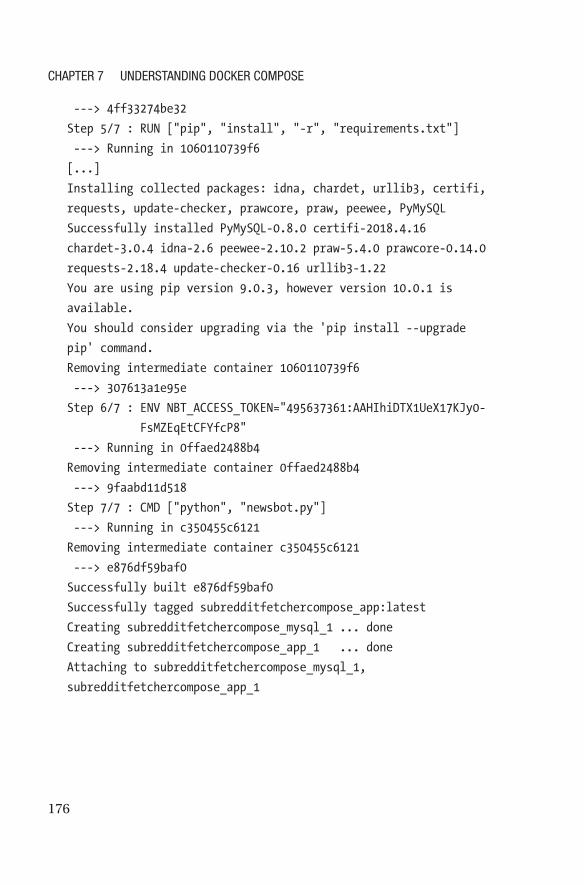
176
---> 4ff33274be32
Step 5/7 : RUN ["pip", "install", "-r", "requirements.txt"]
---> Running in 1060110739f6
[...]
Installing collected packages: idna, chardet, urllib3, certifi,
requests, update-checker, prawcore, praw, peewee, PyMySQL
Successfully installed PyMySQL-0.8.0 certifi-2018.4.16
chardet-3.0.4 idna-2.6 peewee-2.10.2 praw-5.4.0 prawcore-0.14.0
requests-2.18.4 update-checker-0.16 urllib3-1.22
You are using pip version 9.0.3, however version 10.0.1 is
available.
You should consider upgrading via the 'pip install --upgrade
pip' command.
Removing intermediate container 1060110739f6
---> 307613a1e95e
Step 6/7 : ENV NBT_ACCESS_TOKEN="495637361:AAHIhiDTX1UeX17KJy0-
FsMZEqEtCFYfcP8"
---> Running in 0ffaed2488b4
Removing intermediate container 0ffaed2488b4
---> 9faabd11d518
Step 7/7 : CMD ["python", "newsbot.py"]
---> Running in c350455c6121
Removing intermediate container c350455c6121
---> e876df59baf0
Successfully built e876df59baf0
Successfully tagged subredditfetchercompose_app:latest
Creating subredditfetchercompose_mysql_1 ... done
Creating subredditfetchercompose_app_1 ... done
Attaching to subredditfetchercompose_mysql_1,
subredditfetchercompose_app_1
Chapter 7 Understanding doCker Compose
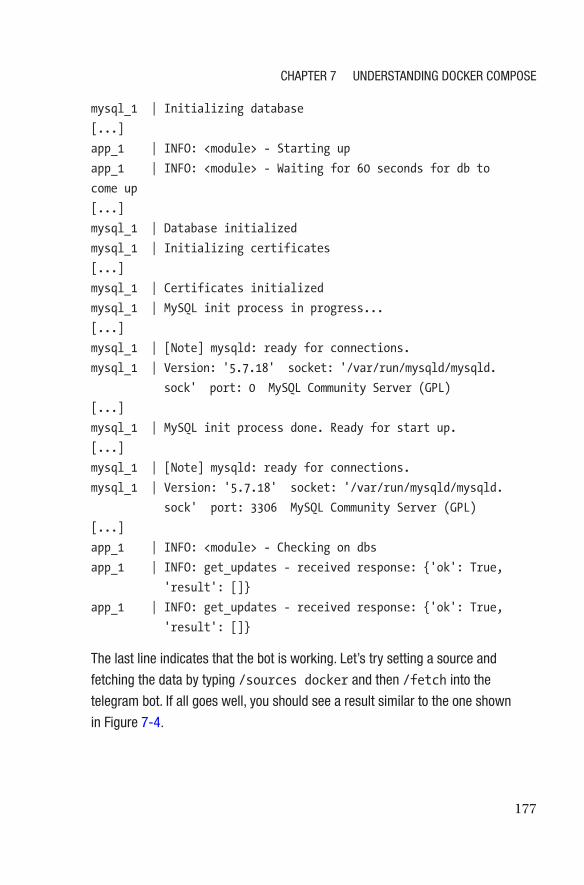
177
mysql_1 | Initializing database
[...]
app_1 | INFO: <module> - Starting up
app_1 | INFO: <module> - Waiting for 60 seconds for db to
come up
[...]
mysql_1 | Database initialized
mysql_1 | Initializing certificates
[...]
mysql_1 | Certificates initialized
mysql_1 | MySQL init process in progress...
[...]
mysql_1 | [Note] mysqld: ready for connections.
mysql_1 | Version: '5.7.18' socket: '/var/run/mysqld/mysqld.
sock' port: 0 MySQL Community Server (GPL)
[...]
mysql_1 | MySQL init process done. Ready for start up.
[...]
mysql_1 | [Note] mysqld: ready for connections.
mysql_1 | Version: '5.7.18' socket: '/var/run/mysqld/mysqld.
sock' port: 3306 MySQL Community Server (GPL)
[...]
app_1 | INFO: <module> - Checking on dbs
app_1 | INFO: get_updates - received response: {'ok': True,
'result': []}
app_1 | INFO: get_updates - received response: {'ok': True,
'result': []}
the last line indicates that the bot is working. Let’s try setting a source and
fetching the data by typing /sources docker and then /fetch into the
telegram bot. if all goes well, you should see a result similar to the one shown
in Figure 7-4.
Chapter 7 Understanding doCker Compose
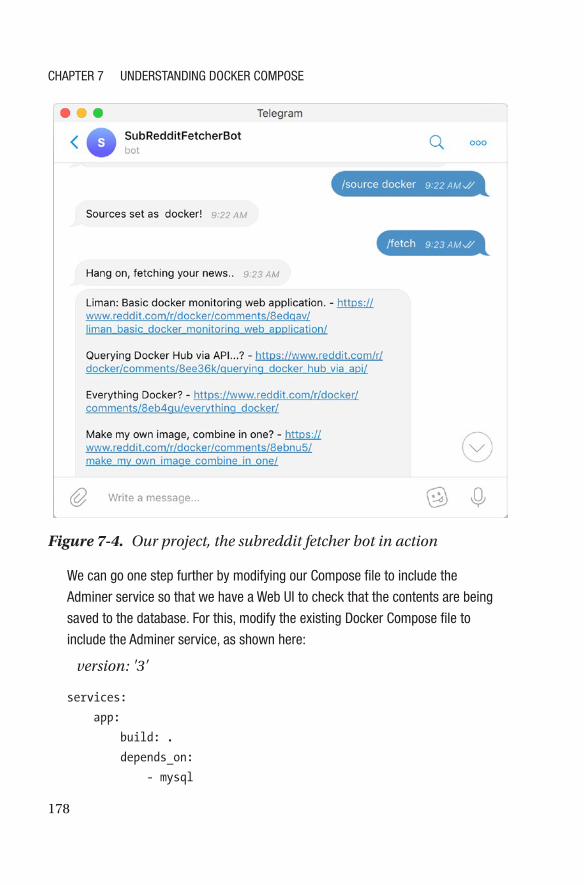
178
We can go one step further by modifying our Compose file to include the
adminer service so that we have a Web Ui to check that the contents are being
saved to the database. For this, modify the existing docker Compose file to
include the adminer service, as shown here:
version: '3'
services:
app:
build: .
depends_on:
- mysql
Figure 7-4. Our project, the subreddit fetcher bot in action
Chapter 7 Understanding doCker Compose
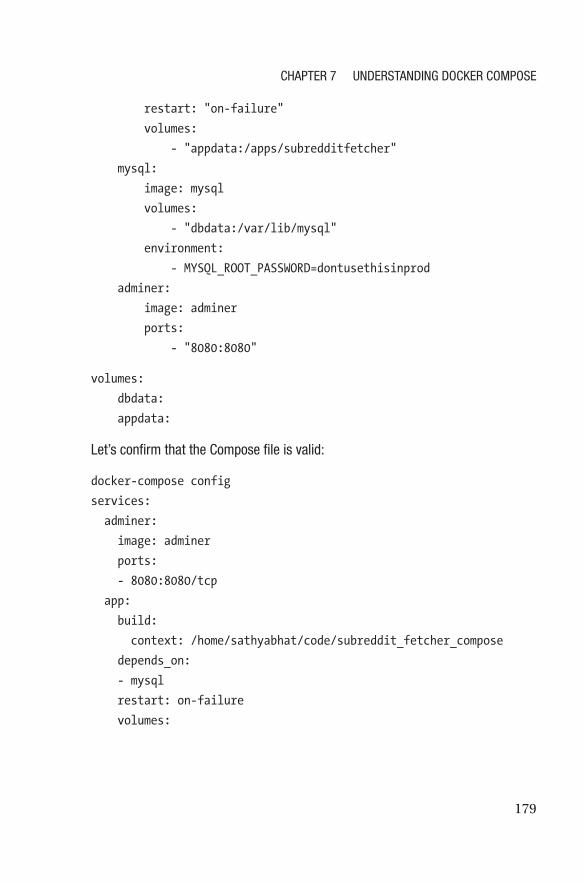
179
restart: "on-failure"
volumes:
- "appdata:/apps/subredditfetcher"
mysql:
image: mysql
volumes:
- "dbdata:/var/lib/mysql"
environment:
- MYSQL_ROOT_PASSWORD=dontusethisinprod
adminer:
image: adminer
ports:
- "8080:8080"
volumes:
dbdata:
appdata:
Let’s confirm that the Compose file is valid:
docker-compose config
services:
adminer:
image: adminer
ports:
- 8080:8080/tcp
app:
build:
context: /home/sathyabhat/code/subreddit_fetcher_compose
depends_on:
- mysql
restart: on-failure
volumes:
Chapter 7 Understanding doCker Compose
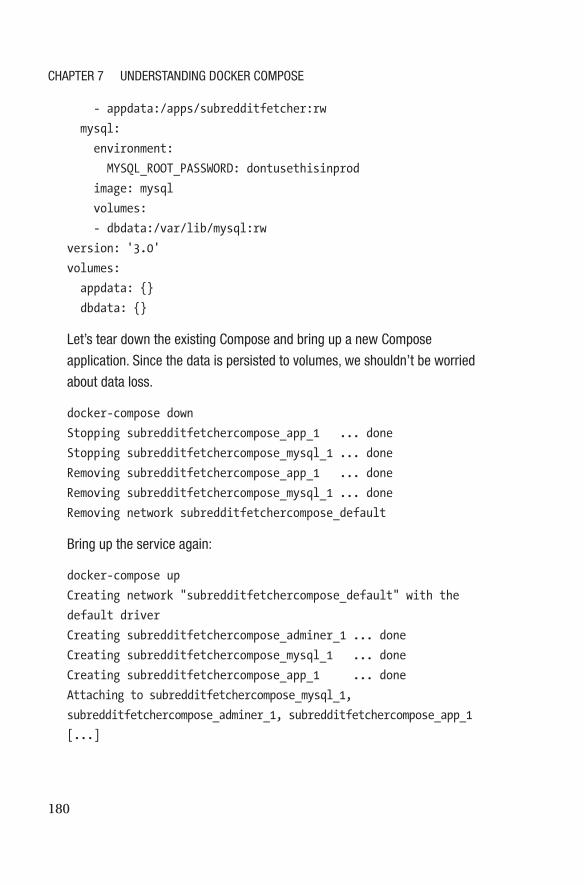
180
- appdata:/apps/subredditfetcher:rw
mysql:
environment:
MYSQL_ROOT_PASSWORD: dontusethisinprod
image: mysql
volumes:
- dbdata:/var/lib/mysql:rw
version: '3.0'
volumes:
appdata: {}
dbdata: {}
Let’s tear down the existing Compose and bring up a new Compose
application. since the data is persisted to volumes, we shouldn’t be worried
about data loss.
docker-compose down
Stopping subredditfetchercompose_app_1 ... done
Stopping subredditfetchercompose_mysql_1 ... done
Removing subredditfetchercompose_app_1 ... done
Removing subredditfetchercompose_mysql_1 ... done
Removing network subredditfetchercompose_default
Bring up the service again:
docker-compose up
Creating network "subredditfetchercompose_default" with the
default driver
Creating subredditfetchercompose_adminer_1 ... done
Creating subredditfetchercompose_mysql_1 ... done
Creating subredditfetchercompose_app_1 ... done
Attaching to subredditfetchercompose_mysql_1,
subredditfetchercompose_adminer_1, subredditfetchercompose_app_1
[...]
Chapter 7 Understanding doCker Compose
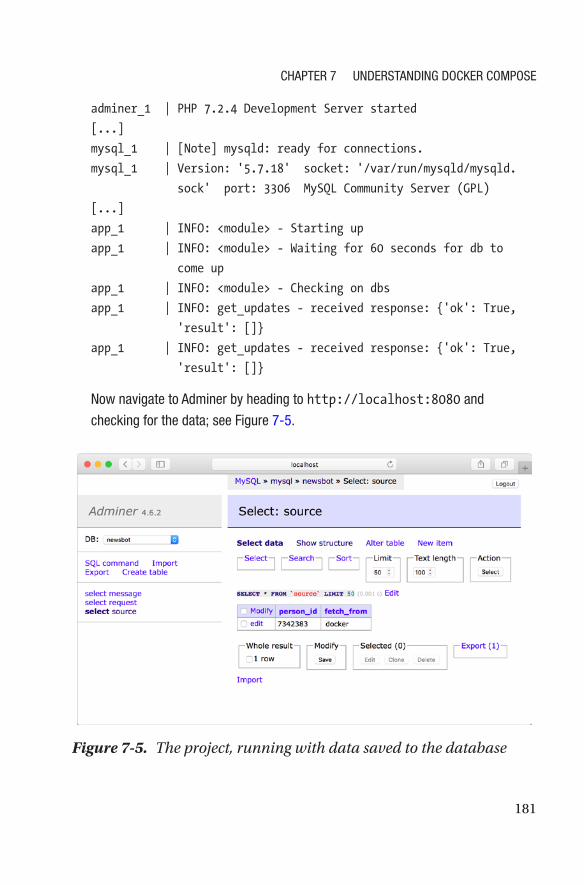
181
adminer_1 | PHP 7.2.4 Development Server started
[...]
mysql_1 | [Note] mysqld: ready for connections.
mysql_1 | Version: '5.7.18' socket: '/var/run/mysqld/mysqld.
sock' port: 3306 MySQL Community Server (GPL)
[...]
app_1 | INFO: <module> - Starting up
app_1 | INFO: <module> - Waiting for 60 seconds for db to
come up
app_1 | INFO: <module> - Checking on dbs
app_1 | INFO: get_updates - received response: {'ok': True,
'result': []}
app_1 | INFO: get_updates - received response: {'ok': True,
'result': []}
now navigate to adminer by heading to http://localhost:8080 and
checking for the data; see Figure 7-5.
Figure 7-5. The project, running with data saved to the database
Chapter 7 Understanding doCker Compose
182
success! the application is running and the data is saved to the database
despite you removing and recreating the containers.
SummaryIn this chapter, you learned about Docker Compose, including how to
install it and why it is used. You also did a deep dive into the Docker
Compose file and the CLI. Finally, you ran through some exercises on
building multi-containers applications with Docker Compose and learned
how to extend the Newsbot project to a multi-container application using
Docker Compose, adding a linked database and a Web UI to edit the
database.
Chapter 7 Understanding doCker Compose
183© Sathyajith Bhat 2018 S. Bhat, Practical Docker with Python, https://doi.org/10.1007/978-1-4842-3784-7
Index
AADD and COPY instructions, 65
BBind mounts, 95BotFather
creation, 43REST API test tools, 45telegram’s Bot creation
interface, 42Bridge network
Adminer container, 128–129command, 124connecting containers, 137container via named host, 140detached mode, 127IP address, 131IP and connects, 141log in details, 132login will fail, 130MySQL container, 127name creation, 132outline process, 121result, 127user-defined network, 120
Ccgroups, 5chroot, 4CMD and ENTRYPOINT
instructions, 69Compose
Adminer login page, 171basics, 154CLI reference
build command, 166down, 166exec, 166logs, 167stop, 167
convertion, 173database details, 172file reference
ports, 162restart, 165services, 159volumes, 163
file versioningformat, 154Version 1, 155Version 2, 155Version 3, 155
184
installation, 153MySQL database
container, 167overview, 151subreddit fetcher bot, 178
Containerizationcgroups, 5chroot, 4containers/virtual machines, 5Docker Inc., 1FreeBSD jails, 4LXC, 5OpenVZ, 4OverlayFS, 2problem understanding, 2–3
DData persistence
data lossbind mounts, 95features, 92strategies, 94tmpfs mounts, 94volumes, 99
meaning, 91Dependencies, 46Docker 101
bind mounts and volumes, 18compose file, 23container, 17Docker Engine, 20–23Dockerfile, 19
hands-on Docker (see Hands-on Docker)
image, 17installation, 9layers, 16Linux, 13machine, 23MacOS, 12registries, 19Windows installation, 10
Docker EngineAPI, 22–23CLI, 20–22daemon, 20
Docker Store, 31Dockerfile, 19
build command, 53, 56build context, 54Dockerignore, 55guidelines and
recommendations, 79–80hello world docker image, 81instructions, 59
ADD and COPY instructions, 65
CMD and ENTRYPOINT, 69ENV, 73EXPOSE, 75FROM, 60LABEL, 78RUN, 67VOLUME, 75WORKDIR, 61
multi-stage builds, 80–81, 86
Compose (cont.)
Index
185
project review, 87requirements.txt file, 84standard build, 84
EElastic Block Store (EBS), 91ENTRYPOINT, 71ENV instruction, 73EXPOSE instruction, 75
FFile reference
ports, 162restart, 165services
build, 159context, 160depends_on, 161environment/env_file
key, 160image key, 162image tag, 160
volumes, 163File versioning
Version 1, 155Version 2, 155Version 3, 155
FreeBSD jails, 4FROM instruction, 60
GGotchas, 72
H, I, J, KHands-On Docker
commands, 24images, 26real-world images, 30
Host networksinstruction, 121nginx container, 141
Hyper-V, 11
LLABEL instruction, 78Linux, 13
MMacOS, 12Macvlan networks, 122Multi-stage builds, 80–81
NNetworking
bridge (see Bridge network)command, 123host
instruction, 121nginx container, 141
Macvlan, 122mysql container, 142none, 122, 126overlay, 122single host/virtual
machine, 119
Index
186
Network Interface Card (NIC), 122
Newsbotdependencies, 46interaction, 46libraries, 46posts, 50response, 49running, 47scenarios, 46sending messages, 48sources, 49
nginx container, 107
OOpenVZ, 4OverlayFS, 2Overlay network, 122
P, QPromiscuous, 122Python app, 39
BotFather, 42Newsbot (see Newsbot)Reddit, 40Telegram
Messenger, 40
RRUN instruction, 67
SShell and Exec Form, 72Software Defined Networking
(SDN), 120
T, UTelegram Messenger
one-time password, 42signup page, 40–41
tmpfs mounts, 94
VVirtual machines, 7VOLUME instruction, 75Volumes
advantages, 99container, 103Dockerfile, 106nginx container, 107project adding, 112subcommands
command, 100creation, 100inspect, 101list volume, 102prune volume, 102remove volume, 102
W, X, Y, ZWORKDIR instructions, 61
Index