PowerBook G3 Pismo Inverter Replacement inverter powers the LCD backlight and is not a difficult...
15
PowerBook G3 Pismo Inverter Replacement Written By: iRobot PowerBook G3 Pismo Inverter Replacement © iFixit — CC BY-NC-SA www.iFixit.com Page 1 of 15
Transcript of PowerBook G3 Pismo Inverter Replacement inverter powers the LCD backlight and is not a difficult...

PowerBook G3 Pismo Inverter ReplacementWritten By: iRobot
PowerBook G3 Pismo Inverter Replacement
© iFixit — CC BY-NC-SA www.iFixit.com Page 1 of 15

INTRODUCTION
The inverter powers the LCD backlight and is not a difficult part to replace.
TOOLS:Anti-Static Wrist Strap (1)
Phillips #0 Screwdriver (1)
Spudger (1)
T8 Torx Screwdriver (1)
PARTS:G3 Pismo Display Inverter (1)
PowerBook G3 Pismo Inverter Replacement
© iFixit — CC BY-NC-SA www.iFixit.com Page 2 of 15

Step 1 — Keyboard
Turn the keyboard locking screw sothat it is parallel to the space bar.
Pull the keyboard release tabstoward you and lift up on thekeyboard until it pops free.
Lift the keyboard out by pulling it upand away from you. Rest thekeyboard, face down, on top of thetrack pad.
Step 2
Pull the keyboard ribbon straight upfrom the logic board. Place thekeyboard aside.
The connector may be tight. Gentlyrock the connector from side to sidewhile pulling directly upward to freeit. You can use this technique onmany of the cards and cables you'llbe disconnecting.
Make sure you have removed thelaptop battery and CD/DVD modulesfrom the expansion bays beforeproceeding.
PowerBook G3 Pismo Inverter Replacement
© iFixit — CC BY-NC-SA www.iFixit.com Page 3 of 15

Step 3
Your laptop should lookapproximately like this.
Step 4 — Heat Shield
Remove the two silver Phillips #1screws that attach the heat shield tothe internal metal framework.
Lift the heat shield up and pull ittoward you.
PowerBook G3 Pismo Inverter Replacement
© iFixit — CC BY-NC-SA www.iFixit.com Page 4 of 15
Step 5
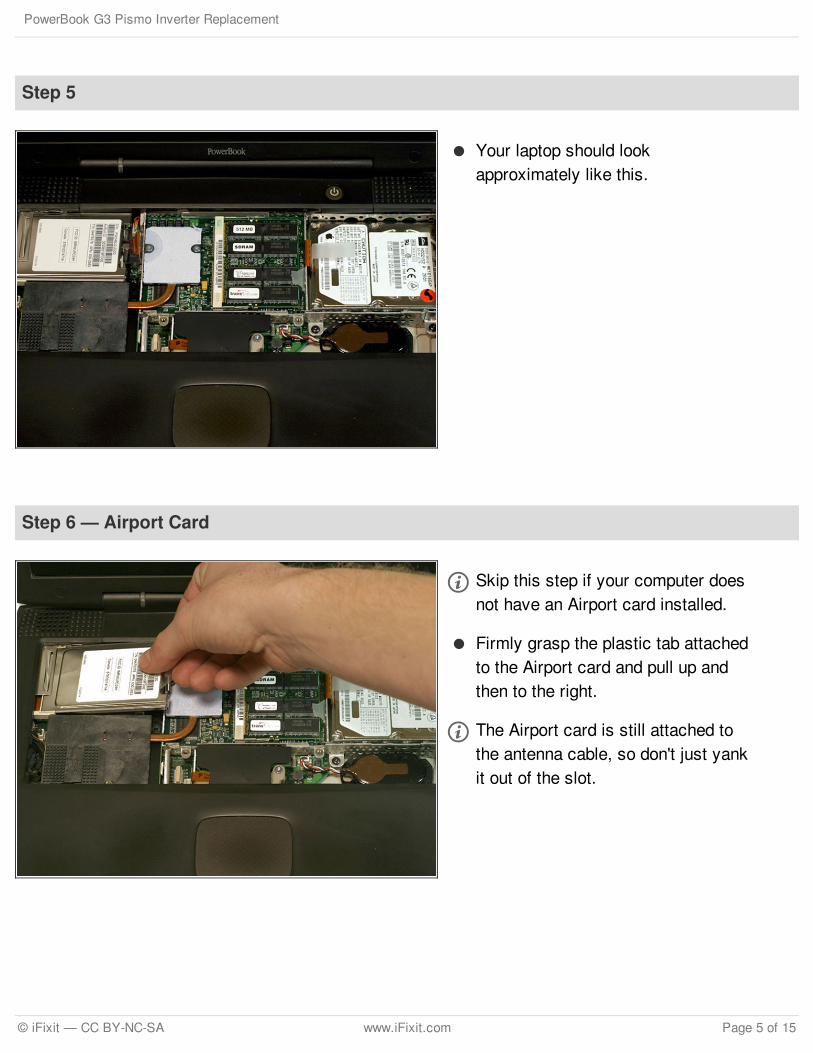
Your laptop should lookapproximately like this.
Step 6 — Airport Card
Skip this step if your computer doesnot have an Airport card installed.
Firmly grasp the plastic tab attachedto the Airport card and pull up andthen to the right.
The Airport card is still attached tothe antenna cable, so don't just yankit out of the slot.
PowerBook G3 Pismo Inverter Replacement
© iFixit — CC BY-NC-SA www.iFixit.com Page 5 of 15

Step 7
Disconnect the antenna cable fromthe Airport card.
Step 8 — PRAM Battery
Pull the battery cable directly upfrom the logic board.
Remove the battery from its holderby pulling up and to the left.
PowerBook G3 Pismo Inverter Replacement
© iFixit — CC BY-NC-SA www.iFixit.com Page 6 of 15

Step 9
Your laptop should lookapproximately like this.
Step 10 — Heat Sink
Remove the long silver Phillips #1screw from the heat sink.
Remove the two T8 Torx screws thatattach the heat sink to theprocessor.
PowerBook G3 Pismo Inverter Replacement
© iFixit — CC BY-NC-SA www.iFixit.com Page 7 of 15
Step 11
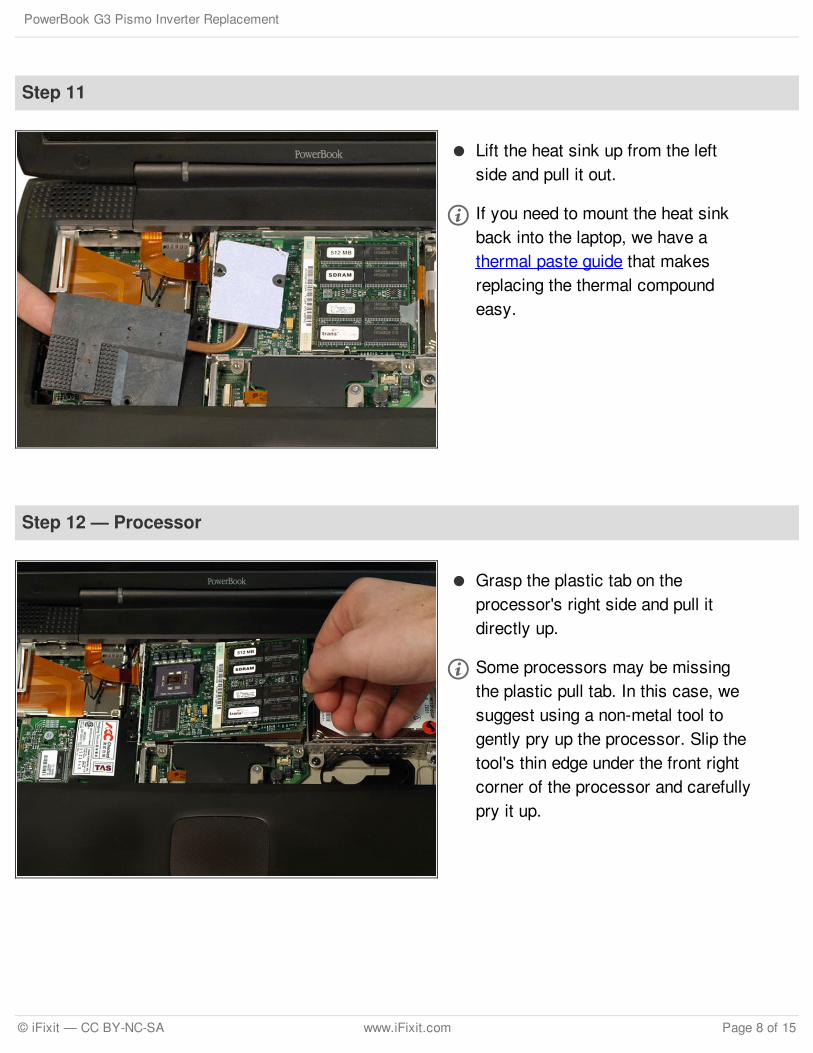
Lift the heat sink up from the leftside and pull it out.
If you need to mount the heat sinkback into the laptop, we have athermal paste guide that makesreplacing the thermal compoundeasy.
Step 12 — Processor
Grasp the plastic tab on theprocessor's right side and pull itdirectly up.
Some processors may be missingthe plastic pull tab. In this case, wesuggest using a non-metal tool togently pry up the processor. Slip thetool's thin edge under the front rightcorner of the processor and carefullypry it up.
PowerBook G3 Pismo Inverter Replacement
© iFixit — CC BY-NC-SA www.iFixit.com Page 8 of 15

Step 13
Your laptop should lookapproximately like this.
Step 14 — Modem
Remove the black Torx screw fromthe right side of the modem.
Remove the small black plasticrectangle with four holes.
PowerBook G3 Pismo Inverter Replacement
© iFixit — CC BY-NC-SA www.iFixit.com Page 9 of 15

Step 15
Use the tips of your fingers, aspudger, or a flat non-metal tool toget under the modem's edge and pryit up from its socket.
Step 16
Disconnect the cable from the rightside of the modem.
PowerBook G3 Pismo Inverter Replacement
© iFixit — CC BY-NC-SA www.iFixit.com Page 10 of 15

Step 17 — Hard Drive
Grasp the orange cable at the leftend of the hard drive and disconnectit from the logic board.
Try to grasp the cable on the plasticconnector rather than on the flexiblecable section.
Step 18
Grasp the plastic tab and pull thehard drive up and to the left, makingsure that the metal bracket doesn'tcatch on the black plastic casing.
PowerBook G3 Pismo Inverter Replacement
© iFixit — CC BY-NC-SA www.iFixit.com Page 11 of 15

Step 19
Your laptop should lookapproximately like this.
Step 20 — Clutch Cover
Push the display back so that it liesflat.
Slip your index finger or a nylon toolunder the clutch cover near thepower button and pull gently upwarduntil you feel it come free.
Repeat the previous step on the leftside.
PowerBook G3 Pismo Inverter Replacement
© iFixit — CC BY-NC-SA www.iFixit.com Page 12 of 15

Step 21
Lift the clutch cover up and off,rotating it toward yourself.
Step 22 — Inverter
Grasp the orange display data cableand disconnect it from the logicboard.
PowerBook G3 Pismo Inverter Replacement
© iFixit — CC BY-NC-SA www.iFixit.com Page 13 of 15

Step 23
Remove the single black Torx screwthat fastens the display cable to theplastic casing.
Grasp the thin display inverter boardat its left end; lift up and rotatetoward yourself.
There are two tabs that hold thedisplay inverter in place; these arewhat you need to get past in order topull the board free.
Step 24
Disconnect the white inverter cablefrom the right end of the board
PowerBook G3 Pismo Inverter Replacement
© iFixit — CC BY-NC-SA www.iFixit.com Page 14 of 15

To reassemble your device, follow these instructions in reverse order.
This document was last generated on 2017-06-21 09:15:29 AM.
Step 25
Disconnect the inverter plug, pullingdirectly up from the logic board.
PowerBook G3 Pismo Inverter Replacement
© iFixit — CC BY-NC-SA www.iFixit.com Page 15 of 15