Post Graduate Course in - clix.tiss.edu · Eklavya – Bhopal, Homi Bhabha Centre for Science...
116
S03 Interactive Science Teaching Reflective Teaching with ICT Teacher Coursebook Post Graduate Course in
Transcript of Post Graduate Course in - clix.tiss.edu · Eklavya – Bhopal, Homi Bhabha Centre for Science...

S03 Interactive Science Teaching
Re�ective Teaching with ICT
Teacher Coursebook
Post Graduate Course in
The Connected Learning Initiative (CLIx) is a technology enabled initiative at scale for high school students. The initiative was seeded by Tata Trusts, Mumbai and is led by Tata Institute of Social Sciences, Mumbai and Massachusetts Institute of Technology, Cambridge, MA USA. CLIx offers a scalable and sustainable model of open education, to meet the educational needs of students and teachers. The initiative has won UNESCO’s prestigious 2017 King Hamad Bin Isa Al-Khalifa Prize, for the Use of Information and Communication Technology (ICT) in the �ield of Education.
CLIx incorporates thoughtful pedagogical design and leverages contemporary technology and online capabilities. Resources for students are in the areas of Mathematics, Sciences, Communicative English and Digital Literacy, designed to be interactive, foster collaboration and integrate values and 21st century skills. These are being offered to students of government secondary schools in Chhattisgarh, Mizoram, Rajasthan and Telangana in their regional languages and also released as Open Educational Resources (OERs).
Teacher Professional Development is available through professional communities of practice and the blended Post Graduate Certi�icate in Re�lective Teaching with ICT. Through research and collaborations, CLIx seeks to nurture a vibrant ecosystem of partnerships and innovation to improve schooling for underserved communities.
Collaborators:Centre for Education Research & Practice – Jaipur, Department of Education, Mizoram University – Aizawl, Eklavya – Bhopal, Homi Bhabha Centre for Science Education, TIFR – Mumbai, National Institute of Advanced Studies – Bengaluru, State Council of Educational Research and Training (SCERT) of Telangana – Hyderabad, Tata Class Edge – Mumbai, Inter-University Centre for Astronomy and Astrophysics – Pune, Govt. of Chhattisgarh, Govt. of Mizoram, Govt. of Rajasthan and Govt. of Telangana.
© TISS, 2018
Except where otherwise noted, this content is licensed under a Creative Commons Attribution 4.0 International license
Any questions, suggestions or queries may be sent to us at:[email protected]
Centre for Education, Innovation and Action ResearchTata Institute of Social SciencesV.N.Purav Marg, Deonar,Mumbai – 400088, IndiaPhone: +91 – 22- 25525002/3/4www.clix.tiss.edu
TISS/CEI&AR/CLIx/TCb/S/e/04Dec’18/01
This coursebook belongs to:
Name: ......................................................................................................Class: .......................................................................................................Section: ...................................................................................................
Reflective Teaching with ICT
S03 Interactive Science Teaching
Post Graduate Course in
Teacher Coursebook
CLIx subject teamAnish MokashiAnup SaxenaArpita PandeyDeepak VermaDinesh Kumar VermaHoney SinghJudith PerryPriyanka SaxenaSayali ChougaleUmesh K ChouhanV. V. Binoy
Academic mentorArvind SardanaBhas BapatProf. Bholeshwar DubeHimanshu SrivastvaProf. Kishore PanwarRajesh KhindriVivek Mehta
Academic supportAmitabh Mukharjee Anu GuptaDr. Ramani AtkuriSaurav ShomeDr. Sumit Roy
Production ManagementPallavi Seth
Software developmentBrandon HanksVarun Jain
Software SupportShahid Ahmad
IllustrationsAnkita Thakur Heera DhurvayKhizar Mohammad Khan Tariq Khan
DesignAnkita ThakurGauri WandalkarIshita BiswasKanak Shashi
EditorsC. N. SubramaniamMadhav KelkarPraveen AllamsettiRashmi PaliwalLate Rex D. RozarioSuresh KosarajuSushil JoshiTultul Biswas
TranslatorsChitti SreeramMadhav KelkarLokesh Malti PrakashSatyamadhvi NanduriShivani Bajaj
Video development supportDeepak VermaKhizar Mohammad KhanKumar MohitPallav ThudgarTariq Khan
Special Thanks
Arvind Gupta (for straw flute video), Dominic Mazzoni and Roger Dannenberg (for Audacity Software), Eklavya Bal Vigyanik Team (for textbooks).
We would like to sincerely acknowledge all the resources that we have referred to for the development of our modules.
Voice overDinesh Kumar VermaGaurav YadavHoney SinghPallavi SethPriyanka SaxenaSubeer KangsabanikVandana Pandey

Table of Contents
Atomic Structure 1Basic Astronomy 15Ecosystem 43Health and Disease 57Understanding Motion 75Sound 93


1
Atomic Structure

2

3
A Note for Teachers
‘All things are made of atoms—little particles that move around in perpetual motion, attracting each other when they are a little distance apart, but repelling upon being squeezed into one another’
If all the scientific knowledge were destroyed in some catastrophe, then Feynman reckoned we could pass greatest amount of scientific knowledge with the fewest of words in the above statement regarding the atomic theory.
Atomic theory is key to understanding the diverse nature of different matter around us. The differences in elements stem from the differences in their atoms. The structure of atoms of the elements determines how the elements and their compounds behave chemically. Understanding how matters behave is important and useful for investigation across various disciplines of science.
The key questions and focus areas of modules are:
• What can be considered as pure substances? • Why don’t we get large number of element in the free state? • Why some of the elements like the inert gases can exist in the free state? • Why do elements combine to form compounds?

4
5
Table of Contents
Atomic Structure Section 1: Basic Module Information 7Section 2: Pedagogic Approach 9Section 3: Notes for Implementing Student Module 11
Lesson 1: Why Chemistry 11Lesson 2: Need of the Atom 11Lesson 3: Atom and Atom Factory 11Lesson 4: The Rule of 8 13Lesson 5: Molecule factory 13

6
7
Student Module: Atomic Structure
Section 1: Basic Module Information
Prior Knowledge1. Name and symbols of some common chemical elements such as Hydrogen, Oxygen2. Name and symbols of some common chemical compounds such as Sodium Chloride3. Chemical Change
Structure of the Module
Lesson 1: Why Chemistry• Why Chemistry• Periodic table• What is an element?• The language of chemistry I • The language of chemistry II
Lesson 2: Need of the Atom• Need for an Atom I• Need for an Atom II
Lesson 3: Atom and Atom Factory• Atom • Atom factory• Atom factory again!• Review atom• Electrons & Chemical reactivity of an element
Lesson 4: The Rule of 8• The rule of 8 • Na & Ne - Cl & Ar• H & He - O & Ne
Lesson 5: Molecule Factory• Molecule factory • Some more molecules• Molecule Review
Student Feedback SurveyCredits
Expected Timeline
Preparation Time: 2 weeksTeachers should spend 2 hours on the digital tools (Video analysis player and Run Kitty Run game) to get familiar with them. They would further require two hours of self-study and preparation for classroom instructions.
Implementation: 3 weeks1. Lesson 1 - Two 40 Minutes Period or 1 Block Teaching Period2. Lesson 2 - Two 40 Minutes Period or 1 Block Teaching Period3. Lesson 3 (includes digital activity) - One 40 Minutes Period and 1 hour-long Block Teaching
Period for simulation4. Lesson 4 - 1 Block Teaching Period
8
5. Lesson 5 (includes digital activity) - 1 Block Teaching Period for simulation and One 40 Minute Periods for Teaching and Assessment
6. Feedback - One 40 Minute long Period for Feedback and Remediation
Assignment: 1 Week
Requirements
Please make sure of the following:1. Assign a notebook (which we call as journal) for yourself. Assign one page for each of the days for
note taking. You can record your reflections, experiences or learning in this notebook.2. You should have access to a computer that has a browser and internet connection.
9
Section 2: Pedagogic Approach
Pedagogical PillarsThis module is designed by keeping the three pedagogic pillars in mind.
Collaboration: In scientific endeavour, collaboration is uniquely important. Peer review and replication of studies are standard practice in scientific research. The scientific community is dependent on one another for generation of valid scientific knowledge. Hence, it is important to provide opportunity for collaboration while learning science.
The students do the digital simulations in pairs or groups. A student would have to explain their decisions to their peers. This would serve two purposes. The peers would be able to identify the gaps in their understanding and correct it at the same time. It is recommended that the teachers should encourage discussion among students.
Learning from mistakes: Mistakes and misunderstanding are important sources of learning. We all have intuitive explanations for the phenomena around us e.g., many people in ancient Greece and India believed matter is made up of earth, water, fire etc. Examining our mistakes and misunderstandings opens the door to critical understanding of the scientific concepts.
The digital activities give students a chance to learn from their mistakes. In the ‘Atom Factory’ activity students can play with the constituents of the atoms, learn from their mistakes and check the correct configuration of the elements. In the same activity the game gives students two attempts for each question. Students get a chance to examine their answers, and ponder why the answer was incorrect. They are able to check the answer if they do not get the answer the second time.
Authentic learning: The module begins with some examples of application of chemistry in day-to-day life. Chemistry is not something which scientists do in a laboratory. It is all around us. In this module students examine the notion of pure substances. Clean air or water appear to be pure but scientifically these cannot be regarded as pure substances. It was difficult to discover elements that are pure substances since most of the elements are not found in their pure forms. This also raises the question why elements do not exist in their pure forms. Understanding the structure of atoms of different elements and their effect on chemical properties of the elements helps us understand the formation of different substances around us. Moreover, this makes us appreciate the fact that all substances in the universe from stars to trees share common building blocks.
Role of ModelsModels hold great significance in the world of science. From the double helix model of DNA to the Bohr’s model of atom, models have expanded our understanding of the natural phenomena. Building models, deducing their prediction, comparing the prediction to observations, comparing different models and revising them are important aspects of theory construction and testing in science. At the same time observational data can also be organized in the form of models.
While learning science, models can help students build critical understanding of the concepts. Students should be exposed to different types of representations such as 3-dimensional concrete models and 2-dimensional simulations. This exposure could help students to distinguish between a system and its representation and create complex mental models. The science lessons could provide opportunity to students explicitly create mental representations and engage with thought experiments.
This module focuses on critical understanding of Bohr’s atomic model and uses it to explain the behavior of substances in chemical reaction. The module makes it clear that the model is a close approximation of the atomic structure. Quantum physics has further refined our understanding of the atoms and the subatomic particles. However, Bohr’s model can be considered as a good stepping stone to exploring more complex ideas regarding the atomic theory. In science, models and theories evolve continuously and different models can co-exist. Not all models may be perfect or complete. We choose the model which serves us the best in the given condition e.g. For subatomic particles we use quantum mechanics, for

10
macroscopic objects we use classical mechanics while for extremely massive objects general relativity is used.
11
Section 3: Notes for Implementing Student Module
Lesson 1: Why ChemistryLearning Objectives: Students will be able to:
1. Understand the questions chemistry pursues and appreciate the use of chemistry in various fields of science
2. Recognize the chemical symbols of some of the common elements and explain how they have been named.
3. Define what is an element and describe why elements are considered pure substances
What are pure substances? We can separate out mixtures using different methods till the substances appear pure to our eyes e.g. water collected by condensation. But can these substances be considered pure substances. Scientists have devised methods which can further divide the substances till we are left with substances that we call elements. Scientists have discovered a total of 118 elements till date. 94 of these elements occur naturally on earth while 24 have been synthesized in the labs. The elements are organized in a table in a systematic manner. This table is known as the periodic table. The elements are represented by the two letters - the first letter of the symbol is same as the first letter of element’s name (or its latin name) and the second letter is any other letter from the element’s name (or its latin name). These representations or codes are known as chemical symbols.
Lesson 2: Need of the Atom Learning Objectives: Students will be able to
1. Recognize that most of the pure elements readily react to form compounds.2. Identify the differences in chemical properties of noble gases and other elements.3. Differentiate between elements and compounds4. Differentiate between atoms and molecules
The lesson starts with a video of a piece of sodium metal being cut. The change of the cut cross-section is shiny at the beginning but soon loses its shine. On examination scientists have found that Sodium reacts with Oxygen in the atmosphere to produce Sodium Oxide. Similarly most of the other elements readily undergo chemical change and form compounds. These compounds are usually more stable than pure elements. During formation of compounds, two or more atoms of different elements combine and form a molecule. E.g. Two Hydrogen and one Oxygen atom combine to produce a water molecule. One Sodium and One Chlorine atom combine to produce a sodium chloride molecule. Molecules need not be formed by atoms of different elements. The atoms of many gaseous elements (that exist in gaseous stage under standard temperature and pressure) cannot exist in free state -two or more atoms of the same element combine to form molecules e.g. Hydrogen molecule, Oxygen molecule.
However, even though the elements in the last (18th) column exist as gases under standard temperature and pressure, they do not form molecules. These gases are also non-reactive in nature under normal condition and do not form compounds with other elements. These elements can exist in free state and are known as noble elements.
This makes us wonder -Why most atoms cannot exist independently (without reacting with atoms of the same or different elements) like the atoms of the noble gases?
To answer this question we need to examine the differences in the structure of the atoms of noble gases and other elements.
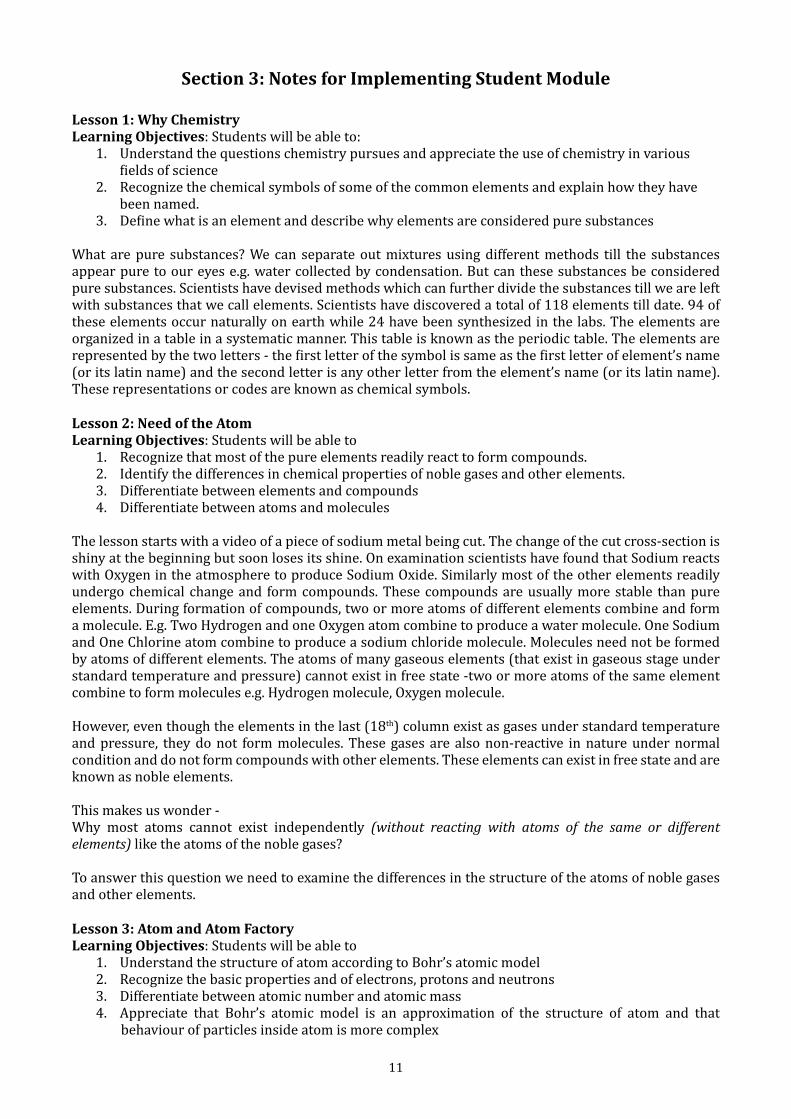
Lesson 3: Atom and Atom FactoryLearning Objectives: Students will be able to
1. Understand the structure of atom according to Bohr’s atomic model2. Recognize the basic properties and of electrons, protons and neutrons 3. Differentiate between atomic number and atomic mass4. Appreciate that Bohr’s atomic model is an approximation of the structure of atom and that
behaviour of particles inside atom is more complex

12
5. Identify that electron orbitals can contain a specific number of electrons
Students should be given a basic overview of the Bohr’s atomic model. This includes the knowledge of the properties of the three particles, namely, electrons, neutrons and protons. Electrons are negatively charged particles and have negligible mass compared to protons and neutrons. Protons are positively charged whereas neutrons do not possess any charge. Most of the mass of the atoms are concentrated at the center where the protons and the neutrons reside. This is known as the nucleus of the atom. The electrons revolve around the nucleus in specified paths known as orbits. This model is an approximation of the structure of atom.
Atomic Number - The number of protons in the nucleus of the atoms of a element is known as the atomic number of the element. In the neutral state the number of protons and electrons in the atoms remain the same and hence they do not have a net charge. Atoms can be ionized (have a net charge) by losing or gaining electrons. Hence, the number of electrons in the atoms of an element are not always constant. Similarly, the number of neutrons in the nucleus can also differ in different isotopes of the same element. Hence, elements are identified by their atomic number. In the periodic table the elements are organized in the increasing order of their atomic number.
Atomic Mass Number - The sum of the number of protons and neutrons in the atoms of an element is known as the atomic mass number of the element. Atomic mass number of the same element can be different for different isotopes. E.g. 12C and 13C isotopes of carbon have atomic mass 12 and 13 respectively.
The symbol of an element is accompanied by a subscript and a superscript. One such example is given below. Magnesium has atomic number 12. It has three isotopes of atomic mass number 24, 25 and 26 respectively.
Figure 1: Convention of writing Mass number and Atomic Number of an element (Credit: By Uopchem25123 [CC BY-SA 3.0 (https://creativecommons.org/licenses/by-sa/3.0)], from Wikimedia Commons)
In the Figure 1 the subscript on the left represents the atomic number which is 12 i.e. Magnesium atom has 12 protons. The superscript on the left of the symbol represents the mass number. This symbol represents the 24 Mg isotope i.e. this Magnesium atom has 24-12 =12 neutrons. The superscript on the top right corner represents the net charge the atom carries. If nothing is written there the atom has zero net charge. In this case the +2 represents the net double positive charge this Magnesium atom carries. So, the atom has 10 electrons in total.
Formation of ions would be explored later in lesson 3 and 4 but students must be familiar with the different components of the chemical symbol that they are going to explore in the digital activity.
Digital Activity: Atom Factory
Learning Objectives: In this activity students will be able to:1. Build atoms till atomic number 10.2. Identify the contribution of neutrons, protons and electrons to the atomic number, atomic mass
number and the net charge of the atoms.3. Identify alternative representations of electrons in the form or electron cloud.
13
The ‘Atom Factory’ activity has three components i.e. ‘Build an Atom’, ‘Symbols’ and ‘Game’. The first time, students will spend only 10 minutes on the App. Teachers will do the debriefing. Then students will make atoms one after another.
The students should first go through ‘Build an Atom’ and ‘Symbols’ only. They should make the atoms of different elements one by one in the increasing order of their atomic number. Both the activities are similar. In ‘Symbols’ component students can explicitly check different components of the chemical symbol for the atoms they are making.
Digital Activity: Atom Factory Again!Learning Objectives: Students will be able to
1. Identify the order of filling of the electron orbitals.2. Identify the maximum number of electrons that the first and the second orbitals can take.
Students explore the ‘Build an Atom’ component again. In this activity they focus on the electrons only. They can be asked to check if the second orbital can be filled without filling the first orbital. They can be asked to check the maximum number of electrons that can be placed in the first and the second orbitals.
The students can then be asked to explore the ‘Game’ in which they get a chance to practice the knowledge they have acquired.
Students can then answer the questions under the ‘Review what you have learned’ section.
Lesson 4: The Rule of 8Learning Objectives: Students will be able to
1. Compare the distribution of electrons in the noble gases with the distribution of elements in other elements.
2. Describe how ionic bond helps Sodium and Chlorine attain stability in Sodium Chloride molecule.3. Describe how covalent bond helps Hydrogen and Oxygen attain stability in the water molecule.
The lesson starts with examination of atomic structure of noble gases. The outermost orbitals of the atoms of noble gases are full which renders them chemically inert under normal temperature and pressure. Atoms of other elements try to attain this stable electronic configuration by combining with other atoms of same or different elements. The module details how formation of both ionic and covalent bonds helps elements attain stable electronic configuration.
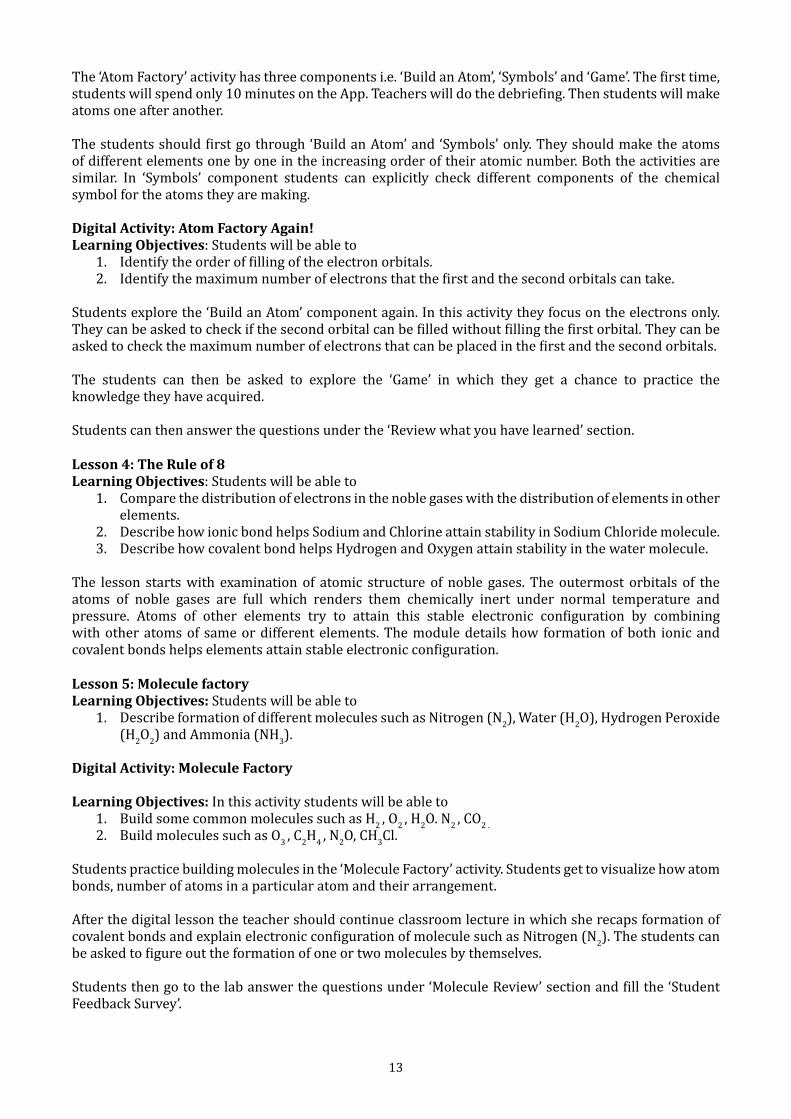
Lesson 5: Molecule factoryLearning Objectives: Students will be able to
1. Describe formation of different molecules such as Nitrogen (N2), Water (H2O), Hydrogen Peroxide (H2O2) and Ammonia (NH3).
Digital Activity: Molecule Factory
Learning Objectives: In this activity students will be able to1. Build some common molecules such as H2 , O2 , H2O. N2 , CO2 .2. Build molecules such as O3 , C2H4 , N2O, CH3Cl.
Students practice building molecules in the ‘Molecule Factory’ activity. Students get to visualize how atom bonds, number of atoms in a particular atom and their arrangement.
After the digital lesson the teacher should continue classroom lecture in which she recaps formation of covalent bonds and explain electronic configuration of molecule such as Nitrogen (N2). The students can be asked to figure out the formation of one or two molecules by themselves.
Students then go to the lab answer the questions under ‘Molecule Review’ section and fill the ‘Student Feedback Survey’.

14

15
Basic Astronomy

16
17
A Note for Teachers
Of the many familiar everyday natural phenomena, the motion of celestial bodies across the sky is perhaps the grandest and most significant to human life. The widespread interest of young people in popular astronomy makes it a particularly promising topic for school education. Yet problems in students’ and adults’ knowledge of basic astronomy are also well documented. Research shows that the heliocentric model of solar system is a difficult notion for students as well as for adults all over the world even after relevant instruction. Explaining even simple daily phenomena using an appropriate part of this model can be a challenging task. Various studies report that proposing faulty explanations for occurrence of day and night, seasons, phases of moon, eclipses, etc. is common among school students and among adults. The basic astronomy module helps students to construct correct mental models and explain phenomena based on them. It closely follows the syllabus from most textbooks at Grade 8 or 9.
This document is prepared with the objective of supporting you, the teacher, in your journey through the Basic Astronomy module. This module has three units, each unit has a number of lessons, and each lesson has activities. There are 12 lessons in all, of which 3 are digital lessons (to be conducted in a computer lab) and 9 are classroom lessons. The classroom lessons are offered as a part of the student module for the sake of completeness, but you will be conducting those lessons in the classroom. So the material in those lessons is actually meant for you. Students only need to access digital activities in the computer lab. It is absolutely essential that you are thoroughly familiar with the student module and know a little more than what is covered in this handbook.
For each lesson in the student module, there is a corresponding lesson for teachers in this document. It consists of videos of the activity and a few notes for you. The videos will help you to understand how to conduct the activities in the lesson and the notes provide justification of the activities and help you to acquire deeper understanding of astronomy. Immediately after reviewing a lesson in the student module, please read the corresponding lesson in the teacher module.
Section 1 of this document provides some basic information (structure of the module, timeline and requirement from you). Overall pedagogic approach and some notes about the digital activities in this module are provided in Section 2. Sections 3, 4 and 5 are dedicated to Units 1, 2 and 3 of the student module.

18

19
Table of Contents
Basic Astronomy Section 1: Basic Module Information 21Section 2: Pedagogic Approach 24Section 3: Notes for Implementing Student Module Unit 1 - The Earth 28
3.1 Lesson 1: The Spherical Earth 283.2 Lesson 2: Rotation of the Earth 303.3 Lesson 3: Digital Activity 1 323.4 Lesson 4: Revolution of the Earth 32
Section 4: Notes for Implementing Student Module Unit 2 - The Moon 344.1 Lesson 1: Motion of the Moon 344.2 Lesson 2: Phases of the Moon and Eclipses 344.3 Lesson 3: Digital Activity 2 364.4 Lesson 4: Moonrise and Month 37
Section 5: Notes for Implementing Student Module Unit 3 - The Solar System and Beyond 38
5.1 Lesson 1: The Solar System 385.2 Lesson 2: Scaling the Solar System 385.3 Lesson 3: Digital Activity 3 405.4 Lesson 4: Introduction to the Universe 40

20
21
Basic AstronomyTeachers’ Handbook
Section 1: Basic Module Information
1.1 Prior KnowledgeThese are the things your students must know before you start teaching this module.Maths
1. Concept of unit2. Measurement (km, m, kg, g, s)3. Ratio
Geometry1. Angle2. Circle (radius, diameter, curvature, tangent)3. Basics of coordinate geometry (For example, there are three orthogonal axes.)
Astronomy1. Basics of gravitation2. The Earth (north and south poles, equator, northern and southern hemispheres, tropics of cancer and capricorn)
Science1. Chemical elements2. Basic optics (For example, light travels in a straight line.)
1.2 Structure of the ModuleUnit 01: The Earth Pre-Assessment Lesson 1: The Spherical Earth 1.1 Introduction: The Earth and the Globe 1.2 Activity : Positioning a Human Being on the Globe (model) 1.3 Cardinal Directions 1.4 The Horizon
Lesson 2: Rotation of the Earth 2.1 Activity 1: Geosynchron 2.2 Activity 2: Apparent motion of the Sun (Role Play) 2.3 Activity 3: Apparent Motion of the Stars (Role Play) 2.4 Activity 4: Stationary Position of the Pole Star (Role Play)
Lesson 3: Digital Activity 1 3.1 Animation: Rotation of Earth 3.2 Activity : AstRoamer: What's the Time?
Lesson 4: Revolution of the Earth 4.1 Activity 1: Revolution of the Earth Around the Sun (Role Play) 4.2 Activity 2: Change in Path of the Sun over the Year (Gesture) 4.3 Activity 3: Changes in the night sky over the year (Role Play) Glossary
Unit 02: The Moon Lesson 1 : Motion of the Moon 1.1 Introduction: Characteristics of the Moon 1.2 Activity 1: Motion of the Moon Around the Earth (Role Play) 1.3 Activity 2: The Sun-Earth-Moon System (Role Play)
22
Lesson 2: Phases of the Moon and Eclipses 2.1 Introduction 2.2 Activity 1: Phases of the Moon 2.3 Activity 2: Inclined Orbit of the Moon (Gesture) 2.4 Food For Thought
Lesson 3: Digital Activity 2 3.1 Animation: Motions of the Moon and the Earth 3.2 Activity: AstRoamer: Moon Track 3.3 Phases of the Earth
Lesson 4: Moonrise and Month 4.1 Introduction 4.2 Activity 1: Changes in the Time of Moonrise (Role play) 4.3 Activity 2: Motion of the Moon with respect to Stars (Role play) Glossary
Unit 03: The Solar System and Beyond Lesson 1: The Solar System 1.1 The Sun 1.2 The Planet 1.3 Activity : Revolution of planets (role play)
Lesson 2: Scaling the Solar System 2.1 Activity : Relative sizes of planets and distances in solar system (model) 2.2 Minor Planets 2.3 Satellites 2.4 Asteroids 2.5 Comets
Lesson 3: Digital Activity 3 3.1 Animation: Solar System 3.2 Activity : AstRoamer: Planet Trek
Lesson 4: Introduction to the Universe 4.1 Stars 4.2 Activity : Parallax (gesture) 4.3 Galaxies 4.4 Think! Glossary
Student Feedback Survey Post-Assessment Credits
1.3 Expected timelineTwelve hours of digital activity, nine hours of self-study and fifteen hours of implementation are assigned for this module.
1. 1 week: Observations2. 2 weeks: Observations + Student Module + Teacher Module3. 3 weeks: Implementation in the Classroom4. 1 week: Assignment5. 1 week: Feedback
Thus, the entire module is planned for eight weeks.
23
RequirementsPlease make sure the following material is available:
1. Assign a notebook (which we will call a journal) for this module. Assign one page to make notes for every day.
2. You should have access to a computer that has USB port, audio and video player and an internet connection.3. You should have a smartphone to receive the Telegram message you will get every day.4. You will need the following material:
a. A Globe, kneaded dough and few match sticksb. A lemon, a stiff stick or a cycle spoke and light torch/bulbc. A measuring tape, a chalk, a small bead (diameter ~ 0.4 cm), two marbles (diameter ~
1cm), a small bead (diameter ~ 0.5 cm), a coconut (diameter 11 cm), a big orange (diameter ~ 9 to 10 cm), two table tennis balls (diameter ~ 4 cm).
24
Section 2: Pedagogic Approach
2.1 Pedagogic PillarsThis module is designed by keeping the three pedagogic pillars in mind.
1. Collaboration: You might notice that most activities in the student module are to be done in pairs or groups. We expect that two students will use one computer when they are in the computer lab for the digital lessons. We have deliberately designed the first part of the digital game (AstRoamer: What Is the Time?) for two students to answer alternately in the hope that it will set the trend for the rest of the activities. Do encourage your students to carry out activities collaboratively and discuss among themselves.Interestingly, collaboration is inherent in astronomy because astronomy requires observations from different locations on earth and at different times over a long period of time. A single person cannot make all the observations. This is why telescopes are placed all over the world and observations from all of them lead to discoveries. You might know that the 2017 Nobel Prize for physics went to the discovery of gravitational waves (which is an area in astronomy). Although the prize was given to three people who came up with the idea of building a certain kind of observatory1, the winners acknowledged the contribution of a thousand scientists all over the world who collaborated in this project!Of course, collaboration is not unique to astronomy. One of the central practices in science, intended to ensure the validity of new discoveries, is peer review and replications of an experiment. Fields other than natural sciences also use different forms of collaboration. So, it is important to teach students to work in groups of different sizes. They should be able to contribute to the group and at the same time, gain from the experience of working in the group.
2. Learning from mistakes: The core of the scientific method consists of proposing a theory, making predictions and testing them against observations. If the prediction does not match the observations, changes are proposed in the theory and again the cycle is repeated. Knowledge is being formed only because there are some mistakes in prediction.If a student learns the correct answers, takes pains to memorise them and correctly reproduces them in the exam, there is certainly some value to it. This student has learned some facts of science. But, a student has learned essence of science when she comes across a question, tries to find out the answer by observation or experimentation, takes a risk to express it (because she doesn’t know whether her answer is correct), exposes her ideas to the criticism of her peers, recognises the shortcomings of her answer pointed out by others and keeps pondering it. Making our own mistakes is a better way to learn science than memorising the correct answers given by someone else.
Most activities in the Astronomy module do not require students to write anything. If they make mistakes during role-play activities or discussions, they can revise it. We hope that this will make theenvironment more open to exploration and less threatening. In the digital game, students get twochances to answer. They get feedback if the first attempt is incorrect. This helps them to revise their answer the second time. More importantly, if they do not get it correct the second time, they are given an explanation of the correct answer. They can play the game multiple times and eventually learn!
3 Authentic learning: In basic astronomy we help students understand the explanations of commonplace astronomical phenomena such as occurrence of day-night, seasons, phases of the moon and so on. These explanations constitute scientific literacy. Many of us, as a child, have wondered why do days get shorter around November-December or why does moon’s shape change? Students first need to do careful observations and understand the pattern in these phenomena (e.g. seasonal changes through year or phase cycle), which is why at primary grades it is important to encourage draw and write about what they observe and students to keep systematic notes. Most school syllabus introduce the heliocentric model of the solar system and explanations of the astronomical phenomena based on it during high-school grades. From different experiments it is known that Grade 8-9 students are capable of understanding the basic explanations (one of the difficult areas is great distances and masses in
1 LIGO: Laser Interferometer Gravitational-Wave Observatory. Two such observatories were in the USA at first. Similar observatories with different names have been built in different parts of the world. One such observatory is proposed in India to increase the accuracy of observations.
25
astronomy). These explanations in the school must be related to student’s experiences in life. In India, there are many references to astronomical phenomena in our lives. Several festivals are related to astronomical phenomena (e.g. Makar Sankranti, Eid, Budhha Pornima). Farmers in many parts often mark start of the monsoon with starting of Mrigashīrsha Nakshatra and fishermen can predict the tides based on the phase of the moon. We need to help students to connect this indigenous knowledge to what they learn in the school (We have tried to do this in Part 2 of the game - AstRoamer: Moon track). Unfortunately, indigenous knowledge also constitutes astrology. In the module we have have made a couple of attempts to communicate the scientific reason to a certain astronomical phenomena, and challenged the astrological claims regarding them. But in the classroom, you may come across astrological beliefs more often than that. Do encourage your students to spell out them instead of ignoring them. And then ask students to think about them scientifically and make an informed decision about whether they want to believe it or not! We trust your discretion in such situation!
2.2 Classroom ActivitiesSuppose you are planning a family trip or school trip of about 2–3 days to a place where you have not been earlier. What do you do? You read about the place, decide which spots to visit, study the map, plan the order of visiting the selected spots, enquire about modes of travel, find out the precautions you need to take, book the tickets, pack your bags and so on. When you consult a map and plan your trip, you are visualising an unknown space (i. e., the place you plan to visit) with the help of a visual tool (a map) and thinking about it. Similarly, when you pack your bag, you take a bag of appropriate size and arrange your things in a such a way that the most things fit in the available space. In both these cases, you are applying ‘visuospatial thinking’.
Visuospatial thinking is an ability found in everybody, and we need it to carry out many of our routine activities, such as using appropriate pots to cook or driving or arranging our tables or cupboards or rooms. Many fields such as painting, sculpting, architecture, fashion designing and sports heavily rely on visuospatial thinking. Recent research has shown that visuospatial thinking plays a crucial role in science and engineering. A chemist must know how atoms are arranged in a particular molecule; surgeon must know how the internal organs are arranged in the human body to perform a surgery; an automobile engineer must know how gears are interlocked in a vehicle; a geologist must know the structure of the earth; an astronomer must know the model of the solar system and galaxy; and so on.
When students learn a simple thing such as that the earth is spherical and that human beings live on its surface, they need to apply visualisation. They cannot see the earth as spherical because all that the human eye can see is flat. We can show students a globe (which is a visual tool just like a map), but that is not enough, because the globe is not same as the earth. Students need to imagine the real earth, with oceans and atmosphere and all other things on it. They need to add properties such as gravitation and magnetic forces to create a mental model of the earth.
Visuospatial thinking can be supported through various tools. Concrete models (such as a globe) are one of them. The other common tools are photographs or diagrams. But diagrams are two dimensional and static. They are also abstract in the sense that some details are left out and some conceptual information is added. For example, in a diagram of the earth, we leave out all the irregularities on the surface, the colours, etc. but add the axis of rotation, the equator, etc. This poses difficulty in comprehending diagrams. Imagine the leap of imagination required to visualise a huge three-dimensional sphere rotating around its axis and the consequences of the rotation such as the occurrence of day and night from seeing a small circle on a diagram with a line indicating an axis and an arrow indicating movement!
In this module, we have used yet other tools to promote students’ understanding: gestures and role-play activities. You may have noticed that while giving directions to a particular location, people often use gestures with phrases such as ‘take a left’, ‘turn a little to the right’ (indicating the angle by hand), ‘cross the roundabout’ and so on. Interestingly, people use these gestures even when they are talking on the phone when the listener cannot see them, which means that they are using gestures to aid their own thinking as much as to communicate. Thus, gestures are useful in spatial thinking. We have used selected gestures

26
such as tracing the path of the sun across the sky in different seasons or using the right-hand thumb rule to remember the direction of rotation of the earth. Please encourage your students to use gestures. They might provide a clue to what the students are thinking. For example, if a student indicates the shape of the earth by moving a pointing finger in a circular manner, that student is probably thinking in two dimensions. But if the student uses a hand as if holding a ball, then she is definitely thinking in three dimensions.
Astronomy poses a particular challenge in visuospatial thinking. We learn the models (e.g. of the earth or the solar system) as if we were outside the model, but we experience the phenomena we attempt to explain (such as the occurrence of day and night). The frame of reference for the model and the phenomenon is not the same. This problem can be addressed using role play. For example, if you ask a student to rotate around herself, she would notice how objects in her field of view appear to move from one side to another. Here, she is enacting the model but observing a phenomenon. There are several such role plays in the module. (Videos for all of them are included in this unit.) Some role plays aim at only mimicking the model and not explaining any phenomenon. They too are useful in understanding simultaneous motions of various celestial bodies, the dynamic aspect of which is difficult to convey through diagrams. We strongly encourage you to get all students to participate in the activities instead of demonstrating them. The understanding students gain by doing the activities is far more robust than by learning through any other kind. You may have to make extra efforts such as taking students to an empty lobby or on the playground, setting some self-discipline rules such as not talking or making noise and not laughing if someone makes a mistake. But it is possible to do all the activities and it is very satisfying to get students to do them.
Finally, students are asked to draw what they have learned. We have given the exemplar diagrams in the module for your reference. But avoid giving readymade diagrams to students. Ask them to draw what they have learned. For example, while explaining the seasons, you can draw the earth on the board, then ask students to take turns to draw different parts of the diagram (sun rays, the axis, the equator, the angle of the rays falling near the equator and so on). If one student makes a mistake, ask another student to correct it. Please pay more attention to the conceptual understanding reflected in the diagram than to the neatness of the diagram. Don’t bother to use a compass to draw a circle every time. Ask students to draw it freehand, and you will notice that they will draw a very good circle after a little practice. Ask them to draw diagrams at every opportunity, ask them to draw diagrams as homework. It is a great success in learning if your students can express themselves through diagrams.
2.3 Digital ActivitiesThere are three digital lessons in the module. Each lesson consists of two parts. The first part has animations that students are supposed to watch carefully, and the second part has an interactive game. Here are the details in brief.Unit 1: The EarthLesson 3
a. Animation of the rotation of the earth viewed from different angles. This will help students to reinforce the mental model of the rotation of three-dimensional earth.
b. AstRoamer: What ss the Time? This first level of the game is based on the rotation of the earth.Unit 2: The MoonLesson 7
a. Animations of the sun-earth, earth-moon and sun-earth-moon systems. You might find the actual orbit of the moon quite interesting!
b. AstRoamer: Moon Track: This is the second level of the game designed to explain the phases of the moon.
Unit 3: The Solar SystemLesson 11
a. Interactive animation of the solar systemb. AstRoamer: Planet Trek: This is the third level of the game designed to familiarise students with
the properties of different planets.

27
It is important that students themselves play the game, make mistakes and learn. Again, you will have to make extra efforts to make batches, take students to the computer lab and help them use computers whenever necessary. But you will see the value in it, and students will enjoy playing the game!
2.4 Some Important Notes
Assessment: Unit 1 starts with pre-assessment. Please ask your students to take this test on the computer individually. This will help you to identify how much our students already know. That should be the starting point of your instruction. You need to hand-hold your students while they take the tour in space (i.e. go through this module). A similar test is given as a post-assessment in Unit 3. It will help you to identify how much our students learnt. It will also help us to gauge the success of our module. So please ask your students to be honest and respond with their true answers. These marks do not count anywhere and are not a judgement of their (or your) ability.
Glossary (list of difficult words and their meanings) is given at the end of every lesson. A link is also provided on the top of each page. Students can click on it and check the meanings of difficult words. The words are arranged alphabetically (like dictionary). Clickable letters are provided on the top of the glossary page. Students can click on any letter and go to the page of that letter directly.
Useful digital tools: There are several computer software programmes and mobile device applications for amateur astronomers. They typically give the names and positions of stars and celestial objects at a given time and sometimes include information about them. The following two digital tools are very useful (and they are free of any charge).
1. SkyView: This mobile app gives the name of any celestial object you point your phone at. It can even give the names and positions of the objects in the sky during daytime; you just have to allow it to use your location.
2. Stellarium: This computer software can show the sky as seen at any time and from anywhere in the world. If you click on one of the celestial objects, it also gives information about that object. You can download it from here: http://stellarium.org
Both of these tools are fun to play. Check them out.
The banner image of Unit 3 is a photograph of a part of the Saraswati Supercluster, which was identified by Indian scientists in July 2017. The Saraswati Supercluster is one of the oldest and largest cosmic structures known to us. It has at least 43 clusters of galaxies and is 250,000 light years away. It is called Sarawsati after the extinct river mentioned in ancient Indian texts. For more information, please visit: https://en.wikipedia.org/wiki/Saraswati_Supercluster
This web image is selected to honour the Indian astronomers who made this important discovery. We also thought that students will be motivated to learn astronomy if they knew that Indian scientists too contribute to important discoveries in this field and students could aim at such a position in the future!
28
Section 3: Notes for Implementing Student Module Unit 1 - The Earth
Learning Objectives: Students should be able to1. Explain the occurrence of day-night and the apparent motion of the sun and the stars from east
to west in relation to the rotation of the earth.2. Understand that the earth is spherical, that it rotates around itself and revolves around the sun.3. Explain the occurrence of the seasons and changes in the night sky over the year.
In Unit 1, we mainly revise some of the basic concepts such as the shape and motion of the earth. In Lesson 1, we discuss the spherical shape of the earth and its consequences such as that different parts of the sky are visible from different parts of the earth. In Lesson 2, we elaborate on the rotation of the earth and how as a consequence, all celestial bodies appear to move across the sky from the east to the west. Lesson 3 is a digital lesson. In Lesson 4 we discuss the revolution of the earth around the sun and its consequences such as the occurrence of the seasons and the changes in the night sky.
3.1 Lesson 1: The Spherical Earth
Learning Objectives: Students should be able to1. Determine directions (up, down, north, south, east and west) at a given location on the earth.2. Integrate gravity into the spherical model of the earth.3. Understand that different parts of the sky are visible from different locations on earth and draw
the horizon as seen at a given location.
Many research studies have shown that students come to class with preconceptions about the natural world. One common preconception is that the earth is flat, or like a disc. This is because that is how the surface of the earth looks at most places on earth. Sometimes, even adults do not believe that the earth is spherical and human beings live all over the surface of the earth. They feel that human beings will fall off the earth and that the water in the oceans will spill. They think this because gravity is not integrated into their mental model of the earth.
When students are exposed to the scientific model of spherical earth (without reference to gravity), they integrate their pre-conceptions with this information and form new models such as that the earth is spherical but we live inside that sphere. Some students think that the earth could be partially flat from upper side (like a puri) where people live. These are called ‘synthetic models’.
It is important that our students construct the correct mental model of earth if they are to understand the rest of basic astronomy. So, even if some part of the content in Unit 1 is covered in lower grades, we encourage you to implement it in the classroom. It will be good revision for your students and an opportunity for correction to those students who may have alternative conceptions.
Introduction: The Earth and the Globe
Learning Objectives: Students should be able to1. Understand that the earth is spherical.2. Understand the differences between the earth and the globe.
The globe is a model of the earth and not the earth itself, just as the matchstick figure is not a human being but a model of a human being. Many a times, students think that a model is a replica of reality, just the scale is different. This can generate misconceptions among students. For example, the globe is usually hollow, so students who think that it is a faithful replica of the earth may think that the earth too is hollow.Students must understand that any representation is an abstract version and represents only some aspects of the original. A model has strengths and limitations. A concrete model is typically three-dimen-sional and can be made realistic, but it is difficult to transform and hence difficult to use to solve prob-lems. On the other hand, a diagram can be suitable to solve a problem but it is two-dimensional and static,
29
which poses difficulty for students in visualising the three-dimensional, dynamic earth.Activity 1: Positioning a Human Being on the Globe (model)Video: https://youtu.be/8EwKm3R06LU
Learning Objectives: Students should be able to1. Determine up and down at any given location on the earth.2. Understand that there is no absolute up and down in space, so the globe need not be held at any particular orientation. (The axis need not be inclined, and the north pole need not be up.)3. Erect human beings on the earth.
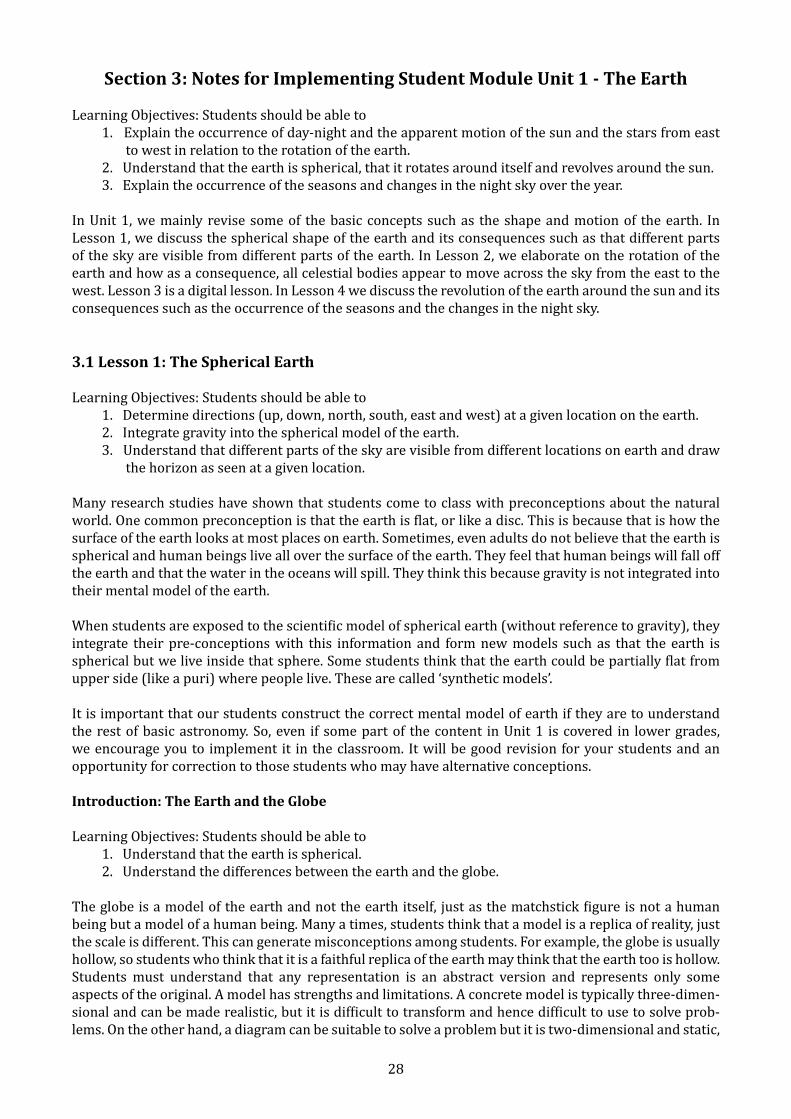
Students often see the globe on a stand with its axis inclined by 23.5. They need to understand that the globe is positioned with an inclined axis assuming that the sun is in the horizontal plane. It is just a convention to position the globe with the north pole up and the south pole down. There is no inherent up and down direction in space. We can just as well hold the axis horizontal if we consider the sun to be above the earth (as shown in Figure 1). I find this orientation much easier to imagine.
Figure 1: Representation of the Earth where its axis is horizontal
Cardinal DirectionsLearning ObjectivesStudents should be able to identify cardinal directions at a given location on earth.
Cardinal directions play the role of an axis in determining positions and trajectories of astronomical objects. In the horizontal coordinate system, the position of a star is usually described by altitude and azimuth. The angle above the horizon is called ‘altitude’. And horizontal angle from North is called azimuth (North is considered ‘0o’).
30
The HorizonLearning Objectives: Students should be able to
1. Know that the sunrays falling on the earth can be considered parallel2. Draw horizon at a given location of the earth
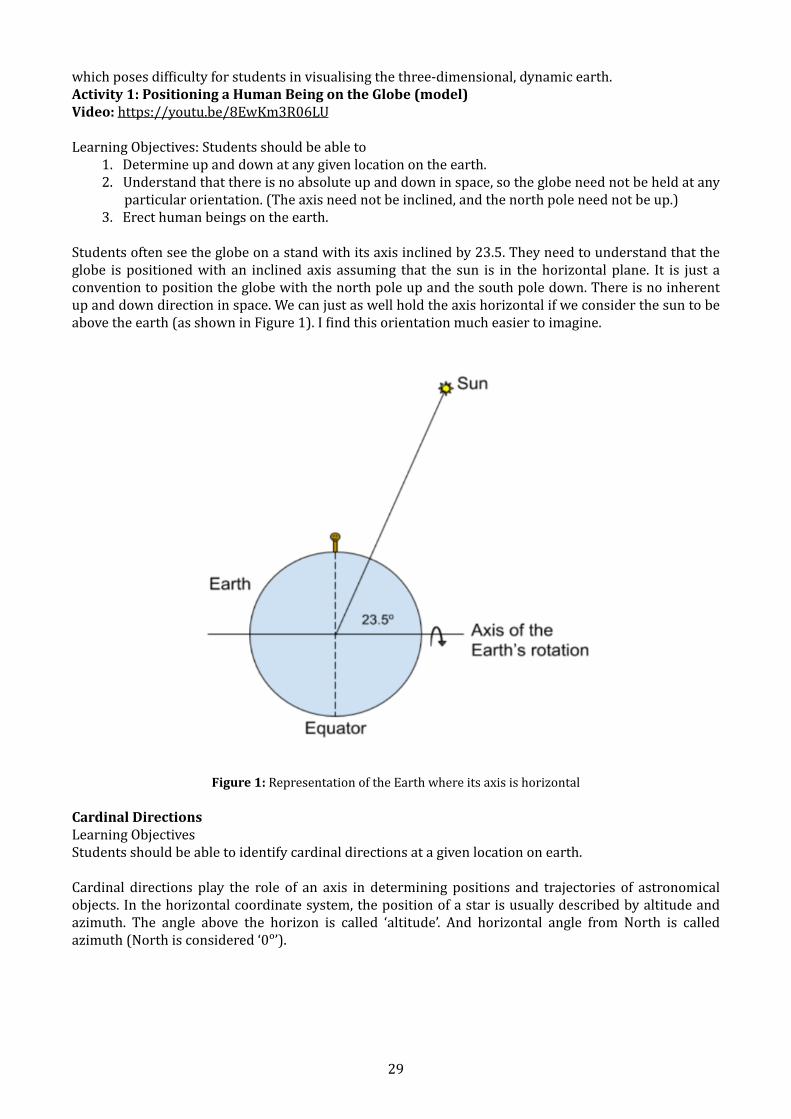
Even if the sun emits light in all directions, sunrays falling on the earth can be considered parallel. We often see the sun and sometimes we see beams of rays coming from clouds which do not appear parallel. So it is hard to believe that sun rays falling on the earth can be parallel. But, because the Sun is very far away as compared to diameter of the earth, the angle subtended by any two rays falling on the Earth is very small (Figure 2). So they can be considered parallel. That is why, at a given point of time, on a flat ground, shadows created by sun rays fall in same direction (are parallel). However, direction of shadows change over large distances because of curvature of the earth.
We make similar assumptions for rays coming from other stars as well, because they are even farther away than the sun. It is one of the most important piece in explaining many astronomical phenomena and it can never be stressed enough. Please find games of optics where your students can verify that the sun rays are parallel.
The horizon is an imaginary boundary between the sky and the earth. At any time, we can see only the sky above the horizon, so it is a frame of reference for all astronomical observations made from the earth. Since diagrams are two dimensional, we draw a line to show the horizon. In reality, it is a ring. The horizon is a very important concept but is missing in most textbooks. Please help your students to understand the horizon.
Figure 2: Diameter of the Earth is small as compared to the Sun-Earth distance. The angle between sun rays falling on the Earth is very small, so they can be considered parallel.
3.2 Lesson 2: Rotation of the Earth
Learning Objectives: Students should be able to1. Explain the apparent daily motion of the sun, stars etc from east to west.2. Understand the rotational motion of the earth.
Rotation is one of the important spatial operations. Although it seems easy, ‘mental rotation’ is known to be difficult, especially when the objects to be rotated are of irregular shapes. Students sometimes confuse spatial operations ‘rotation’ and ‘reflection’. Moreover, students often confuse the axis of rotation with the axis of symmetry, which need not coincide. For example, in a clock, the hands rotate around an axis which is at one of their ends. It is an interesting exercise to ask students to figure out the axes of rotation of different rotating bodies (a fan, a door etc.) or of parts of our body that can rotate (neck, hands etc.)
Activity 1: GeosynchronVideo: https://youtu.be/p_lHLqTWf48
Learning Objectives: Students should be able to1. Determine approximate local time at any location on earth given the direction of sunrays.2. Understand that at any time, half of the earth is lit and half of it is dark.3. Determine the direction of earth’s rotation (which is anticlockwise as seen from above the north pole).
A geosynchron is a globe with its axis parallel to the earth’s axis. You know that the earth’s axis points towards the pole star. So, the axis of the globe must also be in the north-south direction and pointing
31
towards the pole star. At any given location on earth, the pole star is seen at an angle equal to the latitude of that location. (Please measure the angle of the pole star and check this!) The geosynchron remains parallel to the earth as the earth rotates on its axis and revolves around the sun. Hence, day and night, the direction of shadows and the seasons are the same on the real earth and on this “parallel earth”.
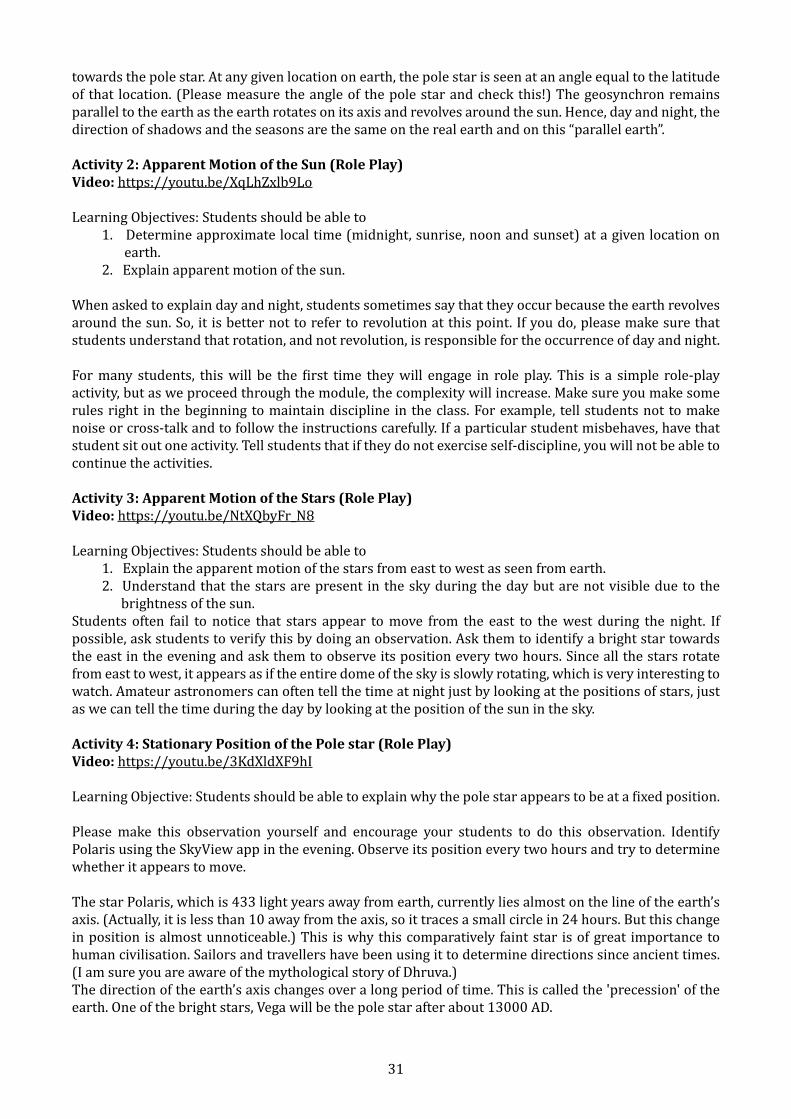
Activity 2: Apparent Motion of the Sun (Role Play)Video: https://youtu.be/XqLhZxlb9Lo
Learning Objectives: Students should be able to 1. Determine approximate local time (midnight, sunrise, noon and sunset) at a given location on earth.2. Explain apparent motion of the sun.
When asked to explain day and night, students sometimes say that they occur because the earth revolves around the sun. So, it is better not to refer to revolution at this point. If you do, please make sure that students understand that rotation, and not revolution, is responsible for the occurrence of day and night.
For many students, this will be the first time they will engage in role play. This is a simple role-play activity, but as we proceed through the module, the complexity will increase. Make sure you make some rules right in the beginning to maintain discipline in the class. For example, tell students not to make noise or cross-talk and to follow the instructions carefully. If a particular student misbehaves, have that student sit out one activity. Tell students that if they do not exercise self-discipline, you will not be able to continue the activities.
Activity 3: Apparent Motion of the Stars (Role Play)Video: https://youtu.be/NtXQbyFr_N8
Learning Objectives: Students should be able to 1. Explain the apparent motion of the stars from east to west as seen from earth.2. Understand that the stars are present in the sky during the day but are not visible due to the brightness of the sun.
Students often fail to notice that stars appear to move from the east to the west during the night. If possible, ask students to verify this by doing an observation. Ask them to identify a bright star towards the east in the evening and ask them to observe its position every two hours. Since all the stars rotate from east to west, it appears as if the entire dome of the sky is slowly rotating, which is very interesting to watch. Amateur astronomers can often tell the time at night just by looking at the positions of stars, just as we can tell the time during the day by looking at the position of the sun in the sky.
Activity 4: Stationary Position of the Pole star (Role Play)Video: https://youtu.be/3KdXldXF9hI
Learning Objective: Students should be able to explain why the pole star appears to be at a fixed position.
Please make this observation yourself and encourage your students to do this observation. Identify Polaris using the SkyView app in the evening. Observe its position every two hours and try to determine whether it appears to move.
The star Polaris, which is 433 light years away from earth, currently lies almost on the line of the earth’s axis. (Actually, it is less than 10 away from the axis, so it traces a small circle in 24 hours. But this change in position is almost unnoticeable.) This is why this comparatively faint star is of great importance to human civilisation. Sailors and travellers have been using it to determine directions since ancient times. (I am sure you are aware of the mythological story of Dhruva.)The direction of the earth’s axis changes over a long period of time. This is called the 'precession' of the earth. One of the bright stars, Vega will be the pole star after about 13000 AD.
32
3.3 Lesson 3: Digital Activity 1
Animation: Rotation of EarthLearning Objectives: Students should be able to
1. Construct a three-dimensional model of the rotating earth.2. Identify the direction of rotation of the earth.
This lesson contains four animations. The first animation shows the rotating earth from different angles. This will help reinforce the students’ mental model of rotation of the three-dimensional earth. It indicates that when seen from above the north pole, the direction of earth’s rotation is anticlockwise but if seen from above the south pole, the direction of rotation is clockwise. The other three animations show the same animation from three different perspectives (from above the north pole, south pole and equator). In these animations, the realistic earth morphs into a simple diagram often seen in textbooks. When students next see that diagram, they would remember the animation and treat the earth as a three-dimensional, dynamic object.
Activity: AstRoamer: What's the Time? Learning Objectives: Students should be able to
1. Explain why the time at different locations on the earth is different.2. Predict the time at a given location on the earth when the direction of sunrays is known.
The clues in this game are the location (name of a country) of a certain element and the time (noon, midnight, sunrise or sunset) when it will be found at that location. The elements included in the game are actually found in those countries. The earth can be rotated by hovering the mouse cursor over an arrow near the pole. If students can rotate the earth so as to position the country at the prescribed time, they get the element. There are two chances for each clue. The game is to be played in pairs (one player in the northern hemisphere and the other in the southern hemisphere).
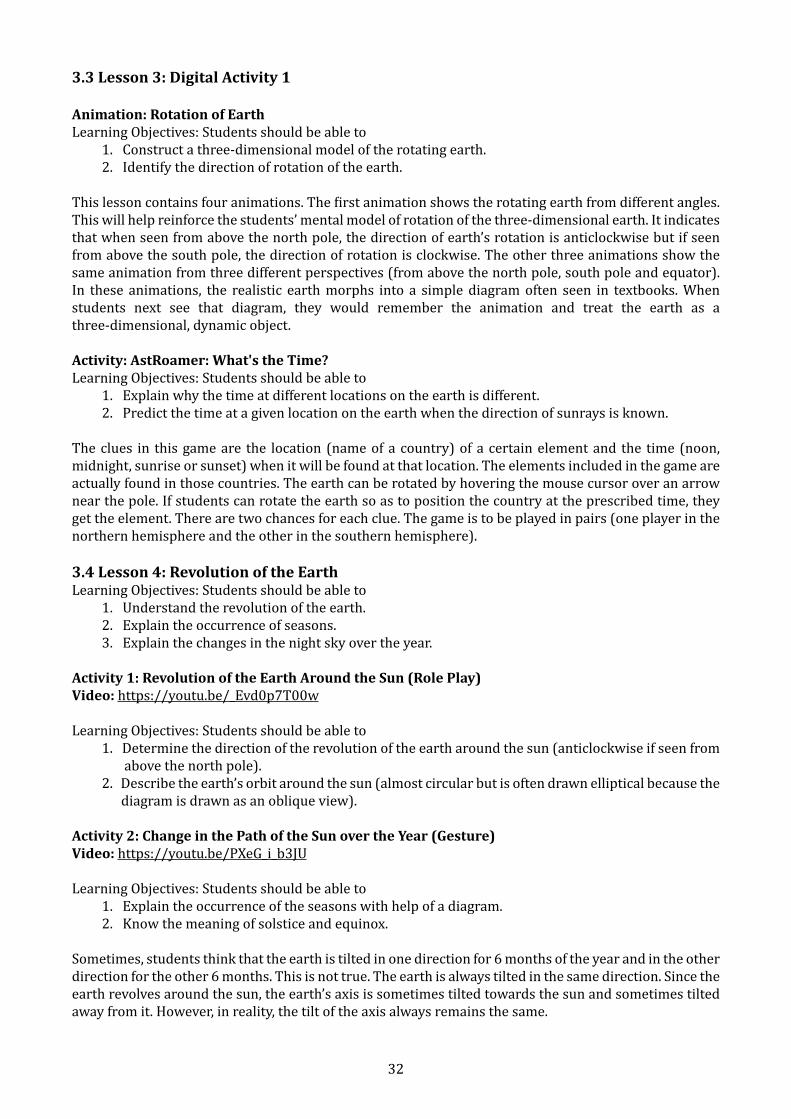
3.4 Lesson 4: Revolution of the EarthLearning Objectives: Students should be able to
1. Understand the revolution of the earth.2. Explain the occurrence of seasons.3. Explain the changes in the night sky over the year.
Activity 1: Revolution of the Earth Around the Sun (Role Play)Video: https://youtu.be/_Evd0p7T00w
Learning Objectives: Students should be able to1. Determine the direction of the revolution of the earth around the sun (anticlockwise if seen from above the north pole).2. Describe the earth’s orbit around the sun (almost circular but is often drawn elliptical because the diagram is drawn as an oblique view).
Activity 2: Change in the Path of the Sun over the Year (Gesture)Video: https://youtu.be/PXeG_i_b3JU
Learning Objectives: Students should be able to1. Explain the occurrence of the seasons with help of a diagram.2. Know the meaning of solstice and equinox.
Sometimes, students think that the earth is tilted in one direction for 6 months of the year and in the other direction for the other 6 months. This is not true. The earth is always tilted in the same direction. Since the earth revolves around the sun, the earth’s axis is sometimes tilted towards the sun and sometimes tilted away from it. However, in reality, the tilt of the axis always remains the same.
33
Another common alternative conception is that the earth experiences seasons because of its elliptical orbit. That is, when the earth is closer to the sun, we experience summer and when it is further away from the sun, we experience winter. Students must learn that this is not true. Remind them that when it is summer in the northern hemisphere, it is winter in the southern hemisphere and vice versa. We have seen that the earth’s orbit is almost circular and not elliptical. Thus, an elliptical orbit is not the reason for experiencing seasons on earth.
Activity 3: Changes in the night sky over the year (Role Play)Video: https://youtu.be/fKoerxDH-vs
Learning Objective: Students should be able to explain why we see different parts of the sky at different time of the year.
It was mentioned that most students fail to notice that stars appear to move from the east to the west every night. It is even harder to notice that their positions at a certain time change slightly from day to day. If possible, plan night sky observations spread over the year (every 3 to 4 months) so that your students notice that different stars are visible at the same time of the night after a few months. Otherwise, you can show this using computer software like Stellarium. The lesson explains the reason in detail.

34
Section 4: Notes for Implementing Student Module Unit 2 - The Moon
In Unit 2, the moon is introduced into the earth-sun system. We begin with a description of the motion of the moon due to the earth’s influence (Lesson 1). Next, we explain in detail various phenomena like the phases of the moon and eclipses (Lesson 2). The digital activity on Lesson 3 is based on motion of the moon and how it results in phases of the moon. Finally, in Lesson 4 we look at how the position of the moon in the night sky changes over a period of time and its scientific and cultural consequences.
4.1 Lesson 1: Motion of the MoonLearning Objectives: Students should be able to
1. Know basic information about the moon.2. Understand the motion of the moon.
Introduction: Characteristics of the MoonLearning Objective: To recall some basic facts about the moon.
The introduction helps students to recall most of the facts about the moon they learned in earlier grades. It also addresses some common misconceptions about the moon such as surface of the moon would be white or lighter than the earth. Take some time and help students imagine how it would feel on the moon. This will ignite their interest.
Activity 1: Motion of the Moon Around the Earth (Role Play)Video: https://youtu.be/OzvYA6lJvGY
Learning Objective: Students should be able to mimic the motion of the moon around the stationary earth.
The motion of the moon is one of the simplest yet most confusing motions to understand. If students know that we see only one face of the moon, they often take it to mean that the moon only revolves around the earth and does not rotate around its axis. Role play should help in understanding the correct motion.
(Advance knowledge for teachers: The moon and earth orbit around a common centre of mass. But the mass of the earth is much larger so the centre of the mass of the earth-moon system is very near to the centre of the earth, making it appear as if the moon’s orbit is centred on the earth.)
Activity 2: The Sun-Earth-Moon System (Role Play)Video: https://youtu.be/7urhrHT16us
Learning Objective: Students should be able to construct a dynamic model of the sun-earth-moon system.
This complex motion can be understood using role play. The corresponding animation is given in Unit 2, Lesson 3, Activity 3.1 (Title: Motions of the Moon and the Earth). Encourage students to draw the diagram for this system before they see an animation.)
4.2 Lesson 2: Phases of the Moon and EclipsesLearning Objectives: Students should be able to
1. Explain the phases of the moon.2. Explain solar and lunar eclipses.3. Connect cultural or indigenous knowledge to observational astronomy.
IntroductionLearning ObjectiveStudents should be able to review the phases of the moon students observed.
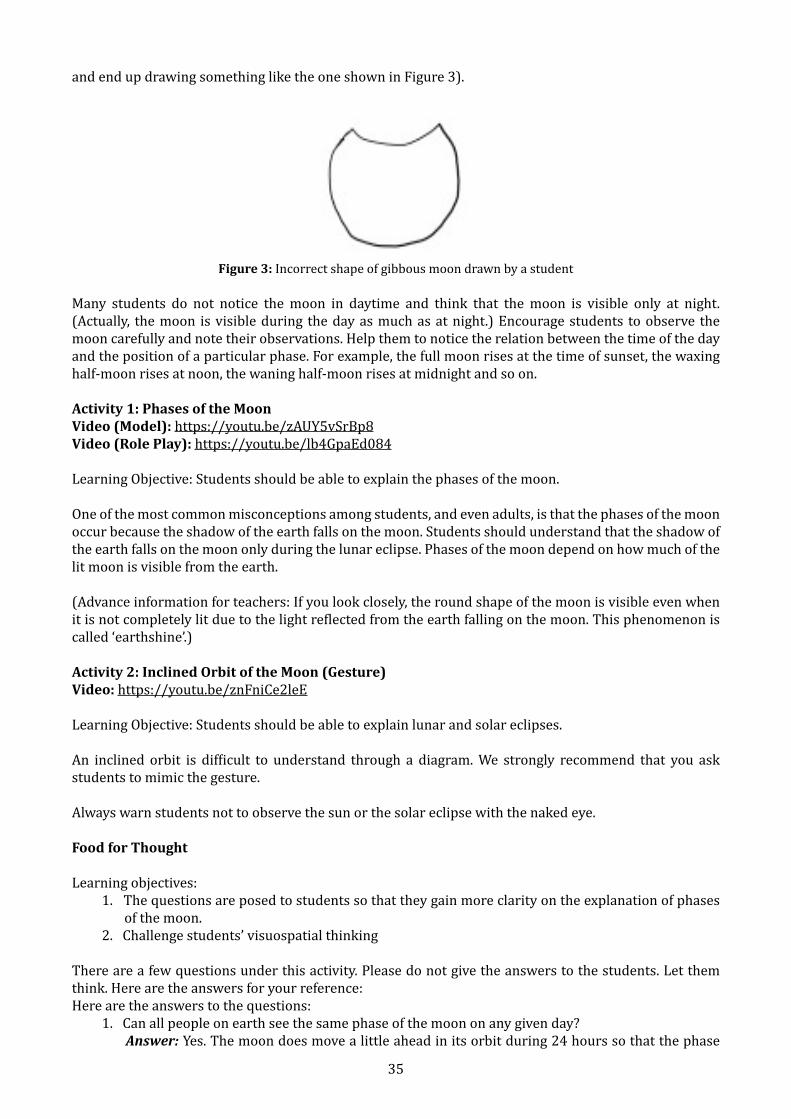
The phases of the moon is one of the most commonly observed astronomical phenomenon; however, students often cannot draw the exact shapes of all the phases. (They often cannot draw the gibbous shape
35
and end up drawing something like the one shown in Figure 3).
Figure 3: Incorrect shape of gibbous moon drawn by a student
Many students do not notice the moon in daytime and think that the moon is visible only at night. (Actually, the moon is visible during the day as much as at night.) Encourage students to observe the moon carefully and note their observations. Help them to notice the relation between the time of the day and the position of a particular phase. For example, the full moon rises at the time of sunset, the waxing half-moon rises at noon, the waning half-moon rises at midnight and so on.
Activity 1: Phases of the MoonVideo (Model): https://youtu.be/zAUY5vSrBp8Video (Role Play): https://youtu.be/lb4GpaEd084
Learning Objective: Students should be able to explain the phases of the moon.
One of the most common misconceptions among students, and even adults, is that the phases of the moon occur because the shadow of the earth falls on the moon. Students should understand that the shadow of the earth falls on the moon only during the lunar eclipse. Phases of the moon depend on how much of the lit moon is visible from the earth.
(Advance information for teachers: If you look closely, the round shape of the moon is visible even when it is not completely lit due to the light reflected from the earth falling on the moon. This phenomenon is called ‘earthshine’.)
Activity 2: Inclined Orbit of the Moon (Gesture)Video: https://youtu.be/znFniCe2leE
Learning Objective: Students should be able to explain lunar and solar eclipses.
An inclined orbit is difficult to understand through a diagram. We strongly recommend that you ask students to mimic the gesture.
Always warn students not to observe the sun or the solar eclipse with the naked eye.
Food for Thought
Learning objectives:1. The questions are posed to students so that they gain more clarity on the explanation of phases of the moon.2. Challenge students’ visuospatial thinking
There are a few questions under this activity. Please do not give the answers to the students. Let them think. Here are the answers for your reference:Here are the answers to the questions:
1. Can all people on earth see the same phase of the moon on any given day?Answer: Yes. The moon does move a little ahead in its orbit during 24 hours so that the phase
36
changes slightly during one day, but this change is very small.
2. Do people in the southern hemisphere see the same phase of the moon as those in the northern hemisphere?
Answer: Yes.
3. Imagine that you are on the moon. How would the earth appear from the moon? As we know, the apparent size of the sun and the moon is almost the same when viewed from the earth. Would the size of the sun and the earth appear the same from the moon? If not, would the earth appear smaller or bigger than the sun? Would you be able to see the phases of the earth?
Answer: The radius of the earth is almost four times bigger than that of the moon. So, the size of the earth seen from the moon is four times bigger than that of the moon as seen from the earth. The distance between the sun and the earth is almost same as that between the sun and the moon. So, the apparent size of the sun would be same from the earth and the moon. Thus, in the moon’s sky, the earth will appear four times bigger than the sun.The earth will not be visible from half of the surface of the moon (the part which is not visible from the earth). The position of the earth would remain same from any particular location of the moon from which the earth is visible. The earth will not appear to be moving.The sun will appear to move slowly and complete one revolution around the moon once a month. Thus, one day on the moon is equivalent to about 29 days on earth.
a. How would the earth appear from the moon when we see the full moon from the earth?Answer: The dark part of the earth would be visible, so it will be new earth from the moon.
b. How would the earth appear from the moon when we see the new moon from the earth?Answer: The lit part of the earth would be visible, so it will be full earth from the moon.
c. How would the earth appear from the moon when we see the half-moon from the earth?Answer: Half-earth will be visible from the moon when we see half-moon from the earth.
d. When we see a lunar eclipse from the earth, what would you see from the moon?Answer: If seen from the moon during a lunar eclipse, the earth will block the sun. So, a solar eclipse will visible from the moon.
4.3 Lesson 3: Digital Activity 2Activity 1: Animation: Motions of the Moon and the EarthLearning Objectives: Students should be able to
1. Construct a dynamic model of the sun-earth-moon system.2. Recognise that the orbits of the earth and the moon are not exactly circular.3. Estimate how the orbit of the moon will look when the motion of the earth is taken into account.4. Develop an understanding of the durations of revolutions of the moon and the earth.
There are three sets (sun-earth, earth-moon and sun-earth-moon system) of animations in this activity. Each set contains three animations. The first shows only the motion of the celestial body (most realistic). In the second animation, the moving body traces its orbit (an abstraction that is present in diagrams is added to the first animation). In the last animation, the orbit is traced against a grid to show the slight ellipticity present in the orbits. All animations include a day counter in a corner of the screen.
Activity 2: AstRoamer: Moon TrackLearning Objectives: Students should be able to
1. Identify the position of the moon in its orbit for a given phase.2. Connect cultural experiences (festivals) with observational astronomy (phases of the moon).
The clue in the game is information of the phase of the moon (the festival celebrated in that phase or its position at a certain time). Students are asked to identify the position of the moon in its orbit. If they identify the correct position, they get two points, and a picture of the moon as seen from the earth as feedback. If their answer is incorrect, they get the feedback about how the moon will look from the
37
position they have chosen and another chance to answer. If they give the correct answer on the second attempt, they get one point.
You might notice that the surface of the moon in this activity does not look like the familiar one. Here is the reason: The diagram shows the earth-moon system from above the north pole, which is why the orbit of the moon is circular instead of elliptical. To keep the view consistent, we have used the photograph of the moon from above its north pole.
Activity 3: Phases of the EarthLearning Objective: Exposing students to views from different perspectives in space and challenge their spatial cognition.
Just as the phases of the moon are seen from the earth, phases of the earth can be seen from the moon. Two photographs (one of the full earth and another of the gibbous earth) are given in this activity.
4.4 Lesson 4: Moonrise and MonthThe content in this lesson is not included in most Indian textbooks. However, we have included it here because the phenomena explained in this lesson are commonly observed, are referred commonly in our sociocultural life (e.g. starting of a nakshatra, the time of moonrise) and are fairly easy to explain. They are also great exercises to sharpen visuospatial thinking. If you are short of time, you can skip this lesson, but we encourage you to incorporate it if possible.
IntroductionLearning Objective: To remind students that moonrise and moonset time changes over the year.
Students often notice the moon at different positions at different times. For example, they might notice a half-moon right at the zenith around sunset. However, because they do not keep systematic notes, they often fail to realise that the moon rises a little late (about 50 minutes) every day than the previous day. Encourage students to find the pattern in the rising and setting time of the moon. You can use a calendar or a local newspaper to find out the time for moonrise for the entire month and help students to see the pattern.
Activity 1: Changes in the Time of Moonrise (Role Play)Video: https://youtu.be/D51_8jG0uus
Learning Objective: Students should be able to explain changes in the time of moonrise and moonset in over a month.
Here, one has to consider two simultaneous motions: rotation of the earth and revolution of the moon around the earth. These motions might be difficult to express in a diagram, so we strongly encourage you to engage your students in role play.
Activity 2: Motion of the Moon with Respect to the Stars (Role Play)Learning Objective: Students should be able to explain the motion of the moon with respect to background stars.
Here again, one has to consider two simultaneous motions: revolution of the earth around the sun and revolution of the moon around the earth. These motions might be difficult to express in a diagram, so we strongly encourage you to engage your students in role play.

38
Section 5: Notes for Implementing Student Module Unit 3 - The Solar System and Beyond
In this unit we will study the Solar system (Lessons 1 & 2). Lesson 3 is a digital lesson on solar system. In Lesson 4 we will briefly introduce the stars and the galaxies.
5.1 Lesson 1: The Solar SystemLearning Objective: Students should be able to appreciate the sun (and the planets) as objects of scientific study.
The SunLearning Objective: Students should be able to recall basic facts about the sun.
Advance information for teachers: The sun emits electromagnetic waves of different wavelengths. Visible light is only one of them. Electromagnetic radiations are given different names such as:
1. Radio waves (wavelength: 1 mm to 105 km, corresponding frequency: 300 GHz2 to 20 KHz)2. Microwaves (wavelength: 1 mm to 100 cm, corresponding frequency: 300 GHz to 300 MHz)3. Infrared (wavelength: 700 nanometres to 1 mm, corresponding frequency: 430 THz3 to 300 GHz)4. Visible light (wavelength: 400 to 700 nanometres, frequency: 430–750 THz)5. Ultraviolet (wavelength: 10 to 400 nanometres, corresponding frequency: 750 THz to 3×10¹⁶ Hz)6. X-rays (wavelength: 0.01 to 10 nanometres, corresponding frequency: 3×10¹⁶ Hz to 3×10¹⁹ Hz) and7. Gamma rays (wavelength: less than 10 picometers4, corresponding frequency: 1019 Hz).
The PlanetsLearning Objective: Students should know basic facts about the planets (biggest and smallest planet, planet closest to the sun and farthest away from the sun, the revolution time increases as the distance of a planet from the sun increases).
There are certain notations used in this lesson. Please explain them to your students. Such notations are commonly used at the advanced level of study. Prepare your students for that. But allow enough time for students to familiarise themselves with these notations.
Activity 1: The Revolution of Planets (Role Play)Video: https://youtu.be/1cjdKeMdXIE
Learning Objectives: Students should be able to1. Mimic the orbital motion of planets around the sun2. Know the meaning of the terms inner planets, outer planets and transit.
5.2 Lesson 2: Scaling the Solar SystemLearning Objective: Students should know about the major components of the solar system.
Activity 1: Relative Sizes of Planets and Distances in Solar System (Model)Learning Objective: Students should be able to develop a rough idea of the sizes and distances of planets in the solar system.
In this lesson, we give a table of smaller objects which maintain the same ratio as the planets. Please encourage your students to calculate some ratios themselves (e.g. ratio of radii of the earth and Jupiter). They will remember them much better!
2 1GHz = 109 Hz; Giga means 109
3 1THz = 1012 Hz; Tera means 1012
4 1 picometer = 10−11 m

39
Figure 4: Scaled down solar system
40
Satellites, Minor Planets, Asteroids, CometsLearning Objectives: Exposing students to interesting information about the solar system.
These four sections give some detailed information about smaller objects in the solar system. Please do not expect students to memorise this information. It is given because students often find these details interesting and they develop an implicit understanding of science and astronomy from such details. For example, they notice that our country has a thriving space programme and astronomy research and they can take it up as a career. They might also infer that comets are just rocks and there cannot be any harm in watching them.
5.3 Lesson 3: Digital Activity 3Activity 1: Animation: Solar SystemLearning Objectives: Students should be able to
1. Construct a three- dimensional, dynamic model of the solar system2. Develop a rough idea about the relative orbital speeds of planets.3. Develop a rough idea about the relative sizes of planets.4. Develop a rough idea about the relative distances between the planets and the sun.
Description: This interactive animation contains the following options:1. Choice of views (top and oblique)2. Choice of frame (sun at the centre or at one side)3. Speed (true to relative speeds of the planets)4. Size (true to relative sizes of the planets)5. Distance (true to relative distances of the planets from the sun)
You can click on the name of the planet from the list at the bottom and its details will appear near the planet.
Activity 2: AstRoamer: Planet trekLearning Objective: Students should be able to identify a planet by its physical properties and chemical composition.
In this game, students need to collect certain chemical compounds (or elements) by going to the planet where they are found. The clue includes the compound to be found and information about the planet. If students click on the correct planet, they get the compound. If not, they get another chance, with some additional information about the planet.
The interactive game includes instructions and the first two levels of the game also include a demo.To increase the difficulty level of the game, we have included two clues for planet Venus. Also, we have included a clue for Pluto even though it is a minor planet. Thus, there are total 10 clues.
5.4 Lesson 4: Introduction to the UniverseLearning objectives: Students should know that
1. Our solar system is situated in a galaxy.2. There are a large number of galaxies in the universe.
As noted earlier, please do not expect students to memorise the facts in this lesson. Expose them to the information and pose some questions for them to ponder.StarsLearning Objective Students should be able to develop an understanding of astronomical distances.
Activity 1: Parallax (Gesture)Video: https://youtu.be/uiRQ7HIUm54

41
People wonder how we know how big the sun is or how far it is. Astronomers use many clever methods to find out this and other such information. Parallax is one of them. Ask your students to estimate the distance, say, of the flagpole in the school ground from a certain place using parallax. Ask them about the different ways of estimating distances on earth, such as, using a tape, pacing, pedometer, odometer, SONAR, RADAR, and so on.
GalaxiesLearning Objectives: Students should be able to
1. Recall that galaxies are formed of a large number of stars.2. Recall that the sun is far from the centre of the Milky Way.
By learning about stars and galaxies, one feels a sense of awe about the universe. Let your students experience it! Let them know that there are many things we still don’t know. But there are many interesting things such as pulsars, blackholes, exoplanets, nebulae out there. Encourage them to read about these things. If you can excite them about astronomy (or science in general) your job is done! They will do the rest!

42
43
Ecosystem

44
45
A Note for Teachers
All societies in the world have designed pedagogical tools for ensuring the growth of their young members as socially empowered citizens who can make the world a better place. Although the process of learning starts from home, schools provide an exposure to various branches and dimensions of knowledge systems and handhold the student to scientifically analyze and understand various natural and social phenomena happening in their surroundings. Amongst various subjects taught in schools, science occupies an important position since the methodologies followed by this domain of knowledge, namely, observation, experimentation, inference taking etc., can contribute significantly to the development of critical and creative thinking as well as development of scientific temper amongst the students. Additionally, each science subject, like physics, chemistry, biology, mathematics etc., provides different kinds of intellectual challenge to students. For instance physics and chemistry provide the tools for validating the concepts learned by doing experiments.
Biology, the division of science which discloses the world of both microscopic and macroscopic forms of life, structure and function of the body of various organisms including human beings and diverse components of the environment and the relationship between them is very close to the human life. It deals with the topics that are directly linked to the day-to-day life of an individual, such as health, reproduction, environmental conservation, biodiversity, etc. However, learning biology requires convergence of information from other branches of science such as physics, chemistry, mathematics and even social science. Here, learning cannot be restricted to the classroom and Mother Nature is the biggest laboratory and classroom available for a student. Moreover, understanding the various concepts discussed in biology requires visualization and imagination. While going through biology lessons, students have to imagine many organisms, some of which are not visible to the naked eye or even through a microscope, (one of the “sophisticated tools” available in their classroom)’. Or the ones which they have never come across in their life (marine or forest dwelling organisms). Additionally, grasping topics such as biogeochemical cycle, evolution etc., and processes which take place in a time span of centuries to millions of years also requires active imagination and visualization.
Unfortunately, in most of the developing countries, including India, teaching aids available in biology classrooms are blackboards and charts which compel the students to learn this vital subject by rote as they fail to connect it with their day-to-day life. For example, while learning about locomotion in a microorganism Euglena, which uses flagella to move, for most of the students the only source of information about this organism is the figure given in their textbook. However, Information Communication Technology (ICT) tools help students to visualize concepts and help in reducing the intellectual load by making biology education fun. However, installing facilities such as computers and smart classrooms and making ICT materials available in vernacular languages to schools in rural India is not expected in the near future. If we want to elevate the quality of biology education and provide training to our students to level with the demands and challenges of the 21st century, we will have to restructure our science education, keeping biology as the central point.

46
47
Table of Contents
Ecosystem
Section 1: Basic Module Information 49Section 2: Pedagogic Approach 51Section 3: Notes for Implementing Student Module 52
Lesson 1: Exploration of an Ecosystem 52Lesson 2: Understanding an Ecosystem 52Lesson 3: Let’s make an ecosystem 53Lesson 4: Measuring an abiotic factor: Oxygen 53Lesson 5: From where organisms get energy and nutrients 53Lesson 6: Human and ecosystems 54Lesson 7: Agriculture and Ecosystems 54

48
49
The Ecosystem ModuleTeacher’s Handbook
Ecology – Where Various Subjects Converge
Ecology or environmental science constitutes one of the major limbs of biology. This subject introduces the vital message that humans are only one among the countless species inhabiting the planet earth and each of these organisms are constantly interacting with each other and depend directly or indirectly with the living and non-living things present in their surroundings for their survival. Additionally, learning ecology is expected to expose students to the fact that our survival, health and wealth are dependent on various abiotic and biotic components present in the environment. This subject would also sensitize them to judiciously use natural resources, avoid pollution and protect the environment. Unfortunately, in India, ecology is not given much emphasis in the schools and the important concept of ‘interconnectedness and interdependence’ is seldom discussed in the classroom. However, in the current scenario of natural resource depletion, global warming, increased pollution and war for natural resources happening all over the world, imparting the essence of ecology to the student is the need of the hour.
Section 1: Basic Module Information
Prior Knowledge
Students should be familiar with the Invitation to CLIx module. They should be acquainted with typing tools and the spreadsheet.
Structure of the Module
The Ecosystem module has one unit and seven lessons. Seven lessons are organized as shown below:
Unit: Ecosystem Pre-assessment Lesson 1: Exploration of an Ecosystem 1.1 Exploration of an Ecosystem 1.2 Activity 1: Let’s explore the surroundings
Lesson 2: Understanding an Ecosystem 2.1 Understanding an Ecosystem 2.2 Aquatic Ecosystems 2.3 Terrestrial Ecosystems 2.4 Man-made Ecosystems 2.5 Activity 1: Let’s make a list of ecosystems
Lesson 3: Let’s Make an Ecosystem3.1 Let’s Make an Ecosystem3.2 Activity 1: Let’s record the observations about the ecosystem we made
Lesson 4: Measuring an Abiotic Factor: Oxygen 4.1 Measuring an Abiotic Factor: Oxygen 4.2 Can Oxygen Dissolve in Water?
Lesson 5: From Where Do Organisms Get Energy and Nutrients? 5.1 From Where Do Organisms Get Energy and Nutrients: Producers 5.2 From Where Do Organisms Get Energy and Nutrients: Consumers 5.3 From Where Do Organisms Get Energy and Nutrients: Decomposers 5.4 Activity 1: Let’s study the biotic components in our surroundings
Lesson 6: Human and Ecosystems
50
6.1 Human and Ecosystems6.2 Activity 1: Let us check how many types of biotic and abiotic resources we need to prepare our meals
6.3 Activity 2: Ecosystem Services
Lesson 7: Agriculture and Ecosystems 7.1 Agriculture and Ecosystems 7.2 Activity 1: The Fish farm 7.3 Activity 2: Earthworms and Agricultural Ecosystems
Post-assessmentStudent Feedback SurveyCredits and Citations
Expected Timeline:
Preparation time: 2 Weeks (8-10 hours)
Implementation of the Module: 3 Weeks (10 hours)Field Study: 1 hourDigital learning and discussion: 5 hourExperiments: 2 hourActivity-based learning in the classroom: 2 hour
Assignments: 1 Week
Requirements
Please make sure of the following:1. You should have access to a computer that has USB port, audio and video player and an internet
connection.2. You should have a smartphone to receive the Telegram message you will get every day.3. Assign a notebook (which we will call a journal) for this module. Assign one page to make notes
for every day.4. You will need the following material for making an ecosystem:
a. Transparent plastic bottle (empty water or cold drink bottles can be used for this purpose, it important that all bottles should be of same volume)
b. Scissors or a thick cutter (to cut the plastic bottle)c. Measuring cups: you can collect small measuring cups that come with children’s medicine
and syrup.d. Artificial Manure: solutions will be provided to your school.
5. You will need the following material for BOD experiment:a. BOD bottleb. Syringe ( of 1 ml and 5 ml)c. Test tube d. Paper cupe. Solutions of the following chemicals:
i. Manganese sulphateii. Alkaline potassium iodide
iii. Phosphoric acid iv. Starchv. Sodium thiosulphate
51
Section 2: Pedagogic Approach
The ecosystem module is developed considering the concerns and constraints faced by both students and teachers in the high school biology classrooms. The module presents basic concepts in ecology, tightly bridging it with the concepts discussed in various 9th standard biology lessons and real-life situations experienced by the students. The module begins with an exploration of the surrounding and understanding the biotic and abiotic factors present in the immediate surroundings of the students, and helps them to understand the basic structure of an ecosystem as well to ‘think globally by acting locally’. The module is built considering three major pillars of pedagogy - collaborative learning, learning from mistakes and relevance. Activities in the module are to be performed in collaboration with other students.
The CLIx platform creates a space where students can write comments, ask and discuss various topics. The field study, experiment to measure oxygen dissolved in the water and construction of the ecosystem in the classroom has to be done in groups and the collaboration between the members is the key to successful completion of these segments of the module. It is a well-known fact that mistakes made in the classroom could act as the catalyst for learning. The measurement of dissolved oxygen, and the simulations on the fish farm help the students to make a hypothesis and test it by conducting the experiment in the laboratory or virtual world. The DO experiment is designed in such a way that different groups in the class get significantly different values when they complete the experiment. This situation raises questions amongst the students about why their team did not get a value similar to the other teams. Teachers could use this opportunity for discussion and introduce the concept of variation in the oxygen content of stagnant and flowing waters and what happens to the oxygen when we boil the water in our kitchen. The third pillar – relevance - has been given a lot of emphasis while designing the ecosystem module. Most of the activities, whether it is classification of ecosystems or understanding how our food security is linked with the biodiversity, are chosen in such a way that they have a direct connection with the life of the students coming from diverse backgrounds. .
The Ecosystem module also introduces important learning tools, observation, categorization, experimentation as well as the constructionism through various activities and helps students to think holistically and develop scientific temper and environmental awareness. The tools of ICT such as videos, simulations etc., have been widely used to help students in visualizing many concepts in ecology. Care was given to connect each lesson with the day-to-day life of the student so they could understand the importance of the subject ecology and make the information gained an integral part of their life.
The Ecosystem module is designed and developed considering various chapters given in the 9th standard biology textbook of NCERT and the CLIx states, Chhattisgarh Telangana, Mizoram and Rajasthan. The module has been divided into seven lessons covering different topics on the ecosystem. The details of each lesson and its connection with the different sections of the textbook are given below. Please refer to the section ‘for teachers’ given in the online version of the module for further details.
52
Section 3: Notes for Implementing Student Module
Lesson 1: Exploration of an Ecosystem Learning objectives: Students will be able to
1. Do a detailed observation and report it.2. Categorise things into biotic and abiotic components.
This lesson introduces the basic building blocks of an ecosystem, biotic and abiotic factors to the students. Students get the chance to observe and collect data under the guidance of the teacher while conducting the field study. Teachers are requested to show students various types of plants, animals and lifeless factors such as plastic, glass, different types of rocks etc. during the exploration of the surroundings. It is also advised to collect the vernacular names of plants and animals living in the local area and gather local knowledge available with students about these organisms. Furthermore, the pollutants such as biodegradable or degradable wastes present in the field should be used for initiating discussion on pollution.
Video in lesson 1: shows different types of bacteria. By watching this video students get the chance to see the disease-causing bacteria such as Salmonella typhi (causing typhoid) or Vibrio cholera (cholera). Teacher can use this video to introduce the kingdom Monera to the students.
Lesson 1 - Activity 1: Teachers should direct the students to make a table given in the activity 1, before going to the field for observation. Students have to be guided to categorize the data collected by them into abiotic and biotic factors and a discussion should be conducted to make the relationship between them clear to the students. Through this activity students will learn how observations are made and the role it plays in a scientific investigation.
Lesson 2: Understanding an EcosystemLearning objectives: Students will be able to
1. Differentiate between natural and man human-made ecosystem.2. Understand the dynamic relationship between biotic and abiotic components of the ecosystem.3. Differentiate between aquatic and terrestrial ecosystems.
This lesson opens the world of diversity of ecosystems, both natural and man-made to the students. This lesson is the continuation of lesson 1 and teachers are required to discuss the biotic and abiotic components present in each ecosystem and the relationship between them. The aim of this lesson is to empower students to extend the basic concept of ecosystem which they have learned in lesson 1 to other ecosystems as well and to provide a chance to understand the nature of various ecosystems described in their textbook. This lesson could be used for enhancing the quality of teaching of the topics such as habitat, adaptation and biodiversity.
Videos in lesson 2.1: illustrates the concept of aquatic ecosystem i.e., freshwater and marine ecosystem. Please request students to note the characteristics of underwater habitats in fresh and marine ecosystems.
Videos in lesson 2.2: demonstrates the terrestrial ecosystem i.e., forest, grassland and desert. Highlight adaptations acquired by different organisms to face the demand of various kinds of terrestrial ecosystems to the students and discuss its importance for survival in that ecosystem. E.g. How spots present on the body of cheetah helps to camouflage in the grassland ecosystem, how camel is adapted to the desert (like camel has long eyelashes, it has nostrils that can open and close) etc.
Videos in lesson 2.3: exemplify man-made ecosystems, i.e., aquatic and urban ecosystems. Familiarizing students with the concept that human beings also create ecosystems to satisfy their needs, and that such systems also follow the basic rules of ecology, is essential for developing a holistic approach to the learning of any complex system including ecosystems, at a very young age itself. Discuss how biotic and abiotic factors are added while making an aquarium and how the relationships between them are maintained, how a city works as an ecosystem and the role of human beings in maintaining the
53
relationship between abiotic and biotic factors in a man-made ecosystem. .
Lesson 2 - Activity 1: This activity also teaches students the importance of using the tool ‘categorization’ to understand and get control over a large amount of data - the hallmark of any biological analysis.
Lesson 3: Let’s make an ecosystem Learning objectives: Students will be able to
1. Make an ecosystem and observe it over a long period of time. They will also will be able to report the observations.
2. Understand how presence of different abiotic components determines the appearance of various biotic components.
Students use plastic bottles to create an ecosystem. Different groups add different components to their ecosystem and measure the abiotic component (oxygen) in their system. Constructing something is considered to be one of the best strategies to gather knowledge about it, especially if it is a complex system like ecosystem. While making an ecosystem students get exposure to various elements constituting it and the connection and interaction between each of them. In this activity-based lesson, students construct a man-made ecosystem, i.e., artificial aquatic ecosystem, maintain it and observe the changes happening in it in due course of time under the guidance of the teacher. This activity is expected to inculcate the habit of observation and continuous data collection for many days in students, a necessary skill required for studying any biological process.
Lesson 4: Measuring an abiotic factor: Oxygen Learning objectives: Students will be able to
1. Perform the experiment to measure the dissolved oxygen in the given water sample.2. Understand the role of experiments in science.
This lesson introduces one of the most important tools of science and its pedagogy: experimentation. The aim of this lesson is to bring in the culture of doing experiments into the classroom and empower students to ask the fundamental question of science, “prove it”. The experiment is designed in such a way that students should do the activity in groups, promoting the collective and collaborative learning. In addition to giving the experience with formulation of hypothesis and testing it empirically, this lesson reminds teachers that many experiments could be done in the classroom using low-cost materials that could be purchased from the local market. Along with studying the protocol to test a hypothesis, oxygen is dissolved in the water, students get exposure to the basic concept of ‘volume’ and measurement of liquid, as well as an inexpensive, accurate and easily available tool for measuring volume, viz., the syringe.
Video in lesson 4: is a tutorial to perform dissolved oxygen test.
Lesson 5: From where organisms get energy and nutrients Learning objectives: Students will be able to
1. Categorise the biotic factors into producers, consumers and decomposers based on their roles.2. Understand how abiotic factors get converted into various components by producers, consumers
and decomposers.While lesson 4 introduced the concept of abiotic factors and its measurement, the current lesson introduces the categorization of the biotic factors present in an ecosystem based on their role; some of them convert abiotic factors into biotic factors (producer), others consume the biotic materials produced by the producers (consumers) and third group converts the biotic factors into abiotic factors (decomposers), completing the cycle. Teachers are requested to introduce this linkage between various forms of life present in different ecosystem while introducing this lesson to the students.
Videos in lesson 5.1: There are three videos in lesson 5; the first one titled ‘algae’ shows various filamentous and single cellular forms of algae, which are the producers of aquatic ecosystem. Along with introducing the role of this microorganism in maintaining the oxygen level and food availability in the aquatic habitats, the same video can be used while teaching the kingdom Protista. The second video on Euglena could be exhibited while discussing the portion on this organism given in the textbook. Video 3

54
(Plants) is connected with the lesson on biodiversity; students could see various kinds of thallophytes, gymnosperms and angiosperms. Additionally, a segment of video 3 is dedicated to describing adaptations shown by various plants which could be used to communicate the topic adaptation more effectively.
Videos in lesson 5.2: show different types of microscopic and macroscopic animals (consumers) living in aquatic habitats. These videos could be used also for providing an introduction to the animals belonging to various ‘groups of taxonomy (classification)’ described in the chapter on biodiversity and classification in the textbook.
Video in lesson 5.3: shows various types of fungi which plays the role of decomposers in ecosystems. Please show this video while teaching the Kingdom Fungi.
Lesson 5 - Activity 1: Functions as a platform for the students to learn the categorization of living things present in their surroundings into producers, consumers and decomposers and to know how they are connected and dependent on each other. Teachers are requested to guide students to extend this activity to different kinds of ecosystems they know as well as to the ecosystem they have constructed in the classroom.
Lesson 6: Human and ecosystems Learning objectives: Students will be able to
1. Understand the biodiversity and its role in human survival.2. Learn the role of various biotic and abiotic factors producing human food.
Like any other organism, humans are also dependent on the environment for the fulfilment of various needs. Meanwhile such activities can impact various biotic and abiotic components present in our environment as well as the relationship between them. However, though students gather theoretical knowledge of ecology, they rarely get the chance to reflect how their day- to-day life is connected with various biotic and abiotic components present in the environment. The present lesson aims to make students aware of our dependency on the environment and the need for conserving natural resources and avoiding pollution.
Lesson 6 - Activity 1: Although the topic biodiversity is taught in detail in India classrooms, students often fail to appreciate the value of diverse kinds of organisms living in their surroundings. In this context, the present activity aims to make students aware of our dependency on diverse kinds of plants and animals to fulfil one of our primary needs - food. Teachers are requested to select different kinds of food items prepared locally and list the ingredients of each item by discussing with students. Additionally, the direction of the discussion could be extended to the cultivation of each ingredient and linking it with the lessons on agriculture. For instance, if mustard is added to a food item, teachers could ask students to collect information on which states it is cultivated in, what are the processes it goes through before it reaches your kitchen, etc. Additionally, making a list of the items students use from morning till they sleep (start from toothpaste and brush or neem twig, coffee/ tea……to the bed they sleep), the processes through which they are obtained (cultivated / process of preparation in the case of abiotic factors) could also be conducted to provide the broad picture of our dependency on the environment.
Lesson 6 - Activity 2: This activity is meant to show students the direct and indirect services provided by different ecosystems. Teachers are requested to use this activity while teaching habitat, natural resources, water, pollution etc. While making students familiar with the services we are getting from different ecosystems, the message of judicious use of natural resources, avoiding pollution and sustainable development should also be discussed. In the place of video of aquatic ecosystem given in the lesson, teachers are also encouraged to use local ecosystems known to the students for this activity.
Lesson 7: Agriculture and EcosystemsLearning objectives: Students will be able to
1. Understand how study of ecology helps human in growing their food.2. Visualize the dynamic ecological processes using ICT tool called StarLogo.3. Understand how vermicompost is made.

55
In many contexts students ask their teachers to tell them the fields where the knowledge of ecology is applied for the benefit of human beings. Agriculture is one of the best answer for this question. This lesson presents a detailed analysis of how basic knowledge of ecology, ‘biotic factors abiotic factors and the interaction between them’ is applied in agriculture. Teachers can link this lesson to concept of man-made habitats as well as lessons on agriculture given in the textbook.
Video1 in Lesson 7: demonstrates steps of developing a paddy field ecosystem. Using this video as a model, teachers could discuss the various steps involved in the cultivation of various crops and direct students to think how productivity from a crop field can be increased by applying the knowledge of ecology they have.
Lesson 7 - Activity 1: It is a well-known fact that many of the ecological process take long duration to complete and for many students, visualization of such processes is not an easy task. Hence many of them learn such topics by heart and hence cannot use the information for thinking. However, with help of an ICT tool called simulation, students can not only see the time consuming ecological processes happen-ing on their screen but also can test what happens to the ecosystem in focus if some of the factors are altered by human activity or through natural process. In this activity, an applied ecological situation is provided to the students, cultivating fish which eats only algae. Teachers should support students by helping them connect variation in the number of algae and concomitant change happening in the number of fishes while playing the simulation. This activity has another target; making students familiar with the use of graphs for visually representing complex phenomena that are difficult to describe using words. Hence teachers should encourage students to come up with ecological questions about fish pond and to test them using the simulation and understand them using the graphical representation generated by it. For instance, you could ask students what will happen if all the algae are removed from a pond (set number of algae at 0 and run the simulation) or if growth rate of algae is very high (which happens during eutrophication) etc., and discuss the ecological processes leading to the result obtained.
Lesson 7 - Activity 2: Introduces various steps involved in the preparation of vermicompost, a manure prepared by many farmers in India. Teachers are encouraged to make a setup in the school to maintain earthworms with the support of students. Food waste produced by students could be used for feeding earthworm and the students could use worm cast as manure for the plants in the school garden.

56
57
Health and Disease

58

59
A Note for Teachers
As teachers you are aware of the aspirations of the NCF 2005 document that students should not be restricted to limit themselves to the information given in their prescribed science textbooks. The same view has been expressed in the state curriculums too. The curriculum urges that science education should empower students to strengthen their skills of objective thinking, questioning, investigating, reasoning and sharing the evidences to prove a hypothesis with authentic evidence, and systematically arrive at conclusions. School curricula and textbooks need to be designed in a way to help students understand and experience the nature of science. This is one way to make a leap from a teacher-centric classroom that relies heavily on textbooks, to a more learner-centric classroom. An interactive student-centric classroom emphasises understanding of scientific concepts through the use of experiential learning. To make a class student-centric, teachers need to shift to being facilitators for which they need multiple ideas and strategies. Hence CLIx modules support you with the tools and techniques to teach science using novel strategies in addition to several other inputs you have received, including the use of technology.
The module ‘Health & Disease’ has a direct application and relevance in our daily lives. This module, comes under Biology and also has curricular connections with Chemistry and Physics. This module puts the topic of Health and Diseases under lens of scientific inquiry and aligns it with the concepts of nature of science. The module emphasizes that the concepts of human health, diseases, nutrition and diet need to be viewed with the same scientific lens as other science subjects. The issues of health should also be thought in the same scientific manner as one would think about other natural phenomena; that one should rely on scientific methods to arrive at conclusions regarding health and not believe in hearsay.
Since the concept of health and disease is introduced in all the states, lesson four in this topic, ‘What does data tell us’ is used as an exemplar to enable students to learn science using technology and the principles underlying the three pedagogic pillars. The main objective of this module is to enable stu-dents to experience and appreciate the nature of science through the topics of health and diseases. This module is a blend of digital and hands on activities to investigate. Wherever students need not use the computer, teachers are free to conduct the activity elsewhere other than in the computer lab.

60

61
Table of Contents
Health and Disease Section 1 : Basic Module Information 63Section 2: Pedagogic Approach 66Section 3: Notes for Implementing Student Module 68
Lesson 1: Concept of Health 68Lesson 2: The Story of Malaria 69Lesson 3: Let’s Investigate! 71Lesson 4: What Does Data Tell Us? 73

62
Special Thanks
Samir Dhurde, Sonal Thorve, Maharudra Mate, Ashok Rupner, Anish Mokashi, Glenda Stump, O. P. Sinha and studentsfrom Kendriya Vidyalaya, Southern Command, Pune.To the students and teachers of all the schools where we piloted our modules.To all the teachers, copyeditors and Rajasthan and Telangana team for their time and effort in the revalidation of content.
63
The Health and Disease Module
Section 1 : Basic Module Information
Prior Knowledge: Students are required to have a basic idea about• Types of diseases• An overview of the cardiovascular system in human body• Basics of scientific method
Students should have completed parts of CLIx i2c module.
Structure of the Module:This module has one unit, divided into four lessons.
Unit 1: Health and Disease Pre-assessment Lesson 1: Concept of Health 1.1 What is health? 1.2 Overlap of the three aspects of health 1.3 Overlap of the three aspects of health: stories of the people around us 1.4 From health to disease 1.5 How do diseases reach us? 1.6 Preventing ourselves from diseases
Lesson 2: The Story of Malaria 2.1 Malaria Discovery 2.2 Story of Malaria page 1 2.3 Story of Malaria page 2 2.4 Story of Malaria page 3 2.5 Story of Malaria: Activity 1: Mosquito Search 2.6 Story of Malaria: Activity 2: Where do larvae live? 2.7 Story of Malaria page 4 2.8 Story of Malaria page 5 2.9 Story of Malaria: Activity 3: Imagine you are a scientist 2.10 Story of Malaria page 6 2.11 Story of Malaria: Activity 4: Different types of mosquitoes 2.12 Story of Malaria page 7 2.13 Story of Malaria page 8
Lesson 3: Let’s Investigate! 3.0.0 Finding answers to some questions 3.1 High blood pressure 3.1.1 What causes high BP? 3.1.2 How is BP measured? 3.1.3 Smoking 3.2.1 Lungs of people who smoke 3.2.2 Lung capacity of smokers and non-smokers (part 1) 3.2.3 Lung capacity of smokers and non-smokers (part 2) 3.2.4 Your question, your investigation!- Smoking 3.3 Anemia 3.3.1 Iron-deficiency can cause Anemia 3.3.2 Food sources of iron (part 1) 3.3.3 Food sources of iron (part 2) 3.3.4 Your question, your investigation! - Anemia
64
Lesson 4: What Does Data Tell Us? 4.1 Finding patterns in data: simulation tutorial 4.2 Finding patterns in data
Post-assessment Student Feedback Survey Credits and Citations
Expected timeline:Preparation time for teacher: 1 Week (4 hours)Checking Lab readinessCollecting Materials for field studyPreparations for classroom teachingGrouping students and providing ground rules and instructions prior to each activity
Time for classroom implementation : 3 weeks (12 class periods)Field Study: two class periodsDigital learning and discussion: four class periodsExperiments: three class periodsActivity-based learning in the classroom: three class periods
Assignment : 1 Week
Total Time Required: 5 Weeks
Requirements:
General requirements:1. You should have access to a computer that has USB port, audio and video player and an Internet
connection.2. You should have a smartphone to receive the Telegram message you will get every day.3. Assign a notebook (which we will call a journal) for this module. Assign one page to make notes for
every day.4. All materials for hands-on-activities5. Familiarity with the local diseases, remedies, food habits etc. Also Teachers to be familiar with
• Content in the textbook• Content of the health and disease CLIx module • Familiarity with the vegetation, flora and fauna, common health issues, food habits, hygiene in
the area around school surroundings and the community in general.• Latest and current developments in epidemiology• Narrations of the past incidences of health scenario and how it has reached the present status:
beginning from local, state level, countrywide and worldwide scenario.
For lesson specific activities:6. For studying mosquito and their larvae:
a. Small cups (can use coconut shells, used water bottles etc) to collect the mosquito larvaeb. Piece of cloth or sieve to cover the cupc. Rubber bands/ thread to tie d. A hand lens if available. Else bubble lens, water lens etc can be used (ideas will be shared on
telegram from time to time)7. For ‘Blood Pressure’ experiment you will need:
a. Waterb. Two bucketsc. An old plastic bottle that can be easily pressedd. Two pipes about 2 meters with different diameters
65
8. For ‘Smoking’ experiment you will need:a. One large (5 liter) plastic bottle or container b. A bucket in which the plastic-bottle can comfortably fitc. Rubber or plastic pipe of about 2 meterd. A 250 ml cylinder or beaker (to measure)e. Small strips of paperf. Adhesive Tape
8. For “Anemia” – testing for iron experiment you will need:a. Tea leavesb. One liter water (distilled)c. About 10 grams of jaggeryd. Two large container to hold one liter water : one to boil water, another to collect tea decoctione. Strainerf. Whatmann filter paperg. Two Small beaker (25ml to 100ml) (alternately glass bottle may be used)h. Suitable glass or plastic funnel to fit into the beakeri. Stove or burners to boil water
10. Small cups to collect water from different sources to repeat the above experiment with different water samples.
11. For teaching the concept of sampling, population, trials : small blank paper chits or red and blue coloured buttons (double the number of participants)
66
Section 2: Pedagogic Approach
In an interactive, learner-centric classroom you need to play the role of a facilitator. This is essential for teaching science when the aim is not just the understanding of concepts but also to help students internalise the nature of science. Students’ current knowledge may not be adequate for them to understand the cause and effect of natural phenomenon around them. Hence, you need to ensure that your students learn scientific terms and symbols through which they can communicate their learning.
Students are likely to have their own beliefs about the natural phenomenon which may not be sufficient to generalise into principles. Next, some macroscopic or microscopic natural phenomena are beyond students’ direct perceptions. Third, explanations of some phenomena require the learners to be exposed to the use of tools from within the domain and also from other disciplines such as mathematics, physics, chemistry and social sciences. It is therefore desirable to help students to refine their ideas and beliefs. Encourage them to go beyond the information given in books. It is here that technology will help you to make best use of available time for an effective learning experience. Design activities to incorporates pedagogic pillars while using the authentic methodology of doing science.
CollaborationIn scientific endeavour, collaboration is uniquely important. Peer review and replication of studies are standard practices in scientific research. The scientific community is dependent on one another for generation of valid scientific knowledge. Hence, it is important to provide opportunities for collaboration while learning science. The pillar of collaboration translates into the planning of activities that allow students to work in pairs or in small groups.
Learning from mistakesMistakes and misunderstandings are important aspects of learning. We all have intuitive explanations for the phenomena around us. For example many people believe that bottled mineral water is safer than tap water. How far is this information true? What other factors need to be considered to determine the potability of safe drinking water? Examining our current understanding to eliminate mistakes and misunderstandings opens the door to critical understanding of scientific concepts. The activities in the modules lead students to the realization for the need to experiment, the need for repetition of experiment and verification before concluding.
Authentic learningIn the context of ‘Health & Disease’ the term ‘authentic’ may be interpreted as relevant. Health is a topic that is not just familiar to every student, it is a topic of extreme relevance as everyone has encountered some form of a health problem in one’s life. To make learning authentic, one may draw upon personal experiences and create activities that lead students to think about health and diseases in daily life. They may use personal data or data from local institutions as hospitals and clinics to think about the broader concept of health beyond their understanding of health to mean illness or physical disease.
Objectives of the Health and Diseases Module: • The primary aim of this module is to analyse health and disease from the perspective of scientific
inquiry.• Students get an opportunity to gain an in-depth understanding about health and its related concepts
through digital and hands-on activities. • Expected learning outcomes:
○ Students develop a wider perspective of understanding health issues and how it affects daily life. ○ Students understand the interconnectedness of physical and mental wellbeing along with
control of illness and how it contributes to the the overall social and economic health of the society.
○ Students develop the ability to assess health related information and data for its credibility and quality.
○ Students understand the importance of need for experimentation, testing and interpreting the test results.

67
○ Students learn to engage in interactive discussions with peers and teacher about health issues thus enabling collaborative learning.

68
Section 3: Notes for Implementing Student Module
General tips to conduct activities efficiently
• sStudents may not get computer lab access to complete the entire module. Realistically, the best teachers should do is to conduct the hands-on activities and discussions in the modules in the classroom. They need to access the computer lab only for the exclusive digital activities. For example, during Lesson 4, ‘What Data Tells Us’ is when students must be in the computer lab and be able to do the virtual, computer simulation activities.
• In order to make optimum use of the resources provided for this module, you need to be familiar with all the lessons. Later you may guide students on how they may perform the digital and physical activities.
• Whether it is a classroom collective activity, outdoor activity or in the computer lab, you need to ensure that every student is given a chance to share their observations and views. So do not be in a hurry to reveal ‘the correct’ answer. For example in activity 1, lesson 1, after every student lists indicators of health, a consolidated table can be put up on a chart paper and displayed in the class. This will help you ensure peer learning and also help students to learn from mistakes, make self corrections and learn with understanding.
• State the ground rules and instruction for each activity clearly and explicitly before students begin their activity so that there is no loss of time. To prevent chaos in the classroom, make sure that students are not confused.
• By ensuring material readiness, weekly planning and organizing students-computer ratios efficiently you can ensure that time is managed effectively. This is one of the ways to help students derive optimum benefit from the interactive CLIx modules.
• If there are more students then group them in such a way that they can take turns to do the digital and hands-on activities.
• It would be helpful for you to be familiar with the entire module and the related lessons in the textbook before it is introduced to students. If a topic from the textbook is also present in the CLIx module, you may not need to teach that topic twice.
• Although in Biology, nature is the best site for learning, it may not be adequate. Certain experiments may be done in controlled spaces like laboratories and classrooms. For example, observing the life cycle of an insect, germination of seeds and so on .
• Certain observations and experiments may be done virtually using technology. For example, a slow motion video to observe how a mosquito larvae develops.
• For some activities you may involve your colleagues from other domains or people in the community. By doing this students will not only get first hand information but they will realise the need of collaboration even among adults. For instance in lesson three you can request a physics teacher to explain the concept of pressure. This helps students connect physics and biology.
Lesson 1: Concept of HealthLearning Objectives: At the end of this lesson, students will be able to:• Use an example or scenario to show that health is not just an absence of disease.• List three aspects that determine health and the indicators of health.• Provide reasons for why we suffer from diseases.• Suggest ways for prevention of diseases.
Activities: • Classroom discussions: Discuss to arrive at the three aspects that influence health; physical, social
and mental well-being. This is a collective activity involving peer learning and learning from mistakes, addressing alternate conceptions and misconceptions.
69
• Digital activity: Listening to/watching story followed by peer discussion • Outdoor activity: Interaction with community members and sharing learning • Classroom activity: Discussion and note taking, linking text book content with experience about
agents and vectors that cause disease.• Classroom thinking activity: Discussion about health and diseases, causes of diseases based on per-
sonal experience of students.
For achieving the learning objectives for this lesson, you need to• Facilitate and moderate discussion by leading the students to ask questions to each other. The more
you practice this form of discussion, more comfortable you will be for such discussions in the future. • You can demonstrate how to interview for activity 3 called ‘Let’s talk’. It requires them to interact
with people in their neighbourhood. ○ You need to draw their attention to the sample questions given at the end of the activity. ○ Demonstrate how to be sensitive to the respondents feelings and preferences whether to answer
their questions or not. ○ Tell students that they can translate these to their local language
• In this unit some activities require students to share their life experiences as in activity 1, lesson 1. Some require them to read the lesson before doing the activity as in lesson 1, activity 4. Encourage them to read the entire lesson. To make it more inclusive, you may also group them in three or fours and divide the lesson into four parts and then collate the names of diseases they have found out in the text so that even students who are lagging will can contribute.
• This lesson incorporates activities involving all the three pedagogic pillars. Activity 1 is a classroom activity. This activity supports authentic learning as students get an opportunity to think and articulate their understanding of indicators of health to begin with and at a later stage when they do activity 2, Chanda’s story they will be able to clarify their beliefs with peers. Thus it supports the second pillar - peer learning. Finally by the time they complete the activity 4 and 5, to some extent students get opportunity to realise the possibility of learning from mistakes
Lesson 2: The Story of MalariaLearning Objectives: At the end of this lesson, students will be able to:• Understand that malaria is a communicable disease• List agents that cause malaria and the vectors that spread it.• Learn to verify observations by exploring the field• Understand places to look for, observation, collection of samples.• Understand the nature of science through history of science.
Activities: • Reading, Listening/Watching story about Malaria Discovery: Depending on the availability of time
and access to computer either students can read these illustrated stories or the teacher can project this on a common large screen and read out the story to the entire class.
• Whether students read the stories on their own, or whether you read them, perform the activities at the exact point where they are suggested
• Outdoor Activity 1a: Mapping and predicting prior to Mosquito Search. Searching for mosquitoes requires students to have a few prior knowledge of their whereabouts. Before sending the children explain students the precautions they need to take while hunting for mosquitoes.
• Outdoor activity 1b: Verification of the presence of mosquitoes, collection of a few mosquitoes alive or dead. Ask students if they know techniques to catch mosquitoes or suggest ways to collect mosquitoes.
• Outdoor Activity 2a: Mapping and predicting the possible location where mosquito larvae are found. To predict the possible location of mosquito larva briefly narrate the life cycle of a mosquito. Our
70
experience shows that some students are not familiar with how larvae look like. Before sending them to collect larvae, you may show them the video of a larva or you collect a few of them in a bottle and show it to children
• Outdoor Activity 2b: Observation of development of larvae in the laboratory or classroom. This activity needs at least two weeks. This exposes students to one of the methods of life science, namely systematic observation over an extended period of time in a controlled environment.
• Classroom discussion: Where do larvae live?: Spend 10 to 15 minutes in this activity. You will be surprised to see how children learn from mistakes and peer learning. They will share what they thought earlier, what new they learnt and so on.
• Predictions in classroom (group activity): Recalling the types of mosquitoes and guessing the possible differences in the type of disease they spread. You can probe by asking them to give reason for their claims.
• Activity 3: Collection of different kinds of mosquitoes from neighborhood: In particular focus to collect anopheles mosquito. Let students observe and discuss their structure, habitat, behaviour and so on before you give them additional information before moving on to activity 4.
• Activity 4: In this they present their observation and characters used for classification to identify different types of mosquitoes. Later in a collaborative manner they learn to consolidate individual observation and tabulate. This collective work can be displayed in the classroom.
For achieving the learning objectives of this lesson you need to:• Encourage students to follow the sequence of activities in each lesson. This lesson for example,
○ Is organised in a way that one story is divided into three episodes. ○ Each episode asks students to perform activities to validate the authenticity of the information
in that episode. ○ For example, activities three and four in lesson two should be done after reading the section of
the story on how Dr.Lavern discovered evidences to show the connection between mosquitoes and malaria. This leads students to wonder if all mosquitoes cause malaria? If there is a way to know which mosquito causes which disease etc. For this students will need to do activities 3 and 4.
○ Students will derive maximum benefit of realising the nature of science and understanding the history of science by doing the activities they are asked to do after each episode.
○ So you must facilitate them to complete the activity before moving on to the subsequent episodes.• To save time and ensure that students get time to do the activities, it is better that you read out the
stories and instructions and let students do activities, present their results and participate in discussions
• Most of the activities in this lesson supports collaborative learning and learning from mistakes. Hence encourage peer discussion among students, working in groups and presentation of the results of their activities. This will enable the peer learning within the group and also across the groups in your class.
Preamble to Lessons 3 and 4: Modern Day Health HazardsHere is a perspective based on what has been covered so far in this module and what we are about to cover. You have read and taught about malaria - a disease that can be avoided by keeping your surroundings clean, ensuring that mosquitoes do not get a chance to breed and so on. It is still very much possible that you would be bitten by a mosquito in a place you visit for just sometime. There is an element of chance that you may contract this disease no matter how careful you may try to be. However, there is class of diseases that we are about to touch upon, which, it can be said, is something we bring upon ourselves. High blood pressure, smoking, anemia are some conditions that we bring upon ourselves partly due to the habits we develop and partly due to our modern lifestyle. Let’s consider smoking. What starts out as a harmless experiment in early stages of youth, goes on to become a dependency that is hard to give up. Very often smokers find that smoking helps them cope with the stress of modern day living. So they often continue smoking which increases their chances of getting cardiovascular diseases. Not just smoking, or chewing of tobacco, even poor nutrition can lead to diseases like anemia. All these are
71
symptomatic of a larger issue of mental well being.
When you view these health concerns with the view of the three aspects of health, it becomes a starting point for students to relook at how they may think about these issues for themselves and for those around them. Using real life stories have students reflect and debate aspects of health being a center point for the discussion around blood pressure and cardiovascular diseases. While the digital and hands on activities might enable an understanding of the mechanics of diseases, your role as a facilitator really would be to generate a deeper awareness within themselves about aspects of health. This awareness thus created may help them become healthier individuals and also become positive influences in their communities.
Lesson 3: Let’s Investigate!Learning Objectives: At the end of this lesson, students will be able to:• Organise the data collected pertaining to lifestyle diseases like blood pressure, and habits like
smoking and deficiency diseases like anemia.• Analyse and interpret the data.• Present the data using simple mathematical concepts in the form of percentages or graphs and tables.• Learn to work in groups and present their findings to others.• Understand the importance of modelling, simulations and actual investigation by designing simple
experiment or conducting surveys.
Activities3.1 High blood pressure• Activity 1 involves reading a story and discussing it. This is not a digital activity. Even so, it is
important to provide a context that is relevant to students’ life. By doing this students will be able to connect classroom learning with what happens in the real world.You may read out the story in the classroom to save time.
• Activities 2 and 3 have been designed to show the flow of blood in blood vessels. These are not digital activities.These activities aim to demonstrate the relation between the diameter of the blood vessel and the rate of flow of blood. You simulate flow of blood through blood vessels using flexible pipes of different diameters, flexible bottles, buckets and water. By obstructing the flow of water in the pipe using clothespin, pipe you can even simulate variations in diameter of the blood vessels and its relation to variations in blood pressure. Teachers may read out the instruction to the entire class and students can conduct the experiment in smaller groups.
○ By doing these activities students will understand that using water bottle and pipe it is an easy way to demonstrate reasons for variations in blood flow. They understand the need for simulation.
○ The activity can be carried out either inside or outside the classroom: If you can set up 4 or 5 sets every student will get opportunity to do this experiment to demonstrate the relation between diameter of the blood vessel and the rate of flow of blood.
○ As this uses simple readily available local materials, it can also be repeated in their homes. ○ As teachers you can use this opportunity to go deeper by sharing the reasons for changes in
diameter of blood vessels, role of valves in the veins, and so on.• Activity four (outdoor activity): Interview people to know if they are diagnosed with BP and
investigating the reasons for BP - Individual student to collect data from at least five persons in a given class.
• One suggestion is to get a health worker into your classroom and ask them to demonstrate the use of instrument to measure BP-sphygmomanometer.
• Presentation of results of survey: Students learn graphical representation. The graph so obtained can be discussed in the whole class for 10 minutes. Moderate discussion to find out if any observation are not included in the graph, if they are outliers, and what could be the reason for such exceptions and so on.
72
• Whole class Classroom/Digital: Students do data collation, analysis and classification based on age and incidence of high or low BP. This not only promotes collaborative learning but also helps students to realise the need for validation of their observations using large samples.
3.2 SmokingThese are also interconnected activities to help students understand the effects of smoking and that smoking is connected to health. These activities will also enable students on how to try to convince the larger community about the ill effects of smoking.
• Activity 1 (whole classroom discussion): Let students recall people who smoke and share theirobservations about smokers. Tell students that it is not important to disclose the name and other details about the person they are talking about.
• Activity 2: Is a digital activity on reading the narration of a smoker. Based on this students have to guess if there is a relation between inhaling smoke and the efficiency of lungs. After reading, have students discuss the points raised in the reading while you moderate their discussion.
• Activity 3: Lung capacity of smokers and non-smokers. This has two parts. First is a hands on activity and the second part is collation and analysis of result. Finally the results of the experiment is compared with what students understood from activity 2.
• Activity 3a: this is a hands on activity to measure lung capacity of smokers and non-smokers. It is meant to verify the student’s guess. It is better to introduce this activity on the previous day to inform students to find out if any person who smokes would be willing to volunteer to take part in this activity. You can also try to get a volunteer.
• Activity 3b: This is a small group activity. Students tabulate their observations and try to answer a few questions. Encourage students to ask more questions.
• Activity 4: This is the stage of culmination of investigation on smoking. Based on the tabulated results and answers to the questions the groups present their results. Finally you can facilitate to wrap up the activity by comparing the results and record the final agreement that students would possibly come up with. This makes students to use authentic sources of information, look for patterns, generalise and put forward their views with conviction as to why certain habits have influence on the health of the community and how is it different from diseases.
3.3 AnaemiaThis theme is taken as an exemplar of deficiency condition that affects health of an individual. Along with other steps of doing science such as guessing, hypothesising, there are activities that introduces students to the possibility of using digital simulations to experience the intangible concepts in the absence of sophisticated tools such as compound microscopes and when there is a need to learn about large samples to investigate the causes for certain natural occurrence.
• Activity 1: Is to establish a context which students can easily relate. Let students to read the story and guess the iron rich item in the list. Later encourage them to list more items used in their homes. This enables them to connect the story with their own life.
• Activity 2: Preparing solutions of food items to test if they contain iron.
• Activity 3: this is a hands on experiment to test the presence of iron. Keep the apparatus needed to do the activity ready. Depending on the quantity of availability of resources you either plan to demonstrate or allow children to do the activity in groups. Some of the food items the students should be able to bring from their homes.
• Activity 4: In this the outcome of the experiment carried out as activity 3 is further investigated. This requires your help as a moderator. During this activity, be prepared to answer students’ unexpected queries such as how do you know that the stain on filter paper is iron? In what way the whatman filter paper is different from other papers? How did common people come to know whether the food item has iron content in it or not ? What other ways are there to test quantity of iron in different foods. If

73
you feel it’s a question concerning chemistry, request a chemistry teacher to explain. You may even record the children’s questions and answer then at a later point (feel free post them on telegram for others to respond.)
• Activity 5: Will be carried out as an extension of activity four. In this as teacher facilitator you add more to the existing understanding of students.For instance symptoms to identify anemia, causes of anemia if any other than iron deficiency in blood.
For achieving the learning objectives you need to:
• Allow students to experience how to do science by collecting authentic information and understand that health is not merely physical illness.
• Engage in discussions with students to help them connect the impact of diseases and illnesses in terms of social, economical, psychological wellbeing of the society.
• Try to facilitate the students to do all activities related to lifestyle diseases; blood pressure, smoking and deficiency diseases like anemia. Instead of students themselves reading out the introduction and instructions, you will save time for activities if you yourself read out the introduction and instructions to all students in one go.
• Divide the entire class into three groups. Each group can work on one of the themes and finally they can present their work to the entire class.
• Encourage them to do the activities of the other two themes during their leisure time.
Lesson 4: What Does Data Tell Us?Learning Objective:At the end of this lesson, students will be able to:
• Experience the role of technology in learning through this lesson.
• Look for patterns in data by watching the simulation tutorial followed by a digital Interactive activity which they themselves can do.
• Experience the excitement of handling large data, sampling and repeating the experiment.
• Students will come to know how and at what stage generalisations can be made.
Activity: This is new to students and is an exemplar for digital simulation activity. This needs to be conducted in two parts.
PART 1
• Experiencing need for sampling using hands on activity. It might take at least 10-20 minutes depending on the class size.
■ First make sure that the students will understand the concept of sampling in a population, and the need for repeated experiments by drawing fresh samples from the same population pool.
■ To do this, demonstrate the following simple activity to help students understand total population and sample size. Two possibilities, using small chits on which the word either anemic or non-anemic is written or use blue and red coloured buttons /counters to represent non-anemic and anemic conditions respectively.
■ For variation add any one neutral parameter. For chits written as ‘no idea’, and some other colour buttons to represent no-idea.
• If there are 30 students you need to have 30 each of the two kinds of chits or two kinds of buttons. This represents a population size of 60. Add 5 more for neutral ones- no-idea chits or no-idea buttons
• Mix them up in a bowl. This will now have 65 chits.(this number varies as per your class strength
• Pass the bowl around. Let each student pickup one chit.
74
• Take a count of number of anemic/ anemic. Record the numbers. • Ask students to return the chits to the bowl and shuffle them again.• Repeat the same for another two rounds. • Each time note the numbers of anemic, non-anemic and neutral chits either on the black
board or on a chart paper. Draw attention to the differences if any.• Then briefly discuss the possibilities if it were to be a larger population and the need for
sampling and repetition.
PART 2:Here students need to log into the computer for this. The activity lends itself for students to find patterns by changing the sizes of data samples and trying out various combinations of variables such as gender, age, and so on.
• Provide proper verbal introduction and demonstrate navigation to all in one go. • Even before they begin the activity, show them how to tabulate their observation• Preferably let students work in pairs.• Do not forget to make time for sharing the results followed by discussion. This is the way students
learn about validation of their results and you can ensure collaborative learning
For achieving the learning objectives you need to:• Remember that this is the only lesson in health and disease module which requires computer as it
consists of only digital activity. Hence you will need to ensure that the computer lab is ready.• Explain the meaning of population and sampling to students before they go to the computer lab. Since
this is a new concept, it will require your facilitation.• To achieve the best results, it is better if you can arrange for two continuous consecutive class periods.
So that at a stretch both part 1 and part 2 can be done.• Part I is a hands on collective activity. This requires teacher’s prior preparation.• At the end of Part 2:set aside at least 20 minutes to consolidate the results and finally share with the
larger group • In case the class size is large (more than say one computer :3 students), let six students be in a group
per computer. Give clear instruction that each student should take turns to do at least two trials and they should together consolidate their data and analyse it.
• The last 15 minutes of the session need to be set aside for conclusion of this lesson and discuss about the overall learning about health and disease.
Understanding Motion


A Note for Teachers
Although we are well familiar with motion, it has been observed that students have difficulties in learning about the physics of motion. Research studies show that they find concepts such as average speed, instantaneous speed, constant speed, acceleration, graphs of motion and the difference between the speed and velocity, etc. difficult to comprehend.
Moreover, they do not understand the context of learning motion. The CLIx module offered here tries to create a context for students to learn about motion. It has activities, riddles, thought experiment, control experiment, multi-representational digital tools and specific tools to analyze the data from an experiment. Activities and experiments are designed in such a manner, it encourage collaborative learning.
The module on Motion has been designed keeping in mind that students already know many things from their experiences of daily life and build various concepts in their mind. Some of the concepts they build may be vague but nonetheless it is important for them to understand how these concepts developed and how newer concepts might be constructed.
The module uses students’ own knowledge as entry points into the topic and provides adequate opportunities to reflect on what they are experiencing and learning.

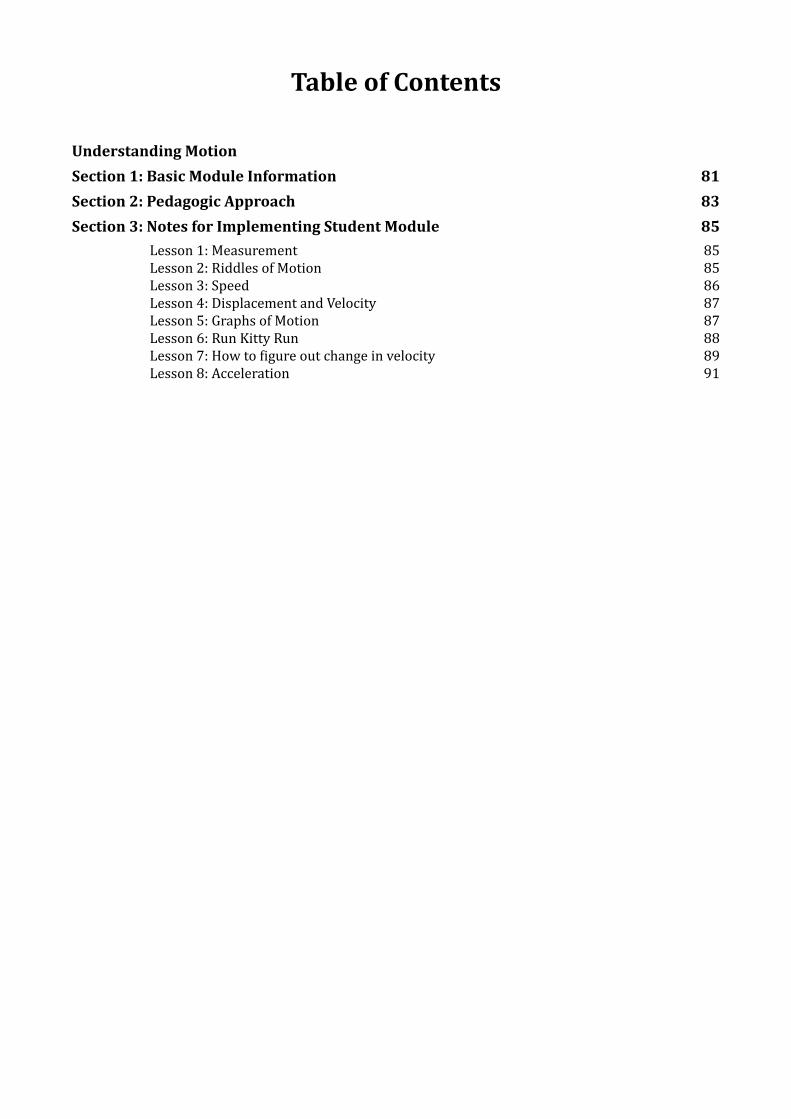
Table of Contents
Understanding MotionSection 1: Basic Module Information 81Section 2: Pedagogic Approach 83Section 3: Notes for Implementing Student Module 85
Lesson 1: Measurement 85Lesson 2: Riddles of Motion 85Lesson 3: Speed 86Lesson 4: Displacement and Velocity 87Lesson 5: Graphs of Motion 87Lesson 6: Run Kitty Run 88Lesson 7: How to figure out change in velocity 89Lesson 8: Acceleration 91


81
Student Module Name: Understanding Motion
Section 1: Basic Module Information
Prior KnowledgeBefore starting this module your students should know the following:
1. Measurement units like unit of length and time2. Basic mathematical operations like addition, subtraction, multiplication and division3. X and Y coordinates of the graph4. Tabulation of the data
Structure of the ModuleLesson 1: Measurement
1.1 Importance of measurement1.2 Make your own measuring tape1.3 Measurement of steps1.4 Standardisation of scale1.5 Average length of a step1.6 Be aware of errors in measurement
Lesson 2: Riddles of Motion2.1 Riddle 1 - Are we stationary?2.2 Riddle 2 - Is the boat moving?2.3 Riddle 3 - At rest or in motion?2.4 Riddle 4 - Same Path or Different Path?2.5 Distance and time
Lesson 3: Speed3.1 Scooter Ride Video3.2 Average speed3.3 Constant speed3.4 Instantaneous Speed3.5 Unit of speed3.6 Food for Thought3.7 Let’s do the exercise
Lesson 4: Displacement and Velocity4.1 Distance versus Displacement4.2 Speed and direction4.3 Calculating velocity
Lesson 5: Graphs of Motion5.1 Introduction to Graph5.2 Let’s check5.3 Interpretation of graph5.4 Position-time graph5.5 Speed-time graph5.6 Let’s check
Lesson 6: Run Kitty Run6.1 Run Kitty Run - A game
Lesson 7: How to Figure Out Change in Velocity7.1 A way to investigate motion7.2 Discover your own motion7.3 Work out change in speed of runner
82
7.4 Discussion time7.5 Motion on inclined plane7.6 Rolling Ball Experiment7.7 Work out change in speed of ball
Lesson 8: Acceleration8.1 Video Analysis Tool8.2 Defining acceleration8.3 Calculating acceleration8.4 Unit of acceleration
Expected TimelinePreparation time: 4 hoursTeachers should spend 2 hours on the digital tools (Video analysis player and Run Kitty Run game) to get familiar with them. They would further require two hours of self-study and preparation for classroom instructions.
Timeline for classroom implementation:1. Lesson 1 - One hour-long Block Teaching Period2. Lesson 2 (includes digital activity) - Two 30 Minutes Period or one hour-long Block Teaching Period3. Lesson 3 (includes digital activity) - Two 30 Minute Period or one hour-long Block Teaching Period4. Lesson 4 - Two 30 Minutes Period or one hour-long Block Teaching Period5. Lesson 5 - one hour-long Block Teaching Period and one 30 Minute 6. Lesson 6 (includes digital activity) - one hour-long Block Teaching Period7. Lesson 7 - Two block teaching periods of an hour each 8. Lesson 8 (includes digital activity) - Two 30 Minutes Period or 1 hour-long Block Teaching Period
Thus, the entire module is planned for ten hours (three weeks) that is it requires ten hours to implement the module in the class.
Time for Assignment: 1 week
RequirementsPlease make sure of the following:
1. Assign a notebook (which we call a journal) to yourself. You may write your reflections, experiences and learnings. You can share these with us via the Telegram messenger app or email.
2. You need to have a smartphone to receive messages which you will receive daily on Telegram. 3. You need to have access to a computer that has a browser, audio and video player and internet
connection.4. You will need the following material for ‘Make your own measuring tape’ activity:
a. Three A-4 size paper sheets (one side used paper will do) b. A sketch pen c. Scissors
d. A meter scale5. You will also need following material for ‘Graphs of Motion’ lesson:
a. Notebook b. Graph Papers c. Pen/pencil
6. You will need following material for ‘Running race’ activity: a. Find a track at least 40 meter long b. Measuring tape or meter scale to measure the track c. stopwatches per group to record the time b. Paper and pen to note down the data
7. You will need following material for ‘Rolling ball experiment’: a. An aluminum angle of length 160 cm b. A marble or a steel ball of 1 inch diameter c. Stopwatches
83
Section 2: Pedagogic Approach
Pedagogic PillarsThis module is designed by keeping the three pedagogic pillars in mind.
Collaboration: In scientific endeavour the collaboration is uniquely important. Peer review and replication of studies are standard practice in scientific research. The scientific community is dependent on one another for generation of valid scientific knowledge. Hence , it is important to provide opportunity for collaboration while learning science.
In both, the physical as well as the digital activities, students need to engage with their peers. All activities of the Motion module have been designed to be done in a group. Group size may vary from activity to activity. For example, students need to work collaboratively in the measurement activities. A group of 4 members is ideal for the activity ‘Make your own tape’ of measurement lesson. Run Kitty Run digital game is designed as a two player game, where one player can make a bet and other would see if the one was right or not.
A student would have to explain their decisions to their peers. This would serve a dual purpose. The peers would be able to identify gaps in their own understanding and correct it at the same time. They would also receive feedback from their peers about their own work, which would be an additional benefit.
Learning from mistakes: Mistakes and misunderstandings are important sources of learning. We all have intuitive explanations for the phenomena around us. For example, one might think that a moving object stops moving because the force acting on it becomes gradually lesser and after a point it is no longer able to push the object. Examining our mistakes and misunderstandings opens the door to critical understanding of the scientific concepts.
The module has digital and hands-on activities that give students a chance to learn from their mistakes. In the ‘Run Kitty Run’ game students can play the same level again and again until they succeed. They can apply their learning to catch the mouse at the finish line. As they learn from their mistakes they move forward and complete the next set of attempts of the same level in lesser time. Similarly for rolling ball experiment, the inconvenience in recording the data due to higher slope of the v-shaped channel can be undertaken as soon as the experiment is done.
Authentic learning: In the Motion module students record the data which is supposed to be analysed by him/her to arrive at a conclusion. There are activities which allow students to understand the need for average value, to prepare their own measuring tape to measure the shorter distances, and to have the data of their own speed for the run of 40 meters. The examples used in the lessons are contextualized to make them more relevant to the student.
---The notion of motion is very intuitive to all of us. We all have experienced varied speeds. We know that it is hard to maintain constant speed. We have the experience of accelerated motion when a bus or a train picks up speed or reduces speed suddenly and we feel a jerk. We have seen the clouds floating in the sky, the sun rising from one direction and setting in the other direction etc. These and other similar amazing phenomena occur around us every day.
The module on motion sets the context and scope for the discussion about such phenomena. These modules explain motion with specific examples that contextualize the concepts of relative motion and the qualitative description of motion.
An investigative approach has been used to delve deeper into the topic. Moving forward with this ap-proach, students will learn to differentiate between speed, average speed, instantaneous speed, distance and displacement, velocity and acceleration. At places students are given a context to revise their un-derstanding of plotting graphs of motion and reading slopes. It allows them to deduce their prediction, comparing it to observations, comparing different analyses/outcomes and revising them as they are im-portant aspects of theory construction and testing in science.

84
The module includes a game where students can enhance their understanding of the concept of motion by playing it repetitively. The digital tools help them to apply their previous knowledge and learning and provides a platform where they can test their learning on their own.
85
Section 3: Notes for Implementing Student Module
Lesson 1: Measurement
Learning Objectives After going through this lesson, students will be able to:
1. Understand the importance of the units of measurement2. Identify the need for standardized scales3. Recognize the errors in measurement4. Calculate average distance5. Recognize the importance and the use of the average value
Materials required1. Three A-4 size paper sheets (one side used paper will do), a sketch pen, scissors, a meter scale, a
notebook.2. Computer lab is not required to complete activities of the lesson. The activities can be performed
in the classroom.
Approach • Students will prepare a 2-meter-long tape using one sided waste paper or newspaper. • They will measure of distance of 10 meters using this tape. They will count their steps for this
distance and then take the average. • The average length of one step now becomes their scale to measure various distances i.e. distance
from school to home, from their class for Head-master’s room. • Some, who have a wrist watch can also keep time to cover these distances. These data set can be
used to work out average speed in steps/minute.
Through these activities the students would understand the need to calculate average values. Teachers can explicitly discuss the use of average values. This can be linked with ‘Lesson 3: Speed’ to reinforce the need and method to calculate the average speed.
Another important concept explored in this lesson is errors in measurement. This is an essential component of learning and doing science. You can ask students to compare the paper tape of one group with another. You can ask them to measure the earlier measured length again, you can ask them to measure the width of the blackboard again and again. They may find it surprising that these numbers will change slightly. You can ask them about the reason for this variance. Repeating the measurement of a given length will give you a value which is better than the last value. You can take them to the point that variance will exist. That is why the need for taking an average emerges.
When students encounter errors, initiate a discussion with them instead of reprimanding them. Discussions about best practices could be held to avoid errors. Students also need to recognize that there are certain errors they cannot avoid. For example, you cannot measure a value lesser than the least count of the instrument.
Lesson 2: Riddles of Motion
Learning Objectives: After going through this lesson, students will be able to:1. Recognize that motion of objects are described relative to frame(s)2. Identify the effect of choosing a frame of references on the perceived motion
Materials required1. A notebook to note down the reflection or discussion points (students may also use notebook
feature of the platform).2. Computer lab is required to complete the activities of the lesson.
ApproachThe idea of relative motion, frame of reference and the role of an observer are important concepts to help analyze motion quantitatively and qualitatively. These concepts require a fair amount of
86
contextualization to build deeper understanding.
In this unit students are asked to think about the concepts without using these terms. We have used a set of videos to create a real context to bring these concepts to the fore. They are in the form of riddles. Students will watch the video and the teacher will conduct the discussion based on observation from videos. The teacher can use a projector to show the video.
Riddle1 - Some things around us appear to be at rest e.g. buildings, trees, mountains etc. while others appear to be moving e.g. moving cars, animals, trains etc. But can we say that the things that are at rest are actually at rest? We know the earth rotates around its axis and revolves around the sun. So the things that appear to be at rest to us would appear to be moving to an astronaut who is looking down from space.
This riddle raises two questions -1. Why don’t we feel the motion of the earth?2. Why do we consider mountains, building etc. stationary?
To answer the first question imagine a perfectly silent and vibration free vehicle in the form of a train, car or airplane. This vehicle is moving at a constant speed. You have a glass of water. Would the water in the glass appear to be moving? By just looking at the water in the glass can you say the vehicle is moving. Since the vehicle is moving at a constant speed everything inside it appears to be at rest. If the brakes are applied suddenly the water would come out of the glass. The earth’s orbit is not perfectly circular. Hence it does not revolve at a constant speed. But the change of speed is very gradual. Hence, we don’t feel the motion of the earth.
To answer the second question, imagine you are inside a train. A person sitting on the ground might describe the motion of the train from east to west or she might refer to some stationary object i.e., from one building to another. But if asked, you will describe the motion inside the train with reference to the objects inside the train that are at rest with respect to the train. For example, the rat went under the seat. It is easier and it serves your purpose. Similarly on earth, we usually describe motion with reference to things that are stationary with respect to the earth. For example, ground, buildings, mountains, etc.
Riddle 2 – Ask students if the boat is moving? Further, ask for the reference point of the movement. Is it moving with reference to the water? Would it appear to be moving with reference to the boatman or any object that is on the boat?Then the discussion should move towards why is it difficult to figure out from the video if the boat is moving or not. Ask them if seeing the shore would have made it easier to tell if the boat was moving? Why? Why are we not able tell if the boat is moving by looking at the water only.
Riddle 3 – Begin with asking the question if the boats are moving. In response to students’ answers, ask in reference to what the boat is moving. The discussion should move towards the issue of defining rest and motion – how to define the state of rest or motion if both objects move in the same direction with the same speed. Is their position changing with respect to one another? Can we say that they are stationary with respect to one another? Is the boat moving with respect to the land? Would the boat appear to be moving with respect to a boat moving at a different speed or in a different direction? (the third video)
Riddle 4 – It brings out the role of the observer in describing an event. The video captures an event from the perspective of two observers who are at different frame of reference with respect to each other and with respect to the event too. As the event appears to them differently they also describe it differently.
Lesson 3: Speed
Lesson Objectives: After going through this lesson, students will be able to:1. Calculate average speed using total distance covered and the time taken to cover it 2. Differentiate between average speed and instantaneous speed3. Differentiate between constant speed and average speed4. Recognize the use of average speed and instantaneous speed in daily lives5. Identify the units of speed

87
Materials required1. A notebook to note down the reflection or discussion points (students may also use notebook
feature of the platform).2. Computer lab is required to complete the activities of the lesson.
ApproachThe lesson contains a video of a scooter ride, it has some information about the distance and time the rider takes to complete a journey. In the video, use the milestones as a reference for the distance and watch for the time. At some points the speedometer of the scooter is focused upon in the video to highlight varying speed of the scooter and the speed at particular point of time i.e. instantaneous speed.
Students are supposed to find this out themselves from the video. This data set is further computed to derive the average speed equation.
There is a small assessment attached with the first page of the lesson. This will help students to reflect on the data and do some mental calculation. Teachers could use the blackboard to help students recall the data that they have collected from the video. Teachers could also explain the assessment question if the students find it difficult.
At the end of the lesson students should be able to learn about the average speed, constant speed and instantaneous speed. The students should recognize that a vehicle travelling at the average speed of X km/hour during a journey does not indicate that it was travelling at the constant speed of X km/hour throughout the journey. Also from the instantaneous speed we won’t be able to calculate the average speed; we would need to find out the distance covered and the time taken to cover it. Link it with the data of the paper tape activity in lesson 1. Students can use the average speed formula, to compute their average speed to reach school from home by referring to the data set generated in the lesson 1 exercise. You can further discuss with them the reason for this speed varying from one day to another.
Lesson 4: Displacement and Velocity
Lesson Objectives: After going through this lesson, students will be able to1. Differentiate between distance and displacement2. Differentiate between speed and velocity3. Calculate velocity velocity using displacement and the time taken for the displacement
Materials required1. A notebook to note down the reflection or discussion points (students may also use notebook
feature of the platform).2. Computer lab is required to complete the activities of the lesson.
ApproachThis lesson is more on the application side. Hence, make students work on the computer for this lesson. Students will work in pairs to complete this section.
Velocity has been elaborated here in detail. There are animated examples to help students to visually understand what does it mean when we say velocity is “speed with direction”. Context have been built where velocity has been worked systematically out of a given problem. Lesson 5: Graphs of Motion
Lesson Objectives: After going through this lesson, students will be able to1. Recall their basic understanding of graphs2. Interpret the nature of motion from distance-time graph3. Plot motion on distance-time graphs4. Interpret the nature of motion from speed-time graph
88
5. Plot motion on speed-time graphs
Materials required1. A notebook to note down the reflection or discussion points (students may also use notebook
feature of the platform), graph papers, and pen/pencil2. Computer lab is required to complete the activities of the lesson.
Approach
Students are to work on computer in pairs. They should also use their notebook while working on the computer.
Graphs are one of the most important tools in science to display information. In this lesson we detail two types of graphs – distance-time (or position-time) graph and speed (or velocity-time) graph. The first one helps us see how position of a moving object is changing with respect to time. In the second we get to see how speed is changing with respect to time. We have well described event in the module around which graphs have been built. In some exercises students will find out the missing data after reading the slope and in some they will use the data to fill up the missing slope piece on the graph.
You can use it to revise the graph with students, which is essential to learn about motion. Graph literacy also helps them in learning about equations of motion.Student should be able to read the slope easily and say what type of motion it represents. The section has some assessment pieces too. They will help teachers learn whether students have developed a grasp over the concept or not.
Lesson 6: Run Kitty Run
Lesson Objectives: After going through this lesson, students will be able to1. Apply and test his/her understanding of speed2. Apply and test his/her understanding of graphs of motion
Materials required1. A notebook to note down the reflection or discussion points (students may also use notebook
feature of the platform).2. Computer lab is required to complete activities of the lesson (One computer per two students is
Ideal).
Approach“Run Kitty Run” is a two player game. Students have to ensure that the kitty catches the mouse on time. The game involves player 1 altering the settings of the game so that the cat catches the mouse right on the finish line. This earns the player one star. If the cat catches the mouse early or is not able to catch it at finish line then she loses. After player 1 has fixed her settings, player 2 has to bet if the cat would catch the mouse ‘early’ ‘on time’ or ‘late’. On making the correct prediction player 2 earns one star.
The game has a tutorial and 7 levels. The students can go through the tutorial. If the teacher explains it then this can be skipped. At level 1, the mouse goes first. The player 1 adjusts the speed of the cat which goes after a delay of some seconds. At all levels, the task of player 2 remains as described in the first paragraph. At level 2, the students do the same thing as level 1. In addition they can check the effect of changing the speed of the kitty on the Position-time and Speed-time graph. At level 3, the graphs appear after the race is completed. So the student have to make the prediction first but they can check where they went wrong graphically after the race ends. At level 4, the speed of the kitty is fixed, the students have to set the time delay so that the kitty catches the mouse. Level 5 is similar to level 2 but the difficulty level is higher. Level 6 is similar to level 2 but students are provided only with speed-time graph. At level 7, student are provided with the position-time graph. The kitty and the mouse start together without any delay. Player 1 can increase and decrease kitty’s speed but she can’t see its exact value. The players are
89
provided with a position-time graph. The player has to set the speed using the graph.
‘Run Kitty Run’ is a multi-representation game which will allows students to apply their knowledge of speed as well as the position-time and speed-time graphs. This will help students to contextualize graphs of motion and enable them to practice their knowledge under different circumstances that the game creates.
Lesson 7: How to figure out change in velocity
Lesson Objectives: After going through this lesson, student will be able to1. Differentiate between uniform and nonuniform motion2. Identify if a motion is uniform or non-uniform by collecting segment-wise data3. Find out change in average speed of a ball rolling down on an inclined plane
Materials required1. A long track to run (24 meters long at least), stopwatch, v-shaped aluminium channel, steel ball or
marble, marker (sketch pen/chalk or something), meter tape/scale and A notebook to note down the recorded data and reflection or discussion points (students may also use notebook feature of the platform).
2. Computer lab is not required to complete the activities of the lesson. Activities can be performed in the classroom.
ApproachIn this part of the chapter we try to understand uniform and non-uniform motion. Till now we have discussed to analyze and describe manner in a qualitative manner. But in this lesson we would engage with motion in a quantitative manner. The students will carefully record data and analyse it to arrive at their conclusion. They need to record both position and time precisely. We use a real life example here.
A. A short sprint – minimum 40 meters, maximum 60 meter.B. A bicycle rolling down the slope.
Preparation: a teacher need to prepare for the activities. The material needed here is as follows:
1. Set of stopwatches or mobile phones – 4 per group; they can be rotated among different groups. You can also take the help of another teacher to manage more group of students this way.
2. Form a group of at least 6 students, give every group a name. this way identification becomes easy if you have large number of students.
3. Roles – before they start the activity – please explain to them and one student will become the record keeper with table to record the data. 4 will stand on the four segment points of the running track – they will be called the time keepers. And one runner will run. All students will have to run. Therefore, once the first person’s race is over, she will replace one of the 5 members from their assigned role and take their role. At the end of activity every student would have played the role of timekeeper, record keeper and the runner.
Every student will run for minimum three times.
4. Table to fill up the data – the table is given in the student module. Please ask every student to make it in their notebook.
5. Place arrangement – you need a place for students to run. A minimum length of 24 meter will work – please ask students to measure it and divided into four equal parts and mark these points.
Students should be given some time to practice with stopwatches.
90
Work in the classroom: The first session of this chapter begins in the class. You would present them with the following scenario ask them to write their answer answers in their notebook. This answer will become a reference point for them to compare their finding from the activities:
1. Suppose you are running a 60-meter race. Could you try to imagine how would you run this race from start to finish? With the same speed? Will you speed vary? How will it vary?
2. If you rolling down a bicycle on the slope, without pedaling, if the motion of bicycle change or not? If no, why? If yes, how from start to finish?
Then they will conduct the activity. Running race activity: Using the data, they can plot their position-time graph and compare each other’s slopes. They can also work out the average speed for each segment, compare which one was faster in which segment and whether anyone has the same average speed in each segment or in every segment the average speed was varying?
You can ask them to compare their assumption about the way they run with real time data? How does it differ? Can they confidently speak about the nature of their run? What helped them speak confidently? Was it the data? Students may come to the conclusion that their motion on the track was non-uniform. Data tells them so. Without data we could not have described this motion precisely. Similarly, many of the real life motion events are non-uniform in nature. But the only way we can con-clusively say about them if we either break the whole motion path in smaller equal segments and record the time of each segment or if we record the distance covered in every second? Please emphasize on this method to be used to describe motion in detail. The smaller the segment the more conclusive our description would be.
A bicycle rolling down the slope: It is difficult to get real time data of the bicycle on the road. Here we introduce the concept of a control experiment. Instead of doing the original experiment, we do a similar experiment that is easier to perform. The road becomes the aluminium angle and the bicycle becomes the marble or steel ball. Students divide the distance into 5 segments of 30 cm each and record the time to cover each segment.
If you have 5 stop watches then the entire activity can be done in one go. One person will leave the ball while 5 timekeepers will record the time as the ball passes from each segment.
If you have one stopwatch one student can drop the ball while the other can record the time, one by one for different segments.
They fill the data in their notebook. The table is given in the student module.
They will process the data, work out the average speed for each segment and then try to describe the change in motion using this data.
May be they describe that speed of the ball was increasing as the ball was rolling down the plan. Compare it with a running race. For example, in a running race, the average speed was varying unevenly – in some it was high, whereas in some it was slow, whereas in the rolling down the speed was getting gradually higher. Both are examples of non-uniform motion.
91
Lesson 8: Acceleration
Learning Objectives: After going through this lesson, students will be able to1. Define acceleration2. Calculate acceleration of a ball rolling down an inclined plane by video analysis3. Identify units of acceleration
Materials required1. A notebook to note down the reflection or discussion points (students may also use notebook
feature of the platform).2. Computer lab is required to complete the activities of the lesson (One computer per two students
is Ideal).
ApproachThe video analysis player (a digital tool) is used to analyse the motion of the ball. By this time students would have done the rolling ball experiment. Continuing the same experiment, students can analyse the acceleration of the ball using the video analysis player. Five videos of the rolling ball experiment are given in the resources section on the TISSx platform. To browse the video, first go to the resources, then go to the ‘Rolling ball’ video new, click any of the experiment videos out of five. Download the video.You have to make sure that while playing with video analysis player, you need to set the frames as 30 fps. The tutorial (video) of how to use video analysis player is given in the student module.
Before we start acceleration, we should appreciate that it is one of the most difficult concepts for students to understand in this section. We need to deal with it carefully. Students are generally familiar with the term, accelerator, as they use it often in the context motorbikes or vehicles. In Chhattisgarh, students responded by saying that accelerator is used to give ‘race’ to the vehicle. You can also ask them what happens when there is a sudden change in speed – increase or decrease, race up or race down? Then you talk to them about a situation like the following: you are on a bus going at a constant speed/motion. For 10 minutes it goes like this, then suddenly the driver speeds up, the speed change goes for a minute, then again a 10-minute patch of smooth ride, then again a one-minute patch of sudden speed down. In dealing with acceleration we are interested in those parts of the motion where there is change in speed/velocity. One of the major problems for students is how to compute acceleration and why it has the unit of time appearing twice. So stepwise this is how we should progress
1. Help them figure out how do we feel acceleration and what happens with respect to the speed at those points2. Use the video and clock to help them understand that we are concerned about the change in speed in given interval of time. Speed is already a ratio/rate of distance over unit time. Acceleration is a further rate of – distance over time over time.3. Initially you help them understand km/h/minute (using video); meter/minute/sec4. Then bring them to the unit which is generally used – meter/sec/sec which is also writtenas meter/sec 2 .
Here we generally use examples of uniform acceleration for students to first help them understand and to enable them to calculate it easily.

93
Sound

94
95
A Note for Teachers
This CLIX module has been primarily designed for class 8 students. The aim of this module is for students to learn the basics of sound by following the process of science.
We picked up the concepts that we thought were important to know the basic science of sound at an introductory level. We know that the application of physics behind sound is wide. It is used to measure the depth of the sea, ultrasound scanning for medical diagnosis, designing a sound proof or echo-free building, etc. For that, one should have an understanding of the properties of sound like frequency, amplitude, propagation of sound in different medium, etc.
In this module we are not dealing with the speed of sound, and sound as energy, as it would be too early to talk about these concepts with the students. For example, speed of sound has elasticity factor of the medium and the density. So students must first understand these concepts well. Similarly, energy as a concept is extremely wide and abstract in nature. Therefore, these concepts have not been incorporated in this module, though they are important.
We know that sound is a commonly known thing. Hearing, speaking or producing sound is very familiar to us but do we know what it really is, how it is produced, how it propagates? Sound is intangible and can only be indirectly perceived or felt. The phenomenon of sound is extremely complex and it depends on various factors that may vary case to case. For example - what is the reason behind the sound produced when a balloon bursts? What would be the first step to examine the phenomena?!
When this module was being written, many questions came to mind - let me share some of these with you. Here are some examples: What was the first sound in the universe? What was the note of that very first sound? What was the very first musical instrument? How did people discover music? What is the history of music? How did people come to know that sound needs a medium to propagate?
The activities of the sound module directly or indirectly demands questioning skills. Encourage your students to think beyond the limits of the textbook because knowledge is not limited. In the module we took care that the materials required for the activities should be locally available. We consciously designed activities for which there is no requirement of sophisticated equipments or labs. We want students to arrive at the answers through investigation. So we request you do not hasten to provide the answers.
All the best!

96

97
Table of Contents
Sound
Section 1: Basic Module Information 99Section 2: Pedagogic Approach 102Section 3: Notes for Implementing Student Module 103
Lesson 1: Sounds Around Us 103Lesson 2: Knowing More about Sound 104Lesson 3: Sound Travels 105Lesson 4: How does Sound Travel? 106Lesson 5: Solve the Puzzle 107

98

99
Student Module Name: Sound
Section 1: Basic Module Information
Prior KnowledgeStudents should have prior knowledge of states of matter - that matter exists in three forms-solid, liquid and gas.
Structure of the modulePre-testIntroductionLesson 1: Sounds Around Us 1.1 Where are these sounds coming from?
1.2 A science classroom like yours1.3 Make sound(s)1.4 Sound is vibration1.5 Seeing vibrations1.5 Seeing vibrations (continued)
Lesson 2: Knowing More About Sound 2.1 Loudness
2.1 Loudness (continued)2.2 Pitch2.3 World of music
Lesson 3: Sound Travels 3.1 Paper cup telephone
3.1 Paper cup telephone (continued) - A3.1 Paper cup telephone (continued) - B3.2 Singing spoon3.3 Do walls have ears?3.4 Hitting spoons inside the bucket3.5 Vibrating balloon3.6 Sound travels: as vibrations through different media
Lesson 4: How Does Sound Travel? 4.1 A speaker
4.2 A slinky spring4.3 Is air like a spring?4.4 Does the medium move with the sound?4.5 Is this true in other cases too?
Lesson 5: Solve the Puzzle 5.1 Let’s explore: Friends discussing a question
Student Feedback SurveyPost-testCredits and Citation
Expected TimelinePreparation time: 1 week (4 hours)Teachers should spend one hour on the digital tool (Audacity) to get familiar with it. They would further require two hours of self-study and preparation for classroom instructions.
100
Timeline for classroom implementation: 2 weeks (8 hours) Introduction (Intro to module) - 10 min
1. Lesson 1 - 1 hour-long Two Block Teaching Periods2. Lesson 2 (includes digital activity) - 1 hour-long Block Teaching Period and one 30 Minute Period3. Lesson 3 - 1 hour-long Two Block Teaching Periods4. Lesson 4 - 1 hour-long Block Teaching Period and one 30 Minute Period or Three 30 Minute Pe-
riods5. Lesson 5 - 1 hour-long Block Teaching Period
Assignment time: 1 weekThus, the entire module is planned for four weeks, that is, it requires eight hours to implement the mod-ule in the class.
RequirementsPlease make sure of the following:
1. Assign a notebook (which we call a journal) to yourself. It will be your diary where you can write your reflections, experiences and learnings. You can share these with us via the Telegram messen-ger app or email.
2. You need to have a smartphone to receive messages which you will receive daily on Telegram. 3. You need to have access to a computer that has a browser, audio and video player and internet
connection.4. You need to have Audacity software installed in the computer5. You will need the following material for ‘Make Sound(s)’ activity:
a. Rubber band b. Empty boxes c. Thread d. Balloon e. Marbles f. Pebbles Note- You may add to the list according to the availability of the material in your locality. This list material is just for your reference.
6. You will also need the following material for ‘Seeing Vibration’ activity: a. Paper cup b. Straw c. Scissors
7. You will need the following material for ‘Pitch’ activity: a. Straw b. Scissors
8. You will need the following material for ‘Paper Cup Telephone’ activity: a. Paper Cup b. Thread c. Scissors
9. You will need the following material for ‘Singing Spoon’ activity: a. Spoon b. String
10. You will need the following material for ‘Do walls have ears?’ activity: a. Coin or pebble (to hit the wall) b. A wall (of course!)
11. You will need the following material for ‘Hitting spoons inside the bucket’ activity: a. Bucket filled with water b. Two spoons
12. You will need the following material for ‘Vibrating balloon’ activity: a. Balloon b. Paper
13. You will need the following material for ‘Is air like a spring?’ activity:a. Syringe (without needle)
14. You will need the following material for ‘Is this true in other cases too?’ activity: a. Rope (at least 10 meters long)

101
b. Sketch Pen15. You will need the following material for ‘Is this true in other cases too?’ activity:
a. Rubber band or elastic b. Rope c. String
102
Section 2: Pedagogic Approach
Connection to Pedagogic PillarsThis module is designed by keeping the three pedagogic pillars in mind.
CollaborationIn scientific endeavour collaboration is uniquely important. Peer review and replication of studies are standard practices in scientific research. The scientific community is dependent on one another for generation of valid scientific knowledge. Hence, it is important to provide the opportunity for collaboration while learning science.
In both the physical as well as the digital activities, students need to engage with their peers. All activities of the Sound module have been designed to be done in groups. Group sizes may vary from activity to activity. For example - a group of 4 members is ideal for the ‘Make Sound(s)’ activity. For Audacity digital software, it is ideal that two students work on the tool at a time, so that they can help each other to record the sound(s), observe the waveform and analyze the amplitude of different sound samples recorded.
Encourage students towards collaborative learning where each member of a group would have a specific role (Keep changing the role of members in a group).
Learning from mistakesMistakes and misunderstandings are important sources of learning. The approach of the module is such that it prompts questions that act as a catalysts for thoughts. It gets students involved in the process of finding answers, it allows students to make mistakes and learn from them. It also gives space to learners to assess themselves - as students will do activities to answer given follow-up questions. The expectation from the module will be the construction of ideas based on their learnings. Authentic learningIn the Sound module students have to perform the activity and go through many questions that arise from the activity itself. Some of the questions are given in the module for reflection and a few are given for further exploration.
For example, lesson 3 includes a paper cup telephone activity. When students perform this activity they will get to know that the string vibrates when sound travels through it. It gives them an authentic learning experience of one of the most important concepts - that particles of a medium vibrate when sound travels through it. The examples used in the lessons are contextualized to make them more relevant to the student.
103
Section 3: Notes for Implementing Student Module
Lesson 1: Sounds Around Us
Learning ObjectivesAfter going through this lesson, students will be able to:
1. Know various kinds of sources of sound.2. Understand the mechanism of production of sound.3. Visualize vibration.
Approach
1.1 Where are these sounds coming from?This is an introductory activity to engage students. Let the students sit in groups and listen to the audio. Once this is done, ask them to identify the sound sources. You may also ask them to mimic different kinds of sounds like sounds of animals, birds, etc. Or ask them to go around and collect sample of different kinds of sounds themselves.
1.2 A science classroom like yoursWe want students to ask questions and make the classroom environment lively and free of fear. Asking questions make us think, reason out. Motivate students to ask questions. Let the students sit in groups and watch the video. After watching the video let them discuss their queries or questions in groups. Give them around 5 minute for the group discussion. Then ask students to type their questions about sound, “What they want to learn/know about sound?” in the assessment toolbox and submit it. They can type more than one question. You can access these questions on the platform itself.
As a facilitator, categorize the recorded questions into three categories - Production of sound, Characteristics of sound, Propagation of sound and other. You could address the other kinds of questions at the end of the lesson or leave them for the students to explore by themselves.
Take the discussion forward by picking up production of sound first. It is possible that students will come up with varied questions with wider scope, which the syllabus of the textbook and this module do not cover. Do not discourage students to ask questions just because the textbook does not provide answers, or we do not know the answer. We can always explore ways to find the answer. At this stage, for the students, it is more important to be involved in the process of finding the answer rather than just knowing/getting to the answer.
1.3 Make sound(s)(i) Make sound(s) with things around youThis activity is to make sounds with things around, as quickly as possible. You should motivate students to come up with their own ideas. For example, students can make sound using the cap of a pen, by banging on the table, etc. Please ensure that they do this activity in groups.
(ii) Make sound(s) with things given to youIn this activity you should provide a few commonly available materials such as rubber bands, plastic straws, paper cup, pebbles, empty boxes, plastic bottles and bags, string/thread etc. These materials should be kept in the class or can be given in groups if the number of students in the class is large. Please ensure that they do the activity in groups.
In the end, you should also present at least one design in the class that demonstrates blowing, hitting or plucking. For example, you can show vibration in a string while plucking or vibration of pieces of chalk, You could put some pieces of chalk on a table and hit the table with a duster or a similar object. With the help of your design, or the students design, try to demonstrate or introduce “vibration”. Ask students to visualize vibrations in air.
1.4 Sound is vibrationIn this section the production mechanism of sound is described and explicitly demonstrated that the sound is only vibration. Help students to contextualize it.

104
Here we also touched upon the concept of damping without explicitly using the term. We believe that students may have experience of damping though they might not be familiar with the term. Our intention is not that they just learn the terminology but that they understand that vibrations can be damped, because of which we can not feel or observe them. Damping means reduction in the amplitude of the vibration. The amplitude becomes so small, that sound waves do not reach us. Because of this we are not able hear sounds even though the frequency is in audible range.
Discuss the questions given in the box for further exploration with the students. Allow students to explore them on their own.
1.5 Seeing vibrationsIn the previous topic we concluded that sound is vibration and vibration is sound. But do we really see any vibration in an object which makes sound? For example vibration in a flute, whistle, etc. In fact, vibrations could be felt but could be hard to see (because of low amplitude and high frequency), in a sound making object. Therefore, the activity “dancing ring on the base of the cup” will be a direct experience to see the vibrations caused due to the sound produced and for this you do not need mobile phone!!
Instructions to perform the activity are provided in the student module. Please make sure that every group performs this activity and discusses the questions given. You can also suggest examples or alternatives to this activity, which give direct evidence of the vibrations due to sound.
1.5 Seeing vibrations (continued)This is somewhat contradictory to what is described in the previous activity (dancing rings on the base of the cup). We realized that in everyday life, we cannot actually see vibrations except in a few cases, like the vibration of a mobile phone (when phone is on vibrating mode), vibration of speaker (sometimes) .
Constituent particles of matter vibrate around their mean position in normal conditions. But it is beyond the limits of our vision and the frequency is not in the audible human range. Sound waves, when propagated through a medium, exert pressure on the particles of the medium.
If the frequency of the vibration is in the audible range of the human ear, then we can hear sound. If the amplitude of the vibration is within the limits of human vision, then we can observe vibrations, however it is difficult to tell the exact frequency of a vibrating object just by observing it.
There is an activity in a box for further exploration. Let the students do it and discuss their findings. You can give it as homework and discuss their experience and cause of production of sound in each case in classroom.
Lesson 2: Knowing More about Sound
Learning Objectives After going through this lesson, students will be able to:
1. Describe the relation between amplitude and loudness.2. Identify low pitch and high pitch sounds.3. Understand frequency.
Approach
2.1 LoudnessLoudness and shrillness are characteristics that we usually attach to the voice or sounds in day-to-day life. In this activity we will understand these parameters (loudness and shrillness) with the scientific concepts amplitude and frequency. We will focus on the visualization of amplitude and frequency, and their relation with the sound’s loudness and shrillness, using digital tools and through hands-on activity.
There is a video which shows the amplitude of three balls. Displacement from the mean position is shown by an arrow. Discuss the displacement with the students, if required. You must emphasise the fact that amplitude is the maximum displacement from mean position, either up or down.
105
2.1 Loudness (continued)You are aware that sounds from different sources are different (loud/shrill). They are different because they are produced in different manners and even if they are produced in the same manner, they have different frequencies and amplitudes. We can use the tool “Audacity” to analyse the sound. Students can see the amplitude and frequency of sound signals using this tool.
A tutorial video is given in this section. You need to get familiar with the Audacity tool prior to conducting this session. We used the term “wiggle” for the waveform on the screen. Horizontal spread of the wiggle shows the distance traveled by the sound, height of the wiggle shows the amplitude of the sound.
Allow students do the activity in groups. Ask them to watch the tutorial video first so that they can use the tool with ease. Ask them to record the sound sample in a low voice or volume and then in a high voice or volume and compare the height of the wiggle. Height of the wiggle corresponds to amplitude of sound wave.
Please refer the student’s module for instructions to save audio file or open the recorded sample. Make sure that students get the idea that loudness and amplitude are related to each other. Allow enough time to students to spend on the tool to explore it and analyze sound. Discuss the question given for further exploration with students. Elaborate it if needed.
Note down the responses of students. This discussion might also be useful for their biology classes when they learn about the nervous system of the human body.
2.2 PitchWe described shrillness in terms of frequency. There is a video of straw flute, where students can compare the shrillness in the sound as the length of the straw varies. You can also ask them to categorize sound on the basis of shrillness and loudness. You can use audio clip 1.2 for this. Discuss the questions given for further exploration with the students. You can do this as a thought experiment, like what would we do if we want to know the frequency of running ceiling fan.
2.3 World of musicLet the students read this activity. Give them some time to work with Audacity and record their song (it could be different sounds also). Help them to complete the project work and provide their analysis of recorded sound sample(s).
Lesson 3: Sound Travels
Learning Objectives After going through this lesson, students will be able to:
1. Know that sound propagates through solid, liquid and air.2. Show/feel vibration while sound is propagating
Approach
3.1 Paper cup telephoneYou would be familiar with the paper cup toy telephone and so would the students. It is fun playing with a toy telephone but we can also learn from it. You can discuss amplification of sound, effect of tension on the medium on sound, sound in different materials - string of different materials, cup of different materials, etc. Few questions given with the activity can be discussed with the students as - Cup help to amplify the sound, so if we change the cup size we will get different sound (loud/low). Stretched string has more tension than loose, which allows particles to vibrate from one end to other. While if we keep the string slack, vibrations are lost in the way and we cannot hear the sound. Facilitate every group to perform the activity. Ask them to note down their answers/observations in their notebook or they can use CLIx platform Notebook.
3.1 Paper cup telephone (continued) - AIn paper telephone, one can feel the vibrations of the voice by touching the thread at any place when it is taut. This would provide evidence that when sound propagates, particles of the medium vibrate.
106
3.1 Paper cup telephone (continued) - BIf we are not able to hear through the cup at the listening end, it means vibrations are not reaching to the end. In this section we are further exploring with the same paper cup telephone that if we create an obstacle for the vibrations so that it cannot travel through the string, then we are not able to hear sound.
In the paper cup telephone activity, the medium which is providing the path to the vibrations to travel is solid (string and cup) and gas (air inside the cup).
3.2 Singing spoonWhen you do this activity you will listen to an enchanting voice similar to a temple bell which vibrates for longer time. The vibrations of a spoon can be heard for a longer time because sound waves with small amplitudes travel to our ear via the string. We will not be able to listen to a sound with small amplitude if there is no string. The string provides a pathway to send sound waves of small amplitudes to us. This activity is mainly to show that sound travels through solids (here string). But the enchanting singing of the spoon make it very interesting.
In this activity, air as a medium has no role in the propagation of sound. The vibrations are coming only through a solid medium.
3.3 Do walls have ears?Generally, Students have a notion that sound cannot travel through a solid medium like a thick wall. This activity will help them discover that sound can travel through a solid medium like the activities 3.1 and 3.2. Take care that while doing the activity sound should not come directly through the air.
3.4 Hitting spoons inside the bucketYou know that sound also travel through liquid mediums but it may be difficult to convince the students. Therefore, students can learn through direct experience that sound also travels through liquids. Take two or three buckets filled with water to the class.
You can also do the same activity with different liquids and explore the difference in loudness and shrill-ness with the changing viscosity of the liquid.
3.5 Vibrating balloonThis activity helps students feel the vibrations on the balloon which is caused by the vibrating particles in the air. The activity can trigger a discussion among the students. You can ask them, “How do the vibrations reach the balloon?”. After listening to their answer you can tell them that sound forces particles around us to vibrate, and it is these vibrating particles that put the balloon in vibration.
3.6 Sound travels; as vibrations through different mediaThis section is the gist of all the activities done above in lesson 4. After doing hands-on activities and direct experiences of this which are said about the propagation of sound in different media (gas/liquid/solid).
Lesson 4: How does Sound Travel?
Learning Objectives After going through this lesson, students will be able to:
1. Understand the behaviour of particles of a medium while sound is traveling through the medium.2. Know the elastic property of air.
Approach4.1 A speakerWe often refer to the example of the vibrating diaphragm of speaker while it is producing sound. You can also see the image of it in textbooks. But it is a very unusual experience. We do not actually see the dia-phragm going back and forth (vibrating). Here we have tried to provide this experience as it happens in reality. There are two videos given in this section to make things simpler (visualization of vibrating dia-phragm). One is captured in slow motion and the other is at normal motion. Discuss the questions related

107
to the vibrating diaphragm of the speaker with the students. There is a simple pendulum attached with the vibrating speaker for comparing the speed of the slow motion video with the normal speed video.
4.2 A slinky springSlinky spring provides a clue to how sound travels through a medium. We tried to build an analogy be-tween the compression and rarefaction of a slinky spring and air particles.
One can see the compression and rarefaction while the wave is passing through the slinky spring. Video 4.2 (a) shows a single wave pulse traveling in slow motion in a golden coloured slinky spring. Video 4.2 (b) shows consecutive waves traveling many times, one can see the reflection of the wave also. You can demonstrate or ask students to do the activity, if a slinky spring is available.
4.3 Is air like a spring?This activity shows the elastic property of air. You have to arrange some syringes for the activity. One syringe per group is enough.
4.4 Does the medium move with the sound?Waves do not carry matter with it, i.e., particles of the medium do not move with the wave, it vibrates about its mean position and passes energy to the neighboring particles. Students might need to revisit the activities done previously to make connections. Help them to recall and revisit. Ask students to share their experiences and learning.
4.5 Is this true in other cases too?For activity 1, you need a good quality nylon rope. Nylon rope shows better wave than string. While do-ing the activity ask students to observe the position of the coloured mark. The activity has to be done in groups. Assign roles to members of the group like two students will hold the ends of the rope, one will observe the coloured mark, other one will make a note.
In activity 2, ask students to observe the motion of the paper boat with the propagation of the ripples on the water.
While shooting the video we have taken care of the other disturbances which could affect it, e.g., wind, the movement of a foot near the bucket, and any high amplitude sound source. You can also demon-strate the activity but take the necessary precautions.
Lesson 5: Solve the Puzzle
Learning Objectives After going through this lesson, students will be able to:
1. Recall the concepts discussed in the previous lessons2. Relate the concepts with real world problem
Approach
5.1 Let’s explore; Friends discussing a question
Let students discuss in groups and solve the puzzle. Do not assess them on the basis of wrong or right answers. You may give some hint and help them revisit concepts related to sound learned in previous lessons.

108

Centre for Education, Innovation and Action ResearchTata Institute of Social Sciences
V.N. Purav Marg, Deonar, Mumbai 400088, India
Phone: + 91 022 25525003 www.tiss.edu