PLMS 3 Users Guide - United States Marine Corps 3 Users...DISTRIBUTION STATEMENT A: Approved for...
151
Publications Library Management System Version 3 Users Guide 4 June 2007 DISTRIBUTION STATEMENT A: Approved for public release; distribution is unlimited. PCN: 18730000100
Transcript of PLMS 3 Users Guide - United States Marine Corps 3 Users...DISTRIBUTION STATEMENT A: Approved for...

Publications Library Management System
Version 3
Users Guide
4 June 2007
DISTRIBUTION STATEMENT A: Approved for public release; distribution is unlimited.
PCN: 18730000100


i
Table of Contents Welcome To PLMS 1 Introduction 3 BRIEF OVERVIEW .............................................................................................................................................3 KEY FEATURES OF PLMS.................................................................................................................................3 TERMS AND ABBREVIATIONS ...........................................................................................................................4 SYSTEM REQUIREMENTS ..................................................................................................................................8 PLMS SPONSOR...............................................................................................................................................9 Upgrading from a previous version 11 DOS PLMS....................................................................................................................................................11 CONVERTING YOUR DOS PLMS FILES...........................................................................................................11 DELETING THE OLD DOS VERSION .................................................................................................................13 PLMS Basics 15 WHY USE PLMS?...........................................................................................................................................15 PLMS CONFIGURATIONS ...............................................................................................................................15 PLMS USERS .................................................................................................................................................18 SECTION CLERK RESPONSIBILITIES ................................................................................................................19 DCP RESPONSIBILITIES..................................................................................................................................20 Getting Started 21 MAKING SURE I AM READY TO GO ..................................................................................................................21 NEW PLMS USERS.........................................................................................................................................21 SECTION LIBRARY (SL)..................................................................................................................................22 USE THE USMC MASTER LIST.......................................................................................................................23 How Do I? 27 ADD/CHANGE LOCAL PUBLICATIONS TO MY SECTION LIBRARY (SL)............................................................27 ADD A PCN TO MY SECTION LIBRARY ...........................................................................................................28 ADD AN ID NUMBER TO MY SECTION LIBRARY .............................................................................................30 ADD ASSOCIATIONS TO AN IDNO/SSIC..........................................................................................................32 ADD LOCATION(S) FOR A SPECIFIC PCN TO MY SECTION LIBRARY (SL) ........................................................32 ADD QUANTITIES TO A LOCATION FOR A PCN IN MY SL ................................................................................33 CHANGE LOCATION(S) FOR A SPECIFIC PCN IN MY SECTION LIBRARY (SL)...................................................34 CHANGE UNIT RATED QUANTITIES.................................................................................................................34 CREATE MY SECTION LIBRARY (SL) ..............................................................................................................35 DELETE A LOCAL PUBLICATION FROM MY SECTION LIBRARY (SL)................................................................36 DELETE A LOCATION FROM MY SECTION LIBRARY (SL) ................................................................................37 DELETE A PCN FROM A LOCATION IN MY SECTION LIBRARY (SL) ................................................................38 DELETE MY SECTION LIBRARY (SL) ..............................................................................................................39 DELETE A PCN FROM MY SECTION LIBRARY (SL) .........................................................................................39 DOWNLOAD PLMS ........................................................................................................................................41 DOWNLOAD THE LATEST COPY OF MASTERLIST............................................................................................41 EXIT PLMS WITHOUT SAVING MY DATA ........................................................................................................42 EXPORT SECTION LIBRARY (SL) ....................................................................................................................42

Table of Contents
ii
FIND ID NUMBER(S) A PCN IS ASSOCIATED TO ..............................................................................................43 FIND PCN(S) AN ID NUMBER IS ASSOCIATED WITH ........................................................................................44 FIND PUBLICATIONS DESIGNATED NON EQUIPMENT ASSOCIATED (NEA)......................................................45 FIND PUBLICATIONS WITH "NO LOCATION(S) ASSIGNED" ..............................................................................46 GET THE MOST RECENT VERSION OF PLMS FOR MY USE ................................................................................47 LOAD MY SECTION LIBRARY (SL)..................................................................................................................47 LOCATE A PUBLICATION NOT PHYSICALLY PRESENT IN MY SECTION .............................................................48 LOCATE MY EXISTING SECTION LIBRARY (SL) ..............................................................................................49 MAINTAIN LOCATIONS FOR MY SECTION........................................................................................................50 MAINTAIN QUANTITIES FOR A SPECIFIC PCN .................................................................................................52 MOVE MY SECTION LIBRARY (SL).................................................................................................................53 ORDER PUBLICATIONS ...................................................................................................................................54 RECONCILE MY PLMS APPLICATION EACH MONTH ........................................................................................56 REMOVE A PUBLICATION FROM MY SECTION LIBRARY (SL) ..........................................................................58 REMOVE AN ID NUMBER FROM MY SECTION LIBRARY (SL)...........................................................................59 REMOVE ASSOCIATIONS TO AN IDNO.............................................................................................................60 RENAME A LOCATION IN MY SECTION ............................................................................................................62 RENAME MY SECTION ....................................................................................................................................63 SAVE MY SECTION LIBRARY (SL) ..................................................................................................................64 SAVE MY NEW UNIT PL FILE ..........................................................................................................................65 SUBMIT A NAVMC 10772 .............................................................................................................................66 USE THE FIND OPTION...................................................................................................................................68 USE THE USMC MASTER LIST.......................................................................................................................70 VIEW INFORMATION ON ANY PCN .................................................................................................................73 What does it mean? 73 SUPERCEDES PUBLICATION <00000000000>.................................................................................................73 NONSTOCKED PUB. SEE MCO 5600.31 ....................................................................................................74 Reports 75 VIEWING REPORTS..........................................................................................................................................75 PRINTING REPORTS.........................................................................................................................................76 SENDING REPORTS .........................................................................................................................................77 AUTOMATICALLY DELETE REPORTS OVER 120 DAYS OLD ..............................................................................79 SECTION .........................................................................................................................................................79
Section Library ..........................................................................................................................................79 Shortages/Overages...................................................................................................................................89 Non Equipment Associated (NEA).............................................................................................................90 Section Change Report ..............................................................................................................................91 Working with MCPDS ...............................................................................................................................94
SHARED..........................................................................................................................................................97 New Publications.......................................................................................................................................97 Deleted Publications .................................................................................................................................98
MISCELLANEOUS............................................................................................................................................99

Table of Contents
iii
RECONCILIATION...................................................................................................................................99 Conversion Exception Listing..................................................................................................................106
Distribution Control Point (DCP) 111 CREATE A DCP ............................................................................................................................................111 WHAT DOES THE DCP DO?...........................................................................................................................112 EDIT PL........................................................................................................................................................113
Managing your Unit PL...........................................................................................................................113 Add PCN to Unit PL................................................................................................................................116 Remove PCN from Unit PL .....................................................................................................................117 MCPDS Unit Change Request.................................................................................................................118 Export Unit Publication Library (PL) .....................................................................................................121 Create Unit PL Report.............................................................................................................................122
CONNECTING YOUR SECTIONS......................................................................................................................124 First Coordinate with the Section(s) .......................................................................................................124 Receiving a New Section Library ............................................................................................................125 Adding a Section through Manage Sections ............................................................................................128 Converting a DOS PLMS Unit PL...........................................................................................................133
MANAGE SECTIONS......................................................................................................................................136 Managing your Unit's Sections................................................................................................................136 Add a Section to the Unit.........................................................................................................................138 Rename a Section ....................................................................................................................................138 Change how files are exchanged with a Section......................................................................................138 Delete a Section from the Unit ................................................................................................................141
Index 143

1
Welcome To PLMS
Welcome to the Publication Library Management System (PLMS), the standard USMC library management tool from the Administration and Resource Management Division, Publishing and Logistics Management Section, HQMC. This program provides an automated system for use by commands to manage publications and will help to ensure each unit achieves and maintains Core Capability for maintaining their publication library and that publications received and maintained are essential. This Windows ® based version of PLMS replaces all prior DOS versions. The functionality is similar to the previous DOS version, and still supports the functions required in performing the job. . Brief Overview Key Features of PLMS Why Use PLMS


3
Introduction
Brief Overview
PLMS is used throughout the USMC by individuals and units at all levels to manage their publications libraries. A library is a managed collection of publications held in either physical or electronic form. PLMS provides you a list of all USMC Headquarters level publications (FM,MCO, NAVMC, MI, SL, TI, TM, etc…) which it refers to as the Master List and is updated monthly. From this list you choose those publications you have or wish to have and add them to your Section Library. Once in your Section Library you indicate how many of each you require, how many you currently have on hand, where they are located and how many you have on order. For technical publications you select which equipment you have based on their ID Numbers and then PLMS tells you which publications are recommended to maintain each item of equipment. Monthly during reconciliation with the new Master List file, if a publication
was deleted, it automatically removes it from your Section Library and instructs you to dispose of those copies you have on hand. If a publications is revised, PLMS recommends you replace your old copies with new ones. For technical publications, as additional publications are associated to your equipment, PLMS automatically adds them to your Section Library and recommends you order copies if needed and removes publications if no longer required by the equipment you have. PLMS is designed to be used in coordination with Marine Corps Publications
Distribution System (MCPDS). PLMS can be configured as simply as a single library on one PC all the way
up to a Unit level library supporting many section libraries. For all other types of publications whether they be Division, Brigade,
Regiment , Battalion or Company Orders, other services manuals, commercial books, etc… PLMS provides a limited capability to include these in your library. While PLMS cannot create and send your orders directly for addition
publications, it does provide worksheets to give to the MCPDS clerk listing your orders and how many and to whom they will be going to. Key features of PLMS
PLMS is a tool that assists you with the maintenance of your publication library (PL) for all publications required by your unit or section. While its primary emphasis is in support of the unit publication library (PL), each section can also track and maintain their individual libraries to be shared and utilized with the unit Directives Control Point (DCP). Listed below are PLMS key features: Section Library

Publications Library Management System v3
4
Master List of USMC Publications Local Publications FIND Reports Alternative Configuration's PLMS Reconciliation
Terms and Abbreviations
Associations All publications in PLMS are designated as either technical or non-technical depending on if its equipment or administrative related. All technical publications are ‘associated’ to one or more Id Numbers (e.g. items of equipment). All non-technical publications are ‘associated’ to one or more Standard Subject Identification Codes (SSIC). In managing publications in PLMS, each association whether it be PCN/ID Number or PCN/SSIC is maintained separately meaning that if a PCN is ‘associated’ to 5 different ID Numbers, there exists 5 associations that can be separately assigned as being required or not. Assigning one as required puts that publication and Id Number into your Section Library. DCP A Directive Control Point (DCP) is responsible for maintaining the units Publication Listing (PL). He may or may not communicate with other Sections within that Unit, but he is responsible for ordering, receiving, distribution, inventory, and control of the unit’s USMC publications. He may have direct access to update the Marine Corps Publication Distribution System (MCPDS), or else is responsible to get MCPDS update information to the MCPDS clerk. This type user would be either a "DCP Only" whose Section and Unit PL are basically one in the same, or a "DCP w/Sections" who combines one or more Sections with his own (if he has one) to create a Unit PL. In either case, the Unit PL data is what is used to update MCPDS.
EDO Electronic Distribution Only (EDO) publications are those publications that are only available electronically. EDO publications are no longer physically stocked, however they are valid USMC publications and can be tracked in PLMS if desired. When viewing an EDO publication in the Master List or Section

Introduction
5
Library, the word "EDO" will be highlighted to indicate that publication is only available electronically. EXPORT Method used to distribute or transport files between the DCP and its sections, and vice versa (i.e. e-mail, Diskette, or Shared Files). FMF Fleet Marine Force, or Fleet Marine Forces FSMAO Field Supply and Maintenance Analysis Office HQMC Headquarters Marine Corps SL The Section Library (SL) is a listing of required publications for a Section. IMPORT Method used to distribute or transport files between the DCP and its sections, and vice versa (i.e. e-mail, Diskette, or Shared Files). IAAC The Individual Activity Address Code (IAAC) identifies a unit within the Marine Corps, a supporting establishment, or any other desired entity that can be reached through an independent address. (i.e. 7450003 = MCCDPA QUANTICO VA) IAC The Individual Activity Code (IAC) is used interchangeably with IAAC INVALID ID NUMBER - 00000A When a PCN is associated to an invalid Id Number, this indicates that a technical PCN in MCPDS is associated with one of the following types of Id Number: - A generic IdNo, which is used exclusively in MCPDS for tracking purposes
only - An IdNo that is no longer valid according to the official IdNo file used for
PLMS You can either associate these PCN(s) to the invalid IdNo (00000A) for tracking purposes, or you can designate them Non Equipment Associated (NEA), or do both. When you perform the reconciliation process, and the PCN is associated to a valid Id Number, you will then be notified to make any necessary updates. ISC Information Systems Coordinator ISMO Information Systems Management Office

Publications Library Management System v3
6
LAN The Local Area Network (LAN) is a group of computers and associated devices that share a common communications line and typically share the resources of a single processor or server within a small geographic area (i.e. an office building). Usually, the server has applications and data storage that are shared in common by multiple computer users. LOCAL PUBLICATIONS Local publications are physical copies of documentation that users want to keep track of. They consist of such things as: BN Orders, commercially purchased books, various types of documentation, etc. Local publications can be tracked within a section, however they will not be available in the USMC Master list of Publications. LOCATION Is a physical or logical location that is store publications. A location could be a binder, drawer, someone’s desk, a computer server path, etc… PLMS allows you to construct a hierarchy of locations and you normally store the publication in the lowest level. In the following example you would Add the publication to Binder 3.
S-1 File Cabinet 1 Drawer A Binder 3
So the location of the publication would be S-1/File Cabinet 1/Drawer A/Binder 3.
MASTER LIST OF PUBLICATIONS A listing of all USMC publications that you can choose from to include in your Section Library MCPDS Marine Corps Publications Distribution System
NEA Non Equipment Associated - One feature of PLMS is that you can designate ID Numbers as Required and then designate their associated PCNs as Required or not. In your Section Library this binds those PCNs to their ID Numbers so if the ID Number is no longer Required or is deleted, then PLMS automatically assumes that those PCNs bound to that ID Number are no longer required either and will remove them from your Section Library. To retain a technical PCN in your Section Library regardless of what happens to its associated ID Numbers, it is marked as NEA. NO LOCATION ASSIGNED When you initially add a PCN to your Section Library (SL) it is not yet assigned a location showing where the publication will

Introduction
7
be located, "No Location Assigned" appears in the location field until such time that you assign a location. A "No Locations" folder is system generated to store any PCN not yet assigned to a Location. You can move PCN(s) from this folder to an existing Location, however you cannot move a PCN from an existing Location to this folder. The only time a PCN will be replaced in the "No Locations" folder is if its assigned Location is deleted and the User confirms to remove it along with any assigned quantities for that PCN. ON-HAND QUANTITY: The number of copies you physically have on hand for a specific publication at one or more locations. If you have a publication on hand, you must first indicate where that publication is physically located in the Publication Library Management System or you won’t be able to assign its on-hand quantity. ON-ORDER QUANTITY: The number of copies you have requested to be ordered for a specific publication at one or more of its locations. PC Personal Computer PCN Publication Control Number PLMS Publication Library Management System REQUIRED QUANTITY: That quantity you are required to maintain to support your section in doing its job, for a specific publication at one or more of its locations. QUANTITY RATED The number of copies of a publication that a unit or section required to perform its mission. Also known as an ‘Allowance Quantity’. While the number was originally determined by the publication’s HQMC sponsor, the local commands are authorized to adjust it as needed.
SECTION A portion of a unit that is responsible for managing their own publications library. (e.g. S-1, Armory, MMO, SUPPLY, etc…) SECTION CLERK A Section Clerk maintains a listing of all publications located in his Section. These publications can consist of USMC publications and/or local publications within the Section. If that Section is part of a Unit and requires DCP interaction, then he is designated as a "Section w/DCP" type

Publications Library Management System v3
8
user. If that Section works strictly on his own and does not require any DCP interaction, then he is designated as a "Section Only" type user. SECTION LIBRARY The collection of USMC and local publications that is managed at the section level. This includes keeping track of which publications the sections requires, the ID Numbers for that equipment it is responsible for maintaining, how many of each publication is required, how many are on hand, where they are located and how many are on order. SECTION LIBRARY FILE A extract file that a section sends to their DCP which includes a listing of how many of each PCN is required, how many are on hand and how many are requested to be ordered. SSIC Standard Subject Identification Codes. SUBORDINATE UNIT A section that is supported by a DCP TAMCN Table of Authorized Control Numbers UNIT The combination of the DCP and all of its subordinate Sections. Normally equating to an IAAC or RUC level. UNIT PL File The Unit Publications Listing file is a database of those Marine Corps PCNs rated by a single unit. It consists of two tables. The first, ‘UnitSections’ contains a list of all of the Sections contained within a Unit by their Sections name including their Section Library file exchange folder location, Unit PL file exchange folder location, method of file exchange, date of last imported Section Library and Section POC. The second table contains a list of all of the rated PCNs by Section and includes Section Required Quantity, Section OnHand, Quantity, Section OnOrder Quantity and DCP Rated and DCP Ordered Quantities Adjustments. This database is maintained by the DCP and a copy of it is distributed to all the subordinate sections. UNIT RATED QUANTITY The total of all Required Quantities of all Sections of a Unit for a particular PCN. USMC: United States Marine Corps System Requirements
PLMS requires

Introduction
9
• Windows 98, Windows Me, Windows XP, Windows NT 4.0, or Windows 2000. It will not run under Windows 3.x or Windows NT 3.1 or 3.5.
• A mouse or other pointing device. • For printed output, a Windows-supported printer • Access to the internet either directly or indirectly (via another PC) to
download program updates and periodic file updates PLMS Sponsor
Publication Library Management System (PLMS) is sponsored by ARD Address:
COMMANDANT OF THE MARINE CORPS (ARDE) HEADQUARTERS US MARINE CORPS 2 NAVY ANNEX WASHINGTON DC 20380-1775
PHONE: Commercial: (703) 614-1712/1713 DSN: 224-1712 FAX: Commercial (703) 614-1463 DSN: 224-1463 World Wide Web: http://192.156.19.102/plms.nsf POC: ARD Email: Organizational Mail box [email protected] Office Hours: Monday to Friday 8:00 A.M. to 5:00 P.M. Eastern Standard Time


11
Upgrading from a previous version
DOS PLMS
The old 2 .13 version of PLMS dated 01 April 1993 was based on an older technology (i.e. MS-DOS) and is lo longer compatible with the software that the Marine Corps uses today. If you are using the DOS version of PLMS you may want to perform a conversion process to load your existing section library into the new version of PLMS.
You are not require to convert your existing DOS PLMS library, instead you may want to ‘start over’ in building your Section Library from scratch. Instead you will need to create a new Section Library
This version of PLMS is configured for all User types.
Notes:
• Future PLMS data and the PLMS program will be distributed separately. • PLMS is no longer exclusively based on the SL1/2 – 1/3. Data will be
provided from the best available source.
Converting your DOS PLMS files
The prior version of PLMS was verion 2.13 dated 01 April 1993 and was design to be run under MS-DOS. The new version runs under Microsoft Windows ® . You have the option of converting your existing Section Library data to the new program or starting with an empty library and re-entering your publications library from the beginning.
If you choose to convert your files you will need to run the conversion process. The conversion process will read your Section Library files, run through a filtering process which will remove obsolete PCNs and ID Numbers, clean up any location inconsistencies, create your new Section Library with the same Section Name assigned with hopefully the correct configuration , load your required PCNS with their Required and Onhand quantities, locations and NEA statuses, and load your required ID Numbers. A Conversion Exception Listing will list anything that could not be converted clean and was either fixed by the program, deleted or needs manual correction by you.
To start the conversion process:
1) Start PLMS. If you are the first Section Library on this PC then you will be asked ‘Do you want to convert your existing Section Library?’. Click [Yes]. If you are not the first Section Library on this PC the PLMS Section

Publications Library Management System v3
12
Name screen appears. Space out the Section Name listed and click [Convert].
2) The Welcome to the PLMS Data Conversion Process screen appears. Click [Start]
3) Insert you DOS PLMS Section Library and Unit PL diskettes as prompted
4) The PLMS Conversion Exception Listing appears. This lists all the things the conversion had to perform to copy your DOS PLMS Section Library to your Windows PLMS Section Library. Please Print the listing for later action.
5) Close the PLMS Conversion Exception Listing display screen.
6) Your new Section Library is loaded and displayed and available for use..
7) See PLMS Configurations to verify you are set to the correct configuration
8) Perform those actions as directed by ‘Your Actions’ on the PLMS Conversion Exception Listing.
When the conversion process starts the ‘Welcome to the PLMS Data Conversion Process’ screen is displayed. To continue click ‘Start’. You’ll need to insert your library disk(s) in the your diskette drive. The system will search for the appropriate files on your disk, if they are found it will perform the conversion process. This process can takes several minutes depending on the size of your Section Library. Once the conversion is complete, your PLMS Conversion Exception Listing is displayed for preview. Please print (Click Print) this listing, you might need it if there is any final data correction needed. Then Close the Listing . You will now be placed in your Section Library.
Notes: 1. The conversion process will only need to be run once for each Section
Library. If you want/need to run the conversion again, you must first delete that Section Name from PLMS.
2. If you are converting from 2 separate diskettes (one Unit PL, other Section Library), the Unit diskette goes in first.
3. DOS PLMS is not an installed program and therefore is not covered by most NMCI or local permission rules so you should not need any ‘administrator authority’ to delete DOS PLMS from your PC.
4. Please see local ISC support personnel if assistance is necessary.
Upgrading from a previous version
13
Deleting the old DOS version
If you are no longer going to use the old DOS version of PLMS, it can be deleted. Since your Section Library(SL) is actually contained on your SL diskette itself, this can be done before or after you have converted your library to the new version of PLMS. To delete PLMS Version 2.13
1. First identify the location of DOS PLMS on your PC. Perform an Explore or FIND across storage areas looking or the file ‘PUBS.EXE’.
2. When found then that folder and all subordinate folders can be deleted. 3. Also any shortcuts that may have been added can also be deleted
Notes:
5. Do not delete your Section Library files from your diskettes until you are sure you no longer need them. (i.e. you have converted your SL to the new PLMS program AND you have a backup of your new SL.
6. DOS PLMS is not an installed program and therefore is not covered by most NMCI or local permission rules so you should not need any ‘administrator authority’ to delete DOS PLMS from your PC.
7. Please see local ISC support personnel if assistance is necessary.


15
PLMS Basics
Why use PLMS?
PLMS is designed to assist users in maintaining a current and accurate account of the publications required by MCO 5600.31G & MCO 5000.14C The PLMS program can be used by any person or organization within the Marine Corps who needs to or wants to maintain a publications library . This program will assist you in loading and maintaining a Section Library for your section. PLMS supports both individual and unit level libraries. Individual sections can start as a Section Library (SL) which can later be incorporated into a Unit level library. Unit level libraries roll up all subordinate section libraries together to provide a unit level view and allow better coordination between PLMS and MCPDS. Each SL will be unique and supports that Section in achieving and maintaining core capabilities for managing their publication library and helping to ensure essential publications available for use. Designated personnel at each individual section maintain the Section Library. Fields are provided to record the quantity on hand, quantity required, physical locations of each copy, quantity on order and non-equipment associated requirements. For technical publication embedded features are included that allow you to manage required publications by identifying which equipment you have. All (or selected) publications for that equipment is then automatically added to you SL. If a publication is no longer required because you either no longer have that equipment or that publication no longer is designated to support any equipment you have, then that publication is automatically removed from your SL. PLMS provides various tools to manage your publication library.
- Print various Section Library (SL) Report - Maintenance of location and quantity information for each specific
publication - Add local publications - Query availability publications in other sections within your Unit
PLMS Configurations
Configuration is used to determine which type of PLMS user you are in order to provide the appropriate features and options to you. PLMS has four different configurations. If you are converting your existing Section Library from the previous DOS version of PLMS, your initial configuration will be determined from information contained on your diskettes. While it should be correct, it is only a best guess and may need to be corrected. If you are creating a new Section Library, then you must determine which of the four configurations will

Publications Library Management System v3
16
support your needs best. When creating a new section library you will automatically be defaulted to "Section Only". Use the Configure option located on the PLMS Section Library screen to change it if necessary. The available PLMS configurations are listed below.
1) DCP Only: If you are only responsible for your own Section Library, deciding which and how many publications your section rates, you have the capablility to order your own PCNs directly using the Marine Corps Publication Distribution System (MCPDS) and you have no subordinate Section Libraries to manage, you are a Section Only type PLMS user
2) DCP with/Sections: If you manage subordinate Sections who also use PLMS to maintain their own individual Section Libraries, you are a DCP with/Sections type PLMS user. As a DCP you coordinate determining publications requirements and consolidating ordering of pubs across your unit. Optionally you can have your own Section Library.
3) Section Only: If you are only responsible for your own Section Library, deciding which and how many publications your section rates, but you must submit a request to someone else to actually order the PCNs and you have no subordinate Section Libraries to manage, you are a Section Only type PLMS user.
4) Section with/DCP: If you are only responsible for your own Section Library, managing the physical locations of all your publications, determining which and how many publications your section needs, but to order a PCN or change how many you rate you must send a request up to a unit level (DCP) publications clerk who also uses PLMS then you are a Section with/DCP. Dependant of which type user you are will determine what your "Configure" screen will look like.
To check or change your configuration click ‘Configure’ on the main Section Library screen. Here you will be presented a variety of options depending on you type of user. Depending on the type of user, the following fields can be changed.
DCP Only
DCP w/Sections
Section Only
Section w/DCP
Type of User X X X X
Section Name X X X
POC X X X X
Backup Path Name X X X X
IAAC X X

PLMS Basics
17
Date of PL
Unit PL File Location X X X
Section Library Exchange Method X
Section Library File Location X
Type of User – Indicates which type of PLMS user is supported by this program. To change it simply click on the correct option. Section Name – Name of Section Library. This name was assigned when this Section Library was created but can be renamed here. Max 20 characters. No special characters (i.e. !,@.#.$…) allowed. POC – Point of Contact for Section Library. Example: Sgt D. A. Smith DSN 555-1234 Backup Path Name – Since all computers are susceptible to hardware/software failures, a good practice is to back up your data on a regular basis. When you select the PLMS ‘Create Backup’ option, the backup file is written to the folder listed here. By default a Backup folder is created for you under the PLMS folder where this program is installed. To change it click on the Browse button to the right and select (or create) another folder on any location available. IAAC – Individual Address Activity Code – Assigned to the Unit by HQMC (code AR) to identify your in when accessing the Marine Corps Publications Distribution System (MCPDS) for ordering USMC publications or changing the quantity rated by your unit. Date of PL – The Publications List (PL) is a unit level file listing all PCNs as rated by your unit, which section is assigned how many and how many orders are outstanding. This file is maintained by the DCP and distributed to all subordinate sections. The date that the exported file is created is the Date of PL. Unit PL File Location – The unit PL file is maintained and distributed by the DCP and received and saved by the section libraries. For the DCP this location specifies where to save the PL file when created. For Section Libraries this location specifies where the file is put (manually if Section Library Exchange Method is PSD or E-Mail, automatically if Section Library Exchange Method is Shared). If Section Library Exchange Method is Shared, this location must be coordinated with the DCP. Section Library Exchange Method – For type user Section w/DCP, section library data is exchanged with the DCP. This exchange can be performed using one of the following methods:

Publications Library Management System v3
18
1) Portable Storage Device (PSD) – any portable device (diskette, Zip Disk, CD, USB flash drive, etc…). You have the option of specifying the PSD here (see Section Library File Location) or saving it on your local hard drive first and then manually copying it to your PSD which can then be transported to the DCP when exporting. When importing from the DCP the Unit PL file the process is reversed.
2) Email- when exporting a Section Library file by email, the file is first written to the location specified at Section Library File Location and then you send an email to the DCP with this file as an attachment. When importing the Unit PL file by email. It comes in as an attachment and then you save it to the location specified in Unit PL File Location.
3) Shared. (Preferred) – Coordinating between the DCP and subordinate Sections, you determine a location(s) on your network where both sides have read/write permissions. Then the Section Library set their Unit PL File Location and Section Library File Location to these agreed upon locations. The location can be the same for Section Library file and Unit PL file or different locations. The DCP enters these same locations to that Section in the Manage Section Screen. Different sections can use the same shared locations or different ones as needed.
Section Library File Location – The Section Library Extract file is created by the Section to be exported to the DCP. It contains a list of all of the PCNs in the Section Library along with their Required, On-Hand, and On-Order Quantities. Also the section POC is included. See Export the Section Library for information on sending the file to the DCP.
PLMS Users
PLMS is designed to handle the most common configurations that various units and individuals within the Marine Corps might need to manage their publications library.
PLMS is designed around two basic types of users.
1) Section – The section user is the manager of an individual library. The library consists of one or more publications. For each of these publication the user keeps track of the quantity required, quantity

PLMS Basics
19
required, quantity on hand, quantity on order and the location of each copy.
2) DCP – The Distribution Control Point user is a manager of sections. The subordinate sections send their publications lists with quantities to the DCP who consolidates them into a Unit level Publications List (PL). The DCP then either enters in MCPDS directly or forwards to the MCPDS clerk any changes to required quantities and any orders for publications. This updated Unit PL is then distributed to the various section to provide visibility throughout the unit of all publications within the Unit. The DCP may or may not have a section library also.
Based on these two types of users PLMS is further divided into four configurations, each with specific capabilities. See PLMS Configurations.
Section Clerk Responsibilities
The Section clerk is that individual(s) tasked with maintaining the Section library. The clerk must have access to a computer with PLMS installed. Multiple section libraries may be loaded to the same PLMS program.
Section Clerk duties for all PLMS configuration as follows: - Input all required PCNs - Input all assigned equipment IdNos - Enter Required, On Hand, On Order Quantities - Maintain Locations - Assign all On Hand copies to a Location - Perform monthly HQ reconciliation - Periodic inventory of all publications on hand - Input Local publications
Additional Section Clerk duties for Section Only configuration as follows:
- Create MCPDS Section Change Request
Additional Section Clerk duties for Section with/DCP configuration as follows:
- Export Section Library to DCP - Import Unit Publications Listing (PL) from DCP - Review Section Change Report and apply required updates - Coordinate section name changes with DCP - Coordinate File Exchange with DCP

Publications Library Management System v3
20
DCP Responsibilities
The Directive Control Point (DCP) clerk is that individual(s) tasked with maintaining the Unit Publications Listing (PL). The clerk must have access to a computer with PLMS installed.
DCP Clerk duties for DCP with/Section configuration as follows: - Input all subordinate sections using Manage Sections - Import Section Library to DCP - Review and Approve Section request to change required quantities - Review and Approve Section Request for orders - Export Unit Publications Listing (PL) from DCP - Perform monthly HQ reconciliation - Create MCPDS Unit Change Request - Reconcile PLMS with MCPDS - Coordinate File Exchange with sections
DCP Clerk duties for DCP Only configuration as follows:
- Perform monthly HQ reconciliation - Create MCPDS Unit Change Request - Update PLMS changes in MCPDS - Reconcile PLMS with MCPDS

21
Getting Started
Making sure I am ready to go
If you are reading this, then you should already have PLMS installed on your PC. Depending on your situation, this could have been done several different ways:
1. If you have an NMCI provided PC, a MAC (Move, Add, Change) request was completed
2. PLMS was installed as part of a group distribution via NMCI initiated by the PLMS sponsor
3. You inherited an NMCI PC that already had PLMS loaded 4. You have a non-NMCI PC that you installed PLMS 5. You have a non-NMCI PC that already had PLMS installed
PLMS exists in two parts.
1. The PLMS program itself. This is the installed portion of PLMS 2. The MasterList file. This file contains all of the USMC publications and
ID Numbers along with any other related information. This file is distributed periodically by HQMC via their web site and you need to download it and save it you your PC in the /Data subfolder of PLMS.
a. If you do not have this file when you start PLMS, a ‘Load Initial PLMS Shared Database’ popup will appear instructing you to download and save the file
b. If your Masterlist file is more than 60 days old a ‘Shared Library is Old’ popup message will appear reminding you that you need to obtain the latest copy of the MasterList file.
c. To see the date of your MasterList, from the Section Library screen click ‘Help’ then ‘About’ on the menubar.
New PLMS Users
As a new PLMS user, you could either be using PLMS for the very first time and will be creating your Section Library(SL) from scratch or you have been using the DOS version of PLMS for years and have a well established SL.
• If you are using PLMS for the very first time you need to Create your Section Library.
• If you are running DOS PLMS already you need to Convert your Section Library.

Publications Library Management System v3
22
Section Library (SL)
The Section Library (SL) is both a concept and a screen you look at while using PLMS. • The concept is that the SL represents your collection of those
publications you have indicated you require along with the locations where you stored them and their quantities required, on hand and on order. Also included are those ID Numbers you marked as required to assist you in managing their technical publications. All this information together comprise your unique SL.
• The screen is titled ‘PLMS Section Library: your section name’. This is the focal point in using PLMS to manage your publications. Everything you do in PLMS once you enter your SL starts and end here. The rest of this help page will describe the parts and uses of the SL screen.
Looking at the SL screen its divided into four separate areas:
1. The top part of the screen is the Equipment Information or SSIC Information area depending on whether the PCN currently being view is technical (i.e. equipment related) or non-technical (i.e. administration related). The left side of this area contains general information while the right side lists those publications associated to either that ID Number or SSIC. You here have the option of listing only those publications Required (i.e. present in your SL) or All publications associated to either that ID Number or SSIC. Within the Associated Publications box you can select the active publication by clicking on its PCN or Long Title. Checking/unchecking the Rqd checkbox add/removes a publication from your SL.
2. The middle part of the left side of the screen is the PCN Information area. This shows which publication is currently active and lists the details of that publication. There is a Delete button that will remove that publication from your SL.
3. The lower part of the left side of the screen is the Search area. This area allows you to list and select those items in your SL based on a set of various keys. There are nine different searches that you can perform. Clicking on that search option lists those items. Then typing into the open box allows you to position to a particular value. Clicking on a listed item selects it and if it’s a publication it makes it the active publication, if its not a publication then its first associated publication becomes the active one by default. Only those Search option that have something to list are selectable else they are dimmed.
4. The right side lower half of the screen is the Library Information area. This area is based on the active publication currently selected. In it is listed those locations that this publication is assigned to along with the Required, On Hand and On Order quantities for each of those locations. To assign a location to the active publication click on the Add button. If

Getting Started
23
you want to change an existing location, click on the old location, click the Change button and then select the new assigned location. To remove the publication from a location, click on that location then click the Delete button. If you hover the mouse pointer over a location you will see the entire location with all of its levels displayed. Normally you just see the last level.
While this was just a quick overview of the capabilities of the Section Library screen, click on any of the references below for more detailed instructions:
• Add a PCN to my Section Library • Add an ID Number to my Section Library • Add Associations to an ID Number / SSIC • Add location for a specific PCN to my Section Library • Add quantities to a Location for a PCN • Add / Change a Local Publication to my Section Library • Change location for a specific PCN • Delete a Local publication from my Section Library • Delete a PCN from a Location • Delete a PCN • Electronic Distribution Only (EDO) • Exit PLMS without saving my data • Export Section Library • Find ID Number a PCN is associated to • Find PCNs an ID Number is associated with • Find publications designated Non Equipment Associated (NEA) • Find publications with No Location Assigned • Maintain Location(s) for a specific PCN • Maintain locations for my Section • Maintain quantities for a specific PCN • Remove a publication from my Section Library • Remove an ID Number from my Section Library • Remove Associations to an ID Number \ SSIC • Rename a Location • Save my Section Library
Use the USMC Master List
Publications Library Management System v3
24
The USMC Master List contains a list of all the official publications (i.e. PCNs) and items of equipment (i.e. ID Numbers) sponsored by Headquarters Marine Corps. In order to manage your Section Library, in it you should included all PCNs that you currently or will Require, have On Hand or have or will Order and all ID Numbers for item of equipment you are (or will be) required to maintain. Having a PCN or ID Number in your Section Library mean that you ‘Require’ it. To go into the MasterList, from the Section Library (SL) screen, click on ‘MasterList’ on the menu bar. Once in MasterList, PLMS provides a variety of options for identifying PCNs and ID Numbers to load into your Section Library.
Identify by PCN
1. Click on ‘PCN’ in the Search box. This lists all publications by PCN. On the right side of the screen the associated SSICs (non-technical publications) or ID Numbers (technical publications) are listed.
2. Either scroll down to or start typing in the desired PCN into the Search box
3. Once the PCN is located that you want to put into your Section Library (SL), click on the Rqd checkbox to the left of the PCN. This adds it to your Section library.
4. Except if the PCN is technical (associated to ID Numbers - those ID Numbers are listed to the right). When a technical PCN is checked, it must then be either designeated Non-Equipment Associated (NEA) by checking the NEA box or if you want that PCN to be included in your Section Library based on the ID Number(s), click on the Rqd IdNo checkbox(es) to check it. This established the PCN/ID Number association(s). It also adds the ID Number(s) to your Section Library if its not already there.
Identify by Short Title
1. Click on ‘Short Title’ in the Search box. This lists all publications by their Short Title. On the right side of the screen the associated SSICs (non-technical publications) or ID Numbers (technical publications) are listed.
2. Either scroll down to or start typing in the Short Title into the Search box 3. Once the correct Short Title is located that you want to put into your
Section Library (SL), click on the Rqd checkbox to the left of the Short Title. This adds it to your Section library.
4. Except if it is the Short Title of a technical PCN (associated to ID Numbers - those ID Numbers are listed to the right). When a technical PCN is checked, it must then be either designeated Non-Equipment Associated (NEA) by checking the NEA box or if you want the PCN to
Getting Started
25
be included in your Section Library based on the ID Number(s), click on the Rqd IdNo checkbox(es) to check it. This established the PCN/ID Number association(s). It also adds the ID Number(s) to your Section Library if its not already there.
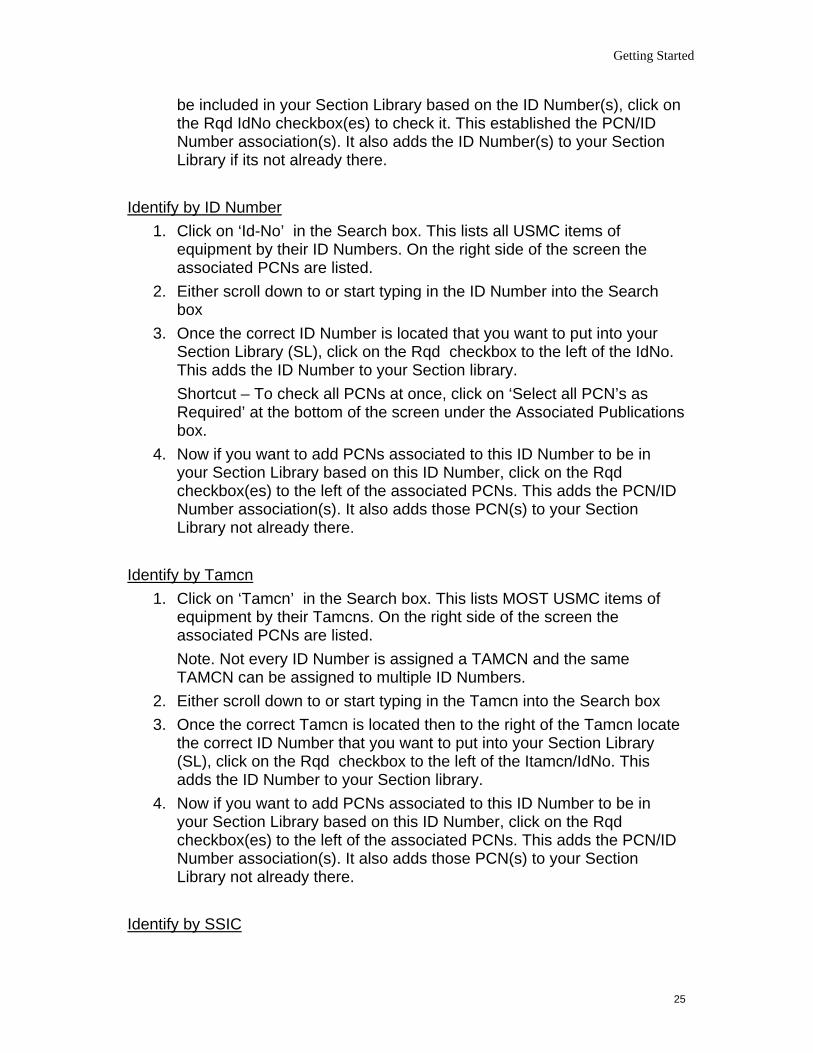
Identify by ID Number
1. Click on ‘Id-No’ in the Search box. This lists all USMC items of equipment by their ID Numbers. On the right side of the screen the associated PCNs are listed.
2. Either scroll down to or start typing in the ID Number into the Search box
3. Once the correct ID Number is located that you want to put into your Section Library (SL), click on the Rqd checkbox to the left of the IdNo. This adds the ID Number to your Section library. Shortcut – To check all PCNs at once, click on ‘Select all PCN’s as Required’ at the bottom of the screen under the Associated Publications box.
4. Now if you want to add PCNs associated to this ID Number to be in your Section Library based on this ID Number, click on the Rqd checkbox(es) to the left of the associated PCNs. This adds the PCN/ID Number association(s). It also adds those PCN(s) to your Section Library not already there.
Identify by Tamcn
1. Click on ‘Tamcn’ in the Search box. This lists MOST USMC items of equipment by their Tamcns. On the right side of the screen the associated PCNs are listed. Note. Not every ID Number is assigned a TAMCN and the same TAMCN can be assigned to multiple ID Numbers.
2. Either scroll down to or start typing in the Tamcn into the Search box 3. Once the correct Tamcn is located then to the right of the Tamcn locate
the correct ID Number that you want to put into your Section Library (SL), click on the Rqd checkbox to the left of the Itamcn/IdNo. This adds the ID Number to your Section library.
4. Now if you want to add PCNs associated to this ID Number to be in your Section Library based on this ID Number, click on the Rqd checkbox(es) to the left of the associated PCNs. This adds the PCN/ID Number association(s). It also adds those PCN(s) to your Section Library not already there.
Identify by SSIC

Publications Library Management System v3
26
1. Click on ‘SSIC’ in the Search box. This lists all Standard Subject Identification Codes by their SSICs. On the right side of the screen the associated PCNs are listed. Note: Only non-technical PCNs are assigned an SSIC. A PCN can be assigned to several different SSICs.
2. Click on to highlight the SSIC. On the right side of the screen the associated PCNs are listed.
3. Scroll down through the PCNs to locate the ones you want to put into your Section Library, click on the Rqd checkbox to the left of the PCN(s). This adds the PCN to your Section library.
4. To obtain more information about a PCN, click once on the PCN or Short Title to highlight it and then click the ‘PCN Information' button at the bottom of the screen.
Find
If you can’t locate your PCN or ID Number with any of the simple searches above, then you can use the Find tool. To use Find, click on ‘Find’ on the menubar. When using Find from the MasterList, after locating the PCN or ID Number, simply double click on that PCN or ID Number and you will return to the MasterList positioned at that PCN or ID Number.
Notes:
1. To look at PCN or ID Number information without checking/unchecking the Rqd checkbox, click on the PCN, Short Title, Id No, Tamcn, or SSIC once to highlight it. Clicking on it s second time or double clicking will caused the Required checkbox to check/uncheck.
2. Required technical PCNs must be either designated NEA, be associated to a Required ID Number, or both.
3. If it is a technical PCN but its valid associated ID Number(s) is unknown, it will be assigned to ID Number 00000A INVALD IDNO or inversely ID Number 00000A lists all PCNs which have no valid associated ID Numbers.
4. If the ID Number has no associated PCNs, then the message ‘There Are No Asso…’ will be displayed.
27
How Do I?
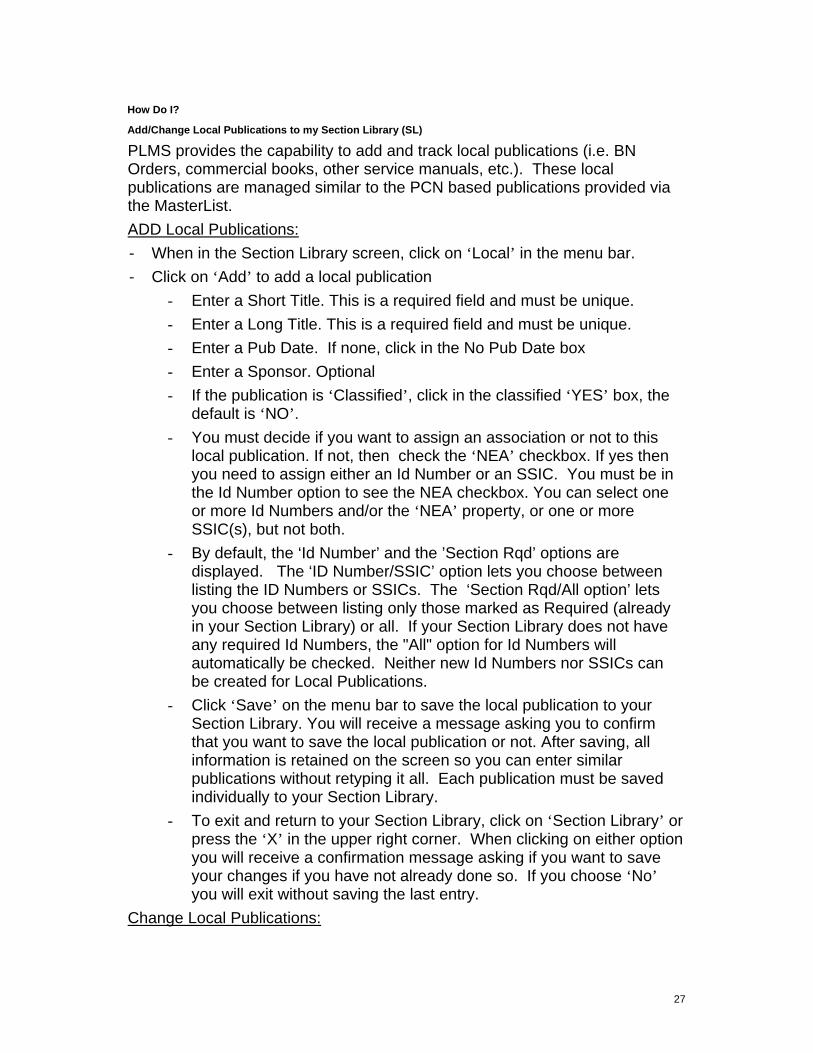
Add/Change Local Publications to my Section Library (SL)
PLMS provides the capability to add and track local publications (i.e. BN Orders, commercial books, other service manuals, etc.). These local publications are managed similar to the PCN based publications provided via the MasterList. ADD Local Publications: - When in the Section Library screen, click on ‘Local’ in the menu bar. - Click on ‘Add’ to add a local publication
- Enter a Short Title. This is a required field and must be unique. - Enter a Long Title. This is a required field and must be unique. - Enter a Pub Date. If none, click in the No Pub Date box - Enter a Sponsor. Optional - If the publication is ‘Classified’, click in the classified ‘YES’ box, the
default is ‘NO’. - You must decide if you want to assign an association or not to this
local publication. If not, then check the ‘NEA’ checkbox. If yes then you need to assign either an Id Number or an SSIC. You must be in the Id Number option to see the NEA checkbox. You can select one or more Id Numbers and/or the ‘NEA’ property, or one or more SSIC(s), but not both.
- By default, the ‘Id Number’ and the ’Section Rqd’ options are displayed. The ‘ID Number/SSIC’ option lets you choose between listing the ID Numbers or SSICs. The ‘Section Rqd/All option’ lets you choose between listing only those marked as Required (already in your Section Library) or all. If your Section Library does not have any required Id Numbers, the "All" option for Id Numbers will automatically be checked. Neither new Id Numbers nor SSICs can be created for Local Publications.
- Click ‘Save’ on the menu bar to save the local publication to your Section Library. You will receive a message asking you to confirm that you want to save the local publication or not. After saving, all information is retained on the screen so you can enter similar publications without retyping it all. Each publication must be saved individually to your Section Library.
- To exit and return to your Section Library, click on ‘Section Library’ or press the ‘X’ in the upper right corner. When clicking on either option you will receive a confirmation message asking if you want to save your changes if you have not already done so. If you choose ‘No’ you will exit without saving the last entry.
Change Local Publications:

Publications Library Management System v3
28
- In your Section Library screen use any of the Search option available to locate the local publication you will be changing. All local publications have ‘LOCAL’ for their PCN so you need to identify the particular publication by its Short Title or Long Title. Once located click on and highlight the local publication you want to update.
- Click on ‘Local’ in the menu bar. - Click on ‘Change’ to pop up the Change Local Publication screen. This
option allows you to change the Short Title, Long Title, Pub Date, Sponsor, Classification and associations to Id Numbers or SSIC’s for your local publications. - The Local Publication frame will be loaded with existing data for the
local publication you want to update. - Fields can be updated as required.
- Click on ‘Save’ on the menu bar to save the changes in your Section Library. Once clicked, you will receive a message asking you to confirm to save the local publication changes or not.
- To exit the screen and return to your Section Library, click on ‘Section Library’ or press the ‘X’ in the upper right corner. When clicking on either option you will receive a confirmation message asking if you want to save your changes if you have not already done so. If you choose ‘No’ you will exit without saving.
- Locations/Quantities for a local PCN: - See ‘Maintain Location(s) for a Specific PCN'. - See ‘Maintain Quantities for a specific PCN'.
Add a PCN to my Section Library
Adding a PCN means including that publication to the list of publications that you actively track and manage. This could be a new publication that you or someone else decided that you should have in your Section Library, your mission could have changed that now require your section to maintain additional publications(.i.e. you now maintain an additional item of equipment), or was directed to you from above. Once you know you will be adding a PCN, you need to make certain decisions along the way. Primarily:
• How many copies do you need? • Which location(s) will you be storing them? • Do you need to order the copies yourself or are they already being
provided to you? • If it is a technical publication, which ID Number(s) are you supporting
with it?

Reports
29
• Does that ID Number need to be marked as Required? • If it is a technical publication, do you want to retain it even if its
associated ID Numbers are deleted? Depending on the situation, there are various ways to add a PCN to your Section Library. If you know the PCN:
1. From Section Library screen click ‘MasterList’ 2. In the PCN Search box either type in the PCN or click and drag the
scrollbar down to the desired PCN 3. Once the PCN is located click on the adjacent ‘Rqd’ checkbox
a. If the PCN is non-technical (the right side of the of the screen lists ‘SSIC’s Associated with.. ‘) click SectionLibrary on the menubar to return to the Section Library Screen. You will be positioned at the PCN last checked.
b. If the PCN is technical (the right side of the screen lists ‘ID Numbers Associated with…’) you must decide if to also check the PCN as Non-Equipment Associated (NEA) or check one or more of the Associated ID Numbers or both. Next click SectionLibrary on the menubar to return to the Section Library Screen. You will be positioned at the PCN last checked.
4. Back on the Section Library screen, the last PCN you checked as Rqd is now being displayed. You can stop now and fill in the rest of the information later or proceed with entering what is known.
a. If you know the Locations that you will be storing the publications at click the ‘Add’ button in Library Information.
1) In the ‘Add … to New location’ screen if the Location already exists, locate it and click on that location to highlight it.
2) If it doesn’t exist yet, add the location and then click on the new location to highlight it.
3) Click on ‘AddPubtoLocation’ on the menubar 4) This automatically assigns that PCN to that location and
returns you to the Section Library screen still positioned at that PCN
b. If you know the Required, OnHand or OnOrder quantities enter them now for the appropriate Locations. To enter a quantity, click on the appropriate cell to highlight it and type in the correct number

Publications Library Management System v3
30
5. If other PCNs were checked as Rqd in step 3 above, type in the PCN or scroll down the PCNs in the PCNs Search box to locate it. Once located, repeat step 4 above.
If you do not know the PCN, you can use the Find option to locate it. Once the publication is located, double click on the PCN and continue at step 3 above. Alternately if the PCN’s associated SSIC (for non-technical PCNs) or ID Number (for technical PCNs) is already marked as Required in your Section Library you can check the PCN as Rqd directly from the Section Library Screen.
• If you know the PCN’s SSIC: 1) Click’ SSIC’ in the Search box in the lower left part of the screen 2) Locate the SSIC and click it to highlight it 3) Click ‘All’ in the Associated Publications box in the upper right
part of the screen 4) Click and drag the scrollbar down to the desired PCN 5) Click the adjacent Rqd checkbox 6) Continue with Step 3 above
• If you know the PCN’s ID Number: 1) Click ‘ID Number’ in the Search box in the lower left part of the
screen 2) Locate the ID Number and click it to highlight it 3) Click ‘All’ in the Associated Publications box in the upper right
part of the screen 4) Click and drag the scrollbar down to the desired PCN 5) Click the adjacent Rqd checkbox 6) Continue with Step 3 above
Add an ID Number to my Section Library
Adding an ID Number means registering an item of equipment in your Section Library and requiring its associated publications for maintenance. At the time you add that ID Number you have the option of adding all or some of its associated PCNs to your Section Library. If you skip adding an associated PCN it can be added later if you decide. One of the key features of PLMS is that it tries to manage those PCNs associated to Required ID Numbers for you.

Reports
31
• If a new PCN is published that is associated to a PCN you have as Required, it will automatically be added to your Section Library
• If its decide by the item manager that a PCN is no longer needed to support that item of equipment, then it will be automatically removed from your Section Library unless its marked as NEA or its associated to another required ID Number
Depending on the situation, there are various ways to locate and add an ID Number to your Section Library. If you know the ID Number:
1. From Section Library screen click ‘MasterList’ 2. In the Search box click ‘Id-No’ and either type in the ID Number or click
and drag the scrollbar down to the desired ID Number 3. Once the ID Number is located click on the adjacent ‘Rqd’ checkbox 4. Optionally check one or more of the Associated Publications on the right
side of the screen. To check them all at once check ‘Select all PCN’s as Required’ at the bottom of the Associated Publications box.
5. Click SectionLibrary on the menubar to return to the Section Library Screen. You will be positioned at the ID Number last checked as Required.
If you know the TAMCN:
1. From Section Library screen click ‘MasterList’ 2. In the Search box click ‘Tamcn’ and either type in the TAMCN or click
and drag the scrollbar down to the desired TAMCN. Note: The same TAMCN can have several different ID Numbers. When selecting the TAMCN be sure to look at the accompanying Nomenclature to insure you are checking the correct one.
3. Once the TAMCN is located click on the adjacent ‘Rqd’ checkbox 4. Optionally check one or more of the Associated Publications on the right
side of the screen. To check them all at once check ‘Select all PCN’s as Required’ at the bottom of the Associated Publications box.
5. Click SectionLibrary on the menubar to return to the Section Library Screen. You will be positioned at the TAMCN last checked as Required.
If you do not know the ID Number or TAMCN of an item of equipment, you can use the Find option to locate it. Once the publication is located, double click on the ID Number and continue at step 3 above.

Publications Library Management System v3
32
Example: You know you have an M14 rifle but you don’t know its ID Number or TAMCN. Using the FIND option you can enter ‘Rifle’ or ‘M14’ or ‘7.62’ in Nomenclature and then get its ID Number.
Notes: • An ID Number can be added to your Section Library with any Associated
PCNs. • If there are no PCN associated to an ID Number, the listed under
Associated Publications will be ‘There are no Asso…’ • If you check an Associated PCN without checking the ID Number first, the
ID Number will automatically be checked • Unchecking the ID Number automatically unchecks all checked PCNs
Add Associations to an IdNo/SSIC
In Section Library, in the Associated Publications box (upper right of screen) those PCN(s) that are associated with that Id Number or SSIC are checked. The initial associations were assigned when the publication/ID Number or SSIC was checked ‘required’ in the Master List. To add additional associations, simply click on the "ALL’ option to list all PCNs that are associated to that ID Number or SSIC and check those additional ones you want added to your Section Library. NOTES: 1. If there are no PCN(s) associated to the IdNo/SSIC, then the message
"There Are No Associated Publications for this IdNo/SSIC" will be displayed.
2. If there are no PCN(s) selected for an IdNo, then the message "No Publications were selected for this IdNo" will be displayed.
Add location(s) for a specific PCN to my Section Library (SL)
- Adding a location means you are specifying a publication(s) exists at a certain location. This location could be a binder, drawer, someone’s desk, a computer server path, almost anywhere that physically or logically exists. PLMS allows you to construct a hierarchy of locations where you put the publication in the lowest level. In the following example you would Add the publication to Binder 3.
S-1 File Cabinet 1 Drawer A
Reports
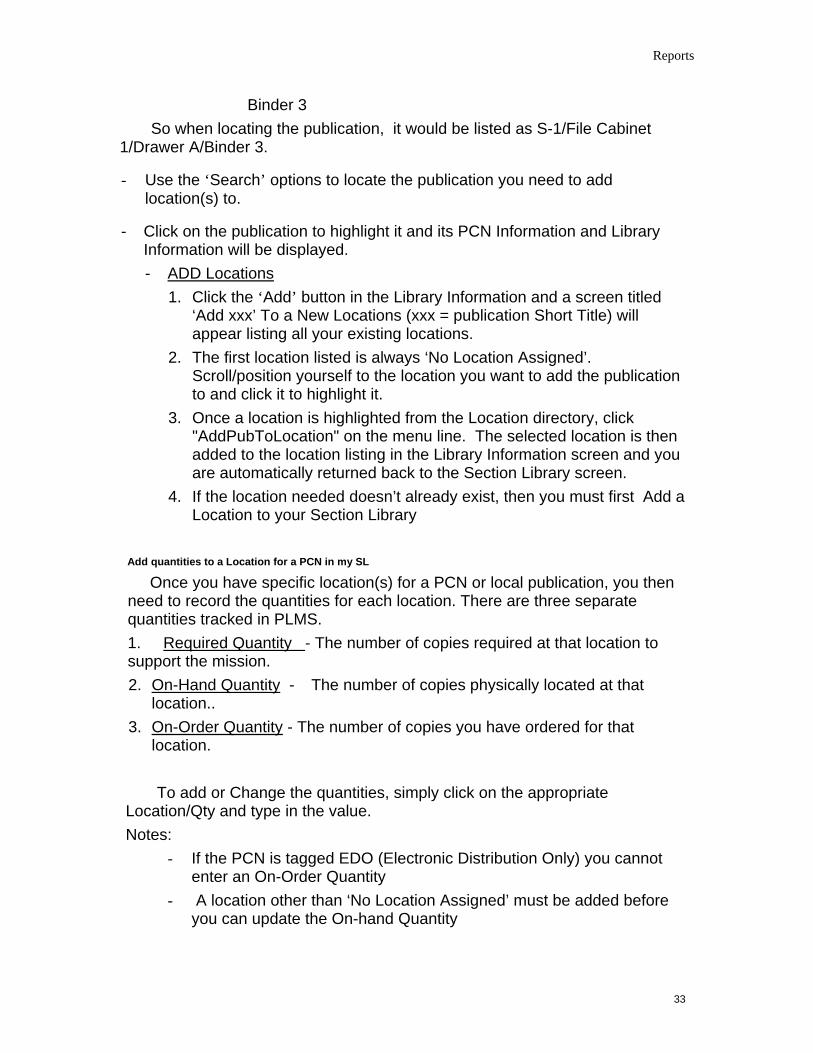
33
Binder 3 So when locating the publication, it would be listed as S-1/File Cabinet 1/Drawer A/Binder 3.
- Use the ‘Search’ options to locate the publication you need to add location(s) to.
- Click on the publication to highlight it and its PCN Information and Library Information will be displayed. - ADD Locations
1. Click the ‘Add’ button in the Library Information and a screen titled ‘Add xxx’ To a New Locations (xxx = publication Short Title) will appear listing all your existing locations.
2. The first location listed is always ‘No Location Assigned’. Scroll/position yourself to the location you want to add the publication to and click it to highlight it.
3. Once a location is highlighted from the Location directory, click "AddPubToLocation" on the menu line. The selected location is then added to the location listing in the Library Information screen and you are automatically returned back to the Section Library screen.
4. If the location needed doesn’t already exist, then you must first Add a Location to your Section Library
Add quantities to a Location for a PCN in my SL
Once you have specific location(s) for a PCN or local publication, you then need to record the quantities for each location. There are three separate quantities tracked in PLMS. 1. Required Quantity - The number of copies required at that location to support the mission. 2. On-Hand Quantity - The number of copies physically located at that
location.. 3. On-Order Quantity - The number of copies you have ordered for that
location.
To add or Change the quantities, simply click on the appropriate Location/Qty and type in the value. Notes:
- If the PCN is tagged EDO (Electronic Distribution Only) you cannot enter an On-Order Quantity
- A location other than ‘No Location Assigned’ must be added before you can update the On-hand Quantity

Publications Library Management System v3
34
Change location(s) for a specific PCN in my Section Library (SL)
If for any reason you need to change the location of a PCN, you can do this in one of several ways:
1. First using the Search options locate and highlight (click on) that PCN. Then in Library Information click on the ‘old’ location. Once you’ve clicked the old location, the ‘Change’ button is now active. Click on the Change button and then a list of all your existing locations will appear. You will automatically be positioned to the PCN under its old Location. You can now select (click on) any other location that will be the ‘new’ locatiion, and then click on "ChgPubLocation" on the menu line. The PCN with its Required, Oh-Hand, and On-Order quantities is now transferred to the new location and you are automatically returned back to the Section Library screen.
2. From the Section Library screen click on Locals on the menubar and then Locations. A list of all your existing locations will appear. Scroll/locate the ‘old’ location and then either double click on that location or click on its ‘+’ sign. This will cause a list of PCNs in the location to appear. Click on the PCN you want changed and highlight it. Now holding down the left mouse button ‘drag’ the PCN to the ‘new’ location. Once the new location is highlighted , release the left mouse button and the PCN with its Required, Oh-Hand, and On-Order quantities is now transferred to the new location. You may now repeat the same process with another Location/PCN or click ‘Section Library" on the menu line to return back to the Section Library screen.
3. From the Section Library screen click on Locals on the menubar and then Locations. A list of all your existing locations will appear. Scroll/locate the ‘old’ location and then either double click on that location or click on its ‘+’ sign. This will cause a list of PCNs in the location to appear. Click on the PCN you want changed and highlight it. Now click on ‘Cut’ on the menu bar. Now Scroll/Locate the new location and click on the new location. Once the new location is highlighted then click ‘Paste’ on the menubar and the PCN with its Required, Oh-Hand, and On-Order quantities is now transferred to the new location. You may now repeat the same process with another Location/PCN or click ‘Section Library" on the menu line to return back to the Section Library screen. Anytime after you have ‘Cut’, you can click ‘Undo Cut’ on the menubar to release the selected PCN.
. Using either method above, you will now see the location is changed in the location listing. It is automatically assigned in alphabetical order for that PCN, and the old location is removed.
Change Unit Rated quantities

Reports
35
The Unit Rated Quantity is the total of the Required Quantities of all sections within a Unit. This quantity is maintained by the DCP and is distributed to each on the Section Libraries within the Unit Publications Listing (PL) file. The Unit Rated Quantity can be changed by either of two ways:
1. Each section updates (increase, decrease or set to 0) the Required Quantity of PCN(s) and Exports their Section Library to the DCP. The DCP Imports the Section Library into the Unit PL. The DCP can optionally review and adjust the Required Quantity for each of their subordinate sections or simply accept the section’s new quantity. The DCP then creates an Export Unit PL file which is sent to each of the subordinate sections. The sections in turn Import the Unit PL which contain the new Unit Rated quantities.
2. The DCP can unilaterally adjust (increase, decrease, add new PCNs, delete existing PCNs ) any of the Required Quantities for their subordinate sections. The DCP then creates an Export Unit PL file which is sent to each of the subordinate sections. The sections in turn Import the Unit PL which contain the new Unit Rated quantities. When a Section imports the a Unit PL, a Section Change Report is generated that lists each of changes made for that Section of its Required Quantities and On-Order Quantities. The Section then use this report to update their Section Library.
Notes: - EDO (Electronic Distribution Only) PCNs do not have Unit Rated
Quantities.
Create my Section Library (SL)
If your Section Library already exists but you are not seeing it listed, you will need to reconnect it to PLMS on this PC. See Locate my Existing Section Library
To create a new Section Library:
1) Start PLMS. If you are the first Section Library on this PC then you will be asked ‘Do you want to convert your existing Section Library?’. Click [No]. If you are not the first Section Library on this PC the PLMS Section Name screen automatically appears.
2) On the PLMS Section Name screen if the already is a Section Name listed, blank it out by typing a space over it.
3) Type in the name of your Section Library. (i.e. ALPHA CO, S-1, NBC, DCP, etc.) Click Continue.

Publications Library Management System v3
36
4) The Create or Locate Section Library screen appears. Click on ‘Create a new Section Library’.
5) The Save As screen appears. This screen indicates where your Section Library file will be stored. By default it will be stored in a subfolder name ‘Section Libraries’ located under the folder where PLMS program is installed. You may change the location at this time. The Section Library filename is PLMSsectionname.MDB. **DO NOT CHANGE THE FILENAME. **DO NOT SELECT ANY EXISTING SECTION FILES LISTED. Click Save.
6) Your new Section Library is created and available for use.
7) See PLMS Configurations to verify you are set to the correct configuration
Notes: - One or more Sections can use PLMS on the same PC, however all Sections
must be under the same Unit if they are subordinate to a DCP. - Section names must be unique on the same PC - You can build your Section Library (SL) using either of the following methods
to load it: - Use the USMC Master List to load your Section Library - Add Local Publications
Delete a Local publication from my Section Library (SL)
Deleting a local publication from your Section Library(SL) removes it entirely to include its Short Title, Long Title, Associations, Quantities, etc… Caution. Local publications are not available in the Master List, so if you accidentally delete it you must add it back from scratch. A local publication can be ‘deleted’ from your Section Library in one of two ways. 1. In your Section Library screen use any of the Search option available to
locate the local publication you will be deleting. Verify using the PCN Information that this is the local publication you want to delete; then, click on the "Delete Publication" button.
a. If there are Required, On-hand, or On-Order Quantities, a confirmation screen will be displayed.
b. Click Ok to delete local publication or c. Click Cancel to abort
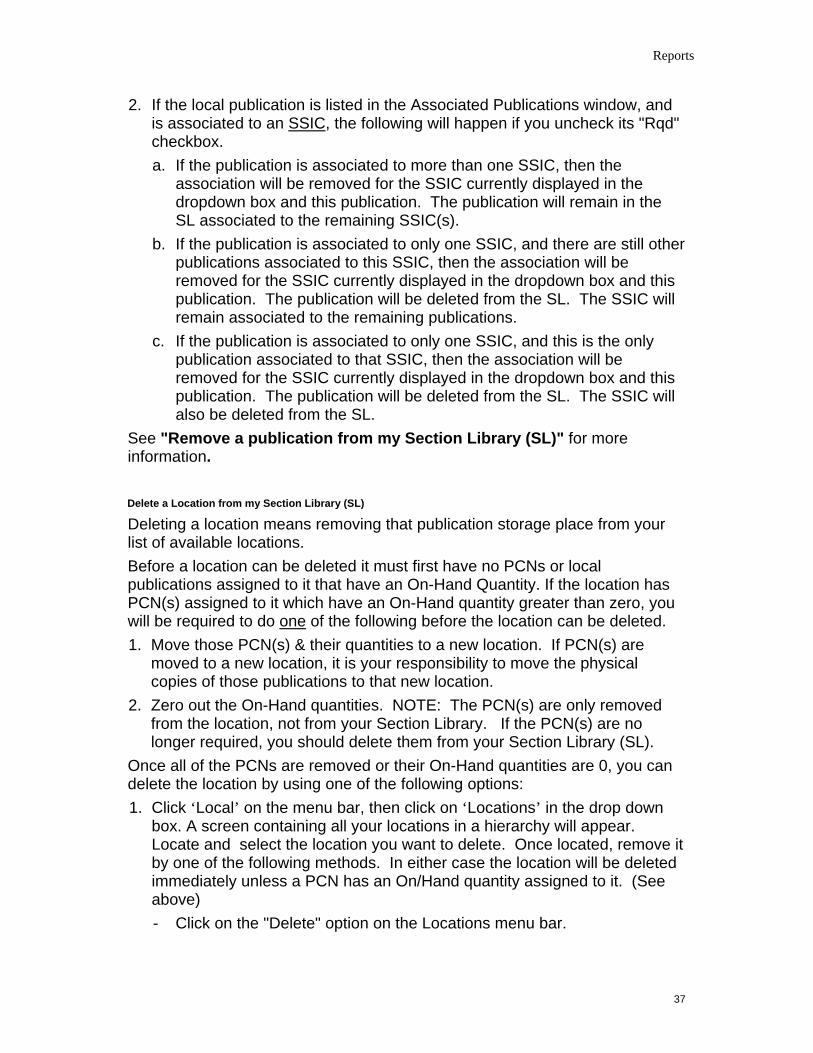
Reports
37
2. If the local publication is listed in the Associated Publications window, and is associated to an SSIC, the following will happen if you uncheck its "Rqd" checkbox. a. If the publication is associated to more than one SSIC, then the
association will be removed for the SSIC currently displayed in the dropdown box and this publication. The publication will remain in the SL associated to the remaining SSIC(s).
b. If the publication is associated to only one SSIC, and there are still other publications associated to this SSIC, then the association will be removed for the SSIC currently displayed in the dropdown box and this publication. The publication will be deleted from the SL. The SSIC will remain associated to the remaining publications.
c. If the publication is associated to only one SSIC, and this is the only publication associated to that SSIC, then the association will be removed for the SSIC currently displayed in the dropdown box and this publication. The publication will be deleted from the SL. The SSIC will also be deleted from the SL.
See "Remove a publication from my Section Library (SL)" for more information. Delete a Location from my Section Library (SL)
Deleting a location means removing that publication storage place from your list of available locations. Before a location can be deleted it must first have no PCNs or local publications assigned to it that have an On-Hand Quantity. If the location has PCN(s) assigned to it which have an On-Hand quantity greater than zero, you will be required to do one of the following before the location can be deleted. 1. Move those PCN(s) & their quantities to a new location. If PCN(s) are
moved to a new location, it is your responsibility to move the physical copies of those publications to that new location.
2. Zero out the On-Hand quantities. NOTE: The PCN(s) are only removed from the location, not from your Section Library. If the PCN(s) are no longer required, you should delete them from your Section Library (SL).
Once all of the PCNs are removed or their On-Hand quantities are 0, you can delete the location by using one of the following options: 1. Click ‘Local’ on the menu bar, then click on ‘Locations’ in the drop down
box. A screen containing all your locations in a hierarchy will appear. Locate and select the location you want to delete. Once located, remove it by one of the following methods. In either case the location will be deleted immediately unless a PCN has an On/Hand quantity assigned to it. (See above) - Click on the "Delete" option on the Locations menu bar.
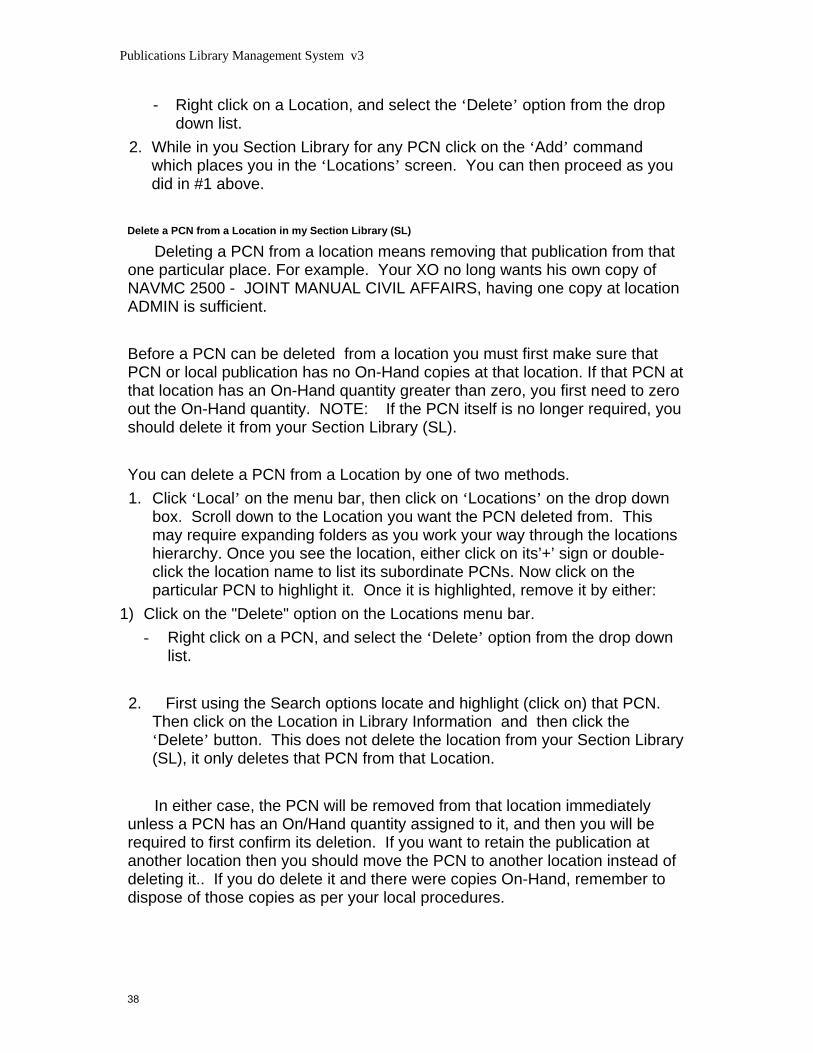
Publications Library Management System v3
38
- Right click on a Location, and select the ‘Delete’ option from the drop down list.
2. While in you Section Library for any PCN click on the ‘Add’ command which places you in the ‘Locations’ screen. You can then proceed as you did in #1 above.
Delete a PCN from a Location in my Section Library (SL)
Deleting a PCN from a location means removing that publication from that one particular place. For example. Your XO no long wants his own copy of NAVMC 2500 - JOINT MANUAL CIVIL AFFAIRS, having one copy at location ADMIN is sufficient. Before a PCN can be deleted from a location you must first make sure that PCN or local publication has no On-Hand copies at that location. If that PCN at that location has an On-Hand quantity greater than zero, you first need to zero out the On-Hand quantity. NOTE: If the PCN itself is no longer required, you should delete it from your Section Library (SL). You can delete a PCN from a Location by one of two methods. 1. Click ‘Local’ on the menu bar, then click on ‘Locations’ on the drop down
box. Scroll down to the Location you want the PCN deleted from. This may require expanding folders as you work your way through the locations hierarchy. Once you see the location, either click on its’+’ sign or double-click the location name to list its subordinate PCNs. Now click on the particular PCN to highlight it. Once it is highlighted, remove it by either:
1) Click on the "Delete" option on the Locations menu bar. - Right click on a PCN, and select the ‘Delete’ option from the drop down
list.
2. First using the Search options locate and highlight (click on) that PCN. Then click on the Location in Library Information and then click the ‘Delete’ button. This does not delete the location from your Section Library (SL), it only deletes that PCN from that Location.
In either case, the PCN will be removed from that location immediately unless a PCN has an On/Hand quantity assigned to it, and then you will be required to first confirm its deletion. If you want to retain the publication at another location then you should move the PCN to another location instead of deleting it.. If you do delete it and there were copies On-Hand, remember to dispose of those copies as per your local procedures.
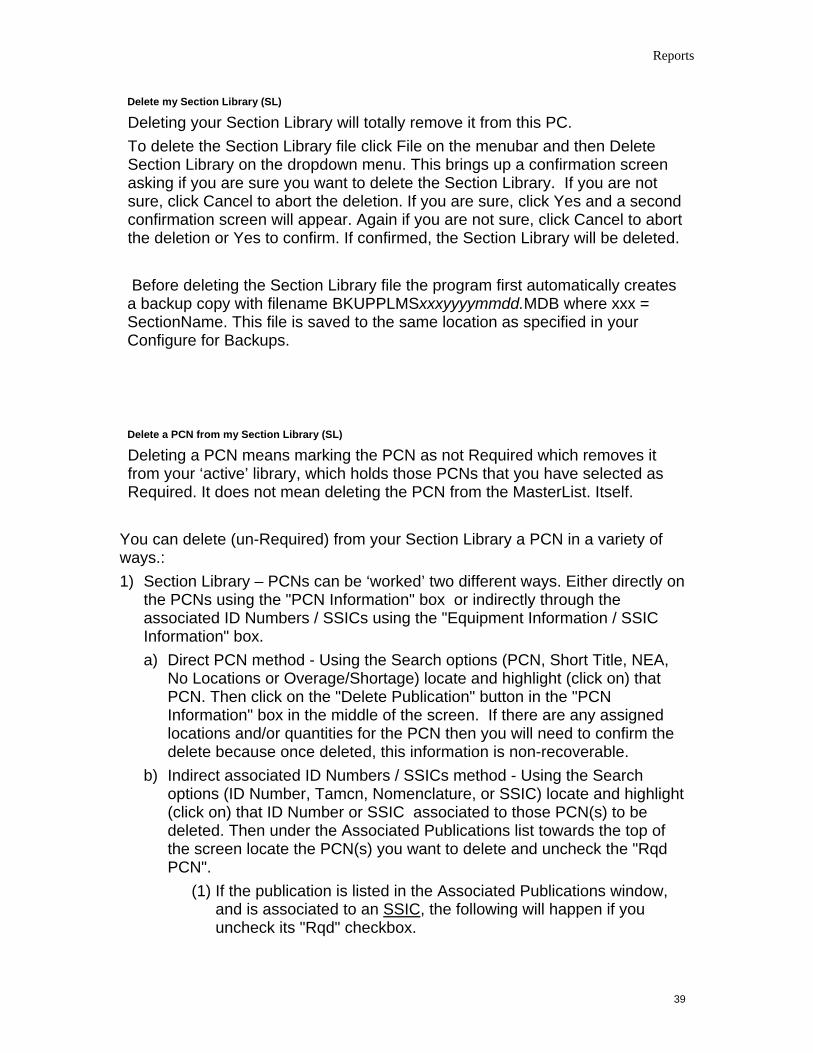
Reports
39
Delete my Section Library (SL)
Deleting your Section Library will totally remove it from this PC. To delete the Section Library file click File on the menubar and then Delete Section Library on the dropdown menu. This brings up a confirmation screen asking if you are sure you want to delete the Section Library. If you are not sure, click Cancel to abort the deletion. If you are sure, click Yes and a second confirmation screen will appear. Again if you are not sure, click Cancel to abort the deletion or Yes to confirm. If confirmed, the Section Library will be deleted. Before deleting the Section Library file the program first automatically creates a backup copy with filename BKUPPLMSxxxyyyymmdd.MDB where xxx = SectionName. This file is saved to the same location as specified in your Configure for Backups.
Delete a PCN from my Section Library (SL)
Deleting a PCN means marking the PCN as not Required which removes it from your ‘active’ library, which holds those PCNs that you have selected as Required. It does not mean deleting the PCN from the MasterList. Itself.
You can delete (un-Required) from your Section Library a PCN in a variety of ways.: 1) Section Library – PCNs can be ‘worked’ two different ways. Either directly on
the PCNs using the "PCN Information" box or indirectly through the associated ID Numbers / SSICs using the "Equipment Information / SSIC Information" box. a) Direct PCN method - Using the Search options (PCN, Short Title, NEA,
No Locations or Overage/Shortage) locate and highlight (click on) that PCN. Then click on the "Delete Publication" button in the "PCN Information" box in the middle of the screen. If there are any assigned locations and/or quantities for the PCN then you will need to confirm the delete because once deleted, this information is non-recoverable.
b) Indirect associated ID Numbers / SSICs method - Using the Search options (ID Number, Tamcn, Nomenclature, or SSIC) locate and highlight (click on) that ID Number or SSIC associated to those PCN(s) to be deleted. Then under the Associated Publications list towards the top of the screen locate the PCN(s) you want to delete and uncheck the "Rqd PCN".
(1) If the publication is listed in the Associated Publications window, and is associated to an SSIC, the following will happen if you uncheck its "Rqd" checkbox.
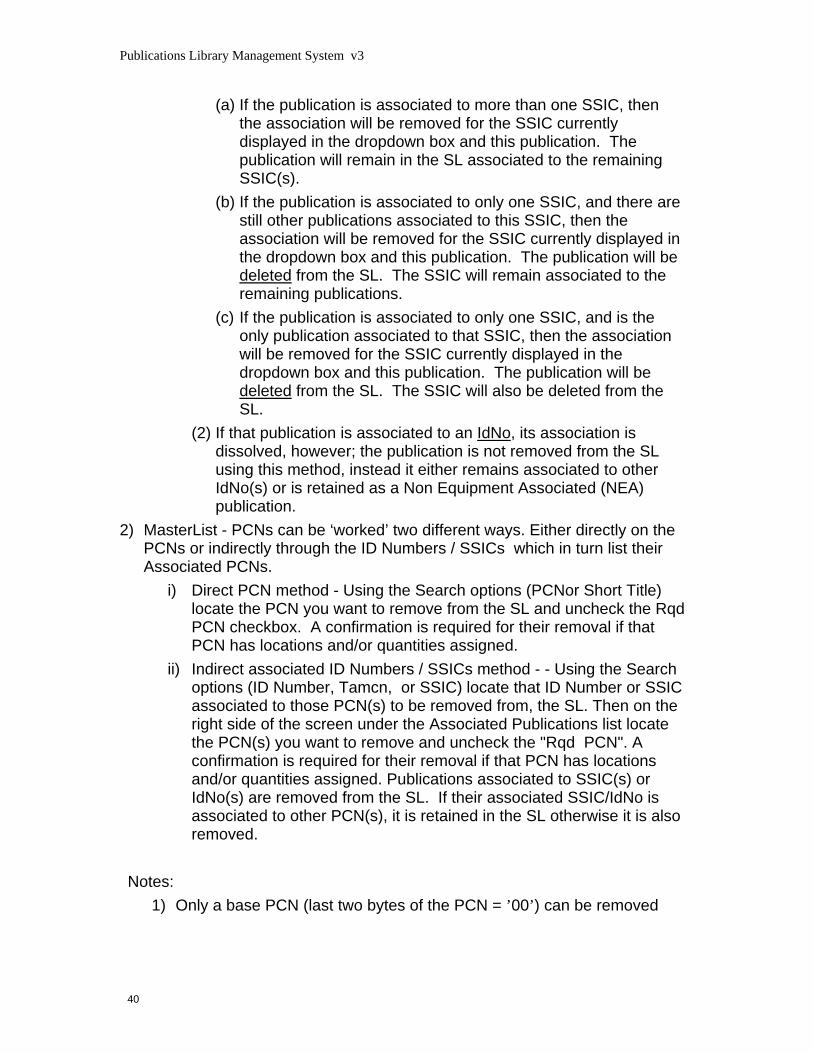
Publications Library Management System v3
40
(a) If the publication is associated to more than one SSIC, then the association will be removed for the SSIC currently displayed in the dropdown box and this publication. The publication will remain in the SL associated to the remaining SSIC(s).
(b) If the publication is associated to only one SSIC, and there are still other publications associated to this SSIC, then the association will be removed for the SSIC currently displayed in the dropdown box and this publication. The publication will be deleted from the SL. The SSIC will remain associated to the remaining publications.
(c) If the publication is associated to only one SSIC, and is the only publication associated to that SSIC, then the association will be removed for the SSIC currently displayed in the dropdown box and this publication. The publication will be deleted from the SL. The SSIC will also be deleted from the SL.
(2) If that publication is associated to an IdNo, its association is dissolved, however; the publication is not removed from the SL using this method, instead it either remains associated to other IdNo(s) or is retained as a Non Equipment Associated (NEA) publication.
2) MasterList - PCNs can be ‘worked’ two different ways. Either directly on the PCNs or indirectly through the ID Numbers / SSICs which in turn list their Associated PCNs.
i) Direct PCN method - Using the Search options (PCNor Short Title) locate the PCN you want to remove from the SL and uncheck the Rqd PCN checkbox. A confirmation is required for their removal if that PCN has locations and/or quantities assigned.
ii) Indirect associated ID Numbers / SSICs method - - Using the Search options (ID Number, Tamcn, or SSIC) locate that ID Number or SSIC associated to those PCN(s) to be removed from, the SL. Then on the right side of the screen under the Associated Publications list locate the PCN(s) you want to remove and uncheck the "Rqd PCN". A confirmation is required for their removal if that PCN has locations and/or quantities assigned. Publications associated to SSIC(s) or IdNo(s) are removed from the SL. If their associated SSIC/IdNo is associated to other PCN(s), it is retained in the SL otherwise it is also removed.
Notes:
1) Only a base PCN (last two bytes of the PCN = ’00’) can be removed

Reports
41
2) Change PCN’s (last two bytes of the PCN = ’01 - 99’) are automatically added and removed when its base PCN is added or removed.
3) A deleted PCN can always be ‘re-Added’ from the MasterList.. A deleted local publication must be ‘re-Added’ manually from scratch.
Download PLMS
1. Go to the HQMC web site URL: www.usmc.mil 2. On the menubar select ‘Publications’ 3. On the dropdown click on ‘Publications Library Management System’ 4. Follow the instructions. Download the latest Copy of MasterList
Before you first use PLMS and each month there after you should download a copy of the latest USMC MasterList. After you download it and start PLMS again, it will automatically reconcile your Section Library with the new MasterList. To download the latest copy of MasterList: 1. Go to the HQMC web site URL: www.usmc.mil 2. On the menubar select ‘Publications’ 3. On the dropdown click on ‘Publications Library Management System’ 4. Contained within the web page you will find the latest MasterList file
available. 5. Following the instructions listed in the web page. Notes: 1. The MasterList file will be named PLMSSHAREDyyyymmdd.MDB where
yyyymmdd = date of MasterList. 2. If you miss a month, just ignore it and download the latest one. 3. If in doubt where to Save the MasterList file to on your PC, use Windows
Search and search your local drives for file ‘PLMSSECTIONLIBRARYTEMPLATE.MDB’. It will be in a subfolder named ‘\Data’ one folder level down from a files named ‘PLMSSection.exe’. Copy the Masterlist File to the \Data subfolder.

Publications Library Management System v3
42
Exit PLMS without saving my data
You can exit PLMS without saving your changes you made since signing on by perform one of the following actions:
1. Click on the ‘X’ in the upper right corner, 2. Click on ‘File’ on the menubar and then click ‘Exit’. 3. Click on the ‘Exit’ icon
If there were any changes to any information you will receive a message asking if you want to save any changes made to your Section Library.
1. Click ‘Yes’ to exit with saving. 2. Click ‘No" to exit without saving. 3. Click ‘Cancel’ to abort the exit and remain in your Section Library.
Export Section Library (SL)
Exporting a Section Library is the process used by a section to send a copy of their library data to their DCP. This data is used by the DCP to update the Unit Publications Listing (PL) and to indicate which and how many PCNs to order for the section. Before a section can Export their Section Library, they must first be configured as a ‘Section w/DCP’ type PLMS user. To check your user type, while in your Section Library screen click ‘Configure’ on the menubar. In the Section Configuration screen under ‘Type of User’ you will find your setting. First see PLMS Configurations to see if you are set at the correct ‘Type of User’. If you need to change your configuration to ‘Section w/DCP, see Change my User Type. To Export your Section Library:
1. Click on ‘File’ then ‘Export Section Library’ on the menubar 2. An ‘Export Complete’ popup screen will appear to confirm the export file
has been created along with the file’s name and location. Please note this information.
3. The Export file is created and depending on your method of exchanging files with your DCP what further action on your part is required. To view which method you are configured to use, from your Section Library screen click ‘Configure’ on the menubar. The Section Configuration screen is displayed. Towards the bottom under ‘Section Library’ one of the three methods will be selected.
a. Portable Storage Device (PSD). Indicates you will be delivering the Export file using a portable device such as a diskette, zip-drive, USB-drive, etc… To complete this you need to copy the file

Reports
43
that was indicated on the ‘Export Complete’ popup screen to the PSD. Then deliver the PSD to your DCP.
b. E-Mail. Indicates you will be delivering the Export file via email as an attachment. To complete this you need to attach the file that was indicated on the ‘Export Complete’ popup screen and email it to your DCP.
c. Shared. Indicates you have stored the Export file at a location accessible to your DCP. The DCP. Further action on your part such as notifying the DCP is according to your local procedures.
Notes:
1. If you don’t know the Export file’s name and location. The name of the file will be sectionnameyyyymmdd.TXT where sectionname is the name of your Section Library and yyyymmdd is the date the Export file was created. The location can be found in your Section Configuration screen under ‘Secction Library’.
Find Id Number(s) a PCN is associated to
Each technical PCN is associated to one or more items of equipment. These items of equipment are identified by their ID Number. There are 2 levels of Associations:
1. All – these are all of the MasterList PCN/ID Numbers associations that exists as provided for by HQ
2. Required – Of the Master associations, the Required ones are only those designated by the section as applying to them.
To identify which ID Numbers a PCN is associated to: 1. Search the Section Library (SL). In the Section Library screen click on PCN
in the ‘SEARCH’ options to display a listing of all of the PCNs in your Section Library. Scroll down and locate the PCN. If a Required Id Number is associated with the PCN, the Equipment Information frame will be displayed towards the top under Equipment Information. If the Id Number box in the Equipment Information box has a ‘down’ arrow next to it, this indicates to the user that the publication has more than one required Id Number associated to it.
2. Search the Master List. In the MasterList screen click on PCN in the ‘SEARCH’ options to display a listing of all of the PCNs. Scroll down and locate the PCN and click on the PCN or Short Title to highlight it. To the right you will see a box of ‘ID Numbers Associated with xxxxxxxxxxx’. These are all of the ID Numbers associated to that PCN. If the PCN is

Publications Library Management System v3
44
required it will have a checkmark to the left of the PCN. If the ID Number is Required, it will have a checkmark to the left of the ID Number.
3. Use the ‘ FIND' option. From either the Section Library screen or MasterList screen click on ‘Find’ on the menubar. Enter a PCN click on ‘Find Now’ or press the ‘Enter’ key. All associated IdNo’s for that PCN will be listed.
Notes:
1. If no valid ID Number exists for that PCN, then the Associated ID Number will be ‘00000A - Invalid IDNO’.
2. While in the Find screen, if you double-click on a PCN it will take you to: a. If the PCN is Required it will position you in Section Library
screen at that PCN b. If the PCN is not Required it will position you in MasterList screen
at the PCN 3. While in the Find screen, if you double-click on an ID Number it will take
you to: a. If the ID Number is Required it will position you in Section Library
screen at that ID Number b. If the ID Number is not Required it will position you in MasterList
screen at the ID Number
Find PCN(s) an Id Number is associated with
Each ID Numbers is associated to zero or more PCNs. There are 2 levels of Associations:
1. All – these are all of the MasterList PCN/ID Numbers associations that exists as provided for by HQ
2. Required – Of the Master associations, the Required ones are only those designated by the section as applying to them.
To identify which PCNs an ID Numbers is associated to:
1. Search the Section Library (SL). In the Section Library screen click on’ ID Number’ in the ‘SEARCH’ options to display a listing of all of the ID Numbers in your Section Library. Scroll down and locate the ID Number. Click on the ID Number to highlight it, the ID Number details will be displayed towards the top in Equipment Information. In the accompanying Associated Publications box, all of the Required PCNs are listed by default. If you click the ‘All’ option to the right of

Reports
45
Associated Publications, then All associated PCNs will be listed. Those Required PCNs will be checked.
2. Search the Master List. In the MasterList screen click on Id-No in the ‘SEARCH’ options to display a listing of all of the ID Numbers. Scroll down and locate the ID Number and click on the IdNo or Nomenclature to highlight it. To the right you will see a box of ‘AssociatedPublications for xxxxxx’. These are all of the PCNs associated to that ID Number. If the ID NUmber is required it will have a checkmark to the left of the IdNo. If the PCN is Required, it will have a checkmark to the left of the PCN.
3. Use the ‘ FIND' option. From either the Section Library screen or MasterList screen click on ‘Find’ on the menubar. Enter a ID Number click on ‘Find Now’ or press the ‘Enter’ key. All associated PCNs for that ID Number will be listed.
Notes:
1. In Section Library under Associated Publications if there are no Required PCNs but there are All PCNs then ‘No Publications were Selected for this I…’ is listed.
2. In Section Library under Associated Publications if there are no associated PCNs for this ID Number I the Masterlist then ‘There Are No Associated Publications…’ is listed.
3. In MasterList if there are no PCNs associated to the ID Number then ‘There are No Asso…’ is listed under Associated Publications.
4. While in the Find screen, if you double-click on a PCN it will take you to: a. If the PCN is Required it will position you in Section Library
screen at that PCN b. If the PCN is not Required it will position you in MasterList screen
at the PCN 5. While in the Find screen, if you double-click on an ID Number it will take
you to: a. If the ID Number is Required it will position you in Section Library
screen at that ID Number b. If the ID Number is not Required it will position you in MasterList
screen at the ID Number
Find publications designated Non Equipment Associated (NEA)
One feature of PLMS is that you can designate ID Numbers as Required and then designate their associated PCNs as Required or not. In your Section Library this binds those PCNs to their ID Numbers so if the ID Number is no longer Required or is deleted, then PLMS automatically assumes that those
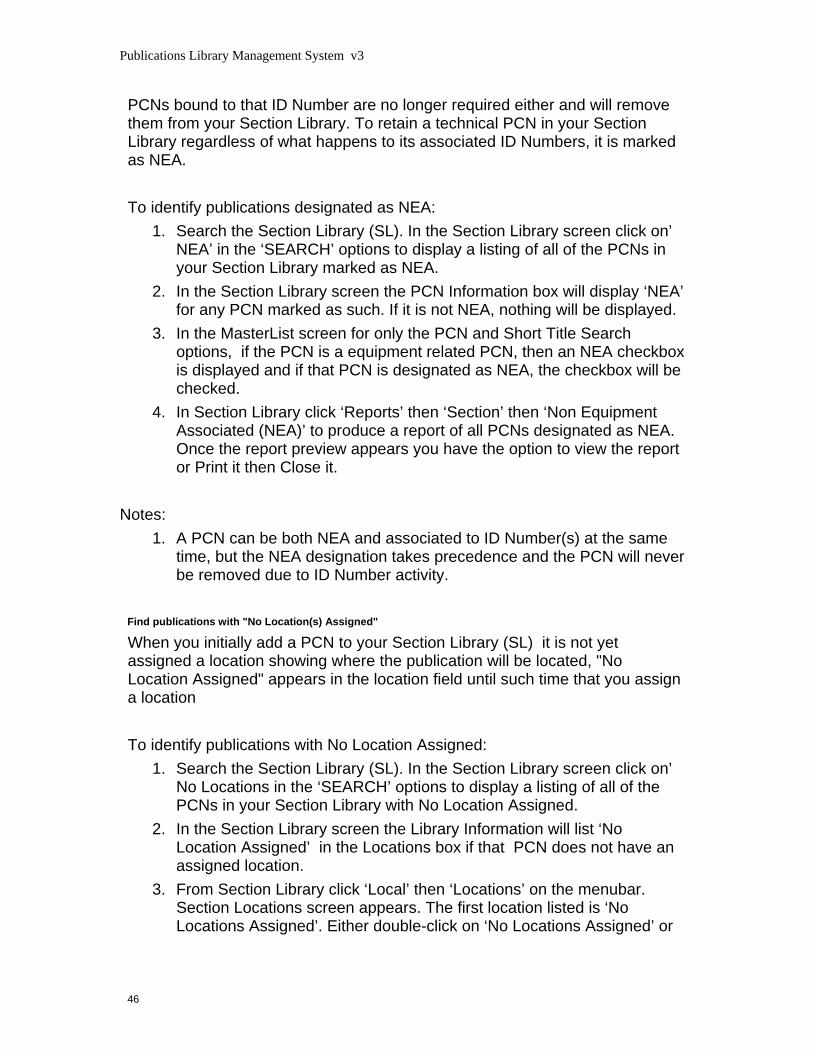
Publications Library Management System v3
46
PCNs bound to that ID Number are no longer required either and will remove them from your Section Library. To retain a technical PCN in your Section Library regardless of what happens to its associated ID Numbers, it is marked as NEA. To identify publications designated as NEA:
1. Search the Section Library (SL). In the Section Library screen click on’ NEA’ in the ‘SEARCH’ options to display a listing of all of the PCNs in your Section Library marked as NEA.
2. In the Section Library screen the PCN Information box will display ‘NEA’ for any PCN marked as such. If it is not NEA, nothing will be displayed.
3. In the MasterList screen for only the PCN and Short Title Search options, if the PCN is a equipment related PCN, then an NEA checkbox is displayed and if that PCN is designated as NEA, the checkbox will be checked.
4. In Section Library click ‘Reports’ then ‘Section’ then ‘Non Equipment Associated (NEA)’ to produce a report of all PCNs designated as NEA. Once the report preview appears you have the option to view the report or Print it then Close it.
Notes:
1. A PCN can be both NEA and associated to ID Number(s) at the same time, but the NEA designation takes precedence and the PCN will never be removed due to ID Number activity.
Find publications with "No Location(s) Assigned"
When you initially add a PCN to your Section Library (SL) it is not yet assigned a location showing where the publication will be located, "No Location Assigned" appears in the location field until such time that you assign a location To identify publications with No Location Assigned:
1. Search the Section Library (SL). In the Section Library screen click on’ No Locations in the ‘SEARCH’ options to display a listing of all of the PCNs in your Section Library with No Location Assigned.
2. In the Section Library screen the Library Information will list ‘No Location Assigned’ in the Locations box if that PCN does not have an assigned location.
3. From Section Library click ‘Local’ then ‘Locations’ on the menubar. Section Locations screen appears. The first location listed is ‘No Locations Assigned’. Either double-click on ‘No Locations Assigned’ or

Reports
47
click ‘No Locations Assigned’ and then click ‘Expand All’ on the menubar to list all of the PCNs with No Location Assigned.
4. In Section Library click ‘Reports’ then ‘Section’ then ‘Section Library’. The ‘Section Library Report Selections form’ popup appears. Select For ‘Locations’ then select ‘Selected Location Inventory’. Under ‘Full Location Path’ click ‘No Location Assigned’ to highlight it and then click the OK button to produce a report of all PCNs with No Location Assigned. Once the report preview appears you have the option to view the report or Print it then Close it
Get the most recent version of PLMS for my use
1. From the Section Library screen click ‘Help’ then ‘About’ on the menubar. 2. Note the Version number and the Master List dated date. 3. Go to the HQMC web site URL: www.usmc.mil 4. On the menubar select ‘Publications’ 5. On the dropdown click on ‘Publications Library Management System’ 6. Contained within the web page you will find the latest Version number of
PLMS and the latest Master List file available. 7. If you need to upgrade either your version of PLMS or your Master List file,
following the instructions listed in the web page.
Load my Section Library (SL)
When you first created your Section Library (SL) you were required to first decide if you wanted to convert your old DOS PLMS diskettes or you want to create an empty SL. - If you already converted your library from the DOS version of PLMS, then
its should already be loaded with your SL. If you forgot to convert your DOS version of PLMS when you created your Section Library or you chose not to and have now changed your mind and want your old library information loaded into your new Section Library, your only option is to delete the section library your created and start over, this time using the Conversion process.
- If you need to load addition PCNs, local publications, and/or ID Numbers after conversion
o Add a PCN to my Section Library o Add a local publication to my Section Library o Add an ID Number to my Section Library

Publications Library Management System v3
48
- If you did not convert, then the newly created SL will be empty. There are many different approaches to load a new section library, here are a few suggestions:
o If you are primarily a technical publications shop, take an inventory of all items of equipment you have and record their ID Numbers (or TAMCNs). Then inventory all of the publications you have on hand, noting their locations, quantity and if you have any on order or backorder. Start PLMS and select your Section name. Once in your Section Library go to MasterList on the menubar. In MasterList select Id-No (or Tamcn) search and then locate and mark as required each item of equipment. At the same time mark any PCNs you have that are listed under that ID Number also as required. Once this is completed return to SectionLibrary and do through each of the PCNs updating their location(s) and quantities.
o If you are primarily an administrative publications shop, take an inventory of all of the publications you have on hand, noting their locations, quantity and if you have any on order or backorder. Start PLMS and select your Section name. Once in your Section Library go to MasterList on the menubar. In MasterList select PCN Search and then locate and mark as required each PCN you have. Once this is completed return to SectionLibrary and do through each of the PCNs updating their location(s) and quantities.
o If you have a mix of administrative and technical publications then you’ll probably want to perform a combination of the processes above.
o If you have any local publications (i.e. commercial books, manual, magazines, other service publications not assigned a PCN, etc…) then while in you Section Library click on Local, then Add on the menubar. There you can add all your local publications to your SL.
o If you have any technical publications that you want to retain in your SL regardless of what happens to their Associated ID Numbers, the in MasterList locate that PCN and check its NEA box.
Locate a Publication not physically present in my Section
If PLMS is configured for unit level, in addition to viewing those publications managed in your own Section Library, you can see what publications are assigned to the other sections within your unit. This may be useful if you need look at a publication you don’t have but it might be elsewhere in your unit, or

Reports
49
before ordering a little used publication for your section, knowing another section nearby has one might mean you don’t need one in your own section. To check if a publication is located somewhere else in your unit.
1) From your Section Library screen click ‘MasterList’ on the menubar 2) Using any of the Search options available, locate the publication in
question 3) Click on the PCN to highlight it 4) If the [PL Information] button listed at the bottom of the screen is not
dimmed, click on it Note: If the button is dimmed, then that PCN is not assigned to any section within your unit
5) The ‘PL Information’ screen will be displayed with the publications PCN, Short Title and Rated Quantity for the Unit. Then each section assigned that PCN will be listed along with the number of copies rated by that section.
Locate my Existing Section Library (SL)
While normally once your Section Library(SL) is loaded to your PC, all you have to do to open your SL is select your Section Name from the list presented when your start PLMS and click [Continue] and you are in. The program keeps track of where you saved your SL when you created it. But under some circumstances you might need to locate your SL.
- You’ve reloaded the PLMS program - You moved your SL from one location to another - The drive where your SL is located was remapped (i.e. was x: but is
now w:) - You are accessing your SL from another PLMS workstation that you
had not previously used So if you start PLMS and your Section is not listed in the Section Name dropdown list, it may have been disconnected due to one of the reasons above. To connect your Section Library to this copy of PLMS, you must first know the path to your SL file. The SL filename is PLMSsectionname.mdb. Use Windows Explorer to first locate the file. Once located note its path location. Now enter in the Section Name box your section name exactly as it is on the filename by removing the leading ‘PLMS’ and trailing ‘.mdb’. Click Continue. Now on the ‘Create or Locate Section Library’ screen click on ‘Locate my existing Section Library’. This in turn pops up an Open screen. Using the Look in: dropdown box maneuver to the location of your section file and double-click the file name. The

Publications Library Management System v3
50
name of the section your entered must match that enclosed within PLMSsectionname.mdb exactly. If they do not match exactly, double-clicking will do nothing. Then you must click Cancel to exit. Notes: 1. If you need to change the section name, first connect the SL with the
existing name, then follow the instructions for changing the section name through the configuration options.
-
Maintain locations for my Section
Locations are storage locations that you define to your Section Library so you can then assign the copies of your PCNs or local publications to them. Before you can assign a copy of a publication to a Location, you must first define that Location. These locations can be arranged in a hierarchical structure. Example: Central Files Cabinet 1 Drawer A Binder 1A Drawer B Binder 1B Cabinet 2 Drawer A Binder 1A Or the locations can be simply a sequential list: Example: Binder 1 Binder 2 Binder 3 PLMS does specify how you name and organize your locations. There are two ways to bring up the Section Locations screen
1. While in the Section Library screen click on ‘Local’ then ‘Locations’ on the menubar.
2. While in the Section Library, on any PCN click the ‘Add’ button under Locations in Library Information.

Reports
51
The Section Locations initially defaults to having just two Locations
1. ‘No Locations Assigned’ folder exists to store any PCN not yet assigned to a Location. You can move PCN(s) from this folder to any other Location, however you cannot move a PCN from an existing Location to this folder.
2. Section level Location (named same as Section Library name) is the highest level Location that you add all new Locations to. You cannot assign publications to this level. The Section level Location cannot be Renamed, Cut, moved, or Deleted.
To update your Locations the following options are provided either using the menubar or right click on your mouse.
- New – Adds a new location to the Location directory. Click on the Location you want to add the new Location under and then click New. A pop-up appears prompting you for the name of the new Location. Maximum 25 characters and the first character must be either a number or a letter
- Rename – Renames an existing Location. Click on the Location you want to rename and then click Rename. A pop-up appears prompting you for the new name of the Location. Maximum 25 characters and the first character must be either a number or a letter.
- Cut – Marks an existing Location so you can move it somewhere else in your Locations directory . Click on the Location you want to move and then click ‘Cut’. Notice that ‘Paste’ is now enabled for use. Now scroll through your Locations and locate the location you want to move your ‘Cut’ Location under and click to highlight it. Now click ‘Paste’ and that Locations and all subordinate Locations and PCNs will be moved to it. If you change your mind after marking a ‘Cut’, click ‘Undo Cut’ to nullify the action.
- Delete – Deletes an existing Location. Click on the Location you want to delete and then click ‘Delete’. If the Location has PCN (s) assigned to it, you must first remove them from that Location prior to deleting it. A quick method to do this is to one by one delete or move each of the subordinate PCN(s). If deleting the PCN and it has an On-Hand quantity greater than zero, you must confirm each PCN delete. Once you confirm the delete, the PCN along with all of its quantities is deleted from only that Location. The PCN(s) are deleted from the location only, not your Section Library (SL). It is your responsibility to reassign the publications or destroy the physical copies if it is no longer needed.
- Paste – Once a PCN is ‘Cut’, the ‘Paste’ option becomes available allowing you to move the Location to under another location.

Publications Library Management System v3
52
- Collapse All – Allows you to close your entire location directory, so only the first level is actually viewed.
- Expand All - Allows you to view your entire location directory at all levels.
- Locations are composed of a cascading set of levels, sorted in alphabetical order. They exist in parent/child relationships. When you are in the Location directory tree structure, you may select a location from any level to move, except the parent (Section Name), which cannot be moved.
Notes: 1. The Locations directory is sorted alphabetically within each level. 2. Right-clicking will also provide most of the same options as the menubar 3. To change the Section level Location, you must change the name of your
Section Library using Configure.
Maintain quantities for a specific PCN
Each publication in your Section Library whether its USMC distributed with an assigned PCN or it’s locally added, is managed using a set of three quantity values and their assigned location(s).
- Required Quantity – The quantity you are required to maintain to support the performance of your mission. This number is originally assigned by the publication’s HQMC sponsor (unless local) and is then adjusted by you as needed. The number can be spread across multiple locations.
- On Hand Quantity – The number of copies have on hand for a specific publication at one or more locations. If you have any copies on hand, you must assign them to a location. These copies can be physical (paper, CDs, or other) or digital (.doc, .pdf, or other).
- On Order Quantity - The number of copies you have requested to be ordered for a specific publication at one or more of its locations.
Example: PCN 18405529300 TM-05538C-10-3 W/CH 2 M16A2 RIFLE, 5.56-MM Location Rqd OnHand OnOrder Binder 1 1 1 0 Binder 2 2 1 1 Binder 3 1 0 0 Total 4 2 1

Reports
53
Notes:
• If OnHand + OnOrder < Rqd it is considered a Shortage • If OnHand + OnOrder > Rqd it is considered a Overage • To order an additional copy for a location, add 1 to the existing OnOrder
value • Totals are automatically computed
Move my Section Library (SL)
For various reasons you may need to move your Section Library from one location to another. This may be from one folder on your PC to another folder on the same PC or some location you have access to in your network. Or moving from one PC to another. Your Section Library is unique and should only be maintained in one location. You should only ‘Move’ your location, never ‘Copy’ it to another location if there will then be two copies of the same Section Library. To move your Section Library on the same PC.
1) Go to Explorer 2) Locate the directory where you stored your Section Library 3) If you don’t remember, do a Search on PLMS*.mdb (Your Section
Library is named PLMSsectionname.mdb)). 4) Click on your Section Library to highlight it. 5) ‘Cut’ the file from its current location and then ‘Paste’ it to its new
location 6) Start PLMS, select that Section Name and click [Continue] 7) PLMS will not be able to locate the Section Library so it will prompt
you with a ‘Create or Locate Section Library’ screen. 8) Select ‘Locate my existing Section Library’. You will now see a Open
screen. Click on the ‘Look in:’ locations box and locate the folder where you ‘Pasted’ the Section Library file into
9) The Section Library file name (i.e. PLMSsectionname.mdb).should be listed, click to highlight it and click the [Open] button or double-click the Section Library file name.
10) Your Section Library is now open and its new location has been updated in PLMS.

Publications Library Management System v3
54
To move your Section Library from one PC to another PC. 1) The second PC must already have PLMS loaded, if not then it must
be first installed. 2) Go to Explorer 3) Locate the directory where you stored your Section Library 4) If you don’t remember, do a Search on PLMS*.mdb (Your Section
Library is named PLMSsectionname.mdb). 5) You must now transport your Section Library from the first PC to the
second. This can be done in many ways. You can email it as an attachment. You can copy it to a diskette and hand carry it. You can Cut and Paste to a shared location on the network. Whichever method you choose, it is advised you first create a backup copy of your section Library.
6) On the second PC you then need to save the Section Library file. By default a Section Library file should be in folder …\PLMS\Section Libraries, but can be saved in any folder.
7) Start PLMS on the second PC and type in the Section Name into the Section Name box and click [Continue]
8) PLMS at first will not be able to locate the Section Library so it will prompt you with a ‘Create or Locate Section Library’ screen.
9) Select ‘Locate my existing Section Library’. You will now see a Open screen. Click on the ‘Look in:’ locations box and locate the folder that you ‘Pasted’ the Section Library file into
10) The Section Library file name should be listed, click to highlight it and click the [Open] button or double-click the Section Library file name.
11) Your Section Library is now open and PLMS will now know where your library is located.
12) Go back to the first PC and now delete your section Library.
Notes: - While you should never have more than one copy of your Section
Library, you can have it connected to multiple PCs with PLMS installed, each one pointing to the same PLMSsectionname.mdb. WARNING. Do not access the Section Library from multiple PCs at the same time, or else unpredictable results could occur that could corrupt the file itself.
Order Publications
PLMS version 1 does not support direct ordering of PCNs from the USMC publications stock point in Albany GA. Instead, PLMS is designed to assist you in using the Marine Corps Publication Distribution System (MCPDS) which is

Reports
55
the only official method for ordering USMC publications. PLMS does this by several methods depending on which if the four types of PLMS user you are. 1) DCP Only: As a DCP Only type user, you have access to update
MCPDS directly. To order a PCN, on the PCN Section Library screen use the Search options to locate the PCN to be ordered. In the Library Information area you will see a list of Locations along with their Rqd (Required), OnHand, and OnOrd (On Order) quantities. The OnOrd value indicates the number of copies on order for that Location for that PCN. To order additional copies, simply increment the number the desired number of copies. (i.e. to order 1 additional copy, if the OnOrd = 0, change it to 1, or if the OnOrd = 1, change it to 2). The next time you create your MCPDS Section Change Request the additional quantities to be ordered are included.
2) DCP with/Sections: As a DCP with/Sections type user, if you are also managing a Section Library named DCP you order PCNs for yourself the same way as your other sections do. To order a PCN, on the PCN Section Library screen use the Search options to locate the PCN to be ordered. In the Library Information area you will see a list of Locations along with their Rqd (Required), OnHand, and OnOrd (On Order) quantities. The OnOrd value indicates the number of copies on order for that Location for that PCN. To order additional copies, simply increment the number the desired number of copies. (i.e. to order 1 additional copy, if the OnOrd = 0, change it to 1, or if the OnOrd = 1, change it to 2). The next time you create your MCPDS Unit Change Request the additional quantities to be ordered for the DCP section are included. If you are also have access to MCPDS you will then be ordering from the MCPDS Unit Change Request, else if you don’t have access to MCPDS then you will need to give the MCPDS Unit Change Request to your MCPDS clerk.
3) Section Only: As a Section Only type user, you are supported by a MCPDS clerk who does not use PLMS. To order a PCN, on the Section Library screen locate the PCN you wish to order using any of the Search options provided. Then in the Library Information box enter the quantity to be ordered in the OnOrd column for whichever Locations require the copy(s). This can be done for as many PCNs you need to order and over any period of time. When you are ready to submit your order request to your MCPDS clerk, click on ‘MCPDS Section Change Request’ on the menubar. This will generate a report of any/all inventory changes and orders you are requesting since the last time you produced this report. A number in the Order Qty column indicated to the MCPDS clerk that you request that many copies. When requesting this report you will be prompted with a ‘Reset Inventory Order Quantity baseline’ screen. This allows you to at anytime preview your report before finalizing it. Only answer YES when you are ready to deliver this copy to

Publications Library Management System v3
56
your MCPDS clerk.. See report ‘MCPDS Section Change Request’. Your MCPDS clerk will use this report to place your orders for you.
4) Section with/DCP: As a Section with/DCP type user, you are supported by a DCP and your DCP will coordinate the ordering of your PCNs with the MCPDS clerk. To order a PCN, on the PCN Section Library screen use the Search options to locate the PCN to be ordered. In the Library Information area you will see a list of Locations along with their Rqd (Required), OnHand, and OnOrd (On Order) quantities. The OnOrd value indicates the number of copies on order for that Location for that PCN. To order additional copies, simply increment the number the desired number of copies. (i.e. to order 1 additional copy, if the OnOrd = 0, change it to 1, or if the OnOrd = 1, change it to 2). The next time you do an ‘Export Section Library’, this will send the order information to your DCP who will (if it is approved) place the order for that PCN for you. Later you will receive an updated Unit PL file from the DCP and it will contain your ‘Section Change Report’ which lists all of the new orders. Those requested by you (approved/disapproved) and ordered for you by the DCP themselves.
Notes:
1. Those PCNs marked ‘EDO (Electronic Distribution Only) can not be ordered. To obtain a copy you must download it from the appropriate web site.
2. If there is already a number in the OnOrd field, then increment the number with the additional number of copies.
3. When you place an order for a base PCN (last two bytes = ‘00’), the same quantity is automatically ordered for its change PCN(s) (last two bytes > ’00). If you also placed an order for any of those change PCN(s), and the amount is greater than the base order, then the difference will be ordered for the change.
4. Document numbers are not being tracked in this system.
Reconcile my PLMS application each month
Each month HQMC (Code-AR) puts out a new file listing of all of the USMC publications. This file is referred to as the PLMS Master List file (also know as the PLMS Shared file). To keep your Section Library up to date, you need to download this file and save it in your PLMS\Data subfolder. After you have saved the file, the next time you start PLMS it will automatically detect that there is a new Master List file present and update all of the Section Libraries on this PC. A separate report listing all of the changes for each Section Library is then made available to that section.

Reports
57
To review your Reconciliation Report. On your PLMS Section Library screen click ‘Reports’ on the menubar. On the dropdown list you will see listed at the bottom your available Reconciliation Reports. They are listed as ‘Reconciliation yyyymmdd’ where the date is the date of the downloaded PLMS Shared File. Click on the most recent date. The Reconciliation Report is divided into two parts.
1. The first part lists by PCN the following actions that were performed on your Section Library:
- PCN Add – If an ID Number is Required in your Section Library, then any new PCNs associated to that Id Number will automatically be added to your Section Library. You then need to decide if you need that new PCN and if so order the appropriate number of copies. If not Delete it from your Section Library. Note: you may already be on Initial Distribution for this PCN.
- Non Technical PCNs Associations - For those non-technical PCNs in your Section Library, if an SSIC association exists in your Section Library and is no longer valid, this association will be deleted from your Section Library, or if a new SSIC association is added and does not exist on the Section library, the association will be added to your Section Library
- PCN Date Change– if a PCN’s Pub-Date has changed then the Pub-Date will be updated in your Section Library. If your unit is already registered in MCPDS that you require this PCN, MCPDS will automatically ship to your IAC that number of replacement copies. If you need additional copies or do not receive your replacement copies after 90 days, then you should order new copies. Replace your old copies with the replacement copies when received. If the PCN starts with ‘7’, these are distribution only PCNs and are not reported here if their date changes.
- PCN Supercede – When a PCN in your Section library is Superceded the superceding PCN is checked if its already in the Section Library. If its not already there,, then the superceding PCN is first added to the Section Library with the RqdQtys and Locations of the superceded PCN. Then the superceded PCN is deleted from your Section Library. You should then order the appropriate number of copies of the superceding PCN.
- PCN Deleted - If a PCN is deleted then it will be deleted from your Section Library. You should then dispose of all copies of that PCN. Be sure to pay attention if the deleted PCN is the base (last 2 digits = ‘00’) or a change. Do not dispose of the publication if the deleted PCN is a change (last 2 digits NOT ‘00’).
2. The second part of the report lists by ID Number the following actions that were performed on your Section Library:

Publications Library Management System v3
58
- PCN Deleted Associations for Technical Publications – a Section Library association is deleted. If the PCN is associated to only one Id Number is not Non Equipment Associated (NEA) its changed to NEA. Check if you still require the PCN or not. If not, delete it from your Section Library.
- Id Number Delete– If an ID Number your marked as Required is deleted then it is deleted from your Section Library. Any PCNs you have in your Section Library that are associated to this ID Number but no other ID Numbers and are not already marked Non Equipment Associated (NEA), will changed to NEA. Check if you still require the PCN or not. If not, delete it from your Section Library.
- PCN Added Associations for Technical Publications – If you have a technical PCN in your Section Library and an association to an ID Number that you already have marked as Required is added to this PCN, then this association is added to your Section Library unless the PCN is set to NEA, then new associations will not be added.
Notes:
1. PLMS also refers to the Master List file as the Shared file.
Remove a publication from my Section Library (SL)
Removing a publication has two different meanings depending on whether it is a Local or USMC-wide publication. Removing a USMC publications means deleting that PCN with all of its assigned Locations and quantities and associations from of your Section Library. The PCN remains in the MasterList. Removing a Local publication means deleting that publication with all of its assigned Locations and quantities and associations plus its Short Title, Long Title, Publications Date, Sponsor and Classification. Local publications do not exist in the MasterList. PCNs can be removed from your Section Library from either the Section Library screen or from the MasterList screen. Local publications can only be removed from the Section Library screen. 1. Removing publications using the Section Library screen:
a. Locate the PCN (or local publication) for which you will be removing. Any Search in the Section Library screen can be used to locate that publication.

Reports
59
b. Once located click "Delete Publication" button in PCN Information. c. If this is a local publication or if there are any existing quantities, a
pop-up screen will appear asking you to confirm this deletion. Click OK to confirm or Cancel to abort.
2. Removing PCNs using the MasterList screen a. Locate the PCN which you will be removing. Use Search options
PCN or Short Title to locate that publication. Note: Using the other Search option can produce unpredictable results if the PCN is associated to more than one ID Number or SSIC.
b. Once located Uncheck the "Required Box" in the Search Area for that PCN.
c. If there are any existing quantities, a pop-up screen will appear asking you to confirm this deletion. Click OK to confirm or Cancel to abort.
Notes:
1. To re-Add a USMC-wide publication "Add a PCN " 2. To re-Add a local publication
Remove an Id Number from my Section Library (SL)
ID Numbers are added to your Section Library to record those items of equipment your section is responsible for maintaining. By marking an ID Number as Required you can better manage those publications associated with that equipment. If you no longer have that item of equipment or are no longer responsible for its maintenance, then you should remove its ID Number from your Section Library. ID Numbers can be removed from your Section Library from either the Section Library screen or from the MasterList screen. 1) Removing publications using the Section Library screen:
a. Locate the IDNumber which you will be removing. Any Search ( except SSIC) in the Section Library screen can be used to locate that ID Number or a PCN associated with that ID Number.
b. Once located click "Not Req’d" button in Equipment Information. c. If there are any PCNs in your Section Library that are associated to
ONLY this ID Number, then a pop-up will appear listing those PCNs for your confirmation. Click OK to remove this ID Number and change the PCNs to NEA or Cancel to abort.
2) Removing PCNs using the MasterList screen
Publications Library Management System v3
60
a. Locate the ID Number which you will be removing. Use Search options Id-No or Tamcn to locate that ID Number. .
b. Once located Uncheck the "Required Box" for that ID Number c. The ID Number is removed from your Section Library and any PCNs in
your Section Library that were associated to ONLY this ID Number and were not already marked as NEA will be changed to NEA.
Notes:
1. This process DOES NOT DELETE PCNS FROM YOUR SECTION LIBRARY.
2. To remove the PCNs associated to this ID Number from your Section Library, you must individually remove them. See Delete a PCN from my Section Library
Remove Associations to an IdNo
There are various reasons to have a publication in your Section Library: 1. You are responsible for maintaining an item of equipment and require
its maintenance publications 2. You require a technical publication regardless of what item(s) of
equipment it applies to 3. You require a non-technical publication for administrative purposes
To make it easier to manage publications, PLMS maintains a list of associations. These are the cross references of which PCNs are needed to maintain an specific ID Number and which ID Numbers are supported by a particular PCN For example: ID Number 00796C RADIACMETER IM-143B/PD PCN 16738355000 TI-4733-15/1E PCN 16738355100 TI-4733-15/2A PCN 16747104900 TI-4733-15/9B PCN 16691202200 TI-07722A-14/1 ID Number 08194B TOW Weapon System ID Number 08194A TOW Maintenance Shelter

Reports
61
ID Number 07722A Launcher Tubular GM TOW M220A1 By marking an association (ID Number/PCN) as required, you are telling PLMS that you need that PCN dependant on that ID Number. If you no longer require the ID Number, then you no longer need the PCN. Associations can be removed from your Section Library from either the Section Library screen or from the MasterList screen.
1) Removing associations using the Section Library screen: a. Locate the ID Number or PCN for which you want to remove the
association. Any Search option ( except SSIC) can be used to locate that ID Number or PCN.
b. Once located click on it and it will display in Equipment Information. c. If you selected a PCN, it will be highlighted in the Associated
Publications box and all Required ID Numbers will be listed. If the particular ID Number you need is not displayed, click on the dropdown arrow for ID Numbers and click on the correct ID Number. Then go back over to the Associated Publications box and uncheck the Rqd PCN checkbox for the that PCN. If that PCN was associated to ONLY this ID Number in your Section Library then the PCN will be changed to NEA.
d. If you selected an ID Number its first PCN in the Associated Publications box is highlighted by default. Locate and uncheck the Rqd PCN checkbox for the correct PCN. If that PCN was associated to ONLY this ID Number in your Section Library then the PCN will be changed to NEA.
2) Removing associations using the MasterList screen a. Locate the ID Number or PCN for which you want to remove the
association. Any Search option ( except SSIC) can be used to locate that ID Number or PCN.
b. Once located click on it to highlight. c. If you selected a PCN, it will list its associated ID Numbers on the right
side of the screen under ‘ID Numbers Associated with …’ . You can now uncheck either the PCN or the ID Number(s). • Unchecking the PCN will remove the ID Number associations. If the
PCN has any Required, OnHand or OnOrder quantities, a confirmation pop-up will appear. Click OK to remove this PCN from your Section Library or Cancel to abort.
• Unchecking the ID Number. If the PCN is NEA, then unchecking the ID Number removes the association. If the PCN is not NEA, then

Publications Library Management System v3
62
unchecking the ID Number removes the association and if it was the last associated ID Number, then the PCN is changed to NEA.
d. If you selected an ID Number, it will list its associated PCNs on the right side of the screen under ‘Associated Publication(s) For …’. You can now uncheck either the ID Number or the PCN(s). • Unchecking the ID Number removes the association to all associated
PCNs and removes the ID Number from your Section Library. If the PCN(s) are not associated already to another Required ID Number and the PCN is not already NEA the PCN is changed to NEA.
• Unchecking the PCN will remove the association to that ID Number. . If the PCN(s) are not associated already to another Required ID Number and the PCN is not already NEA the PCN is changed to NEA. If this is the last Required PCN for that ID Number then the ID Number is removed from your Section Library.
NOTES:
1. If it is a technical PCN but its valid associated ID Number(s) is unknown, it will be assigned to ID Number 00000A INVALD IDNO.
2. On MasterList. If the ID Number has no associated PCNs, then the message ‘There Are No Asso…’ will be displayed.
3. On Section Library. If there are no Required PCN associated to this ID Number the message "No Publications were Selected for this I…" will be displayed.
Rename a location in my Section
The Location is the name of the storage place where the publication is kept (e.g. Binder 1). You can Rename the Location by using one of the following options:
1. Click ‘Local’ on the menu bar, then click on ‘Locations’ in the drop down box. A screen containing all your locations in a hierarchy will appear. Locate and select the location you want to rename. Once located, Click on the "Rename" option on the Locations menu bar. A Rename Location pop-up will appear with the Location name. Change the Location name to the new name and click Ok or Cancel to abort.
2. While in you Section Library for any PCN click on the ‘Add’ command which places you in the ‘Locations’ screen. You can then proceed as you did in #1 above.
Notes:

Reports
63
1. All PCNs in your Section Library with this Location will be automatically changed to the new Location name.
2. If the new name already exists at that same level, you will receive a message asking you to enter another Location name.
Rename my Section
Your section name identifies your particular Section Library. To change your section name. Depending of which Type of User you are:
1. DCP Only - From your Section Library screen click ‘Configure’ on the menubar. Change the Section Name. Click ‘File’ then ‘Save’ on the menubar.
2. DCP with/Sections - your section name must be ‘DCP’ and cannot be renamed.
3. Section Only - From your Section Library screen click ‘Configure’ on the menubar. Change the Section Name. Click ‘File’ then ‘Save’ on the menubar.
4. Section with/DCP – The section name serves as the key in connecting the individual Section Libraries to the Unit PL. The Unit PL is managed exclusively by the DCP and all section name changes MUST be coordinated with the DCP. The are two methods to change the section name:
a. Initiated by the Section 1. Section. From your Section Library screen click ‘Configure’ on
the menubar. Change the Section Name. Click ‘File’ then ‘Save’ on the menubar.
2. Section. When you are ready to Export your Section Library to your DCP, contact the DCP and inform them that you are changing your Section Library from x to y.
3. Section. Export your Section Library as usual. 4. DCP. The next time the you go into Edit PL an ‘Unknown
Section Library Import’ screen will appear stating that the new section name currently does not exist in the Unit PL. If you know which Section is being renamed, select option ‘Rename’ and click ‘Okay’. If not, click ‘Ignore’.
5. DCP. You will now be placed in Manage Sections and a ‘Rename Section’ popup screen will appear instructing you to

Publications Library Management System v3
64
double click on the old Section Name in your Sections list after clicking OK.
6. DCP. Locate the old Section Name and double click on the name
7. DCP. Another Rename popup screen will now appear asking you to confirm the rename. Click Yes to confirm the rename.
8. Rename action completed. b. Initiated by the DCP
1. DCP. From your Section Library screen click ‘DCP’ then ‘Manage Sections’ on the menubar.
2. DCP. Click on the Section to be renamed to highlight it 3. DCP. Click ‘Sections’ then ‘Rename’ on the menubar 4. DCP. Change the Section Name. 5. DCP. When you are ready to Export the Unit PL to the
Sections, contact the section that was renamed and inform them that you have changed their Section Name from x to y.
6. DCP. Export the Unit PL as usual. 7. Section. Start PLMS and select your old Section Name.
Once in Section Library click ‘Configure’ on the menubar. 8. Section. Change the Section Name to EXACTLY match
what it was changed to by the DCP. Click ‘File’ then ‘Save’ on the menubar.
9. Section. Click ‘Reports’ then ‘Section’ then ‘Section Change Report’ to view any Rqd Qty or OnOrder Qty adjustments that were performed by the DCP.
10. Rename action completed. Notes:
1. If you are unsure which Type of User you are, on the Section Library screen click on ‘Configure’ on the menubar. Then look under ‘Type of User’.
2. If you are a ‘DCP with/Sections’ and you want to manage your Section Library with a name other than DCP then you must create another section library and use it like any other ‘Section with/DCP’ type user would.
Save my Section Library (SL)
Your Section Library (SL) is that set of information which makes your library unique. This includes those PCNs and ID Numbers you have marked as Required, PCNs marked NEA, the Required, OnHand and OnOrder quantities, their locations, local publications and your configuration settings.
Reports
65
When you start PLMS, a copy of your Section Library is made and you are updating this ‘working copy’ while you are working in PLMS. To commit any updates permanently, you must ‘Save’ your Section Library. You can then save your data in one of the following ways:
1. You can save your SL at any time by clicking on ‘File’ then ‘Save’ in the Section Library (SL) screen menubar.
2. You can save your SL at any time by clicking on the icon that looks like a diskette. If you hover the cursor over it, it will say ‘Save’.
3. When exiting PLMS, if you have made any changes to your Section Library you will be asked if you want to Save your library. Answer Yes to make any changes you made permanent, answer No to abort all the changes you made since the last time you Saved, or Answer Cancel to remain in PLMS.
Notes:
1. You should save your Section Library frequently if you are doing extensive updates.
2. If a power outage or PC failure should occur, all updates you had made since the last Save will be lost.
Save my new Unit PL file
This topic only applies if you are configured with a Type of User of ‘Section with/DCP’. Periodically your DCP will distribute the latest copy of your unit’s Unit PL file to all sections. Depending on how you are configured to receive the Unit PL file you may need to take additional action to get the Unit PL file located to where it needs to be. If your File Exchange Method is:
a. Portable Storage Device (PSD). There are two ways you could have gone with this. The first way the Unit Publication Library File Location points directly to the PSD’s drive (i.e. it has A:\ for using a diskette) and you simply inset or connect the PSD into the appropriate drive. The other way is that there is an intermediate holding location listed at Configure Unit Publication Library File Location and you will need to use Windows Explorer to manually copy the Unit PL file to that location.
b. E-Mail. There is an intermediate holding location listed at Configure Unit Publication Library File Location and you will need to ‘Save As’ the attached Unit PL file to that location.
Publications Library Management System v3
66
c. Shared. The Unit PL file is automatically written directly to the Unit Publication Library File Location by the DCP. No action required of the section.
Once the Unit PL file is received by you and is located in the proper folder, you will need to process it . To process the Unit PL file, you simply need to sign off PLMS if you are signed in, make sure that the file is copied to the correct location and then start PLMS again. The ‘Section Change Report' is then automatically created and presented for preview. The Section Change Report lists adjustments that your DCP is making to your Section Library at the Unit level. It is then the responsibility of the Section Clerk to make these changes in their Section Library. Notes:
1. To see what method of exchanging files with the DCP you have established and where the Unit PL file needs to be located, you need to look at your PLMS configuration settings. To locate these on the Section Library screen click <Configure> on the menubar. Once on the Section Configuration screen the method of exchanging files information will be found under the area ‘Section Library’ , the same method applies to both the Unit Publication Library and the Section Library.
2. See your ISC for assistance if needed. Submit a NAVMC 10772
The NAVMC 10772 Form is a two-part form. Part 1 is used to recommend changes to technical manuals, and Part 2 is used to recommend changes to Logistics Maintenance Data Coding (i.e., Source, Maintenance, Recoverability coding (SMCR) Technical applications other than publications). This is an excerpt from MCO P5215.17, The Marine Corps Technical
Publications System ,Chapter 6, Information Feedback. "6000. The Assistant Commander Acquisition Logistics has now made
available, on the Internet, a NAVMC 10772 tracking program. Operating Forces that have submitted NAVMC 10772 (Recommended Changes to Technical Publications/Logistics Data Changes) can now access the program at: https://pubs.ala.usmc.mil/navmc/. This is the first screen of the NAVMC 10772 Program. (If, when you click on the above URL you are not sent to the site, copy the URL and paste it into the internet address box for access.)

Reports
67
Reminder: User must have a dot mil (.mil) address and a Common Access Card (CAC) to access this site. On the home page of the NAVMC 10772 tracking program is a "What’s new" button. By clicking on this button, the latest information on future enhancements or other information that needs to be disseminated immediately to the users of technical publications (i.e., FSMAOs and MMOs) is available. There are six ways that queries can be made to this program. It can be interrogated by the following criteria: Equipment Item Designator Number (ID Number); Publication Control Number (PCN); Reporting Unit Code (RUC); Unit Control Number (recommend that this number consist of the Units RUC + 4 digit Julian date, and 4 digit sequencing number (i.e., M6700480960001)); MCLB Control Number; and Publication Short Title. When a search is made by Equipment ID number, a listing of all NAVMC 10772s received since October 1997 will be displayed for that ID; when a search is made by PCN, a listing in PCN sequence will be displayed, and so on for the other search criteria. By utilization of this tracking program, users can see what NAVMCs have been submitted for a specific piece of equipment, what and where the discrepancy is in the manual, the suggested corrections, the Equipment Specialist/LMS’s response to the submitter and whether or not the suggested corrective action was approved and if a change is in process. This eliminates duplication and decreases the workload of the Equipment Specialist/LMS. This program is operated in real time and is constantly being updated; therefore, the data displayed is the latest data available. Administrative time is drastically reduced in tracking and maintaining logs and records for the NAVMCs submitted by the unit for the "accountability" requirements of FSMAO and IG inspections. Another advantage of the use of this program is that Operating Forces can submit NAVMC 10772s directly within this 6-3 THE MARINE CORPS TECHNICAL PUBLICATIONS SYSTEM program and the submission will automatically go to the Publications Section e-mail Mailbox (i.e., [email protected]) which is constantly monitored. The submission is almost immediate vice the 7 to 10 days using the postal service. The paper method of submitting NAVMC 10772s has been a problem in that when the form goes through the postal service, it is normally mutilated by the automatic processing and sorting machines used by the post office or it gets lost. Often when the form is received it is in pieces and in a plastic bag (not all of the pieces are received). Responding to this type of receipt is almost impossible. " What if I don’t have a CAC or access to a CAC reader? The online version of this form could previously be reached only through the Albany Publications website, which is a restricted website that requires a CAC, the user’s Personal Identification Number (PIN), a card reader, and PKI certificates loaded to the hard drive of the computer being used to access the

Publications Library Management System v3
68
secure (restricted) website. Following concerns of nonaccessibility, links to the on-line NAVMC 10772 Form have been placed on nonsecure web pages where a CAC and PKI certifications are not required. Equipment operators and mechanics can now submit electronic NAVMC 10772 Technical Publication Change Request Forms without reaching for their Common Access Cards (CACs) and having to load their Public Key Infrastructure certificates to the computer hard drive they are using to access this form. To submit a NAVMAC 10772, users may now go to the MCLB Albany address, http://www.ala.usmc.mil, click on the "Quick Links" drop-down listing at the bottom of the screen and select "NAVMC 10772 Change Requests" On the Logistics Command home page, http://www.logcom.usmc.mil, read the red links index on the left side of the page, select "Logistics Apps," and click on "NAVMC 10772 Change Forms." The NAVMC 10772 form can still be reached with a CAC at its original location, https://www.pubs.ala.usmc.mil. The NAVMC 10772 tracking program will remain on the secure website due to security regulations. Links to the form from additional websites used by the Operating Forces are also being considered. Use the FIND option
The ‘Find’ option allows you to create a list of publications based on a complex set of search criteria. Based on the values you enter, the MasterList database of all USMC publications is searched and returns the list of PCNs that MATCH ALL the search criteria. The search criteria are as follows:
1. PCN – enter 1-9 digits starting with the first (leftmost) digit of the PCN or enter ‘LOCAL’ to search only your Local publications. Example: To list all ARMY TECHNICAL ORDNANCE MANUALS enter ‘349’
2. IdNumber – enter 1-6 characters starting from the first (leftmost) character of the ID Number Example: To list the 5 Ton 6x6 truck in various configurations enter ‘08088’
3. Tamcn – enter 1-5 characters starting from the first (leftmost) character of the Tamcn Example – To list all commodity Communications equipment enter ‘A’
4. Short Title – enter 1-35 characters of any portion of a Short Title

Reports
69
Example – To list all Army administrative manuals that the Marine Corps has adopted for use enter ‘PAM’
5. Long Title - enter 1-35 characters of any portion of a Long Title Example – To list all publications that have to do with generators, enter ‘generator’
6. Nomenclature Example – To list all publications that have to do with night vision, enter ‘night vision’
While you can do simple one criteria searches, the power of the Find option is using multiple criteria to limit your result to the best matches.
Example - To list all Technical Manuals (TMs) that apply to dump trucks of any model. Enter ‘D’ in Tamcn (vehicles), ‘TM’ in Short Title (Technical Manuals) and ‘dump’ in Nomenclature.
The ‘Find’ option is available from the "Section Library " or "MasterList" screens. To start click on ‘Find’ in the menu bar. Enter your selection criteria and click ‘Find Now’. Once the Search Display Area lists those PCNs that matched your selection criteria at the bottom of the screen, you can double click in any PCN related information (PCN, Short Title, Long Title) cell or any IdNo releted information (IdNo, Tamcn, Nomenclature) cell to position yourself:
• If you double click on PCN, Short Title or Long Title AND that PCN is already in your Section Library, you will be positioned at that PCN in your Section Library.
• If you double click on PCN, Short Title or Long Title AND that PCN is NOT in your Section Library, you will be positioned at that PCN in MasterList.
• If you double click on IdNo, Tamcn or Nomenclature AND that ID Number is already in your Section Library, you will be positioned at that ID Number in your Section Library.
• If you double click on IdNo, Tamcn or Nomenclature AND that ID Number is NOT in your Section Library, you will be positioned at that ID Number in your MasterList.
Notes:
1. Alphabetic characters (A-Z) entered are not case sensitive. ‘A’ is the same as ‘a’.

Publications Library Management System v3
70
2. If there are no matches on your criteria, a message will display: ‘No Records Meet your Criteria’.
3. If you entered Find from ‘Edit PL’ screen see Add PCN to Unit PL Use the USMC Master List
The USMC Master List contains a list of all the official publications (i.e. PCNs) and items of equipment (i.e. ID Numbers) sponsored by Headquarters Marine Corps. In order to manage your Section Library, in it you should included all PCNs that you currently or will Require, have On Hand or have or will Order and all ID Numbers for item of equipment you are (or will be) required to maintain. Having a PCN or ID Number in your Section Library mean that you ‘Require’ it. To go into the MasterList, from the Section Library (SL) screen, click on ‘MasterList’ on the menu bar. Once in MasterList, PLMS provides a variety of options for identifying PCNs and ID Numbers to load into your Section Library.
Identify by PCN
5. Click on ‘PCN’ in the Search box. This lists all publications by PCN. On the right side of the screen the associated SSICs (non-technical publications) or ID Numbers (technical publications) are listed.
6. Either scroll down to or start typing in the desired PCN into the Search box
7. Once the PCN is located that you want to put into your Section Library (SL), click on the Rqd checkbox to the left of the PCN. This adds it to your Section library.
8. Except if the PCN is technical (associated to ID Numbers - those ID Numbers are listed to the right). When a technical PCN is checked, it must then be either designeated Non-Equipment Associated (NEA) by checking the NEA box or if you want that PCN to be included in your Section Library based on the ID Number(s), click on the Rqd IdNo checkbox(es) to check it. This established the PCN/ID Number association(s). It also adds the ID Number(s) to your Section Library if its not already there.
Identify by Short Title
5. Click on ‘Short Title’ in the Search box. This lists all publications by their Short Title. On the right side of the screen the associated SSICs (non-technical publications) or ID Numbers (technical publications) are listed.
6. Either scroll down to or start typing in the Short Title into the Search box

Reports
71
7. Once the correct Short Title is located that you want to put into your Section Library (SL), click on the Rqd checkbox to the left of the Short Title. This adds it to your Section library.
8. Except if it is the Short Title of a technical PCN (associated to ID Numbers - those ID Numbers are listed to the right). When a technical PCN is checked, it must then be either designeated Non-Equipment Associated (NEA) by checking the NEA box or if you want the PCN to be included in your Section Library based on the ID Number(s), click on the Rqd IdNo checkbox(es) to check it. This established the PCN/ID Number association(s). It also adds the ID Number(s) to your Section Library if its not already there.
Identify by ID Number
5. Click on ‘Id-No’ in the Search box. This lists all USMC items of equipment by their ID Numbers. On the right side of the screen the associated PCNs are listed.
6. Either scroll down to or start typing in the ID Number into the Search box
7. Once the correct ID Number is located that you want to put into your Section Library (SL), click on the Rqd checkbox to the left of the IdNo. This adds the ID Number to your Section library. Shortcut – To check all PCNs at once, click on ‘Select all PCN’s as Required’ at the bottom of the screen under the Associated Publications box.
8. Now if you want to add PCNs associated to this ID Number to be in your Section Library based on this ID Number, click on the Rqd checkbox(es) to the left of the associated PCNs. This adds the PCN/ID Number association(s). It also adds those PCN(s) to your Section Library not already there.
Identify by Tamcn
5. Click on ‘Tamcn’ in the Search box. This lists MOST USMC items of equipment by their Tamcns. On the right side of the screen the associated PCNs are listed. Note. Not every ID Number is assigned a TAMCN and the same TAMCN can be assigned to multiple ID Numbers.
6. Either scroll down to or start typing in the Tamcn into the Search box 7. Once the correct Tamcn is located then to the right of the Tamcn locate
the correct ID Number that you want to put into your Section Library (SL), click on the Rqd checkbox to the left of the Itamcn/IdNo. This adds the ID Number to your Section library.

Publications Library Management System v3
72
8. Now if you want to add PCNs associated to this ID Number to be in your Section Library based on this ID Number, click on the Rqd checkbox(es) to the left of the associated PCNs. This adds the PCN/ID Number association(s). It also adds those PCN(s) to your Section Library not already there.
Identify by SSIC
5. Click on ‘SSIC’ in the Search box. This lists all Standard Subject Identification Codes by their SSICs. On the right side of the screen the associated PCNs are listed. Note: Only non-technical PCNs are assigned an SSIC. A PCN can be assigned to several different SSICs.
6. Click on to highlight the SSIC. On the right side of the screen the associated PCNs are listed.
7. Scroll down through the PCNs to locate the ones you want to put into your Section Library, click on the Rqd checkbox to the left of the PCN(s). This adds the PCN to your Section library.
8. To obtain more information about a PCN, click once on the PCN or Short Title to highlight it and then click the ‘PCN Information' button at the bottom of the screen.
Find
If you can’t locate your PCN or ID Number with any of the simple searches above, then you can use the Find tool. To use Find, click on ‘Find’ on the menubar. When using Find from the MasterList, after locating the PCN or ID Number, simply double click on that PCN or ID Number and you will return to the MasterList positioned at that PCN or ID Number.
Notes:
5. To look at PCN or ID Number information without checking/unchecking the Rqd checkbox, click on the PCN, Short Title, Id No, Tamcn, or SSIC once to highlight it. Clicking on it s second time or double clicking will caused the Required checkbox to check/uncheck.
6. Required technical PCNs must be either designated NEA, be associated to a Required ID Number, or both.
7. If it is a technical PCN but its valid associated ID Number(s) is unknown, it will be assigned to ID Number 00000A INVALD IDNO or inversely ID Number 00000A lists all PCNs which have no valid associated ID Numbers.
8. If the ID Number has no associated PCNs, then the message ‘There Are No Asso…’ will be displayed.

Reports
73
View Information on any PCN
Your Section Library only contains information for PCNs that you have marked as Required. You can see detailed information on any PCN by using the ‘PCN Information’ option available in the Master List of PCNs. While in the Master List screen, using any of the Search options provided located the desired PCN and then click on the ‘PCN Information’ button located at the bottom of the screen. The following information is displayed.
• PCN • Short Title • Long Title • Sponsor • Pub Date • Classification • EDO – displays ‘EDO’ if the PCN is Electronic Distribution Only • Non-Stocked – displays ‘NONSTOCKED PUB. See MCO P5600.31’ if
the PCN is nonstocked. • Associations – lists those ID Numbers or SSICs that this PCN is
associated to. 1) If the PCN is Technical (Equipment associated) then the ID Numbers
of those items equipment this PCN is associated to are listed. • You can list All (default) ID Numbers associated to this PCN
or • You can list only Required (those you have marked as required)
ID Numbers associated to this PCN 2. If the PCN is nonTechnical (Administrative) then the SSICs of the
subject areas this PCN is associated to are listed.
What does it mean?
Supercedes Publication <00000000000>
<00000000000> will identify the supercede PCN. This PCN has replaced the PCN 00000000000. If you had PCN
00000000000 in your section library at the time of the last Reconciliation, then the Required Quantities you had for PCN 000000000 will have carried over to the new PCN. In other words whatever you rated of the old PCN, you still rate as the new.
Publications Library Management System v3
74
Exception: If you already had the new PCN in your Section Library at the time
of reconciliation, then no quantities were carried forward.
NONSTOCKED PUB. see MCO 5600.31
A NONSTOCKED PUBLICATION is normally a either a publication that the Marine Corps does not maintain copies in their warehouse that can be ordered or is a Distribution Only PCN that represents a ‘type’ of publication not a specific publication and cannot be ordered. Instead these are used to distribute this ‘type’ of publication to those units on MCPDS Publications List (PL). Example: PCN 71000025200 MCPEL/MCEFS The following is an excerpt from MCO P5600.31G, Chapter 3, Section 3, Paragraph 3309. 3309. NONSTOCKED PUBLICATIONS. Requests for nonstocked publications will be submitted to the CMC (ARD) and include the following:
Complete identification of the publication(s) including publication number, title, and stock number, if known, and the source document in which identified. Equipment Item Designator (ID) Number, if applicable. Source of supply, if known. Justification for the publication. Point of contact, telephone number, IAC, fax number, ELMS address, and whether requirement is for one-time issue or continuing distribution. Recommendations for addition of specific publications should be submitted directly to the appropriate subject matter expert for consideration for entry into MCPDS.
The following is an excerpt from NAVMC 2761, Catalog of Publications, Appendix C Listing of Publications Control Number Prefixes. NONSTOCKED-DISTRIBUTION ONLY 710-740 710 N Distribution Only These PCN’s represent Marine Corps. Only
publications nonstocked but distributed to Marine Corps commands. Since these publications are nonstocked, they

Reports
75
have been assigned PCN’s for distribution only. PCN’s in this series may not be used for ordering. PCN’s in this series which appear on your PL confirm distribution to your IAC.
720 N Distribution Only These PCN’s represent Navy publications. Only
publications nonstocked but distributed to Marine Corps commands. Since these publications are nonstocked, they have been assigned PCN’s for distribution only. PCN’s in this series may not be used for ordering. PCN’s in this series which appear on your PL confirm distribution to your IAC.
730 N Distribution Only These PCN’s represent Army publications. Only
publications nonstocked but distributed to Marine Corps commands. Since these publications are nonstocked, they have been assigned PCN’s for distribution only. PCN’s in this series may not be used for ordering. PCN’s in this series which appear on your PL confirm distribution to your IAC.
740 N Distribution Only These PCN’s represent miscellaneous. Only
publications nonstocked but distributed to Marine Corps commands. Since these publications are nonstocked, they have been assigned PCN’s for distribution only. PCN’s in this series may not be used for ordering. PCN’s in this series which appear on your PL confirm distribution to your IAC.
Reports
Viewing reports
Use this procedure to select and view a report in PLMS. Whenever you select and open a PLMS report, you actually generate the report. Once opened, you can print, copy, save (export), and mail reports. There are four major types of reports in PLMS:

Publications Library Management System v3
76
1. Section - These reports are based on your individual Section Library and provide a means for you to list your library inventory fully or partially in many different ways.
2. Shared – These reports are based on the USMC Master List and provide general information such as a list of New or Deleted publications since the previous Shared file was downloaded.
3. Unit - These reports are used by the DCP to list Unit level information 4. Miscellaneous – Various reports,
To Select a report, click ‘Reports’ on the menubar on your Section Library screen and proceed through the dropdown lists to the report you want. Exceptions:
• MCPDS Section Change Request - This report is only available if your Type of User is Section Only. To select this report click ‘MCPDS Section Change Request’ on the menubar on your Section Library screen.
• MCPDS Unit Change Request - This report is only available if your Type of User is DCP w/1 to many Sections. To select this report click ‘DCP’ then ‘Edit PL’ on the menubar on your Section Library screen. Then click ‘MCPDS Chg Request’ on the menubar on your Edit PL screen.
• Conversion Exception Listing – This report is created automatically at the time you converted your DOS PLMS diskettes and was presented to you for viewing at that time. There is no way to view this report again from PLMS. If you must view this report again, use Windows Explorer to locate the report file and double click on the file name listed. File is named plmsrptsectionnameConversion.htm where sectionname = your Section Name.
Printing reports
Use this procedure to print a PLMS report to any Windows printer. (The printer needs to be set up for your Windows operating system under the Start menu, Settings, Printers.) You might find it convenient to work with a printed copy of a specific report to handle some tasks such as conducting a library shelf inventory. You can also print reports to share information within your organization. To print a report:

Reports
77
1. While view the report, click the ‘Print’ button at the bottom of the page.
2. The Print dialog opens. The default Windows printer is automatically
selected.
3. (Optional) If you want to print the report on a different printer, click ‘Printer Setup’ or Alt-U. This will display the Page Setup screen. Next Click the ‘Printer’ button which will pop up a list of all of your defined printers. Select a different Printer and click ‘OK’ then ‘OK’ again.
4. Click ‘Print’. The report prints on the selected printer.
Notes:
3. If you want to change default settings for your printer, click Properties on Page Setup Printer scrceen and make your changes before clicking OK at the Print dialog.
Sending Reports
Use this procedure to share reports with other people by sending the report content file as an email attachment. This could be useful if you need to send a copy of a report to your DCP or and other Sections or another person within your organization. You can email reports to anyone with a valid email address. To send a report via email:
1. Use Windows Explorer to locate the report file. The report files are located in the subfolder /Reports subordinate to where PLMS is installed on your PC. When you created the report, a file of the report was created. Use the list below to identify the appropriate report file.
a. plmsrptPcn.htm – Required PCNs List or Selected Required PCN by PCN Prefixes
b. plmsrptShrtTitles.htm – Required PCNs Short Titles or Required PCN Short Titles by Selected PCN Prefixes
c. plmsrptIdNo.htm – Required ID Numbers or Selected Required ID Numbers and PCNs
d. plmsrptSectLoc.htm – PCN by Locations or PCN by Selected Location

Publications Library Management System v3
78
e. plmsrptComIdNo.htm – Commodity extract by ID and PCN Group or Commodity Extract by PCN Group and ID
f. plmsrptShortageOverage.HTM– Shortages/Overages g. plmsrptsectionnameSectionChangeyyyymmdd.htm – Section
Change Report h. plmsrptsectionnameRECONyyyymmdd.htm – Reconciliation i. plmsrptMCPDSDCPyyyymmddhhmmss.htm – MCPDS Unit
Change Request j. plmsrptsectionnameMCPDSyyyymmdd.htm – MCPDS Section
Change Request k. plmsrptNEA.htm – Non Equipment Associated (NEA) l. plmsrptBOATSConversion.htm– Conversion Exception Listing m. plmsrptNewPcn.htm – New Publications n. plmsrptDelPcn.htm – Deleted Publications
2. To confirm the correct file was identified, double click on the *.htm file which opens the report for view. If this is the correct , Close the report and proceed, else locate or recreate the correct report file.
Hint: Look at the Modified value for that file. It corresponds to the date/time your originally created the report. If the report viewed is not your Section Library, re-create the report again by running correct report option in PLMS.
3. Depending on your current email environment, you may be restricted from sending files with an *.htm extension. If this is the case, then you will need to rename your file temporarily to any non-restricted extension (.i.e. .txt or tst) and then the receiving party will need to rename the file back to .htm upon receipt. See your ISC for assistance.
4. Now attach the report file to your email: a. In Windows Explorer click on the report file name and then
Edit/Copy on the menubar. In Outlook in the body of your email click Edit/Paste on the menubar.
b. Or in Outlook click Insert/File on the menubar, then in the Insert File popup locate the previously identified report file, click to highlight it and then click Insert.
5. Address and send your email to its intended recipients. Notes:
1. If you don’t know the location of your PLMS program, perform a Search on ‘PLMSSection.exe’. and double click on the file name listed. File is named ConversionExtractssectionname.htm where sectionname = your Section Name.

Reports
79
Automatically delete reports over 120 days old
PLMS automatically deletes all report files saved in the /Reports subfolder that are older than 120 dayts old. This helps keep your report files Section
Section Library
PCN'S
Required PCN List This report lists all PCNs that you have selected as Required in your Section Library. Report Title: REQUIRED PCNS All local publications are included. Report is in PCN sequence. All Local publications are listed following last PCN . The following fields are listed: • PCN (if Local then PCN = ‘LOCAL’) • Short Title • Long Title • Pub-Date To create this Report: Click ‘Reports’ then ‘Section’ then ‘Section Library’ then For: PCN’s By: Required PCN List. [OK]. Report filename: \Reports\plmsrptPcn.htm
PCN by Group list

Publications Library Management System v3
80
This report lists all Required PCNs that you have in your Section Library that belong to the PCN group(s) (i.e. PCN Prefix – first 3 digits of PCN) that you selected from the list of those available. Report Title: SELECTED REQUIRED PCN BY PCN PREFIXES Local publications are NOT included. Report is in PCN sequence separated by PCN groups. The following fields are listed: • PCN (if Local then PCN = ‘LOCAL’) • Short Title • Long Title • Pub-Date To create this Report: Click ‘Reports’ then ‘Section’ then ‘Section Library’ then For: PCN’s By: PCN by Group List. A list of all available PCN groups are listed. Select (i.e. highlight) those group(s) you wish to include in the report. • To select a single group, click on its PCN Prefix • To select additional groups, CNTRL + click on its PCN Prefix • To select a series of groups, click on the first PCN Prefix, then Shift + click
on the last PCN Prefix in the series Click [OK] Report filename: \Reports\plmsrptPcn.htm
Short Titles
Required PCN list by Short Title This report lists all PCNs that you have selected as Required in your Section Library. Report Title: REQUIRED PCN SHORT TITLES All local publications are included. Report is in Short Title sequence.
Reports
81
The following fields are listed: • Short Title • Long Title • PCN (if Local then PCN = ‘LOCAL’) • Pub-Date To create this Report: Click ‘Reports’ then ‘Section’ then ‘Section Library’ then For: Short Title’s By: Required PCN List. [OK]. Report filename: \Reports\plmsrptShrtTitles.htm
PCN by Group list by Short Title This report lists all Required PCNs that you have in your Section Library that belong to the PCN group(s) (i.e. PCN Prefix – first 3 digits of PCN) that you selected from the list of those available. Report Title: REQUIRED PCN SHORT TITLES BY SELECTED PCN PREFIXES Local publications are NOT included. Report is in Short Title sequence within each selected PCN group. The following fields are listed: • Short Title • Long Title • PCN (if Local then PCN = ‘LOCAL’) • Pub-Date To create this Report: Click ‘Reports’ then ‘Section’ then ‘Section Library’ then For: Short Title’s By: PCN by Group List. A list of all available PCN groups are listed. Select (i.e. highlight) those group(s) you wish to include in the report. • To select a single group, click on its PCN Prefix • To select additional groups, CNTRL + click on its PCN Prefix
Publications Library Management System v3
82
• To select a series of groups, click on the first PCN Prefix, then Shift + click on the last PCN Prefix in the series
Click [OK] Report filename: \Reports\plmsrptShrtTitles.htm
Id Numbers
Required Id Number list This report lists all ID Numbers that you have selected as Required in your Section Library. Report Title: REQUIRED ID NUMBERS Report is in ID Number sequence. The following fields are listed: • ID Number • Nomenclature • TAMCN To create this Report: Click ‘Reports’ then ‘Section’ then ‘Section Library’ then For: ID Numbers By: Required ID Number List. [OK]. Report filename: \Reports\ plmsrptIdNo.htm
Selected Id Number Inventory This report lists all Required PCNs that you have that belong to the ID Numbers that you selected from the list of those designated as Required in your Section Library. Report Title: SELECTED REQUIRED ID NUMBERS AND PCNS Local publications are included.

Reports
83
Report is in first ID Number sequence then PCN sequence within each ID Number. Local publications are listed following last PCN within each ID Number. The following fields are listed with the ID Number header: • ID Number • Nomenclature • TAMCN Within each ID Number, their associated Required PCNs are listed with the following fields: • PCN • Short Title • Long Title • Pub Date • Location(s) • Unit PL - the quantity authorized to your Unit for that PCN • Section IDL - the quantity authorized to your Section for that PCN • Qty Rqd – quantity required for that Location for that PCN • Qty O/H – quantity on hand for that Location for that PCN • Qty On Order – quantity on order for that Location for that PCN To create this Report: Click ‘Reports’ then ‘Section’ then ‘Section Library’ then For: ID Numbers By: Selected ID Number Inventory. A list of all Required ID Numbers are listed. Select (i.e. highlight) those ID Numbers you wish to include in the report. • To select a single ID Number, click on its PCN Prefix • To select additional ID Numbers, CNTRL + click on its ID Number • To select a series of ID Numbers, click on the first ID Number, then Shift +
click on the last ID Number in the series Click [OK] Report filename: \Reports\plmsrptIdNo.htm
Locations
All Locations Inventory This report lists all your Locations along with those PCNs that have been assigned to them in your Section Library.

Publications Library Management System v3
84
Report Title: PCN BY LOCATIONS Report is first in Location sequence then PCN sequence within each Location. Local publications are listed following last PCN within each Location. The following fields are listed with the Location header: • Location – full location name including all levels Within each Location, its assigned PCNs are listed with the following fields: • Publication Title – Long Title + Short Title • PCN • Pub Date • Unit PL - the quantity authorized to your Unit for that PCN • Section IDL - the quantity authorized to your Section for that PCN • Qty Rqd – quantity required for that Location for that PCN • Qty O/H – quantity on hand for that Location for that PCN • Qty O/O – quantity on order for that Location for that PCN To create this Report: Click ‘Reports’ then ‘Section’ then ‘Section Library’ then For: Locations By: All Locations Inventory. [OK]. Report filename: \Reports\plmsrptSectLoc.htm
Selected Location Inventory This report lists selected Locations along with their PCNs that have been assigned to them in your Section Library. Report Title: PCN BY SELECTED LOCATION Report is first in Location sequence then PCN sequence within each Location. Local publications are listed following last PCN within each Location. The following fields are listed with the Location header: • Location – full location name including all levels Within each Location, its assigned PCNs are listed with the following fields:

Reports
85
• Publication Title – Long Title + Short Title • PCN • Pub Date • Unit PL - the quantity authorized to your Unit for that PCN • Section IDL - the quantity authorized to your Section for that PCN • Qty Rqd – quantity required for that Location for that PCN • Qty O/H – quantity on hand for that Location for that PCN • Qty O/O – quantity on order for that Location for that PCN To create this Report: Click ‘Reports’ then ‘Section’ then ‘Section Library’ then For: Locatons By: Selected Location Inventory. A list of all your Locations with at least one publication assigned to it is listed. Select (i.e. highlight) those Locations you wish to include in the report. • To select a single Location, click on that Location • To select additional Locations, CNTRL + click on the Location • To select a series of Locations, click on the first Location, then Shift + click
on the last Location in the series Click [OK] Report filename: \Reports\plmsrptSectLoc.htm
Commodity Extracts
Required Id Number list This report lists all ID Numbers that you have selected as Required in your Section Library. Report Title: REQUIRED ID NUMBERS Report is in ID Number sequence. The following fields are listed: • ID Number • Nomenclature • TAMCN

Publications Library Management System v3
86
To create this Report: Click ‘Reports’ then ‘Section’ then ‘Section Library’ then For: ID Numbers By: Required ID Number List. [OK]. Report filename: \Reports\ plmsrptIdNo.htm
PCN Group Inventory This report lists all Required PCNs that you have that belong to the ID Numbers that have in your Section Library. Report Title: COMMODITY EXTRACT BY ID AND PCN GROUP Local publications are included. Report is in first ID Number sequence then in PCN Group sequence within that ID Number and then finally in PCN sequence within that PCN Group. Local publications are listed following the last PCN Group of each ID Number under their own ‘NO DESIGNATED GROUP’ header. The following fields are listed with the ID Number header: • ID Number • Nomenclature • TAMCN The following fields are listed with the PCN Group header: • PCN Group (i.e. PCN Prefix – first 3 digits of PCN) • PCN Group Description Within each ID Number, their associated Required PCNs are listed with the following fields: • PCN • Short Title • Long Title • Pub Date • Location(s) • Unit PL - the quantity authorized to your Unit for that PCN • Section IDL - the quantity authorized to your Section for that PCN
Reports
87
• Qty Rqd – quantity required for that Location for that PCN • Qty O/H – quantity on hand for that Location for that PCN • Qty On Order – quantity on order for that Location for that PCN
To create this Report: Click ‘Reports’ then ‘Section’ then ‘Section Library’ then For: Commodity Extracts By: Required ID Number(s). Check PCN Group Inventory. Click [OK] Report filename: \Reports\plmsrptComIdNo.htm
PCN by Group list This report lists all Required PCNs that you have in your Section Library that belong to the PCN group(s) (i.e. PCN Prefix – first 3 digits of PCN) that you selected from the list of those available. Report Title: SELECTED REQUIRED PCN BY PCN PREFIXES Local publications are NOT included. Report is in PCN sequence separated by PCN groups. The following fields are listed: • PCN (if Local then PCN = ‘LOCAL’) • Short Title • Long Title • Pub-Date To create this Report: Click ‘Reports’ then ‘Section’ then ‘Section Library’ then For: PCN’s By: PCN by Group List. A list of all available PCN groups are listed. Select (i.e. highlight) those group(s) you wish to include in the report. • To select a single group, click on its PCN Prefix • To select additional groups, CNTRL + click on its PCN Prefix • To select a series of groups, click on the first PCN Prefix, then Shift + click
on the last PCN Prefix in the series Click [OK]

Publications Library Management System v3
88
Report filename: \Reports\plmsrptPcn.htm
Selected Id Number(s) This report lists selected ID numbers with all of the PCNs associated to it that you have in your Section Library separated by their PCN Groups. Report Title: COMMODITY EXTRACT BY PCN GROUP AND ID Local publications are included. Report is first in PCN Group sequence then in ID Numbers sequence within that Group and then finally in PCN sequence within that ID Number. Local publications are listed at the end under their own ‘NO DESIGNATED GROUP’ header. The following fields are listed with the PCN Group header: • PCN Group (i.e. PCN Prefix – first 3 digits of PCN) • PCN Group Description The following fields are listed with the ID Number header: • ID Number • Nomenclature • TAMCN Within each ID Number, their associated Required PCNs are listed with the following fields: • PCN • Short Title • Long Title • Pub Date
To create this Report: Click ‘Reports’ then ‘Section’ then ‘Section Library’ then For: Commodity Extracts By: PCN Group(s). Check Selected Id Number(s). Click [OK] Report filename: \Reports\plmsrptComIdNo.htm

Reports
89
Shortages/Overages
PL Shortages/Overages This report lists all PCNs in your Section Library that has either an Overage or Shortage. You should use this listing making adjustments if necessary to clear out any Shortages/Overages Overage –On Hand + On Order greater than Required Shortage - On Hand + On Order less than Required Report Title: PLMS Shortages/Overages Local publications are included. Report is in PCN sequence. All Local publications are listed following last PCN . The following fields are listed: • PCN • Short Title • Long Title • Pub Date • Location(s). For each location:
o Qty Rqd – quantity required for that Location for that PCN at that Location
o Qty O/H – quantity on hand for that Location for that PCN at that Location
o Qty On Order – quantity on order for that Location for that PCN at that Location
• Totals for publication o Qty Rqd – Total quantity required for that Location for that PCN o Qty O/H – Total quantity on hand for that Location for that PCN o Qty On Order – Total quantity on order for that Location for that PCN
• To create this Report: Click ‘Reports’ then ‘Section’ then
‘Shortages/Overages’. Report filename: \Reports\ plmsrptShortageOverage.HTM Notes: Local publications On Order quantity is always 0.

Publications Library Management System v3
90
Non Equipment Associated (NEA)
NEA list This report lists all PCNs in your Section Library that you have designated as non Equipment Associated (NEA). Report Title: PLMS NON EQUIPMENT ASSOCIATED(NEA) Local publications are included. Report is in PCN sequence. All Local publications are listed following last PCN . The following fields are listed: • Publication Title (Short Title + Long Title) • PCN • Pub Date • Location(s). For each location:
o Unit PL - the quantity authorized to your Unit for that PCN o Section IDL - the quantity authorized to your Section for that PCN o Qty Rqd – quantity required for that Location for that PCN at that
Location o Qty O/H – quantity on hand for that Location for that PCN at that
Location o Qty On Order – quantity on order for that Location for that PCN at
that Location
To create this Report: Click ‘Reports’ then ‘Section’ then ‘Non Equipment Associated’. Report filename: \Reports\plmsrptNEA.HTM Notes: Local publications On Order quantity is always 0.
Reports
91
Section Change Report
Section Change Report Periodically your DCP will create a new version of the Unit Publications Listing (PL). This is a list of all the PCNs that your unit rates and how many copies of each one. The DCP creates a Unit PL file and distributes it to all the subordinate Sections. Each Section then loads this file and produces a Section Change Report which details all of the Required Quantity and Order adjustments that the DCP has made to your section library. These are the approved ‘official’ quantities. This report is automatically presented at the time the latest Unit PL is first processed by the Section. If there is any action to be taken you should print off the report at this time. If you missed it, see Notes below. It is then the responsibility of the Section Clerk to make these changes in their library and dispose of any physical excess publications if needed unless your DCP has otherwise directed you to turn in excess copies. The only exception to this rule is that if the DCP adds a PCN to a Section, then this PCN will automatically be added to the Section Library with the number of copies required and the number of copies ordered as entered by the DCP. The location will be ‘No Location Assigned’. If the Sections request for Required Quantity or for an Order is approved by the DCP, it WILL NOT be listed here on this report. This report is only for exceptions, changes made by the DCP to the Section’s Library.
SECTION: MT Required Orders Rqd DCP Adj Qty DCP Adj PCN Short Title Qty Adj Qty Ord Adj OnOrd DCP Adjustments 10000000100 MCO 1A 1 -1 0 RqdQty Deleted 10201655000 MCO 1510.68B 1 +1 2 Order Qty Chgd 10201655000 MCO 1510.68B 1 +1 2 1 +1 2 RqdQty Addition - Order Qty increased Legend REQUIRED: - Rqd Qty – Number of copies of this PCN the Section requests to rate

Publications Library Management System v3
92
- DCP Adj – Adjustment by the DCP to a Section’s requested quantity change or can also be changed at any time by the DCP
- Adj Qty – Total number of copies now rated by the Section. The section should change their library’s Required Quantity to this value.
ORDERS: - Qty Ord – Additional order quantity requested by the Section. - DCP Adj – Adjustment by the DCP to the Section’s requested order
quantity or can also be an order placed by the DCP for the Section. - Adj Ord – Total number of copies now on order. The section should
change their library’s On Order Quantity to this value DCP Adjustments. This specifies what the DCP adjusted either in response to a Section request or initiated directly by the DCP. Each PCN will have either a Required comment, Orders comment or a combination of both. DCP Required Adjustments: • RqdQty Deleted – DCP removed section from Unit PL for this PCN. Section
rates 0. • Rqd Addition disapproved – Section requested to rate this PCN but was
denied by DCP. • RqdQty Increase disapproved/Deleted – Section requested an increase in
their quantity rated, but DCP denied request and removed section from Unit PL for this PCN.
• RqdQty Decrease disapproved/Deleted – Section requested a decrease in their quantity rated, but DCP totally removed section from Unit PL for this PCN.
• RqdQty Added – DCP added section to the Unit PL for this PCN. **automatically added to Section Library**.
• RqdQty Increased - DCP increased the number of copies rated for this PCN.
• RqdQty Decreased – DCP decreased the number of copies rated for this PCN.
• RqdQty Addition Increased - Section requested to rate this PCN and DCP changed the number of copies to above that requested.
• RqdQty Addition Decreased – Section requested to rate this PCN and DCP changed the number of copies to below that requested.
• RqdQty Deletion disapproved/Increased – Section requested to be removed from the Unit PL for this PCN, but DCP denied the request and then increased the number of copies rated.

Reports
93
• RqdQty Deletion disapproved/Decreased – Section requested to be removed from the Unit PL for this PCN, and DCP denied the request, but DCP did decrease the number of copies rated.
• RqdQty Deletion disapproved – Section requested to be removed from the Unit PL for this PCN, but DCP denied the request. There was no change in the number of copies rated.
• RqdQty Increase disapproved – Section requested to increase the number of copies rated for this PCN, but DCP denied the request.
• RqdQty Increase disapproved/Decreased – Section requested to increase the number of copies rated for this PCN, and DCP denied the request, but DCP did decrease the number of copies rated.
• RqdQty Increase Increased - Section requested an increase the number of copies rated for this PCN, and DCP changed the number of copies to above that requested.
• RqdQty Decrease disapproved - Section requested a decrease in the number of copies rated for this PCN, but DCP denied the request. There was no change in the number of copies rated.
• RqdQty Decrease Decreased - Section requested a decrease in the number of copies rated for this PCN and DCP changed the number of copies to below that requested.
• RqdQty Decrease disapproved/Increased - Section requested a decrease in the number of copies rated for this PCN but DCP denied the request and and then increased the number of copies rated.
DCP Order Adjustments: • Ordered by DCP – DCP ordered copies of this PCN for the Section • Order Qty decreased - Section requested copies of the PCN to be ordered
but DCP changed the number of copies ordred to below that requested. • Order Qty increased - Section requested copies of the PCN to be ordered
and DCP changed the number of copies ordred to above that requested. • Order Disapproved - Section requested copies of the PCN to be ordered
but the DCP disapproved the order. Notes:
1. To view this Report: Click ‘Reports’ then ‘Section’ then ‘Section Change Report’
2. Report file is located at : \Reports\plmsrptsectionnameSectionChangeyyyymmdd.htm
3. If there are no changes that need to be performed by the section, a message ‘No data is available for SECTION CHANGE REPORT.’ is displayed.

Publications Library Management System v3
94
Working with MCPDS
Working with your MCPDS clerk If your Type of User is Section Only, then in order for you to permanently change your allowance of USMC publications and to order new copies of publications, then your need to provide this information to your MCPDS clerk. But first you might ask what is an allowance and what do I need a MCPDS clerk for. An allowance is how many copies of a publication a particular unit rates. For instance, say your unit has a Motor Transport section that maintains all of your vehicles and you have 10 M998 trucks. Lets say there are 10 Technical Manuals(TMs) needed to maintain the M998 and you want to have 1 manual for every 5 vehicles, so you require 2 copies of each one. If a copy wears out and you simply need to replace it, you order another one. But if your unit gets 5 more M998’s and you want one more copy of each manual. Yes, you do order 1 copy each of the 10 TM’s but you should also change your USMC allowance to 3 copies of each instead of the previous 2. Why? Because if another TM is published for the M998 you will get the same number of copies as the ‘like’ publication. Save you the trouble of ordering those extra copies. Also when changes are made to a publication, copies of the changes are sent out to those units who have an allowance for the base publication and in the quantity equal to the base. Also assists Albany in managing the stock warehouse of publications. Each unit is assigned an Individual Activity Address Code (IAAC) and is given access to the Marine Corps Publication and Distribution System (MCPDS). Using the access the MCPDS ‘clerk’ manages the unit’s publications allowances and the ordering of publications. Normally this duty is performed by the S-1 or Admin shop, but it could be assigned anywhere in the unit by the Commanding Officer. If you don’t know who your MCPDS clerk is, ask around. To assist you in communicating with your MCPDS clerk, PLMS provides to you a MCPDS Section Change Request report. This reports list all allowance changes needed by your Section Library and all new orders that need to be placed.

Reports
95
MCPDS Section Change Request If your Type of User is Section Only, periodically you will need to send your MCPDS clerk a list of your requested PCN allowance adjustments (additions, deletions, quantity changes) and any new orders for copies of PCNs you require. To facilitate this request, PLMS generates a ‘MCPDS Section Change Request’ report for you. This report shows all of your allowance (Rqd Qty) adjustments and new orders (OnOrd Qty) you have made since the last time your ‘Reset Inventory Order Quantity baseline’ and gave your MCPDS clerk a copy of this report.
This report is your request for your section to rate x amount of copies of a PCN and to order you x amount of copies of a PCN. A request does not automatically constitute approval. Based of local procedures your MCPDS clerk may adjust or disapprove your requests. If this happens then the MCPDS clerk should note any changes to your request so you can make those changes to your Section Library. This includes new or additional PCNs that are being provided to your section by either your MCPDS clerk or the publication sponsor at HQMC.
To create this Report: Click ‘MCPDS Change Request’ on PLMS Section Library screen menubar. Once you request this report a ‘Reset Inventory Order Quantity baseline’ confirmation popup screen will appear. Here you must decide if you want to simply preview your report or you want to commit those changes and create the ‘MCPDS Section Change Request’ report to give to your MCPDS clerk. If you want to just look at the report without sending it up the chain, click [No]. If you are creating it to give it to your MCPDS clerk, click [Yes]. When you are providing this report to your MCPDS clerk, there are several ways to send it:
1. Print the report and either hand carry it or otherwise deliver it to your MCPDS clerk
2. The report filename is plmsrptsectionnameMCPDSyyyymmdd.htm where yyyymmdd = the date the report was create. This file is located in subfolder \Reports. See Notes below if you cannot locate the file. Use the most recent file based on the date/time.
a. Email a copy of the file as an attachment to your MCPDS clerk. See Sending a Report
b. Or Copy the file to a shared network location and inform your MCPDS clerk its location and its use.

Publications Library Management System v3
96
The following is an example of a ‘Section Change Request’ report: 07:24 AM PUBLICATION LIBRARY MANAGEMENT SYSTEM (PLMS) 17 Nov 2005 MCPDS SECTION CHANGE REQUEST SECTION: COMM-ELEC POC: CPL SMITH ----------------------------------------------------------------------------------------------------------------------------------- Inventory Order PCN Qty Qty Publication Title Notes ------------------------------------------------------------------------------------------------------------------------------------ 12300678000 1 SL-3-00678A ____________________________ 12309947000 1 1 SL-3-09947A ____________________________ 16008211500 2 1 MI 08211B-50/6 _____________________________ 16113324300 0 1 MI-2005-35/12 _____________________________ Legend REQUIRED:
• PCN • Inventory Qty – The number of copies your section requires to
accomplish its mission. • Order Qty – The number of new or additional copies you require to
either replace existing copies you already rate or to bring your On Hand total in line with your Qty Required.
• Publication Title – Short Title of PCN • Notes – comment area for you to send notes to your MCPDS clerk to for
the MCPDS clerk to annotate for you Notes:
• Since Local publications do not exists in MCPDS, they are never included in this report

Reports
97
• Since EDO publications do not have an allowance quantity nor can they be ordered via MCPDS, they are never included in this report
• If you don’t know where the reports file is located, run a Windows Search on file rpt*mcpds.htm
• You should delete any MCPDS Section Change Request files you no longer need
For the MCPDS Clerk Since your Type of User is Section Only, then your MCPDS clerk does not use PLMS and probably does not know what PLMS is. Since your MCPDS clerk is the only one who can change your USMC allowance quantity and order USMC publications there still is a requirement for you as a subordinate section to convey your requests for your allowance changes and orders. This is done via the ‘MCPDS Section Change Request’. You need to discuss with your MCPDS clerk that you have PLMS and will be providing this report. You need to agree upon the method that you send this report to the MCPDS clerk (i.e. printed report or email attachment or shared file). Shared
New Publications
This report lists all new PCNs published by HQMC sponsors. Review this list and decide if your Section requires any of these publications. Your unit and in turn your section may already have been identified as being included in the initial issue of any of these new publications by the publication’s sponsor so you may want to first check with your MCPDS clerk before taking action on requesting any of these new PCNs. Report Title: PLMS NEW PUBLICATIONS Report is in PCN sequence The following fields are listed with the Location header: • PCN • Short Title

Publications Library Management System v3
98
• Long Title • Pub Date To create this Report: Click ‘Reports’ then ‘Shared’ then ‘New Publications’. Report filename: \Reports\ plmsrptNewPcn.htm
Notes:
• New PCNs are determined by comparing the incoming USMC Master List file against the one you currently have. Any PCN on the incoming not on your existing is considered ‘New’. Due to various circumstances you will occasionally see listed new PCNs that have a PubDate that is years old. Also your list of ‘New Publications’ may not be the same as another PLMS user
• Disclaimer: When converting from DOS PLMS to Windows PLMS the new PLMS program gets its publications list from a source different from the old PLMS and many publications will be listed as NEW, even though they are not.
Deleted Publications
This report lists all of the PCNs deleted since your last Master List. PLMS automatically deleted these publications from your Section Library if you had any as was noted on the Reconciliation Report. When PCNs that are in your Section Library are deleted, there are several potential actions that you were directed to take. These were also noted on your Reconciliation Report. Report Title: PLMS DELETED PUBLICATIONS Report is in PCN sequence The following fields are listed with the Location header: • PCN • Short Title • Long Title • Pub Date To create this Report: Click ‘Reports’ then ‘Shared’ then ‘Deleted Publications’.

Reports
99
Report filename: \Reports\ plmsrptDelPcn.htm Notes:
• Deleted PCNs are determined by comparing the incoming USMC Master List file against the one you currently have. Any PCN on your current Master List that is not on the incoming is considered ‘Deleted. Due to various circumstances you will occasionally see PCNs listed as Deleted by error. If you feel that this is the case, contact your MCPDS clerk and ask them to verify that a particular PCN has truly been deleted.. Also your list of ‘Deleted Publications’ may not be the same as another PLMS user if their current Master List was not the same version as yours.
Miscellaneous
RECONCILIATION
One key feature of PLMS is that it tries to assist you in managing your Section Library (SL). When you start PLMS and there is a later copy of the USMC Master List, PLMS automatically does a comparison of your SL against the new Master List to see what needs to be updated in your SL and to make additional recommendations. This process is called Reconciliation.
During reconciliation the following events are evaluated and if found, performed and reported.
PCN Events 1. PCN Add – If an Id Number is designated as Required in your Section
Library, then any new PCNs associated to that Id Number will automatically be added to your Section Library. You should decide if you require that PCN, if so, than determine the number Required and update your SL and order copies as needed. If you don’t require that PCN then remove it from your SL. Example: 31100604500 SB 740-95-500 PCN added
Association to the following IDNO(s) were added: 24980A GUN MACH CAL.50 HB M2 W/E Evaluate the continued requirement to retain PCN 31100604500 in Section Library.
2. PCN Associations Added or Deleted to Non Technical Publications– The Reconciliation process looks at your non-technical required PCNs and if any of these had their associated SSICs changed, your SL will be automatically updated. No action is required by you. Example: 10000001500 UM-OLDS
Association to the following SSIC(s) were added:

Publications Library Management System v3
100
003000 OPERATIONS AND READINESS 004000 LOGISTICS Association to the following SSIC(s) were deleted: 001000 MILITARY PERSONNEL
3. PCN Date Change – All of your required PCNs are checked to make sure that you have the correct version of the publication based on its Publication Date. If the Pub-Date was changed, your SL is automatically updated with a recommendation if you should replace your copies. If your unit is already registered in MCPDS that you are on record this PCN, MCPDS will automatically ship to your IAC that number on record replacement copies. If you need additional copies or do not receive your replacement copies after 90 days of the Date of Publication, then you should order new copies. Also listed are the locations and On Hand quantities you currently have. If the PCN starts with ‘7’, these are distribution only PCNs and are not reported here if their date changes. Also if the new PCN Date is older than the previous is assumed that it’s a management correction of an erroneous date and no action is needed on your part. Example: 18410789000 TM 10789A-14&P W/CH 1 Published on 29
MAR 02 was updated on 15 MAR 04
Replace copies dated 29 Mar 02 with copies dated 15 Mar 04. . MCPDS distributed replacement copies of record. WING A, CABINET 1, DRAWER 1, BINDER 1 002
4. PCN Deleted - All of your required PCNs are checked to see if they are
still an active PCN. If not then they are deleted from your SL. Each location is listed with its On Hand quantity. You need to dispose of these copies. If its a technical (ID Number associated) PCN then each Required Id Number it is associated to is also listed and those associations deleted. Example 1 : 10200136400 MCO 1001R.57 PCN deleted
Dispose of 10200136400 WING A, CABINET 2, DRAWER 1, BINDER 1 001
Example 2: 31100604500 SB 740-95-500 PCN deleted
Dispose of 31100604500 WING A, CABINET 1, DRAWER 1, BINDER 1 001

Reports
101
WING C, CABINET 1, DRAWER 1, BINDER 1 002 Association to 31100604500 for the following IDNO(s) were removed: 02498A GUN MACH CAL.50 HB M2 W/E 02498B MACHINE GUN 50 CAL W/O EQPT M2 02498C MACHINE GUN 50 CAL M48
5. PCN Superceded – A PCN can also be superceded. This means that
PCN1 has been replaced by PCN2 and PCN1 has been deleted. If your Section Library contains a superceded PCN then you library is checked if the superceding PCN is already in your Section Library. If it is, the old PCN is deleted as normal. If its not already in your library, then the superceding PCN is first added to your Section Library with the RqdQtys and Locations of the superceded PCN then the superceded PCN is deleted. A Supercede message indicates this event. Example: 31100604500 SB 740-95-500 PCN deleted
Dispose of 31100604500 WING A, CABINET 1, DRAWER 1, BINDER 1 001 Association to 31100604500 for the following IDNO(s) were removed: 02498A GUN MACH CAL.50 HB M2 W/E 02498B MACHINE GUN 50 CAL W/O EQPT M2 02498C MACHINE GUN 50 CAL M48 Superceded by 31100604600 dated 30 DEC 03
ID NUMBER Events 1. PCN Added Associations to Technical Publications – Occasionally
additional ID Number associations are added to existing PCNs. These are not new PCNs nor new ID Numbers, its just that its been determined that this PCN is now designated to support this ID Number. If you have already checked the ID Number as required and the PCN as required then the association will be added to your Section Library. If the PCN is flagged Non Equipment Associated (NEA) the new association will not be added. No action is required by you. Example: 02498A GUN MACH CAL.50 HB M2 W/E PCN Association Added
Association added: PCN 31100604500 SB 740-95-500

Publications Library Management System v3
102
2. Id Number Delete – All of your required ID Numbers are checked to see if they are still an active ID Number. If not, then these ID Numbers are deleted from your SL Each PCN in your Section Library that is associated to that Id Number is checked to see if it is Non Equipment Associated (NEA) or if also associated to another required ID Number. If its either one, then the association to the deleted ID Number is simply deleted from your Section Library. If the PCN not NEA or associated to another required ID Number then the PCN is also deleted from your Section Library and those locations with On Hand quantities are listed for you to dispose of them. Example: 00038G GENERATOR SET 60KW 60HZ UT MEP-006A IDNO deleted
Association to 00038G for the following PCN(s) were removed: 12300038600 SL-3-00038G/07499A_W/CH1-2 17700038600 TM 00038G/09244A-CD 18400010600 TM-00038G-35 W/CH 1-12 Dispose of 17700038600 WING A, CABINET 1, DRAWER 1, BINDER 1 001 WING C, CABINET 1, DRAWER 1, BINDER 1 002 Dispose of 18400010600 WING A, CABINET 2, DRAWER 1, BINDER 1 001
3. PCN Association Deleted for Technical Publications – Occasionally an ID
Number association is removed from an existing PCN. The PCN is not deleted nor is the ID Number, its just that its been determined that this PCN is no longer required to support that item of equipment. The PCN is checked to see how many required ID Numbers its associated with. If this is the only required ID Number this PCN is associated with in your Section Library, its checked to see if the PCN is also designated Non Equipment Associated (NEA). If the PCN is NEA, then the PCN associated is simply deleted it, if its not NEA, then the PCN is changed to NEA and a message is displayed recommending you evaluate if you still require this PCN and/or the ID Number. If you still require them then there is nothing further you need to do here, else delete them from you section library. Example 1: 07007B ASSAULT AMPH VEH PERSONNEL AAVP7A1 PCN Association Deleted
Association deleted: PCN 18409674001 TM 09674A-25&P/2A, CHANGE 1
Association deleted: PCN 18409674002 TM 09674A-25&P/2A, CHANGE 2

Reports
103
Example 2: 10576A COMMUNICATIONS INTE 93001A0000-01 PCN Association Deleted
Association deleted: PCN 18210393000 TM 10393A-14&P PCN changed to Non Equipment Associated (NEA) Evaluate the continued requirement to retain PCN 18210393000
in Section Library. Evaluate the continued requirement to retain IDNO 10576A in
Section Library Report Title: RECONCILIATION BY PCN AND/OR ID NUMBER Report is in two sections. The first part is by PCN, the second by ID Number.
To view this Report: Click ‘Reports’ then ‘Reconciliation yyyymmdd’. yyyymmdd = Date of Master List Report filename: \Reports\ plmsrptsectionnameRECONyyyymmdd.htm The following is an example of a RECONCILIATION BY PVN AND/OR ID NUMBER report: 17 AUGUST 2005 PAGE: 1 RECONCILIATION BY PCN AND/OR ID NUMBER SECTION: MT Master List Dated: 01 JAN 2005
PCN SHORT TITLE MESSAGE 10000001500 UM-OLDS Association to the following SSIC(s) were added: 003000 OPERATIONS AND READINESS 004000 LOGISTICS Association to the following SSIC(s) were deleted: 001000 MILITARY PERSONNEL __________________________________________________________________________________________ 18410789000 TM 10789A-14&P W/CH 1 Published on 29 MAR 02 was updated on 15 MAR 04 Replace copies dated 29 Mar 02 with copies dated 15 Mar 04

Publications Library Management System v3
104
WING A, CABINET 1, DRAWER 1, BINDER 1 001 Additionally the following change PCN(s) were deleted. 18410789001 L-TITLE 1 18410789002 L-TITLE 2 18410789080 L-TITLE 3 ____________________________________________________________________________________________ 18409666000 TM 09665B-13&P/2 PCN dated 08 JUN 93 replaced by 18409665000 dated 30 DEC 03. WING A, CABINET 1, DRAWER 1, BINDER 1 001 ____________________________________________________________________________________________ 31100604500 SB 740-95-500 PCN deleted Dispose of 31100604500 WING A, CABINET 1, DRAWER 1, BINDER 1 001 WING C, CABINET 1, DRAWER 1, BINDER 1 002 WING D, CABINET 1, DRAWER 1, BINDER 1 001 Association to 31100604500 for the following IDNO(s) were removed: 02498A GUN MACH CAL.50 HB M2 W/E 02498B MACHINE GUN 50 CAL W/O EQPT M2 02498C MACHINE GUN 50 CAL M48 ____________________________________________________________________________________________ 31100604500 SB 740-95-500 PCN added Association to the following IDNO(s) were added: 24980A GUN MACH CAL.50 HB M2 W/E 09847A MAINTENANCE KIT OUTBOARD ENGINE Evaluate the continued requirement to retain PCN 31100604500 in Section Library. ____________________________________________________________________________________________ 31100604500 SB 740-95-500 PCN deleted Dispose of 31100604500
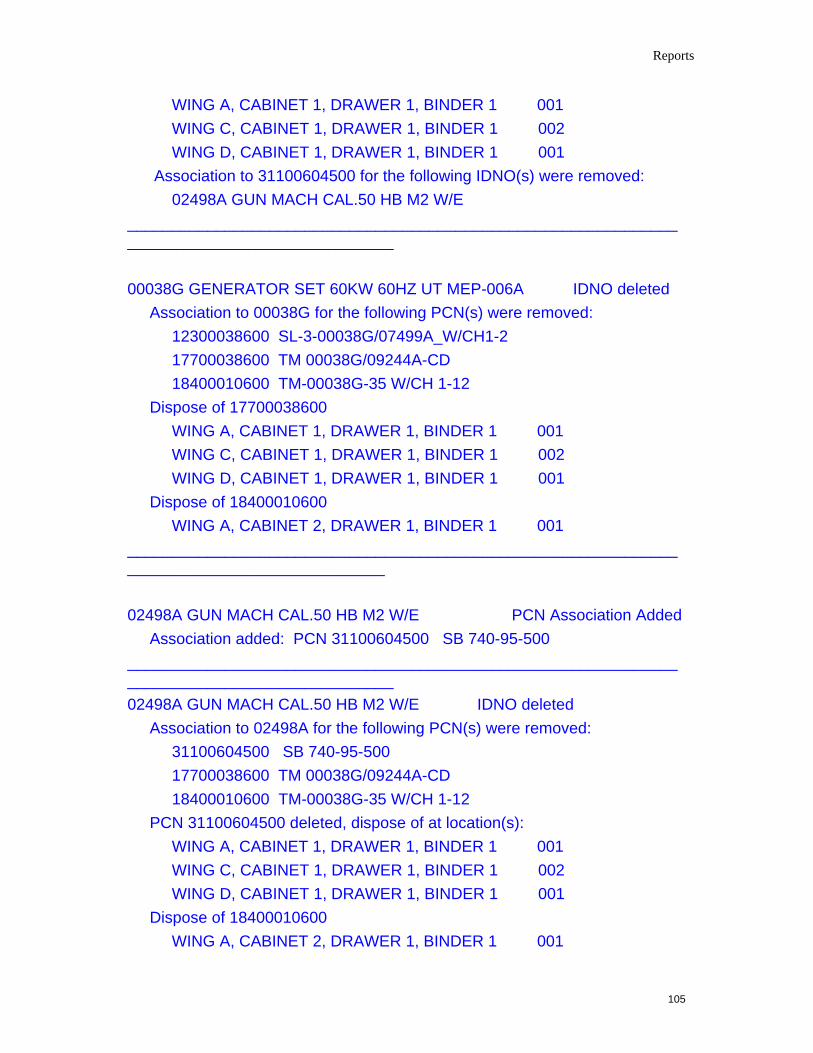
Reports
105
WING A, CABINET 1, DRAWER 1, BINDER 1 001 WING C, CABINET 1, DRAWER 1, BINDER 1 002 WING D, CABINET 1, DRAWER 1, BINDER 1 001 Association to 31100604500 for the following IDNO(s) were removed: 02498A GUN MACH CAL.50 HB M2 W/E ____________________________________________________________________________________________ 00038G GENERATOR SET 60KW 60HZ UT MEP-006A IDNO deleted Association to 00038G for the following PCN(s) were removed: 12300038600 SL-3-00038G/07499A_W/CH1-2 17700038600 TM 00038G/09244A-CD 18400010600 TM-00038G-35 W/CH 1-12 Dispose of 17700038600 WING A, CABINET 1, DRAWER 1, BINDER 1 001 WING C, CABINET 1, DRAWER 1, BINDER 1 002 WING D, CABINET 1, DRAWER 1, BINDER 1 001 Dispose of 18400010600 WING A, CABINET 2, DRAWER 1, BINDER 1 001 ___________________________________________________________________________________________
02498A GUN MACH CAL.50 HB M2 W/E PCN Association Added Association added: PCN 31100604500 SB 740-95-500 ____________________________________________________________________________________________ 02498A GUN MACH CAL.50 HB M2 W/E IDNO deleted Association to 02498A for the following PCN(s) were removed: 31100604500 SB 740-95-500 17700038600 TM 00038G/09244A-CD 18400010600 TM-00038G-35 W/CH 1-12 PCN 31100604500 deleted, dispose of at location(s): WING A, CABINET 1, DRAWER 1, BINDER 1 001 WING C, CABINET 1, DRAWER 1, BINDER 1 002 WING D, CABINET 1, DRAWER 1, BINDER 1 001 Dispose of 18400010600 WING A, CABINET 2, DRAWER 1, BINDER 1 001

Publications Library Management System v3
106
___________________________________________________________________________________________ 10576A COMMUNICATIONS INTE 93001A0000-01 PCN Association Deleted Association deleted: PCN 18210393000 TM 10393A-14&P PCN changed to Non Equipment Associated (NEA) Evaluate the continued requirement to retain PCN 18210393000 in Section Library. Evaluate the continued requirement to retain IDNO 10576A in Section Library Conversion Exception Listing
The Conversion Exception Report is a one time report created when a Conversion of a DOS PLMS Section Library is performed. When a conversion is performed, PLMS attempts to copy all of your Section Library information to Windows PLMS but can occur data inconsistencies that DOS PLMS allowed, that Windows PLMS does not . In order to start with ‘clean’ data, anything that does not conform to the standard business rules is either modified or rejected. This report lists everything that was either modified or rejected. The first part of this report is a legend of explanations of each of the possible exceptions that can occur, followed by a list of all the exceptions that were encountered duringthe conversion of your Section Library. You should print a copy of this report for review and take the actions recommended under ‘YOUR ACTION’.. The following is an example of a ‘PLMS CONVERSION EXCEPTION LISTING’:
20 JAN 2005 PLMS CONVERSION EXCEPTION LISTING PAGE: 001
SECTION: MT
MESSAGE EXPLANATION YOUR ACTION

Reports
107
NEA designation was removed
This PCN is not an Equipment associated PCN. Its Non Equipment Associated (NEA) flag was removed.
None
Location xxxx added with RQD 001
This Location was on the base but was missing on the change so it was added. Its RQD qty is automatically set equal to the base.
Verify number of copies O/H at this location and record the result. NOTE: Based on past reconciliation’s you may see PCNS that were not viewable in DOS PLMS, ignore these.
Location NO LOCATION ASSIGNED added with RQD 001
The base PCN for this change has a RQD qty with NO LOCATION ASSIGNED. The RQD qty was missing on the change so it was added. Its RQD qty is automatically set equal to the base.
Verify number of copies O/H at this location and record the result.
Location xxxx RQD changed to 001
The RQD qty for this Location does not match its base RQD qty and has been changed to match the base.
Verify number of copies O/H at this location and record the result.
Location xxxx Deleted. O/H 001 needs a location
This Location does not match its base locations and was deleted. It had an O/H qty.
The O/H qty copies must be assigned to a new location. NOTE: Based on past reconciliation’s you may see PCNS that were not viewable in DOS PLMS, ignore these.
Location "UNKNOWN". O/H 001 was removed.
The only location is blank and its O/H qty is greater than 0. O/H qtys are only assigned
Assign a valid location and record the O/H qty.
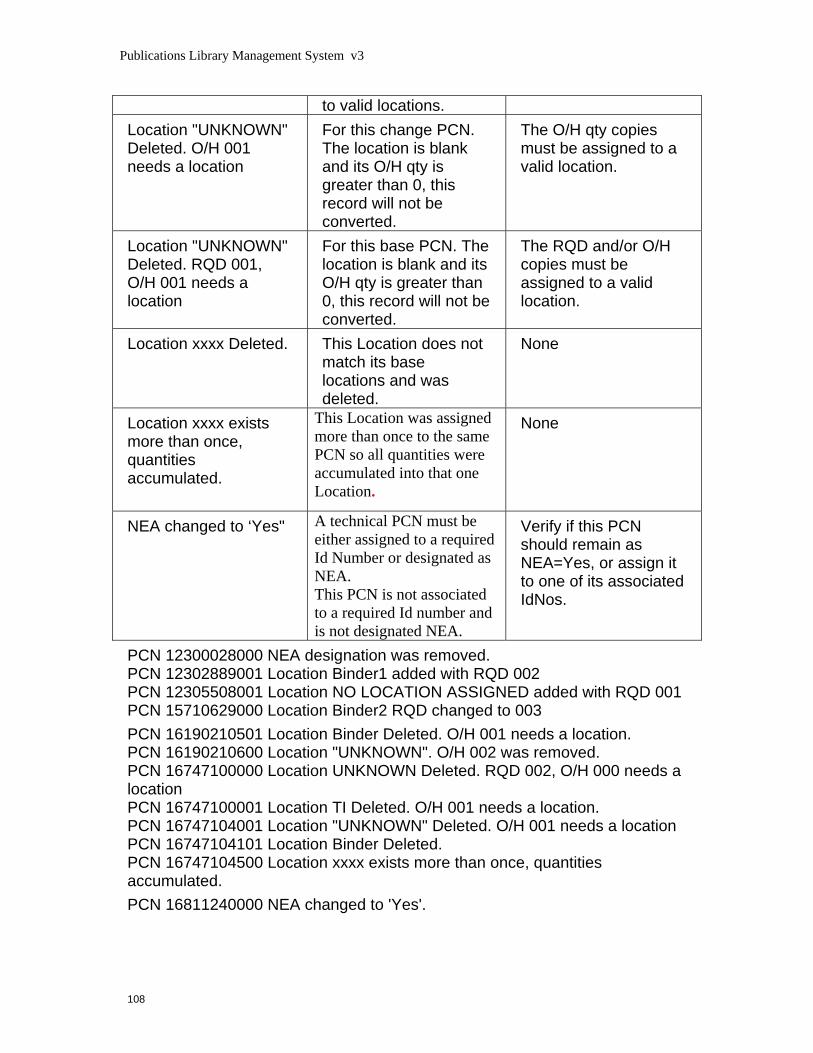
Publications Library Management System v3
108
to valid locations. Location "UNKNOWN" Deleted. O/H 001 needs a location
For this change PCN. The location is blank and its O/H qty is greater than 0, this record will not be converted.
The O/H qty copies must be assigned to a valid location.
Location "UNKNOWN" Deleted. RQD 001, O/H 001 needs a location
For this base PCN. The location is blank and its O/H qty is greater than 0, this record will not be converted.
The RQD and/or O/H copies must be assigned to a valid location.
Location xxxx Deleted. This Location does not match its base locations and was deleted.
None
Location xxxx exists more than once, quantities accumulated.
This Location was assigned more than once to the same PCN so all quantities were accumulated into that one Location.
None
NEA changed to ‘Yes" A technical PCN must be either assigned to a required Id Number or designated as NEA. This PCN is not associated to a required Id number and is not designated NEA.
Verify if this PCN should remain as NEA=Yes, or assign it to one of its associated IdNos.
PCN 12300028000 NEA designation was removed. PCN 12302889001 Location Binder1 added with RQD 002 PCN 12305508001 Location NO LOCATION ASSIGNED added with RQD 001 PCN 15710629000 Location Binder2 RQD changed to 003 PCN 16190210501 Location Binder Deleted. O/H 001 needs a location. PCN 16190210600 Location "UNKNOWN". O/H 002 was removed. PCN 16747100000 Location UNKNOWN Deleted. RQD 002, O/H 000 needs a location PCN 16747100001 Location TI Deleted. O/H 001 needs a location. PCN 16747104001 Location "UNKNOWN" Deleted. O/H 001 needs a location PCN 16747104101 Location Binder Deleted. PCN 16747104500 Location xxxx exists more than once, quantities accumulated. PCN 16811240000 NEA changed to 'Yes'.

Reports
109
Notes: • Since DOS PLMS did not support Local publications, there will be
none in this report. • To locate your report after you start PLMS, run a Windows Search on
file plmsrptConversion*.htm. The ‘*’ will equal the name of your Section Library.


111
Distribution Control Point (DCP)
Create a DCP
A DCP is a special Type of User who acts as the coordinator for all the Section Libraries within a unit using PLMS. While the DCP uses the same PLMS program that are used by the sections to manage their Section Libraries, the DCP has an extended set of capabilities to enable them to carry out their management tasks.
The Section Name of the DCP is always ‘DCP’ and cannot be changed.
The DCP may or may not have their own Section Library information loaded in their DCP Section Library.
If you are converting from prior DOS PLMS diskettes:
1) Before you start, insure your DCP Name is ‘DCP’. If its is not, then change it prior to conversion.
2) Start PLMS. If you are the first Section Library on this PC then you will be asked ‘Do you want to convert your existing Section Library?’. Click [Yes]. If you are not the first Section Library on this PC, when the PLMS Section Name screen appears space out the Section Name listed and click [Convert].
3) The Welcome to the PLMS Data Conversion Process screen appears. Click [Start]
4) Insert you DOS PLMS Section Library and Unit PL diskettes as prompted
5) The PLMS Conversion Exception Listing appears. If you are managing a Section Library under your DCP section name this lists all the exceptions the conversion found in copying your DOS PLMS Section Library to your Windows PLMS Section Library. Please Print the listing for later action.
6) Close the PLMS Conversion Exception Listing display screen.
7) Your new Section Library is loaded and displayed and available for use..
8) See PLMS Configurations to verify you are set to ‘DCP with/Sections’. If not, change the Type of user to ‘DCP with/Sections’.
9) If needed, perform those actions as directed by ‘Your Actions’ on the PLMS Conversion Exception Listing.
If you are creating your Section Library from scratch:
1) Start PLMS. If you are the first Section Library on this PC then you will be asked ‘Do you want to convert your existing Section Library?’. Click [No]. If

Publications Library Management System v3
112
you are not the first Section Library on this PC the PLMS Section Name screen automatically appears.
2) On the PLMS Section Name screen if the already is a Section Name listed, blank it out by typing a space over it.
3) Type in ‘DCP’..
4) The Create or Locate Section Library screen appears. Click on ‘Create a new Section Library’.
5) The Save As screen appears. This screen indicates where your Section Library file will be stored. By default it will be stored in a subfolder name ‘Section Libraries’ located under the folder where PLMS program is installed. You may change the location at this time. The Section Library filename is PLMSDCP.MDB. **DO NOT CHANGE THE FILENAME. **DO NOT SELECT ANY EXISTING SECTION NAMES LISTED. Click Save.
6) Your new Section Library is created and available for use.
You are now ready to start setting up your subordinate Sections. Notes:
- One or more Sections, including the DCP can use PLMS on the same PC. What does the DCP do?
The Distribution Control Point (DCP) serves as a clearinghouse for those sections within a unit who use PLMS. The DCP performs the following tasks:
• Manages the Unit PL • Makes sure that the Sections Quantity Required are entered into
MCPDS • Makes sure that MCPDS Quantity Required are distributed to the
Sections • Consolidates Orders to enter into MCPDS • Distributes new copies of the Unit PL to the Sections • Receives Section Files for review and incorporation into the Unit PL • Reconciles the PLMS Unit PL with MCPDS Unit PL • Add PCNs to Unit PL • Change Unit Rated quantities • Rename Sections • Reviews SLs

Distribution Control Point (DCP)
113
DCP
Motor T Admin Section X
MCPDS
Unit PL File
Section File
Section File
Section File
Qty Chgs &Orders
PL Listing &Order Status
Edit PL
Managing your Unit PL
The Unit Publications Listing (PL) is a database containing a list of all the publications that your unit rates, how many each Section rates, how many each Section has on hand, and how many each Section has on order. Think of the Unit PL as the sum of all of the Sections. There are a variety of methods that a unit can use to manage their publications at the unit level and while PLMS provides the tools, it does not advocate any particular style of management. There are two basic approaches:
1. Strong DCP Management. With this approach the DCP adds most if not all of the new PCNs that will be in the unit and then allocates the appropriate qty to each Section. This information is sent down to the Sections when the Unit PL is exported down. The DCP conducts a strict review of allowance requests for changing rated quantities made by the Sections and any new orders for additional copies. This is the top down method.
2. Strong Section Management. With this approach the Section enters most of the information at their level and the unit data gets changed when the DCP imports the Section libraries and rolls their data into

Publications Library Management System v3
114
the Unit PL. The DCP conducts little or no review of the requested changes or additional orders by the sections. This is the bottom up method.
So what does this really mean? For example. A Headquarters sponsor creates a new publication and based on other publications your unit already rates, decides that you rate one and you automatically will receive one copy. If you carefully watched through MCPDS you might see that this new publication is coming out and your unit will get one copy, but probably you won’t know until it lands in your mailbox. But your unit really needs three copies. One each for sections 1 & 2 & 3. A strong DCP can decide that Section 1 gets the existing copy and then adds one to Rated Copies Requested to Sections 2 & 3 and order one copy for each Sections 2 & 3. When the sections get their copies of the new Unit PL file they will be notified of the change. Or in a strong Section environment, the DCP adds that PCN to the Unit PL and assigns that one copy to the Section with the greatest need or keeps it himself as master file copy. The section themselves will then need to decide if they need this new publication and say Sections 2 and 3 do but Section 1 doesn’t. Sections 2 & 3 then select the new PCN from their MasterList and enter 1 for Rqd and OnOrd. When they export their section libraries up to the DCP, they will be incorporated into the Unit PL and if the DCP doesn’t change it, then will become permanent. The following capabilities are provided in managing the Unit PL: Add PCN to Unit PL Change Unit Rated quantities Remove PCN from Unit PL Export Unit Publication Library PL Receiving a New Section Library Create Unit PL Report Normal cycle of PLMS

Distribution Control Point (DCP)
115
Section Export theirSection Library Extract
file to the DCP
DCP receives theSection(s) Library
Extract File(s)
DCP brings up Edit PLscreen for review and
adjusts Sectionsinformation as needed
DCP Export Unit PL toSections
Sections Receive UnitPL and review Section
Change Report andapply adjustemnts
Section manages theirSection Library
Note:
1. If there is an active section named DCP, then it is managed directly through the normal PLMS Section Library screen, not through Edit PL. The DCP is shown here is for informational purposes only.

Publications Library Management System v3
116
Add PCN to Unit PL
Adding a PCN to the Unit PL means including that publication to the list of publications that your unit rates as per the Marine Corps Publication Distribution System (MCPDS). MCPDS keeps track of which and how many copies of a publication that every unit in the USMC requires. This information is used for determining fielding of changes, similar and replacement publications. The decision that your unit requires an additional publication can originate from your subordinate sections, someone else within your unit or from the HQMC publication sponsor in the case of new publications. There are two primary ways that PCNs are added to your Unit PL:
1. Imported from the Section Libraries – A section decides that it needs an additional PCN and adds that PCN to their Section Library along with the Rated Copies Requested, Copies On Hand and Orders Requested quantities. When they export a copy of their Section Library to the DCP and the DCP Imports that file, the Unit PL is automatically updated with these requested quantities. The DCP at this time has the option to review all of these requests and to make any adjustments before they are permanently posted to the Unit PL.
2. Manually added by the DCP – Whether it originates from MCPDS or from elsewhere in the Unit, the DCP can directly add PCNs to the Unit PL. When added, the Rated Copies Requested and Orders Requested quantities can also be added to the appropriate Section(s) at this time.
To add a PCN directly to your Unit PL:
1. From Section Library screen click ‘DCP’ then ‘Edit PL’ 2. Click the ‘Add’ button 3. The Find screen now appears. Using any of the available Find options
locate the PCN desired and double click on that PCN 4. You are returned to the Edit PL screen and positioned at that PCN. 5. You now have the option to assign the Rated Copies and to request
copies to be ordered for the sections within your unit a. Rated Copies - For each section that requires this PCN, enter
their number of copies in Rated Copies Requested cell. That qty will the be automatically moved from ‘Requested’ to ‘Existing’ because you as the DCP are deemed the approving authority for assigning Rated copies within your unit.

Distribution Control Point (DCP)
117
b. Orders Requested - For each section that requires this PCN, enter their number of copies that needs to be ordered for that section in the Orders Requested cell. These quantities will remain in the Requested column until the next Finished MCPDS Unit Change Request is created or an Export Unit PL is performed. At that time those qtys will be automatically moved from Requested to Submitted.
Notes: • If your unit is fully using PLMS, when reconciling your Unit PL Total
Rated Copies Existing quantity should match that qty in MCPDS. If your unit is only partially using PLMS (some sections do not), then there will be a gap in the quantities for those sections not using MCPDS.
• If you are adding a PCN to the section ‘DCP’ you must add it to the DCP Section Library itself. It will then be automatically added to the Unit PL
• Change PCNs are automatically added with the base PCN Remove PCN from Unit PL
Removing a PCN from the Unit PL means deleting that publication from the list of publications that your unit rates as per the Marine Corps Publication Distribution System (MCPDS). MCPDS keeps track of which and how many copies of a publication that every unit in the USMC requires. This information is used for determining fielding of changes, similar and replacement publications. The decision that your unit no longer requires a publication can originate from your subordinate sections or from someone else within your unit. The most common reasons for this are that the publication has been converted to EDO and no longer exists in paper form, or you are no longer responsible for maintaining an item of equipment thus no longer require the publications supporting it. To remove a PCN from your Unit PL:
1. From Section Library screen click ‘DCP’ then ‘Edit PL’ 2. Make sure ‘PL Display’ is set to ‘All PCNs’. If not, click on ‘All PCNs’ 3. Click on the PCN or PCN dropdown button and scroll/select the PCN 4. Or click Next / Previous button until you locate the PCN to be removed 5. Or click PgUp/PgDn on your keyboard until you locate the PCN to be
removed 6. Click the ‘Remove’ button 7. If there are no Rated Copies, the PCN is deleted from the Unit PL 8. If there are Rated Copies, then a confirmation pop up screen will
appear. Click OK to complete the removal or Cancel to Abort.

Publications Library Management System v3
118
Notes: • If a PCN is deleted from the Master List, it will automatically be removed
from the Unit PL after all the subordinate Section Libraries have sent in the Section Library Files to the DCP.
• If all subordinate Section Libraries request their Rated Copies be changed to zero, the DCP must still manually Remove the PCN from the Unit PL.
• If your unit is fully using PLMS, when reconciling your Unit PL Total Rated Copies Existing quantity should match that qty in MCPDS. If your unit is only partially using PLMS (some sections do not), then there will be a gap in the quantities for those sections not using MCPDS.
MCPDS Unit Change Request
If your Type of User is DCP with/Sections, periodically you will need to get MCPDS updated with your unit’s latest allowance adjustments and outstanding orders. Whether you access to MCPDS yourself or need to send the information to your MCPDS clerk for data entry, PLMS provides to you the ‘MCPDS Unit Change Request’. This report shows all of your unit’s allowance adjustments and required orders that have made since the last time you created a ‘Finished’ copy of this report. The Finished copy locks in your numbers.
To create this Report: Click ‘DCP’ then ‘Edit PL’ on PLMS Section Library screen menubar. Once in the ‘Edit PL’ screen you can generate this report in two ways:
1. Click ‘MCPDS Chg Request’ on the menubar. A ‘Finish Rated Copies and Orders?’ popup is displayed asking if you want to create a Finished copy or a Draft copy of the report. Click [Yes] to create the Finished copy or [No] to create a Draft copy.
2. Click ‘Export Unit PL’ on the menubar. A ‘Export Unit Publications Library’ confirmation popup is displayed asking if you want to generate a Finished copy of this report and commit these updates to your Unit PL. Click [Ok] to create the report, commit the updates and generate a new export version of your Unit PL, or [Cancel] to abort.
Draft Copy – A preview copy of this report used to review all your unit’s allowance updates and pending orders recorded to date since the last time you created a Finished copy.
Finished Copy – A deliverable copy of this report that contains all your unit’s allowance updates and new orders recorded to date since the last time you

Distribution Control Point (DCP)
119
created a Finished copy. This copy is used to update MCPDS either yourself or give it to your MCPDS clerk.
If you need to provide this report to someone else who is your MCPDS clerk, there are several ways to send it:
1. Print the report and either hand carry it or otherwise deliver it to your MCPDS clerk
2. The report filename is rptyyyymmddhhmmssDCPmcpds.htm where yyyymmddhhmmss = the date/time the report was created This file is located in subfolder \Reports. See Notes below if you cannot locate the file. Use the most recent file based on the date/time.
a. Email a copy of the file as an attachment to your MCPDS clerk b. Copy the file to a shared network location and inform your
MCPDS clerk its location and its use. The following is an example of a MCPDS Unit Change Request. There are 4 PCNs that need to get updated in MCPDS. For the first PCN 12300678000, the allowance quantity needs to be changed to 5, with section Armory requiring 1, MMO 3 and S-1 1. Also need to order 1 copy for MMO. The second PCN 12309947000 has no allowance changes but needs to order 2 copies, 1 for Armory and 1 for MMO. The third PCN 16008211500, the allowance quantity needs to be changed to 4, with section Armory requiring 1, MMO 3. There are no orders needs for this PCN. The fourth PCN 16113324300 is no longer needed and its allowance needs to be changed to 0. 07:24 AM PUBLICATION LIBRARY MANAGEMENT SYSTEM (PLMS) 17 Nov 2005 MCPDS UNIT CHANGE REQUEST IAAC: 1025001 ----------------------------------------------------------------------------------------------------------------------------------- PCN Qty Orders Publication Title Notes ------------------------------------------------------------------------------------------------------------------------------------ 12300678000 5 1 SL-3-00678A ____________________________ ARMORY 1 MMO 3 1 S-1 1 12309947000 2 SL-3-09947A ____________________________

Publications Library Management System v3
120
ARMORY 1 MMO 1 16008211500 4 MI 08211B-50/6 _____________________________ ARMORY 1 MMO 3 16113324300 0 MI-2005-35/12 _____________________________ Legend
• PCN • Qty – The number of copies your unit requires to accomplish its mission. • Orders – The number of new or additional copies you require to either
replace existing copies you already rate or to bring your On Hand total in line with your Qty Required.
• Publication Title – Short Title of PCN • Notes – comment area for you to send notes to your MCPDS clerk to for
the MCPDS clerk to annotate for you Notes:
• Since Local publications do not exists in MCPDS, they are never included in this report
• Since EDO publications do not have an allowance quantity nor can they be ordered via MCPDS, they are never included in this report
• If you don’t know where the reports file is located, run a Windows Search on file rpt*DCPmcpds.htm
• You should delete any MCPDS Unit Change Request files you no longer need
• MCPDS optionally allows you to record which section receives how many of the IAAC’s total allowance quantity. This report supports that capability by listing all Sections with a required qty > 0 when reporting an updated allowance.

Distribution Control Point (DCP)
121
Export Unit Publication Library (PL)
Exporting a Unit Publications Library(PL)is the process used by the DCP to commit all outstanding section requests to change required quantities and order additional copies of publications to the Unit PL file and then create a copy of the Unit PL for all the subordinate sections. The Unit PL is used by the sections as notification of any Required Quantity changes and ordering of PCNs done on behalf of the sections by the DCP and to provide visibility to the sections to all of the PCNs held across the unit.. Before the DCP can Export the Unit PL, they must first be configured as a ‘DCP w/Sections’ type PLMS user. To check your user type, while in your Section Library screen click ‘Configure’ on the menubar. In the Section Configuration screen under ‘Type of User’ you will find your setting. First see PLMS Configurations to see if you should be a ‘DCP w/Sections’. . If you need to change your configuration to ‘DCP w/Sections’, see Change my User Type. To Export your Unit PL:
1. Click on ‘DCP’ then ‘Edit PL’ on the menubar 2. The Edit PL screen appears. Click on ‘Export Unit PL’ on the menubar. 3. The Export Unit Publications Library popup screen appears asking you
to confirm creating the MCPDS Unit Change Request and permanently updating the Unit PL file. Click ‘Ok’ to proceed or ‘Cancel’ to abort’. This action is non-reversible.
4. The MCPDS Unit Change Request is generated and displayed for viewing. Please print this report and then take action in MCPDS as report directs to change quantities of PCNs required by the unit and any orders that need to be placed.
5. The Export file is created and depending on your methods of exchanging files with your subordinate sections, what further action on your part is required. To review the methods determined for each of the sections, from your Edit PL screen click ‘Manage Sections’ on the menubar or if you are on the Section Library screen, click on ‘DCP’ then ‘Manage Sections’ on the menubar. The ‘Manage Sections’ screen is displayed. Listed with each section is ‘Method’ which indicates how you need to provide their copy of the Unit PL to that section. There are three methods.
a. Portable Storage Device (PSD). Indicates you will be delivering the section’s copy of the Unit PL file using a portable device such as a diskette, zip-drive, USB-drive, etc… To complete these you need to copy the distributed Unit PL file to the PSD. Then manually deliver the PSD to the section. The distributed Unit PL

Publications Library Management System v3
122
file is named PLMSUNITPLyyyymmdd.MDB where yyyymmdd = date file was created. The file is located at the location listed under ‘Unit PL Folder’ for that section in screen ‘Manage Sections’.
b. E-Mail. Indicates you will be delivering section’s copy of the Unit PL file via email as an attachment. To complete this you need to attach the distributed Unit PL file The distributed Unit PL file is named PLMSUNITPLyyyymmdd.MDB where yyyymmdd = date file was created. The file is located at the location listed under ‘Unit PL Folder’ for that section in screen ‘Manage Sections’.
c. Shared. Indicates you have stored the section’s copy of the Unit PL file at a location accessible to that section. Further action on your part such as notifying the section that a new Unit PL file is ready is according to your local procedures. The next time the section sign into PLMS, the file will be processed and a Section Change Report will be displayed to the section
Create Unit PL Report
If your Type of User is DCP with/Sections, periodically you might want to conduct a unit Publications Listing (PL) review with all of your sections. To assist this effort PLMS provides a Unit PL Report which lists by PCN all of the PCNs rated by your unit along with how many each section rates and how many each section has on order. To create this report: Click ‘DCP’ then ‘Edit PL’ on PLMS Section Library screen menubar. Once you are in the ‘Edit PL’ screen click ‘Unit PL Report’ on the menubar. If you need to provide this report to someone else, there are several ways to do it:
1. Print the report 2. The report filename is plmsrptDCPPLyyyymmddhhmmss.htm where
yyyymmddhhmmss = the date/time the report was created This file is located in subfolder \Reports. See Notes below if you cannot locate the file. Use the most recent file based on the date/time.
a. Email a copy of the file as an attachment b. Copy the file to a shared network location and inform the other
party of its location and its use. The following is an example of a UNIT PUBLICATIONS LISTING. While this listing can be many pages long, shown here is just an example of the beginning of a report. Listed are the first 4 PCNs that are rated by this unit. For the first PCN 12300678000, ARMORY rates 1 copy and has none on order, MMO rates 3 copies and has 1 copy on order and S-1 rates 1 copy and has

Distribution Control Point (DCP)
123
none on order. The second PCN 12309947000 is not rated by any sections but ARMORY and MMO each have 1 copy on order. The third PCN 16008211500, the DCP and ARMORY each rate 1 copy and MMO 2 copies. There are no orders for this PCN. The fourth PCN 16113324300 is not rated by any section nor on order by any section. Either it should be removed or assigned to be rated by some section. 07:24 AM PUBLICATION LIBRARY MANAGEMENT SYSTEM (PLMS) 02 Aug 2006 UNIT PUBLICATIONS LISTING IAAC: 1025001 ----------------------------------------------------------------------------------------------------------------------------------- PCN Qty Orders Publication Title Notes ------------------------------------------------------------------------------------------------------------------------------------ 12300678000 5 1 SL-3-00678A ____________________________ ARMORY 1 ____________________________ MMO 3 1 ____________________________ S-1 1 ____________________________ 12309947000 2 SL-3-09947A ____________________________ ARMORY 1 ____________________________ MMO 1 ____________________________ 16008211500 4 MI 08211B-50/6 _____________________________ DCP 1 ____________________________ ARMORY 1 ____________________________ MMO 2 ____________________________

Publications Library Management System v3
124
16113324300 MI-2005-35/12 _____________________________ Legend
• PCN • Qty – The number of copies the unit/section requires to accomplish its
mission. • Orders – The number of new or additional copies required to either
replace existing copies already rated or to bring the On Hand qty in line with the Qty Required.
• Publication Title – Short Title of PCN • Notes – general comment area
Notes:
• This report can be run at any time • Since Local publications do not exists in MCPDS, they are never
included in this report • Since EDO publications do not have an allowance quantity nor can
they be ordered via MCPDS, they are never included in this report • If you don’t know where the reports file is located, run a Windows
Search on file rpt*DCPmcpds.htm • You should delete any MCPDS Unit Change Request files you no
longer need • MCPDS optionally allows you to record which section receives how
many of the IAAC’s total allowance quantity. This report supports that capability by listing all Sections with a required qty > 0 when reporting an updated allowance.
Connecting your sections
First Coordinate with the Section(s)
Before you connect a Section Library to the DCP Library, there is some information that first must be decided between the DCP and a section:
1) The name of the section. This name must be 1-20 characters (letters, numbers, or spaces). Must be unique within this unit. If you are

Distribution Control Point (DCP)
125
converting from DOS PLMS you will normally use the section name already established.
2) How the section is going to exchange files with the DCP. There are two files that are routinely exchanged. • The Section Library file – an extract of the Section Library that the
section sends it to the DCP. • The Unit Library file – periodically the DCP will create a snapshot file
of the Unit Library and send a copy to each of the sections. Each section is evaluated separately as to their method exchanging these files. There are 3 methods supported by PLMS:
a. Portable Storage Device (PSD) – (e.g. diskettes, Zip-disks, CDs, etc… ) – the file is either copied to or written directly to the PSD. The PSD is then delivered to the other party (Section to DCP or DCP to Section) by whatever means available. It could be hand-carried, guard-mail, official mail, UPS, etc…
b. Email – the file is written to a specified location on your PC and then is sent as an attachment to the other party (Section to DCP or DCP to Section).
c. **Shared network file – determine a network drive and folder that both parties (DCP & Section) have access to read/write to. One location for the Section Library Extract file and one for the Unit Library file or the same for both.
**This is the preferred method. Once the connections are defined, all files exchanges are handled in the background without manual intervention.
3) Who goes first. There are several approaches that can be used depending on your particular situation.
a. Section exports their Section Library and DCP adds it in b. DCP defines the section and exports Unit PL to section c. DCP and Section(s) all covert from DOS PLMS together
. Receiving a New Section Library
A Section exports their Section Library and DCP adds it to the Unit PL. Scenario: A section using PLMS to manage their Section Library that is currently not in the Unit PL is going to become part of the Unit. The section changes their configuration from Section-Only to Section with/DCP. This enables the section to then export their Section Library to

Publications Library Management System v3
126
a DCP. The section exports their Section Library to the DCP as an email attachment This ‘export’ file is copied to any ‘Section Library Folder’ recognized by the DCP. Since this section is not defined to the Unit PL, it will be flagged as an ‘Unknown’ section and at that time the DCP can choose to Add it to the Unit PL.
1) The section needs to set up their PLMS program to handle sending their section library extract to the DCP based upon the agreements with the DCP. The section starts PLMS and opens the Section Library. On the Section Library screen click <Configure> on the menubar. Under the area ‘Type of User’ click on option ‘Section w/DCP’ then under the area ‘Section Library’ look at File Location. This is where a copy of the Section Library will be saved when they Export their Section Library. Depending on their exchange method selected:
a. If the section’s exchange method is PSD. Depending on if you want PLMS to directly copy your Section Library to the device or to first place it in a holding location and then you will manually copy it yourself to the device. If you want the direct write, click the device dropdown and select the correct device. (the device must be available to confirm). If you want to use an intermediate location, select that location and click OK. Recommend using default location _:\plms install folder\Section Libraries.
b. If this section’s exchange method is Email. You must select an intermediate location to store the file until you send it as an email attachment, select that location and click OK. Recommend using default location _:\plms install folder\ Section Libraries.
c. If this section’s exchange method is Shared. Select that location you agreed upon with the DCP and click OK.
2) On the Section’s Configuration screen click ‘File’ then ‘Save’ on the menubar. That closes the screen and returns to the Section Library screen.
3) On the Section Library screen click ‘File’ then ‘Export Section Library’. An Export Complete pop up will appear. Click OK.
4) Click ‘File’ then ‘Exit’ on the menubar to exit PLMS 5) Section. Now you need to get the exported Section Library file to the DCP
depending on the file exchange methods selected a. If the section’s exchange method is PSD. Depending on if you set it
up to directly copy the Unit PL to the device or to first place it in an intermediate location. If you did the direct write, a file named PLMSsectionnameyyyymmdd.TXT was written to it.. If you used an intermediate location, then using Windows Explorer go to the location selected in #26a and then copy the file PLMSsectionnameyyyymmdd.TXT to the device. Now deliver the PSD to the DCP.
Distribution Control Point (DCP)
127
b. If the section’s exchange method is Email. Using your Email program compose a new email message your DCP specifying that you are sending them your section library extract file and they need to copy the attachment to the location they specified to handle your section. Then attach the file named PLMSsectionnameyyyymmdd.TXT located at the location you specified in 26b above and send the email.
c. If the section’s exchange method is Shared the only action needed is to notify the DCP that your Section Library extract file is now available.
6) The DCP needs to copy all of the incoming PSD and E-Mail Section Library extract files to the default location _:\plms install folder\Section Libraries. As each Section Library extract file is received by the DCP, depending on the exchange method selected.
a. If the section’s exchange method is PSD. Using Windows Explorer copy the Section Library extract file named PLMSsectionnameyyyymmdd.TXT that’s located on the PSD your received from the section to the folder location that was just noted above.
b. If the section’s exchange method is Email. In the email received from the section Save the attachment (Section Library extract file named PLMSsectionnameyyyymmdd.TXT) to the folder location that was just noted above.
c. If the section’s exchange method is Shared no action required at this time.
7) The DCP starts PLMS and opens the DCP library. Click on ‘DCP’ then ‘Edit PL’ on the menubar. Each new Section Library will prompt you with an ‘Unknown Section Library Import’ pop up. This is telling you a section library has been received but it is not listed in your Unit PL. Click the ‘New Section’ option then [Okay].
8) The new section automatically adds another row to your Manage Sections screen with the Section Library Folder and Unit PL Folder set at the default locations. You must now finish Adding the new section.
9) If the Section Library Folder In column Section Library Folder needs to be changed, double-click the cell to pop up Section Library Folder then:
a. If this section’s exchange method is PSD. You will be receiving a physical device. When received you’ll copy the section library file to this location and PLMS will then automatically process it from this location the next time to go into your Edit PL screen. Select the location you will be copying your received PSD file to and click OK. Recommend using default location _:\plms install folder\Section Libraries
b. If this section’s exchange method is Email. You will be receiving an email with an attachment containing a section library file. When received you’ll copy the attachemnt to this location and PLMS will

Publications Library Management System v3
128
then automatically process it from this location the next time to go into your Edit PL screen. Select the location you will be copying your email attachment to and click OK. Recommend using default location _:\plms install folder\Section Libraries
c. If this section’s exchange method is Shared. Select that location you agreed upon with that section for exchanging the section library extract files and click OK.
10) If the Unit PL Folder In column Unit PL Folder needs to be changed, double-click the cell to pop up Unit PL Folder then:
a. If this section’s exchange method is PSD. Depends on if you want PLMS to directly copy the Unit PL to the device or to first place it in a holding location and you will manually copy it yourself to the device. If you want the direct write, click the device dropdown and select the correct device. (the device must be available to confirm). If you want to use an intermediate location, select that location and click OK. Recommend using default location _:\plms install folder\Unit PL . You should use the same location for all sections with method PSD.
b. If this section’s exchange method is Email. You must select an intermediate location to store the file until you send it as an email attachment, select that location and click OK. Recommend using default location _:\plms install folder\Unit PL. You should use the same location for all sections with method E-Mail.
c. If this section’s exchange method is Shared. Select that location you agreed upon with that section and click OK.
11) Click on the Delivery Method column to the right 12) In column Delivery Method click the dropdown and then click PSD, Shared,
or E-Mail as appropriate. 13) (optional) Click on the Section Library POC column to the right and enter
name/phone number of POC for that section. 14) Click ‘File’ then ‘Save’ then ‘File’ then ‘Exit’ on the menubar. 15) The new section is now loaded to the Unit PL. The Until PL can now be
reviewed and a new Unit PL distributed to all the subordinate sections if desired.
. Adding a Section through Manage Sections
The DCP is going to first add the section to the Unit PL and then export the unit PL to the new section.

Distribution Control Point (DCP)
129
Scenario: A new section is going to start using PLMS to manage their publications and are going to become part of the Unit. The section first gets PLMS installed on their PC and then can start loading their Section Library or wait until the DCP gives them a copy of the Unit PL. When the section receives a copy of the Unit PL file they first go into their PLMS to find out where to copy the Unit PL file to, exits, copies the Unit PL file to the correct location and starts PLMS again.. The section goes into PLMS again and changes their configuration from Section-Only to Section with/DCP. They are now operational.
1) DCP. Start PLMS and select the Section name ‘DCP’, click [Continue]. On
the Section Library screen click ‘DCP’ then ‘Manage Sections’ on the menubar
2) Click ‘Sections’ then ‘Add’ on the menubar 3) This opens up an empty row at the bottom to load the section. 4) In column Section Name enter the section name. Click Tab right or click on
the Section Library Folder column to the right 5) In column Section Library Folder, double-click to pop up Section Library
Folder then: a. If this section’s exchange method will be PSD. You will be receiving a
physical device. When received you’ll copy the section library file to this location and PLMS will then automatically process it from this location the next time to go into your Edit PL screen. Select the location you will be copying your received PSD file to and click OK. Recommend using default location _:\plms install folder\Section Libraries
b. If this section’s exchange method will be Email. You will be receiving an email with an attachment containing a section library file. When received you’ll copy the attachemnt to this location and PLMS will then automatically process it from this location the next time to go into your Edit PL screen. Select the location you will be copying your email attachment to and click OK. Recommend using default location _:\plms install folder\Section Libraries
c. If this section’s exchange method will be Shared. Select that location you agreed upon with that section for exchanging the section library extract files and click OK.
6) Click Tab right or click on the Unit PL Folder column to the right 7) In column Unit PL Folder, double-click to pop up Unit PL Folder then:
a. If this section’s exchange method will be PSD. Depends on if you want PLMS to directly copy the Unit PL to the device or to first place it in a holding location and you will manually copy it yourself to the device. If you want the direct write, click the device dropdown and select the correct device. (the device must be available to confirm). If you want to

Publications Library Management System v3
130
use an intermediate location, select that location and click OK. Recommend using default location _:\plms install folder\Unit PL . You should use the same location for all sections with method PSD.
b. If this section’s exchange method will be Email. You must select an intermediate location to store the file until you send it as an email attachment, select that location and click OK. Recommend using default location _:\plms install folder\Unit PL. You should use the same location for all sections with method E-Mail.
c. If this section’s exchange method will be Shared. Select that location you agreed upon with that section and click OK.
8) Click Tab right or click on the Delivery Method column to the right 9) In column Delivery Method click the dropdown and then click PSD, Shared,
or E-Mail as appropriate. 10) Click Tab right or click on the Section Library POC column to the right 11) (optional) In column Section Library POC enter name/phone number of
POC for that section. 12) Click ‘File’ then ‘Save’ on the menubar. 13) Click ‘DCP Edit PL’ on the menubar 14) You now have the option of adding PCNs to this new section or adding this
new section to PCNs already listed. 15) On the Edit Pl screen click ‘Export Unit PL’ on the menubar 16) An Export Unit Publications Library screen will pop up, click OK to continue 17) A MCPDS Unit Change Request will pop up. If there is anything listed on
this report you will need to print it and make sure those changes get taken care of in MCPDS. Click Close
18) The Unit PL export files have now been written to those locations as specified in Manage Sections at the Section Library Folder for all of the sections.
19) Click Section Library on the menubar to exit Edit PL 20) Click ‘File’ then ‘Exit’ on the menubar to exit PLMS 21) Now you need to get the export Unit PL file to all of your sections
depending on the file exchange methods selected: a. If the section’s exchange method is PSD. Depending on if you set it up
to directly copy the Unit PL to the device or to first place it in an intermediate location. If you did the direct write, a file named PLMSUNITPLyyyymmdd.MDB was written to it.. If you used an intermediate location, then using Windows Explorer go to the location selected and then copy the file PLMSUNITPLyyyymmdd.MDB to the device. Now deliver the PSD to the section POC.
b. If the section’s exchange method is Email. Using your Email program compose a new email message to those section POCs whose method is

Distribution Control Point (DCP)
131
E-Mail specifying that you are sending them a new PLMS Unit PL file and they need to copy the attachment to the location they specified in their PLMS program under Configure, Unit Publication Library, File Location. Then attach the file named PLMSUNITPLyyyymmdd.MDB located to the location you specified in 7b above and send the email.
c. If the section’s exchange method is Shared the only action needed is to notify the section POCs that their Unit PL file is now available.
22) The ‘existing’ sections should already know the process of importing a new Unit PL file, but the new section may not. The new section needs to set the location where their PLMS program will look for the incoming Unit PL file and set their method of exchanging files. They will start PLMS and open the Section Library. On the Section Library screen click <Configure> on the menubar. Under the area ‘Unit Publication Library’ click on either PSD, E-Mail, or Shared that was agreed upon with the DCP. Next look at File Location. This is where the incoming Unit PL file will be saved. Note this location, Save and exit PLMS. Depending on their exchange method selected.
a. If the section’s exchange method is PSD. Now using Windows Explorer copy the Unit PL file named PLMSUNITPLyyyymmdd.MDB that’s located on the PSD your received from your DCP to the folder location that was just noted above.
b. If the section’s exchange method is Email. In the email received from the DCP Save the attachment (Unit PL file named PLMSUNITPLyyyymmdd.MDB) to the folder location that was just noted above.
c. No action required at this time. 23) Section. Now that a copy of the Unit PL file has been copied to the correct
location start PLMS and open your Section Library. 24) The section now needs to set up their PLMS program to handle sending
their section library extract to the DCP based upon that agreement made with the DCP. Start PLMS and open the Section Library. On the Section Library screen click <Configure> on the menubar. Under the area ‘Section Library’ look at File Location. This is where a copy of your Section Library will be saved when you Export your Section Library. Depending on their exchange method selected:
b. If the section’s exchange method is PSD. Depending on if you want PLMS to directly copy your Section Library to the device or to first place it in a holding location and then you will manually copy it yourself to the device. If you want the direct write, click the device dropdown and select the correct device. (the device must be available to confirm). If you want to use an intermediate location, select that location and click OK. Recommend using default location _:\plms install folder\Section Libraries.

Publications Library Management System v3
132
c. If this section’s exchange method is Email. You must select an intermediate location to store the file until you send it as an email attachment, select that location and click OK. Recommend using default location _:\plms install folder\ Section Libraries.
d. If this section’s exchange method is Shared. Select that location you agreed upon with the DCP and click OK.
25) On the Section Configuration screen click ‘File’ then ‘Save’ on the menubar. That closes the screen and returns to the Section Library screen.
26) On the Section Library screen click ‘File’ then ‘Export Section Library’ . An Export Complete pop up will appear. Click OK.
27) Click ‘File’ then ‘Exit’ on the menubar to exit PLMS 28) Section. Now you need to get the exported Section Library file to the DCP
depending on the file exchange methods selected a. If the section’s exchange method is PSD. Depending on if you set it
up to directly copy the Unit PL to the device or to first place it in an intermediate location. If you did the direct write, a file named PLMSsectionnameyyyymmdd.TXT was written to it.. If you used an intermediate location, then using Windows Explorer go to the location selected in #24a above and then copy the file PLMSsectionnameyyyymmdd.TXT to the device. Now deliver the PSD to the DCP.
b. If the section’s exchange method is Email. Using your Email program compose a new email message your DCP specifying that you are sending them your section library extract file and they need to copy the attachment to the location they specified to handle your section. Then attach the file named PLMSsectionnameyyyymmdd.TXT located at the location you specified in 24b above and send the email.
c. If the section’s exchange method is Shared the only action needed is to notify the DCP that your Section Library extract file is now available.
29) Depending on the file exchange method the DCP either then needs to copy the incoming PSD or E-Mail attachment to the correct file folder or if its method Shared, then its already there.
a. If the section’s exchange method is PSD. Now using Windows Explorer copy the Section Library extract file named PLMSsectionnameyyyymmdd.TXT that’s located on the PSD your received from the section to the folder location that was just noted above.
b. If the section’s exchange method is Email. In the email received from the section Save the attachment (Section Library extract file named PLMSsectionnameyyyymmdd.TXT) to the folder location that was just noted above.
c. No action required at this time.

Distribution Control Point (DCP)
133
30) The DCP starts PLMS and opens their DCP library. Click on ‘DCP’ then ‘Edit PL’ on the menubar. All Section Library extract files are now automatically read and loaded to the Unit PL. The Until PL is now ready for review. To see which section libraries were processed, click on ‘Manage Sections’ on the menubar.
31) This brings up the Manage Sections screen. Looking in the column title ‘SL Date’, this is the date that you loaded that section into your Unit PL.
Converting a DOS PLMS Unit PL
The DCP converts existing Unit PL with defined sections. Scenario: An entire unit of a DCP and all the subordinate sections are converting over to the new version of PLMS from the older DOS version. A Unit PL is in use and the DCP has distributed current copies of the Unit Library diskettes to all of the sections. Since everyone is up to date with their data, then there isn’t any initial file exchanging needed. The DCP and Sections just need to convert their DCP or Section libraries and then update their configuration setting based of what was agreed upon for exchanging files. The conversion should have set each section to ‘Section with/DCP’ and the DCP to ‘DCP with/Sections’. .
1) DCP. Convert your DOS PLMS DCP Unit and Section diskettes. On the
Section Library screen click <Configure> on the menubar. Under Type of User it should be set to ‘DCP w/1 to many Section’. If not, then there was a problem with your DCP data. Go back to DOS PLMS and check that your DCP name is ‘DCP’, if it isn’t change it. And in ‘EDIT PL/IDL’ check that a Location ‘DCP’ exists. If it doesn’t, add it. Go into Windows PLMS and delete the DCP library you just created, exit PLMS and run the Conversion process again with the updated diskettes..
2) On the Section Library screen click ‘DCP’ then ‘Manage Sections’ on the menubar.
3) Now you need to update each of the sections data with the file exchange information you decided with the sections. For each section click on the section name to highlight it, then click ‘Sections’ then ‘Modify’ on the menubar. This opens up that section for updating. In column Section Library Folder, double-click to pop up Section Library Folder then:
a. If this section’s exchange method is PSD. You will be receiving a physical device. When received you’ll copy the section library file to this location and PLMS will then automatically process it from this location the next time to go into your Edit PL screen. Select the location you will be copying your received PSD file to and click OK.

Publications Library Management System v3
134
Recommend using default location _:\plms install folder\Section Libraries
b. If this section’s exchange method is Email. You will be receiving an email with an attachment containing a section library file. When received you’ll copy the attachemnt to this location and PLMS will then automatically process it from this location the next time to go into your Edit PL screen. Select the location you will be copying your email attachment to and click OK. Recommend using default location _:\plms install folder\Section Libraries
c. If this section’s exchange method is Shared. Select that location you agreed upon with that section for exchanging the section library extract files and click OK.
4) For each section click on the section name to highlight it, then click ‘Sections’ then ‘Modify’ on the menubar. This opens up that section for updating. In column Unit PL Folder, double-click to pop up Unit PL Folder then:
a. If this section’s exchange method is PSD. Depends on if you want PLMS to directly copy the Unit PL to the device or to first place it in a holding location and you will manually copy it yourself to the device. If you want the direct write, click the device dropdown and select the correct device. (the device must be available to confirm). If you want to use an intermediate location, select that location and click OK. Recommend using default location _:\plms install folder\Unit PL . You should use the same location for all sections with method PSD.
b. If this section’s exchange method is Email. You must select an intermediate location to store the file until you send it as an email attachment, select that location and click OK. Recommend using default location _:\plms install folder\Unit PL. You should use the same location for all sections with method E-Mail.
c. If this section’s exchange method is Shared. Select that location you agreed upon with that section and click OK.
5) In column Delivery Method click the dropdown and then click PSD, Shared, or E-Mail as appropriate.
6) (optional) In column Section Library POC enter name/phone number of POC for that section.
7) Click ‘File’ then ‘Save’ on the menubar 8) Click ‘File’ then ‘Exit’ on the menubar 9) On the Edit PL screen click ‘Export Unit PL’ on the menubar 10) This ends the DCP portion. 11) For each Section. Convert your DOS PLMS Unit and Section diskettes. On
the Section Library screen click <Configure> on the menubar. Under Type of User it should be set to ‘Section w/DCP’. If not, then there was a problem with your Section and Unit diskettes. Go back to DOS PLMS and check that

Distribution Control Point (DCP)
135
your DCP name is you sectionname. If it isn’t change it. And in ‘EDIT PL/IDL’ check that a Location with your exists sectionname. If it doesn’t then either you are using the wrong section name or the DCP has not included your section in the Unit PL. In either case contact your DCP and get your sectionname added to the Unit Library. Once resolved, go back into Windows PLMS and delete the section library you just created, exit PLMS and run the Conversion process again with the updated diskettes.
12) Each section needs to set the location where their PLMS program will locate the incoming Unit PL file. The location should have already been decided. If not see: First Coordinate with the Section(s). Start PLMS and open the Section Library. On the Section Library screen click <Configure> on the menubar. Under the area ‘Unit Publication Library’ look at File Location. This is where the incoming Unit PL file will be saved. If it is not correct, click the adjacent [Browse] button, then click the dropdown button in ‘Save In:’ and locate the correct folder. Depending on the exchange method selected.
a. If the section’s exchange method is PSD. You will be receiving a physical device containing a copy of the Unit PL file. When received you’ll copy this file to the location specified on your Section Configuration File Location of Unit Publication Library. PLMS will automatically process from this location the next time you start PLMS and a new file is present. Recommend using default location _:\plms install folder\Unit PL.
b. If the section’s exchange method is Email. You will be receiving an Email from your DCP with an attachment containing a copy of the Unit PL file. When received you’ll copy this attached file to the location specified on your Section Configuration File Location of Unit Publication Library. PLMS will automatically process from this location the next time you start PLMS and a new file is present. Recommend using default location _:\plms install folder\Unit PL.
c. If the section’s exchange method is Shared. The DCP will directly save a copy of the Unit PL file at this location. Every time you start PLMS it automatically looks to see if a new Unit PL file is present and there is, processes it.
13) Each section next needs to set their PLMS program to the correct file exchange method and where to locate the outgoing Section Library extract file based upon the agreement that was made with the DCP. Again in Configure under the area ‘Section Library’. First set your configuration to the agreed upon method of exchanging files with the DCP. Click on either Portable Storage Device (PSD), E-Mail, or Shared. Next look at File Location. This is where a copy of your Section Library will be saved when you Export your Section Library. Depending on their exchange method selected:

Publications Library Management System v3
136
a. If the section’s exchange method is PSD. Depending on if you want PLMS to directly copy your Section Library to the device or to first place it in a holding location and then you will manually copy it yourself to the device. If you want the direct write, click the device dropdown and select the correct device. (the device must be available to confirm). If you want to use an intermediate location, select that location and click OK. Recommend using default location _:\plms install folder\Section Libraries.
b. If this section’s exchange method is Email. You must select an intermediate location to store the file until you send it as an email attachment, select that location and click OK. Recommend using default location _:\plms install folder\ Section Libraries.
c. If this section’s exchange method is Shared. Select that location you agreed upon with the DCP and click OK.
14) On the Section Configuration screen click ‘File’ then ‘Save’ on the menubar. That closes the screen and returns to the Section Library screen.
15) Now that the DCP and Sections are all set up, the unit should test the entire file exchange process. This will encompass the DCP sending out Unit PL files to all of the sections, each section processing their copy of the Unit PL file, then confirming it. Next each section will export their Section Library to the DCP and the DCP will process each of them.
16) This completes the setup and verification of connecting the sections to the DCP.
Manage Sections
Managing your Unit's Sections
Once you have connected a Section to your unit, there is no more action required unless something changes. There are a number of events that can occur that would require the DCP to go into his Manage Sections table and perform some kind of action. Add a new section Rename a section Modify how section exchanges files with DCP Modify where a incoming Section Library extract file is stored Modify where the outgoing of Unit PL file is stored Delete Section

Distribution Control Point (DCP)
137
When viewing Manage Sections, the following items of information are displayed.
1) Section Name – The name of the section as it is listed in the Unit PL. This must match what that section has as their section name exactly.
2) SL Date – This is the date that the DCP received the section’s Section Library extract file
3) Section Library Folder – folder and its path of where this section’s Section Library Extract file will be located when processed.
a. If the Delivery Method is Portable Storage Device (PSD) then this location is either the drive for the PSD or an intermediate holding location depending on how you decided to handle incoming PSD files
b. If the Delivery Method is E-Mail then the received Section Library Extract file must first be copied to this location and will then be processed from there.
c. If the Delivery Method is Shared then this location is where the section wrote their Section Library Extract file to and where you will read it from.
4) Unit PL Folder Folder – folder and its path of where this section’s copy of the Unit PL file will be written to when the DCP Exports the Unit PL.
a. If the Delivery Method is Portable Storage Device (PSD) then this location is either the drive for the PSD or an intermediate holding location depending on how you decided to handle outgoing PSD files
b. If the Delivery Method is E-Mail then this is the location where PLMS will write a copy of the Unit PL file to so you can email it as an attachment to those sections which with this Delivery Method.
c. If the Delivery Method is Shared then this location is where the file is written to and where the section will read it from.
5) Delivery Method – How the DCP and section will exchange their Section Library Extract file and Unit PL files .
a. Portable Storage Device (PSD) – (e.g. diskettes, Zip-disks, CDs, USB drives, etc… ) – the file is either copied to or written directly to the PSD. The PSD is then delivered to the other party (Section to DCP or DCP to Section) by whatever means available. It could be hand-carried, guard-mail, official mail, UPS, etc…
b. Email – the file is written to a specified location on your PC and then is sent as an attachment to the other party (Section to DCP or DCP to Section).

Publications Library Management System v3
138
c. Shared – The files will be written directly to and read directly from a network drive and folder that both parties (DCP & Section) have access to.
6) Section Library POC – Point of Contact responsible for that section’s library
Note:
1. The section DCP is listed for information purposes only and cannot be changed.
Add a Section to the Unit
Adding a Section to the Unit means including that section into the overall management of publications within that Unit. It could be a new section that is going to start managing their own publications library or a section that has used PLMS stand alone for years and now falls under the unit. Other many other scenarios are possible. There are two primary ways that a section can be added to your Unit.
1. Receive an existing PLMS Section Library and having it automatically add the section to the Manage Sections table
2. Manually add the Section to the Manage Sections table Rename a Section
See Section with/DCP options under Rename my Section. Change how files are exchanged with a Section
There are two files that are routinely exchanged between sections and their DCP that support the unit level implementation of PLMS:
1. Section Library Extract file 2. Copy of the Unit PL file
There are three methods in PLMS by which these files can be exchanged or delivered:
Distribution Control Point (DCP)
139
1. Portable Storage Device (PSD) – (e.g. diskettes, Zip-disks, CDs, USB drives, etc… ) – the file is either copied to or written directly to the PSD. The PSD is then delivered to the other party (Section to DCP or DCP to Section) by whatever means available. It could be hand-carried, guard-mail, official mail, UPS, etc…
2. Email – the file is written to a specified location on your PC and then is sent as an attachment to the other party (Section to DCP or DCP to Section).
3. Shared – The files will be written directly to and read directly from a network drive and folder that both parties (DCP & Section) have access to.
Once the file exchange method is established, it might need to be changed to accommodate changing technology or circumstances. For instance a unit may be deployed and no longer can exchange files on a shared server location, but must now exchange the files via PSD also known as sneaker net. Or a section who used to use email has now gained connectivity and can exchange file via a shared server. If the Delivery Method remains Shared but the location folder(s) used to exchange the Section Library Extract file and/or Copy of the Unit PL file needs to be changed:
1) DCP. Start PLMS and select the Section name ‘DCP’, click [Continue]. On the Section Library screen click ‘DCP’ then ‘Manage Sections’ on the menubar
2) Click on the Section Name whose folder locations is to be changed 3) Click ‘Sections’ then ‘Modify’ on the menubar 4) If the Section Library Folder is to be changed, double-click on the
existing Section Library Folder location of that section and the ‘Section Library Folder’ pop us screen appears. To change the drive click the down button and select the correct drive. Listed below will be the folders of the first level of that drive. Click on the folders/path until you select to new folder where the Section Library Extract file will be written by the section and read by the DCP. Click OK.
5) If the Unit PL Folder is to be changed, double-click on the existing Unit PL Folder location of that section and the ‘Unit PL Folder ‘ pop us screen appears. To change the drive click the down button and select the correct drive. Listed below will be the folders of the first level of that drive. Click on the folders/path until you select to new folder where the copy of the Unit PL file will be written by the DCP and read by the section. Click OK.
6) Click ‘File’ then ‘Save’ on the menubar.

Publications Library Management System v3
140
7) The section needs to change their folders in Configuration to match that of the DCP.
If the Delivery Method was PSD or E-Mail but id being changed to Shared.
1) DCP. Start PLMS and select the Section name ‘DCP’, click [Continue]. On the Section Library screen click ‘DCP’ then ‘Manage Sections’ on the menubar
2) Click on the Section Name that is being changed 3) Click ‘Sections’ then ‘Modify’ on the menubar 4) To change the Section Library Folder double-click on the existing
Section Library Folder location of that section and the ‘Section Library Folder’ pop us screen appears. To change the drive click the down button and select the correct drive. Listed below will be the folders of the first level of that drive. Click on the folders/path until you select to new folder where the Section Library Extract file will be written by the section and read by the DCP. Click OK.
5) To change the Unit PL Folder double-click on the existing Unit PL Folder location of that section and the ‘Unit PL Folder ‘ pop us screen appears. To change the drive click the down button and select the correct drive. Listed below will be the folders of the first level of that drive. Click on the folders/path until you select to new folder where the copy of the Unit PL file will be written by the DCP and read by the section. Click OK.
6) Click on the dropdown button in Delivery Method and click Shared. 7) Click ‘File’ then ‘Save’ on the menubar 8) The section needs to change their folders and method in Configuration
to match that of the DCP. If the Delivery Method was Shared but id being changed to PSD or E-Mail.
1) DCP. Start PLMS and select the Section name ‘DCP’, click [Continue]. On the Section Library screen click ‘DCP’ then ‘Manage Sections’ on the menubar
2) Click on the Section Name that is being changed 3) Click ‘Sections’ then ‘Modify’ on the menubar 4) To change the Section Library Folder double-click on the existing
Section Library Folder location of that section and the ‘Section Library Folder’ pop us screen appears. To change the drive click the down button and select the correct drive. Listed below will be the folders of the first level of that drive. Click on the folders/path until you select to new folder where the file will be read by the DCP. By default its

Distribution Control Point (DCP)
141
recommended that the location be _:\plms install folder\ Section Libraries. Click OK.
5) To change the Unit PL Folder double-click on the existing Unit PL Folder location of that section and the ‘Unit PL Folder ‘ pop us screen appears. To change the drive click the down button and select the correct drive. Listed below will be the folders of the first level of that drive. Click on the folders/path until you select to new folder where the file will be read by the DCP. By default its recommended that the location be _:\plms install folder\Unit PL. Click OK.
6) Click on the dropdown button in Delivery Method and click either PSD or E-Mail as appropriate.
7) Click ‘File’ then ‘Save’ on the menubar 9) The section needs to change their folders and method in Configuration
also. Delete a Section from the Unit
Deleting a Section to the Unit means removing that section from the overall management of publications within that Unit. This could be because that section has been absorbed into another section, or it no longer will be using PLMS for whatever reason, or that section will be managed through a different DCP, or other many other scenarios are possible. To Delete a section from your unit PL:
10) DCP. Start PLMS and select the Section name ‘DCP’, click [Continue]. On the Section Library screen click ‘DCP’ then ‘Manage Sections’ on the menubar
11) Click on the Section Name which is being deleted 12) Click ‘Sections’ then ‘Delete’ on the menubar 13) A ‘Delete Section Library sectionname’ comfirmation pop up will appear
asking to conform the deletion. Click ‘Yes’ to conform or ‘No’ to cancel the deletion. Note: After the deletion is confirmed, the section will still remain listed here until you either ‘Save’ the updates or Exit the ‘Manage Sections’ screen. Until that time, you can recall a deleted section by clicking on the deleted Section Name, then right clicking. A Restore Option box will appear. Click ‘Restore’ and the Section will be restored. To cancel this action, simply click off the Restore Option box.

Publications Library Management System v3
142
14) Click ‘File’ then ‘Save’ or ‘File’ then ‘Exit’ on the menubar to complete the deletion.

143
Index
A
Add 32, 33, 50, 52 Location in my Section 50 Location(s) to a specific PCN in my SL 32 On-Hand Quantity 33, 52 On-Order Quantity 33, 52 Required Quantity 33, 52
Add a PCN to my Section Library 28 Add a Section to the Unit 138 Add an ID Number to my Section Library 30 Add Associations to an IdNo/SSIC 32 Add PCN to addressStreetUnit PL 116 Add/Change Local Publications to my Section
Library SL 27 Adding a Section through Manage Sections 128 All Locations Inventory 83 Automatically delete reports over 120 days old79
C
Change Location(s) for a specific PCN 32 Locations in Section 62 On-Hand Quantity 33 On-Order Quantity 33, 52 Required Quantity 33, 52
Change how files are exchanged with a unit 138 Conversion 11
Convert Old DOS PLMS files 11 Conversion Exception Listing 106 Converting a addressStreetDOS PLMS Unit PL
133 Create a DCP 111 Create addressStreetUnit PL Report 122
D
Data 41 Download latest USMC Master file of
publications 41 Export Section Library (SL) 42 Export Unit Publication Library (PL) 121
DCP Responsibilities 20 Delete 12, 58, 59
Id Number 59 Local Publications 36 My Section Library 38 Old DOS version 12 On-Hand Quantities 52 On-Order Quantities 52 Required Quantities 52 Stock Publication 58
Delete a PCN from my Section Library SL 39 Delete a Section from the Unit 141 DOS PLMS 11 DOS version PLMS 12
Delete 12 Download 41
Download PLMS 41 Download the latest Copy of MasterList 41
E
Exit 41 Saving my Section Library (SL) 64 Without saving my Section Library (SL) 41
Export 4 Section Library 42 Unit Publication Listing 18
F
Find 68 First Coordinate with the Section s 124 For the MCPDS Clerk 97
H
HQMC 1, 4, 21, 41 Download PLMS from HQMC website 41 PLMS Sponsor 9, 21
I
Id Number 59 Remove from my Section Library (SL) 59
Import 18
K
Key features of PLMS 1, 3
L
Load my Section Library SL 47

Publications Library Management System v3
144
Locate a Publication not physically present in my Section 48
Locate my Existing Section Library SL 49 Locations
For a specific Section 50
M
Making sure I am ready to go 21 Managing your addressStreetUnit PL 113 Managing your Unit s Sections 136 Master List 4, 18, 22
Publications 22 MCPDS Change Request 95 MCPDS Unit Change Request 118 Move 53
Move Section Library 53
N
NEA list 90 NONSTOCKED PUB. see MCO 5600.31 74
O
Order Publications 54
P
PCN 1, 3, 4, 15, 18, 19, 21, 22, 41 Change location(s) for a specific PCN 34 Electronic Distribution Only (placeEDO) 4 Master List 22
PCN by Group list 79, 87 PCN by Group list by Short Title 81 PCN Group Inventory 86 PLMS 1, 3, 4, 8, 9, 12, 15, 18, 19, 21, 22, 41
Definition of 4 For Sections 1 Key features 1 Requirements 8 Sponsor 9 Users 18 Welcome 1
PLMS Configurations 15 Printing reports 76
Q
Quantities 4 On-Hand 52
On-Order 52 Required 52
R
Receiving a New Section Library 125 RECONCILIATION 99 Remove Associations to an IdNo/SSIC 60 Remove PCN from addressStreetUnit PL 117 Rename a Section 138 Required Id Number list 82, 85 Required PCN List 79 Required PCN list by Short Title 80 Responsibilities 4, 18, 21
Section 19
S
Save 21 Section Library (SL) 64
Save my addressStreetUnit PL 65 Section 1, 3, 4, 18, 19, 21, 22
Responsibilities 19 Section Change Report 91 Section Library (SL) 3, 4, 18, 19, 21, 22, 53
Change Section Name 63 Maintain locations 18 Maintain quantities 52 Move Section Library 53
Selected Id Number Inventory 82 Selected Id Number s 88 Selected Location Inventory 84 Sending Reports 77 Submit a NAVMC 10772 66 Supercedes Publication <00000000000> 73
T
Terms and Abbreviations 4
U
Unit 1, 3, 4, 18, 19, 21 Update 3, 18, 19, 21 Use the USMC Master List 23, 70 Users 3, 4, 15, 18, 21, 41
V
View Information on any PCN 73
Index
145
Viewing reports 75
W
What does the DCP do? 112
Working with your MCPDS clerk 94