PlatformSettings · Firepower-chassis /fabric-interconnect/ipv6-config # set out-of-band ipv6...
44
Platform Settings • Changing the Management IP Address, on page 1 • Setting the Date and Time, on page 3 • Configuring SSH, on page 8 • Configuring Telnet, on page 8 • Configuring SNMP, on page 9 • Configuring HTTPS, on page 17 • Configuring AAA, on page 29 • Configuring Syslog, on page 40 • Configuring DNS Servers, on page 43 Changing the Management IP Address Before you begin You can change the management IP address on the Firepower 9300 chassis from the FXOS CLI. After changing the management IP address, you will need to reestablish any connections to Firepower Chassis Manager or the FXOS CLI using the new address. Note Procedure Step 1 Connect to the FXOS CLI (see Accessing the FXOS CLI). Step 2 To configure an IPv4 management IP address: a) Set the scope for fabric-interconnect a: Firepower-chassis# scope fabric-interconnect a b) To view the current management IP address, enter the following command: Firepower-chassis /fabric-interconnect # show c) Enter the following command to configure a new management IP address and gateway: Platform Settings 1
Transcript of PlatformSettings · Firepower-chassis /fabric-interconnect/ipv6-config # set out-of-band ipv6...

Platform Settings
• Changing the Management IP Address, on page 1• Setting the Date and Time, on page 3• Configuring SSH, on page 8• Configuring Telnet, on page 8• Configuring SNMP, on page 9• Configuring HTTPS, on page 17• Configuring AAA, on page 29• Configuring Syslog, on page 40• Configuring DNS Servers, on page 43
Changing the Management IP AddressBefore you begin
You can change the management IP address on the Firepower 9300 chassis from the FXOS CLI.
After changing the management IP address, you will need to reestablish any connections to Firepower ChassisManager or the FXOS CLI using the new address.
Note
Procedure
Step 1 Connect to the FXOS CLI (see Accessing the FXOS CLI).Step 2 To configure an IPv4 management IP address:
a) Set the scope for fabric-interconnect a:
Firepower-chassis# scope fabric-interconnect a
b) To view the current management IP address, enter the following command:
Firepower-chassis /fabric-interconnect # show
c) Enter the following command to configure a new management IP address and gateway:
Platform Settings1

Firepower-chassis /fabric-interconnect # set out-of-band ip ip_address netmask network_mask gwgateway_ip_address
d) Commit the transaction to the system configuration:
Firepower-chassis /fabric-interconnect* # commit-buffer
Step 3 To configure an IPv6 management IP address:a) Set the scope for fabric-interconnect a:
Firepower-chassis# scope fabric-interconnect a
b) Set the scope for management IPv6 configuration:
Firepower-chassis /fabric-interconnect # scope ipv6-config
c) To view the current management IPv6 address, enter the following command:
Firepower-chassis /fabric-interconnect/ipv6-config # show ipv6-if
d) Enter the following command to configure a new management IP address and gateway:
Firepower-chassis /fabric-interconnect/ipv6-config # set out-of-band ipv6 ipv6_address ipv6-prefixprefix_length ipv6-gw gateway_address
e) Commit the transaction to the system configuration:
Firepower-chassis /fabric-interconnect/ipv6-config* # commit-buffer
Example
The following example configures an IPv4 management interface and gateway:
Firepower-chassis# scope fabric-interconnect aFirepower-chassis /fabric-interconnect # show
Fabric Interconnect:ID OOB IP Addr OOB Gateway OOB Netmask OOB IPv6 Address OOB IPv6 Gateway
Prefix Operability---- --------------- --------------- --------------- ---------------- ----------------
------ -----------A 192.0.2.112 192.0.2.1 255.255.255.0 :: ::
64 OperableFirepower-chassis /fabric-interconnect # set out-of-band ip 192.0.2.111 netmask 255.255.255.0gw 192.0.2.1Warning: When committed, this change may disconnect the current CLI sessionFirepower-chassis /fabric-interconnect* #commit-bufferFirepower-chassis /fabric-interconnect #
The following example configures an IPv6 management interface and gateway:
Firepower-chassis# scope fabric-interconnect aFirepower-chassis /fabric-interconnect # scope ipv6-configFirepower-chassis /fabric-interconnect/ipv6-config # show ipv6-if
Platform Settings2
Platform SettingsChanging the Management IP Address

Management IPv6 Interface:IPv6 Address Prefix IPv6 Gateway----------------------------------- ---------- ------------2001::8998 64 2001::1
Firepower-chassis /fabric-interconnect/ipv6-config # set out-of-band ipv6 2001::8999ipv6-prefix 64 ipv6-gw 2001::1Firepower-chassis /fabric-interconnect/ipv6-config* # commit-bufferFirepower-chassis /fabric-interconnect/ipv6-config #
Setting the Date and TimeUse the CLI commands described below to configure the network time protocol (NTP) on the system, to setthe date and time manually, or to view the current system time.
NTP settings are automatically synced between the Firepower 9300 chassis and any logical devices installedon the chassis.
Setting the Time Zone
Procedure
Step 1 Enter system mode:
Firepower-chassis# scope system
Step 2 Enter system services mode:
Firepower-chassis /system # scope services
Step 3 Set the time zone:
Firepower-chassis /system/services # set timezone
At this point, you are prompted to enter a number corresponding to your continent, country, and time zoneregion. Enter the appropriate information at each prompt.
When you have finished specifying the location information, you are prompted to confirm that the correcttime zone information is being set. Enter 1 (yes) to confirm, or 2 (no) to cancel the operation.
Step 4 To view the configured time zone:
Firepower-chassis /system/services # top
Firepower-chassis# show timezone
Example
The following example configures the time zone to the Pacific time zone region, commits thetransaction, and displays the configured time zone:
Platform Settings3
Platform SettingsSetting the Date and Time

Firepower-chassis# scope systemFirepower-chassis /system # scope servicesFirepower-chassis /system/services # set timezonePlease identify a location so that time zone rules can be set correctly.Please select a continent or ocean.1) Africa 4) Arctic Ocean 7) Australia 10) Pacific Ocean2) Americas 5) Asia 8) Europe3) Antarctica 6) Atlantic Ocean 9) Indian Ocean#? 2Please select a country.1) Anguilla 28) Haiti2) Antigua & Barbuda 29) Honduras3) Argentina 30) Jamaica4) Aruba 31) Martinique5) Bahamas 32) Mexico6) Barbados 33) Montserrat7) Belize 34) Nicaragua8) Bolivia 35) Panama9) Brazil 36) Paraguay10) Canada 37) Peru11) Caribbean Netherlands 38) Puerto Rico12) Cayman Islands 39) St Barthelemy13) Chile 40) St Kitts & Nevis14) Colombia 41) St Lucia15) Costa Rica 42) St Maarten (Dutch part)16) Cuba 43) St Martin (French part)17) Curacao 44) St Pierre & Miquelon18) Dominica 45) St Vincent19) Dominican Republic 46) Suriname20) Ecuador 47) Trinidad & Tobago21) El Salvador 48) Turks & Caicos Is22) French Guiana 49) United States23) Greenland 50) Uruguay24) Grenada 51) Venezuela25) Guadeloupe 52) Virgin Islands (UK)26) Guatemala 53) Virgin Islands (US)27) Guyana#? 49Please select one of the following time zone regions.1) Eastern Time2) Eastern Time - Michigan - most locations3) Eastern Time - Kentucky - Louisville area4) Eastern Time - Kentucky - Wayne County5) Eastern Time - Indiana - most locations6) Eastern Time - Indiana - Daviess, Dubois, Knox & Martin Counties7) Eastern Time - Indiana - Pulaski County8) Eastern Time - Indiana - Crawford County9) Eastern Time - Indiana - Pike County10) Eastern Time - Indiana - Switzerland County11) Central Time12) Central Time - Indiana - Perry County13) Central Time - Indiana - Starke County14) Central Time - Michigan - Dickinson, Gogebic, Iron & Menominee Counties15) Central Time - North Dakota - Oliver County16) Central Time - North Dakota - Morton County (except Mandan area)17) Central Time - North Dakota - Mercer County18) Mountain Time19) Mountain Time - south Idaho & east Oregon20) Mountain Standard Time - Arizona (except Navajo)21) Pacific Time22) Pacific Standard Time - Annette Island, Alaska23) Alaska Time24) Alaska Time - Alaska panhandle25) Alaska Time - southeast Alaska panhandle
Platform Settings4
Platform SettingsSetting the Time Zone

26) Alaska Time - Alaska panhandle neck27) Alaska Time - west Alaska28) Aleutian Islands29) Hawaii#? 21
The following information has been given:
United StatesPacific Time
Therefore timezone 'America/Los_Angeles' will be set.Local time is now: Wed Jun 24 07:39:25 PDT 2015.Universal Time is now: Wed Jun 24 14:39:25 UTC 2015.Is the above information OK?1) Yes2) No#? 1Firepower-chassis /system/services* # commit-bufferFirepower-chassis /system/services # topFirepower-chassis# show timezoneTimezone: America/Los_Angeles (Pacific Time)Firepower-chassis#
Setting the Date and Time Using NTPNTP is used to implement a hierarchical system of servers that provide a precisely synchronized time amongnetwork systems. This kind of accuracy is required for time-sensitive operations, such as validating CRLs,which include a precise time stamp.
Procedure
Step 1 Enter system mode:
Firepower-chassis# scope system
Step 2 Enter system services mode:
Firepower-chassis /system # scope services
Step 3 Configure the system to use the NTP server with the specified hostname, IPv4, or IPv6 address:
Firepower-chassis /system/services # create ntp-server {hostname | ip-addr | ip6-addr}
Step 4 Commit the transaction to the system configuration:
Firepower-chassis /system/services # commit-buffer
Step 5 To view the synchronization status for all configured NTP servers:
Firepower-chassis /system/services # show ntp-server
Step 6 To view the synchronization status for a specific NTP server:
Firepower-chassis /system/services # scope ntp-server {hostname | ip-addr | ip6-addr}
Platform Settings5
Platform SettingsSetting the Date and Time Using NTP

Firepower-chassis /system/services/ntp-server # show detail
Example
The following example configures an NTP server with the IP address 192.168.200.101 and commitsthe transaction:Firepower-chassis# scope systemFirepower-chassis /system # scope servicesFirepower-chassis /system/services # create ntp-server 192.168.200.101Firepower-chassis /system/services* # commit-bufferFirepower-chassis /system/services #
The following example configures an NTP server with the IPv6 address 4001::6 and commits thetransaction:Firepower-chassis# scope systemFirepower-chassis /system # scope servicesFirepower-chassis /system/services # create ntp-server 4001::6Firepower-chassis /system/services* # commit-bufferFirepower-chassis /system/services #
Deleting an NTP Server
Procedure
Step 1 Enter system mode:
Firepower-chassis# scope system
Step 2 Enter system services mode:
Firepower-chassis /system # scope services
Step 3 Delete the NTP server with the specified hostname, IPv4, or IPv6 address:
Firepower-chassis /system/services # delete ntp-server {hostname | ip-addr | ip6-addr}
Step 4 Commit the transaction to the system configuration:
Firepower-chassis /system/services # commit-buffer
Example
The following example deletes the NTP server with the IP address 192.168.200.101 and commitsthe transaction:Firepower-chassis# scope systemFirepower-chassis /system # scope services
Platform Settings6
Platform SettingsDeleting an NTP Server

Firepower-chassis /system/services # delete ntp-server 192.168.200.101Firepower-chassis /system/services* # commit-bufferFirepower-chassis /system/services #
The following example deletes the NTP server with the IPv6 address 4001::6 and commits thetransaction:Firepower-chassis# scope systemFirepower-chassis /system # scope servicesFirepower-chassis /system/services # delete ntp-server 4001::6Firepower-chassis /system/services* # commit-bufferFirepower-chassis /system/services #
Setting the Date and Time ManuallyThis section describes how to set the date and time manually on the Firepower chassis. System clockmodifications take effect immediately.
If the system clock is currently being synchronized with an NTP server, you will not be able to set the dateand time manually.
Note
Procedure
Step 1 Enter system mode:
Firepower-chassis# scope system
Step 2 Enter system services mode:
Firepower-chassis /system # scope services
Step 3 Configure the system clock:
Firepower-chassis /system/services # set clock month day year hour min sec
For month, use the first three digits of the month. Hours must be entered using the 24-hour format, where 7pm would be entered as 19.
System clock modifications take effect immediately. You do not need to commit the buffer.
Example
The following example configures the system clock:Firepower-chassis# scope systemFirepower-chassis /system # scope servicesFirepower-chassis /system/services # set clock jun 24 2015 15 27 00Firepower-chassis /system/services #
Platform Settings7
Platform SettingsSetting the Date and Time Manually

Configuring SSHThe following procedure describes how to enable or disable SSH access to the Firepower chassis, and toenable the FXOS chassis as an SSH client. SSH is enabled by default.
Procedure
Step 1 Enter system mode:
Firepower-chassis # scope system
Step 2 Enter system services mode:
Firepower-chassis /system # scope services
Step 3 To configure SSH access to the Firepower chassis, do one of the following:
• To allow SSH access to the Firepower chassis, enter the following command:
Firepower-chassis /system/services # enable ssh-server
• To disallow SSH access to the Firepower chassis, enter the following command:
Firepower-chassis /system/services # disable ssh-server
Step 4 Commit the transaction to the system configuration:
Firepower /system/services # commit-buffer
Example
The following example enables SSH access to the Firepower chassis and commits the transaction:Firepower# scope systemFirepower /system # scope servicesFirepower /system/services # enable ssh-serverFirepower /system/services* # commit-bufferFirepower /system/services #
Configuring TelnetThe following procedure describes how to enable or disable Telnet access to the Firepower chassis. Telnet isdisabled by default.
Telnet configuration is currently only available using the CLI.Note
Platform Settings8
Platform SettingsConfiguring SSH
Procedure
Step 1 Enter system mode:
Firepower-chassis # scope system
Step 2 Enter system services mode:
Firepower-chassis /system # scope services
Step 3 To configure Telnet access to the Firepower chassis, do one of the following:
• To allow Telnet access to the Firepower chassis, enter the following command:
Firepower-chassis /system/services # enable telnet-server
• To disallow Telnet access to the Firepower chassis, enter the following command:
Firepower-chassis /system/services # disable telnet-server
Step 4 Commit the transaction to the system configuration:
Firepower /system/services # commit-buffer
Example
The following example enables Telnet and commits the transaction:Firepower-chassis# scope systemFirepower-chassis /system # scope servicesFirepower-chassis /services # enable telnet-serverFirepower-chassis /services* # commit-bufferFirepower-chassis /services #
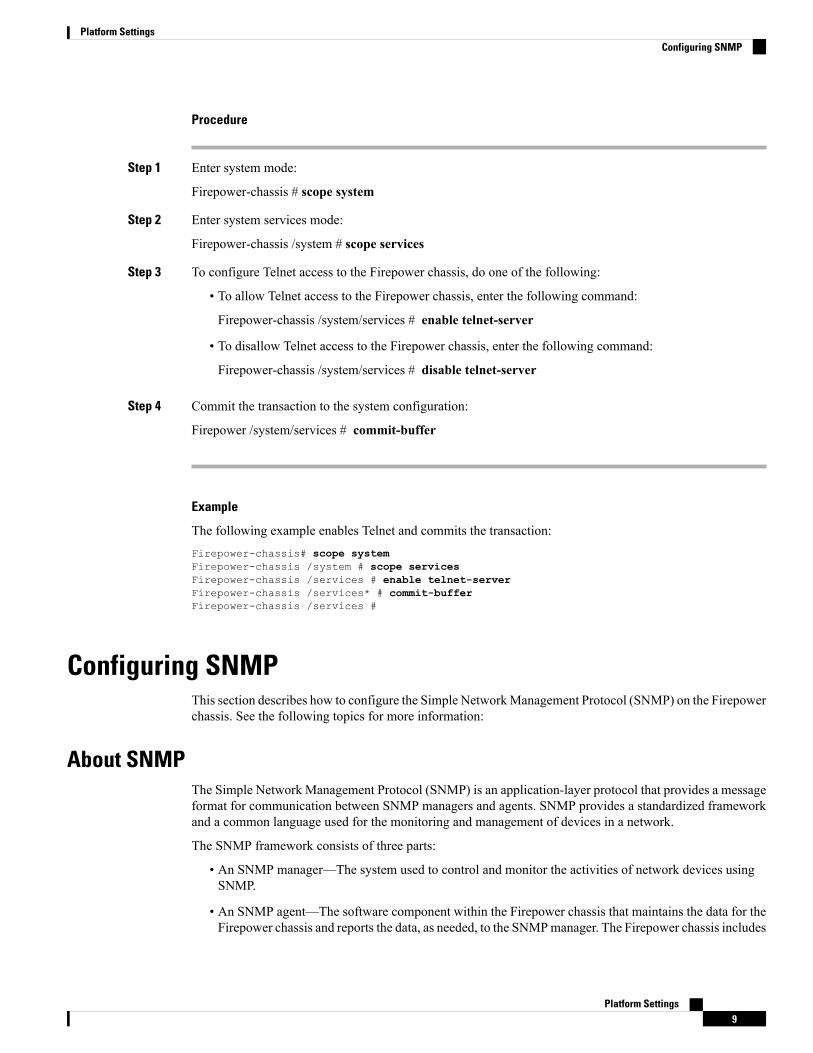
Configuring SNMPThis section describes how to configure the Simple NetworkManagement Protocol (SNMP) on the Firepowerchassis. See the following topics for more information:
About SNMPThe Simple Network Management Protocol (SNMP) is an application-layer protocol that provides a messageformat for communication between SNMP managers and agents. SNMP provides a standardized frameworkand a common language used for the monitoring and management of devices in a network.
The SNMP framework consists of three parts:
• An SNMP manager—The system used to control and monitor the activities of network devices usingSNMP.
• An SNMP agent—The software component within the Firepower chassis that maintains the data for theFirepower chassis and reports the data, as needed, to the SNMPmanager. The Firepower chassis includes
Platform Settings9
Platform SettingsConfiguring SNMP

the agent and a collection of MIBs. To enable the SNMP agent and create the relationship between themanager and agent, enable and configure SNMP in the Firepower Chassis Manager or the FXOS CLI.
• A managed information base (MIB)—The collection of managed objects on the SNMP agent.
The Firepower chassis supports SNMPv1, SNMPv2c and SNMPv3. Both SNMPv1 and SNMPv2c use acommunity-based form of security. SNMP is defined in the following:
• RFC 3410 (http://tools.ietf.org/html/rfc3410)
• RFC 3411 (http://tools.ietf.org/html/rfc3411)
• RFC 3412 (http://tools.ietf.org/html/rfc3412)
• RFC 3413 (http://tools.ietf.org/html/rfc3413)
• RFC 3414 (http://tools.ietf.org/html/rfc3414)
• RFC 3415 (http://tools.ietf.org/html/rfc3415)
• RFC 3416 (http://tools.ietf.org/html/rfc3416)
• RFC 3417 (http://tools.ietf.org/html/rfc3417)
• RFC 3418 (http://tools.ietf.org/html/rfc3418)
• RFC 3584 (http://tools.ietf.org/html/rfc3584)
SNMP NotificationsA key feature of SNMP is the ability to generate notifications from an SNMP agent. These notifications donot require that requests be sent from the SNMP manager. Notifications can indicate improper userauthentication, restarts, the closing of a connection, loss of connection to a neighbor router, or other significantevents.
The Firepower chassis generates SNMP notifications as either traps or informs. Traps are less reliable thaninforms because the SNMP manager does not send any acknowledgment when it receives a trap, and theFirepower chassis cannot determine if the trap was received. An SNMP manager that receives an informrequest acknowledges the message with an SNMP response protocol data unit (PDU). If the Firepower chassisdoes not receive the PDU, it can send the inform request again.
SNMP Security Levels and PrivilegesSNMPv1, SNMPv2c, and SNMPv3 each represent a different security model. The security model combineswith the selected security level to determine the security mechanism applied when the SNMP message isprocessed.
The security level determines the privileges required to view the message associated with an SNMP trap. Theprivilege level determines whether the message needs to be protected from disclosure or authenticated. Thesupported security level depends upon which security model is implemented. SNMP security levels supportone or more of the following privileges:
• noAuthNoPriv—No authentication or encryption
• authNoPriv—Authentication but no encryption
Platform Settings10
Platform SettingsSNMP Notifications

• authPriv—Authentication and encryption
SNMPv3 provides for both security models and security levels. A security model is an authentication strategythat is set up for a user and the role in which the user resides. A security level is the permitted level of securitywithin a security model. A combination of a security model and a security level determines which securitymechanism is employed when handling an SNMP packet.
Supported Combinations of SNMP Security Models and LevelsThe following table identifies what the combinations of security models and levels mean.
Table 1: SNMP Security Models and Levels
What HappensEncryptionAuthenticationLevelModel
Uses a community string match for authentication.NoCommunitystring
noAuthNoPrivv1
Uses a community string match for authentication.NoCommunitystring
noAuthNoPrivv2c
Uses a username match for authentication.NoUsernamenoAuthNoPrivv3
Provides authentication based on the HMAC SecureHash Algorithm (SHA).
NoHMAC-SHAauthNoPrivv3
Provides authentication based on the HMAC-SHAalgorithm. Provides Data Encryption Standard (DES)56-bit encryption in addition to authentication basedon the Cipher Block Chaining (CBC) DES (DES-56)standard.
DESHMAC-SHAauthPrivv3
SNMPv3 Security FeaturesSNMPv3 provides secure access to devices by a combination of authenticating and encrypting frames overthe network. SNMPv3 authorizes management operations only by configured users and encrypts SNMPmessages. The SNMPv3User-Based SecurityModel (USM) refers to SNMPmessage-level security and offersthe following services:
• Message integrity—Ensures that messages have not been altered or destroyed in an unauthorized mannerand that data sequences have not been altered to an extent greater than can occur non-maliciously.
• Message origin authentication—Ensures that the claimed identity of the user on whose behalf receiveddata was originated is confirmed.
• Message confidentiality and encryption—Ensures that information is not made available or disclosed tounauthorized individuals, entities, or processes.
SNMP SupportThe Firepower chassis provides the following support for SNMP:
Platform Settings11
Platform SettingsSupported Combinations of SNMP Security Models and Levels

Support for MIBs
The Firepower chassis supports read-only access to MIBs.
For information about the specific MIBs available and where you can obtain them, see the Cisco FXOS MIBReference Guide.
Authentication Protocol for SNMPv3 Users
The Firepower chassis supports the HMAC-SHA-96 (SHA) authentication protocol for SNMPv3 users.
AES Privacy Protocol for SNMPv3 Users
The Firepower chassis uses Advanced Encryption Standard (AES) as one of the privacy protocols for SNMPv3message encryption and conforms with RFC 3826.
The privacy password, or priv option, offers a choice of DES or 128-bit AES encryption for SNMP securityencryption. If you enable AES-128 configuration and include a privacy password for an SNMPv3 user, theFirepower chassis uses the privacy password to generate a 128-bit AES key. The AES privacy password canhave a minimum of eight characters. If the passphrases are specified in clear text, you can specify a maximumof 64 characters.
Enabling SNMP and Configuring SNMP Properties
Procedure
Step 1 Enter monitoring mode:
Firepower-chassis# scope monitoring
Step 2 Enable SNMP:
Firepower-chassis /monitoring # enable snmp
Step 3 Enter snmp community mode:
Firepower-chassis /monitoring # set snmp community
After you enter the set snmp community command, you are prompted to enter the SNMP community.
Step 4 Specify the SNMP community. Use the community name as a password. The community name can be anyalphanumeric string up to 32 characters.
Firepower-chassis /monitoring # Enter a snmp community: community-name
Step 5 Specify the system contact person responsible for SNMP. The system contact name can be any alphanumericstring up to 255 characters, such as an email address or name and telephone number.
Firepower-chassis /monitoring # set snmp syscontact system-contact-name
Step 6 Specify the location of the host on which the SNMP agent (server) runs. The system location name can beany alphanumeric string up to 512 characters.
Firepower-chassis /monitoring # set snmp syslocation system-location-name
Step 7 Commit the transaction to the system configuration:
Platform Settings12
Platform SettingsEnabling SNMP and Configuring SNMP Properties

Firepower-chassis /monitoring # commit-buffer
Example
The following example enables SNMP, configures an SNMP community named SnmpCommSystem2,configures a system contact named contactperson, configures a contact location named systemlocation,and commits the transaction:Firepower-chassis# scope monitoringFirepower-chassis /monitoring # enable snmpFirepower-chassis /monitoring* # set snmp communityEnter a snmp community: SnmpCommSystem2Firepower-chassis /monitoring* # set snmp syscontact contactperson1Firepower-chassis /monitoring* # set snmp syslocation systemlocationFirepower-chassis /monitoring* # commit-bufferFirepower-chassis /monitoring #
What to do next
Create SNMP traps and users.
Creating an SNMP Trap
Procedure
Step 1 Enter monitoring mode:
Firepower-chassis# scope monitoring
Step 2 Enable SNMP:
Firepower-chassis /monitoring # enable snmp
Step 3 Create an SNMP trap with the specified host name, IPv4 address, or IPv6 address.
Firepower-chassis /monitoring # create snmp-trap {hostname | ip-addr | ip6-addr}
Step 4 Specify the SNMP community name to be used for the SNMP trap:
Firepower-chassis /monitoring/snmp-trap # set community community-name
Step 5 Specify the port to be used for the SNMP trap:
Firepower-chassis /monitoring/snmp-trap # set port port-num
Step 6 Specify the SNMP version and model used for the trap:
Firepower-chassis /monitoring/snmp-trap # set version {v1 | v2c | v3}
Step 7 (Optional) Specify the type of trap to send.
Firepower-chassis /monitoring/snmp-trap # set notificationtype {traps | informs}
This can be:
Platform Settings13
Platform SettingsCreating an SNMP Trap

• traps if you select v2c or v3 for the version.
• informs if you select v2c for the version.
An inform notification can be sent only if you select v2c for the version.Note
Step 8 (Optional) If you select v3 for the version, specify the privilege associated with the trap:
Firepower-chassis /monitoring/snmp-trap # set v3privilege {auth | noauth | priv}
This can be:
• auth—Authentication but no encryption
• noauth—No authentication or encryption
• priv—Authentication and encryption
Step 9 Commit the transaction to the system configuration:
Firepower-chassis /monitoring/snmp-trap # commit-buffer
Example
The following example enables SNMP, creates an SNMP trap using an IPv4 address, specifies thatthe trap will use the SnmpCommSystem2 community on port 2, sets the version to v3, sets thenotification type to traps, sets the v3 privilege to priv, and commits the transaction:Firepower-chassis# scope monitoringFirepower-chassis /monitoring # enable snmpFirepower-chassis /monitoring* # create snmp-trap 192.168.100.112Firepower-chassis /monitoring/snmp-trap* # set community SnmpCommSystem2Firepower-chassis /monitoring/snmp-trap* # set port 2Firepower-chassis /monitoring/snmp-trap* # set version v3Firepower-chassis /monitoring/snmp-trap* # set notificationtype trapsFirepower-chassis /monitoring/snmp-trap* # set v3privilege privFirepower-chassis /monitoring/snmp-trap* # commit-bufferFirepower-chassis /monitoring/snmp-trap #
The following example enables SNMP, creates an SNMP trap using an IPv6 address, specifies thatthe trap will use the SnmpCommSystem3 community on port 2, sets the version to v3, sets thenotification type to traps, sets the v3 privilege to priv, and commits the transaction:Firepower-chassis# scope monitoringFirepower-chassis /monitoring # enable snmpFirepower-chassis /monitoring* # create snmp-trap 2001::1Firepower-chassis /monitoring/snmp-trap* # set community SnmpCommSystem3Firepower-chassis /monitoring/snmp-trap* # set port 2Firepower-chassis /monitoring/snmp-trap* # set version v3Firepower-chassis /monitoring/snmp-trap* # set notificationtype trapsFirepower-chassis /monitoring/snmp-trap* # set v3privilege privFirepower-chassis /monitoring/snmp-trap* # commit-bufferFirepower-chassis /monitoring/snmp-trap #
Platform Settings14
Platform SettingsCreating an SNMP Trap
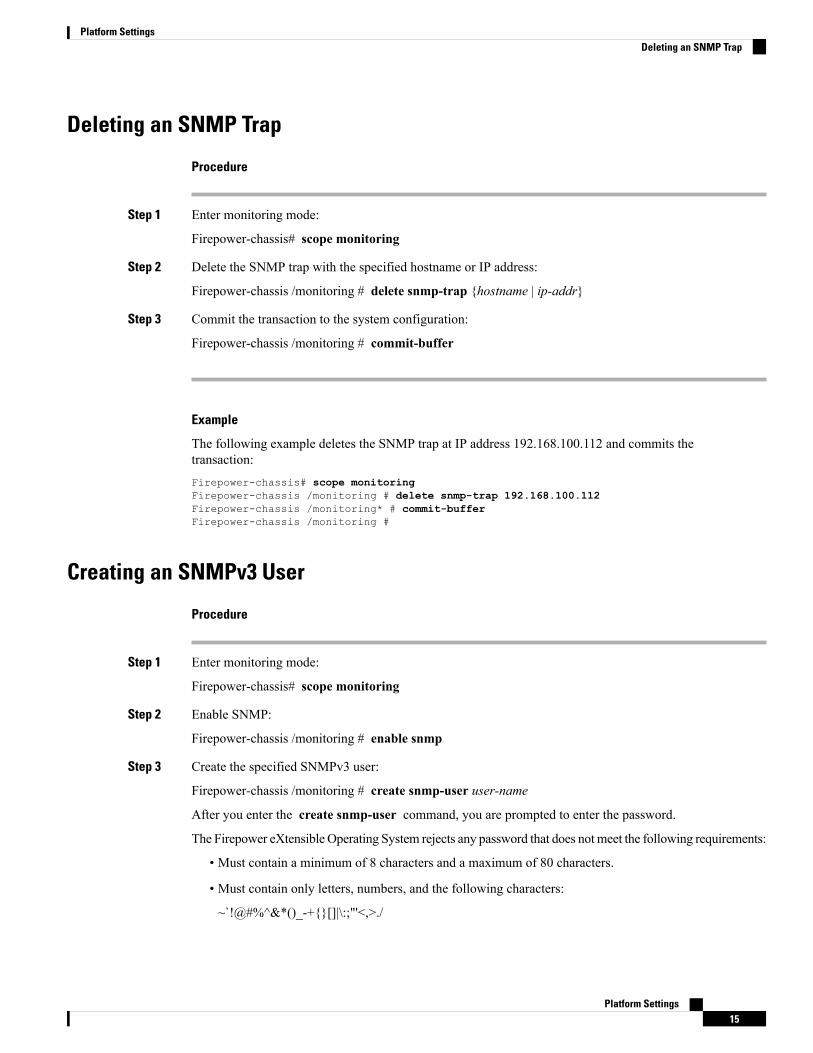
Deleting an SNMP Trap
Procedure
Step 1 Enter monitoring mode:
Firepower-chassis# scope monitoring
Step 2 Delete the SNMP trap with the specified hostname or IP address:
Firepower-chassis /monitoring # delete snmp-trap {hostname | ip-addr}
Step 3 Commit the transaction to the system configuration:
Firepower-chassis /monitoring # commit-buffer
Example
The following example deletes the SNMP trap at IP address 192.168.100.112 and commits thetransaction:Firepower-chassis# scope monitoringFirepower-chassis /monitoring # delete snmp-trap 192.168.100.112Firepower-chassis /monitoring* # commit-bufferFirepower-chassis /monitoring #
Creating an SNMPv3 User
Procedure
Step 1 Enter monitoring mode:
Firepower-chassis# scope monitoring
Step 2 Enable SNMP:
Firepower-chassis /monitoring # enable snmp
Step 3 Create the specified SNMPv3 user:
Firepower-chassis /monitoring # create snmp-user user-name
After you enter the create snmp-user command, you are prompted to enter the password.
The Firepower eXtensible Operating System rejects any password that does notmeet the following requirements:
• Must contain a minimum of 8 characters and a maximum of 80 characters.
• Must contain only letters, numbers, and the following characters:
~`!@#%^&*()_-+{}[]|\:;"'<,>./
Platform Settings15
Platform SettingsDeleting an SNMP Trap

• Must not contain the following symbols: $ (dollar sign), ? (question mark), or = (equals sign).
• Must contain at least five different characters.
• Must not contain too many consecutively incrementing or decrementing numbers or letters. For example,the string "12345" has four such characters, and the string "ZYXW" has three. If the total number ofsuch characters exceeds a certain limit (typically more than around 4-6 such occurrences), the simplicitycheck will fail.
The consecutively incrementing or decrementing character count is not reset whennon-incrementing or decrementing characters are used in between. For example, abcd&!21will fail the password check, but abcd&!25, will not.
Note
Step 4 Enable or disable the use of AES-128 encryption:
Firepower-chassis /monitoring/snmp-user # set aes-128 {no | yes}
By default, AES-128 encryption is disabled.
Step 5 Specify the user privacy password:
Firepower-chassis /monitoring/snmp-user # set priv-password
After you enter the set priv-password command, you are prompted to enter and confirm the privacy password.
The Firepower eXtensible Operating System rejects any password that does notmeet the following requirements:
• Must contain a minimum of 8 characters and a maximum of 80 characters.
• Must contain only letters, numbers, and the following characters:
~`!@#%^&*()_-+{}[]|\:;"'<,>./
• Must not contain the following symbols: $ (dollar sign), ? (question mark), or = (equals sign).
• Must contain at least five different characters.
• Must not contain too many consecutively incrementing or decrementing numbers or letters. For example,the string "12345" has four such characters, and the string "ZYXW" has three. If the total number ofsuch characters exceeds a certain limit (typically more than around 4-6 such occurrences), the simplicitycheck will fail.
The consecutively incrementing or decrementing character count is not reset whennon-incrementing or decrementing characters are used in between. For example, abcd&!21will fail the password check, but abcd&!25, will not.
Note
Step 6 Commit the transaction to the system configuration:
Firepower-chassis /monitoring/snmp-user # commit-buffer
Example
The following example enables SNMP, creates an SNMPv3 user named snmp-user14, enablesAES-128 encryption, sets the password and privacy password, and commits the transaction:
Platform Settings16
Platform SettingsCreating an SNMPv3 User

Firepower-chassis# scope monitoringFirepower-chassis /monitoring # enable snmpFirepower-chassis /monitoring* # create snmp-user snmp-user14Password:Firepower-chassis /monitoring/snmp-user* # set aes-128 yesFirepower-chassis /monitoring/snmp-user* # set priv-passwordEnter a password:Confirm the password:Firepower-chassis /monitoring/snmp-user* # commit-bufferFirepower-chassis /monitoring/snmp-user #
Deleting an SNMPv3 User
Procedure
Step 1 Enter monitoring mode:
Firepower-chassis# scope monitoring
Step 2 Delete the specified SNMPv3 user:
Firepower-chassis /monitoring # delete snmp-user user-name
Step 3 Commit the transaction to the system configuration:
Firepower-chassis /monitoring # commit-buffer
Example
The following example deletes the SNMPv3 user named snmp-user14 and commits the transaction:Firepower-chassis# scope monitoringFirepower-chassis /monitoring # delete snmp-user snmp-user14Firepower-chassis /monitoring* # commit-bufferFirepower-chassis /monitoring #
Configuring HTTPSThis section describes how to configure HTTPS on the Firepower 9300 chassis.
You can change the HTTPS port using Firepower Chassis Manager or the FXOS CLI. All other HTTPSconfiguration can only be done using the FXOS CLI.
Note
Platform Settings17
Platform SettingsDeleting an SNMPv3 User

Certificates, Key Rings, and Trusted PointsHTTPS uses components of the Public Key Infrastructure (PKI) to establish secure communications betweentwo devices, such as a client's browser and the Firepower 9300 chassis.
Encryption Keys and Key Rings
Each PKI device holds a pair of asymmetric Rivest-Shamir-Adleman (RSA) encryption keys, one kept privateand one made public, stored in an internal key ring. A message encrypted with either key can be decryptedwith the other key. To send an encrypted message, the sender encrypts the message with the receiver's publickey, and the receiver decrypts the message using its own private key. A sender can also prove its ownershipof a public key by encrypting (also called 'signing') a known message with its own private key. If a receivercan successfully decrypt the message using the public key in question, the sender's possession of thecorresponding private key is proven. Encryption keys can vary in length, with typical lengths from 512 bitsto 2048 bits. In general, a longer key is more secure than a shorter key. FXOS provides a default key ringwith an initial 2048-bit key pair, and allows you to create additional key rings.
The default key ring certificate must be manually regenerated if the cluster name changes or the certificateexpires.
Certificates
To prepare for secure communications, two devices first exchange their digital certificates. A certificate is afile containing a device's public key along with signed information about the device's identity. To merelysupport encrypted communications, a device can generate its own key pair and its own self-signed certificate.When a remote user connects to a device that presents a self-signed certificate, the user has no easy methodto verify the identity of the device, and the user's browser will initially display an authentication warning. Bydefault, FXOS contains a built-in self-signed certificate containing the public key from the default key ring.
Trusted Points
To provide stronger authentication for FXOS, you can obtain and install a third-party certificate from a trustedsource, or trusted point, that affirms the identity of your device. The third-party certificate is signed by theissuing trusted point, which can be a root certificate authority (CA) or an intermediate CA or trust anchor thatis part of a trust chain that leads to a root CA. To obtain a new certificate, you must generate a certificaterequest through FXOS and submit the request to a trusted point.
The certificate must be in Base64 encoded X.509 (CER) format.Important
Creating a Key RingFXOS supports a maximum of 8 key rings, including the default key ring.
Procedure
Step 1 Enter security mode:
Firepower-chassis # scope security
Platform Settings18
Platform SettingsCertificates, Key Rings, and Trusted Points

Step 2 Create and name the key ring:
Firepower-chassis # create keyring keyring-name
Step 3 Set the SSL key length in bits:
Firepower-chassis # set modulus {mod1024 |mod1536 |mod2048 |mod512}
Step 4 Commit the transaction:
Firepower-chassis # commit-buffer
Example
The following example creates a keyring with a key size of 1024 bits:Firepower-chassis# scope securityFirepower-chassis /security # create keyring kr220Firepower-chassis /security/keyring* # set modulus mod1024Firepower-chassis /security/keyring* # commit-bufferFirepower-chassis /security/keyring #
What to do next
Create a certificate request for this key ring.
Regenerating the Default Key RingThe default key ring certificate must be manually regenerated if the cluster name changes or the certificateexpires.
Procedure
Step 1 Enter security mode:
Firepower-chassis # scope security
Step 2 Enter key ring security mode for the default key ring:
Firepower-chassis /security # scope keyring default
Step 3 Regenerate the default key ring:
Firepower-chassis /security/keyring # set regenerate yes
Step 4 Commit the transaction:
Firepower-chassis # commit-buffer
Platform Settings19
Platform SettingsRegenerating the Default Key Ring
Example
The following example regenerates the default key ring:Firepower-chassis# scope securityFirepower-chassis /security # scope keyring defaultFirepower-chassis /security/keyring* # set regenerate yesFirepower-chassis /security/keyring* # commit-bufferFirepower-chassis /security/keyring #
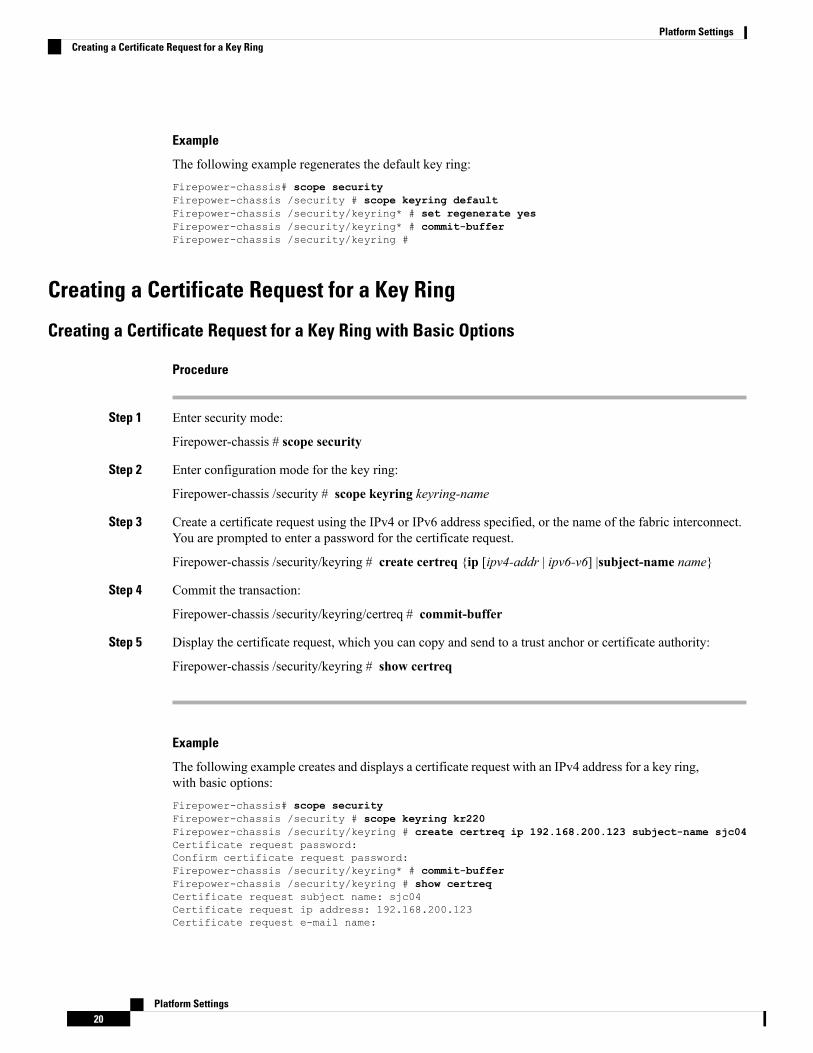
Creating a Certificate Request for a Key Ring
Creating a Certificate Request for a Key Ring with Basic Options
Procedure
Step 1 Enter security mode:
Firepower-chassis # scope security
Step 2 Enter configuration mode for the key ring:
Firepower-chassis /security # scope keyring keyring-name
Step 3 Create a certificate request using the IPv4 or IPv6 address specified, or the name of the fabric interconnect.You are prompted to enter a password for the certificate request.
Firepower-chassis /security/keyring # create certreq {ip [ipv4-addr | ipv6-v6] |subject-name name}
Step 4 Commit the transaction:
Firepower-chassis /security/keyring/certreq # commit-buffer
Step 5 Display the certificate request, which you can copy and send to a trust anchor or certificate authority:
Firepower-chassis /security/keyring # show certreq
Example
The following example creates and displays a certificate request with an IPv4 address for a key ring,with basic options:Firepower-chassis# scope securityFirepower-chassis /security # scope keyring kr220Firepower-chassis /security/keyring # create certreq ip 192.168.200.123 subject-name sjc04Certificate request password:Confirm certificate request password:Firepower-chassis /security/keyring* # commit-bufferFirepower-chassis /security/keyring # show certreqCertificate request subject name: sjc04Certificate request ip address: 192.168.200.123Certificate request e-mail name:
Platform Settings20
Platform SettingsCreating a Certificate Request for a Key Ring

Certificate request country name:State, province or county (full name):Locality (eg, city):Organization name (eg, company):Organization Unit name (eg, section):Request:-----BEGIN CERTIFICATE REQUEST-----MIIBfTCB5wIBADARMQ8wDQYDVQQDEwZzYW1jMDQwgZ8wDQYJKoZIhvcNAQEBBQADgY0AMIGJAoGBALpKn1t8qMZO4UGqILKFXQQc2c8b/vW2rnRF8OPhKbhghLA1YZ1FJqcYEG5Yl1+vgohLBTd45s0GC8m4RTLJWHo4SwccAUXQ5Zngf45YtX1WsylwUWV40re/zgTk/WCd56RfOBvWR2Dtztu2pGA14sd761zLxt29K7R8mzj6CAUVAgMBAAGgLTArBgkqhkiG9w0BCQ4xHjAcMBoGA1UdEQEB/wQQMA6CBnNhbWMwNIcECsEiXjANBgkqhkiG9w0BAQQFAAOBgQCsxN0qUHYGFoQw56RwQueLTNPnrndqUwuZHUO03Tegnhsyu4satpyiPqVV9viKZ+spvc6x5PWIcTWgHhH8BimOb/0OKuG8kwfIGGsEDlAvTTYvUP+BZ9OFiPbRIA718S+V8ndXr1HejiQGxlDNqoN+odCXPc5kjoXD0lZTL09HBA==-----END CERTIFICATE REQUEST-----
Firepower-chassis /security/keyring #
What to do next
• Copy the text of the certificate request, including the BEGIN and END lines, and save it in a file. Sendthe file with the certificate request to a trust anchor or certificate authority to obtain a certificate for thekey ring.
• Create a trusted point and set the certificate chain for the certificate of trust received from the trust anchor.
Creating a Certificate Request for a Key Ring with Advanced Options
Procedure
Step 1 Enter security mode:
Firepower-chassis # scope security
Step 2 Enter configuration mode for the key ring:
Firepower-chassis /security # scope keyring keyring-name
Step 3 Create a certificate request:
Firepower-chassis /security/keyring # create certreq
Step 4 Specify the country code of the country in which the company resides:
Firepower-chassis /security/keyring/certreq* # set country country name
Step 5 Specify the Domain Name Server (DNS) address associated with the request:
Firepower-chassis /security/keyring/certreq* # set dns DNS Name
Step 6 Specify the email address associated with the certificate request:
Firepower-chassis /security/keyring/certreq* # set e-mail E-mail name
Step 7 Specify the IP address of the Firepower 9300 chassis:
Platform Settings21
Platform SettingsCreating a Certificate Request for a Key Ring with Advanced Options

Firepower-chassis /security/keyring/certreq* # set ip {certificate request ip-address|certificate requestip6-address }
Step 8 Specify the city or town in which the company requesting the certificate is headquartered:
Firepower-chassis /security/keyring/certreq* # set locality locality name (eg, city)
Step 9 Specify the organization requesting the certificate:
Firepower-chassis /security/keyring/certreq* # set org-name organization name
Step 10 Specify the organizational unit:
Firepower-chassis /security/keyring/certreq* # set org-unit-name organizational unit name
Step 11 Specify an optional password for the certificate request:
Firepower-chassis /security/keyring/certreq* # set password certificate request password
Step 12 Specify the state or province in which the company requesting the certificate is headquartered:
Firepower-chassis /security/keyring/certreq* # set state state, province or county
Step 13 Specify the fully qualified domain name of the Firepower 9300 chassis:
Firepower-chassis /security/keyring/certreq* # set subject-name certificate request name
Step 14 Commit the transaction:
Firepower-chassis /security/keyring/certreq # commit-buffer
Step 15 Display the certificate request, which you can copy and send to a trust anchor or certificate authority:
Firepower-chassis /security/keyring # show certreq
Example
The following example creates and displays a certificate request with an IPv4 address for a key ring,with advanced options:Firepower-chassis# scope securityFirepower-chassis /security # scope keyring kr220Firepower-chassis /security/keyring # create certreqFirepower-chassis /security/keyring/certreq* # set ip 192.168.200.123Firepower-chassis /security/keyring/certreq* # set subject-name sjc04Firepower-chassis /security/keyring/certreq* # set country USFirepower-chassis /security/keyring/certreq* # set dns bg1-samc-15AFirepower-chassis /security/keyring/certreq* # set email [email protected] /security/keyring/certreq* # set locality new york cityFirepower-chassis /security/keyring/certreq* # set org-name "Cisco Systems"Firepower-chassis /security/keyring/certreq* # set org-unit-name TestingFirepower-chassis /security/keyring/certreq* # set state new yorkFirepower-chassis /security/keyring/certreq* # commit-bufferFirepower-chassis /security/keyring/certreq # show certreqCertificate request subject name: sjc04Certificate request ip address: 192.168.200.123Certificate request e-mail name: [email protected] request country name: USState, province or county (full name): New York
Platform Settings22
Platform SettingsCreating a Certificate Request for a Key Ring with Advanced Options

Locality name (eg, city): new york cityOrganization name (eg, company): CiscoOrganization Unit name (eg, section): TestingRequest:-----BEGIN CERTIFICATE REQUEST-----MIIBfTCB5wIBADARMQ8wDQYDVQQDEwZzYW1jMDQwgZ8wDQYJKoZIhvcNAQEBBQADgY0AMIGJAoGBALpKn1t8qMZO4UGqILKFXQQc2c8b/vW2rnRF8OPhKbhghLA1YZ1FJqcYEG5Yl1+vgohLBTd45s0GC8m4RTLJWHo4SwccAUXQ5Zngf45YtX1WsylwUWV40re/zgTk/WCd56RfOBvWR2Dtztu2pGA14sd761zLxt29K7R8mzj6CAUVAgMBAAGgLTArBgkqhkiG9w0BCQ4xHjAcMBoGA1UdEQEB/wQQMA6CBnNhbWMwNIcECsEiXjANBgkqhkiG9w0BAQQFAAOBgQCsxN0qUHYGFoQw56RwQueLTNPnrndqUwuZHUO03Tegnhsyu4satpyiPqVV9viKZ+spvc6x5PWIcTWgHhH8BimOb/0OKuG8kwfIGGsEDlAvTTYvUP+BZ9OFiPbRIA718S+V8ndXr1HejiQGxlDNqoN+odCXPc5kjoXD0lZTL09HBA==-----END CERTIFICATE REQUEST-----
Firepower-chassis /security/keyring/certreq #
What to do next
• Copy the text of the certificate request, including the BEGIN and END lines, and save it in a file. Sendthe file with the certificate request to a trust anchor or certificate authority to obtain a certificate for thekey ring.
• Create a trusted point and set the certificate chain for the certificate of trust received from the trust anchor.
Creating a Trusted Point
Procedure
Step 1 Enter security mode:
Firepower-chassis # scope security
Step 2 Create a trusted point:
Firepower-chassis /security # create trustpoint name
Step 3 Specify certificate information for this trusted point:
Firepower-chassis /security/trustpoint # set certchain [certchain]
If you do not specify certificate information in the command, you are prompted to enter a certificate or a listof trustpoints defining a certification path to the root certificate authority (CA). On the next line followingyour input, type ENDOFBUF to finish.
The certificate must be in Base64 encoded X.509 (CER) format.Important
Step 4 Commit the transaction:
Firepower-chassis /security/trustpoint # commit-buffer
Platform Settings23
Platform SettingsCreating a Trusted Point

Example
The following example creates a trusted point and provides a certificate for the trusted point:Firepower-chassis# scope securityFirepower-chassis /security # create trustpoint tPoint10Firepower-chassis /security/trustpoint* # set certchainEnter lines one at a time. Enter ENDOFBUF to finish. Press ^C to abort.Trustpoint Certificate Chain:> -----BEGIN CERTIFICATE-----> MIIDMDCCApmgAwIBAgIBADANBgkqhkiG9w0BAQQFADB0MQswCQYDVQQGEwJVUzEL> BxMMU2FuIEpvc2UsIENBMRUwEwYDVQQKEwxFeGFtcGxlIEluYy4xEzARBgNVBAsT> ClRlc3QgR3JvdXAxGTAXBgNVBAMTEHRlc3QuZXhhbXBsZS5jb20xHzAdBgkqhkiG> 9w0BCQEWEHVzZXJAZXhhbXBsZS5jb20wgZ8wDQYJKoZIhvcNAQEBBQADgY0AMIGJ> AoGBAMZw4nTepNIDhVzb0j7Z2Je4xAG56zmSHRMQeOGHemdh66u2/XAoLx7YCcYU> ZgAMivyCsKgb/6CjQtsofvtrmC/eAehuK3/SINv7wd6Vv2pBt6ZpXgD4VBNKONDl> GMbkPayVlQjbG4MD2dx2+H8EH3LMtdZrgKvPxPTE+bF5wZVNAgMBAAGgJTAjBgkq> hkiG9w0BCQcxFhMUQSBjaGFsbGVuZ2UgcGFzc3dvcmQwDQYJKoZIhvcNAQEFBQAD> gYEAG61CaJoJaVMhzCl903O6Mg51zq1zXcz75+VFj2I6rH9asckCld3mkOVx5gJU> Ptt5CVQpNgNLdvbDPSsXretysOhqHmp9+CLv8FDuy1CDYfuaLtvlWvfhevskV0j6> jtcEMyZ+f7+3yh421ido3nO4MIGeBgNVHSMEgZYwgZOAFLlNjtcEMyZ+f7+3yh42> 1ido3nO4oXikdjB0MQswCQYDVQQGEwJVUzELMAkGA1UECBMCQ0ExFDASBgNVBAcT> C1NhbnRhIENsYXJhMRswGQYDVQQKExJOdW92YSBTeXN0ZW1zIEluYy4xFDASBgNV> BAsTC0VuZ2luZWVyaW5nMQ8wDQYDVQQDEwZ0ZXN0Q0GCAQAwDAYDVR0TBAUwAwEB> /zANBgkqhkiG9w0BAQQFAAOBgQAhWaRwXNR6B4g6Lsnr+fptHv+WVhB5fKqGQqXc> wR4pYiO4z42/j9Ijenh75tCKMhW51az8copP1EBmOcyuhf5C6vasrenn1ddkkYt4> PR0vxGc40whuiozBolesmsmjBbedUCwQgdFDWhDIZJwK5+N3x/kfa2EHU6id1avt> 4YL5Jg==> -----END CERTIFICATE-----> ENDOFBUFFirepower-chassis /security/trustpoint* # commit-bufferFirepower-chassis /security/trustpoint #
What to do next
Obtain a key ring certificate from the trust anchor or certificate authority and import it into the key ring.
Importing a Certificate into a Key Ring
Before you begin
• Configure a trusted point that contains the certificate chain for the key ring certificate.
• Obtain a key ring certificate from a trust anchor or certificate authority.
Procedure
Step 1 Enter security mode:
Firepower-chassis # scope security
Step 2 Enter configuration mode for the key ring that will receive the certificate:
Firepower-chassis /security # scope keyring keyring-name
Platform Settings24
Platform SettingsImporting a Certificate into a Key Ring
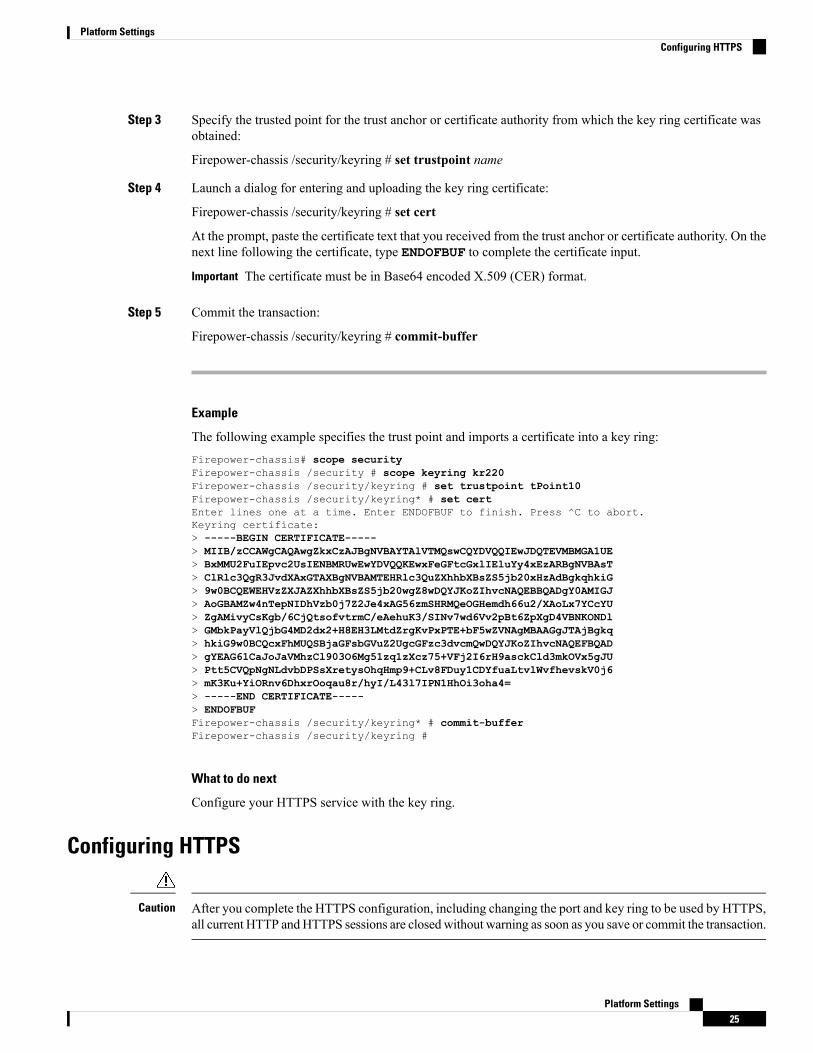
Step 3 Specify the trusted point for the trust anchor or certificate authority from which the key ring certificate wasobtained:
Firepower-chassis /security/keyring # set trustpoint name
Step 4 Launch a dialog for entering and uploading the key ring certificate:
Firepower-chassis /security/keyring # set cert
At the prompt, paste the certificate text that you received from the trust anchor or certificate authority. On thenext line following the certificate, type ENDOFBUF to complete the certificate input.
The certificate must be in Base64 encoded X.509 (CER) format.Important
Step 5 Commit the transaction:
Firepower-chassis /security/keyring # commit-buffer
Example
The following example specifies the trust point and imports a certificate into a key ring:Firepower-chassis# scope securityFirepower-chassis /security # scope keyring kr220Firepower-chassis /security/keyring # set trustpoint tPoint10Firepower-chassis /security/keyring* # set certEnter lines one at a time. Enter ENDOFBUF to finish. Press ^C to abort.Keyring certificate:> -----BEGIN CERTIFICATE-----> MIIB/zCCAWgCAQAwgZkxCzAJBgNVBAYTAlVTMQswCQYDVQQIEwJDQTEVMBMGA1UE> BxMMU2FuIEpvc2UsIENBMRUwEwYDVQQKEwxFeGFtcGxlIEluYy4xEzARBgNVBAsT> ClRlc3QgR3JvdXAxGTAXBgNVBAMTEHRlc3QuZXhhbXBsZS5jb20xHzAdBgkqhkiG> 9w0BCQEWEHVzZXJAZXhhbXBsZS5jb20wgZ8wDQYJKoZIhvcNAQEBBQADgY0AMIGJ> AoGBAMZw4nTepNIDhVzb0j7Z2Je4xAG56zmSHRMQeOGHemdh66u2/XAoLx7YCcYU> ZgAMivyCsKgb/6CjQtsofvtrmC/eAehuK3/SINv7wd6Vv2pBt6ZpXgD4VBNKONDl> GMbkPayVlQjbG4MD2dx2+H8EH3LMtdZrgKvPxPTE+bF5wZVNAgMBAAGgJTAjBgkq> hkiG9w0BCQcxFhMUQSBjaGFsbGVuZ2UgcGFzc3dvcmQwDQYJKoZIhvcNAQEFBQAD> gYEAG61CaJoJaVMhzCl903O6Mg51zq1zXcz75+VFj2I6rH9asckCld3mkOVx5gJU> Ptt5CVQpNgNLdvbDPSsXretysOhqHmp9+CLv8FDuy1CDYfuaLtvlWvfhevskV0j6> mK3Ku+YiORnv6DhxrOoqau8r/hyI/L43l7IPN1HhOi3oha4=> -----END CERTIFICATE-----> ENDOFBUFFirepower-chassis /security/keyring* # commit-bufferFirepower-chassis /security/keyring #
What to do next
Configure your HTTPS service with the key ring.
Configuring HTTPS
After you complete the HTTPS configuration, including changing the port and key ring to be used by HTTPS,all current HTTP andHTTPS sessions are closedwithout warning as soon as you save or commit the transaction.
Caution
Platform Settings25
Platform SettingsConfiguring HTTPS

Procedure
Step 1 Enter system mode:
Firepower-chassis# scope system
Step 2 Enter system services mode:
Firepower-chassis /system # scope services
Step 3 Enable the HTTPS service:
Firepower-chassis /system/services # enable https
Step 4 (Optional) Specify the port to be used for the HTTPS connection:
Firepower-chassis /system/services # set https port port-num
Step 5 (Optional) Specify the name of the key ring you created for HTTPS:
Firepower-chassis /system/services # set https keyring keyring-name
Step 6 (Optional) Specify the level of Cipher Suite security used by the domain:
Firepower-chassis /system/services # set https cipher-suite-mode cipher-suite-mode
cipher-suite-mode can be one of the following keywords:
• high-strength
• medium-strength
• low-strength
• custom—Allows you to specify a user-defined Cipher Suite specification string.
Step 7 (Optional) If cipher-suite-mode is set to custom, specify a custom level of Cipher Suite security for thedomain:
Firepower-chassis /system/services # set https cipher-suite cipher-suite-spec-string
cipher-suite-spec-string can contain up to 256 characters and must conform to the OpenSSL Cipher Suitespecifications. You cannot use any spaces or special characters except ! (exclamation point), + (plus sign), -(hyphen), and : (colon). For details, see http://httpd.apache.org/docs/2.0/mod/mod_ssl.html#sslciphersuite.
For example, the medium strength specification string FXOS uses as the default is:ALL:!ADH:!EXPORT56:!LOW:RC4+RSA:+HIGH:+MEDIUM:+EXP:+eNULL
This option is ignored if cipher-suite-mode is set to anything other than custom.Note
Step 8 Commit the transaction to the system configuration:
Firepower-chassis /system/services # commit-buffer
Platform Settings26
Platform SettingsConfiguring HTTPS

Example
The following example enables HTTPS, sets the port number to 443, sets the key ring name tokring7984, sets the Cipher Suite security level to high, and commits the transaction:Firepower-chassis# scope systemFirepower-chassis /system # scope servicesFirepower-chassis /system/services # enable httpsFirepower-chassis /system/services* # set https port 443Warning: When committed, this closes all the web sessions.Firepower-chassis /system/services* # set https keyring kring7984Firepower-chassis /system/services* # set https cipher-suite-mode highFirepower-chassis /system/services* # commit-bufferFirepower-chassis /system/services #
Changing the HTTPS PortThe HTTPS service is enabled on port 443 by default. You cannot disable HTTPS, but you can change theport to use for HTTPS connections.
Procedure
Step 1 Enter system mode:
Firepower-chassis # scope system
Step 2 Enter system services mode:
Firepower-chassis /system # scope services
Step 3 Specify the port to use for HTTPS connections:
Firepower-chassis /system/services # set https port port-number
Specify an integer between 1 and 65535 for port-number. HTTPS is enabled on port 443 by default.
Step 4 Commit the transaction to the system configuration:
Firepower /system/services # commit-buffer
After changing the HTTPS port, all current HTTPS sessions are closed. Users will need to log back in to theFirepower Chassis Manager using the new port as follows:
https://<chassis_mgmt_ip_address>:<chassis_mgmt_port>
where <chassis_mgmt_ip_address> is the IP address or host name of the Firepower chassis that you enteredduring initial configuration and <chassis_mgmt_port> is the HTTPS port you have just configured.
Example
The following example sets the HTTPS port number to 443 and commits the transaction:
Platform Settings27
Platform SettingsChanging the HTTPS Port

Firepower-chassis# scope systemFirepower-chassis /system # scope servicesFirepower-chassis /system/services # set https port 444Warning: When committed, this closes all the web sessions.Firepower-chassis /system/services* # commit-bufferFirepower-chassis /system/services #
Deleting a Key Ring
Procedure
Step 1 Enter security mode:
Firepower-chassis # scope security
Step 2 Delete the named key ring:
Firepower-chassis /security # delete keyring name
Step 3 Commits the transaction:
Firepower-chassis /security # commit-buffer
Example
The following example deletes a key ring:Firepower-chassis# scope securityFirepower-chassis /security # delete keyring key10Firepower-chassis /security* # commit-bufferFirepower-chassis /security #
Deleting a Trusted Point
Before you begin
Ensure that the trusted point is not used by a key ring.
Procedure
Step 1 Enters security mode:
Firepower-chassis# scope security
Step 2 Delete the named trusted point:
Firepower-chassis /security # delete trustpoint name
Step 3 Commits the transaction:
Platform Settings28
Platform SettingsDeleting a Key Ring
Firepower-chassis /security # commit-buffer
Example
The following example deletes a trusted point:Firepower-chassis# scope securityFirepower-chassis /security # delete trustpoint tPoint10Firepower-chassis /security* # commit-bufferFirepower-chassis /security #
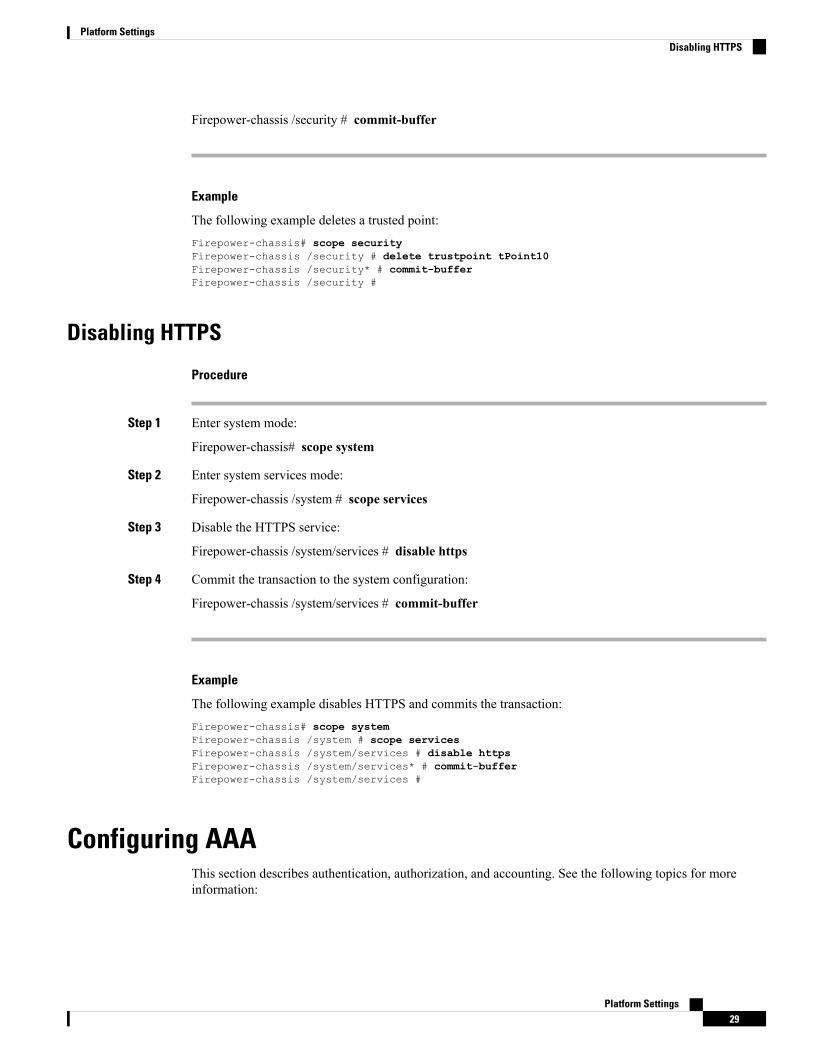
Disabling HTTPS
Procedure
Step 1 Enter system mode:
Firepower-chassis# scope system
Step 2 Enter system services mode:
Firepower-chassis /system # scope services
Step 3 Disable the HTTPS service:
Firepower-chassis /system/services # disable https
Step 4 Commit the transaction to the system configuration:
Firepower-chassis /system/services # commit-buffer
Example
The following example disables HTTPS and commits the transaction:Firepower-chassis# scope systemFirepower-chassis /system # scope servicesFirepower-chassis /system/services # disable httpsFirepower-chassis /system/services* # commit-bufferFirepower-chassis /system/services #
Configuring AAAThis section describes authentication, authorization, and accounting. See the following topics for moreinformation:
Platform Settings29
Platform SettingsDisabling HTTPS

About AAAAAA is a set of services for controlling access to computer resources, enforcing policies, assessing usage,and providing the information necessary to bill for services. These processes are considered important foreffective network management and security.
Authentication
Authentication provides a way to identify a user, typically by having the user enter a valid username and validpassword before access is granted. The AAA server compares a user's authentication credentials with otheruser credentials stored in a database. If the credentials match, the user is permitted access to the network. Ifthe credentials do not match, authentication fails and network access is denied.
You can configure the Firepower 9300 chassis to authenticate administrative connections to the chassis,including the following sessions:
• HTTPS
• SSH
• Serial console
Authorization
Authorization is the process of enforcing policies: determining what types of activities, resources, or servicesa user is permitted to access. After a user is authenticated, that user may be authorized for different types ofaccess or activity.
Accounting
Accounting measures the resources a user consumes during access, which may include the amount of systemtime or the amount of data that a user has sent or received during a session. Accounting is carried out throughthe logging of session statistics and usage information, which is used for authorization control, billing, trendanalysis, resource utilization, and capacity planning activities.
Interaction Between Authentication, Authorization, and Accounting
You can use authentication alone or with authorization and accounting. Authorization always requires a userto be authenticated first. You can use accounting alone, or with authentication and authorization.
AAA Servers
The AAA server is a network server that is used for access control. Authentication identifies the user.Authorization implements policies that determine which resources and services an authenticated user mayaccess. Accounting keeps track of time and data resources that are used for billing and analysis.
Local Database Support
The Firepower chassis maintains a local database that you can populate with user profiles. You can use a localdatabase instead of AAA servers to provide user authentication, authorization, and accounting.
Platform Settings30
Platform SettingsAbout AAA
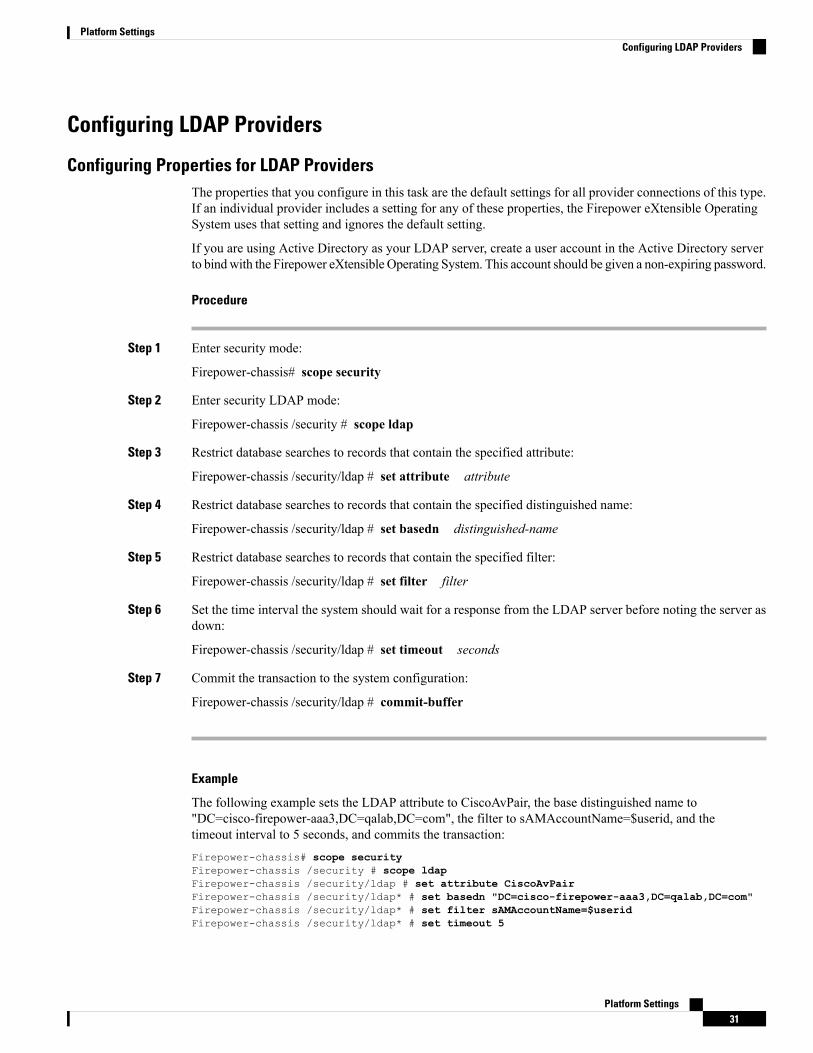
Configuring LDAP Providers
Configuring Properties for LDAP ProvidersThe properties that you configure in this task are the default settings for all provider connections of this type.If an individual provider includes a setting for any of these properties, the Firepower eXtensible OperatingSystem uses that setting and ignores the default setting.
If you are using Active Directory as your LDAP server, create a user account in the Active Directory serverto bindwith the Firepower eXtensible Operating System. This account should be given a non-expiring password.
Procedure
Step 1 Enter security mode:
Firepower-chassis# scope security
Step 2 Enter security LDAP mode:
Firepower-chassis /security # scope ldap
Step 3 Restrict database searches to records that contain the specified attribute:
Firepower-chassis /security/ldap # set attribute attribute
Step 4 Restrict database searches to records that contain the specified distinguished name:
Firepower-chassis /security/ldap # set basedn distinguished-name
Step 5 Restrict database searches to records that contain the specified filter:
Firepower-chassis /security/ldap # set filter filter
Step 6 Set the time interval the system should wait for a response from the LDAP server before noting the server asdown:
Firepower-chassis /security/ldap # set timeout seconds
Step 7 Commit the transaction to the system configuration:
Firepower-chassis /security/ldap # commit-buffer
Example
The following example sets the LDAP attribute to CiscoAvPair, the base distinguished name to"DC=cisco-firepower-aaa3,DC=qalab,DC=com", the filter to sAMAccountName=$userid, and thetimeout interval to 5 seconds, and commits the transaction:Firepower-chassis# scope securityFirepower-chassis /security # scope ldapFirepower-chassis /security/ldap # set attribute CiscoAvPairFirepower-chassis /security/ldap* # set basedn "DC=cisco-firepower-aaa3,DC=qalab,DC=com"Firepower-chassis /security/ldap* # set filter sAMAccountName=$useridFirepower-chassis /security/ldap* # set timeout 5
Platform Settings31
Platform SettingsConfiguring LDAP Providers

Firepower-chassis /security/ldap* # commit-bufferFirepower-chassis /security/ldap #
User login will fail if the userdn for an LDAP user exceeds 255 characters.Note
What to do next
Create an LDAP provider.
Creating an LDAP ProviderThe Firepower eXtensible Operating System supports a maximum of 16 LDAP providers.
Before you begin
If you are using Active Directory as your LDAP server, create a user account in the Active Directory serverto bindwith the Firepower eXtensible Operating System. This account should be given a non-expiring password.
Procedure
Step 1 Enter security mode:
Firepower-chassis# scope security
Step 2 Enter security LDAP mode:
Firepower-chassis /security # scope ldap
Step 3 Create an LDAP server instance and enter security LDAP server mode:
Firepower-chassis /security/ldap # create server server-name
If SSL is enabled, the server-name , typically an IP address or FQDN, must exactly match a Common Name(CN) in the LDAP server's security certificate. Unless an IP address is specified, a DNS server must beconfigured.
Step 4 (Optional) Set an LDAP attribute that stores the values for the user roles and locales:
Firepower-chassis /security/ldap/server # set attribute attr-name
This property is always a name-value pair. The system queries the user record for the value that matches thisattribute name.
This value is required unless a default attribute has been set for LDAP providers.
Step 5 (Optional) Set the specific distinguished name in the LDAP hierarchy where the server should begin a searchwhen a remote user logs in and the system attempts to get the user's DN based on their username:
Firepower-chassis /security/ldap/server # set basedn basedn-name
Platform Settings32
Platform SettingsCreating an LDAP Provider
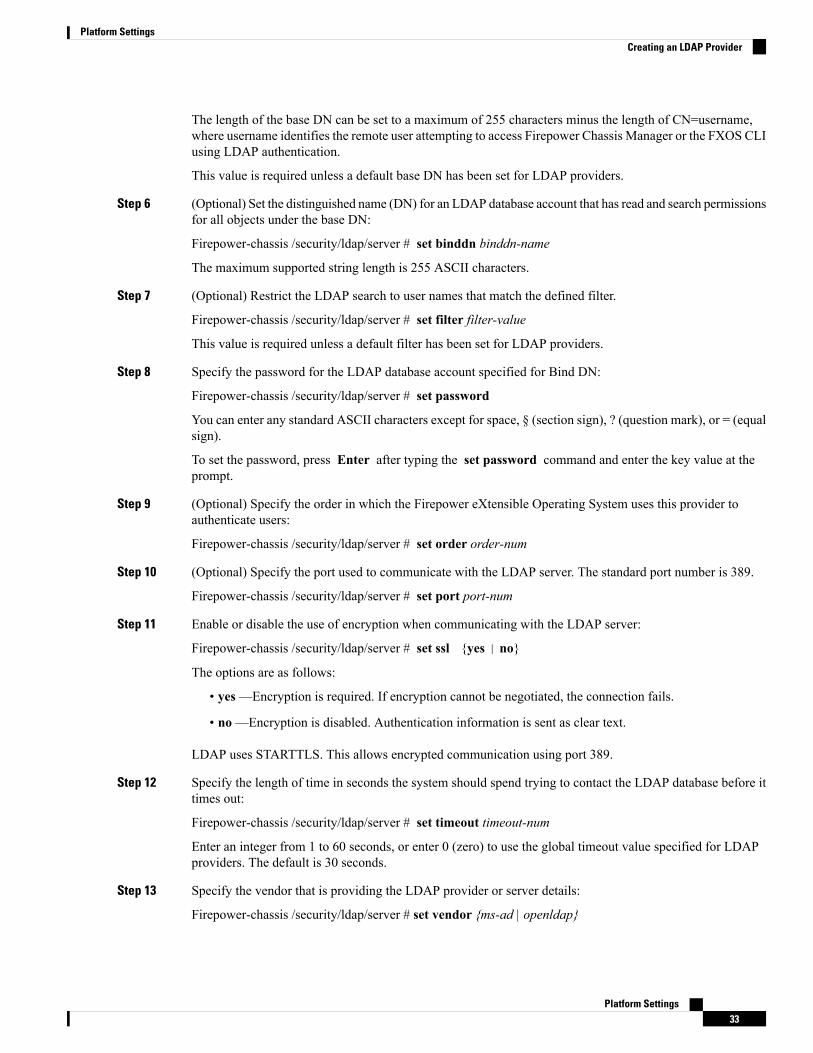
The length of the base DN can be set to a maximum of 255 characters minus the length of CN=username,where username identifies the remote user attempting to access Firepower Chassis Manager or the FXOS CLIusing LDAP authentication.
This value is required unless a default base DN has been set for LDAP providers.
Step 6 (Optional) Set the distinguished name (DN) for an LDAP database account that has read and search permissionsfor all objects under the base DN:
Firepower-chassis /security/ldap/server # set binddn binddn-name
The maximum supported string length is 255 ASCII characters.
Step 7 (Optional) Restrict the LDAP search to user names that match the defined filter.
Firepower-chassis /security/ldap/server # set filter filter-value
This value is required unless a default filter has been set for LDAP providers.
Step 8 Specify the password for the LDAP database account specified for Bind DN:
Firepower-chassis /security/ldap/server # set password
You can enter any standard ASCII characters except for space, § (section sign), ? (question mark), or = (equalsign).
To set the password, press Enter after typing the set password command and enter the key value at theprompt.
Step 9 (Optional) Specify the order in which the Firepower eXtensible Operating System uses this provider toauthenticate users:
Firepower-chassis /security/ldap/server # set order order-num
Step 10 (Optional) Specify the port used to communicate with the LDAP server. The standard port number is 389.
Firepower-chassis /security/ldap/server # set port port-num
Step 11 Enable or disable the use of encryption when communicating with the LDAP server:
Firepower-chassis /security/ldap/server # set ssl {yes | no}
The options are as follows:
• yes—Encryption is required. If encryption cannot be negotiated, the connection fails.
• no—Encryption is disabled. Authentication information is sent as clear text.
LDAP uses STARTTLS. This allows encrypted communication using port 389.
Step 12 Specify the length of time in seconds the system should spend trying to contact the LDAP database before ittimes out:
Firepower-chassis /security/ldap/server # set timeout timeout-num
Enter an integer from 1 to 60 seconds, or enter 0 (zero) to use the global timeout value specified for LDAPproviders. The default is 30 seconds.
Step 13 Specify the vendor that is providing the LDAP provider or server details:
Firepower-chassis /security/ldap/server # set vendor {ms-ad | openldap}
Platform Settings33
Platform SettingsCreating an LDAP Provider

The options are as follows:
• ms-ad—LDAP provider is Microsoft Active Directory
• openldap—LDAP provider is not Microsoft Active Directory
Step 14 Commit the transaction to the system configuration:
Firepower-chassis /security/ldap/server # commit-buffer
Example
The following example creates an LDAP server instance named 10.193.169.246, configures thebinddn, password, order, port, SSL settings, vendor attribute, and commits the transaction:Firepower-chassis# scope securityFirepower-chassis /security # scope ldapFirepower-chassis /security/ldap* # create server 10.193.169.246Firepower-chassis /security/ldap/server* # set binddn"cn=Administrator,cn=Users,DC=cisco-firepower-aaa3,DC=qalab,DC=com"Firepower-chassis /security/ldap/server* # set passwordEnter the password:Confirm the password:Firepower-chassis /security/ldap/server* # set order 2Firepower-chassis /security/ldap/server* # set port 389Firepower-chassis /security/ldap/server* # set ssl yesFirepower-chassis /security/ldap/server* # set timeout 30Firepower-chassis /security/ldap/server* # set vendor ms-adFirepower-chassis /security/ldap/server* # commit-bufferFirepower-chassis /security/ldap/server #
The following example creates an LDAP server instance named 12:31:71:1231:45b1:0011:011:900,configures the binddn, password, order, port, SSL settings, vendor attribute, and commits thetransaction:Firepower-chassis# scope securityFirepower-chassis /security # scope ldapFirepower-chassis /security/ldap* # create server 12:31:71:1231:45b1:0011:011:900Firepower-chassis /security/ldap/server* # set binddn"cn=Administrator,cn=Users,DC=cisco-firepower-aaa3,DC=qalab,DC=com"Firepower-chassis /security/ldap/server* # set passwordEnter the password:Confirm the password:Firepower-chassis /security/ldap/server* # set order 1Firepower-chassis /security/ldap/server* # set port 389Firepower-chassis /security/ldap/server* # set ssl yesFirepower-chassis /security/ldap/server* # set timeout 45Firepower-chassis /security/ldap/server* # set vendor ms-adFirepower-chassis /security/ldap/server* # commit-bufferFirepower-chassis /security/ldap/server #
Platform Settings34
Platform SettingsCreating an LDAP Provider

Deleting an LDAP Provider
Procedure
Step 1 Enter security mode:
Firepower-chassis# scope security
Step 2 Enter security LDAP mode:
Firepower-chassis /security # scope ldap
Step 3 Delete the specified server:
Firepower-chassis /security/ldap # delete server serv-name
Step 4 Commit the transaction to the system configuration:
Firepower-chassis /security/ldap # commit-buffer
Example
The following example deletes the LDAP server called ldap1 and commits the transaction:Firepower-chassis# scope securityFirepower-chassis /security # scope ldapFirepower-chassis /security/ldap # delete server ldap1Firepower-chassis /security/ldap* # commit-bufferFirepower-chassis /security/ldap #
Configuring RADIUS Providers
Configuring Properties for RADIUS ProvidersThe properties that you configure in this task are the default settings for all provider connections of this type.If an individual provider includes a setting for any of these properties, the Firepower eXtensible OperatingSystem uses that setting and ignores the default setting.
Procedure
Step 1 Enter security mode:
Firepower-chassis# scope security
Step 2 Enter security RADIUS mode:
Firepower-chassis /security # scope radius
Step 3 (Optional) Specify the number of times to retry communicating with the RADIUS server before noting theserver as down:
Platform Settings35
Platform SettingsDeleting an LDAP Provider

Firepower-chassis /security/radius # set retries retry-num
Step 4 (Optional) Set the time interval the system should wait for a response from the RADIUS server before notingthe server as down:
Firepower-chassis /security/radius # set timeout seconds
Step 5 Commit the transaction to the system configuration:
Firepower-chassis /security/radius # commit-buffer
Example
The following example sets the RADIUS retries to 4, sets the timeout interval to 30 seconds, andcommits the transaction:Firepower-chassis# scope securityFirepower-chassis /security # scope radiusFirepower-chassis /security/radius # set retries 4Firepower-chassis /security/radius* # set timeout 30Firepower-chassis /security/radius* # commit-bufferFirepower-chassis /security/radius #
What to do next
Create a RADIUS provider.
Creating a RADIUS ProviderThe Firepower eXtensible Operating System supports a maximum of 16 RADIUS providers.
Procedure
Step 1 Enter security mode:
Firepower-chassis# scope security
Step 2 Enter security RADIUS mode:
Firepower-chassis /security # scope radius
Step 3 Create a RADIUS server instance and enter security RADIUS server mode:
Firepower-chassis /security/radius # create server server-name
Step 4 (Optional) Specify the port used to communicate with the RADIUS server.
Firepower-chassis /security/radius/server # set authport authport-num
Step 5 Set the RADIUS server key:
Firepower-chassis /security/radius/server # set key
To set the key value, press Enter after typing the set key command and enter the key value at the prompt.
Platform Settings36
Platform SettingsCreating a RADIUS Provider
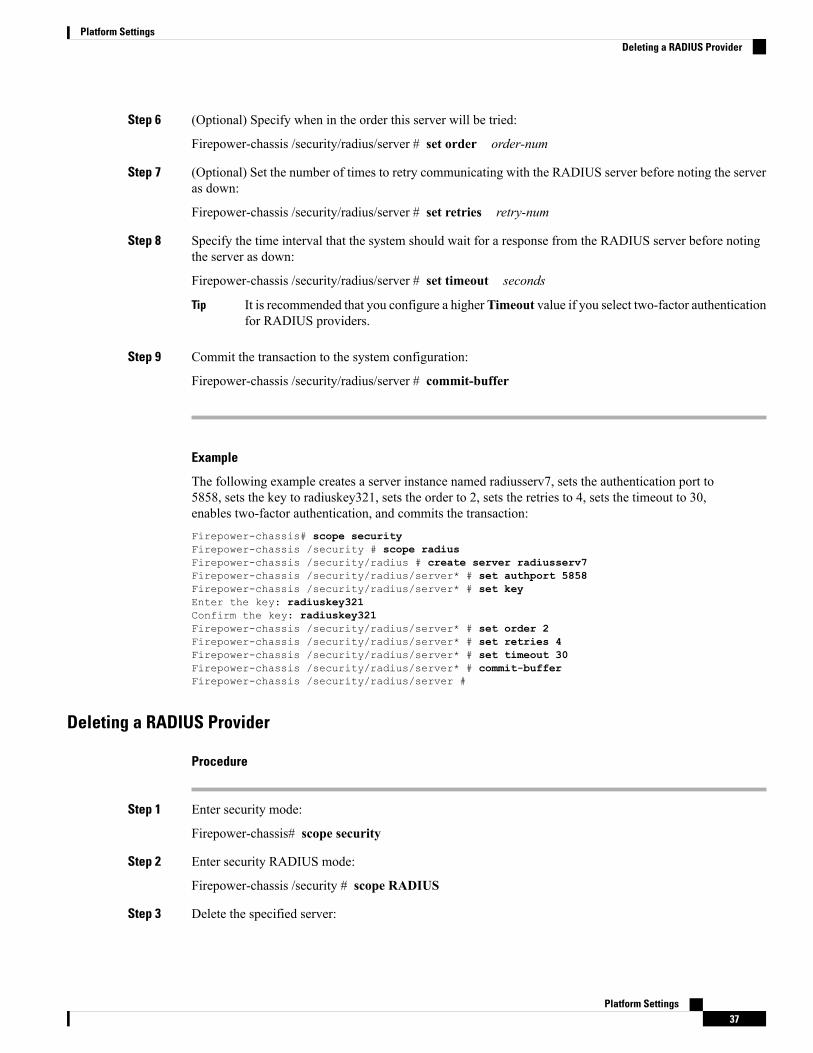
Step 6 (Optional) Specify when in the order this server will be tried:
Firepower-chassis /security/radius/server # set order order-num
Step 7 (Optional) Set the number of times to retry communicating with the RADIUS server before noting the serveras down:
Firepower-chassis /security/radius/server # set retries retry-num
Step 8 Specify the time interval that the system should wait for a response from the RADIUS server before notingthe server as down:
Firepower-chassis /security/radius/server # set timeout seconds
It is recommended that you configure a higherTimeout value if you select two-factor authenticationfor RADIUS providers.
Tip
Step 9 Commit the transaction to the system configuration:
Firepower-chassis /security/radius/server # commit-buffer
Example
The following example creates a server instance named radiusserv7, sets the authentication port to5858, sets the key to radiuskey321, sets the order to 2, sets the retries to 4, sets the timeout to 30,enables two-factor authentication, and commits the transaction:Firepower-chassis# scope securityFirepower-chassis /security # scope radiusFirepower-chassis /security/radius # create server radiusserv7Firepower-chassis /security/radius/server* # set authport 5858Firepower-chassis /security/radius/server* # set keyEnter the key: radiuskey321Confirm the key: radiuskey321Firepower-chassis /security/radius/server* # set order 2Firepower-chassis /security/radius/server* # set retries 4Firepower-chassis /security/radius/server* # set timeout 30Firepower-chassis /security/radius/server* # commit-bufferFirepower-chassis /security/radius/server #
Deleting a RADIUS Provider
Procedure
Step 1 Enter security mode:
Firepower-chassis# scope security
Step 2 Enter security RADIUS mode:
Firepower-chassis /security # scope RADIUS
Step 3 Delete the specified server:
Platform Settings37
Platform SettingsDeleting a RADIUS Provider
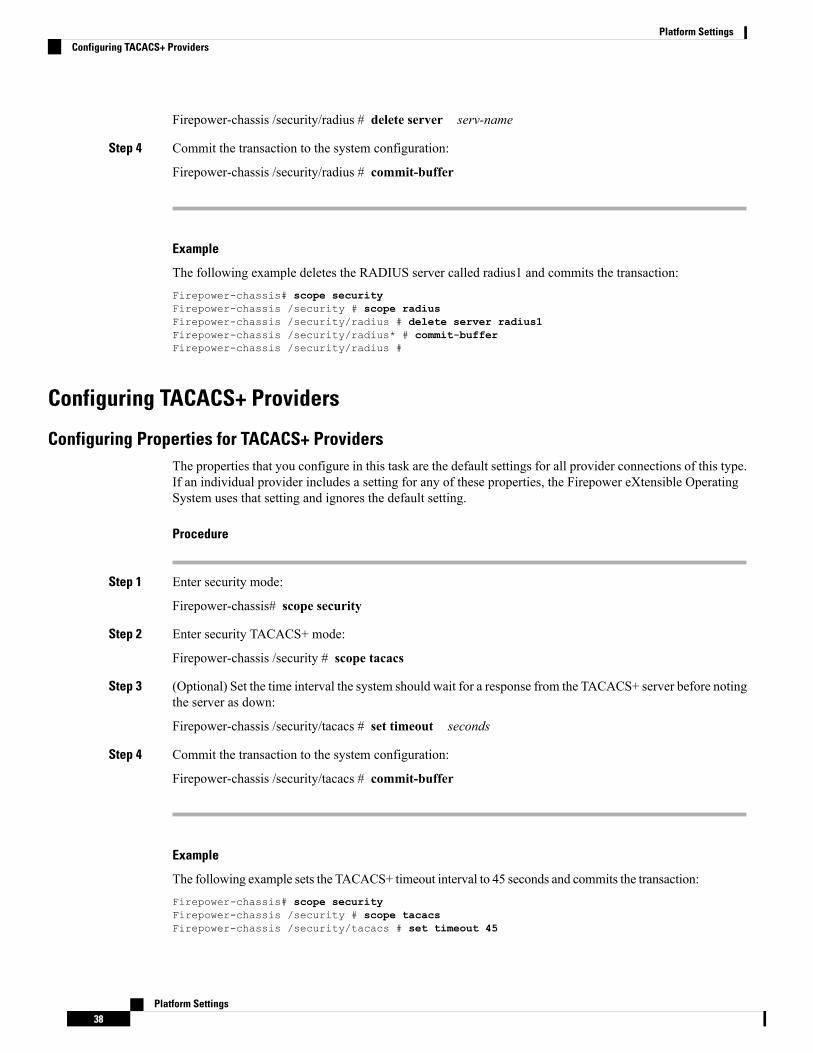
Firepower-chassis /security/radius # delete server serv-name
Step 4 Commit the transaction to the system configuration:
Firepower-chassis /security/radius # commit-buffer
Example
The following example deletes the RADIUS server called radius1 and commits the transaction:Firepower-chassis# scope securityFirepower-chassis /security # scope radiusFirepower-chassis /security/radius # delete server radius1Firepower-chassis /security/radius* # commit-bufferFirepower-chassis /security/radius #
Configuring TACACS+ Providers
Configuring Properties for TACACS+ ProvidersThe properties that you configure in this task are the default settings for all provider connections of this type.If an individual provider includes a setting for any of these properties, the Firepower eXtensible OperatingSystem uses that setting and ignores the default setting.
Procedure
Step 1 Enter security mode:
Firepower-chassis# scope security
Step 2 Enter security TACACS+ mode:
Firepower-chassis /security # scope tacacs
Step 3 (Optional) Set the time interval the system should wait for a response from the TACACS+ server before notingthe server as down:
Firepower-chassis /security/tacacs # set timeout seconds
Step 4 Commit the transaction to the system configuration:
Firepower-chassis /security/tacacs # commit-buffer
Example
The following example sets the TACACS+ timeout interval to 45 seconds and commits the transaction:Firepower-chassis# scope securityFirepower-chassis /security # scope tacacsFirepower-chassis /security/tacacs # set timeout 45
Platform Settings38
Platform SettingsConfiguring TACACS+ Providers

Firepower-chassis /security/tacacs* # commit-bufferFirepower-chassis /security/tacacs #
What to do next
Create a TACACS+ provider.
Creating a TACACS+ ProviderThe Firepower eXtensible Operating System supports a maximum of 16 TACACS+ providers.
Procedure
Step 1 Enter security mode:
Firepower-chassis# scope security
Step 2 Enter security TACACS+ mode:
Firepower-chassis /security # scope tacacs
Step 3 Create a TACACS+ server instance and enter security TACACS+ server mode:
Firepower-chassis /security/tacacs # create server server-name
Step 4 Specify the TACACS+ server key:
Firepower-chassis /security/tacacs/server # set key
To set the key value, press Enter after typing the set key command and enter the key value at the prompt.
Step 5 (Optional) Specify when in the order this server will be tried:
Firepower-chassis /security/tacacs/server # set order order-num
Step 6 Specify the time interval that the system should wait for a response from the TACACS+ server before notingthe server as down:
Firepower-chassis /security/tacacs/server # set timeout seconds
It is recommended that you configure a higher timeout value if you select two-factor authenticationfor TACACS+ providers.
Tip
Step 7 (Optional) Specify the port used to communicate with the TACACS+ server:
Firepower-chassis /security/tacacs/server # set port port-num
Step 8 Commit the transaction to the system configuration:
Firepower-chassis /security/tacacs/server # commit-buffer
Platform Settings39
Platform SettingsCreating a TACACS+ Provider

Example
The following example creates a server instance named tacacsserv680, sets the key to tacacskey321,sets the order to 4, sets the authentication port to 5859, and commits the transaction:Firepower-chassis# scope securityFirepower-chassis /security # scope tacacsFirepower-chassis /security/tacacs # create server tacacsserv680Firepower-chassis /security/tacacs/server* # set keyEnter the key: tacacskey321Confirm the key: tacacskey321Firepower-chassis /security/tacacs/server* # set order 4Firepower-chassis /security/tacacs/server* # set port 5859Firepower-chassis /security/tacacs/server* # commit-bufferFirepower-chassis /security/tacacs/server #
Deleting a TACACS+ Provider
Procedure
Step 1 Enter security mode:
Firepower-chassis# scope security
Step 2 Enter security TACACS+ mode:
Firepower-chassis /security # scope tacacs
Step 3 Delete the specified server:
Firepower-chassis /security/tacacs # delete server serv-name
Step 4 Commit the transaction to the system configuration:
Firepower-chassis /security/tacacs # commit-buffer
Example
The following example deletes the TACACS+ server called tacacs1 and commits the transaction:Firepower-chassis# scope securityFirepower-chassis /security # scope tacacsFirepower-chassis /security/tacacs # delete server tacacs1Firepower-chassis /security/tacacs* # commit-bufferFirepower-chassis /security/tacacs #
Configuring SyslogSystem logging is a method of collecting messages from devices to a server running a syslog daemon. Loggingto a central syslog server helps in aggregation of logs and alerts. A syslog service accepts messages and stores
Platform Settings40
Platform SettingsDeleting a TACACS+ Provider

them in files, or prints them according to a simple configuration file. This form of logging provides protectedlong-term storage for logs. Logs are useful both in routine troubleshooting and in incident handling.
Procedure
Step 1 Enter monitoring mode:
Firepower-chassis# scope monitoring
Step 2 Enable or disable the sending of syslogs to the console:
Firepower-chassis /monitoring # {enable | disable} syslog console
Step 3 (Optional) Select the lowest message level that you want displayed. If syslogs are enabled, the system displaysthat level and above on the console. The level options are listed in order of decreasing urgency. The defaultlevel is Critical.
Firepower-chassis /monitoring # set syslog console level {emergencies | alerts | critical}
Step 4 Enable or disable the monitoring of syslog information by the operating system:
Firepower-chassis /monitoring # {enable | disable} syslog monitor
Step 5 (Optional) Select the lowest message level that you want displayed. If the monitor state is enabled, the systemdisplays that level and above. The level options are listed in order of decreasing urgency. The default level isCritical.
Firepower-chassis /monitoring # set syslog monitor level {emergencies | alerts | critical | errors |warnings| notifications | information | debugging}
Messages at levels below Critical are displayed on the terminal monitor only if you have enteredthe terminal monitor command.
Note
Step 6 Enable or disable the writing of syslog information to a syslog file:
Firepower-chassis /monitoring # {enable | disable} syslog file
Step 7 Specify the name of the file in which the messages are logged. Up to 16 characters are allowed in the filename.
Firepower-chassis /monitoring # set syslog file name filename
Step 8 (Optional) Select the lowest message level that you want stored to a file. If the file state is enabled, the systemstores that level and above in the syslog file. The level options are listed in order of decreasing urgency. Thedefault level is Critical.
Firepower-chassis /monitoring # set syslog file level {emergencies | alerts | critical | errors | warnings |notifications | information | debugging}
Step 9 (Optional) Specify the maximum file size, in bytes, before the system begins to write over the oldest messageswith the newest ones. The range is 4096 to 4194304 bytes.
Firepower-chassis /monitoring # set syslog file size filesize
Step 10 Configure sending of syslog messages to up to three external syslog servers:a) Enable or disable the sending of syslog messages to up to three external syslog servers:
Platform Settings41
Platform SettingsConfiguring Syslog

Firepower-chassis /monitoring # {enable | disable} syslog remote-destination {server-1 | server-2 |server-3}
b) (Optional) Select the lowest message level that you want stored to the external log. If the remote-destinationis enabled, the system sends that level and above to the external server. The level options are listed inorder of decreasing urgency. The default level is Critical.
Firepower-chassis /monitoring # set syslog remote-destination {server-1 | server-2 | server-3}level{emergencies | alerts | critical | errors | warnings | notifications | information | debugging}
c) Specify the hostname or IP address of the specified remote syslog server. Up to 256 characters are allowedin the hostname.
Firepower-chassis /monitoring # set syslog remote-destination {server-1 | server-2 | server-3} hostnamehostname
d) (Optional) Specify the facility level contained in the syslog messages sent to the specified remote syslogserver.
Firepower-chassis /monitoring # set syslog remote-destination {server-1 | server-2 | server-3} facility{local0 | local1 | local2 | local3 | local4 | local5 | local6 | local7}
Step 11 Configure the local sources. Enter the following command for each of the local sources you want to enableor disable:
Firepower-chassis /monitoring # {enable | disable} syslog source {audits | events | faults}
This can be one of the following:
• audits—Enables or disables the logging of all audit log events.
• events—Enables or disables the logging of all system events.
• faults—Enables or disables the logging of all system faults.
Step 12 Commit the transaction:
Firepower-chassis /monitoring # commit-buffer
Example
This example shows how to enable the storage of syslog messages in a local file and commits thetransaction:Firepower-chassis# scope monitoringFirepower-chassis /monitoring # disable syslog consoleFirepower-chassis /monitoring* # disable syslog monitorFirepower-chassis /monitoring* # enable syslog fileFirepower-chassis /monitoring* # set syslog file name SysMsgsFirepowerFirepower-chassis /monitoring* # set syslog file level notificationsFirepower-chassis /monitoring* # set syslog file size 4194304Firepower-chassis /monitoring* # disable syslog remote-destination server-1Firepower-chassis /monitoring* # disable syslog remote-destination server-2Firepower-chassis /monitoring* # disable syslog remote-destination server-3Firepower-chassis /monitoring* # commit-bufferFirepower-chassis /monitoring #
Platform Settings42
Platform SettingsConfiguring Syslog
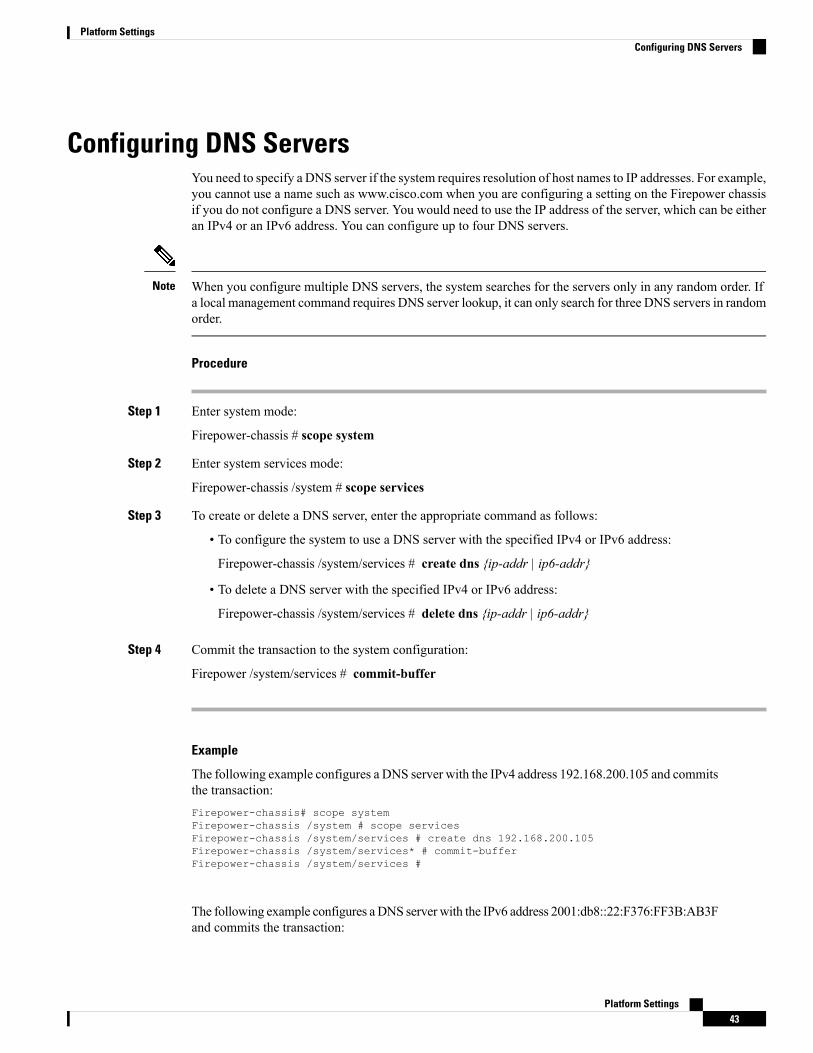
Configuring DNS ServersYou need to specify a DNS server if the system requires resolution of host names to IP addresses. For example,you cannot use a name such as www.cisco.com when you are configuring a setting on the Firepower chassisif you do not configure a DNS server. You would need to use the IP address of the server, which can be eitheran IPv4 or an IPv6 address. You can configure up to four DNS servers.
When you configure multiple DNS servers, the system searches for the servers only in any random order. Ifa local management command requires DNS server lookup, it can only search for three DNS servers in randomorder.
Note
Procedure
Step 1 Enter system mode:
Firepower-chassis # scope system
Step 2 Enter system services mode:
Firepower-chassis /system # scope services
Step 3 To create or delete a DNS server, enter the appropriate command as follows:
• To configure the system to use a DNS server with the specified IPv4 or IPv6 address:
Firepower-chassis /system/services # create dns {ip-addr | ip6-addr}
• To delete a DNS server with the specified IPv4 or IPv6 address:
Firepower-chassis /system/services # delete dns {ip-addr | ip6-addr}
Step 4 Commit the transaction to the system configuration:
Firepower /system/services # commit-buffer
Example
The following example configures a DNS server with the IPv4 address 192.168.200.105 and commitsthe transaction:Firepower-chassis# scope systemFirepower-chassis /system # scope servicesFirepower-chassis /system/services # create dns 192.168.200.105Firepower-chassis /system/services* # commit-bufferFirepower-chassis /system/services #
The following example configures aDNS server with the IPv6 address 2001:db8::22:F376:FF3B:AB3Fand commits the transaction:
Platform Settings43
Platform SettingsConfiguring DNS Servers
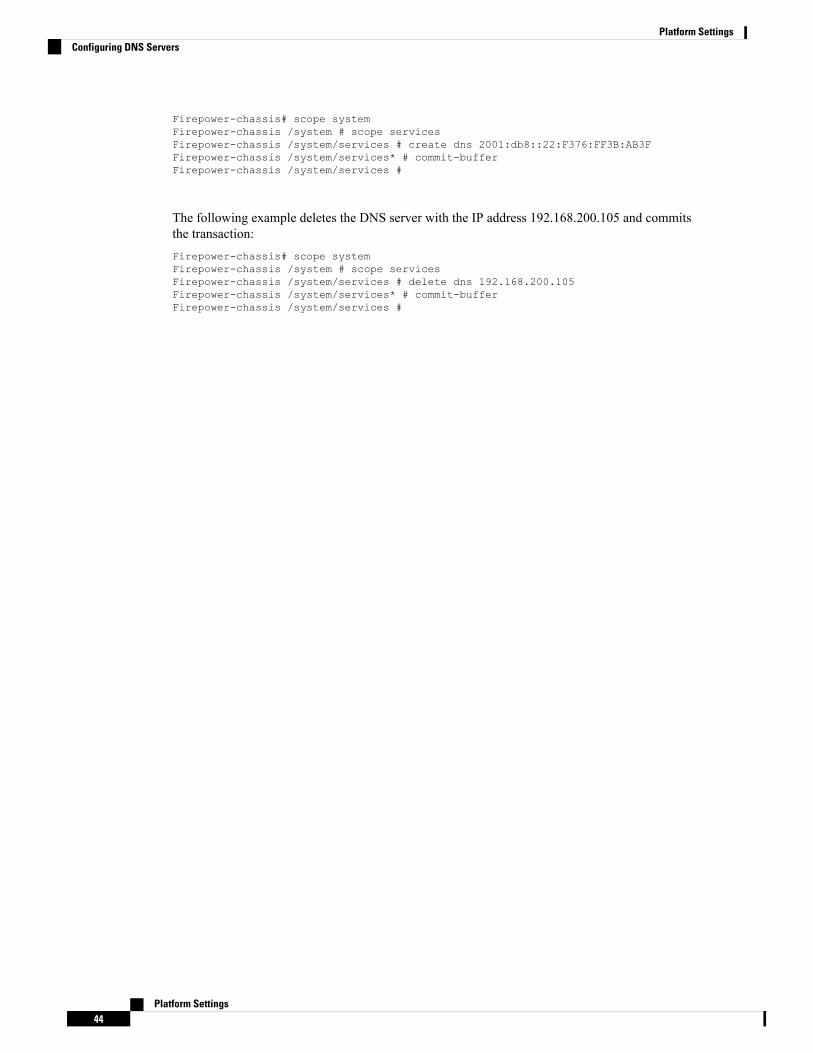
Firepower-chassis# scope systemFirepower-chassis /system # scope servicesFirepower-chassis /system/services # create dns 2001:db8::22:F376:FF3B:AB3FFirepower-chassis /system/services* # commit-bufferFirepower-chassis /system/services #
The following example deletes the DNS server with the IP address 192.168.200.105 and commitsthe transaction:Firepower-chassis# scope systemFirepower-chassis /system # scope servicesFirepower-chassis /system/services # delete dns 192.168.200.105Firepower-chassis /system/services* # commit-bufferFirepower-chassis /system/services #
Platform Settings44
Platform SettingsConfiguring DNS Servers