
PLANETARI New e Classic Settembre 2015 - klindexsupport.it · MANUAL BOOK Please read and save...
34
MANUAL BOOK Please read and save these instructions PLANETARI N EW & C LASSIC KLINDEX S.R.L. Via Vallone, 16 – 65024 – Manoppello (PE) Italy Tel. +39 085 859 800 - Fax +39 085 8599 224 http://www.klindex.it e-mail: [email protected] Data ultimo aggiornamento: 02/09/2015 MANUALE DI MANUTENZIONI NORME GENERALI PER LA SICUREZZA Leggere e conservare queste istruzioni GENERAL SAFETY NORMS Please read and save these instructions NORMES GENERALES DE SÛRETÉ Prière de lire et de conserver ALLGEMEINE SICHERHEITSBESTIMMUNGEN Bitte Lesen und aufbewahren NORMAS GENERALESE DE SESEGURIDAD Lea y conserve estas instrucciones por favor MANUAL DE MANUTENÇÃO NORMAS GERAIS PARA A SEGURANÇA Leia e conserve essas informações LEGGI QUESTO MANUALE DI ISTRUZIONE READ THIS MANUAL BOOK PRIÈRE DE LIRE ANLEITUNSBUCH BITTE LESEN POR FAVOR, LEER Y CONSERVAR ESTAS INSTRUCCIONES POR FAVOR, LEIA ESTE MANUAL DE INSTRUÇÕES Italiano: Questo manuale di istruzione contiene importanti informazioni per l'uso e la sicurezza di questa macchina. Mancare di leggere questo manuale prima di iniziare a operare o tentare di fare qualsiasi riparazione o manutenzione alla vostra macchina potrebbe risultare dannoso a voi o ad altre persone. Potrete causare danni alla macchina o ad altre proprietà o ad altre persone. Prima di utilizzare la macchina dovete accertarvi di utilizzarla secondo le istruzioni riportate in questo libretto. Tutte le istruzioni date in questo manuale sono viste con l’operatore posto dietro la macchina. English: This book has important information for the use and safe operation of this machine. Failure to read this book prior to operating or attempting any service or maintenance procedure to your machine could result in injury and could be dangerous to your or other people. Damage to your machine or the other property could occur. You must have training in the operation of this machine before operating it. If you or your operator(s) cannot read English have this manual explained very well before attempting to use it. All directions given in this book are as seen from the operator's position at the rear of the machine. Français: Ce livret d’instructions contient d’importantes informations pour l’utilisation et la sûreté de cette machine. Ne pas lire ce livret avant de commencer à travailler ou tenter de faire n’importe quelle réparation ou manutention à votre machine pourrait se révéler pour vous ou pour d’autres personnes dangereux. Vous pourriez causer des dommages à la machine, à vous-même, ou aux autres personnes. Avant de commencer à utiliser la machine vous devez vous assurer qu’elle soit utilisée selon les instructions reportées dans ce livret. Toutes les instructions données dans ce livret ont été vues de la position de l’opérateur derrière la machine. Deutsch: Dieses Einleitungsbuch enthält wichtige Informationen für die Haltung dieser Maschine. Das nicht Beachten dieser Informationen, vor der Nützung oder bei selbstständige Reparaturen an Ihrer Maschine, könnte Schaden an Ihnen oder anderen Personen zufügen. Es könnten Schaden an der Maschine und Eigentum Anderer entstehen. Vor der Nutzung dieser Maschine vergewissern Sie sich das alle Anleitungen die dieses Lehrbuch enthält eingehalten werden. Alle Informationen sind mit den Arbeiter hinter der Maschine angegeben. Espanol: Este manual de instrucciones contiene importantes informaciones para el uso y la seguridad de esta màquina. No leer este manual antes de empezar a trabajar o intentar realizar cualquier reparaciòn o manutenciòn sobre esta màquina podrìa causar daños a la màquina, a la propriedad o a otras personas. Antes de utilizar la màquina tienen que verificar que sea utilizada segun las instrucciones descritas en este manual. Todas las directivas dadas en este manual han sido vistas desde la posiciòn de un operador colocado detràs de la màquina. Português: Este manual de instruções contém importantes informações para o uso e segurança desta máquina. Usar a máquina ou tentar fazer qualquer reparação ou manutenção sem primeiro ler este manual, pode resultar danoso a si ou a outras pessoas. Poderá causar danos à máquina, à propriedade ou a outras pessoas. Antes de utilizar a máquina deverá verificar que seja usada segundo as instruções reportadas neste livro. Todas as instruções dadas neste manual são apresentadas com o operador por trás da máquina.
Transcript of PLANETARI New e Classic Settembre 2015 - klindexsupport.it · MANUAL BOOK Please read and save...
M A N U A L B O O K
Please read and save these instructions
P L A N E T A R I
N E W & C L A S S I C
KLINDEX S.R.L. Via Vallone, 16 – 65024 – Manoppello (PE) Italy Tel. +39 085 859 800 - Fax +39 085 8599 224 http://www.klindex.it e-mail: [email protected]
Data ultimo aggiornamento: 02/09/2015
MANUALE DI MANUTENZIONI NORME GENERALI PER LA SICUREZZA Leggere e conservare queste istruzioni
GENERAL SAFETY NORMS Please read and save these instructions
NORMES GENERALES DE SÛRETÉ Prière de lire et de conserver
ALLGEMEINE SICHERHEITSBESTIMMUNGEN Bitte Lesen und aufbewahren
NORMAS GENERALESE DE SESEGURIDAD Lea y conserve estas instrucciones por favor
MANUAL DE MANUTENÇÃO NORMAS GERAIS PARA A SEGURANÇA Leia e conserve essas informações
LEGGI QUESTO MANUALE DI ISTRUZIONE
READ THIS MANUAL BOOK
PRIÈRE DE LIRE
ANLEITUNSBUCH BITTE LESEN
POR FAVOR, LEER Y CONSERVAR ESTAS INSTRUCCIONES
POR FAVOR, LEIA ESTE MANUAL DE INSTRUÇÕES
Italiano: Questo manuale di istruzione contiene importanti informazioni per l'uso e la sicurezza di questa macchina. Mancare di leggere questo manuale prima di iniziare a operare o tentare di fare qualsiasi riparazione o manutenzione alla vostra macchina potrebbe risultare dannoso a voi o ad altre persone. Potrete causare danni alla macchina o ad altre proprietà o ad altre persone. Prima di utilizzare la macchina dovete accertarvi di utilizzarla secondo le istruzioni riportate in questo libretto. Tutte le istruzioni date in questo manuale sono viste con l’operatore posto dietro la macchina.
English: This book has important information for the use and safe operation of this machine. Failure to read this book prior to operating or attempting any service or maintenance procedure to your machine could result in injury and could be dangerous to your or other people. Damage to your machine or the other property could occur. You must have training in the operation of this machine before operating it. If you or your operator(s) cannot read English have this manual explained very well before attempting to use it. All directions given in this book are as seen from the operator's position at the rear of the machine.
Français: Ce livret d’instructions contient d’importantes informations pour l’utilisation et la sûreté de cette machine. Ne pas lire ce livret avant de commencer à travailler ou tenter de faire n’importe quelle réparation ou manutention à votre machine pourrait se révéler pour vous ou pour d’autres personnes dangereux. Vous pourriez causer des dommages à la machine, à vous-même, ou aux autres personnes. Avant de commencer à utiliser la machine vous devez vous assurer qu’elle soit utilisée selon les instructions reportées dans ce livret. Toutes les instructions données dans ce livret ont été vues de la position de l’opérateur derrière la machine.
Deutsch: Dieses Einleitungsbuch enthält wichtige Informationen für die Haltung dieser Maschine. Das nicht Beachten dieser Informationen, vor der Nützung oder bei selbstständige Reparaturen an Ihrer Maschine, könnte Schaden an Ihnen oder anderen Personen zufügen. Es könnten Schaden an der Maschine und Eigentum Anderer entstehen. Vor der Nutzung dieser Maschine vergewissern Sie sich das alle Anleitungen die dieses Lehrbuch enthält eingehalten werden. Alle Informationen sind mit den Arbeiter hinter der Maschine angegeben.
Espanol: Este manual de instrucciones contiene importantes informaciones para el uso y la seguridad de esta màquina. No leer este manual antes de empezar a trabajar o intentar realizar cualquier reparaciòn o manutenciòn sobre esta màquina podrìa causar daños a la màquina, a la propriedad o a otras personas. Antes de utilizar la màquina tienen que verificar que sea utilizada segun las instrucciones descritas en este manual. Todas las directivas dadas en este manual han sido vistas desde la posiciòn de un operador colocado detràs de la màquina.
Português: Este manual de instruções contém importantes informações para o uso e segurança desta máquina. Usar a máquina ou tentar fazer qualquer reparação ou manutenção sem primeiro ler este manual, pode resultar danoso a si ou a outras pessoas. Poderá causar danos à máquina, à propriedade ou a outras pessoas. Antes de utilizar a máquina deverá verificar que seja usada segundo as instruções reportadas neste livro. Todas as instruções dadas neste manual são apresentadas com o operador por trás da máquina.


Data ultimo aggiornamento: 02/09/2015 Pag. 1 di 28
ISTRUZIONI GENERALI PER LEVIGARE CON SISTEMA PLANETARIO
I PLANETARI BREVETTATI hanno rivoluzionato il modo di levigare e lucidare i pavimenti in marmo e granito rendendo il lavoro di levigatura molto più facile, molto più veloce e più economico. I PLANETARI possono essere applicati a qualsiasi “monospazzola” di qualsiasi marca o modello semplicemente applicando la “ flangia “ della macchina che si vuole utilizzare.
AVVERTENZA GENERALE Prima di iniziare il lavoro di levigatura è importante considerare che la DUREZZA DEI MATERIALI LAPIDEI è sempre diversa.
Tenendo presente questa caratteristica dei pavimenti, ricordarsi che:
a) PIÙ IL PAVIMENTO È TENERO, MAGGIORE È LA FORZA NECESSARIA per far girare gli abrasivi.
b) PIÙ IL PAVIMENTO È DURO, MINORE È LA FORZA NECESSARIA per far girare gli abrasivi
c) PIÙ ALTA È LA VELOCITÀ DI ROTAZIONE DEGLI UTENSILI DIAMANTATI più veloce è l’esecuzione del lavoro, ma maggiore è la forza necessaria per far girare gli utensili ad alta velocità, e quindi più potente dovrebbe essere la macchina.
Alla luce di questi principi fondamentali sono stati realizzati tre tipi di Planetari:
PLANETARIO K 800 a 800 giri, consigliato per pavimenti teneri e parquet
PLANETARIO K 1000 a 1.000 giri, consigliato per pavimenti di media durezza come il marmo PLANETARIO K 2000 a 2.000 giri, consigliato per pavimenti duri come il granito o il grés porcellanato
CORRETTO VOLTAGGIO E USO DI CAVI ELETTRICI SUPPLEMENTARI DI CONNESSIONE
Uno dei più frequenti casi di cattivo funzionamento della macchina levigatrice è dovuto al fatto che spesso non arriva la corretta quantità di energia elettrica alla macchina. Seguire questi importanti consigli:
a) Collegarsi alla presa di corrente più vicina all’interruttore Generale. Specialmente nei vecchi impianti ci può essere molta dispersione di energia o cattivi collegamenti lungo la rete elettrica.
b) In caso necessita prolunga elettrica, utilizzare solo cavi elettrici di sezione doppia rispetto a quello in dotazione della macchina.
c) Mai collegare alla stessa presa di corrente due macchine come per esempio la macchina e l’aspiraliquidi.
ATTENZIONE : montaggio della staffa di bloccaggio Si raccomanda di serrare bene la staffa di bloccaggio UT0730x alla carcassa del PLANETARIO CLASSIC prima del suo utilizzo. Controllare periodicamente (ogni inizio lavoro) il suo serraggio.
MANUTENZIONE: si raccomanda di ingrassare periodicamente
GRASSO Grado NLGI 2 Classificazione DIN51502 KP 2 P - 25 Test Timken carico utile ASTM2509 50 (lbs) Temperatura di lavoro -25 / +170 (°C) Olio di base / viscosità (40°C) Minerale / 840 mm2/s Addensante Sapone complesso AL
Quantità Cuscinetti satelliti 10 g per ogni ingrassino Ruote dentate 30 g per ogni ingrassino
Frequenza ─ Effettuare il I° ingrassaggio dopo 50 ore di lavoro ─ Effettuare i successivi ingrassaggi ogni 100 ore di lavoro
Data ultimo aggiornamento: 02/09/2015 Pag. 2 di 28
ISTRUZIONI PER LEVIGARE IL MARMO LEVIGATURA DI PAVIMENTI IN MARMO
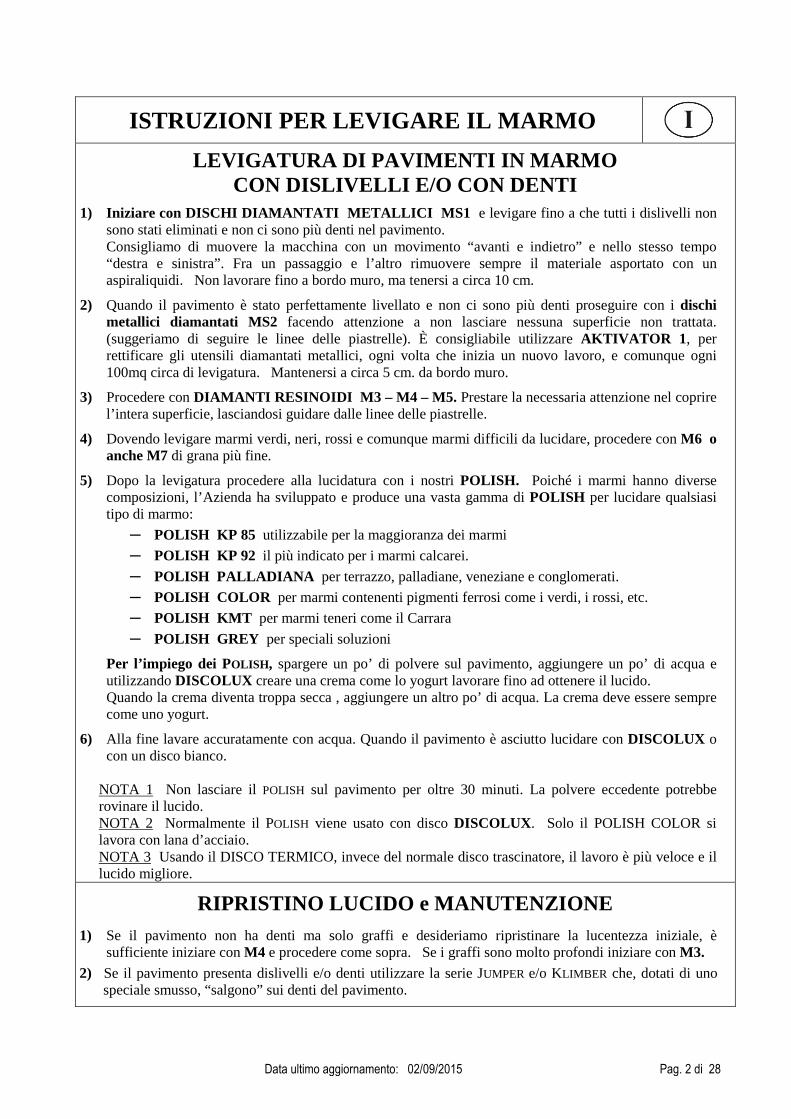
CON DISLIVELLI E/O CON DENTI 1) Iniziare con DISCHI DIAMANTATI METALLICI MS1 e levigare fino a che tutti i dislivelli non
sono stati eliminati e non ci sono più denti nel pavimento. Consigliamo di muovere la macchina con un movimento “avanti e indietro” e nello stesso tempo “destra e sinistra”. Fra un passaggio e l’altro rimuovere sempre il materiale asportato con un aspiraliquidi. Non lavorare fino a bordo muro, ma tenersi a circa 10 cm.
2) Quando il pavimento è stato perfettamente livellato e non ci sono più denti proseguire con i dischi metallici diamantati MS2 facendo attenzione a non lasciare nessuna superficie non trattata. (suggeriamo di seguire le linee delle piastrelle). È consigliabile utilizzare AKTIVATOR 1 , per rettificare gli utensili diamantati metallici, ogni volta che inizia un nuovo lavoro, e comunque ogni 100mq circa di levigatura. Mantenersi a circa 5 cm. da bordo muro.
3) Procedere con DIAMANTI RESINOIDI M3 – M4 – M5. Prestare la necessaria attenzione nel coprire l’intera superficie, lasciandosi guidare dalle linee delle piastrelle.
4) Dovendo levigare marmi verdi, neri, rossi e comunque marmi difficili da lucidare, procedere con M6 o anche M7 di grana più fine.
5) Dopo la levigatura procedere alla lucidatura con i nostri POLISH. Poiché i marmi hanno diverse composizioni, l’Azienda ha sviluppato e produce una vasta gamma di POLISH per lucidare qualsiasi tipo di marmo:
─ POLISH KP 85 utilizzabile per la maggioranza dei marmi
─ POLISH KP 92 il più indicato per i marmi calcarei.
─ POLISH PALLADIANA per terrazzo, palladiane, veneziane e conglomerati.
─ POLISH COLOR per marmi contenenti pigmenti ferrosi come i verdi, i rossi, etc.
─ POLISH KMT per marmi teneri come il Carrara
─ POLISH GREY per speciali soluzioni
Per l’impiego dei POLISH , spargere un po’ di polvere sul pavimento, aggiungere un po’ di acqua e utilizzando DISCOLUX creare una crema come lo yogurt lavorare fino ad ottenere il lucido. Quando la crema diventa troppa secca , aggiungere un altro po’ di acqua. La crema deve essere sempre come uno yogurt.
6) Alla fine lavare accuratamente con acqua. Quando il pavimento è asciutto lucidare con DISCOLUX o con un disco bianco.
NOTA 1 Non lasciare il POLISH sul pavimento per oltre 30 minuti. La polvere eccedente potrebbe rovinare il lucido. NOTA 2 Normalmente il POLISH viene usato con disco DISCOLUX . Solo il POLISH COLOR si lavora con lana d’acciaio. NOTA 3 Usando il DISCO TERMICO, invece del normale disco trascinatore, il lavoro è più veloce e il lucido migliore.
RIPRISTINO LUCIDO e MANUTENZIONE 1) Se il pavimento non ha denti ma solo graffi e desideriamo ripristinare la lucentezza iniziale, è
sufficiente iniziare con M4 e procedere come sopra. Se i graffi sono molto profondi iniziare con M3. 2) Se il pavimento presenta dislivelli e/o denti utilizzare la serie JUMPER e/o KLIMBER che, dotati di uno
speciale smusso, “salgono” sui denti del pavimento.
Data ultimo aggiornamento: 02/09/2015 Pag. 3 di 28
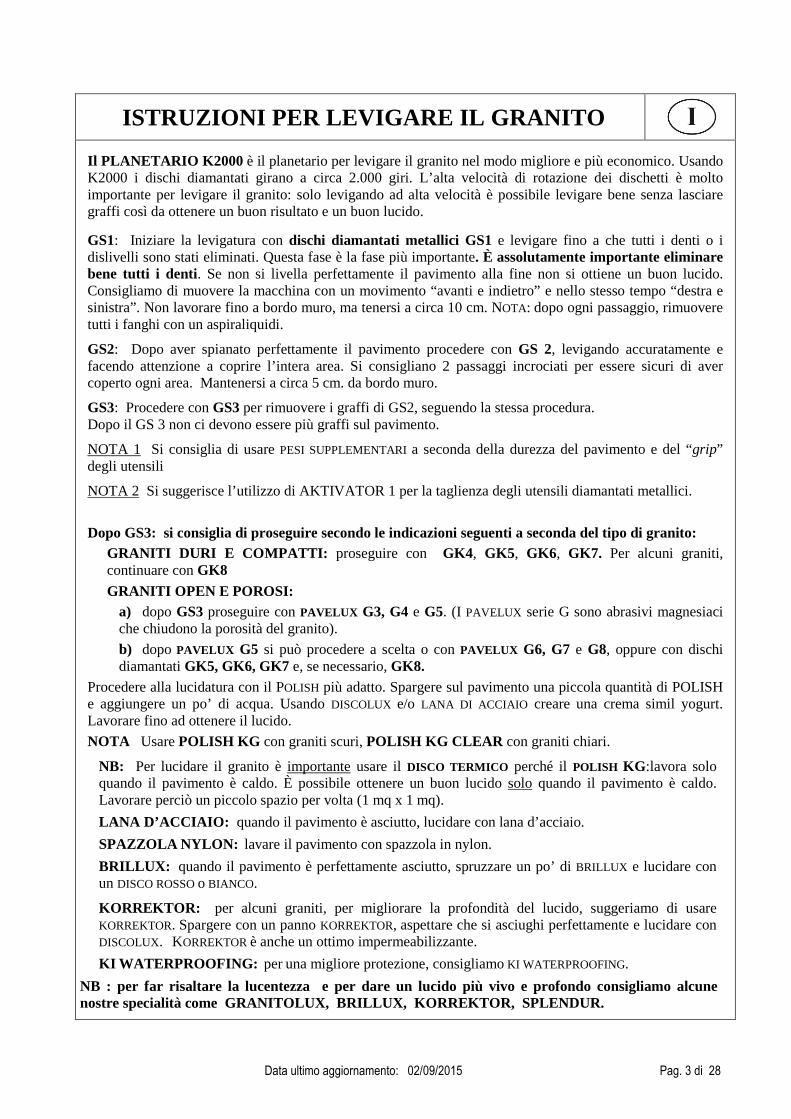
ISTRUZIONI PER LEVIGARE IL GRANITO Il PLANETARIO K2000 è il planetario per levigare il granito nel modo migliore e più economico. Usando K2000 i dischi diamantati girano a circa 2.000 giri. L’alta velocità di rotazione dei dischetti è molto importante per levigare il granito: solo levigando ad alta velocità è possibile levigare bene senza lasciare graffi così da ottenere un buon risultato e un buon lucido.
GS1: Iniziare la levigatura con dischi diamantati metallici GS1 e levigare fino a che tutti i denti o i dislivelli sono stati eliminati. Questa fase è la fase più importante. È assolutamente importante eliminare bene tutti i denti. Se non si livella perfettamente il pavimento alla fine non si ottiene un buon lucido. Consigliamo di muovere la macchina con un movimento “avanti e indietro” e nello stesso tempo “destra e sinistra”. Non lavorare fino a bordo muro, ma tenersi a circa 10 cm. NOTA: dopo ogni passaggio, rimuovere tutti i fanghi con un aspiraliquidi.
GS2: Dopo aver spianato perfettamente il pavimento procedere con GS 2, levigando accuratamente e facendo attenzione a coprire l’intera area. Si consigliano 2 passaggi incrociati per essere sicuri di aver coperto ogni area. Mantenersi a circa 5 cm. da bordo muro.
GS3: Procedere con GS3 per rimuovere i graffi di GS2, seguendo la stessa procedura. Dopo il GS 3 non ci devono essere più graffi sul pavimento.
NOTA 1 Si consiglia di usare PESI SUPPLEMENTARI a seconda della durezza del pavimento e del “grip” degli utensili
NOTA 2 Si suggerisce l’utilizzo di AKTIVATOR 1 per la taglienza degli utensili diamantati metallici.
Dopo GS3: si consiglia di proseguire secondo le indicazioni seguenti a seconda del tipo di granito:
GRANITI DURI E COMPATTI: proseguire con GK4, GK5, GK6, GK7. Per alcuni graniti, continuare con GK8 GRANITI OPEN E POROSI:
a) dopo GS3 proseguire con PAVELUX G3, G4 e G5. (I PAVELUX serie G sono abrasivi magnesiaci che chiudono la porosità del granito).
b) dopo PAVELUX G5 si può procedere a scelta o con PAVELUX G6, G7 e G8, oppure con dischi diamantati GK5, GK6, GK7 e, se necessario, GK8.
Procedere alla lucidatura con il POLISH più adatto. Spargere sul pavimento una piccola quantità di POLISH e aggiungere un po’ di acqua. Usando DISCOLUX e/o LANA DI ACCIAIO creare una crema simil yogurt. Lavorare fino ad ottenere il lucido.
NOTA Usare POLISH KG con graniti scuri, POLISH KG CLEAR con graniti chiari.
NB: Per lucidare il granito è importante usare il DISCO TERMICO perché il POLISH KG :lavora solo quando il pavimento è caldo. È possibile ottenere un buon lucido solo quando il pavimento è caldo. Lavorare perciò un piccolo spazio per volta (1 mq x 1 mq).
LANA D’ACCIAIO: quando il pavimento è asciutto, lucidare con lana d’acciaio.
SPAZZOLA NYLON: lavare il pavimento con spazzola in nylon.
BRILLUX: quando il pavimento è perfettamente asciutto, spruzzare un po’ di BRILLUX e lucidare con un DISCO ROSSO o BIANCO.
KORREKTOR: per alcuni graniti, per migliorare la profondità del lucido, suggeriamo di usare KORREKTOR. Spargere con un panno KORREKTOR, aspettare che si asciughi perfettamente e lucidare con DISCOLUX. KORREKTOR è anche un ottimo impermeabilizzante.
KI WATERPROOFING: per una migliore protezione, consigliamo KI WATERPROOFING.
NB : per far risaltare la lucentezza e per dare un lucido più vivo e profondo consigliamo alcune nostre specialità come GRANITOLUX, BRILLUX, KORREKTOR, SPLENDUR.
Data ultimo aggiornamento: 02/09/2015 Pag. 4 di 28
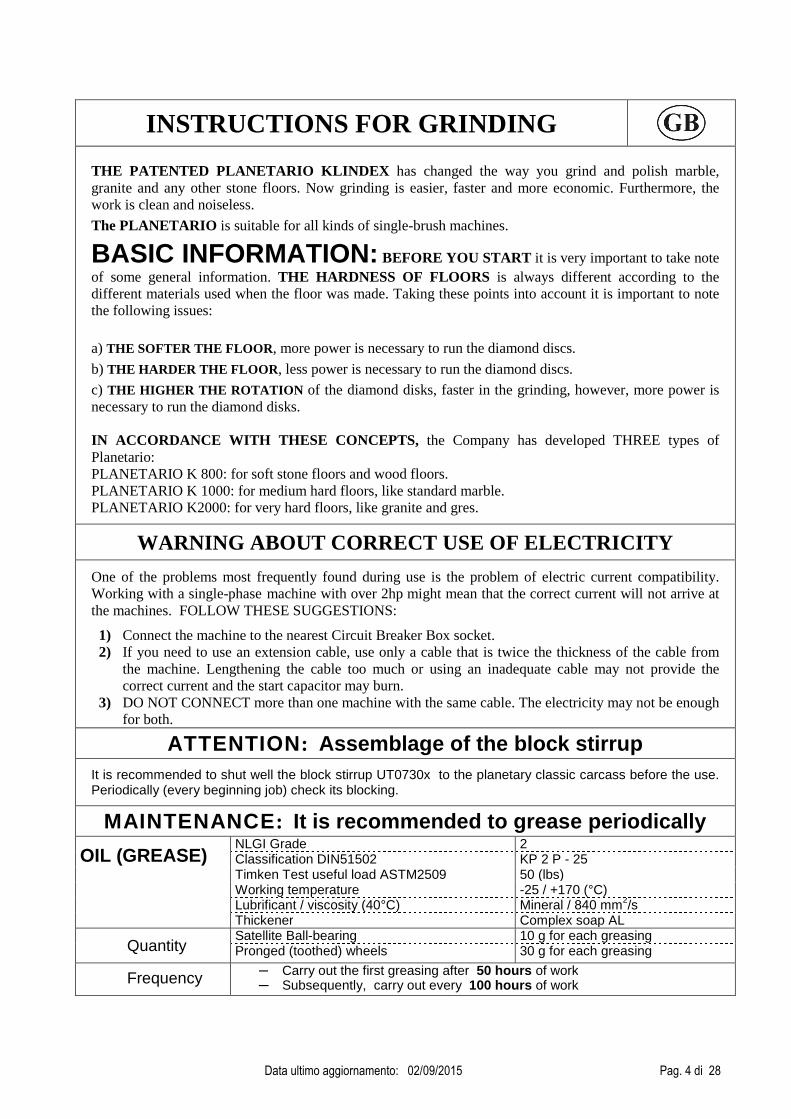
INSTRUCTIONS FOR GRINDING THE PATENTED PLANETARIO KLINDEX has changed the way you grind and polish marble, granite and any other stone floors. Now grinding is easier, faster and more economic. Furthermore, the work is clean and noiseless.
The PLANETARIO is suitable for all kinds of single-brush machines.
BASIC INFORMATION: BEFORE YOU START it is very important to take note of some general information. THE HARDNESS OF FLOORS is always different according to the different materials used when the floor was made. Taking these points into account it is important to note the following issues:
a) THE SOFTER THE FLOOR , more power is necessary to run the diamond discs. b) THE HARDER THE FLOOR , less power is necessary to run the diamond discs.
c) THE HIGHER THE ROTATION of the diamond disks, faster in the grinding, however, more power is necessary to run the diamond disks. IN ACCORDANCE WITH THESE CONCEPTS, the Company has developed THREE types of Planetario: PLANETARIO K 800: for soft stone floors and wood floors. PLANETARIO K 1000: for medium hard floors, like standard marble. PLANETARIO K2000: for very hard floors, like granite and gres.
WARNING ABOUT CORRECT USE OF ELECTRICITY
One of the problems most frequently found during use is the problem of electric current compatibility. Working with a single-phase machine with over 2hp might mean that the correct current will not arrive at the machines. FOLLOW THESE SUGGESTIONS:
1) Connect the machine to the nearest Circuit Breaker Box socket. 2) If you need to use an extension cable, use only a cable that is twice the thickness of the cable from
the machine. Lengthening the cable too much or using an inadequate cable may not provide the correct current and the start capacitor may burn.
3) DO NOT CONNECT more than one machine with the same cable. The electricity may not be enough for both.
ATTENTION : Assemblage of the block stirrup It is recommended to shut well the block stirrup UT0730x to the planetary classic carcass before the use. Periodically (every beginning job) check its blocking.
MAINTENANCE : It is recommended to grease periodically
OIL (GREASE) NLGI Grade 2 Classification DIN51502 KP 2 P - 25 Timken Test useful load ASTM2509 50 (lbs) Working temperature -25 / +170 (°C) Lubrificant / viscosity (40°C) Mineral / 840 mm2/s Thickener Complex soap AL
Quantity Satellite Ball-bearing 10 g for each greasing Pronged (toothed) wheels 30 g for each greasing
Frequency ─ Carry out the first greasing after 50 hours of work ─ Subsequently, carry out every 100 hours of work

Data ultimo aggiornamento: 02/09/2015 Pag. 5 di 28
INSTRUCTIONS FOR GRINDING MARBLE
GRINDING ROUGH OR UNEVEN MARBLE FLOORS 1) To start, use metallic diamond discs MS1 until the surface is even. PLEASE NOTE: If the floors are
notably uneven, start the grinding process with MS0 and proceed with MS1. For a faster and more efficient job we advise you to work with a slow and constant movement, proceeding in a linear pattern following the lines of the tiles. Between one stage and another always remove the mud with a vacuum cleaner. With MS1 or MS0 don’t work up to the wall but stay 10 cm (25 inches) far.
2) When the floor has been perfectly evened and there are not any lippages proceed with the metallic diamond disc MS2, being careful not to leave any untreated areas (we emphasize the importance of working in linear patterns). With MS2 don’t work up to the wall but stay 5 cm (25 inches) far. Before starting any new work do not forget to use AKTIVATOR 1 for sharpening the metallic diamond tools.
3) Proceed with the resin diamond disc M3 – M4 – M5 using the same procedure used with MS2.
4) Working on green, black marble floor hard to polish, proceed with the diamond disc M6 and/or M7 (smaller grain)
5) After grinding, proceed to shine the floors using our POLISH POWDER: the Company has developed and produces a complete range of Polish to shine all kinds of marble floors:
─ POLISH KP 85 the most used for almost all kind of marble.
─ POLISH KP 92 the best for calcareous marble.
─ POLISH PALLADIANA for terrazzo, palladiane and conglomerate.
─ POLISH COLOR for green, black or marble that contains iron pigments.
─ POLISH KMT for soft marbles like Carrara
─ POLISH GREY the special polish for non-calcareous marble.
To use the POLISH: spread the powder on the floor and add a bit of water. Using the DISCOLUX, make the cream like a “yogourt “ consistency and work until the desired shine is achieved. If necessary, add another little bit of Polish and water.
6) When the desired shine is achieved, wash the floor with DISCOLUX. When the floor is dry, polish with a DRY white disc.
NOTE 1: Do not leave the POLISH cream on the floor for over 30 minutes without washing. The excess powder remaining on the floor surface may ruin the shine. NOTE 2: Usually the POLISH is used with DISCOLUX. Only when using POLISH COLOR should steel wool be used. NOTE 3: THERMIC PLATE WARMER: Using the THERMIC DISC instead of the NORMAL PAD HOLDER the work will be faster and the shine deeper.
RESTORING and MAINTENANCE 1) If the floor doesn’t have lippages but only scratches, you may start with the M4 and proceed with the
M5 diamond discs. If the scratches are very deep you may start with the M3 disc.
2) If the floor has lippages or is uneven use diamond discs series JUMPER and/or KLIMBER. They have special bevel that allows to jump on lippages without breaking.

Data ultimo aggiornamento: 02/09/2015 Pag. 6 di 28
INSTRUCTION FOR GRINDING GRANITE PLANETARIO K2000 is the most suitable Planetario for grinding granite floors. Using K2000, the diamond-disks run at about 2000 rpm. The high speed is very important to polish granite: only by cutting at high speeds is it possible to smooth granite thoroughly without leaving scratches and to obtain an excellent shine.
GS1: Start with metallic-diamond-disc GS1 and work until the floor is perfectly evened without any lippages. This stage is the most important stage. It is absolutely important to eliminate all the rough edges. If floors are not perfectly evened, you will not obtain a good shine. We suggest to move the machine with a movement “forward and backward” and at the same time “to right and left” following the lines of the tiles. With GS1 don’t work up to the wall but stay 10 cm (25 inch) far. After any step remove the mud by vacuum cleaner and not by hand.
GS2: After levelling, proceed with GS2. It is ideal to grind the floors in a cross-patterned direction.
GS3: Proceed with metallic-diamond-disc GS3. It is ideal to grind the floors in a cross-patterned direction. No scratches should be visible on the floors after this step.
NOTE 1 : it is suggested to add EXTRA WEIGHT according to the hardness of the floor and the tools grip.
NOTE 2 : it is suggested to use AKTIVATOR 1 for sharpening the metallic diamond tools
After GS3 proceed in one of the following system: a) FOR HARD AND COMPACT GRANITE : proceed with G4, G5; G6, G7 and if it is necessary
with G8
b) FOR OPEN AND POUROS GRANITE : 1) after GS3 proceed with PAVELUX G3, G4 and G5. PAVELUX are magnesian abrasive useful to
close the microporosity of the granite 2) after PAVELUX G5 you can proceed with PAVELUX G6, G7 and G8 or with diamond discs GK6,
GK7 and GK8
After grinding, proceed to shine the floors using our POLISH POWDER: POLISH KG: for dark-coloured granite POLISH KG CLEAR: for light-coloured granite
To use the POLISH: spread the powder on the floor and add a bit of water. Using the DISCOLUX or STEEL WOOL, make the cream like a “yogourt” consistency and work until the desired shine is achieved. If necessary, add another little bit of Polish and water. .
PLEASE NOTE: For polishing granite floors it is important to work with the THERMIC DISC because POLISH KG works only when the floor is warmed. IT IS IMPORTANT TO APPLY THE POLISH PROGRESSIVELY OVER SMALL AREAS 1m2 x 1m2.
STEEL WOOL: when the floor is dry, polish with steel wool.
NYLON BRUSH: wash accurately the floor with a nylon brush. :
BRILLUX: when the floor is perfectly dry spray a little bit of BRILLUX and polish with RED PAD or WHITE PAD.
KORREKTOR: to obtain a deep shine, spread KORREKTOR on the floor by cloth , wait until becomes perfectly dry and polish with DISCOLUX. KORREKTOR is also a good waterproofing..
KI WATERPROOFING: for a special water-proofing it is suggested to apply KI WATERPROOFING.
After polishing, proceed to enhance the shine with GRANITOLUX or BRILLUX: The granite will look like it was factory-made!

Data ultimo aggiornamento: 02/09/2015 Pag. 7 di 28
ISTRUCTIONS GENERALES POUR PONCER LES PLANETAIRES BREVETÉS ont révolutionné la façon de poncer et lustrer les sols en marbre et en granit. Maintenant le ponçage est beaucoup plus facile, beaucoup plus rapide et plus économique.
LES PLANETAIRES peuvent être montés sur n’importe quelle monobrosse de n’importe quelle marque ou modèle simplement en appliquant la flange de la machine qu’on veut utiliser.
AVERTISSEMENT GENERAL Avant de commencer le ponçage il est
important considérer que la DURETE DES PIERRES est toujours différente.
Tenant compte des caractéristiques de sol, vous devez vous rappeler que:
a) PLUS LE SOL EST TENDRE, PLUS IL FAUT DE FORCE pour faire tourner les abrasifs.
b) PLUS LE SOL EST DUR ET MOINS EST LA FORCE NECESSAIRE pour faire tourner les abrasifs.
c) PLUS HAUTE EST LAVITESSE DE ROTATION DES DISQUES DIAMANTES, plus rapide est l’exécution du travail mais plus est la force nécessaire pour faire tourner les disques à haute vitesse.
Sur la base de ces principes fondamentaux ils ont été réalisés trois types de planétaires:
PLANETAIRE K 800 à 800 RPM conseillé pour sols tendres et pour parquet.
PLANETAIRE K 1000 à 1.000 RPM conseillé pour sols de moyenne duretés comme le marbre.
PLANETARIO K 2000 à 2.000 RPM conseillé pour les sols duretés comme le granit ou le gres.
VOLTAGE CORRECT ET UTILISATION DE CABLES ELETRIQUES SUPPLEMENTAIRES DE BRANCHEMENT .
Un des plus fréquents cas de mauvais fonctionnement de la machine monobrosse pour travaux de ponçage ou pour des travaux qui ont besoin de plus de force de moteur est dû au fait que, souvent la quantité de courant nécessaire n’arrive pas à la machine. Suivre ces deux conseils importants:
a) Brancher à la prise de courant plus près de l’interrupteur général. Spécialement dans les vieilles installations il peut y avoir beaucoup de dispersion d’énergie ou de mauvais relais le long du circuit.
b) Si vous avez besoin d’une rallonge électrique, utiliser seulement un câble électrique de diamètre double par rapport à celui de la machine.
c) Ne brancher jamais sur la même prise de courant deux machines comme par exemple la monobrosse et l’aspire liquides.
ATTENTION: montage de la staffe de blocage Nous vous recommandons de bien serrer la staffe de blocage UT0730x à la carcasse du PLANETAIRE CLASSIC avant son utilisation. Contrôler périodiquement (à chaque début de travail) qu’il soit bien serré.
MANUTENTION : On recommande de graisser periodiquement
GRAS Grade NLGI 2 Classification DIN51502 KP 2 P - 25 Test Timken charge utile ASTM2509 50 (lbs) Température de travail -25 / +170 (°C) Huile de base / viscosité (40°C) Mineral / 840 mm2/s Addensant Savon complexe AL
Quantité Coussinets satellites 10 g pour chaque graisseur Roues denté 30 g pour chaque graisseur
Fréquence ─ Effectuer le premier graissages après 50 heures de travail ─ Effectuer les graissages successifs après chaques 100 heures de travail
Data ultimo aggiornamento: 02/09/2015 Pag. 8 di 28
INSTRUCTIONS POUR PONCER LE MARBRE PONCAGE DES SOLS EN MARBRE
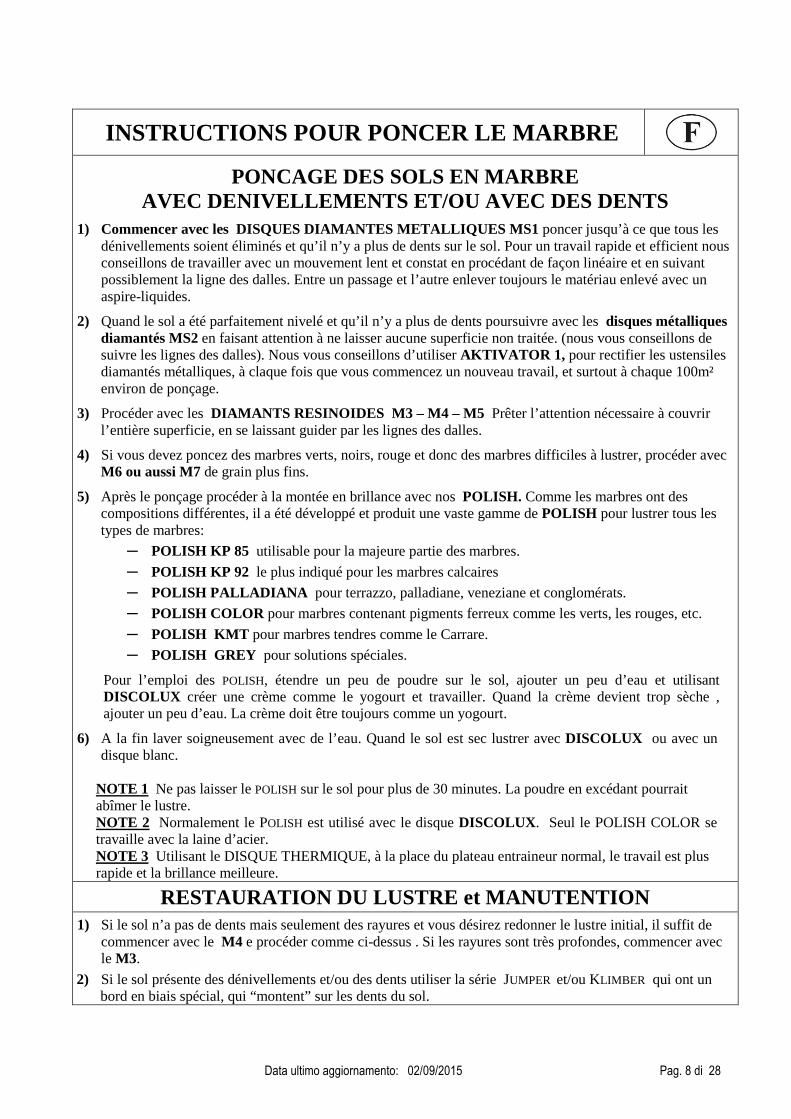
AVEC DENIVELLEMENTS ET/OU AVEC DES DENTS 1) Commencer avec les DISQUES DIAMANTES METALLIQUES MS1 poncer jusqu’à ce que tous les
dénivellements soient éliminés et qu’il n’y a plus de dents sur le sol. Pour un travail rapide et efficient nous conseillons de travailler avec un mouvement lent et constat en procédant de façon linéaire et en suivant possiblement la ligne des dalles. Entre un passage et l’autre enlever toujours le matériau enlevé avec un aspire-liquides.
2) Quand le sol a été parfaitement nivelé et qu’il n’y a plus de dents poursuivre avec les disques métalliques diamantés MS2 en faisant attention à ne laisser aucune superficie non traitée. (nous vous conseillons de suivre les lignes des dalles). Nous vous conseillons d’utiliser AKTIVATOR 1, pour rectifier les ustensiles diamantés métalliques, à claque fois que vous commencez un nouveau travail, et surtout à chaque 100m² environ de ponçage.
3) Procéder avec les DIAMANTS RESINOIDES M3 – M4 – M5 Prêter l’attention nécessaire à couvrir l’entière superficie, en se laissant guider par les lignes des dalles.
4) Si vous devez poncez des marbres verts, noirs, rouge et donc des marbres difficiles à lustrer, procéder avec M6 ou aussi M7 de grain plus fins.
5) Après le ponçage procéder à la montée en brillance avec nos POLISH. Comme les marbres ont des compositions différentes, il a été développé et produit une vaste gamme de POLISH pour lustrer tous les types de marbres:
─ POLISH KP 85 utilisable pour la majeure partie des marbres.
─ POLISH KP 92 le plus indiqué pour les marbres calcaires
─ POLISH PALLADIANA pour terrazzo, palladiane, veneziane et conglomérats.
─ POLISH COLOR pour marbres contenant pigments ferreux comme les verts, les rouges, etc.
─ POLISH KMT pour marbres tendres comme le Carrare.
─ POLISH GREY pour solutions spéciales.
Pour l’emploi des POLISH, étendre un peu de poudre sur le sol, ajouter un peu d’eau et utilisant DISCOLUX créer une crème comme le yogourt et travailler. Quand la crème devient trop sèche , ajouter un peu d’eau. La crème doit être toujours comme un yogourt.
6) A la fin laver soigneusement avec de l’eau. Quand le sol est sec lustrer avec DISCOLUX ou avec un disque blanc.
NOTE 1 Ne pas laisser le POLISH sur le sol pour plus de 30 minutes. La poudre en excédant pourrait abîmer le lustre. NOTE 2 Normalement le POLISH est utilisé avec le disque DISCOLUX . Seul le POLISH COLOR se travaille avec la laine d’acier. NOTE 3 Utilisant le DISQUE THERMIQUE, à la place du plateau entraineur normal, le travail est plus rapide et la brillance meilleure.
RESTAURATION DU LUSTRE et MANUTENTION 1) Si le sol n’a pas de dents mais seulement des rayures et vous désirez redonner le lustre initial, il suffit de
commencer avec le M4 e procéder comme ci-dessus . Si les rayures sont très profondes, commencer avec le M3.
2) Si le sol présente des dénivellements et/ou des dents utiliser la série JUMPER et/ou KLIMBER qui ont un bord en biais spécial, qui “montent” sur les dents du sol.

Data ultimo aggiornamento: 02/09/2015 Pag. 9 di 28
INSTRUCTIONS POUR PONCER LE GRANIT LE PLANETAIRE K 2000 est le planétaire pour poncer le granit de façon meilleure et plus économique. Utilisant le K2000 les disques diamantés tournent à environ 2.000 tours . La haue vitesse de rotation des satellites est très importante pour poncer le granit: seulement en ponçant à haute vitesse il est possible bien poncer sans laisser de rayures et obtenir un bon résultat et une bonne brillance.
GS1: Commencer le ponçage avec les disques diamantés métalliques GS1 et poncer jusqu’à l’élimination totale des dents ou des dénivellements. Cette phase est la plus importante. Il est absolument important bien éliminer toutes les dents. Si vous ne nivelez pas parfaitement le sol à la fin on n’obtient pas une bonne brillance. Nous vous conseillons de donner un mouvement “en avant et en arrière” à la machine et en même temps “droite et gauche”. Ne pas travailler jusqu’au bord du mur, mais rester à environ 10 cm. NOTE: après chaque passage, enlever toutes les boues avec un aspire liquides..
GS2: Après avoir aplani parfaitement le sol procéder avec le GS 2, en ponçant soigneusement et en faisant attention de couvrir l’entière superficie et en suivant si possible les lignes des dalles pour ne laisser aucun endroit non traité. Nous conseillons 2 passages entrecroisés pour être sûr d’avoir couvert toute la surface. rester à environ 5 cm du bord du mur.
GS3: Procéder avec le GS3 pour enlever les rayures de GS2, et en suivant la même procédure. Après le GS 3 il ne doit plus y avoir de rayures sur le sol.
NOTE 1 Nous vous conseillons d’utiliser des POIDS SUPPLEMENTAIRES selon la dureté du sol et du “grip” des ustensiles NOTE 2 Nous conseillons l’utilisation de AKTIVATOR 1 pour la coupe des ustensiles diamantés métalliques.
Après GS3: Nous conseillons de poursuivre selon les indications suivantes selon le type de granit: GRANITS DURS ET COMPACTES: poursuivre avec GK4, GK5, GK6, GK7. Pour certains granits, continuer avec GK8 GRANITS “OUVERTS” ET POREUX
c) après GS3 poursuivre avec PAVELUX G3, G4 et G5. (. (Les PAVELUX série G sont des abrasifs en magnésien qui ferment la porosité du granit).
d) après PAVELUX G5 on peut procéder au choix ou avec PAVELUX G6, G7 e G8, ou bien, avec les disques diamantés GK5, GK6, GK7 et, si nécessaire, GK8.
Procéder à la montée en brillance avec le POLISH adapte. Etendre sur le sol une petite quantité de POLISH
KG et ajouter un peu d’eau. Utilisant DISCOLUX et/ou LAINE D’ACIER créer une crème semblable au yogourt. Travailler jusqu’à obtenir le lustre.
NB: Utiliser le POLISH KG avec le granit foncé, le POLISH KG CLEAR avec le granit claire
NB: Pour lustrer le granit il est important utiliser le DISQUE THERMIQUE parce-que le POLISH KG travaille seulement quand le sol est chaud.
NB: Il est possible obtenir un bon lustre seulement quand le sol est chaud. Travailler donc une petite surface à la fois (1 m² x 1 m²).
LAINE D’ACIER: quand le sol est sec, lustrer avec la laine d’acier.
BROSSE NYLON: laver le sol avec la brosse nylon.
BRILLUX: quand le sol est parfaitement sec, vaporiser un peu de BRILLUX et lustrer avec un DISQUE
ROUGE OU BLANC.
KORREKTOR: pour certains granits, pour améliorer la profondeur du lustre, nous conseillons d’utiliser KORREKTOR. Etendre avec un chiffon KORREKTOR, attendre qu’il sèche parfaitement et lustrer avec DISCOLUX. KORREKTOR est également un excellent imperméabilisant.
KI WATERPROOFING: pour une meilleure protection, nous conseillons KI WATERPROOFING.
NB: pour exalter la brillance et pour donner un lustre plus vif et profond nous conseillons certaines de nos spécialités comme GRANITOLUX, BRILLUX, KORREKTOR, SPLENDUR.

Data ultimo aggiornamento: 02/09/2015 Pag. 10 di 28
POLIEREN GEBRAUCHTSANLEITUNG DIE PATETIERTEN PLANETAREN haben die Welt der Polierung und Bohnerung von Marmor und Granit Fußboden völlig erneuert. Jetzt ist die Arbeit der Polierung viel leichter und schneller.
DIE PLANETAREN können an jeder Monobürste von jeder Marke dank der “flangia” dieser eingebaut werden.
ALLGEMEINE INFORMATIONEN : bevor man mit den Polieren anfängt muss man beachten dass die HÄRTE DER FUßBODEN je nach benutztem Material ändert.
Beachten Sie diese Merkmale der Fußboden, merken Sie sich:
a) DESTO WEICHER DER FUßBODEN; DESTO MEHR IST DIE KRAFT DIE MAN BRAUCHT um die Schleifen drehen zu lassen.
b) DESTO HÄRTER DER FUßBODEN; DESTO WENIGER DIE KRAFT DIE MAN BRAUCHT um die Schleifen drehen zu lassen.
c) DESTO HÖHER DIE GESCHWINDIGKEIT DER UMDREHUNGEN DER DIAMANTIERTEN PLATTEN; desto schneller Arbeitet man aber desto mehr ist die Kraft die man braucht um die Platten auf hoher Geschwindigkeit drehen zu lassen.
Die Firma hat auf Wissen dieser Merkmale drei Arten von Planetaren entwickelt:
PLANETARIO K 800 mit 800 empfohlen für weichen Fuβboden und parquet
PLANETARIO K 1000 mit 1.000 empfohlen für dürschnitlichen harten Fuβboden wie Marmor
PLANETARIO K 2000 mit 2.000 empfohlen für harten Fuβboden wie Granit oder Gres
RICHTIGE WOLLTAGE UND GEBRAUCH VON ELEKTRISCHEN KAB ELN Einer der häufigsten Gründe falscher Funktion von der Monobürste bei Polierarbeiten oder bei anderer Arbeiten wobei der Motor mehr Kraft braucht, ist es das die Maschine nicht genügend mit Strom versorgt wird. Folgen Sie bitte diese drei Empfehlungen:
a) Vor allem bei älteren Gebäuden ist es wichtig sich an der nah liegende Steckdose vom Generalschalter zu verbinden, dar der Strom durch schlechte Verbindungen verloren gehen kann.
b) Im Falle das Sie ein Verlängerungskabel brauchen, verwenden Sie Kabeln die doppelt so groß sind wie die der Maschine
c) Nie zwei Maschinen an einer Steckdose verbinden, z. B. Monobürste und Saugmaschine
ACHTUNG : montage Speer-Steigbügel Es wird empfohlen bevor man der planetario classic benuts, der Speer-Steigbügel cod. UT0730x fest am Basiskörper zu speeren. Periodish (vor jeder Arbeit) die Speere prüfen
WARTUNG: es empfehlen die periodische Schmierung
SCHUTZFETT NLGI Grade 2 Classification DIN51502 KP 2 P - 25 Timken Test useful load ASTM2509 50 (lbs) Working temperature -25 / +170 (°C) Lubrificant / viscosity (40°C) Mineral / 840 mm2/s Thickener Complex soap AL
Menge Satellite Drehlagerung 10 g für jeden Nabenschmierung Zahnrader 30 g für jeden Nabenschmierung
Häufigkeit ─ die erste Schmierung nach 50 Stunden Arbeit vornehmen ─ die folgend Schmierungen alle 100 Stunden Arbeit vornehmen

Data ultimo aggiornamento: 02/09/2015 Pag. 11 di 28
PATENTIERTES SYSTEM ZUM POLIEREN VON MARMOR
POLIEREN VON MARMOR FU ΒBODEN DIE UNHEBUNGEN HABEN 1) Mit DIAMANTIERTEN METALISCHEN PLATTEN MS1 anfangen, polieren so lange bis es
keine Unhebungen mehr gibt und im Fußboden keine Zähne mehr sichtbar sind. Wir empfehlen die Maschine mit Bewegungen wie, „vor und zurück“ und „rechts und links“, zu benutzen. Zwischen ein Gang und den anderen dem Material mit einem Sauger für Flüssigkeit entfernen. Nich bis zum Rand der Wand arbeiten, halten sie ca. 10 cm. Abstand.
2) Wenn der Fußboden perfekt poliert wurde und keine Zähne mehr sichtbar sind, mit DIAMANTIERTEN METALISCHEN PLATTEN MS2 achten die dabei das die komplette Oberfläche behandelt wird. AKTIVATOR 1 ist zum reiniger der diamantierten metalischen platten, vor jeder neuen Arbait, und/oder nach ca. 100 mq Polierung empfohlen. Halten Sie sich ca. 5 cm von der wand.
3) Mit VERHARZTEN DIAMANTEN M3- M4-M5 Achten Sie darauf die komplette Oberfläche zu decken, lassen Sie sich dabei von der Linie der Fliesen führen.
4) Beim polieren von grünen, schwarzen, roten und anderen schweren Marmor Arten könnte es notwendig sein die DIAMANTIERTEN PLATTEN M6 oder auch M7 zu benutzen.
5) Nach der Politur mit den Bohnern mit unseren POLISH folgen. Die Firma hat eine große Anzahl verschiedener POLISH entwickelt und produziert um alle Arten an Marmor zu drängen
POLISH KP 85 für fast alle Marmorarten nützpar
POLISH KP 92 der häufiger genommen wird, sehr gut für Kalkhaltiges Marmor
POLISH PALLADIANA für terrazzo, palladiane, veneziane und conglomerati.
POLISH COLOR für Marmor mit eisern Pigmenten wie grün, rot, rosa u.s.w.
POLISH KMT für weicheren Marmor wie Carrara
POLISH GREY für besondere Lösung Um Polish zu benutzen, etwas Pulver auf den Boden verteilen und etwas Wasser dazu gießen, eine cremige Lösung wie „Yoghurt“ entsteht. Weiter verarbeiten bis man den Drang enthält Wenn die Creme zu trocken wird etwas Wasser dazu gießen. Die Creme muss immer wie Yoghurt sein.
6) Am Ende mit Wasser waschen. Wenn der Boden trocken ist mit DISCOLUX oder mit einer weißen Platte drängen.
NOTIZ 1 Den Polish nie länger als 30 Minuten auf den Boden lassen, es könnte den Drang schädigen. NOTIZ 2 In der Regel benutzt man die DISCOLUX Platte, nur bei POLISH COLOR arbeitet man mit Stahlwolle NOTIZ 3 Wenn man eine THERMISCH PLATTE benutzt geht die Arbeit schneller und das Drang wird besser
GEDRÄNGTE FUßBODEN NACHPOLIEREN UND HALTUNG
1) Wenn der Fußboden Zähne hat oder nicht eben ist, mit M2 anfangen bis keine Zähnemehr zu sehen sind. ( Falls der Boden sehr geschädigt ist mit M1 anfangen ) Weiter arbeiten mit M3-M4-M5 wie oben beschrieben.
2) Falls der Boden keine Zähne hat sondern nur Kratzer und wir den Drang wieder herstellen wollen, mit M4 anfangen dann M5. Falls die Kratzer tief sind mit M3 anfangen.

Data ultimo aggiornamento: 02/09/2015 Pag. 12 di 28
PATENTIERTES POLIERSYSTEM FÜR GRANIT Der PLANETAR K 2000 ist der schnellste und preisgünstigste Planetar für die Politur von Granit. Bei der Nützung der K 2000 können die diamantierten Platten auf circa 2000 Umdrehungen arbeiten. Bei der Politur von Granit ist die hohe Anzahl der Umdrehungen sehr Wichtig: nur mit schnellen Schnitten im Granit ist es möglich gut zu drängen ohne Kratzer zu hinterlassen.
GS 1: Die Politur mit metallischen diamantierten Platten GS1 anfangen und so lange polieren bis alle Zähne und Unebenheiten weg sind. Diese Fase ist die wichtigste. Es ist absolut wichtig alle Zähne weg zu polieren. Wenn man den Fußboden nicht richtig ebnet ist es nicht möglich einem guten Drang zu bekommen. Wir empfehlen die Maschine mit Bewegungen wie, „vor und zurück“ und „rechts und links“, zu benutzen. Nich bis zum Rand der Wand arbeiten, halten sie ca. 10 cm. Abstand. NOTIZ: nach jeder Gang, mit einen sauger für Flüssigkeit den match aufsaugen.
GS 2: Wenn man den Boden geebnet hat mit GS2 weiter arbeiten, sorgfältig polieren und die ganze Oberfläche zu bearbeiten. Es ist empfohlen 2 gekreuzte Durchgänge zu machen um sicher zu sein das man die komplette Oberfläche gedeckt hat. Halten Sie sich ca. 5 cm von der Wand.
GS 3: Mit GS3 weiter arbeiten um die Kratzer von GS2 zu entfernen, in den man die selbe Prozedur folgt. Nach GS3 dürfen keine Kratzer mehr auf den Fuβboden sein und dieselbe Prozedur folgen. Es ist empfohlen die Vorgänge zu überkreuzen.
NOTIZ 1 beim arbeiten von härteren Fuβboden ist es notwendig EXTRA GEWICHT zu benutzen.
NOTIZ 2 AKTIVATOR 1 ist für die Schärfe der diamantierten metalischen Geräte empfohlen.
NACH GS 3 wie folgt weiter gehen je nach Granit Art: GRANIT DICHT UND HART: mit GK4, GK5, GK6 und GK7 folgen für einige mit GK8 weiter machen.
GRANIT OPEN UND PÖROS: a) Nach GS3 mit PAVELUX G3, G4 und G5 folgen. (Die PAVELUX G serie sind Schleifmittel
magnesiumhaltig die porösichkeit vom Granit schlieβen)
b) Nach PAVELUX G5 kann man zwischen PAVELUX G6, G7 und G8 oder der diamantierten Platten GK5, GK6, GK7 und falls notwendig, GK8 auswählen.
Mit den passender POLISH polieren. Eine kleine Menge von POLISH auf der Fuβboden verteilen und etwas Wasser dazugeben. Mit hilfe von DISCOLUX und/oder mit Stahlwolle eine Creme wie „Yoghurt“ herstellen. So lange weiter Arbeiten bis der gewünschte glanz entsteht.
NOTIZ: POLISH KG für dunkler Granit und POLISH KG CLEAR für hellen Granit verwerden.
WICHTIG: Um den Granit zu drängen ist es wichtig die THERMISCHE SCHALLPLATTE zu benutzen das der POLISH KG nur auf warmen Boden arbeitet. Nur mit warmen Fußboden ist es möglich ein guten Drang zu bekommen. Daher nur auf kleine Flächen arbeiten (1mq x 1 mq).
STAHLWOLLE: wenn der Fußboden trocken ist, mit STAHLWOLLE polieren.
NYLONBÜRSTE: Fußboden mit einer NYLONBÜRSTE washen
BRILLUX: wenn der Fußboden komplett getrocknet ist, etwas BRILLUX spritzen und mit einer WEIΒEN
ODER ROTEN PLATTE polieren.
KORREKTOR: um den Glanz bei einiger Granitarten zu verbessern, empfehlen wir KORREKTOR zu verwerden. Mit einem Tuch KORREKTOR verteilen, warten das es komplett trocken ist und mit DISCOLUX nachpolieren. KORREKTOR ist auch ein optimales wasserdichter Stoff.
KI WATERPROFING: für ein noch sicheren Schutz, empfehlen wir KI WATERPROFING
WICHTIG: Um den Glanz zu bevorheben und um ihn lebendisch wirken zu lassen, empfehlen wir einige unsere speziellen Produkte wie GRANITOLUX , SPLENDUR LIQUIDO und SPLENDUR SOLIDO

Data ultimo aggiornamento: 02/09/2015 Pag. 13 di 28
ISTRUCIONES GENERALES PARA LEVIGAR
LOS PLANETARIOS PATENTADOS han revolucionado el modo de levigar y abrillantar los pisos en marmol y granito. Ahora el trabajo de levigadura es mucho màs facil, màs veloz y màs economico.
LOS PLANETARIOS pueden ser usados en cualquier pulidora de cualquier marca o modelo basta introducir la “flangia” (disco) de la maquina que se quiere usar.
ADVERTENCIA GENERAL : primero de empezar el trabajo de levigadura es importante examinar que la DUREZA DEL PISO es siempre diferente a segun del material que viene usado. El granito por ejemplo es mucho màs duro del marmol. Pero es importante saber que hai tambien diferencia de dureza entre marmol y marmol y entre granito y granito.
Teniendo presente estas carateristicas de los pisos, recuerda que:
a) MAS EL PISO ES TIERNO, MAJOR ES LA FUERZA NECESARIA para hacer girar los abrasivos.
b) MAS EL PISO ES DURO, MENOR ES LA FUERZA NECESARIA para hacer girar los abresivos.
c) MAS ALTA ES LA VELOCIDAD DE ROTACION DE LOS DISCOS DIAMANTADOS màs veloz es el trabajo pero major es la fuerza que hace falta para hacer girar los discos a alta velocidad.
Para estos principios fundamentales han sido realizados y productos tres tipos de Planetarios:
PLANETARIO K 800 a 800 giros consejado para utilizar con normales pulidoras. PLANETARIO K 1000 a 1.000 giros es consejados para el marmol. PLANETARIO K 2000 a 2.000 giros es consejado para el granito.
CORRECTO VOLTAJE Y USO DE CAVOS ELETRICOS SUPLEMENTARIOS DE CONECION
Unos de los màs frecuentes casos de mal funcionamento de la maquina pulidora para trabajos de levigadura o para trabajos que necesitan màs fuerza motriz es que muchas vecez no llega la correcta cantidad de energia eletrica a la maquina. Seguir estos tres importantes consejos:
a) Colegarse a la toma de corriente màs cerca al interruptor general. En las viejas instalaciones se puede haber mucha disperciòn de energia o malos colegamentos en la red eletrica
b) Si hace falta un alargador eletrico, usar solo cavos eletricos de diametro doble al que tiene en dotaciòn la maquina.
c) Nunca conectar en la misma toma de corriente dos maquinas como por ejemplo una pulidora y una aspira lìquidos.
ATTENTION : Assemblage of the block stirrup It is recommended to shut well the block stirrup UT0730x to the planetary classic carcass before the use. Periodically (every beginning job) check its blocking.
MAINTENANCE : It is recommended to grease periodically
OIL (GREASE) NLGI Grade 2 Classification DIN51502 KP 2 P - 25 Timken Test useful load ASTM2509 50 (lbs) Working temperature -25 / +170 (°C) Lubrificant / viscosity (40°C) Mineral / 840 mm2/s Thickener Complex soap AL
Quantity Satellite Ball-bearing 10 g for each greasing Pronged (toothed) wheels 30 g for each greasing
Frequency ─ Carry out the first greasing after 50 hours of work ─ Subsequently, carry out every 100 hours of work
Data ultimo aggiornamento: 02/09/2015 Pag. 14 di 28
SISTEMA DE LEVIGAR MARMO PATENTADO
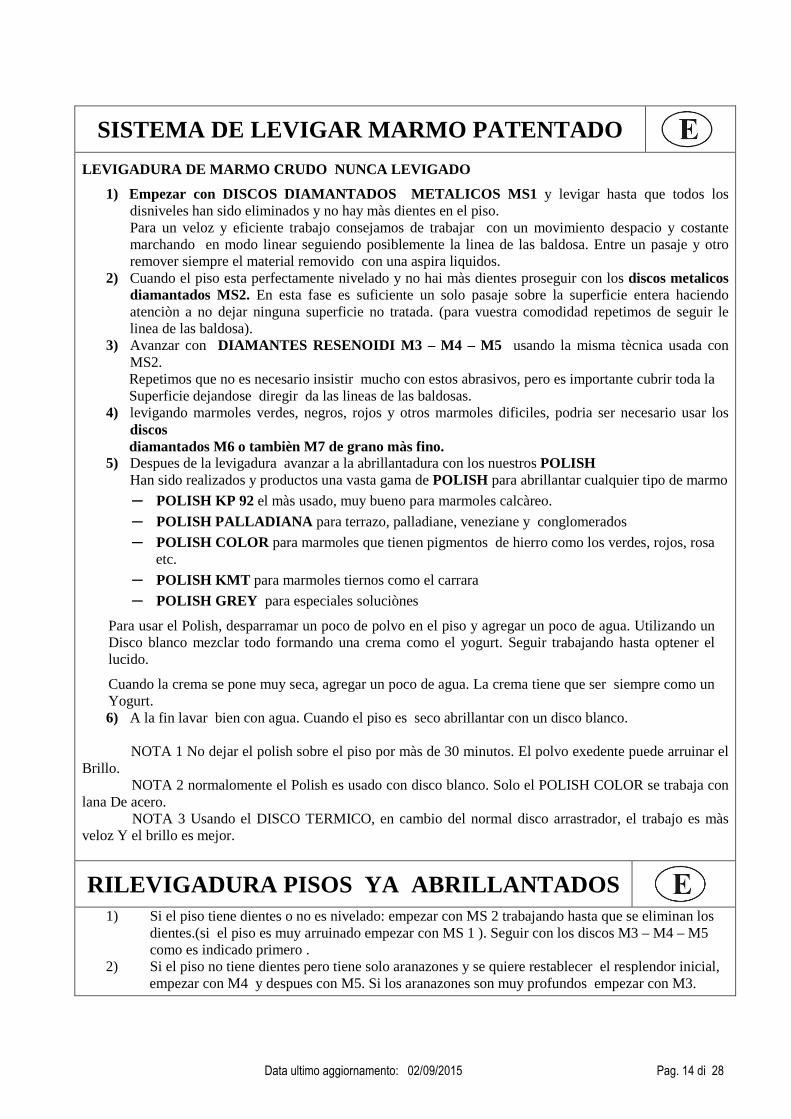
LEVIGADURA DE MARMO CRUDO NUNCA LEVIGADO
1) Empezar con DISCOS DIAMANTADOS METALICOS MS1 y levigar hasta que todos los disniveles han sido eliminados y no hay màs dientes en el piso. Para un veloz y eficiente trabajo consejamos de trabajar con un movimiento despacio y costante marchando en modo linear seguiendo posiblemente la linea de las baldosa. Entre un pasaje y otro remover siempre el material removido con una aspira liquidos.
2) Cuando el piso esta perfectamente nivelado y no hai màs dientes proseguir con los discos metalicos diamantados MS2. En esta fase es suficiente un solo pasaje sobre la superficie entera haciendo atenciòn a no dejar ninguna superficie no tratada. (para vuestra comodidad repetimos de seguir le linea de las baldosa).
3) Avanzar con DIAMANTES RESENOIDI M3 – M4 – M5 usando la misma tècnica usada con MS2. Repetimos que no es necesario insistir mucho con estos abrasivos, pero es importante cubrir toda la Superficie dejandose diregir da las lineas de las baldosas.
4) levigando marmoles verdes, negros, rojos y otros marmoles dificiles, podria ser necesario usar los discos diamantados M6 o tambièn M7 de grano màs fino.
5) Despues de la levigadura avanzar a la abrillantadura con los nuestros POLISH Han sido realizados y productos una vasta gama de POLISH para abrillantar cualquier tipo de marmo
─ POLISH KP 92 el màs usado, muy bueno para marmoles calcàreo.
─ POLISH PALLADIANA para terrazo, palladiane, veneziane y conglomerados
─ POLISH COLOR para marmoles que tienen pigmentos de hierro como los verdes, rojos, rosa etc.
─ POLISH KMT para marmoles tiernos como el carrara
─ POLISH GREY para especiales soluciònes
Para usar el Polish, desparramar un poco de polvo en el piso y agregar un poco de agua. Utilizando un Disco blanco mezclar todo formando una crema como el yogurt. Seguir trabajando hasta optener el lucido.
Cuando la crema se pone muy seca, agregar un poco de agua. La crema tiene que ser siempre como un Yogurt. 6) A la fin lavar bien con agua. Cuando el piso es seco abrillantar con un disco blanco. NOTA 1 No dejar el polish sobre el piso por màs de 30 minutos. El polvo exedente puede arruinar el
Brillo. NOTA 2 normalomente el Polish es usado con disco blanco. Solo el POLISH COLOR se trabaja con
lana De acero. NOTA 3 Usando el DISCO TERMICO, en cambio del normal disco arrastrador, el trabajo es màs
veloz Y el brillo es mejor.
RILEVIGADURA PISOS YA ABRILLANTADOS
1) Si el piso tiene dientes o no es nivelado: empezar con MS 2 trabajando hasta que se eliminan los dientes.(si el piso es muy arruinado empezar con MS 1 ). Seguir con los discos M3 – M4 – M5 como es indicado primero .
2) Si el piso no tiene dientes pero tiene solo aranazones y se quiere restablecer el resplendor inicial, empezar con M4 y despues con M5. Si los aranazones son muy profundos empezar con M3.

Data ultimo aggiornamento: 02/09/2015 Pag. 15 di 28
SISTEMA DI LEVIGADURA GRANITO PATENTADO
EL PLANETARIO K 2000 es el planetario para levigare el granito en modo mejor y màs economico. Usando K2000 los discos diamantados pueden girar a casi 2.000 giros. La alta velocidad de rotaciòn de los discos es muy importante para levigar el granito: solo cortando el granito a alta velocidad es posible levigar bien sin dejar rallones y asi obtener un buen resultado y un buen brillo.
GS 1: empezar a levigar con discos diamantados metalicos GS 1 y levigar hasta que todos los dientes o disniveles sean eliminados. Esta es la fase màs importante. Es absolutamente importante eliminar bien todos los dientes. Si no se nivela bien el piso a la fin no so obtiene un buen brillo. GS 2 : Despues de haber nivelado perfetamente el piso seguir con GS 2, levigar haciendo cuidado a cubrir todo el aire siguiendo las lineas de las baldosa para no dejar superficies no tratadas. GS 3 : Avanzar con DOS PASADAS DE GS3 seguIndo la misma procedimiento. Es consejable cruzar las pasadas. NB trabajando sobre granitos duros hace falta de los pesos suplementares. Usando la nuestra especial Levighetor 600 puede agregar hasta 100 kg.
NB Despues el GS 3 el piso tiene que ser perfetamente liso y sìn rallones o porosidad. DESPUES GS 3 avanzar en el siguiente modo: GK 4 – GK 5 – GK 6 – GK 7
NB : para granitos muy duros y de valor es disponible tambièn el G8 de grano màs fina
Para mejorar el brillo avanzar en el seguiente modo: POLISH KG : desparramar sobre el piso una pequena cantidad de POLISH KG y agregar un poco de agua. Usando lana de acero o el nuestro DISCOLUX crear una crema como el yogurt.Trabajar hasta que se abrillanta. Despues de la abrillantadura lavar. El piso va a tener un buen brillo. NB : Para abrillantar el granito es importante usar el DISCO TERMICO porquè el POLISH KG trabaja solo cuando el piso es caliente. NB : Es posible obtener un buen brillo solo cuando el piso es caliente. Por eso trabajar a pequenos pedazos a la vez. NB : para hacer evidenciar el resplandor y para dar un brillo màs vivo y profundo consejamos algunas nuestras especialidades como : GRANITOLUX , SPLENDUR LIQUIDO e SPLENDUR SOLIDO

Data ultimo aggiornamento: 02/09/2015 Pag. 16 di 28
INSTRUÇÕES GERAIS PARA LIXAR COM O SISTEMA PLANETÁRIO
Os PATENTEADOS DO SISTEMA PLANETÁRIO revolucionaram o modo de lixar e polir pisos em mármore e granito, tornando o trabalho de lixar muito mais fácil, veloz e econômico. Os PLANETÁRIOS podem ser aplicados à 'monoescovas' de qualquer marca ou modelo, simplesmente aplicando-o à flange da máquina que deseja-se usar.
ADVERTÊNCIA GERAL Antes de iniciar o trabalho de lixar é importante considerar que a DUREZA DOS MATERIAIS E PEDRAS sempre difere.
Tendo em mente esta característica dos pisos, lembrar que:
a) QUANTO MAIS 'MOLE' O PISO, MAIOR É A FORÇA NECESSÁRIA para fazer girar os abrasivos.
b) QUANTO MAIS DURO O PISO, MENOR É A FORÇA NECESSÁRIA para fazer girar os abrasivos.
c) QUANTO MAIS ALTA É A VELOCIDADE DE ROTAÇÃO DOS ACESSÓRIOS DIAMANTADOS mais veloz é a execução do trabalho, porém, maior é a força necessária para fazer girar os acessórios a alta velocidade e portanto, mais potente deve ser a máquina.
De acordo com esses aspectos fundamentais foram criados três tipos de Planetário:
PLANETÁRIO K 800 : 800 giros, aconselhado para pisos macios e parquet.
PLANETÁRIO K 1000: 1.000 giros, aconselhado para pisos de média dureza como o mámore. PLANETÁRIO K 2000: 2.000 giros, aconselhado para pisos duros como granito, grés e porcellanato.
VOLTAGEM CORRETA E USO DE FIOS ELÉTRICOS DE CONEXÃO SUPLEMENTAR
Um dos casos mais freqüentes de mal funcionamento da lixadeira é devido ao fato de que muitas vezes não chega a correta quantidade de energia elétrica à máquina. Siga este importante conselho:
a) Conectar-se à saída de energia mais próxima ao interruptor Geral. Especialmente nas instalações antigas pode haver muita dispersão de energia, ou má conexão ao longo da rede elétrica.
b) Em caso de necessidade de extensão, utilizar somente fios elétricos de seção dupla com relação aos utilizados na máquina.
c) Jamais ligar na mesma tomada duas máquinas, como a lixadeira e o aspiralíquidos.
ATENÇÃO : montagem do suporte de travamento Recomenda-se fechar bem o suporte de travamento (staffa di bloccaggio) UT0730x na base do PLANETÁRIO CLASSIC antes de usá-lo; verificando periodicamente (a cada início do trabalho) seu aperto.
MANUTENÇÃO: recomenda-se engraxá-la periodicamente
GORDO Grau NLGI 2 Classificação DIN51502 KP 2 P - 25 Teste Timken carga útil ASTM2509 50 (lbs) Temperatura de trabalho -25 / +170 (°C) Óleo de base / viscosidade (40°C) Mineral / 840 m2/s Espessante Sabão compleo AL
Valor Rolamento Satelitares 10 g para cada engraxamento Rodas dentadas 30 g para cada engraxamento
Freqüência ─ Engraxar pela 1ª vez após 50 horas de trabalho ─ Efetuar os engraxamentos sucessivos a cada 100 horas de trabalho

Data ultimo aggiornamento: 02/09/2015 Pag. 17 di 28
INSTRUÇÕES PARA LIXAR O MÁRMORE
LIXAR PISOS DE MÁRMORE COM DESNÍVEIS E /OU DENTES
1) Iniciar com DISCOS DIAMANTADOS METÁLICOS MS1 e lixar até que todos os desníveis forem eliminados e não haja mais diferenças no piso. Aconselhamos que a máquina seja movimentada “para frente e para atrás” e no mesmo tempo “à direita e à esquerda”. Entre uma passada e outra remover todo o material retirado com o aspiralíquidos. Não trabalhar até a beira da parede, mas manter-se a cerca de 10 cm.
2) Quando o piso estiver perfeitamente nivelado, prosseguir com os discos diamantados metálicos MS2 prestando atenção para não deixar nenhuma parte do piso sem tratamento (sugerimos seguir a linha das lajotas). É aconselhável utilizar AKTIVATOR 1 , para retificar os acessórios diamantados metálicos, cada vez que iniciar um novo trabalho, e também a cada 100mq de trabalho realizado. Manter-se a cerca de 5 cm da beira da parede.
3) Continuar com RESINÓIDES DIAMANTADOS M3 – M4 – M5. Prestar a necessária atenção para cobrir toda a superfície a ser trabalhada, deixando-se guiar pela linha das lajotas.
4) Quando for necessário lixar mármore verde, vermelho, negro e também mármores difíceis de polir, utilizar o M6 ou também o M7 de grão mais fino.
5) Após lixar, continuar com o polimento, utilizando o POLISH KLINDEX. Como os mármores possuem diversas composições, nossa empresa tem desenvolvido e produzido uma vasta gama de pós (POLISH) para polir qualquer tipo de mármore:
─ POLISH KP 85 utilizável para a maioria dos mármores
─ POLISH KP 92 os mais indicados para os mármores calcários.
─ POLISH PALLADIANA para terrazzo, palladiane, veneziane e conglomerati.
─ POLISH COLOR para mármores que contém pigmentos ferrosos como o verde e o vermelho por exemplo.
─ POLISH KMT para mármores macios como o Carrara.
─ POLISH GREY para soluções especiais.
Para o emprego da linha POLISH , espargir um pouco de pó sobre o piso, adicionar um pouco de água e utilizando o DISCOLUX formar um creme como o iogurte, trabalhando até obter o brilho. Quando o creme se tornar muito seco, adicionar mais um pouco de água, mantendo-o sempre como um iogurte.
6) No final do trabalho lavar bem com água. Quando o piso estiver seco, lustrar com DISCOLUX ou com um disco branco.
NOTA 1 Não deixar o polish sobre o piso por mais de 30 minutos. Pó em excesso poderia danificar o brilho.
NOTA 2 Normalmente o POLISH é utilizado com discos DISCOLUX . Somente o POLISH COLOR é trabalhado com lã de aço.
NOTA 3 Usando o DISCO TÉRMICO, ao invés do normal disco arrastador, o trabalho é mais veloz e o brilho é melhor.
RECUPERAÇÃO DO BRILHO E MANUTENÇÃO 1) Se o pavimento não tem desníveis, mas apenas riscos e desejamos recuperar a luminosidade inicial, é
suficiente iniciar com o M4 e prosseguir como acima. Se os riscos forem muito profundos, iniciar com o M3. 2) Se o pavimento apresentar desníveis e/ou dentes, utilizar a série JUMPER e/ou KLIMBER que, possuem um
sistema especial para trabalhar nesses pisos.

Data ultimo aggiornamento: 02/09/2015 Pag. 18 di 32
INSTRUÇÕES PARA LIXAR GRANITO
O PLANETÁRIO K2000 é o planetário para lixar granito do modo melhor e mais econômico. Usando K2000 os discos diamantados giram a cerca de 2.000 giros. A alta velocidade de rotação dos disquetes é muito importante para lixar o granito: apenas lixando a alta velocidade é possível lixar bem sem deixar riscos, obtendo assim o resultado e o brilho desejado.
GS1: Começar a lixar com discos diamantados metálicos GS1 e lixar até que todos os desníveis sejam eliminados. Esta etapa é a mais importante. É de importância absoluta eliminar por completo todos os dentes que houverem no piso. Se o piso não for nivelado completamente, no final do trabalho não se obtém um bom brilho. Aconselhamos que a máquina seja movimentada “para frente e para atrás” e “à direita e à esquerda”. Não trabalhar até a beira da parede, mas manter-se a cerca de 10 cm. NOTA: após cada passada, remover todos os resíduos com o aspiralíquido.
GS2: Após cuidar do piso, prosseguir com o GS2, lixando cuidadosamente e cuidando para trabalhar em toda a área. Aconselhamos que sejam feitas duas passadas cruzadas para certificar-se de haver trabalhado em toda a área. Manter-se a cerca de 5 cm. da borda da parede.
GS3: Prosseguir com o GS3 para remover os riscos do GS2, seguindo o mesmo procedimento. Após o GS3 não deve haver mais riscos no piso.
NOTA 1 Aconselha-se usar pesos suplementares conforme a dureza do piso e do “grip” dos acessórios.
NOTA 2 Sugerimos o uso de AKTIVATOR 1 para o corte dos acessórios diamantados metálicos.
Após o GS3: Siga as seguintes indicações, conforme o tipo do granito:
GRANITOS DUROS E COMPACTOS: prosseguir com GK4, GK5, GK6, GK7. Para alguns granitos, continuar com o GK8. GRANITOS ABERTOS E POROSOS:
a) Após o GS3 prosseguir com o PAVELUX G3, G4 e G5. (Os pavelux série G são abrasivos magnésicos que fecham a porosidade do granito).
b) Após PAVELUX G5 pode-se prosseguir conforme desejar, ou com PAVELUX G6, G7 e G8, ou ainda com discos diamantados GK5, GK6, GK7 e, se necessário, GK8.
Após o polimento, usar o POLISH mais adequado. Espargir um pouco de pó sobre o piso e adicionar um pouco de água. Utilizando o DISCOLUX e/o lã de aço, formar um creme como o iogurte e trabalhar até obter brilho.
NOTA: Usar POLISH KG com granitos escuros e POLISH KG CLEAR com granitos claros.
NB: Para polir o granito é importante usar o DISCO TÉRMICO porque o POLISH KG funciona apenas quando o piso está quente, somente assim obtendo um bom brilho. Trabalhar portanto, apenas pequenas partes por vez (1 mq x 1 mq).
LÃ DE AÇO: quando o piso estiver seco, polir com lã de aço.
ESCOVA DE NYLON: lavar o piso com escova de nylon.
BRILLUX: quando o piso estiver perfeitamente seco, espirrar um pouco de BRILLUX e lustrar com um disco vermelho, ou branco.
KORREKTOR: para alguns granitos, para melhorar a profundidade do lustro, sugere-se o uso de KORREKTOR. Espalhar KORREKTOR com um pano, esperar enxugar perfeitamente e polir com DISCOLUX. KORREKTOR é também um excelente impermeabilizante.
KI WATERPROOFING: ACONSELHADO para uma proteção melhor.
NB : para realçar a luminosidade e para um brilho mais vivo e profundo, aconselhamos algumas das nossas especialidades: GRANITOLUX, BRILLUX, KORREKTOR, SPLENDUR.

Data ultimo aggiornamento: 02/09/2015 Pag. 19 di 32

Data ultimo aggiornamento: 02/09/2015 Pag. 20 di 32
PLANETARIO K800 NEW Cod. PL4606
N° CODICE DESCRIZIONE QUANT.
1 PL27601 DISTANZIALE CENTRALE 2008 1
3 VITE TCEI M6X25 UNI 5931 4
4 LINGUETTA 8 X 7 X 22 UNI 6604 A 2
5 GUA041 PARAOLIO CON LABBRO PARAPOLVERE 150 X 180 X 12
1
6 PL23001 CAMPANA SUPERIORE 1
7 PL17701 PIASTRINA DI BATTUTA 2
8 CUSCINETTO 16024 1
9 ANELLO SEEGER 180 FORO UNI 7437 1
10 PL21801 SOLARE K700/800 M=1,75 Z=111 1
11 VITE TSEI M6X30 UNI 5933 ZINCATA 6
12 DADO M8 UNI5588-65 3
13 ROSETTA M10 UNI 6592 3
14 PL00704 SATELLITE K700/800 Z=34 M=1,75 3
15 PL00902 PORTASATELLITE K800 NEW 2006 1
16 PL1P000016 GUARNIZIONE 1
17 PL15103 PIASTRA DI BLOCCAGGIO 3
18 VITE AUTOFILETTANTE 3,9X13 UNI6954 15
19 CUSCINETTO 6305-2RS 6
20 PL1P000020 DISTANZIALE K800/1000 NEW 2006 3
21 ANELLO SEEGER 62 FORO UNI 7437 3
22 ANELLO SEEGER 25 ALBERO UNI 7435 3
23 LINGUETTA 5 X 5 X 20 UNI 6604 – A 3
24 LINGUETTA 8 X 7 X 20 UNI 6604 – A 3
25 PL1P000025 PERNO PORTAMOLA 3
26 VITE TE FLANGIATA M8X20 DIN6921 3
27 GRANO M8X10 UNI5923 3
28
PD00101 PORTADIAMANTE Ø=100 VT
3 PD00202 PORTADIAMANTE Ø=100 AS
PD00403 PORTADIAMANTE Ø=140 AS
PD00503 PORTADIAMANTI Ø 140 VT SCANALATO
29 PL1P000029 GHIERA “NADELLA” LR31 M120 X 2 CON
BLOCCAGGIO LATERALE SUL FILETTO 1
30 GRANO M8X10 UNI5923 1
31 PL1P990031 PASTICCA IN OTTONE 6,5X4 1
32 INGRASSINO M6 UNI7663-A 6
33 PL27402 ALBERO CON INNESTO PLANETARIO 2008 1
34 GUA005 V-RING V-060-A 3
35 PL19501 + GOMMA PARACOLPI PLANETARIO CORTO (4X30) 1
PL19601 GOMMA PARACOLPI PLANETARIO LUNGO (4X30) 1
36 AP4501 PARASCHIZZI ANTITRACCIA 1
37 PL27501 DISTANZIALE CENTRALE GRANDE 2008 1
38 PL22601 DISCO MOUSSE DI TENUTA H=8 1
39 CUSCINETTO 61926 1
40 INGRASSINO 90° M6 UNI7663-A 1

Data ultimo aggiornamento: 02/09/2015 Pag. 21 di 32
PLANETARIO K 800 NEW WOODEN Cod. PL4510
N° CODICE DESCRIZIONE QUANT.
1 GUA041 PARAOLIO CON LABBRO PARAPOLVERE
150X180X12 1
2 PL27402 ALBERO CON INNESTO PLANETARIO 2008 1
3 LINGUETTA 8 X 7 X 25 UNI 6604 – A 2
4 VITE TSEI M 6X30 UNI 5933 6
5 PL27601 DISTANZIALE CENTRALE 2008 1
6 PL21702 CAMPANA SUPERIORE 1
7 PL1P000025 PERNO PORTAMOLA 3
8 PL21801 SOLARE K700/800 M=1,75 Z=111 1
9 CUSCINETTO 16024 1
10 ANELLO SEEGER 180 FORO UNI 7437 1
11 PL17701 PIASTRINA DI BATTUTA 2
12 DADO M10 UNI 5587 3
13 PL00704 SATELLITE K700/800 M=1,75 Z=34 3
14 ROSETTA M10 UNI 6592 3
15 PL18002 PORTA SATELLITE K800 WOODEN 1
16 ANELLO SEEGER 25 ALBERO UNI 7435 3
17 GRANO M8X10 UNI 5923 4
18 PL16403 COLLARE GUARNIZIONE 1
19 VITE TCEI M5X8 UNI 5931 9
20 GUA036 V-RING V-375A 1
21 PL1P000020 DISTANZIALE 3
22 CUSCINETTO 6305-2RS 6
23 ANELLO SEEGER 62 FORO UNI 7437 3
24 LINGUETTA 8 X 7 X 20 UNI 6604 – A 3
25 PL1P000029 GHIERA “NADELLA” LR31 M120 X 2 CON
BLOCCAGGIO LATERALE SUL FILETTO 1
26 LINGUETTA 5 X 5 X 20 UNI 6604 – A 3
27 PL18301 PASTICCA IN OTTONE 1
28 INGRASSATORE TSD M6 UNI 7663-A 6
29 VITE TCEI M 6X25 UNI 5931 4
30 PD00403 PORTADIAMANTE Ø=140 AS
3 PD00503 PORTADIAMANTI Ø=140 VT SCANALATO
31 GUA005 V-RING V-060A 3
32 PL28901 GOMMA PARACOLPI PLANETARIO 140 LUNGO (20X15) 1
33 PL28801 GOMMA PARACOLPI PLANETARIO 140 CORTO (20X15) 1
34 PL27501 DISTANZIALE CENTRALE GRANDE 2008 1
35 PL22601 DISCO MOUSSE DI TENUTA h=8 1
36 CUSCINETTO 61926 1
37 INGRASSATORE 90° M6 UNI 7663-A 1
KIT CAPPA PER PLANETARIO WOODEN / VACUUM HOOD KIT Cod. AP0201
N° Codice Descrizione Quant.
2 AP2001 ANELLO PER CAPPA PLANETARIO 1
FASCIA ASPIRAZIONE CPL PER PLANETARIO COD. AP1501
1 R2653 Bocchettone 1
3 AP00401 Gomma per Sistema di Aspirazione H115 1

Data ultimo aggiornamento: 02/09/2015 Pag. 22 di 32
PLANETARIO K1000 NEW Cod. PL4303
N° CODICE DESCRIZIONE QUANT.
1 PL27601 DISTANZIALE CENTRALE 2008 1
3 VITE TCEI M6X25 UNI 5931 4
4 LINGUETTA 8 X 7 X 22 UNI 6604 A 2
5 GUA041 PARAOLIO CON LABBRO PARAPOLVERE 150 X 180 X 12
1
6 PL17902B CAMPANA 1000 1
7 PL17701 PIASTRINA DI BATTUTA 2
8 CUSCINETTO 16024 1
9 ANELLO SEEGER 180 FORO UNI 7437 1
10 PL1P000010 SOLARE 1000 NEW 2006 1
11 VITE TCEI M8X22 UNI 5931 3
12 DADO M10 UNI5588 ZINCATO 3
13 ROSETTA M10 UNI 6592 3
14 PL1P000014 SATELLITE 1000 NEW 2006 3
15 PL22901 PORTASATELLITE 1000 NEW 2006 1
16 PL1P000016 GUARNIZIONE PLANETARIO 1
17 PL15103 PIASTRA DI BLOCCAGGIO 3
18 VITE AUTOFILETTANTE 3,9X13 UNI6954 15
19 CUSCINETTO 6305-2RS 6
20 PL1P000020 DISTANZIALE K800/1000 NEW 2006 3
21 ANELLO SEEGER 62 FORO UNI 7437 3
22 ANELLO SEEGER 25 ALBERO UNI 7435 3
23 LINGUETTA 5 X 5 X 20 UNI 6604 – A 3
24 LINGUETTA 8 X 7 X 20 UNI 6604 – A 3
25 PL1P000025 PERNO PORTAMOLA K800/1000 NEW 2006 3
26 VITE TE FLANGIATA M8X20 DIN6921 3
27 GRANO M8X10 UNI5923 3
28
PD00101 PORTADIAMANTE Ø=100 VT
3 PD00202 PORTADIAMANTE Ø=100 AS
PD00403 PORTADIAMANTE Ø=140 AS
PD00503 PORTADIAMANTI Ø 140 VT SCANALATO
29 PL1P000029 GHIERA “NADELLA” M120 X 2 CON
BLOCCAGGIO LATERALE SUL FILETTO 1
30 GRANO M8X10 UNI5923 1
31 PL1P990031 PASTICCA IN OTTONE 6,5X4 1
32 INGRASSINO M6 UNI7663-A 6
33 PL27402 ALBERO CON INNESTO PLANETARIO 2008 1
34 GUA005 V-RING V-060-A 3
35 PL08001 GOMMA PARACOLPI 1
36 AP4501 PARASCHIZZI ANTITRACCIA 1
37 PL27501 DISTANZIALE CENTRALE GRANDE 2008 1
38 PL22601 DISCO MOUSSE DI TENUTA H=8 1
39 CUSCINETTO 61926 1
40 INGRASSINO 90° M6 UNI7663-A 1
CAPPA PARASCHIZZI 1200 Cod. AP9302
N° Codice Descrizione Quant.
1 AP12502 ANELLO PER CAPPA 1200 1
2 AP12601 FASCIA PARASCHIZZI 1200 CPL H=115 1

Data ultimo aggiornamento: 02/09/2015 Pag. 23 di 32
PLANETARIO K 1200 NEW Cod. PL5803
N° CODICE DESCRIZIONE QUANT.
1 GUA041 PARAOLIO CON LABBRO PARAPOLVERE
150X180X12 1
2 PL27402 ALBERO CON INNESTO PLANETARIO 2008 1
3 LINGUETTA 8 X 7 X 25 UNI 6604 – A 2 4 VITE TSEI M 6X30 UNI 5933 6 5 PL27601 DISTANZIALE CENTRALE 2008 1 6 PL21702 CAMPANA SUPERIORE 1 7 PL1P000025 PERNO PORTAMOLA 3 8 PL21801 SOLARE K700/800 M=1,75 Z=111 1
9 CUSCINETTO 16024 2 10 ANELLO SEEGER 180 FORO UNI 7437 1 11 PL17701 PIASTRINA DI BATTUTA 2 12 DADO M10 UNI 5587 3 13 PL00704 SATELLITE K700/800 M=1,75 Z=34 3 14 ROSETTA M10 UNI 6592 3
15 PL18002 PORTA SATELLITE K800 WOODEN 1 16 ANELLO SEEGER 25 ALBERO UNI 7435 3 17 GRANO M8X10 UNI 5923 4 18 PL16403 COLLARE GUARNIZIONE 1 19 VITE TCEI M5X8 UNI 5931 9 20 GUA036 V-RING V-375A 1
21 PL1P000020 DISTANZIALE 3 22 CUSCINETTO 6305-2RS 6 23 ANELLO SEEGER 62 FORO UNI 7437 3 24 LINGUETTA 8 X 7 X 20 UNI 6604 – A 3 25 PL1P000029 GHIERA “NADELLA” LR31 M120 X 2 CON
BLOCCAGGIO LATERALE SUL FILETTO 1
26 LINGUETTA 5 X 5 X 20 UNI 6604 – A 3 27 PL18301 PASTICCA IN OTTONE 1 28 INGRASSATORE TSD M6 UNI 7663-A 6 29 VITE TCEI M 6X25 UNI 5931 4 30 PD1701 PORTADIAMANTE AMMORTIZZATO Ø=146 3
31 GUA005 V-RING V-060A 3 32 PL18501 GOMMA PARACOLPI PLANETARIO 140 LUNGO (20X30) 1
33 PL18401 GOMMA PARACOLPI PLANETARIO 140 CORTO (20X30) 1
34 PL27501 DISTANZIALE CENTRALE GRANDE 2008 1 35 PL22601 DISCO MOUSSE DI TENUTA h=8 1 36 CUSCINETTO 61926 1
37 INGRASSATORE TSO M6 UNI 7663-A 1 38 AP9302 CAPPA PARASCHIZZI 1200 1
PORTADIAMANTE AMMORTIZZATO Ø=146 PER PLANETARIO Cod. PD1701
N° Codice Descrizione Q.tà
1 PD06401 FLANGIA PORTADIAMANTE AMMORTIZZATO 1
2 PD03003 GIUNTO FLESSIBILE 140 GOMMA 1
3 PD03202 PIASTRA DI ACCOPPIAMENTO 1
4 PD03502 DISCO CONDOTTO AS 1
5 PD03402 ANELLO SUPERIORE 1
6 VITE TSEI M6X20 UNI 5933 6
7 DADO AUTOBLOCCANTE M6 DIN 985 6
8 VITE TSEI M6X16 UNI 5933 4
9 GRANO M8X10 UNI 5923 1

Data ultimo aggiornamento: 02/09/2015 Pag. 24 di 32
PLANETARIO K1500 NEW Cod. PL7303
N° CODICE DESCRIZIONE QUANT.1 GUA041 PARAOLIO CON LABBRO PARAPOLVERE 150X180X12 1
2 PL27402 ALBERO CON INNESTO PLANETARIO 2008 1 3 LINGUETTA 8 X 7 X 25 UNI 6604 – A 2 4 VITE TSEI M 6X30 UNI 5933 6
5 PL27601 DISTANZIALE CENTRALE 2008 1 6 PL21702 CAMPANA SUPERIORE 1 7 PL1P000025 PERNO PORTAMOLA 3 8 PL21801 SOLARE K700/800 M=1,75 Z=111 1 9 CUSCINETTO 16024 2 10 ANELLO SEEGER 180 FORO UNI 7437 1
11 PL17701 PIASTRINA DI BATTUTA 2 12 DADO M10 UNI 5587 3 13 PL00704 SATELLITE K700/800 M=1,75 Z=34 3 14 ROSETTA M10 UNI 6592 3 15 PL18002 PORTA SATELLITE K800 WOODEN 1 16 ANELLO SEEGER 25 ALBERO UNI 7435 3
17 GRANO M8X10 UNI 5923 4 18 PL16403 COLLARE GUARNIZIONE 1 19 VITE TCEI M5X8 UNI 5931 9 20 GUA036 V-RING V-375A 1 21 PL1P000020 DISTANZIALE 3 22 CUSCINETTO 6305-2RS 6
23 ANELLO SEEGER 62 FORO UNI 7437 3 24 LINGUETTA 8 X 7 X 20 UNI 6604 – A 3 25 PL1P000029 GHIERA “NADELLA” LR31 M120 X 2 CON
BLOCCAGGIO LATERALE SUL FILETTO 1
26 LINGUETTA 5 X 5 X 20 UNI 6604 – A 3 27 PL18301 PASTICCA IN OTTONE 1 28 INGRASSATORE TSD M6 UNI 7663-A 6
29 VITE TCEI M 6X25 UNI 5931 4 30 PD1401 PORTADIAMANTE AMMORTIZZATO Ø=200 3 31 GUA005 V-RING V-060A 3 32 PL18501 GOMMA PARACOLPI PLANETARIO 140 LUNGO (20X30) 1
33 PL18401 GOMMA PARACOLPI PLANETARIO 140 CORTO (20X30) 1
34 PL27501 DISTANZIALE CENTRALE GRANDE 2008 1
35 PL22601 DISCO MOUSSE DI TENUTA h=8 1 36 CUSCINETTO 61926 1 37 INGRASSATORE TSO M6 UNI 7663-A 1 38 AP9103 CAPPA PARASCHIZZI 1500 1
PORTADIAMANTE AMMORTIZZATO Ø=200 PER PLANETARIO Cod. PD1401
N° Codice Descrizione Q.tà
1 PD06401 FLANGIA PORTADIAMANTE AMMORTIZZATO 1
2 PD03003 GIUNTO FLESSIBILE 140 GOMMA 1
3 PD03202 PIASTRA DI ACCOPPIAMENTO 1
4 PD40501 SUPPORTO UTENSILE QUICK ATTACK 1
5 PD03402 ANELLO SUPERIORE 1
6 VITE TSEI M6X20 UNI 5933 6
7 DADO AUTOBLOCCANTE M6 DIN 985 6
8 VITE TSEI M6X16 UNI 5933 4
9 GRANO M8X10 UNI 5923 1

Data ultimo aggiornamento: 02/09/2015 Pag. 25 di 32
CAPPA PARASCHIZZI 1500 Cod. AP9103
N° Codice Descrizione Quant.
1 AP12404 ANELLO PER CAPPA 1500 1
2 AP8401 FASCIA PARASCHIZZI RTK400 / K1500 CPL H=115
1
PLANETARIO K2000 NEW Cod. PL4404
N° CODICE DESCRIZIONE QUANT.
1 PL27601 DISTANZIALE CENTRALE 2008 1
3 VITE TCEI M6X25 UNI 5931 4
4 LINGUETTA 8 X 7 X 22 UNI 6604-A 2
5 GUA041 PARAOLIO CON LABBRO PARAPOLVERE 150 X 180 X 12
1
6 PL17902G CAMPANA 2000 1
7 PL17701 PIASTRINA DI BATTUTA 2
8 CUSCINETTO 16024 1
9 ANELLO SEEGER 180 FORO UNI 7437 1
10 PL08301 SOLARE 2000 NEW 2006 1
11 VITE TCEI M8X22 UNI 5931 3
12 DADO M8 UNI5588 ZINCATO 3
13 ROSETTA M10 UNI 6592 3
14 PL08101 SATELLITE 2000 NEW 2006 3
15 PL22901 PORTASATELLITE 1000 NEW 2006 1
16 PL1P000016 GUARNIZIONE PLANETARIO 1
17 PL15103 PIASTRA DI BLOCCAGGIO 3
18 VITE AUTOFILETTANTE 3,9X13 UNI6954 15
19 CUSCINETTO 6305-2RS 6
20 PL1P000020 DISTANZIALE K800/1000 NEW 2006 3
21 ANELLO SEEGER 62 FORO UNI 7437 3
22 ANELLO SEEGER 25 ALBERO UNI 7435 3
23 LINGUETTA 5 X 5 X 20 UNI 6604 – A 3
24 LINGUETTA 8 X 7 X 20 UNI 6604 – A 3
25 PL08201 PERNO PORTAMOLA K2000 NEW 2006 3
26 VITE TE FLANGIATA M8X20 DIN6921 3
27 GRANO M8X10 UNI5923 3
28 PD00101 PORTADIAMANTE Ø=100 VT
3 PD00202 PORTADIAMANTE Ø=100 AS
29 PL1P000029 GHIERA “NADELLA” LR31 M120 X 2 CON
BLOCCAGGIO LATERALE SUL FILETTO 1
30 GRANO M8X10 UNI5923 1
31 PL1P990031 PASTICCA IN OTTONE 6,5X4 1
32 INGRASSINO M6 UNI7663-A 6
33 PL27402 ALBERO CON INNESTO PLANETARIO 2008 1
34 GUA005 V-RING V-060-A 3
35 PL19501 + GOMMA PARACOLPI PLANETARIO CORTO (4X30) 1
PL19601 GOMMA PARACOLPI PLANETARIO LUNGO (4X30) 1
36 AP4501 PARASCHIZZI ANTITRACCIA 1
37 PL27501 DISTANZIALE CENTRALE GRANDE 2008 1
38 PL22601 DISCO MOUSSE DI TENUTA H=8 1
39 CUSCINETTO 61926 1
40 INGRASSINO 90° M6 UNI7663-A 1

Data ultimo aggiornamento: 02/09/2015 Pag. 26 di 32
PLANETARIO K800 MAX HD Cod. PL010304SE
N° CODICE DESCRIZIONE QUANT.
1 GUA140 V-RING 200 A 1
2 VITE TCEI M4X10 UNI5931 12
3 PL50501 ANELLO PROTEZIONE V-RING 800 MAX HD 1
4 GUA124 V-RING 150 A 1
5 LINGUETTA 8X7X25 UNI6604-A 2
6 PL27403 ALBERO CON INNESTO PLANETARIO 2008 1
7 PL18401 PARACOLPI PLANETARIO MAX CORTO 1
8 PL18501 PARACOLPI PLANETARIO MAX LUNGO 1
9 VITE TSEI M6X30 UNI5933 6
10 PL39003 CAMPANA SUPERIORE K 800 MAX HD 1
11 PL17701 PIASTRINA DI BATTUTA 2
12 VITE TCEI M6X25 UNI5931 4
13 GUA036 V-RING V-375A 1
14 PL21801 SOLARE K700/800 M=1,75 Z=111 1
15 CUSCINETTO 61926 1
16 ANELLO SEEGER 180 UNI7437 (FORO) 1
17 GRANO M4X5 UNI 5927 6
18 PL39201 DISTANZIALE CENTRALE GRANDE 2011 1
19 PL16001 DADO DI BLOCCO 3
20 MOLLA A TAZZA DI=10,2, DE=28 9
21 PL39101 DISTANZIALE CENTRALE 2011 1
22 PL38501 SATELLITE K800 MAX HD Z=34 M=1,75 3
23 CUSCINETTO 16024 1
24 PL38601 DISTANZIALE SATELLITE D=36 D=25,3 H=3 3
25 CUSCINETTO 32206 J2/Q 6
26 VITE TCEI M6X16 UNI 5931 9
27 PL38703 PORTASATELLITE K800 MAX HD 1
28 PL38802 COLLARE GUARNIZIONE K800 MAX HD 1
29 INGRASSATORE TSD M6 UNI7663-A 7
30 DADO BASSO M6 DIN 985 9
31 LINGUETTA 8X7X22 UNI6604-A 6
32 RCD103 CURVA M/F 1/8 1
33 PL38401 PERNO PORTAUTENSILE K800 MAX HD 3
34 PL50601 PROLUNGA INGRASSATORE 1
35 LINGUETTA 8X7X20 UNI6604-A 3
36 GUA035 PARAOLIO 30X50X7 CON PARAPOLVERE 3
37 GRANO M8X10 UNI5923 1
38 PL18301 PASTICCA OTTONE 1
39 PL16305 SUPPORTO GUARNIZIONE 3
40 PL1P000029 GHIERA "NADELLA" M120X2 CON
BLOCCAGGIO LATERALE SUL FILETTO 1
Data ultimo aggiornamento: 02/09/2015 Pag. 27 di 32
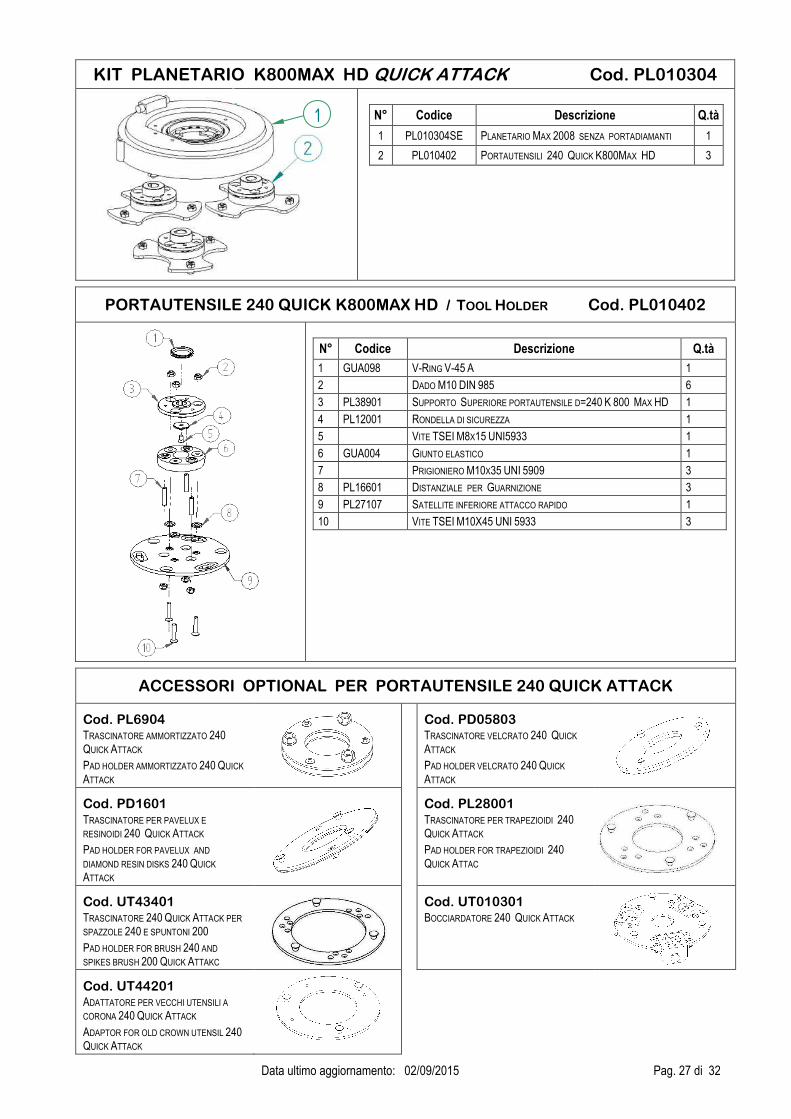
KIT PLANETARIO K800MAX HD QUICK ATTACK Cod. PL010304
N° Codice Descrizione Q.tà
1 PL010304SE PLANETARIO MAX 2008 SENZA PORTADIAMANTI 1
2 PL010402 PORTAUTENSILI 240 QUICK K800MAX HD 3
PORTAUTENSILE 240 QUICK K800MAX HD / TOOL HOLDER Cod. PL010402
N° Codice Descrizione Q.tà
1 GUA098 V-RING V-45 A 1
2 DADO M10 DIN 985 6
3 PL38901 SUPPORTO SUPERIORE PORTAUTENSILE D=240 K 800 MAX HD 1
4 PL12001 RONDELLA DI SICUREZZA 1
5 VITE TSEI M8X15 UNI5933 1
6 GUA004 GIUNTO ELASTICO 1
7 PRIGIONIERO M10X35 UNI 5909 3
8 PL16601 DISTANZIALE PER GUARNIZIONE 3
9 PL27107 SATELLITE INFERIORE ATTACCO RAPIDO 1
10 VITE TSEI M10X45 UNI 5933 3
ACCESSORI OPTIONAL PER PORTAUTENSILE 240 QUICK ATTACK
Cod. PL6904 TRASCINATORE AMMORTIZZATO 240
QUICK ATTACK PAD HOLDER AMMORTIZZATO 240 QUICK
ATTACK
Cod. PD05803 TRASCINATORE VELCRATO 240 QUICK
ATTACK PAD HOLDER VELCRATO 240 QUICK
ATTACK
Cod. PD1601 TRASCINATORE PER PAVELUX E
RESINOIDI 240 QUICK ATTACK PAD HOLDER FOR PAVELUX AND
DIAMOND RESIN DISKS 240 QUICK
ATTACK
Cod. PL28001 TRASCINATORE PER TRAPEZIOIDI 240
QUICK ATTACK PAD HOLDER FOR TRAPEZIOIDI 240
QUICK ATTAC
Cod. UT43401 TRASCINATORE 240 QUICK ATTACK PER
SPAZZOLE 240 E SPUNTONI 200 PAD HOLDER FOR BRUSH 240 AND
SPIKES BRUSH 200 QUICK ATTAKC
Cod. UT010301 BOCCIARDATORE 240 QUICK ATTACK
Cod. UT44201 ADATTATORE PER VECCHI UTENSILI A
CORONA 240 QUICK ATTACK ADAPTOR FOR OLD CROWN UTENSIL 240
QUICK ATTACK
1

Data ultimo aggiornamento: 02/09/2015 Pag. 28 di 32
PLANETARIO CLASSIC K1000/800
N° COD. ART. DESCRIZIONE QUANT. N° COD. ART. DESCRIZIONE QUANT.
1 PM9701 CAMPANA SUPERIORE 1 85 DADO CIECO M8 UNI 5721 IN OTTONE 2
3 UT07301 STAFFA A L CLASSIC 1 86 PL07101 CAMPANA INFERIORE K800 1
5 ANELLO SEEGER 17 UNI 7435 - A 3 87 CUSCINETTO 6008 2RSR 2
6 VITE TERS M8X16 CR Z 3X1 DIN 6921 3 89 CUSCINETTO 6203 2RSR 6
7 PD00101 PORTADIAMANTE Ø=100 VT 3 90 PL07801 SUPPORTO A 2 CUSCINETTI 3
PD00202 PORTADIAMANTE Ø=100 AS 3 91 PL07601 DISTANZIALE PER SUPPORTO 3
9 DADO BASSO M8 UNI 5589 3 92 ANELLO SEEGER 40 UNI 7437 – F 3
14 VITE TCEI M8X26 UNI 5931 6 93 PM9724 ALBERO 1
31 VITE TCEI M8X20 UNI 5931 2 95 PL07401 PERNO PER SUPPORTO 2 CUSCINETTI 3
32 AP4501 FASCIA PARASCHIZZI ANTITRACCIA 1 96 PN9896 CORONA K800 1
37 PM9737 GUARNIZIONE PER STAFFA PLANETARIO 1 97 PN9897 PIGNIONE K800 3
40 LINGUETTA 20 X 5 X 5 UNI 6604 – A 3 98 ANELLO SEEGER 68 UNI 7437 – F 1
43 DADO MEDIO M6 UNI 5588 6 99 ANELLO DI TENUTA 45 X 60 X 7 1
45 VITE TSEI M6X16 UNI 5933 6 100 PM9721 GHIERA AUTOBLOCCANTE KM8 1
46 VITE TSEI M6X20 UNI 5933 6 101 LINGUETTA 12 X 8 X 40 UNI 6604 – A 1
50 PM9750 CASTELLETTO INFERIORE (K19) 1 102 PL15202 PIASTRA GUARNIZIONE CLASSIC 3
51 PM9751 CASTELLETTO SUPERIORE CON FLANGIA (K24) 1 103 PL1P000016 GUARNIZIONE PLANETARIO 1
82 PL08001 GOMMA PARACOLPI PER PORTADIAMANTE
Ø=100 1 200 PL1701 KIT SUPPORTO CPL PER PLANETARIO 3
84 INGRASSINO M6 UNI7663-A 3

Data ultimo aggiornamento: 02/09/2015 Pag. 29 di 32
- PLANETARIO CLASSIC K800 WOODEN-
(20X
30)

Data ultimo aggiornamento: 02/09/2015 Pag. 30 di 32
- PLANETARIO CLASSIC K 2000 con supporto a due cuscinetti -
(4X3
0)


GARANZIA Questa macchina è garantita da difetti di costruzione per il periodo di anni UNO (1) o 600 ore -quello che scade prima- dalla data di acquisto, se usata e mantenuta secondo le istruzioni riportate nel LIBRETTO DI ISTRUZIONI E MANUTENZIONI KLINDEX. Nessuna Garanzia è riconosciuta se la macchina viene utilizzata per scopi diversi da quelli indicati nel presente Libretto di Istruzioni. La garanzia è estesa solo alle parti originali previsti per l’uso del prodotto. Non sono coperti da garanzia le normali parti di consumo, quali: cavi elettrici, parti in gomma, tubi, spazzole, parti elettriche, etc. Qualsiasi difficoltà dovesse svilupparsi durante l’uso della macchina bisogna: 2) CONTATTARE IL SERVIZIO ASSISTENZA CLIENTI KLINDEX
65024 MANOPPELLO ( PE ) via Vallone 16 ITALIA TEL 085 / 859 800 – 859 546 FAX 085 / 8599224 3) Ritornare la macchina al centro assistenza KLINDEX. Le spese di trasporto sono a totale carico del acquirente e devono essere anticipate (NO contrassegno). Copia del Certificato di Garanzia deve
essere spedito insieme alla macchina da riparare. Non saranno effettuati lavori in garanzia se il Certificato di Garanzia non viene allegato alla macchina da riparare. 4) KLINDEX riparerà la macchina e/o sostituirà i pezzi difettosi senza nessun addebito in un tempo ragionevole dopo aver ricevuto la macchina.
La RESPONSABILITÀ DEL PRODUTTORE è limitata solo alla riparazione del prodotto e alla sostituzione dei ricambi ritenuti difettosi. In caso di malfunzionamento o difetto: a) il produttore non potrà essere ritenuto responsabile per eventuali lavori non completati. b) al produttore non potrà essere richiesta nessuna penale di nessun tipo né altre forme di risarcimento di qualsiasi genere. Non ci sono altre garanzie oltre a quelle qui specificate. Non ci sono altre forme di garanzia che si estendono oltre quelle qui descritte, ne altre forme di garanzie promesse da rivenditori.
WARRANTY This machine is guaranteed for one (1) year or 600 hours, whichever expires first, from the date of purchase, from all defects in materials and workmanship under normal use and proper maintenance. The guarantee is valid only if the machine is operated and maintained according to the KLINDEX Maintenance and Operating Instructions. The warranty is void if aftermarket alterations, changes, or modifications have been made to the equipment or if non-original or non-approved tooling is used. This guarantee is extended only to the original purchaser for use of the product. It does not cover normal wear-and-tear parts such as electrical cables, rubber parts, hoses and motor brushes. If any difficulties develop with the machine you should: 1) CONTACT KLINDEX CUSTOMER ASSISTANCE DEPARTMENT:
65024 MANOPPELLO ( PE ) via Vallone 16 ITALY TEL ++39-85 – 859800 – 859646 FAX ++39 85/8599224 Return the product to the KLINDEX customer assistance department. Transportation charges from and to the our head office must be prepaid by the purchaser. A copy of the warranty registration card must be sent with the machine to be repaired under warranty.
2) KLINDEX will repair the machine and or replace any defective parts under warranty within a reasonable time after receiving the machine. 3) KLINDEX’S liability under this warranty is limited only to repairing the product and/or replacement of parts.
There are no specific warranties other than those specified herein. There are no guarantees which extend beyond this description. No warranties, including but not limited to warranty of merchantability, shall be implied. In case of a malfunction or defect, the producer is not responsible for any eventual uncompleted work by the customer.
GARANTIE Cette machine est garantie contre les défauts de construction pour une période d’UN AN ou 600 heures, celle qui échoit en premier à partir de la date d’achat, si utilisée et maintenue selon les instructions du LIVRET D’INSTRUCTIONS ET DE MANUTENTION KLINDEX. Aucune garantie n’est reconnue si la machine est utilisée pour emplois différents de ceux indiqués dans ce livret. La garantie est étendue seulement aux parties originales pour l’utilisation du produit. Les parties normales de consommation: câbles électriques, parties en gomme, tubes, brosses, parties électriques etc... ne sont pas couverts par la garantie. Pour toutes difficultés rencontrées durant l’utilisation de la machine, vous devez : 1) CONTACTER LE SERVICE ASSISTANCE CLIENTS KLINDEX
65024 MANOPPELLO (PE) – Via Vallone 16 - Italie Tel. ++39-85 – 859800 – 859646 FAX ++39 85/8599224 2) Renvoyer la machine au centre d’assistance KLINDEX. Les frais de transport sont à la charge totale de l’acheteur et doivent être payés par avance. Copie du Certificat de Garantie doit être expédié avec
la machine à réparer. 3) KLINDEX réparera la machine et/ou remplacera les pièces défectueuses sans aucun frais dans un temps raisonnable après avoir reçu la machine.
La RESPONSABILITE DU PRODUCTEUR est limitée seulement à la réparation du produit et à la substitution des pièces de rechange retenues défectueuses. En cas de mauvais fonctionnement ou défaut : a) le producteur ne pourra être retenu responsable pour d’éventuels travaux non complétés. b) Il ne pourra être demandé au protucteur aucune pénale de tous genres ni autres formes de dédommagement. Il n’y a pas d’autres garanties autres que celles spécifiées. Il n’y a pas d’autres formes de garanties autres que celles décrites ci-dessus , ni autres formes de garanties promises par les revendeurs.
GARANTIA Esta máquina KLINDEX es garantizada por UN AÑO O 600 horas, de la fecha de compra ,da los defectos de construcción, se usada y mantenida segun las instrucciones del MANUAL DE INSTRUCCIONES Y MANTENIMIENTO KLINDEX. La garantía es extendida solo a las piezas originales para el uso de el producto. La garantía no cubre las piezas de consumo: cables eléctricos, piezas de goma, tubos, cepillos, partes eléctricas etc... En caso de cualquier dificultad durante el uso de la máquina, se debe : 1) CONTATAR EL DIPARTIMENTO ASISTENCIA KLINDEX
65024 MANOPPELLO ( PE ) via Vallone 16 ITALIA TEL ++39-85 – 859800 – 859646 FAX ++39 85/8599224 2) Despachar la máquina al centro de asistencia KLINDEX . Los gastos de transporte son a atotal cargo de el comprador y se deber pagar por adelandado. 3) KLINDEX repará la máquina y/o reemplazera las piezas defectuosas, sin ningun cargo, en un período de tiempo razonable despue de haber recibido la máquina.
No hai otras formas de garantía que pueden ser exendidas mas de estas detalladas. No hai otras formas de garantía reconocidas, ni otras garantías prometidas de los revendedores.
GARANTIE Diese Maschine ist für 1 Jahr oder 600 Stunden je nach dem was vorher von Kauftag verfällt, gewehrleistet bei Haltung und Nützung nach Anleitung von KLINDEX LEHR-UND GEBRAUCHTSEINLEITUNGSBUCH. Es wird keine Garantie gewehrleistet wenn die Maschine für Tähigkeiten genützt wird die nicht in diesem Lehrbuch enthalten sind. Die Garantie gilt nur für Originalteile des Produktes. In der Garantie sind Teile die sich ausnützen wie: Elektrokabeln, Gummiteile, Schläuche; Bürsten, elektrische Teile u.s.w. ausgeschloßen. Bei jeglicher Schwierigkeiten die während der Arbeit vorkommen könnten muß man: 1) DEN KLINDEX KUNDEN BETREUNGS SERVICE KONTATIEREN
65024 MANOPPELLO ( PE ) via Vallone 16 ITALIA TEL ++39-85 – 859800 – 859646 FAX ++39 85/8599224 2) Die Maschine den KLINDEX Betreuns Zentrum zurück geben. Kosten die dabei für den Transport entstehen trägt der Käufer und müßen so mit gezahlt werden. Zusammer mit der Maschine die
repariet werden muß eine Kopie des Garantie Schein senden. Es werden keine vorgenommen wenn die Kopie fehlt. 3) KLINDEX repariert und/oder tauscht die Maschine ohne Kosten für den Käufer nach einer vernünftigen Zeit nach den Kauf. Die VERANTWORTUNG DES HERSTELLER ist für die Reparatur oder Austausch
defekter Teile des Produktes limitiert. Jm Fall defekter oder Fehlfunktion: a) der Hertsteller ist nicht verantwortlich für nicht erledigten Arbeiten. b) vom Hertsteller darf und kann man keinerlei Schadensersatz verlangen.
Es gibt keine weitere Garantien außer die oben genannten. Es gibt keine weiter erkannten Garantien, auch nicht wenn vom Verkäufer versprochen.
GARANTIA Esta máquina tem garantia de um ano ou 600 horas a partir da data de compra, para defeitos de fabricação, se usada e mantida segundo as instruções reportadas no LIVRO DE INSTRUÇÕES E MANUTENÇÕES KLINDEX. Nenhuma garantia será reconhecida se a máquina for utilizada para objectivos diversos daqueles indicados no presente Livro de Instruções. A garantia cobre somente as partes originais previstas para o uso do produto. Não tem cobertura de garantia as normais partes de consumo, quais: cabos eléctricos, partes em borracha, tubos, escovas, partes eléctricas, etc. Se qualquer dificuldade surgir durante o uso da máquina é necessário: 1) CONTACTAR O SERVIÇO DE ASSISTÊNCIA CLIENTES KLINDEX 65024 MANOPPELLO ( PE ) via Vallone 16 ITALIA TEL 085 / 859 800 – 859 546 FAX 085 / 8599224 Somente esses são autorizados para fazer reparaçoes durante o periodo de garantia. 2) Levar a máquina ao centro assistência KLINDEX. As despesas de transporte são a cargo do adquirente e devem ser antecipadas (NÃO SE ACEITAM CHEQUES). A Cópia do Certificado de Garantia deve ser mandada juntamente à máquina de reparação. 3) KLINDEX reparará a máquina e/ou substituirá as peças defeituosas sem nenhum débito, num tempo breve após ter recebido a máquina.
A RESPONSABILIDADE DO PRODUTOR é limitada somente à reparação do produto e à substituição das peças consideradas defeituosas. Em caso de mal funcionamento ou defeito: a) o produtor não poderá ser considerado responsável por eventuais trabalhos não completados. b) ao produtor não se poderá requerer nenhum processo penal nem qualquer outra forma de indenização. Não existem outras garantias à parte daquelas aqui especificadas. Não existem outras formas de garantia que se possam estender à parte daquelas aqui descritas, nem outras formas de garantia prometidas por revendedores.


