
Phpcodebook
657
PHP Cookbook By David Sklar , Adam Trachtenberg Publisher : O'Reilly Pub Date : November 2002 ISBN : 1-56592-681-1 Pages : 632 The PHP Cookbook is a collection of problems, solutions, and practical examples for PHP programmers. The book contains a unique and extensive collection of best practices for everyday PHP programming dilemmas. It contains over 250 recipes, ranging from simple tasks to entire programs that demonstrate complex tasks, such as printing HTML tables and generating bar charts -- a treasure trove of useful code for PHP programmers, from novices to advanced practitioners.
-
Upload
adil-jafri -
Category
Documents
-
view
353 -
download
0
description
Transcript of Phpcodebook

PHP Cookbook By David Sklar, Adam Trachtenberg
Publisher : O'Reilly
Pub Date : November 2002
ISBN : 1-56592-681-1
Pages : 632
The PHP Cookbook is a collection of problems, solutions, and practical examples
for PHP programmers. The book contains a unique and extensive collection of
best practices for everyday PHP programming dilemmas. It contains over 250
recipes, ranging from simple tasks to entire programs that demonstrate complex
tasks, such as printing HTML tables and generating bar charts -- a treasure
trove of useful code for PHP programmers, from novices to advanced
practitioners.
Copyright
Preface
Who This Book Is For
What Is in This Book
Other Resources
Conventions Used in This Book
Comments and Questions
Acknowledgments
Chapter 1. Strings
Section 1.1. Introduction
Recipe 1.2. Accessing Substrings
Recipe 1.3. Replacing Substrings
Recipe 1.4. Processing a String One Character at a Time
Recipe 1.5. Reversing a String by Word or Character
Recipe 1.6. Expanding and Compressing Tabs
Recipe 1.7. Controlling Case
Recipe 1.8. Interpolating Functions and Expressions Within Strings
Recipe 1.9. Trimming Blanks from a String
Recipe 1.10. Parsing Comma-Separated Data
Recipe 1.11. Parsing Fixed-Width Delimited Data
Recipe 1.12. Taking Strings Apart
Recipe 1.13. Wrapping Text at a Certain Line Length
Recipe 1.14. Storing Binary Data in Strings
Chapter 2. Numbers
Section 2.1. Introduction
Recipe 2.2. Checking Whether a String Contains a Valid Number
Recipe 2.3. Comparing Floating-Point Numbers
Recipe 2.4. Rounding Floating-Point Numbers
Recipe 2.5. Operating on a Series of Integers
Recipe 2.6. Generating Random Numbers Within a Range
Recipe 2.7. Generating Biased Random Numbers
Recipe 2.8. Taking Logarithms
Recipe 2.9. Calculating Exponents
Recipe 2.10. Formatting Numbers
Recipe 2.11. Printing Correct Plurals
Recipe 2.12. Calculating Trigonometric Functions
Recipe 2.13. Doing Trigonometry in Degrees, not Radians
Recipe 2.14. Handling Very Large or Very Small Numbers
Recipe 2.15. Converting Between Bases
Recipe 2.16. Calculating Using Numbers in Bases Other Than Decimal

Chapter 3. Dates and Times
Section 3.1. Introduction
Recipe 3.2. Finding the Current Date and Time
Recipe 3.3. Converting Time and Date Parts to an Epoch Timestamp
Recipe 3.4. Converting an Epoch Timestamp to Time and Date Parts
Recipe 3.5. Printing a Date or Time in a Specified Format
Recipe 3.6. Finding the Difference of Two Dates
Recipe 3.7. Finding the Difference of Two Dates with Julian Days
Recipe 3.8. Finding the Day in a Week, Month, Year, or the Week Number in a Year
Recipe 3.9. Validating a Date
Recipe 3.10. Parsing Dates and Times from Strings
Recipe 3.11. Adding to or Subtracting from a Date
Recipe 3.12. Calculating Time with Time Zones
Recipe 3.13. Accounting for Daylight Saving Time
Recipe 3.14. Generating a High-Precision Time
Recipe 3.15. Generating Time Ranges
Recipe 3.16. Using Non-Gregorian Calendars
Recipe 3.17. Program: Calendar
Chapter 4. Arrays
Section 4.1. Introduction
Recipe 4.2. Specifying an Array Not Beginning at Element 0
Recipe 4.3. Storing Multiple Elements per Key in an Array
Recipe 4.4. Initializing an Array to a Range of Integers
Recipe 4.5. Iterating Through an Array
Recipe 4.6. Deleting Elements from an Array
Recipe 4.7. Changing Array Size
Recipe 4.8. Appending One Array to Another
Recipe 4.9. Turning an Array into a String
Recipe 4.10. Printing an Array with Commas
Recipe 4.11. Checking if a Key Is in an Array
Recipe 4.12. Checking if an Element Is in an Array
Recipe 4.13. Finding the Position of an Element in an Array
Recipe 4.14. Finding Elements That Pass a Certain Test
Recipe 4.15. Finding the Largest or Smallest Valued Element in an Array
Recipe 4.16. Reversing an Array
Recipe 4.17. Sorting an Array
Recipe 4.18. Sorting an Array by a Computable Field
Recipe 4.19. Sorting Multiple Arrays
Recipe 4.20. Sorting an Array Using a Method Instead of a Function
Recipe 4.21. Randomizing an Array
Recipe 4.22. Shuffling a Deck of Cards
Recipe 4.23. Removing Duplicate Elements from an Array

Recipe 4.24. Finding the Union, Intersection, or Difference of Two Arrays
Recipe 4.25. Finding All Element Combinations of an Array
Recipe 4.26. Finding All Permutations of an Array
Recipe 4.27. Program: Printing an Array in a Horizontally Columned HTML Table
Chapter 5. Variables
Section 5.1. Introduction
Recipe 5.2. Avoiding == Versus = Confusion
Recipe 5.3. Establishing a Default Value
Recipe 5.4. Exchanging Values Without Using Temporary Variables
Recipe 5.5. Creating a Dynamic Variable Name
Recipe 5.6. Using Static Variables
Recipe 5.7. Sharing Variables Between Processes
Recipe 5.8. Encapsulating Complex Data Types as a String
Recipe 5.9. Dumping Variable Contents as Strings
Chapter 6. Functions
Section 6.1. Introduction
Recipe 6.2. Accessing Function Parameters
Recipe 6.3. Setting Default Values for Function Parameters
Recipe 6.4. Passing Values by Reference
Recipe 6.5. Using Named Parameters
Recipe 6.6. Creating Functions That Take a Variable Number of Arguments
Recipe 6.7. Returning Values by Reference
Recipe 6.8. Returning More Than One Value
Recipe 6.9. Skipping Selected Return Values
Recipe 6.10. Returning Failure
Recipe 6.11. Calling Variable Functions
Recipe 6.12. Accessing a Global Variable Inside a Function
Recipe 6.13. Creating Dynamic Functions
Chapter 7. Classes and Objects
Section 7.1. Introduction
Recipe 7.2. Instantiating Objects
Recipe 7.3. Defining Object Constructors
Recipe 7.4. Destroying an Object
Recipe 7.5. Cloning Objects
Recipe 7.6. Assigning Object References
Recipe 7.7. Calling Methods on an Object Returned by Another Method
Recipe 7.8. Accessing Overridden Methods
Recipe 7.9. Using Property Overloading
Recipe 7.10. Using Method Polymorphism
Recipe 7.11. Finding the Methods and Properties of an Object

Recipe 7.12. Adding Properties to a Base Object
Recipe 7.13. Creating a Class Dynamically
Recipe 7.14. Instantiating an Object Dynamically
Chapter 8. Web Basics
Section 8.1. Introduction
Recipe 8.2. Setting Cookies
Recipe 8.3. Reading Cookie Values
Recipe 8.4. Deleting Cookies
Recipe 8.5. Redirecting to a Different Location
Recipe 8.6. Using Session Tracking
Recipe 8.7. Storing Sessions in a Database
Recipe 8.8. Detecting Different Browsers
Recipe 8.9. Building a GET Query String
Recipe 8.10. Using HTTP Basic Authentication
Recipe 8.11. Using Cookie Authentication
Recipe 8.12. Flushing Output to the Browser
Recipe 8.13. Buffering Output to the Browser
Recipe 8.14. Compressing Web Output with gzip
Recipe 8.15. Hiding Error Messages from Users
Recipe 8.16. Tuning Error Handling
Recipe 8.17. Using a Custom Error Handler
Recipe 8.18. Logging Errors
Recipe 8.19. Eliminating "headers already sent" Errors
Recipe 8.20. Logging Debugging Information
Recipe 8.21. Reading Environment Variables
Recipe 8.22. Setting Environment Variables
Recipe 8.23. Reading Configuration Variables
Recipe 8.24. Setting Configuration Variables
Recipe 8.25. Communicating Within Apache
Recipe 8.26. Profiling Code
Recipe 8.27. Program: Website Account (De)activator
Recipe 8.28. Program: Abusive User Checker
Chapter 9. Forms
Section 9.1. Introduction
Recipe 9.2. Processing Form Input
Recipe 9.3. Validating Form Input
Recipe 9.4. Working with Multipage Forms
Recipe 9.5. Redisplaying Forms with Preserved Information and Error Messages
Recipe 9.6. Guarding Against Multiple Submission of the Same Form
Recipe 9.7. Processing Uploaded Files
Recipe 9.8. Securing PHP's Form Processing

Recipe 9.9. Escaping Control Characters from User Data
Recipe 9.10. Handling Remote Variables with Periods in Their Names
Recipe 9.11. Using Form Elements with Multiple Options
Recipe 9.12. Creating Dropdown Menus Based on the Current Date
Chapter 10. Database Access
Section 10.1. Introduction
Recipe 10.2. Using Text-File Databases
Recipe 10.3. Using DBM Databases
Recipe 10.4. Connecting to a SQL Database
Recipe 10.5. Querying a SQL Database
Recipe 10.6. Retrieving Rows Without a Loop
Recipe 10.7. Modifying Data in a SQL Database
Recipe 10.8. Repeating Queries Efficiently
Recipe 10.9. Finding the Number of Rows Returned by a Query
Recipe 10.10. Escaping Quotes
Recipe 10.11. Logging Debugging Information and Errors
Recipe 10.12. Assigning Unique ID Values Automatically
Recipe 10.13. Building Queries Programmatically
Recipe 10.14. Making Paginated Links for a Series of Records
Recipe 10.15. Caching Queries and Results
Recipe 10.16. Program: Storing a Threaded Message Board
Chapter 11. Web Automation
Section 11.1. Introduction
Recipe 11.2. Fetching a URL with the GET Method
Recipe 11.3. Fetching a URL with the POST Method
Recipe 11.4. Fetching a URL with Cookies
Recipe 11.5. Fetching a URL with Headers
Recipe 11.6. Fetching an HTTPS URL
Recipe 11.7. Debugging the Raw HTTP Exchange
Recipe 11.8. Marking Up a Web Page
Recipe 11.9. Extracting Links from an HTML File
Recipe 11.10. Converting ASCII to HTML
Recipe 11.11. Converting HTML to ASCII
Recipe 11.12. Removing HTML and PHP Tags
Recipe 11.13. Using Smarty Templates
Recipe 11.14. Parsing a Web Server Log File
Recipe 11.15. Program: Finding Stale Links
Recipe 11.16. Program: Finding Fresh Links
Chapter 12. XML
Section 12.1. Introduction

Recipe 12.2. Generating XML Manually
Recipe 12.3. Generating XML with the DOM
Recipe 12.4. Parsing XML with the DOM
Recipe 12.5. Parsing XML with SAX
Recipe 12.6. Transforming XML with XSLT
Recipe 12.7. Sending XML-RPC Requests
Recipe 12.8. Receiving XML-RPC Requests
Recipe 12.9. Sending SOAP Requests
Recipe 12.10. Receiving SOAP Requests
Recipe 12.11. Exchanging Data with WDDX
Recipe 12.12. Reading RSS Feeds
Chapter 13. Regular Expressions
Section 13.1. Introduction
Recipe 13.2. Switching From ereg to preg
Recipe 13.3. Matching Words
Recipe 13.4. Finding the nth Occurrence of a Match
Recipe 13.5. Choosing Greedy or Nongreedy Matches
Recipe 13.6. Matching a Valid Email Address
Recipe 13.7. Finding All Lines in a File That Match a Pattern
Recipe 13.8. Capturing Text Inside HTML Tags
Recipe 13.9. Escaping Special Characters in a Regular Expression
Recipe 13.10. Reading Records with a Pattern Separator
Chapter 14. Encryption and Security
Section 14.1. Introduction
Recipe 14.2. Keeping Passwords Out of Your Site Files
Recipe 14.3. Obscuring Data with Encoding
Recipe 14.4. Verifying Data with Hashes
Recipe 14.5. Storing Passwords
Recipe 14.6. Checking Password Strength
Recipe 14.7. Dealing with Lost Passwords
Recipe 14.8. Encrypting and Decrypting Data
Recipe 14.9. Storing Encrypted Data in a File or Database
Recipe 14.10. Sharing Encrypted Data with Another Web Site
Recipe 14.11. Detecting SSL
Recipe 14.12. Encrypting Email with GPG
Chapter 15. Graphics
Section 15.1. Introduction
Recipe 15.2. Drawing Lines, Rectangles, and Polygons
Recipe 15.3. Drawing Arcs, Ellipses, and Circles
Recipe 15.4. Drawing with Patterned Lines

Recipe 15.5. Drawing Text
Recipe 15.6. Drawing Centered Text
Recipe 15.7. Building Dynamic Images
Recipe 15.8. Getting and Setting a Transparent Color
Recipe 15.9. Serving Images Securely
Recipe 15.10. Program: Generating Bar Charts from Poll Results
Chapter 16. Internationalization and Localization
Section 16.1. Introduction
Recipe 16.2. Listing Available Locales
Recipe 16.3. Using a Particular Locale
Recipe 16.4. Setting the Default Locale
Recipe 16.5. Localizing Text Messages
Recipe 16.6. Localizing Dates and Times
Recipe 16.7. Localizing Currency Values
Recipe 16.8. Localizing Images
Recipe 16.9. Localizing Included Files
Recipe 16.10. Managing Localization Resources
Recipe 16.11. Using gettext
Recipe 16.12. Reading or Writing Unicode Characters
Chapter 17. Internet Services
Section 17.1. Introduction
Recipe 17.2. Sending Mail
Recipe 17.3. Sending MIME Mail
Recipe 17.4. Reading Mail with IMAP or POP3
Recipe 17.5. Posting Messages to Usenet Newsgroups
Recipe 17.6. Reading Usenet News Messages
Recipe 17.7. Getting and Putting Files with FTP
Recipe 17.8. Looking Up Addresses with LDAP
Recipe 17.9. Using LDAP for User Authentication
Recipe 17.10. Performing DNS Lookups
Recipe 17.11. Checking if a Host Is Alive
Recipe 17.12. Getting Information About a Domain Name
Chapter 18. Files
Section 18.1. Introduction
Recipe 18.2. Creating or Opening a Local File
Recipe 18.3. Creating a Temporary File
Recipe 18.4. Opening a Remote File
Recipe 18.5. Reading from Standard Input
Recipe 18.6. Reading a File into a String
Recipe 18.7. Counting Lines, Paragraphs, or Records in a File
Recipe 18.8. Processing Every Word in a File
Recipe 18.9. Reading a Particular Line in a File
Recipe 18.10. Processing a File Backward by Line or Paragraph
Recipe 18.11. Picking a Random Line from a File
Recipe 18.12. Randomizing All Lines in a File
Recipe 18.13. Processing Variable Length Text Fields
Recipe 18.14. Reading Configuration Files
Recipe 18.15. Reading from or Writing to a Specific Location in a File
Recipe 18.16. Removing the Last Line of a File
Recipe 18.17. Modifying a File in Place Without a Temporary File
Recipe 18.18. Flushing Output to a File
Recipe 18.19. Writing to Standard Output
Recipe 18.20. Writing to Many Filehandles Simultaneously
Recipe 18.21. Escaping Shell Metacharacters
Recipe 18.22. Passing Input to a Program
Recipe 18.23. Reading Standard Output from a Program
Recipe 18.24. Reading Standard Error from a Program
Recipe 18.25. Locking a File
Recipe 18.26. Reading and Writing Compressed Files
Recipe 18.27. Program: Unzip
Chapter 19. Directories
Section 19.1. Introduction
Recipe 19.2. Getting and Setting File Timestamps
Recipe 19.3. Getting File Information
Recipe 19.4. Changing File Permissions or Ownership
Recipe 19.5. Splitting a Filename into Its Component Parts
Recipe 19.6. Deleting a File
Recipe 19.7. Copying or Moving a File
Recipe 19.8. Processing All Files in a Directory
Recipe 19.9. Getting a List of Filenames Matching a Pattern
Recipe 19.10. Processing All Files in a Directory
Recipe 19.11. Making New Directories
Recipe 19.12. Removing a Directory and Its Contents
Recipe 19.13. Program: Web Server Directory Listing
Recipe 19.14. Program: Site Search
Chapter 20. Client-Side PHP
Section 20.1. Introduction
Recipe 20.2. Parsing Program Arguments
Recipe 20.3. Parsing Program Arguments with getopt
Recipe 20.4. Reading from the Keyboard
Recipe 20.5. Reading Passwords

Recipe 20.6. Displaying a GUI Widget in a Window
Recipe 20.7. Displaying Multiple GUI Widgets in a Window
Recipe 20.8. Responding to User Actions
Recipe 20.9. Displaying Menus
Recipe 20.10. Program: Command Shell
Recipe 20.11. Program: Displaying Weather Conditions
Chapter 21. PEAR
Section 21.1. Introduction
Recipe 21.2. Using the PEAR Package Manager
Recipe 21.3. Finding PEAR Packages
Recipe 21.4. Finding Information About a Package
Recipe 21.5. Installing PEAR Packages
Recipe 21.6. Installing PECL Packages
Recipe 21.7. Upgrading PEAR Packages
Recipe 21.8. Uninstalling PEAR Packages
Recipe 21.9. Documenting Classes with PHPDoc
Colophon
Index

Preface
PHP is the engine behind millions of dynamic web applications. Its broad feature set,
approachable syntax, and support for different operating systems and web servers have made
it an ideal language for both rapid web development and the methodical construction of
complex systems.
One of the major reasons for PHP's success as a web scripting language is its origins as a tool
to process HTML forms and create web pages. This makes PHP very web-friendly. Additionally,
it is a polyglot. PHP can speak to a multitude of databases, and it knows numerous Internet
protocols. PHP also makes it simple to parse browser data and make HTTP requests. This web-
specific focus carries over to the recipes and examples in the PHP Cookbook.
This book is a collection of solutions to common tasks in PHP. We've tried to include material
that will appeal to everyone from newbies to wizards. If we've succeeded, you'll learn
something (or perhaps many things) from the PHP Cookbook. There are tips in here for
everyday PHP programmers as well as for people coming to PHP with experience in another
language.
PHP, in source-code and binary forms, is available for download for free from
http://www.php.net/. The PHP web site also contains installation instructions, comprehensive
documentation, and pointers to online resources, user groups, mailing lists, and other PHP
resources.
Who This Book Is For
This book is for programmers who need to solve problems with PHP. If you don't know any
PHP, make this your second PHP book. The first should be Programming PHP, also from
O'Reilly & Associates.
If you're already familiar with PHP, this book will help you overcome a specific problem and
get on with your life (or at least your programming activities.) The PHP Cookbook can also
show you how to accomplish a particular task in PHP, like sending email or writing a SOAP
server, that you may already know how to do in another language. Programmers converting
applications from other languages to PHP will find this book a trusty companion.
What Is in This Book
We don't expect that you'll sit down and read this book from cover to cover. (although we'll be
happy if you do!). PHP programmers are constantly faced with a wide variety of challenges on
a wide range of subjects. Turn to the PHP Cookbook when you encounter a problem you need
to solve. Each recipe is a self-contained explanation that gives you a head start towards
finishing your task. When a recipe refers to topics outside its scope, it contains pointers to
related recipes and other online and offline resources.

If you choose to read an entire chapter at once, that's okay. The recipes generally flow from
easy to hard, with example programs that "put it all together" at the end of many chapters.
The chapter introduction provides an overview of the material covered in the chapter,
including relevant background material, and points out a few highlighted recipes of special
interest.
The book begins with four chapters about basic data types. Chapter 1 covers details like
processing substrings, manipulating case, taking strings apart into smaller pieces, and parsing
comma-separated data. Chapter 2 explains operations with floating-point numbers, random
numbers, converting between bases, and number formatting. Chapter 3 shows you how to
manipulate dates and times, format them, handle time zones and daylight saving time, and
find time to microsecond precision. Chapter 4 covers array operations like iterating, merging,
reversing, sorting, and extracting particular elements.
Next are three chapters that discuss program building blocks. Chapter 5 covers notable
features of PHP's variable handling, like default values, static variables, and producing string
representations of complex data types. The recipes in Chapter 6 deal with using functions in
PHP: processing arguments, passing and returning variables by reference, creating functions
at runtime, and scoping variables. Chapter 7 covers PHP's object-oriented capabilities, with
recipes on using overloading and polymorphism, defining constructors, and cloning objects.
The heart of the book is five chapters devoted to topics that are central to web programming.
Chapter 8 covers cookies, headers, authentication, configuration variables, and other
fundamentals of web applications. Chapter 9 covers processing and validating form input,
displaying multi-page forms, showing forms with error messages, and escaping special
characters in user data. Chapter 10 explains the differences between text-file, DBM, and SQL
databases and, using the PEAR DB database abstraction layer, shows how to assign unique ID
values, retrieve rows, change data, escape quotes, and log debugging information. Chapter 11
focuses on retrieving URLs and processing HTML but also touches on using templates and
parsing server access logs. Chapter 12 covers XML and related formats, including the DOM,
SAX, XSLT, XML-RPL, and SOAP.
The next section of the book is a series of chapters on other features and extensions of PHP
that provide a lot of useful functionality. These are recipes that help you build applications that
are more robust, secure, user-friendly, and efficient. Chapter 13 covers regular expressions,
including matching a valid email address, capturing text inside of HTML tags, and using greedy
or non-greedy matching. Chapter 14 discusses encryption, including generating and storing
passwords, sharing encrypted data with others, storing encrypted data in a file or database,
and using SSL. Chapter 15 shows you how to create graphics, with recipes on drawing text,
lines, polygons, and curves. Chapter 16 helps you make your applications globally friendly and
includes recipes on using locales and localizing text, dates and times, currency values, and
images. Chapter 17 discusses network-related tasks, like reading and sending email messages
and newsgroup posts, using FTP and LDAP, and doing DNS and Whois lookups.

Chapter 18 and Chapter 19 cover the filesystem. Chapter 18 focuses on files: opening and
closing them, using temporary files, locking file, sending compressed files, and processing the
contents of files. Chapter 19 deals with directories and file metadata, with recipes on changing
file permissions and ownership, moving or deleting a file, and processing all files in a
directory.
Last, there are two chapters on topics that extend the reach of what PHP can do. Chapter 20
covers using PHP outside of web programming. Its recipes cover command-line topics like
parsing program arguments and reading passwords, as well as topics related to building client-
side GUI applications with PHP-GTK like displaying widgets, responding to user actions, and
displaying menus. Chapter 21 covers PEAR, the PHP Extension and Application Repository.
PEAR is a collection of PHP code that provides various functions and extensions to PHP. We use
PEAR modules throughout the book and Chapter 21 shows you how to install and upgrade
them.
Other Resources
Web Sites
There is a tremendous amount of PHP reference material online. With everything from the
annotated PHP manual to sites with periodic articles and tutorials, a fast Internet connection
rivals a large bookshelf in PHP documentary usefulness. Here are some key sites:
The Annotated PHP Manual: http://www.php.net/manual/
Available in seventeen languages, this includes both official documentation of functions and language features as well as
user-contributed comments.
PHP mailing lists: http://www.php.net/mailing-lists.php
There are many PHP mailing lists covering installation, programming, extending PHP, and various other topics. A read-
only web interface to the mailing lists is at http://news.php.net/.
PHP Presentation archive: http://conf.php.net/
A collection of presentations on PHP given at various conferences.
PEAR: http://pear.php.net/
PEAR calls itself "a framework and distribution system for reuseable PHP components." You'll find lots of useful PHP
classes and sample code there.
PHP.net: A Tourist's Guide: http://www.php.net/sites.php
This is a guide to the various web sites under the php.net umbrella.
PHP Knowledge Base: http://php.faqts.com/

Many questions and answers from the PHP community, as well as links to other resources.
PHP DevCenter: http://www.onlamp.com/php/
A collection of PHP articles and tutorials with a good mix of introductory and advanced topics.
Books
This section lists books that are helpful references and tutorials for building applications with
PHP. Most are specific to web-related programming; look for books on MySQL, HTML, XML,
and HTTP.
At the end of the section, we've included a few books that are useful for every programmer
regardless of language of choice. These works can make you a better programmer by teaching
you how to think about programming as part of a larger pattern of problem solving.
• Programming PHP by Kevin Tatroe and Rasmus Lerdorf (O'Reilly).
• HTML and XHTML: The Definitive Guide by Chuck Musciano and Bill Kennedy (O'Reilly).
• Dynamic HTML: The Definitive Guide by Danny Goodman (O'Reilly).
• Mastering Regular Expressions by Jeffrey E. F. Friedl (O'Reilly).
• XML in a Nutshell by Elliotte Rusty Harold and W. Scott Means (O'Reilly).
• MySQL Reference Manual, by Michael "Monty" Widenius, David Axmark, and MySQL AB
(O'Reilly); also available at http://www.mysql.com/documentation/.
• MySQL, by Paul DuBois (New Riders).
• Web Security, Privacy, and Commerce by Simson Garfinkel and Gene Spafford
(O'Reilly).
• Web Services Essentials, by Ethan Cerami (O'Reilly).
• HTTP Pocket Reference, by Clinton Wong (O'Reilly).
• The Practice of Programming, by Brian W. Kernighan and Rob Pike (Addison-Wesley).
• Programming Pearls by Jon Louis Bentley (Addison-Wesley).
• The Mythical Man-Month, by Frederick P. Brooks (Addison-Wesley).
Conventions Used in This Book
Programming Conventions
We've generally omitted from examples in this book the <?php and ?> opening and closing
markers that begin and end a PHP program, except in examples where the body of the code
includes an opening or closing marker. To minimize naming conflicts, function and class names
in the PHP Cookbook begin with pc_.
The examples in this book were written to run under PHP Version 4.2.2. Sample code should
work on both Unix and Windows, except where noted in the text. Some functions, notably the
XML-related ones, were written to run under PHP Version 4.3.0. We've noted in the text when
we depend on a feature not present in PHP Version 4.2.2.
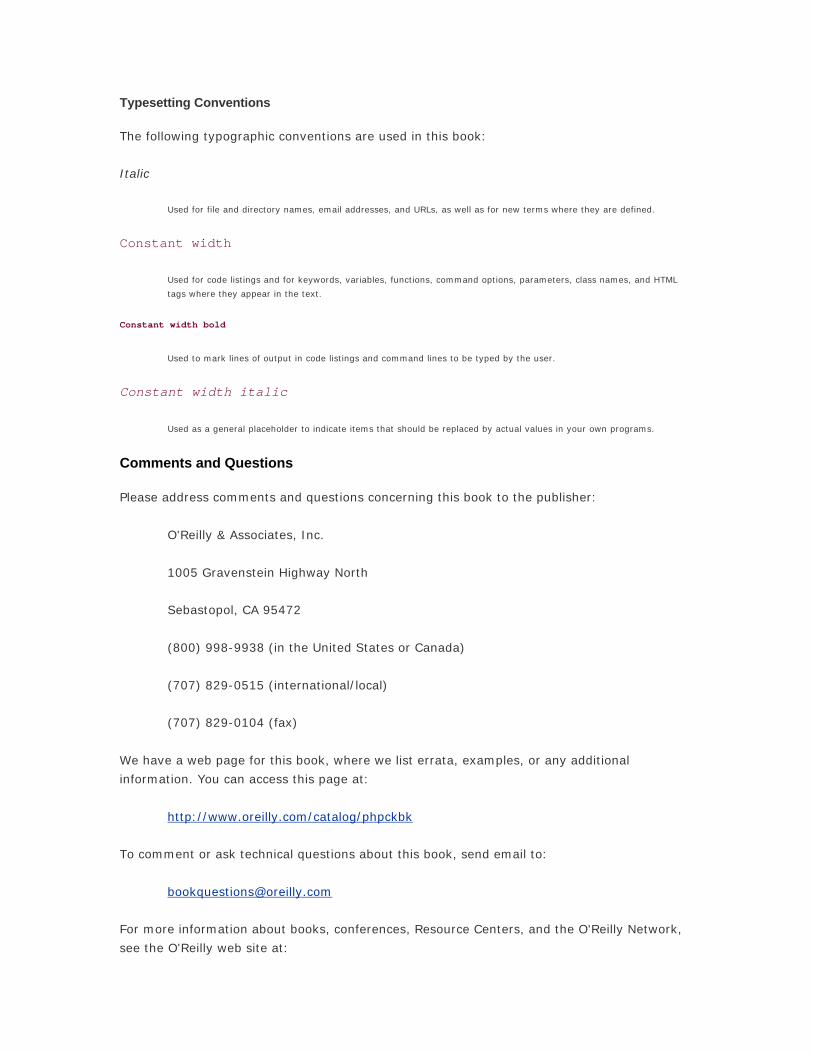
Typesetting Conventions
The following typographic conventions are used in this book:
Italic
Used for file and directory names, email addresses, and URLs, as well as for new terms where they are defined.
Constant width
Used for code listings and for keywords, variables, functions, command options, parameters, class names, and HTML
tags where they appear in the text.
Constant width bold
Used to mark lines of output in code listings and command lines to be typed by the user.
Constant width italic
Used as a general placeholder to indicate items that should be replaced by actual values in your own programs.
Comments and Questions
Please address comments and questions concerning this book to the publisher:
O'Reilly & Associates, Inc.
1005 Gravenstein Highway North
Sebastopol, CA 95472
(800) 998-9938 (in the United States or Canada)
(707) 829-0515 (international/local)
(707) 829-0104 (fax)
We have a web page for this book, where we list errata, examples, or any additional
information. You can access this page at:
http://www.oreilly.com/catalog/phpckbk
To comment or ask technical questions about this book, send email to:
For more information about books, conferences, Resource Centers, and the O'Reilly Network,
see the O'Reilly web site at:

http://www.oreilly.com
Acknowledgments
Most importantly, thanks to everyone who has contributed their time, creativity, and skills to
making PHP what it is today. This amazing volunteer effort has created not only hundreds of
thousands of lines of source code, but also comprehensive documentation, a QA infrastructure,
lots of add-on applications and libraries, and a thriving user community worldwide. It's a thrill
and an honor to add the PHP Cookbook to the world of PHP.
Thanks also our reviewers: Stig Bakken, Shane Caraveo, Ike DeLorenzo, Rasmus Lerdorf,
Adam Morton, Ophir Prusak, Kevin Tatroe, and Nathan Torkington. They caught plenty of bugs
and offered many helpful suggestions for making the book better. We would like to specially
single out Nat Torkington for flooding us with a plethora of useful changes and suggested
additions.
All the folks at Student.Net Publishing, Student.Com, and TVGrid.Com provided a fertile
environment for exploring PHP. Our experiences there in large part made this book possible.
Bret Martin and Miranda Productions provided hosting and infrastructure that let us collaborate
remotely while writing. We're only four miles from each other, but in Manhattan, that's
remote.
Last, but far from least, thanks to our editor Paula Ferguson. From her shockingly quick (to
our friends) acceptance of our modest book proposal to her final handling of our requests for
last-minute revisions, she's guided the PHP Cookbook with a steady hand through the O'Reilly
publishing process. Without her, this book would never have made the transformation from
idea into reality.
David Sklar
Thanks to Adam for writing this book with me (and catching all the places I used too many
parentheses).
Thanks to my parents, who didn't really know what they were getting into when they bought
me that 4K Radio Shack Color Computer 20 years ago.
Thanks to Susannah for unwavering love and support, and for reminding me at crucial
moments that life's not a paragraph.
Adam Trachtenberg
It is hard to express the size of my debt to David for putting up with me over the course of
working together on the PHP Cookbook. His comments drastically improved my writing and his
unwavering punctuality helped keep me close to schedule.

Thanks to Coleco and its Adam computer, for making me the first kid on the block able to own
a computer named after himself.
Thanks to all my friends and business-school classmates who grew tired of hearing me say
"Sorry, I've got to go work on the book tonight" and who still talked to me after I took two
weeks to return their phone calls.
A special thanks to Elizabeth Hondl. Her childlike fascination with web technologies proves that
if you ask often enough, you just might make it in the book.
Thanks to my brother, parents, and entire family. So much of me comes from them. Their
encouragement and love sustains me.
Chapter 1. Strings
Section 1.1. Introduction
Recipe 1.2. Accessing Substrings
Recipe 1.3. Replacing Substrings
Recipe 1.4. Processing a String One Character at a Time
Recipe 1.5. Reversing a String by Word or Character
Recipe 1.6. Expanding and Compressing Tabs
Recipe 1.7. Controlling Case
Recipe 1.8. Interpolating Functions and Expressions Within Strings
Recipe 1.9. Trimming Blanks from a String
Recipe 1.10. Parsing Comma-Separated Data
Recipe 1.11. Parsing Fixed-Width Delimited Data
Recipe 1.12. Taking Strings Apart
Recipe 1.13. Wrapping Text at a Certain Line Length
Recipe 1.14. Storing Binary Data in Strings

1.1 Introduction
Strings in PHP are a sequence of characters, such as "We hold these truths to be self evident,"
or "Once upon a time," or even "111211211." When you read data from a file or output it to a
web browser, your data is represented as strings.
Individual characters in strings can be referenced with array subscript style notation, as in C.
The first character in the string is at index 0. For example:
$neighbor = 'Hilda'; print $neighbor[3]; d
However, PHP strings differ from C strings in that they are binary-safe (i.e., they can contain
null bytes) and can grow and shrink on demand. Their size is limited only by the amount of
memory that is available.
You can initialize strings three ways, similar in form and behavior to Perl and the Unix shell:
with single quotes, with double quotes, and with the "here document" (heredoc) format. With
single-quoted strings, the only special characters you need to escape inside a string are
backslash and the single quote itself:
print 'I have gone to the store.'; print 'I\'ve gone to the store.'; print 'Would you pay $1.75 for 8 ounces of tap water?'; print 'In double-quoted strings, newline is represented by \n'; I have gone to the store. I've gone to the store. Would you pay $1.75 for 8 ounces of tap water? In double-quoted strings, newline is represented by \n
Because PHP doesn't check for variable interpolation or almost any escape sequences in
single-quoted strings, defining strings this way is straightforward and fast.
Double-quoted strings don't recognize escaped single quotes, but they do recognize
interpolated variables and the escape sequences shown in Table 1-1.
Table 1-1. Double-quoted string escape sequences
Escape sequence Character
\n Newline (ASCII 10)
\r Carriage return (ASCII 13)
\t Tab (ASCII 9)
\\ Backslash
\$ Dollar sign
\" Double quotes
\{ Left brace

\} Right brace
\[ Left bracket
\] Right bracket
\0 through \777 Octal value
\x0 through \xFF Hex value
For example:
print "I've gone to the store."; print "The sauce cost \$10.25."; $cost = '$10.25'; print "The sauce cost $cost."; print "The sauce cost \$\061\060.\x32\x35."; I've gone to the store. The sauce cost $10.25. The sauce cost $10.25. The sauce cost $10.25.
The last line of code prints the price of sauce correctly because the character 1 is ASCII code
49 decimal and 061 octal. Character 0 is ASCII 48 decimal and 060 octal; 2 is ASCII 50
decimal and 32 hex; and 5 is ASCII 53 decimal and 35 hex.
Heredoc-specified strings recognize all the interpolations and escapes of double- quoted
strings, but they don't require double quotes to be escaped. Heredocs start with <<< and a
token. That token (with no leading or trailing whitespace), followed by a semicolon to end the
statement (if necessary), ends the heredoc. For example:
print <<< END It's funny when signs say things like: Original "Root" Beer "Free" Gift Shoes cleaned while "you" wait or have other misquoted words. END; It's funny when signs say things like: Original "Root" Beer "Free" Gift Shoes cleaned while "you" wait or have other misquoted words.
With heredocs, newlines, spacing, and quotes are all preserved. The end-of-string identifier is
usually all caps, by convention, and it is case sensitive. Thus, this is okay:
print <<< PARSLEY It's easy to grow fresh: Parsley Chives on your windowsill PARSLEY;

So is this:
print <<< DOGS If you like pets, yell out: DOGS AND CATS ARE GREAT! DOGS;
Heredocs are useful for printing out HTML with interpolated variables:
if ($remaining_cards > 0) { $url = '/deal.php'; $text = 'Deal More Cards'; } else { $url = '/new-game.php'; $text = 'Start a New Game'; } print <<< HTML There are <b>$remaining_cards</b> left. <p> <a href="$url">$text</a> HTML;
In this case, the semicolon needs to go after the end-of-string delimiter, to tell PHP the
statement is ended. In some cases, however, you shouldn't use the semicolon:
$a = <<< END Once upon a time, there was a END . ' boy!'; print $a; Once upon a time, there was a boy!
In this case, the expression needs to continue on the next line, so you don't use a semicolon.
Note also that in order for PHP to recognize the end-of-string delimiter, the . string
concatenation operator needs to go on a separate line from the end-of-string delimiter.
Recipe 1.2 Accessing Substrings
You want to extract part of a string, starting at a particular place in the string. For example,
you want the first eight characters of a username entered into a form.
1.2.1 Solution
Use substr( ) to select your substrings:
$substring = substr($string,$start,$length); $username = substr($_REQUEST['username'],0,8);
1.2.2 Discussion
If $start and $length are positive, substr( ) returns $length characters in the string,
starting at $start. The first character in the string is at position 0:

print substr('watch out for that tree',6,5); out f
If you leave out $length, substr( ) returns the string from $start to the end of the
original string:
print substr('watch out for that tree',17); t tree
If $start plus $length goes past the end of the string, substr( ) returns all of the string
from $start forward:
print substr('watch out for that tree',20,5); ree
If $start is negative, substr( ) counts back from the end of the string to determine where
your substring starts:
print substr('watch out for that tree',-6); print substr('watch out for that tree',-17,5); t tree out f
If $length is negative, substr( ) counts back from the end of the string to determine
where your substring ends:
print substr('watch out for that tree',15,-2); print substr('watch out for that tree',-4,-1); hat tr tre
1.2.3 See Also
Documentation on substr( ) at http://www.php.net/substr.
Recipe 1.3 Replacing Substrings
1.3.1 Problem
You want to replace a substring with a different string. For example, you want to obscure all
but the last four digits of a credit card number before printing it.
1.3.2 Solution
Use substr_replace( ):
// Everything from position $start to the end of $old_string // becomes $new_substring $new_string = substr_replace($old_string,$new_substring,$start);

// $length characters, starting at position $start, become $new_substring $new_string = substr_replace($old_string,$new_substring,$start,$length);
1.3.3 Discussion
Without the $length argument, substr_replace( ) replaces everything from $start to
the end of the string. If $length is specified, only that many characters are replaced:
print substr_replace('My pet is a blue dog.','fish.',12); print substr_replace('My pet is a blue dog.','green',12,4); $credit_card = '4111 1111 1111 1111'; print substr_replace($credit_card,'xxxx ',0,strlen($credit_card)-4); My pet is a fish. My pet is a green dog. xxxx 1111
If $start is negative, the new substring is placed at $start characters counting from the
end of $old_string, not from the beginning:
print substr_replace('My pet is a blue dog.','fish.',-9); print substr_replace('My pet is a blue dog.','green',-9,4); My pet is a fish. My pet is a green dog.
If $start and $length are 0, the new substring is inserted at the start of $old_string:
print substr_replace('My pet is a blue dog.','Title: ',0,0); Title: My pet is a blue dog.
The function substr_replace( ) is useful when you've got text that's too big to display all
at once, and you want to display some of the text with a link to the rest. For example, this
displays the first 25 characters of a message with an ellipsis after it as a link to a page that
displays more text:
$r = mysql_query("SELECT id,message FROM messages WHERE id = $id") or die( ); $ob = mysql_fetch_object($r); printf('<a href="more-text.php?id=%d">%s</a>', $ob->id, substr_replace($ob->message,' ...',25));
The more-text.php page can use the message ID passed in the query string to retrieve the full
message and display it.
1.3.4 See Also
Documentation on substr_replace( ) at http://www.php.net/substr-replace.
Recipe 1.4 Processing a String One Character at a Time
1.4.1 Problem

You need to process each character in a string individually.
1.4.2 Solution
Loop through each character in the string with for. This example counts the vowels in a
string:
$string = "This weekend, I'm going shopping for a pet chicken."; $vowels = 0; for ($i = 0, $j = strlen($string); $i < $j; $i++) { if (strstr('aeiouAEIOU',$string[$i])) { $vowels++; } }
1.4.3 Discussion
Processing a string a character at a time is an easy way to calculate the "Look and Say"
sequence:
function lookandsay($s) { // initialize the return value to the empty string $r = ''; // $m holds the character we're counting, initialize to the first * character in the string $m = $s[0]; // $n is the number of $m's we've seen, initialize to 1 $n = 1; for ($i = 1, $j = strlen($s); $i < $j; $i++) { // if this character is the same as the last one if ($s[$i] == $m) { // increment the count of this character $n++; } else { // otherwise, add the count and character to the return value // $r .= $n.$m; // set the character we're looking for to the current one // $m = $s[$i]; // and reset the count to 1 // $n = 1; } } // return the built up string as well as the last count and character // return $r.$n.$m; } for ($i = 0, $s = 1; $i < 10; $i++) { $s = lookandsay($s); print "$s\n"; } 1 11 21 1211

111221 312211 13112221 1113213211 31131211131221 13211311123113112211
It's called the "Look and Say" sequence because each element is what you get by looking at
the previous element and saying what's in it. For example, looking at the first element, 1, you
say "one one." So the second element is "11." That's two ones, so the third element is "21."
Similarly, that's one two and one one, so the fourth element is "1211," and so on.
1.4.4 See Also
Documentation on for at http://www.php.net/for; more about the "Look and Say" sequence
at http://mathworld.wolfram.com/LookandSaySequence.html.
Recipe 1.5 Reversing a String by Word or Character
1.5.1 Problem
You want to reverse the words or the characters in a string.
1.5.2 Solution
Use strrev( ) to reverse by character:
print strrev('This is not a palindrome.'); .emordnilap a ton si sihT
To reverse by words, explode the string by word boundary, reverse the words, then rejoin:
$s = "Once upon a time there was a turtle."; // break the string up into words $words = explode(' ',$s); // reverse the array of words $words = array_reverse($words); // rebuild the string $s = join(' ',$words); print $s; turtle. a was there time a upon Once
1.5.3 Discussion
Reversing a string by words can also be done all in one line:
$reversed_s = join(' ',array_reverse(explode(' ',$s)));
1.5.4 See Also
Recipe 18.8 discusses the implications of using something other than a space character as
your word boundary; documentation on strrev( ) at http://www.php.net/strrev and
array_reverse( ) at http://www.php.net/array-reverse.
Recipe 1.6 Expanding and Compressing Tabs
1.6.1 Problem
You want to change spaces to tabs (or tabs to spaces) in a string while keeping text aligned
with tab stops. For example, you want to display formatted text to users in a standardized
way.
1.6.2 Solution
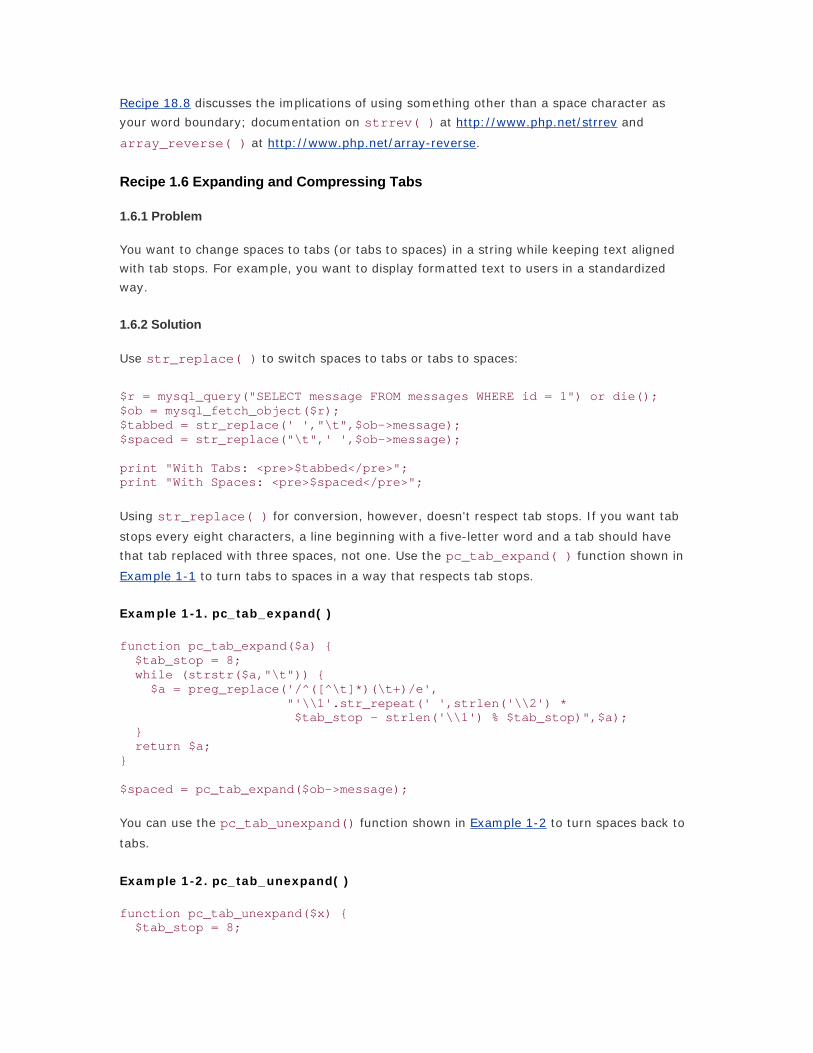
Use str_replace( ) to switch spaces to tabs or tabs to spaces:
$r = mysql_query("SELECT message FROM messages WHERE id = 1") or die(); $ob = mysql_fetch_object($r); $tabbed = str_replace(' ',"\t",$ob->message); $spaced = str_replace("\t",' ',$ob->message); print "With Tabs: <pre>$tabbed</pre>"; print "With Spaces: <pre>$spaced</pre>";
Using str_replace( ) for conversion, however, doesn't respect tab stops. If you want tab
stops every eight characters, a line beginning with a five-letter word and a tab should have
that tab replaced with three spaces, not one. Use the pc_tab_expand( ) function shown in
Example 1-1 to turn tabs to spaces in a way that respects tab stops.
Example 1-1. pc_tab_expand( )
function pc_tab_expand($a) { $tab_stop = 8; while (strstr($a,"\t")) { $a = preg_replace('/^([^\t]*)(\t+)/e', "'\\1'.str_repeat(' ',strlen('\\2') * $tab_stop - strlen('\\1') % $tab_stop)",$a); } return $a; } $spaced = pc_tab_expand($ob->message);
You can use the pc_tab_unexpand() function shown in Example 1-2 to turn spaces back to
tabs.
Example 1-2. pc_tab_unexpand( )
function pc_tab_unexpand($x) { $tab_stop = 8;
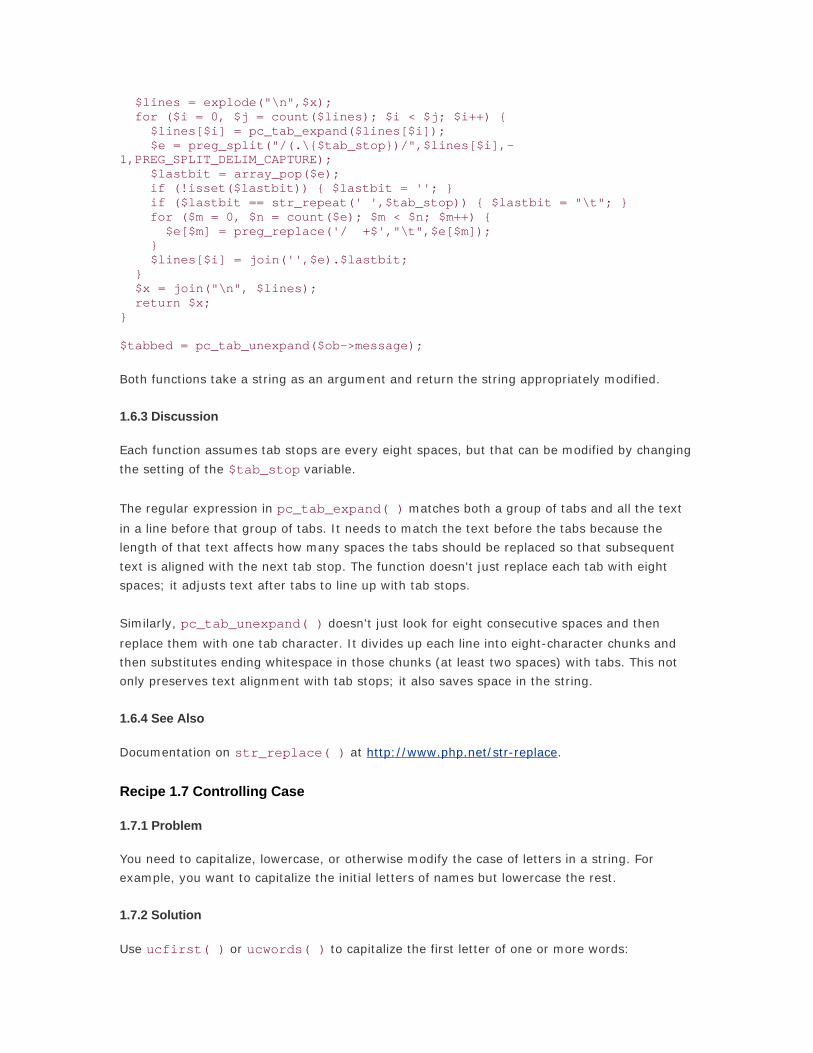
$lines = explode("\n",$x); for ($i = 0, $j = count($lines); $i < $j; $i++) { $lines[$i] = pc_tab_expand($lines[$i]); $e = preg_split("/(.\{$tab_stop})/",$lines[$i],-1,PREG_SPLIT_DELIM_CAPTURE); $lastbit = array_pop($e); if (!isset($lastbit)) { $lastbit = ''; } if ($lastbit == str_repeat(' ',$tab_stop)) { $lastbit = "\t"; } for ($m = 0, $n = count($e); $m < $n; $m++) { $e[$m] = preg_replace('/ +$',"\t",$e[$m]); } $lines[$i] = join('',$e).$lastbit; } $x = join("\n", $lines); return $x; } $tabbed = pc_tab_unexpand($ob->message);
Both functions take a string as an argument and return the string appropriately modified.
1.6.3 Discussion
Each function assumes tab stops are every eight spaces, but that can be modified by changing
the setting of the $tab_stop variable.
The regular expression in pc_tab_expand( ) matches both a group of tabs and all the text
in a line before that group of tabs. It needs to match the text before the tabs because the
length of that text affects how many spaces the tabs should be replaced so that subsequent
text is aligned with the next tab stop. The function doesn't just replace each tab with eight
spaces; it adjusts text after tabs to line up with tab stops.
Similarly, pc_tab_unexpand( ) doesn't just look for eight consecutive spaces and then
replace them with one tab character. It divides up each line into eight-character chunks and
then substitutes ending whitespace in those chunks (at least two spaces) with tabs. This not
only preserves text alignment with tab stops; it also saves space in the string.
1.6.4 See Also
Documentation on str_replace( ) at http://www.php.net/str-replace.
Recipe 1.7 Controlling Case
1.7.1 Problem
You need to capitalize, lowercase, or otherwise modify the case of letters in a string. For
example, you want to capitalize the initial letters of names but lowercase the rest.
1.7.2 Solution
Use ucfirst( ) or ucwords( ) to capitalize the first letter of one or more words:
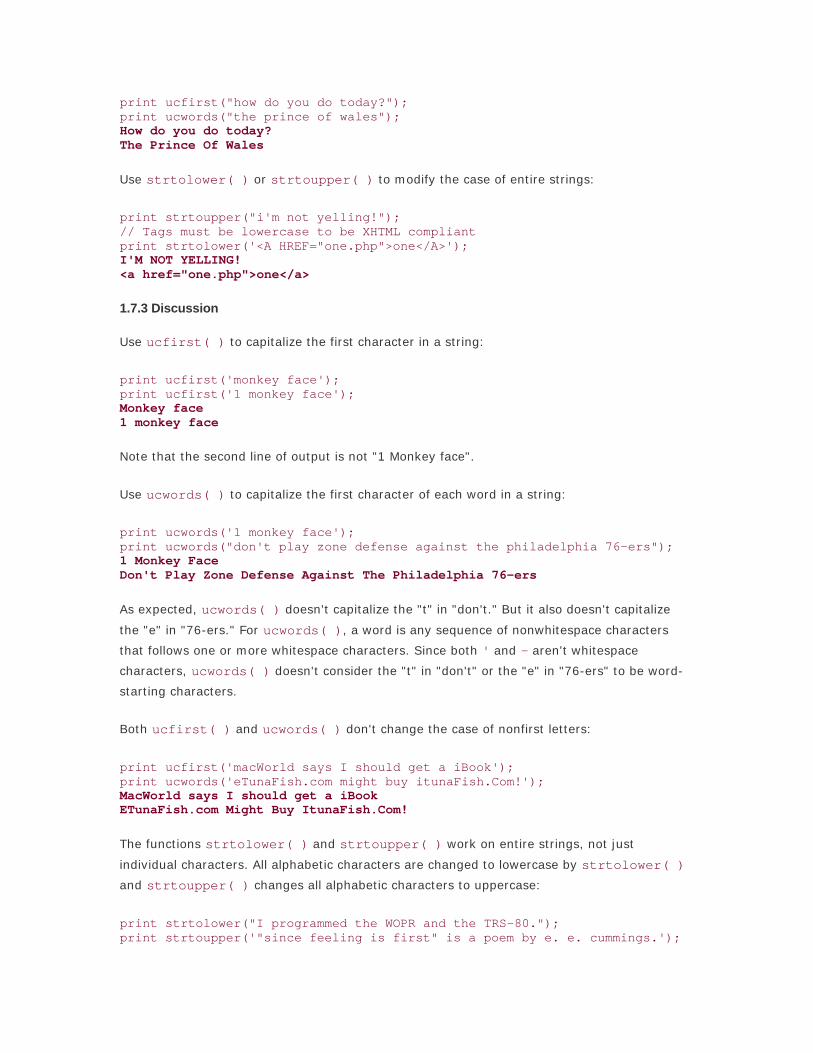
print ucfirst("how do you do today?"); print ucwords("the prince of wales"); How do you do today? The Prince Of Wales
Use strtolower( ) or strtoupper( ) to modify the case of entire strings:
print strtoupper("i'm not yelling!"); // Tags must be lowercase to be XHTML compliant print strtolower('<A HREF="one.php">one</A>'); I'M NOT YELLING! <a href="one.php">one</a>
1.7.3 Discussion
Use ucfirst( ) to capitalize the first character in a string:
print ucfirst('monkey face'); print ucfirst('1 monkey face'); Monkey face 1 monkey face
Note that the second line of output is not "1 Monkey face".
Use ucwords( ) to capitalize the first character of each word in a string:
print ucwords('1 monkey face'); print ucwords("don't play zone defense against the philadelphia 76-ers"); 1 Monkey Face Don't Play Zone Defense Against The Philadelphia 76-ers
As expected, ucwords( ) doesn't capitalize the "t" in "don't." But it also doesn't capitalize
the "e" in "76-ers." For ucwords( ), a word is any sequence of nonwhitespace characters
that follows one or more whitespace characters. Since both ' and - aren't whitespace
characters, ucwords( ) doesn't consider the "t" in "don't" or the "e" in "76-ers" to be word-
starting characters.
Both ucfirst( ) and ucwords( ) don't change the case of nonfirst letters:
print ucfirst('macWorld says I should get a iBook'); print ucwords('eTunaFish.com might buy itunaFish.Com!'); MacWorld says I should get a iBook ETunaFish.com Might Buy ItunaFish.Com!
The functions strtolower( ) and strtoupper( ) work on entire strings, not just
individual characters. All alphabetic characters are changed to lowercase by strtolower( )
and strtoupper( ) changes all alphabetic characters to uppercase:
print strtolower("I programmed the WOPR and the TRS-80."); print strtoupper('"since feeling is first" is a poem by e. e. cummings.');

i programmed the wopr and the trs-80. "SINCE FEELING IS FIRST" IS A POEM BY E. E. CUMMINGS.
When determining upper- and lowercase, these functions respect your locale settings.
1.7.4 See Also
For more information about locale settings, see Chapter 16; documentation on ucfirst( )
at http://www.php.net/ucfirst, ucwords( ) at http://www.php.net/ucwords, strtolower(
) at http://www.php.net/strtolower, and strtoupper( ) at http://www.php.net/strtoupper.
Recipe 1.8 Interpolating Functions and Expressions Within Strings
1.8.1 Problem
You want to include the results of executing a function or expression within a string.
1.8.2 Solution
Use the string concatenation operator (.) when the value you want to include can't be inside
the string:
print 'You have '.($_REQUEST['boys'] + $_REQUEST['girls']).' children.'; print "The word '$word' is ".strlen($word).' characters long.'; print 'You owe '.$amounts['payment'].' immediately'; print "My circle's diameter is ".$circle->getDiameter().' inches.';
1.8.3 Discussion
You can put variables, object properties, and array elements (if the subscript is unquoted)
directly in double-quoted strings:
print "I have $children children."; print "You owe $amounts[payment] immediately."; print "My circle's diameter is $circle->diameter inches.";
Direct interpolation or using string concatenation also works with heredocs. Interpolating with
string concatenation in heredocs can look a little strange because the heredoc delimiter and
the string concatenation operator have to be on separate lines:
print <<< END Right now, the time is END . strftime('%c') . <<< END but tomorrow it will be END . strftime('%c',time() + 86400);

Also, if you're interpolating with heredocs, make sure to include appropriate spacing for the
whole string to appear properly. In the previous example, "Right now the time" has to include
a trailing space, and "but tomorrow it will be" has to include leading and trailing spaces.
1.8.4 See Also
For the syntax to interpolate variable variables (like ${"amount_$i"}), see Recipe 5.5;
documentation on the string concatenation operator at
http://www.php.net/language.operators.string.
Recipe 1.9 Trimming Blanks from a String
1.9.1 Problem
You want to remove whitespace from the beginning or end of a string. For example, you want
to clean up user input before validating it.
1.9.2 Solution
Use ltrim( ) , rtrim( ), or trim( ). ltrim( ) removes whitespace from the beginning
of a string, rtrim( ) from the end of a string, and trim( ) from both the beginning and
end of a string:
$zipcode = trim($_REQUEST['zipcode']); $no_linefeed = rtrim($_REQUEST['text']); $name = ltrim($_REQUEST['name']);
1.9.3 Discussion
For these functions, whitespace is defined as the following characters: newline, carriage
return, space, horizontal and vertical tab, and null.
Trimming whitespace off of strings saves storage space and can make for more precise display
of formatted data or text within <pre> tags, for example. If you are doing comparisons with
user input, you should trim the data first, so that someone who mistakenly enters "98052 " as
their Zip Code isn't forced to fix an error that really isn't. Trimming before exact text
comparisons also ensures that, for example, "salami\n" equals "salami." It's also a good idea
to normalize string data by trimming it before storing it in a database.
The trim( ) functions can also remove user-specified characters from strings. Pass the
characters you want to remove as a second argument. You can indicate a range of characters
with two dots between the first and last characters in the range.
// Remove numerals and space from the beginning of the line print ltrim('10 PRINT A$',' 0..9'); // Remove semicolon from the end of the line print rtrim('SELECT * FROM turtles;',';'); PRINT A$

SELECT * FROM turtles
PHP also provides chop( ) as an alias for rtrim( ). However, you're best off using rtrim(
) instead, because PHP's chop( ) behaves differently than Perl's chop( ) (which is
deprecated in favor of chomp( ), anyway) and using it can confuse others when they read
your code.
1.9.4 See Also
Documentation on trim( ) at http://www.php.net/trim, ltrim( ) at
http://www.php.net/ltrim, and rtrim( ) at http://www.php.net/rtrim.
Recipe 1.10 Parsing Comma-Separated Data
1.10.1 Problem
You have data in comma-separated values ( CSV) format, for example a file exported from
Excel or a database, and you want to extract the records and fields into a format you can
manipulate in PHP.
1.10.2 Solution
If the CSV data is in a file (or available via a URL), open the file with fopen( ) and read in
the data with fgetcsv( ). This prints out the data in an HTML table:
$fp = fopen('sample2.csv','r') or die("can't open file"); print "<table>\n"; while($csv_line = fgetcsv($fp,1024)) { print '<tr>'; for ($i = 0, $j = count($csv_line); $i < $j; $i++) { print '<td>'.$csv_line[$i].'</td>'; } print "</tr>\n"; } print '</table>\n'; fclose($fp) or die("can't close file");
1.10.3 Discussion
The second argument to fgetcsv( ) must be longer than the maximum length of a line in
your CSV file. (Don't forget to count the end-of-line whitespace.) If you read in CSV lines
longer than 1K, change the 1024 used in this recipe to something that accommodates your
line length.
You can pass fgetcsv( ) an optional third argument, a delimiter to use instead of a comma
(,). Using a different delimiter however, somewhat defeats the purpose of CSV as an easy way
to exchange tabular data.

Don't be tempted to bypass fgetcsv( ) and just read a line in and explode( ) on the
commas. CSV is more complicated than that, in order to deal with embedded commas and
double quotes. Using fgetcsv( ) protects you and your code from subtle errors.
1.10.4 See Also
Documentation on fgetcsv( ) at http://www.php.net/fgetcsv.
Recipe 1.11 Parsing Fixed-Width Delimited Data
1.11.1 Problem
You need to break apart fixed-width records in strings.
1.11.2 Solution
Use substr( ):
$fp = fopen('fixed-width-records.txt','r') or die ("can't open file"); while ($s = fgets($fp,1024)) { $fields[1] = substr($s,0,10); // first field: first 10 characters of the line $fields[2] = substr($s,10,5); // second field: next 5 characters of the line $fields[3] = substr($s,15,12); // third field: next 12 characters of the line // a function to do something with the fields process_fields($fields); } fclose($fp) or die("can't close file");
Or unpack( ):
$fp = fopen('fixed-width-records.txt','r') or die ("can't open file"); while ($s = fgets($fp,1024)) { // an associative array with keys "title", "author", and "publication_year" $fields = unpack('A25title/A14author/A4publication_year',$s); // a function to do something with the fields process_fields($fields); } fclose($fp) or die("can't close file");
1.11.3 Discussion
Data in which each field is allotted a fixed number of characters per line may look like this list
of books, titles, and publication dates:
$booklist=<<<END Elmer Gantry Sinclair Lewis1927 The Scarlatti InheritanceRobert Ludlum 1971 The Parsifal Mosaic Robert Ludlum 1982

Sophie's Choice William Styron1979 END;
In each line, the title occupies the first 25 characters, the author's name the next 14
characters, and the publication year the next 4 characters. Knowing those field widths, it's
straightforward to use substr( ) to parse the fields into an array:
$books = explode("\n",$booklist); for($i = 0, $j = count($books); $i < $j; $i++) { $book_array[$i]['title'] = substr($books[$i],0,25); $book_array[$i]['author'] = substr($books[$i],25,14); $book_array[$i]['publication_year'] = substr($books[$i],39,4); }
Exploding $booklist into an array of lines makes the looping code the same whether it's
operating over a string or a series of lines read in from a file.
The loop can be made more flexible by specifying the field names and widths in a separate
array that can be passed to a parsing function, as shown in the pc_fixed_width_substr(
) function in Example 1-3.
Example 1-3. pc_fixed_width_substr( )
function pc_fixed_width_substr($fields,$data) { $r = array(); for ($i = 0, $j = count($data); $i < $j; $i++) { $line_pos = 0; foreach($fields as $field_name => $field_length) { $r[$i][$field_name] = rtrim(substr($data[$i],$line_pos,$field_length)); $line_pos += $field_length; } } return $r; } $book_fields = array('title' => 25, 'author' => 14, 'publication_year' => 4); $book_array = pc_fixed_width_substr($book_fields,$books);
The variable $line_pos keeps track of the start of each field, and is advanced by the
previous field's width as the code moves through each line. Use rtrim( ) to remove trailing
whitespace from each field.
You can use unpack( ) as a substitute for substr( ) to extract fields. Instead of specifying
the field names and widths as an associative array, create a format string for unpack( ). A
fixed-width field extractor using unpack( ) looks like the pc_fixed_width_unpack( )
function shown in Example 1-4.

Example 1-4. pc_fixed_width_unpack( )
function pc_fixed_width_unpack($format_string,$data) { $r = array(); for ($i = 0, $j = count($data); $i < $j; $i++) { $r[$i] = unpack($format_string,$data[$i]); } return $r; } $book_array = pc_fixed_width_unpack('A25title/A14author/A4publication_year', $books);
Because the A format to unpack( ) means "space padded string," there's no need to rtrim(
) off the trailing spaces.
Once the fields have been parsed into $book_array by either function, the data can be
printed as an HTML table, for example:
$book_array = pc_fixed_width_unpack('A25title/A14author/A4publication_year', $books); print "<table>\n"; // print a header row print '<tr><td>'; print join('</td><td>',array_keys($book_array[0])); print "</td></tr>\n"; // print each data row foreach ($book_array as $row) { print '<tr><td>'; print join('</td><td>',array_values($row)); print "</td></tr>\n"; } print '</table>\n';
Joining data on </td><td> produces a table row that is missing its first <td> and last </td>.
We produce a complete table row by printing out <tr><td> before the joined data and
</td></tr> after the joined data.
Both substr( ) and unpack( ) have equivalent capabilities when the fixed-width fields are
strings, but unpack( ) is the better solution when the elements of the fields aren't just
strings.
1.11.4 See Also
For more information about unpack( ), see Recipe 1.14 and http://www.php.net/unpack;
Recipe 4.9 discusses join( ).
Recipe 1.12 Taking Strings Apart
1.12.1 Problem

You need to break a string into pieces. For example, you want to access each line that a user
enters in a <textarea> form field.
1.12.2 Solution
Use explode( ) if what separates the pieces is a constant string:
$words = explode(' ','My sentence is not very complicated');
Use split( ) or preg_split( ) if you need a POSIX or Perl regular expression to describe
the separator:
$words = split(' +','This sentence has some extra whitespace in it.'); $words = preg_split('/\d\. /','my day: 1. get up 2. get dressed 3. eat toast'); $lines = preg_split('/[\n\r]+/',$_REQUEST['textarea']);
Use spliti( ) or the /i flag to preg_split( ) for case-insensitive separator matching:
$words = spliti(' x ','31 inches x 22 inches X 9 inches'); $words = preg_split('/ x /i','31 inches x 22 inches X 9 inches');
1.12.3 Discussion
The simplest solution of the bunch is explode( ). Pass it your separator string, the string to
be separated, and an optional limit on how many elements should be returned:
$dwarves = 'dopey,sleepy,happy,grumpy,sneezy,bashful,doc'; $dwarf_array = explode(',',$dwarves);
Now $dwarf_array is a seven element array:
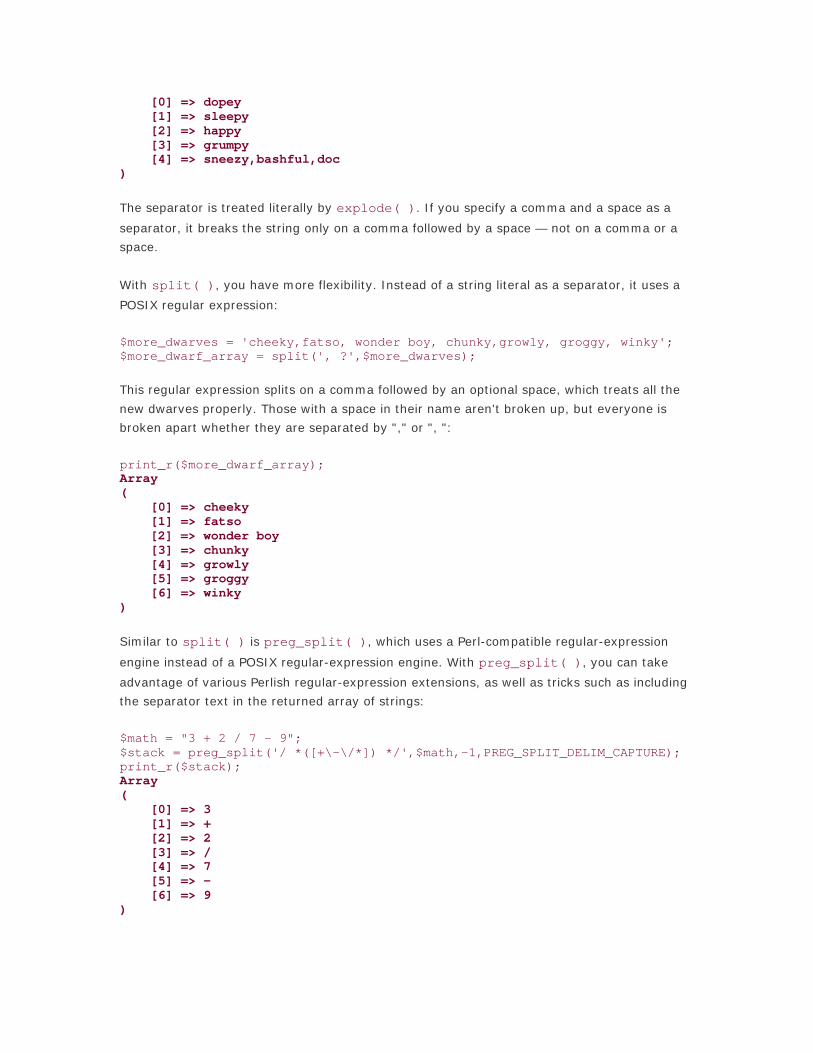
print_r($dwarf_array); Array ( [0] => dopey [1] => sleepy [2] => happy [3] => grumpy [4] => sneezy [5] => bashful [6] => doc )
If the specified limit is less than the number of possible chunks, the last chunk contains the
remainder:
$dwarf_array = explode(',',$dwarves,5); print_r($dwarf_array); Array (
[0] => dopey [1] => sleepy [2] => happy [3] => grumpy [4] => sneezy,bashful,doc )
The separator is treated literally by explode( ). If you specify a comma and a space as a
separator, it breaks the string only on a comma followed by a space — not on a comma or a
space.
With split( ), you have more flexibility. Instead of a string literal as a separator, it uses a
POSIX regular expression:
$more_dwarves = 'cheeky,fatso, wonder boy, chunky,growly, groggy, winky'; $more_dwarf_array = split(', ?',$more_dwarves);
This regular expression splits on a comma followed by an optional space, which treats all the
new dwarves properly. Those with a space in their name aren't broken up, but everyone is
broken apart whether they are separated by "," or ", ":
print_r($more_dwarf_array); Array ( [0] => cheeky [1] => fatso [2] => wonder boy [3] => chunky [4] => growly [5] => groggy [6] => winky )
Similar to split( ) is preg_split( ), which uses a Perl-compatible regular-expression
engine instead of a POSIX regular-expression engine. With preg_split( ), you can take
advantage of various Perlish regular-expression extensions, as well as tricks such as including
the separator text in the returned array of strings:
$math = "3 + 2 / 7 - 9"; $stack = preg_split('/ *([+\-\/*]) */',$math,-1,PREG_SPLIT_DELIM_CAPTURE); print_r($stack); Array ( [0] => 3 [1] => + [2] => 2 [3] => / [4] => 7 [5] => - [6] => 9 )

The separator regular expression looks for the four mathematical operators (+, -, /, *),
surrounded by optional leading or trailing spaces. The PREG_SPLIT_DELIM_CAPTURE flag
tells preg_split( ) to include the matches as part of the separator regular expression in
parentheses in the returned array of strings. Only the mathematical operator character class is
in parentheses, so the returned array doesn't have any spaces in it.
1.12.4 See Also
Regular expressions are discussed in more detail in Chapter 13; documentation on explode(
) at http://www.php.net/explode, split( ) at http://www.php.net/split, and preg_split(
) at http://www.php.net/preg-split.
Recipe 1.13 Wrapping Text at a Certain Line Length
1.13.1 Problem
You need to wrap lines in a string. For example, you want to display text in <pre>/</pre>
tags but have it stay within a regularly sized browser window.
1.13.2 Solution
Use wordwrap( ):
$s = "Four score and seven years ago our fathers brought forth on this continen t a new nation, conceived in liberty and dedicated to the proposition that all men are created equal."; print "<pre>\n".wordwrap($s)."\n</pre>"; <pre> Four score and seven years ago our fathers brought forth on this continent a new nation, conceived in liberty and dedicated to the proposition that all men are created equal. </pre>
1.13.3 Discussion
By default, wordwrap( ) wraps text at 75 characters per line. An optional second argument
specifies different line length:
print wordwrap($s,50); Four score and seven years ago our fathers brought forth on this continent a new nation, conceived in liberty and dedicated to the proposition that all men are created equal.
Other characters besides "\n" can be used for linebreaks. For double spacing, use "\n\n":
print wordwrap($s,50,"\n\n");

Four score and seven years ago our fathers brought forth on this continent a new nation, conceived in liberty and dedicated to the proposition that all men are created equal.
There is an optional fourth argument to wordwrap( ) that controls the treatment of words
that are longer than the specified line length. If this argument is 1, these words are wrapped.
Otherwise, they span past the specified line length:
print wordwrap('jabberwocky',5); print wordwrap('jabberwocky',5,"\n",1); jabberwocky jabbe rwock y
1.13.4 See Also
Documentation on wordwrap( ) at http://www.php.net/wordwrap.
Recipe 1.14 Storing Binary Data in Strings
1.14.1 Problem
You want to parse a string that contains values encoded as a binary structure or encode
values into a string. For example, you want to store numbers in their binary representation
instead of as sequences of ASCII characters.
1.14.2 Solution
Use pack( ) to store binary data in a string:
$packed = pack('S4',1974,106,28225,32725);
Use unpack( ) to extract binary data from a string:
$nums = unpack('S4',$packed);
1.14.3 Discussion
The first argument to pack( ) is a format string that describes how to encode the data that's
passed in the rest of the arguments. The format string S4 tells pack( ) to produce four
unsigned short 16-bit numbers in machine byte order from its input data. Given 1974, 106,
28225, and 32725 as input, this returns eight bytes: 182, 7, 106, 0, 65, 110, 213, and 127.
Each two-byte pair corresponds to one of the input numbers: 7 * 256 + 182 is 1974; 0 * 256
+ 106 is 106; 110 * 256 + 65 = 28225; 127 * 256 + 213 = 32725.

The first argument to unpack( ) is also a format string, and the second argument is the data
to decode. Passing a format string of S4, the eight-byte sequence that pack( ) produced
returns a four-element array of the original numbers:
print_r($nums); Array ( [1] => 1974 [2] => 106 [3] => 28225 [4] => 32725 )
In unpack( ), format characters and their count can be followed by a string to be used as an
array key. For example:
$nums = unpack('S4num',$packed); print_r($nums); Array ( [num1] => 1974 [num2] => 106 [num3] => 28225 [num4] => 32725 )
Multiple format characters must be separated with / in unpack( ):
$nums = unpack('S1a/S1b/S1c/S1d',$packed); print_r($nums); Array ( [a] => 1974 [b] => 106 [c] => 28225 [d] => 32725 )
The format characters that can be used with pack( ) and unpack( ) are listed in Table 1-2.
Table 1-2. Format characters for pack( ) and unpack( )
Format character Data type
a NUL-padded string
A Space-padded string
h Hex string, low nibble first
H Hex string, high nibble first
c signed char
C unsigned char
s signed short (16 bit, machine byte order)

S unsigned short (16 bit, machine byte order)
n unsigned short (16 bit, big endian byte order)
v unsigned short (16 bit, little endian byte order)
i signed int (machine-dependent size and byte order)
I unsigned int (machine-dependent size and byte order)
l signed long (32 bit, machine byte order)
L unsigned long (32 bit, machine byte order)
N unsigned long (32 bit, big endian byte order)
V unsigned long (32 bit, little endian byte order)
f float (machine dependent size and representation)
d double (machine dependent size and representation)
x NUL byte
X Back up one byte
@ NUL-fill to absolute position
For a, A, h, and H, a number after the format character indicates how long the string is. For
example, A25 means a 25-character space-padded string. For other format characters, a
following number means how many of that type appear consecutively in a string. Use * to
take the rest of the available data.
You can convert between data types with unpack( ). This example fills the array $ascii
with the ASCII values of each character in $s:
$s = 'platypus'; $ascii = unpack('c*',$s); print_r($ascii); Array ( [1] => 112 [2] => 108 [3] => 97 [4] => 116 [5] => 121 [6] => 112 [7] => 117 [8] => 115 )
1.14.4 See Also
Documentation on pack( ) at http://www.php.net/pack and unpack( ) at
http://www.php.net/unpack .

Chapter 2. Numbers
Section 2.1. Introduction
Recipe 2.2. Checking Whether a String Contains a Valid Number
Recipe 2.3. Comparing Floating-Point Numbers
Recipe 2.4. Rounding Floating-Point Numbers
Recipe 2.5. Operating on a Series of Integers
Recipe 2.6. Generating Random Numbers Within a Range
Recipe 2.7. Generating Biased Random Numbers
Recipe 2.8. Taking Logarithms
Recipe 2.9. Calculating Exponents
Recipe 2.10. Formatting Numbers
Recipe 2.11. Printing Correct Plurals
Recipe 2.12. Calculating Trigonometric Functions
Recipe 2.13. Doing Trigonometry in Degrees, not Radians
Recipe 2.14. Handling Very Large or Very Small Numbers
Recipe 2.15. Converting Between Bases
Recipe 2.16. Calculating Using Numbers in Bases Other Than Decimal

2.1 Introduction
In everyday life, numbers are easy to identify. They're 3:00 P.M., as in the current time, or
$1.29, as in the cost of a pint of milk. Maybe they're like , the ratio of the circumference to
the diameter of a circle. They can be pretty large, like Avogadro's number, which is about 6 x
1023. In PHP, numbers can be all these things.
However, PHP doesn't treat all these numbers as "numbers." Instead, it breaks them down
into two groups: integers and floating-point numbers. Integers are whole numbers, such as -
4, 0, 5, and 1,975. Floating-point numbers are decimal numbers, such as -1.23, 0.0, 3.14159,
and 9.9999999999.
Conveniently, most of the time PHP doesn't make you worry about the differences between
the two because it automatically converts integers to floating-point numbers and floating-point
numbers to integers. This conveniently allows you to ignore the underlying details. It also
means 3/2 is 1.5, not 1, as it would be in some programming languages. PHP also
automatically converts from strings to numbers and back. For instance, 1+"1" is 2.
However, sometimes this blissful ignorance can cause trouble. First, numbers can't be
infinitely large or small; there's a minimum size of 2.2e-308 and a maximum size of about
1.8e308.[1] If you need larger (or smaller) numbers, you must use the BCMath or GMP
libraries, which are discussed in Recipe 2.14.
[1] These numbers are actually platform-specific, but the values are common because they are from the 64-bit IEEE standard 754.
Next, floating-point numbers aren't guaranteed to be exactly correct but only correct plus or a
minus a small amount. Now, this amount is small enough for most occasions, but you can end
up with problems in certain instances. For instance, humans automatically convert 6 followed
by an endless string of 9s after the decimal point to 7, but PHP thinks it's 6 with a bunch of 9s.
Therefore, if you ask PHP for the integer value of that number, it returns 6, not 7. For similar
reasons, if the digit located in the 200th decimal place is significant, floating-point numbers
aren't useful. Again, the BCMath and GMP libraries ride to the rescue. But, for most occasions,
PHP behaves very nicely when playing with numbers and lets you treat them just as you do in
real life.
Recipe 2.2 Checking Whether a String Contains a Valid Number
2.2.1 Problem
You want to ensure that a string contains a number. For example, you want to validate an age
that the user has typed into a form input field.
2.2.2 Solution
Use is_numeric( ):

if (is_numeric('five')) { /* false */ } if (is_numeric(5)) { /* true */ } if (is_numeric('5')) { /* true */ } if (is_numeric(-5)) { /* true */ } if (is_numeric('-5')) { /* true */ }
2.2.3 Discussion
Besides working on numbers, is_numeric( ) can also be applied to numeric strings. The
distinction here is that the integer 5 and the string 5 technically aren't the same in PHP.[2]
[2] The most glaring example of this difference came during the transition from PHP 3 to PHP 4. In PHP 3, empty('0') returned false, but as of PHP 4, it returns true. On the other hand, empty(0) has always returned true and still does. (Actually, you need to call empty( ) on variables containing '0' and 0.) See the Introduction to Chapter 5 for details.
Helpfully, is_numeric( ) properly parses decimal numbers, such as 5.1; however, numbers
with thousands separators, such as 5,100, cause is_numeric( ) to return false.
To strip the thousands separators from your number before calling is_numeric( ) use
str_replace( ):
is_numeric(str_replace($number, ',', ''));
To check if your number is a specific type, there are a variety of self-explanatorily named
related functions: is_bool( ) , is_float( ) (or is_double( ) or is_real( ); they're
all the same), and is_int( ) (or is_integer( ) or is_long( )).
2.2.4 See Also
Documentation on is_numeric( ) at http://www.php.net/is-numeric and str_replace( )
at http://www.php.net/str-replace.
Recipe 2.3 Comparing Floating-Point Numbers
2.3.1 Problem
You want to check whether two floating-point numbers are equal.
2.3.2 Solution
Use a small delta value, and check if the numbers are equal within that delta:
$delta = 0.00001; $a = 1.00000001;

$b = 1.00000000; if (abs($a - $b) < $delta) { /* $a and $b are equal */ }
2.3.3 Discussion
Floating-point numbers are represented in binary form with only a finite number of bits for the
mantissa and the exponent. You get overflows when you exceed those bits. As a result,
sometimes PHP (and other languages, too) don't believe two equal numbers are actually equal
because they may differ toward the very end.
To avoid this problem, instead of checking if $a == $b, make sure the first number is within
a very small amount ($delta) of the second one. The size of your delta should be the
smallest amount of difference you care about between two numbers. Then use abs( ) to get
the absolute value of the difference.
2.3.4 See Also
Recipe 2.4 for information on rounding floating-point numbers; documentation on floating-
point numbers in PHP at http://www.php.net/language.types.float.
Recipe 2.4 Rounding Floating-Point Numbers
2.4.1 Problem
You want to round a floating-point number, either to an integer value or to a set number of
decimal places.
2.4.2 Solution
To round a number to the closest integer, use round( ) :
$number = round(2.4); // $number = 2
To round up, use ceil( ):
$number = ceil(2.4); // $number = 3
To round down, use floor( ):
$number = floor(2.4); // $number = 2
2.4.3 Discussion
If a number falls exactly between two integers, its behavior is undefined:
$number = round(2.5); // $number is 2 or 3!

Be careful! As we mention in Recipe 2.3, floating-point numbers don't always work out to
exact values because of how they're stored internally by the computer. This can create
situations in which the obvious answer isn't. A value you expect to have a decimal part of
"0.5" might instead be ".499999...9" (with a whole bunch of 9s) or ".500000...1" (with many
0s and a trailing 1). If you want to ensure that a number is rounded up as you might expect,
add a small delta value to it before rounding:
$delta = 0.0000001; $number = round(2.5 + $delta); // $number = 3
To keep a set number of digits after the decimal point, round( ) accepts an optional
precision argument. For example, if you are calculating the total price for the items in a user's
shopping cart:
$cart = 54.23; $tax = $cart * .05; $total = $cart + $tax; // $total = 56.9415 $final = round($total, 2); // $final = 56.94
2.4.4 See Also
Recipe 2.3 for information on comparing floating-point numbers; documentation on round( )
at http://www.php.net/round.
Recipe 2.5 Operating on a Series of Integers
2.5.1 Problem
You want to apply a piece of code over a range of integers.
2.5.2 Solution
Use the range( ) function, which returns an array populated with integers:
foreach(range($start,$end) as $i) { plot_point($i); }
Instead of using range( ), it can be more efficient to use a for loop. Also, you can
increment using values other than 1. For example:
for ($i = $start; $i <= $end; $i += $increment) { plot_point($i); }
2.5.3 Discussion

Loops like this are common. For instance, you could be plotting a function and need to
calculate the results for multiple points on the graph. Or, you could be NASA counting down
until the launch of the Space Shuttle Columbia.
In the first example, range( ) returns an array with values from $start to $end. Then
foreach pulls out each element and assigns it to $i inside of the loop. The advantage of
using range( ) is its brevity, but this technique has a few disadvantages. For one, a large
array can take up unnecessary memory. Also, you're forced to increment the series one
number at a time, so you can't loop through a series of even integers, for example.
As of PHP 4.1, it is valid for $start to be larger than $end. In this case, the numbers
returned by range( ) are in descending order. Also, you can use iterate over character
sequences:
print_r(range('l', 'p')); Array ( [0] => l [1] => m [2] => n [3] => o [4] => p )
The for loop method just uses a single integer and avoids the array entirely. While it's longer,
you have greater control over the loop, because you can increment and decrement $i more
freely. Also, you can modify $i from inside the loop, something you can't do with range( ),
because PHP reads in the entire array when it enters the loop, and changes to the array don't
effect the sequence of elements.
2.5.4 See Also
Recipe 4.4 for details on initializing an array to a range of integers; documentation on range(
) at http://www.php.net/range.
Recipe 2.6 Generating Random Numbers Within a Range
2.6.1 Problem
You want to generate a random number within a range of numbers.
2.6.2 Solution
Use mt_rand( ):
// random number between $upper and $lower, inclusive $random_number = mt_rand($lower, $upper);
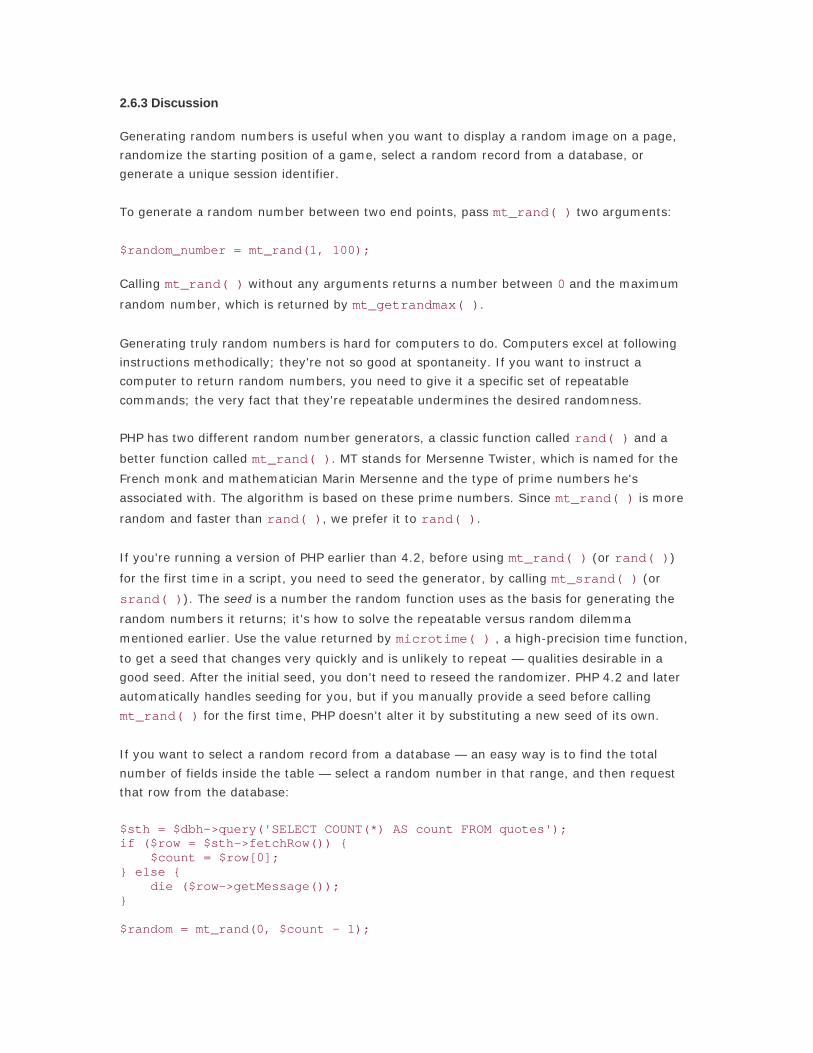
2.6.3 Discussion
Generating random numbers is useful when you want to display a random image on a page,
randomize the starting position of a game, select a random record from a database, or
generate a unique session identifier.
To generate a random number between two end points, pass mt_rand( ) two arguments:
$random_number = mt_rand(1, 100);
Calling mt_rand( ) without any arguments returns a number between 0 and the maximum
random number, which is returned by mt_getrandmax( ).
Generating truly random numbers is hard for computers to do. Computers excel at following
instructions methodically; they're not so good at spontaneity. If you want to instruct a
computer to return random numbers, you need to give it a specific set of repeatable
commands; the very fact that they're repeatable undermines the desired randomness.
PHP has two different random number generators, a classic function called rand( ) and a
better function called mt_rand( ). MT stands for Mersenne Twister, which is named for the
French monk and mathematician Marin Mersenne and the type of prime numbers he's
associated with. The algorithm is based on these prime numbers. Since mt_rand( ) is more
random and faster than rand( ), we prefer it to rand( ).
If you're running a version of PHP earlier than 4.2, before using mt_rand( ) (or rand( ))
for the first time in a script, you need to seed the generator, by calling mt_srand( ) (or
srand( )). The seed is a number the random function uses as the basis for generating the
random numbers it returns; it's how to solve the repeatable versus random dilemma
mentioned earlier. Use the value returned by microtime( ) , a high-precision time function,
to get a seed that changes very quickly and is unlikely to repeat — qualities desirable in a
good seed. After the initial seed, you don't need to reseed the randomizer. PHP 4.2 and later
automatically handles seeding for you, but if you manually provide a seed before calling
mt_rand( ) for the first time, PHP doesn't alter it by substituting a new seed of its own.
If you want to select a random record from a database — an easy way is to find the total
number of fields inside the table — select a random number in that range, and then request
that row from the database:
$sth = $dbh->query('SELECT COUNT(*) AS count FROM quotes'); if ($row = $sth->fetchRow()) { $count = $row[0]; } else { die ($row->getMessage()); } $random = mt_rand(0, $count - 1);
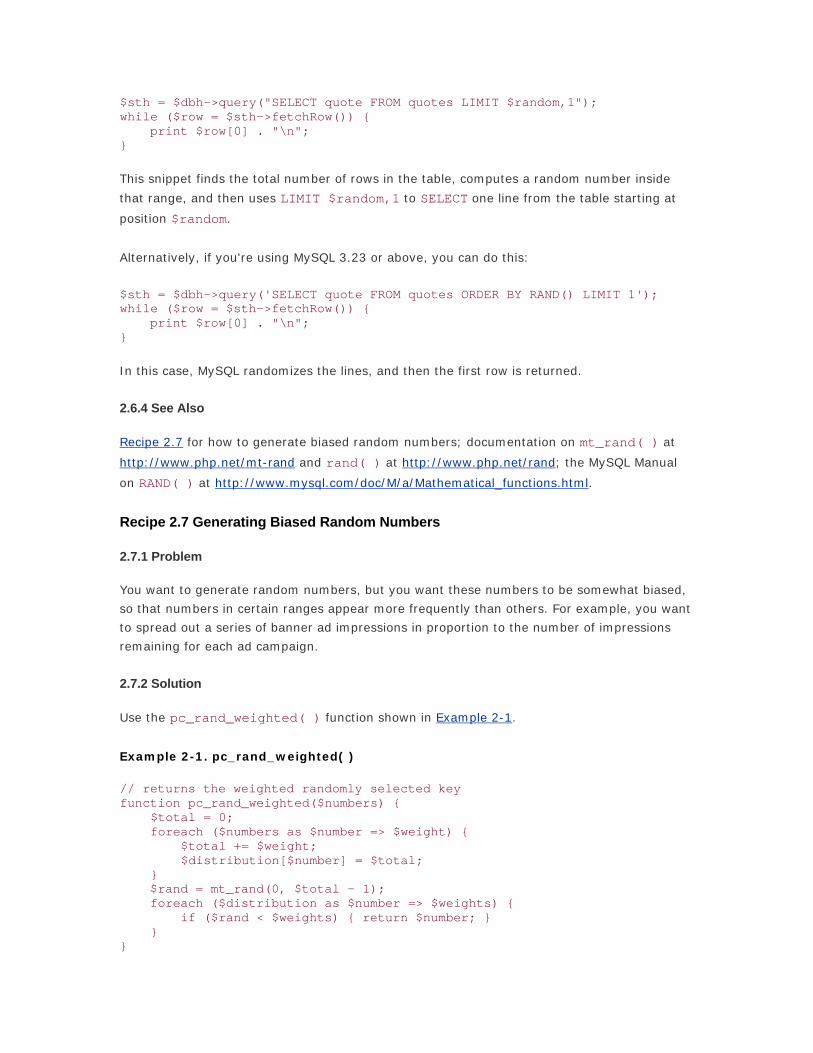
$sth = $dbh->query("SELECT quote FROM quotes LIMIT $random,1"); while ($row = $sth->fetchRow()) { print $row[0] . "\n"; }
This snippet finds the total number of rows in the table, computes a random number inside
that range, and then uses LIMIT $random,1 to SELECT one line from the table starting at
position $random.
Alternatively, if you're using MySQL 3.23 or above, you can do this:
$sth = $dbh->query('SELECT quote FROM quotes ORDER BY RAND() LIMIT 1'); while ($row = $sth->fetchRow()) { print $row[0] . "\n"; }
In this case, MySQL randomizes the lines, and then the first row is returned.
2.6.4 See Also
Recipe 2.7 for how to generate biased random numbers; documentation on mt_rand( ) at
http://www.php.net/mt-rand and rand( ) at http://www.php.net/rand; the MySQL Manual
on RAND( ) at http://www.mysql.com/doc/M/a/Mathematical_functions.html.
Recipe 2.7 Generating Biased Random Numbers
2.7.1 Problem
You want to generate random numbers, but you want these numbers to be somewhat biased,
so that numbers in certain ranges appear more frequently than others. For example, you want
to spread out a series of banner ad impressions in proportion to the number of impressions
remaining for each ad campaign.
2.7.2 Solution
Use the pc_rand_weighted( ) function shown in Example 2-1.
Example 2-1. pc_rand_weighted( )
// returns the weighted randomly selected key function pc_rand_weighted($numbers) { $total = 0; foreach ($numbers as $number => $weight) { $total += $weight; $distribution[$number] = $total; } $rand = mt_rand(0, $total - 1); foreach ($distribution as $number => $weights) { if ($rand < $weights) { return $number; } } }

2.7.3 Discussion
Imagine if instead of an array in which the values are the number of remaining impressions,
you have an array of ads in which each ad occurs exactly as many times as its remaining
number of impressions. You can simply pick an unweighted random place within the array,
and that'd be the ad that shows.
This technique can consume a lot of memory if you have millions of impressions remaining.
Instead, you can calculate how large that array would be (by totalling the remaining
impressions), pick a random number within the size of the make-believe array, and then go
through the array figuring out which ad corresponds to the number you picked. For instance:
$ads = array('ford' => 12234, // advertiser, remaining impressions 'att' => 33424, 'ibm' => 16823); $ad = pc_rand_weighted($ads);
2.7.4 See Also
Recipe 2.6 for how to generate random numbers within a range.
Recipe 2.8 Taking Logarithms
2.8.1 Problem
You want to take the logarithm of a number.
2.8.2 Solution
For logs using base e (natural log), use log( ):
$log = log(10); // 2.30258092994
For logs using base 10, use log10( ):
$log10 = log10(10); // 1
For logs using other bases, use pc_logn( ):
function pc_logn($number, $base) { return log($number) / log($base); } $log2 = pc_logn(10, 2); // 3.3219280948874
2.8.3 Discussion

Both log( ) and log10( ) are defined only for numbers that are greater than zero. The
pc_logn( ) function uses the change of base formula, which says that the log of a number in
base n is equal to the log of that number, divided by the log of n.
2.8.4 See Also
Documentation on log( ) at http://www.php.net/log and log10( ) at
http://www.php.net/log10.
Recipe 2.9 Calculating Exponents
2.9.1 Problem
You want to raise a number to a power.
2.9.2 Solution
To raise e to a power, use exp( ):
$exp = exp(2); // 7.3890560989307
To raise it to any power, use pow( ):
$exp = pow( 2, M_E); // 6.5808859910179 $pow = pow( 2, 10); // 1024 $pow = pow( 2, -2); // 0.25 $pow = pow( 2, 2.5); // 5.6568542494924 $pow = pow(-2, 10); // 1024 $pow = pow( 2, -2); // 0.25 $pow = pow(-2, -2.5); // NAN (Error: Not a Number)
2.9.3 Discussion
The built-in constant M_E is an approximation of the value of e. It equals
2.7182818284590452354. So exp($n) and pow(M_E, $n) are identical.
It's easy to create very large numbers using exp( ) and pow( ); if you outgrow PHP's
maximum size (almost 1.8e308), see Recipe 2.14 for how to use the arbitrary precision
functions. With these functions, PHP returns INF, infinity, if the result is too large and NAN,
not-a-number, on an error.
2.9.4 See Also
Documentation on pow( ) at http://www.php.net/pow, exp( ) at http://www.php.net/exp,
and information on predefined mathematical constants at http://www.php.net/math.

Recipe 2.10 Formatting Numbers
2.10.1 Problem
You have a number and you want to print it with thousands and decimals separators. For
instance, you want to display prices for items in a shopping cart.
2.10.2 Solution
Use the number_format( ) function to format as an integer:
$number = 1234.56; print number_format($number); // 1,235 because number is rounded up
Specify a number of decimal places to format as a decimal:
print number_format($number, 2); // 1,234.56
2.10.3 Discussion
The number_format( ) function formats a number by inserting the correct decimal and
thousands separators for your locale. If you want to manually specify these values, pass them
as the third and fourth parameters:
$number = 1234.56; print number_format($number, 2, '@', '#'); // 1#234@56
The third argument is used as the decimal point and the last separates thousands. If you use
these options, you must specify both arguments.
By default, number_format( ) rounds the number to the nearest integer. If you want to
preserve the entire number, but you don't know ahead of time how many digits follow the
decimal point in your number, use this:
$number = 1234.56; // your number list($int, $dec) = explode('.', $number); print number_format($number, strlen($dec));
2.10.4 See Also
Documentation on number_format( ) at http://www.php.net/number-format.
Recipe 2.11 Printing Correct Plurals
2.11.1 Problem
You want to correctly pluralize words based on the value of a variable. For instance, you are
returning text that depends on the number of matches found by a search.
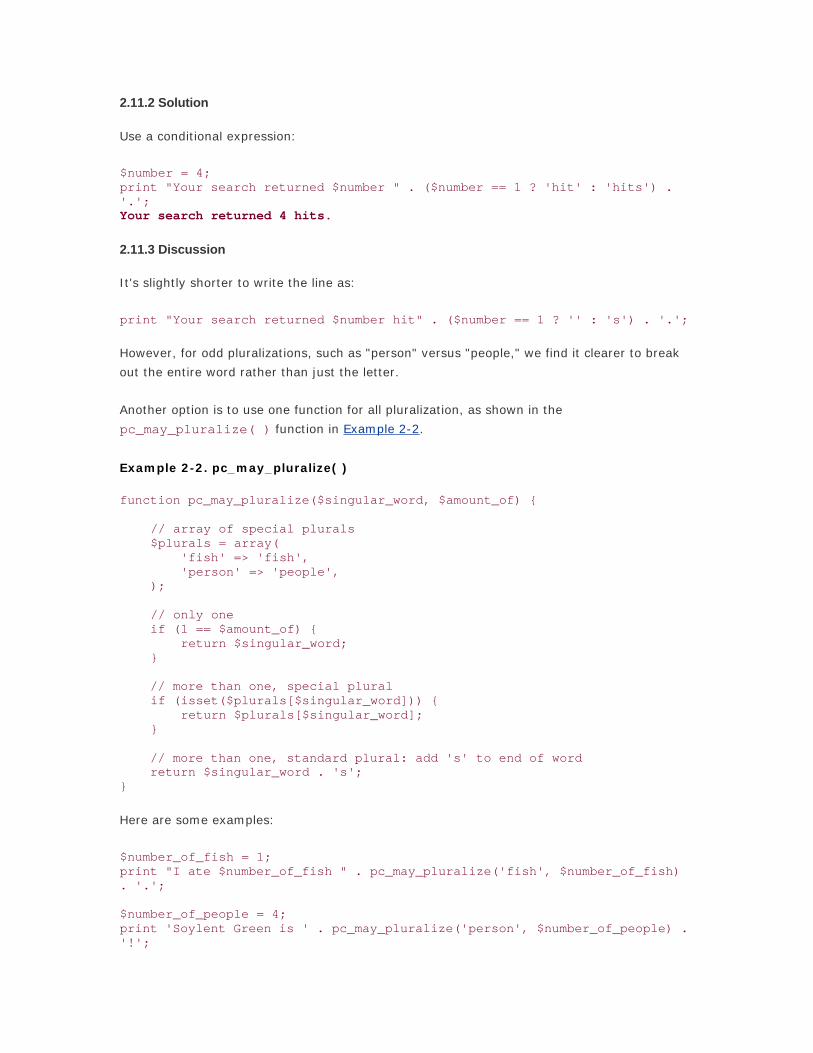
2.11.2 Solution
Use a conditional expression:
$number = 4; print "Your search returned $number " . ($number == 1 ? 'hit' : 'hits') . '.'; Your search returned 4 hits.
2.11.3 Discussion
It's slightly shorter to write the line as:
print "Your search returned $number hit" . ($number == 1 ? '' : 's') . '.';
However, for odd pluralizations, such as "person" versus "people," we find it clearer to break
out the entire word rather than just the letter.
Another option is to use one function for all pluralization, as shown in the
pc_may_pluralize( ) function in Example 2-2.
Example 2-2. pc_may_pluralize( )
function pc_may_pluralize($singular_word, $amount_of) { // array of special plurals $plurals = array( 'fish' => 'fish', 'person' => 'people', ); // only one if (1 == $amount_of) { return $singular_word; } // more than one, special plural if (isset($plurals[$singular_word])) { return $plurals[$singular_word]; } // more than one, standard plural: add 's' to end of word return $singular_word . 's'; }
Here are some examples:
$number_of_fish = 1; print "I ate $number_of_fish " . pc_may_pluralize('fish', $number_of_fish) . '.'; $number_of_people = 4; print 'Soylent Green is ' . pc_may_pluralize('person', $number_of_people) . '!';

I ate 1 fish. Soylent Green is people!
If you plan to have multiple plurals inside your code, using a function such as
pc_may_pluralize( ) increases readability. To use the function, pass
pc_may_pluralize( ) the singular form of the word as the first argument and the amount
as the second. Inside the function, there's a large array, $plurals, that holds all the special
cases. If the $amount is 1, you return the original word. If it's greater, you return the special
pluralized word, if it exists. As a default, just add an "s" to the end of the word.
Recipe 2.12 Calculating Trigonometric Functions
2.12.1 Problem
You want to use trigonometric functions, such as sine, cosine, and tangent.
2.12.2 Solution
PHP supports many trigonometric functions natively: sin( ) , cos( ), and tan( ):
$cos = cos(2.1232);
You can also use their inverses: asin( ), acos( ), and atan( ):
$atan = atan(1.2);
2.12.3 Discussion
These functions assume their arguments are in radians, not degrees. (See Recipe 2.13 if this
is a problem.)
The function atan2( ) takes two variables $x and $y, and computes atan($x/$y).
However, it always returns the correct sign because it uses both parameters when finding the
quadrant of the result.
For secant, cosecant, and cotangent, you should manually calculate the reciprocal values of
sin( ), cos( ), and tan( ):
$n = .707; $secant = 1 / sin($n); $cosecant = 1 / cos($n); $cotangent = 1 / tan($n);
Starting in PHP 4.1, you can also use hyperbolic functions: sinh( ), cosh( ), and tanh( ),
plus, of course, asin( ), cosh( ), and atanh( ). The inverse functions, however, aren't
supported on Windows.

2.12.4 See Also
Recipe 2.13 for how to perform trig operations in degrees, not radians; documentation on
sin( ) at http://www.php.net/sin, cos( ) at http://www.php.net/cos, tan( ) at
http://www.php.net/tan, asin( ) at http://www.php.net/asin, acos( ) at
http://www.php.net/acos, atan( ) at http://www.php.net/atan, and atan2( ) at
http://www.php.net/atan2.
Recipe 2.13 Doing Trigonometry in Degrees, not Radians
2.13.1 Problem
You have numbers in degrees but want to use the trigonometric functions.
2.13.2 Solution
Use deg2rad( ) and rad2deg( ) on your input and output:
$cosine = rad2deg(cos(deg2rad($degree)));
2.13.3 Discussion
By definition, 360 degrees is equal to 2 radians, so it's easy to manually convert between
the two formats. However, these functions use PHP's internal value of , so you're assured a
high-precision answer. To access this number for other calculations, use the constant M_PI,
which is 3.14159265358979323846.
There is no built-in support for gradians. This is considered a feature, not a bug.
2.13.4 See Also
Recipe 2.13 for trig basics; documentation on deg2rad( ) at http://www.php.net/deg2rad
and rad2deg( ) at http://www.php.net/rad2deg.
Recipe 2.14 Handling Very Large or Very Small Numbers
2.14.1 Problem
You need to use numbers that are too large (or small) for PHP's built-in floating-point
numbers.
2.14.2 Solution
Use either the BCMath or GMP libraries.
Using BCMath:

$sum = bcadd('1234567812345678', '8765432187654321'); // $sum is now the string '9999999999999999' print $sum;
Using GMP:
$sum = gmp_add('1234567812345678', '8765432187654321'); // $sum is now a GMP resource, not a string; use gmp_strval( ) to convert print gmp_strval($sum);
2.14.3 Discussion
The BCMath library is easy to use. You pass in your numbers as strings, and the function
return the sum (or difference, product, etc.) as a string. However, the range of actions you
can apply to numbers using BCMath is limited to basic arithmetic.
The GMP library is available as of PHP 4.0.4. While most members of the GMP family of
functions accept integers and strings as arguments, they prefer to pass numbers around as
resources, which are essentially pointers to the numbers. So, unlike BCMath functions, which
return strings, GMP functions return only resources. You then pass the resource to any GMP
function, and it acts as your number.
The only downside is when you want to view or use the resource with a non-GMP function, you
need to explicitly convert it using gmp_strval( ) or gmp_intval( ).
GMP functions are liberal in what they accept. For instance:
$four = gmp_add(2, 2); // You can pass integers $eight = gmp_add('4', '4'); // Or strings $twelve = gmp_add($four, $eight); // Or GMP resources print gmp_strval($twelve); // Prints 12
However, you can do many more things with GMP numbers than addition, such as raising a
number to a power, computing large factorials very quickly, finding a greatest common divisor
(GCD), and other fancy mathematical stuff:
// Raising a number to a power $pow = gmp_pow(2, 10); // 1024 // Computing large factorials very quickly $factorial = gmp_fact(20); // 2432902008176640000 // Finding a GCD $gcd = gmp_gcd (123, 456); // 3 // Other fancy mathematical stuff $legdendre = gmp_legendre(1, 7); // 1
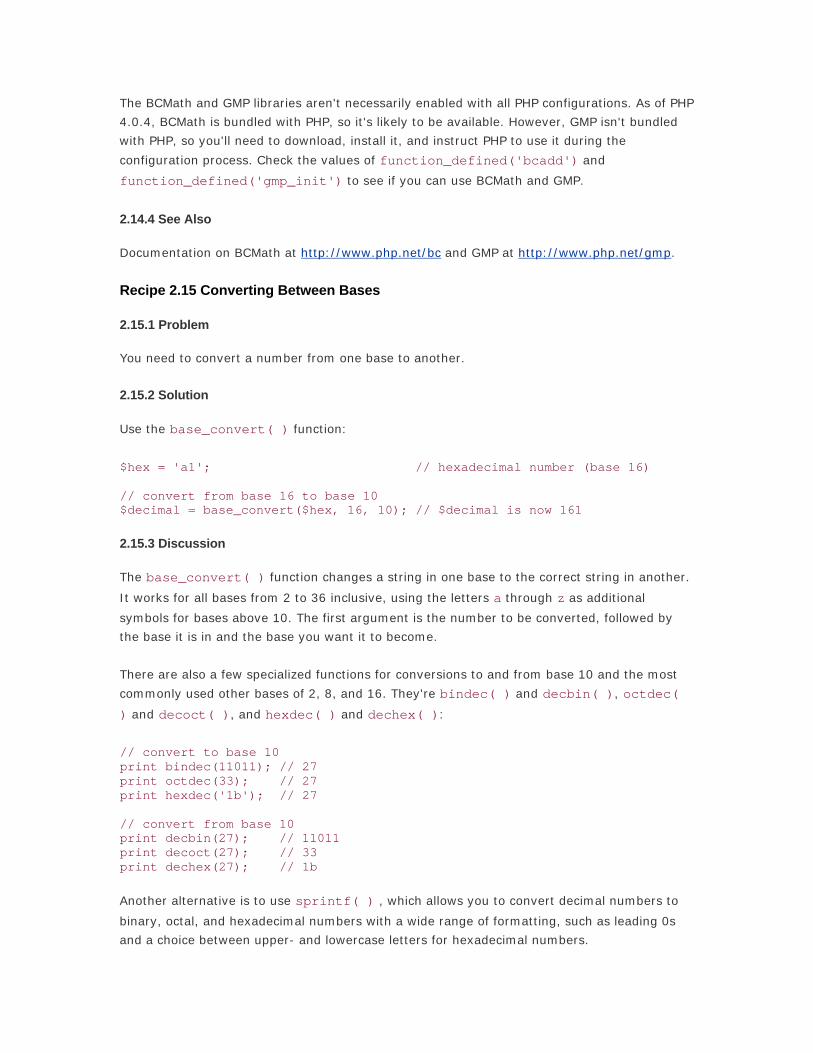
The BCMath and GMP libraries aren't necessarily enabled with all PHP configurations. As of PHP
4.0.4, BCMath is bundled with PHP, so it's likely to be available. However, GMP isn't bundled
with PHP, so you'll need to download, install it, and instruct PHP to use it during the
configuration process. Check the values of function_defined('bcadd') and
function_defined('gmp_init') to see if you can use BCMath and GMP.
2.14.4 See Also
Documentation on BCMath at http://www.php.net/bc and GMP at http://www.php.net/gmp.
Recipe 2.15 Converting Between Bases
2.15.1 Problem
You need to convert a number from one base to another.
2.15.2 Solution
Use the base_convert( ) function:
$hex = 'a1'; // hexadecimal number (base 16) // convert from base 16 to base 10 $decimal = base_convert($hex, 16, 10); // $decimal is now 161
2.15.3 Discussion
The base_convert( ) function changes a string in one base to the correct string in another.
It works for all bases from 2 to 36 inclusive, using the letters a through z as additional
symbols for bases above 10. The first argument is the number to be converted, followed by
the base it is in and the base you want it to become.
There are also a few specialized functions for conversions to and from base 10 and the most
commonly used other bases of 2, 8, and 16. They're bindec( ) and decbin( ), octdec(
) and decoct( ), and hexdec( ) and dechex( ):
// convert to base 10 print bindec(11011); // 27 print octdec(33); // 27 print hexdec('1b'); // 27 // convert from base 10 print decbin(27); // 11011 print decoct(27); // 33 print dechex(27); // 1b
Another alternative is to use sprintf( ) , which allows you to convert decimal numbers to
binary, octal, and hexadecimal numbers with a wide range of formatting, such as leading 0s
and a choice between upper- and lowercase letters for hexadecimal numbers.
For instance, say you want to print out HTML color values:
printf('#%02X%02X%02X', 0, 102, 204); // #0066CC
2.15.4 See Also
Documentation on base_convert( ) at http://www.php.net/base-convert and sprintf( )
formatting options at http://www.php.net/sprintf.
Recipe 2.16 Calculating Using Numbers in Bases Other Than Decimal
2.16.1 Problem
You want to perform mathematical operations with numbers formatted not in decimal, but in
octal or hexadecimal. For example, you want to calculate web-safe colors in hexadecimal.
2.16.2 Solution
Prefix the number with a leading symbol, so PHP knows it isn't in base 10. The following
values are all equal:
0144 // base 8 100 // base 10 0x64 // base 16
Here's how to count from decimal 1 to 15 using hexadecimal notation:
for ($i = 0x1; $i < 0x10; $i++) { print "$i\n"; }
2.16.3 Discussion
Even if you use hexadecimally formatted numbers in a for loop, by default, all numbers are
printed in decimal. In other words, the code in the Solution doesn't print out "..., 8, 9, a, b,
...". To print in hexadecimal, use one of the methods listed in Recipe 2.15. Here's an example:
for ($i = 0x1; $i < 0x10; $i++) { print dechex($i) . "\n"; }
For most calculations, it's easier to use decimal. Sometimes, however, it's more logical to
switch to another base, for example, when using the 216 web-safe colors. Every web color
code is of the form RRGGBB, where RR is the red color, GG is the green color, and BB is the
blue color. Each color is actually a two-digit hexadecimal number between 0 and FF.
What makes web-safe colors special is that RR, GG, and BB each must be one of the following
six numbers: 00, 33, 66, 99, CC, and FF (in decimal: 0, 51, 102, 153, 204, 255). So, 003366
is web-safe, but 112233 is not. Web-safe colors render without dithering on a 256-color
display.

When creating a list of these numbers, use hexadecimal notation in this triple-loop to reinforce
the list's hexadecimal basis:
for ($rr = 0; $rr <= 0xFF; $rr += 0x33) for ($gg = 0; $gg <= 0xFF; $gg += 0x33) for ($bb = 0; $bb <= 0xFF; $bb += 0x33) printf("%02X%02X%02X\n", $rr, $gg, $bb);
Here the loops compute all possible web-safe colors. However, instead of stepping through
them in decimal, you use hexadecimal notation, because it reinforces the hexadecimal link
between the numbers. Print them out using printf( ) to format them as uppercase
hexadecimal numbers at least two digits long. One-digit numbers are passed with a leading
zero.
2.16.4 See Also
Recipe 2.15 for details on converting between bases; Chapter 3, "Web Design Principles for
Print Designers," in Web Design in a Nutshell (O'Reilly).

Chapter 3. Dates and Times
Section 3.1. Introduction
Recipe 3.2. Finding the Current Date and Time
Recipe 3.3. Converting Time and Date Parts to an Epoch Timestamp
Recipe 3.4. Converting an Epoch Timestamp to Time and Date Parts
Recipe 3.5. Printing a Date or Time in a Specified Format
Recipe 3.6. Finding the Difference of Two Dates
Recipe 3.7. Finding the Difference of Two Dates with Julian Days
Recipe 3.8. Finding the Day in a Week, Month, Year, or the Week Number in a Year
Recipe 3.9. Validating a Date
Recipe 3.10. Parsing Dates and Times from Strings
Recipe 3.11. Adding to or Subtracting from a Date
Recipe 3.12. Calculating Time with Time Zones
Recipe 3.13. Accounting for Daylight Saving Time
Recipe 3.14. Generating a High-Precision Time
Recipe 3.15. Generating Time Ranges
Recipe 3.16. Using Non-Gregorian Calendars
Recipe 3.17. Program: Calendar

3.1 Introduction
Displaying and manipulating dates and times seems simple at first but gets more difficult
depending on how diverse and complicated your users are. Do your users span more than one
time zone? Probably so, unless you are building an intranet or a site with a very specific
geographical audience. Is your audience frightened away by timestamps that look like "2002-
07-20 14:56:34 EDT" or do they need to be calmed with familiar representations like
"Saturday July 20, 2000 (2:56 P.M.)." Calculating the number of hours between today at 10
A.M. and today at 7 P.M. is pretty easy. How about between today at 3 A.M. and noon on the
first day of next month? Finding the difference between dates is discussed in Recipe 3.6 and
Recipe 3.7.
These calculations and manipulations are made even more hectic by daylight saving (or
summer) time (DST). Thanks to DST, there are times that don't exist (in most of the United
States, 2 A.M. to 3 A.M. on the first Sunday in April) and times that exist twice (in most of the
United States, 1 A.M. to 2 A.M. on the last Sunday in October). Some of your users may live in
places that observe DST, some may not. Recipe 3.12 and Recipe 3.13 provide ways to work
with time zones and DST.
Programmatic time handling is made much easier by two conventions. First, treat time
internally as Coordinated Universal Time (abbreviated UTC and also known as GMT, Greenwich
Mean Time), the patriarch of the time-zone family with no DST or summer time observance.
This is the time zone at 0 degrees longitude, and all other time zones are expressed as offsets
(either positive or negative) from it. Second, treat time not as an array of different values for
month, day, year, minute, second, etc., but as seconds elapsed since the Unix epoch:
midnight on January 1, 1970 (UTC, of course). This makes calculating intervals much easier,
and PHP has plenty of functions to help you move easily between epoch timestamps and
human-readable time representations.
The function mktime( ) produces epoch timestamps from a given set of time parts, while
date( ) , given an epoch timestamp, returns a formatted time string. You can use these
functions, for example, to find on what day of the week New Year's Day 1986 occurred:
$stamp = mktime(0,0,0,1,1,1986); print date('l',$stamp); Wednesday
This use of mktime( ) returns the epoch timestamp at midnight on January 1, 1986. The l
format character to date( ) tells it to return the full name of the day of the week that
corresponds to the given epoch timestamp. Recipe 3.5 details the many format characters
available to date( ).
In this book, the phrase epoch timestamp refers to a count of seconds since the Unix epoch.
Time parts (or date parts or time and date parts) means an array or group of time and date
components such as day, month, year, hour, minute, and second. Formatted time string (or

formatted date string, etc.) means a string that contains some particular grouping of time and
date parts, for example "2002-03-12," "Wednesday, 11:23 A.M.," or "February 25."
If you used epoch timestamps as your internal time representation, you avoided any Y2K
issues, because the difference between 946702799 (1999-12-31 23:59:59 UTC) and
946702800 (2000-01-01 00:00:00 UTC) is treated just like the difference between any other
two timestamps. You may, however, run into a Y2038 problem. January 19, 2038 at 3:14:07
A.M. (UTC) is 2147483647 seconds after midnight January 1, 1970. What's special about
2147483647? It's 231 - 1, which is the largest integer expressible when 32 bits represent a
signed integer. (The 32nd bit is used for the sign.)
The solution? At some point before January 19, 2038, make sure you trade up to hardware
that uses, say, a 64-bit quantity for time storage. This buys you about another 292 billion
years. (Just 39 bits would be enough to last you until about 10680, well after the impact of
the Y10K bug has leveled the Earth's cold fusion factories and faster-than-light travel
stations.) 2038 might seem far off right now, but so did 2000 to COBOL programmers in the
1950s and 1960s. Don't repeat their mistake!
Recipe 3.2 Finding the Current Date and Time
3.2.1 Problem
You want to know what the time or date is.
3.2.2 Solution
Use strftime( ) or date( ) for a formatted time string:
print strftime('%c'); print date('r'); Mon Aug 12 18:23:45 2002 Mon, 12 Aug 2002 18:23:45 -0400
Use getdate( ) or localtime( ) if you want time parts:
$now_1 = getdate( ); $now_2 = localtime( ); print "$now_1[hours]:$now_1[minutes]:$now_1[seconds]"; print "$now_2[2]:$now_2[1]:$now_2[0]"; 18:23:45 18:23:45
3.2.3 Discussion
The functions strftime( ) and date( ) can produce a variety of formatted time and date
strings. They are discussed in more detail in Recipe 3.5. Both localtime( ) and getdate(
), on the other hand, return arrays whose elements are the different pieces of the specified
date and time.

The associative array getdate( ) returns has the key/value pairs listed in Table 3-1.
Table 3-1. Return array from getdate( )
Key Value
seconds Seconds
minutes Minutes
hours Hours
mday Day of the month
wday Day of the week, numeric (Sunday is 0, Saturday is 6)
mon Month, numeric
year Year, numeric
yday Day of the year, numeric (e.g., 299)
weekday Day of the week, textual, full (e.g., "Friday")
month Month, textual, full (e.g., "January")
For example, here's how to use getdate( ) to print out the month, day, and year:
$a = getdate( ); printf('%s %d, %d',$a['month'],$a['mday'],$a['year']); August 7, 2002
Pass getdate( ) an epoch timestamp as an argument to make the returned array the
appropriate values for local time at that timestamp. For example, the month, day, and year at
epoch timestamp 163727100 is:
$a = getdate(163727100); printf('%s %d, %d',$a['month'],$a['mday'],$a['year']); March 10, 1975
The function localtime( ) returns an array of time and date parts. It also takes an epoch
timestamp as an optional first argument, as well as a boolean as an optional second
argument. If that second argument is true, localtime( ) returns an associative array
instead of a numerically indexed array. The keys of that array are the same as the members
of the tm_struct structure that the C function localtime( ) returns, as shown in Table 3-
2.
Table 3-2. Return array from localtime( )
Numeric position Key Value
0 tm_sec Second
1 tm_min Minutes
2 tm_hour Hour
3 tm_mday Day of the month
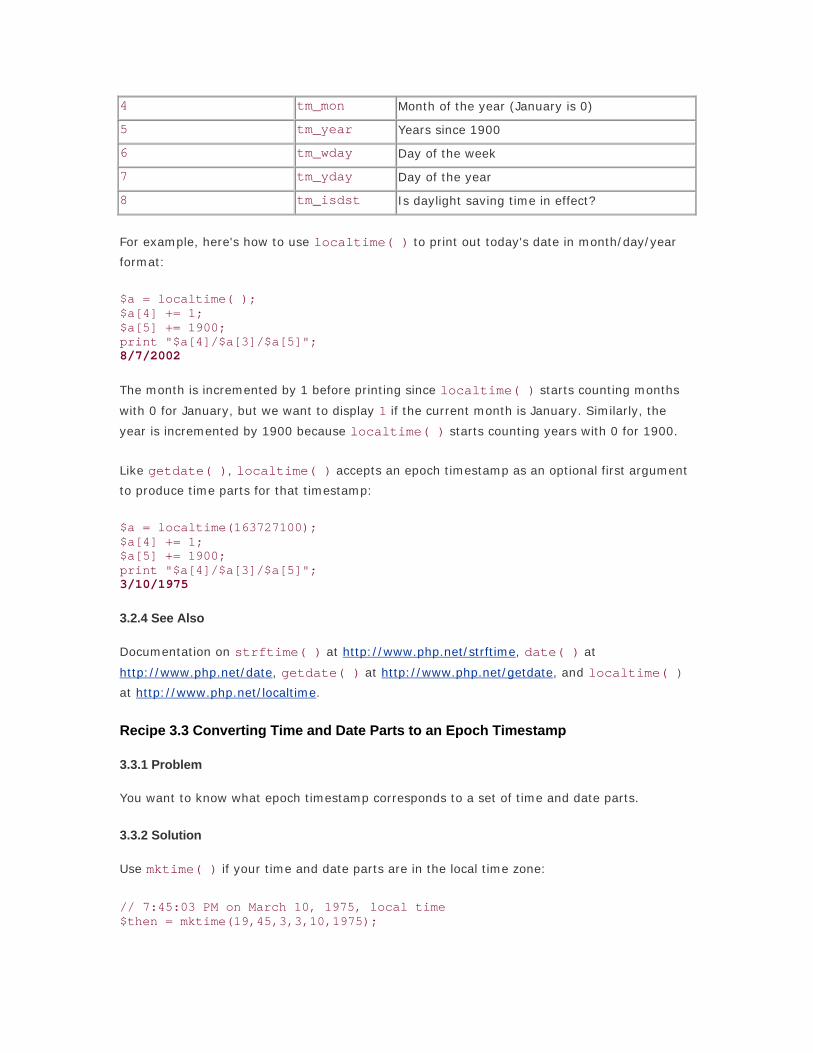
4 tm_mon Month of the year (January is 0)
5 tm_year Years since 1900
6 tm_wday Day of the week
7 tm_yday Day of the year
8 tm_isdst Is daylight saving time in effect?
For example, here's how to use localtime( ) to print out today's date in month/day/year
format:
$a = localtime( ); $a[4] += 1; $a[5] += 1900; print "$a[4]/$a[3]/$a[5]"; 8/7/2002
The month is incremented by 1 before printing since localtime( ) starts counting months
with 0 for January, but we want to display 1 if the current month is January. Similarly, the
year is incremented by 1900 because localtime( ) starts counting years with 0 for 1900.
Like getdate( ), localtime( ) accepts an epoch timestamp as an optional first argument
to produce time parts for that timestamp:
$a = localtime(163727100); $a[4] += 1; $a[5] += 1900; print "$a[4]/$a[3]/$a[5]"; 3/10/1975
3.2.4 See Also
Documentation on strftime( ) at http://www.php.net/strftime, date( ) at
http://www.php.net/date, getdate( ) at http://www.php.net/getdate, and localtime( )
at http://www.php.net/localtime.
Recipe 3.3 Converting Time and Date Parts to an Epoch Timestamp
3.3.1 Problem
You want to know what epoch timestamp corresponds to a set of time and date parts.
3.3.2 Solution
Use mktime( ) if your time and date parts are in the local time zone:
// 7:45:03 PM on March 10, 1975, local time $then = mktime(19,45,3,3,10,1975);
Use gmmktime( ) if your time and date parts are in GMT:
// 7:45:03 PM on March 10, 1975, in GMT $then = gmmktime(19,45,3,3,10,1975);
Pass no arguments to get the current date and time in the local or UTC time zone:
$now = mktime(); $now_utc = gmmktime();
3.3.3 Discussion
The functions mktime( ) and gmmktime( ) each take a date and time's parts (hour, minute,
second, month, day, year, DST flag) and return the appropriate Unix epoch timestamp. The
components are treated as local time by mktime( ), while gmmktime( ) treats them as a
date and time in UTC. For both functions, a seventh argument, the DST flag (1 if DST is being
observed, 0 if not), is optional. These functions return sensible results only for times within
the epoch. Most systems store epoch timestamps in a 32-bit signed integer, so "within the
epoch" means between 8:45:51 P.M. December 13, 1901 UTC and 3:14:07 A.M. January 19,
2038 UTC.
In the following example, $stamp_now is the epoch timestamp when mktime( ) is called and
$stamp_future is the epoch timestamp for 3:25 P.M. on June 4, 2012:
$stamp_now = mktime( ); $stamp_future = mktime(15,25,0,6,4,2012); print $stamp_now; print $stamp_future; 1028782421 1338837900
Both epoch timestamps can be fed back to strftime( ) to produce formatted time strings:
print strftime('%c',$stamp_now); print strftime('%c',$stamp_future); Thu Aug 8 00:53:41 2002 Mon Jun 4 15:25:00 2012
Because the previous calls to mktime( ) were made on a computer set to EDT (which is four
hours behind GMT), using gmmktime( ) instead produces epoch timestamps that are 14400
seconds (four hours) smaller:
$stamp_now = gmmktime( ); $stamp_future = gmmktime(15,25,0,6,4,2012); print $stamp_now; print $stamp_future; 1028768021 1338823500

Feeding these gmmktime( )-generated epoch timestamps back to strftime( ) produces
formatting time strings that are also four hours earlier:
print strftime('%c',$stamp_now); print strftime('%c',$stamp_future); Wed Aug 7 20:53:41 2002 Mon Jun 4 11:25:00 2012
3.3.4 See Also
Recipe 3.4 for how to convert an epoch timestamp back to time and date parts;
documentation on mktime( ) at http://www.php.net/mktime and gmmktime( ) at
http://www.php.net/gmmktime.
Recipe 3.4 Converting an Epoch Timestamp to Time and Date Parts
3.4.1 Problem
You want the set of time and date parts that corresponds to an epoch timestamp.
3.4.2 Solution
Pass an epoch timestamp to getdate( ):
$time_parts = getdate(163727100);
3.4.3 Discussion
The time parts returned by getdate( ) are detailed in Table 3-1. These time parts are in
local time. If you want time parts in another time zone corresponding to a particular epoch
timestamp, see Recipe 3.12.
3.4.4 See Also
Recipe 3.3 for how to convert time and date parts back to epoch timestamps; Recipe 3.12 for
how to deal with time zones; documentation on getdate( ) at http://www.php.net/getdate.
Recipe 3.5 Printing a Date or Time in a Specified Format
3.5.1 Problem
You need to print out a date or time formatted in a particular way.
3.5.2 Solution
Use date( ) or strftime( ):
print strftime('%c');

print date('m/d/Y'); Tue Jul 30 11:31:08 2002 07/30/2002
3.5.3 Discussion
Both date( ) and strftime( ) are flexible functions that can produce a formatted time
string with a variety of components. The formatting characters for these functions are listed in
Table 3-3. The Windows column indicates whether the formatting character is supported by
strftime( ) on Windows systems.
Table 3-3. strftime( ) and date( ) format characters
Type strftime(
)
date(
) Description Range Windows
Hour %H H Hour, numeric, 24-hour clock 00-23 Yes
Hour %I h Hour, numeric, 12-hour clock 01-12 Yes
Hour %k Hour, numeric, 24-hour clock,
leading zero as space 0-23 No
Hour %l Hour, numeric, 12-hour clock,
leading zero as space 1-12 No
Hour %p A AM or PM designation for current
locale Yes
Hour %P a am/pm designation for current
locale No
Hour G Hour, numeric, 24-hour clock,
leading zero trimmed 0-23 No
Hour g Hour, numeric, 12-hour clock,
leading zero trimmed 0-1 No
Minute %M I Minute, numeric 00-59 Yes
Second %S s Second, numeric 00-61[1] Yes
Day %d d Day of the month, numeric 01-31 Yes
Day %e Day of the month, numeric, leading
zero as space 1-31 No
Day %j z Day of the year, numeric
001-366 for
strftime( );
0-365 for
date( )
Yes
Day %u Day of the week, numeric (Monday
is 1) 1-7 No
Day %w w Day of the week, numeric (Sunday
is 0) 0-6 Yes
Day j Day of the month, numeric, leading 1-31 No

zero trimmed
Day S English ordinal suffix for day of the
month, textual
"st," "th," "nd,"
"rd" No
Week %a D Abbreviated weekday name, text for
current locale Yes
Week %A l Full weekday name, text for current
locale Yes
Week %U Week number in the year; numeric;
first Sunday is the first day of the
first week
00-53 Yes
Week %V W
ISO 8601:1988 week number in the
year; numeric; week 1 is the first
week that has at least 4 days in the
current year; Monday is the first day
of the week
01-53 No
Week %W Week number in the year; numeric;
first Monday is the first day of the
first week
00-53 Yes
Month %B F Full month name, text for current
locale Yes
Month %b M Abbreviated month name, text for
current locale Yes
Month %h Same as %b No
Month %m m Month, numeric 01-12 Yes
Month n Month, numeric, leading zero
trimmed 1-12 No
Month t Month length in days, numeric 28, 29, 30, 31 No
Year %C Century, numeric 00-99 No
Year %g Like %G, but without the century 00-99 No
Year %G
ISO 8601 year with century;
numeric; the four-digit year
corresponding to the ISO week
number; same as %y except if the
ISO week number belongs to the
previous or next year, that year is
used instead
No
Year %y y Year without century, numeric 00-99 Yes
Year %Y Y Year, numeric, including century Yes
Year L Leap year flag (yes is 1) 0, 1 No
Timezone %z O Hour offset from GMT, +/-HHMM -1200-+1200 Yes, but

(e.g., -0400, +0230) acts like %Z
Timezone %Z T Time zone, name, or abbreviation;
textual Yes
Timezone I Daylight saving time flag (yes is 1) 0, 1 No
Timezone Z Seconds offset from GMT; west of
GMT is negative, east of GMT is
positive
-43200-43200 No
Compound %c Standard date and time format for
current locale Yes
Compound %D Same as %m/%d/%y No
Compound %F Same as %Y-%m-%d No
Compound %r Time in AM or PM notation for
current locale No
Compound %R Time in 24-hour notation for current
locale No
Compound %T Time in 24-hour notation (same as
%H:%M:%S) No
Compound %x Standard date format for current
locale(without time) Yes
Compound %X Standard time format for current
locale(without date) Yes
Compound r RFC 822 formatted date (e.g., "Thu,
22 Aug 2002 16:01:07 +0200") No
Other %s U Seconds since the epoch No
Other B Swatch Internet time No
Formatting %% Literal % character Yes
Formatting %n Newline character No
Formatting %t Tab character No
[1] The range for seconds extends to 61 to account for leap seconds.
The first argument to each function is a format string, and the second argument is an epoch
timestamp. If you leave out the second argument, both functions default to the current date
and time. While date( ) and strftime( ) operate over local time, they each have UTC-
centric counterparts (gmdate( ) and gmstrftime( )).
The formatting characters for date( ) are PHP-specific, but strftime( ) uses the C-library
strftime( ) function. This may make strftime( ) more understandable to someone
coming to PHP from another language, but it also makes its behavior slightly different on
various platforms. Windows doesn't support as many strftime( ) formatting commands as

most Unix-based systems. Also, strftime( ) expects its formatting characters to each be
preceded by a % (think printf( )), so it's easier to produce strings with lots of interpolated
time and date values in them.
For example, at 12:49 P.M. on July 15, 2002, the code to print out:
It's after 12 pm on July 15, 2002
with strftime( ) looks like:
print strftime("It's after %I %P on %B %d, %Y");
With date( ) it looks like:
print "It's after ".date('h a').' on '.date('F d, Y');
Non-date-related characters in a format string are fine for strftime( ), because it looks for
the % character to decide where to interpolate the appropriate time information. However,
date( ) doesn't have such a delimiter, so about the only extras you can tuck into the
formatting string are spaces and punctuation. If you pass strftime( )'s formatting string to
date( ):
print date("It's after %I %P on %B%d, %Y");
you'd almost certainly not want what you'd get:
131'44 pmf31eMon, 15 Jul 2002 12:49:44 -0400 %1 %P o7 %742%15, %2002
To generate time parts with date( ) that are easy to interpolate, group all time and date
parts from date( ) into one string, separating the different components with a delimiter that
date( ) won't translate into anything and that isn't itself part of one of your substrings.
Then, using explode( ) with that delimiter character, put each piece of the return value
from date( ) in an array, which is easily interpolated in your output string:
$ar = explode(':',date("h a:F d, Y")); print "It's after $ar[0] on $ar[1]";
3.5.4 See Also
Documentation on date( ) at http://www.php.net/date and strftime( ) at
http://www.php.net/strftime; on Unix-based systems, man strftime for your system-specific
strftime( ) options; on Windows, see
http://msdn.microsoft.com/library/default.asp?url=/library/en-
us/vclib/html/_crt_strftime.2c_.wcsftime.asp for strftime( ) details.

Recipe 3.6 Finding the Difference of Two Dates
3.6.1 Problem
You want to find the elapsed time between two dates. For example, you want to tell a user
how long it's been since she last logged onto your site.
3.6.2 Solution
Convert both dates to epoch timestamps and subtract one from the other. Use this code to
separate the difference into weeks, days, hours, minutes, and seconds:
// 7:32:56 pm on May 10, 1965 $epoch_1 = mktime(19,32,56,5,10,1965); // 4:29:11 am on November 20, 1962 $epoch_2 = mktime(4,29,11,11,20,1962); $diff_seconds = $epoch_1 - $epoch_2; $diff_weeks = floor($diff_seconds/604800); $diff_seconds -= $diff_weeks * 604800; $diff_days = floor($diff_seconds/86400); $diff_seconds -= $diff_days * 86400; $diff_hours = floor($diff_seconds/3600); $diff_seconds -= $diff_hours * 3600; $diff_minutes = floor($diff_seconds/60); $diff_seconds -= $diff_minutes * 60; print "The two dates have $diff_weeks weeks, $diff_days days, "; print "$diff_hours hours, $diff_minutes minutes, and $diff_seconds "; print "seconds elapsed between them."; The two dates have 128 weeks, 6 days, 14 hours, 3 minutes, and 45 seconds elapsed between them.
Note that the difference isn't divided into larger chunks than weeks (i.e., months or years)
because those chunks have variable length and wouldn't give an accurate count of the time
difference calculated.
3.6.3 Discussion
There are a few strange things going on here that you should be aware of. First of all, 1962
and 1965 precede the beginning of the epoch. Fortunately, mktime( ) fails gracefully here
and produces negative epoch timestamps for each. This is okay because the absolute time
value of either of these questionable timestamps isn't necessary, just the difference between
the two. As long as epoch timestamps for the dates fall within the range of a signed integer,
their difference is calculated correctly.
Next, a wall clock (or calendar) reflects a slightly different amount of time change between
these two dates, because they are on different sides of a DST switch. The result subtracting
epoch timestamps gives is the correct amount of elapsed time, but the perceived human time
change is an hour off. For example, on the Sunday morning in April when DST is activated,
what's the difference between 1:30 A.M. and 4:30 A.M.? It seems like three hours, but the

epoch timestamps for these two times are only 7,200 seconds apart — two hours. When a
local clock springs forward an hour (or falls back an hour in October), the steady march of
epoch timestamps takes no notice. Truly, only two hours have passed, although our clock
manipulations make it seem like three.
If you want to measure actual elapsed time (and you usually do), this method is fine. If you're
more concerned with the difference in what a clock says at two points in time, use Julian days
to compute the interval, as discussed in Recipe 3.7.
To tell a user the elapsed time since her last login, you need to find the difference between the
login time and her last login time:
$epoch_1 = time(); $r = mysql_query("SELECT UNIX_TIMESTAMP(last_login) AS login FROM user WHERE id = $id") or die(); $ob = mysql_fetch_object($r); $epoch_2 = $ob->login; $diff_seconds = $epoch_1 - $epoch_2; $diff_weeks = floor($diff_seconds/604800); $diff_seconds -= $diff_weeks * 604800; $diff_days = floor($diff_seconds/86400); $diff_seconds -= $diff_days * 86400; $diff_hours = floor($diff_seconds/3600); $diff_seconds -= $diff_hours * 3600; $diff_minutes = floor($diff_seconds/60); $diff_seconds -= $diff_minutes * 60; print "You last logged in $diff_weeks weeks, $diff_days days, "; print "$diff_hours hours, $diff_minutes minutes, and $diff_seconds ago.";
3.6.4 See Also
Recipe 3.7 to find the difference between two dates with Julian days; Recipe 3.11 for adding
and subtracting from a date; documentation on MySQL's UNIX_TIMESTAMP( ) function at
http://www.mysql.com/doc/D/a/Date_and_time_functions.html.
Recipe 3.7 Finding the Difference of Two Dates with Julian Days
3.7.1 Problem
You want to find the difference of two dates measured by what a clock would say, not the
actual elapsed time.
3.7.2 Solution
Use gregoriantojd( ) to get the Julian day for a set of date parts, then subtract one Julian
day from the other to find the date difference. Then convert the time parts to seconds and
subtract one from the other to find the time difference. If the time difference is less than 0,
decrease the date difference by one and adjust the time difference to apply to the previous
day. Here's the code:

$diff_date = gregoriantojd($date_1_mo, $date_1_dy, $date_1_yr) - gregoriantojd($date_2_mo, $date_2_dy, $date_2_yr); $diff_time = $date_1_hr * 3600 + $date_1_mn * 60 + $date_1_sc - $date_2_hr * 3600 - $date_2_mn * 60 - $date_2_sc; if ($diff_time < 0) { $diff_date--; $diff_time = 86400 - $diff_time; }
3.7.3 Discussion
Finding differences with Julian days lets you operate outside the range of epoch seconds and
also accounts for DST differences.
If you have the components of your two days in arrays:
// 7:32:56 pm on May 10, 1965 list($date_1_yr, $date_1_mo, $date_1_dy, $date_1_hr, $date_1_mn, $date_1_sc)= array(1965, 5, 10, 19, 32, 56); // 4:29:11 am on November 20, 1962 list($date_2_yr, $date_2_mo, $date_2_dy, $date_2_hr, $date_2_mn, $date_2_sc)= array(1962, 11, 20, 4, 29, 11); $diff_date = gregoriantojd($date_1_mo, $date_1_dy, $date_1_yr) - gregoriantojd($date_2_mo, $date_2_dy, $date_2_yr); $diff_time = $date_1_hr * 3600 + $date_1_mn * 60 + $date_1_sc - $date_2_hr * 3600 - $date_2_mn * 60 - $date_2_sc; if ($diff_time < 0) { $diff_date--; $diff_time = 86400 - $diff_time; } $diff_weeks = floor($diff_date/7); $diff_date -= $diff_weeks * 7; $diff_hours = floor($diff_time/3600); $diff_time -= $diff_hours * 3600; $diff_minutes = floor($diff_time/60); $diff_time -= $diff_minutes * 60; print "The two dates have $diff_weeks weeks, $diff_date days, "; print "$diff_hours hours, $diff_minutes minutes, and $diff_time "; print "seconds between them."; The two dates have 128 weeks, 6 days, 15 hours, 3 minutes, and 45 seconds between them.
This method produces a time difference based on clock time, which is why the result shows an
hour more of difference than in Recipe 3.6. May 10 is during DST, and November 11 is during
standard time.
The function gregoriantojd( ) is part of PHP's calendar extension, and so is available only
if that extension is loaded.
3.7.4 See Also
Recipe 3.6 to find the difference between two dates in elapsed time; Recipe 3.11 for adding
and subtracting from a date; documentation on gregoriantojd( ) at

http://www.php.net/gregoriantojd; an overview of the Julian Day system is at
http://tycho.usno.navy.mil/mjd.html.
Recipe 3.8 Finding the Day in a Week, Month, Year, or the Week Number in a Year
3.8.1 Problem
You want to know the day or week of the year, the day of the week, or the day of the month.
For example, you want to print a special message every Monday, or on the first of every
month.
3.8.2 Solution
Use the appropriate arguments to date( ) or strftime( ):
print strftime("Today is day %d of the month and %j of the year."); print 'Today is day '.date('d').' of the month and '.date('z').' of the year.';
3.8.3 Discussion
The two functions date( ) and strftime( ) don't behave identically. Days of the year start
with 0 for date( ), but with 1 for strftime( ). Table 3-4 contains all the day and week
number format characters date( ) and strftime( ) understand.
Table 3-4. Day and week number format characters
Type strftime(
)
date(
) Description Range
Day %d d Day of the month, numeric 01-31
Day %j z Day of the year, numeric
001-366 for
strftime( ); 0-
365 for date( )
Day %u Day of the week, numeric (Monday is 1) 1-7
Day %w w Day of the week, numeric (Sunday is 0) 0-6
Day %W ISO 8601 day of the week, numeric (Monday is
the first day of the week) 0-6
Week %U Week number in the year; numeric; first Sunday
is the first day of the first week 00-53
Week %V W
ISO 8601:1988 week number in the year;
numeric; week 1 is the first week that has at
least four days in the current year; Monday is
the first day of the week
01-53
To print out something only on Mondays, use the w formatting character to date( ) or the %w
string with strftime( ):
if (1 == date('w')) { print "Welcome to the beginning of your work week."; } if (1 == strftime('%w')) { print "Only 4 more days until the weekend!"; }
There are different ways to calculate week numbers and days in a week, so be careful to
choose the appropriate one. The ISO standard (ISO 8601), says that weeks begin on Mondays
and that the days in the week are numbered 1 (Monday) through 7 (Sunday). Week 1 in a
year is the first week in a year with a Thursday in that year. This means the first week in a
year is the first week with a majority of its days in that year. These week numbers range from
01 to 53.
Other week number standards range from 00 to 53, with days in a year's week 53 potentially
overlapping with days in the following year's week 00.
As long as you're consistent within your programs, you shouldn't run into any trouble, but be
careful when interfacing with other PHP programs or your database. For example, MySQL's
DAYOFWEEK( ) function treats Sunday as the first day of the week, but numbers the days 1
to 7, which is the ODBC standard. Its WEEKDAY( ) function, however, treats Monday as the
first day of the week and numbers the days from 0 to 6. Its WEEK( ) function lets you choose
whether weeks should start on Sunday or Monday, but it's incompatible with the ISO standard.
3.8.4 See Also
Documentation on date( ) at http://www.php.net/date and strftime( ) at
http://www.php.net/strftime; MySQL's DAYOFWEEK( ), WEEKDAY( ), and WEEK( ) functions
are documented at http://www.mysql.com/doc/D/a/Date_and_time_functions.html.
Recipe 3.9 Validating a Date
3.9.1 Problem
You want to check if a date is valid. For example, you want to make sure a user hasn't
provided a birthdate such as February 30, 1962.
3.9.2 Solution
Use checkdate( ):
$valid = checkdate($month,$day,$year);
3.9.3 Discussion

The function checkdate( ) returns true if $month is between 1 and 12, $year is between
1 and 32767, and $day is between 1 and the correct maximum number of days for $month
and $year. Leap years are correctly handled by checkdate( ), and dates are rendered
using the Gregorian calendar.
Because checkdate( ) has such a broad range of valid years, you should do additional
validation on user input if, for example, you're expecting a valid birthdate. The Guinness Book
of World Records says the oldest person ever reached 122. To check that a birthdate indicates
a user between 18 and 122 years old, use the pc_checkbirthdate( ) function shown in
Example 3-1.
Example 3-1. pc_checkbirthdate( )
function pc_checkbirthdate($month,$day,$year) { $min_age = 18; $max_age = 122; if (! checkdate($month,$day,$year)) { return false; } list($this_year,$this_month,$this_day) = explode(',',date('Y,m,d')); $min_year = $this_year - $max_age; $max_year = $this_year - $min_age; print "$min_year,$max_year,$month,$day,$year\n"; if (($year > $min_year) && ($year < $max_year)) { return true; } elseif (($year == $max_year) && (($month < $this_month) || (($month == $this_month) && ($day <= $this_day)))) { return true; } elseif (($year == $min_year) && (($month > $this_month) || (($month == $this_month && ($day > $this_day))))) { return true; } else { return false; } }
Here is some sample usage:
// check December 3, 1974 if (pc_checkbirthdate(12,3,1974)) { print "You may use this web site."; } else { print "You are too young to proceed."; exit( ); }

This function first uses checkdate( ) to make sure that $month, $day, and $year
represent a valid date. Various comparisons then make sure that the supplied date is in the
range set by $min_age and $max_age.
If $year is noninclusively between $min_year and $max_year, the date is definitely within
the range, and the function returns true. If not, some additional checks are required. If
$year equals $max_year (e.g., in 2002, $year is 1984), $month must be before the current
month. If $month equals the current month, $day must be before or equal to the current day.
If $year equals $min_year (e.g., in 2002, $year is 1880), $month must be after the
current month. If $month equals the current month, $day must be after the current day. If
none of these conditions are met, the supplied date is outside the appropriate range, and the
function returns false.
The function returns true if the supplied date is exactly $min_age years before the current
date, but false if the supplied date is exactly $max_age years after the current date. That is,
it would let you through on your 18th birthday, but not on your 123rd.
3.9.4 See Also
Documentation on checkdate( ) at http://www.php.net/checkdate; information about The
Guinness Book's oldest person is at http://www.guinnessworldrecords.com (navigate to "The
Human Body," "Age and Youth," and then "Oldest Woman Ever").
Recipe 3.10 Parsing Dates and Times from Strings
3.10.1 Problem
You need to get a date or time in a string into a format you can use in calculations. For
example, you want to convert date expressions such as "last Thursday" into an epoch
timestamp.
3.10.2 Solution
The simplest way to parse a date or time string is with strtotime( ) , which turns a variety
of human-readable date and time strings into epoch timestamps:
$a = strtotime('march 10'); // defaults to the current year
3.10.3 Discussion
The grammar strtotime( ) uses is both complicated and comprehensive so the best way to
get comfortable with it is to try out lots of different time expressions. If you're curious about
its nuts and bolts, check out ext/standard/parsedate.y in the PHP source distribution.
The function strtotime( ) understands words about the current time:

$a = strtotime('now'); print strftime('%c',$a); $a = strtotime('today'); print strftime('%c',$a); Mon Aug 12 20:35:10 2002 Mon Aug 12 20:35:10 2002
It understands different ways to identify a time and date:
$a = strtotime('5/12/1994'); print strftime('%c',$a); $a = strtotime('12 may 1994'); print strftime('%c',$a); Thu May 12 00:00:00 1994 Thu May 12 00:00:00 1994
It understands relative times and dates:
$a = strtotime('last thursday'); // On August 12, 2002 print strftime('%c',$a); $a = strtotime('2001-07-12 2pm + 1 month'); print strftime('%c',$a); Thu Aug 8 00:00:00 2002 Mon Aug 12 14:00:00 2002
It understands time zones. When the following is run from a computer in EDT, it prints out the
same time:
$a = strtotime('2002-07-12 2pm edt + 1 month'); print strftime('%c',$a); Mon Aug 12 14:00:00 2002
However, when the following is run from a computer in EDT, it prints out the time in EDT when
it is 2 P.M. in MDT (two hours before EDT):
$a = strtotime('2002-07-12 2pm mdt + 1 month'); print strftime('%c',$a); Mon Aug 12 16:00:00 2002
If the date and time you want to parse out of a string are in a format you know in advance,
instead of calling strtotime( ), you can build a regular expression that grabs the different
date and time parts you need. For example, here's how to parse "YYYY-MM-DD HH:MM:SS"
dates, such as a MySQL DATETIME field:
$date = '1974-12-03 05:12:56'; preg_match('/(\d{4})-(\d{2})-(\d{2}) (\d{2}):(\d{2}):(\d{2})/',$date,$date_parts);
This puts the year, month, day, hour, minute, and second into $date_parts[1] through
$date_parts[6]. (preg_match( ) puts the entire matched expression into
$date_parts[0].)

You can use regular expressions to pull the date and time out of a larger string that might also
contain other information (from user input, or a file you're reading), but if you're sure about
the position of the date in the string you're parsing, you can use substr( ) to make it even
faster:
$date_parts[0] = substr($date,0,4); $date_parts[1] = substr($date,5,2); $date_parts[2] = substr($date,8,2); $date_parts[3] = substr($date,11,2); $date_parts[4] = substr($date,14,2); $date_parts[5] = substr($date,17,2);
You can also use split( );
$ar = split('[- :]',$date); print_r($ar); Array ( [0] => 1974 [1] => 12 [2] => 03 [3] => 05 [4] => 12 [5] => 56 )
Be careful: PHP converts between numbers and strings without any prompting, but numbers
beginning with a 0 are considered to be in octal (base 8). So, 03 and 05 are 3 and 5; but, 08
and 09 are not 8 and 9.
preg_match( ) and strtotime( ) are equally efficient in parsing a date format such as
"YYYY-MM-DD HH:MM:SS", but ereg( ) is about four times slower than either. If you need
the individual parts of the date string, preg_match( ) is more convenient, but strtotime(
) is obviously much more flexible.
3.10.4 See Also
Documentation on strtotime( ) at http://www.php.net/strtotime; the grammar for
strtotime( ) is available at http://cvs.php.net/cvs.php/php4/ext/standard/parsedate.y.
Recipe 3.11 Adding to or Subtracting from a Date
3.11.1 Problem
You need to add or subtract an interval from a date.
3.11.2 Solution
Depending on how your date and interval are represented, use strtotime( ) or some
simple arithmetic.
If you have your date and interval in appropriate formats, the easiest thing to do is use
strtotime( ):
$birthday = 'March 10, 1975'; $whoopee_made = strtotime("$birthday - 9 months ago");
If your date in an epoch timestamp and you can express your interval in seconds, subtract the
interval from the timestamp:
$birthday = 163727100; $gestation = 36 * 7 * 86400; // 36 weeks $whoopee_made = $birthday - $gestation;
3.11.3 Discussion
Using strtotime( ) is good for intervals that are of varying lengths, like months. If you
can't use strtotime( ), you can convert your date to an epoch timestamp and add or
subtract the appropriate interval in seconds. This is mostly useful for intervals of a fixed time,
such as days or weeks:
$now = time( ); $next_week = $now + 7 * 86400;
Using this method, however, you can run into problems if the endpoints of your interval are on
different sides of a DST switch. In this case, one of your fixed length days isn't 86,400
seconds long; it's either 82,800 or 90,000 seconds long, depending on the season. If you use
UTC exclusively in your application, you don't have to worry about this. But if you have to use
local time, you can count days without worrying about this hiccup with Julian days. You can
convert between epoch timestamps and Julian days with unixtojd( ) and jdtounix( ):
$now = time( ); $today = unixtojd($now); $next_week = jdtounix($today + 7); // don't forget to add back hours, minutes, and seconds $next_week += 3600 * date('H',$now) + 60 * date('i',$now) + date('s',$now);
The functions unixtojd( ) and jdtounix( ) are part of PHP's calendar extension, so they
are only available if that extension is loaded.
3.11.4 See Also
Recipe 3.6 for finding the difference between two dates in elapsed time; Recipe 3.7 for finding
the difference between two dates in Julian days; documentation on strtotime( ) at
http://www.php.net/strtotime, unixtojd( ) at http://www.php.net/unixtojd, and
jdtounix( ) at http://www.php.net/jdtounix.

Recipe 3.12 Calculating Time with Time Zones
3.12.1 Problem
You need to calculate times in different time zones. For example, you want to give users
information adjusted to their local time, not the local time of your server.
3.12.2 Solution
For simple calculations, you can explicitly add or subtract the offsets between two time zones:
// If local time is EST $time_parts = localtime(); // California (PST) is three hours earlier $california_time_parts = localtime(time() - 3 * 3600);
On Unix-based systems, if you don't know the offsets between time zones, just set the TZ
environment variable to your target time zone:
putenv('TZ=PST8PDT'); $california_time_parts = localtime();
3.12.3 Discussion
Before we sink too deeply into the ins and outs of time zones, we want to pass along the
disclaimer that the U.S. Naval Observatory offers at http://tycho.usno.navy.mil/tzones.html.
Namely, official worldwide time-zone information is somewhat fragile "because nations are
sovereign powers that can and do change their timekeeping systems as they see fit." So,
remembering that we are at the mercy of the vagaries of international relations, here are
some ways to cope with Earth's many time zones.
For a relatively simple treatment of offsets between time zones, use an array in your program
that has the various time zones' offsets from UTC. Once you determine what time zone your
user is in, just add that offset to the appropriate UTC time and the functions that print out UTC
time (e.g., gmdate( ), gmstrftime( )) can print out the correct adjusted time.
// Find the current time $now = time(); // California is 8 hours behind UTC $now += $pc_timezones['PST']; // Use gmdate() or gmstrftime() to print California-appropriate time print gmstrftime('%c',$now);
The previous code uses this $pc_timezones array, which contains offsets from UTC:
// From Perl's Time::Timezone $pc_timezones = array( 'GMT' => 0, // Greenwich Mean

'UTC' => 0, // Universal (Coordinated) 'WET' => 0, // Western European 'WAT' => -1*3600, // West Africa 'AT' => -2*3600, // Azores 'NFT' => -3*3600-1800, // Newfoundland 'AST' => -4*3600, // Atlantic Standard 'EST' => -5*3600, // Eastern Standard 'CST' => -6*3600, // Central Standard 'MST' => -7*3600, // Mountain Standard 'PST' => -8*3600, // Pacific Standard 'YST' => -9*3600, // Yukon Standard 'HST' => -10*3600, // Hawaii Standard 'CAT' => -10*3600, // Central Alaska 'AHST' => -10*3600, // Alaska-Hawaii Standard 'NT' => -11*3600, // Nome 'IDLW' => -12*3600, // International Date Line West 'CET' => +1*3600, // Central European 'MET' => +1*3600, // Middle European 'MEWT' => +1*3600, // Middle European Winter 'SWT' => +1*3600, // Swedish Winter 'FWT' => +1*3600, // French Winter 'EET' => +2*3600, // Eastern Europe, USSR Zone 1 'BT' => +3*3600, // Baghdad, USSR Zone 2 'IT' => +3*3600+1800, // Iran 'ZP4' => +4*3600, // USSR Zone 3 'ZP5' => +5*3600, // USSR Zone 4 'IST' => +5*3600+1800, // Indian Standard 'ZP6' => +6*3600, // USSR Zone 5 'SST' => +7*3600, // South Sumatra, USSR Zone 6 'WAST' => +7*3600, // West Australian Standard 'JT' => +7*3600+1800, // Java 'CCT' => +8*3600, // China Coast, USSR Zone 7 'JST' => +9*3600, // Japan Standard, USSR Zone 8 'CAST' => +9*3600+1800, // Central Australian Standard 'EAST' => +10*3600, // Eastern Australian Standard 'GST' => +10*3600, // Guam Standard, USSR Zone 9 'NZT' => +12*3600, // New Zealand 'NZST' => +12*3600, // New Zealand Standard 'IDLE' => +12*3600 // International Date Line East );
On Unix systems, you can use the zoneinfo library to do the conversions. This makes your
code more compact and also transparently handles DST, as discussed in Recipe 3.13.
To take advantage of zoneinfo in PHP, do all your internal date math with epoch timestamps.
Generate them from time parts with the pc_mktime( ) function shown in Example 3-2.
Example 3-2. pc_mktime( )
function pc_mktime($tz,$hr,$min,$sec,$mon,$day,$yr) { putenv("TZ=$tz"); $a = mktime($hr,$min,$sec,$mon,$day,$yr); putenv('TZ=EST5EDT'); // change EST5EDT to your server's time zone! return $a; }

Calling putenv( ) before mktime( ) fools the system functions mktime( ) uses into
thinking they're in a different time zone. After the call to mktime( ), the correct time zone
has to be restored. On the East Coast of the United States, that's EST5EDT. Change this to the
appropriate value for your computer's location (see Table 3-5).
Time parts are turned into epoch timestamps by pc_mktime( ). Its counterpart, to turn
epoch timestamps into formatted time strings and time parts, is pc_strftime( ), shown in
Example 3-3.
Example 3-3. pc_strftime( )
function pc_strftime($tz,$format,$timestamp) { putenv("TZ=$tz"); $a = strftime($format,$timestamp); putenv('TZ=EST5EDT'); // change EST5EDT to your server's time zone! return $a; }
This example uses the same system-function-fooling pc_mktime( ) does to get the right
results from strftime( ).
The great thing about these functions is that you don't have to worry about the offsets from
UTC of different time zones, whether DST is in effect, or any other irregularities of time-zone
differences. You just set the appropriate zone and let your system's libraries do the rest.
Note that the value of the $tz variable in both these functions should not be a time-zone
name but a zoneinfo zone. zoneinfo zones are more specific than time zones, because they
correspond to particular places. Table 3-5 contains mappings for appropriate zoneinfo zones
for some UTC offsets. The last column indicates whether the zone observes DST.
Table 3-5. zoneinfo zones
UTC offset (hours) UTC offset (seconds) zoneinfo zone DST?
-12 -43200 Etc/GMT+12 No
-11 -39600 Pacific/Midway No
-10 -36000 US/Aleutian Yes
-10 -36000 Pacific/Honolulu No
-9 -32400 America/Anchorage Yes
-9 -32400 Etc/GMT+9 No
-8 -28800 PST8PDT Yes
-8 -28800 America/Dawson_Creek No
-7 -25200 MST7MDT Yes
-7 -25200 MST No
-6 -21600 CST6CDT Yes

-6 -21600 Canada/Saskatchewan No
-5 -18000 EST5EDT Yes
-5 -18000 EST No
-4 -14400 America/Halifax Yes
-4 -14400 America/Puerto_Rico No
-3.5 -12600 America/St_Johns Yes
-3 -10800 America/Buenos_Aires No
0 0 Europe/London Yes
0 0 GMT No
1 3600 CET Yes
1 3600 GMT-1 No
2 7200 EET No
2 7200 GMT-2 No
3 10800 Asia/Baghdad Yes
3 10800 GMT-3 No
3.5 12600 Asia/Tehran Yes
4 14400 Asia/Dubai No
4 14400 Asia/Baku Yes
4.5 16200 Asia/Kabul No
5 18000 Asia/Tashkent No
5.5 19800 Asia/Calcutta No
5.75 20700 Asia/Katmandu No
6 21600 Asia/Novosibirsk Yes
6 21600 Etc/GMT-6 No
6.5 23400 Asia/Rangoon No
7 25200 Asia/Jakarta No
8 28800 Hongkong No
9 32400 Japan No
9.5 34200 Australia/Darwin No
10 36000 Australia/Sydney Yes
10 36000 Pacific/Guam No
12 43200 Etc/GMT-13 No
12 43200 Pacific/Auckland Yes
Countries around the world don't begin and end DST observance on the same days or at the
same times. To calculate time appropriately for an international DST-observing location, pick a
zoneinfo zone that matches your desired location as specifically as possible.
3.12.4 See Also
Recipe 3.13 for dealing with DST; documentation on putenv( ) at
http://www.php.net/putenv, localtime( ) at http://www.php.net/localtime, gmdate( ) at
http://www.php.net/gmdate, and gmstrftime( ) at http://www.php.net/gmstrftime;
zoneinfo zone names and longitude and latitude coordinates for hundreds of places around the
world are available at ftp://elsie.nci.nih.gov/pub/tzdata2002c.tar.gz; many links to historical
and technical information about time zones can be found at http://www.twinsun.com/tz/tz-
link.htm.
Recipe 3.13 Accounting for Daylight Saving Time
3.13.1 Problem
You need to make sure your time calculations properly consider DST.
3.13.2 Solution
The zoneinfo library calculates the effects of DST properly. If you are using a Unix-based
system, take advantage of zoneinfo with putenv( ):
putenv('TZ=MST7MDT'); print strftime('%c');
If you can't use zoneinfo, you can modify hardcoded time-zone offsets based on whether the
local time zone is currently observing DST. Use localtime( ) to determine the current DST
observance status:
// Find the current UTC time $now = time(); // California is 8 hours behind UTC $now -= 8 * 3600; // Is it DST? $ar = localtime($now,true); if ($ar['tm_isdst']) { $now += 3600; } // Use gmdate() or gmstrftime() to print California-appropriate time print gmstrftime('%c',$now);
3.13.3 Discussion
Altering an epoch timestamp by the amount of a time zone's offset from UTC and then using
gmdate( ) or gmstrftime( ) to print out time zone-appropriate functions is flexible — it
works from any time zone — but the DST calculations are slightly inaccurate. For the brief
intervals when the server's DST status is different from the target time zone's, the results are
incorrect. For example, at 3:30 A.M. EDT on the first Sunday in April (after the switch to DST),
it's still before the switch (11:30 P.M.) in the Pacific time zone. A server in Eastern time using

this method calculates California time to be seven hours behind UTC, whereas it's actually
eight hours. At 6:00 A.M. EDT (3:00 A.M. PDT), both Pacific and Eastern time are observing
DST, and the calculation is correct again (putting California at seven hours behind UTC).
3.13.4 See Also
Recipe 3.12 for dealing with time zones; documentation on putenv( ) at
http://www.php.net/putenv, localtime( ) at http://www.php.net/localtime, gmdate( ) at
http://www.php.net/gmdate, and gmstrftime( ) at http://www.php.net/gmstrftime; a
detailed presentation on DST is at http://webexhibits.org/daylightsaving/.
Recipe 3.14 Generating a High-Precision Time
3.14.1 Problem
You need to measure time with finer than one-second resolution, for example to generate a
unique ID.
3.14.2 Solution
Use microtime( ) :
list($microseconds,$seconds) = explode(' ',microtime());
3.14.3 Discussion
The function microtime( ) returns a string that contains the microseconds part of elapsed
time since the epoch, a space, and seconds since the epoch. For example, a return value of
0.41644100 1026683258 means that 1026683258.41644100 seconds have elapsed since
the epoch. A string is returned instead of a double because the double doesn't have enough
capacity to hold the entire value with microsecond precision.
Time including microseconds is useful for generating unique IDs. When combined with the
current process ID, it guarantees a unique ID, as long as a process doesn't generate more
than one ID per microsecond:
list($microseconds,$seconds) = explode(' ',microtime()); $id = $seconds.$microseconds.getmypid();
However, this method is not as foolproof on multithreaded systems, where there is a nonzero
(but very tiny) chance that two threads of the same process could call microtime( )
simultaneously.
3.14.4 See Also
Documentation on microtime( ) at http://www.php.net/microtime.

Recipe 3.15 Generating Time Ranges
3.15.1 Problem
You need to know all the days in a week or a month. For example, you want to print out a list
of appointments for a week.
3.15.2 Solution
Identify your start date using time( ) and strftime( ). If your interval has a fixed length,
you can loop through that many days. If not, you need to test each subsequent day for
membership in your desired range.
For example, a week has seven days, so you can use a fixed loop to generate all the days in
the current week:
// generate a time range for this week $now = time(); // If it's before 3 AM, increment $now, so we don't get caught by DST // when moving back to the beginning of the week if (3 < strftime('%H', $now)) { $now += 7200; } // What day of the week is today? $today = strftime('%w', $now); // How many days ago was the start of the week? $start_day = $now - (86400 * $today); // Print out each day of the week for ($i = 0; $i < 7; $i++) { print strftime('%c',$start_day + 86400 * $i); }
3.15.3 Discussion
A particular month or year could have a variable number of days, so you need to compute the
end of the time range based on the specifics of that month or year. To loop through every day
in a month, find the epoch timestamps for the first day of the month and the first day of the
next month. The loop variable, $day is incremented a day at a time (86400 seconds) until it's
no longer less than the epoch timestamp at the beginning of the next month:
// Generate a time range for this month $now = time(); // If it's before 3 AM, increment $now, so we don't get caught by DST // when moving back to the beginning of the month if (3 < strftime('%H', $now)) { $now += 7200; } // What month is this? $this_month = strftime('%m',$now); // Epoch timestamp for midnight on the first day of this month

$day = mktime(0,0,0,$this_month,1); // Epoch timestamp for midnight on the first day of next month $month_end = mktime(0,0,0,$this_month+1,1); while ($day < $month_end) { print strftime('%c',$day); $day += 86400; }
3.15.4 See Also
Documentation on time( ) at http://www.php.net/time and strftime( ) at
http://www.php.net/strftime.
Recipe 3.16 Using Non-Gregorian Calendars
3.16.1 Problem
You want to use a non-Gregorian calendar, such as a Julian, Jewish, or French Republican
calendar.
3.16.2 Solution
PHP's calendar extension provides conversion functions for working with the Julian calendar,
as well as the French Republican and Jewish calendars. To use these functions, the calendar
extension must be loaded.
These functions use the Julian day count (which is different than the Julian calendar) as their
intermediate format to move information between them.
The two functions jdtogregorian( ) and gregoriantojd( ) convert between Julian days
and the familiar Gregorian calendar:
$jd = gregoriantojd(3,9,1876); // March 9, 1876; $jd = 2406323 $gregorian = jdtogregorian($jd); // $gregorian = 3/9/1876
The valid range for the Gregorian calendar is 4714 BCE to 9999 CE.
3.16.3 Discussion
To convert between Julian days and the Julian calendar, use jdtojulian( ) and
juliantojd( ):
// February 29, 1900 (not a Gregorian leap year) $jd = juliantojd(2,29,1900); // $jd = 2415092 $julian = jdtojulian($jd); // $julian = 2/29/1900 $gregorian = jdtogregorian($jd); // $gregorian = 3/13/1900
The valid range for the Julian calendar is 4713 BCE to 9999 CE, but since it was created in 46
BCE, you run the risk of annoying Julian calendar purists if you use it for dates before that.
To convert between Julian days and the French Republican calendar, use jdtofrench( ) and
frenchtojd( ):
$jd = frenchtojd(8,13,11); // 13 floréal XI; $jd = 2379714 $french = jdtofrench($jd); // $french = 8/13/11 $gregorian = jdtofregorian($jd); // $gregorian = 5/3/1803; sale of Louisiana to U.S.
The valid range for the French Republican calendar is September 1792 to September 1806,
which is small, but since the calendar was only in use from October 1793 to January 1806, it's
comprehensive enough.
To convert between Julian days and the Jewish calendar, use jdtojewish( ) and
jewishtojd( ):
$jd = JewishToJD(6,14,5761); // Adar 14, 5761; $jd = 2451978 $jewish = JDToJewish($jd); // $jewish = 6/14/5761 $gregorian = JDToGregorian($jd); // $gregorian = 3/9/2001
The valid range for the Jewish calendar starts with 3761 BCE (year 1 on the Jewish calendar).
3.16.4 See Also
Documentation for the calendar functions at http://www.php.net/calendar; the history of the
Gregorian calendar is explained at
http://scienceworld.wolfram.com/astronomy/GregorianCalendar.html.
Recipe 3.17 Program: Calendar
The pc_calendar() function shown in Example 3-4 prints out a month's calendar, similar to
the Unix cal program. Here's how you can use the function:
// print the calendar for the current month list($month,$year) = explode(',',date('m,Y')); pc_calendar($month,$year);
The pc_calendar( ) function prints out a table with a month's calendar in it. It provides
links to the previous and next month and highlights the current day.
Example 3-4. pc_calendar( )
<?php function pc_calendar($month,$year,$opts = '') { // set default options // if (! is_array($opts)) { $opts = array(); }

if (! isset($opts['today_color'])) { $opts['today_color'] = '#FFFF00'; } if (! isset($opts['month_link'])) { $opts['month_link'] = '<a href="'.$_SERVER['PHP_SELF'].'?month=%d&year=%d">%s</a>'; } list($this_month,$this_year,$this_day) = split(',',strftime('%m,%Y,%d')); $day_highlight = (($this_month == $month) && ($this_year == $year)); list($prev_month,$prev_year) = split(',',strftime('%m,%Y',mktime(0,0,0,$month-1,1,$year))); $prev_month_link = sprintf($opts['month_link'],$prev_month,$prev_year,'<'); list($next_month,$next_year) = split(',',strftime('%m,%Y',mktime(0,0,0,$month+1,1,$year))); $next_month_link = sprintf($opts['month_link'],$next_month,$next_year,'>'); ?> <table border="0" cellspacing="0" cellpadding="2" align="center"> <tr> <td align="left"> <?php print $prev_month_link ?> </td> <td colspan="5" align="center"> <?php print strftime('%B %Y',mktime(0,0,0,$month,1,$year)); ?> </td> <td align="right"> <?php print $next_month_link ?> </td> </tr> <?php $totaldays = date('t',mktime(0,0,0,$month,1,$year)); // print out days of the week print '<tr>'; $weekdays = array('Su','Mo','Tu','We','Th','Fr','Sa'); while (list($k,$v) = each($weekdays)) { print '<td align="center">'.$v.'</td>'; } print '</tr><tr>'; // align the first day of the month with the right week day $day_offset = date("w",mktime(0, 0, 0, $month, 1, $year)); if ($day_offset > 0) { for ($i = 0; $i < $day_offset; $i++) { print '<td> </td>'; } } $yesterday = time() - 86400; // print out the days for ($day = 1; $day <= $totaldays; $day++) { $day_secs = mktime(0,0,0,$month,$day,$year); if ($day_secs >= $yesterday) { if ($day_highlight && ($day == $this_day)) { print sprintf('<td align="center" bgcolor="%s">%d</td>', $opts['today_color'],$day); } else {

print sprintf('<td align="center">%d</td>',$day); } } else { print sprintf('<td align="center">%d</td>',$day); } $day_offset++; // start a new row each week // if ($day_offset == 7) { $day_offset = 0; print "</tr>\n"; if ($day < $totaldays) { print '<tr>'; } } } // fill in the last week with blanks // if ($day_offset > 0) { $day_offset = 7 - $day_offset; } if ($day_offset > 0) { for ($i = 0; $i < $day_offset; $i++) { print '<td> </td>'; } } print '</tr></table>'; } ?>
The pc_calendar( ) function begins by checking options passed to it in $opts. The color
that the current day is highlighted with can be passed as an RGB value in
$opts['today_color']. This defaults to #FFFF00, bright yellow. Also, you can pass a
printf( )-style format string in $opts['month_link'] to change how the links to the
previous and next months are printed.
Next, the function sets $day_highlight to true if the month and year for the calendar
match the current month and year. The links to the previous month and next month are put
into $prev_month_link and $next_month_link using the format string in
$opts['month_link'].
pc_calendar( ) then prints out the top of the HTML table that contains the calendar and a
table row of weekday abbreviations. Using the day of the week returned from
strftime('%w'), blank table cells are printed so the first day of the month is aligned with
the appropriate day of the week. For example, if the first day of the month is a Tuesday, two
blank cells have to be printed to occupy the slots under Sunday and Monday in the first row of
the table.
After this preliminary information has been printed, pc_calendar( ) loops through all the
days in the month. It prints a plain table cell for most days, but a table cell with a different
background color for the current day. When $day_offset reaches 7, a week has completed,
and a new table row needs to start.
Once a table cell has been printed for each day in the month, blank cells are added to fill out
the last row of the table. For example, if the last day of the month is a Thursday, two cells are
added to occupy the slots under Friday and Saturday. Last, the table is closed, and the
calendar is complete.

Chapter 4. Arrays
Section 4.1. Introduction
Recipe 4.2. Specifying an Array Not Beginning at Element 0
Recipe 4.3. Storing Multiple Elements per Key in an Array
Recipe 4.4. Initializing an Array to a Range of Integers
Recipe 4.5. Iterating Through an Array
Recipe 4.6. Deleting Elements from an Array
Recipe 4.7. Changing Array Size
Recipe 4.8. Appending One Array to Another
Recipe 4.9. Turning an Array into a String
Recipe 4.10. Printing an Array with Commas
Recipe 4.11. Checking if a Key Is in an Array
Recipe 4.12. Checking if an Element Is in an Array
Recipe 4.13. Finding the Position of an Element in an Array
Recipe 4.14. Finding Elements That Pass a Certain Test
Recipe 4.15. Finding the Largest or Smallest Valued Element in an Array
Recipe 4.16. Reversing an Array
Recipe 4.17. Sorting an Array
Recipe 4.18. Sorting an Array by a Computable Field
Recipe 4.19. Sorting Multiple Arrays
Recipe 4.20. Sorting an Array Using a Method Instead of a Function
Recipe 4.21. Randomizing an Array
Recipe 4.22. Shuffling a Deck of Cards

Recipe 4.23. Removing Duplicate Elements from an Array
Recipe 4.24. Finding the Union, Intersection, or Difference of Two Arrays
Recipe 4.25. Finding All Element Combinations of an Array
Recipe 4.26. Finding All Permutations of an Array
Recipe 4.27. Program: Printing an Array in a Horizontally Columned HTML Table

4.1 Introduction
Arrays are lists: lists of people, lists of sizes, lists of books. To store a group of related items
in a variable, use an array. Like a list on a piece of paper, the elements in array have an
order. Usually, each new item comes after the last entry in the array, but just as you can
wedge a new entry between a pair of lines already in a paper list, you can do the same with
arrays in PHP.
In many languages, there is only one type of array: what is called a numerical array (or just
an array). In a numerical array, if you want to find an entry, you need to know its position
within the array, known as an index. Positions are identified by numbers: they start at 0 and
work upwards one by one.
In some languages, there is also another type of array: an associative array , also known as a
hash. In an associative array, indexes aren't integers, but strings. So, in a numerical array of
U.S. presidents, "Abraham Lincoln" might have index 16; in the associative-array version, the
index might be "Honest." However, while numerical arrays have a strict ordering imposed by
their keys, associative arrays frequently make no guarantees about the key ordering.
Elements are added in a certain order, but there's no way to determine the order later.
In a few languages, there are both numerical and associative arrays. But, usually the
numerical array $presidents and the associative array $presidents are distinct arrays.
Each array type has a specific behavior, and you need to operate on them accordingly. PHP
has both numerical and associative arrays, but they don't behave independently.
In PHP, numerical arrays are associative arrays, and associative arrays are numerical arrays.
So, which kind are they really? Both and neither. The line between them constantly blurs back
and forth from one to another. At first, this can be disorienting, especially if you're used to
rigid behavior, but soon you'll find this flexibility an asset.
To assign multiple values to an array in one step, use array( ):
$fruits = array('Apples', 'Bananas', 'Cantaloupes', 'Dates');
Now, the value of $fruits[2] is 'Cantaloupes'.
array( ) is very handy when you have a short list of known values. The same array is also
produced by:
$fruits[0] = 'Apples'; $fruits[1] = 'Bananas'; $fruits[2] = 'Cantaloupes'; $fruits[3] = 'Dates';
and:
$fruits[ ] = 'Apples';

$fruits[ ] = 'Bananas'; $fruits[ ] = 'Cantaloupes'; $fruits[ ] = 'Dates';
Assigning a value to an array with an empty subscript is shorthand for adding a new element
to the end of the array. So, PHP looks up the length of $fruits and uses that as the position
for the value you're assigning. This assumes, of course, that $fruits isn't set to a scalar
value, such as 3, and isn't an object. PHP complains if you try to treat a nonarray as an array;
however, if this is the first time you're using this variable, PHP automatically converts it to an
array and begins indexing at 0.
An identical feature is the function array_push( ) , which pushes a new value on top of the
array stack. However, the $foo[ ] notation is the more traditional PHP style; it's also faster.
But, sometimes, using array_push( ) more accurately conveys the stack nature of what
you're trying to do, especially when combined with array_pop( ) , which removes the last
element from an array and returns it.
So far, we've placed integers and strings only inside arrays. However, PHP allows you to
assign any data type you want to an array element: booleans, integers, floating-point
numbers, strings, objects, resources, NULL, and even other arrays. So, you can pull arrays or
objects directly from a database and place them into an array:
while ($row = mysql_fetch_row($r)) { $fruits[ ] = $row; } while ($obj = mysql_fetch_object($s)) { $vegetables[ ] = $obj; }
The first while statement creates an array of arrays; the second creates an array of objects.
See Recipe 4.3 for more on storing multiple elements per key.
To define an array not using integer keys but string keys, you can also use array( ), but
specify the key/value pairs with =>:
$fruits = array('red' => 'Apples', 'yellow' => 'Bananas', 'beige' => 'Cantaloupes', 'brown' => 'Dates');
Now, the value of $fruits['beige'] is 'Cantaloupes'. This is shorthand for:
$fruits['red'] = 'Apples'; $fruits['yellow'] = 'Bananas'; $fruits['beige'] = 'Cantaloupes'; $fruits['brown'] = 'Dates';
Each array can only hold one unique value for each key. Adding:
$fruits['red'] = 'Strawberry';
overwrites the value of 'Apple'. However, you can always add another key at a later time:
$fruits['orange'] = 'Orange';
The more you program in PHP, the more you find yourself using associative arrays instead of
numerical ones. Instead of creating a numeric array with string values, you can create an
associative array and place your values as its keys. If you want, you can then store additional
information in the element's value. There's no speed penalty for doing this, and PHP preserves
the ordering. Plus, looking up or changing a value is easy because you already know the key.
The easiest way to cycle though an array and operate on all or some of the elements inside is
to use foreach:
$fruits = array('red' => 'Apples', 'yellow' => 'Bananas', 'beige' => 'Cantaloupes', 'brown' => 'Dates'); foreach ($fruits as $color => $fruit) { print "$fruit are $color.\n"; } Apples are red. Bananas are yellow. Cantaloupes are beige. Dates are brown.
Each time through the loop, PHP assigns the next key to $color and the key's value to
$fruit. When there are no elements left in the array, the loop finishes.
To break an array apart into individual variables, use list( ):
$fruits = array('Apples', 'Bananas', 'Cantaloupes', 'Dates'); list($red, $yellow, $beige, $brown) = $fruits;
Recipe 4.2 Specifying an Array Not Beginning at Element 0
4.2.1 Problem
You want to assign multiple elements to an array in one step, but you don't want the first
index to be 0.
4.2.2 Solution
Instruct array( ) to use a different index using the => syntax:
$presidents = array(1 => 'Washington', 'Adams', 'Jefferson', 'Madison');
4.2.3 Discussion

Arrays in PHP, like most, but not all, computer languages begin with the first entry located at
index 0. Sometimes, however, the data you're storing makes more sense if the list begins at
1. (And we're not just talking to recovering Pascal programmers here.)
In the Solution, George Washington is the first president, not the zeroth, so if you wish to
print a list of the presidents, it's simpler to do this:
foreach ($presidents as $number => $president) { print "$number: $president\n"; }
than this:
foreach ($presidents as $number => $president) { $number++; print "$number: $president\n"; }
The feature isn't restricted to the number 1; any integer works:
$reconstruction_presidents = array(16 => 'Lincoln', 'Johnson', 'Grant');
Also, you can use => multiple times in one call:[1]
[1] John Tyler was elected as Harrison's Vice President under the Whig Party platform but was expelled from the party shortly after assuming the presidency following the death of Harrison.
$whig_presidents = array(9 => 'Harrison', 'Tyler', 12 => 'Taylor', 'Fillmore');
PHP even allows you to use negative numbers in the array( ) call. (In fact, this method
works for noninteger keys, too.) What you'll get is technically an associative array, although
as we said, the line between numeric arrays and associative arrays is often blurred in PHP;
this is just another one of these cases.
$us_leaders = array(-1 => 'George II', 'George III', 'Washington');
If Washington is the first U.S. leader, George III is the zeroth, and his grandfather George II is
the negative-first.
Of course, you can mix and match numeric and string keys in one array( ) definition, but
it's confusing and very rarely needed:
$presidents = array(1 => 'Washington', 'Adams', 'Honest' => 'Lincoln', 'Jefferson');
This is equivalent to:

$presidents[1] = 'Washington'; // Key is 1 $presidents[ ] = 'Adams'; // Key is 1 + 1 => 2 $presidents['Honest'] = 'Lincoln'; // Key is 'Honest' $presidents[ ] = 'Jefferson'; // Key is 2 + 1 => 3
4.2.4 See Also
Documentation on array( ) at http://www.php.net/array.
Recipe 4.3 Storing Multiple Elements per Key in an Array
4.3.1 Problem
You want to associate multiple elements with a single key.
4.3.2 Solution
Store the multiple elements in an array:
$fruits = array('red' => array('strawberry','apple'), 'yellow' => array('banana'));
Or, use an object:
while ($obj = mysql_fetch_object($r)) { $fruits[ ] = $obj; }
4.3.3 Discussion
In PHP, keys are unique per array, so you can't associate more than one entry in a key
without overwriting the old value. Instead, store your values in an anonymous array:
$fruits['red'][ ] = 'strawberry'; $fruits['red'][ ] = 'apple'; $fruits['yellow'][ ] = 'banana';
Or, if you're processing items in a loop:
while (list($color,$fruit) = mysql_fetch_array($r)) { $fruits[$color][ ] = $fruit; }
To print the entries, loop through the array:
foreach ($fruits as $color=>$color_fruit) { // $color_fruit is an array foreach ($color_fruit as $fruit) { print "$fruit is colored $color.<br>"; } }

Or use the pc_array_to_comma_string( ) function from Recipe 4.10.
foreach ($fruits as $color=>$color_fruit) { print "$color colored fruits include " . pc_array_to_comma_string($color_fruit) . "<br>"; }
4.3.4 See Also
Recipe 4.10 for how to print arrays with commas.
Recipe 4.4 Initializing an Array to a Range of Integers
4.4.1 Problem
You want to assign a series of consecutive integers to an array.
4.4.2 Solution
Use range($start, $stop):
$cards = range(1, 52);
4.4.3 Discussion
For increments other than 1, you can use:
function pc_array_range($start, $stop, $step) { $array = array(); for ($i = $start; $i <= $stop; $i += $step) { $array[] = $i; } return $array; }
So, for odd numbers:
$odd = pc_array_range(1, 52, 2);
And, for even numbers:
$even = pc_array_range(2, 52, 2);
4.4.4 See Also
Recipe 2.5 for how to operate on a series of integers; documentation on range( ) at
http://www.php.net/range.

Recipe 4.5 Iterating Through an Array
4.5.1 Problem
You want to cycle though an array and operate on all or some of the elements inside.
4.5.2 Solution
Use foreach :
foreach ($array as $value) { // Act on $value }
Or, to get an array's keys and values:
foreach ($array as $key => $value) { // Act II }
Another technique is to use for:
for ($key = 0, $size = count($array); $key < $size; $key++) { // Act III }
Finally, you can use each( ) in combination with list( ) and while:
reset($array) // reset internal pointer to beginning of array while (list($key, $value) = each ($array)) { // Final Act }
4.5.3 Discussion
A foreach loop is the shortest way to iterate through an array:
// foreach with values foreach ($items as $cost) { ... } // foreach with keys and values foreach($items as $item => $cost) { ... }
With foreach, PHP iterates over a copy of the array instead of the actual array. In contrast,
when using each( ) and for, PHP iterates over the original array. So, if you modify the
array inside the loop, you may (or may not) get the behavior you expect.

If you want to modify the array, reference it directly:
reset($items); while (list($item, $cost) = each($items)) { if (! in_stock($item)) { unset($items[$item]); // address the array directly } }
The variables returned by each( ) aren't aliases for the original values in the array: they're
copies, so, if you modify them, it's not reflected in the array. That's why you need to modify
$items[$item] instead of $item.
When using each( ), PHP keeps track of where you are inside the loop. After completing a
first pass through, to begin again at the start, call reset( ) to move the pointer back to the
front of the array. Otherwise, each( ) returns false.
The for loop works only for arrays with consecutive integer keys. Unless you're modifying the
size of your array, it's inefficient to recompute the count( ) of $items each time through
the loop, so we always use a $size variable to hold the array's size:
for ($item = 0, $size = count($items); $item < $size; $item++) { ... }
If you prefer to count efficiently with one variable, count backwards:
for ($item = count($items) - 1; $item >= 0; $item--) { ... }
The associative version of the for loop is:
for (reset($array); $key = key($array); next($array) ) { ... }
This fails if any element holds a string that evaluates to false, so a perfectly normal value
such as 0 causes the loop to end early.
Finally, use array_map( ) to hand off each element to a function for processing:
// lowercase all words $lc = array_map('strtolower', $words);
The first argument to array_map( ) is a function to modify an individual element, and the
second is the array to be iterated through.

Generally, we find these functions less flexible than the previous methods, but they are well-
suited for the processing and merging of multiple arrays.
If you're unsure if the data you'll be processing is a scalar or an array, you need to protect
against calling foreach with a non-array. One method is to use is_array( ) :
if (is_array($items)) { // foreach loop code for array } else { // code for scalar }
Another method is to coerce all variables into array form using settype( ):
settype($items, 'array'); // loop code for arrays
This turns a scalar value into a one element array and cleans up your code at the expense of a
little overhead.
4.5.4 See Also
Documentation on for at http://www.php.net/for, foreach at http://www.php.net/foreach,
while at http://www.php.net/while, each( ) at http://www.php.net/each, reset( ) at
http://www.php.net/reset, and array_map( ) at http://www.php.net/array-map.
Recipe 4.6 Deleting Elements from an Array
4.6.1 Problem
You want to remove one or more elements from an array.
4.6.2 Solution
To delete one element, use unset( ):
unset($array[3]); unset($array['foo']);
To delete multiple noncontiguous elements, also use unset( ):
unset($array[3], $array[5]); unset($array['foo'], $array['bar']);
To delete multiple contiguous elements, use array_splice( ):
array_splice($array, $offset, $length);
4.6.3 Discussion
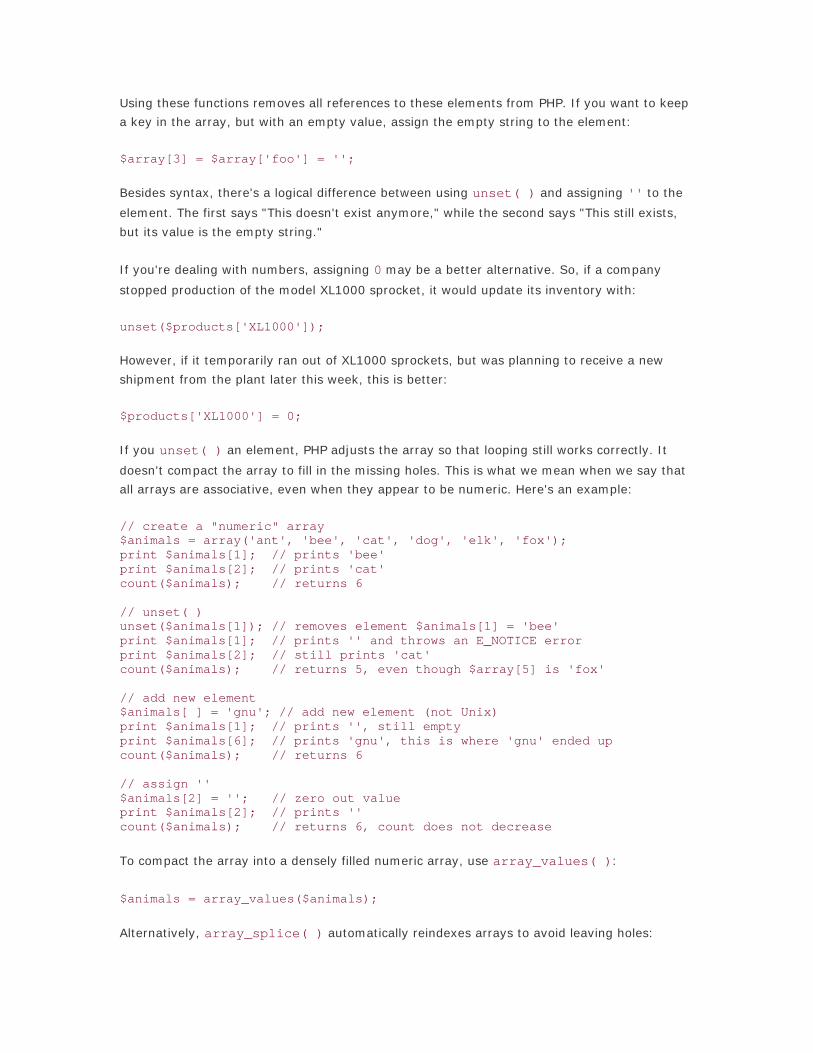
Using these functions removes all references to these elements from PHP. If you want to keep
a key in the array, but with an empty value, assign the empty string to the element:
$array[3] = $array['foo'] = '';
Besides syntax, there's a logical difference between using unset( ) and assigning '' to the
element. The first says "This doesn't exist anymore," while the second says "This still exists,
but its value is the empty string."
If you're dealing with numbers, assigning 0 may be a better alternative. So, if a company
stopped production of the model XL1000 sprocket, it would update its inventory with:
unset($products['XL1000']);
However, if it temporarily ran out of XL1000 sprockets, but was planning to receive a new
shipment from the plant later this week, this is better:
$products['XL1000'] = 0;
If you unset( ) an element, PHP adjusts the array so that looping still works correctly. It
doesn't compact the array to fill in the missing holes. This is what we mean when we say that
all arrays are associative, even when they appear to be numeric. Here's an example:
// create a "numeric" array $animals = array('ant', 'bee', 'cat', 'dog', 'elk', 'fox'); print $animals[1]; // prints 'bee' print $animals[2]; // prints 'cat' count($animals); // returns 6 // unset( ) unset($animals[1]); // removes element $animals[1] = 'bee' print $animals[1]; // prints '' and throws an E_NOTICE error print $animals[2]; // still prints 'cat' count($animals); // returns 5, even though $array[5] is 'fox' // add new element $animals[ ] = 'gnu'; // add new element (not Unix) print $animals[1]; // prints '', still empty print $animals[6]; // prints 'gnu', this is where 'gnu' ended up count($animals); // returns 6 // assign '' $animals[2] = ''; // zero out value print $animals[2]; // prints '' count($animals); // returns 6, count does not decrease
To compact the array into a densely filled numeric array, use array_values( ):
$animals = array_values($animals);
Alternatively, array_splice( ) automatically reindexes arrays to avoid leaving holes:

// create a "numeric" array $animals = array('ant', 'bee', 'cat', 'dog', 'elk', 'fox'); array_splice($animals, 2, 2); print_r($animals); Array ( [0] => ant [1] => bee [2] => elk [3] => fox )
This is useful if you're using the array as a queue and want to remove items from the queue
while still allowing random access. To safely remove the first or last element from an array,
use array_shift( ) and array_pop( ), respectively.
However, if you find yourself often running into problems because of holes in arrays, you may
not be "thinking PHP." Look at the ways to iterate through the array in Recipe 4.5 that don't
involve using a for loop.
4.6.4 See Also
Recipe 4.5 for iteration techniques; documentation on unset( ) at
http://www.php.net/unset, array_splice( ) at http://www.php.net/array-splice, and
array_values( ) at http://www.php.net/array-values.
Recipe 4.7 Changing Array Size
4.7.1 Problem
You want to modify the size of an array, either by making it larger or smaller than its current
size.
4.7.2 Solution
Use array_pad( ) to make an array grow:
// start at three $array = array('apple', 'banana', 'coconut'); // grow to five $array = array_pad($array, 5, '');
Now, count($array) is 5, and the last two elements contain the empty string.
To reduce an array, you can use array_splice( ):
// no assignment to $array array_splice($array, 2);

This removes all but the first two elements from $array.
4.7.3 Discussion
Arrays aren't a predeclared size in PHP, so you can resize them on the fly.
To pad an array, use array_pad( ). The first argument is the array to be padded. The next
argument is the size and direction you want to pad. To pad to the right, use a positive integer;
to pad to the left, use a negative one. The third argument is the value to be assigned to the
newly created entries. The function returns a modified array and doesn't alter the original.
Here are some examples:
// make a four-element array with 'dates' to the right $array = array('apple', 'banana', 'coconut'); $array = array_pad($array, 4, 'dates'); print_r($array); Array ( [0] => apple [1] => banana [2] => coconut [3] => dates ) // make a six-element array with 'zucchinis' to the left $array = array_pad($array, -6, 'zucchini'); print_r($array); Array ( [0] => zucchini [1] => zucchini [2] => apple [3] => banana [4] => coconut [5] => dates )
Be careful. array_pad($array, 4, 'dates') makes sure an $array is at least four
elements long, it doesn't add four new elements. In this case, if $array was already four
elements or larger, array_pad( ) would return an unaltered $array.
Also, if you declare a value for a fourth element, $array[4]:
$array = array('apple', 'banana', 'coconut'); $array[4] = 'dates';
you end up with a four-element array with indexes 0, 1, 2, and 4:
Array ( [0] => apple

[1] => banana [2] => coconut [4] => dates )
PHP essentially turns this into an associative array that happens to have integer keys.
The array_splice( ) function, unlike array_pad( ), has the side-effect of modifying the
original array. It returns the spliced out array. That's why you don't assign the return value to
$array. However, like array_pad( ), you can splice from either the right or left. So, calling
array_splice( ) with a value of -2 chops off the last two elements from the end:
// make a four-element array $array = array('apple', 'banana', 'coconut', 'dates'); // shrink to three elements array_splice($array, 3); // remove last element, equivalent to array_pop( ) array_splice($array, -1); // only remaining fruits are apple and banana print_r($array); Array ( [0] => apple [1] => banana )
4.7.4 See Also
Documentation on array_pad( ) at http://www.php.net/array-pad and array_splice( )
at http://www.php.net/array-splice.
Recipe 4.8 Appending One Array to Another
4.8.1 Problem
You want to combine two arrays into one.
4.8.2 Solution
Use array_merge( ):
$garden = array_merge($fruits, $vegetables);
4.8.3 Discussion
The array_merge( ) function works with both predefined arrays and arrays defined in place
using array( ):
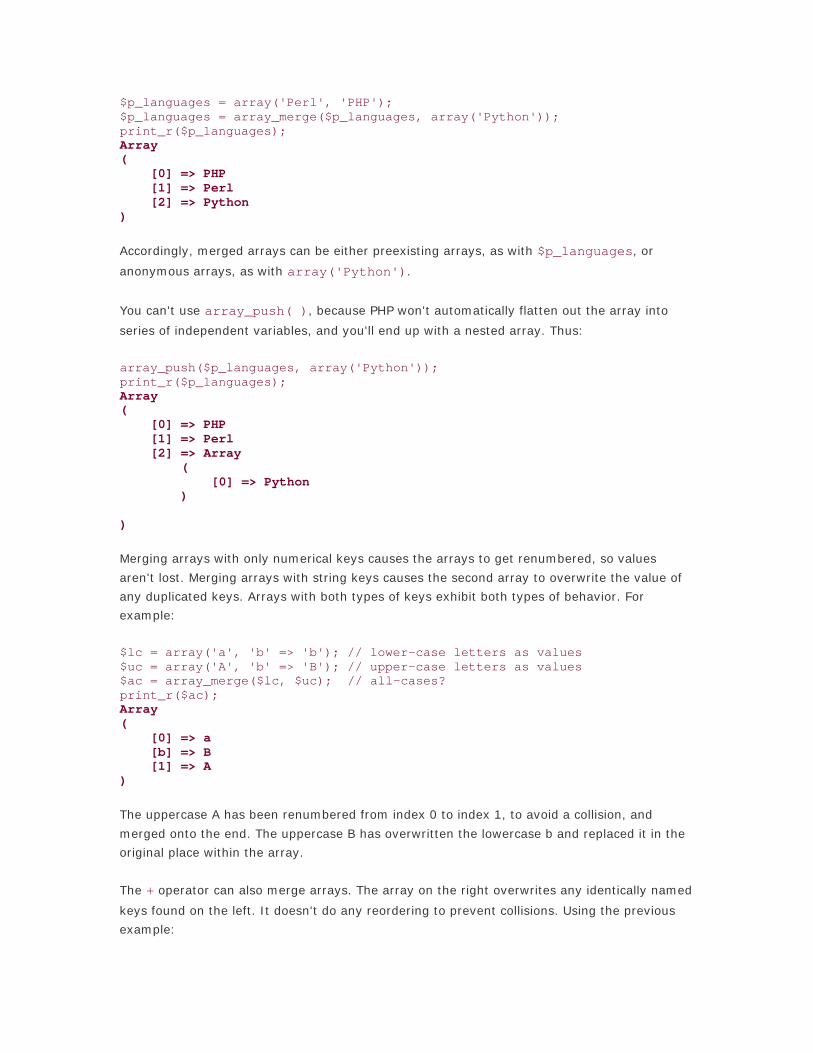
$p_languages = array('Perl', 'PHP'); $p_languages = array_merge($p_languages, array('Python')); print_r($p_languages); Array ( [0] => PHP [1] => Perl [2] => Python )
Accordingly, merged arrays can be either preexisting arrays, as with $p_languages, or
anonymous arrays, as with array('Python').
You can't use array_push( ), because PHP won't automatically flatten out the array into
series of independent variables, and you'll end up with a nested array. Thus:
array_push($p_languages, array('Python')); print_r($p_languages); Array ( [0] => PHP [1] => Perl [2] => Array ( [0] => Python ) )
Merging arrays with only numerical keys causes the arrays to get renumbered, so values
aren't lost. Merging arrays with string keys causes the second array to overwrite the value of
any duplicated keys. Arrays with both types of keys exhibit both types of behavior. For
example:
$lc = array('a', 'b' => 'b'); // lower-case letters as values $uc = array('A', 'b' => 'B'); // upper-case letters as values $ac = array_merge($lc, $uc); // all-cases? print_r($ac); Array ( [0] => a [b] => B [1] => A )
The uppercase A has been renumbered from index 0 to index 1, to avoid a collision, and
merged onto the end. The uppercase B has overwritten the lowercase b and replaced it in the
original place within the array.
The + operator can also merge arrays. The array on the right overwrites any identically named
keys found on the left. It doesn't do any reordering to prevent collisions. Using the previous
example:

print_r($a + $b); print_r($b + $a); Array ( [0] => a [b] => b ) Array ( [0] => A [b] => B )
Since a and A both have a key of 0, and b and B both have a key of b, you end up with a total
of only two elements in the merged arrays.
In the first case, $a + $b becomes just $b, and in the other, $b + $a becomes $a.
However, if you had two distinctly keyed arrays, this wouldn't be a problem, and the new
array would be the union of the two arrays.
4.8.4 See Also
Documentation on array_merge( ) at http://www.php.net/array-merge.
Recipe 4.9 Turning an Array into a String
4.9.1 Problem
You have an array, and you want to convert it into a nicely formatted string.
4.9.2 Solution
Use join( ):
// make a comma delimited list $string = join(',', $array);
Or loop yourself:
$string = ''; foreach ($array as $key => $value) { $string .= ",$value"; } $string = substr($string, 1); // remove leading ","
4.9.3 Discussion

If you can use join( ), do; it's faster than any PHP-based loop. However, join( ) isn't
very flexible. First, it places a delimiter only between elements, not around them. To wrap
elements inside HTML bold tags and separate them with commas, do this:
$left = '<b>'; $right = '</b>'; $html = $left . join("$right,$left", $html) . $right;
Second, join( ) doesn't allow you to discriminate against values. If you want to include a
subset of entries, you need to loop yourself:
$string = ''; foreach ($fields as $key => $value) { // don't include password if ('password' != $key) { $string .= ",<b>$value</b>"; } } $string = substr($string, 1); // remove leading ","
Notice that a separator is always added to each value, then stripped off outside the loop.
While it's somewhat wasteful to add something that will be later subtracted, it's far cleaner
and efficient (in most cases) then attempting to embed logic inside of the loop. To wit:
$string = ''; foreach ($fields as $key => $value) { // don't include password if ('password' != $value) { if (!empty($string)) { $string .= ','; } $string .= "<b>$value</b>"; } }
Now you have to check $string every time you append a value. That's worse than the simple
substr( ) call. Also, prepend the delimiter (in this case a comma) instead of appending it
because it's faster to shorten a string from the front than the rear.
4.9.4 See Also
Recipe 4.10 for printing an array with commas; documentation on join( ) at
http://www.php.net/join and substr( ) at http://www.php.net/substr.
Recipe 4.10 Printing an Array with Commas
4.10.1 Problem
You want to print out an array with commas separating the elements and with an "and" before
the last element if there are more than two elements in the array.

4.10.2 Solution
Use the pc_array_to_comma_string( ) function shown in Example 4-1, which returns the
correct string.
Example 4-1. pc_array_to_comma_string( )
function pc_array_to_comma_string($array) { switch (count($array)) { case 0: return ''; case 1: return reset($array); case 2: return join(' and ', $array); default: $last = array_pop($array); return join(', ', $array) . ", and $last"; } }
4.10.3 Discussion
If you have a list of items to print, it's useful to print them in a grammatically correct fashion.
It looks awkward to display text like this:
$thundercats = array('Lion-O', 'Panthro', 'Tygra', 'Cheetara', 'Snarf'); print 'ThunderCat good guys include ' . join(', ', $thundercats) . '.'; ThunderCat good guys include Lion-O, Panthro, Tygra, Cheetara, Snarf.
This implementation of this function isn't completely straightforward, since we want
pc_array_to_comma_string( ) to work with all arrays, not just numeric ones beginning at
0. If restricted only to that subset, for an array of size one, you return $array[0]. But, if the
array doesn't begin at 0, $array[0] is empty. So, you can use the fact that reset( ),
which resets an array's internal pointer, also returns the value of the first array element.
For similar reasons, you call array_pop( ) to grab the end element, instead of assuming it's
located at $array[count($array)-1]. This allows you to use join( ) on $array.
Also note that the code for case 2 actually also works correctly for case 1. And, the default
code works (though inefficiently) for case 2; however, the transitive property doesn't apply, so
you can't use the default code on elements of size 1.
4.10.4 See Also

Recipe 4.9 for turning an array into a string; documentation on join( ) at
http://www.php.net/join, array_pop( ) at http://www.php.net/array-pop, and reset( ) at
http://www.php.net/reset.
Recipe 4.11 Checking if a Key Is in an Array
4.11.1 Problem
You want to know if an array contains a certain key.
4.11.2 Solution
Use isset( ):
if (isset($array['key'])) { /* there is a value for 'key' in $array */ }
4.11.3 Discussion
You can check the definedness of an array element just as you'd for any other variable. See
the Introduction to Chapter 5 for more information about the truth value of variables.
4.11.4 See Also
Documentation on isset( ) at http://www.php.net/isset.
Recipe 4.12 Checking if an Element Is in an Array
4.12.1 Problem
You want to know if an array contains a certain value.
4.12.2 Solution
Use in_array( ):
if (in_array($array, $value)) { // an element has $value as its value in array $array }
4.12.3 Discussion
Use in_array( ) to check if an element of an array holds a value:
$book_collection = array('Emma', 'Pride and Prejudice', 'Northhanger Abbey'); $book = 'Sense and Sensibility'; if (in_array($book_collection, $book)) { echo 'Own it.';

} else { echo 'Need it.'; }
The default behavior of in_array( ) is to compare items using the == operator. To use the
strict equality check, ===, pass true as the third parameter to in_array( ):
$array = array(1, '2', 'three'); in_array(0, $array); // true! in_array(0, $array, true); // false in_array(1, $array); // true in_array(1, $array, true); // true in_array(2, $array); // true in_array(2, $array, true); // false
The first check, in_array(0, $array), evaluates to true because to compare the number
0 against the string three, PHP casts three to an integer. Since three isn't a numeric
string, as is 2, it becomes 0. Therefore, in_array( ) thinks there's a match.
Consequently, when comparing numbers against data that may contain strings, it's safest to
use a strict comparison.
If you find yourself calling in_array( ) multiple times on the same array, it may be better
to use an associative array, with the original array elements as the keys in the new associative
array. Looking up entries using in_array( ) takes linear time; with an associative array, it
takes constant time.
If you can't create the associative array directly but need to convert from a traditional one
with integer keys, use array_flip( ) to swap the keys and values of an array:
$book_collection = array('Emma', 'Pride and Prejudice', 'Northhanger Abbey'); // convert from numeric array to associative array $book_collection = array_flip($book_collection); $book = 'Sense and Sensibility'; if (isset($book_collection[$book])) { echo 'Own it.'; } else { echo 'Need it.'; }
Note that doing this condenses multiple keys with the same value into one element in the
flipped array.
4.12.4 See Also

Recipe 4.13 for determining the position of an element in an array; documentation on
in_array( ) at http://www.php.net/in-array and array_flip( ) at
http://www.php.net/array-flip.
Recipe 4.13 Finding the Position of an Element in an Array
4.13.1 Problem
You want know if an element is in an array, and, if it is, you want to know where it is located.
4.13.2 Solution
Use array_search( ). It returns the key of the found element or false:
$position = array_search($array, $value); if ($position !== false) { // the element in position $position has $value as its value in array $array }
4.13.3 Discussion
Use in_array( ) to find if an array contains a value; use array_search( ) to discover
where that value is located. However, because array_search( ) gracefully handles
searches in which the value isn't found, it's better to use array_search( ) instead of
in_array( ). The speed difference is minute, and the extra information is potentially useful:
$favorite_foods = array(1 => 'artichokes', 'bread', 'cauliflower', 'deviled eggs'); $food = 'cauliflower'; $position = array_search($food, $favorite_foods); if ($position !== false) { echo "My #$position favorite food is $food"; } else { echo "Blech! I hate $food!"; }
Use the !== check against false because if your string is found in the array at position 0, the
if evaluates to a logical false, which isn't what is meant or wanted.
If a value is in the array multiple times, array_search() is only guaranteed to return one of
the instances, not the first instance.
4.13.4 See Also
Recipe 4.12 for checking whether an element is in an array; documentation on
array_search( ) at http://www.php.net/array-search; for more sophisticated searching of

arrays using regular expression, see preg_replace( ) at http://www.php.net/preg-replace
and Chapter 13.
Recipe 4.14 Finding Elements That Pass a Certain Test
4.14.1 Problem
You want to locate entries in an array that meet certain requirements.
4.14.2 Solution
Use a foreach loop:
$movies = array(...); foreach ($movies as $movie) { if ($movie['box_office_gross'] < 5000000) { $flops[] = $movie; } }
Or array_filter( ):
$movies = array(...); function flops($movie) { return ($movie['box_office_gross'] < 5000000) ? 1 : 0; } $flops = array_filter($movies, 'flops');
4.14.3 Discussion
The foreach loops are simple; you scroll through the data and append elements to the return
array that match your criteria.
If you want only the first such element, exit the loop using break :
foreach ($movies as $movie) { if ($movie['box_office_gross'] > 200000000) { $blockbuster = $movie; break; } }
You can also return directly from a function:
function blockbuster($movies) { foreach ($movies as $movie) { if ($movie['box_office_gross'] > 200000000) { return $movie; } } }

With array_filter( ), however, you first create a callback function that returns true for
values you want to keep and false for values you don't. Using array_filter( ), you then
instruct PHP to process the array as you do in the foreach.
It's impossible to bail out early from array_filter( ), so foreach provides more flexibility
and is simpler to understand. Also, it's one of the few cases in which the built-in PHP function
doesn't clearly outperform user-level code.
4.14.4 See Also
Documentation on array_filter( ) at http://www.php.net/array-filter.
Recipe 4.15 Finding the Largest or Smallest Valued Element in an Array
4.15.1 Problem
You have an array of elements, and you want to find the largest or smallest valued element.
For example, you want to find the appropriate scale when creating a histogram.
4.15.2 Solution
To find the largest element, use max( ):
$largest = max($array);
To find the smallest element, use min( ):
$smallest = min($array);
4.15.3 Discussion
Normally, max( ) returns the larger of two elements, but if you pass it an array, it searches
the entire array instead. Unfortunately, there's no way to find the index of the largest element
using max( ). To do that, you must sort the array in reverse order to put the largest element
in position 0:
arsort($array);
Now the value of the largest element is $array[0].
If you don't want to disturb the order of the original array, make a copy and sort the copy:
$copy = $array; arsort($copy);
The same concept applies to min( ) but use asort( ) instead of arsort( ).

4.15.4 See Also
Recipe 4.17 for sorting an array; documentation on max( ) at http://www.php.net/max,
min( ) at http://www.php.net/min, arsort( ) at http://www.php.net/arsort, and asort(
) at http://www.php.net/min.
Recipe 4.16 Reversing an Array
4.16.1 Problem
You want to reverse the order of the elements in an array.
4.16.2 Solution
Use array_reverse( ):
$array = array('Zero', 'One', 'Two'); $reversed = array_reverse($array);
4.16.3 Discussion
The array_reverse( ) function reverses the elements in an array. However, it's often
possible to avoid this operation. If you wish to reverse an array you've just sorted, modify the
sort to do the inverse. If you want to reverse a list you're about to loop through and process,
just invert the loop. Instead of:
for ($i = 0, $size = count($array); $i < $size; $i++) { ... }
do the following:
for ($i = count($array) - 1; $i >=0 ; $i--) { ... }
However, as always, use a for loop only on a tightly packed array.
Another alternative would be, if possible, to invert the order elements are placed into the
array. For instance, if you're populating an array from a series of rows returned from a
database, you should be able to modify the query to ORDER DESC. See your database manual
for the exact syntax for your database.
4.16.4 See Also
Documentation on array_reverse( ) at http://www.php.net/array-reverse.
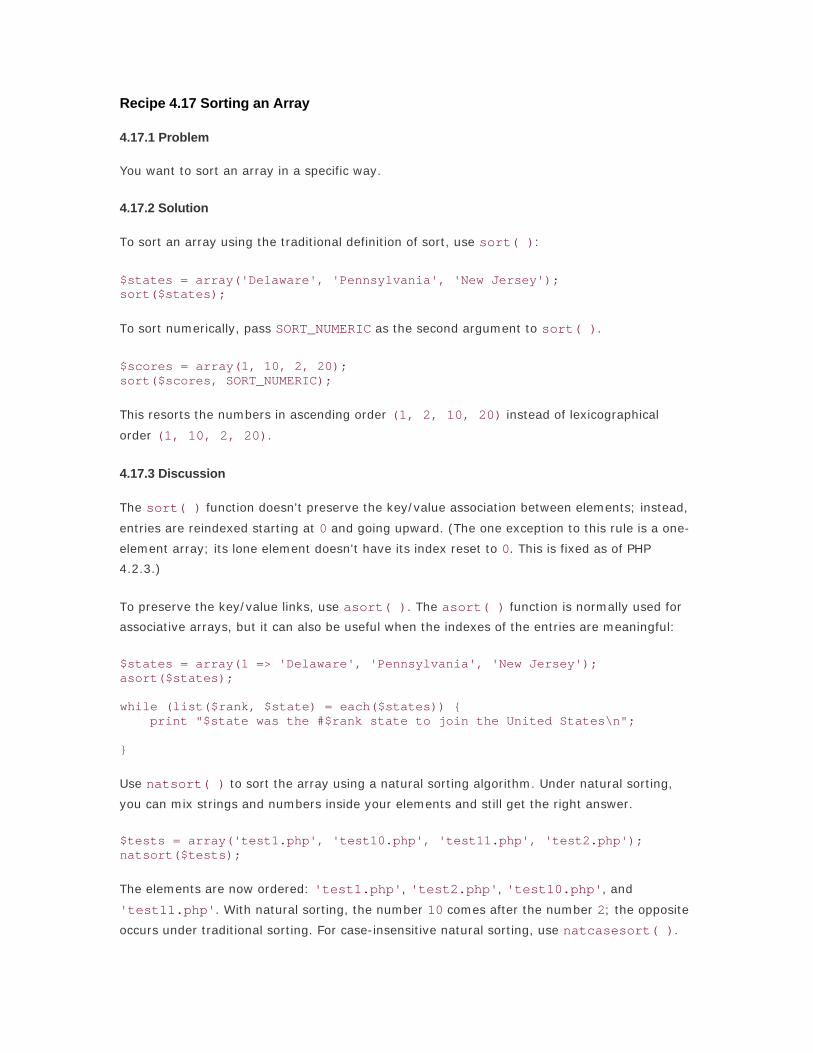
Recipe 4.17 Sorting an Array
4.17.1 Problem
You want to sort an array in a specific way.
4.17.2 Solution
To sort an array using the traditional definition of sort, use sort( ):
$states = array('Delaware', 'Pennsylvania', 'New Jersey'); sort($states);
To sort numerically, pass SORT_NUMERIC as the second argument to sort( ).
$scores = array(1, 10, 2, 20); sort($scores, SORT_NUMERIC);
This resorts the numbers in ascending order (1, 2, 10, 20) instead of lexicographical
order (1, 10, 2, 20).
4.17.3 Discussion
The sort( ) function doesn't preserve the key/value association between elements; instead,
entries are reindexed starting at 0 and going upward. (The one exception to this rule is a one-
element array; its lone element doesn't have its index reset to 0. This is fixed as of PHP
4.2.3.)
To preserve the key/value links, use asort( ). The asort( ) function is normally used for
associative arrays, but it can also be useful when the indexes of the entries are meaningful:
$states = array(1 => 'Delaware', 'Pennsylvania', 'New Jersey'); asort($states); while (list($rank, $state) = each($states)) { print "$state was the #$rank state to join the United States\n"; }
Use natsort( ) to sort the array using a natural sorting algorithm. Under natural sorting,
you can mix strings and numbers inside your elements and still get the right answer.
$tests = array('test1.php', 'test10.php', 'test11.php', 'test2.php'); natsort($tests);
The elements are now ordered: 'test1.php', 'test2.php', 'test10.php', and
'test11.php'. With natural sorting, the number 10 comes after the number 2; the opposite
occurs under traditional sorting. For case-insensitive natural sorting, use natcasesort( ).

To sort the array in reverse order, use rsort( ) or arsort( ), which is like rsort( ) but
also preserves keys. There is no natrsort( ) or natcasersort( ). You can also pass
SORT_NUMERIC into these functions.
4.17.4 See Also
Recipe 4.18 for sorting with a custom comparison function and Recipe 4.19 for sorting multiple
arrays; documentation on sort( ) at http://www.php.net/sort, asort( ) at
http://www.php.net/asort, natsort( ) at http://www.php.net/natsort, natcasesort( ) at
http://www.php.net/natcasesort, rsort( ) at http://www.php.net/rsort, and arsort( ) at
http://www.php.net/arsort.
Recipe 4.18 Sorting an Array by a Computable Field
4.18.1 Problem
You want to define your own sorting routine.
4.18.2 Solution
Use usort( ) in combination with a custom comparison function:
// sort in reverse natural order function natrsort($a, $b) { return strnatcmp($b, $a); } $tests = array('test1.php', 'test10.php', 'test11.php', 'test2.php'); usort($tests, 'natrsort');
4.18.3 Discussion
The comparison function must return a value greater that 0 if $a > $b, 0 if $a == $b, and a
value less than 0 if $a < $b. To sort in reverse, do the opposite. The function in the Solution,
strnatcmp( ), obeys those rules.
To reverse the sort, instead of multiplying the return value of strnatcmp($a, $b) by -1,
switch the order of the arguments to strnatcmp($b, $a).
The sort function doesn't need to be a wrapper for an existing sort. For instance, the
pc_date_sort( ) function, shown in Example 4-2, shows how to sort dates.
Example 4-2. pc_date_sort( )
// expects dates in the form of "MM/DD/YYYY" function pc_date_sort($a, $b) { list($a_month, $a_day, $a_year) = explode('/', $a); list($b_month, $b_day, $b_year) = explode('/', $b);

if ($a_year > $b_year ) return 1; if ($a_year < $b_year ) return -1; if ($a_month > $b_month) return 1; if ($a_month < $b_month) return -1; if ($a_day > $b_day ) return 1; if ($a_day < $b_day ) return -1; return 0; } $dates = array('12/14/2000', '08/10/2001', '08/07/1999'); usort($dates, 'pc_date_sort');
While sorting, usort( ) frequently recomputes the sort function's return values each time it's
needed to compare two elements, which slows the sort. To avoid unnecessary work, you can
cache the comparison values, as shown in pc_array_sort( ) in Example 4-3.
Example 4-3. pc_array_sort( )
function pc_array_sort($array, $map_func, $sort_func = '') { $mapped = array_map($map_func, $array); // cache $map_func( ) values if ('' == $sort_func) { asort($mapped); // asort( ) is faster then usort( ) } else { uasort($mapped, $sort_func); // need to preserve keys } while (list($key) = each($mapped)) { $sorted[ ] = $array[$key]; // use sorted keys } return $sorted; }
To avoid unnecessary work, pc_array_sort( ) uses a temporary array, $mapped, to cache
the return values. It then sorts $mapped, using either the default sort order or a user-
specified sorting routine. Importantly, it uses a sort that preserves the key/value relationship.
By default, it uses asort( ) because asort( ) is faster than uasort( ). (Slowness in
uasort( ) is the whole reason for pc_array_sort( ) after all.) Finally, it creates a sorted
array, $sorted, using the sorted keys in $mapped to index the values in the original array.
For small arrays or simple sort functions, usort( ) is faster, but as the number of
computations grows, pc_array_sort( ) surpasses usort( ). The following example sorts
elements by their string lengths — a relatively quick custom sort:
function pc_u_length($a, $b) { $a = strlen($a); $b = strlen($b);

if ($a == $b) return 0; if ($a > $b) return 1; return -1; } function pc_map_length($a) { return strlen($a); } $tests = array('one', 'two', 'three', 'four', 'five', 'six', 'seven', 'eight', 'nine', 'ten'); // faster for < 5 elements using pc_u_length() usort($tests, 'pc_u_length'); // faster for >= 5 elements using pc_map_length() $tests = pc_array_sort($tests, 'pc_map_length');
Here, pc_array_sort( ) is faster than usort( ) once the array reaches five elements.
4.18.4 See Also
Recipe 4.17 for basic sorting and Recipe 4.19 for sorting multiple arrays; documentation on
usort( ) at http://www.php.net/usort, asort( ) at http://www.php.net/asort, and
array_map( ) at http://www.php.net/array-map.
Recipe 4.19 Sorting Multiple Arrays
4.19.1 Problem
You want to sort multiple arrays or an array with multiple dimensions.
4.19.2 Solution
Use array_multisort( ):
To sort multiple arrays simultaneously, pass multiple arrays to array_multisort( ):
$colors = array('Red', 'White', 'Blue'); $cities = array('Boston', 'New York', 'Chicago'); array_multisort($colors, $cities); print_r($colors); print_r($cities); Array ( [0] => Blue [1] => Red [2] => White ) Array ( [0] => Chicago

[1] => Boston [2] => New York )
To sort multiple dimensions within a single array, pass the specific array elements:
$stuff = array('colors' => array('Red', 'White', 'Blue'), 'cities' => array('Boston', 'New York', 'Chicago')); array_multisort($stuff['colors'], $stuff['cities']); print_r($stuff); Array ( [colors] => Array ( [0] => Blue [1] => Red [2] => White ) [cities] => Array ( [0] => Chicago [1] => Boston [2] => New York ) )
To modify the sort type, as in sort( ), pass in SORT_REGULAR, SORT_NUMERIC, or
SORT_STRING after the array. To modify the sort order, unlike in sort( ), pass in SORT_ASC
or SORT_DESC after the array. You can also pass in both a sort type and a sort order after the
array.
4.19.3 Discussion
The array_multisort( ) function can sort several arrays at once or a multidimensional
array by one or more dimensions. The arrays are treated as columns of a table to be sorted by
rows. The first array is the main one to sort by; all the items in the other arrays are reordered
based on the sorted order of the first array. If items in the first array compare as equal, the
sort order is determined by the second array, and so on.
The default sorting values are SORT_REGULAR and SORT_ASC, and they're reset after each
array, so there's no reason to pass either of these two values, except for clarity.
$numbers = array(0, 1, 2, 3); $letters = array('a', 'b', 'c', 'd'); array_multisort($numbers, SORT_NUMERIC, SORT_DESC, $letters, SORT_STRING , SORT_DESC);
This example reverses the arrays.

4.19.4 See Also
Recipe 4.17 for simple sorting and Recipe 4.18 for sorting with a custom function;
documentation on array_multisort( ) at http://www.php.net/array-multisort.
Recipe 4.20 Sorting an Array Using a Method Instead of a Function
4.20.1 Problem
You want to define a custom sorting routine to order an array. However, instead of using a
function, you want to use an object method.
4.20.2 Solution
Pass in an array holding a class name and method in place of the function name:
usort($access_times, array('dates', 'compare'));
4.20.3 Discussion
As with a custom sort function, the object method needs to take two input arguments and
return 1, 0, or -1, depending if the first parameter is larger than, equal to, or less than the
second:
class pc_sort { // reverse-order string comparison function strrcmp($a, $b) { return strcmp($b, $a); } } usort($words, array('pc_sort', 'strrcmp'));
4.20.4 See Also
Chapter 7 for more on classes and objects; Recipe 4.18 for more on custom sorting of arrays.
Recipe 4.21 Randomizing an Array
4.21.1 Problem
You want to scramble the elements of an array in a random order.
4.21.2 Solution
If you're running PHP 4.3 or above, use shuffle( ):
shuffle($array);
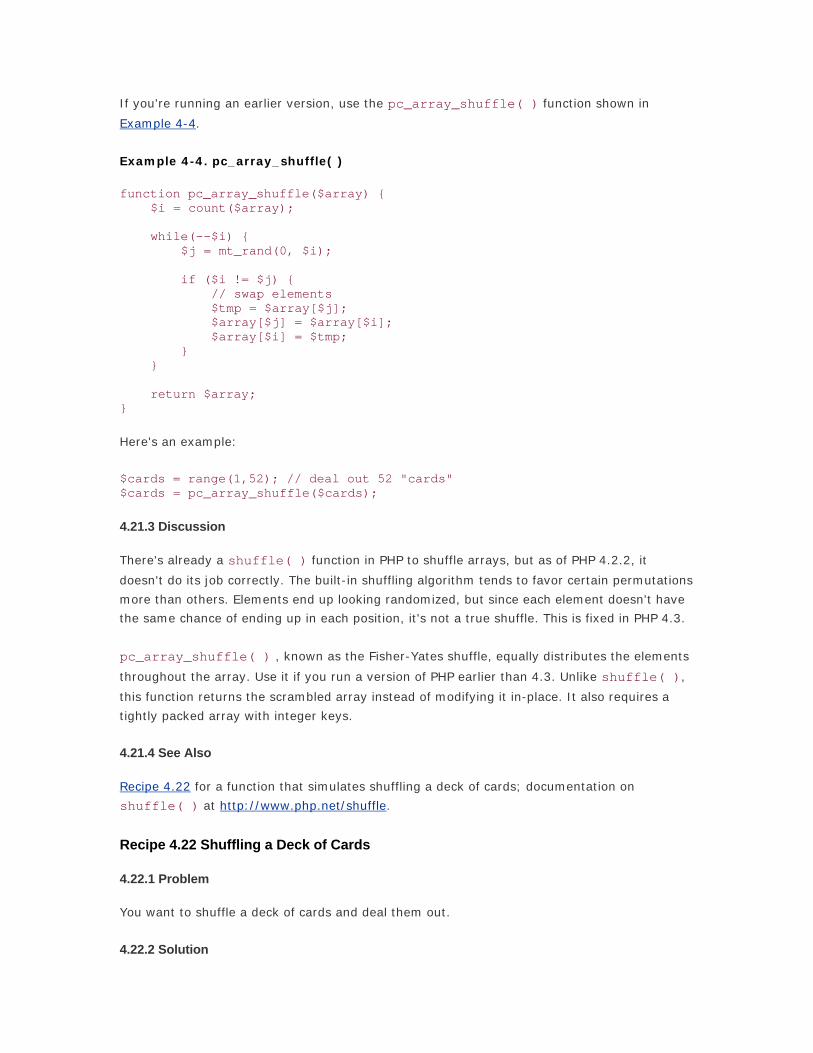
If you're running an earlier version, use the pc_array_shuffle( ) function shown in
Example 4-4.
Example 4-4. pc_array_shuffle( )
function pc_array_shuffle($array) { $i = count($array); while(--$i) { $j = mt_rand(0, $i); if ($i != $j) { // swap elements $tmp = $array[$j]; $array[$j] = $array[$i]; $array[$i] = $tmp; } } return $array; }
Here's an example:
$cards = range(1,52); // deal out 52 "cards" $cards = pc_array_shuffle($cards);
4.21.3 Discussion
There's already a shuffle( ) function in PHP to shuffle arrays, but as of PHP 4.2.2, it
doesn't do its job correctly. The built-in shuffling algorithm tends to favor certain permutations
more than others. Elements end up looking randomized, but since each element doesn't have
the same chance of ending up in each position, it's not a true shuffle. This is fixed in PHP 4.3.
pc_array_shuffle( ) , known as the Fisher-Yates shuffle, equally distributes the elements
throughout the array. Use it if you run a version of PHP earlier than 4.3. Unlike shuffle( ),
this function returns the scrambled array instead of modifying it in-place. It also requires a
tightly packed array with integer keys.
4.21.4 See Also
Recipe 4.22 for a function that simulates shuffling a deck of cards; documentation on
shuffle( ) at http://www.php.net/shuffle.
Recipe 4.22 Shuffling a Deck of Cards
4.22.1 Problem
You want to shuffle a deck of cards and deal them out.
4.22.2 Solution

Create a array of 52 integers, shuffle them, and map them to cards:
$suits = array('Clubs', 'Diamonds', 'Hearts', 'Spades'); $cards = array('Ace', 2, 3, 4, 5, 6, 7, 8, 9, 10, 'Jack', 'Queen', 'King'); $deck = pc_array_shuffle(range(0, 51)); while (($draw = array_pop($deck)) != NULL) { print $cards[$draw / 4] . ' of ' . $suits[$draw % 4] . "\n"; }
This code uses the pc_array_shuffle( ) function from Recipe 4.21.
4.22.3 Discussion
Here, a pair of arrays, $suits and $cards, is created to hold the English representation of a
card. The numbers 0 through 51 are randomly arranged and assigned to $deck. To deal a
card, just pop them off the top of the array, treating the array like a literal deck of cards.
It's necessary to add the check against NULL inside the while, otherwise the loop terminates
when you draw the zeroth card. If you modify the deck to contain the numbers 1 through 52,
the mathematics of deciding which number belongs to which card becomes more complex.
To deal multiple cards at once, call array_slice( ):
array_slice($deck, $cards * -1);
4.22.4 See Also
Recipe 4.21 for a function that randomizes an array; documentation on array_slice( ) at
http://www.php.net/array-slice.
Recipe 4.23 Removing Duplicate Elements from an Array
4.23.1 Problem
You want to eliminate duplicates from an array.
4.23.2 Solution
If the array is already complete, use array_unique( ), which returns a new array that
contains no duplicate values:
$unique = array_unique($array);
If you create the array while processing results, here is a technique for numerical arrays:
foreach ($_REQUEST['fruits'] as $fruit) { if (!in_array($array, $fruit)) { $array[ ] = $fruit; }

}
Here's one for associative arrays:
foreach ($_REQUEST['fruits'] as $fruit) { $array[$fruit] = $fruit; }
4.23.3 Discussion
Once processing is completed, array_unique( ) is the best way to eliminate duplicates.
But, if you're inside a loop, you can eliminate the duplicate entries from appearing by checking
if they're already in the array.
An even faster method than using in_array( ) is to create a hybrid array in which the key
and the value for each element are the same. This eliminates the linear check of in_array(
) but still allows you to take advantage of the array family of functions that operate over the
values of an array instead of the keys.
In fact, it's faster to use the associative array method and then call array_values( ) on the
result (or, for that matter, array_keys( ), but array_values( ) is slightly faster) than to
create a numeric array directly with the overhead of in_array( ).
4.23.4 See Also
Documentation on array_unique( ) at http://www.php.net/array-unique.
Recipe 4.24 Finding the Union, Intersection, or Difference of Two Arrays
4.24.1 Problem
You have a pair of arrays, and you want to find their union (all the elements), intersection
(elements in both, not just one), or difference (in one but not both).
4.24.2 Solution
To compute the union:
$union = array_unique(array_merge($a, $b));
To compute the intersection:
$intersection = array_intersection($a, $b);
To find the simple difference:
$difference = array_diff($a, $b);

And for the symmetric difference:
$difference = array_merge(array_diff($a, $b), array_diff($b, $a));
4.24.3 Discussion
Many necessary components for these calculations are built into PHP, it's just a matter of
combining them in the proper sequence.
To find the union, you merge the two arrays to create one giant array with all values. But,
array_merge( ) allows duplicate values when merging two numeric arrays, so you call
array_unique( ) to filter them out. This can leave gaps between entries because
array_unique( ) doesn't compact the array. It isn't a problem, however, as foreach and
each( ) handle sparsely filled arrays without a hitch.
The function to calculate the intersection is simply named array_intersection( ) and
requires no additional work on your part.
The array_diff( ) function returns an array containing all the unique elements in $old
that aren't in $new. This is known as the simple difference:
$old = array('To', 'be', 'or', 'not', 'to', 'be'); $new = array('To', 'be', 'or', 'whatever'); $difference = array_diff($old, $new); Array ( [3] => not [4] => to )
The resulting array, $difference contains 'not' and 'to', because array_diff( ) is
case-sensitive. It doesn't contain 'whatever' because it doesn't appear in $old.
To get a reverse difference, or in other words, to find the unique elements in $new that are
lacking in $old, flip the arguments:
$old = array('To', 'be', 'or', 'not', 'to', 'be'); $new = array('To', 'be', 'or', 'whatever'); $reverse_diff = array_diff($new, $old); Array ( [3] => whatever )
The $reverse_diff array contains only 'whatever'.
If you want to apply a function or other filter to array_diff( ), roll your own diffing
algorithm:

// implement case-insensitive diffing; diff -i $seen = array( ); foreach ($new as $n) { $seen[strtolower($n)]++; } foreach ($old as $o) { $o = strtolower($o); if (!$seen[$o]) { $diff[$o] = $o; } }
The first foreach builds an associative array lookup table. You then loop through $old and, if
you can't find an entry in our lookup, add the element to $diff.
It can be a little faster to combine array_diff( ) with array_map( ):
$diff = array_diff(array_map('strtolower', $old), array_map('strtolower', $new));
The symmetric difference is what's in $a, but not $b, and what's in $b, but not $a:
$difference = array_merge(array_diff($a, $b), array_diff($b, $a));
Once stated, the algorithm is straightforward. You call array_diff( ) twice and find the two
differences. Then you merge them together into one array. There's no need to call
array_unique( ), since you've intentionally constructed these arrays to have nothing in
common.
4.24.4 See Also
Documentation on array_unique( ) at http://www.php.net/array-unique,
array_intersect( ) at http://www.php.net/array-intersect, array_diff( ) at
http://www.php.net/array-diff, array_merge( ) at http://www.php.net/array-merge, and
array_map( ) at http://www.php.net/array-map.
Recipe 4.25 Finding All Element Combinations of an Array
4.25.1 Problem
You want to find all combinations of sets containing some or all of the elements in an array,
also called the power set.
4.25.2 Solution
Use the pc_array_power_set( ) function shown in Example 4-5.
Example 4-5. pc_array_power_set( )
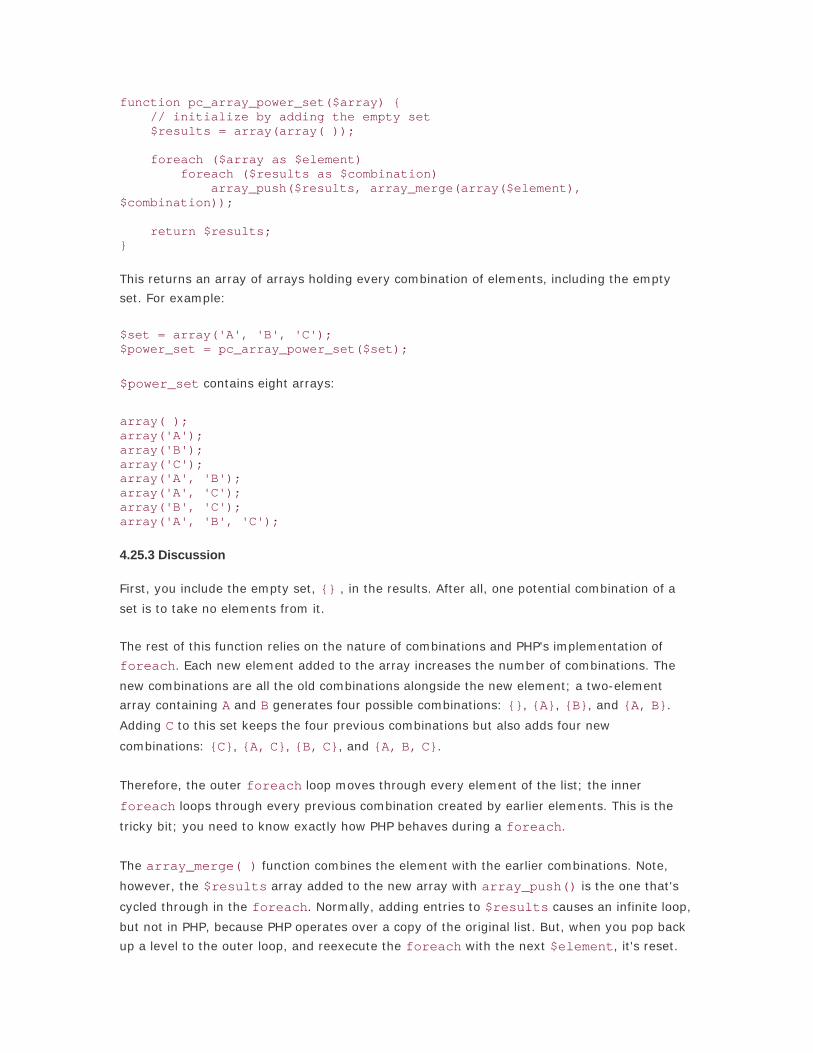
function pc_array_power_set($array) { // initialize by adding the empty set $results = array(array( )); foreach ($array as $element) foreach ($results as $combination) array_push($results, array_merge(array($element), $combination)); return $results; }
This returns an array of arrays holding every combination of elements, including the empty
set. For example:
$set = array('A', 'B', 'C'); $power_set = pc_array_power_set($set);
$power_set contains eight arrays:
array( ); array('A'); array('B'); array('C'); array('A', 'B'); array('A', 'C'); array('B', 'C'); array('A', 'B', 'C');
4.25.3 Discussion
First, you include the empty set, {} , in the results. After all, one potential combination of a
set is to take no elements from it.
The rest of this function relies on the nature of combinations and PHP's implementation of
foreach. Each new element added to the array increases the number of combinations. The
new combinations are all the old combinations alongside the new element; a two-element
array containing A and B generates four possible combinations: {}, {A}, {B}, and {A, B}.
Adding C to this set keeps the four previous combinations but also adds four new
combinations: {C}, {A, C}, {B, C}, and {A, B, C}.
Therefore, the outer foreach loop moves through every element of the list; the inner
foreach loops through every previous combination created by earlier elements. This is the
tricky bit; you need to know exactly how PHP behaves during a foreach.
The array_merge( ) function combines the element with the earlier combinations. Note,
however, the $results array added to the new array with array_push() is the one that's
cycled through in the foreach. Normally, adding entries to $results causes an infinite loop,
but not in PHP, because PHP operates over a copy of the original list. But, when you pop back
up a level to the outer loop, and reexecute the foreach with the next $element, it's reset.
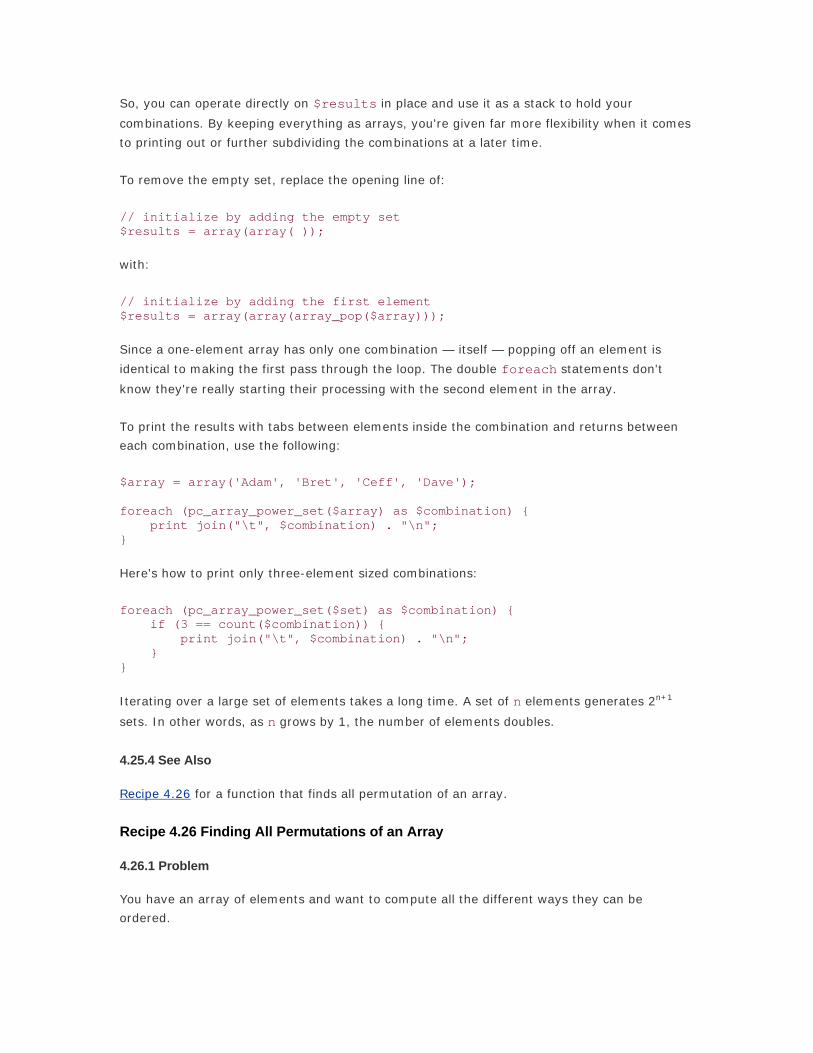
So, you can operate directly on $results in place and use it as a stack to hold your
combinations. By keeping everything as arrays, you're given far more flexibility when it comes
to printing out or further subdividing the combinations at a later time.
To remove the empty set, replace the opening line of:
// initialize by adding the empty set $results = array(array( ));
with:
// initialize by adding the first element $results = array(array(array_pop($array)));
Since a one-element array has only one combination — itself — popping off an element is
identical to making the first pass through the loop. The double foreach statements don't
know they're really starting their processing with the second element in the array.
To print the results with tabs between elements inside the combination and returns between
each combination, use the following:
$array = array('Adam', 'Bret', 'Ceff', 'Dave'); foreach (pc_array_power_set($array) as $combination) { print join("\t", $combination) . "\n"; }
Here's how to print only three-element sized combinations:
foreach (pc_array_power_set($set) as $combination) { if (3 == count($combination)) { print join("\t", $combination) . "\n"; } }
Iterating over a large set of elements takes a long time. A set of n elements generates 2n+1
sets. In other words, as n grows by 1, the number of elements doubles.
4.25.4 See Also
Recipe 4.26 for a function that finds all permutation of an array.
Recipe 4.26 Finding All Permutations of an Array
4.26.1 Problem
You have an array of elements and want to compute all the different ways they can be
ordered.

4.26.2 Solution
Use one of the two permutation algorithms discussed next.
4.26.3 Discussion
The pc_permute() function shown in Example 4-6 is a PHP modification of a basic recursive
function.
Example 4-6. pc_permute( )
function pc_permute($items, $perms = array( )) { if (empty($items)) { print join(' ', $perms) . "\n"; } else { for ($i = count($items) - 1; $i >= 0; --$i) { $newitems = $items; $newperms = $perms; list($foo) = array_splice($newitems, $i, 1); array_unshift($newperms, $foo); pc_permute($newitems, $newperms); } } }
For example:
pc_permute(split(' ', 'she sells seashells')); she sells seashells she seashells sells sells she seashells sells seashells she seashells she sells seashells sells she
However, while this recursion is elegant, it's inefficient, because it's making copies all over the
place. Also, it's not easy to modify the function to return the values instead of printing them
out without resorting to a global variable.
The pc_next_permutation( ) function shown in Example 4-7, however, is a little slicker. It
combines an idea of Mark-Jason Dominus from Perl Cookbook by Tom Christianson and
Nathan Torkington (O'Reilly) with an algorithm from Edsger Dijkstra's classic text A Discipline
of Programming (Prentice-Hall).
Example 4-7. pc_next_permutation( )
function pc_next_permutation($p, $size) { // slide down the array looking for where we're smaller than the next guy for ($i = $size - 1; $p[$i] >= $p[$i+1]; --$i) { } // if this doesn't occur, we've finished our permutations // the array is reversed: (1, 2, 3, 4) => (4, 3, 2, 1)

if ($i == -1) { return false; } // slide down the array looking for a bigger number than what we found before for ($j = $size; $p[$j] <= $p[$i]; --$j) { } // swap them $tmp = $p[$i]; $p[$i] = $p[$j]; $p[$j] = $tmp; // now reverse the elements in between by swapping the ends for (++$i, $j = $size; $i < $j; ++$i, --$j) { $tmp = $p[$i]; $p[$i] = $p[$j]; $p[$j] = $tmp; } return $p; } $set = split(' ', 'she sells seashells'); // like array('she', 'sells', 'seashells') $size = count($set) - 1; $perm = range(0, $size); $j = 0; do { foreach ($perm as $i) { $perms[$j][] = $set[$i]; } } while ($perm = pc_next_permutation($perm, $size) and ++$j); foreach ($perms as $p) { print join(' ', $p) . "\n"; }
Dominus's idea is that instead of manipulating the array itself, you can create permutations of
integers. You then map the repositioned integers back onto the elements of the array to
calculate the true permutation — a nifty idea.
However, this technique still has some shortcomings. Most importantly, to us as PHP
programmers, it frequently pops, pushes, and splices arrays, something that's very Perl-
centric. Next, when calculating the permutation of integers, it goes through a series of steps
to come up with each permutation; because it doesn't remember previous permutations, it
therefore begins each time from the original permutation. Why redo work if you can help it?
Dijkstra's algorithm solves this by taking a permutation of a series of integers and returning
the next largest permutation. The code is optimized based upon that assumption. By starting
with the smallest pattern (which is just the integers in ascending order) and working your way
upwards, you can scroll through all permutations one at a time, by plugging the previous
permutation back into the function to get the next one. There are hardly any swaps, even in
the final swap loop in which you flip the tail.
There's a side benefit. Dominus's recipe needs the total number of permutations for a given
pattern. Since this is the factorial of the number of elements in the set, that's a potentially
expensive calculation, even with memoization. Instead of computing that number, it's faster to
return false from pc_next_permutation( ) when you notice that $i == -1. When that

occurs, you're forced outside the array, and you've exhausted the permutations for the
phrase.
Two final notes of implementation. Since the size of the set is invariant, you capture it once
using count( ) and pass it into pc_next_permutation( ); this is faster than repeatedly
calling count( ) inside the function. Also, since the set is guaranteed by its construction to
have unique elements, i.e., there is one and only one instance of each integer, we don't need
to need to check for equality inside the first two for loops. However, you should include them
in case you want to use this recipe on other numeric sets, in which duplicates might occur.
4.26.4 See Also
Recipe 4.25 for a function that finds the power set of an array; Recipe 4.19 in the Perl
Cookbook (O'Reilly); Chapter 3, A Discipline of Programming (Prentice-Hall).
Recipe 4.27 Program: Printing an Array in a Horizontally Columned HTML Table
Converting an array into a horizontally columned table places a fixed number of elements in a
row. The first set goes in the opening table row, the second set goes in the next row, and so
forth. Finally, you reach the final row, where you might need to optionally pad the row with
empty table data cells.
The function pc_grid_horizontal( ) , shown in Example 4-8, lets you specify an array
and number of columns. It assumes your table width is 100%, but you can alter the
$table_width variable to change this.
Example 4-8. pc_grid_horizontal( )
function pc_grid_horizontal($array, $size) { // compute <td> width %ages $table_width = 100; $width = intval($table_width / $size); // define how our <tr> and <td> tags appear // sprintf() requires us to use %% to get literal % $tr = '<tr align="center">'; $td = "<td width=\"$width%%\">%s</td>"; // open table $grid = "<table width=\"$table_width%\">$tr"; // loop through entries and display in rows of size $sized // $i keeps track of when we need a new table tow $i = 0; foreach ($array as $e) { $grid .= sprintf($td, $e); $i++; // end of a row // close it up and open a new one

if (!($i % $size)) { $grid .= "</tr>$tr"; } } // pad out remaining cells with blanks while ($i % $size) { $grid .= sprintf($td, ' '); $i++; } // add </tr>, if necessary $end_tr_len = strlen($tr) * -1; if (substr($grid, $end_tr_len) != $tr) { $grid .= '</tr>'; } else { $grid = substr($grid, 0, $end_tr_len); } // close table $grid .= '</table>'; return $grid; }
The function begins by calculating the width of each <td> as a percentage of the total table
size. Depending on the number of columns and the overall size, the sum of the <td> widths
might not equal the <table> width, but this shouldn't effect the displayed HTML in a
noticeable fashion. Next, define the <td> and <tr> tags, using printf-style formatting
notation. To get the literal % needed for the <td> width percentage, use a double %%.
The meat of the function is the foreach loop through the array in which we append each
<td> to the $grid. If you reach the end of a row, which happens when the total number of
elements processed is a multiple of number of elements in a row, you close and then reopen
the <tr>.
Once you finish adding all the elements, you need to pad the final row with blank or empty
<td> elements. Put a nonbreaking space inside the data cell instead of leaving it empty to
make the table renders properly in the browser. Now, make sure there isn't an extra <tr> at
the end of grid, which occurs when the number of elements is an exact multiple of the width
(in other words, if you didn't need to add padding cells). Finally, you can close the table.
For example, let's print the names of the 50 U.S. states in a six-column table:
// establish connection to database $dsn = 'mysql://user:password@localhost/table'; $dbh = DB::connect($dsn); if (DB::isError($dbh)) { die ($dbh->getMessage( )); } // query the database for the 50 states $sql = "SELECT state FROM states"; $sth = $dbh->query($sql);

// load data into array from database while ($row = $sth->fetchRow(DB_FETCHMODE_ASSOC)) { $states[ ] = $row['state']; } // generate the HTML table $grid = pc_grid_horizontal($states, 6); // and print it out print $grid;
When rendered in a browser, it looks like Figure 4-1.
Figure 4-1. The United States of America
Because 50 doesn't divide evenly by six, there are four extra padding cells in the last row.

Chapter 5. Variables
Section 5.1. Introduction
Recipe 5.2. Avoiding == Versus = Confusion
Recipe 5.3. Establishing a Default Value
Recipe 5.4. Exchanging Values Without Using Temporary Variables
Recipe 5.5. Creating a Dynamic Variable Name
Recipe 5.6. Using Static Variables
Recipe 5.7. Sharing Variables Between Processes
Recipe 5.8. Encapsulating Complex Data Types as a String
Recipe 5.9. Dumping Variable Contents as Strings

5.1 Introduction
Along with conditional logic, variables are the core of what makes computer programs
powerful and flexible. If you think of a variable as a bucket with a name that holds a value,
PHP lets you have plain old buckets, buckets that contain the name of other buckets, buckets
with numbers or strings in them, buckets holding arrays of other buckets, buckets full of
objects, and just about any other variation on that analogy you can think of.
A variable is either set or unset. A variable with any value assigned to it, true or false,
empty or nonempty, is set. The function isset( ) returns true when passed a variable
that's set. The only way to turn a variable that's set into one that's unset is to call unset( )
on the variable. Scalars, arrays, and objects can all be passed to unset( ). You can also
pass unset( ) multiple variables to unset them all:
unset($vegetables); unset($vegetables[12]); unset($earth, $moon, $stars);
If a variable is present in the query string of a URL, even if it has no value assigned to it, it is
set. Thus:
http://www.example.com/set.php?chimps=&monkeys=12
sets $_GET['monkeys'] to 12 and $_GET['chimps'] to the empty string.
All unset variables are also empty. Set variables may be empty or nonempty. Empty variables
have values that evaluate to false as a boolean: the integer 0, the double 0.0, the empty
string, the string "0", the boolean false, an array with no elements, an object with no
variables or methods, and NULL. Everything else is nonempty. This includes the string "00",
and the string " ", containing just a space character.
Variables evaluate to either true or false. The values listed earlier that evaluate to false
as a boolean are the complete set of what's false in PHP. Every other value is true. The
distinction between empty and false is that emptiness is only possible for variables. Constants
and return values from functions can be false, but they can't be empty. For example, the
following is valid because $first_name is a variable:
if (empty($first_name)) { .. }
On the other hand, these two examples return parse errors because 0 (a constant) and the
return value from get_first_name( ) can't be empty:
if (empty(0)) { .. } if (empty(get_first_name())) { .. }

Recipe 5.2 Avoiding == Versus = Confusion
5.2.1 Problem
You don't want to accidentally assign values when comparing a variable and a constant.
5.2.2 Solution
Use:
if (12 == $dwarves) { ... }
instead of:
if ($dwarves == 12) { ... }
Putting the constant on the left triggers a parse error with the assignment operator. In other
words, PHP complains when you write:
if (12 = $dwarves) { ... }
but:
if ($dwarves = 12) { ... }
silently executes, assigning 12 to the variable $dwarves, and then executing the code inside
the block. ($dwarves = 12 evaluates to 12, which is true.)
5.2.3 Discussion
Putting a constant on the left side of a comparison coerces the comparison to the type of the
constant. This causes problems when you are comparing an integer with a variable that could
be an integer or a string. 0 == $dwarves is true when $dwarves is 0, but it's also true
when $dwarves is sleepy. Since an integer (0) is on the left side of the comparison, PHP
converts what's on the right (the string sleepy) to an integer (0) before comparing. To avoid
this, use the identity operator, 0 === $dwarves, instead.
5.2.4 See Also
Documentation for = at http://www.php.net/language.operators.assignment.php and for ==
and === at http://www.php.net/manual/language.operators.comparison.php.
Recipe 5.3 Establishing a Default Value
5.3.1 Problem

You want to assign a default value to a variable that doesn't already have a value. It often
happens that you want a hardcoded default value for a variable that can be overridden from
form input or through an environment variable.
5.3.2 Solution
Use isset( ) to assign a default to a variable that may already have a value:
if (! isset($cars)) { $cars = $default_cars; }
Use the ternary (a ? b : c) operator to give a new variable a (possibly default) value:
$cars = isset($_REQUEST['cars']) ? $_REQUEST['cars'] : $default_cars;
5.3.3 Discussion
Using isset( ) is essential when assigning default values. Without it, the nondefault value
can't be 0 or anything else that evaluates to false. Consider this assignment:
$cars = $_REQUEST['cars'] ? $_REQUEST['cars'] : $default_cars;
If $_REQUEST['cars'] is 0, $cars is set to $default_cars even though 0 may be a valid
value for $cars.
You can use an array of defaults to set multiple default values easily. The keys in the defaults
array are variable names, and the values in the array are the defaults for each variable:
$defaults = array('emperors' => array('Rudolf II','Caligula'), 'vegetable' => 'celery', 'acres' => 15); foreach ($defaults as $k => $v) { if (! isset($GLOBALS[$k])) { $GLOBALS[$k] = $v; } }
Because the variables are set in the global namespace, the previous code doesn't work for
setting function-private defaults. To do that, use variable variables:
foreach ($defaults as $k => $v) { if (! isset($$k)) { $$k = $v; } }
5.3.4 See Also
Documentation on isset( ) at http://www.php.net/isset; variable variables are discussed in
Recipe 5.5 and at http://www.php.net/language.variables.variable.

Recipe 5.4 Exchanging Values Without Using Temporary Variables
5.4.1 Problem
You want to exchange the values in two variables without using additional variables for
storage.
5.4.2 Solution
To swap $a and $b:
list($a,$b) = array($b,$a);
5.4.3 Discussion
PHP's list( ) language construct lets you assign values from an array to individual
variables. Its counterpart on the right side of the expression, array( ), lets you construct
arrays from individual values. Assigning the array that array( ) returns to the variables in
the list( ) lets you juggle the order of those values. This works with more than two values,
as well:
list($yesterday,$today,$tomorrow) = array($today,$tomorrow,$yesterday);
This method isn't faster than using temporary variables, so you should use it for clarity, but
not speed.
5.4.4 See Also
Documentation on list( ) at http://www.php.net/list and array( ) at
http://www.php.net/array.
Recipe 5.5 Creating a Dynamic Variable Name
5.5.1 Problem
You want to construct a variable's name dynamically. For example, you want to use variable
names that match the field names from a database query.
5.5.2 Solution
Use PHP's variable variable syntax by prepending a $ to a variable whose value is the variable
name you want:
$animal = 'turtles'; $turtles = 103; print $$animal; 103

5.5.3 Discussion
The previous example prints 103. Because $animal = 'turtles', $$animal is $turtles,
which equals 103.
Using curly braces, you can construct more complicated expressions that indicate variable
names:
$stooges = array('Moe','Larry','Curly'); $stooge_moe = 'Moses Horwitz'; $stooge_larry = 'Louis Feinberg'; $stooge_curly = 'Jerome Horwitz'; foreach ($stooges as $s) { print "$s's real name was ${'stooge_'.strtolower($s)}.\n"; } Moe's real name was Moses Horwitz. Larry's real name was Louis Feinberg. Curly's real name was Jerome Horwitz.
PHP evaluates the expression between the curly braces and uses it as a variable name. That
expression can even have function calls in it, such as strtolower( ).
Variable variables are also useful when iterating through similarly named variables. Say you
are querying a database table that has fields named title_1, title_2, etc. If you want to
check if a title matches any of those values, the easiest way is to loop through them like this:
for ($i = 1; $i <= $n; $i++) { $t = "title_$i"; if ($title == $$t) { /* match */ } }
Of course, it would be more straightforward to store these values in an array, but if you are
maintaining old code that uses this technique (and you can't change it), variable variables are
helpful.
The curly brace syntax is also necessary in resolving ambiguity about array elements. The
variable variable $$donkeys[12] could have two meanings. The first is "take what's in the
12th element of the $donkeys array and use that as a variable name." Write this as:
${$donkeys[12]}. The second is, "use what's in the scalar $donkeys as an array name and
look in the 12th element of that array." Write this as: ${$donkeys}[12].
5.5.4 See Also
http://www.php.net/language.variables.variable for documentation on variable variables.
Recipe 5.6 Using Static Variables
5.6.1 Problem

You want a local variable to retain its value between invocations of a function.
5.6.2 Solution
Declare the variable as static:
function track_times_called( ) { static $i = 0; $i++; return $i; }
5.6.3 Discussion
Declaring a variable static causes its value to be remembered by a function. So, if there are
subsequent calls to the function, you can access the value of the saved variable. The
pc_check_the_count( ) function shown in Example 5-1 uses static variables to keep
track of the strikes and balls for a baseball batter.
Example 5-1. pc_check_the_count( )
function pc_check_the_count($pitch) { static $strikes = 0; static $balls = 0; switch ($pitch) { case 'foul': if (2 == $strikes) break; // nothing happens if 2 strikes // otherwise, act like a strike case 'strike': $strikes++; break; case 'ball': $balls++; break; } if (3 == $strikes) { $strikes = $balls = 0; return 'strike out'; } if (4 == $balls) { $strikes = $balls = 0; return 'walk'; } return 'at bat'; } $what_happened = check_the_count($pitch);
In pc_check_the_count( ), the logic of what happens to the batter depending on the pitch
count is in the switch statement inside the function. You can instead return the number of
strikes and balls, but this requires you to place the checks for striking out, walking, and
staying at the plate in multiple places in the code.

While static variables retain their values between function calls, they do so only during one
invocation of a script. A static variable accessed in one request doesn't keep its value for
the next request to the same page.
5.6.4 See Also
Documentation on static variables at http://www.php.net/language.variables.scope.
Recipe 5.7 Sharing Variables Between Processes
5.7.1 Problem
You want a way to share information between processes that provides fast access to the
shared data.
5.7.2 Solution
Store the data in a shared memory segment, and guarantee exclusive access to the shared
memory with a semaphore:
$semaphore_id = 100; $segment_id = 200; // get a handle to the semaphore associated with the shared memory // segment we want $sem = sem_get($semaphore_id,1,0600); // ensure exclusive access to the semaphore sem_acquire($sem) or die("Can't acquire semaphore"); // get a handle to our shared memory segment $shm = shm_attach($segment_id,16384,0600); // retrieve a value from the shared memory segment $population = shm_get_var($shm,'population'); // manipulate the value $population += ($births + $immigrants - $deaths - $emigrants); // store the value back in the shared memory segment shm_put_var($shm,'population',$population); // release the handle to the shared memory segment shm_detach($shm); // release the semaphore so other processes can acquire it sem_release($sem);
5.7.3 Discussion
A shared memory segment is a slice of your machine's RAM that different processes (such as
the multiple web server processes that handle requests) can access. A semaphore makes sure
that the different processes don't step on each other's toes when they access the shared
memory segment. Before a process can use the segment, it needs to get control of the
semaphore. When it's done with the segment, it releases the semaphore for another process
to grab.
To get control of a semaphore, use sem_get( ) to find the semaphore's ID. The first
argument to sem_get( ) is an integer semaphore key. You can make the key any integer

you want, as long as all programs that need to access this particular semaphore use the same
key. If a semaphore with the specified key doesn't already exist, it's created, the maximum
number of processes that can access the semaphore is set to the second argument of
sem_get( ) (in this case, 1), and the semaphore's permissions are set to sem_get( )'s
third argument (0600). These permissions work just like file permissions, so 0600 means that
the user that created the semaphore can read it and write to it. In this context, user doesn't
just mean the process that created the semaphore but any process with the same user ID.
Permissions of 0600 should be appropriate for most uses, in which web server processes run
as the same user.
sem_get( ) returns an identifier that points to the underlying system semaphore. Use this ID
to gain control of the semaphore with sem_acquire( ). This function waits until the
semaphore can be acquired (perhaps waiting until other processes release the semaphore)
and then returns true. It returns false on error. Errors include invalid permissions or not
enough memory to create the semaphore. Once the semaphore is acquired, you can read from
the shared memory segment.
First, establish a link to the particular shared memory segment with shm_attach( ) . As
with sem_get( ), the first argument to shm_attach( ) is an integer key. This time,
however it identifies the desired segment, not the semaphore. If the segment with the
specified key doesn't exist, the other arguments create it. The second argument (16384) is
the size in bytes of the segment, and the last argument (0600) are the permissions on the
segment. shm_attach(200,16384,0600) creates a 16K shared memory segment that can
be read from and written to only by the user who created it. The function returns the identifier
you need to read from and write to the shared memory segment.
After attaching to the segment, pull variables out of it with shm_get_var($shm,
'population'). This looks in the shared memory segment identified by $shm and retrieves
the value of the variable called population. You can store any type of variable in shared
memory. Once the variable is retrieved, it can be operated on like other variables.
shm_put_var($shm,'population',$population) puts the value of $population back
into the shared memory segment as a variable called population.
You're now done with the shared memory statement. Detach from it with shm_detach( )
and release the semaphore with sem_release( ) so another process can use it.
Shared memory's chief advantage is that it's fast. But since it's stored in RAM, it can't hold too
much data, and it doesn't persist when a machine is rebooted (unless you take special steps to
write the information in shared memory to disk before shutdown and then load it into memory
again at startup). Also, shared memory is not available on Windows.
5.7.4 See Also

Recipe 8.28 includes a program that uses shared memory; documentation on shared memory
and semaphore functions at http://www.php.net/sem.
Recipe 5.8 Encapsulating Complex Data Types as a String
5.8.1 Problem
You want a string representation of an array or object for storage in a file or database. This
string should be easily reconstitutable into the original array or object.
5.8.2 Solution
Use serialize( ) to encode variables and their values into a textual form:
$pantry = array('sugar' => '2 lbs.','butter' => '3 sticks'); $fp = fopen('/tmp/pantry','w') or die ("Can't open pantry"); fputs($fp,serialize($pantry)); fclose($fp);
To recreate the variables, use unserialize( ):
$new_pantry = unserialize(join('',file('/tmp/pantry')));
5.8.3 Discussion
The serialized string that is reconstituted into $pantry looks like:
a:2:{s:5:"sugar";s:6:"2 lbs.";s:6:"butter";s:8:"3 sticks";}
This stores enough information to bring back all the values in the array, but the variable name
itself isn't stored in the serialized representation.
When passing serialized data from page to page in a URL, call urlencode( ) on the data to
make sure URL metacharacters are escaped in it:
$shopping_cart = array('Poppy Seed Bagel' => 2, 'Plain Bagel' => 1, 'Lox' => 4); print '<a href="next.php?cart='.urlencode(serialize($shopping_cart)).'">Next</a>';
The magic_quotes_gpc and magic_quotes_runtime configuration settings affect data
being passed to unserialize( ). If magic_quotes_gpc is on, data passed in URLs, POST
variables, or cookies must be processed with stripslashes( ) before it's unserialized:
$new_cart = unserialize(stripslashes($cart)); // if magic_quotes_gpc is on $new_cart = unserialize($cart); // if magic_quotes_gpc is off

If magic_quotes_runtime is on, serialized data stored in a file must be processed with
addslashes( ) when writing and stripslashes() when reading:
$fp = fopen('/tmp/cart,'w'); fputs($fp,addslashes(serialize($a))); fclose($fp); // if magic_quotes_runtime is on $new_cart = unserialize(stripslashes(join('',file('/tmp/cart')))); // if magic_quotes_runtime is off $new_cart = unserialize(join('',file('/tmp/cart')));
Serialized data read from a database must also be processed with stripslashes( ) when
magic_quotes_runtime is on:
mysql_query( "INSERT INTO cart (id,data) VALUES (1,'".addslashes(serialize($cart))."')"); $r = mysql_query('SELECT data FROM cart WHERE id = 1'); $ob = mysql_fetch_object($r); // if magic_quotes_runtime is on $new_cart = unserialize(stripslashes($ob->data)); // if magic_quotes_runtime is off $new_cart = unserialize($ob->data);
Serialized data going into a database always needs to have addslashes( ) called on it (or
another database-appropriate escaping method) to ensure it's saved properly.
5.8.4 See Also
Recipe 10.8 for information on escaping data for a database.
Recipe 5.9 Dumping Variable Contents as Strings
5.9.1 Problem
You want to inspect the values stored in a variable. It may be a complicated nested array or
object, so you can't just print it out or loop through it.
5.9.2 Solution
Use print_r( ) or var_dump( ):
$array = array("name" => "frank", 12, array(3, 4)); print_r($array); Array ( [name] => frank [0] => 12 [1] => Array

( [0] => 3 [1] => 4 ) ) var_dump($array); array(3) { ["name"]=> string(5) "frank" [0]=> int(12) [1]=> array(2) { [0]=> int(3) [1]=> int(4) } }
5.9.3 Discussion
The output of print_r( ) is more concise and easier to read. The output of var_dump( ),
however, gives data types and lengths for each variable.
Since these functions recursively work their way through variables, if you have references
within a variable pointing back to the variable itself, you can end up with an infinite loop. Both
functions stop themselves from printing variable information forever, though. Once print_r(
) has seen a variable once, it prints *RECURSION* instead of printing information about the
variable again and continues iterating through the rest of the information it has to print. When
var_dump( ) sees a variable more than three times, it throws a fatal error and ends script
execution. Consider the arrays $user_1 and $user_2, which reference each other through
their friend elements:
$user_1 = array('name' => 'Max Bialystock', 'username' => 'max'); $user_2 = array('name' => 'Leo Bloom', 'username' => 'leo'); // Max and Leo are friends $user_2['friend'] = &$user_1; $user_1['friend'] = &$user_2; // Max and Leo have jobs $user_1['job'] = 'Swindler'; $user_2['job'] = 'Accountant';
The output of print_r($user_2) is:
Array ( [name] => Leo Bloom [username] => leo

[friend] => Array ( [name] => Max Bialystock [username] => max [friend] => Array ( [name] => Leo Bloom [username] => leo [friend] => Array *RECURSION* [job] => Accountant ) [job] => Swindler ) [job] => Accountant )
When print_r( ) sees the reference to $user_1 the second time, it prints *RECURSION*
instead of descending into the array. It then continues on its way, printing the remaining
elements of $user_1 and $user_2.
Confronted with recursion, var_dump( ) behaves differently:
array(4) { ["name"]=> string(9) "Leo Bloom" ["username"]=> string(3) "leo" ["friend"]=> &array(4) { ["name"]=> string(14) "Max Bialystock" ["username"]=> string(3) "max" ["friend"]=> &array(4) { ["name"]=> string(9) "Leo Bloom" ["username"]=> string(3) "leo" ["friend"]=> &array(4) { ["name"]=> string(14) "Max Bialystock" ["username"]=> string(3) "max" ["friend"]=> &array(4) { ["name"]=> string(9) "Leo Bloom" ["username"]=> string(3) "leo" ["friend"]=> &array(4) { ["name"]=>
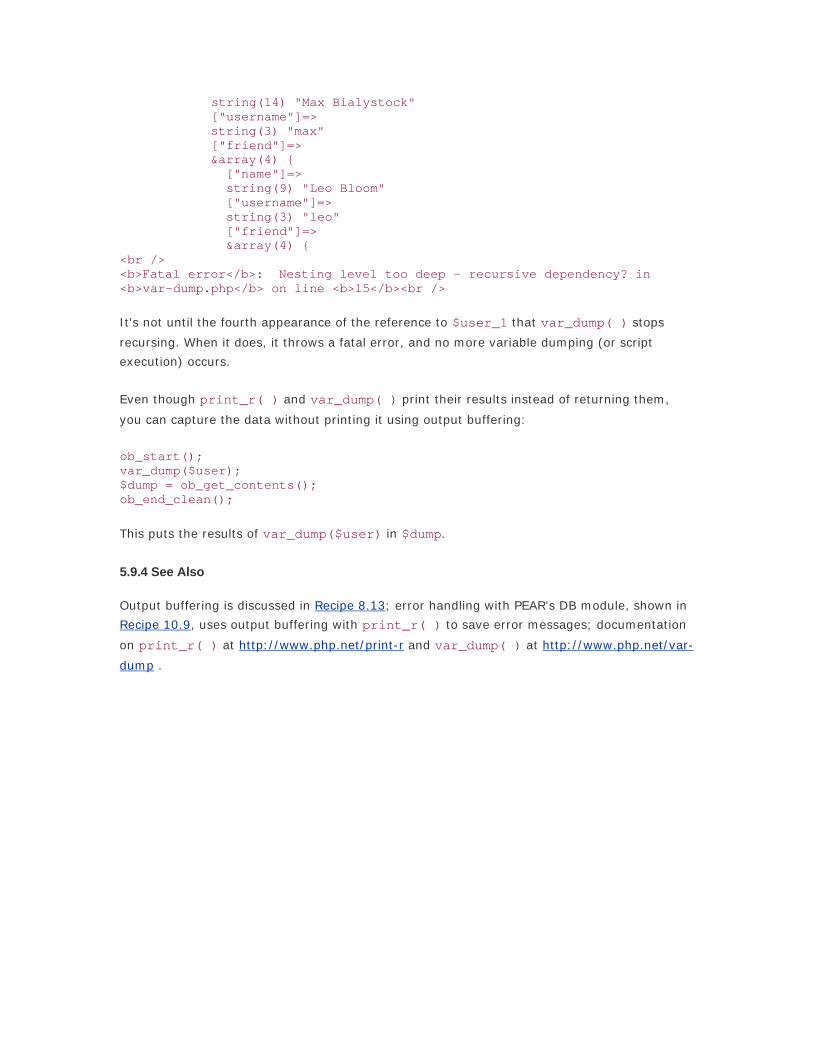
string(14) "Max Bialystock" ["username"]=> string(3) "max" ["friend"]=> &array(4) { ["name"]=> string(9) "Leo Bloom" ["username"]=> string(3) "leo" ["friend"]=> &array(4) { <br /> <b>Fatal error</b>: Nesting level too deep - recursive dependency? in <b>var-dump.php</b> on line <b>15</b><br />
It's not until the fourth appearance of the reference to $user_1 that var_dump( ) stops
recursing. When it does, it throws a fatal error, and no more variable dumping (or script
execution) occurs.
Even though print_r( ) and var_dump( ) print their results instead of returning them,
you can capture the data without printing it using output buffering:
ob_start(); var_dump($user); $dump = ob_get_contents(); ob_end_clean();
This puts the results of var_dump($user) in $dump.
5.9.4 See Also
Output buffering is discussed in Recipe 8.13; error handling with PEAR's DB module, shown in
Recipe 10.9, uses output buffering with print_r( ) to save error messages; documentation
on print_r( ) at http://www.php.net/print-r and var_dump( ) at http://www.php.net/var-
dump .

Chapter 6. Functions
Section 6.1. Introduction
Recipe 6.2. Accessing Function Parameters
Recipe 6.3. Setting Default Values for Function Parameters
Recipe 6.4. Passing Values by Reference
Recipe 6.5. Using Named Parameters
Recipe 6.6. Creating Functions That Take a Variable Number of Arguments
Recipe 6.7. Returning Values by Reference
Recipe 6.8. Returning More Than One Value
Recipe 6.9. Skipping Selected Return Values
Recipe 6.10. Returning Failure
Recipe 6.11. Calling Variable Functions
Recipe 6.12. Accessing a Global Variable Inside a Function
Recipe 6.13. Creating Dynamic Functions

6.1 Introduction
Functions help you create organized and reusable code. They allow you to abstract out details
so your code becomes more flexible and more readable. Without functions, it is impossible to
write easily maintainable programs because you're constantly updating identical blocks of code
in multiple places and in multiple files.
With a function you pass a number of arguments in and get a value back:
// add two numbers together function add($a, $b) { return $a + $b; } $total = add(2, 2); // 4
To declare a function, use the function keyword, followed by the name of the function and
any parameters in parentheses. To invoke a function, simply use the function name, specifying
argument values for any parameters to the function. If the function returns a value, you can
assign the result of the function to a variable, as shown in the previous example.
You don't need to predeclare a function before you call it. PHP parses the entire file before it
begins executing, so you can intermix function declarations and invocations. You can't,
however, redefine a function in PHP. If PHP encounters a function with an identical name to
one it's already found, it throws a fatal error and dies.
Sometimes, the standard procedure of passing in a fixed number of arguments and getting
one value back doesn't quite fit a particular situation in your code. Maybe you don't know
ahead of time exactly how many parameters your function needs to accept. Or, you do know
your parameters, but they're almost always the same values, so it's tedious to continue to
repass them. Or, you want to return more than one value from your function.
This chapter helps you use PHP to solve these types of problems. We begin by detailing
different ways to pass arguments to a function. Recipe 6.2 through Recipe 6.6 cover passing
arguments by value, reference, and as named parameters; assigning default parameter
values; and functions with a variable number of parameters.
The next four recipes are all about returning values from a function. Recipe 6.7 describes
returning by reference, Recipe 6.8 covers returning more than one variable, Recipe 6.9
describes how to skip selected return values, and Recipe 6.10 talks about the best way to
return and check for failure from a function. The final three recipes show how to call variable
functions, deal with variable scoping problems, and dynamically create a function. There's one
recipe on function variables located in Recipe 6.2; if you want a variable to maintain its value
between function invocations, see Recipe 5.6.

Recipe 6.2 Accessing Function Parameters
6.2.1 Problem
You want to access the values passed to a function.
6.2.2 Solution
Use the names from the function prototype:
function commercial_sponsorship($letter, $number) { print "This episode of Sesame Street is brought to you by "; print "the letter $letter and number $number.\n"; } commercial_sponsorship('G', 3); commercial_sponsorship($another_letter, $another_number);
6.2.3 Discussion
Inside the function, it doesn't matter whether the values are passed in as strings, numbers,
arrays, or another kind of variable. You can treat them all the same and refer to them using
the names from the prototype.
Unlike in C, you don't need to (and, in fact, can't) describe the type of variable being passed
in. PHP keeps track of this for you.
Also, unless specified, all values being passed into and out of a function are passed by value,
not by reference. This means PHP makes a copy of the value and provides you with that copy
to access and manipulate. Therefore, any changes you make to your copy don't alter the
original value. Here's an example:
function add_one($number) { $number++; } $number = 1; add_one($number); print "$number\n"; 1
If the variable was passed by reference, the value of $number would be 2.
In many languages, passing variables by reference also has the additional benefit of being
significantly faster than by value. While this is also true in PHP, the speed difference is
marginal. For that reason, we suggest passing variables by reference only when actually
necessary and never as a performance-enhancing trick.
6.2.4 See Also
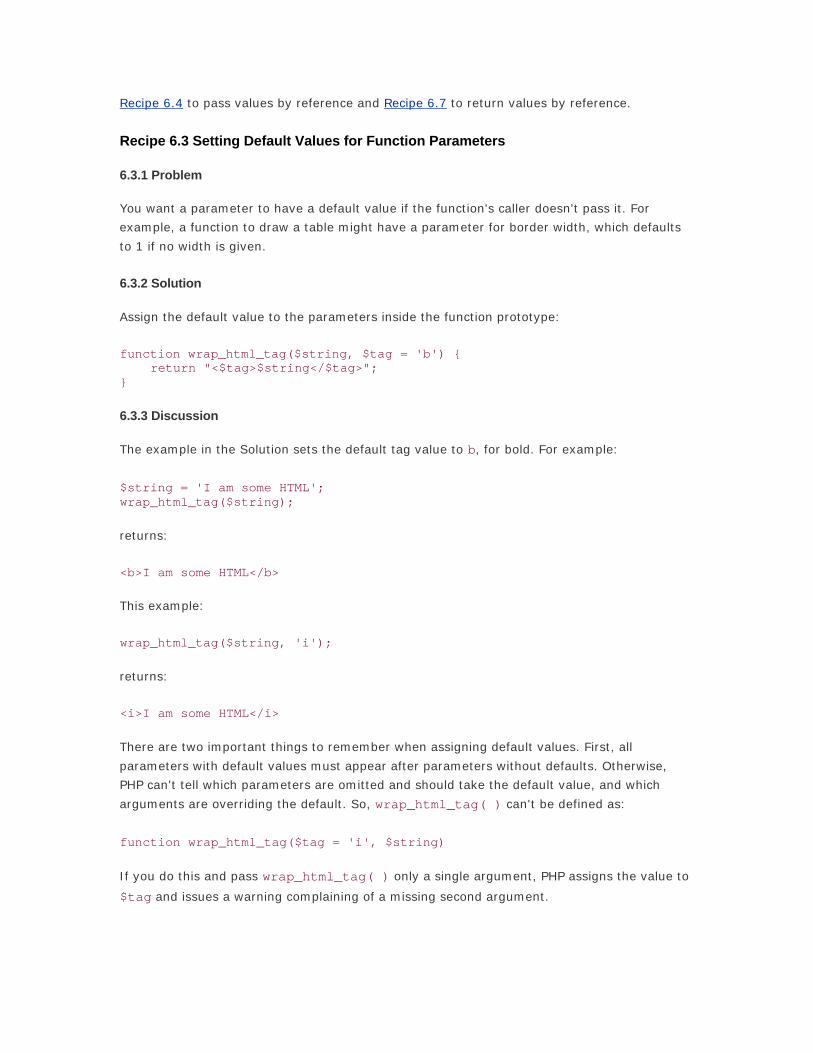
Recipe 6.4 to pass values by reference and Recipe 6.7 to return values by reference.
Recipe 6.3 Setting Default Values for Function Parameters
6.3.1 Problem
You want a parameter to have a default value if the function's caller doesn't pass it. For
example, a function to draw a table might have a parameter for border width, which defaults
to 1 if no width is given.
6.3.2 Solution
Assign the default value to the parameters inside the function prototype:
function wrap_html_tag($string, $tag = 'b') { return "<$tag>$string</$tag>"; }
6.3.3 Discussion
The example in the Solution sets the default tag value to b, for bold. For example:
$string = 'I am some HTML'; wrap_html_tag($string);
returns:
<b>I am some HTML</b>
This example:
wrap_html_tag($string, 'i');
returns:
<i>I am some HTML</i>
There are two important things to remember when assigning default values. First, all
parameters with default values must appear after parameters without defaults. Otherwise,
PHP can't tell which parameters are omitted and should take the default value, and which
arguments are overriding the default. So, wrap_html_tag( ) can't be defined as:
function wrap_html_tag($tag = 'i', $string)
If you do this and pass wrap_html_tag( ) only a single argument, PHP assigns the value to
$tag and issues a warning complaining of a missing second argument.

Second, the assigned value must be a constant — a string or a number. It can't be a variable.
Again, using wrap_html_tag( ) as our example, you can't do this:
$my_favorite_html_tag = 'i'; function wrap_html_tag($string, $tag = $my_favorite_html_tag) { ... }
If you want to assign a default of nothing, one solution is to assign the empty string to your
parameter:
function wrap_html_tag($string, $tag = '') { if (empty($tag)) return $string; return "<$tag>$string</$tag>"; }
This function returns the original string, if no value is passed in for the $tag. Or, if a
(nonempty) tag is passed in, it returns the string wrapped inside of tags.
Depending on circumstances, another option for the $tag default value is either 0 or NULL. In
wrap_html_tag( ), you don't want to allow an empty valued-tag. However, in some cases,
the empty string can be an acceptable option. For instance, join( ) is often called on the
empty string, after calling file( ), to place a file into a string. Also, as the following code
shows, you can use a default message if no argument is provided but an empty message if the
empty string is passed:
function pc_log_db_error($message = NULL) { if (is_null($message)) { $message = 'Couldn't connect to DB'; } error_log("[DB] [$message]"); }
6.3.4 See Also
Recipe 6.6 on creating functions that take a variable number of arguments.
Recipe 6.4 Passing Values by Reference
6.4.1 Problem
You want to pass a variable to a function and have it retain any changes made to its value
inside the function.
6.4.2 Solution
To instruct a function to accept an argument passed by reference instead of value, prepend an
& to the parameter name in the function prototype:

function wrap_html_tag(&$string, $tag = 'b') { $string = "<$tag>$string</$tag>"; }
Now there's no need to return the string because the original is modified in-place.
6.4.3 Discussion
Passing a variable to a function by reference allows you to avoid the work of returning the
variable and assigning the return value to the original variable. It is also useful when you want
a function to return a boolean success value of true or false, but you still want to modify
argument values with the function.
You can't switch between passing a parameter by value or reference; it's either one or the
other. In other words, there's no way to tell PHP to optionally treat the variable as a reference
or as a value.
Actually, that statement isn't 100% true. If the configuration directive
allow_call_time_pass_reference is enabled, PHP lets you optionally pass a value by
reference by prepending an ampersand to the variable's name. However, this feature has been
deprecated since PHP 4.0 Beta 4, and PHP issues explicit warnings that this feature may go
away in the future when you employ call-time pass-by-reference. Caveat coder.
Also, if a parameter is declared to accept a value by reference, you can't pass a constant
string (or number, etc.), or PHP will die with a fatal error.
6.4.4 See Also
Recipe 6.7 on returning values by reference.
Recipe 6.5 Using Named Parameters
6.5.1 Problem
You want to specify your arguments to a function by name, instead of simply their position in
the function invocation.
6.5.2 Solution
Have the function use one parameter but make it an associative array:
function image($img) { $tag = '<img src="' . $img['src'] . '" '; $tag .= 'alt="' . ($img['alt'] ? $img['alt'] : '') .'">'; return $tag; } $image = image(array('src' => 'cow.png', 'alt' => 'cows say moo')); $image = image(array('src' => 'pig.jpeg'));

6.5.3 Discussion
While using named parameters makes the code inside your functions more complex, it ensures
the calling code is easier to read. Since a function lives in one place but is called in many, this
makes for more understandable code.
When you use this technique, PHP doesn't complain if you accidentally misspell a parameter's
name, so you need to be careful because the parser won't catch these types of mistakes. Also,
you can't take advantage of PHP's ability to assign a default value for a parameter. Luckily,
you can work around this deficit with some simple code at the top of the function:
function image($img) { if (! isset($img['src'])) { $img['src'] = 'cow.png'; } if (! isset($img['alt'])) { $img['alt'] = 'milk factory'; } if (! isset($img['height'])) { $img['height'] = 100; } if (! isset($img['width'])) { $img['width'] = 50; } ... }
Using the isset( ) function, check to see if a value for each parameter is set; if not, assign
a default value.
Alternatively, you can write a short function to handle this:
function pc_assign_defaults($array, $defaults) { $a = array( ); foreach ($defaults as $d => $v) { $a[$d] = isset($array[$d]) ? $array[$d] : $v; } return $a; }
This function loops through a series of keys from an array of defaults and checks if a given
array, $array, has a value set. If it doesn't, the function assigns a default value from
$defaults. To use it in the previous snippet, replace the top lines with:
function image($img) { $defaults = array('src' => 'cow.png', 'alt' => 'milk factory', 'height' => 100, 'width' => 50 ); $img = pc_assign_defaults($img, $defaults); ... }
This is nicer because it introduces more flexibility into the code. If you want to modify how
defaults are assigned, you only need to change it inside pc_assign_defaults( ) and not in
hundreds of lines of code inside various functions. Also, it's clearer to have an array of

name/value pairs and one line that assigns the defaults instead of intermixing the two
concepts in a series of almost identical repeated lines.
6.5.4 See Also
Recipe 6.6 on creating functions that accept a variable number of arguments.
Recipe 6.6 Creating Functions That Take a Variable Number of Arguments
6.6.1 Problem
You want to define a function that takes a variable number of arguments.
6.6.2 Solution
Pass an array and place the variable arguments inside the array:
// find the "average" of a group of numbers function mean($numbers) { // initialize to avoid warnings $sum = 0; // the number of elements in the array $size = count($numbers); // iterate through the array and add up the numbers for ($i = 0; $i < $size; $i++) { $sum += $numbers[$i]; } // divide by the amount of numbers $average = $sum / $size; // return average return $average; } $mean = mean(array(96, 93, 97));
6.6.3 Discussion
There are two good solutions, depending on your coding style and preferences. The more
traditional PHP method is the one described in the Solution. We prefer this method because
using arrays in PHP is a frequent activity; therefore, all programmers are familiar with arrays
and their behavior.
So, while this method creates some additional overhead, bundling variables is commonplace.
It's done in Recipe 6.5 to create named parameters and in Recipe 6.8 to return more than one
value from a function. Also, inside the function, the syntax to access and manipulate the array
involves basic commands such as $array[$i] and count($array).

However, this can seem clunky, so PHP provides an alternative and allows you direct access to
the argument list:
// find the "average" of a group of numbers function mean() { // initialize to avoid warnings $sum = 0; // the number of arguments passed to the function $size = func_num_args(); // iterate through the arguments and add up the numbers for ($i = 0; $i < $size; $i++) { $sum += func_get_arg($i); } // divide by the amount of numbers $average = $sum / $size; // return average return $average; } $mean = mean(96, 93, 97);
This example uses a set of functions that return data based on the arguments passed to the
function they are called from. First, func_num_args( ) returns an integer with the number
of arguments passed into its invoking function — in this case, mean( ). From there, you can
then call func_get_arg( ) to find the specific argument value for each position.
When you call mean(96, 93, 97), func_num_args( ) returns 3. The first argument is in
position 0, so you iterate from 0 to 2, not 1 to 3. That's what happens inside the for loop
where $i goes from 0 to less than $size. As you can see, this is the same logic used in the
first example in which an array was passed. If you're worried about the potential overhead
from using func_get_arg( ) inside a loop, don't be. This version is actually faster than the
array passing method.
There is a third version of this function that uses func_num_args( ) to return an array
containing all the values passed to the function. It ends up looking like hybrid between the
previous two functions:
// find the "average" of a group of numbers function mean() { // initialize to avoid warnings $sum = 0; // load the arguments into $numbers $numbers = func_get_args(); // the number of elements in the array $size = count($numbers);

// iterate through the array and add up the numbers for ($i = 0; $i < $size; $i++) { $sum += $numbers[$i]; } // divide by the amount of numbers $average = $sum / $size; // return average return $average; } $mean = mean(96, 93, 97);
Here you have the dual advantages of not needing to place the numbers inside a temporary
array when passing them into mean( ), but inside the function you can continue to treat
them as if you did. Unfortunately, this method is slightly slower than the first two.
6.6.4 See Also
Recipe 6.8 on returning multiple values from a function; documentation on func_num_arg(
) at http://www.php.net/func-num-arg, func_get_arg( ) at http://www.php.net/func-get-
arg, and func_get_args( ) at http://www.php.net/func-get-args.
Recipe 6.7 Returning Values by Reference
6.7.1 Problem
You want to return a value by reference, not by value. This allows you to avoid making a
duplicate copy of a variable.
6.7.2 Solution
The syntax for returning a variable by reference is similar to passing it by reference. However,
instead of placing an & before the parameter, place it before the name of the function:
function &wrap_html_tag($string, $tag = 'b') { return "<$tag>$string</$tag>"; }
Also, you must use the =& assignment operator instead of plain = when invoking the function:
$html =& wrap_html_tag($string);
6.7.3 Discussion
Unlike passing values into functions, in which an argument is either passed by value or by
reference, you can optionally choose not to assign a reference and just take the returned
value. Just use = instead of =&, and PHP assigns the value instead of the reference.

6.7.4 See Also
Recipe 6.4 on passing values by reference.
Recipe 6.8 Returning More Than One Value
6.8.1 Problem
You want to return more than one value from a function.
6.8.2 Solution
Return an array and use list( ) to separate elements:
function averages($stats) { ... return array($median, $mean, $mode); } list($median, $mean, $mode) = averages($stats);
6.8.3 Discussion
From a performance perspective, this isn't a great idea. There is a bit of overhead because
PHP is forced to first create an array and then dispose of it. That's what is happening in this
example:
function time_parts($time) { return explode(':', $time); } list($hour, $minute, $second) = time_parts('12:34:56');
You pass in a time string as you might see on a digital clock and call explode( ) to break it
apart as array elements. When time_parts( ) returns, use list( ) to take each element
and store it in a scalar variable. Although this is a little inefficient, the other possible solutions
are worse because they can lead to confusing code.
One alternative is to pass the values in by reference. However, this is somewhat clumsy and
can be nonintuitive since it doesn't always make logical sense to pass the necessary variables
into the function. For instance:
function time_parts($time, &$hour, &$minute, &$second) { list($hour, $minute, $second) = explode(':', $time); } time_parts('12:34:56', $hour, $minute, $second);
Without knowledge of the function prototype, there's no way to look at this and know $hour,
$minute, and $second are, in essence, the return values of time_parts( ).

You can also use global variables, but this clutters the global namespace and also makes it
difficult to easily see which variables are being silently modified in the function. For example:
function time_parts($time) { global $hour, $minute, $second; list($hour, $minute, $second) = explode(':', $time); } time_parts('12:34:56');
Again, here it's clear because the function is directly above the call, but if the function is in a
different file or written by another person, it'd be more mysterious and thus open to creating a
subtle bug.
Our advice is that if you modify a value inside a function, return that value and assign it to a
variable unless you have a very good reason, such as significant performance issues. It's
cleaner and easier to understand and maintain.
6.8.4 See Also
Recipe 6.4 on passing values by reference and Recipe 6.12 for information on variable
scoping.
Recipe 6.9 Skipping Selected Return Values
6.9.1 Problem
A function returns multiple values, but you only care about some of them.
6.9.2 Solution
Omit variables inside of list( ):
// Only care about minutes function time_parts($time) { return explode(':', $time); } list(, $minute,) = time_parts('12:34:56');
6.9.3 Discussion
Even though it looks like there's a mistake in the code, the code in the Solution is valid PHP.
This is most frequently seen when a programmer is iterating through an array using each( ),
but cares only about the array values:
while (list(,$value) = each($array)) { process($value); }

However, this is more clearly written using a foreach:
foreach ($array as $value) { process($value); }
To reduce confusion, we don't often use this feature, but if a function returns many values,
and you only want one or two of them, this technique can come in handy. One example of this
case is if you read in fields using fgetcsv( ), which returns an array holding the fields from
the line. In that case, you can use the following:
while ($fields = fgetcsv($fh, 4096)) { print $fields[2] . "\n"; // the third field }
If it's an internally written function and not built-in, you could also make the returning array
have string keys, because it's hard to remember, for example, that array element 2 is
associated with 'rank':
while ($fields = read_fields($filename)) { $rank = $fields['rank']; // the third field is now called rank print "$rank\n"; }
However, here's the most efficient method:
while (list(,,$rank,,) = fgetcsv($fh, 4096)) { print "$rank\n"; // directly assign $rank }
Be careful you don't miscount the amount of commas; you'll end up with a bug.
6.9.4 See Also
Recipe 1.10 for more on reading files using fgetcsv( ).
Recipe 6.10 Returning Failure
6.10.1 Problem
You want to indicate failure from a function.
6.10.2 Solution
Return false:
function lookup($name) { if (empty($name)) { return false; } ... }

if (false !== lookup($name)) { /* act upon lookup */ }
6.10.3 Discussion
I n PHP, non-true values aren't standardized and can easily cause errors. As a result, it's best
if all your functions return the defined false keyword because this works best when checking
a logical value.
Other possibilities are '' or 0. However, while all three evaluate to non-true inside an if,
there's actually a difference among them. Also, sometimes a return value of 0 is a meaningful
result, but you still want to be able to also return failure.
For example, strpos( ) returns the location of the first substring within a string. If the
substring isn't found, strpos( ) returns false. If it is found, it returns an integer with the
position. Therefore, to find a substring position, you might write:
if (strpos($string, $substring)) { /* found it! */ }
However, if $substring is found at the exact start of $string, the value returned is 0.
Unfortunately, inside the if, this evaluates to false, so the conditional is not executed.
Here's the correct way to handle the return value of strpos( ):
if (false !== strpos($string, $substring)) { /* found it! */ }
Also, false is always guaranteed to be false — in the current version of PHP and forever
more. Other values may not guarantee this. For example, in PHP 3, empty('0') was true,
but it changed to false in PHP 4.
6.10.4 See Also
The introduction to Chapter 5 for more on the truth values of variables; documentation on
strpos( ) at http://www.php.net/strpos and empty( ) at http://www.php.net/empty;
information on migrating from PHP 3 to PHP 4 at http://www.php.net/migration4.
Recipe 6.11 Calling Variable Functions
6.11.1 Problem
You want to call different functions depending on a variable's value.
6.11.2 Solution
Use variable variables:
function eat_fruit($fruit) { print "chewing $fruit."; }

$function = 'eat_fruit'; $fruit = 'kiwi'; $function($fruit); // calls eat_fruit( )
6.11.3 Discussion
If you have multiple possibilities to call, use an associative array of function names:
$dispatch = array( 'add' => 'do_add', 'commit' => 'do_commit', 'checkout' => 'do_checkout', 'update' => 'do_update' ); $cmd = (isset($_REQUEST['command']) ? $_REQUEST['command'] : ''); if (array_key_exists($cmd, $dispatch)) { $function = $dispatch[$cmd]; $function(); // call function } else { error_log("Unknown command $cmd"); }
This code takes the command name from a request and executes that function. Note the
check to see that the command is in a list of acceptable command. This prevents your code
from calling whatever function was passed in from a request, such as phpinfo( ) . This
makes your code more secure and allows you to easily log errors.
Another advantage is that you can map multiple commands to the same function, so you can
have a long and a short name:
$dispatch = array( 'add' => 'do_add', 'commit' => 'do_commit', 'ci' => 'do_commit', 'checkout' => 'do_checkout', 'co' => 'do_checkout', 'update' => 'do_update', 'up' => 'do_update' );
6.11.4 See Also
Recipe 5.5 for more on variable variables.
Recipe 6.12 Accessing a Global Variable Inside a Function
6.12.1 Problem
You need to access a global variable inside a function.
6.12.2 Solution

Bring the global variable into local scope with the global keyword:
function eat_fruit($fruit) { global $chew_count; for ($i = $chew_count; $i > 0; $i--) { ... } }
Or reference it directly in $GLOBALS:
function eat_fruit($fruit) { for ($i = $GLOBALS['chew_count']; $i > 0; $i--) { ... } }
6.12.3 Discussion
If you use a number of global variables inside a function, the global keyword may make the
syntax of the function easier to understand, especially if the global variables are interpolated
in strings.
You can use the global keyword to bring multiple global variables into local scope by
specifying the variables as a comma-separated list:
global $age,$gender,shoe_size;
You can also specify the names of global variables using variable variables:
$which_var = 'age'; global $$which_var; // refers to the global variable $age
However, if you call unset( ) on a variable brought into local scope using the global
keyword, the variable is unset only within the function. To unset the variable in the global
scope, you must call unset( ) on the element of the $GLOBALS array:
$food = 'pizza'; $drink = 'beer'; function party( ) { global $food, $drink; unset($food); // eat pizza unset($GLOBALS['drink']); // drink beer } print "$food: $drink\n"; party( ); print "$food: $drink\n"; pizza: beer

pizza:
You can see that $food stayed the same, while $drink was unset. Declaring a variable
global inside a function is similar to assigning a reference of the global variable to the local
one:
$food = &GLOBALS['food'];
6.12.4 See Also
Documentation on variable scope at http://www.php.net/variables.scope and variable
references at http://www.php.net/language.references.
Recipe 6.13 Creating Dynamic Functions
6.13.1 Problem
You want to create and define a function as your program is running.
6.13.2 Solution
Use create_function( ):
$add = create_function('$i,$j', 'return $i+$j;'); $add(1, 1); // returns 2
6.13.3 Discussion
The first parameter to create_function( ) is a string that contains the arguments for the
function, and the second is the function body. Using create_function( ) is exceptionally
slow, so if you can predefine the function, it's best to do so.
The most frequently used case of create_function( ) in action is to create custom sorting
functions for usort( ) or array_walk( ):
// sort files in reverse natural order usort($files, create_function('$a, $b', 'return strnatcmp($b, $a);'));
6.13.4 See Also
Recipe 4.18 for information on usort( ); documentation on create_function( ) at
http://www.php.net/create-function and on usort( ) at http://www.php.net/usort.

Chapter 7. Classes and Objects
Section 7.1. Introduction
Recipe 7.2. Instantiating Objects
Recipe 7.3. Defining Object Constructors
Recipe 7.4. Destroying an Object
Recipe 7.5. Cloning Objects
Recipe 7.6. Assigning Object References
Recipe 7.7. Calling Methods on an Object Returned by Another Method
Recipe 7.8. Accessing Overridden Methods
Recipe 7.9. Using Property Overloading
Recipe 7.10. Using Method Polymorphism
Recipe 7.11. Finding the Methods and Properties of an Object
Recipe 7.12. Adding Properties to a Base Object
Recipe 7.13. Creating a Class Dynamically
Recipe 7.14. Instantiating an Object Dynamically

7.1 Introduction
At first, PHP wasn't an object-oriented (OO) language. As it evolved, more and more object-
oriented features appeared. First, you could define classes, but there were no constructors.
Then, constructors appeared, but there were no destructors. Slowly but surely, as more
people began to push the limits of PHP's syntax, additional features were added to satisfy the
demand.
However, if you're the type of person who wishes PHP to be a true OO language, you'll
probably be disappointed. At its heart, PHP is a procedural language. It isn't Java. But, if
you're the type of person who wants to use some OO features in your code, PHP is probably
right for you.
A class is a package containing two things: data and methods to access and modify that data.
The data portion consists of variables; they're known as properties. The other part of a class is
a set of functions that can alter a class' properties; they're called methods.
When we define a class, we don't define an object that can be accessed and manipulated.
Instead, we define a template for an object. From this blueprint, we create malleable objects
through a process known as instantiation . A program can have multiple objects of the same
class, just as a person can have more than one book or many pieces of fruit.
Classes also live in a defined hierarchy. At the top of the chain, there is a generic class. In
PHP, this class is named stdClass, for "standard class." Each class down the line is more
specialized than its parent. For example, a parent class could be a building. Buildings can be
further divided into residential and commercial. Residential buildings can be further subdivided
into houses and apartment buildings, and so forth.
Both houses and apartment buildings have the same set of properties as all residential
buildings, just as residential and commercial buildings share some things in common. When
classes are used to express these parent-child relationships, the child class inherits the
properties and methods defined in the parent class. This allows you to reuse the code from the
parent class and requires you to write code only to adapt the new child to its specialized
circumstances. This is called inheritance and is one of the major advantages of classes over
functions. The process of defining a child class from a parent is known as subclassing or
extending.
Objects play another role in PHP outside their traditional OO position. Since PHP can't use
more than one namespace, the ability for a class to package multiple properties into a single
object is extremely helpful. It allows clearly demarcated separate areas for variables.
Classes in PHP are easy to define and create:
class guest_book { var $comments; var $last_visitor;

function update($comment, $visitor) { ... } }
The class keyword defines an class, just as function defines a function. Properties are
declared using the var keyword. Method declaration is identical to how functions are defined.
The new keyword instantiates an object:
$gb = new guest_book;
Object instantiation is covered in more detail in Recipe 7.2.
Inside a class, you can optionally declare properties using var. There's no requirement to do
so, but it is a useful way to reveal all the class' variables. Since PHP doesn't force you to
predeclare all your variables, it's possible to create one inside a class without PHP throwing an
error or otherwise letting you know. This can cause the list of variables at the top of a class
definition to be misleading, because it's not the same as the list of variables actually in the
class.
Besides declaring a property, you can also assign it a value:
var $last_visitor = 'Donnan';
You can assign constant values only using this construct:
var $last_visitor = 'Donnan'; // okay var $last_visitor = 9; // okay var $last_visitor = array('Jesse'); // okay var $last_visitor = pick_visitor( ); // bad var $last_visitor = 'Chris' . '9'; // bad
If you try to assign something else, PHP dies with a parse error.
To assign a non-constant value to a variable, do it from a method inside the class.
var $last_visitor; function update($comment, $visitor) { if (!empty($comment)) { array_unshift($this->comments, $comment); $this->last_visitor = $visitor; } }
If the visitor left a comment, you add it to the top of the array of comments and set that
person as the latest visitor to the guest book. The variable $this is a special variable that

refers to the current object. So, to access the $size property of an object from inside that
object, refer to $this->size.
To assign nonconstant values to variables upon instantiation, assign them in the class
constructor. The class constructor is a method automatically called when a new object is
created, and it has the same name as your class:
class guest_book { var $comments; var $last_visitor; function guest_book($user) { $dbh = mysql_connect('localhost', 'username', 'password'); $db = mysql_select_db('sites'); $user = mysql_real_escape_string($user); $sql = "SELECT comments, last_visitor FROM guest_books WHERE user='$user'"; $r = mysql_query($sql); if ($obj = mysql_fetch_object($r)) { $this->comments = $obj->comments; $this->last_visitor = $obj->last_visitor; } } } $gb = new guest_book('stewart');
Constructors are covered in Recipe 7.3. Note that mysql_real_escape_string() is new as
of PHP 4.3; for earlier versions, use mysql_escape_string().
Be careful not to mistakenly type $this->$size. This is legal, but it's not the same as
$this->size. Instead, it accesses the property of the object whose name is the value stored
in the $size variable. More often then not, $size is undefined, so $this->$size appears
empty. For more on variable property names, see Recipe 6.6.
Besides using -> to access a method or member variable, you can also use ::. This syntax
can access static methods in a class. These methods are identical for every instance of an
class, because they can't rely on instance-specific data. For example:
class convert { // convert from Celsius to Fahrenheit function c2f($degrees) { return (1.8 * $degrees) + 32; } } $f = convert::c2f(100); // 212
To implement inheritance by extending an existing class, use the extends keyword:

class xhtml extends xml { }
Child classes inherit parent methods and can optionally choose to implement their own specific
versions:
class DB { var $result; function getResult() { return $this->result; } function query($sql) { error_log("query() must be overridden by a database-specific child"); return false; } } class MySQL extends DB { function query($sql) { $this->result = mysql_query($sql); } }
The MySQL class above inherits the getResult( ) method unchanged from the parent DB
class, but has its own MySQL-specific query( ) method.
Preface the method name with parent :: to explicitly call a parent method:
function escape($sql) { $safe_sql = mysql_real_escape_string($sql); // escape special characters $safe_sql = parent::escape($safe_sql); // parent method adds '' around $sql return $safe_sql; }
Recipe 7.8 covers accessing overridden methods.
The underlying engine powering PHP is named Zend. PHP 4 uses Zend Engine 1; PHP 5 will
use an updated version — Zend Engine 2 (ZE2). ZE2 has an entirely new object model that
allows PHP to support many new object-oriented features: constructors and destructors,
private methods, exception handling, cloning, and nested classes. In this chapter, we mention
when there's a difference in syntax or features between PHP 4 and what's supported by ZE2,
so you can plan for the future.
Recipe 7.2 Instantiating Objects
7.2.1 Problem

You want to create a new instance of an object.
7.2.2 Solution
Define the class, then use new to create an instance of the class:
class user { function load_info($username) { // load profile from database } } $user = new user; $user->load_info($_REQUEST['username']);
7.2.3 Discussion
You can instantiate multiple instances of the same object:
$adam = new user; $adam->load_info('adam'); $dave = new user; $dave->load_info('adam');
These are two independent objects that happen to have identical information. They're like
identical twins; they may start off the same, but they go on to live separate lives.
7.2.4 See Also
Recipe 7.5 for more on copying objects; Recipe 7.6 for more on copying objects by reference;
documentation on classes and objects at http://www.php.net/oop.
Recipe 7.3 Defining Object Constructors
7.3.1 Problem
You want to define a method that is called when an object is instantiated. For example, you
want to automatically load information from a database into an object when it's created.
7.3.2 Solution
Define a method with the same name as the class:
class user { function user($username, $password) { ... } }
7.3.3 Discussion

If a function has the same name as its class, it acts as a constructor:
class user { var $username; function user($username, $password) { if ($this->validate_user($username, $password)) { $this->username = $username; } } } $user = new user('Grif', 'Mistoffelees'); // using built-in constructor
PHP hasn't always had support for constructors. So people made pseudo-constructors by
adopting a naming convention and calling that function after creation:
class user { ... init($username, $password) { ... } } $user = new user(); $user->init($username, $password);
If you see this, it's usually a result of legacy code.
However, having a standard name for all constructors makes it easier to call your parent's
constructor (because you don't need to know the name of the parent class) and also doesn't
require you to modify the constructor if you rename your class name. With Zend Engine 2, the
naming conventions of constructors have been modified, and the new constructor name is _
_construct( ). However, for backwards compatibility, if this method isn't found, PHP tries
to call a constructor with the same name as the class.
7.3.4 See Also
Recipe 7.8 for more on calling parent constructors; documentation on object constructors at
http://www.php.net/oop.constructor.
Recipe 7.4 Destroying an Object
7.4.1 Problem
You want to eliminate an object.
7.4.2 Solution
Objects are automatically destroyed when a script terminates. To force the destruction of an
object, use unset( ):

$car = new car; // buy new car ... unset($car); // car wreck
7.4.3 Discussion
It's not normally necessary to manually clean up objects, but if you have a large loop, unset(
) can help keep memory usage from spiraling out of control.
PHP 4 doesn't have destructors, however Zend Engine 2 supports them with the _
_destruct( ) method.
7.4.4 See Also
Documentation on unset( ) at http://www.php.net/unset.
Recipe 7.5 Cloning Objects
7.5.1 Problem
You want to make a copy of an existing object. For instance, you have an object containing a
message posting and you want to copy it as the basis for a reply message.
7.5.2 Solution
Use = to assign the object to a new variable:
$rabbit = new rabbit; $rabbit->eat(); $rabbit->hop(); $baby = $rabbit;
7.5.3 Discussion
In PHP, all that's needed to make a copy of an object is to assign it to a new variable. From
then on, each instance of the object has an independent life and modifying one has no effect
upon the other:
class person { var $name; function person ($name) { $this->name = $name; } } $adam = new person('adam'); print $adam->name; // adam $dave = $adam; $dave->name = 'dave'; print $dave->name; // dave

print $adam->name; // still adam
Zend Engine 2 allows explicit object cloning via a _ _clone( ) method that is called
whenever an object is copied. This provides more finely-grained control over exactly which
properties are duplicated.
7.5.4 See Also
Recipe 7.6 for more on assigning objects by reference.
Recipe 7.6 Assigning Object References
7.6.1 Problem
You want to link two objects, so when you update one, you also update the other.
7.6.2 Solution
Use =& to assign one object to another by reference:
$adam = new user; $dave =& $adam;
7.6.3 Discussion
When you do an object assignment using =, you create a new copy of an object. So, modifying
one doesn't alter the other. But when you use =&, the two objects point at each other, so any
changes made in the first are also made in the second:
$adam = new user; $adam->load_info('adam'); $dave =& $adam; $dave->load_info('dave');
The values in $adam are equal to those of $dave.
7.6.4 See Also
Recipe 7.5 for more on copying object; documentation on references at
http://www.php.net/references.
Recipe 7.7 Calling Methods on an Object Returned by Another Method
7.7.1 Problem
You need to call a method on an object returned by another method.
7.7.2 Solution

Assign the object to a temporary variable, and then call the method of that temporary
variable:
$orange = $fruit->get('citrus'); $orange->peel( );
7.7.3 Discussion
This is necessary because a parse error results from:
$fruit->get('citrus')->peel( );
Zend Engine 2 supports direct dereferencing of objects returned from a method so this
workaround is no longer necessary.
Recipe 7.8 Accessing Overridden Methods
7.8.1 Problem
You want to access a method in the parent class that's been overridden in the child.
7.8.2 Solution
Prefix parent:: to the method name:
class shape { function draw( ) { // write to screen } } class circle extends shape { function draw($origin, $radius) { // validate data if ($radius > 0) { parent::draw( ); return true; } return false; } }
7.8.3 Discussion
When you override a parent method by defining one in the child, the parent method isn't
called unless you explicitly reference it.
In the Solution, we override the draw( ) method in the child class, circle, because you
want to accept circle specific parameters and validate the data. However, in this case, we still
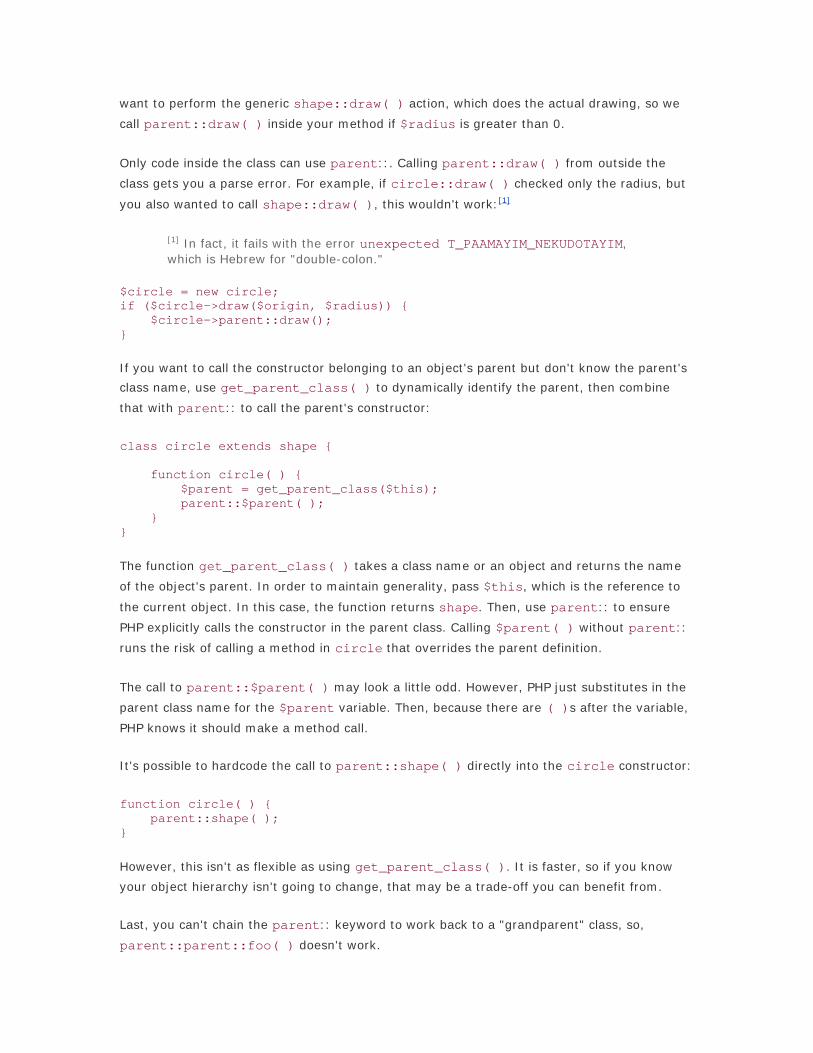
want to perform the generic shape::draw( ) action, which does the actual drawing, so we
call parent::draw( ) inside your method if $radius is greater than 0.
Only code inside the class can use parent::. Calling parent::draw( ) from outside the
class gets you a parse error. For example, if circle::draw( ) checked only the radius, but
you also wanted to call shape::draw( ), this wouldn't work:[1]
[1] In fact, it fails with the error unexpected T_PAAMAYIM_NEKUDOTAYIM, which is Hebrew for "double-colon."
$circle = new circle; if ($circle->draw($origin, $radius)) { $circle->parent::draw(); }
If you want to call the constructor belonging to an object's parent but don't know the parent's
class name, use get_parent_class( ) to dynamically identify the parent, then combine
that with parent:: to call the parent's constructor:
class circle extends shape { function circle( ) { $parent = get_parent_class($this); parent::$parent( ); } }
The function get_parent_class( ) takes a class name or an object and returns the name
of the object's parent. In order to maintain generality, pass $this, which is the reference to
the current object. In this case, the function returns shape. Then, use parent:: to ensure
PHP explicitly calls the constructor in the parent class. Calling $parent( ) without parent::
runs the risk of calling a method in circle that overrides the parent definition.
The call to parent::$parent( ) may look a little odd. However, PHP just substitutes in the
parent class name for the $parent variable. Then, because there are ( )s after the variable,
PHP knows it should make a method call.
It's possible to hardcode the call to parent::shape( ) directly into the circle constructor:
function circle( ) { parent::shape( ); }
However, this isn't as flexible as using get_parent_class( ). It is faster, so if you know
your object hierarchy isn't going to change, that may be a trade-off you can benefit from.
Last, you can't chain the parent:: keyword to work back to a "grandparent" class, so,
parent::parent::foo( ) doesn't work.

7.8.4 See Also
Recipe 7.3 for more on object constructors; documentation on class parents at
http://www.php.net/keyword.parent and on get_parent_class( ) at
http://www.php.net/get-parent-class.
Recipe 7.9 Using Property Overloading
7.9.1 Problem
You want handler functions to execute whenever you read and write object properties. This
lets you write generalized code to handle property access in your class.
7.9.2 Solution
Use the experimental overload extension and write _ _get( ) and _ _set( ) methods to
intercept property requests.
7.9.3 Discussion
Property overloading allows you to seamlessly obscure from the user the actual location of
your object's properties and the data structure you use to store them.
For example, the pc_user class shown in Example 7-1 stores variables in an array, $data.
Example 7-1. pc_user class
require_once 'DB.php'; class pc_user { var $data = array(); function pc_user($user) { /* connect to database and load information on * the user named $user into $this->data */ $dsn = 'mysql://user:password@localhost/test'; $dbh = DB::connect($dsn); if (DB::isError($dbh)) { die ($dbh->getMessage()); } $user = $dbh->quote($user); $sql = "SELECT name,email,age,gender FROM users WHERE user LIKE '$user'"; if ($data = $dbh->getAssoc($sql)) { foreach($data as $key => $value) { $this->data[$key] = $value; } } } function __get($property_name, &$property_value) {

if (isset($this->data[$property_name])) { $property_value = $this->data[$property_name]; return true; } return false; } function __set($property_name, $property_value) { $this->data[$property_name] = $property_value; return true; } }
Here's how to use the pc_user class:
overload('pc_user'); $user = new pc_user('johnwood'); $name = $user->name; // reads $user->data['name'] $user->email = '[email protected]'; // sets $user->data['email']
The class constructor connects to the users table in the database and retrieves information
about the user named $user. When you set data, _ _set( ) rewrites the element inside of
$data. Likewise, use _ _get( ) to trap the call and return the correct array element.
Using an array as the alternate variable storage source doesn't provide many benefits over a
nonoverloaded object, but this feature isn't restricted to simple arrays. For instance, you can
make $this->email return the get_name( ) method of an email object. You can also avoid
pulling all the user information from the database at once and request it on demand. Another
alternative is to use a more persistent storage mechanism, such as files, shared memory, or a
database to hold data.
7.9.4 See Also
Recipe 6.8 for information on storing objects in external sources; documentation on the
overload extension at http://www.php.net/overload.
Recipe 7.10 Using Method Polymorphism
7.10.1 Problem
You want to execute different code depending on the number and type of arguments passed to
a method.
7.10.2 Solution
PHP doesn't support method polymorphism as a built-in feature. However, you can emulate it
using various type-checking functions. The following combine( ) function uses
is_numeric(), is_string(), is_array(), and is_bool():

// combine() adds numbers, concatenates strings, merges arrays, // and ANDs bitwise and boolean arguments function combine($a, $b) { if (is_numeric($a) && is_numeric($b)) { return $a + $b; } if (is_string($a) && is_string($b)) { return "$a$b"; } if (is_array($a) && is_array($b)) { return array_merge($a, $b); } if (is_bool($a) && is_bool($b)) { return $a & $b; } return false; }
7.10.3 Discussion
Because PHP doesn't allow you to declare a variable's type in a method prototype, it can't
conditionally execute a different method based on the method's signature, as can Java and
C++. You can, instead, make one function and use a switch statement to manually recreate
this feature.
For example, PHP lets you edit images using GD. It can be handy in an image class to be able
to pass in either the location of the image (remote or local) or the handle PHP has assigned to
an existing image stream. Example 7-2 shows a pc_Image class that does just that.
Example 7-2. pc_Image class
class pc_Image { var $handle; function ImageCreate($image) { if (is_string($image)) { // simple file type guessing // grab file suffix $info = pathinfo($image); $extension = strtolower($info['extension']); switch ($extension) { case 'jpg': case 'jpeg': $this->handle = ImageCreateFromJPEG($image); break; case 'png': $this->handle = ImageCreateFromPNG($image); break; default: die('Images must be JPEGs or PNGs.');

} } elseif (is_resource($image)) { $this->handle = $image; } else { die('Variables must be strings or resources.'); } } }
In this case, any string passed in is treated as the location of a file, so we use pathinfo() to
grab the file extension. Once we know the extension, we try to guess which
ImageCreateFrom( ) function accurately opens the image and create a handle.
If it's not a string, we're dealing directly with a GD stream, which is of type resource. Since
there's no conversion necessary, we assign the stream directly to $handle. Of course, if
you're using this class in a production environment, you'd be more robust in your error
handling.
Method polymorphism also encompasses methods with differing numbers of arguments. The
code to find the number of arguments inside a method is identical to how you process variable
argument functions using func_num_args( ). This is discussed in Recipe 6.6.
7.10.4 See Also
Recipe 6.6 for variable argument functions; documentation on is_string( ) at
http://www.php.net/is-string, is_resource( ) at http://www.php.net/is-resource, and
pathinfo( ) at http://www.php.net/pathinfo.
Recipe 7.11 Finding the Methods and Properties of an Object
7.11.1 Problem
You want to inspect an object to see what methods and properties it has, which lets you write
code that works on any generic object, regardless of type.
7.11.2 Solution
Use get_class_methods( ) and get_class_vars( ) to probe an object for information:
// learn about cars $car_methods = get_class_methods('car'); $car_vars = get_class_vars('car'); // act on our knowledge if (in_array('speed_away', $car_methods)) { $getaway_van = new car; $getaway_van->speed_away( ); }
7.11.3 Discussion
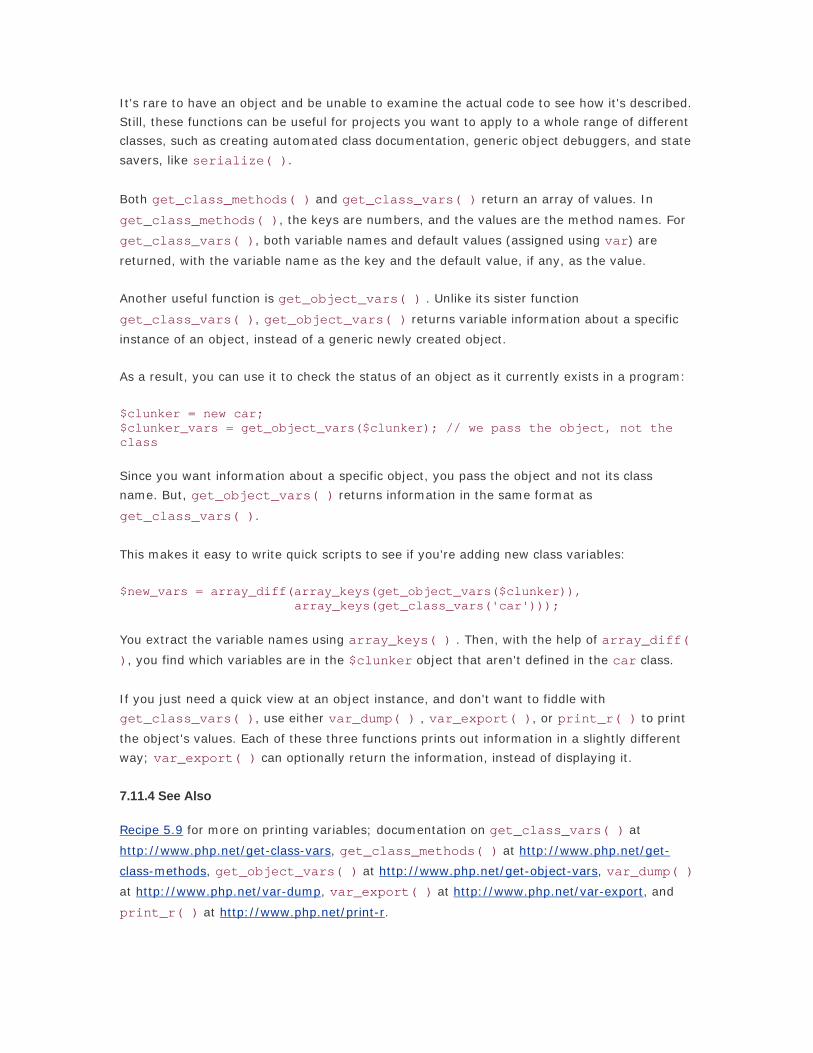
It's rare to have an object and be unable to examine the actual code to see how it's described.
Still, these functions can be useful for projects you want to apply to a whole range of different
classes, such as creating automated class documentation, generic object debuggers, and state
savers, like serialize( ).
Both get_class_methods( ) and get_class_vars( ) return an array of values. In
get_class_methods( ), the keys are numbers, and the values are the method names. For
get_class_vars( ), both variable names and default values (assigned using var) are
returned, with the variable name as the key and the default value, if any, as the value.
Another useful function is get_object_vars( ) . Unlike its sister function
get_class_vars( ), get_object_vars( ) returns variable information about a specific
instance of an object, instead of a generic newly created object.
As a result, you can use it to check the status of an object as it currently exists in a program:
$clunker = new car; $clunker_vars = get_object_vars($clunker); // we pass the object, not the class
Since you want information about a specific object, you pass the object and not its class
name. But, get_object_vars( ) returns information in the same format as
get_class_vars( ).
This makes it easy to write quick scripts to see if you're adding new class variables:
$new_vars = array_diff(array_keys(get_object_vars($clunker)), array_keys(get_class_vars('car')));
You extract the variable names using array_keys( ) . Then, with the help of array_diff(
), you find which variables are in the $clunker object that aren't defined in the car class.
If you just need a quick view at an object instance, and don't want to fiddle with
get_class_vars( ), use either var_dump( ) , var_export( ), or print_r( ) to print
the object's values. Each of these three functions prints out information in a slightly different
way; var_export( ) can optionally return the information, instead of displaying it.
7.11.4 See Also
Recipe 5.9 for more on printing variables; documentation on get_class_vars( ) at
http://www.php.net/get-class-vars, get_class_methods( ) at http://www.php.net/get-
class-methods, get_object_vars( ) at http://www.php.net/get-object-vars, var_dump( )
at http://www.php.net/var-dump, var_export( ) at http://www.php.net/var-export, and
print_r( ) at http://www.php.net/print-r.

Recipe 7.12 Adding Properties to a Base Object
7.12.1 Problem
You want to create an object and add properties to it, but you don't want to formally define it
as a specific class. This is useful when you have a function that requires an object with certain
properties, such as what's returned from mysql_fetch_object( ) or imap_header( ).
7.12.2 Solution
Use the built-in base class, stdClass:
$pickle = new stdClass; $pickle->type = 'fullsour';
7.12.3 Discussion
Just as array( ) returns an empty array, creating an object of the type stdClass provides
you with an object without properties or methods.
Like objects belonging to other classes, you can create new object properties, assign them
values, and check those properties:
$guss = new stdClass; $guss->location = 'Essex'; print "$guss->location\n"; $guss->location = 'Orchard'; print "$guss->location\n"; Essex Orchard
Methods, however, can't be defined after an object is instantiated.
It is useful to create objects of stdClass when you have a function that takes a generic
object, such as one returned from a database fetching function, but you don't want to actually
make a database request. For example:
function pc_format_address($obj) { return "$obj->name <$obj->email>"; } $sql = "SELECT name, email FROM users WHERE id=$id"; $dbh = mysql_query($sql); $obj = mysql_fetch_object($dbh); print pc_format_address($obj); David Sklar <[email protected]>

The pc_print_address( ) function takes a name and email address and converts it to a
format as you might see in the To and From fields in an email program. Here's how to call this
function without calling mysql_fetch_object( ):
$obj = new stdClass; $obj->name = 'Adam Trachtenberg'; $obj->email = '[email protected]'; print pc_format_address($obj); Adam Trachtenberg <[email protected]>
Recipe 7.13 Creating a Class Dynamically
7.13.1 Problem
You want to create a class, but you don't know everything about it until your code is executed.
7.13.2 Solution
Use eval( ) with interpolated variables:
eval("class van extends $parent_class { function van() { \$this->$parent_class(); } };"); $mystery_machine = new van;
7.13.3 Discussion
While it's okay in PHP to use variable names to call functions or create objects, it's not okay to
define functions and classes in a similar manner:
$van( ); // okay $van = new $parent_class // okay function $van( ) {}; // bad class $parent_class {}; // bad
Trying to do either of the last two examples results in a parser error because PHP expects a
string, and you supplied a variable.
So, if you want to make a class named $van and you don't know beforehand what's going to
be stored in $van, you need to employ eval( ) to do your dirty work:
eval("class $van {};");
There is a performance hit whenever you call eval( ), so high traffic sites should try to
restructure their code to avoid this technique when possible. Also, if you're defining your class
based on input from users, be sure to escape any potentially dangerous characters.

7.13.4 See Also
Recipe 7.14 to instantiate an object dynamically; documentation on eval( ) at
http://www.php.net/eval.
Recipe 7.14 Instantiating an Object Dynamically
7.14.1 Problem
You want to instantiate an object, but you don't know the name of the class until your code is
executed. For example, you want to localize your site by creating an object belonging to a
specific language. However, until the page is requested, you don't know which language to
select.
7.14.2 Solution
Use a variable for your class name:
$language = $_REQUEST['language']; $valid_langs = array('en_US' => 'US English', 'en_GB' => 'British English', 'es_US' => 'US Spanish', 'fr_CA' => 'Canadian French'); if (isset($valid_langs[$language]) && class_exists($language)) { $lang = new $language; }
7.14.3 Discussion
Sometimes you may not know the class name you want to instantiate at runtime, but you
know part of it. For instance, to provide your class hierarchy a pseudo-namespace, you may
prefix a leading series of characters in front of all class names; this is why we often use pc_ to
represent PHP Cookbook or PEAR uses Net_ before all Networking classes.
However, while this is legal PHP:
$class_name = 'Net_Ping'; $class = new $class_name; // new Net_Ping
This is not:
$partial_class_name = 'Ping'; $class = new "Net_$partial_class_name"; // new Net_Ping
This, however, is okay:
$partial_class_name = 'Ping'; $class_prefix = 'Net_';

$class_name = "$class_prefix$partial_class_name"; $class = new $class_name; // new Net_Ping
So, you can't instantiate an object when its class name is defined using variable concatenation
in the same step. However, because you can use simple variable names, the solution is to
preconcatenate the class name.
7.14.4 See Also
Recipe 6.5 for more on variable variables; Recipe 7.12 for more on defining a call dynamically;
documentation on class_exists( ) at http://www.php.net/class-exists.

Chapter 8. Web Basics
Section 8.1. Introduction
Recipe 8.2. Setting Cookies
Recipe 8.3. Reading Cookie Values
Recipe 8.4. Deleting Cookies
Recipe 8.5. Redirecting to a Different Location
Recipe 8.6. Using Session Tracking
Recipe 8.7. Storing Sessions in a Database
Recipe 8.8. Detecting Different Browsers
Recipe 8.9. Building a GET Query String
Recipe 8.10. Using HTTP Basic Authentication
Recipe 8.11. Using Cookie Authentication
Recipe 8.12. Flushing Output to the Browser
Recipe 8.13. Buffering Output to the Browser
Recipe 8.14. Compressing Web Output with gzip
Recipe 8.15. Hiding Error Messages from Users
Recipe 8.16. Tuning Error Handling
Recipe 8.17. Using a Custom Error Handler
Recipe 8.18. Logging Errors
Recipe 8.19. Eliminating "headers already sent" Errors
Recipe 8.20. Logging Debugging Information
Recipe 8.21. Reading Environment Variables
Recipe 8.22. Setting Environment Variables

Recipe 8.23. Reading Configuration Variables
Recipe 8.24. Setting Configuration Variables
Recipe 8.25. Communicating Within Apache
Recipe 8.26. Profiling Code
Recipe 8.27. Program: Website Account (De)activator
Recipe 8.28. Program: Abusive User Checker

8.1 Introduction
Web programming is probably why you're reading this book. It's why the first version of PHP
was written and what continues to make it so popular today. With PHP, it's easy to write
dynamic web programs that do almost anything. Other chapters cover various PHP
capabilities, like graphics, regular expressions, database access, and file I/O. These
capabilities are all part of web programming, but this chapter focuses on some web-specific
concepts and organizational topics that will make your web programming stronger.
Recipe 8.2, Recipe 8.3, and Recipe 8.4 show how to set, read, and delete cookies. A cookie is
a small text string that the server instructs the browser to send along with requests the
browser makes. Normally, HTTP requests aren't "stateful"; each request can't be connected to
a previous one. A cookie, however, can link different requests by the same user. This makes it
easier to build features such as shopping carts or to keep track of a user's search history.
Recipe 8.5 shows how to redirect users to a different web page than the one they requested.
Recipe 8.6 explains the session module, which lets you easily associate persistent data with a
user as he moves through your site. Recipe 8.7 demonstrates how to store session information
in a database, which increases the scalability and flexibility of your web site. Discovering the
features of a user's browser is shown in Recipe 8.8. Recipe 8.9 shows the details of
constructing a URL that includes a GET query string, including proper encoding of special
characters and handling of HTML entities.
The next two recipes demonstrate how to use authentication, which lets you protect your web
pages with passwords. PHP's special features for dealing with HTTP Basic authentication are
explained in Recipe 8.10. Sometimes it's a better idea to roll your own authentication method
using cookies, as shown in Recipe 8.11.
The three following recipes deal with output control. Recipe 8.12 shows how to force output to
be sent to the browser. Recipe 8.13 explains the output buffering functions. Output buffers
enable you to capture output that would otherwise be printed or delay output until an entire
page is processed. Automatic compression of output is shown in Recipe 8.14.
Recipe 8.15 to Recipe 8.20 cover error handling topics, including controlling where errors are
printed, writing custom functions to handle error processing, and adding debugging assistance
information to your programs. Recipe 8.19 includes strategies for avoiding the common
"headers already sent" error message, such as using the output buffering discussed in Recipe
8.13.
The next four recipes show how to interact with external variables: environment variables and
PHP configuration settings. Recipe 8.21 and Recipe 8.22 discuss environment variables, while
Recipe 8.23 and Recipe 8.24 discuss reading and changing PHP configuration settings. If
Apache is your web server, you can use the techniques in Recipe 8.25 to communicate with
other Apache modules from within your PHP programs.

Recipe 8.26 demonstrates a few methods for profiling and benchmarking your code. By finding
where your programs spend most of their time, you can focus your development efforts on
improving the code that has the most noticeable speed-up effect to your users.
This chapter also includes two programs that assist in web site maintenance. Program Recipe
8.27 validates user accounts by sending an email message with a customized link to each new
user. If the user doesn't visit the link within a week of receiving the message, the account is
deleted. Program Recipe 8.28 monitors requests in real time on a per-user basis and blocks
requests from users that flood your site with traffic.
Recipe 8.2 Setting Cookies
8.2.1 Problem
You want to set a cookie.
8.2.2 Solution
Use setcookie( ):
setcookie('flavor','chocolate chip');
8.2.3 Discussion
Cookies are sent with the HTTP headers, so setcookie( ) must be called before any output
is generated.
You can pass additional arguments to setcookie( ) to control cookie behavior. The third
argument to setcookie( ) is an expiration time, expressed as an epoch timestamp. For
example, this cookie expires at noon GMT on December 3, 2004:
setcookie('flavor','chocolate chip',1102075200);
If the third argument to setcookie( ) is missing (or empty), the cookie expires when the
browser is closed. Also, many systems can't handle a cookie expiration time greater than
2147483647, because that's the largest epoch timestamp that fits in a 32-bit integer, as
discussed in the introduction to Chapter 3.
The fourth argument to setcookie( ) is a path. The cookie is sent back to the server only
when pages whose path begin with the specified string are requested. For example, the
following cookie is sent back only to pages whose path begins with /products/:
setcookie('flavor','chocolate chip','','/products/');
The page that's setting this cookie doesn't have to have a URL that begins with /products/, but
the following cookie is sent back only to pages that do.

The fifth argument to setcookie( ) is a domain. The cookie is sent back to the server only
when pages whose hostname ends with the specified domain are requested. For example, the
first cookie in the following code is sent back to all hosts in the example.com domain, but the
second cookie is sent only with requests to the host jeannie.example.com:
setcookie('flavor','chocolate chip','','','.example.com'); setcookie('flavor','chocolate chip','','','jeannie.example.com');
If the first cookie's domain was just example.com instead of .example.com, it would be sent
only to the single host example.com (and not www.example.com or jeannie.example.com).
The last optional argument to setcookie( ) is a flag that if set to 1, instructs the browser
only to send the cookie over an SSL connection. This can be useful if the cookie contains
sensitive information, but remember that the data in the cookie is stored in the clear on the
user's computer.
Different browsers handle cookies in slightly different ways, especially with regard to how
strictly they match path and domain strings and how they determine priority between different
cookies of the same name. The setcookie( ) page of the online manual has helpful
clarifications of these differences.
8.2.4 See Also
Recipe 8.3 shows how to read cookie values; Recipe 8.4 shows how to delete cookies; Recipe
8.13 explains output buffering; Recipe 8.19 shows how to avoid the "headers already sent"
error message that sometimes occurs when calling setcookie( ); documentation on
setcookie( ) at http://www.php.net/setcookie; an expanded cookie specification is detailed
in RFC 2965 at http://www.faqs.org/rfcs/rfc2965.html.
Recipe 8.3 Reading Cookie Values
8.3.1 Problem
You want to read the value of a cookie that's been previously set.
8.3.2 Solution
Look in the $_COOKIE superglobal array:
if (isset($_COOKIE['flavor'])) { print "You ate a $_COOKIE[flavor] cookie."; }
8.3.3 Discussion
A cookie's value isn't available in $_COOKIE during the request in which the cookie is set. In
other words, the setcookie( ) function doesn't alter the value of $_COOKIE. On

subsequent requests, however, each cookie is stored in $_COOKIE. If register_globals is
on, cookie values are also assigned to global variables.
When a browser sends a cookie back to the server, it sends only the value. You can't access
the cookie's domain, path, expiration time, or secure status through $_COOKIE because the
browser doesn't send that to the server.
To print the names and values of all cookies sent in a particular request, loop through the
$_COOKIE array:
foreach ($_COOKIE as $cookie_name => $cookie_value) { print "$cookie_name = $cookie_value<br>"; }
8.3.4 See Also
Recipe 8.2 shows how to set cookies; Recipe 8.4 shows how to delete cookies; Recipe 8.13
explains output buffering; Recipe 8.19 shows how to avoid the "headers already sent" error
message that sometimes occurs when calling setcookie( ); Recipe 9.8 for information on
register_globals.
Recipe 8.4 Deleting Cookies
8.4.1 Problem
You want to delete a cookie so a browser doesn't send it back to the server.
8.4.2 Solution
Call setcookie( ) with no value for the cookie and an expiration time in the past:
setcookie('flavor','',time()-86400);
8.4.3 Discussion
It's a good idea to make the expiration time a few hours or an entire day in the past, in case
your server and the user's computer have unsynchronized clocks. For example, if your server
thinks it's 3:06 P.M. and a user's computer thinks it's 3:02 P.M., a cookie with an expiration
time of 3:05 P.M. isn't deleted by that user's computer even though the time is in the past for
the server.
The call to setcookie( ) that deletes a cookie has to have the same arguments (except for
value and time) that the call to setcookie( ) that set the cookie did, so include the path,
domain, and secure flag if necessary.
8.4.4 See Also
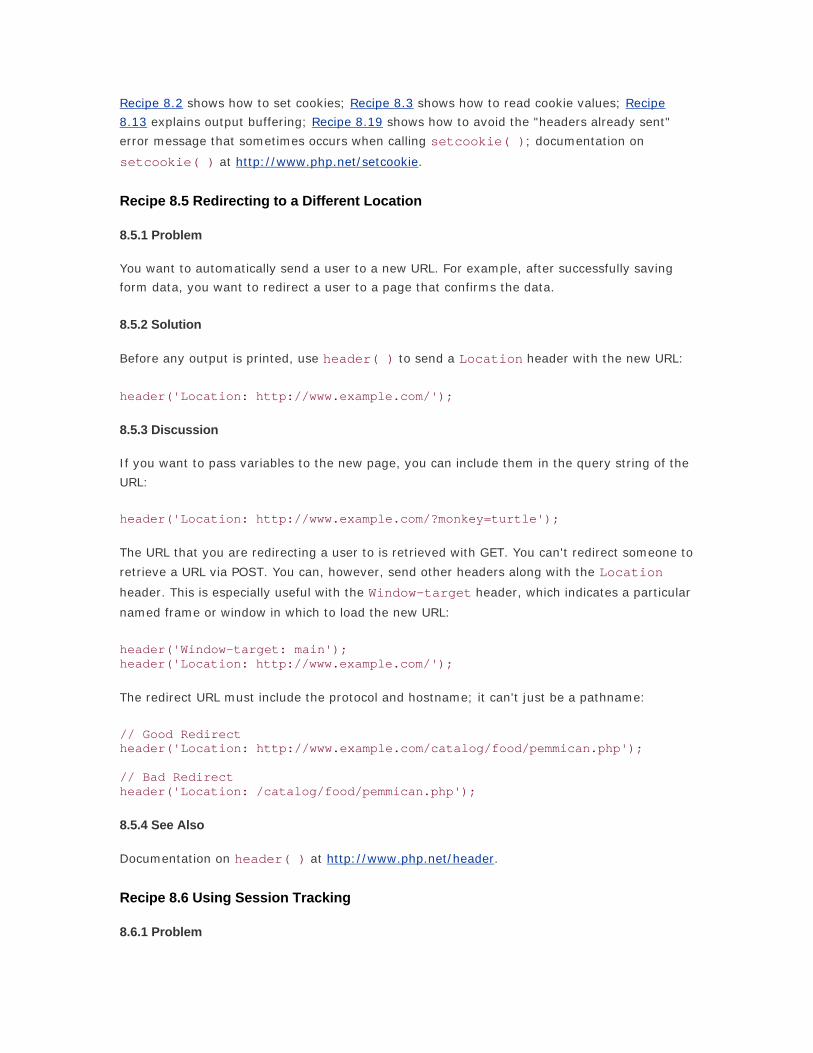
Recipe 8.2 shows how to set cookies; Recipe 8.3 shows how to read cookie values; Recipe
8.13 explains output buffering; Recipe 8.19 shows how to avoid the "headers already sent"
error message that sometimes occurs when calling setcookie( ); documentation on
setcookie( ) at http://www.php.net/setcookie.
Recipe 8.5 Redirecting to a Different Location
8.5.1 Problem
You want to automatically send a user to a new URL. For example, after successfully saving
form data, you want to redirect a user to a page that confirms the data.
8.5.2 Solution
Before any output is printed, use header( ) to send a Location header with the new URL:
header('Location: http://www.example.com/');
8.5.3 Discussion
If you want to pass variables to the new page, you can include them in the query string of the
URL:
header('Location: http://www.example.com/?monkey=turtle');
The URL that you are redirecting a user to is retrieved with GET. You can't redirect someone to
retrieve a URL via POST. You can, however, send other headers along with the Location
header. This is especially useful with the Window-target header, which indicates a particular
named frame or window in which to load the new URL:
header('Window-target: main'); header('Location: http://www.example.com/');
The redirect URL must include the protocol and hostname; it can't just be a pathname:
// Good Redirect header('Location: http://www.example.com/catalog/food/pemmican.php'); // Bad Redirect header('Location: /catalog/food/pemmican.php');
8.5.4 See Also
Documentation on header( ) at http://www.php.net/header.
Recipe 8.6 Using Session Tracking
8.6.1 Problem

You want to maintain information about a user as she moves through your site.
8.6.2 Solution
Use the session module. The session_start( ) function initializes a session, and accessing
an element in the global $_SESSION array tells PHP to keep track of the corresponding
variable.
session_start(); $_SESSION['visits']++; print 'You have visited here '.$_SESSION['visits'].' times.';
8.6.3 Discussion
To start a session automatically on each request, set session.auto_start to 1 in php.ini.
With session.auto_start, there's no need to call session_start( ).
The session functions keep track of users by issuing them cookies with a randomly generated
session IDs. If PHP detects that a user doesn't accept the session ID cookie, it automatically
adds the session ID to URLs and forms.[1] For example, consider this code that prints a URL:
[1] Before PHP 4.2.0, this behavior had to be explicitly enabled by building PHP with the --enable-trans-sid configuration setting.
print '<a href="train.php">Take the A Train</a>';
If sessions are enabled, but a user doesn't accept cookies, what's sent to the browser is
something like:
<a href="train.php?PHPSESSID=2eb89f3344520d11969a79aea6bd2fdd">Take the A Train</a>
In this example, the session name is PHPSESSID and the session ID is
2eb89f3344520d11969a79aea6bd2fdd. PHP adds those to the URL so they are passed
along to the next page. Forms are modified to include a hidden element that passes the
session ID. Redirects with the Location header aren't automatically modified, so you have to
add a session ID to them yourself using the SID constant:
$redirect_url = 'http://www.example.com/airplane.php'; if (defined('SID') && (! isset($_COOKIE[session_name()]))) { $redirect_url .= '?' . SID; } header("Location: $redirect_url");
The session_name( ) function returns the name of the cookie that the session ID is stored
in, so this code appends the SID constant only to $redirect_url if the constant is defined,
and the session cookie isn't set.

By default, PHP stores session data in files in the /tmp directory on your server. Each session
is stored in its own file. To change the directory in which the files are saved, set the
session.save_path configuration directive in php.ini to the new directory. You can also call
session_save_path( ) with the new directory to change directories, but you need to do
this before accessing any session variables.
8.6.4 See Also
Documentation on session_start( ) at http://www.php.net/session-start,
session_save_path( ) at http://www.php.net/session-save-path; the session module has
a number of configuration directives that help you do things like manage how long sessions
can last and how they are cached; these are detailed in the "Sessions" section of the online
manual at http://www.php.net/session.
Recipe 8.7 Storing Sessions in a Database
8.7.1 Problem
You want to store session data in a database instead of in files. If multiple web servers all
have access to the same database, the session data is then mirrored across all the web
servers.
8.7.2 Solution
Set session.save_handler to user in php.ini and use the pc_DB_Session class shown in
Example 8-1. For example:
$s = new pc_DB_Session('mysql://user:password@localhost/db'); ini_get('session.auto_start') or session_start();
8.7.3 Discussion
One of the most powerful aspects of the session module is its abstraction of how sessions get
saved. The session_set_save_handler( ) function tells PHP to use different functions for
the various session operations such as saving a session and reading session data. The
pc_DB_Session class stores the session data in a database. If this database is shared
between multiple web servers, users' session information is portable across all those web
servers. So, if you have a bunch of web servers behind a load balancer, you don't need any
fancy tricks to ensure that a user's session data is accurate no matter which web server they
get sent to.
To use pc_DB_Session, pass a data source name (DSN) to the class when you instantiate it.
The session data is stored in a table called php_session whose structure is:
CREATE TABLE php_session ( id CHAR(32) NOT NULL, data MEDIUMBLOB,

last_access INT UNSIGNED NOT NULL, PRIMARY KEY(id) )
If you want the table name to be different than php_session, set session.save_path in
php.ini to your new table name. Example 8-1 shows the pc_DB_Session class.
Example 8-1. pc_DB_Session class
require 'PEAR.php'; require 'DB.php'; class pc_DB_Session extends PEAR { var $_dbh; var $_table; var $_connected = false; var $_gc_maxlifetime; var $_prh_read; var $error = null; /** * Constructor */ function pc_DB_Session($dsn = null) { if (is_null($dsn)) { $this->error = PEAR::raiseError('No DSN specified'); return; } $this->_gc_maxlifetime = ini_get('session.gc_maxlifetime'); // Sessions last for a day unless otherwise specified. if (! $this->_gc_maxlifetime) { $this->_gc_maxlifetime = 86400; } $this->_table = ini_get('session.save_path'); if ((! $this->_table) || ('/tmp' == $this->_table)) { $this->_table = 'php_session'; } $this->_dbh = DB::connect($dsn); if (DB::isError($this->_dbh)) { $this->error = $this->_dbh; return; } $this->_prh_read = $this->_dbh->prepare( "SELECT data FROM $this->_table WHERE id LIKE ? AND last_access >= ?"); if (DB::isError($this->_prh_read)) { $this->error = $this->_prh_read; return; } if (! session_set_save_handler(array(&$this,'_open'), array(&$this,'_close'), array(&$this,'_read'),

array(&$this,'_write'), array(&$this,'_destroy'), array(&$this,'_gc'))) { $this->error = PEAR::raiseError('session_set_save_handler() failed'); return; } return $this->_connected = true; } function _open() { return $this->_connected; } function _close() { return $this->_connected; } function _read($id) { if (! $this->_connected) { return false; } $sth = $this->_dbh->execute($this->_prh_read, array($id,time() - $this->_gc_maxlifetime)); if (DB::isError($sth)) { $this->error = $sth; return ''; } else { if (($sth->numRows() == 1) && ($ar = $sth->fetchRow(DB_FETCHMODE_ORDERED))) { return $ar[0]; } else { return ''; } } } function _write($id,$data) { $sth = $this->_dbh->query( "REPLACE INTO $this->_table (id,data,last_access) VALUES (?,?,?)", array($id,$data,time())); if (DB::isError($sth)) { $this->error = $sth; return false; } else { return true; } } function _destroy($id) { $sth = $this->_dbh->query("DELETE FROM $this->_table WHERE id LIKE ?", array($id)); if (DB::isError($sth)) { $this->error = $sth; return false; } else { return true;

} } function _gc($maxlifetime) { $sth = $this->_dbh->query("DELETE FROM $this->_table WHERE last_access < ?", array(time() - $maxlifetime)); if (DB::isError($sth)) { $this->error = $sth; return false; } else { return true; } } }
The pc_DB_Session::_write( ) method uses a MySQL-specific SQL command, REPLACE
INTO, which updates an existing record or inserts a new one, depending on whether there is
already a record in the database with the given id field. If you use a different database,
modify the _write( ) function to accomplish the same task. For instance, delete the existing
row (if any), and insert a new one, all inside a transaction:
function _write($id,$data) { $sth = $this->_dbh->query('BEGIN WORK'); if (DB::isError($sth)) { $this->error = $sth; return false; } $sth = $this->_dbh->query("DELETE FROM $this->_table WHERE id LIKE ?", array($id)); if (DB::isError($sth)) { $this->error = $sth; $this->_dbh->query('ROLLBACK'); return false; } $sth = $this->_dbh->query( "INSERT INTO $this->_table (id,data,last_access) VALUES (?,?,?)", array($id,$data,time())); if (DB::isError($sth)) { $this->error = $sth; $this->_dbh->query('ROLLBACK'); return false; } $sth = $this->_dbh->query('COMMIT'); if (DB::isError($sth)) { $this->error = $sth; $this->_dbh->query('ROLLBACK'); return false; } return true; }
8.7.4 See Also

Documentation on session_set_save_handler( ) at http://www.php.net/session-set-
save-handler; a handler using PostgreSQL is available at
http://www.zend.com/codex.php?id=456&single=1; the format for data source names is
discussed in Recipe 10.4.
Recipe 8.8 Detecting Different Browsers
8.8.1 Problem
You want to generate content based on the capabilities of a user's browser.
8.8.2 Solution
Use the object returned by get_browser( ) to determine a browser's capabilities:
$browser = get_browser( ); if ($browser->frames) { // print out a frame-based layout } elseif ($browser->tables) { // print out a table-based layout } else { // print out a boring layout }
8.8.3 Discussion
The get_browser( ) function examines the environment variable
$_ENV['HTTP_USER_AGENT'] (set by the web server) and compares it to browsers listed in
an external browser capability file. Due to licensing issues, PHP isn't distributed with a browser
capability file. The "Obtaining PHP" section of the PHP FAQ (http://www.php.net/faq.obtaining)
lists http://www.cyscape.com/asp/browscap/ and http://www.amrein.
com/apps/page.asp?Q=InowDownload as sources for a browser capabilities file, and there is
also one at http://asp.net.do/browscap.zip.
Once you download a browser capability file, you need to tell PHP where to find it by setting
the browscap configuration directive to the pathname of the file. If you use PHP as a CGI, set
the directive in the php.ini file:
browscap=/usr/local/lib/browscap.txt
If you use Apache, you need to set the directive in your Apache configuration file:
php_value browscap "/usr/local/lib/browscap.txt"
Many of the capabilities get_browser( ) finds are shown in Table 8-1. For user-configurable
capabilities such as javascript or cookies though, get_browser( ) just tells you if the
browser can support those functions. It doesn't tell you if the user has disabled the functions.

If JavaScript is turned off in a JavaScript-capable browser or a user refuses to accept cookies
when the browser prompts him, get_browser( ) still indicates that the browser supports
those functions.
Table 8-1. Browser capability object properties
Property Description
platform Operating system the browser is running on (e.g., Windows, Macintosh,
UNIX, Win32, Linux, MacPPC)
version Full browser version (e.g., 5.0, 3.5, 6.0b2)
majorver Major browser version (e.g., 5, 3, 6)
minorver Minor browser version (e.g., 0, 5, 02)
frames 1 if the browser supports frames
tables 1 if the browser supports tables
cookies 1 if the browser supports cookies
backgroundsounds 1 if the browser supports background sounds with <embed> or
<bgsound>
vbscript 1 if the browser supports VBScript
javascript 1 if the browser supports JavaScript
javaapplets 1 if the browser can run Java applets
activexcontrols 1 if the browser can run ActiveX controls
8.8.4 See Also
Documentation on get_browser( ) at http://www.php.net/get-browser.
Recipe 8.9 Building a GET Query String
8.9.1 Problem
You need to construct a link that includes name/value pairs in a query string.
8.9.2 Solution
Encode the names and values with urlencode( ) and use join( ) to create the query
string:
$vars = array('name' => 'Oscar the Grouch', 'color' => 'green', 'favorite_punctuation' => '#'); $safe_vars = array( ); foreach ($vars as $name => $value) { $safe_vars[ ] = urlencode($name).'='.urlencode($value); } $url = '/muppet/select.php?' . join('&',$safe_vars);

8.9.3 Discussion
The URL built in the solution is:
/muppet/select.php?name=Oscar+the+Grouch&color=green&favorite_punctuation=%23
The query string has spaces encoded as +. Special characters such as # are hex-encoded as
%23 because the ASCII value of # is 35, which is 23 in hexadecimal.
Although urlencode( ) prevents any special characters in the variable names or values
from disrupting the constructed URL, you may have problems if your variable names begin
with the names of HTML entities. Consider this partial URL for retrieving information about a
stereo system:
/stereo.php?speakers=12&cdplayer=52&=10
The HTML entity for ampersand (&) is & so a browser may interpret that URL as:
/stereo.php?speakers=12&cdplayer=52&=10
To prevent embedded entities from corrupting your URLs, you have three choices. The first is
to choose variable names that can't be confused with entities, such as _amp instead of amp.
The second is to convert characters with HTML entity equivalents to those entities before
printing out the URL. Use htmlentities( ) :
$url = '/muppet/select.php?' . htmlentities(join('&',$safe_vars));
The resulting URL is:
/muppet/select.php?name=Oscar+the+Grouch&color=green&favorite_punctuation=%23
Your third choice is to change the argument separator from & to ; by setting the configuration
directive arg_separator.input to ;. You then join name-value pairs with ; to produce a
query string:
/muppet/select.php?name=Oscar+the+Grouch;color=green;favorite_punctuation=%23
You may run into trouble with any GET method URLs that you can't explicitly construct with
semicolons, such as a form with its method set to GET, because your users' browsers use & as
the argument separator.
Because many browsers don't support using ; as an argument separator, the easiest way to
avoid problems with entities in URLs is to choose variable names that don't overlap with entity

names. If you don't have complete control over variable names, however, use
htmlentities( ) to protect your URLs from entity decoding.
8.9.4 See Also
Documentation on urlencode( ) at http://www.php.net/urlencode and htmlentities( )
at http://www.php.net/htmlentities.
Recipe 8.10 Using HTTP Basic Authentication
8.10.1 Problem
You want to use PHP to protect parts of your web site with passwords. Instead of storing the
passwords in an external file and letting the web server handle the authentication, you want
the password verification logic to be in a PHP program.
8.10.2 Solution
The $_SERVER['PHP_AUTH_USER'] and $_SERVER['PHP_AUTH_PW'] global variables
contain the username and password supplied by the user, if any. To deny access to a page,
send a WWW-Authenticate header identifying the authentication realm as part of a response
with status code 401:
header('WWW-Authenticate: Basic realm="My Website"'); header('HTTP/1.0 401 Unauthorized'); echo "You need to enter a valid username and password."; exit;
8.10.3 Discussion
When a browser sees a 401 header, it pops up a dialog box for a username and password.
Those authentication credentials (the username and password), if accepted by the server, are
associated with the realm in the WWW-Authenticate header. Code that checks authentication
credentials needs to be executed before any output is sent to the browser, since it might send
headers. For example, you can use a function such as pc_validate( ), shown in Example
8-2.
Example 8-2. pc_validate( )
function pc_validate($user,$pass) { /* replace with appropriate username and password checking, such as checking a database */ $users = array('david' => 'fadj&32', 'adam' => '8HEj838'); if (isset($users[$user]) && ($users[$user] == $pass)) { return true; } else { return false; }
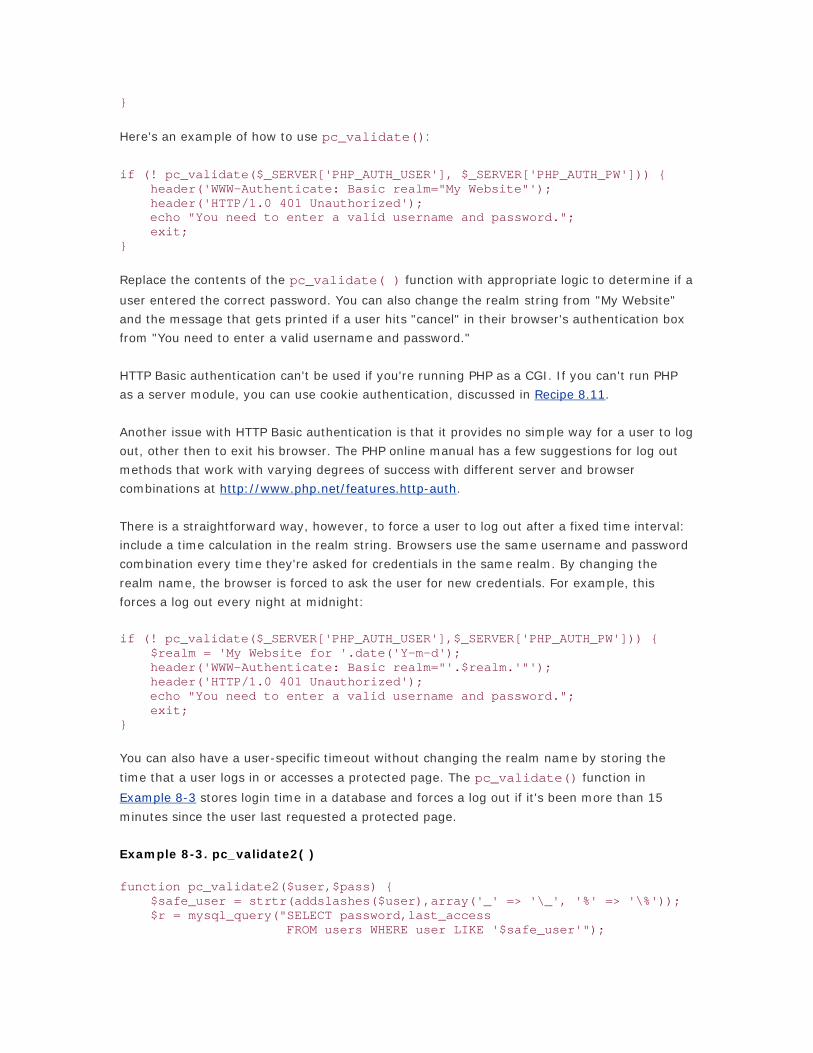
}
Here's an example of how to use pc_validate():
if (! pc_validate($_SERVER['PHP_AUTH_USER'], $_SERVER['PHP_AUTH_PW'])) { header('WWW-Authenticate: Basic realm="My Website"'); header('HTTP/1.0 401 Unauthorized'); echo "You need to enter a valid username and password."; exit; }
Replace the contents of the pc_validate( ) function with appropriate logic to determine if a
user entered the correct password. You can also change the realm string from "My Website"
and the message that gets printed if a user hits "cancel" in their browser's authentication box
from "You need to enter a valid username and password."
HTTP Basic authentication can't be used if you're running PHP as a CGI. If you can't run PHP
as a server module, you can use cookie authentication, discussed in Recipe 8.11.
Another issue with HTTP Basic authentication is that it provides no simple way for a user to log
out, other then to exit his browser. The PHP online manual has a few suggestions for log out
methods that work with varying degrees of success with different server and browser
combinations at http://www.php.net/features.http-auth.
There is a straightforward way, however, to force a user to log out after a fixed time interval:
include a time calculation in the realm string. Browsers use the same username and password
combination every time they're asked for credentials in the same realm. By changing the
realm name, the browser is forced to ask the user for new credentials. For example, this
forces a log out every night at midnight:
if (! pc_validate($_SERVER['PHP_AUTH_USER'],$_SERVER['PHP_AUTH_PW'])) { $realm = 'My Website for '.date('Y-m-d'); header('WWW-Authenticate: Basic realm="'.$realm.'"'); header('HTTP/1.0 401 Unauthorized'); echo "You need to enter a valid username and password."; exit; }
You can also have a user-specific timeout without changing the realm name by storing the
time that a user logs in or accesses a protected page. The pc_validate() function in
Example 8-3 stores login time in a database and forces a log out if it's been more than 15
minutes since the user last requested a protected page.
Example 8-3. pc_validate2( )
function pc_validate2($user,$pass) { $safe_user = strtr(addslashes($user),array('_' => '\_', '%' => '\%')); $r = mysql_query("SELECT password,last_access FROM users WHERE user LIKE '$safe_user'");

if (mysql_numrows($r) == 1) { $ob = mysql_fetch_object($r); if ($ob->password == $pass) { $now = time(); if (($now - $ob->last_access) > (15 * 60)) { return false; } else { // update the last access time mysql_query("UPDATE users SET last_access = NOW() WHERE user LIKE '$safe_user'"); return true; } } } else { return false; } }
For example:
if (! pc_validate($_SERVER['PHP_AUTH_USER'],$_SERVER['PHP_AUTH_PW'])) { header('WWW-Authenticate: Basic realm="My Website"'); header('HTTP/1.0 401 Unauthorized'); echo "You need to enter a valid username and password."; exit; }
8.10.4 See Also
Recipe 8.11; the HTTP Authentication section of the PHP online manual at
http://www.php.net/features.http-auth.
Recipe 8.11 Using Cookie Authentication
8.11.1 Problem
You want more control over the user login procedure, such as presenting your own login form.
8.11.2 Solution
Store authentication status in a cookie or as part of a session. When a user logs in
successfully, put their username in a cookie. Also include a hash of the username and a secret
word so a user can't just make up an authentication cookie with a username in it:
$secret_word = 'if i ate spinach'; if (pc_validate($_REQUEST['username'],$_REQUEST['password'])) { setcookie('login', $_REQUEST['username'].','.md5($_REQUEST['username'].$secret_word)); }
8.11.3 Discussion
When using cookie authentication, you have to display your own login form:

<form method="post" action="login.php"> Username: <input type="text" name="username"> <br> Password: <input type="password" name="password"> <br> <input type="submit" value="Log In"> </form>
You can use the same pc_validate( ) function from the Recipe 8.10 to verify the username
and password. The only difference is that you pass it $_REQUEST['username'] and
$_REQUEST['password'] as the credentials instead of $_SERVER['PHP_AUTH_USER'] and
$_SERVER['PHP_AUTH_PW']. If the password checks out, send back a cookie that contains a
username and a hash of the username, and a secret word. The hash prevents a user from
faking a login just by sending a cookie with a username in it.
Once the user has logged in, a page just needs to verify that a valid login cookie was sent in
order to do special things for that logged-in user:
unset($username); if ($_COOKIE['login']) { list($c_username,$cookie_hash) = split(',',$_COOKIE['login']); if (md5($c_username.$secret_word) == $cookie_hash) { $username = $c_username; } else { print "You have sent a bad cookie."; } } if ($username) { print "Welcome, $username."; } else { print "Welcome, anonymous user."; }
If you use the built-in session support, you can add the username and hash to the session and
avoid sending a separate cookie. When someone logs in, set an additional variable in the
session instead of sending a cookie:
if (pc_validate($_REQUEST['username'],$_REQUEST['password'])) { $_SESSION['login'] = $_REQUEST['username'].','.md5($_REQUEST['username'].$secret_word)); }
The verification code is almost the same; it just uses $_SESSION instead of $_COOKIE:
unset($username); if ($_SESSION['login']) { list($c_username,$cookie_hash) = explode(',',$_SESSION['login']); if (md5($c_username.$secret_word) == $cookie_hash) { $username = $c_username; } else { print "You have tampered with your session."; } }
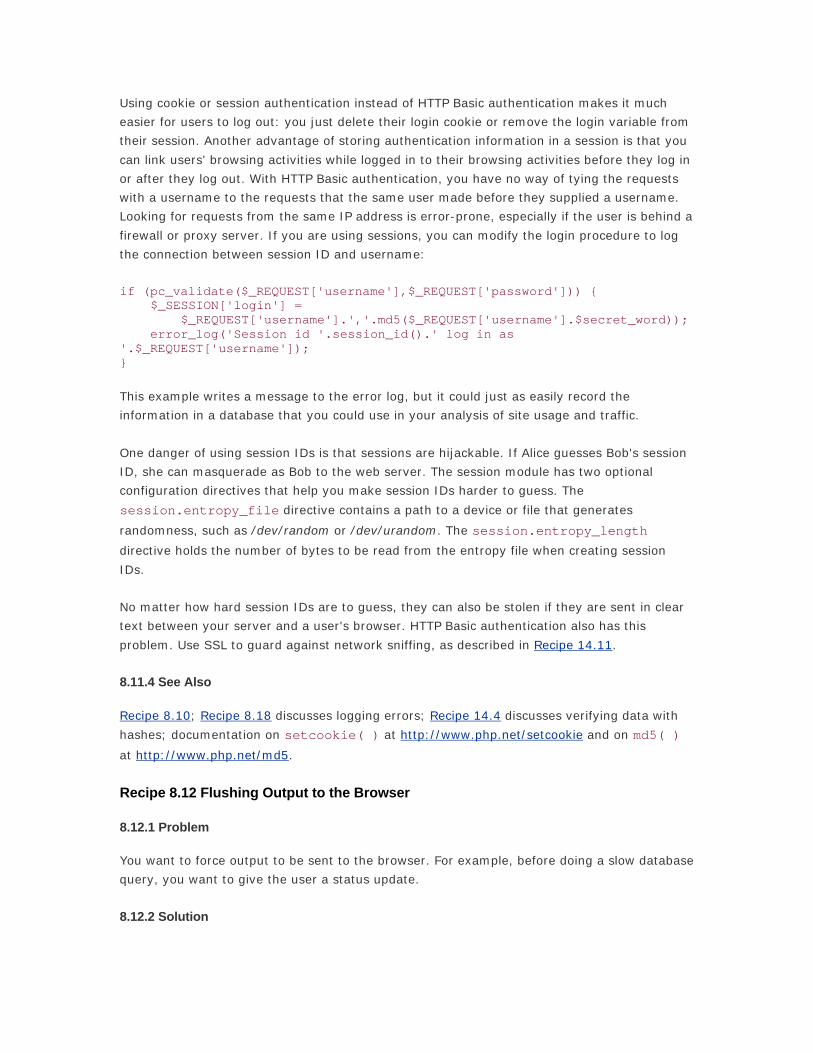
Using cookie or session authentication instead of HTTP Basic authentication makes it much
easier for users to log out: you just delete their login cookie or remove the login variable from
their session. Another advantage of storing authentication information in a session is that you
can link users' browsing activities while logged in to their browsing activities before they log in
or after they log out. With HTTP Basic authentication, you have no way of tying the requests
with a username to the requests that the same user made before they supplied a username.
Looking for requests from the same IP address is error-prone, especially if the user is behind a
firewall or proxy server. If you are using sessions, you can modify the login procedure to log
the connection between session ID and username:
if (pc_validate($_REQUEST['username'],$_REQUEST['password'])) { $_SESSION['login'] = $_REQUEST['username'].','.md5($_REQUEST['username'].$secret_word)); error_log('Session id '.session_id().' log in as '.$_REQUEST['username']); }
This example writes a message to the error log, but it could just as easily record the
information in a database that you could use in your analysis of site usage and traffic.
One danger of using session IDs is that sessions are hijackable. If Alice guesses Bob's session
ID, she can masquerade as Bob to the web server. The session module has two optional
configuration directives that help you make session IDs harder to guess. The
session.entropy_file directive contains a path to a device or file that generates
randomness, such as /dev/random or /dev/urandom. The session.entropy_length
directive holds the number of bytes to be read from the entropy file when creating session
IDs.
No matter how hard session IDs are to guess, they can also be stolen if they are sent in clear
text between your server and a user's browser. HTTP Basic authentication also has this
problem. Use SSL to guard against network sniffing, as described in Recipe 14.11.
8.11.4 See Also
Recipe 8.10; Recipe 8.18 discusses logging errors; Recipe 14.4 discusses verifying data with
hashes; documentation on setcookie( ) at http://www.php.net/setcookie and on md5( )
at http://www.php.net/md5.
Recipe 8.12 Flushing Output to the Browser
8.12.1 Problem
You want to force output to be sent to the browser. For example, before doing a slow database
query, you want to give the user a status update.
8.12.2 Solution

Use flush( ):
print 'Finding identical snowflakes...'; flush(); $sth = $dbh->query( 'SELECT shape,COUNT(*) AS c FROM snowflakes GROUP BY shape HAVING c > 1');
8.12.3 Discussion
The flush( ) function sends all output that PHP has internally buffered to the web server,
but the web server may have internal buffering of its own that delays when the data reaches
the browser. Additionally, some browsers don't display data immediately upon receiving it,
and some versions of Internet Explorer don't display a page until they've received at least 256
bytes. To force IE to display content, print blank spaces at the beginning of the page:
print str_repeat(' ',300); print 'Finding identical snowflakes...'; flush(); $sth = $dbh->query( 'SELECT shape,COUNT(*) AS c FROM snowflakes GROUP BY shape HAVING c > 1');
8.12.4 See Also
Recipe 18.18; documentation on flush( ) at http://www.php.net/flush.
Recipe 8.13 Buffering Output to the Browser
8.13.1 Problem
You want to start generating output before you're finished sending headers or cookies.
8.13.2 Solution
Call ob_start( ) at the top of your page and ob_end_flush( ) at the bottom. You can
then intermix commands that generate output and commands that send headers. The output
won't be sent until ob_end_flush( ) is called:
<?php ob_start(); ?> I haven't decided if I want to send a cookie yet. <?php setcookie('heron','great blue'); ?> Yes, sending that cookie was the right decision. <?php ob_end_flush(); ?>
8.13.3 Discussion

You can pass ob_start( ) the name of a callback function to process the output buffer with
that function. This is useful for postprocessing all the content in a page, such as hiding email
addresses from address-harvesting robots:
<?php function mangle_email($s) { return preg_replace('/([^@\s]+)@([-a-z0-9]+\.)+[a-z]{2,}/is', '<$1@...>', $s); } ob_start('mangle_email'); ?> I would not like spam sent to [email protected]! <?php ob_end_flush(); ?>
The mangle_email( ) function transforms the output to:
I would not like spam sent to <ronald@...>!
The output_buffering configuration directive turns output buffering on for all pages:
output_buffering = On
Similarly, output_handler sets an output buffer processing callback to be used on all pages:
output_handler=mangle_email
Setting an output_handler automatically sets output_buffering to on.
8.13.4 See Also
Recipe 10.11 uses output buffering in a database error logging function; documentation on
ob_start( ) at http://www.php.net/ob-start, ob_end_flush( ) at
http://www.php.net/ob-end-flush, and output buffering at http://www.php.net/outcontrol.
Recipe 8.14 Compressing Web Output with gzip
8.14.1 Problem
You want to send compressed content to browsers that support automatic decompression.
8.14.2 Solution
Add this setting to your php.ini file:
zlib.output_compression=1

8.14.3 Discussion
Browsers tell the server that they can accept compressed responses with the Accept-
Encoding header. If a browser sends Accept-Encoding: gzip or Accept-Encoding:
deflate, and PHP is built with the zlib extension, the zlib.output_compression
configuration directive tells PHP to compress the output with the appropriate algorithm before
sending it back to the browser. The browser uncompresses the data before displaying it.
You can adjust the compression level with the zlib.output_compression_level
configuration directive:
; minimal compression zlib.output_compression_level=1 ; maximal compression zlib.output_compression_level=9
At higher compression levels, less data needs to be sent from the server to the browser, but
more server CPU time must be used to compress the data.
8.14.4 See Also
Documentation on the zlib extension at http://www.php.net/zlib.
Recipe 8.15 Hiding Error Messages from Users
8.15.1 Problem
You don't want PHP error messages visible to users.
8.15.2 Solution
Set the following values in your php.ini or web server configuration file:
display_errors =off log_errors =on
These settings tell PHP not to display errors as HTML to the browser but to put them in the
server's error log.
8.15.3 Discussion
When log_errors is set to on, error messages are written to the server's error log. If you
want PHP errors to be written to a separate file, set the error_log configuration directive
with the name of that file:
error_log = /var/log/php.error.log

If error_log is set to syslog, PHP error messages are sent to the system logger using
syslog(3) on Unix and to the Event Log on Windows NT.
There are lots of error messages you want to show your users, such as telling them they've
filled in a form incorrectly, but you should shield your users from internal errors that may
reflect a problem with your code. There are two reasons for this. First, these errors appear
unprofessional (to expert users) and confusing (to novice users). If something goes wrong
when saving form input to a database, check the return code from the database query and
display a message to your users apologizing and asking them to come back later. Showing
them a cryptic error message straight from PHP doesn't inspire confidence in your web site.
Second, displaying these errors to users is a security risk. Depending on your database and
the type of error, the error message may contain information about how to log in to your
database or server and how it is structured. Malicious users can use this information to mount
an attack on your web site.
For example, if your database server is down, and you attempt to connect to it with
mysql_connect( ), PHP generates the following warning:
<br> <b>Warning</b>: Can't connect to MySQL server on 'db.example.com' (111) in <b>/www/docroot/example.php</b> on line <b>3</b><br>
If this warning message is sent to a user's browser, he learns that your database server is
called db.example.com and can mount an attack on it.
8.15.4 See Also
Recipe 8.18 for how to log errors; documentation on PHP configuration directives at
http://www.php.net/configuration.
Recipe 8.16 Tuning Error Handling
8.16.1 Problem
You want to alter the error-logging sensitivity on a particular page. This lets you control what
types of errors are reported.
8.16.2 Solution
To adjust the types of errors PHP complains about, use error_reporting( ):
error_reporting(E_ALL); // everything error_reporting(E_ERROR | E_PARSE); // only major problems error_reporting(E_ALL & ~E_NOTICE); // everything but notices
8.16.3 Discussion

Every error generated has an error type associated with it. For example, if you try to
array_pop( ) a string, PHP complains that "This argument needs to be an array," since you
can only pop arrays. The error type associated with this message is E_NOTICE, a nonfatal
runtime problem.
By default, the error reporting level is E_ALL & ~E_NOTICE, which means all error types
except notices. The & is a logical AND, and the ~ is a logical NOT. However, the php.ini-
recommended configuration file sets the error reporting level to E_ALL, which is all error
types.
Error messages flagged as notices are runtime problems that are less serious than warnings.
They're not necessarily wrong, but they indicate a potential problem. One example of an
E_NOTICE is "Undefined variable," which occurs if you try to use a variable without previously
assigning it a value:
// Generates an E_NOTICE foreach ($array as $value) { $html .= $value; } // Doesn't generate any error message $html = ''; foreach ($array as $value) { $html .= $value; }
In the first case, the first time though the foreach, $html is undefined. So, when you
append to it, PHP lets you know you're appending to an undefined variable. In the second
case, the empty string is assigned to $html above the loop to avoid the E_NOTICE. The
previous two code snippets generate identical code because the default value of a variable is
the empty string. The E_NOTICE can be helpful because, for example, you may have
misspelled a variable name:
foreach ($array as $value) { $hmtl .= $value; // oops! that should be $html } $html = '' foreach ($array as $value) { $hmtl .= $value; // oops! that should be $html }
A custom error-handling function can parse errors based on their type and take an appropriate
action. A complete list of error types is shown in Table 8-2.
Table 8-2. Error types
Value Constant Description Catchable
1 E_ERROR Nonrecoverable error No
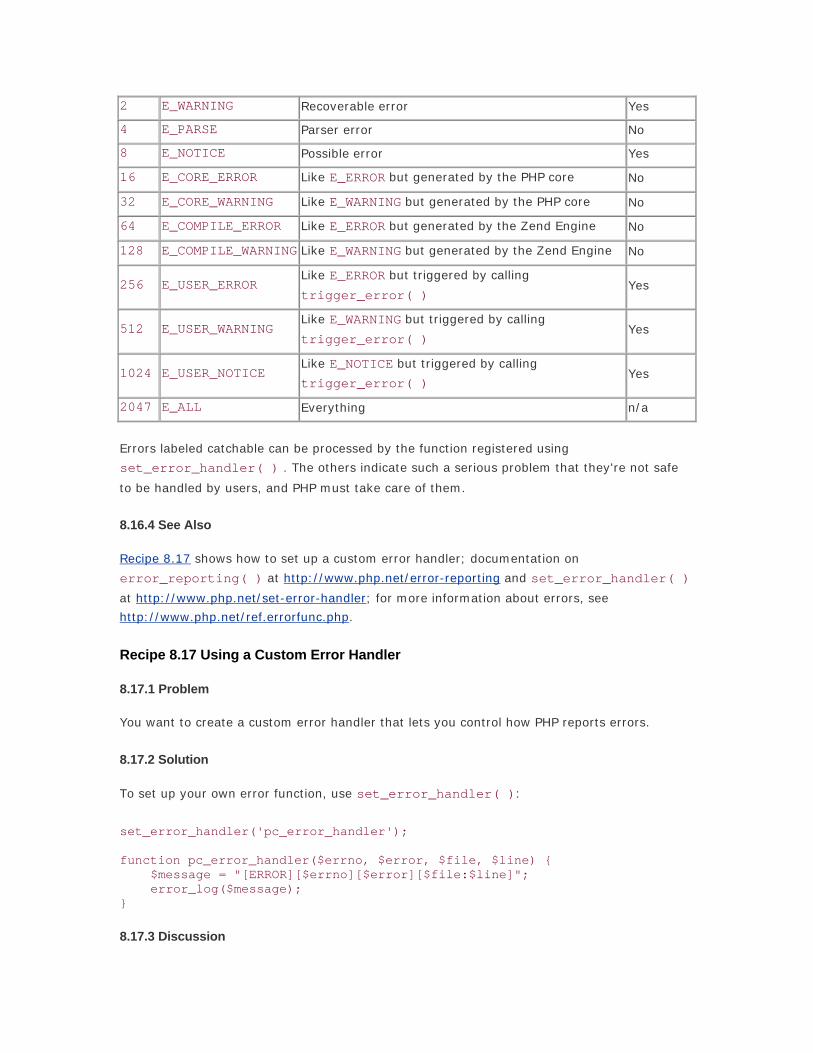
2 E_WARNING Recoverable error Yes
4 E_PARSE Parser error No
8 E_NOTICE Possible error Yes
16 E_CORE_ERROR Like E_ERROR but generated by the PHP core No
32 E_CORE_WARNING Like E_WARNING but generated by the PHP core No
64 E_COMPILE_ERROR Like E_ERROR but generated by the Zend Engine No
128 E_COMPILE_WARNING Like E_WARNING but generated by the Zend Engine No
256 E_USER_ERROR Like E_ERROR but triggered by calling
trigger_error( ) Yes
512 E_USER_WARNING Like E_WARNING but triggered by calling
trigger_error( ) Yes
1024 E_USER_NOTICE Like E_NOTICE but triggered by calling
trigger_error( ) Yes
2047 E_ALL Everything n/a
Errors labeled catchable can be processed by the function registered using
set_error_handler( ) . The others indicate such a serious problem that they're not safe
to be handled by users, and PHP must take care of them.
8.16.4 See Also
Recipe 8.17 shows how to set up a custom error handler; documentation on
error_reporting( ) at http://www.php.net/error-reporting and set_error_handler( )
at http://www.php.net/set-error-handler; for more information about errors, see
http://www.php.net/ref.errorfunc.php.
Recipe 8.17 Using a Custom Error Handler
8.17.1 Problem
You want to create a custom error handler that lets you control how PHP reports errors.
8.17.2 Solution
To set up your own error function, use set_error_handler( ):
set_error_handler('pc_error_handler'); function pc_error_handler($errno, $error, $file, $line) { $message = "[ERROR][$errno][$error][$file:$line]"; error_log($message); }
8.17.3 Discussion
A custom error handling function can parse errors based on their type and take the
appropriate action. See Table 8-2 in Recipe 8.16 for a list of error types.
Pass set_error_handler( ) the name of a function, and PHP forwards all errors to that
function. The error handling function can take up to five parameters. The first parameter is the
error type, such as 8 for E_NOTICE. The second is the message thrown by the error, such as
"Undefined variable: html". The third and fourth arguments are the name of the file and the
line number in which PHP detected the error. The final parameter is an array holding all the
variables defined in the current scope and their values.
For example, in this code $html is appended to without first being assigned an initial value:
error_reporting(E_ALL); set_error_handler('pc_error_handler'); function pc_error_handler($errno, $error, $file, $line, $context) { $message = "[ERROR][$errno][$error][$file:$line]"; print "$message"; print_r($context); } $form = array('one','two'); foreach ($form as $line) { $html .= "<b>$line</b>"; }
When the "Undefined variable" error is generated, pc_error_handler( ) prints:
[ERROR][8][Undefined variable: html][err-all.php:16]
After the initial error message, pc_error_handler( ) also prints a large array containing all
the globals, environment, request, and session variables.
Errors labeled catchable in Table 8-2 can be processed by the function registered using
set_error_handler( ). The others indicate such a serious problem that they're not safe to
be handled by users and PHP must take care of them.
8.17.4 See Also
Recipe 8.16 lists the different error types; documentation on set_error_handler( ) at
http://www.php.net/set-error-handler.
Recipe 8.18 Logging Errors
8.18.1 Problem
You want to write program errors to a log. These errors can include everything from parser
errors and files not being found to bad database queries and dropped connections.

8.18.2 Solution
Use error_log( ) to write to the error log:
// LDAP error if (ldap_errno($ldap)) { error_log("LDAP Error #" . ldap_errno($ldap) . ": " . ldap_error($ldap)); }
8.18.3 Discussion
Logging errors facilitates debugging. Smart error logging makes it easier to fix bugs. Always
log information about what caused the error:
$r = mysql_query($sql); if (! $r) { $error = mysql_error( ); error_log('[DB: query @'.$_SERVER['REQUEST_URI']."][$sql]: $error"); } else { // process results }
You're not getting all the debugging help you could be if you simply log that an error occurred
without any supporting information:
$r = mysql_query($sql); if (! $r) { error_log("bad query"); } else { // process result }
Another useful technique is to include the _ _FILE_ _ and _ _LINE_ _ constants in your
error messages:
error_log('['._ _FILE_ _.']['._ _LINE_ _."]: $error");
The _ _FILE_ _ constant is the current filename, and _ _LINE_ _ is the current line
number.
8.18.4 See Also
Recipe 8.15 for hiding error messages from users; documentation on error_log( ) at
http://www.php.net/error-log.
Recipe 8.19 Eliminating "headers already sent" Errors
8.19.1 Problem

You are trying to send a HTTP header or cookie using header( ) or setcookie( ), but PHP
reports a "headers already sent" error message.
8.19.2 Solution
This error happens when you send nonheader output before calling header( ) or
setcookie( ).
Rewrite your code so any output happens after sending headers:
// good setcookie("name", $name); print "Hello $name!"; // bad print "Hello $name!"; setcookie("name", $name); // good <?php setcookie("name",$name); ?> <html><title>Hello</title>
8.19.3 Discussion
An HTTP message has a header and a body, which are sent to the client in that order. Once
you begin sending the body, you can't send any more headers. So, if you call setcookie( )
after printing some HTML, PHP can't send the appropriate Cookie header.
Also, remove trailing whitespace in any include files. When you include a file with blank lines
outside <?php ?> tags, the blank lines are sent to the browser. Use trim( ) to remove
leading and trailing blank lines from files:
$file = '/path/to/file.php'; // backup copy($file, "$file.bak") or die("Can't copy $file: $php_errormsg); // read and trim $contents = trim(join('',file($file))); // write $fh = fopen($file, 'w') or die("Can't open $file for writing: $php_errormsg); if (-1 == fwrite($fh, $contents)) { die("Can't write to $file: $php_errormsg); } fclose($fh) or die("Can't close $file: $php_errormsg);
Instead of processing files on a one-by-one basis, it may be more convenient to do so on a
directory-by-directory basis. Recipe 19.8 describes how to process all the files in a directory.

If you don't want to worry about blank lines disrupting the sending of headers, turn on output
buffering. Output buffering prevents PHP from immediately sending all output to the client. If
you buffer your output, you can intermix headers and body text with abandon. However, it
may seem to users that your server takes longer to fulfill their requests since they have to
wait slightly longer before the browser displays any output.
8.19.4 See Also
Recipe 8.13 discusses output buffering; Recipe 19.8 for processing all files in a directory;
documentation on header( ) at http://www.php.net/header.
Recipe 8.20 Logging Debugging Information
8.20.1 Problem
You want to make debugging easier by adding statements to print out variables. But, you
want to easily be able to switch back and forth from production and debug modes.
8.20.2 Solution
Put a function that conditionally prints out messages based on a defined constant in a page
included using the auto_prepend_file configuration setting. Save the following code to
debug.php:
// turn debugging on define('DEBUG',true); // generic debugging function function pc_debug($message) { if (defined(DEBUG) && DEBUG) { error_log($message); } }
Set the auto_prepend_file directive in php.ini:
auto_prepend_file=debug.php
Now call pc_debug( ) from your code to print out debugging information:
$sql = 'SELECT color, shape, smell FROM vegetables'; pc_debug("[sql: $sql]"); // only printed if DEBUG is true $r = mysql_query($sql);
8.20.3 Discussion
Debugging code is a necessary side-effect of writing code. There are a variety of techniques to
help you quickly locate and squash your bugs. Many of these involve including scaffolding that
helps ensure the correctness of your code. The more complicated the program, the more

scaffolding needed. Fred Brooks, in The Mythical Man-Month, guesses that there's "half as
much code in scaffolding as there is in product." Proper planning ahead of time allows you to
integrate the scaffolding into your programming logic in a clean and efficient fashion. This
requires you to think out beforehand what you want to measure and record and how you plan
on sorting through the data gathered by your scaffolding.
One technique for sifting through the information is to assign different priority levels to
different types of debugging comments. Then the debug function prints information only if it's
higher than the current priority level.
define('DEBUG',2); function pc_debug($message, $level = 0) { if (defined(DEBUG) && ($level > DEBUG) { error_log($message); } } $sql = 'SELECT color, shape, smell FROM vegetables'; pc_debug("[sql: $sql]", 1); // not printed, since 1 < 2 pc_debug("[sql: $sql]", 3); // printed, since 3 > 2
Another technique is to write wrapper functions to include additional information to help with
performance tuning, such as the time it takes to execute a database query.
function getmicrotime(){ $mtime = microtime(); $mtime = explode(' ',$mtime); return ($mtime[1] + $mtime[0]); } function db_query($sql) { if (defined(DEBUG) && DEBUG) { // start timing the query if DEBUG is on $DEBUG_STRING = "[sql: $sql]<br>\n"; $starttime = getmicrotime(); } $r = mysql_query($sql); if (! $r) { $error = mysql_error(); error_log('[DB: query @'.$_SERVER['REQUEST_URI']."][$sql]: $error"); } elseif (defined(DEBUG) && DEBUG) { // the query didn't fail and DEBUG is turned on, so finish timing it $endtime = getmicrotime(); $elapsedtime = $endtime - $starttime; $DEBUG_STRING .= "[time: $elapsedtime]<br>\n"; error_log($DEBUG_STRING); } return $r; }
Here, instead of just printing out the SQL to the error log, you also record the number of
seconds it takes MySQL to perform the request. This lets you see if certain queries are taking
too long.
The getmicrotime( ) function converts the output of microtime( ) into a format that
allows you to easily perform addition and subtraction upon the numbers.
8.20.4 See Also
Documentation on define( ) at http://www.php.net/define, defined( ) at
http://www.php.net/defined, and error_log( ) at http://www.php.net/error-log; The
Mythical Man-Month, by Frederick P. Brooks (Addison-Wesley).
Recipe 8.21 Reading Environment Variables
8.21.1 Problem
You want to get the value of an environment variable.
8.21.2 Solution
Read the value from the $_ENV superglobal array:
$name = $_ENV['USER'];
8.21.3 Discussion
Environment variables are named values associated with a process. For instance, in Unix, you
can check the value of $_ENV['HOME'] to find the home directory of a user:
print $_ENV['HOME']; // user's home directory /home/adam
Early versions of PHP automatically created PHP variables for all environment variables by
default. As of 4.1.0, php.ini-recommended disables this because of speed considerations;
however php.ini-dist continues to enable environment variable loading for backward
compatibility.
The $_ENV array is created only if the value of the variables_order configuration directive
contains E. If $_ENV isn't available, use getenv( ) to retrieve an environment variable:
$path = getenv('PATH');
The getenv( ) function isn't available if you're running PHP as an ISAPI module.
8.21.4 See Also
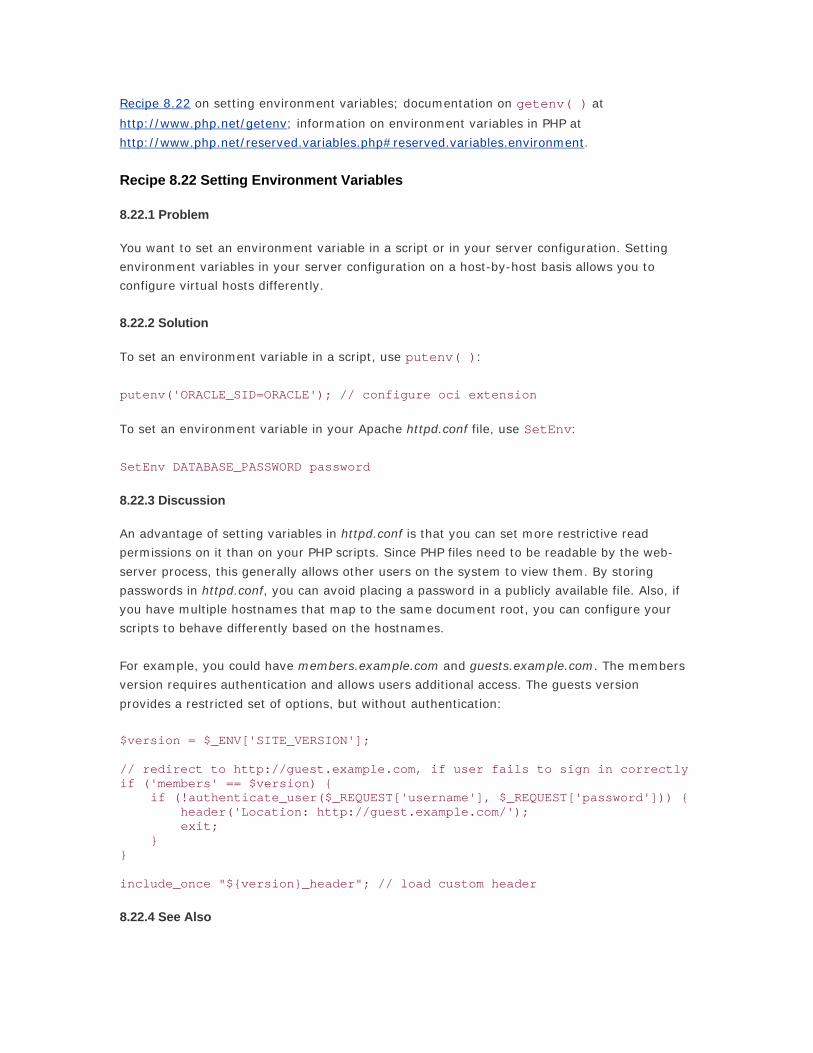
Recipe 8.22 on setting environment variables; documentation on getenv( ) at
http://www.php.net/getenv; information on environment variables in PHP at
http://www.php.net/reserved.variables.php#reserved.variables.environment.
Recipe 8.22 Setting Environment Variables
8.22.1 Problem
You want to set an environment variable in a script or in your server configuration. Setting
environment variables in your server configuration on a host-by-host basis allows you to
configure virtual hosts differently.
8.22.2 Solution
To set an environment variable in a script, use putenv( ):
putenv('ORACLE_SID=ORACLE'); // configure oci extension
To set an environment variable in your Apache httpd.conf file, use SetEnv:
SetEnv DATABASE_PASSWORD password
8.22.3 Discussion
An advantage of setting variables in httpd.conf is that you can set more restrictive read
permissions on it than on your PHP scripts. Since PHP files need to be readable by the web-
server process, this generally allows other users on the system to view them. By storing
passwords in httpd.conf, you can avoid placing a password in a publicly available file. Also, if
you have multiple hostnames that map to the same document root, you can configure your
scripts to behave differently based on the hostnames.
For example, you could have members.example.com and guests.example.com. The members
version requires authentication and allows users additional access. The guests version
provides a restricted set of options, but without authentication:
$version = $_ENV['SITE_VERSION']; // redirect to http://guest.example.com, if user fails to sign in correctly if ('members' == $version) { if (!authenticate_user($_REQUEST['username'], $_REQUEST['password'])) { header('Location: http://guest.example.com/'); exit; } } include_once "${version}_header"; // load custom header
8.22.4 See Also

Recipe 8.21 on getting the values of environment variables; documentation on putenv( ) at
http://www.php.net/putenv; information on setting environment variables in Apache at
http://httpd.apache.org/docs/mod/mod_env.html.
Recipe 8.23 Reading Configuration Variables
8.23.1 Problem
You want to get the value of a PHP configuration setting.
8.23.2 Solution
Use ini_get( ):
// find out the include path: $include_path = ini_get('include_path');
8.23.3 Discussion
To get all configuration variable values in one step, call ini_get_all( ). It returns the
variables in an associative array, and each array element is itself an associative array. The
second array has three elements: a global value for the setting, a local value, and an access
code:
// put all configuration variables in an associative array $vars = ini_get_all( ); print_r($vars['include_path']); Array ( [global_value] => .:/usr/local/lib/php/ [local_value] => .:/usr/local/lib/php/ [access] => 7 )
The global_value is the value set from the php.ini file; the local_value is adjusted to
account for any changes made in the web server's configuration file, any relevant .htaccess
files, and the current script. The value of access is a numeric constant representing the
places where this value can be altered. Table 8-3 explains the values for access. Note that
the name access is a little misleading in this respect, as the setting's value can always be
checked, but not adjusted.
Table 8-3. Access values
Value PHP constant Meaning
1 PHP_INI_USER Any script, using ini_set( )
2 PHP_INI_PERDIR Directory level, using .htaccess
4 PHP_INI_SYSTEM System level, using php.ini or httpd.conf
7 PHP_INI_ALL Everywhere: scripts, directories, and the system

A value of 6 means the setting can be changed in both the directory and system level, as 2 +
4 = 6. In practice, there are no variables modifiable only in PHP_INI_USER or
PHP_INI_PERDIR, and all variables are modifiable in PHP_INI_SYSTEM, so everything has a
value of 4, 6, or 7.
You can also get variables belonging to a specific extension by passing the extension name to
ini_get_all( ):
// return just the session module specific variables $session = ini_get_all('session');
By convention, the variables for an extension are prefixed with the extension name and a
period. So, all the session variables begin with session. and all the Java variables begin with
java., for example.
Since ini_get( ) returns the current value for a configuration directive, if you want to check
the original value from the php.ini file, use get_cfg_var( ):
$original = get_cfg_var('sendmail_from'); // have we changed our address?
The value returned by get_cfg_var( ) is the same as what appears in the global_value
element of the array returned by ini_get_all( ).
8.23.4 See Also
Recipe 8.24 on setting configuration variables; documentation on ini_get( ) at
http://www.php.net/ini-get, ini_get_all( ) at http://www.php.net/ini-get-all, and
get_cfg_var( ) at http://www.php.net/get-cfg-var; a complete list of configuration
variables and when they can be modified at http://www.php.net/function.ini-set.php.
Recipe 8.24 Setting Configuration Variables
8.24.1 Problem
You want to change the value of a PHP configuration setting.
8.24.2 Solution
Use ini_set( ):
// add a directory to the include path ini_set('include_path', ini_get('include_path') . ':/home/fezzik/php');
8.24.3 Discussion

Configuration variables are not permanently changed by ini_set( ). The new value lasts
only for the duration of the request in which ini_set( ) is called. To make a persistent
modification, alter the values stored in the php.ini file.
It isn't meaningful to alter certain variables, such as asp_tags or register_globals
because by the time you call ini_set( ) to modify the setting, it's too late to change the
behavior the setting affects. If a variable can't be changed, ini_set( ) returns false.
However, it is useful to alter configuration variables in certain pages. For example, if you're
running a script from the command line, set html_errors to off.
To reset a variable back to its original setting, use ini_restore( ):
ini_restore('sendmail_from'); // go back to the default value
8.24.4 See Also
Recipe 8.23 on getting values of configuration variables; documentation on ini_set( ) at
http://www.php.net/ini-set and ini_restore( ) at http://www.php.net/ini-restore.
Recipe 8.25 Communicating Within Apache
8.25.1 Problem
You want to communicate from PHP to other parts of the Apache request process. This
includes setting variables in the access_log.
8.25.2 Solution
Use apache_note( ):
// get value $session = apache_note('session'); // set value apache_note('session', $session);
8.25.3 Discussion
When Apache processes a request from a client, it goes through a series of steps; PHP plays
only one part in the entire chain. Apache also remaps URLs, authenticates users, logs
requests, and more. While processing a request, each handler has access to a set of key/value
pairs called the notes table. The apache_note( ) function provides access to the notes table
to retrieve information set by handlers earlier on in the process and leave information for
handlers later on.

For example, if you use the session module to track users and preserve variables across
requests, you can integrate this with your log file analysis so you can determine the average
number of page views per user. Use apache_note( ) in combination with the logging
module to write the session ID directly to the access_log for each request:
// retrieve the session ID and add it to Apache's notes table apache_note('session_id', session_id( ));
Then, modify your httpd.conf file to add this string to your LogFormat:
%{session_id}n
The trailing n tells Apache to use a variable stored in its notes table by another module.
If PHP is built with the --enable-memory-limit configuration option, it stores the peak
memory usage of each request in a note called mod_php_memory_usage. Add the memory
usage information to a LogFormat with:
%{mod_php_memory_usage}n
8.25.4 See Also
Documentation on apache_note( ) at http://www.php.net/apache-note; information on
logging in Apache at http://httpd.apache.org/docs/mod/mod_log_config.html.
Recipe 8.26 Profiling Code
8.26.1 Problem
You have a block of code and you want to profile it to see how long each statement takes to
execute.
8.26.2 Solution
Use the PEAR Benchmark module:
require 'Benchmark/Timer.php'; $timer =& new Benchmark_Timer(true); $timer->start(); // some setup code here $timer->setMarker('setup'); // some more code executed here $timer->setMarker('middle'); // even yet still more code here $timer->setmarker('done'); // and a last bit of code here $timer->stop();

$timer->display();
8.26.3 Discussion
Calling setMarker( ) records the time. The display( ) method prints out a list of
markers, the time they were set, and the elapsed time from the previous marker:
------------------------------------------------------------- marker time index ex time perct ------------------------------------------------------------- Start 1029433375.42507400 - 0.00% ------------------------------------------------------------- setup 1029433375.42554800 0.00047397613525391 29.77% ------------------------------------------------------------- middle 1029433375.42568700 0.00013899803161621 8.73% ------------------------------------------------------------- done 1029433375.42582000 0.00013303756713867 8.36% ------------------------------------------------------------- Stop 1029433375.42666600 0.00084602832794189 53.14% ------------------------------------------------------------- total - 0.0015920400619507 100.00% -------------------------------------------------------------
The Benchmark module also includes the Benchmark_Iterate class, which can be used to
time many executions of a single function:
require 'Benchmark/Iterate.php'; $timer =& new Benchmark_Iterate; // a sample function to time function use_preg($ar) { for ($i = 0, $j = count($ar); $i < $j; $i++) { if (preg_match('/gouda/',$ar[$i])) { // it's gouda } } } // another sample function to time function use_equals($ar) { for ($i = 0, $j = count($ar); $i < $j; $i++) { if ('gouda' == $ar[$i]) { // it's gouda } } } // run use_preg() 1000 times $timer->run(1000,'use_preg', array('gouda','swiss','gruyere','muenster','whiz')); $results = $timer->get(); print "Mean execution time for use_preg(): $results[mean]\n"; // run use_equals() 1000 times $timer->run(1000,'use_equals', array('gouda','swiss','gruyere','muenster','whiz'));
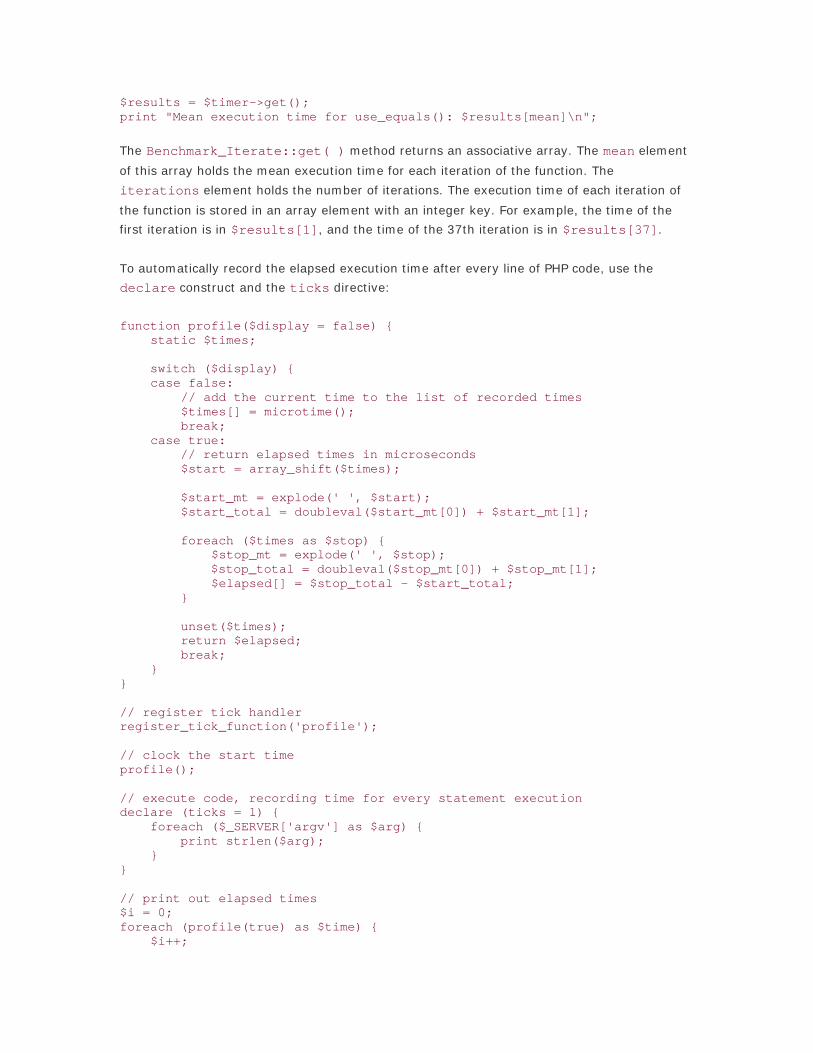
$results = $timer->get(); print "Mean execution time for use_equals(): $results[mean]\n";
The Benchmark_Iterate::get( ) method returns an associative array. The mean element
of this array holds the mean execution time for each iteration of the function. The
iterations element holds the number of iterations. The execution time of each iteration of
the function is stored in an array element with an integer key. For example, the time of the
first iteration is in $results[1], and the time of the 37th iteration is in $results[37].
To automatically record the elapsed execution time after every line of PHP code, use the
declare construct and the ticks directive:
function profile($display = false) { static $times; switch ($display) { case false: // add the current time to the list of recorded times $times[] = microtime(); break; case true: // return elapsed times in microseconds $start = array_shift($times); $start_mt = explode(' ', $start); $start_total = doubleval($start_mt[0]) + $start_mt[1]; foreach ($times as $stop) { $stop_mt = explode(' ', $stop); $stop_total = doubleval($stop_mt[0]) + $stop_mt[1]; $elapsed[] = $stop_total - $start_total; } unset($times); return $elapsed; break; } } // register tick handler register_tick_function('profile'); // clock the start time profile(); // execute code, recording time for every statement execution declare (ticks = 1) { foreach ($_SERVER['argv'] as $arg) { print strlen($arg); } } // print out elapsed times $i = 0; foreach (profile(true) as $time) { $i++;

print "Line $i: $time\n"; }
The ticks directive allows you to execute a function on a repeatable basis for a block of code.
The number assigned to ticks is how many statements go by before the functions that are
registered using register_tick_function( ) are executed.
In the previous example, we register a single function and have the profile( ) function
execute for every statement inside the declare block. If there are two elements in
$_SERVER['argv'], profile( ) is executed four times: once for each time through the
foreach loop, and once each time the print strlen($arg) line is executed.
You can also set things up to call two functions every three statements:
register_tick_function('profile'); register_tick_function('backup'); declare (ticks = 3) { // code... }
You can also pass additional parameters into the registered functions, which can be object
methods instead of regular functions:
// pass "parameter" into profile( ) register_tick_function('profile', 'parameter'); // call $car->drive( ); $car = new Vehicle; register_tick_function(array($car, 'drive'));
If you want to execute an object method, pass the object and the name of the method in
encapsulated within an array. This lets the register_tick_function( ) know you're
referring to an object instead of a function.
Call unregister_tick_function( ) to remove a function from the list of tick functions:
unregister_tick_function('profile');
8.26.4 See Also
http://pear.php.net/package-info.php?package=Benchmark for information on the PEAR
Benchmark class; documentation on register_tick_function( ) at
http://www.php.net/register-tick-function, unregister_tick_function( ) at
http://www.php.net/unregister-tick-function,anddeclareathttp://www.php.net/declare.

Recipe 8.27 Program: Website Account (De)activator
When users sign up for your web site, it's helpful to know that they've provided you with a
correct email address. To validate the email address they provide, send an email to the
address they supply when they sign up. If they don't visit a special URL included in the email
after a few days, deactivate their account.
This system has three parts. The first is the notify-user.php program that sends an email to a
new user and asks them to visit a verification URL, shown in Example 8-4. The second, shown
in Example 8-5, is the verify-user.php page that handles the verification URL and marks users
as valid. The third is the delete-user.php program that deactivates accounts of users who
don't visit the verification URL after a certain amount of time. This program is shown in
Example 8-6.
Here's the SQL to create the table that user information is stored in:
CREATE TABLE users ( email VARCHAR(255) NOT NULL, created_on DATETIME NOT NULL, verify_string VARCHAR(16) NOT NULL, verified TINYINT UNSIGNED );
You probably want to store more information than this about your users, but this is all that's
needed to verify them. When creating a user's account, save information to the users table,
and send the user an email telling them how to verify their account. The code in Example 8-4
assumes that user's email address is stored in the variable $email.
Example 8-4. notify-user.php
// generate verify_string $verify_string = ''; for ($i = 0; $i < 16; $i++) { $verify_string .= chr(mt_rand(32,126)); } // insert user into database if (! mysql_query("INSERT INTO users (email,created_on,verify_string,verified) VALUES ('".addslashes($email)."',NOW(),'".addslashes($verify_string)."',0)")) { error_log("Can't insert user: ".mysql_error()); exit; } $verify_string = urlencode($verify_string); $safe_email = urlencode($email); $verify_url = "http://www.example.com/verify.php"; $mail_body=<<<_MAIL_ To $email:
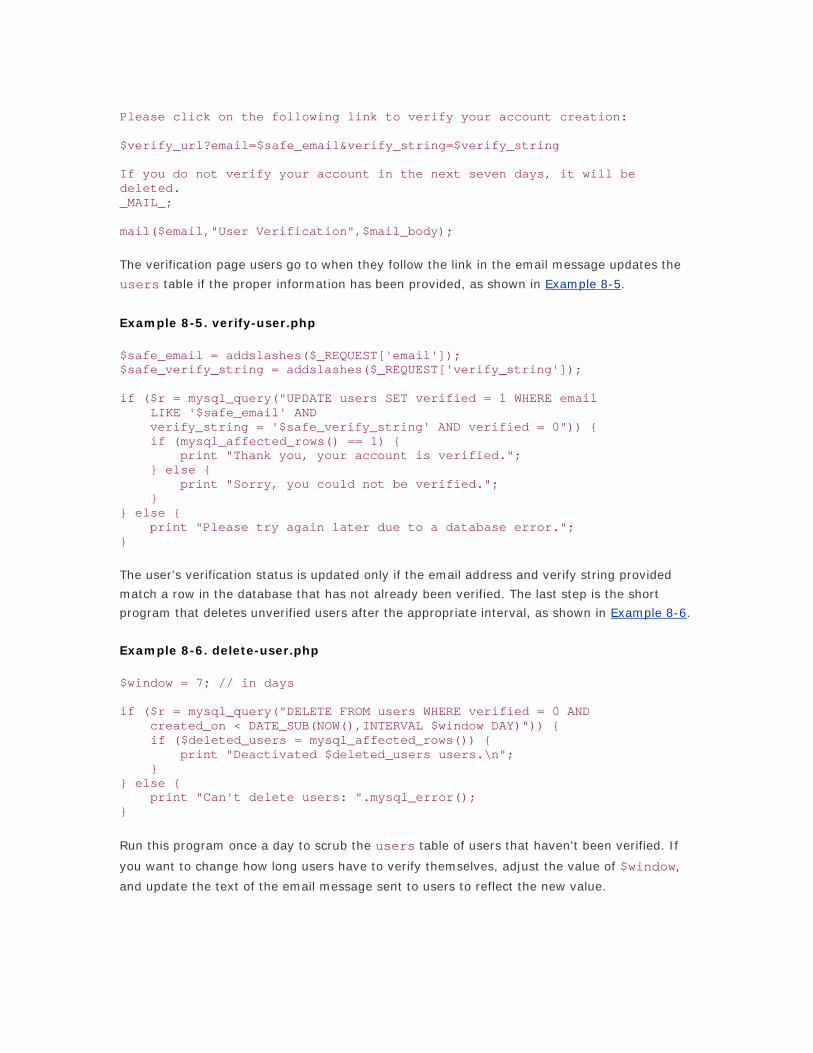
Please click on the following link to verify your account creation: $verify_url?email=$safe_email&verify_string=$verify_string If you do not verify your account in the next seven days, it will be deleted. _MAIL_; mail($email,"User Verification",$mail_body);
The verification page users go to when they follow the link in the email message updates the
users table if the proper information has been provided, as shown in Example 8-5.
Example 8-5. verify-user.php
$safe_email = addslashes($_REQUEST['email']); $safe_verify_string = addslashes($_REQUEST['verify_string']); if ($r = mysql_query("UPDATE users SET verified = 1 WHERE email LIKE '$safe_email' AND verify_string = '$safe_verify_string' AND verified = 0")) { if (mysql_affected_rows() == 1) { print "Thank you, your account is verified."; } else { print "Sorry, you could not be verified."; } } else { print "Please try again later due to a database error."; }
The user's verification status is updated only if the email address and verify string provided
match a row in the database that has not already been verified. The last step is the short
program that deletes unverified users after the appropriate interval, as shown in Example 8-6.
Example 8-6. delete-user.php
$window = 7; // in days if ($r = mysql_query("DELETE FROM users WHERE verified = 0 AND created_on < DATE_SUB(NOW(),INTERVAL $window DAY)")) { if ($deleted_users = mysql_affected_rows()) { print "Deactivated $deleted_users users.\n"; } } else { print "Can't delete users: ".mysql_error(); }
Run this program once a day to scrub the users table of users that haven't been verified. If
you want to change how long users have to verify themselves, adjust the value of $window,
and update the text of the email message sent to users to reflect the new value.

Recipe 8.28 Program: Abusive User Checker
Shared memory's speed makes it an ideal way to store data different web server processes
need to access frequently when a file or database would be too slow. Example 8-7 shows the
pc_Web_Abuse_Check class, which uses shared memory to track accesses to web pages in
order to cut off users that abuse a site by bombarding it with requests.
Example 8-7. pc_Web_Abuse_Check class
class pc_Web_Abuse_Check { var $sem_key; var $shm_key; var $shm_size; var $recalc_seconds; var $pageview_threshold; var $sem; var $shm; var $data; var $exclude; var $block_message; function pc_Web_Abuse_Check() { $this->sem_key = 5000; $this->shm_key = 5001; $this->shm_size = 16000; $this->recalc_seconds = 60; $this->pageview_threshold = 30; $this->exclude['/ok-to-bombard.html'] = 1; $this->block_message =<<<END <html> <head><title>403 Forbidden</title></head> <body> <h1>Forbidden</h1> You have been blocked from retrieving pages from this site due to abusive repetitive activity from your account. If you believe this is an error, please contact <a href="mailto:[email protected]?subject=Site+Abuse">[email protected]</a>. </body> </html> END; } function get_lock() { $this->sem = sem_get($this->sem_key,1,0600); if (sem_acquire($this->sem)) { $this->shm = shm_attach($this->shm_key,$this->shm_size,0600); $this->data = shm_get_var($this->shm,'data'); } else { error_log("Can't acquire semaphore $this->sem_key"); } } function release_lock() { if (isset($this->data)) {
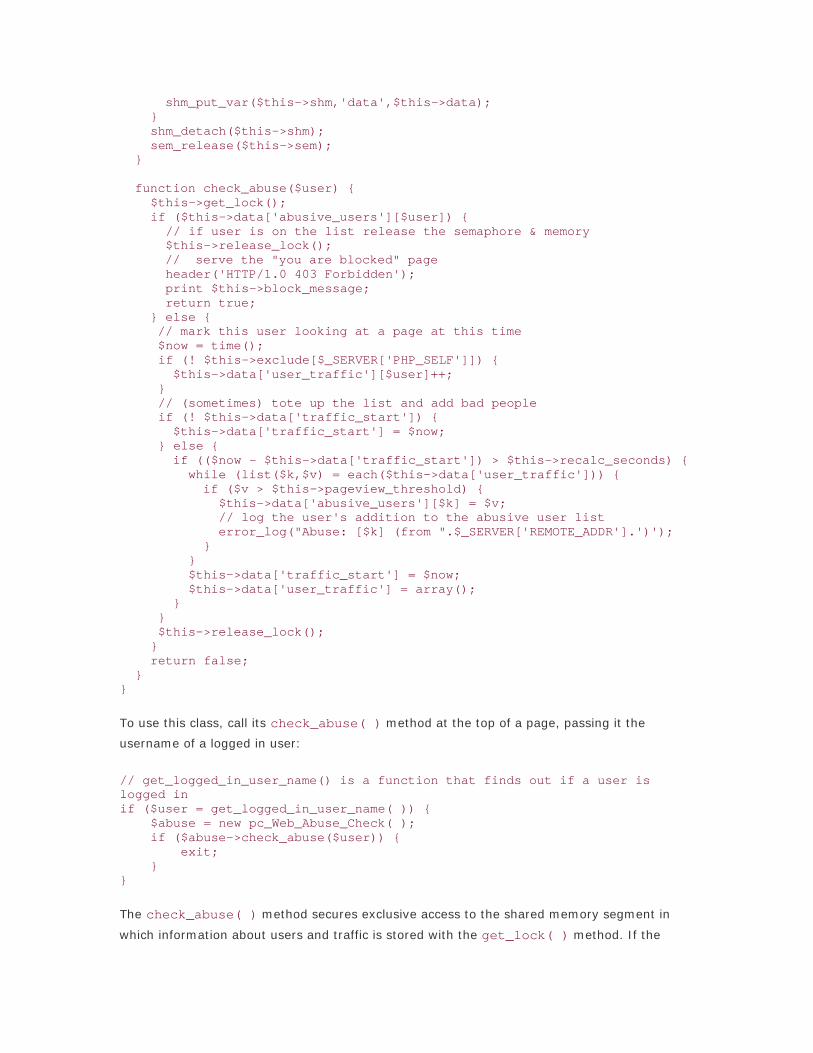
shm_put_var($this->shm,'data',$this->data); } shm_detach($this->shm); sem_release($this->sem); } function check_abuse($user) { $this->get_lock(); if ($this->data['abusive_users'][$user]) { // if user is on the list release the semaphore & memory $this->release_lock(); // serve the "you are blocked" page header('HTTP/1.0 403 Forbidden'); print $this->block_message; return true; } else { // mark this user looking at a page at this time $now = time(); if (! $this->exclude[$_SERVER['PHP_SELF']]) { $this->data['user_traffic'][$user]++; } // (sometimes) tote up the list and add bad people if (! $this->data['traffic_start']) { $this->data['traffic_start'] = $now; } else { if (($now - $this->data['traffic_start']) > $this->recalc_seconds) { while (list($k,$v) = each($this->data['user_traffic'])) { if ($v > $this->pageview_threshold) { $this->data['abusive_users'][$k] = $v; // log the user's addition to the abusive user list error_log("Abuse: [$k] (from ".$_SERVER['REMOTE_ADDR'].')'); } } $this->data['traffic_start'] = $now; $this->data['user_traffic'] = array(); } } $this->release_lock(); } return false; } }
To use this class, call its check_abuse( ) method at the top of a page, passing it the
username of a logged in user:
// get_logged_in_user_name() is a function that finds out if a user is logged in if ($user = get_logged_in_user_name( )) { $abuse = new pc_Web_Abuse_Check( ); if ($abuse->check_abuse($user)) { exit; } }
The check_abuse( ) method secures exclusive access to the shared memory segment in
which information about users and traffic is stored with the get_lock( ) method. If the

current user is already on the list of abusive users, it releases its lock on the shared memory,
prints out an error page to the user, and returns true. The error page is defined in the class's
constructor.
If the user isn't on the abusive user list, and the current page (stored in
$_SERVER['PHP_SELF']) isn't on a list of pages to exclude from abuse checking, the count
of pages that the user has looked at is incremented. The list of pages to exclude is also
defined in the constructor. By calling check_abuse( ) at the top of every page and putting
pages that don't count as potentially abusive in the $exclude array, you ensure that an
abusive user will see the error page even when retrieving a page that doesn't count towards
the abuse threshold. This makes your site behave more consistently.
The next section of check_abuse( ) is responsible for adding users to the abusive users list.
If more than $this->recalc_seconds have passed since the last time it added users to the
abusive users list, it looks at each user's pageview count and if any are over $this-
>pageview_threshold, they are added to the abusive users list, and a message is put in
the error log. The code that sets $this->data['traffic_start'] if it's not already set is
executed only the very first time check_abuse( ) is called. After adding any new abusive
users, check_abuse( ) resets the count of users and pageviews and starts a new interval
until the next time the abusive users list is updated. After releasing its lock on the shared
memory segment, it returns false.
All the information check_abuse( ) needs for its calculations, such as the abusive user list,
recent pageview counts for users, and the last time abusive users were calculated, is stored
inside a single associative array, $data. This makes reading the values from and writing the
values to shared memory easier than if the information was stored in separate variables,
because only one call to shm_get_var( ) and shm_put_var( ) are necessary.
The pc_Web_Abuse_Check class blocks abusive users, but it doesn't provide any reporting
capabilities or a way to add or remove specific users from the list. Example 8-8 shows the
abuse-manage.php program, which lets you manage the abusive user data.
Example 8-8. abuse-manage.php
// the pc_Web_Abuse_Check class is defined in abuse-check.php require 'abuse-check.php'; $abuse = new pc_Web_Abuse_Check(); $now = time(); // process commands, if any $abuse->get_lock(); switch ($_REQUEST['cmd']) { case 'clear': $abuse->data['traffic_start'] = 0; $abuse->data['abusive_users'] = array(); $abuse->data['user_traffic'] = array();

break; case 'add': $abuse->data['abusive_users'][$_REQUEST['user']] = 'web @ '.strftime('%c',$now); break; case 'remove': $abuse->data['abusive_users'][$_REQUEST['user']] = 0; break; } $abuse->release_lock(); // now the relevant info is in $abuse->data print 'It is now <b>'.strftime('%c',$now).'</b><br>'; print 'Current interval started at <b>'.strftime('%c',$abuse->data['traffic_start']); print '</b> ('.($now - $abuse->data['traffic_start']).' seconds ago).<p>'; print 'Traffic in the current interval:<br>'; if (count($abuse->data['user_traffic'])) { print '<table border="1"><tr><th>User</th><th>Pages</th></tr>'; while (list($user,$pages) = each($abuse->data['user_traffic'])) { print "<tr><td>$user</td><td>$pages</td></tr>"; } print "</table>"; } else { print "<i>No traffic.</i>"; } print '<p>Abusive Users:'; if ($abuse->data['abusive_users']) { print '<table border="1"><tr><th>User</th><th>Pages</th></tr>'; while (list($user,$pages) = each($abuse->data['abusive_users'])) { if (0 === $pages) { $pages = 'Removed'; $remove_command = ''; } else { $remove_command = "<a href=\"$_SERVER[PHP_SELF]?cmd=remove&user=".urlencode($user)."\">remove</a>"; } print "<tr><td>$user</td><td>$pages</td><td>$remove_command</td></tr>"; } print '</table>'; } else { print "<i>No abusive users.</i>"; } print<<<END <form method="post" action="$_SERVER[PHP_SELF]"> <input type="hidden" name="cmd" value="add"> Add this user to the abusive users list: <input type="text" name="user" value=""> <br> <input type="submit" value="Add User"> </form> <hr> <form method="post" action="$_SERVER[PHP_SELF]"> <input type="hidden" name="cmd" value="clear">

<input type="submit" value="Clear the abusive users list"> END;
Example 8-8 prints out information about current user page view counts and the current
abusive user list, as shown in Figure 8-1. It also lets you add or remove specific users from
the list and clear the whole list.
Figure 8-1. Abusive users
When it removes users from the abusive users list, instead of:
unset($abuse->data['abusive_users'][$_REQUEST['user']])
it sets the following to 0:
$abuse->data['abusive_users'][$_REQUEST['user']]

This still causes check_abuse( ) to return false, but it allows the page to explicitly note
that the user was on the abusive users list but was removed. This is helpful to know in case a
user that was removed starts causing trouble again.
When a user is added to the abusive users list, instead of recording a pageview count, the
script records the time the user was added. This is helpful in tracking down who or why the
user was manually added to the list.
If you deploy pc_Web_Abuse_Check and this maintenance page on your server, make sure
that the maintenance page is protected by a password or otherwise inaccessible to the general
public. Obviously, this code isn't very helpful if abusive users can remove themselves from the
list of abusive users.

Chapter 9. Forms
Section 9.1. Introduction
Recipe 9.2. Processing Form Input
Recipe 9.3. Validating Form Input
Recipe 9.4. Working with Multipage Forms
Recipe 9.5. Redisplaying Forms with Preserved Information and Error Messages
Recipe 9.6. Guarding Against Multiple Submission of the Same Form
Recipe 9.7. Processing Uploaded Files
Recipe 9.8. Securing PHP's Form Processing
Recipe 9.9. Escaping Control Characters from User Data
Recipe 9.10. Handling Remote Variables with Periods in Their Names
Recipe 9.11. Using Form Elements with Multiple Options
Recipe 9.12. Creating Dropdown Menus Based on the Current Date

9.1 Introduction
The genius of PHP is its seamless integration of form variables into your programs. It makes
web programming smooth and simple, from web form to PHP code to HTML output.
There's no built-in mechanism in HTTP to allow you to save information from one page so you
can access it in other pages. That's because HTTP is a stateless protocol. Recipe 9.2, Recipe
9.4, Recipe 9.5, and Recipe 9.6 all show ways to work around the fundamental problem of
figuring out which user is making which requests to your web server.
Processing data from the user is the other main topic of this chapter. You should never trust
the data coming from the browser, so it's imperative to always validate all fields, even hidden
form elements. Validation takes many forms, from ensuring the data match certain criteria, as
discussed in Recipe 9.3, to escaping HTML entities to allow the safe display of user entered
data, as covered in Recipe 9.9. Furthermore, Recipe 9.8 tells how to protect the security of
your web server, and Recipe 9.7 covers how to process files uploaded by a user.
Whenever PHP processes a page, it checks for GET and POST form variables, uploaded files,
applicable cookies, and web server and environment variables. These are then directly
accessible in the following arrays: $_GET , $_POST, $_FILES, $_COOKIE, $_SERVER, and
$_ENV. They hold, respectively, all variables set by GET requests, POST requests, uploaded
files, cookies, the web server, and the environment. There's also $_REQUEST, which is one
giant array that contains the values from the other six arrays.
When placing elements inside of $_REQUEST, if two arrays both have a key with the same
name, PHP falls back upon the variables_order configuration directive. By default,
variables_order is EGPCS (or GPCS, if you're using the php.ini-recommended configuration
file). So, PHP first adds environment variables to $_REQUEST and then adds GET, POST,
cookie, and web server variables to the array, in this order. For instance, since C comes after
P in the default order, a cookie named username overwrites a POST variable named
username.
If you don't have access to PHP's configuration files, you can use ini_get( ) to check a
setting:
print ini_get('variables_order'); EGPCS
You may need to do this because your ISP doesn't let you view configuration settings or
because your script may run on someone else's server. You can also use phpinfo( ) to view
settings. However, if you can't rely on the value of variables_order, you should directly
access $_GET and $_POST instead of using $_REQUEST.
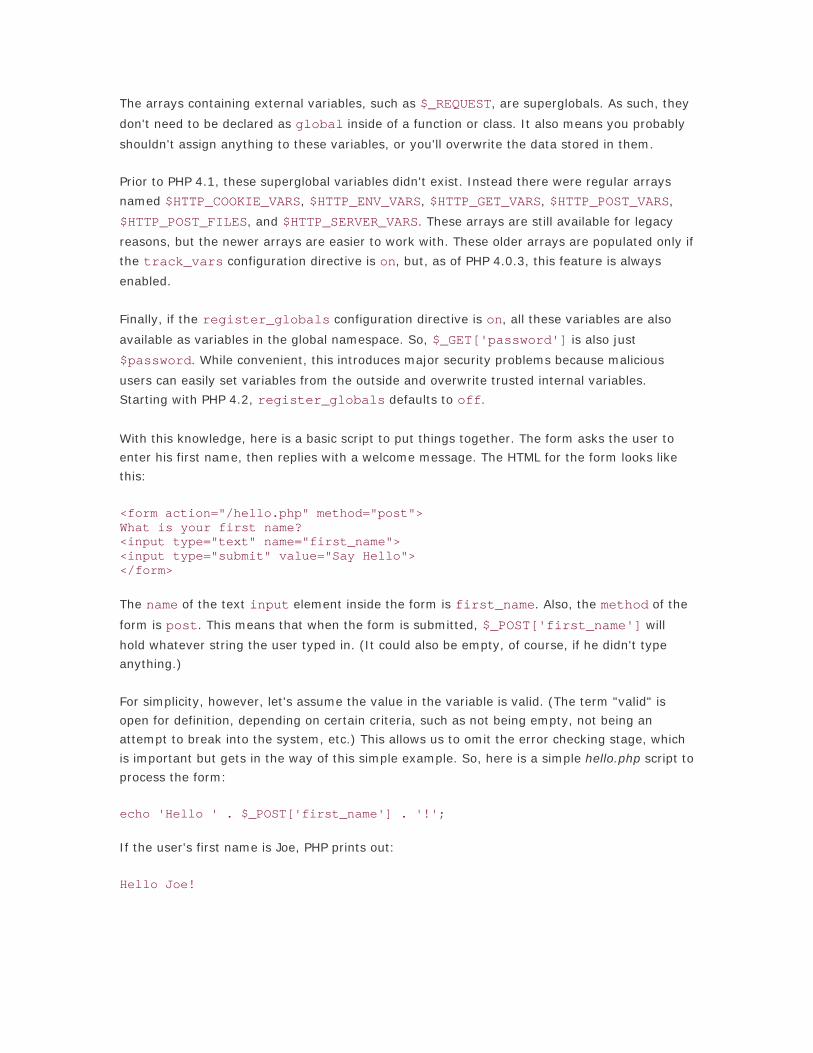
The arrays containing external variables, such as $_REQUEST, are superglobals. As such, they
don't need to be declared as global inside of a function or class. It also means you probably
shouldn't assign anything to these variables, or you'll overwrite the data stored in them.
Prior to PHP 4.1, these superglobal variables didn't exist. Instead there were regular arrays
named $HTTP_COOKIE_VARS, $HTTP_ENV_VARS, $HTTP_GET_VARS, $HTTP_POST_VARS,
$HTTP_POST_FILES, and $HTTP_SERVER_VARS. These arrays are still available for legacy
reasons, but the newer arrays are easier to work with. These older arrays are populated only if
the track_vars configuration directive is on, but, as of PHP 4.0.3, this feature is always
enabled.
Finally, if the register_globals configuration directive is on, all these variables are also
available as variables in the global namespace. So, $_GET['password'] is also just
$password. While convenient, this introduces major security problems because malicious
users can easily set variables from the outside and overwrite trusted internal variables.
Starting with PHP 4.2, register_globals defaults to off.
With this knowledge, here is a basic script to put things together. The form asks the user to
enter his first name, then replies with a welcome message. The HTML for the form looks like
this:
<form action="/hello.php" method="post"> What is your first name? <input type="text" name="first_name"> <input type="submit" value="Say Hello"> </form>
The name of the text input element inside the form is first_name. Also, the method of the
form is post. This means that when the form is submitted, $_POST['first_name'] will
hold whatever string the user typed in. (It could also be empty, of course, if he didn't type
anything.)
For simplicity, however, let's assume the value in the variable is valid. (The term "valid" is
open for definition, depending on certain criteria, such as not being empty, not being an
attempt to break into the system, etc.) This allows us to omit the error checking stage, which
is important but gets in the way of this simple example. So, here is a simple hello.php script to
process the form:
echo 'Hello ' . $_POST['first_name'] . '!';
If the user's first name is Joe, PHP prints out:
Hello Joe!

Recipe 9.2 Processing Form Input
9.2.1 Problem
You want to use the same HTML page to emit a form and then process the data entered into
it. In other words, you're trying to avoid a proliferation of pages that each handle different
steps in a transaction.
9.2.2 Solution
Use a hidden field in the form to tell your program that it's supposed to be processing the
form. In this case, the hidden field is named stage and has a value of process:
if (isset($_POST['stage']) && ('process' == $_POST['stage'])) { process_form(); } else { print_form(); }
9.2.3 Discussion
During the early days of the Web, when people created forms, they made two pages: a static
HTML page with the form and a script that processed the form and returned a dynamically
generated response to the user. This was a little unwieldy, because form.html led to form.cgi
and if you changed one page, you needed to also remember to edit the other, or your script
might break.
Forms are easier to maintain when all parts live in the same file and context dictates which
sections to display. Use a hidden form field named stage to track your position in the flow of
the form process; it acts as a trigger for the steps that return the proper HTML to the user.
Sometimes, however, it's not possible to design your code to do this; for example, when your
form is processed by a script on someone else's server.
When writing the HTML for your form, however, don't hardcode the path to your page directly
into the action. This makes it impossible to rename or relocate your page without also
editing it. Instead, PHP supplies a helpful variable:
$_SERVER['PHP_SELF']
This variable is an alias to the URL of the current page. So, set the value of the action
attribute to that value, and your form always resubmits, even if you've moved the file to a
new place on the server.
So, the example in the introduction of this chapter is now:
if (isset($_POST['stage']) && ('process' == $_POST['stage'])) { process_form(); } else {

print_form(); } function print_form() { echo <<<END <form action="$_SERVER[PHP_SELF]" method="post"> What is your first name? <input type="text" name="first_name"> <input type="hidden" name="stage" value="process"> <input type="submit" value="Say Hello"> </form> END; } function process_form() { echo 'Hello ' . $_POST['first_name'] . '!'; }
If your form has more than one step, just set stage to a new value for each step.
9.2.4 See Also
Recipe 9.4 for handling multipage forms.
Recipe 9.3 Validating Form Input
9.3.1 Problem
You want to ensure data entered from a form passes certain criteria.
9.3.2 Solution
Create a function that takes a string to validate and returns true if the string passes a check
and false if it doesn't. Inside the function, use regular expressions and comparisons to check
the data. For example, Example 9-1 shows the pc_validate_zipcode( ) function, which
validates a U.S. Zip Code.
Example 9-1. pc_validate_zipcode( )
function pc_validate_zipcode($zipcode) { return preg_match('/^[0-9]{5}([- ]?[0-9]{4})?$/', $zipcode); }
Here's how to use it:
if (pc_validate_zipcode($_REQUEST['zipcode'])) { // U.S. Zip Code is okay, can proceed process_data(); } else { // this is not an okay Zip Code, print an error message print "Your ZIP Code is should be 5 digits (or 9 digits, if you're "; print "using ZIP+4)."; print_form();

}
9.3.3 Discussion
Deciding what constitutes valid and invalid data is almost more of a philosophical task than a
straightforward matter of following a series of fixed steps. In many cases, what may be
perfectly fine in one situation won't be correct in another.
The easiest check is making sure the field isn't blank. The empty( ) function best handles
this problem.
Next come relatively easy checks, such as the case of a U.S. Zip Code. Usually, a regular
expression or two can solve these problems. For example:
/^[0-9]{5}([- ]?[0-9]{4})?$/
finds all valid U.S. Zip Codes.
Sometimes, however, coming up with the correct regular expression is difficult. If you want to
verify that someone has entered only two names, such as "Alfred Aho," you can check
against:
/^[A-Za-z]+ +[A-Za-z]+$/
However, Tim O'Reilly can't pass this test. An alternative is /^\S+\s+\S+$/; but then Donald
E. Knuth is rejected. So think carefully about the entire range of valid input before writing
your regular expression.
In some instances, even with regular expressions, it becomes difficult to check if the field is
legal. One particularly popular and tricky task is validating an email address, as discussed in
Recipe 13.7. Another is how to make sure a user has correctly entered the name of her U.S.
state. You can check against a listing of names, but what if she enters her postal service
abbreviation? Will MA instead of Massachusetts work? What about Mass.?
One way to avoid this issue is to present the user with a dropdown list of pregenerated
choices. Using a select element, users are forced by the form's design to select a state in
the format that always works, which can reduce errors. This, however, presents another series
of difficulties. What if the user lives some place that isn't one of the choices? What if the range
of choices is so large this isn't a feasible solution?
There are a number of ways to solve these types of problems. First, you can provide an
"other" option in the list, so that a non-U.S. user can successfully complete the form.
(Otherwise, she'll probably just pick a place at random, so she can continue using your site.)
Next, you can divide the registration process into a two-part sequence. For a long list of
options, a user begins by picking the letter of the alphabet his choice begins with; then, a new
page provides him with a list containing only the choices beginning with that letter.

Finally, there are even trickier problems. What do you do when you want to make sure the
user has correctly entered information, but you don't want to tell her you did so? A situation
where this is important is a sweepstakes; in a sweepstakes, there's often a special code box
on the entry form in which a user enters a string — AD78DQ — from an email or flier she's
received. You want to make sure there are no typos, or your program won't count her as a
valid entrant. You also don't want to allow her to just guess codes, because then she could try
out those codes and crack the system.
The solution is to have two input boxes. A user enters her code twice; if the two fields match,
you accept the data as legal and then (silently) validate the data. If the fields don't match,
you reject the entry and have the user fix it. This procedure eliminates typos and doesn't
reveal how the code validation algorithm works; it can also prevent misspelled email
addresses.
Finally, PHP performs server-side validation. Server-side validation requires that a request be
made to the server, and a page returned in response; as a result, it can be slow. It's also
possible to do client-side validation using JavaScript. While client-side validation is faster, it
exposes your code to the user and may not work if the client doesn't support JavaScript or has
disabled it. Therefore, you should always duplicate all client-side validation code on the server.
9.3.4 See Also
Recipe 13.7 for a regular expression for validating email addresses; Chapter 7, "Validation on
the Server and Client," of Web Database Applications with PHP and MySQL (Hugh Williams and
David Lane, O'Reilly).
Recipe 9.4 Working with Multipage Forms
9.4.1 Problem
You want to use a form that displays more than one page and preserve data from one page to
the next.
9.4.2 Solution
Use session tracking:
session_start(); $_SESSION['username'] = $_GET['username'];
You can also include variables from a form's earlier pages as hidden input fields in its later
pages:
<input type="hidden" name="username" value="<?php echo htmlentities($_GET['username']); ?>">
9.4.3 Discussion

Whenever possible, use session tracking. It's more secure because users can't modify session
variables. To begin a session, call session_start( ); this creates a new session or resumes
an existing one. Note that this step is unnecessary if you've enabled session.auto_start
in your php.ini file. Variables assigned to $_SESSION are automatically propagated. In the
Solution example, the form's username variable is preserved by assigning
$_GET['username'] to $_SESSION['username'].
To access this value on a subsequent request, call session_start( ) and then check
$_SESSION['username']:
session_start( ); $username = htmlentities($_SESSION['username']); print "Hello $username.";
In this case, if you don't call session_start( ), $_SESSION isn't set.
Be sure to secure the server and location where your session files are located (the filesystem,
database, etc.); otherwise your system will be vulnerable to identity spoofing.
If session tracking isn't enabled for your PHP installation, you can use hidden form variables as
a replacement. However, passing data using hidden form elements isn't secure because
anyone can edit these fields and fake a request; with a little work, you can increase the
security to a reliable level.
The most basic way to use hidden fields is to include them inside your form.
<form action="<?php echo $_SERVER['PHP_SELF']; ?>" method="get"> <input type="hidden" name="username" value="<?php echo htmlentities($_GET['username']); ?>">
When this form is resubmitted, $_GET['username'] holds its previous value unless someone
has modified it.
A more complex but secure solution is to convert your variables to a string using serialize(
), compute a secret hash of the data, and place both pieces of information in the form. Then,
on the next request, validate the data and unserialize it. If it fails the validation test, you'll
know someone has tried to modify the information.
The pc_encode( ) encoding function shown in Example 9-2 takes the data to encode in the
form of an array.
Example 9-2. pc_encode( )
$secret = 'Foo25bAr52baZ';
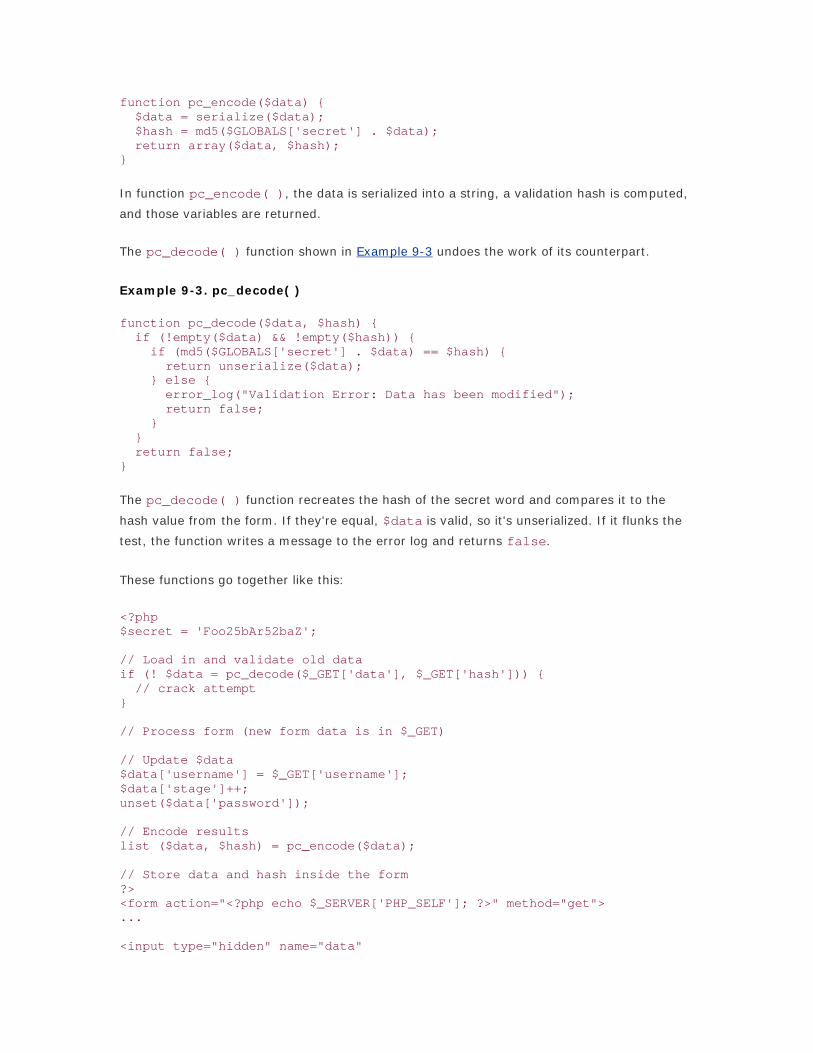
function pc_encode($data) { $data = serialize($data); $hash = md5($GLOBALS['secret'] . $data); return array($data, $hash); }
In function pc_encode( ), the data is serialized into a string, a validation hash is computed,
and those variables are returned.
The pc_decode( ) function shown in Example 9-3 undoes the work of its counterpart.
Example 9-3. pc_decode( )
function pc_decode($data, $hash) { if (!empty($data) && !empty($hash)) { if (md5($GLOBALS['secret'] . $data) == $hash) { return unserialize($data); } else { error_log("Validation Error: Data has been modified"); return false; } } return false; }
The pc_decode( ) function recreates the hash of the secret word and compares it to the
hash value from the form. If they're equal, $data is valid, so it's unserialized. If it flunks the
test, the function writes a message to the error log and returns false.
These functions go together like this:
<?php $secret = 'Foo25bAr52baZ'; // Load in and validate old data if (! $data = pc_decode($_GET['data'], $_GET['hash'])) { // crack attempt } // Process form (new form data is in $_GET) // Update $data $data['username'] = $_GET['username']; $data['stage']++; unset($data['password']); // Encode results list ($data, $hash) = pc_encode($data); // Store data and hash inside the form ?> <form action="<?php echo $_SERVER['PHP_SELF']; ?>" method="get"> ... <input type="hidden" name="data"
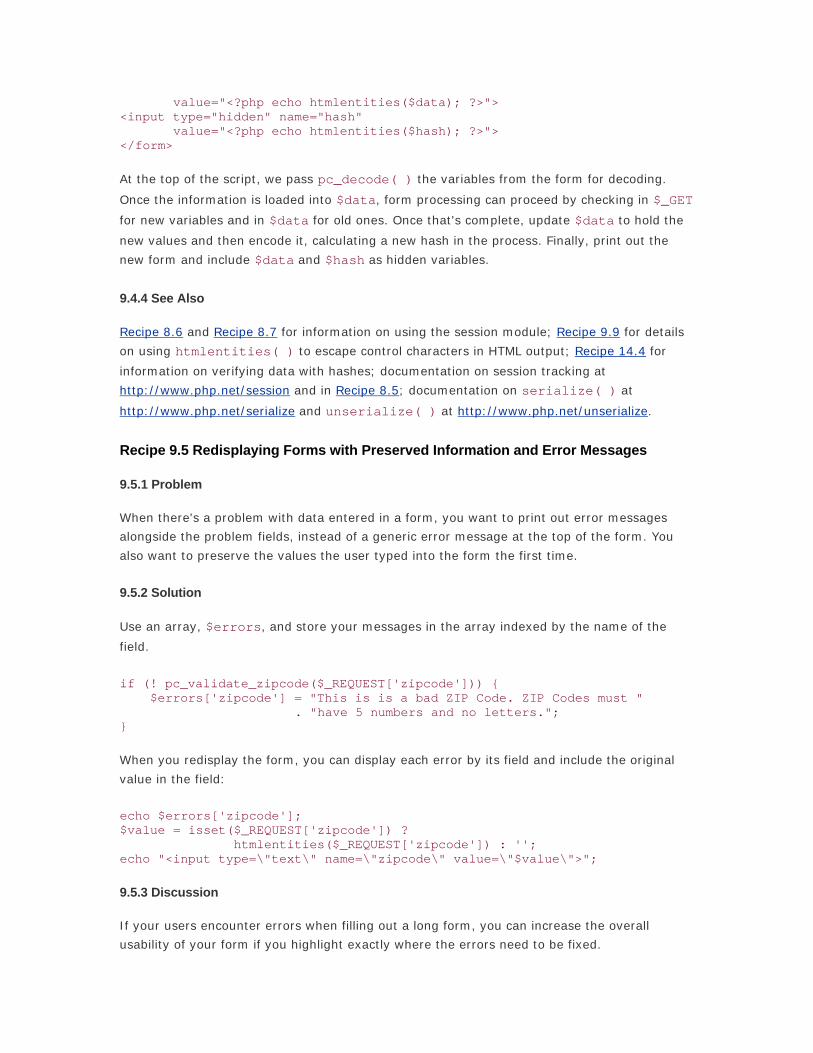
value="<?php echo htmlentities($data); ?>"> <input type="hidden" name="hash" value="<?php echo htmlentities($hash); ?>"> </form>
At the top of the script, we pass pc_decode( ) the variables from the form for decoding.
Once the information is loaded into $data, form processing can proceed by checking in $_GET
for new variables and in $data for old ones. Once that's complete, update $data to hold the
new values and then encode it, calculating a new hash in the process. Finally, print out the
new form and include $data and $hash as hidden variables.
9.4.4 See Also
Recipe 8.6 and Recipe 8.7 for information on using the session module; Recipe 9.9 for details
on using htmlentities( ) to escape control characters in HTML output; Recipe 14.4 for
information on verifying data with hashes; documentation on session tracking at
http://www.php.net/session and in Recipe 8.5; documentation on serialize( ) at
http://www.php.net/serialize and unserialize( ) at http://www.php.net/unserialize.
Recipe 9.5 Redisplaying Forms with Preserved Information and Error Messages
9.5.1 Problem
When there's a problem with data entered in a form, you want to print out error messages
alongside the problem fields, instead of a generic error message at the top of the form. You
also want to preserve the values the user typed into the form the first time.
9.5.2 Solution
Use an array, $errors, and store your messages in the array indexed by the name of the
field.
if (! pc_validate_zipcode($_REQUEST['zipcode'])) { $errors['zipcode'] = "This is is a bad ZIP Code. ZIP Codes must " . "have 5 numbers and no letters."; }
When you redisplay the form, you can display each error by its field and include the original
value in the field:
echo $errors['zipcode']; $value = isset($_REQUEST['zipcode']) ? htmlentities($_REQUEST['zipcode']) : ''; echo "<input type=\"text\" name=\"zipcode\" value=\"$value\">";
9.5.3 Discussion
If your users encounter errors when filling out a long form, you can increase the overall
usability of your form if you highlight exactly where the errors need to be fixed.
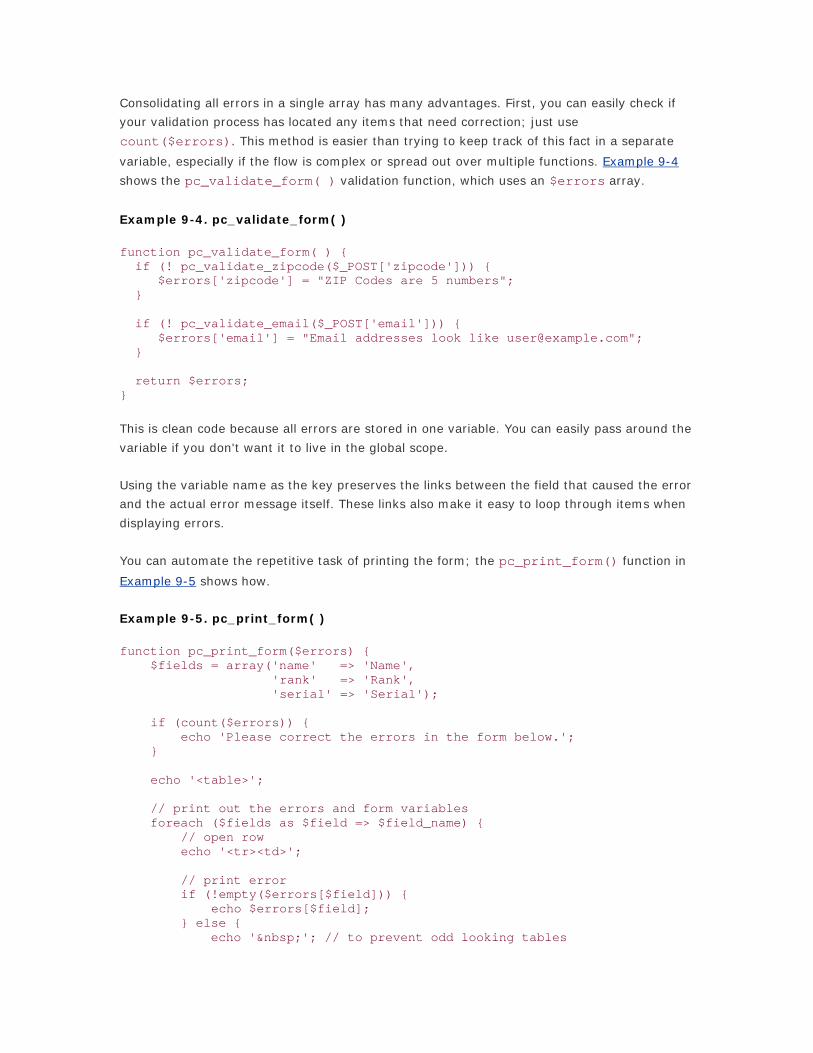
Consolidating all errors in a single array has many advantages. First, you can easily check if
your validation process has located any items that need correction; just use
count($errors). This method is easier than trying to keep track of this fact in a separate
variable, especially if the flow is complex or spread out over multiple functions. Example 9-4
shows the pc_validate_form( ) validation function, which uses an $errors array.
Example 9-4. pc_validate_form( )
function pc_validate_form( ) { if (! pc_validate_zipcode($_POST['zipcode'])) { $errors['zipcode'] = "ZIP Codes are 5 numbers"; } if (! pc_validate_email($_POST['email'])) { $errors['email'] = "Email addresses look like [email protected]"; } return $errors; }
This is clean code because all errors are stored in one variable. You can easily pass around the
variable if you don't want it to live in the global scope.
Using the variable name as the key preserves the links between the field that caused the error
and the actual error message itself. These links also make it easy to loop through items when
displaying errors.
You can automate the repetitive task of printing the form; the pc_print_form() function in
Example 9-5 shows how.
Example 9-5. pc_print_form( )
function pc_print_form($errors) { $fields = array('name' => 'Name', 'rank' => 'Rank', 'serial' => 'Serial'); if (count($errors)) { echo 'Please correct the errors in the form below.'; } echo '<table>'; // print out the errors and form variables foreach ($fields as $field => $field_name) { // open row echo '<tr><td>'; // print error if (!empty($errors[$field])) { echo $errors[$field]; } else { echo ' '; // to prevent odd looking tables

} echo "</td><td>"; // print name and input $value = isset($_REQUEST[$field]) ? htmlentities($_REQUEST[$field]) : ''; echo "$field_name: "; echo "<input type=\"text\" name=\"$field\" value=\"$value\">"; echo '</td></tr>'; } echo '</table>'; }
The complex part of pc_print_form( ) comes from the $fields array. The key is the
variable name; the value is the pretty display name. By defining them at the top of the
function, you can create a loop and use foreach to iterate through the values; otherwise, you
need three separate lines of identical code. This integrates with the variable name as a key in
$errors, because you can find the error message inside the loop just by checking
$errors[$field].
If you want to extend this example beyond input fields of type text, modify $fields to
include more meta-information about your form fields:
$fields = array('name' => array('name' => 'Name', 'type' => 'text'), 'rank' => array('name' => 'Rank', 'type' => 'password'), 'serial' => array('name' => 'Serial', 'type' => 'hidden') );
9.5.4 See Also
Recipe 9.3 for simple form validation.
Recipe 9.6 Guarding Against Multiple Submission of the Same Form
9.6.1 Problem
You want to prevent people from submitting the same form multiple times.
9.6.2 Solution
Generate a unique identifier and store the token as a hidden field in the form. Before
processing the form, check to see if that token has already been submitted. If it hasn't, you
can proceed; if it has, you should generate an error.
When creating the form, use uniqid( ) to get a unique identifier:
<?php $unique_id = uniqid(microtime(),1);

... ?> <input type="hidden" name="unique_id" value="<?php echo $unique_id; ?>"> </form>
Then, when processing, look for this ID:
$unique_id = $dbh->quote($_GET['unique_id']); $sth = $dbh->query("SELECT * FROM database WHERE unique_id = $unique_id"); if ($sth->numRows( )) { // already submitted, throw an error } else { // act upon the data }
9.6.3 Discussion
For a variety of reasons, users often resubmit a form. Usually it's a slip-of-the-mouse: double-
clicking the Submit button. They may hit their web browser's Back button to edit or recheck
information, but then they re-hit Submit instead of Forward. It can be intentional: they're
trying to stuff the ballot box for an online survey or sweepstakes. Our Solution prevents the
nonmalicious attack and can slow down the malicious user. It won't, however, eliminate all
fraudulent use: more complicated work is required for that.
The Solution does prevent your database from being cluttered with too many copies of the
same record. By generating a token that's placed in the form, you can uniquely identify that
specific instance of the form, even when cookies is disabled. When you then save the form's
data, you store the token alongside it. That allows you to easily check if you've already seen
this form and record the database it belongs to.
Start by adding an extra column to your database table — unique_id — to hold the
identifier. When you insert data for a record, add the ID also. For example:
$username = $dbh->quote($_GET['username']); $unique_id = $dbh->quote($_GET['unique_id']); $sth = $dbh->query("INSERT INTO members ( username, unique_id) VALUES ($username, $unique_id)");
By associating the exact row in the database with the form, you can more easily handle a
resubmission. There's no correct answer here; it depends on your situation. In some cases,
you'll want to ignore the second posting all together. In others, you'll want to check if the
record has changed, and, if so, present the user with a dialog box asking if they want to
update the record with the new information or keep the old data. Finally, to reflect the second
form submission, you could update the record silently, and the user never learns of a problem.
All these possibilities should be considered given the specifics of the interaction. Our opinion is
there's no reason to allow the deficits of HTTP to dictate the user experience. So, while the
third choice, silently updating the record, isn't what normally happens, in many ways this is

the most natural option. Applications we've developed with this method are more user
friendly; the other two methods confuse or frustrate most users.
It's tempting to avoid generating a random token and instead use a number one greater then
the number of records already in the database. The token and the primary key will thus be the
same, and you don't need to use an extra column. There are (at least) two problems with this
method. First, it creates a race condition. What happens when a second person starts the form
before the first person has completed it? The second form will then have the same token as
the first, and conflicts will occur. This can be worked around by creating a new blank record in
the database when the form is requested, so the second person will get a number one higher
than the first. However, this can lead to empty rows in the database if users opt not to
complete the form.
The other reason not do this is because it makes it trivial to edit another record in the
database by manually adjusting the ID to a different number. Depending on your security
settings, a fake GET or POST submission allows the data to be altered without difficulty. A long
random token, however, can't be guessed merely by moving to a different integer.
9.6.4 See Also
Recipe 14.4 for more details on verifying data with hashes; documentation on uniqid( ) at
http://www.php.net/uniqid.
Recipe 9.7 Processing Uploaded Files
9.7.1 Problem
You want to process a file uploaded by a user.
9.7.2 Solution
Use the $_FILES array:
// from <input name="event" type="file"> if (is_uploaded_file($_FILES['event']['tmp_name'])) { readfile($_FILES['event']['tmp_name']); // print file on screen }
9.7.3 Discussion
Starting in PHP 4.1, all uploaded files appear in the $_FILES superglobal array. For each file,
there are four pieces of information:
name
The name assigned to the form input element
type

The MIME type of the file
size
The size of the file in bytes
tmp_name
The location in which the file is temporarily stored on the server.
If you're using an earlier version of PHP, you need to use $HTTP_POST_FILES instead.
After you've selected a file from that array, use is_uploaded_file( ) to confirm that the
file you're about to process is a legitimate file resulting from a user upload, then process it as
you would other files on the system. Always do this. If you blindly trust the filename supplied
by the user, someone can alter the request and add names such as /etc/passwd to the list for
processing.
You can also move the file to a permanent location; use move_uploaded_file( ) to safely
transfer the file:
// move the file: move_uploaded_file() also does a check of the file's // legitimacy, so there's no need to also call is_uploaded_file() move_uploaded_file($_FILES['event']['tmp_name'], '/path/to/file.txt');
Note that the value stored in tmp_name is the complete path to the file, not just the base
name. Use basename( ) to chop off the leading directories if needed.
Be sure to check that PHP has permission to read and write to both the directory in which
temporary files are saved (see the upload_tmp_dir configuration directive to check where
this is) and the location in which you're trying to copy the file. This can often be user nobody
or apache, instead of your personal username. Because of this, if you're running under
safe_mode, copying a file to a new location will probably not allow you to access it again.
Processing files can often be a subtle task because not all browsers submit the same
information. It's important to do it correctly, however, or you open yourself up to a possible
security hole. You are, after all, allowing strangers to upload any file they choose to your
machine; malicious people may see this as an opportunity to crack into or crash the computer.
As a result, PHP has a number of features that allow you to place restrictions on uploaded
files, including the ability to completely turn off file uploads all together. So, if you're
experiencing difficulty processing uploaded files, check that your file isn't being rejected
because it seems to pose a security risk.
To do such a check first, make sure file_uploads is set to On inside your configuration file.
Next, make sure your file size isn't larger than upload_max_filesize; this defaults to 2 MB,

which stops someone trying to crash the machine by filling up the hard drive with a giant file.
Additionally, there's a post_max_size directive, which controls the maximum size of all the
POST data allowed in a single request; its initial setting is 8 MB.
From the perspective of browser differences and user error, if you can't get $_FILES to
populate with information, make sure you add enctype="multipart/form-data" to the
form's opening tag; PHP needs this to trigger processing. If you can't do so, you need to
manually parse $HTTP_RAW_POST_DATA. (See RFCs 1521 and 1522 for the MIME specification
at http://www.faqs.org/rfcs/rfc1521.html and http://www.faqs.org/rfcs/rfc1522.html.)
Also, if no file is selected for uploading, versions of PHP prior to 4.1 set tmp_name to none;
newer versions set it to the empty string. PHP 4.2.1 allows files of length 0. To be sure a file
was uploaded and isn't empty (although blank files may be what you want, depending on the
circumstances), you need to make sure tmp_name is set and size is greater than 0. Last, not
all browsers necessarily send the same MIME type for a file; what they send depends on their
knowledge of different file types.
9.7.4 See Also
Documentation on handling file uploads at http://www.php.net/features.file-upload and on
basename() at http://www.php.net/basename.
Recipe 9.8 Securing PHP's Form Processing
9.8.1 Problem
You want to securely process form input variables and not allow someone to maliciously alter
variables in your code.
9.8.2 Solution
Disable the register_globals configuration directive and access variables only from the
$_REQUEST array. To be even more secure, use $_GET , $_POST, and $_COOKIE to make
sure you know exactly where your variables are coming from.
To do this, make sure this line appears in your php.ini file:
register_globals = Off
As of PHP 4.2, this is the default configuration.
9.8.3 Discussion
When register_globals is set on, external variables, including those from forms and
cookies, are imported directly into the global namespace. This is a great convenience, but it
can also open up some security holes if you're not very diligent about checking your variables

and where they're defined. Why? Because there may be a variable you use internally that isn't
supposed to be accessible from the outside but has its value rewritten without your
knowledge.
Here is a simple example. You have a page in which a user enters a username and password.
If they are validated, you return her user identification number and use that numerical
identifier to look up and print out her personal information:
// assume magic_quotes_gpc is set to Off $username = $dbh->quote($_GET['username']); $password = $dbh->quote($_GET['password']); $sth = $dbh->query("SELECT id FROM users WHERE username = $username AND password = $password"); if (1 == $sth->numRows( )) { $row = $sth->fetchRow(DB_FETCHMODE_OBJECT); $id = $row->id; } else { "Print bad username and password"; } if (!empty($id)) { $sth = $dbh->query("SELECT * FROM profile WHERE id = $id"); }
Normally, $id is set only by your program and is a result of a verified database lookup.
However, if someone alters the GET string, and passes in a value for $id, with
register_globals enabled, even after a bad username and password lookup, your script
still executes the second database query and returns results. Without register_globals,
$id remains unset because only $_REQUEST['id'] (and $_GET['id']) are set.
Of course, there are other ways to solve this problem, even when using register_globals.
You can restructure your code not to allow such a loophole.
$sth = $dbh->query("SELECT id FROM users WHERE username = $username AND password = $password"); if (1 == $sth->numRows( )) { $row = $sth->fetchRow(DB_FETCHMODE_OBJECT); $id = $row->id; if (!empty($id)) { $sth = $dbh->query("SELECT * FROM profile WHERE id = $id"); } } else { "Print bad username and password"; }
Now you use $id only when it's been explicitly set from a database call. Sometimes, however,
it is difficult to do this because of how your program is laid out. Another solution is to
manually unset( ) or initialize all variables at the top of your script:

unset($id);
This removes the bad $id value before it gets a chance to affect your code. However, because
PHP doesn't require variable initialization, it's possible to forget to do this in one place; a bug
can then slip in without a warning from PHP.
9.8.4 See Also
Documentation on register_globals at http://www.php.net/security.registerglobals.php.
Recipe 9.9 Escaping Control Characters from User Data
9.9.1 Problem
You want to securely display user-entered data on an HTML page.
9.9.2 Solution
For HTML you wish to display as plain text, with embedded links and other tags, use
htmlentities( ):
echo htmlentities('<p>O'Reilly & Associates</p>'); <p>O'Reilly & Associates</p>
9.9.3 Discussion
PHP has a pair of functions to escape characters in HTML. The most basic is
htmlspecialchars( ), which escapes four characters: < > " and &. Depending on optional
parameters, it can also translate ' instead of or in addition to ". For more complex encoding,
use htmlentities( ); it expands on htmlspecialchars( ) to encode any character that
has an HTML entity.
$html = "<a href='fletch.html'>Stew's favorite movie.</a>\n"; print htmlspecialchars($html); // double-quotes print htmlspecialchars($html, ENT_QUOTES); // single- and double-quotes print htmlspecialchars($html, ENT_NOQUOTES); // neither <a href="fletch.html">Stew's favorite movie.</a> <a href="fletch.html">Stew's favorite movie.</a> <a href="fletch.html">Stew's favorite movie.</a>
Both functions allow you to pass in a character encoding table that defines what characters
map to what entities. To retrieve either table used by the previous functions, use
get_html_translation_table( ) and pass in HTML_ENTITIES or HTML_SPECIALCHARS.
This returns an array that maps characters to entities; you can use it as the basis for your own
table.
$copyright = "Copyright © 2003 O'Reilly & Associates\n"; $table = get_html_translation_table(); // get <, >, ", and & $table[©] = '©â?? // add ©
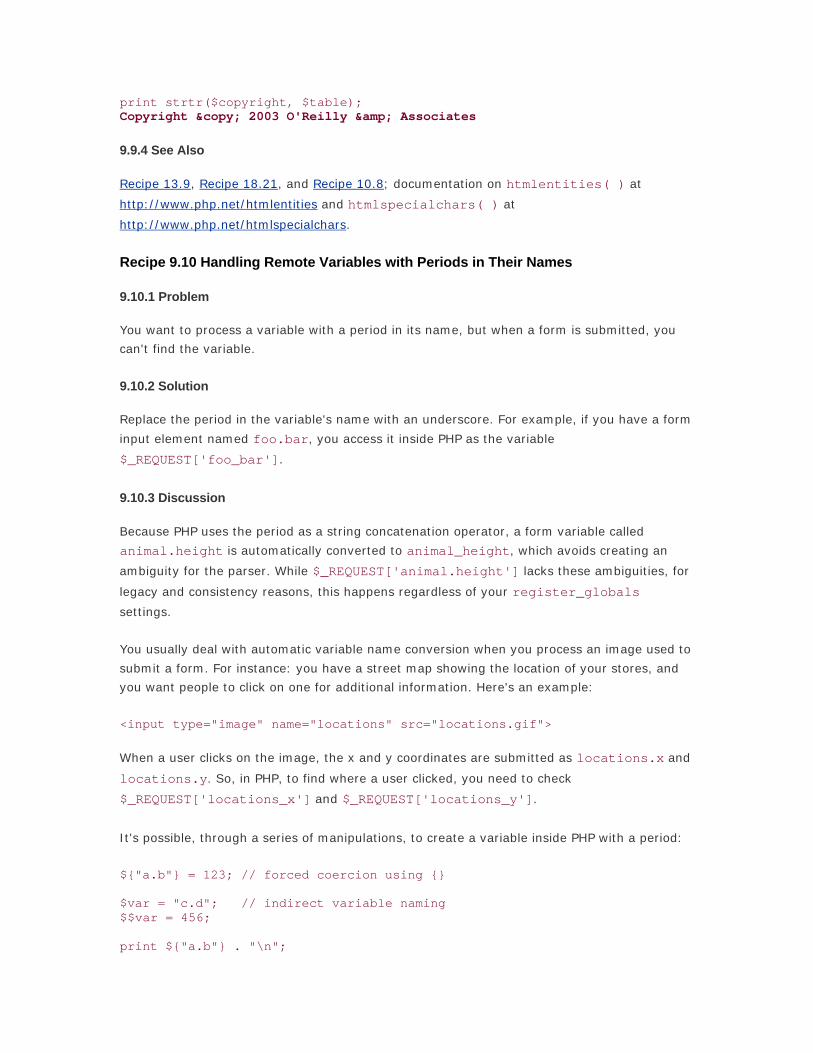
print strtr($copyright, $table); Copyright © 2003 O'Reilly & Associates
9.9.4 See Also
Recipe 13.9, Recipe 18.21, and Recipe 10.8; documentation on htmlentities( ) at
http://www.php.net/htmlentities and htmlspecialchars( ) at
http://www.php.net/htmlspecialchars.
Recipe 9.10 Handling Remote Variables with Periods in Their Names
9.10.1 Problem
You want to process a variable with a period in its name, but when a form is submitted, you
can't find the variable.
9.10.2 Solution
Replace the period in the variable's name with an underscore. For example, if you have a form
input element named foo.bar, you access it inside PHP as the variable
$_REQUEST['foo_bar'].
9.10.3 Discussion
Because PHP uses the period as a string concatenation operator, a form variable called
animal.height is automatically converted to animal_height, which avoids creating an
ambiguity for the parser. While $_REQUEST['animal.height'] lacks these ambiguities, for
legacy and consistency reasons, this happens regardless of your register_globals
settings.
You usually deal with automatic variable name conversion when you process an image used to
submit a form. For instance: you have a street map showing the location of your stores, and
you want people to click on one for additional information. Here's an example:
<input type="image" name="locations" src="locations.gif">
When a user clicks on the image, the x and y coordinates are submitted as locations.x and
locations.y. So, in PHP, to find where a user clicked, you need to check
$_REQUEST['locations_x'] and $_REQUEST['locations_y'].
It's possible, through a series of manipulations, to create a variable inside PHP with a period:
${"a.b"} = 123; // forced coercion using {} $var = "c.d"; // indirect variable naming $$var = 456; print ${"a.b"} . "\n";

print $$var . "\n"; 123 456
This is generally frowned on because of the awkward syntax.
9.10.4 See Also
Documentation on variables from outside PHP at
http://www.php.net/language.variables.external.php.
Recipe 9.11 Using Form Elements with Multiple Options
9.11.1 Problem
You have a form element with multiple values, such as a checkbox or select element, but
PHP sees only one value.
9.11.2 Solution
Place brackets ([ ]) after the variable name:
<input type="checkbox" name="boroughs[]" value="bronx"> The Bronx <input type="checkbox" name="boroughs[]" value="brooklyn"> Brooklyn <input type="checkbox" name="boroughs[]" value="manhattan"> Manhattan <input type="checkbox" name="boroughs[]" value="queens"> Queens <input type="checkbox" name="boroughs[]" value="statenisland"> Staten Island
Inside your program, treat the variable as an array:
print 'I love ' . join(' and ', $boroughs) . '!';
9.11.3 Discussion
By placing [ ] after the variable name, you tell PHP to treat it as an array instead of a scalar.
When it sees another value assigned to that variable, PHP auto-expands the size of the array
and places the new value at the end. If the first three boxes in the Solution were checked, it's
as if you'd written this code at the top of the script:
$boroughs[ ] = "bronx"; $boroughs[ ] = "brooklyn"; $boroughs[ ] = "manhattan";
You can use this to return information from a database that matches multiple records:
foreach ($_GET['boroughs'] as $b) { $boroughs[ ] = strtr($dbh->quote($b),array('_' => '\_', '%' => '\%')); } $locations = join(',', $boroughs);

$dbh->query("SELECT address FROM locations WHERE borough IN ($locations)");
This syntax also works with multidimensional arrays:
<input type="checkbox" name="population[NY][NYC]" value="8008278">New York...
If checked, this form element sets $population['NY']['NYC'] to 8008278.
Placing a [ ] after a variable's name can cause problems in JavaScript when you try to
address your elements. Instead of addressing the element by its name, use the numerical ID.
You can also place the element name inside single quotes. Another way is to assign the
element an ID, perhaps the name without the [ ], and use that ID instead. Given:
<form> <input type="checkbox" name="myName[]" value="myValue" id="myName"> </form>
the following three refer to the same form element:
document.forms[0].elements[0]; // using numerical IDs document.forms[0].elements['myName[ ]']; // using the name with quotes document.forms[0].elements['myName']; // using ID you assigned
9.11.4 See Also
The introduction to Chapter 4 for more on arrays.
Recipe 9.12 Creating Dropdown Menus Based on the Current Date
9.12.1 Problem
You want to create a series of dropdown menus that are based automatically on the current
date.
9.12.2 Solution
Use date( ) to find the current time in the web server's time zone and loop through the days
with mktime( ).
The following code generates option values for today and the six days that follow. In this
case, "today" is January 1, 2002.
list($hour, $minute, $second, $month, $day, $year) = split(':', date('h:i:s:m:d:Y')); // print out one week's worth of days for ($i = 0; $i < 7; ++$i) { $timestamp = mktime($hour, $minute, $second, $month, $day + $i, $year); $date = date("D, F j, Y", $timestamp);

print "<option value=\"$timestamp\">$date</option>\n"; } <option value="946746000">Tue, January 1, 2002</option> <option value="946832400">Wed, January 2, 2002</option> <option value="946918800">Thu, January 3, 2002</option> <option value="947005200">Fri, January 4, 2002</option> <option value="947091600">Sat, January 5, 2002</option> <option value="947178000">Sun, January 6, 2002</option> <option value="947264400">Mon, January 7, 2002</option>
9.12.3 Discussion
In the Solution, we set the value for each date as its Unix timestamp representation because
we find this easier to handle inside our programs. Of course, you can use any format you find
most useful and appropriate.
Don't be tempted to eliminate the calls to mktime( ); dates and times aren't as consistent as
you'd hope. Depending on what you're doing, you might not get the results you want. For
example:
$timestamp = mktime(0, 0, 0, 10, 24, 2002); // October 24, 2002 $one_day = 60 * 60 * 24; // number of seconds in a day // print out one week's worth of days for ($i = 0; $i < 7; ++$i) { $date = date("D, F j, Y", $timestamp); print "<option value=\"$timestamp\">$date</option>"; $timestamp += $one_day; } <option value="972619200">Fri, October 25, 2002</option> <option value="972705600">Sat, October 26, 2002</option> <option value="972792000">Sun, October 27, 2002</option> <option value="972878400">Sun, October 27, 2002</option> <option value="972964800">Mon, October 28, 2002</option> <option value="973051200">Tue, October 29, 2002</option> <option value="973137600">Wed, October 30, 2002</option>
This script should print out the month, day, and year for a seven-day period starting October
24, 2002. However, it doesn't work as expected.
Why are there two "Sun, October 27, 2002"s? The answer: daylight saving time. It's not true
that the number of seconds in a day stays constant; in fact, it's almost guaranteed to change.
Worst of all, if you're not near either of the change-over dates, you're liable to miss this bug
during testing.
9.12.4 See Also

Chapter 3, particularly Recipe 3.13, but also Recipe 3.2, Recipe 3.3, Recipe 3.5, Recipe 3.11,
and Recipe 3.14; documentation on date( ) at http://www.php.net/date and mktime( ) at
http://www.php.net/mktime.

Chapter 10. Database Access
Section 10.1. Introduction
Recipe 10.2. Using Text-File Databases
Recipe 10.3. Using DBM Databases
Recipe 10.4. Connecting to a SQL Database
Recipe 10.5. Querying a SQL Database
Recipe 10.6. Retrieving Rows Without a Loop
Recipe 10.7. Modifying Data in a SQL Database
Recipe 10.8. Repeating Queries Efficiently
Recipe 10.9. Finding the Number of Rows Returned by a Query
Recipe 10.10. Escaping Quotes
Recipe 10.11. Logging Debugging Information and Errors
Recipe 10.12. Assigning Unique ID Values Automatically
Recipe 10.13. Building Queries Programmatically
Recipe 10.14. Making Paginated Links for a Series of Records
Recipe 10.15. Caching Queries and Results
Recipe 10.16. Program: Storing a Threaded Message Board
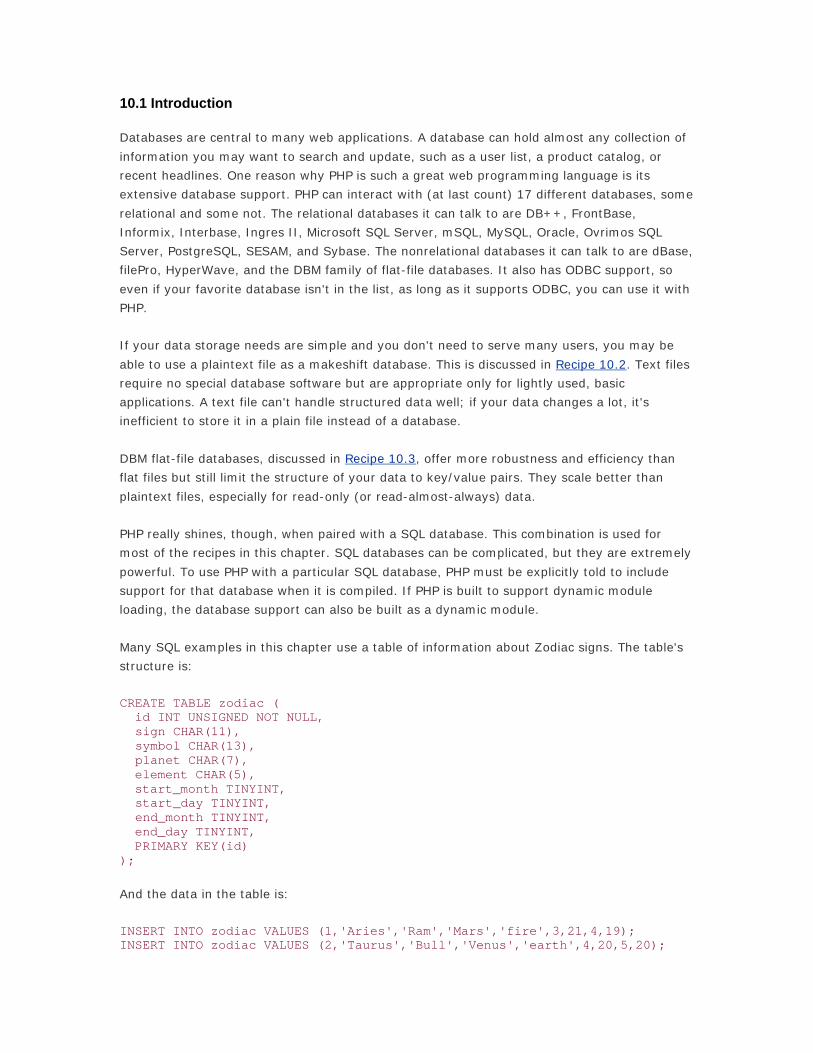
10.1 Introduction
Databases are central to many web applications. A database can hold almost any collection of
information you may want to search and update, such as a user list, a product catalog, or
recent headlines. One reason why PHP is such a great web programming language is its
extensive database support. PHP can interact with (at last count) 17 different databases, some
relational and some not. The relational databases it can talk to are DB++, FrontBase,
Informix, Interbase, Ingres II, Microsoft SQL Server, mSQL, MySQL, Oracle, Ovrimos SQL
Server, PostgreSQL, SESAM, and Sybase. The nonrelational databases it can talk to are dBase,
filePro, HyperWave, and the DBM family of flat-file databases. It also has ODBC support, so
even if your favorite database isn't in the list, as long as it supports ODBC, you can use it with
PHP.
If your data storage needs are simple and you don't need to serve many users, you may be
able to use a plaintext file as a makeshift database. This is discussed in Recipe 10.2. Text files
require no special database software but are appropriate only for lightly used, basic
applications. A text file can't handle structured data well; if your data changes a lot, it's
inefficient to store it in a plain file instead of a database.
DBM flat-file databases, discussed in Recipe 10.3, offer more robustness and efficiency than
flat files but still limit the structure of your data to key/value pairs. They scale better than
plaintext files, especially for read-only (or read-almost-always) data.
PHP really shines, though, when paired with a SQL database. This combination is used for
most of the recipes in this chapter. SQL databases can be complicated, but they are extremely
powerful. To use PHP with a particular SQL database, PHP must be explicitly told to include
support for that database when it is compiled. If PHP is built to support dynamic module
loading, the database support can also be built as a dynamic module.
Many SQL examples in this chapter use a table of information about Zodiac signs. The table's
structure is:
CREATE TABLE zodiac ( id INT UNSIGNED NOT NULL, sign CHAR(11), symbol CHAR(13), planet CHAR(7), element CHAR(5), start_month TINYINT, start_day TINYINT, end_month TINYINT, end_day TINYINT, PRIMARY KEY(id) );
And the data in the table is:
INSERT INTO zodiac VALUES (1,'Aries','Ram','Mars','fire',3,21,4,19); INSERT INTO zodiac VALUES (2,'Taurus','Bull','Venus','earth',4,20,5,20);

INSERT INTO zodiac VALUES (3,'Gemini','Twins','Mercury','air',5,21,6,21); INSERT INTO zodiac VALUES (4,'Cancer','Crab','Moon','water',6,22,7,22); INSERT INTO zodiac VALUES (5,'Leo','Lion','Sun','fire',7,23,8,22); INSERT INTO zodiac VALUES (6,'Virgo','Virgin','Mercury','earth',8,23,9,22); INSERT INTO zodiac VALUES (7,'Libra','Scales','Venus','air',9,23,10,23); INSERT INTO zodiac VALUES (8,'Scorpio','Scorpion','Mars','water',20,24,11,21); INSERT INTO zodiac VALUES (9,'Sagittarius','Archer','Jupiter','fire',11,22,12,21); INSERT INTO zodiac VALUES (10,'Capricorn','Goat','Saturn','earth',12,22,1,19); INSERT INTO zodiac VALUES (11,'Aquarius','Water Carrier','Uranus','air',1,20,2,18); INSERT INTO zodiac VALUES (12,'Pisces','Fishes','Neptune','water',2,19,3,20);
The specific functions required to talk to the database differ with each database, but each
follows a similar pattern. Connecting to the database returns a database connection handle.
You use the connection handle to create statement handles, which are associated with
particular queries. A query statement handle then gets the results of that query.
This example retrieves all the rows from the zodiac table with Oracle, using the OCI8
interface:
if (! $dbh = OCILogon('david', 'foo!bar','ORAINST')) { die("Can't connect: ".OCIError()); } if (! $sth = OCIParse($dbh,'SELECT * FROM zodiac')) { die("Can't parse query: ".OCIError()); } if (! OCIExecute($sth)) { die("Can't execute query: ".OCIError()); } $cols = OCINumCols($sth); while (OCIFetch($sth)) { for ($i = 1; $i <= $cols; $i++) { print OCIResult($sth,$i); print " "; } print "\n"; }
The OCILogin( ) function connects to a given Oracle instance with a username and
password. You can leave out the third argument (the instance) if the environment variable
ORACLE_SID is set to the desired Oracle instance. A statement handle is returned from
OCIParse( ) , and OCIExecute( ) runs the query. Each time OCIFetch( ) is called, the
next row in the result is retrieved into a result buffer. The value of a particular column of the
current row in the result buffer is retrieved by OCIResult( ).
Here's the same example using PostgreSQL:

if (! $dbh = pg_connect('dbname=test user=david password=foo!bar')) { die("Can't connect: ".pg_errormessage()); } if (! $sth = pg_exec($dbh,'SELECT * FROM zodiac')) { die("Can't execute query: ".pg_errormessage()); } for ($i = 0, $j = pg_numrows($sth); $i < $j; $i++) { $ar = pg_fetch_row($sth,$i); foreach ($ar as $col) { print "$col "; } print "\n"; }
In this case, pg_connect( ) connects to PostgreSQL using the provided database name,
user, and password. The query is run by pg_exec( ). There's no need for a separate parse
and execute step as with Oracle. Because pg_fetch_row( ) retrieves a specific row from the
result set into an array, you loop over all the rows (using pg_numrows( ) to get the total
number of rows) and print out each element in the array.
Here's the same exercise with MySQL:
if (! $dbh = mysql_connect('localhost','david','foo!bar')) { die("Can't connect: ".mysql_error()); } mysql_select_db('test'); if (! $sth = mysql_query('SELECT * FROM zodiac')) { die("Can't execute query: ".mysql_error()); } while ($ar = mysql_fetch_row($sth)) { foreach ($ar as $col) { print "$col "; } print "\n"; }
First, mysql_connect( ) returns a database handle using the provided hostname,
username, and password. You then use mysql_select_db( ) to indicate which database to
use. The query is executed by mysql_query( ). The mysql_fetch_row( ) function
retrieves the next row in the result set and NULL when there are no more rows; use a while
loop to retrieve all the rows.
Each example prints out all the data in the zodiac table, one row per line, with spaces between
each field, as shown here:
Aries Ram Mars fire 3 21 4 19 Taurus Bull Venus earth 4 20 5 20 Gemini Twins Mercury air 5 21 6 21

Cancer Crab Moon water 6 22 7 22 Leo Lion Sun fire 7 23 8 22 Virgo Virgin Mercury earth 8 23 9 22 Libra Scales Venus air 9 23 10 23 Scorpio Scorpion Mars water 20 24 11 21 Sagittarius Archer Jupiter fire 11 22 12 21 Capricorn Goat Saturn earth 12 22 1 19 Aquarius Water Carrier Uranus air 1 20 2 18 Pisces Fishes Neptune water 2 19 3 20
Recipe 10.5 through Recipe 10.9 cover the basics of sending queries to the database and
getting the results back, as well as using queries that change the data in the database.
There are a number of options and optimizations for each database PHP supports. Most
database interfaces support persistent connections with separate connection functions. In the
previous three examples, you would use OCIPLogon( ) , pg_pconnect( ), and
mysql_pconnect( ) for persistent instead of single-request connections.
If you require a database-specific set of functions, the PHP online manual section for each
database has many useful tips for proper configuration and use. If you can, use a database
abstraction layer instead. Starting with Recipe 10.4, all the SQL examples use the PEAR DB
database abstraction layer, which minimizes the amount of code that has to change to make
the examples work on different databases. Here's code that can display all the rows in the
zodiac table using DB and MySQL:
require 'DB.php'; $dbh = DB::connect('mysql://david:foo!bar@localhost/test'); $sth = $dbh->query('SELECT * FROM zodiac'); while ($row = $sth->fetchRow()) { print join(' ',$row)."\n"; }
The only thing that needs to change to make this code work on another database is the
argument passed to DB::connect( ) , which specifies what database to connect to.
However, a database abstraction layer doesn't make SQL completely portable. Each database
vendor generally has custom SQL extensions that enable handy features on one database and
don't work at all on another database.
While it's possible to write SQL that works on different databases with a minimum of changes,
tuning a database for speed and efficiency is not portable. Having portable database
interactions can be a useful goal, but it needs to be balanced with the likelihood of your code
being used with multiple databases. If you're writing code for wide distribution, working with
many databases is a plus. If your code is an internal project, however, you probably don't
need to be as concerned with database independence.
Whatever database you're using, you're probably going to be capturing information from HTML
form fields and storing that information in the database. Some characters, such as the
apostrophe and backslash, have special meaning in SQL, so you have to be careful if your
form data contains those characters. PHP has a feature called "magic quotes" to make this

easier. When the configuration setting magic_quotes_gpc is on, variables coming from GET
requests, POST requests, and cookies have single quotes, double quotes, backslashes, and
nulls escaped with a backslash. You can also turn on magic_quotes_runtime to
automatically escape quotes, backslashes, and nulls from external sources such as database
queries or text files. For example, if magic_quotes_runtime is on, and you read a file into
an array with file( ), the special characters in that array are backslash-escaped.
For example, if $_REQUESTS['excuse'] is "Ferris wasn't sick," and magic_quotes_gpc is
on, this query executes successfully:
$dbh->query("INSERT INTO excuses (truth) VALUES ('" . $_REQUESTS['excuse'] . ')');
Without the magic quotes, the apostrophe in "wasn't" signals the end of the string to the
database, and the query produces a syntax error. To instruct magic_quotes_gpc and
magic_quotes_runtime to escape single quotes with another single quote instead of a
backslash, set magic_quotes_sybase to on. Recipe 10.10 discusses escaping special
characters in queries. General debugging techniques you can use to handle errors resulting
from database queries are covered in Recipe 10.11.
The remaining recipes cover database tasks that are more involved than just simple queries.
Recipe 10.12 shows how to automatically generate unique ID values you can use as record
identifiers. Recipe 10.13 covers building queries at runtime from a list of fields. This makes it
easier to manage INSERT and UPDATE queries that involve a lot of columns. Recipe 10.14
demonstrates how to display links that let you page through a result set, displaying a few
records on each page. To speed up your database access, you can cache queries and their
results, as explained in Recipe 10.15.
Recipe 10.2 Using Text-File Databases
10.2.1 Problem
You want a lightweight way to store information between requests.
10.2.2 Solution
Use a text file with advisory locking to prevent conflicts. You can store data in the text file in
any useful format (CSV, pipe-delimited, etc.) One convenient way is to put all the data you
want to store in one variable (a big associative array) and then store the output of calling
serialize( ) on the variable:
$data_file = '/tmp/data'; // open the file for reading and writing $fh = fopen($data_file,'a+') or die($php_errormsg); rewind($fh) or die($php_errormsg);

// get an exclusive lock on the file flock($fh,LOCK_EX) or die($php_errormsg); // read in and unserialize the data $serialized_data = fread($fh,filesize($data_file)) or die($php_errormsg); $data = unserialize($serialized_data); /* * do whatever you need to with $data ... */ // reserialize the data $serialized_data = serialize($data); // clear out the file rewind($fh) or die($php_errormsg); ftruncate($fp,0) or die($php_errormsg); // write the data back to the file and release the lock if (-1 == (fwrite($fh,$serialized_data))) { die($php_errormsg); } fflush($fh) or die($php_errormsg); flock($fh,LOCK_UN) or die($php_errormsg); fclose($fh) or die($php_errormsg);
10.2.3 Discussion
Storing your data in a text file doesn't require any additional database software to be installed,
but that's pretty much its only advantage. Its main disadvantages are clumsiness and
inefficiency. At the beginning of a request, you've got to lock your text file and haul out all
your data from it, even if you're only using a little bit of the data. Until you unlock the file at
the end of the request, all other processes have to wait around, doing nothing, which means
all your users are waiting too. One of the great assets of databases is that they give you
structured access to your data, so you only lock (and load into memory) the data you actually
care about. The text file solution doesn't do that.
What's worse, the locking you can do with a text file isn't nearly as robust as what you can do
with a database. Because flock( ) provides a kind of file locking called advisory locking, the
only thing that prevents multiple processes from stepping on each other and trashing your
data is politeness and diligent programming. There's no guarantee your data is safe from an
innocently incompetent or intentionally malicious program.
10.2.4 See Also
Recipe 5.8 discusses serializing data; Recipe 18.25 goes into the details of file locking;
documentation on flock( ) at http://www.php.net/flock, serialize( ) at
http://www.php.net/serialize, and unserialize( ) at http://www.php.net/unserialize.
Recipe 10.3 Using DBM Databases
10.3.1 Problem
You want a more stable and scalable way to store simple data than what text files offer.

10.3.2 Solution
Use the DBA abstraction layer to access a DBM-style database:
$dbh = dba_open('fish.db','c','gdbm') or die($php_errormsg); // retrieve and change values if (dba_exists('flounder',$dbh)) { $flounder_count = dba_fetch('flounder',$dbh); $flounder_count++; dba_replace('flounder',$flounder_count); print "Updated the flounder count."; } else { dba_insert('flounder',1); print "Started the flounder count."; } // no more tilapia dba_delete('tilapia',$dbh); // what fish do we have? for ($key = dba_firstkey($dbh); $key !== false; $key = dba_nextkey($dbh)) { $value = dba_fetch($key); print "$key: $value\n"; } dba_close($dbh);
10.3.3 Discussion
PHP can support a few different kinds of DBM backends: GDBM, NDBM, DB2, DB3, DBM, and
CDB. The DBA abstraction layer lets you use the same functions on any DBM backend. All
these backends store key/value pairs. You can iterate through all the keys in a database,
retrieve the value associated with a particular key, and find if a particular key exists. Both the
keys and the values are strings.
The following program maintains a list of usernames and passwords in a DBM database. The
username is the first command-line argument, and the password is the second argument. If
the given username already exists in the database, the password is changed to the given
password; otherwise the user and password combination are added to the database:
$user = $_SERVER['argv'][1]; $password = $_SERVER['argv'][2]; $data_file = '/tmp/users.db'; $dbh = dba_open($data_file,'c','gdbm') or die("Can't open db $data_file"); if (dba_exists($user,$dbh)) { print "User $user exists. Changing password."; } else { print "Adding user $user."; }
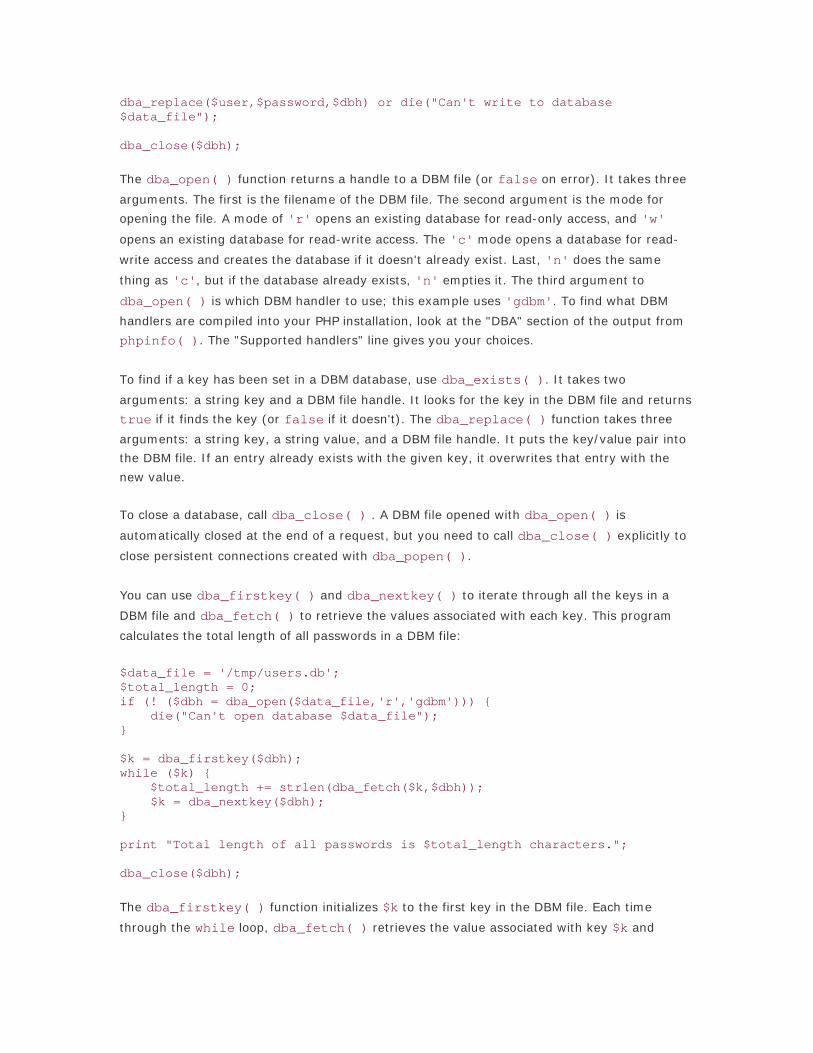
dba_replace($user,$password,$dbh) or die("Can't write to database $data_file"); dba_close($dbh);
The dba_open( ) function returns a handle to a DBM file (or false on error). It takes three
arguments. The first is the filename of the DBM file. The second argument is the mode for
opening the file. A mode of 'r' opens an existing database for read-only access, and 'w'
opens an existing database for read-write access. The 'c' mode opens a database for read-
write access and creates the database if it doesn't already exist. Last, 'n' does the same
thing as 'c', but if the database already exists, 'n' empties it. The third argument to
dba_open( ) is which DBM handler to use; this example uses 'gdbm'. To find what DBM
handlers are compiled into your PHP installation, look at the "DBA" section of the output from
phpinfo( ). The "Supported handlers" line gives you your choices.
To find if a key has been set in a DBM database, use dba_exists( ). It takes two
arguments: a string key and a DBM file handle. It looks for the key in the DBM file and returns
true if it finds the key (or false if it doesn't). The dba_replace( ) function takes three
arguments: a string key, a string value, and a DBM file handle. It puts the key/value pair into
the DBM file. If an entry already exists with the given key, it overwrites that entry with the
new value.
To close a database, call dba_close( ) . A DBM file opened with dba_open( ) is
automatically closed at the end of a request, but you need to call dba_close( ) explicitly to
close persistent connections created with dba_popen( ).
You can use dba_firstkey( ) and dba_nextkey( ) to iterate through all the keys in a
DBM file and dba_fetch( ) to retrieve the values associated with each key. This program
calculates the total length of all passwords in a DBM file:
$data_file = '/tmp/users.db'; $total_length = 0; if (! ($dbh = dba_open($data_file,'r','gdbm'))) { die("Can't open database $data_file"); } $k = dba_firstkey($dbh); while ($k) { $total_length += strlen(dba_fetch($k,$dbh)); $k = dba_nextkey($dbh); } print "Total length of all passwords is $total_length characters."; dba_close($dbh);
The dba_firstkey( ) function initializes $k to the first key in the DBM file. Each time
through the while loop, dba_fetch( ) retrieves the value associated with key $k and

$total_length is incremented by the length of the value (calculated with strlen( )). With
dba_nextkey( ), $k is set to the next key in the file.
You can use serialize( ) to store complex data in a DBM file, just like in a text file.
However, the data in the DBM file can be indexed by a key:
$dbh = dba_open('users.db','c','gdbm') or die($php_errormsg); // read in and unserialize the data if ($exists = dba_exists($_REQUEST['username'])) { $serialized_data = dba_fetch($_REQUEST['username']) or die($php_errormsg); $data = unserialize($serialized_data); } else { $data = array(); } // update values if ($_REQUEST['new_password']) { $data['password'] = $_REQUEST['new_password']; } $data['last_access'] = time(); // write data back to file if ($exists) { dba_replace($_REQUEST['username'],serialize($data)); } else { dba_insert($_REQUEST['username'],serialize($data)); } dba_close($dbh);
While this example can store multiple users' data in the same file, you can't search, for
example, a user's last access time, without looping through each key in the file. Structured
data like this belongs in a SQL database.
Each DBM handler has different behavior in some areas. For example, GDBM provides internal
locking. If one process has opened a GDBM file in read-write mode, other calls to dba_open(
) to open the same file in read-write mode will fail. The DB3 handler, however, provides no
such internal locking; you need to do that with additional code, as discussed for text files in
Recipe 18.25. Two DBA functions are also database-specific: dba_optimize( ) and
dba_sync( ). The dba_optimize( ) function calls a handler-specific DBM file-optimization
function. Currently, this is implemented only for GDBM, for which its gdbm_reorganize( )
function is called. The dba_sync( ) function calls a handler-specific DBM file synchronizing
function. For DB2 and DB3, their sync( ) function is called. For GDBM, its gdbm_sync( )
function is called. Nothing happens for other DBM handlers.
Using a DBM database is a step up from a text file but it lacks most features of a SQL
database. Your data structure is limited to key/value pairs, and locking robustness varies
greatly depending on the DBM handler. Still, DBM handlers can be a good choice for heavily
accessed read-only data; for example, the Internet Movie Database uses DBM databases.

10.3.4 See Also
Recipe 5.8 discusses serializing data; Recipe 18.25 studies the details of file locking;
documentation on the DBA functions at http://www.php.net/dba; for more information on the
DB2 and DB3 DBM handlers, see http://www.sleepycat.com/faq.html#program; for GDBM,
check out http://www.gnu.org/directory/gdbm.html or
http://www.mit.edu:8001/afs/athena.mit.edu/project/gnu/doc/html/gdbm_toc.html; CDB info
is at http://cr.yp.to/cdb.html; the Internet Movie Database's technical specifications are at
http://us.imdb.com/Help/Classes/Master/tech-info.
Recipe 10.4 Connecting to a SQL Database
10.4.1 Problem
You want access to a SQL database.
10.4.2 Solution
Use the connect( ) method of PEAR DB:
require 'DB.php'; $dsn = 'mysql://david:foo!bar@localhost/test'; $dbh = DB::connect($dsn); if (DB::isError($dbh)) { die ($dbh->getMessage()); }
10.4.3 Discussion
To use PEAR DB, you must download it from PEAR at:
http://pear.php.net/package-info.php?package=DB
After loading the DB functions from DB.php, connect to the database with DB::connect( ),
execute the query with $dbh->query( ) , and retrieve each row with $sth->fetchRow( ).
The Solution example connects to MySQL. To connect to Oracle instead, you just need to
change $dsn. This variable holds the data source name (DSN), a string that specifies which
database to connect to and how to connect to it. Here's the value for Oracle:
$dsn = 'oci8://david:foo!bar@ORAINST';
For PostgreSQL, $dsn is:
$dsn = 'pgsql://david:foo!bar@unix(/tmp/.s.PGSQL.5432)/test';
The PostgreSQL DSN is a little more complicated because it specifies that the connection
should be made using a local Unix socket (whose pathname is /tmp/.s.PGSQL.5432) instead of
a TCP/IP connection. In general, the form of a data source name is:

database_interface://user:password@hostname/database
The database_interface part of the DSN is the kind of database you're using, such as
Oracle, MySQL, etc. Currently, PEAR supports 10 database backends, as listed in Table 10-1.
Table 10-1. PEAR DB backends
Name Database
fbsql FrontBase
ibase Interbase
ifx Informix
msql Mini-SQL
mssql Microsoft SQL Server
mysql MySQL
oci8 Oracle (using the OCI8 interface)
odbc ODBC
pgsql PostgreSQL
sybase Sybase
To use a particular PEAR DB backend, PHP must be built with support for the database that
corresponds to the backend. Note that to use the Oracle OCI8 backend, PHP must have the
OCI8 extension (--with-oci8 when building). The older PHP oracle extension (--with-
oracle) isn't compatible with PEAR DB.
user and password are the username and password to use to connect to the database.
hostname is usually the hostname that the database is running on, but it can also be the
name of an instance (for Oracle) or the special syntax used previously to indicate a local
socket. database is the name of the logical database to use, such as what you'd specify with
the dbname parameter in pg_connect( ) or the argument to mysql_select_db( ).
PEAR DB is by no means the only database abstraction layer available for PHP. We've chosen
to focus on it because it's easy to use and widely available. Other database abstraction layers
include ADOdb (http://php.weblogs.com/ADODB), Metabase
(http://en.static.phpclasses.org/browse.html/package/20.html), the DB_Sql class in PHPLib
(http://phplib.sourceforge.net/), and MDB (http://pear.php.net/package-
info.php?package=MDB).
10.4.4 See Also
Recipe 10.5 for querying a SQL database; Recipe 10.7 for modifying a SQL database; Pear DB
at http://pear.php.net/package-info.php?package=DB; documentation on DB::connect( )
at http://pear.php.net/manual/en/core.db.tut_connect.php and

http://pear.php.net/manual/en/core.db.connect.php; information on DSNs at
http://pear.php.net/manual/en/core.db.tut_dsn.php.
Recipe 10.5 Querying a SQL Database
10.5.1 Problem
You want to retrieve some data from your database.
10.5.2 Solution
Use DB::query( ) from PEAR DB to send the SQL query to the database, and then
DB_Result::fetchRow( ) or DB_Result::fetchInto( ) to retrieve each row of the
result:
// using fetchRow() $sth = $dbh->query("SELECT sign FROM zodiac WHERE element LIKE 'fire'"); if (DB::isError($sth)) { die($sth->getMessage()); } while($row = $sth->fetchRow()) { print $row[0]."\n"; } // using fetchInto() $sth = $dbh->query("SELECT sign FROM zodiac WHERE element LIKE 'fire'"); if (DB::isError($sth)) { die($sth->getMessage()); } while($sth->fetchInto($row)) { print $row[0]."\n"; }
10.5.3 Discussion
The fetchRow( ) method returns data, while fetchInto( ) puts the data into a variable
you pass it. Both fetchRow( ) and fetchInto( ) return NULL when no more rows are
available. If either encounter an error when retrieving a row, they return a DB_Error object,
just as the DB::connect( ) and DB::query( ) methods do. You can insert a check for this
inside your loop:
while($row = $sth->fetchRow()) { if (DB::isError($row)) { die($row->getMessage()); } print $row[0]."\n"; }
If magic_quotes_gpc is on, you can use form variables directly in your queries:
$sth = $dbh->query( "SELECT sign FROM zodiac WHERE element LIKE '" . $_REQUEST['element'] . "'");
If not, escape the value with DB::quote( ) , or use a placeholder in the query:

$sth = $dbh->query("SELECT sign FROM zodiac WHERE element LIKE " . $dbh->quote($_REQUEST['element'])); $sth = $dbh->query('SELECT sign FROM zodiac WHERE element LIKE ?', array($_REQUEST['element']));
Recipe 10.10 goes into detail about when you need to quote values and how to do it.
By default, fetchRow( ) and fetchInto( ) put data in numeric arrays. You can tell them
to use associative arrays or objects by passing an additional parameter to either method. For
associative arrays, use DB_FETCHMODE_ASSOC:
while($row = $sth->fetchRow(DB_FETCHMODE_ASSOC)) { print $row['sign']."\n"; } while($sth->fetchInto($row,DB_FETCHMODE_ASSOC)) { print $row['sign']."\n"; }
For objects, use DB_FETCHMODE_OBJECT:
while($row = $sth->fetchRow(DB_FETCHMODE_OBJECT)) { print $row->sign."\n"; } while($sth->fetchInto($row,DB_FETCHMODE_OBJECT)) { print $row->sign."\n"; }
Whatever the fetch mode, the methods still return NULL when there is no more data to
retrieve and a DB_Error object on error. The default numeric array behavior can be specified
with DB_FETCHMODE_ORDERED. You can set a fetch mode to be used in all subsequent calls to
fetchRow( ) or fetchInto( ) with DB::setFetchMode( ) :
$dbh->setFetchMode(DB_FETCHMODE_OBJECT); while($row = $sth->fetchRow()) { print $row->sign."\n"; } // subsequent queries and calls to fetchRow() also return objects
10.5.4 See Also
Recipe 10.4 for connecting to a SQL database; Recipe 10.7 for modifying a SQL database;
Recipe 10.10 details how to quote data for safe inclusion in queries; documentation on
DB::query( ) at http://pear.php.net/manual/en/core.db.tut_query.php and
http://pear.php.net/manual/en/core.db.query.php, fetching at
http://pear.php.net/manual/en/core.db.tut_fetch.php, DB_Result::fetchRow( ) at
http://pear.php.net/manual/en/core.db.fetchrow.php, DB_Result::fetchInto( ) at

http://pear.php.net/manual/en/core.db.fetchinto.php, and DB::setFetchMode( ) at
http://pear.php.net/manual/en/core.db.setfetchmode.php.
Recipe 10.6 Retrieving Rows Without a Loop
10.6.1 Problem
You want a concise way to execute a query and retrieve the data it returns.
10.6.2 Solution
With PEAR DB, use DB::getRow( ) to retrieve the first (or only) row from a query:
$row = $dbh->getRow("SELECT planet,symbol FROM zodiac WHERE sign LIKE 'Pisces'");
Use DB::getAll( ) to retrieve all rows from a query:
$rows = $dbh->getAll("SELECT planet,symbol FROM zodiac WHERE element LIKE 'fire'");
Use DB::getOne( ) to retrieve just one column from one row:
$col = $dbh->getOne("SELECT symbol FROM zodiac WHERE sign = 'Libra'");
Use DB::getCol( ) to retrieve a column from all rows:
$cols = $dbh->getCol('SELECT symbol FROM zodiac');
Use DB::getAssoc( ) to retrieve all rows from a query into an associative array indexed by
the first column of the query:
$assoc = $dbh->getAssoc( "SELECT sign,symbol,planet FROM zodiac WHERE element LIKE 'water'");
10.6.3 Discussion
All these functions return a DB_Error object if an error occurs in executing a query or
retrieving the results. If the query returns no results, getRow( ) and getOne( ) return
NULL; getAll( ), getCol( ), and getAssoc( ) return an empty array.
When returning results, getRow( ) returns an array or object, depending on the current fetch
mode. The getAll( ) method returns an array of arrays or array of objects, also depending
on the fetch mode. The single result getOne( ) returns is usually a string, because PHP
database drivers generally cast retrieved results into strings. Similarly, getCol( ) returns an
array of results whose values are usually strings. The results from getAssoc( ) are returned
as an array. The type of elements of that array are controlled by the fetch mode.
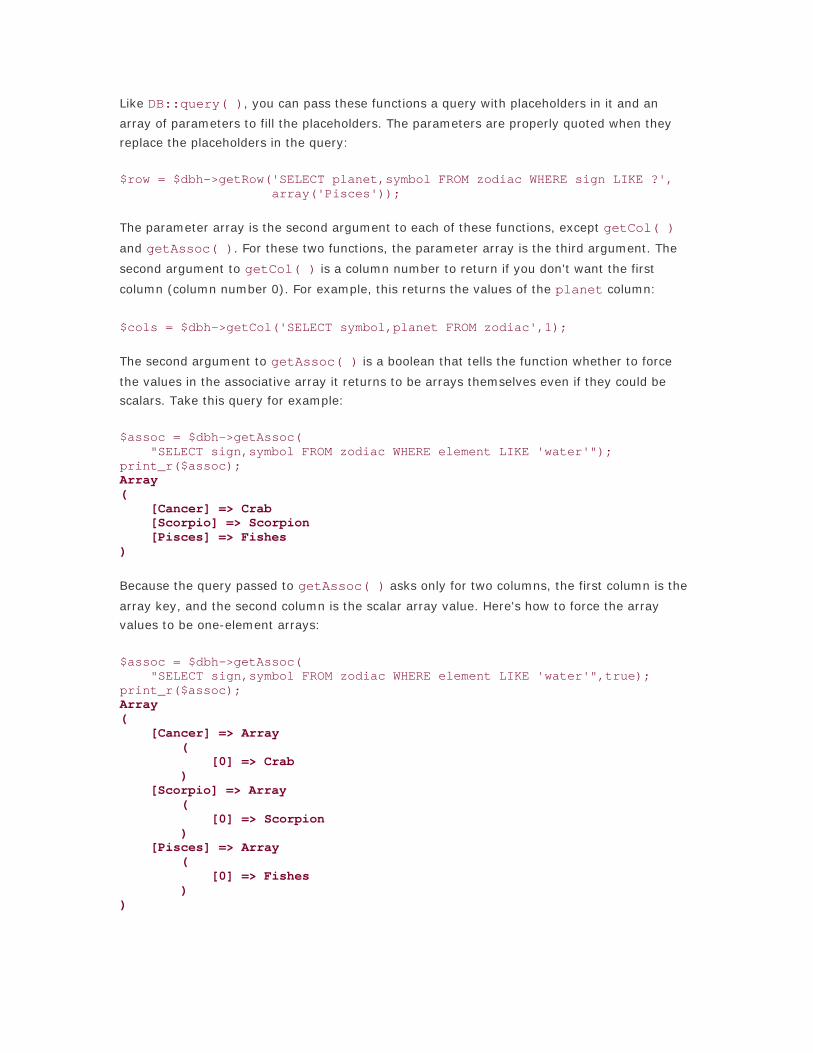
Like DB::query( ), you can pass these functions a query with placeholders in it and an
array of parameters to fill the placeholders. The parameters are properly quoted when they
replace the placeholders in the query:
$row = $dbh->getRow('SELECT planet,symbol FROM zodiac WHERE sign LIKE ?', array('Pisces'));
The parameter array is the second argument to each of these functions, except getCol( )
and getAssoc( ). For these two functions, the parameter array is the third argument. The
second argument to getCol( ) is a column number to return if you don't want the first
column (column number 0). For example, this returns the values of the planet column:
$cols = $dbh->getCol('SELECT symbol,planet FROM zodiac',1);
The second argument to getAssoc( ) is a boolean that tells the function whether to force
the values in the associative array it returns to be arrays themselves even if they could be
scalars. Take this query for example:
$assoc = $dbh->getAssoc( "SELECT sign,symbol FROM zodiac WHERE element LIKE 'water'"); print_r($assoc); Array ( [Cancer] => Crab [Scorpio] => Scorpion [Pisces] => Fishes )
Because the query passed to getAssoc( ) asks only for two columns, the first column is the
array key, and the second column is the scalar array value. Here's how to force the array
values to be one-element arrays:
$assoc = $dbh->getAssoc( "SELECT sign,symbol FROM zodiac WHERE element LIKE 'water'",true); print_r($assoc); Array ( [Cancer] => Array ( [0] => Crab ) [Scorpio] => Array ( [0] => Scorpion ) [Pisces] => Array ( [0] => Fishes ) )

Just as fetchRow( ) and fetchInto( ) do, getRow( ), getAssoc( ), and getAll( )
put data in numeric arrays by default. You can pass them a fetch mode (the third argument to
getRow( ) or getAll( ), the fourth argument to getAssoc( )). They also respect the
fetch mode set by DB::setFetchMode( ).
10.6.4 See Also
Recipe 10.5 for more on the fetch mode; documentation on fetching at
http://pear.php.net/manual/en/core.db.tut_fetch.php, DB::getRow( ) at
http://pear.php.net/manual/en/core.db.getrow.php, DB::getAll( ) at
http://pear.php.net/manual/en/core.db.getall.php, DB::getOne( ) at
http://pear.php.net/manual/en/core.db.getone.php, DB::getCol( ) at
http://pear.php.net/manual/en/core.db.getcol.php, and DB::getAssoc( ) at
http://pear.php.net/manual/en/core.db.getassoc.php.
Recipe 10.7 Modifying Data in a SQL Database
10.7.1 Problem
You want to add, remove, or change data in a SQL database.
10.7.2 Solution
With PEAR DB, use DB::query( ) to send an INSERT, DELETE, or UPDATE command:
$dbh->query("INSERT INTO family (id,name) VALUES (1,'Vito')"); $dbh->query("DELETE FROM family WHERE name LIKE 'Fredo'"); $dbh->query("UPDATE family SET is_naive = 1 WHERE name LIKE 'Kay'");
You can also prepare a query with DB::prepare( ) and execute it with DB::execute( ):
$prh = $dbh->prepare('INSERT INTO family (id,name) VALUES (?,?)'); $dbh->execute($prh,array(1,'Vito')); $prh = $dbh->prepare('DELETE FROM family WHERE name LIKE ?'); $dbh->execute($prh,array('Fredo')); $prh = $dbh->prepare('UPDATE family SET is_naive = ? WHERE name LIKE ?'); $dbh->execute($prh,array(1,'Kay');
10.7.3 Discussion
The query( ) method sends to the database whatever it's passed, so it can be used for
queries that retrieve data or queries that modify data.

The prepare( ) and execute( ) methods are especially useful for queries that you want to
execute multiple times. Once you've prepared a query, you can execute it with new values
without re-preparing it:
$prh = $dbh->prepare('DELETE FROM family WHERE name LIKE ?'); $dbh->execute($prh,array('Fredo')); $dbh->execute($prh,array('Sonny')); $dbh->execute($prh,array('Luca Brasi'));
10.7.4 See Also
Recipe 10.4 for connecting to a SQL database; Recipe 10.5 for querying a SQL database;
Recipe 10.8 discusses prepare( ) and execute( ) in detail; documentation on
DB::query( ) at http://pear.php.net/manual/en/core.db.query.php, DB::prepare( ) at
http://pear.php.net/manual/en/core.db.prepare.php, and DB::execute( ) at
http://pear.php.net/manual/en/core.db.execute.php.
Recipe 10.8 Repeating Queries Efficiently
10.8.1 Problem
You want to run the same query multiple times, substituting in different values each time.
10.8.2 Solution
With PEAR DB, set up the query with DB::prepare( ) and then run the query with
DB::execute( ). The placeholders in the query passed to prepare( ) are replaced with
data by execute( ):
$prh = $dbh->prepare("SELECT sign FROM zodiac WHERE element LIKE ?"); $sth = $dbh->execute($prh,array('fire')); while($sth->fetchInto($row)) { print $row[0]."\n"; } $sth = $dbh->execute($prh,array('water')); while($sth->fetchInto($row)) { print $row[0]."\n"; }
10.8.3 Discussion
In the Solution, the first execute( ) runs the query:
SELECT sign FROM zodiac WHERE element LIKE 'fire'
The second runs:
SELECT sign FROM zodiac WHERE element LIKE 'water'

Each time, execute( ) substitutes the value in its second argument for the ? placeholder. If
there is more than one placeholder, put the arguments in the array in the order they should
appear in the query:
$prh = $dbh->prepare( "SELECT sign FROM zodiac WHERE element LIKE ? OR planet LIKE ?"); // SELECT sign FROM zodiac WHERE element LIKE 'earth' OR planet LIKE 'Mars' $sth = $dbh->execute($prh,array('earth','Mars'));
Values that replace a ? placeholder are appropriately quoted. To insert the contents of a file
instead, use the & placeholder and pass execute( ) the filename:
/* The structure of the pictures table is: CREATE TABLE pictures ( mime_type CHAR(20), data LONGBLOB ) */ $prh = $dbh->prepare('INSERT INTO pictures (mime_type,data) VALUES (?,&)'); $sth = $dbh->execute($prh,array('image/jpeg','test.jpeg'));
To tell execute( ) not to quote a value, use the ! parameter. This is dangerous when
applied to user input; it's useful, however, when one of the values is not a scalar, but a
database function. For example, this query uses the NOW( ) function to insert the current
date and time in a DATETIME column:
$prh = $dbh->prepare("INSERT INTO warnings (message,message_time) VALUES (?,!)"); $dbh->execute($prh,array("Don't cross the streams!",NOW()));
To execute a prepared statement many times with different arguments each time, use
executeMultiple( ). Instead of just passing it one array of arguments as with execute(
), you pass it an array of argument arrays:
$prh = $dbh->prepare('INSERT INTO pictures (mime_type,data) VALUES (?,&)'); $ar = array(array('image/jpeg','earth.jpeg'), array('image/gif','wind.gif'), array('image/jpeg','fire.jpeg')); $sth = $dbh->executeMultiple($prh,$ar);
You must declare the array first and then pass it to executeMultiple( ), or PHP gives an
error that says you are passing executeMultiple( ) a parameter by reference. Although
executeMultiple( ) loops through each argument in the array, if it encounters an error
part-way through, it doesn't continue on with the rest of the arguments. If all queries succeed,
executeMultiple( ) returns the constant DB_OK. Because executeMultiple( ) never
returns a result object, you can't use it for queries that return data.

The Interbase and OCI8 DB backends take advantage of native database features so that
prepare( )/execute( ) is more efficient than query( ) for INSERT/UPDATE/DELETE
queries. The Interbase backend uses the ibase_prepare( ) and ibase_execute( )
functions, and the OCI8 backend uses the OCIParse( ) , OCIBindByName( ), and
OCIExecute( ) functions. Other database backends construct queries to execute by
interpolating the supplied values for the placeholders.
10.8.4 See Also
Documentation on DB::prepare( ) at http://pear.php.net/manual/en/core.db.prepare.php,
DB::execute( ) at http://pear.php.net/manual/en/core.db.execute.php, and
DB::executeMultiple( ) at http://pear.php.net/manual/en/core.db.executemultiple.php;
an overview of executing queries is at
http://pear.php.net/manual/en/core.db.tut_execute.php.
Recipe 10.9 Finding the Number of Rows Returned by a Query
10.9.1 Problem
You want to know how many rows a SELECT query returned, or you want to know how many
rows were changed by an INSERT, UPDATE, or DELETE query.
10.9.2 Solution
To find the number of rows returned by a SELECT query, use PEAR DB's
DB_Result::numRows( ) :
// query $sth = $dbh->query('SELECT * FROM zodiac WHERE element LIKE ?', array('water')); $water_rows = $sth->numRows(); // prepare and execute $prh = $dbh->prepare('SELECT * FROM zodiac WHERE element LIKE ?'); $sth = $dbh->execute($prh,array('fire')); $fire_rows = $sth->numRows();
To find the number of rows changed by an INSERT , UPDATE, or DELETE query, use
DB::affectedRows( ) :
$sth = $dbh->query('DELETE FROM zodiac WHERE element LIKE ?',array('fire')); $deleted_rows = $dbh->affectedRows(); $prh = $dbh->prepare('INSERT INTO zodiac (sign,symbol) VALUES (?,?)', array('Leap Day','Kangaroo')); $dbh->execute($prh,$sth); $inserted_rows = $dbh->affectedRows(); $dbh->query('UPDATE zodiac SET planet = ? WHERE sign LIKE ?',

array('Trantor','Leap Day')); $updated_rows = $dbh->affectedRows();
10.9.3 Discussion
The number of rows in a result set is a property of that result set, so that numRows( ) is
called on the statement handle and not the database handle. The number of rows affected by
a data manipulation query, however, can't be a property of a result set, because those queries
don't return result sets. As a result, affectedRows( ) is a method of the database handle.
10.9.4 See Also
Documentation on DB_Result::numRows( ) at
http://pear.php.net/manual/en/core.db.numrows.php and DB::affectedRows( ) at
http://pear.php.net/manual/en/core.db.affectedrows.php.
Recipe 10.10 Escaping Quotes
10.10.1 Problem
You need to make text or binary data safe for queries.
10.10.2 Solution
Write all your queries with placeholders and pass values to fill the placeholders in an array:
$sth = $dbh->query('UPDATE zodiac SET planet = ? WHERE id = 2', array('Melmac')); $rows = $dbh->getAll('SELECT * FROM zodiac WHERE planet LIKE ?', array('M%'));
You can also use PEAR DB's DB::quote( ) to escape special characters and make sure
strings are appropriately marked (usually with single quotes around them):
$planet = $dbh->quote($planet); $dbh->query("UPDATE zodiac SET planet = $planet WHERE id = 2");
If $planet is Melmac, $dbh->quote($planet) if you are using MySQL returns 'Melmac'.
If $planet is Ork's Moon, $dbh->quote($planet) returns 'Ork\'s Moon'.
10.10.3 Discussion
The DB::quote( ) method makes sure that text or binary data is appropriately quoted, but
you also need to quote the SQL wildcard characters % and _ to ensure that SELECT
statements return the right results. If $planet is set to Melm%, this query returns rows with
planet set to Melmac, Melmacko, Melmacedonia, or anything else beginning with Melm:

$planet = $dbh->quote($planet); $dbh->query("SELECT * FROM zodiac WHERE planet LIKE $planet");
Because % is the SQL wildcard meaning "match any number of characters" (like * in shell
globbing) and _ is the SQL wildcard meaning "match one character" (like ? in shell globbing),
those need to be backslash-escaped as well. Use strtr( ) to escape them:
$planet = $dbh->quote($planet); $planet = strtr($planet,array('_' => '\_', '%' => '\%')); $dbh->query("SELECT * FROM zodiac WHERE planet LIKE $planet");
strtr( ) must be called after DB::quote( ). Otherwise, DB::quote( ) would backslash-
escape the backslashes strtr( ) adds. With DB::quote( ) first, Melm_ is turned into
Melm\_, which is interpreted by the database to mean "the string M e l m followed by a literal
underscore character." With DB::quote( ) after strtr( ), Melm_ is turned into Melm\\_,
which is interpreted by the database to mean "the string Melm followed by a literal backslash
character, followed by the underscore wildcard."
A quote method is defined in the DB base class, but some of the database-specific subclasses
override that method to provide appropriate quoting behavior for the particular database in
use. By using DB::quote( ) instead of replacing specific characters, your program is more
portable.
Quoting of placeholder values happens even if magic_quotes_gpc or
magic_quotes_runtime is turned on. Similarly, if you call DB:quote( ) on a value when
magic quotes are active, the value gets quoted anyway. For maximum portability, remove the
magic quotes-supplied backslashes before you use a query with placeholders or call
DB::quote( ):
$fruit = ini_get('magic_quotes_gpc') ? stripslashes($_REQUEST['fruit']) : $_REQUEST['fruit']; $dbh->query('UPDATE orchard SET trees = trees - 1 WHERE fruit LIKE ?', array($fruit));
10.10.4 See Also
Documentation on DB::quote( ) at http://pear.php.net/manual/en/core.db.quote.php and
magic quotes at http://www.php.net/manual/en/ref.info.php#ini.magic-quotes-gpc.
Recipe 10.11 Logging Debugging Information and Errors
10.11.1 Problem
You want access to information to help you debug database problems. For example, when a
query fails, you want to see what error message the database returns.

10.11.2 Solution
Use DB::isError( ) to investigate the results of a single query:
$sth = $dbh->query("SELECT aroma FROM zodiac WHERE element LIKE 'fire'"); DB::isError($sth) and print 'Database Error: '.$sth->getMessage();
Use DB::setErrorHandling( ) to automatically take action on any database error:
$dbh->setErrorHandling(PEAR_ERROR_PRINT); $sth = $dbh->query("SELECT aroma FROM zodiac WHERE element LIKE 'fire'");
10.11.3 Discussion
When they encounter an error, most PEAR DB methods return an DB_Error object. The
DB::isError( ) method returns true if it's passed a DB_Error object, so you can use that
to test the results of individual queries. The DB_Error class is a subclass of PEAR::Error, so
you can use methods such as getMessage( ) to display information about the error. If you
want to display everything in the error object, use print_r( ):
$sth = $dbh->query('SELECT aroma FROM zodiac WHERE element LIKE 'fire'"); if (DB::isError($sth)) { print_r($sth); }
Since there is no aroma column in the zodiac table, this prints:
db_error Object ( [error_message_prefix] => [mode] => 1 [level] => 1024 [code] => -19 [message] => DB Error: no such field [userinfo] => SELECT aroma FROM zodiac WHERE element LIKE 'fire' \ [nativecode=1054 ** Unknown column 'aroma' in 'field list'] [callback] => )
Using setErrorHandling( ) lets you define a behavior that's invoked automatically
whenever there's a database error. Tell setErrorHandling( ) what to do by passing it a
PEAR_ERROR constant. The PEAR_ERROR_PRINT constant prints the error message, but
program execution continues:
$dbh->setErrorHandling(PEAR_ERROR_PRINT); $sth = $dbh->query("SELECT aroma FROM zodiac WHERE element LIKE 'fire'");
This prints:
DB Error: no such field

To print out an error message and then quit, use PEAR_ERROR_DIE. You can also use the
PEAR_ERROR_CALLBACK constant to run a custom function when an error is raised. This
custom function can print out even more detailed information:
function pc_log_error($error_obj) { error_log(sprintf("%s (%s)",$error_obj->message,$error_obj->userinfo)); } $dbh->setErrorHandling(PEAR_ERROR_CALLBACK,'pc_log_error'); $sth = $dbh->query("SELECT aroma FROM zodiac WHERE element LIKE 'fire'");
When the incorrect SQL in the $dbh->query( ) method raises an error, pc_log_error( )
is called with the DB_Error object passed to it. The pc_log_error( ) callback uses the
properties of the DB_Error object to print a more complete message to the error log:
DB Error: no such field (SELECT aroma FROM zodiac WHERE element LIKE 'fire' [nativecode=Unknown column 'aroma' in 'field list'])
To capture all the data in the error object and write it to the error log, use print_r( ) with
output buffering in the error callback:
function pc_log_error($error_obj) { ob_start(); print_r($error_obj); $dump = ob_get_contents(); ob_end_clean(); error_log('Database Error: '.$dump); } $dbh->setErrorHandling(PEAR_ERROR_CALLBACK,'pc_log_error'); $sth = $dbh->query("SELECT aroma FROM zodiac WHERE element LIKE 'fire'");
This includes all of the error object's fields in the error log message:
Database Error: db_error Object ( [error_message_prefix] => [mode] => 16 [level] => 1024 [code] => -19 [message] => DB Error: no such field [userinfo] => SELECT aroma FROM zodiac WHERE element LIKE 'fire' \ [nativecode=1054 ** Unknown column 'aroma' in 'field list'] [callback] => pc_log_error )
You can also have a DB_Error generate an internal PHP error with PEAR_ERROR_TRIGGER:
$dbh->setErrorHandling(PEAR_ERROR_TRIGGER); $sth = $dbh->query("SELECT aroma FROM zodiac WHERE element LIKE 'fire'");

With the PEAR_ERROR_TRIGGER constant, setErrorHandling( ) uses PHP's
trigger_error( ) function to generate an internal error. This error is handled by PHP's
default error handler or a user-defined error handler set by set_error_handler( ). By
default, the internal error is an E_USER_NOTICE :
<br /> <b>Notice</b>: DB Error: no such field in <b>/usr/local/lib/php/PEAR.php</b> \ on line <b>593</b><br />
Make the error an E_USER_WARNING or E_USER_ERROR by passing a second argument to
setErrorHandling( ):
$dbh->setErrorHandling(PEAR_ERROR_TRIGGER,E_USER_ERROR); $sth = $dbh->query("SELECT aroma FROM zodiac WHERE element LIKE 'fire'");
If the error is an E_USER_ERROR, program execution terminates after displaying the error
message:
<br /> <b>Fatal error</b>: DB Error: no such field in <b>/usr/local/lib/php/PEAR.php</b> on line <b>593</b><br />
10.11.4 See Also
Recipe 8.13 for a discussion of output buffering; Recipe 8.16 through Recipe 8.18 for
discussions on error handling and writing a custom error handler; documentation on
DB::isError( ) at http://pear.php.net/manual/en/core.db.iserror.php, the PEAR_Error
class at http://pear.php.net/manual/en/class.pear-error.php, trigger_error( ) at
http://www.php.net/trigger-error, and set_error_handler( ) at http://www.php.net/set-
error-handler.
Recipe 10.12 Assigning Unique ID Values Automatically
10.12.1 Problem
You want to use an incrementing sequence of integers for unique IDs. For example, you want
to assign unique IDs to users, articles, or other objects as you add them to your database.
10.12.2 Solution
With PEAR DB, use DB::nextId( ) with a sequence name to get the next integer in a
sequence:
$id = $dbh->nextId('user_ids');
10.12.3 Discussion

By default, the sequence is created if it doesn't already exist, and the first ID in the sequence
is 1. You can use the integer returned from nextId( ) in subsequent INSERT statements:
$id = $dbh->nextId('user_ids'); $dbh->query("INSERT INTO users (id,name) VALUES ($id,'david')");
This inserts a record into the users table with an id of 1 and a name of david. To prevent a
sequence from being created if it doesn't already exist, pass false as a second argument to
nextId( ):
$id = $dbh->nextId('user_ids',false); $dbh->query("INSERT INTO users (id,name) VALUES ($id,'david')");
To create a sequence, use createSequence( ); to drop a sequence, use dropSequence(
):
$dbh->createSequence('flowers'); $id = $dbh->nextId('flowers'); $dbh->dropSequence('flowers');
A DB_Error object is returned if you try to create a sequence that already exists or drop a
sequence that doesn't.
10.12.4 See Also
Documentation on DB::nextId( ) at http://pear.php.net/manual/en/core.db.nextid.php,
DB::createSequence( ) at http://pear.php.net/manual/en/core.db.createsequence.php,
and DB::dropSequence( ) at http://pear.php.net/manual/en/core.db.dropsequence.php.
Recipe 10.13 Building Queries Programmatically
10.13.1 Problem
You want to construct an INSERT or UPDATE query from an array of field names. For example,
you want to insert a new user into your database. Instead of hardcoding each field of user
information (such as username, email address, postal address, birthdate, etc.), you put the
field names in an array and use the array to build the query. This is easier to maintain,
especially if you need to conditionally INSERT or UPDATE with the same set of fields.
10.13.2 Solution
To construct an UPDATE query, build an array of field/value pairs and then join( ) together
each element of that array:
$fields = array('symbol','planet','element'); $update_fields = array(); foreach ($fields as $field) {

$update_fields[] = "$field = " . $dbh->quote($GLOBALS[$field]); } $sql = 'UPDATE zodiac SET ' . join(',',$update_fields) . ' WHERE sign = ' . $dbh->quote($sign);
For an INSERT query, construct an array of values in the same order as the fields, and build
the query by applying join( ) to each array:
$fields = array('symbol','planet','element'); $insert_values = array(); foreach ($fields as $field) { $insert_values[] = $dbh->quote($GLOBALS[$field]); } $sql = 'INSERT INTO zodiac (' . join(',',$fields) . ') VALUES (' . join(',',$insert_values) . ')';
If you have PEAR DB Version 1.3 or later, use the DB::autoPrepare( ) method:
$fields = array('symbol','planet','element'); // UPDATE: specify the WHERE clause $update_prh = $dbh->autoPrepare('zodiac',$fields,DB_AUTOQUERY_UPDATE, 'sign = ?'); $update_values = array(); foreach ($fields as $field) { $update_values[] = $GLOBALS[$field]; } $update_values[] = $GLOBALS['sign']; $dbh->execute($update_prh,$update_values); // INSERT: no WHERE clause $insert_prh = $dbh->autoPrepare('zodiac',$fields,DB_AUTOQUERY_INSERT); $insert_values = array(); foreach ($fields as $field) { $insert_values[] = $GLOBALS[$field]; } $dbh->execute($insert_prh,$insert_values);
10.13.3 Discussion
The DB::autoPrepare( ) method is concise and easy to use if you have a recent version of
DB. PHP 4.2.2 comes with DB 1.2. Newer versions of DB can be downloaded from PEAR. Use
method_exists( ) to check whether your version of DB supports autoPrepare( ):
if (method_exists($dbh,'autoPrepare')) { $prh = $dbh->autoPrepare('zodiac',$fields,DB_AUTOQUERY_UPDATE','sign = ?'); // ... } else { error_log("Can't use autoPrepare"); exit; }
If you can't use DB::autoPrepare( ), the array-manipulation techniques shown in the
Solution accomplish the same thing. If you use sequence-generated integers as primary keys,
you can combine the two query-construction techniques into one function. That function
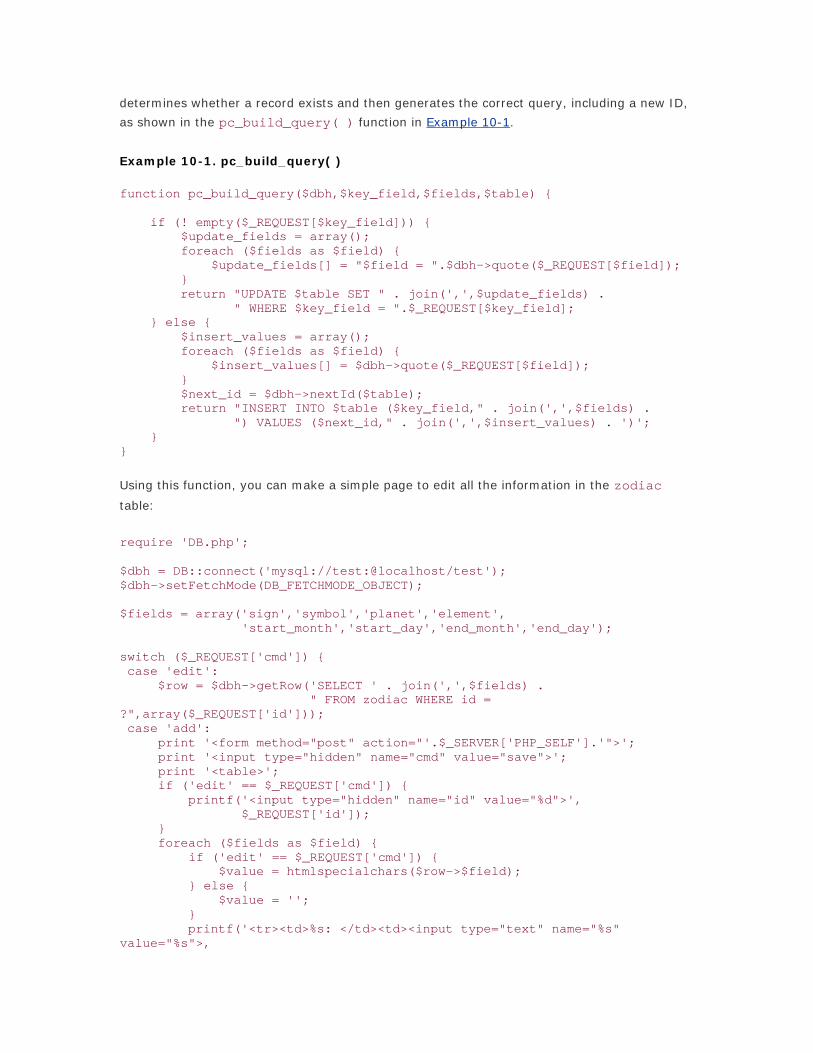
determines whether a record exists and then generates the correct query, including a new ID,
as shown in the pc_build_query( ) function in Example 10-1.
Example 10-1. pc_build_query( )
function pc_build_query($dbh,$key_field,$fields,$table) { if (! empty($_REQUEST[$key_field])) { $update_fields = array(); foreach ($fields as $field) { $update_fields[] = "$field = ".$dbh->quote($_REQUEST[$field]); } return "UPDATE $table SET " . join(',',$update_fields) . " WHERE $key_field = ".$_REQUEST[$key_field]; } else { $insert_values = array(); foreach ($fields as $field) { $insert_values[] = $dbh->quote($_REQUEST[$field]); } $next_id = $dbh->nextId($table); return "INSERT INTO $table ($key_field," . join(',',$fields) . ") VALUES ($next_id," . join(',',$insert_values) . ')'; } }
Using this function, you can make a simple page to edit all the information in the zodiac
table:
require 'DB.php'; $dbh = DB::connect('mysql://test:@localhost/test'); $dbh->setFetchMode(DB_FETCHMODE_OBJECT); $fields = array('sign','symbol','planet','element', 'start_month','start_day','end_month','end_day'); switch ($_REQUEST['cmd']) { case 'edit': $row = $dbh->getRow('SELECT ' . join(',',$fields) . " FROM zodiac WHERE id = ?",array($_REQUEST['id'])); case 'add': print '<form method="post" action="'.$_SERVER['PHP_SELF'].'">'; print '<input type="hidden" name="cmd" value="save">'; print '<table>'; if ('edit' == $_REQUEST['cmd']) { printf('<input type="hidden" name="id" value="%d">', $_REQUEST['id']); } foreach ($fields as $field) { if ('edit' == $_REQUEST['cmd']) { $value = htmlspecialchars($row->$field); } else { $value = ''; } printf('<tr><td>%s: </td><td><input type="text" name="%s" value="%s">,
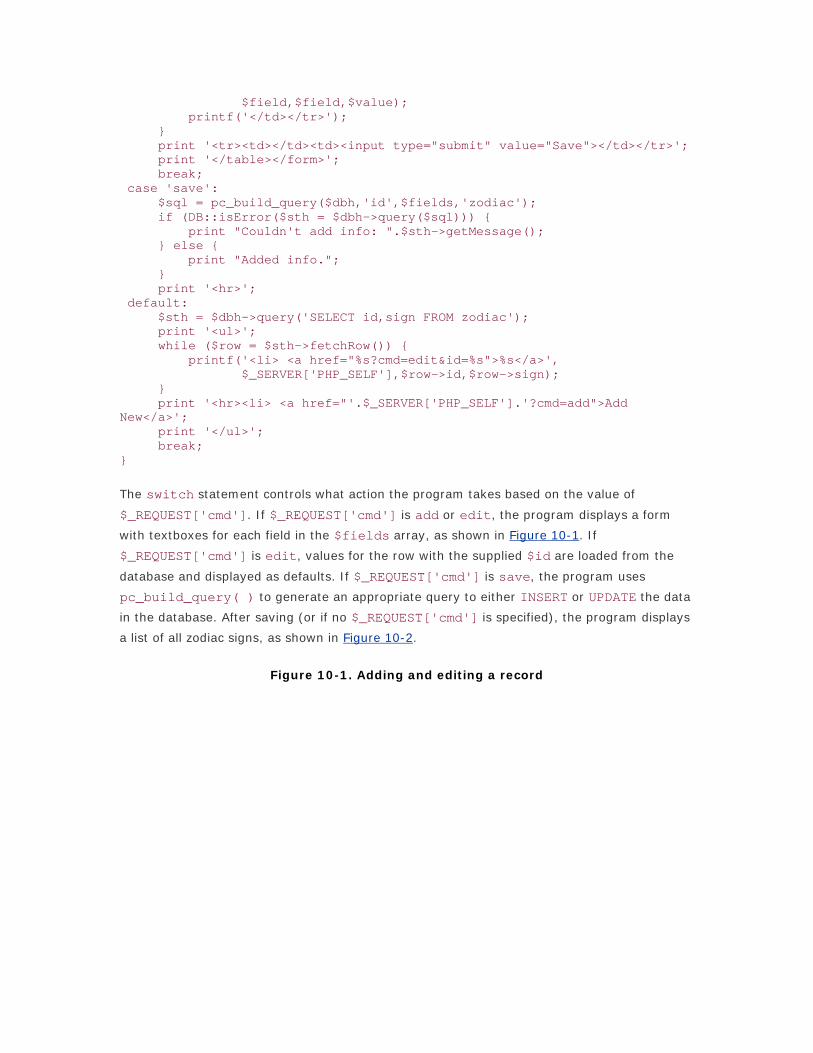
$field,$field,$value); printf('</td></tr>'); } print '<tr><td></td><td><input type="submit" value="Save"></td></tr>'; print '</table></form>'; break; case 'save': $sql = pc_build_query($dbh,'id',$fields,'zodiac'); if (DB::isError($sth = $dbh->query($sql))) { print "Couldn't add info: ".$sth->getMessage(); } else { print "Added info."; } print '<hr>'; default: $sth = $dbh->query('SELECT id,sign FROM zodiac'); print '<ul>'; while ($row = $sth->fetchRow()) { printf('<li> <a href="%s?cmd=edit&id=%s">%s</a>', $_SERVER['PHP_SELF'],$row->id,$row->sign); } print '<hr><li> <a href="'.$_SERVER['PHP_SELF'].'?cmd=add">Add New</a>'; print '</ul>'; break; }
The switch statement controls what action the program takes based on the value of
$_REQUEST['cmd']. If $_REQUEST['cmd'] is add or edit, the program displays a form
with textboxes for each field in the $fields array, as shown in Figure 10-1. If
$_REQUEST['cmd'] is edit, values for the row with the supplied $id are loaded from the
database and displayed as defaults. If $_REQUEST['cmd'] is save, the program uses
pc_build_query( ) to generate an appropriate query to either INSERT or UPDATE the data
in the database. After saving (or if no $_REQUEST['cmd'] is specified), the program displays
a list of all zodiac signs, as shown in Figure 10-2.
Figure 10-1. Adding and editing a record
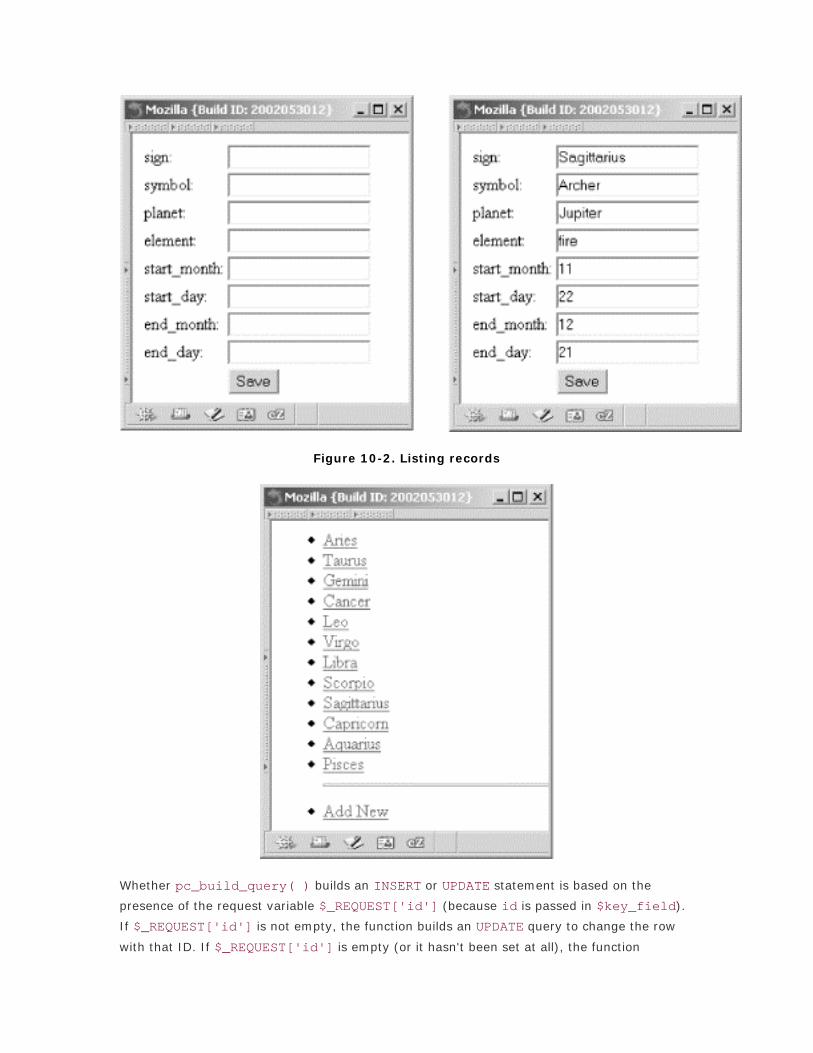
Figure 10-2. Listing records
Whether pc_build_query( ) builds an INSERT or UPDATE statement is based on the
presence of the request variable $_REQUEST['id'] (because id is passed in $key_field).
If $_REQUEST['id'] is not empty, the function builds an UPDATE query to change the row
with that ID. If $_REQUEST['id'] is empty (or it hasn't been set at all), the function

generates a new ID with nextId( ) and uses that new ID in an INSERT query that adds a
row to the table.
10.13.4 See Also
Documentation on DB::autoPrepare( ) at
http://pear.php.net/manual/en/core.db.autoprepare.php; new versions of PEAR DB are
available at http://pear.php.net/package-info.php?package=DB.
Recipe 10.14 Making Paginated Links for a Series of Records
10.14.1 Problem
You want to display a large dataset a page at a time and provide links that move through the
dataset.
10.14.2 Solution
Use the PEAR DB_Pager class:
require 'DB/Pager.php'; $offset = intval($_REQUEST['offset']); $per_page = 3; $sth = $dbh->query('SELECT * FROM zodiac ORDER BY id'); $pager = new DB_Pager($sth, $offset, $per_page); $data = $pager->build(); // display each row on this page while ($v = $pager->fetchRow()) { print "$v->sign, $v->symbol ($v->id)<br>"; } // a link to the previous page printf('<a href="%s?offset=%d"><<Prev</a> |', $_SERVER['PHP_SELF'],$data['prev']); // direct links to each page foreach ($data['pages'] as $page => $start) { printf(' <a href="%s?offset=%d">%d</a> |',$_SERVER['PHP_SELF'],$start,$page); } // a link to the next page printf(' <a href="%s?offset=%d">Next>></a>', $_SERVER['PHP_SELF'],$data['next']); // display which records are on this page printf("<br>(Displaying %d - %d of %d)", $data['from'],$data['to'],$data['numrows']);

If you don't have DB_Pager or you do but don't want to use it, you can roll your own indexed
link display using the pc_indexed_links( ) and pc_print_link( ) functions shown in
the Discussion in Examples 10-2 and 10-3.
$offset = intval($_REQUEST['offset']); if (! $offset) { $offset = 1; } $per_page = 5; $total = $dbh->getOne('SELECT COUNT(*) FROM zodiac'); $sql = $dbh->modifyLimitQuery('SELECT * FROM zodiac ORDER BY id', $offset - 1,$per_page); $ar = $dbh->getAll($sql); foreach ($ar as $k => $v) { print "$v->sign, $v->symbol ($v->id)<br>"; } pc_indexed_links($total,$offset,$per_page); printf("<br>(Displaying %d - %d of %d)",$offset,$offset+$k,$total);
10.14.3 Discussion
DB_Pager is designed specifically to paginate results that come from a PEAR DB query. To use
it, create a DB_Pager object and tell it what query to use, what offset into the result set to
start at, and how many items belong on each page. It calculates the correct pagination.
The $pager->build( ) method calculates the appropriate rows to return and other page-
specific variables. DB_Pager provides a fetchRow( ) method to retrieve the results in the
same way the DB class operates. (You can also use fetchInto( ) with DB_Pager). However,
while it provides all the data you need to build appropriate links, it also leaves it up to you to
build those links. The offset the previous page starts at is in $data['prev'], and
$data['next'] is the offset of the next page. The $data['pages'] array contains page
numbers and their starting offsets. The output when $offset is is shown in Figure 10-3.
Figure 10-3. Paginated results with DB_Pager
All the page numbers, "<<Prev" and "Next>>," are links. "<<Prev" and "1" point to the
current page; the others point to their corresponding pages. On page 4, the "Next>>" link

points back to page 1. (But on page 1, the "<<Prev" link doesn't point to page 4.) The
numbers in the links refer to page numbers, not element numbers.
If DB_Pager isn't available, you can use the pc_print_link( ) and pc_indexed_links(
) functions shown in Examples 10-2 and 10-3 to produce properly formatted links.
Example 10-2. pc_print_link( )
function pc_print_link($inactive,$text,$offset='') { if ($inactive) { printf('<font color="#666666">%s</font>',$text); } else { printf('<a href="%s?offset=%d">%s</a>',$_SERVER['PHP_SELF'],$offset,$text); } }
Example 10-3. pc_indexed_links( )
function pc_indexed_links($total,$offset,$per_page) { $separator = ' | '; // print "<<Prev" link pc_print_link($offset == 1, '<<Prev', $offset - $per_page); // print all groupings except last one for ($start = 1, $end = $per_page; $end < $total; $start += $per_page, $end += $per_page) { print $separator; pc_print_link($offset == $start, "$start-$end", $start); } /* print the last grouping - * at this point, $start points to the element at the beginning * of the last grouping */ /* the text should only contain a range if there's more than * one element on the last page. For example, the last grouping * of 11 elements with 5 per page should just say "11", not "11-11" */ $end = ($total > $start) ? "-$total" : ''; print $separator; pc_print_link($offset == $start, "$start$end", $start); // print "Next>>" link print $separator; pc_print_link($offset == $start, 'Next>>',$offset + $per_page); }
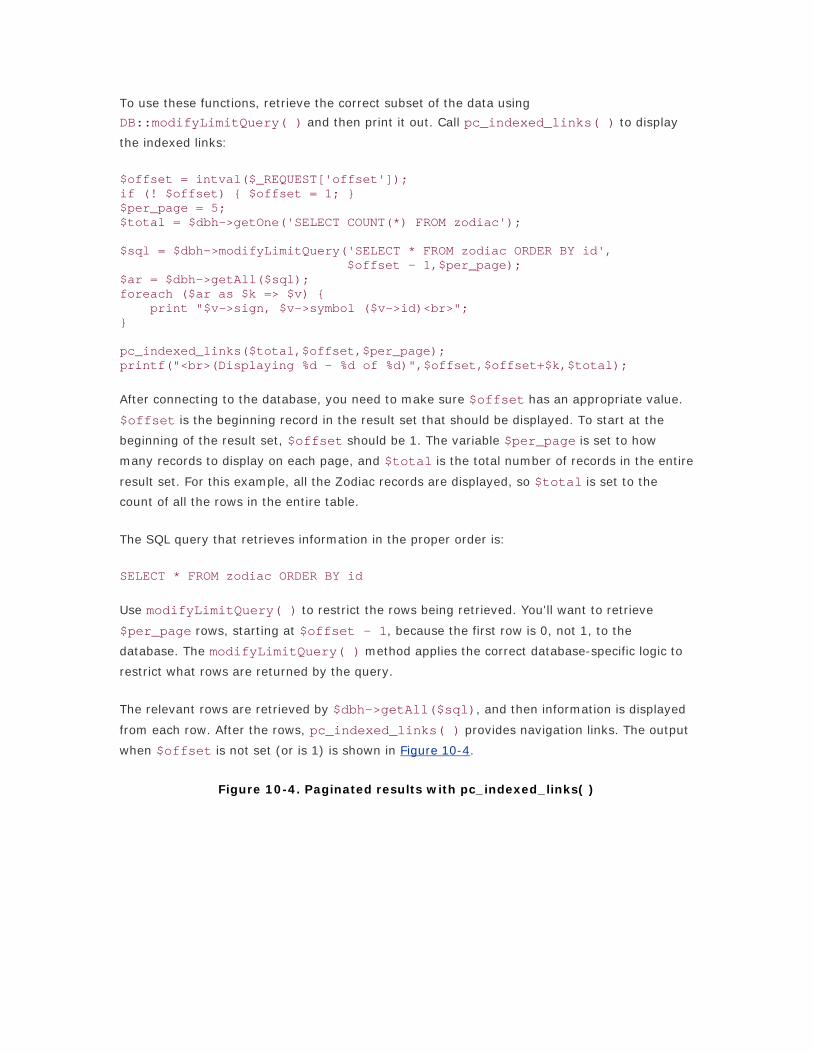
To use these functions, retrieve the correct subset of the data using
DB::modifyLimitQuery( ) and then print it out. Call pc_indexed_links( ) to display
the indexed links:
$offset = intval($_REQUEST['offset']); if (! $offset) { $offset = 1; } $per_page = 5; $total = $dbh->getOne('SELECT COUNT(*) FROM zodiac'); $sql = $dbh->modifyLimitQuery('SELECT * FROM zodiac ORDER BY id', $offset - 1,$per_page); $ar = $dbh->getAll($sql); foreach ($ar as $k => $v) { print "$v->sign, $v->symbol ($v->id)<br>"; } pc_indexed_links($total,$offset,$per_page); printf("<br>(Displaying %d - %d of %d)",$offset,$offset+$k,$total);
After connecting to the database, you need to make sure $offset has an appropriate value.
$offset is the beginning record in the result set that should be displayed. To start at the
beginning of the result set, $offset should be 1. The variable $per_page is set to how
many records to display on each page, and $total is the total number of records in the entire
result set. For this example, all the Zodiac records are displayed, so $total is set to the
count of all the rows in the entire table.
The SQL query that retrieves information in the proper order is:
SELECT * FROM zodiac ORDER BY id
Use modifyLimitQuery( ) to restrict the rows being retrieved. You'll want to retrieve
$per_page rows, starting at $offset - 1, because the first row is 0, not 1, to the
database. The modifyLimitQuery( ) method applies the correct database-specific logic to
restrict what rows are returned by the query.
The relevant rows are retrieved by $dbh->getAll($sql), and then information is displayed
from each row. After the rows, pc_indexed_links( ) provides navigation links. The output
when $offset is not set (or is 1) is shown in Figure 10-4.
Figure 10-4. Paginated results with pc_indexed_links( )

In Figure 10-4, "6-10", "11-12", and "Next>>" are links to the same page with adjusted
$offset arguments, while "<<Prev" and "1-5" are greyed out, because what they would link
to is what's currently displayed.
10.14.4 See Also
Information on DB_Pager at http://pear.php.net/package-info.php?package=DB_Pager.
Recipe 10.15 Caching Queries and Results
10.15.1 Problem
You don't want to rerun potentially expensive database queries when the results haven't
changed.
10.15.2 Solution
Use PEAR's Cache_DB package. It wraps the DB database abstraction layer with an object that
has similar methods and that automatically caches the results of SELECT queries:
require 'Cache/DB.php'; $cache = new Cache_DB; $cache->connect('mysql://test:@localhost/test'); $sth = $cache->query("SELECT sign FROM zodiac WHERE element LIKE 'fire'"); while($row = $sth->fetchRow()) { print $row['sign']."\n"; }
10.15.3 Discussion
Using Cache_DB is almost the same as using DB, but there are some crucial differences. First,
Cache/DB.php is required instead of DB.php. The Cache/DB.php file then loads the appropriate

DB classes. Instead of creating a database handle with the DB::connect( ) method, you
instantiate a Cache_DB object with the new operator and then call the object's connect( )
method. The syntax of $cache->connect( ) is the same, however, so you just pass it the
DSN that identifies the database. The query( ) method of Cache_DB works just like that of
DB, however there are no prepare( ) and execute( ) methods in Cache_DB. query( )
returns a statement handle that supports fetchRow( ) and fetchInto( ), but the default
fetch mode is DB_FETCH_ASSOC, not DB_FETCH_ORDERED.
The first time a particular SELECT statement is passed to $cache->query( ), Cache_DB
executes the statement and returns the results, just like DB, but it also saves the results in a
file whose name is a hash of the query. If the same SELECT statement is passed to $cache-
>query( ) again, Cache_DB retrieves the results from the file instead of running the query
in the database.
By default, Cache_DB creates its cache files in a subdirectory of the current directory called
db_query. You can change this by passing a directory name as part of an options array as a
second argument to the Cache_DB constructor. This sets the cache directory to
/tmp/db_query:
$cache = new Cache_DB('file',array('cache_dir' => '/tmp/'));
The first argument, file, tells Cache_DB what container to use to store the cached data.
file is the default, but you need to include it here to specify the container options in the
second argument. The relevant container option is cache_dir, which tells Cache_DB where
to create the db_query subdirectory. Including a trailing slash is required.
By default, entries stay in the cache for one hour. You can adjust this by passing a different
value (in seconds) when creating a new Cache_DB object. Here's how to keep entries in the
cache for one day, 86,400 seconds:
$cache = new Cache_DB('file',array('cache_dir' => '.', 'filename_prefix' => 'query_'),86400);
Because the expiration time is the third argument, you have to pass the defaults for the first
two arguments as well.
The cache isn't altered if you change the database with an INSERT, UPDATE, or DELETE
query. If there are cached SELECT statements that refer to data no longer in the database,
you need to explicitly remove everything from the cache with the $cache->flush( )
method:
$cache->flush('db_cache');
It's very important to include the db_cache argument to flush( ). The PEAR Cache system
supports dividing up the cached items into different groups, and the Cache_DB object puts

everything it's keeping track of in the db_cache group. Leaving out the group argument
results in deleting the files in the base cache directory (which is probably the directory you're
running your script from).
The file container stores each result in a file whose name is based on an MD5 hash of the
query that generated the particular result. Because MD5 is case-sensitive, the file container is
case-sensitive, too. This means that if the results of SELECT * FROM zodiac are in the cache,
and you run the query SELECT * from zodiac, the results aren't found in the cache, and the
query is run again. Maintaining consistent capitalization, spacing, and field ordering when
constructing your SQL queries results in more efficient cache usage.
Although this recipe focuses on the file container, the PEAR Cache system supports a number
of other containers that hold cached data, such as shared memory, PHPLib sessions,
databases via the dbx library, and msession sessions. To use a different container, pass the
appropriate container name as the first argument when creating a new Cache_DB object:
$cache = new Cache_DB('shm');
10.15.4 See Also
Information about the PEAR Cache system and the different containers at
http://pear.php.net/package-info.php?package=Cache.
Recipe 10.16 Program: Storing a Threaded Message Board
Storing and retrieving threaded messages requires extra care to display the threads in the
correct order. Finding the children of each message and building the tree of message
relationships can easily lead to a recursive web of queries. Users generally look at a list of
messages and read individual messages far more often then they post messages. With a little
extra processing when saving a new message to the database, the query that retrieves a list
of messages to display is simpler and much more efficient.
Store messages in a table structured like this:
CREATE TABLE pc_message ( id INT UNSIGNED NOT NULL, posted_on DATETIME NOT NULL, author CHAR(255), subject CHAR(255), body MEDIUMTEXT, thread_id INT UNSIGNED NOT NULL, parent_id INT UNSIGNED NOT NULL, level INT UNSIGNED NOT NULL, thread_pos INT UNSIGNED NOT NULL, PRIMARY KEY(id) );

The primary key, id, is a unique integer that identifies a particular message. The time and
date that a message is posted is stored in posted_on, and author, subject, and body are
(surprise!) a message's author, subject, and body. The remaining four fields keep track of the
threading relationships between messages. The integer thread_id identifies each thread. All
messages in a particular thread have the same thread_id. If a message is a reply to another
message, parent_id is the id of the replied-to message. level is how many replies into a
thread a message is. The first message in a thread has level 0. A reply to that level message
has level 1, and a reply to that level 1 message has level 2. Multiple messages in a thread can
have the same level and the same parent_id. For example, if someone starts off a thread
with a message about the merits of BeOS over CP/M, the angry replies to that message from
CP/M's legions of fans all have level 1 and a parent_id equal to the id of the original
message.
The last field, thread_pos, is what makes the easy display of messages possible. When
displayed, all messages in a thread are ordered by their thread_pos value.
Here are the rules for calculating thread_pos:
• The first message in a thread has thread_pos = 0.
• For a new message N, if there are no messages in the thread with the same parent as
N, N's thread_pos is one greater than its parent's thread_pos.
• For a new message N, if there are messages in the thread with the same parent as N,
N's thread_pos is one greater than the biggest thread_pos of all the messages with
the same parent as N.
• After new message N's thread_pos is determined, all messages in the same thread
with a thread_pos value greater than or equal to N's have their thread_pos value
incremented by 1 (to make room for N).
The message board program, message.php, shown in Example 10-4 saves messages and
properly calculates thread_pos. Sample output is shown in Figure 10-5.
Figure 10-5. A threaded message board

Example 10-4. message.php
require 'DB.php'; // a helpful database debugging function function log_die($ob) { print '<pre>'; print_r($ob); print '</pre>'; } // connect to the database $dbh = DB::connect('mysql://test:@localhost/test') or die("Can't connect"); if (DB::isError($dbh)) { log_die($dbh); } $dbh->setFetchMode(DB_FETCHMODE_OBJECT); PEAR::setErrorHandling(PEAR_ERROR_CALLBACK,'log_die'); // The value of $_REQUEST['cmd'] tells us what to do switch ($_REQUEST['cmd']) { case 'read': // read an individual message pc_message_read(); break; case 'post': // display the form to post a message pc_message_post(); break; case 'save': // save a posted message if (pc_message_validate()) { // if the message is valid, pc_message_save(); // then save it pc_message_list(); // and display the message list } else { pc_message_post(); // otherwise, redisplay the posting form } break; case 'list': // display a message list by default default: pc_message_list(); break; }

// pc_message_save() saves the message to the database function pc_message_save() { global $dbh; $parent_id = intval($_REQUEST['parent_id']); /* MySQL syntax for making sure pc_message doesn't change while * we're working with it. We also have to lock the tables that * hold the thread and pc_message sequences */ $dbh->query('LOCK TABLES pc_message WRITE, thread_seq WRITE, pc_message_seq WRITE'); // is this message a reply? if ($parent_id) { // get the thread, level, and thread_pos of the parent message $parent = $dbh->getRow("SELECT thread_id,level,thread_pos FROM pc_message WHERE id = $parent_id"); // a reply's level is one greater than its parents $level = $parent->level + 1; /* what's the biggest thread_pos in this thread among messages with the same parent? */ $thread_pos = $dbh->getOne("SELECT MAX(thread_pos) FROM pc_message WHERE thread_id = $parent->thread_id AND parent_id = $parent_id"); // are there existing replies to this parent? if ($thread_pos) { // this thread_pos goes after the biggest existing one $thread_pos++; } else { // this is the first reply, so put it right after the parent $thread_pos = $parent->thread_pos + 1; } /* increment the thread_pos of all messages in the thread that come after this one */ $dbh->query("UPDATE pc_message SET thread_pos = thread_pos + 1 WHERE thread_id = $parent->thread_id AND thread_pos >= $thread_pos"); // the new message should be saved with the parent's thread_id $thread_id = $parent->thread_id; } else { // the message is not a reply, so it's the start of a new thread $thread_id = $dbh->nextId('thread'); $level = 0; $thread_pos = 0; } // get a new id for this message $id = $dbh->nextId('pc_message'); /* insert the message into the database. Using prepare() and execute() makes sure that all fields are properly quoted */ $prh =
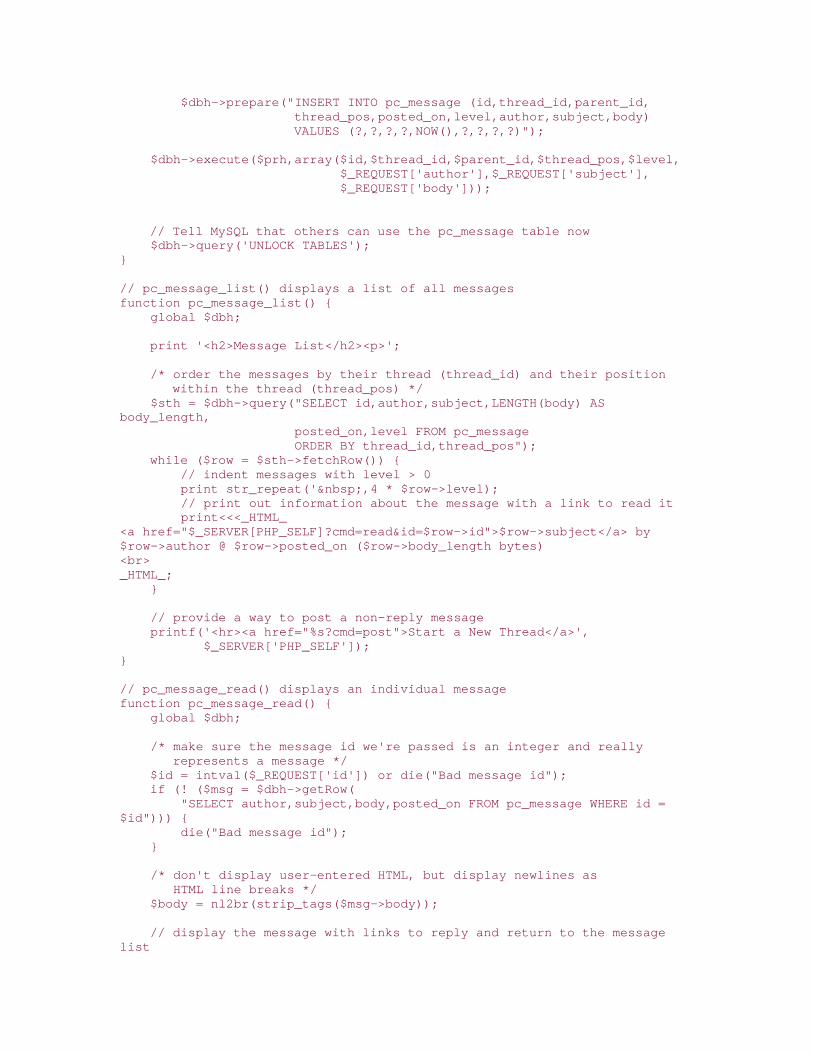
$dbh->prepare("INSERT INTO pc_message (id,thread_id,parent_id, thread_pos,posted_on,level,author,subject,body) VALUES (?,?,?,?,NOW(),?,?,?,?)"); $dbh->execute($prh,array($id,$thread_id,$parent_id,$thread_pos,$level, $_REQUEST['author'],$_REQUEST['subject'], $_REQUEST['body'])); // Tell MySQL that others can use the pc_message table now $dbh->query('UNLOCK TABLES'); } // pc_message_list() displays a list of all messages function pc_message_list() { global $dbh; print '<h2>Message List</h2><p>'; /* order the messages by their thread (thread_id) and their position within the thread (thread_pos) */ $sth = $dbh->query("SELECT id,author,subject,LENGTH(body) AS body_length, posted_on,level FROM pc_message ORDER BY thread_id,thread_pos"); while ($row = $sth->fetchRow()) { // indent messages with level > 0 print str_repeat(' ,4 * $row->level); // print out information about the message with a link to read it print<<<_HTML_ <a href="$_SERVER[PHP_SELF]?cmd=read&id=$row->id">$row->subject</a> by $row->author @ $row->posted_on ($row->body_length bytes) <br> _HTML_; } // provide a way to post a non-reply message printf('<hr><a href="%s?cmd=post">Start a New Thread</a>', $_SERVER['PHP_SELF']); } // pc_message_read() displays an individual message function pc_message_read() { global $dbh; /* make sure the message id we're passed is an integer and really represents a message */ $id = intval($_REQUEST['id']) or die("Bad message id"); if (! ($msg = $dbh->getRow( "SELECT author,subject,body,posted_on FROM pc_message WHERE id = $id"))) { die("Bad message id"); } /* don't display user-entered HTML, but display newlines as HTML line breaks */ $body = nl2br(strip_tags($msg->body)); // display the message with links to reply and return to the message list

print<<<_HTML_ <h2>$msg->subject</h2> <h3>by $msg->author</h3> <p> $body <hr> <a href="$_SERVER[PHP_SELF]?cmd=post&parent_id=$id">Reply</a> <br> <a href="$_SERVER[PHP_SELF]?cmd=list">List Messages</a> _HTML_; } // pc_message_post() displays the form for posting a message function pc_message_post() { global $dbh,$form_errors; foreach (array('author','subject','body') as $field) { // escape characters in default field values $$field = htmlspecialchars($_REQUEST[$field]); // make the error messages display in red if ($form_errors[$field]) { $form_errors[$field] = '<font color="red">' . $form_errors[$field] . '</font><br>'; } } // is this message a reply if ($parent_id = intval($_REQUEST['parent_id'])) { // send the parent_id along when the form is submitted $parent_field = sprintf('<input type="hidden" name="parent_id" value="%d">', $parent_id); // if no subject's been passed in, use the subject of the parent if (! $subject) { $parent_subject = $dbh->getOne('SELECT subject FROM pc_message WHERE id = ?',array($parent_id)); /* prefix 'Re: ' to the parent subject if it exists and doesn't already have a 'Re:' */ $subject = htmlspecialchars($parent_subject); if ($parent_subject && (! preg_match('/^re:/i',$parent_subject))) { $subject = "Re: $subject"; } } } // display the posting form, with errors and default values print<<<_HTML_ <form method="post" action="$_SERVER[PHP_SELF]"> <table> <tr> <td>Your Name:</td> <td>$form_errors[author]<input type="text" name="author" value="$author"> </td> <tr> <td>Subject:</td> <td>$form_errors[subject]<input type="text" name="subject" value="$subject">

</td> <tr> <td>Message:</td> <td>$form_errors[body]<textarea rows="4" cols="30" wrap="physical" name="body">$body</textarea> </td> <tr><td colspan="2"><input type="submit" value="Post Message"></td></tr> </table> $parent_field <input type="hidden" name="cmd" value="save"> </form> _HTML_; } // pc_message_validate() makes sure something is entered in each field function pc_message_validate() { global $form_errors; $form_errors = array(); if (! $_REQUEST['author']) { $form_errors['author'] = 'Please enter your name.'; } if (! $_REQUEST['subject']) { $form_errors['subject'] = 'Please enter a message subject.'; } if (! $_REQUEST['body']) { $form_errors['body'] = 'Please enter a message body.'; } if (count($form_errors)) { return false; } else { return true; } }
To properly handle concurrent usage, pc_message_save( ) needs exclusive access to the
msg table between the time it starts calculating the thread_pos of the new message and
when it actually inserts the new message into the database. We've used MySQL's LOCK
TABLE and UNLOCK TABLES commands to accomplish this. With other databases, the syntax
may vary, or you may need to start a transaction at the beginning of the function and commit
the transaction at the end.
The level field can be used when displaying messages to limit what you retrieve from the
database. If discussion threads become very deep, this can help prevent your pages from
growing too large. For example, here's how to display just the first message in each thread
and any replies to that first message:
$sth = $dbh->query( "SELECT * FROM msg WHERE level <= 1 ORDER BY thread_id,thread_pos"); while ($row = $sth->fetchRow()) { // display each message }

If you're interested in having a discussion group on your web site, you may want to use one of
the existing PHP message board packages. The most popular is Phorum
(http://www.phorum.org/), and there are a number of others listed at
http://www.zend.com/apps.php?CID=261 .

Chapter 11. Web Automation
Section 11.1. Introduction
Recipe 11.2. Fetching a URL with the GET Method
Recipe 11.3. Fetching a URL with the POST Method
Recipe 11.4. Fetching a URL with Cookies
Recipe 11.5. Fetching a URL with Headers
Recipe 11.6. Fetching an HTTPS URL
Recipe 11.7. Debugging the Raw HTTP Exchange
Recipe 11.8. Marking Up a Web Page
Recipe 11.9. Extracting Links from an HTML File
Recipe 11.10. Converting ASCII to HTML
Recipe 11.11. Converting HTML to ASCII
Recipe 11.12. Removing HTML and PHP Tags
Recipe 11.13. Using Smarty Templates
Recipe 11.14. Parsing a Web Server Log File
Recipe 11.15. Program: Finding Stale Links
Recipe 11.16. Program: Finding Fresh Links

11.1 Introduction
Most of the time, PHP is part of a web server, sending content to browsers. Even when you
run it from the command line, it usually performs a task and then prints some output. PHP can
also be useful, however, playing the role of a web browser — retrieving URLs and then
operating on the content. Most recipes in this chapter cover retrieving URLs and processing
the results, although there are a few other tasks in here as well, such as using templates and
processing server logs.
There are four ways to retrieve a remote URL in PHP. Choosing one method over another
depends on your needs for simplicity, control, and portability. The four methods are to use
fopen( ) , fsockopen( ), the cURL extension, or the HTTP_Request class from PEAR.
Using fopen( ) is simple and convenient. We discuss it in Recipe 11.2. The fopen( )
function automatically follows redirects, so if you use this function to retrieve the directory
http://www.example.com/people and the server redirects you to
http://www.example.com/people/, you'll get the contents of the directory index page, not a
message telling you that the URL has moved. The fopen( ) function also works with both
HTTP and FTP. The downsides to fopen( ) include: it can handle only HTTP GET requests
(not HEAD or POST), you can't send additional headers or any cookies with the request, and
you can retrieve only the response body with it, not response headers.
Using fsockopen( ) requires more work but gives you more flexibility. We use fsockopen(
) in Recipe 11.3. After opening a socket with fsockopen( ), you need to print the
appropriate HTTP request to that socket and then read and parse the response. This lets you
add headers to the request and gives you access to all the response headers. However, you
need to have additional code to properly parse the response and take any appropriate action,
such as following a redirect.
If you have access to the cURL extension or PEAR's HTTP_Request class, you should use
those rather than fsockopen( ). cURL supports a number of different protocols (including
HTTPS, discussed in Recipe 11.6) and gives you access to response headers. We use cURL in
most of the recipes in this chapter. To use cURL, you must have the cURL library installed,
available at http://curl.haxx.se. Also, PHP must be built with the --with-curl configuration
option.
PEAR's HTTP_Request class, which we use in Recipe 11.3, Recipe 11.4, and Recipe 11.5,
doesn't support HTTPS, but does give you access to headers and can use any HTTP method. If
this PEAR module isn't installed on your system, you can download it from
http://pear.php.net/get/HTTP_Request. As long as the module's files are in your
include_path, you can use it, making it a very portable solution.
Recipe 11.7 helps you go behind the scenes of an HTTP request to examine the headers in a
request and response. If a request you're making from a program isn't giving you the results
you're looking for, examining the headers often provides clues as to what's wrong.

Once you've retrieved the contents of a web page into a program, use Recipe 11.8 through
Recipe 11.12 to help you manipulate those page contents. Recipe 11.8 demonstrates how to
mark up certain words in a page with blocks of color. This technique is useful for highlighting
search terms, for example. Recipe 11.9 provides a function to find all the links in a page. This
is an essential building block for a web spider or a link checker. Converting between plain
ASCII and HTML is covered in Recipe 11.10 and Recipe 11.11. Recipe 11.12 shows how to
remove all HTML and PHP tags from a web page.
Another kind of page manipulation is using a templating system. Discussed in Recipe 11.13,
templates give you freedom to change the look and feel of your web pages without changing
the PHP plumbing that populates the pages with dynamic data. Similarly, you can make
changes to the code that drives the pages without affecting the look and feel. Recipe 11.14
discusses a common server administration task — parsing your web server's access log files.
Two sample programs use the link extractor from Recipe 11.9. The program in Recipe 11.15
scans the links in a page and reports which are still valid, which have been moved, and which
no longer work. The program in Recipe 11.16 reports on the freshness of links. It tells you
when a linked-to page was last modified and if it's been moved.
Recipe 11.2 Fetching a URL with the GET Method
11.2.1 Problem
You want to retrieve the contents of a URL. For example, you want to include part of one web
page in another page's content.
11.2.2 Solution
Pass the URL to fopen( ) and get the contents of the page with fread( ):
$page = ''; $fh = fopen('http://www.example.com/robots.txt','r') or die($php_errormsg); while (! feof($fh)) { $page .= fread($fh,1048576); } fclose($fh);
You can use the cURL extension:
$c = curl_init('http://www.example.com/robots.txt'); curl_setopt($c, CURLOPT_RETURNTRANSFER, 1); $page = curl_exec($c); curl_close($c);
You can also use the HTTP_Request class from PEAR:
require 'HTTP/Request.php'; $r = new HTTP_Request('http://www.example.com/robots.txt');

$r->sendRequest(); $page = $r->getResponseBody();
11.2.3 Discussion
You can put a username and password in the URL if you need to retrieve a protected page. In
this example, the username is david, and the password is hax0r. Here's how to do it with
fopen( ):
$fh = fopen('http://david:[email protected]/secrets.html','r') or die($php_errormsg); while (! feof($fh)) { $page .= fread($fh,1048576); } fclose($fh);
Here's how to do it with cURL:
$c = curl_init('http://www.example.com/secrets.html'); curl_setopt($c, CURLOPT_RETURNTRANSFER, 1); curl_setopt($c, CURLOPT_USERPWD, 'david:hax0r'); $page = curl_exec($c); curl_close($c);
Here's how to do it with HTTP_Request:
$r = new HTTP_Request('http://www.example.com/secrets.html'); $r->setBasicAuth('david','hax0r'); $r->sendRequest(); $page = $r->getResponseBody();
While fopen( ) follows redirects in Location response headers, HTTP_Request does not.
cURL follows them only when the CURLOPT_FOLLOWLOCATION option is set:
$c = curl_init('http://www.example.com/directory'); curl_setopt($c, CURLOPT_RETURNTRANSFER, 1); curl_setopt($c, CURLOPT_FOLLOWLOCATION, 1); $page = curl_exec($c); curl_close($c);
cURL can do a few different things with the page it retrieves. If the
CURLOPT_RETURNTRANSFER option is set, curl_exec( ) returns a string containing the
page:
$c = curl_init('http://www.example.com/files.html'); curl_setopt($c, CURLOPT_RETURNTRANSFER, 1); $page = curl_exec($c); curl_close($c);
To write the retrieved page to a file, open a file handle for writing with fopen( ) and set the
CURLOPT_FILE option to the file handle:

$fh = fopen('local-copy-of-files.html','w') or die($php_errormsg); $c = curl_init('http://www.example.com/files.html'); curl_setopt($c, CURLOPT_FILE, $fh); curl_exec($c); curl_close($c);
To pass the cURL resource and the contents of the retrieved page to a function, set the
CURLOPT_WRITEFUNCTION option to the name of the function:
// save the URL and the page contents in a database function save_page($c,$page) { $info = curl_getinfo($c); mysql_query("INSERT INTO pages (url,page) VALUES ('" . mysql_escape_string($info['url']) . "', '" . mysql_escape_string($page) . "')"); } $c = curl_init('http://www.example.com/files.html'); curl_setopt($c, CURLOPT_WRITEFUNCTION, 'save_page'); curl_exec($c); curl_close($c);
If none of CURLOPT_RETURNTRANSFER, CURLOPT_FILE, or CURLOPT_WRITEFUNCTION is
set, cURL prints out the contents of the returned page.
The fopen() function and the include and require directives can retrieve remote files only
if URL fopen wrappers are enabled. URL fopen wrappers are enabled by default and are
controlled by the allow_url_fopen configuration directive. On Windows, however, include
and require can't retrieve remote files in versions of PHP earlier than 4.3, even if
allow_url_fopen is on.
11.2.4 See Also
Recipe 11.3 for fetching a URL with the POST method; Recipe 8.13 discusses opening remote
files with fopen(); documentation on fopen( ) at http://www.php.net/fopen, include at
http://www.php.net/include, curl_init( ) at http://www.php.net/curl-init, curl_setopt(
) at http://www.php.net/curl-setopt, curl_exec( ) at http://www.php.net/curl-exec, and
curl_close( ) at http://www.php.net/curl-close; the PEAR HTTP_Request class at
http://pear.php.net/package-info.php?package=HTTP_Request.
Recipe 11.3 Fetching a URL with the POST Method
11.3.1 Problem
You want to retrieve a URL with the POST method, not the default GET method. For example,
you want to submit an HTML form.
11.3.2 Solution
Use the cURL extension with the CURLOPT_POST option set:

$c = curl_init('http://www.example.com/submit.php'); curl_setopt($c, CURLOPT_POST, 1); curl_setopt($c, CURLOPT_POSTFIELDS, 'monkey=uncle&rhino=aunt'); curl_setopt($c, CURLOPT_RETURNTRANSFER, 1); $page = curl_exec($c); curl_close($c);
If the cURL extension isn't available, use the PEAR HTTP_Request class:
require 'HTTP/Request.php'; $r = new HTTP_Request('http://www.example.com/submit.php'); $r->setMethod(HTTP_REQUEST_METHOD_POST); $r->addPostData('monkey','uncle'); $r->addPostData('rhino','aunt'); $r->sendRequest(); $page = $r->getResponseBody();
11.3.3 Discussion
Sending a POST method request requires special handling of any arguments. In a GET
request, these arguments are in the query string, but in a POST request, they go in the
request body. Additionally, the request needs a Content-Length header that tells the server
the size of the content to expect in the request body.
Because of the argument handling and additional headers, you can't use fopen( ) to make a
POST request. If neither cURL nor HTTP_Request are available, use the pc_post_request(
) function, shown in Example 11-1, which makes the connection to the remote web server
with fsockopen( ).
Example 11-1. pc_post_request( )
function pc_post_request($host,$url,$content='') { $timeout = 2; $a = array(); if (is_array($content)) { foreach ($content as $k => $v) { array_push($a,urlencode($k).'='.urlencode($v)); } } $content_string = join('&',$a); $content_length = strlen($content_string); $request_body = "POST $url HTTP/1.0 Host: $host Content-type: application/x-www-form-urlencoded Content-length: $content_length $content_string"; $sh = fsockopen($host,80,&$errno,&$errstr,$timeout) or die("can't open socket to $host: $errno $errstr"); fputs($sh,$request_body); $response = '';

while (! feof($sh)) { $response .= fread($sh,16384); } fclose($sh) or die("Can't close socket handle: $php_errormsg"); list($response_headers,$response_body) = explode("\r\n\r\n",$response,2); $response_header_lines = explode("\r\n",$response_headers); // first line of headers is the HTTP response code $http_response_line = array_shift($response_header_lines); if (preg_match('@^HTTP/[0-9]\.[0-9] ([0-9]{3})@',$http_response_line, $matches)) { $response_code = $matches[1]; } // put the rest of the headers in an array $response_header_array = array(); foreach ($response_header_lines as $header_line) { list($header,$value) = explode(': ',$header_line,2); $response_header_array[$header] = $value; } return array($response_code,$response_header_array,$response_body); }
Call pc_post_request( ) like this:
list($code,$headers,$body) = pc_post_request('www.example.com','/submit.php', array('monkey' => 'uncle', 'rhino' => 'aunt'));
Retrieving a URL with POST instead of GET is especially useful if the URL is very long, more
than 200 characters or so. The HTTP 1.1 specification in RFC 2616 doesn't place a maximum
length on URLs, so behavior varies among different web and proxy servers. If you retrieve
URLs with GET and receive unexpected results or results with status code 414 ("Request-URI
Too Long"), convert the request to a POST request.
11.3.4 See Also
Recipe 11.2 for fetching a URL with the GET method; documentation on curl_setopt( ) at
http://www.php.net/curl-setopt and fsockopen( ) at http://www.php.net/fsockopen; the
PEAR HTTP_Request class at http://pear.php.net/package-info.php?package=HTTP_Request;
RFC 2616 is available at http://www.faqs.org/rfcs/rfc2616.html.
Recipe 11.4 Fetching a URL with Cookies
11.4.1 Problem
You want to retrieve a page that requires a cookie to be sent with the request for the page.
11.4.2 Solution

Use the cURL extension and the CURLOPT_COOKIE option:
$c = curl_init('http://www.example.com/needs-cookies.php'); curl_setopt($c, CURLOPT_VERBOSE, 1); curl_setopt($c, CURLOPT_COOKIE, 'user=ellen; activity=swimming'); curl_setopt($c, CURLOPT_RETURNTRANSFER, 1); $page = curl_exec($c); curl_close($c);
If cURL isn't available, use the addHeader( ) method in the PEAR HTTP_Request class:
require 'HTTP/Request.php'; $r = new HTTP_Request('http://www.example.com/needs-cookies.php'); $r->addHeader('Cookie','user=ellen; activity=swimming'); $r->sendRequest(); $page = $r->getResponseBody();
11.4.3 Discussion
Cookies are sent to the server in the Cookie request header. The cURL extension has a
cookie-specific option, but with HTTP_Request, you have to add the Cookie header just as
with other request headers. Multiple cookie values are sent in a semicolon-delimited list. The
examples in the Solution send two cookies: one named user with value ellen and one
named activity with value swimming.
To request a page that sets cookies and then make subsequent requests that include those
newly set cookies, use cURL's "cookie jar" feature. On the first request, set
CURLOPT_COOKIEJAR to the name of a file to store the cookies in. On subsequent requests,
set CURLOPT_COOKIEFILE to the same filename, and cURL reads the cookies from the file
and sends them along with the request. This is especially useful for a sequence of requests in
which the first request logs into a site that sets session or authentication cookies, and then the
rest of the requests need to include those cookies to be valid:
$cookie_jar = tempnam('/tmp','cookie'); // log in $c = curl_init('https://bank.example.com/login.php?user=donald&password=b1gmoney$'); curl_setopt($c, CURLOPT_RETURNTRANSFER, 1); curl_setopt($c, CURLOPT_COOKIEJAR, $cookie_jar); $page = curl_exec($c); curl_close($c); // retrieve account balance $c = curl_init('http://bank.example.com/balance.php?account=checking'); curl_setopt($c, CURLOPT_RETURNTRANSFER, 1); curl_setopt($c, CURLOPT_COOKIEFILE, $cookie_jar); $page = curl_exec($c); curl_close($c);

// make a deposit $c = curl_init('http://bank.example.com/deposit.php'); curl_setopt($c, CURLOPT_POST, 1); curl_setopt($c, CURLOPT_POSTFIELDS, 'account=checking&amount=122.44'); curl_setopt($c, CURLOPT_RETURNTRANSFER, 1); curl_setopt($c, CURLOPT_COOKIEFILE, $cookie_jar); $page = curl_exec($c); curl_close($c); // remove the cookie jar unlink($cookie_jar) or die("Can't unlink $cookie_jar");
Be careful where you store the cookie jar. It needs to be in a place your web server has write
access to, but if other users can read the file, they may be able to poach the authentication
credentials stored in the cookies.
11.4.4 See Also
Documentation on curl_setopt( ) at http://www.php.net/curl-setopt; the PEAR
HTTP_Request class at http://pear.php.net/package-info.php?package=HTTP_Request
Recipe 11.5 Fetching a URL with Headers
11.5.1 Problem
You want to retrieve a URL that requires specific headers to be sent with the request for the
page.
11.5.2 Solution
Use the cURL extension and the CURLOPT_HTTPHEADER option:
$c = curl_init('http://www.example.com/special-header.php'); curl_setopt($c, CURLOPT_RETURNTRANSFER, 1); curl_setopt($c, CURLOPT_HTTPHEADER, array('X-Factor: 12', 'My-Header: Bob')); $page = curl_exec($c); curl_close($c);
If cURL isn't available, use the addHeader( ) method in HTTP_Request:
require 'HTTP/Request.php'; $r = new HTTP_Request('http://www.example.com/special-header.php'); $r->addHeader('X-Factor',12); $r->addHeader('My-Header','Bob'); $r->sendRequest(); $page = $r->getResponseBody();
11.5.3 Discussion

cURL has special options for setting the Referer and User-Agent request headers —
CURLOPT_REFERER and CURLOPT_USERAGENT:
$c = curl_init('http://www.example.com/submit.php'); curl_setopt($c, CURLOPT_VERBOSE, 1); curl_setopt($c, CURLOPT_RETURNTRANSFER, 1); curl_setopt($c, CURLOPT_REFERER, 'http://www.example.com/form.php'); curl_setopt($c, CURLOPT_USERAGENT, 'CURL via PHP'); $page = curl_exec($c); curl_close($c);
11.5.4 See Also
Recipe 11.14 explains why "referrer" is often misspelled "referer" in web programming
contexts; documentation on curl_setopt( ) at http://www.php.net/curl-setopt; the PEAR
HTTP_Request class at http://pear.php.net/package-info.php?package=HTTP_Request.
Recipe 11.6 Fetching an HTTPS URL
11.6.1 Problem
You want to retrieve a secure URL.
11.6.2 Solution
Use the cURL extension with an HTTPS URL:
$c = curl_init('https://secure.example.com/accountbalance.php'); curl_setopt($c, CURLOPT_RETURNTRANSFER, 1); $page = curl_exec($c); curl_close($c);
11.6.3 Discussion
To retrieve secure URLs, the cURL extension needs access to an SSL library, such as OpenSSL.
This library must be available when PHP and the cURL extension are built. Aside from this
additional library requirement, cURL treats secure URLs just like regular ones. You can provide
the same cURL options to secure requests, such as changing the request method or adding
POST data.
11.6.4 See Also
The OpenSSL Project at http://www.openssl.org/.
Recipe 11.7 Debugging the Raw HTTP Exchange
11.7.1 Problem

You want to analyze the HTTP request a browser makes to your server and the corresponding
HTTP response. For example, your server doesn't supply the expected response to a particular
request so you want to see exactly what the components of the request are.
11.7.2 Solution
For simple requests, connect to the web server with telnet and type in the request headers:
% telnet www.example.com 80 Trying 10.1.1.1... Connected to www.example.com. Escape character is '^]'. GET / HTTP/1.0 Host: www.example.com HTTP/1.1 200 OK Date: Sat, 17 Aug 2002 06:10:19 GMT Server: Apache/1.3.26 (Unix) PHP/4.2.2 mod_ssl/2.8.9 OpenSSL/0.9.6d X-Powered-By: PHP/4.2.2 Connection: close Content-Type: text/html // ... the page body ...
11.7.3 Discussion
When you type in request headers, the web server doesn't know that it's just you typing and
not a web browser submitting a request. However, some web servers have timeouts on how
long they'll wait for a request, so it can be useful to pretype the request and then just paste it
into telnet. The first line of the request contains the request method (GET ), a space and the
path of the file you want (/), and then a space and the protocol you're using (HTTP/1.0). The
next line, the Host header, tells the server which virtual host to use if many are sharing the
same IP address. A blank line tells the server that the request is over; it then spits back its
response: first headers, then a blank line, and then the body of the response.
Pasting text into telnet can get tedious, and it's even harder to make requests with the POST
method that way. If you make a request with HTTP_Request , you can retrieve the response
headers and the response body with the getResponseHeader( ) and getResponseBody(
) methods:
require 'HTTP/Request.php'; $r = new HTTP_Request('http://www.example.com/submit.php'); $r->setMethod(HTTP_REQUEST_METHOD_POST); $r->addPostData('monkey','uncle'); $r->sendRequest(); $response_headers = $r->getResponseHeader(); $response_body = $r->getResponseBody();

To retrieve a specific response header, pass the header name to getResponseHeader( ).
Without an argument, getResponseHeader( ) returns an array containing all the response
headers. HTTP_Request doesn't save the outgoing request in a variable, but you can
reconstruct it by calling the private _buildRequest( ) method:
require 'HTTP/Request.php'; $r = new HTTP_Request('http://www.example.com/submit.php'); $r->setMethod(HTTP_REQUEST_METHOD_POST); $r->addPostData('monkey','uncle'); print $r->_buildRequest();
The request that's printed is:
POST /submit.php HTTP/1.1 User-Agent: PEAR HTTP_Request class ( http://pear.php.net/ ) Content-Type: application/x-www-form-urlencoded Connection: close Host: www.example.com Content-Length: 12 monkey=uncle
With cURL, to include response headers in the output from curl_exec( ), set the
CURLOPT_HEADER option:
$c = curl_init('http://www.example.com/submit.php'); curl_setopt($c, CURLOPT_HEADER, 1); curl_setopt($c, CURLOPT_POST, 1); curl_setopt($c, CURLOPT_POSTFIELDS, 'monkey=uncle&rhino=aunt'); curl_setopt($c, CURLOPT_RETURNTRANSFER, 1); $response_headers_and_page = curl_exec($c); curl_close($c);
To write the response headers directly to a file, open a file handle with fopen( ) and set
CURLOPT_WRITEHEADER to that file handle:
$fh = fopen('/tmp/curl-response-headers.txt','w') or die($php_errormsg); $c = curl_init('http://www.example.com/submit.php'); curl_setopt($c, CURLOPT_POST, 1); curl_setopt($c, CURLOPT_POSTFIELDS, 'monkey=uncle&rhino=aunt'); curl_setopt($c, CURLOPT_RETURNTRANSFER, 1); curl_setopt($c, CURLOPT_WRITEHEADER, $fh); $page = curl_exec($c); curl_close($c); fclose($fh) or die($php_errormsg);
The cURL module's CURLOPT_VERBOSE option causes curl_exec( ) and curl_close( )
to print out debugging information to standard error, including the contents of the request:
$c = curl_init('http://www.example.com/submit.php');

curl_setopt($c, CURLOPT_VERBOSE, 1); curl_setopt($c, CURLOPT_POST, 1); curl_setopt($c, CURLOPT_POSTFIELDS, 'monkey=uncle&rhino=aunt'); curl_setopt($c, CURLOPT_RETURNTRANSFER, 1); $page = curl_exec($c); curl_close($c);
This prints:
* Connected to www.example.com (10.1.1.1) > POST /submit.php HTTP/1.1 Host: www.example.com Pragma: no-cache Accept: image/gif, image/x-xbitmap, image/jpeg, image/pjpeg, */* Content-Length: 23 Content-Type: application/x-www-form-urlencoded monkey=uncle&rhino=aunt* Connection #0 left intact * Closing connection #0
Because cURL prints the debugging information to standard error and not standard output, it
can't be captured with output buffering, as Recipe 10.11 does with print_r( ). You can,
however, open a file handle for writing and set CURLOUT_STDERR to that file handle to divert
the debugging information to a file:
$fh = fopen('/tmp/curl.out','w') or die($php_errormsg); $c = curl_init('http://www.example.com/submit.php'); curl_setopt($c, CURLOPT_VERBOSE, 1); curl_setopt($c, CURLOPT_POST, 1); curl_setopt($c, CURLOPT_POSTFIELDS, 'monkey=uncle&rhino=aunt'); curl_setopt($c, CURLOPT_RETURNTRANSFER, 1); curl_setopt($c, CURLOPT_STDERR, $fh); $page = curl_exec($c); curl_close($c); fclose($fh) or die($php_errormsg);
11.7.4 See Also
Recipe 10.11 for output buffering; documentation on curl_setopt( ) at
http://www.php.net/curl-setopt; the PEAR HTTP_Request class at
http://pear.php.net/package-info.php?package=HTTP_Request; the syntax of an HTTP request
is defined in RFC 2616 and available at http://www.faqs.org/rfcs/rfc2616.html.
Recipe 11.8 Marking Up a Web Page
11.8.1 Problem
You want to display a web page, for example a search result, with certain words highlighted.
11.8.2 Solution
Use preg_replace( ) with an array of patterns and replacements:

$patterns = array('\bdog\b/', '\bcat\b'); $replacements = array('<b style="color:black;background-color=#FFFF00">dog</b>', '<b style='color:black;background-color=#FF9900">cat</b>'); while ($page) { if (preg_match('{^([^<]*)?(</?[^>]+?>)?(.*)$}',$page,$matches)) { print preg_replace($patterns,$replacements,$matches[1]); print $matches[2]; $page = $matches[3]; } }
11.8.3 Discussion
The regular expression used with preg_match( ) matches as much text as possible before
an HTML tag, then an HTML tag, and then the rest of the content. The text before the HTML
tag has the highlighting applied to it, the HTML tag is printed out without any highlighting, and
the rest of the content has the same match applied to it. This prevents any highlighting of
words that occur inside HTML tags (in URLs or alt text, for example) which would prevent the
page from displaying properly.
The following program retrieves the URL in $url and highlights the words in the $words
array. Words are not highlighted when they are part of larger words because they are
matched with the \b Perl-compatible regular expression operator for finding word boundaries.
$colors = array('FFFF00','FF9900','FF0000','FF00FF', '99FF33','33FFCC','FF99FF','00CC33'); // build search and replace patterns for regex $patterns = array(); $replacements = array(); for ($i = 0, $j = count($words); $i < $j; $i++) { $patterns[$i] = '/\b'.preg_quote($words[$i], '/').'\b/'; $replacements[$i] = '<b style="color:black;background-color:#' . $colors[$i % 8] .'">' . $words[$i] . '</b>'; } // retrieve page $fh = fopen($url,'r') or die($php_errormsg); while (! feof($fh)) { $s .= fread($fh,4096); } fclose($fh); if ($j) { while ($s) { if (preg_match('{^([^<]*)?(</?[^>]+?>)?(.*)$}s',$s,$matches)) { print preg_replace($patterns,$replacements,$matches[1]); print $matches[2]; $s = $matches[3]; } } } else { print $s;

}
11.8.4 See Also
Recipe 13.8 for information on capturing text inside HTML tags; documentation on
preg_match( ) at http://www.php.net/preg-match and preg_replace( ) at
http://www.php.net/preg-replace.
Recipe 11.9 Extracting Links from an HTML File
11.9.1 Problem
You need to extract the URLs that are specified inside an HTML document.
11.9.2 Solution
Use the pc_link_extractor( ) function shown in Example 11-2.
Example 11-2. pc_link_extractor( )
function pc_link_extractor($s) { $a = array(); if (preg_match_all('/<a\s+.*?href=[\"\']?([^\"\' >]*)[\"\']?[^>]*>(.*?)<\/a>/i', $s,$matches,PREG_SET_ORDER)) { foreach($matches as $match) { array_push($a,array($match[1],$match[2])); } } return $a; }
For example:
$links = pc_link_extractor($page);
11.9.3 Discussion
The pc_link_extractor( ) function returns an array. Each element of that array is itself a
two-element array. The first element is the target of the link, and the second element is the
text that is linked. For example:
$links=<<<END Click <a href="http://www.oreilly.com">here</a> to visit a computer book publisher. Click <a href="http://www.sklar.com">over here</a> to visit a computer book author. END; $a = pc_link_extractor($links); print_r($a); Array (

[0] => Array ( [0] => http://www.oreilly.com [1] => here ) [1] => Array ( [0] => http://www.sklar.com [1] => over here ) )
The regular expression in pc_link_extractor( ) won't work on all links, such as those
that are constructed with JavaScript or some hexadecimal escapes, but it should function on
the majority of reasonably well-formed HTML.
11.9.4 See Also
Recipe 13.8 for information on capturing text inside HTML tags; documentation on
preg_match_all( ) at http://www.php.net/preg-match-all.
Recipe 11.10 Converting ASCII to HTML
11.10.1 Problem
You want to turn plaintext into reasonably formatted HTML.
11.10.2 Solution
First, encode entities with htmlentities( ) ; then, transform the text into various HTML
structures. The pc_ascii2html( ) function shown in Example 11-3 has basic
transformations for links and paragraph breaks.
Example 11-3. pc_ascii2html( )
function pc_ascii2html($s) { $s = htmlentities($s); $grafs = split("\n\n",$s); for ($i = 0, $j = count($grafs); $i < $j; $i++) { // Link to what seem to be http or ftp URLs $grafs[$i] = preg_replace('/((ht|f)tp:\/\/[^\s&]+)/', '<a href="$1">$1</a>',$grafs[$i]); // Link to email addresses $grafs[$i] = preg_replace('/[^@\s]+@([-a-z0-9]+\.)+[a-z]{2,}/i', '<a href="mailto:$1">$1</a>',$grafs[$i]); // Begin with a new paragraph $grafs[$i] = '<p>'.$grafs[$i].'</p>'; } return join("\n\n",$grafs); }

11.10.3 Discussion
The more you know about what the ASCII text looks like, the better your HTML conversion can
be. For example, if emphasis is indicated with *asterisks* or /slashes/ around words, you can
add rules that take care of that, as follows:
$grafs[$i] = preg_replace('/(\A|\s)\*([^*]+)\*(\s|\z)/', '$1<b>$2</b>$3',$grafs[$i]); $grafs[$i] = preg_replace('{(\A|\s)/([^/]+)/(\s|\z)}', '$1<i>$2</i>$3',$grafs[$i]);
11.10.4 See Also
Documentation on preg_replace( ) at http://www.php.net/preg-replace.
Recipe 11.11 Converting HTML to ASCII
11.11.1 Problem
You need to convert HTML to readable, formatted ASCII text.
11.11.2 Solution
If you have access to an external program that formats HTML as ASCII, such as lynx, call it
like so:
$file = escapeshellarg($file); $ascii = `lynx -dump $file`;
11.11.3 Discussion
If you can't use an external formatter, the pc_html2ascii( ) function shown in Example
11-4 handles a reasonable subset of HTML (no tables or frames, though).
Example 11-4. pc_html2ascii( )
function pc_html2ascii($s) { // convert links $s = preg_replace('/<a\s+.*?href="?([^\" >]*)"?[^>]*>(.*?)<\/a>/i', '$2 ($1)', $s); // convert <br>, <hr>, <p>, <div> to line breaks $s = preg_replace('@<(b|h)r[^>]*>@i',"\n",$s); $s = preg_replace('@<p[^>]*>@i',"\n\n",$s); $s = preg_replace('@<div[^>]*>(.*)</div>@i',"\n".'$1'."\n",$s); // convert bold and italic $s = preg_replace('@<b[^>]*>(.*?)</b>@i','*$1*',$s); $s = preg_replace('@<i[^>]*>(.*?)</i>@i','/$1/',$s); // decode named entities $s = strtr($s,array_flip(get_html_translation_table(HTML_ENTITIES)));

// decode numbered entities $s = preg_replace('//e','chr(\\1)',$s); // remove any remaining tags $s = strip_tags($s); return $s; }
11.11.4 See Also
Recipe 9.9 for more on get_html_translation_table(); documentation on
preg_replace( ) at http://www.php.net/preg-replace, get_html_translation_table(
) at http://www.php.net/get-html-translation-table, and strip_tags( ) at
http://www.php.net/strip-tags.
Recipe 11.12 Removing HTML and PHP Tags
11.12.1 Problem
You want to remove HTML and PHP tags from a string or file.
11.12.2 Solution
Use strip_tags( ) to remove HTML and PHP tags from a string:
$html = '<a href="http://www.oreilly.com">I <b>love computer books.</b></a>'; print strip_tags($html); I love computer books.
Use fgetss( ) to remove them from a file as you read in lines:
$fh = fopen('test.html','r') or die($php_errormsg); while ($s = fgetss($fh,1024)) { print $s; } fclose($fh) or die($php_errormsg);
11.12.3 Discussion
While fgetss( ) is convenient if you need to strip tags from a file as you read it in, it may
get confused if tags span lines or if they span the buffer that fgetss( ) reads from the file.
At the price of increased memory usage, reading the entire file into a string provides better
results:
$no_tags = strip_tags(join('',file('test.html')));
Both strip_tags( ) and fgetss( ) can be told not to remove certain tags by specifying
those tags as a last argument. The tag specification is case-insensitive, and for pairs of tags,

you only have to specify the opening tag. For example, this removes all but <b></b> tags
from $html:
$html = '<a href="http://www.oreilly.com">I <b>love</b> computer books.</a>'; print strip_tags($html,'<b>'); I <b>love</b> computer books.
11.12.4 See Also
Documentation on strip_tags( ) at http://www.php.net/strip-tags and fgetss( ) at
http://www.php.net/fgetss.
Recipe 11.13 Using Smarty Templates
11.13.1 Problem
You want to separate code and design in your pages. Designers can work on the HTML files
without dealing with the PHP code, and programmers can work on the PHP files without
worrying about design.
11.13.2 Solution
Use a templating system. One easy-to-use template system is called Smarty. In a Smarty
template, strings between curly braces are replaced with new values:
Hello, {$name}
The PHP code that creates a page sets up the variables and then displays the template like
this:
require 'Smarty.class.php'; $smarty = new Smarty; $smarty->assign('name','Ruby'); $smarty->display('hello.tpl');
11.13.3 Discussion
Here's a Smarty template for displaying rows retrieved from a database:
<html> <head><title>cheeses</title></head> <body> <table border="1"> <tr> <th>cheese</th> <th>country</th> <th>price</th> </tr> {section name=id loop=$results}
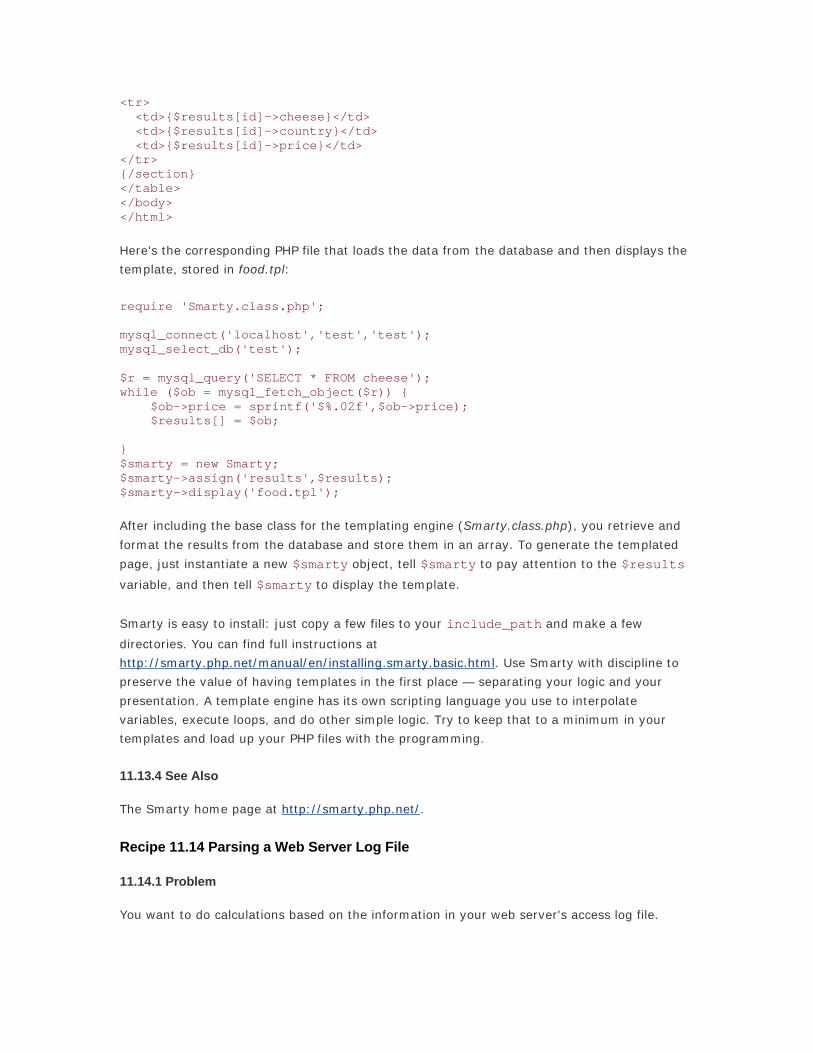
<tr> <td>{$results[id]->cheese}</td> <td>{$results[id]->country}</td> <td>{$results[id]->price}</td> </tr> {/section} </table> </body> </html>
Here's the corresponding PHP file that loads the data from the database and then displays the
template, stored in food.tpl:
require 'Smarty.class.php'; mysql_connect('localhost','test','test'); mysql_select_db('test'); $r = mysql_query('SELECT * FROM cheese'); while ($ob = mysql_fetch_object($r)) { $ob->price = sprintf('$%.02f',$ob->price); $results[] = $ob; } $smarty = new Smarty; $smarty->assign('results',$results); $smarty->display('food.tpl');
After including the base class for the templating engine (Smarty.class.php), you retrieve and
format the results from the database and store them in an array. To generate the templated
page, just instantiate a new $smarty object, tell $smarty to pay attention to the $results
variable, and then tell $smarty to display the template.
Smarty is easy to install: just copy a few files to your include_path and make a few
directories. You can find full instructions at
http://smarty.php.net/manual/en/installing.smarty.basic.html. Use Smarty with discipline to
preserve the value of having templates in the first place — separating your logic and your
presentation. A template engine has its own scripting language you use to interpolate
variables, execute loops, and do other simple logic. Try to keep that to a minimum in your
templates and load up your PHP files with the programming.
11.13.4 See Also
The Smarty home page at http://smarty.php.net/.
Recipe 11.14 Parsing a Web Server Log File
11.14.1 Problem
You want to do calculations based on the information in your web server's access log file.

11.14.2 Solution
Open the file and parse each line with a regular expression that matches the log file format.
This regular expression matches the NCSA Combined Log Format:
$pattern = '/^([^ ]+) ([^ ]+) ([^ ]+) (\[[^\]]+\]) "(.*) (.*) (.*)" ([0-9\-]+) ([0-9\-]+) "(.*)" "(.*)"$/';
11.14.3 Discussion
This program parses the NCSA Combined Log Format lines and displays a list of pages sorted
by the number of requests for each page:
$log_file = '/usr/local/apache/logs/access.log'; $pattern = '/^([^ ]+) ([^ ]+) ([^ ]+) (\[[^\]]+\]) "(.*) (.*) (.*)" ([0-9\-]+) ([0-9\-]+) "(.*)" "(.*)"$/'; $fh = fopen($log_file,'r') or die($php_errormsg); $i = 1; $requests = array(); while (! feof($fh)) { // read each line and trim off leading/trailing whitespace if ($s = trim(fgets($fh,16384))) { // match the line to the pattern if (preg_match($pattern,$s,$matches)) { /* put each part of the match in an appropriately-named * variable */ list($whole_match,$remote_host,$logname,$user,$time, $method,$request,$protocol,$status,$bytes,$referer, $user_agent) = $matches; // keep track of the count of each request $requests[$request]++; } else { // complain if the line didn't match the pattern error_log("Can't parse line $i: $s"); } } $i++; } fclose($fh) or die($php_errormsg); // sort the array (in reverse) by number of requests arsort($requests); // print formatted results foreach ($requests as $request => $accesses) { printf("%6d %s\n",$accesses,$request); }
The pattern used in preg_match( ) matches Combined Log Format lines such as:
10.1.1.162 - david [20/Jul/2001:13:05:02 -0400] "GET /sklar.css HTTP/1.0" 200 278 "-" "Mozilla/4.77 [en] (WinNT; U)"

10.1.1.248 - - [14/Mar/2002:13:31:37 -0500] "GET /php-cookbook/colors.html HTTP/1.1" 200 460 "-" "Mozilla/4.0 (compatible; MSIE 5.5; Windows NT 5.0)"
In the first line, 10.1.1.162 is the IP address that the request came from. Depending on the
server configuration, this could be a hostname instead. When the $matches array is assigned
to the list of separate variables, the hostname is stored in $remote_host. The next hyphen
(-) means that the remote host didn't supply a username via identd,[1] so $logname is set to
-.
[1] identd, defined in RFC 1413, is supposed to be a good way to identify users remotely. However, it's not very secure or reliable. A good explanation of why is at http://www.clock.org/~fair/opinion/identd.html.
The string david is a username provided by the browser using HTTP Basic Authentication and
is put in $user. The date and time of the request, stored in $time, is in brackets. This date
and time format isn't understood by strtotime( ), so if you wanted to do calculations based
on request date and time, you have to do some further processing to extract each piece of the
formatted time string. Next, in quotes, is the first line of the request. This is composed of the
method (GET, POST, HEAD, etc.) which is stored in $method; the requested URI, which is
stored in $request, and the protocol, which is stored in $protocol. For GET requests, the
query string is part of the URI. For POST requests, the request body that contains the
variables isn't logged.
After the request comes the request status, stored in $status. Status 200 means the request
was successful. After the status is the size in bytes of the response, stored in $bytes. The
last two elements of the line, each in quotes, are the referring page if any, stored in
$referer[2] and the user agent string identifying the browser that made the request, stored
in $user_agent.
[2] The correct way to spell this word is "referrer." However, since the original HTTP specification (RFC 1945) misspelled it as "referer," the three-R spelling is frequently used in context.
Once the log file line has been parsed into distinct variables, you can do the needed
calculations. In this case, just keep a counter in the $requests array of how many times
each URI is requested. After looping through all lines in the file, print out a sorted, formatted
list of requests and counts.
Calculating statistics this way from web server access logs is easy, but it's not very flexible.
The program needs to be modified for different kinds of reports, restricted date ranges, report
formatting, and many other features. A better solution for comprehensive web site statistics is
to use a program such as analog, available for free at http://www.analog.cx. It has many
types of reports and configuration options that should satisfy just about every need you may
have.

11.14.4 See Also
Documentation on preg_match( ) at http://www.php.net/preg-match; information about
common log file formats is available at http://httpd.apache.org/docs/logs.html.
Recipe 11.15 Program: Finding Stale Links
The stale-links.php program in Example 11-5 produces a list of links in a page and their
status. It tells you if the links are okay, if they've been moved somewhere else, or if they're
bad. Run the program by passing it a URL to scan for links:
% stale-links.php http://www.oreilly.com/ http://www.oreilly.com/index.html: OK http://www.oreillynet.com: OK http://conferences.oreilly.com: OK http://international.oreilly.com: OK http://safari.oreilly.com: MOVED: mainhom.asp?home ...
The stale-links.php program uses the cURL extension to retrieve web pages. First, it retrieves
the URL specified on the command line. Once a page has been retrieved, the program uses
the pc_link_extractor( ) function from Recipe 11.9 to get a list of links in the page.
Then, after prepending a base URL to each link if necessary, the link is retrieved. Because we
need just the headers of these responses, we use the HEAD method instead of GET by setting
the CURLOPT_NOBODY option. Setting CURLOPT_HEADER tells curl_exec( ) to include the
response headers in the string it returns. Based on the response code, the status of the link is
printed, along with its new location if it's been moved.
Example 11-5. stale-links.php
function_exists('curl_exec') or die('CURL extension required'); function pc_link_extractor($s) { $a = array(); if (preg_match_all('/<A\s+.*?HREF=[\"\']?([^\"\' >]*)[\"\']?[^>]*>(.*?)<\/A>/i', $s,$matches,PREG_SET_ORDER)) { foreach($matches as $match) { array_push($a,array($match[1],$match[2])); } } return $a; } $url = $_SERVER['argv'][1]; // retrieve URL $c = curl_init($url); curl_setopt($c, CURLOPT_RETURNTRANSFER, 1); curl_setopt($c, CURLOPT_FOLLOWLOCATION,1); $page = curl_exec($c); $info = curl_getinfo($c); curl_close($c);

// compute base url from url // this doesn't pay attention to a <base> tag in the page $url_parts = parse_url($info['url']); if ('' == $url_parts['path']) { $url_parts['path'] = '/'; } $base_path = preg_replace('<^(.*/)([^/]*)$>','\\1',$url_parts['path']); $base_url = sprintf('%s://%s%s%s', $url_parts['scheme'], ($url_parts['username'] || $url_parts['password']) ? "$url_parts[username]:$url_parts[password]@" : '', $url_parts['host'], $url_parts['path']); // keep track of the links we visit so we don't visit each more than once $seen_links = array(); if ($page) { $links = pc_link_extractor($page); foreach ($links as $link) { // resolve relative links if (! (preg_match('{^(http|https|mailto):}',$link[0]))) { $link[0] = $base_url.$link[0]; } // skip this link if we've seen it already if ($seen_links[$link[0]]) { continue; } // mark this link as seen $seen_links[$link[0]] = true; // print the link we're visiting print $link[0].': '; flush(); // visit the link $c = curl_init($link[0]); curl_setopt($c, CURLOPT_RETURNTRANSFER, 1); curl_setopt($c, CURLOPT_NOBODY, 1); curl_setopt($c, CURLOPT_HEADER, 1); $link_headers = curl_exec($c); $curl_info = curl_getinfo($c); curl_close($c); switch (intval($curl_info['http_code']/100)) { case 2: // 2xx response codes mean the page is OK $status = 'OK'; break; case 3: // 3xx response codes mean redirection $status = 'MOVED'; if (preg_match('/^Location: (.*)$/m',$link_headers,$matches)) { $location = trim($matches[1]); $status .= ": $location"; } break; default: // other response codes mean errors $status = "ERROR: $curl_info[http_code]";
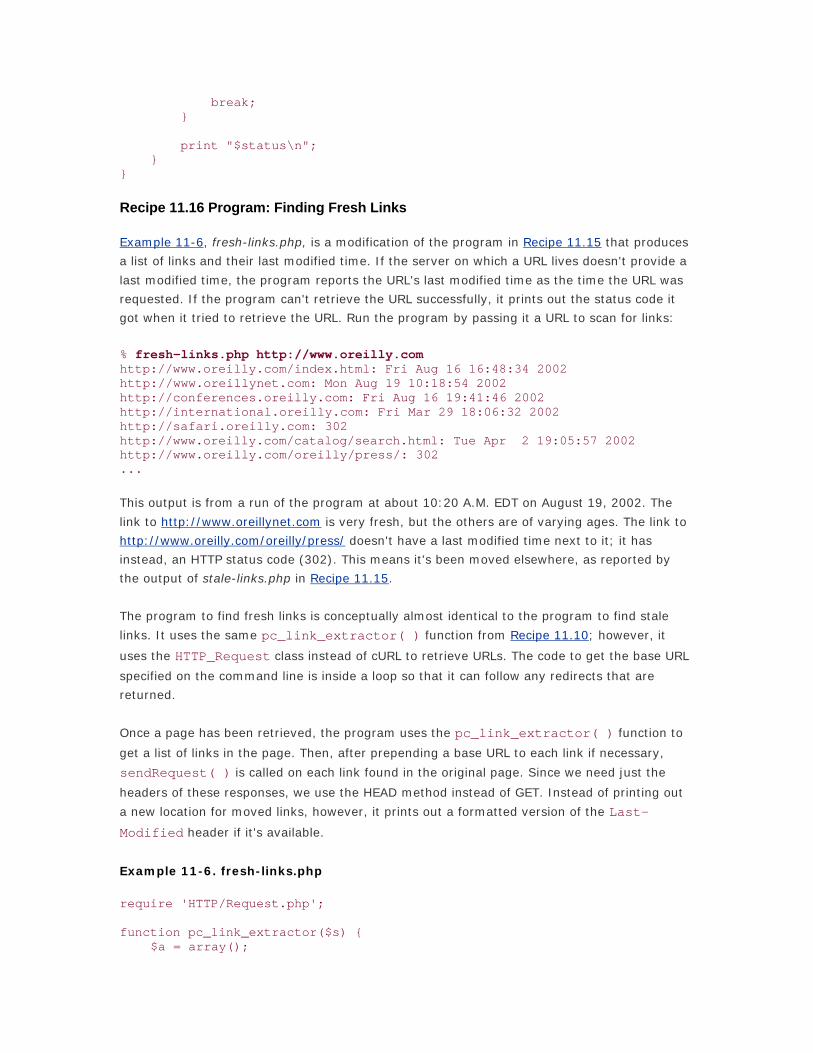
break; } print "$status\n"; } }
Recipe 11.16 Program: Finding Fresh Links
Example 11-6, fresh-links.php, is a modification of the program in Recipe 11.15 that produces
a list of links and their last modified time. If the server on which a URL lives doesn't provide a
last modified time, the program reports the URL's last modified time as the time the URL was
requested. If the program can't retrieve the URL successfully, it prints out the status code it
got when it tried to retrieve the URL. Run the program by passing it a URL to scan for links:
% fresh-links.php http://www.oreilly.com http://www.oreilly.com/index.html: Fri Aug 16 16:48:34 2002 http://www.oreillynet.com: Mon Aug 19 10:18:54 2002 http://conferences.oreilly.com: Fri Aug 16 19:41:46 2002 http://international.oreilly.com: Fri Mar 29 18:06:32 2002 http://safari.oreilly.com: 302 http://www.oreilly.com/catalog/search.html: Tue Apr 2 19:05:57 2002 http://www.oreilly.com/oreilly/press/: 302 ...
This output is from a run of the program at about 10:20 A.M. EDT on August 19, 2002. The
link to http://www.oreillynet.com is very fresh, but the others are of varying ages. The link to
http://www.oreilly.com/oreilly/press/ doesn't have a last modified time next to it; it has
instead, an HTTP status code (302). This means it's been moved elsewhere, as reported by
the output of stale-links.php in Recipe 11.15.
The program to find fresh links is conceptually almost identical to the program to find stale
links. It uses the same pc_link_extractor( ) function from Recipe 11.10; however, it
uses the HTTP_Request class instead of cURL to retrieve URLs. The code to get the base URL
specified on the command line is inside a loop so that it can follow any redirects that are
returned.
Once a page has been retrieved, the program uses the pc_link_extractor( ) function to
get a list of links in the page. Then, after prepending a base URL to each link if necessary,
sendRequest( ) is called on each link found in the original page. Since we need just the
headers of these responses, we use the HEAD method instead of GET. Instead of printing out
a new location for moved links, however, it prints out a formatted version of the Last-
Modified header if it's available.
Example 11-6. fresh-links.php
require 'HTTP/Request.php'; function pc_link_extractor($s) { $a = array();
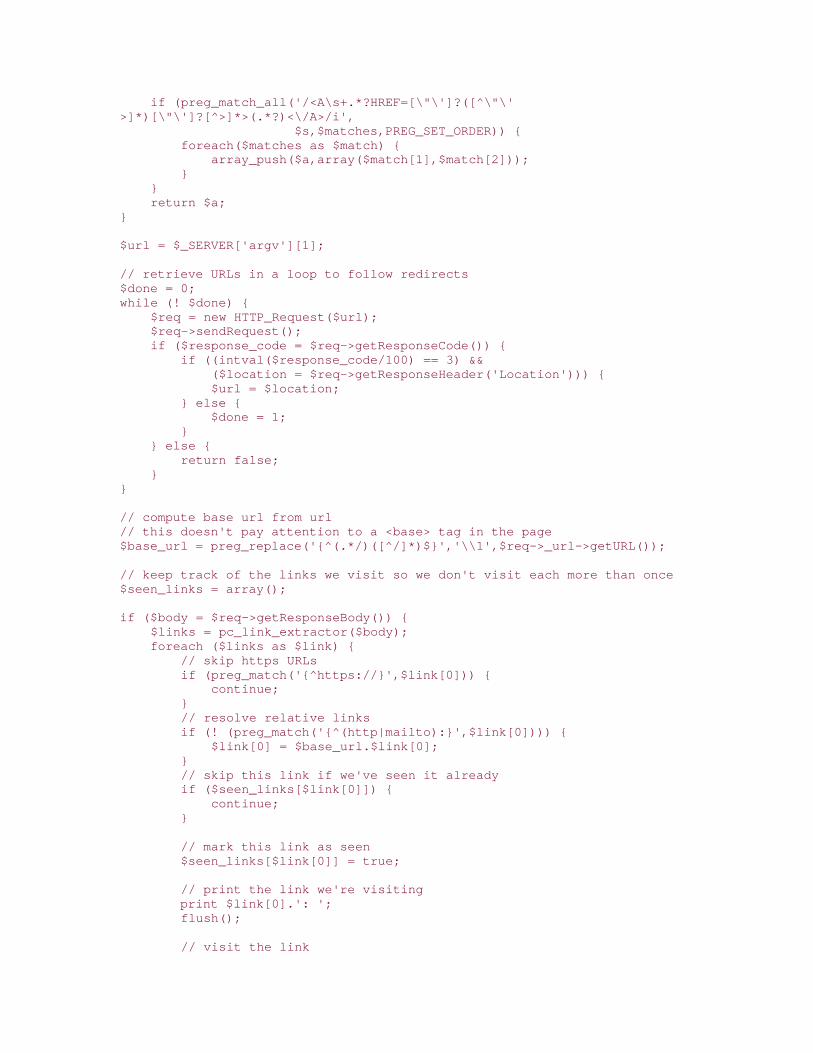
if (preg_match_all('/<A\s+.*?HREF=[\"\']?([^\"\' >]*)[\"\']?[^>]*>(.*?)<\/A>/i', $s,$matches,PREG_SET_ORDER)) { foreach($matches as $match) { array_push($a,array($match[1],$match[2])); } } return $a; } $url = $_SERVER['argv'][1]; // retrieve URLs in a loop to follow redirects $done = 0; while (! $done) { $req = new HTTP_Request($url); $req->sendRequest(); if ($response_code = $req->getResponseCode()) { if ((intval($response_code/100) == 3) && ($location = $req->getResponseHeader('Location'))) { $url = $location; } else { $done = 1; } } else { return false; } } // compute base url from url // this doesn't pay attention to a <base> tag in the page $base_url = preg_replace('{^(.*/)([^/]*)$}','\\1',$req->_url->getURL()); // keep track of the links we visit so we don't visit each more than once $seen_links = array(); if ($body = $req->getResponseBody()) { $links = pc_link_extractor($body); foreach ($links as $link) { // skip https URLs if (preg_match('{^https://}',$link[0])) { continue; } // resolve relative links if (! (preg_match('{^(http|mailto):}',$link[0]))) { $link[0] = $base_url.$link[0]; } // skip this link if we've seen it already if ($seen_links[$link[0]]) { continue; } // mark this link as seen $seen_links[$link[0]] = true; // print the link we're visiting print $link[0].': '; flush(); // visit the link

$req2 = new HTTP_Request($link[0], array('method' => HTTP_REQUEST_METHOD_HEAD)); $now = time(); $req2->sendRequest(); $response_code = $req2->getResponseCode(); // if the retrieval is successful if ($response_code == 200) { // get the Last-Modified header if ($lm = $req2->getResponseHeader('Last-Modified')) { $lm_utc = strtotime($lm); } else { // or set Last-Modified to now $lm_utc = $now; } print strftime('%c',$lm_utc); } else { // otherwise, print the response code print $response_code; } print "\n"; } }
Chapter 12. XML
Section 12.1. Introduction
Recipe 12.2. Generating XML Manually
Recipe 12.3. Generating XML with the DOM
Recipe 12.4. Parsing XML with the DOM
Recipe 12.5. Parsing XML with SAX
Recipe 12.6. Transforming XML with XSLT
Recipe 12.7. Sending XML-RPC Requests
Recipe 12.8. Receiving XML-RPC Requests
Recipe 12.9. Sending SOAP Requests
Recipe 12.10. Receiving SOAP Requests
Recipe 12.11. Exchanging Data with WDDX
Recipe 12.12. Reading RSS Feeds

12.1 Introduction
Recently, XML has gained popularity as a data-exchange and message-passing format. As web
services become more widespread, XML plays an even more important role in a developer's
life. With the help of a few extensions, PHP lets you read and write XML for every occasion.
XML provides developers with a structured way to mark up data with tags arranged in a tree-
like hierarchy. One perspective on XML is to treat it as CSV on steroids. You can use XML to
store records broken into a series of fields. But, instead of merely separating each field with a
comma, you can include a field name, type, and attributes alongside the data.
Another view of XML is as a document representation language. For instance, the PHP
Cookbook was written using XML. The book is divided into chapters; each chapter into recipes;
and each recipe into Problem, Solution, and Discussion sections. Within any individual section,
we further subdivide the text into paragraphs, tables, figures, and examples. An article on a
web page can similarly be divided into the page title and headline, the authors of the piece,
the story itself, and any sidebars, related links, and additional content.
XML text looks similar to HTML. Both use tags bracketed by < and > for marking up text. But
XML is both stricter and looser than HTML. It's stricter because all container tags must be
properly closed. No opening elements are allowed without a corresponding closing tag. It's
looser because you're not forced to use a set list of tags, such as <a>, <img>, and <h1>.
Instead, you have the freedom to choose a series of tag names that best describe your data.
Other key differences between XML and HTML are case-sensitivity, attribute quoting, and
whitespace. In HTML, <B> and <b> are the same bold tag; in XML, they're two different tags.
In HTML, you can often omit quotation marks around attributes; XML, however, requires
them. So, you must always write:
<element attribute="value">
Additionally, HTML parsers generally ignore whitespace, so a run of 20 consecutive spaces is
treated the same as one space. XML parsers preserve whitespace, unless explicitly instructed
otherwise. Because all elements must be closed, empty elements must end with />. For
instance in HTML, the line break is <br>, while in XML, it's written as <br />.[1]
[1] This is why nl2br( ) outputs <br />; its output is XML-compatible.
There is another restriction on XML documents. Since XML documents can be parsed into a
tree of elements, the outermost element is known as the root element . Just as a tree has only
one trunk, an XML document must have exactly one root element. In the previous book
example, this means chapters must be bundled inside a book tag. If you want to place
multiple books inside a document, you need to package them inside a bookcase or another
container. This limitation applies only to the document root. Again, just like trees can have
multiple branches off of the trunk, it's legal to store multiple books inside a bookcase.

This chapter doesn't aim to teach you XML; for an introduction to XML, see Learning XML, by
Erik T. Ray. A solid nuts-and-bolts guide to all aspects of XML is XML in a Nutshell, by Elliotte
Rusty Harold and W. Scott Means. Both books are published by O'Reilly & Associates.
Now that we've covered the rules, here's an example: if you are a librarian and want to
convert your card catalog to XML, start with this basic set of XML tags:
<book> <title>PHP Cookbook</title> <author>Sklar, David and Trachtenberg, Adam</author> <subject>PHP</subject> </book>
From there, you can add new elements or modify existing ones. For example, <author> can
be divided into first and last name, or you can allow for multiple records so two authors aren't
placed in one field.
The first three recipes in this chapter cover writing and reading XML. Recipe 12.2 shows how
to write XML without additional tools. To use the DOM XML extension to write XML in a
standardized fashion, see Recipe 12.3. Reading XML using DOM is the topic of Recipe 12.4.
But XML isn't an end by itself. Once you've gathered all your XML, the real question is "What
do you do with it?" With an event-based parser, as described in Recipe 12.5, you can make
element tags trigger actions, such as storing data into easily manipulated structures or
reformatting the text.
With XSLT, you can take a XSL stylesheet and turn XML into viewable output. By separating
content from presentation, you can make one stylesheet for web browsers, another for PDAs,
and a third for cell phones, all without changing the content itself. This is the subject of Recipe
12.6.
You can use a protocol such as XML-RPC or SOAP to exchange XML messages between
yourself and a server, or to act as a server yourself. You can thus put your card catalog on the
Internet and allow other programmers to query the catalog and retrieve book records in a
format that's easy for them to parse and display in their applications. Another use would be to
set up an RSS feed that gets updated whenever the library gets a new book in stock. XML-RPC
clients and servers are the subjects of Recipe 12.7 and Recipe 12.8, respectively. Recipe 12.9
and Recipe 12.10 cover SOAP clients and servers. WDDX, a data exchange format that
originated with the ColdFusion language, is the topic of Recipe 12.11. Reading RSS feeds, a
popular XML-based headline syndication format, is covered in Recipe 12.12.
As with many bleeding-edge technologies, some of PHP's XML tools are not feature-complete
and bug-free. However, XML is an area of active development in the PHP community; new
features are added and bugs are fixed on a regular basis. As a result, many XML functions
documented here are still experimental. Sometimes, all that means is that the function is 99%
complete, but there may be a few small bugs lying around. Other times, it means that the

name or the behavior of the function could be completely changed. If a function is in a highly
unstable state, we mention it in the recipe.
We've documented the functions as they're currently planned to work in PHP 4.3. Because
XML is such an important area, it made no sense to omit these recipes from the book. Also,
we wanted to make sure that the latest functions are used in our examples. This can,
however, lead to small problems if the function names and prototypes change. If you find that
a recipe isn't working as you'd expect it to, please check the online PHP manual or the errata
section of the catalog page for the PHP Cookbook, http://www.oreilly.com/catalog/phpckbk.
Recipe 12.2 Generating XML Manually
12.2.1 Problem
You want to generate XML. For instance, you want to provide an XML version of your data for
another program to parse.
12.2.2 Solution
Loop through your data and print it out surrounded by the correct XML tags:
header('Content-Type: text/xml'); print '<?xml version="1.0"?>' . "\n"; print "<shows>\n"; $shows = array(array('name' => 'Simpsons', 'channel' => 'FOX', 'start' => '8:00 PM', 'duration' => '30'), array('name' => 'Law & Order', 'channel' => 'NBC', 'start' => '8:00 PM', 'duration' => '60')); foreach ($shows as $show) { print " <show>\n"; foreach($show as $tag => $data) { print " <$tag>" . htmlspecialchars($data) . "</$tag>\n"; } print " </show>\n"; } print "</shows>\n";
12.2.3 Discussion
Printing out XML manually mostly involves lots of foreach loops as you iterate through
arrays. However, there are a few tricky details. First, you need to call header( ) to set the
correct Content-Type header for the document. Since you're sending XML instead of HTML,
it should be text/xml.

Next, depending on your settings for the short_open_tag configuration directive, trying to
print the XML declaration may accidentally turn on PHP processing. Since the <? of <?xml
version="1.0"?> is the short PHP open tag, to print the declaration to the browser you
need to either disable the directive or print the line from within PHP. We do the latter in the
Solution.
Last, entities must be escaped. For example, the & in the show Law & Order needs to be
&. Call htmlspecialchars( ) to escape your data.
The output from the example in the Solution is:
<?xml version="1.0"?> <shows> <show> <name>Simpsons</name> <channel>FOX</channel> <start>8:00 PM</start> <duration>30</duration> </show> <show> <name>Law & Order</name> <channel>NBC</channel> <start>8:00 PM</start> <duration>60</duration> </show> </shows>
12.2.4 See Also
Recipe 12.3 for generating XML using DOM; Recipe 12.4 for reading XML with DOM;
documentation on htmlspecialchars( ) at http://www.php.net/htmlspecialchars.
Recipe 12.3 Generating XML with the DOM
12.3.1 Problem
You want to generate XML but want to do it in an organized way instead of using print and
loops.
12.3.2 Solution
Use PHP's DOM XML extension to create a DOM object; then, call dump_mem( ) or
dump_file( ) to generate a well-formed XML document:
// create a new document $dom = domxml_new_doc('1.0'); // create the root element, <book>, and append it to the document $book = $dom->append_child($dom->create_element('book')); // create the title element and append it to $book
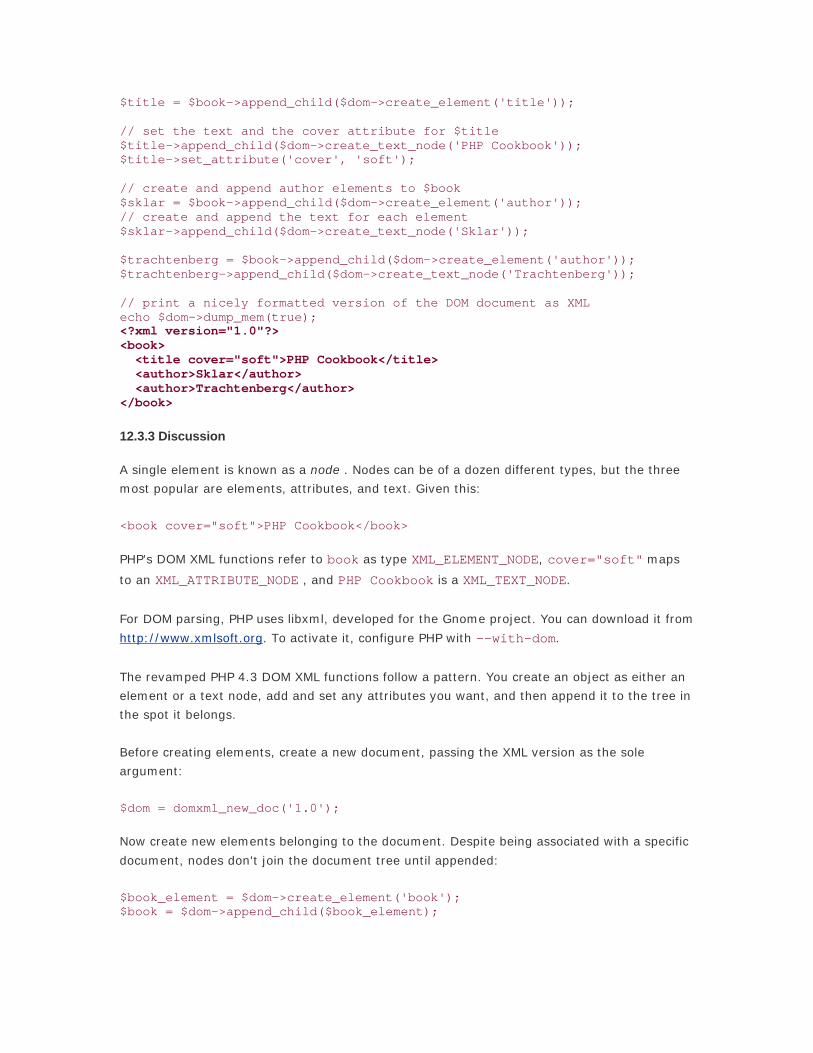
$title = $book->append_child($dom->create_element('title')); // set the text and the cover attribute for $title $title->append_child($dom->create_text_node('PHP Cookbook')); $title->set_attribute('cover', 'soft'); // create and append author elements to $book $sklar = $book->append_child($dom->create_element('author')); // create and append the text for each element $sklar->append_child($dom->create_text_node('Sklar')); $trachtenberg = $book->append_child($dom->create_element('author')); $trachtenberg->append_child($dom->create_text_node('Trachtenberg')); // print a nicely formatted version of the DOM document as XML echo $dom->dump_mem(true); <?xml version="1.0"?> <book> <title cover="soft">PHP Cookbook</title> <author>Sklar</author> <author>Trachtenberg</author> </book>
12.3.3 Discussion
A single element is known as a node . Nodes can be of a dozen different types, but the three
most popular are elements, attributes, and text. Given this:
<book cover="soft">PHP Cookbook</book>
PHP's DOM XML functions refer to book as type XML_ELEMENT_NODE, cover="soft" maps
to an XML_ATTRIBUTE_NODE , and PHP Cookbook is a XML_TEXT_NODE.
For DOM parsing, PHP uses libxml, developed for the Gnome project. You can download it from
http://www.xmlsoft.org. To activate it, configure PHP with --with-dom.
The revamped PHP 4.3 DOM XML functions follow a pattern. You create an object as either an
element or a text node, add and set any attributes you want, and then append it to the tree in
the spot it belongs.
Before creating elements, create a new document, passing the XML version as the sole
argument:
$dom = domxml_new_doc('1.0');
Now create new elements belonging to the document. Despite being associated with a specific
document, nodes don't join the document tree until appended:
$book_element = $dom->create_element('book'); $book = $dom->append_child($book_element);

Here a new book element is created and assigned to the object $book_element. To create
the document root, append $book_element as a child of the $dom document. The result,
$book, refers to the specific element and its location within the DOM object.
All nodes are created by calling a method on $dom. Once a node is created, it can be
appended to any element in the tree. The element from which we call the append_child( )
method determines the location in the tree where the node is placed. In the previous case,
$book_element is appended to $dom. The element appended to $dom is the top-level node,
or the root node.
You can also append a new child element to $book. Since $book is a child of $dom, the new
element is, by extension, a grandchild of $dom:
$title_element = $dom->create_element('title'); $title = $book->append_child($title_element);
By calling $book->append_child( ), this code places the $title_element element under
the $book element.
To add the text inside the <title></title> tags, create a text node using
create_text_node( ) and append it to $title:
$text_node = $dom->create_text_node('PHP Cookbook'); $title->append_child($text_node);
Since $title is already added to the document, there's no need to reappend it to $book.
The order in which you append children to nodes isn't important. The following four lines,
which first append the text node to $title_element and then to $book, are equivalent to
the previous code:
$title_element = $dom->create_element('title'); $text_node = $dom->create_text_node('PHP Cookbook'); $title_element->append_child($text_node); $book->append_child($title_element);
To add an attribute, call set_attribute( ) upon a node, passing the attribute name and
value as arguments:
$title->set_attribute('cover', 'soft');
If you print the title element now, it looks like this:
<title cover="soft">PHP Cookbook</title>
Once you're finished, you can output the document as a string or to a file:

// put the string representation of the XML document in $books $books = $dom->dump_mem( ); // write the XML document to books.xml $dom->dump_file('books.xml', false, true);
The only parameter dump_mem( ) takes is an optional boolean value. An empty value or
false means "return the string as one long line." A true value causes the XML to be nicely
formatted with child nodes indented, like this:
<?xml version="1.0"?> <book> <title cover="soft">PHP Cookbook</title> </book>
You can pass up to three values to dump_file( ). The first one, which is mandatory, is the
filename. The second is whether the file should be compressed with gzip. The final value is the
same pretty formatting option as dump_mem( ).
12.3.4 See Also
Recipe 12.2 for writing XML without DOM; Recipe 12.4 for parsing XML with DOM;
documentation on domxml_new_dom( ) at http://www.php.net/domxml-new-dom and the
DOM functions in general at http://www.php.net/domxml; more information about the
underlying DOM C library at http://xmlsoft.org/.
Recipe 12.4 Parsing XML with the DOM
12.4.1 Problem
You want to parse an XML file using the DOM API. This puts the file into a tree, which you can
process using DOM functions. With the DOM, it's easy to search for and retrieve elements that
fit a certain set of criteria.
12.4.2 Solution
Use PHP's DOM XML extension. Here's how to read XML from a file:
$dom = domxml_open_file('books.xml');
Here's how to read XML from a variable:
$dom = domxml_open_mem($books);
You can also get just a single node. Here's how to get the root node:
$root = $dom->document_element( );
Here's how to do a depth-first recursion to process all the nodes in a document:

function process_node($node) { if ($node->has_child_nodes( )) { foreach($node->child_nodes( ) as $n) { process_node($n); } } // process leaves if ($node->node_type( ) = = XML_TEXT_NODE) { $content = rtrim($node->node_value( )); if (!empty($content)) { print "$content\n"; } } } process_node($root);
12.4.3 Discussion
The W3C's DOM provides a platform- and language-neutral method that specifies the structure
and content of a document. Using the DOM, you can read an XML document into a tree of
nodes and then maneuver through the tree to locate information about a particular element or
elements that match your criteria. This is called tree-based parsing . In contrast, the non-DOM
XML functions allow you to do event-based parsing.
Additionally, you can modify the structure by creating, editing, and deleting nodes. In fact,
you can use the DOM XML functions to author a new XML document from scratch; see Recipe
12.3
One of the major advantages of the DOM is that by following the W3C's specification, many
languages implement DOM functions in a similar manner. Therefore, the work of translating
logic and instructions from one application to another is considerably simplified. PHP 4.3
comes with an updated series of DOM functions that are in stricter compliance with the DOM
standard than previous versions of PHP. However, the functions are not yet 100% compliant.
Future PHP versions should bring a closer alignment, but this may break some applications
that need minor updates. Check the DOM XML material in the online PHP Manual at
http://www.php.net/domxml for changes. Functions available in earlier versions of PHP are
available, but deprecated.
The DOM is large and complex. For more information, read the specification at
http://www.w3.org/DOM/ or pick up a copy of XML in a Nutshell; Chapter 18 discusses the
DOM.
For DOM parsing, PHP uses libxml, developed for the Gnome project. You can download it from
http://www.xmlsoft.org. To activate it, configure PHP with --with-dom.
DOM functions in PHP are object-oriented. To move from one node to another, call methods
such as $node->child_nodes( ), which returns an array of node objects, and $node-

>parent_node( ), which returns the parent node object. Therefore, to process a node,
check its type and call a corresponding method:
// $node is the DOM parsed node <book cover="soft">PHP Cookbook</book> $type = $node->node_type(); switch($type) { case XML_ELEMENT_NODE: // I'm a tag. I have a tagname property. print $node->node_name(); // prints the tagname property: "book" print $node->node_value(); // null break; case XML_ATTRIBUTE_NODE: // I'm an attribute. I have a name and a value property. print $node->node_name(); // prints the name property: "cover" print $node->node_value(); // prints the value property: "soft" break; case XML_TEXT_NODE: // I'm a piece of text inside an element. // I have a name and a content property. print $node->node_name(); // prints the name property: "#text" print $node->node_value(); // prints the content property: "PHP Cookbook" break; default: // another type break; }
To automatically search through a DOM tree for specific elements, use
get_elements_by_tagname( ) . Here's how to do so with multiple book records:
<books> <book> <title>PHP Cookbook</title> <author>Sklar</author> <author>Trachtenberg</author> <subject>PHP</subject> </book> <book> <title>Perl Cookbook</title> <author>Christiansen</author> <author>Torkington</author> <subject>Perl</subject> </book> </books>
Here's how to find all authors:
// find and print all authors $authors = $dom->get_elements_by_tagname('author'); // loop through author elements foreach ($authors as $author) { // child_nodes( ) hold the author values $text_nodes = $author->child_nodes( );

foreach ($text_nodes as $text) { print $text->node_value( ); } print "\n"; }
The get_elements_by_tagname( ) function returns an array of element node objects. By
looping through each element's children, you can get to the text node associated with that
element. From there, you can pull out the node values, which in this case are the names of
the book authors, such as Sklar and Trachtenberg.
12.4.4 See Also
Recipe 12.2 for writing XML without DOM; Recipe 12.3 for writing XML with DOM; Recipe 12.5
for event-based XML parsing; documentation on domxml_open_file( ) at
http://www.php.net/domxml-open-file, domxml_open_mem( ) at
http://www.php.net/domxml-open-mem, and the DOM functions in general at
http://www.php.net/domxml; more information about the underlying DOM C library at
http://xmlsoft.org/.
Recipe 12.5 Parsing XML with SAX
12.5.1 Problem
You want to parse an XML document and format it on an event basis, such as when the parser
encounters a new opening or closing element tag. For instance, you want to turn an RSS feed
into HTML.
12.5.2 Solution
Use the parsing functions in PHP's XML extension:
$xml = xml_parser_create(); $obj = new Parser_Object; // a class to assist with parsing xml_set_object($xml,$obj); xml_set_element_handler($xml, 'start_element', 'end_element'); xml_set_character_data_handler($xml, 'character_data'); xml_parser_set_option($xml, XML_OPTION_CASE_FOLDING, false); $fp = fopen('data.xml', 'r') or die("Can't read XML data."); while ($data = fread($fp, 4096)) { xml_parse($xml, $data, feof($fp)) or die("Can't parse XML data"); } fclose($fp); xml_parser_free($xml);
12.5.3 Discussion

These XML parsing functions require the expat library. However, because Apache 1.3.7 and
later is bundled with expat, this library is already installed on most machines. Therefore, PHP
enables these functions by default, and you don't need to explicitly configure PHP to support
XML.
expat parses XML documents and allows you to configure the parser to call functions when it
encounters different parts of the file, such as an opening or closing element tag or character
data (the text between tags). Based on the tag name, you can then choose whether to format
or ignore the data. This is known as event-based parsing and contrasts with DOM XML, which
use a tree-based parser.
A popular API for event-based XML parsing is SAX: Simple API for XML. Originally developed
only for Java, SAX has spread to other languages. PHP's XML functions follow SAX
conventions. For more on the latest version of SAX — SAX2 — see SAX2 by David Brownell
(O'Reilly).
PHP supports two interfaces to expat: a procedural one and an object-oriented one. Since the
procedural interface practically forces you to use global variables to accomplish any
meaningful task, we prefer the object-oriented version. With the object-oriented interface, you
can bind an object to the parser and interact with the object while processing XML. This allows
you to use object properties instead of global variables.
Here's an example application of expat that shows how to process an RSS feed and transform
it into HTML. For more on RSS, see Recipe 12.12. The script starts with the standard XML
processing code, followed by the objects created to parse RSS specifically:
$xml = xml_parser_create( ); $rss = new pc_RSS_parser; xml_set_object($xml, $rss); xml_set_element_handler($xml, 'start_element', 'end_element'); xml_set_character_data_handler($xml, 'character_data'); xml_parser_set_option($xml, XML_OPTION_CASE_FOLDING, false); $feed = 'http://pear.php.net/rss.php'; $fp = fopen($feed, 'r') or die("Can't read RSS data."); while ($data = fread($fp, 4096)) { xml_parse($xml, $data, feof($fp)) or die("Can't parse RSS data"); } fclose($fp); xml_parser_free($xml);
After creating a new XML parser and an instance of the pc_RSS_parser class, configure the
parser. First, bind the object to the parser; this tells the parser to call the object's methods
instead of global functions. Then call xml_set_element_handler( ) and
xml_set_character_data_handler( ) to specify the method names the parser should
call when it encounters elements and character data. The first argument to both functions is
the parser instance; the other arguments are the function names. With

xml_set_element_handler( ), the middle and last arguments are the functions to call
when a tag opens and closes, respectively. The xml_set_character_data_handler( )
function takes only one additional argument — the function to call when it processes character
data.
Because an object has been associated with our parser, when that parser finds the string
<tag>data</tag>, it calls $rss->start_element( ) when it reaches <tag>; $rss-
>character_data( ) when it reaches data; and $rss->end_element( ) when it reaches
</tag>. The parser can't be configured to automatically call individual methods for each
specific tag; instead, you must handle this yourself. However, the PEAR package
XML_Transform provides an easy way to assign handlers on a tag-by-by basis.
The last XML parser configuration option tells the parser not to automatically convert all tags
to uppercase. By default, the parser folds tags into capital letters, so <tag> and <TAG> both
become the same element. Since XML is case-sensitive, and most feeds use lowercase
element names, this feature should be disabled.
With the parser configured, feed the data to the parser:
$feed = 'http://pear.php.net/rss.php'; $fp = fopen($feed, 'r') or die("Can't read RSS data."); while ($data = fread($fp, 4096)) { xml_parse($xml, $data, feof($fp)) or die("Can't parse RSS data"); } fclose($fp);
In order to curb memory usage, load the file in 4096-byte chunks, and feed each piece to the
parser one at a time. This requires you to write the handler functions that will accommodate
text arriving in multiple calls and not assume the entire string comes in all at once.
Last, while PHP cleans up any open parsers when the request ends, you can also manually
close the parser by calling xml_parser_free( ) .
Now that the generic parsing is properly set up, add the pc_RSS_item and pc_RSS_parser
classes, as shown in Examples Example 12-1 and Example 12-2, to handle a RSS document.
Example 12-1. pc_RSS_item
class pc_RSS_item { var $title = ''; var $description = ''; var $link = ''; function display() { printf('<p><a href="%s">%s</a><br />%s</p>', $this->link,htmlspecialchars($this->title), htmlspecialchars($this->description)); }

}
Example 12-2. pc_RSS_parser
class pc_RSS_parser { var $tag; var $item; function start_element($parser, $tag, $attributes) { if ('item' == $tag) { $this->item = new pc_RSS_item; } elseif (!empty($this->item)) { $this->tag = $tag; } } function end_element($parser, $tag) { if ('item' == $tag) { $this->item->display(); unset($this->item); } } function character_data($parser, $data) { if (!empty($this->item)) { if (isset($this->item->{$this->tag})) { $this->item->{$this->tag} .= trim($data); } } } }
The pc_RSS_item class provides an interface to an individual feed item. This removes the
details of displaying each item from the general parsing code and makes it easy to reset the
data for a new item by calling unset( ).
The pc_RSS_item::display( ) method prints out an HTML-formatted RSS item. It calls
htmlspecialchars( ) to reencode any necessary entities, because expat decodes them
into regular characters while parsing the document. This reencoding, however, breaks on
feeds that place HTML in the title and description instead of plaintext.
Within pc_RSS_parser( ), the start_element( ) method takes three parameters: the
XML parser, the name of the tag, and an array of attribute/value pairs (if any) from the
element. PHP automatically supplies these values to the handler as part of the parsing
process.
The start_element( ) method checks the value of $tag. If it's item, the parser's found a
new RSS item, and a new pc_RSS_item object is instantiated. Otherwise, it checks to see if
$this->item is empty( ); if it isn't, the parser is inside an item element. It's then
necessary to record the tag's name, so that the character_data( ) method knows which
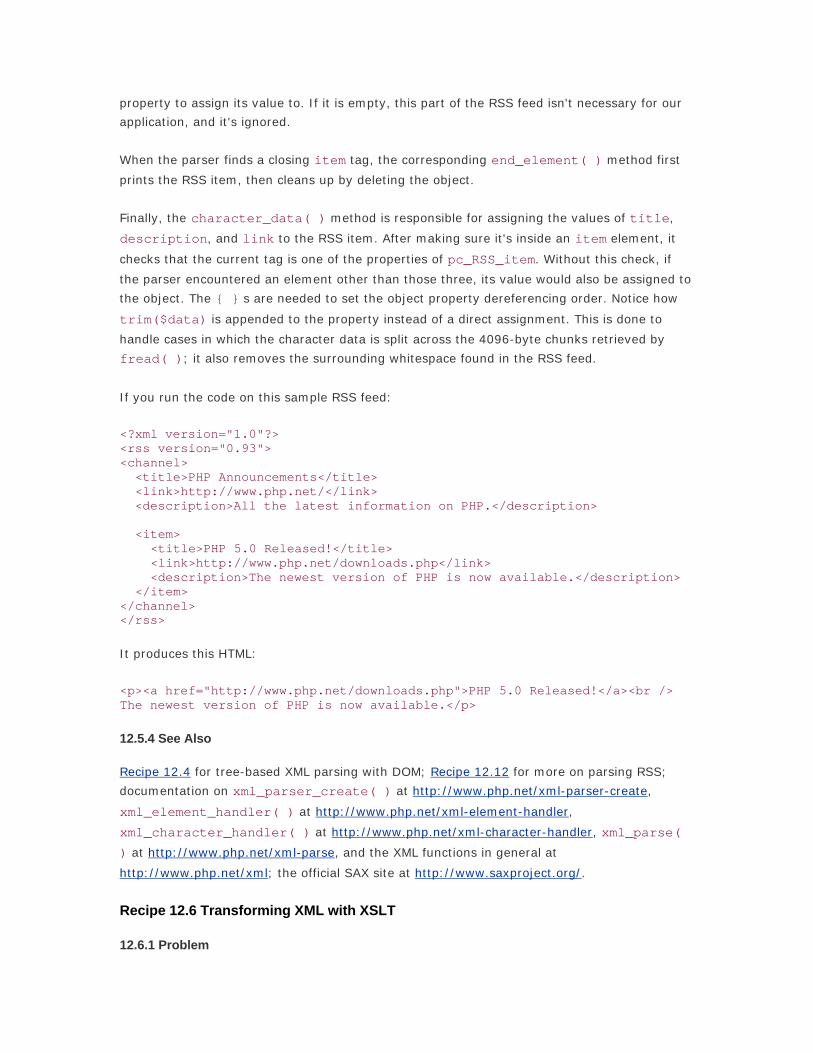
property to assign its value to. If it is empty, this part of the RSS feed isn't necessary for our
application, and it's ignored.
When the parser finds a closing item tag, the corresponding end_element( ) method first
prints the RSS item, then cleans up by deleting the object.
Finally, the character_data( ) method is responsible for assigning the values of title,
description, and link to the RSS item. After making sure it's inside an item element, it
checks that the current tag is one of the properties of pc_RSS_item. Without this check, if
the parser encountered an element other than those three, its value would also be assigned to
the object. The { } s are needed to set the object property dereferencing order. Notice how
trim($data) is appended to the property instead of a direct assignment. This is done to
handle cases in which the character data is split across the 4096-byte chunks retrieved by
fread( ); it also removes the surrounding whitespace found in the RSS feed.
If you run the code on this sample RSS feed:
<?xml version="1.0"?> <rss version="0.93"> <channel> <title>PHP Announcements</title> <link>http://www.php.net/</link> <description>All the latest information on PHP.</description> <item> <title>PHP 5.0 Released!</title> <link>http://www.php.net/downloads.php</link> <description>The newest version of PHP is now available.</description> </item> </channel> </rss>
It produces this HTML:
<p><a href="http://www.php.net/downloads.php">PHP 5.0 Released!</a><br /> The newest version of PHP is now available.</p>
12.5.4 See Also
Recipe 12.4 for tree-based XML parsing with DOM; Recipe 12.12 for more on parsing RSS;
documentation on xml_parser_create( ) at http://www.php.net/xml-parser-create,
xml_element_handler( ) at http://www.php.net/xml-element-handler,
xml_character_handler( ) at http://www.php.net/xml-character-handler, xml_parse(
) at http://www.php.net/xml-parse, and the XML functions in general at
http://www.php.net/xml; the official SAX site at http://www.saxproject.org/.
Recipe 12.6 Transforming XML with XSLT
12.6.1 Problem

You have a XML document and a XSL stylesheet. You want to transform the document using
XSLT and capture the results. This lets you apply stylesheets to your data and create different
versions of your content for different media.
12.6.2 Solution
Use PHP's XSLT extension:
$xml = 'data.xml'; $xsl = 'stylesheet.xsl'; $xslt = xslt_create( ); $results = xslt_process($xslt, $xml, $xsl); if (!$results) { error_log("XSLT Error: #".xslt_errno($xslt).": ".xslt_error($xslt)); } xslt_free($xslt);
The transformed text is stored in $results.
12.6.3 Discussion
XML documents describe the content of data, but they don't contain any information about
how those data should be displayed. However, when XML content is coupled with a stylesheet
described using XSL (eXtensible Stylesheet Language), the content is displayed according to
specific visual rules.
The glue between XML and XSL is XSLT, which stands for eXtensible Stylesheet Language
Transformations. These transformations apply the series of rules enumerated in the stylesheet
to your XML data. So, just as PHP parses your code and combines it with user input to create a
dynamic page, an XSLT program uses XSL and XML to output a new page that contains more
XML, HTML, or any other format you can describe.
There are a few XSLT programs available, each with different features and limitations. PHP
currently supports only the Sablotron XSLT processor, but in the future you'll be able to use
other programs, such as Xalan and Libxslt. You can download Sablotron from
http://www.gingerall.com. To enable Sablotron for XSLT processing, configure PHP with both -
-enable-xslt and --with-xslt-sablot.
Processing documents takes a few steps. First, you need to grab a handle to a new instance of
an XSLT processor with xslt_create( ). Then, to transform the files, use xslt_process(
) to make the transformation and check the results:
$xml = 'data.xml'; $xsl = 'stylesheet.xsl'; $xslt = xslt_create( );

$results = xslt_process($xslt, $xml, $xsl);
You start by defining variables to store the filenames for the XML data and the XSL stylesheet.
They're the first two parameters to the transforming function, xslt_process( ). If the
fourth argument is missing, as it is here, or set to NULL, the function returns the results.
Otherwise, it writes the resulting data to the filename passed:
xslt_process($xslt, $xml, $xsl, 'data.html');
If you want to provide your XML and XSL data from variables instead of files, call
xslt_process( ) with a fifth parameter, which allows you to substitute string placeholders
for your files:
// grab data from database $r = mysql_query("SELECT pages.page AS xml, templates.template AS xsl FROM pages, templates WHERE pages.id=$id AND templates.id=pages.template") or die("$php_errormsg"); $obj = mysql_fetch_object($r); $xml = $obj->xml; $xsl = $obj->xsl; // map the strings to args $args = array('/_xml' => $xml, '/_xsl' => $xsl); $results = xslt_process($xslt, 'arg:/_xml', 'arg:/_xsl', NULL, $args);
When reading and writing files, Sablotron supports two types of URIs. The PHP default is
file:, so Sablotron looks for the data on the filesystem. Sablotron also uses a custom URI of
arg:, which allows users to alternatively pass in data using arguments. That's the feature
used here.
In the previous example, the data for the XML and XSL comes from a database, but, it can
arrive from anywhere, such as a remote URL or POSTed data. Once you've obtained the data,
create the $args array. This sets up mappings between the argument names and the variable
names. The keys of the associative array are the argument names passed to xslt_process(
); the values are the variables holding the data. By convention, /_xml and /_xsl are the
argument names; however, you can use others.
Then call xslt_process( ) and in place of data.xml, use arg:/_xml, with arg: being the
string that lets the extension know to look in the $args array. Because you're passing in
$args as the fifth parameter, you need to pass NULL as the fourth argument; this makes sure
the function returns the results.
Error checking is done using xslt_error( ) and xslt_errno( ) functions:
if (!$results) {

error_log('XSLT Error: #' . xslt_errno($xslt) . ': ' . xslt_error($xslt)); }
The xslt_error( ) function returns a formatted message describing the error, while
xslt_errno( ) provides a numeric error code.
To set up your own custom error handling code, register a function using
xslt_set_error_handler( ). If there are errors, that function is automatically called
instead of any built-in error handler.
function xslt_error_handler($processor, $level, $number, $messages) { error_log("XSLT Error: #$level"); } xslt_set_error_handler($xslt, 'xslt_error_handler');
Finally, PHP cleans up any open XSLT processors when the request ends, but here's how to
manually close the processor and free its memory:
xslt_close($xslt);
12.6.4 See Also
Documentation on xslt_create( ) at http://www.php.net/xslt-create, xslt_process( )
at http://www.php.net/xslt-process, xslt_errno( ) at http://www.php.net/xslt-errno,
xslt_error( ) at http://www.php.net/xslt-error, xslt_error_handler( ) at
http://www.php.net/xslt-error-handler, and xslt_free( ) at http://www.php.net/xslt-free;
XSLT, by Doug Tidwell (O'Reilly).
Recipe 12.7 Sending XML-RPC Requests
12.7.1 Problem
You want to be an XML-RPC client and make requests of a server. XML-RPC lets PHP make
function calls to web servers, even if they don't use PHP. The retrieved data is then
automatically converted to PHP variables for use in your application.
12.7.2 Solution
Use PHP's built-in XML-RPC extension with some helper functions. As of PHP 4.1, PHP bundles
the xmlrpc-epi extension. Unfortunately, xmlrpc-epi does not have any native C functions for
taking a XML-RPC formatted string and making a request. However, the folks behind xmlrpc-
epi have a series of helper functions written in PHP available for download at http://xmlrpc-
epi.sourceforge.net/. The only file used here is the one named utils.php, which is located in
sample/utils. To install it, just copy that file to a location where PHP can find it in its
include_path.

Here's some client code that calls a function on an XML-RPC server that returns state names:
// this is the default file name from the package // kept here to avoid confusion over the file name require 'utils.php'; // server settings $host = 'betty.userland.com'; $port = 80; $uri = '/RPC2'; // request settings // pass in a number from 1-50; get the nth state in alphabetical order // 1 is Alabama, 50 is Wyoming $method = 'examples.getStateName'; $args = array(32); // data to be passed // make associative array out of these variables $request = compact('host', 'port', 'uri', 'method', 'args'); // this function makes the XML-RPC request $result = xu_rpc_http_concise($request); print "I love $result!\n";
12.7.3 Discussion
XML-RPC, a format created by Userland Software, allows you to make a request to a web
server using HTTP. The request itself is a specially formatted XML document. As a client, you
build up an XML request to send that fits with the XML-RPC specification. You then send it to
the server, and the server replies with an XML document. You then parse the XML to find the
results. In the Solution, the XML-RPC server returns a state name, so the code prints:
I love New York!
Unlike earlier implementations of XML-RPC, which were coded in PHP, the current bundled
extension is written in C, so there is a significant speed increase in processing time. To enable
this extension while configuring PHP, add --with-xmlrpc.
The server settings tell PHP which web site to contact to make the request. The $host is the
hostname of the machine; $port is the port the web server is running on, which is usually
port 80; and $uri is the pathname to the XML-RPC server you wish to contact. This request is
equivalent to http://betty.userland.com:80/RPC2. If no port is given, the function defaults to
port 80, and the default URI is the web server root, /.
The request settings are the function to call and the data to pass to the function. The method
examples.getStateName takes an integer from 1 to 50 and returns a string with the name
of the U.S. state, in alphabetical order. In XML-RPC, method names can have periods, while in
PHP, they cannot. If they could, the PHP equivalent to passing 32 as the argument to the XML-
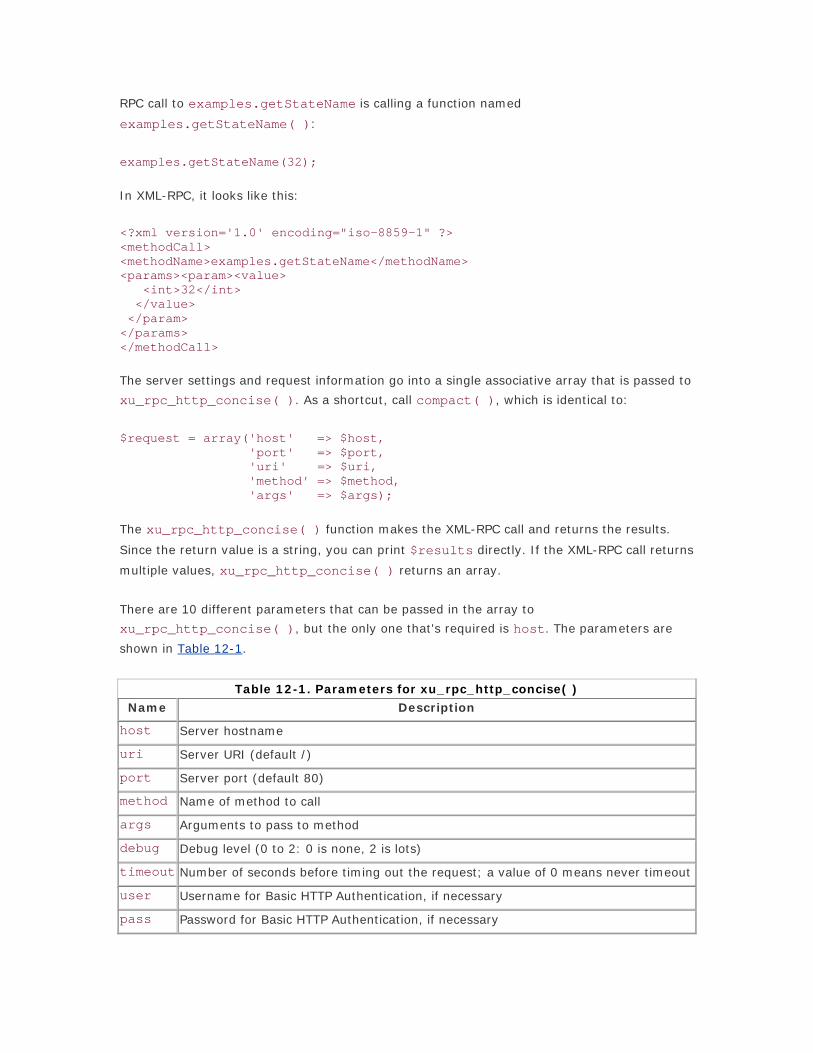
RPC call to examples.getStateName is calling a function named
examples.getStateName( ):
examples.getStateName(32);
In XML-RPC, it looks like this:
<?xml version='1.0' encoding="iso-8859-1" ?> <methodCall> <methodName>examples.getStateName</methodName> <params><param><value> <int>32</int> </value> </param> </params> </methodCall>
The server settings and request information go into a single associative array that is passed to
xu_rpc_http_concise( ). As a shortcut, call compact( ), which is identical to:
$request = array('host' => $host, 'port' => $port, 'uri' => $uri, 'method' => $method, 'args' => $args);
The xu_rpc_http_concise( ) function makes the XML-RPC call and returns the results.
Since the return value is a string, you can print $results directly. If the XML-RPC call returns
multiple values, xu_rpc_http_concise( ) returns an array.
There are 10 different parameters that can be passed in the array to
xu_rpc_http_concise( ), but the only one that's required is host. The parameters are
shown in Table 12-1.
Table 12-1. Parameters for xu_rpc_http_concise( )
Name Description
host Server hostname
uri Server URI (default /)
port Server port (default 80)
method Name of method to call
args Arguments to pass to method
debug Debug level (0 to 2: 0 is none, 2 is lots)
timeout Number of seconds before timing out the request; a value of 0 means never timeout
user Username for Basic HTTP Authentication, if necessary
pass Password for Basic HTTP Authentication, if necessary

secure Use SSL for encrypted transmissions; requires PHP to be built with SSL support
(pass any true value)
12.7.4 See Also
Recipe 12.8 for more on XML-RPC servers; PHP helper functions for use with the xmlrpc-epi
extension at http://xmlrpc-epi.sourceforge.net/; Programming Web Services with XML-RPC, by
Simon St. Laurent, Joe Johnston, and Edd Dumbill (O'Reilly); more on XML-RPC at
http://www.xml-rpc.com
Recipe 12.8 Receiving XML-RPC Requests
12.8.1 Problem
You want to create an XML-RPC server and respond to XML-RPC requests. This allows any
XML-RPC-enabled client to ask your server questions and you to reply with data.
12.8.2 Solution
Use PHP's XML-RPC extension. Here is a PHP version of the Userland XML-RPC demonstration
application that returns an ISO 8601 string with the current date and time:
// this is the function exposed as "get_time( )" function return_time($method, $args) { return date('Ymd\THis'); } $server = xmlrpc_server_create( ) or die("Can't create server"); xmlrpc_server_register_method($server, 'return_time', 'get_time') or die("Can't register method."); $request = $GLOBALS['HTTP_RAW_POST_DATA']; $options = array('output_type' => 'xml', 'version' => 'xmlrpc'); print xmlrpc_server_call_method($server, $request, NULL, $options) or die("Can't call method"); xmlrpc_server_destroy($server);
12.8.3 Discussion
Since the bundled XML-RPC extension, xmlrpc-epi, is written in C, it processes XML-RPC
requests in a speedy and efficient fashion. Add --with-xmlrpc to your configure string to
enable this extension during compile time. For more on XML-RPC, see Recipe 12.7.
The Solution begins with a definition of the PHP function to associate with the XML-RPC
method. The name of the function is return_time( ). This is later linked with the
get_time( ) XML-RPC method:
function return_time($method, $args) {

return date('Ymd\THis'); }
The function returns an ISO 8601-formatted string with the current date and time. We escape
the T inside the call to date( ) because the specification requires a literal T to divide the
date part and the time part. For August 21, 2002 at 3:03:51 P.M., the return value is
20020821T150351.
The function is automatically called with two parameters: the name of the XML-RPC method
the server is responding to and an array of method arguments passed by the XML-RPC client
to the server. In this example, the server ignores both variables.
Next, create the XML-RPC server and register the get_time( ) method:
$server = xmlrpc_server_create( ) or die("Can't create server"); xmlrpc_server_register_method($server, 'return_time', 'get_time');
We create a new server and assign it to $server, then call
xmlrpc_server_register_method( ) with three parameters. The first is the newly
created server, the second is the name of the method to register, and the third is the name of
the PHP function to handle the request.
Now that everything is configured, tell the XML-RPC server to dispatch the method for
processing and print the results to the client:
$request = $GLOBALS['HTTP_RAW_POST_DATA']; $options = array('output_type' => 'xml', 'version' => 'xmlrpc'); print xmlrpc_server_call_method($server, $request, NULL, $options);
The client request comes in as POST data. PHP converts HTTP POST data to variables, but this
is XML-RPC data, so the server needs to access the unparsed data, which is stored in
$GLOBALS['HTTP_RAW_POST_DATA']. In this example, the request XML looks like this:
<?xml version="1.0" encoding="iso-8859-1"?> <methodCall> <methodName>get_time</methodName> <params/></methodCall>
Thus, the server is responding to the get_time( ) method, and it expects no parameters.
We also configure the response options to output the results in XML and interpret the request
as XML-RPC. These two variables are then passed to xmlrpc_server_call_method( )
along with the XML-RPC server, $server. The third parameter to this function is for any user
data you wish to provide; in this case, there is none, so we pass NULL.

The xmlrpc_server_call_method( ) function decodes the variables, calls the correct
function to handle the method, and encodes the response into XML-RPC. To reply to the client,
all you need to do is print out what xmlrpc_server_call_method( ) returns.
Finally, clean up with a call to xmlrpc_server_destroy( ):
xmlrpc_server_destroy($server);
Using the XML-RPC client code from Recipe 12.7, you can make a request and find the time,
as follows:
require 'utils.php'; $output = array('output_type' => 'xml', 'version' => 'xmlrpc'); $result = xu_rpc_http_concise(array( 'method' => 'get_time', 'host' => 'clock.example.com', 'port' => 80, 'uri' => '/time-xmlrpc.php', 'output' => $output)); print "The local time is $result.\n"; The local time is 20020821T162615.
It is legal to associate multiple methods with a single XML-RPC server. You can also associate
multiple methods with the same PHP function. For example, we can create a server that
replies to two methods: get_gmtime( ) and get_time( ). The first method,
get_gmtime( ), is similar to get_time( ), but it replies with the current time in GMT. To
handle this, you can extend get_time( ) to take an optional parameter, which is the name
of a time zone to use when computing the current time.
Here's how to change the return_time( ) function to handle both methods:
function return_time($method, $args) { if ('get_gmtime' == $method) { $tz = 'GMT'; } elseif (!empty($args[0])) { $tz = $args[0]; } else { // use local time zone $tz = ''; } if ($tz) { putenv("TZ=$tz"); } $date = date('Ymd\THis'); if ($tz) { putenv('TZ=EST5EDT'); } // change EST5EDT to your server's zone return $date; }

This function uses both the $method and $args parameters. At the top of the function, we
check if the request is for get_gmtime. If so, the time zone is set to GMT. If it isn't, see if an
alternate time zone is specified as an argument by checking $args[0]. If neither check is
true, we keep the current time zone.
To configure the server to handle the new method, add only one new line:
xmlrpc_server_register_method($server, 'return_time', 'get_gmtime');
This maps get_gmtime( ) to return_time( ).
Here's an example of a client in action. The first request is for get_time( ) with no
parameters; the second calls get_time( ) with a time zone of PST8PDT, which is three
hours behind the server; the last request is for the new get_gmtime( ) method, which is
four hours ahead of the server's time zone.
require 'utils.php'; $output = array('output_type' => 'xml', 'version' => 'xmlrpc'); // get_time( ) $result = xu_rpc_http_concise(array( 'method' => 'get_time', 'host' => 'clock.example.com', 'port' => 80, 'uri' => '/time.php', 'output' => $output)); print "The local time is $result.\n"; // get_time('PST8PDT') $result = xu_rpc_http_concise(array( 'method' => 'get_time', 'args' => array('PST8PDT'), 'host' => 'clock.example.com', 'port' => 80, 'uri' => '/time.php', 'output' => $output)); print "The time in PST8PDT is $result.\n"; // get_gmtime( ) $result = xu_rpc_http_concise(array( 'method' => 'get_gmtime', 'host' => 'clock.example.com', 'port' => 80, 'uri' => '/time.php', 'output' => $output)); print "The time in GMT is $result.\n"; The local time is 20020821T162615. The time in PST8PDT is 20020821T132615. The time in GMT is 20020821T202615.

12.8.4 See Also
Recipe 12.7 for more information about XML-RPC clients; documentation on
xmlrpc_server_create( ) at http://www.php.net/xmlrpc-server-create,
xmlrpc_server_register_method( ) at http://www.php.net/xmlrpc-server-register-
method, xmlrpc_server_call_method( ) at http://www.php.net/xmlrpc-server-call-
method, and xmlrpc_server_destroy( ) at http://www.php.net/xmlrpc-server-destroy;
Programming Web Services with XML-RPC by Simon St. Laurent, Joe Johnston, and Edd
Dumbill (O'Reilly); more on XML-RPC at http://www.xml-rpc.com; the original current time
XML-RPC server at http://www.xmlrpc.com/currentTime.
Recipe 12.9 Sending SOAP Requests
12.9.1 Problem
You want to send a SOAP request. Creating a SOAP client allows you to gather information
from SOAP servers, regardless of their operating system and middleware software.
12.9.2 Solution
Use PEAR's SOAP classes. Here's some client code that uses the GoogleSearch SOAP service:
require 'SOAP/Client.php'; $query = 'php'; // your Google search terms $soap = new SOAP_Client('http://api.google.com/search/beta2'); $params = array( new SOAP_Value('key', 'string', 'your google key'), new SOAP_Value('q', 'string', $query), new SOAP_Value('start', 'int', 0), new SOAP_Value('maxResults', 'int', 10), new SOAP_Value('filter', 'boolean', false), new SOAP_Value('restrict', 'string', ''), new SOAP_Value('safeSearch', 'boolean', false), new SOAP_Value('lr', 'string', 'lang_en'), new SOAP_Value('ie', 'string', ''), new SOAP_Value('oe', 'string', '')); $hits = $soap->call('doGoogleSearch', $params, 'urn:GoogleSearch'); foreach ($hits->resultElements as $hit) { printf('<a href="%s">%s</a><br />', $hit->URL, $hit->title); }
12.9.3 Discussion
The Simple Object Access Protocol (SOAP), is, like XML-RPC, a method for exchanging
information over HTTP. It uses XML as its message format, which makes it easy to create and
parse. As a result, because it's platform- and language-independent, SOAP is available on
many platforms and in many languages, including PHP. To make a SOAP request, you

instantiate a new SOAP_Client object and pass the constructor the location of the page to
make the request:
$soap = new SOAP_Client('http://api.google.com/search/beta2');
Currently, two different types of communications methods are supported: HTTP and SMTP.
Secure HTTP is also allowed, if SSL is built into your version of PHP. To choose one of these
methods, begin your URL with http, https, or mailto.
After creating a SOAP_Client object, you use its call( ) method to call a remote function:
$query = 'php'; $params = array( new SOAP_Value('key', 'string', 'your google key'), new SOAP_Value('q', 'string', $query), new SOAP_Value('start', 'int', 0), new SOAP_Value('maxResults', 'int', 10), new SOAP_Value('filter', 'boolean', false), new SOAP_Value('restrict', 'string', ''), new SOAP_Value('safeSearch', 'boolean', false), new SOAP_Value('lr', 'string', 'lang_en'), new SOAP_Value('ie', 'string', ''), new SOAP_Value('oe', 'string', '')); $hits = $soap->call('doGoogleSearch', $params, 'urn:GoogleSearch');
The $params array holds a collection of SOAP_Value objects. A SOAP_Value object is
instantiated with three arguments: the name, type, and value of the parameter you're passing
to the SOAP server. These vary from message to message, depending upon the SOAP
functions available on the server.
The real action happens with the SOAP_Client::call( ) method, which takes a few
arguments. The first is the method you want the server to execute; here, it's
doGoogleSearch. The second argument is an array of parameters that gets passed to the
function on the SOAP server. The third argument, urn:GoogleSearch, is the SOAP
namespace; it allows the server to know that doGoogleSearch belongs in the GoogleSearch
namespace. With namespaces, a more generally named search method doesn't cause a
conflict with another more specific search method.
There's a fourth parameter that's unused here: soapAction. If you want to provide the SOAP
server with a URI indicating the intent of the request, you can add one here. Unfortunately,
the definition of the word "intent" varies from implementation to implementation. The current
consensus is that soapAction shouldn't be used until its meaning is further clarified. The
PEAR SOAP server doesn't use this field, but other vendors may assign their own meanings.
Upon successful execution, the function returns an object containing the server's response. If
an error occurs, the function returns a PEAR_Error object. Google returns all sorts of
information, but here we just iterate through the $resultElements array and pull out the
URL and title of each hit for display:
foreach ($hits->resultElements as $hit) { printf('<a href="%s">%s</a><br />', $hit->URL, $hit->title); }
This results in:
<a href="http://www.php.net/"><b>PHP</b>: Hypertext Preprocessor</a> <a href="http://www.php.net/downloads.php"><b>PHP</b>: Downloads</a> <a href="http://phpnuke.org/"><b>PHP</b>-Nuke</a> <a href="http://www.phpbuilder.com/">PHPBuilder.com</a> <a href="http://php.resourceindex.com/">The <b>PHP</b> Resource Index</a> <a href="http://www.php.com/"><b>PHP</b>.com: Home</a> <a href="http://www.php.org/"><b>PHP</b>.org</a> <a href="http://php.weblogs.com/"><b>PHP</b> Everywhere:</a> <a href="http://www.php3.org/"></a> <a href="http://gtk.php.net/"><b>PHP</b>-GTK</a>
You can also use Web Services Definition Language (WSDL), to implement the request. With
WSDL, you don't need to explicitly enumerate the parameter keys or the SOAP namespace:
require 'SOAP/Client.php'; $wsdl_url = 'http://api.google.com/GoogleSearch.wsdl'; $WSDL = new SOAP_WSDL($wsdl_url); $soap = $WSDL->getProxy( ); $hits = $soap->doGoogleSearch('your google key',$query,0,10, true,'',false,'lang_en','','');
This code is equivalent to the longer previous example. The SOAP_WSDL object takes a URL for
the GoogleSearch WSDL file and automatically loads the specification from that URL. Instead
of making $soap a SOAP_Client, call SOAP_WSDL::getProxy( ) to create a GoogleSearch
object.
This new object has methods with the same name as the GoogleSearch SOAP methods. So,
instead of passing doGoogleSearch as the first parameter to SOAP_Client::call( ), you
call $soap->doGoogleSearch( ). The $params array becomes the arguments for the
method, without any array encapsulation or SOAP_Value instantiations necessary. Also,
because it's set in the WSDL file, the namespace doesn't need to be specified.
12.9.4 See Also
Recipe 12.10 for more on SOAP servers; Recipe 20.11 for an example of a SOAP client in a
PHP-GTK application; PEAR's SOAP classes at http://pear.php.net/package-
info.php?package=SOAP; Programming Web Services with SOAP, by Doug Tidwell, James
Snell, and Pavel Kulchenko (O'Reilly); information on the Google SOAP service at
http://www.google.com/apis/.

Recipe 12.10 Receiving SOAP Requests
12.10.1 Problem
You want to create an SOAP server and respond to SOAP requests. If your server responds to
SOAP requests, anyone on the Internet that has a SOAP client can make requests of your
server.
12.10.2 Solution
Use PEAR's SOAP_Server class. Here's a server that returns the current date and time:
require 'SOAP/Server.php'; class pc_SOAP_return_time { var $method_namespace = 'urn:pc_SOAP_return_time'; function return_time( ) { return date('Ymd\THis'); } } $rt = new pc_SOAP_return_time( ); $server = new SOAP_Server; $server->addObjectMap($rt); $server->service($HTTP_RAW_POST_DATA);
12.10.3 Discussion
There are three steps to creating a SOAP server with PEAR's SOAP_Server class:
1. Create a class to process SOAP methods and instantiate it
2. Create an instance of a SOAP server and associate the processing object with the server
3. Instruct the SOAP server to process the request and reply to the SOAP client
The PEAR SOAP_Server class uses objects to handle SOAP requests. A request-handling class
needs a $method_namespace property that specifies the SOAP namespace for the class. In
this case, it's urn:pc_SOAP_return_time. Object methods then map to SOAP procedure
names within the namespace. The actual PHP class name isn't exposed via SOAP, so the fact
that both the name of the class and its $method_namespace are identical is a matter of
convenience, not of necessity:
class pc_SOAP_return_time { var $method_namespace = 'urn:pc_SOAP_return_time'; function return_time( ) { return date('Ymd\THis'); } } $rt = new pc_SOAP_return_time( );

Once the class is defined, you create an instance of the class to link methods with the SOAP
server object. Before mapping the procedures to the class methods, however, you first must
instantiate a SOAP_Server object:
$server = new SOAP_Server; $server->addObjectMap($rt); $server->service($GLOBALS['HTTP_RAW_POST_DATA']);
Once that's done, call SOAP_Server::addObjectMap( ) with the object to tell the SOAP
server about the methods the object provides. Now the server is ready to reply to all SOAP
requests within the namespace for which you've defined methods.
To tell the server to respond to the request, call SOAP_Server::service( ) and pass the
SOAP envelope. Because the envelope arrives via POST, you pass
$GLOBALS['HTTP_RAW_POST_DATA']. This provides the server with the complete request,
because the class takes care of the necessary parsing.
To call this procedure using a PEAR SOAP client, use this code:
require 'SOAP/Client.php'; $soapclient = new SOAP_Client('http://clock.example.com/time-soap.php'); $result = $soapclient->call('return_time', array( ), array('namespace' => 'urn:pc_SOAP_return_time')); print "The local time is $result.\n";
This prints:
The local time is 20020821T132615.
To extend the method to read in parameters, you need to alter the method prototype to
include parameter names and then modify the client request to include data for the additional
arguments. This example modifies the SOAP procedure to accept an optional time zone
argument:
class pc_SOAP_return_time { var $method_namespace = 'urn:pc_SOAP_return_time'; function return_time($tz='') { if ($tz) { putenv("TZ=$tz"); } $date = date('Ymd\THis'); if ($tz) { putenv('TZ=EST5EDT'); } // change EST5EDT to your server's zone return $date } }
The second parameter in the client's call now takes a tz option:
$result = $soapclient->call('return_time', array('tz' => 'PST8PDT'),

array('namespace' => 'urn:pc_SOAP_return_time'));
With the new settings, the server returns a time three hours behind the previous one:
20020821T202615
12.10.4 See Also
Recipe 12.9 for more on SOAP clients; PEAR's SOAP classes at http://pear.php.net/package-
info.php?package=SOAP; Programming Web Services with SOAP (O'Reilly); the original SOAP
current time application at http://www.soapware.org/currentTime.
Recipe 12.11 Exchanging Data with WDDX
12.11.1 Problem
You want to serialize data in WDDX format for transmission or unserialize WDDX data you've
received. This allows you to communicate with anyone who speaks WDDX.
12.11.2 Solution
Use PHP's WDDX extension. Serialize multiple variables using wddx_serialize_vars( ):
$a = 'string data'; $b = 123; $c = 'rye'; $d = 'pastrami'; $array = array('c', 'd'); $wddx = wddx_serialize_vars('a', 'b', $array);
You can also start the WDDX packet with wddx_packet_start( ) and add data as it arrives
with wddx_add_vars( ):
$wddx = wddx_packet_start('Some of my favorite things'); // loop through data while ($array = mysql_fetch_array($r)) { $thing = $array['thing']; wddx_add_vars($wddx, 'thing'); } $wddx = wddx_packet_end($wddx);
Use wddx_deserialize( ) to deserialize data:
// $wddx holds a WDDX packet $vars = wddx_deserialize($wddx);
12.11.3 Discussion

WDDX stands for Web Distributed Data eXchange and was one of the first XML formats to
share information in a language-neutral fashion. Invented by the company behind ColdFusion,
WDDX gained a lot of popularity in 1999, but doesn't have much momentum at the present.
Instead, many people have begun to use SOAP as a replacement for WDDX. But WDDX does
have the advantage of simplicity, so if the information you're exchanging is basic, WDDX may
be a good choice. Also, due to its origins, it's very easy to read and write WDDX packets in
ColdFusion, so if you need to communicate with a ColdFusion application, WDDX is helpful.
WDDX requires the expat library, available with Apache 1.3.7 and higher or from
http://www.jclark.com/xml/expat.html. Configure PHP with --with-xml and --enable-
wddx.
The example in the Solution produces the following XML (formatted to be easier to read):
<wddxPacket version='1.0'> <header/> <data> <struct> <var name='a'><string>string data</string></var> <var name='b'><number>123</number></var> <var name='c'><string>rye</string></var> <var name='d'><string>pastrami</string></var> </struct> </data> </wddxPacket>
Variables are wrapped inside <var> tags with the variable name assigned as the value for the
name attribute. Inside there is another set of tags that indicate the variable type: string,
number, dateTime, boolean, array, binary, or recordSet. Finally, you have the data
itself.
You can also serialize one variable at a time using wddx_serialize_value :
// one variable $s = wddx_serialize_value('Serialized', 'An optional comment');
This results in the following XML:
<wddxPacket version='1.0'> <header> <comment>An optional comment</comment> </header> <data> <string>Serialized</string> </data> </wddxPacket>
12.11.4 See Also

Documentation on WDDX at http://www.php.net/wddx; more information at
http://www.openwddx.org; Chapter 20, "Sharing Data with WDDX," from Programming
ColdFusion, by Rob Brooks-Bilson (O'Reilly).
Recipe 12.12 Reading RSS Feeds
12.12.1 Problem
You want to retrieve an RSS feed and look at the items. This allows you to incorporate
newsfeeds from multiple web sites into your application.
12.12.2 Solution
Use the PEAR XML_RSS class. Here's an example that reads the RSS feed for the
php.announce mailing list:
require 'XML/RSS.php'; $feed = 'http://news.php.net/group.php?group=php.announce&format=rss'; $rss =& new XML_RSS($feed); $rss->parse(); print "<ul>\n"; foreach ($rss->getItems() as $item) { print '<li><a href="' . $item['link'] . '">' . $item['title'] . "</a></li>\n"; } print "</ul>\n";
12.12.3 Discussion
RSS, which stands for RDF Site Summary, is an easy-to-use headline or article syndication
format written in XML.[2] Many news web sites, such as Slashdot and O'Reilly's Meerkat,
provide RSS feeds that update whenever new stories are published. Weblogs have also
embraced RSS and having an RSS feed for your blog is a standard feature. The PHP web site
also publishes RSS feeds for most PHP mailing lists.
[2] RDF stands for Resource Definition Framework. RSS also stands for Rich Site Summary.
Retrieving and parsing a RSS feed is simple:
$feed = 'http://news.php.net/group.php?group=php.announce&format=rss'; $rss =& new XML_RSS($feed); $rss->parse();

This example makes $rss a new XML_RSS object and sets the feed to the RSS feed for the
php.announce mailing list. The feed is then parsed by XML_RSS::parse( ) and stored
internally within $rss.
RSS items are then retrieved as an associative array using XML_RSS:getItems( ) :
print "<ul>\n"; foreach ($rss->getItems() as $item) { print '<li><a href="' . $item['link'] . '">' . $item['title'] . "</a></li>\n"; } print "</ul>\n";
This foreach loop creates an unordered list of items with the item title linking back to the
URL associated with the complete article, as shown in Figure 12-1. Besides the required
title and link fields, an item can have an optional description field that contains a brief
write-up about the item.
Figure 12-1. php.announce RSS feed

Each channel also has an entry with information about the feed, as shown in Figure 12-2. To
retrieve that data, call XML_RSS::getChannelInfo( ) :
$feed = 'http://news.php.net/group.php?group=php.announce&format=rss'; $rss =& new XML_RSS($feed); $rss->parse(); print "<ul>\n"; foreach ($rss->getChannelInfo() as $key => $value) { print "<li>$key: $value</li>\n"; } print "</ul>\n";
Figure 12-2. php.announce RSS channel information
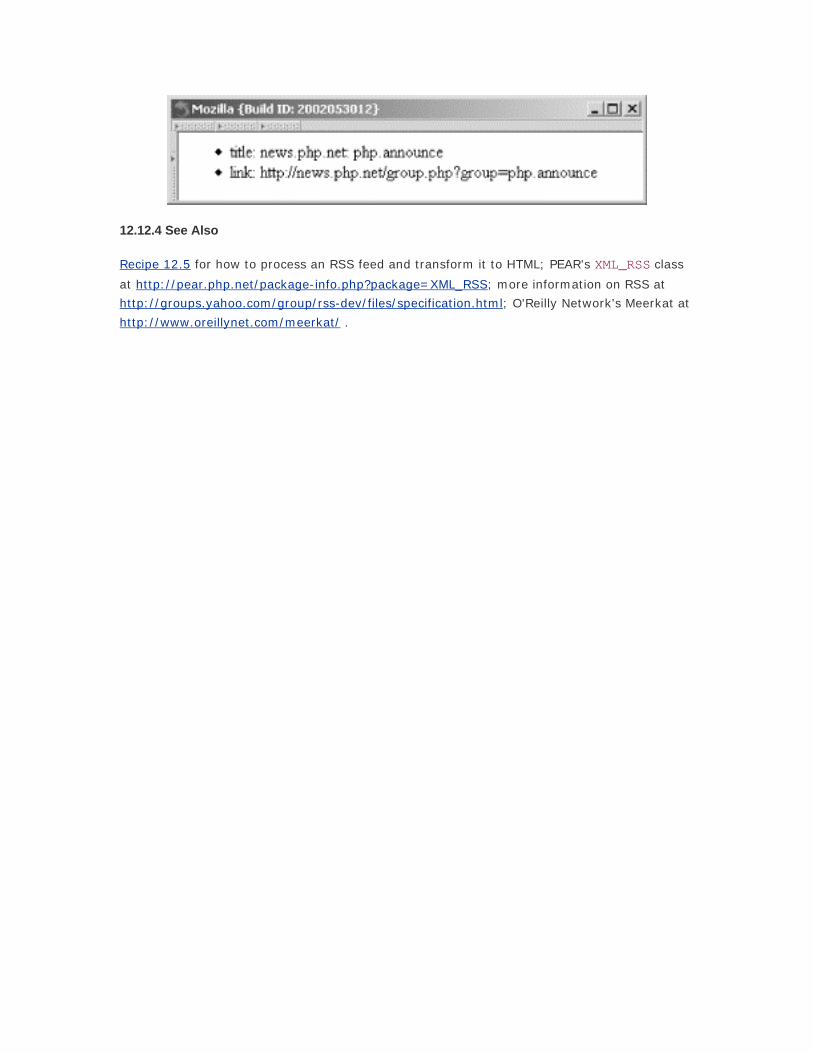
12.12.4 See Also
Recipe 12.5 for how to process an RSS feed and transform it to HTML; PEAR's XML_RSS class
at http://pear.php.net/package-info.php?package=XML_RSS; more information on RSS at
http://groups.yahoo.com/group/rss-dev/files/specification.html; O'Reilly Network's Meerkat at
http://www.oreillynet.com/meerkat/ .

Chapter 13. Regular Expressions
Introduction
Switching From ereg to preg
Matching Words
Finding the nth Occurrence of a Match
Choosing Greedy or Nongreedy Matches
Matching a Valid Email Address
Finding All Lines in a File That Match a Pattern
Capturing Text Inside HTML Tags
Escaping Special Characters in a Regular Expression
Reading Records with a Pattern Separator

13.1 Introduction
Regular expressions are a powerful tool for matching and manipulating text. While not as fast
as plain-vanilla string matching, regular expressions are extremely flexible; they allow you to
construct patterns to match almost any conceivable combination of characters with a simple,
albeit terse and somewhat opaque syntax.
In PHP, you can use regular expression functions to find text that matches certain criteria.
Once located, you can choose to modify or replace all or part of the matching substrings. For
example, this regular expression turns text email addresses into mailto: hyperlinks:
$html = preg_replace('/[^@\s]+@([-a-z0-9]+\.)+[a-z]{2,}/i', '<a href="mailto:$0">$0</a>', $text);
As you can see, regular expressions are handy when transforming plain text into HTML and
vice versa. Luckily, since these are such popular subjects, PHP has many built-in functions to
handle these tasks. Recipe 9.9 tells how to escape HTML entities, Recipe 11.12 covers
stripping HTML tags, and Recipe 11.10 and Recipe 11.11 show how to convert ASCII to HTML
and HTML to ASCII, respectively. For more on matching and validating email addresses, see
Recipe 13.7.
Over the years, the functionality of regular expressions has grown from its basic roots to
incorporate increasingly useful features. As a result, PHP offers two different sets of regular-
expression functions. The first set includes the traditional (or POSIX) functions, all beginning
with ereg (for extended regular expressions; the ereg functions themselves are already an
extension of the original feature set). The other set includes the Perl family of functions,
prefaced with preg (for Perl-compatible regular expressions).
The preg functions use a library that mimics the regular expression functionality of the Perl
programming language. This is a good thing because Perl allows you to do a variety of handy
things with regular expressions, including nongreedy matching, forward and backward
assertions, and even recursive patterns.
In general, there's no longer any reason to use the ereg functions. They offer fewer features,
and they're slower than preg functions. However, the ereg functions existed in PHP for many
years prior to the introduction of the preg functions, so many programmers still use them
because of legacy code or out of habit. Thankfully, the prototypes for the two sets of functions
are identical, so it's easy to switch back and forth from one to another in your mind without
too much confusion. (We list how to do this while avoiding the major gotchas in Recipe 13.2.)
The basics of regular expressions are simple to understand. You combine a sequence of
characters to form a pattern. You then compare strings of text to this pattern and look for
matches. In the pattern, most characters represent themselves. So, to find if a string of HTML
contains an image tag, do this:

if (preg_match('/<img /', $html)) { // found an opening image tag }
The preg_match( ) function compares the pattern of "<img " against the contents of
$html. If it finds a match, it returns 1; if it doesn't, it returns 0. The / characters are called
pattern delimiters ; they set off the start and end of the pattern.
A few characters, however, are special. The special nature of these characters are what
transforms regular expressions beyond the feature set of strstr( ) and strpos( ). These
characters are called metacharacters. The most frequently used metacharacters include the
period (.), asterisk (*), plus (+), and question mark (?). To match an actual metacharacter,
precede the character with a backslash(\).
• The period matches any character, so the pattern /.at/ matches bat, cat, and even
rat.
• The asterisk means match 0 or more of the preceding object. (Right now, the only
objects we know about are characters.)
• The plus is similar to asterisk, but it matches 1 or more instead of or more. So,
/.+at/ matches brat, sprat, and even catastrophe, but not at. To match at,
replace the + with a *.
• The question mark matches 0 or 1 objects.
To apply * and + to objects greater than one character, place the sequence of characters
inside parentheses. Parentheses allow you to group characters for more complicated matching
and also capture the part of the pattern that falls inside them. A captured sequence can be
referenced in preg_replace( ) to alter a string, and all captured matches can be stored in
an array that's passed as a third parameter to preg_match( ) and preg_match_all( ).
The preg_match_all( ) function is similar to preg_match( ), but it finds all possible
matches inside a string, instead of stopping at the first match. Here are some examples:
if (preg_match('/<title>.+<\/title>/', $html)) { // page has a title } if (preg_match_all('/<li>/', $html, $matches)) { print 'Page has ' . count($matches[0]) . " list items\n"; } // turn bold into italic $italics = preg_replace('/(<\/?)b(>)/', '$1i$2', $bold);
If you want to match strings with a specific set of letters, create a character class with the
letters you want. A character class is a sequence of characters placed inside square brackets.
The caret (^) and the dollar sign ($) anchor the pattern at the beginning and the end of the
string, respectively. Without them, a match can occur anywhere in the string. So, to match

only vowels, make a character class containing a, e, i, o, and u; start your pattern with ^;
and end it with $:
preg_match('/^[aeiou]+$/', $string); // only vowels
If it's easier to define what you're looking for by its complement, use that. To make a
character class match the complement of what's inside it, begin the class with a caret. A caret
outside a character class anchors a pattern at the beginning of a string; a caret inside a
character class means "match everything except what's listed in the square brackets":
preg_match('/^[^aeiou]+$/', $string) // only non-vowels
Note that the opposite of [aeiou] isn't [bcdfghjklmnpqrstvwxyz]. The character class
[^aeiou] also matches uppercase vowels such as AEIOU, numbers such as 123, URLs such
as http://www.cnpq.br/, and even emoticons such as :).
The vertical bar (|), also known as the pipe, specifies alternatives. For example:
// find a gif or a jpeg preg_match('/(gif|jpeg)/', $images);
Beside metacharacters, there are also metasymbols. Metasymbols are like metacharacters,
but are longer than one character in length. Some useful metasymbols are \w (match any
word character, [a-zA-Z0-9_]); \d (match any digit, [0-9]); \s (match any whitespace
character), and \b (match a word boundary). Here's how to find all numbers that aren't part
of another word:
// find digits not touching other words preg_match_all('/\b\d+\b/', $html, $matches);
This matches 123, 76!, and 38-years-old, but not 2nd.
Here's a pattern that is the regular expression equivalent of trim( ) :
// delete leading whitespace or trailing whitespace $trimmed = preg_replace('/(^\s+)|(\s+$)/', '', $string);
Finally, there are pattern modifiers. Modifiers effect the entire pattern, not just a character or
group of characters. Pattern modifiers are placed after the trailing pattern delimiter. For
example, the letter i makes a regular expression pattern case-insensitive:
// strict match lower-case image tags only (XHTML compliant) if (preg_match('/<img[^>]+>/', $html)) { ... } // match both upper and lower-case image tags if (preg_match('/<img[^>]+>/i', $html)) {

... }
We've covered just a small subset of the world of regular expressions. We provide some
additional details in later recipes, but the PHP web site also has some very useful information
on POSIX regular expressions at http://www.php.net/regex and on Perl-compatible regular
expressions at http://www.php.net/pcre. The links from this last page to "Pattern Modifiers"
and "Pattern Syntax" are especially detailed and informative.
The best books on this topic are Mastering Regular Expressions by Jeffrey Friedl, and
Programming Perl by Larry Wall, Tom Christiansen, and Jon Orwant, both published by
O'Reilly. (Since the Perl-compatible regular expressions are based on Perl's regular
expressions, we don't feel too bad suggesting a book on Perl.)
Recipe 13.2 Switching From ereg to preg
13.2.1 Problem
You want to convert from using ereg functions to preg functions.
13.2.2 Solution
First, you have to add delimiters to your patterns:
preg_match('/pattern/', 'string')
For eregi( ) case-insensitive matching, use the /i modifier instead:
preg_match('/pattern/i', 'string');
When using integers instead of strings as patterns or replacement values, convert the number
to hexadecimal and specify it using an escape sequence:
$hex = dechex($number); preg_match("/\x$hex/", 'string');
13.2.3 Discussion
There are a few major differences between ereg and preg. First, when you use preg
functions, the pattern isn't just the string pattern; it also needs delimiters, as in Perl, so it's
/pattern/ instead.[1] So:
[1] Or {}, <>, ||, ##, or whatever your favorite delimiters are. PHP supports them all.
ereg('pattern', 'string');
becomes:

preg_match('/pattern/', 'string');
When choosing your pattern delimiters, don't put your delimiter character inside the regular-
expression pattern, or you'll close the pattern early. If you can't find a way to avoid this
problem, you need to escape any instances of your delimiters using the backslash. Instead of
doing this by hand, call addcslashes( ).
For example, if you use / as your delimiter:
$ereg_pattern = '<b>.+</b>'; $preg_pattern = addcslashes($ereg_pattern, '/');
The value of $preg_pattern is now <b>.+<\/b>.
The preg functions don't have a parallel series of case-insensitive functions. They have a
case-insensitive modifier instead. To convert, change:
eregi('pattern', 'string');
to:
preg_match('/pattern/i', 'string');
Adding the i after the closing delimiter makes the change.
Finally, there is one last obscure difference. If you use a number (not a string) as a pattern or
replacement value in ereg_replace( ) , it's assumed you are referring to the ASCII value
of a character. Therefore, since 9 is the ASCII representation of tab (i.e., \t), this code inserts
tabs at the beginning of each line:
$tab = 9; $replaced = ereg_replace('^', $tab, $string);
Here's how to convert linefeed endings:
$converted = ereg_replace(10, 12, $text);
To avoid this feature in ereg functions, use this instead:
$tab = '9';
On the other hand, preg_replace( ) treats the number 9 as the number 9, not as a tab
substitute. To convert these character codes for use in preg_replace( ), convert them to
hexadecimal and prefix them with \x. For example, 9 becomes \x9 or \x09, and 12
becomes \x0c. Alternatively, you can use \t , \r, and \n for tabs, carriage returns, and
linefeeds, respectively.

13.2.4 See Also
Documentation on ereg( ) at http://www.php.net/ereg, preg_match( ) at
http://www.php.net/preg-match, and addcslashes( ) at http://www.php.net/addcslashes.
Recipe 13.3 Matching Words
13.3.1 Problem
You want to pull out all words from a string.
13.3.2 Solution
The key to this is carefully defining what you mean by a word. Once you've created your
definition, use the special character types to create your regular expression:
/\S+/ // everything that isn't whitespace /[A-Z'-]+/i // all upper and lowercase letters, apostrophes, and hyphens
13.3.3 Discussion
The simple question "what is a word?" is surprisingly complicated. While the Perl compatible
regular expressions have a built-in word character type, specified by \w, it's important to
understand exactly how PHP defines a word. Otherwise, your results may not be what you
expect.
Normally, because it comes directly from Perl's definition of a word, \w encompasses all
letters, digits, and underscores; this means a_z is a word, but the email address
[email protected] is not.
In this recipe, we only consider English words, but other languages use different alphabets.
Because Perl-compatible regular expressions use the current locale to define its settings,
altering the locale can switch the definition of a letter, which then redefines the meaning of a
word.
To combat this, you may want to explicitly enumerate the characters belonging to your words
inside a character class. To add a nonstandard character, use \ddd , where ddd is a
character's octal code.
13.3.4 See Also
Recipe 16.3 for information about setting locales.
Recipe 13.4 Finding the nth Occurrence of a Match
13.4.1 Problem

You want to find the nth word match instead of the first one.
13.4.2 Solution
Use preg_match_all( ) to pull all the matches into an array; then pick out the specific
matches you're interested in:
preg_match_all ("/$pattern/$modifiers", $string, $matches) foreach($matches[1] as $match) { print "$match\n"; }
13.4.3 Discussion
Unlike in Perl, PHP's Perl-compatible regular expressions don't support the /g modifier that
allows you to loop through the string one match at a time. You need to use
preg_match_all( ) instead of preg_match( ).
The preg_match_all( ) function returns a two-dimensional array. The first element holds
an array of matches of the complete pattern. The second element also holds an array of
matches, but of the parenthesized submatches within each complete match. So, to get the
third potato, you access the third element of the second element of the $matches array:
$potatoes = 'one potato two potato three potato four'; preg_match_all("/(\w+)\s+potato\b/", $potatoes, $matches); print $matches[1][2]; three
Instead of returning an array divided into full matches and then submatches,
preg_match_all( ) returns an array divided by matches, with each submatch inside. To
trigger this, pass PREG_SET_ORDER in as the fourth argument. Now, three isn't in
$matches[1][2], as previously, but in $matches[2][1].
Check the return value of preg_match_all( ) to find the number of matches:
print preg_match_all("/(\w+)\s+potato\b/", $potatoes, $matches); 3
Note that there are only three matches, not four, because there's no trailing potato after the
word four in the string.
13.4.4 See Also
Documentation on preg_match_all( ) at http://www.php.net/preg-match-all.

Recipe 13.5 Choosing Greedy or Nongreedy Matches
13.5.1 Problem
You want your pattern to match the smallest possible string instead of the largest.
13.5.2 Solution
Place a ? after a quantifier to alter that portion of the pattern:
// find all bolded sections preg_match_all('#<b>.+?</b>#', $html, $matches);
Or, use the U pattern modifier ending to invert all quantifiers from greedy to nongreedy:
// find all bolded sections preg_match_all('#<b>.+</b>#U', $html, $matches);
13.5.3 Discussion
By default, all regular expressions in PHP are what's known as greedy. This means a quantifier
always tries to match as many characters as possible.
For example, take the pattern p.*, which matches a p and then 0 or more characters, and
match it against the string php. A greedy regular expression finds one match, because after it
grabs the opening p, it continues on and also matches the hp. A nongreedy regular
expression, on the other hand, finds a pair of matches. As before, it matches the p and also
the h, but then instead of continuing on, it backs off and leaves the final p uncaptured. A
second match then goes ahead and takes the closing letter.
The following code shows that the greedy match finds only one hit; the nongreedy ones find
two:
print preg_match_all('/p.*/', "php"); // greedy print preg_match_all('/p.*?/', "php"); // nongreedy print preg_match_all('/p.*/U', "php"); // nongreedy 1 2 2
Greedy matching is also known as maximal matching and nongreedy matching can be called
minimal matching, because these options match either the maximum or minimum number of
characters possible.
Initially, all regular expressions were strictly greedy. Therefore, you can't use this syntax with
ereg( ) or ereg_replace( ). Greedy matching isn't supported by the older engine that
powers these functions; instead, you must use Perl-compatible functions.

Nongreedy matching is frequently useful when trying to perform simplistic HTML parsing. Let's
say you want to find all text between bold tags. With greedy matching, you get this:
$html = '<b>I am bold.</b> <i>I am italic.</i> <b>I am also bold.</b>'; preg_match_all('#<b>(.+)</b>#', $html, $bolds); print_r($bolds[1]); Array ( [0] => I am bold.</b> <i>I am italic.</i> <b>I am also bold. )
Because there's a second set of bold tags, the pattern extends past the first </b>, which
makes it impossible to correctly break up the HTML. If you use minimal matching, each set of
tags is self-contained:
$html = '<b>I am bold.</b> <i>I am italic.</i> <b>I am also bold.</b>'; preg_match_all('#<b>(.+?)</b>#', $html, $bolds); print_r($bolds[1]); Array ( [0] => I am bold. [1] => I am also bold. )
Of course, this can break down if your markup isn't 100% valid, and there are stray bold tags
lying around.[2] If your goal is just to remove all (or some) HTML tags from a block of text,
you're better off not using a regular expression. Instead, use the built-in function
strip_tags( ); it's faster and it works correctly. See Recipe 11.12 for more details.
[2] It's possible to have valid HTML and still get into trouble. For instance, if you have bold tags inside a comment. A true HTML parser ignores this section, but our pattern won't.
Finally, even though the idea of nongreedy matching comes from Perl, the -U modifier is
incompatible with Perl and is unique to PHP's Perl-compatible regular expressions. It inverts all
quantifiers, turning them from greedy to nongreedy and also the reverse. So, to get a greedy
quantifier inside of a pattern operating under a trailing /U, just add a ? to the end, the same
way you would normally turn a greedy quantifier into a nongreedy one.
13.5.4 See Also
Recipe 13.9 for more on capturing text inside HTML tags; Recipe 11.12 for more on stripping
HTML tags; documentation on preg_match_all( ) at http://www.php.net/preg-match-all.
Recipe 13.6 Matching a Valid Email Address
13.6.1 Problem
You want to check if an email address is valid.

13.6.2 Solution
This is a popular question and everyone has a different answer, depending on their definition
of valid. If valid means a mailbox belonging to a legitimate user at an existing hostname, the
real answer is that you can't do it correctly, so don't even bother. However, sometimes a
regular expression can help weed out some simple typos and obvious bogus attempts. That
said, our favorite pattern that doesn't require maintenance is:
/^[^@\s]+@([-a-z0-9]+\.)+[a-z]{2,}$/i
If the IMAP extension is enabled, you can also use imap_rfc822_parse_adrlist( ) :
$parsed = imap_rfc822_parse_adrlist($email_address, $default_host) if ('INVALID_ADDRESS' == $parsed['mailbox']) { // bad address }
Ironically, because this function is so RFC-compliant, it may not give the results you expect.
13.6.3 Discussion
The pattern in the Solution accepts any email address that has a name of any sequence of
characters that isn't a @ or whitespace. After the @, you need at least one domain name
consisting of the letters a-z, the numbers 0-9, and the hyphen, separated by periods, and
proceed it with as many subdomains you want. Finally, you end with either a two-digit country
code or another top-level domain, such as .com or .edu.
The solution pattern is handy because it still works if ICANN adds new top-level domains.
However, it does allow through a few false positives. This more strict pattern explicitly
enumerates the current noncountry top-level domains:
/ ^ # anchor at the beginning [^@\s]+ # name is all characters except @ and whitespace @ # the @ divides name and domain ( [-a-z0-9]+ # (sub)domains are letters, numbers, and hyphens \. # separated by a period )+ # and we can have one or more of them ( [a-z]{2} # TLDs can be a two-letter alphabetical country code |com|net # or one of |edu|org # many |gov|mil # possible |int|biz # three-letter |pro # combinations |info|arpa # or even |aero|coop # a few |name # four-letter ones |museum # plus one that's six-letters long! ) $ # anchor at the end

/ix # and everything is case-insensitive
Both patterns are intentionally liberal in what they accept, because we assume you're only
trying to make sure someone doesn't accidentally leave off their top-level domain or type in
something fake such as "not telling." For instance, there's no domain "-.com", but "foo@-
.com" flies through without a blip. (It wouldn't be hard to modify the pattern to correct this,
but that's left as an exercise for you.) On the other hand, it is legal to have an address of
"Tim O'[email protected]", and our pattern won't accept this. However, spaces in
email addresses are rare; because a space almost always represents a mistake, we flag that
address as bad.
The canonical definition of what's a valid address is documented in RFC 822; however, writing
code to handle all cases isn't a pretty task. Here's one example of what you need to consider:
people are allowed to embed comments inside addresses! Comments are set inside
parentheses, so it's valid to write:
Tim (is the man @ computer books) @ oreilly.com
That's equivalent to "[email protected]". (So, again, the pattern fails on that address.)
Alternatively, the IMAP extension has an RFC 822-compliant address parser. This parser
correctly navigates through whitespace comments and other oddities, but it allows obvious
mistakes because it assumes that addresses without hostnames are local:
$email = 'stephen(his account)@ example(his host)'; $parsed = imap_rfc822_parse_adrlist($email,''); print_r($parsed); Array ( [0] => stdClass Object ( [mailbox] => stephen [host] => example [personal] => his host ) )
Reassembling the mailbox and host, you get "stephen@example", which probably isn't what
you want. The empty string you must pass in as the second argument defeats your ability to
check for valid hostnames.
Some people like behind-the-scenes processing such as DNS lookups, to check if the address
is valid. This doesn't make much sense because that technique won't always work, and you
may end up rejecting perfectly valid people from your site, due to no fault of their own. (Also,
its unlikely a mail administrator would fix his mail handling just to work around one web site's
email validation scheme.)

Another consideration when validating email addresses is that it doesn't take too much work
for a user to enter a completely legal and working address that isn't his. For instance, one of
the authors used to have a bad habit of entering "[email protected]" when signing up
for Microsoft's web sites because "Hey! Maybe Bill doesn't know about that new version of
Internet Explorer?"
If the primary concern is to avoid typos, make people enter their address twice, and compare
the two. If they match, it's probably correct. Also, filter out popular bogus addresses, such as
"[email protected]" and the previously mentioned "[email protected]".
(This does have the downside of not letting The President of the United States of America or
Bill Gates sign up for your site.)
However, if you need to ensure people actually have access to the email address they provide,
one technique is to send a message to their address and require them to either reply to the
message or go to a page on your site and type in a special code printed in the body of the
message to confirm their sign-up. If you do choose the special code route, we suggest that
you don't generate a random string of letters, such as HSD5nbADl8. Since it looks like
garbage, it's hard to retype it correctly. Instead, use a word list and create code words such as
television4coatrack. While, on occasion, it's possible to divine hidden meanings in these
combos, you can cut the error rate and your support costs.
13.6.4 See Also
Recipe 8.6 for information about generating good passwords; Recipe 8.27 for a web site
account deactivation program; documentation on imap_rfc822_parse_adrlist( ) at
http://www.php.net/imap-rfc822-parse-adrlist.
Recipe 13.7 Finding All Lines in a File That Match a Pattern
13.7.1 Problem
You want to find all the lines in a file that match a pattern.
13.7.2 Solution
Read the file into an array and use preg_grep( ).
13.7.3 Discussion
There are two ways to do this. Here's the faster method:
$pattern = "/\bo'reilly\b/i"; // only O'Reilly books $ora_books = preg_grep($pattern, file('/path/to/your/file.txt'));
Use the file( ) command to automatically load each line of the file into an array element
and preg_grep( ) to filter the bad lines out.

Here's the more efficient method:
$fh = fopen('/path/to/your/file.txt', 'r') or die($php_errormsg); while (!feof($fh)) { $line = fgets($fh, 4096); if (preg_match($pattern, $line)) { $ora_books[ ] = $line; } } fclose($fh);
Since the first method reads in everything all at once, it's about three times faster then the
second way, which parses the file line by line but uses less memory. One downside, however,
is that because the regular expression works only on one line at a time, the second method
doesn't find strings that span multiple lines.
13.7.4 See Also
Recipe 18.6 on reading files into strings; documentation on preg_grep( ) at
http://www.php.net/preg-grep.
Recipe 13.8 Capturing Text Inside HTML Tags
13.8.1 Problem
You want to capture text inside HTML tags. For example, you want to find all the headings in a
HTML document.
13.8.2 Solution
Read the HTML file into a string and use nongreedy matching in your pattern:
$html = join('',file($file)); preg_match('#<h([1-6])>(.+?)</h\1>#is', $html, $matches);
In this example, $matches[2] contains an array of captured headings.
13.8.3 Discussion
True parsing of HTML is difficult using a simple regular expression. This is one advantage of
using XHTML; it's significantly easier to validate and parse.
For instance, the pattern in the Solution is smart enough to find only matching headings, so
<h1>Dr. Strangelove<h1> is okay, because it's wrapped inside <h1> tags, but not
<h2>How I Learned to Stop Worrying and Love the Bomb</h3>, because the opening
tag is an <h2> while the closing tag is not.
This technique also works for finding all text inside bold and italic tags:
$html = join('',file($file));

preg_match('#<([bi])>(.+?)</\1>#is', $html, $matches);
However, it breaks on nested headings. Using that regular expression on:
<b>Dr. Strangelove or: <i>How I Learned to Stop Worrying and Love the Bomb</i></b>
doesn't capture the text inside the <i> tags as a separate item.
This wasn't a problem earlier; because headings are block level elements, it's illegal to nest
them. However, as inline elements, nested bold and italic tags are valid.
Captured text can be processed by looping through the array of matches. For example, this
code parses a document for its headings and pretty-prints them with indentation according to
the heading level:
$html = join('',file($file)); preg_match('#<h([1-6])>(.+?)</h\1>#is', $html, $matches); for ($i = 0, $j = count($matches[0]); $i < $j; $i++) { print str_repeat(' ', 2 * ($matches[1][$i] - 1)) . $matches[2][$i] . "\n"; }
So, with one representation of this recipe in HTML:
$html =<<<_END_ <h1>PHP Cookbook</h1> Other Chapters <h2>Regular Expressions</h2> Other Recipes <h3>Capturing Text Inside of HTML Tags</h3> <h4>Problem</h4> <h4>Solution</h4> <h4>Discussion</h4> <h4>See Also</h4> _END_; preg_match_all('#<h([1-6])>(.+?)</h\1>#is', $html, $matches); for ($i = 0, $j = count($matches[0]); $i < $j; $i++) { print str_repeat(' ', 2 * ($matches[1][$i] - 1)) . $matches[2][$i] . "\n"; }
You get:
PHP Cookbook Regular Expressions Capturing Text Inside of HTML Tags

Problem Solution Discussion See Also
By capturing the heading level and heading text separately, you can directly access the level
and treat it as an integer when calculating the indentation size. To avoid a two-space indent
for all lines, subtract 1 from the level.
13.8.4 See Also
Recipe 11.8 for information on marking up a web page and Recipe 11.9 for extracting links
from an HTML file; documentation on preg_match( ) at http://www.php.net/preg-match
and str_repeat( ) at http://www.php.net/str-repeat.
Recipe 13.9 Escaping Special Characters in a Regular Expression
13.9.1 Problem
You want to have characters such as * or + treated as literals, not as metacharacters, inside a
regular expression. This is useful when allowing users to type in search strings you want to
use inside a regular expression.
13.9.2 Solution
Use preg_quote( ) to escape Perl-compatible regular-expression metacharacters:
$pattern = preg_quote('The Education of H*Y*M*A*N K*A*P*L*A*N').':(\d+)'; if (preg_match("/$pattern/",$book_rank,$matches)) { print "Leo Rosten's book ranked: ".$matches[1]; }
Use quotemeta( ) to escape POSIX metacharacters:
$pattern = quotemeta('M*A*S*H').':[0-9]+'; if (ereg($pattern,$tv_show_rank,$matches)) { print 'Radar, Hot Lips, and the gang ranked: '.$matches[1]; }
13.9.3 Discussion
Here are the characters that preg_quote( ) escapes:
. \ + * ? ^ $ [ ] ( ) { } < > = ! | :
Here are the characters that quotemeta( ) escapes:
. \ + * ? ^ $ [ ] ( )

These functions escape the metacharacters with backslash.
The quotemeta( ) function doesn't match all POSIX metacharacters. The characters {, },
and | are also valid metacharacters but aren't converted. This is another good reason to use
preg_match( ) instead of ereg( ).
You can also pass preg_quote( ) an additional character to escape as a second argument.
It's useful to pass your pattern delimiter (usually /) as this argument so it also gets escaped.
This is important if you incorporate user input into a regular-expression pattern. The following
code expects $_REQUEST['search_term'] from a web form and searches for words
beginning with $_REQUEST['search_term'] in a string $s:
$search_term = preg_quote($_REQUEST['search_term'],'/'); if (preg_match("/\b$search_term/i",$s)) { print 'match!'; }
Using preg_quote( ) ensures the regular expression is interpreted properly if, for example,
a Magnum, P.I. fan enters t.c. as a search term. Without preg_quote( ), this matches
tic, tucker, and any other words whose first letter is t and third letter is c. Passing the
pattern delimiter to preg_quote( ) as well makes sure that user input with forward slashes
in it, such as CP/M, is also handled correctly.
13.9.4 See Also
Documentation on preg_quote( ) at http://www.php.net/preg-quote and quotemeta( ) at
http://www.php.net/quotemeta.
Recipe 13.10 Reading Records with a Pattern Separator
13.10.1 Problem
You want to read in records from a file, in which each record is separated by a pattern you can
match with a regular expression.
13.10.2 Solution
Read the entire file into a string and then split on the regular expression:
$filename = '/path/to/your/file.txt'; $fh = fopen($filename, 'r') or die($php_errormsg); $contents = fread($fh, filesize($filename)); fclose($fh); $records = preg_split('/[0-9]+\) /', $contents);
13.10.3 Discussion

This breaks apart a numbered list and places the individual list items into array elements. So,
if you have a list like this:
1) Gödel 2) Escher 3) Bach
You end up with a four-element array, with an empty opening element. That's because
preg_split( ) assumes the delimiters are between items, but in this case, the numbers are
before items:
Array ( [0] => [1] => Gödel [2] => Escher [3] => Bach )
From one point of view, this can be a feature, not a bug, since the nth element holds the nth
item. But, to compact the array, you can eliminate the first element:
$records = preg_split('/[0-9]+\) /', $contents); array_shift($records);
Another modification you might want is to strip new lines from the elements and substitute the
empty string instead:
$records = preg_split('/[0-9]+\) /', str_replace("\n",'',$contents)); array_shift($records);
PHP doesn't allow you to change the input record separator to anything other than a newline,
so this technique is also useful for breaking apart records divided by strings. However, if you
find yourself splitting on a string instead of a regular expression, substitute explode( ) for
preg_split( ) for a more efficient operation.
13.10.4 See Also
Recipe 18.6 for reading from a file; Recipe 1.12 for parsing CSV files.
Chapter 14. Encryption and Security
Introduction
Keeping Passwords Out of Your Site Files
Obscuring Data with Encoding
Verifying Data with Hashes
Storing Passwords
Checking Password Strength
Dealing with Lost Passwords
Encrypting and Decrypting Data
Storing Encrypted Data in a File or Database
Sharing Encrypted Data with Another Web Site
Detecting SSL
Encrypting Email with GPG
14.1 Introduction
In a perfect world, encryption wouldn't be necessary. Nosy people would keep their eyes on
their own data, and a credit card number floating around the Internet would attract no special
attention. In so many ways, however, our world isn't perfect, so we need encryption.
Encryption scrambles data. Some data scrambling can't be unscrambled without unreasonable
amounts of processing. This is called one-way encryption . Other encryption methods work in
two directions: data is encrypted; then it's decrypted.
PHP supplies tools to encrypt and secure your data. Some tools, such as the crypt( ) and
md5( ) functions, are part of PHP's base set of functions, and some are extensions that need
to be explicitly included when PHP is compiled (e.g., mcrypt, mhash, and cURL).
The crypt( ) function does one-way DES encryption using the first eight characters of
plaintext to calculate the ciphertext. You pass it the plaintext to encrypt (and a salt, which
strengthens the encryption), and it returns the encrypted ciphertext. PHP generates a random
salt if you don't supply one:
print crypt('shrimp','34'); 34b/4qaoXmcoY
If the constant CRYPT_MD5 is set to 1, crypt( ) can do MD5 encryption. To tell PHP to use
MD5 encryption, start the salt with $1$:
print crypt('shrimp','$1$seasalt!'); $1$seasalt!$C8bRD475BC3T4EvjjmR9I.
Recipe 14.5 discusses crypt( ). It is most widely used for encrypting passwords.
mcrypt is a more full-featured encryption library that offers different algorithms and
encryption modes. Because it supports different kinds of encryption, mcrypt is especially
helpful when you need to exchange encrypted data with other systems or with programs not
written in PHP. mcrypt is discussed in detail in Recipe 14.8.
PHP gives you the tools to protect your data with robust encryption, but encryption is just part
of the large and often complex security picture. Your encrypted data can be unlocked with a
key, so protecting that key is very important. If your encryption keys are accessible to
unauthorized users (because they're stored in a file accessible via your web server or because
they're stored in a file accessible by other users in a shared hosting environment, for
example), your data is at risk, no matter how airtight your chosen encryption algorithm is.
You need to determine how secure you want your data to be. Encrypting it is more secure but
more complex. Simpler encoding hides your data from elementary prying eyes but offers less
security. No encryption or security is absolute. Picking an appropriate security method means
finding a place on the spectrum between convenience and protection. The more convenient (or

computationally inexpensive) types of security generally provide less protection. Sometimes
your goal isn't to protect data from prying eyes but to avoid the appearance of impropriety.
Seeing a plaintext field in a form (or URL) named "Password" could be more disturbing to your
users than the same data wrapped in Base64 encoding. Recipe 14.3 shows how to obscure
data with Base64.
Sensitive data needs to be protected not just on the server but also when it's traveling on the
network between your server and your users. Data sent over regular HTTP is visible to
anybody with access to the network at any point between your server and a user. Recipe
14.11 discusses how to layer HTTP over SSL to prevent network snoopers from peeping at
data as it passes by.
There are plenty of nontechnical prerequisites to tight security. Assigning passwords that are a
random jumble of letters, numbers, and punctuation does no good if those passwords are so
hard to remember that users write them on sticky notes attached to their monitors. As we
have already said, security is not an absolute, but a tradeoff between convenience and
protection. As you use the recipes in this chapter to protect your data, decide what is an
acceptable risk for your data versus the corresponding appropriate level of inconvenience that
security introduces.[1]
[1] Practical Unix and Internet Security, by Simson Garfinkel and Gene Spafford (O'Reilly) offers some helpful and (not surprisingly) practical advice on how to think about the balancing act of risk management.
Recipe 14.2 Keeping Passwords Out of Your Site Files
14.2.1 Problem
You need to use a password to connect to a database, for example. You don't want to put the
password in the PHP files you use on your site in case those files are compromised.
14.2.2 Solution
Store the password in an environment variable in a file that the web server loads when
starting up; then, just reference the environment variable in your script:
mysql_connect('localhost',$_ENV['MYSQL_USER'],$_ENV['MYSQL_PASSWORD']);
14.2.3 Discussion
While this technique removes passwords from the source code of your pages, it does make
them available in other places that need to be protected. Most importantly, make sure that
there are no publicly viewable pages that call phpinfo( ). Because phpinfo( ) displays
environment variables available to scripts, it displays the passwords put into environment
variables.

Next, especially if you are in a shared hosting setup, make sure that the environment
variables are set in such a way that they are available only to your virtual host, not to all
shared hosting users. With Apache, you can do this by setting the variables in a separate file
from the main configuration file:
SetEnv MYSQL_USER "susannah" SetEnv MYSQL_PASSWORD "y23a!t@ce8"
Inside the <VirtualHost> directive for the site in the main configuration file, include this
separate file as follows:
Include "/usr/local/apache/database-passwords"
Make sure that the separate file that contains the passwords (e.g.,
/usr/local/apache/database-passwords) is not readable by any users other than the one that
controls the appropriate virtual host. When Apache starts up and is reading in configuration
files, it's usually running as root, so it is able to read the included file.
14.2.4 See Also
Documentation on Apache's Include directive at
http://httpd.apache.org/docs/mod/core.html#include.
Recipe 14.3 Obscuring Data with Encoding
14.3.1 Problem
You want to prevent data being viewable as plaintext. For example, you don't want hidden
form data to be revealed simply by someone viewing the source code of a web page.
14.3.2 Solution
Encode the data with base64_encode( ):
$personal_data = array('code' => 5123, 'blood_type' => 'O'); $info = base64_encode(serialize($personal_data)); print '<input type="hidden" name="info" value="'.$info.'">'; <input type="hidden" name="info" value="YToyOntzOjQ6ImNvZGUiO2k6NTEyMztzOjEwOiJibG9vZF90eXBlIjtzOjE6Ik8iO30=">
Decode the data with base64_decode( ) :
$personal_data = unserialize(base64_decode($_REQUEST['info'])); get_transfusion($personal_data['blood_type']);
14.3.3 Discussion

The Base64 algorithm encodes data as a string of letters, numbers, and punctuation marks.
This makes it ideal for transforming binary data into a plaintext form and also for obfuscating
data.
14.3.4 See Also
Documentation on base64_encode( ) at http://www.php.net/base64-encode and
base64_decode( ) at http://www.php.net/base64-decode; the Base64 algorithm is defined
in RFC 2045, available at http://www.faqs.org/rfcs/rfc2045.html.
Recipe 14.4 Verifying Data with Hashes
14.4.1 Problem
You want to make sure users don't alter data you've sent them in a cookie or form element.
14.4.2 Solution
Along with the data, send an MD5 hash of the data with a secret word. When you receive the
data back, compute the hash of the received value with the same secret word. If they don't
match, the user has altered the data.
Here's how to print a hash in a hidden form field:
$secret_word = 'flyingturtle'; $id = 2836; $hash = md5($secret_word . $id); print<<<_HTML_ <input type="hidden" name="id" value="$id"> <input type="hidden" name="idhash" value="$hash"> _HTML_;
Here's how to verify the hidden form field data when it's submitted:
$secret_word = 'flyingturtle'; if (md5($secret_word . $_REQUEST['id']) == $_REQUEST['idhash']) { $id = $_REQUEST['id']; } else { die("Invalid data in $_REQUEST[id]"); }
14.4.3 Discussion
When processing the submitted form data, compute the hash of the submitted value of
$_REQUEST['id'] and the secret word. If it matches the submitted hash, the value of
$_REQUEST['id'] has not been altered by the user. If the hashes don't match, you know
that the value of $_REQUEST['id'] you received is not the same as the one you sent.

To use a verification hash with a cookie, add the hash to the cookie value with join( ) :
$secret_word = 'flyingturtle'; $cookie_value = 'Ellen'; $hash = md5($secret_word . $id); setcookie('name',join('|',array($cookie_value,$hash)));
Parse the hash from the cookie value with explode( ):
$secret_word = 'flyingturtle'; list($cookie_value,$cookie_hash) = explode('|',$_COOKIE['name'],2); if (md5($secret_word . $cookie_value) == $cookie_hash) { $name = $cookie_value; } else { die('Invalid data in $_COOKIE[name]'); }
Using a data-verification hash in a form or cookie obviously depends on the secret word used
in hash computation. If a malicious user discovers your secret word, the hash offers no
protection. Aside from guarding the secret word zealously, changing it frequently is a good
idea. For an additional layer of protection, use different secret words, choosing the specific
word to use in the hash based on some property of the $id value (10 different words selected
by $id%10, for example). That way, damage is controlled if one of the words is compromised.
If you have the mhash module installed, you're not limited to MD5 hashes. mhash supports a
number of different hash algorithms. For more information about mhash, see the mhash
material in the online PHP manual or the mhash home page at http://mhash.sourceforge.net/.
14.4.4 See Also
Recipe 8.11 uses a verification hash for cookie-based authentication; Recipe 9.4 for an
example of using hashes with hidden form variables; documentation on md5( ) at
http://www.php.net/md5 and the mhash extension at http://www.php.net/mhash.
Recipe 14.5 Storing Passwords
14.5.1 Problem
You need to keep track of users' passwords so they can log in to your web site.
14.5.2 Solution
When a user signs up, encrypt her chosen password with crypt( ) and store the encrypted
password in your database of users:
// encrypt the password $encrypted_password = crypt($_REQUEST['password']);

// store $encrypted_password in the user database $dbh->query('INSERT INTO users (username,password) VALUES (?,?)', array($_REQUEST['username'],$encrypted_password));
Then, when that user attempts to log in to your web site, encrypt the password she supplies
with crypt( ) and compare it to the stored encrypted password. If the two encrypted values
match, she has supplied the correct password:
$encrypted_password = $dbh->getOne('SELECT password FROM users WHERE username = ?', array($_REQUEST['username'])); if (crypt($_REQUEST['password'],$encrypted_password) == $encrypted_password) { // successful login } else { // unsuccessful login }
14.5.3 Discussion
Storing encrypted passwords prevents users' accounts from becoming compromised if an
unauthorized person gets a peek at your username and password database. (Although such
unauthorized peeks may foreshadow other security problems.)
When the password is initially encrypted, crypt( ) supplies two randomly generated
characters of salt that get prepended to the encrypted password. Passing
$encrypted_password to crypt( ) when testing a user-supplied password tells crypt( )
to use the same salt characters again. The salt reduces your vulnerability to dictionary
attacks, in which someone compares encrypted passwords with encrypted versions of common
words. Still, it's a good idea to prevent users from choosing passwords that are simple words
or other easier-to-crack combinations. Recipe 14.6 provides a function to filter out easily
guessable passwords.
The crypt( ) function uses a one-way algorithm. This means it's currently impossible (or at
least prohibitively computationally expensive) to turn a crypt( )-generated ciphertext back
into plain text. This makes your stored passwords somewhat more secure, but it also means
that you can't get at the plaintext of users' passwords even if you need to. So, for example, if
a user forgets his password, you won't be able to tell him what it is. The best you can do is to
reset the password to a new value and then tell the user the new password. A method for
dealing with lost passwords is covered in Recipe 14.7.
14.5.4 See Also
Recipe 14.9 for information on storing encrypted data; documentation on crypt( ) at
http://www.php.net/crypt.

Recipe 14.6 Checking Password Strength
14.6.1 Problem
You want to make sure users pick passwords that are hard to guess.
14.6.2 Solution
Test a user's password choice with the pc_passwordcheck( ) function, shown later in
Example 14-1. For example:
if ($err = pc_passwordcheck($_REQUEST['username'],$_REQUEST['password'])) { print "Bad password: $err"; // Make the user pick another password }
14.6.3 Discussion
The pc_passwordcheck( ) function, shown in Example 14-1, performs some tests on user-
entered passwords to make sure they are harder to crack. It returns a string describing the
problem if the password doesn't meet its criteria. The password must be at least six characters
long and must have a mix of uppercase letters, lowercase letters, numerals, and special
characters. The password can't contain the username either in regular order or reverse order.
Additionally, the password can't contain a dictionary word. The filename for the word list used
for dictionary checking is stored in $word_file.
The checks for the username or dictionary words in the password are also applied to a version
of the password with letters substituted for lookalike numbers. For example, if the supplied
password is w0rd$%, the function also checks the string word$% for the username and
dictionary words. The "0" character is turned into an "o." Also, "5" is turned into "s," "3" into
"e," and both "1" and "!" into "l" (el).
Example 14-1. pc_passwordcheck( )
function pc_passwordcheck($user,$pass) { $word_file = '/usr/share/dict/words'; $lc_pass = strtolower($pass); // also check password with numbers or punctuation subbed for letters $denum_pass = strtr($lc_pass,'5301!','seoll'); $lc_user = strtolower($user); // the password must be at least six characters if (strlen($pass) < 6) { return 'The password is too short.'; } // the password can't be the username (or reversed username) if (($lc_pass == $lc_user) || ($lc_pass == strrev($lc_user)) || ($denum_pass == $lc_user) || ($denum_pass == strrev($lc_user))) { return 'The password is based on the username.';

} // count how many lowercase, uppercase, and digits are in the password $uc = 0; $lc = 0; $num = 0; $other = 0; for ($i = 0, $j = strlen($pass); $i < $j; $i++) { $c = substr($pass,$i,1); if (preg_match('/^[[:upper:]]$/',$c)) { $uc++; } elseif (preg_match('/^[[:lower:]]$/',$c)) { $lc++; } elseif (preg_match('/^[[:digit:]]$/',$c)) { $num++; } else { $other++; } } // the password must have more than two characters of at least // two different kinds $max = $j - 2; if ($uc > $max) { return "The password has too many upper case characters."; } if ($lc > $max) { return "The password has too many lower case characters."; } if ($num > $max) { return "The password has too many numeral characters."; } if ($other > $max) { return "The password has too many special characters."; } // the password must not contain a dictionary word if (is_readable($word_file)) { if ($fh = fopen($word_file,'r')) { $found = false; while (! ($found || feof($fh))) { $word = preg_quote(trim(strtolower(fgets($fh,1024))),'/'); if (preg_match("/$word/",$lc_pass) || preg_match("/$word/",$denum_pass)) { $found = true; } } fclose($fh); if ($found) { return 'The password is based on a dictionary word.'; } } } return false; }
14.6.4 See Also
Helpful password choosing guidelines are available at
http://tns.sdsu.edu/security/passwd.html.
Recipe 14.7 Dealing with Lost Passwords
14.7.1 Problem
You want to issue a password to a user who claims he's lost his password.
14.7.2 Solution
Generate a new password and send it to the user's email address (which you should have on
file):
// generate new password $new_password = ''; $i = 8; while ($i--) { $new_password .= chr(mt_rand(33,126)); } // encrypt new password $encrypted_password = crypt($new_password); // save new encrypted password to the database $dbh->query('UPDATE users SET password = ? WHERE username = ?', array($encrypted_password,$username)); // email new plaintext password to user mail($email,"New Password","Your new password is $new_password");
14.7.3 Discussion
If a user forgets his password, and you store encrypted passwords as recommended in Recipe
14.5, you can't provide the forgotten password. The one-way nature of crypt( ) prevents
you from retrieving the unencrypted password.
Instead, generate a new password and send that to his preexisting contact address. If you
send the new password to an address you don't already have on file for that user, you don't
have a way to verify that the new address really belongs to the user. It may be an attacker
attempting to impersonate the real user.
Because the email containing the new password isn't encrypted, the code in the Solution
doesn't include the username in the email message to reduce the chances that an attacker
that eavesdrops on the email message can steal the password. To avoid disclosing a new
password by email at all, let a user authenticate himself without a password by answering one
or more personal questions (the answers to which you have on file). These questions can be
"What was the name of your first pet?" or "What's your mother's maiden name?" — anything a
malicious attacker is unlikely to know. If the user provides the correct answers to your
questions, you can let him choose a new password.
One way to compromise between security and readability is to generate a password for a user
out of actual words interrupted by some numbers.
$words =

array('dished','mother','basset','detain','sudden','fellow','logged','sonora', 'earths','remove','dustin','snails','direct','serves','daring','cretan', 'chirps','reward','snakes','mchugh','uphold','wiring','gaston','nurses', 'regent','ornate','dogmas','singed','mended','hinges','latent','verbal', 'grimes','ritual','drying','hobbes','chests','newark','sourer','rumple'); mt_srand((double) microtime() * 1000000); $word_count = count($words); $password = sprintf('%s%02d%s', $words[mt_rand(0,$word_count - 1)], mt_rand(0,99), $words[mt_rand(0,$word_count - 1)]); print $password;
This code produces passwords that are two six-letter words with two numbers between them,
like mother43hinges or verbal08chirps. The passwords are long, but remembering them
is made easier by the words in them.
14.7.4 See Also
Recipe 14.5 for information about storing encrypted passwords and Recipe 14.6 for details on
checking password strength.
Recipe 14.8 Encrypting and Decrypting Data
14.8.1 Problem
You want to encrypt and decrypt data using one of a variety of popular algorithms.
14.8.2 Solution
Use PHP's mcrypt extension:
$key = 'That golden key that opes the palace of eternity.'; $data = 'The chicken escapes at dawn. Send help with Mr. Blue.'; $alg = MCRYPT_BLOWFISH; $mode = MCRYPT_MODE_CBC; $iv = mcrypt_create_iv(mcrypt_get_iv_size($alg,$mode),MCRYPT_DEV_URANDOM); $encrypted_data = mcrypt_encrypt($alg, $key, $data, $mode, $iv); $plain_text = base64_encode($encrypted_data); print $plain_text."\n"; $decoded = mcrypt_decrypt($alg,$key,base64_decode($plain_text),$mode,$iv); print $decoded."\n"; NNB9WnuCYjyd3Y7vUh7XDfWFCWnQY0BsMehHNmBHbGOdJ3cM+yghABb/XyrJ+w3xz9tms74/a70=

The chicken escapes at dawn. Send help with Mr. Blue.
14.8.3 Discussion
The mcrypt extension is an interface with mcrypt, a library that implements many different
encryption algorithms. The data is encrypted and decrypted by mcrypt_encrypt( ) and
mcrypt_decrypt( ), respectively. They each take five arguments. The first is the algorithm
to use. To find which algorithms mcrypt supports on your system, call
mcrypt_list_algorithms( ). The full list of mcrypt algorithms is shown in Table 14-1.
The second argument is the encryption key; the third argument is the data to encrypt or
decrypt. The fourth argument is the mode for the encryption or decryption (a list of supported
modes is returned by mcrypt_list_modes( )). The fifth argument is an initialization vector
(IV), used by some modes as part of the encryption or decryption process.
Table 14-1 lists all the possible mcrypt algorithms, including the constant value used to
indicate the algorithm, the key and block sizes in bits, and whether the algorithm is supported
by libmcrypt 2.2.x and 2.4.x.
Table 14-1. mcrypt algorithm constants
Algorithm constant Description Key size Block
size 2.2.x 2.4.x
MCRYPT_3DES Triple DES 168 (112
effective) 64 Yes Yes
MCRYPT_TRIPLEDES Triple DES 168 (112
effective) 64 No Yes
MCRYPT_3WAY 3way (Joan Daemen) 96 96 Yes No
MCRYPT_THREEWAY 3way 96 96 Yes Yes
MCRYPT_BLOWFISH Blowfish (Bruce Schneier) Up to 448 64 No Yes
MCRYPT_BLOWFISH_COMPAT Blowfish with compatibility to
other implementations Up to 448 64 No Yes
MCRYPT_BLOWFISH_128 Blowfish 128 64 Yes No
MCRYPT_BLOWFISH_192 Blowfish 192 64 Yes MCRYPT_BLOWFISH_256 Blowfish 256 64 Yes No
MCRYPT_BLOWFISH_448 Blowfish 448 64 Yes No
MCRYPT_CAST_128 CAST (Carlisle Adams and
Stafford Tavares) 128 64 Yes Yes
MCRYPT_CAST_256 CAST 256 128 Yes Yes
MCRYPT_CRYPT One-rotor Unix crypt 104 8 Yes
MCRYPT_ENIGNA One-rotor Unix crypt 104 8 No Yes
MCRYPT_DES U.S. Data Encryption Standard 56 64 Yes Yes
MCRYPT_GOST Soviet Gosudarstvennyi 256 64 Yes Yes

Standard ("Government
Standard")
MCRYPT_IDEA International Data Encryption
Algorithm 128 64 Yes Yes
MCRYPT_LOKI97 LOKI97 (Lawrie Brown, Josef
Pieprzyk)
128, 192,
or 256 64 Yes Yes
MCRYPT_MARS MARS (IBM) 128-448 128 No Yes
MCRYPT_PANAMA PANAMA (Joan Daemen, Craig
Clapp) - Stream No Yes
MCRYPT_RC2 Rivest Cipher 2 8-1024 64 No Yes
MCRYPT_RC2_1024 Rivest Cipher 2 1024 64 Yes No
MCRYPT_RC2_128 Rivest Cipher 2 128 64 Yes No
MCRYPT_RC2_256 Rivest Cipher 2 256 64 Yes No
MCRYPT_RC4 Rivest Cipher 4 Up to 2048 Stream Yes No
MCRYPT_ARCFOUR Non-trademarked RC4
compatible Up to 2048 Stream No Yes
MCRYPT_ARCFOUR_IV Arcfour with Initialization
Vector Up to 2048 Stream No Yes
MCRYPT_RC6 Rivest Cipher 6 128, 192,
or 256 128 No Yes
MCRYPT_RC6_128 Rivest Cipher 6 128 128 Yes No
MCRYPT_RC6_192 Rivest Cipher 6 192 128 Yes No
MCRYPT_RC6_256 Rivest Cipher 6 256 128 Yes No
MCRYPT_RIJNDAEL_128 Rijndael (Joan Daemen,
Vincent Rijmen) 128 128 Yes Yes
MCRYPT_RIJNDAEL_192 Rijndael 192 192 Yes Yes
MCRYPT_RIJNDAEL_256 Rijndael 256 256 Yes Yes
MCRYPT_SAFERPLUS SAFER+ (based on SAFER) 128, 192,
or 256 128 Yes Yes
MCRYPT_SAFER_128 Secure And Fast Encryption
Routine with strengthened key
schedule
128 64 Yes Yes
MCRYPT_SAFER_64 Secure And Fast Encryption
Routine with strengthened key 64 64 Yes Yes
MCRYPT_SERPENT Serpent (Ross Anderson, Eli
Biham, Lars Knudsen)
128, 192,
or 256 128 No Yes
MCRYPT_SERPENT_128 Serpent 128 128 Yes No
MCRYPT_SERPENT_192 Serpent 192 128 Yes No
MCRYPT_SERPENT_256 Serpent 256 128 Yes No

MCRYPT_SKIPJACK U.S. NSA Clipper Escrowed
Encryption Standard 80 64 No Yes
MCRYPT_TWOFISH Twofish (Counterpane
Systems)
128, 192,
or 256 128 No Yes
MCRYPT_TWOFISH_128 Twofish 128 128 Yes No
MCRYPT_TWOFISH_192 Twofish 192 128 Yes No
MCRYPT_TWOFISH_256 Twofish 256 128 Yes No
MCRYPT_WAKE Word Auto Key Encryption
(David Wheeler) 256 32 No Yes
MCRYPT_XTEA Extended Tiny Encryption
Algorithm (David Wheeler,
Roger Needham)
128 64 Yes Yes
Except for the data to encrypt or decrypt, all the other arguments must be the same when
encrypting and decrypting. If you're using a mode that requires an initialization vector, it's
okay to pass the initialization vector in the clear with the encrypted text.
The different modes are appropriate in different circumstances. Cipher Block Chaining (CBC)
mode encrypts the data in blocks, and uses the encrypted value of each block (as well as the
key) to compute the encrypted value of the next block. The initialization vector affects the
encrypted value of the first block. Cipher Feedback (CFB) and Output Feedback (OFB) also use
an initialization vector, but they encrypt data in units smaller than the block size. Note that
OFB mode has security problems if you encrypt data in smaller units than its block size.
Electronic Code Book (ECB) mode encrypts data in discreet blocks that don't depend on each
other. ECB mode doesn't use an initialization vector. It is also less secure than other modes
for repeated use, because the same plaintext with a given key always produces the same
ciphertext. Constants to set each mode are listed in Table 14-2.
Table 14-2. mcrypt mode constants
Mode constant Description
MCRYPT_MODE_ECB Electronic Code Book mode
MCRYPT_MODE_CBC Cipher Block Chaining mode
MCRYPT_MODE_CFB Cipher Feedback mode
MCRYPT_MODE_OFB Output Feedback mode with 8 bits of feedback
MCRYPT_MODE_NOFB Output Feedback mode with n bits of feedback, where n is the block
size of the algorithm used (libmcrypt 2.4 and higher only)
MCRYPT_MODE_STREAM Stream Cipher mode, for algorithms such as RC4 and WAKE
(libmcrypt 2.4 and higher only)
Different algorithms have different block sizes. You can retrieve the block size for a particular
algorithm with mcrypt_get_block_size( ) . Similarly, the initialization vector size is

determined by the algorithm and the mode. mcrypt_create_iv( ) and
mcrypt_get_iv_size( ) make it easy to create an appropriate random initialization vector:
$iv = mcrypt_create_iv(mcrypt_get_iv_size($alg,$mode),MCRYPT_DEV_URANDOM);
The first argument to mcrypt_create_iv( ) is the size of the vector, and the second is a
source of randomness. You have three choices for the source of randomness.
MCRYPT_DEV_RANDOM reads from the pseudodevice /dev/random, MCRYPT_DEV_URANDOM
reads from the pseudo-device /dev/urandom, and MCRYPT_RAND uses an internal random
number generator. Not all operating systems support random-generating pseudo-devices.
Make sure to call srand( ) before using MCRYPT_RAND in order to get a nonrepeating
random number stream.
The code and examples in this recipe are compatible with mcrypt 2.4. PHP's mcrypt interface
supports both mcrypt 2.2 and mcrypt 2.4, but there are differences between the two. With
mcrypt 2.2, PHP supports only the following mcrypt functions: mcrypt_ecb( ),
mcrypt_cbc( ), mcrypt_cfb( ), mcrypt_ofb( ), mcrypt_get_key_size( ),
mcrypt_get_block_size( ), mcrypt_get_cipher_name( ), and mcrypt_create_iv(
). To encrypt or decrypt data with mcrypt 2.2, call the appropriate mcrypt_MODE( )
function, based on what mode you want to use, and pass it an argument that instructs it to
encrypt or decrypt. The following code is the mcrypt 2.2-compatible version of the code in the
Solution:
$key = 'That golden key that opes the palace of eternity.'; $data = 'The chicken escapes at dawn. Send help with Mr. Blue.'; $alg = MCRYPT_BLOWFISH; $iv = mcrypt_create_iv(mcrypt_get_block_size($alg),MCRYPT_DEV_URANDOM); $encrypted_data = mcrypt_cbc($alg,$key,$data,MCRYPT_ENCRYPT); $plain_text = base64_encode($encrypted_data); print $plain_text."\n"; $decoded = mcrypt_cbc($alg,$key,base64_decode($plain_text),MCRYPT_DECRYPT); print $decoded."\n";
14.8.4 See Also
Documentation on the mcrypt extension at http://www.php.net/mcrypt; the mcrypt library is
available at http://mcrypt.hellug.gr/; choosing an appropriate algorithm and using it securely
requires care and planning: for more information about mcrypt and the cipher algorithms it
uses, see the online PHP manual section on mcrypt, the mcrypt home page, and the
manpages for /dev/random and /dev/urandom; good books about cryptography include
Applied Cryptography, by Bruce Schneier (Wiley) and Cryptography: Theory and Practice, by
Douglas R. Stinson (Chapman & Hall).

Recipe 14.9 Storing Encrypted Data in a File or Database
14.9.1 Problem
You want to store encrypted data that needs to be retrieved and decrypted later by your web
server.
14.9.2 Solution
Store the additional information required to decrypt the data (such as algorithm, cipher mode,
and initialization vector) along with the encrypted information, but not the key:
// encrypt data $alg = MCRYPT_BLOWFISH; $mode = MCRYPT_MODE_CBC; $iv = mcrypt_create_iv(mcrypt_get_iv_size($alg,$mode),MCRYPT_DEV_URANDOM); $ciphertext = mcrypt_encrypt($alg,$_REQUEST['key'],$_REQUEST['data'],$mode,$iv); // save encrypted data $dbh->query('INSERT INTO noc_list (algorithm,mode,iv,data) values (?,?,?,?)', array($alg,$mode,$iv,$ciphertext));
To decrypt, retrieve a key from the user and use it with the saved data:
$row = $dbh->getRow('SELECT * FROM noc_list WHERE id = 27'); $plaintext = mcrypt_decrypt($row->algorithm,$_REQUEST['key'],$row->data, $row->mode,$row->iv);
14.9.3 Discussion
The save-crypt.php program shown in Example 14-2 stores encrypted data to a file.
Example 14-2. save-crypt.php
function show_form() { print<<<_FORM_ <form method="post" action="$_SERVER[PHP_SELF]"> <textarea name="data" rows="10" cols="40"> Enter data to be encrypted here. </textarea> <br> Encryption Key: <input type="text" name="key"> <input name="submit" type="submit" value="save"> </form> _FORM_; } function save_form() { $alg = MCRYPT_BLOWFISH; $mode = MCRYPT_MODE_CBC; // encrypt data

$iv = mcrypt_create_iv(mcrypt_get_iv_size($alg,$mode),MCRYPT_DEV_URANDOM); $ciphertext = mcrypt_encrypt($alg, $_REQUEST['key'], $_REQUEST['data'], $mode, $iv); // save encrypted data $filename = tempnam('/tmp','enc') or die($php_errormsg); $fh = fopen($filename,'w') or die($php_errormsg); if (false === fwrite($fh,$iv.$ciphertext)) { fclose($fh); die($php_errormsg); } fclose($fh) or die($php_errormsg); return $filename; } if ($_REQUEST['submit']) { $file = save_form(); print "Encrypted data saved to file: $file"; } else { show_form(); }
Example 14-3 shows the corresponding program, get-crypt.php , that accepts a filename and
key and produces the decrypted data.
Example 14-3. get-crypt.php
function show_form() { print<<<_FORM_ <form method="post" action="$_SERVER[PHP_SELF]"> Encrypted File: <input type="text" name="file"> <br> Encryption Key: <input type="text" name="key"> <input name="submit" type="submit" value="display"> </form> _FORM_; } function display() { $alg = MCRYPT_BLOWFISH; $mode = MCRYPT_MODE_CBC; $fh = fopen($_REQUEST['file'],'r') or die($php_errormsg); $iv = fread($fh,mcrypt_get_iv_size($alg,$mode)); $ciphertext = fread($fh,filesize($_REQUEST['file'])); fclose($fh); $plaintext = mcrypt_decrypt($alg,$_REQUEST['key'],$ciphertext,$mode,$iv); print "<pre>$plaintext</pre>"; } if ($_REQUEST['submit']) { display(); } else { show_form();

}
These two programs have their encryption algorithm and mode hardcoded in them, so there's
no need to store this information in the file. The file consists of the initialization vector
immediately followed by the encrypted data. There's no need for a delimiter after the
initialization vector (IV), because mcrypt_get_iv_size( ) returns exactly how many bytes
the decryption program needs to read to get the whole IV. Everything after that in the file is
encrypted data.
Encrypting files using the method in this recipe offers protection if an attacker gains access to
the server on which the files are stored. Without the appropriate key or tremendous amounts
of computing power, the attacker won't be able to read the files. However, the security that
these encrypted file provides is undercut if the data to be encrypted and the encryption keys
travel between your server and your users' web browsers in the clear. Someone who can
intercept or monitor network traffic can see data before it even gets encrypted. To prevent
this kind of eavesdropping, use SSL.
An additional risk when your web server encrypts data as in this recipe comes from how the
data is visible before it's encrypted and written to a file. Someone with root or administrator
access to the server can look in the memory the web server process is using and snoop on the
unencrypted data and the key. If the operating system swaps the memory image of the web
server process to disk, the unencrypted data might also be accessible in this swap file. This
kind of attack can be difficult to pull off but can be devastating. Once the encrypted data is in
a file, it's unreadable even to an attacker with root access to the web server, but if the
attacker can peek at the unencrypted data before it's in that file, the encryption offers little
protection.
14.9.4 See Also
Recipe 14.11 discusses SSL and protecting data as it moves over the network; documentation
on mcrypt_encrypt( ) at http://www.php.net/mcrypt-encrypt, mcrypt_decrypt( ) at
http://www.php.net/mcrypt-decrypt, mcrypt_create_iv( ) at http://www.php.net/mcrypt-
create-iv, and mcrypt_get_iv_size( ) at http://www.php.net/mcrypt-get-iv-size.
Recipe 14.10 Sharing Encrypted Data with Another Web Site
14.10.1 Problem
You want to securely exchange data with another web site.
14.10.2 Solution
If the other web site is pulling the data from your site, put the data up on a password-
protected page. You can also make the data available in encrypted form, with or without a
password. If you need to push the data to another web site, submit the potentially encrypted
data via POST to a password-protected URL.

14.10.3 Discussion
The following page requires a username and password and then encrypts and displays the
contents of a file containing yesterday's account activity:
$user = 'bank'; $password = 'fas8uj3'; if (! (($_SERVER['PHP_AUTH_USER'] == $user) && ($_SERVER['PHP_AUTH_PW'] == $password))) { header('WWW-Authenticate: Basic realm="Secure Transfer"'); header('HTTP/1.0 401 Unauthorized'); echo "You must supply a valid username and password for access."; exit; } header('Content-type: text/plain'); $filename = strftime('/usr/local/account-activity.%Y-%m-%d',time() - 86400); $data = join('',file($filename)); $alg = MCRYPT_BLOWFISH; $mode = MCRYPT_MODE_CBC; $key = "There are many ways to butter your toast."; // encrypt data $iv = $iv = mcrypt_create_iv(mcrypt_get_iv_size($alg,$mode), MCRYPT_DEV_URANDOM); $ciphertext = mcrypt_encrypt($alg, $key, $data, $mode, $iv); print base64_encode($iv.$ciphertext);
Here's the corresponding code to retrieve the encrypted page and decrypt the information:
$user = 'bank'; $password = 'fas8uj3'; $alg = MCRYPT_BLOWFISH; $mode = MCRYPT_MODE_CBC; $key = "There are many ways to butter your toast."; $fh = fopen("http://$user:[email protected]/accounts.php",'r') or die($php_errormsg); $data = ''; while (! feof($fh)) { $data .= fgets($fh,1048576); } fclose($fh) or die($php_errormsg); $binary_data = base64_decode($data); $iv_size = mcrypt_get_iv_size($alg,$mode); $iv = substr($binary_data,0,$iv_size); $ciphertext = substr($binary_data,$iv_size,strlen($binary_data)); print mcrypt_decrypt($alg,$key,$ciphertext,$mode,$iv);
The retrieval program does all the steps of the encryption program but in reverse. It retrieves
the Base64 encoded encrypted data, supplying a username and password. Then, it decodes
the data with Base64 and separates out the initialization vector. Last, it decrypts the data and
prints it out.

In the previous examples, the username and password are still sent over the network in clear
text, unless the connections happen over SSL. However, if you're using SSL, it's probably not
necessary to encrypt the file's contents. We included both password-prompting and file
encryption in these examples to show how it can be done.
There's one circumstance, however, in which both password protection and file encryption is
helpful: if the file isn't automatically decrypted when it's retrieved. An automated program can
retrieve the encrypted file and put it, still encrypted, in a place that can be accessed later. The
decryption key thus doesn't need to be stored in the retrieval program.
14.10.4 See Also
Recipe 8.10 for information on using HTTP Basic authentication; Recipe 14.11 discusses SSL
and protecting data as it moves over the network; documentation on mcrypt_encrypt( ) at
http://www.php.net/mcrypt-encrypt and mcrypt_decrypt( ) at
http://www.php.net/mcrypt-decrypt.
Recipe 14.11 Detecting SSL
14.11.1 Problem
You want to know if a request arrived over SSL.
14.11.2 Solution
Test the value of $_SERVER['HTTPS']:
if ('on' == $_SERVER['HTTPS']) { print "The secret ingredient in Coca-Cola is Soylent Green."; } else { print "Coca-Cola contains many delicious natural and artificial flavors."; }
14.11.3 Discussion
SSL operates on a lower level than HTTP. The web server and a browser negotiate an
appropriately secure connection, based on their capabilities, and the HTTP messages can pass
over that secure connection. To an attacker intercepting the traffic, it's just a stream of
nonsense bytes that can't be read.
Different web servers have different requirements to use SSL, so check your server's
documentation for specific details. No changes have to be made to PHP to work over SSL.
In addition to altering code based on $_SERVER['HTTPS'], you can also set cookies to be
exchanged only over SSL connections. If the last argument to setcookie( ) is 1, the
browser sends the cookie back to the server only over a secure connection:

/* set an SSL-only cookie named "sslonly" with value "yes" that expires * at the end of the current browser session */ setcookie('sslonly','yes','','/','sklar.com',1);
Although the browser sends these cookies back to the server only over an SSL connection, the
server sends them to the browser (when you call setcookie( ) in your page) whether or
not the request for the page that sets the cookie is over SSL. If you're putting sensitive data in
the cookie, make sure that you set the cookie only in an SSL request as well. Keep in mind as
well that the cookie data is unencrypted on the user's computer.
14.11.4 See Also
Recipe 8.2 discusses setting cookies; documentation on setcookie( ) at
http://www.php.net/setcookie.
Recipe 14.12 Encrypting Email with GPG
14.12.1 Problem
You want to send encrypted email messages. For example, you take orders on your web site
and need to send an email to your factory with order details for processing. By encrypting the
email message, you prevent sensitive data such as credit card numbers from passing over the
network in the clear.
14.12.2 Solution
Encrypt the body of the email message with GNU Privacy Guard (GPG) before sending it:
$message_body = escapeshellarg($message_body); $gpg_path = '/usr/local/bin/gpg'; $sender = '[email protected]'; $recipient = '[email protected]'; $home_dir = '/home/web'; $user_env = 'web'; $cmd = "echo $msg | HOME=$home_dir USER=$user_env $gpg_path " . '--quiet --no-secmem-warning --encrypt --sign --armor ' . "--recipient $recipient --local-user $sender"; $message_body = `$cmd`; mail($recipient,'Web Site Order',$message_body);
The email message can be decrypted by GPG, Pretty Good Privacy (PGP) or an email client
plug-in that supports either program.
14.12.3 Discussion
PGP is a popular public key encryption program; GPG is an open-source program based on
PGP. Because PGP in encumbered by a variety of patent and control issues, it's often easier to
use GPG.

The code in the Solution invokes /usr/local/bin/gpg to encrypt the message in
$message_body. It uses the private key belonging to $sender and the public key belonging
to $recipient. This means that only $recipient can decrypt the email message and when
she does, she knows the message came from $sender.
Setting the HOME and USER environment variables tells GPG where to look for its keyring:
$HOME/.gnupg/secring.gpg. The --quiet and --no-secmem-warning options suppress
warnings GPG would otherwise generate. The --encrypt and --sign options tell GPG to
both encrypt and sign the message. Encrypting the message obscures it to anyone other than
the recipient. Signing it adds information so that the recipient knows who generated the
message and when it was generated. The --armor option produces plaintext output instead
of binary, so the encrypted message is suitable for emailing.
Normally, private keys are protected with a passphrase. If a private key protected by a
passphrase is copied by an attacker, the attacker can't encrypt messages with the private key
unless he also knows the passphrase. GPG prompts for the passphrase when encrypting a
message. In this recipe, however, we don't want the private key of $sender to have a
passphrase. If it did, the web site couldn't send new-order email messages without a human
typing in the passphrase each time. Storing the passphrase in a file and providing it to GPG
each time you encrypt offers no additional security over not having a passphrase in the first
place.
The downside of using a key without a passphrase for encryption is that an attacker who
obtains the secret key can send fake order emails to your order processor. This is a
manageable risk. Since orders can be submitted via a web site in the first place, there is
already a place where false information can be injected into the order process. Any procedures
for catching bad orders can also be triggered by these potential fake emails. Also, once the
key theft is discovered, and the problem that enabled the theft is fixed, the attacker is easily
disabled by switching to a new private key.
14.12.4 See Also
The GNU Privacy Guard home page at http://www.gnupg.org/ and the MIT PGP distribution
site at http://web.mit.edu/network/pgp.html.

Chapter 15. Graphics
Introduction
Drawing Lines, Rectangles, and Polygons
Drawing Arcs, Ellipses, and Circles
Drawing with Patterned Lines
Drawing Text
Drawing Centered Text
Building Dynamic Images
Getting and Setting a Transparent Color
Serving Images Securely
Program: Generating Bar Charts from Poll Results

15.1 Introduction
With the assistance of the GD library, you can use PHP to create applications that use dynamic
images to display stock quotes, reveal poll results, monitor system performance, and even
create games. However it's not like using Photoshop or GIMP; you can't draw a line by moving
your mouse. Instead, you need to precisely specify a shape's type, size, and position.
GD has an existing API, and PHP tries to follows its syntax and function-naming conventions.
So, if you're familiar with GD from other languages, such as C or Perl, you can easily use GD
with PHP. If GD is new to you, it may take a few minutes to figure it out, but soon you'll be
drawing like Picasso.
The feature set of GD varies greatly depending on which version GD you're running and which
features were enabled during configuration. Versions of GD up to 1.6 supported reading and
writing GIFs, but this code was removed due to patent problems. Instead, newer versions of
GD support JPEGs, PNGs, and WBMPs. Because PNGs are generally smaller than GIFs, allow
you to use many more colors, have built-in gamma correction, and are supported by all major
web browsers, the lack of GIF support is classified as a feature, not a bug. For more on PNG,
go to http://www.libpng.org/pub/png/ or read Chapter 21, "PNG Format," of Web Design in a
Nutshell written by Jennifer Niederst (O'Reilly).
Besides supporting multiple file formats, GD lets you draw pixels, lines, rectangles, polygons,
arcs, ellipses, and circles in any color you want. Recipe 15.2 covers straight shapes, while
Recipe 15.3 covers the curved ones. To fill shapes with a pattern instead of a solid color, see
Recipe 15.4.
You can also draw text using a variety of font types, including built-in, TrueType, and
PostScript Type 1 fonts. Recipe 15.5 shows the ins and outs of the three main text-drawing
functions, and Recipe 15.6 shows how to center text within a canvas. These two recipes form
the basis for Recipe 15.7, which combines an image template with real-time data to create
dynamic images. GD also lets you make transparent GIFs and PNGs. Setting a color as
transparent and using transparencies in patterns are discussed in Recipe 15.8.
Recipe 15.9 moves away from GD and shows how to securely serve images by restricting user
access. Last, we provide an example application — taking poll results and producing a dynamic
bar graph showing what percentage of users voted for each answer.
All these features work with GD 1.8.4, which is the latest stable version of the library. If you
have an earlier version, you should not have a problem. However, if a particular recipe needs
a specific version of GD, we note it in the recipe.
PHP also supports GD 2.x, which, as of this writing, is still in beta. Despite its beta status, the
new version is relatively stable and has many new features. In particular, Version 2.x allows
true-color images, which lets GD read in PNGs and JPEGs with almost no loss in quality. Also,
GD 2.x supports PNG alpha channels, which allow you to specify a transparency level for each
pixel.

Both versions of GD are available for download from the official GD site at
http://www.boutell.com/gd/. The GD section of the online PHP Manual at
http://www.php.net/image also lists the location of the additional libraries necessary to
provide support for JPEGs and Type 1 fonts.
There are two easy ways to see which version, if any, of GD is installed on your server and
how it's configured. One way is to call phpinfo( ) . You should see --with-gd at the top
under "Configure Command"; further down the page there is also a section titled "gd" that has
more information about which version of GD is installed and what features are enabled. The
other option is to check the return value of function_exists('imagecreate'). If it
returns true, GD is installed. The imagetypes( ) function returns a bit field indicating
which graphics formats are available. See http://www.php.net/imagetypes for more on how to
use this function. If you want to use a feature that isn't enabled, you need to rebuild PHP
yourself or get your ISP to do so.
The basic image generation process has three steps: creating the image, adding graphics and
text to the canvas, and displaying or saving the image. For example:
$image = ImageCreate(200, 50); $background_color = ImageColorAllocate($image, 255, 255, 255); // white $gray = ImageColorAllocate($image, 204, 204, 204); // gray ImageFilledRectangle($image, 50, 10, 150, 40, $gray); header('Content-type: image/png'); ImagePNG($image);
The output of this code, which prints a gray rectangle on a white background, is shown in
Figure 15-1.
Figure 15-1. A gray rectangle on a white background
To begin, you create an image canvas. The ImageCreate( ) function doesn't return an
actual image. Instead, it provides you with a handle to an image; it's not an actual graphic
until you specifically tell PHP to write the image out. Using ImageCreate( ), you can juggle
multiple images at the same time.
The parameters passed to ImageCreate( ) are the width and height of the graphic in pixels.
In this case, it's 200 pixels across and 50 pixels high. Instead of creating a new image, you
can also edit existing images. To open a graphic, call ImageCreateFromPNG( ) or a similarly
named function to open a different file format. The filename is the only argument, and files
can live locally or on remote servers:
// open a PNG from the local machine $graph = ImageCreateFromPNG('/path/to/graph.png');

// open a JPEG from a remote server $icon = ImageCreateFromJPEG('http://www.example.com/images/icon.jpeg');
Once you have an editable canvas, you get access to drawing colors by calling
ImageColorAllocate( ) :
$background_color = ImageColorAllocate($image, 255, 255, 255); // white $gray = ImageColorAllocate($image, 204, 204, 204); // gray
The ImageColorAllocate( ) function takes an image handle to allocate the color to and
three integers. The three integers each range from 0 to 255 and specify the red, green, and
blue components of the color. This is the same RGB color combination that is used in HTML to
set a font or background color. So, white is 255, 255, 255; black is 0, 0, 0, and everything
else is somewhere in between.
The first call to ImageAllocateColor( ) sets the background color. Additional calls allocate
colors for drawing lines, shapes, or text. Therefore, set the background color to 255, 255, 255
and then grab a gray pen with ImageAllocateColor($image, 204, 204, 204). It may
seem odd that the background color is determined by the order ImageAllocateColor() is
called and not by a separate function. But, that's how things work in GD, so PHP respects the
convention.
Call ImageFilledRectangle( ) to place a box onto the canvas.
ImageFilledRectangle( ) takes many parameters: the image to draw on, the x and y
coordinates of the upper left corner of the rectangle, the x and y coordinates of the lower right
corner of the rectangle, and finally, the color to use to draw the shape. Tell
ImageFilledRectangle( ) to draw a rectangle on $image, starting at (50,10) and going
to (150,40), in the color gray:
ImageFilledRectangle($image, 50, 10, 150, 40, $gray);
Unlike a Cartesian graph, (0,0) is not in the lower left corner; instead, it's in the upper left
corner. So, the vertical coordinate of the spot 10 pixels from the top of a 50 pixel high canvas
is 10 because it's 10 pixels down from the top of the canvas. It's not 40, because you measure
from the top down, not the bottom up. And it's not -10, because down is considered the
positive direction, not the negative one.
Now that the image is all ready to go, you can serve it up. First, send a Content-type
header to let the browser know what type of image you're sending. In this case, we display a
PNG. Next, have PHP write the PNG image out using ImagePNG( ) . Once the image is sent,
your task is over:
header('Content-Type: image/png'); ImagePNG($image);

To write the image to disk instead of sending it to the browser, provide a second argument to
ImagePNG( ) with where to save the file:
ImagePng($image, '/path/to/your/new/image.png');
Since the file isn't going to the browser, there's no need to call header( ). Make sure to
specify a path and an image name, and be sure PHP has permission to write to that location.
PHP cleans up the image when the script ends, but, if you wish to manually deallocate the
memory used by the image, calling ImageDestroy($image) forces PHP to get rid of the
image immediately.
Recipe 15.2 Drawing Lines, Rectangles, and Polygons
15.2.1 Problem
You want to draw a line, rectangle, or polygon. You also want to be able to control if the
rectangle or polygon is open or filled in. For example, you want to be able to draw bar charts
or create graphs of stock quotes.
15.2.2 Solution
To draw a line, use ImageLine( ):
ImageLine($image, $x1, $y1, $x2, $y2, $color);
To draw an open rectangle, use ImageRectangle( ):
ImageRectangle($image, $x1, $y1, $x2, $y2, $color);
To draw a solid rectangle, use ImageFilledRectangle( ) :
ImageFilledRectangle($image, $x1, $y1, $x2, $y2, $color);
To draw an open polygon, use ImagePolygon( ):
$points = array($x1, $y1, $x2, $y2, $x3, $y3); ImagePolygon($image, $points, count($points)/2, $color);
To draw a filled polygon, use ImageFilledPolygon( ):
$points = array($x1, $y1, $x2, $y2, $x3, $y3); ImageFilledPolygon($image, $points, count($points)/2, $color);
15.2.3 Discussion
The prototypes for all five functions in the Solution are similar. The first parameter is the
canvas to draw on. The next set of parameters are the x and y coordinates to specify where

GD should draw the shape. In ImageLine( ), the four coordinates are the end points of the
line, and in ImageRectangle( ), they're the opposite corners of the rectangle. For example,
ImageLine($image, 0, 0, 100, 100, $color) produces a diagonal line. Passing the same
parameters to ImageRectangle( ) produces a rectangle with corners at (0,0), (100,0),
(0,100), and (100,100). Both shapes are shown in Figure 15-2.
Figure 15-2. A diagonal line and a square
The ImagePolygon( ) function is slightly different because it can accept a variable number
of vertices. Therefore, the second parameter is an array of x and y coordinates. The function
starts at the first set of points and draws lines from vertex to vertex before finally completing
the figure by connecting back to the original point. You must have a minimum of three
vertices in your polygon (for a total of six elements in the array). The third parameter is the
number of vertices in the shape; since that's always half of the number of elements in the
array of points, a flexible value for this is count($points) / 2 because it allows you to
update the array of vertices without breaking the call to ImageLine().
Last, all the functions take a final parameter that specifies the drawing color. This is usually a
value returned from ImageColorAllocate( ) but can also be the constants
IMG_COLOR_STYLED or IMG_COLOR_STYLEDBRUSHED, if you want to draw nonsolid lines, as
discussed in Recipe 15.4.
These functions all draw open shapes. To get GD to fill the region with the drawing color, use
ImageFilledRectangle( ) and ImageFilledPolygon( ) with the identical set of
arguments as their unfilled cousins.
15.2.4 See Also
Recipe 15.3 for more on drawing other types of shapes; Recipe 15.4 for more on drawing with
styles and brushes; documentation on ImageLine( ) at http://www.php.net/imageline,
ImageRectangle( ) at http://www.php.net/imagerectangle, ImagePolygon( ) at
http://www.php.net/imagepolygon, and ImageColorAllocate( ) at
http://www.php.net/imagecolorallocate.
Recipe 15.3 Drawing Arcs, Ellipses, and Circles
15.3.1 Problem

You want to draw open or filled curves. For example, you want to draw a pie chart showing
the results of a user poll.
15.3.2 Solution
To draw an arc, use ImageArc( ):
ImageArc($image, $x, $y, $width, $height, $start, $end, $color);
To draw an ellipse, use ImageArc( ) and set $start to 0 and $end to 360:
ImageArc($image, $x, $y, $width, $height, 0, 360, $color);
To draw a circle, use ImageArc( ), set $start to 0, set $end to 360, and use the same
value for both $width and $height:
ImageArc($image, $x, $y, $diameter, $diameter, 0, 360, $color);
15.3.3 Discussion
Because the ImageArc( ) function is highly flexible, you can easily create common curves
such as ellipses and circles by passing it the right values. Like many GD functions, the first
parameter is the canvas. The next two parameters are the x and y coordinates for the center
position of the arc. After that comes the arc width and height. Since a circle is an arc with the
same width and height, to draw a circle, set both numbers to your circle's diameter.
The sixth and seventh parameters are the starting and ending angles, in degrees. A value of 0
is at 3 o'clock. The arc then moves clockwise, so 90 is at 6 o'clock, 180 is at 9 o'clock, and
270 is at the top of the hour. (Be careful, this behavior is not consistent among all GD
functions. For example, when you rotate text, you turn in a counter-clockwise direction.) Since
the arc's center is located at ($x,$y), if you draw a semicircle from 0 to 180, it doesn't start
at ($x,$y); instead, it begins at ($x+($diameter/2),$y).
As usual, the last parameter is the arc color.
For example, this draws an open black circle with a diameter of 100 pixels centered on the
canvas, as shown in left half of Figure 15-3:
$image = ImageCreate(100,100); $bg = ImageColorAllocate($image, 255, 255, 255); $black = ImageColorAllocate($image, 0, 0, 0); ImageArc($image, 50, 50, 100, 100, 0, 360, $black);
To produce a solid-colored ellipse or circle, call ImageFillToBorder( ):
ImageArc($image, $x, $y, $diameter, $diameter, 0, 360, $color); ImageFillToBorder($image, $x, $y, $color, $color);

The ImageFillToBorder( ) function floods a region beginning at ($x,$y) with the color
specified as the last parameter until it hits the edge of the canvas or runs into a line with the
same color as the third parameter.
Incorporating this into the earlier example gives:
$image = ImageCreate(100,100); $bg = ImageColorAllocate($image, 255, 255, 255); $black = ImageColorAllocate($image, 0, 0, 0); ImageArc($image, 50, 50, 100, 100, 0, 360, $black); ImageFillToBorder($image, 50, 50, $black, $black);
The output is shown in the right half of Figure 15-3.
Figure 15-3. An open black circle and a filled black circle
If you're running GD 2.x, you can call ImageFilledArc( ) and pass in a final parameter
that describes the fill style. GD 2.x also supports specific ImageEllipse( ) and
ImageFilledEllipse( ) functions.
15.3.4 See Also
Recipe 15.2 for more on drawing other types of shapes; Recipe 15.4 for more on drawing with
styles and brushes; documentation on ImageArc( ) at http://www.php.net/imagearc,
ImageFilledArc( ) at http://www.php.net/imagefilledarc, and ImageFillToBorder( )
at http://www.php.net/imagefilltoborder.
Recipe 15.4 Drawing with Patterned Lines
15.4.1 Problem
You want to draw shapes using line styles other than the default, a solid line.
15.4.2 Solution
To draw shapes with a patterned line, use ImageSetStyle( ) and pass in
IMG_COLOR_STYLED as the image color:
$black = ImageColorAllocate($image, 0, 0, 0); $white = ImageColorAllocate($image, 255, 255, 255);

// make a two-pixel thick black and white dashed line $style = array($black, $black, $white, $white); ImageSetStyle($image, $style); ImageLine($image, 0, 0, 50, 50, IMG_COLOR_STYLED); ImageFilledRectangle($image, 50, 50, 100, 100, IMG_COLOR_STYLED);
15.4.3 Discussion
The line pattern is defined by an array of colors. Each element in the array is another pixel in
the brush. It's often useful to repeat the same color in successive elements, as this increases
the size of the stripes in the pattern.
For instance, here is code for a square drawn with alternating white and black pixels, as shown
in left side of Figure 15-4:
$style = array($white, $black); ImageSetStyle($image, $style); ImageFilledRectangle($image, 0, 0, 49, 49, IMG_COLOR_STYLED);
This is the same square, but drawn with a style of five white pixels followed by five black ones,
as shown in the middle of Figure 15-4:
$style = array($white, $white, $white, $white, $white, $black, $black, $black, $black, $black); ImageSetStyle($image, $style); ImageFilledRectangle($image, 0, 0, 49, 49, IMG_COLOR_STYLED);
Figure 15-4. Three squares with alternating white and black pixels
The patterns look completely different, even though both styles are just white and black
pixels.
If the brush doesn't fit an integer number of times in the shape, it wraps around. In the
previous examples, the square is 50 pixels wide. Since the first brush is 2 pixels long, it fits
exactly 25 times; the second brush is 10 pixels, so it fits 5 times. But, if you make the square
45 by 45 and used the second brush, you don't get straight lines as you did previously, as
shown in the right side of Figure 15-4:
ImageFilledRectangle($image, 0, 0, 44, 44, IMG_COLOR_STYLED);
15.4.4 See Also
Recipe 15.2 and Recipe 15.3 for more on drawing shapes; documentation on
ImageSetStyle( ) at http://www.php.net/imagesetstyle.

Recipe 15.5 Drawing Text
15.5.1 Problem
You want to draw text as a graphic. This allows you to make dynamic buttons or hit counters.
15.5.2 Solution
For built-in GD fonts, use ImageString( ):
ImageString($image, 1, $x, $y, 'I love PHP Cookbook', $text_color);
For TrueType fonts, use ImageTTFText( ):
ImageTTFText($image, $size, 0, $x, $y, $text_color, '/path/to/font.ttf', 'I love PHP Cookbook');
For PostScript Type 1 fonts, use ImagePSLoadFont( ) and ImagePSText( ):
$font = ImagePSLoadFont('/path/to/font.pfb'); ImageString($image, 'I love PHP Cookbook', $font, $size, $text_color, $background_color, $x, $y);
15.5.3 Discussion
Call ImageString( ) to place text onto the canvas. Like other GD drawing functions,
ImageString( ) needs many inputs: the image to draw on, the font number, the x and y
coordinates of the upper right position of the first characters, the text string to display, and
finally, the color to use to draw the string.
With ImageString( ), there are five possible font choices, from 1 to 5. Font number 1 is the
smallest, while font 5 is the largest, as shown in Figure 15-5. Anything above or below that
range generates a size equivalent to the closest legal number.
Figure 15-5. Built-in GD font sizes
To draw text vertically instead of horizontally, use the function ImageStringUp( ) instead.
Figure 15-6 shows the output.
ImageStringUp($image, 1, $x, $y, 'I love PHP Cookbook', $text_color);

Figure 15-6. Vertical text
To use TrueType fonts, you must also install the FreeType library and configure PHP during
installation to use FreeType. The FreeType main site is http://www.freetype.org. To enable
FreeType 1.x support, use --with-ttf and for FreeType 2.x, pass --with-freetype-
dir=DIR.
Like ImageString( ), ImageTTFText( ) prints a string to a canvas, but it takes slightly
different options and needs them in a different order:
ImageTTFText($image, $size, $angle, $x, $y, $text_color, '/path/to/font.ttf', $text);
The $size argument is the font size in pixels; $angle is an angle of rotation, in degrees
going counter-clockwise; and /path/to/font.ttf is the pathname to TrueType font file. Unlike
ImageString( ), ($x,$y) are the lower left coordinates of the baseline for the first
character. (The baseline is where the bottom of most characters sit. Characters such as "g"
and "j" extend below the baseline; "a" and "z" sit on the baseline.)
PostScript Type 1 fonts require t1lib to be installed. It can be downloaded from
ftp://sunsite.unc.edu/pub/Linux/libs/graphics/ and built into PHP using --with-t1lib.
Again, the syntax for printing text is similar but not the same:
$font = ImagePSLoadFont('/path/to/font.pfb'); ImagePSText($image, $text, $font, $size, $text_color, $background_color, $x, $y); ImagePSFreeFont($font);
First, PostScript font names can't be directly passed into ImagePSText( ). Instead, they
must be loaded using ImagePSLoadFont( ). On success, the function returns a font
resource usable with ImagePSText( ). In addition, besides specifying a text color, you also
pass a background color to be used in antialiasing calculations. The ($x,$y) positioning is
akin to the how the TrueType library does it. Last, when you're done with a font, you can
release it from memory by calling ImagePSFreeFont( ).
Besides the mandatory arguments listed above, ImagePSText( ) also accepts four optional
ones, in this order: space , tightness, angle, and antialias_steps. You must include
all four or none of the four (i.e., you can't pass one, two, or three of these arguments). The
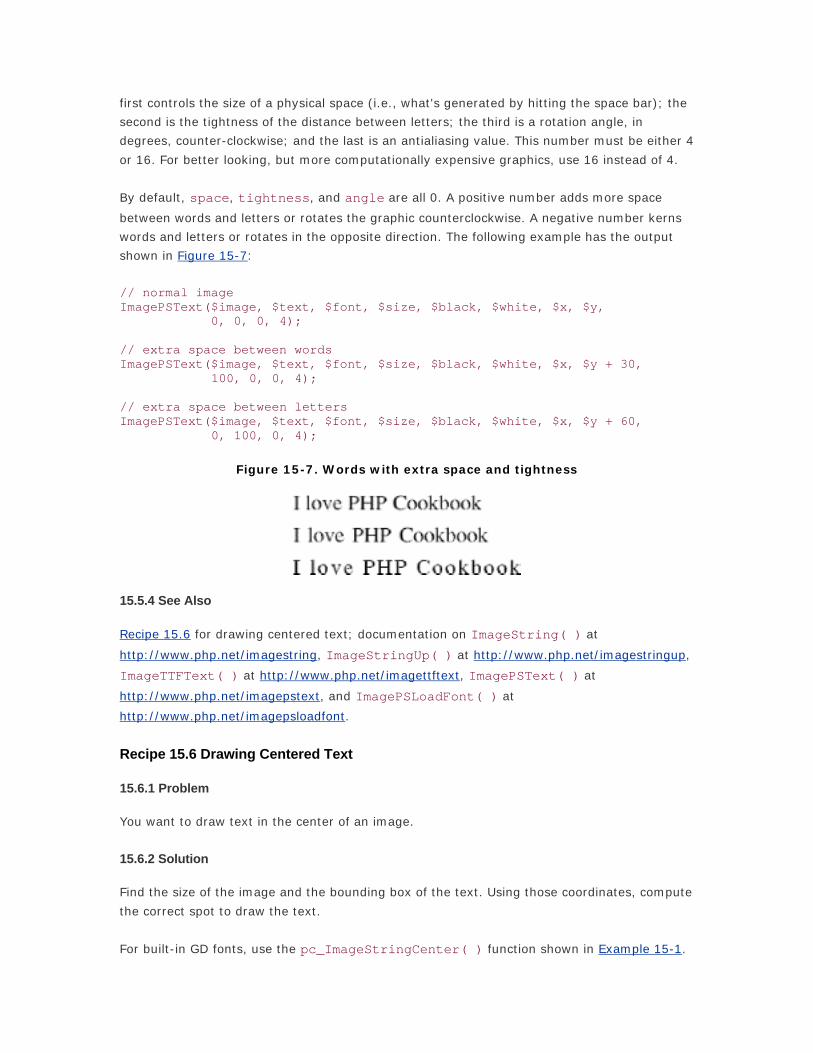
first controls the size of a physical space (i.e., what's generated by hitting the space bar); the
second is the tightness of the distance between letters; the third is a rotation angle, in
degrees, counter-clockwise; and the last is an antialiasing value. This number must be either 4
or 16. For better looking, but more computationally expensive graphics, use 16 instead of 4.
By default, space, tightness, and angle are all 0. A positive number adds more space
between words and letters or rotates the graphic counterclockwise. A negative number kerns
words and letters or rotates in the opposite direction. The following example has the output
shown in Figure 15-7:
// normal image ImagePSText($image, $text, $font, $size, $black, $white, $x, $y, 0, 0, 0, 4); // extra space between words ImagePSText($image, $text, $font, $size, $black, $white, $x, $y + 30, 100, 0, 0, 4); // extra space between letters ImagePSText($image, $text, $font, $size, $black, $white, $x, $y + 60, 0, 100, 0, 4);
Figure 15-7. Words with extra space and tightness
15.5.4 See Also
Recipe 15.6 for drawing centered text; documentation on ImageString( ) at
http://www.php.net/imagestring, ImageStringUp( ) at http://www.php.net/imagestringup,
ImageTTFText( ) at http://www.php.net/imagettftext, ImagePSText( ) at
http://www.php.net/imagepstext, and ImagePSLoadFont( ) at
http://www.php.net/imagepsloadfont.
Recipe 15.6 Drawing Centered Text
15.6.1 Problem
You want to draw text in the center of an image.
15.6.2 Solution
Find the size of the image and the bounding box of the text. Using those coordinates, compute
the correct spot to draw the text.
For built-in GD fonts, use the pc_ImageStringCenter( ) function shown in Example 15-1.

Example 15-1. pc_ImageStringCenter( )
function pc_ImageStringCenter($image, $text, $font) { // font sizes $width = array(1 => 5, 6, 7, 8, 9); $height = array(1 => 6, 8, 13, 15, 15); // find the size of the image $xi = ImageSX($image); $yi = ImageSY($image); // find the size of the text $xr = $width[$font] * strlen($text); $yr = $height[$font]; // compute centering $x = intval(($xi - $xr) / 2); $y = intval(($yi - $yr) / 2); return array($x, $y); }
For example:
list($x, $y) = pc_ImageStringCenter($image, $text, $font); ImageString($image, $font, $x, $y, $text, $fore);
For PostScript fonts, use the pc_ImagePSCenter( ) function shown in Example 15-2.
Example 15-2. pc_ImagePSCenter( )
function pc_ImagePSCenter($image, $text, $font, $size, $space = 0, $tightness = 0, $angle = 0) { // find the size of the image $xi = ImageSX($image); $yi = ImageSY($image); // find the size of the text list($xl, $yl, $xr, $yr) = ImagePSBBox($text, $font, $size, $space, $tightness, $angle); // compute centering $x = intval(($xi - $xr) / 2); $y = intval(($yi + $yr) / 2); return array($x, $y); }
For example:
list($x, $y) = pc_ImagePSCenter($image, $text, $font, $size); ImagePSText($image, $text, $font, $size, $fore, $back, $x, $y);
For TrueType fonts, use the pc_ImageTTFCenter( ) function shown in Example 15-3.

Example 15-3. pc_ImageTTFCenter( )
function pc_ImageTTFCenter($image, $text, $font, $size) { // find the size of the image $xi = ImageSX($image); $yi = ImageSY($image); // find the size of the text $box = ImageTTFBBox($size, $angle, $font, $text); $xr = abs(max($box[2], $box[4])); $yr = abs(max($box[5], $box[7])); // compute centering $x = intval(($xi - $xr) / 2); $y = intval(($yi + $yr) / 2); return array($x, $y); }
For example:
list($x, $y) = pc_ImageTTFCenter($image, $text, $font, $size); ImageTTFText($image, $size, $angle, $x, $y, $fore, $font, $text);
15.6.3 Discussion
All three solution functions return the x and y coordinates for drawing. Of course, depending
on font type, size, and settings, the method used to compute these coordinates differs.
For PostScript Type 1 fonts, pass pc_ImagePSCenter( ) an image allocated from
ImageCreate( ) (or one of its friends) and a number of parameters to specify how to draw
the text. The first three parameters are required: the text to be drawn, the font, and the font
size. The next three are optional: the space in a font, the tightness between letters, and an
angle for rotation in degrees.
Inside the function, use ImageSX( ) and ImageSY( ) to find the size of the canvas; they
return the width and height of the graphic. Then call ImagePSBBox( ) . It returns four
integers: the x and y coordinates of the lower-leftmost location the text and the x and y
coordinates of the upper-rightmost location. Because the coordinates are relative to the
baseline of the text, it's typical for these not to be 0. For instance, a lowercase "g" hangs
below the bottom of the rest of the letters; so, in that case, the lower left y value is negative.
Armed with these six values, we can now calculate the correct centering values. Because
coordinates of the canvas have (0,0) in the upper left corner, but ImagePSBText( ) wants
the lower left corner, the formula for finding $x and $y isn't the same. For $x, we take the
difference between the size of the canvas and the text. This gives the amount of whitespace
that surrounds the text. Then we divide that number by two, to find the number of pixels we
should leave to the left of the text. For $y, we do the same, but add $yi and $yr. By adding

these numbers, we can find the coordinate of the far side of the box, which is what is needed
here because of the inverted way the y coordinate is entered in GD.
We intentionally ignore the lower left coordinates in making these calculations. Because the
bulk of the text sits above the baseline, adding the descending pixels into the centering
algorithm actually worsens the code; it appears off-center to the eye.
To center text, put it together like this:
function pc_ImagePSCenter($image, $text, $font, $size, $space = 0, $tightness = 0, $angle = 0) { // find the size of the image $xi = ImageSX($image); $yi = ImageSY($image); // find the size of the text list($xl, $yl, $xr, $yr) = ImagePSBBox($text, $font, $size, $space, $tightness, $angle); // compute centering $x = intval(($xi - $xr) / 2); $y = intval(($yi + $yr) / 2); return array($x, $y); } $image = ImageCreate(500,500); $text = 'PHP Cookbook Rules!'; $font = ImagePSLoadFont('/path/to/font.pfb'); $size = 20; $black = ImageColorAllocate($image, 0, 0, 0); $white = ImageColorAllocate($image, 255, 255, 255); list($x, $y) = pc_ImagePSCenter($image, $text, $font, $size); ImagePSText($image, $text, $font, $size, $white, $black, $x, $y); ImagePSFreeFont($font); header('Content-type: image/png'); ImagePng($image); ImageDestroy($image);
Unfortunately, this example doesn't work for GD's built-in fonts nor for TrueType fonts.
There's no function to return the size of a string using the built-in fonts, and ImageTTFBBox(
) returns eight values instead of four. With a few modifications, however, we can
accommodate these differences.
Because the built-in fonts are fixed-width, we can easily measure the size of a character to
create a function that returns the size of the text based on its length. Table 15-1 isn't 100%
accurate, but it should return results within one or two pixels, which should be good enough
for most cases.

Table 15-1. GD Built-in font character sizes
Font number Width Height
1 5 6
2 6 8
3 7 13
4 8 15
5 9 15
Inside pc_ImageStringCenter( ) , we calculate the length of the string as an integral
multiple based on its length; the height is just one character high. Note that ImageString(
) takes its y coordinate as the uppermost part of the text, so we should switch the sign back
to a minus when you compute $y.
Here is an example using all five fonts that centers text horizontally:
$text = 'The quick brown fox jumps over the lazy dog.'; for ($font = 1, $y = 5; $font <= 5; $font++, $y += 20) { list($x, $y) = pc_ImageStringCenter($image, $text, $font); ImageString($image, $font, $x, $y, $text, $color); }
The output is shown in Figure 15-8.
Figure 15-8. Centered GD built-in fonts
For TrueType fonts, we need to use ImageTTFBBox( ) or the more modern ImageFtBBox(
). (The function with TTF in the name is for FreeType version 1.x; the one with Ft is for
FreeType 2.x.) It returns eight numbers: the (x,y) coordinates of the four corners of the text
starting in the lower left and moving around counter clockwise. So, the second two
coordinates are for the lower right spot, and so on.
To make pc_ImageTTFCenter( ), begin with pc_ImagePSCenter( ) and swap this line:
// find the size of the text list($xl, $yl, $xr, $yr) = ImagePSBBox($text, $font, $size, $space, $tightness, $angle);
with these:

// find the size of the text $box = ImageTTFBBox($size, $angle, $font, $text); $xr = abs(max($box[2], $box[4])); $yr = abs(max($box[5], $box[7]));
Here's an example of pc_ImageTTFCenter() in use:
list($x, $y) = pc_ImageTTFCenter($image, $text, $font, $size); ImageTTFText($image, $size, $angle, $x, $y, $white, $black, '/path/to/font.ttf', $text);
15.6.4 See Also
Recipe 15.6 for more on drawing text; Recipe 15.7 for more on centering text; documentation
on ImageSX( ) at http://www.php.net/imagesx, ImageSY( ) at
http://www.php.net/imagesy, ImagePSBBox( ) at http://www.php.net/imagepsbbox,
ImageTTFBBox( ) at http://www.php.net/imagettfbbox, ImageFtBBox( ) at
http://www.php.net/imageftbbox.
Recipe 15.7 Building Dynamic Images
15.7.1 Problem
You want to create an image based on a existing image template and dynamic data (typically
text). For instance, you want to create a hit counter.
15.7.2 Solution
Load the template image, find the correct position to properly center your text, add the text to
the canvas, and send the image to the browser:
// Configuration settings $image = ImageCreateFromPNG('button.png'); $text = $_GET['text']; $font = ImagePSLoadFont('Times'); $size = 24; $color = ImageColorAllocate($image, 0, 0, 0); // black $bg_color = ImageColorAllocate($image, 255, 255, 255); // white // Print centered text list($x, $y) = pc_ImagePSCenter($image, $text, $font, $size); ImagePSText($image, $text, $font, $size, $color, $bg_color, $x, $y); // Send image header('Content-type: image/png'); ImagePNG($image); // Clean up ImagePSFreeFont($font); ImageDestroy($image);
15.7.3 Discussion

Building dynamic images with GD is easy; all you need to do is combine a few recipes
together. At the top of the code in the Solution, we load in an image from a stock template
button; it acts as the background on which we overlay the text. We define the text to come
directly from the query string. Alternatively, we can pull the string from a database (in the
case of access counters) or a remote server (stock quotes or weather report icons).
After that, we continue with the other settings: loading a font and specifying its size, color,
and background color. Before printing the text, however, we need to compute its position;
pc_ImagePSCenter( ) from Recipe 15.7 nicely solves this task. Last, we serve the image,
and deallocate the font and image from memory.
For example, the following code generates a page of HTML and image tags using dynamic
buttons, as shown in Figure 15-9:
<?php if (isset($_GET['button'])) { // Configuration settings $image = ImageCreateFromPNG('button.png'); $text = $_GET['button']; // dynamically generated text $font = ImagePSLoadFont('Times'); $size = 24; $color = ImageColorAllocate($image, 0, 0, 0); // black $bg_color = ImageColorAllocate($image, 255, 255, 255); // white // Print centered text list($x, $y) = pc_ImagePSCenter($image, $text, $font, $size); ImagePSText($image, $text, $font, $size, $color, $bg_color, $x, $y); // Send image header('Content-type: image/png'); ImagePNG($image); // Clean up ImagePSFreeFont($font); ImageDestroy($image); } else { ?> <html> <head> <title>Sample Button Page</title> </head> <body> <img src="<?php echo $_SERVER['PHP_SELF']; ?>?button=Previous" alt="Previous" width="132" height="46"> <img src="<?php echo $_SERVER['PHP_SELF']; ?>?button=Next" alt="Next" width="132" height="46"> </body> </html> <?php } ?>
Figure 15-9. Sample button page
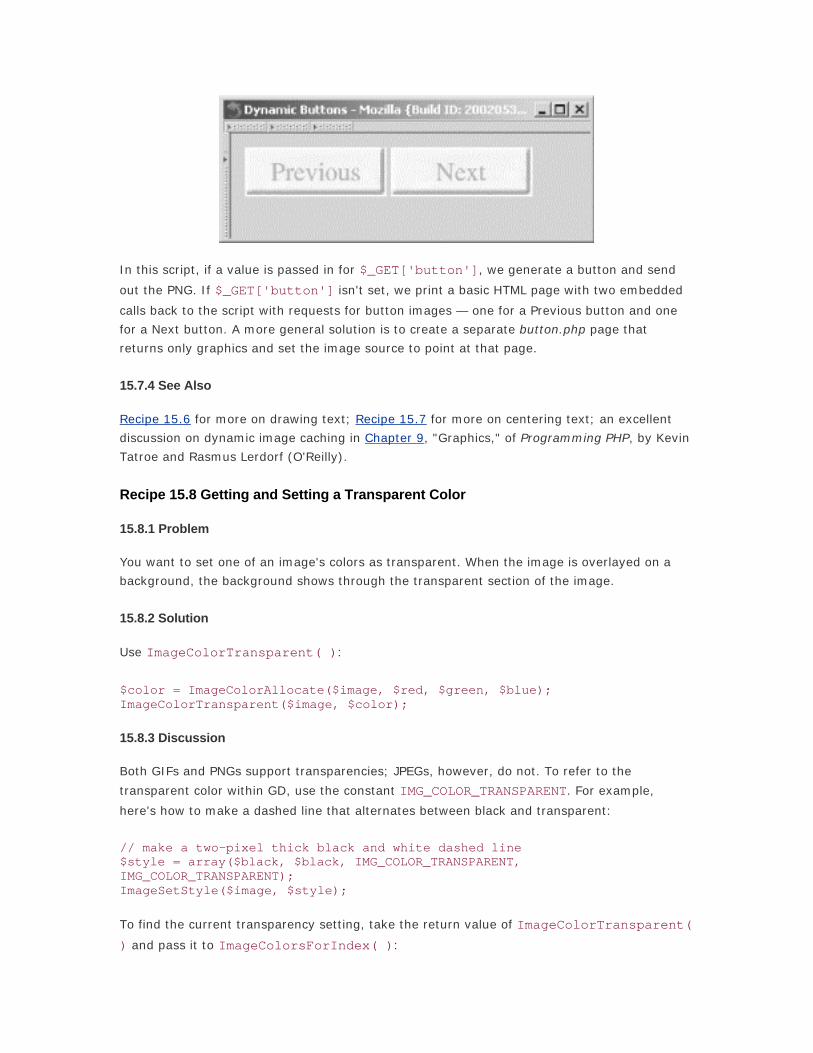
In this script, if a value is passed in for $_GET['button'], we generate a button and send
out the PNG. If $_GET['button'] isn't set, we print a basic HTML page with two embedded
calls back to the script with requests for button images — one for a Previous button and one
for a Next button. A more general solution is to create a separate button.php page that
returns only graphics and set the image source to point at that page.
15.7.4 See Also
Recipe 15.6 for more on drawing text; Recipe 15.7 for more on centering text; an excellent
discussion on dynamic image caching in Chapter 9, "Graphics," of Programming PHP, by Kevin
Tatroe and Rasmus Lerdorf (O'Reilly).
Recipe 15.8 Getting and Setting a Transparent Color
15.8.1 Problem
You want to set one of an image's colors as transparent. When the image is overlayed on a
background, the background shows through the transparent section of the image.
15.8.2 Solution
Use ImageColorTransparent( ):
$color = ImageColorAllocate($image, $red, $green, $blue); ImageColorTransparent($image, $color);
15.8.3 Discussion
Both GIFs and PNGs support transparencies; JPEGs, however, do not. To refer to the
transparent color within GD, use the constant IMG_COLOR_TRANSPARENT. For example,
here's how to make a dashed line that alternates between black and transparent:
// make a two-pixel thick black and white dashed line $style = array($black, $black, IMG_COLOR_TRANSPARENT, IMG_COLOR_TRANSPARENT); ImageSetStyle($image, $style);
To find the current transparency setting, take the return value of ImageColorTransparent(
) and pass it to ImageColorsForIndex( ):

$transparent = ImageColorsForIndex($image, ImageColorTransparent($image)); print_r($transparent); Array ( [red] => 255 [green] => 255 [blue] => 255 )
The ImageColorsForIndex( ) function returns an array with the red, green, and blue
values. In this case, the transparent color is white.
15.8.4 See Also
Documentation on ImageColorTransparent( ) at
http://www.php.net/imagecolortransparent and on ImageColorsForIndex( ) at
http://www.php.net/imagecolorsforindex.
Recipe 15.9 Serving Images Securely
15.9.1 Problem
You want to control who can view a set of images.
15.9.2 Solution
Don't keep the images in your document root, but store them elsewhere. To deliver a file,
manually open it and send it to the browser:
header('Content-Type: image/png'); readfile('/path/to/graphic.png');
15.9.3 Discussion
The first line in the Solution sends the Content-type header to the browser, so the browser
knows what type of object is coming and displays it accordingly. The second opens a file off a
disk (or from a remote URL) for reading, reads it in, dumps it directly to the browser, and
closes the file.
The typical way to serve up an image is to use an <img> tag and set the src attribute to
point to a file on your web site. If you want to protect those images, you probably should use
some form of password authentication. One method is HTTP Basic Authentication, which is
covered in Recipe 8.10.
The typical way, however, may not always be the best. First, what happens if you want to
restrict the files people can view, but you don't want to make things complex by using
usernames and passwords? One option is to link only to the files; if users can't click on the
link, they can't view the file. They might, however, bookmark old files, or they may also try

and guess other filenames based on your naming scheme and manually enter the URL into the
browser.
If your content is embargoed, you don't want people to be able to guess your naming scheme
and view images. When information is embargoed, a select group of people, usually reporters,
are given a preview release, so they can write stories about the topic or be ready to distribute
it the moment the embargo is lifted. You can fix this by making sure only legal content is
under the document root, but this requires a lot of file shuffling back and forth from directory
to directory. Instead, you can keep all the files in one constant place, and deliver only files
that pass a check inside your code.
For example, let's say you have a contract with a publishing corporation to redistribute one of
their comics on your web site. However, they don't want you to create a virtual archive, so
you agree to let your users view only the last two weeks worth of strips. For everything else,
they'll need to go to the official site. Also, you may get comics in advance of their publication
date, but you don't want to let people get a free preview; you want them to keep coming back
to your site on a daily basis.
Here's the solution. Files arrive named by date, so it's easy to identify which files belong to
which day. Now, to lock out strips outside the rolling 14-day window, use code like this:
// display a comic if it's less than 14 days old and not in the future // calculate the current date list($now_m,$now_d,$now_y) = explode(',',date('m,d,Y')); $now = mktime(0,0,0,$now_m,$now_d,$now_y); // two hour boundary on either side to account for dst $min_ok = $now - 14*86400 - 7200; // 14 days ago $max_ok = $now + 7200; // today // find the time stamp of the requested comic $asked_for = mktime(0,0,0,$_REQUEST['mo'],$_REQUEST['dy'],$_REQUEST['yr']); // compare the dates if (($min_ok > $asked_for) || ($max_ok < $asked_for)) { echo 'You are not allowed to view the comic for that day.'; } else { header('Content-type: image/png'); readfile("/www/comics/$_REQUEST['mo']$_REQUEST['dy'] $_REQUEST['yr'].png"); }
15.9.4 See Also
Recipe 18.6 for more on reading files.

Recipe 15.10 Program: Generating Bar Charts from Poll Results
When displaying the results of a poll, it can be more effective to generate a colorful bar chart
instead of just printing the results as text. The function shown in Example 15-4 uses GD to
create an image that displays the cumulative responses to a poll question.
Example 15-4. Graphical bar charts
function pc_bar_chart($question, $answers) { // define colors to draw the bars $colors = array(array(255,102,0), array(0,153,0), array(51,51,204), array(255,0,51), array(255,255,0), array(102,255,255), array(153,0,204)); $total = array_sum($answers['votes']); // define some spacing values and other magic numbers $padding = 5; $line_width = 20; $scale = $line_width * 7.5; $bar_height = 10; $x = $y = $padding; // allocate a large palette for drawing, since we don't know // the image length ahead of time $image = ImageCreate(150, 500); $bg_color = ImageColorAllocate($image, 224, 224, 224); $black = ImageColorAllocate($image, 0, 0, 0); // print the question $wrapped = explode("\n", wordwrap($question, $line_width)); foreach ($wrapped as $line) { ImageString($image, 3, $x, $y , $line, $black); $y += 12; } $y += $padding; // print the answers for ($i = 0; $i < count($answers['answer']); $i++) { // format percentage $percent = sprintf('%1.1f', 100*$answers['votes'][$i]/$total); $bar = sprintf('%d', $scale*$answers['votes'][$i]/$total); // grab color $c = $i % count($colors); // handle cases with more bars than colors $text_color = ImageColorAllocate($image, $colors[$c][0], $colors[$c][1], $colors[$c][2]); // draw bar and percentage numbers ImageFilledRectangle($image, $x, $y, $x + $bar, $y + $bar_height, $text_color); ImageString($image, 3, $x + $bar + $padding, $y,

"$percent%", $black); $y += 12; // print answer $wrapped = explode("\n", wordwrap($answers['answer'][$i], $line_width)); foreach ($wrapped as $line) { ImageString($image, 2, $x, $y, $line, $black); $y += 12; } $y += 7; } // crop image by copying it $chart = ImageCreate(150, $y); ImageCopy($chart, $image, 0, 0, 0, 0, 150, $y); // deliver image header ('Content-type: image/png'); ImagePNG($chart); // clean up ImageDestroy($image); ImageDestroy($chart); }
To call this program, create an array holding two parallel arrays: $answers['answer'] and
$answer['votes']. Element $i of each array holds the answer text and the total number of
votes for answer $i. Figure 15-10 shows this sample output.
// Act II. Scene II. $question = 'What a piece of work is man?'; $answers['answer'][ ] = 'Noble in reason'; $answers['votes'][ ] = 29; $answers['answer'][ ] = 'Infinite in faculty'; $answers['votes'][ ] = 22; $answers['answer'][ ] = 'In form, in moving, how express and admirable'; $answers['votes'][ ] = 59; $answers['answer'][ ] = 'In action how like an angel'; $answers['votes'][ ] = 45; pc_bar_chart($question, $answers);
Figure 15-10. Graphical bar chart of poll results

Here the answers are manually assigned, but for a real poll, this data could be pulled from a
database instead.
This program is a good start, but because it uses the built-in GD fonts, there are a lot of magic
numbers embedded in the program corresponding to the font height and width. Also, the
amount of space between each answer is hardcoded. If you modify this to handle more
advanced fonts, such as PostScript or TrueType, you'll need to update the algorithms that
control those numbers.
At the top of the function, a bunch of RGB combinations are defined; they are used as the
colors to draw the bars. A variety of constants are broken out, such as $line_width, which
is the maximum number of characters per line. The $bar_height variable determines how
high the bars should be, and $scale scales the length of the bar as a function of the longest
possible line. $padding is used to push the results five pixels away from the edge of the
canvas.
We then make a very large canvas to draw the chart; later, we will crop the canvas down to
size, but it can be difficult to know ahead of time how large our total size will be. The default
background color of the bar chart is (224, 224, 224), or a light gray.
In order to restrict the width of the chart to a reasonable size, we use wordwrap( ) to break
our $question down to size and explode( ) it on \n. This gives us an array of correctly-
sized lines, which we loop on to print out one line at a time.
After printing the question, we move on to the answers. First, we format the results numbers
with sprintf( ). To format the total percentage of votes for an answer as a floating-point
number with one decimal point, we use %1.1f. To find the length of the bar corresponding to
that number, you compute a similar number, but instead of multiplying it by 100, we multiply
by a magic number, $scale, and return an integer.
The text color is pulled from the $colors array of RGB triplets. Then, we call
ImageFilledRectangle( ) to draw the bar and ImageString( ) to draw the percentage

text to the right of the bar. After adding some padding, we print the answer using the same
algorithm used to print the question.
When all the answers have been printed, the total size of bar chart is stored in $y. Now we
can correctly crop the graphic to size, but there's no ImageCrop( ) function. To work around
this, we make a new canvas of the appropriate size and ImageCopy( ) over the part of the
original canvas you want to keep. Then we serve the correctly sized image as a PNG using
ImagePNG( ) and clean up with two calls to ImageDestroy( ).
As we mentioned at the beginning of this section, this is just a quick-and-dirty function to
print bar charts. It works, and solves some problems, such a wrapped lines, but isn't 100%
perfect. For instance, it's not very customizable. Many settings are baked directly into the
code. Still, it shows how to put together a variety of GD's functions to create a useful graphical
application.
Chapter 16. Internationalization and Localization
Introduction
Listing Available Locales
Using a Particular Locale
Setting the Default Locale
Localizing Text Messages
Localizing Dates and Times
Localizing Currency Values
Localizing Images
Localizing Included Files
Managing Localization Resources
Using gettext
Reading or Writing Unicode Characters

16.1 Introduction
While everyone who programs in PHP has to learn some English eventually to get a handle on
its function names and language constructs, PHP can create applications that speak just about
any language. Some applications need to be used by speakers of many different languages.
Taking an application written for French speakers and making it useful for German speakers is
made easier by PHP's support for internationalization and localization.
Internationalization (often abbreviated I18N[1]) is the process of taking an application
designed for just one locale and restructuring it so that it can be used in many different
locales. Localization (often abbreviated L10N[2]) is the process of adding support for a new
locale to an internationalized application.
[1] The word "internationalization" has 18 letters between the first "i" and the last "n."
[2] The word "localization" has 10 letters between the first "l" and the "n."
A locale is a group of settings that describe text formatting and language customs in a
particular area of the world. The settings are divided into six categories:
LC_COLLATE
These settings control text sorting: which letters go before and after others in alphabetical order.
LC_CTYPE
These settings control mapping between uppercase and lowercase letters as well as which characters fall into the
different character classes, such as alphanumeric characters.
LC_MONETARY
These settings describe the preferred format of currency information, such as what character to use as a decimal point
and how to indicate negative amounts.
LC_NUMERIC
These settings describe the preferred format of numeric information, such as how to group numbers and what character
is used as a thousands separator.
LC_TIME
These settings describe the preferred format of time and date information, such as names of months and days and
whether to use 24- or 12-hour time.
LC_MESSAGES
This category contains text messages used by applications that need to display information in multiple languages.

There is also a metacategory, LC_ALL, that encompasses all the categories.
A locale name generally has three components. The first, an abbreviation that indicates a
language, is mandatory. For example, "en" for English or "pt" for Portuguese. Next, after an
underscore, comes an optional country specifier, to distinguish between different countries
that speak different versions of the same language. For example, "en_US" for U.S. English and
"en_GB" for British English, or "pt_BR" for Brazilian Portuguese and "pt_PT" for Portuguese
Portuguese. Last, after a period, comes an optional character-set specifier. For example,
"zh_TW.Big5" for Taiwanese Chinese using the Big5 character set. While most locale names
follow these conventions, some don't. One difficulty in using locales is that they can be
arbitrarily named. Finding and setting a locale is discussed in Section 16.2 through Section
16.4.
Different techniques are necessary for correct localization of plain text, dates and times, and
currency. Localization can also be applied to external entities your program uses, such as
images and included files. Localizing these kinds of content is covered in Section 16.5 through
Section 16.9.
Systems for dealing with large amounts of localization data are discussed in Section 16.10 and
Section 16.11. Section 16.10 shows some simple ways to manage the data, and Section 16.11
introduces GNU gettext, a full-featured set of tools that provide localization support.
PHP also has limited support for Unicode. Converting data to and from the Unicode UTF-8
encoding is addressed in Section 16.12.
Recipe 16.2 Listing Available Locales
16.2.1 Problem
You want to know what locales your system supports.
16.2.2 Solution
Use the locale program to list available locales; locale -a prints the locales your system
supports.
16.2.3 Discussion
On Linux and Solaris systems, you can find locale at /usr/bin/locale. On Windows, locales
are listed in the Regional Options section of the Control Panel.
Your mileage varies on other operating systems. BSD, for example, includes locale support but
has no locale program to list locales. BSD locales are often stored in /usr/share/locale, so
looking in that directory may yield a list of usable locales.

While the locale system helps with many localization tasks, its lack of standardization can be
frustrating. Systems aren't guaranteed to have the same locales or even use the same names
for equivalent locales.
16.2.4 See Also
Your system's locale(1) manpage.
Recipe 16.3 Using a Particular Locale
16.3.1 Problem
You want to tell PHP to use the settings of a particular locale.
16.3.2 Solution
Call setlocale( ) with the appropriate category and locale. Here's how to use the es_US
(U.S. Spanish) locale for all categories:
setlocale(LC_ALL,'es_US');
Here's how to use the de_AT (Austrian German) locale for time and date formatting:
setlocale(LC_TIME,'de_AT');
16.3.3 Discussion
To find the current locale without changing it, call setlocale( ) with a NULL locale:
print setlocale(LC_ALL,NULL); en_US
Many systems also support a set of aliases for common locales, listed in a file such as
/usr/share/locale/locale.alias. This file is a series of lines including:
russian ru_RU.ISO-8859-5 slovak sk_SK.ISO-8859-2 slovene sl_SI.ISO-8859-2 slovenian sl_SI.ISO-8859-2 spanish es_ES.ISO-8859-1 swedish sv_SE.ISO-8859-1
The first column of each line is an alias; the second column shows the locale and character set
the alias points to. You can use the alias in calls to setlocale( ) instead of the
corresponding string the alias points to. For example, you can do:
setlocale(LC_ALL,'swedish');
instead of:
setlocale(LC_ALL,'sv_SE.ISO-8859-1');
On Windows, to change the locale, visit the Control Panel. In the Regional Options section, you
can pick a new locale and customize its settings.
16.3.4 See Also
Section 16.4 shows how to set a default locale; documentation on setlocale( ) at
http://www.php.net/setlocale.
Recipe 16.4 Setting the Default Locale
16.4.1 Problem
You want to set a locale that all your PHP programs can use.
16.4.2 Solution
At the beginning of a file loaded by the auto_prepend_file configuration directive, call
setlocale( ) to set your desired locale:
setlocale(LC_ALL,'es_US');
16.4.3 Discussion
Even if you set up appropriate environment variables before you start your web server or PHP
binary, PHP doesn't change its locale until you call setlocale( ). After setting environment
variable LC_ALL to es_US, for example, PHP still runs in the default C locale.
16.4.4 See Also
Section 16.3 shows how to use a particular locale; documentation on setlocale( ) at
http://www.php.net/setlocale and auto_prepend_file at
http://www.php.net/manual/en/configuration.directives.php#ini.auto-prepend-file.
Recipe 16.5 Localizing Text Messages
16.5.1 Problem
You want to display text messages in a locale-appropriate language.
16.5.2 Solution
Maintain a message catalog of words and phrases and retrieve the appropriate string from the
message catalog before printing it. Here's a simple message catalog with some foods in
American and British English and a function to retrieve words from the catalog:
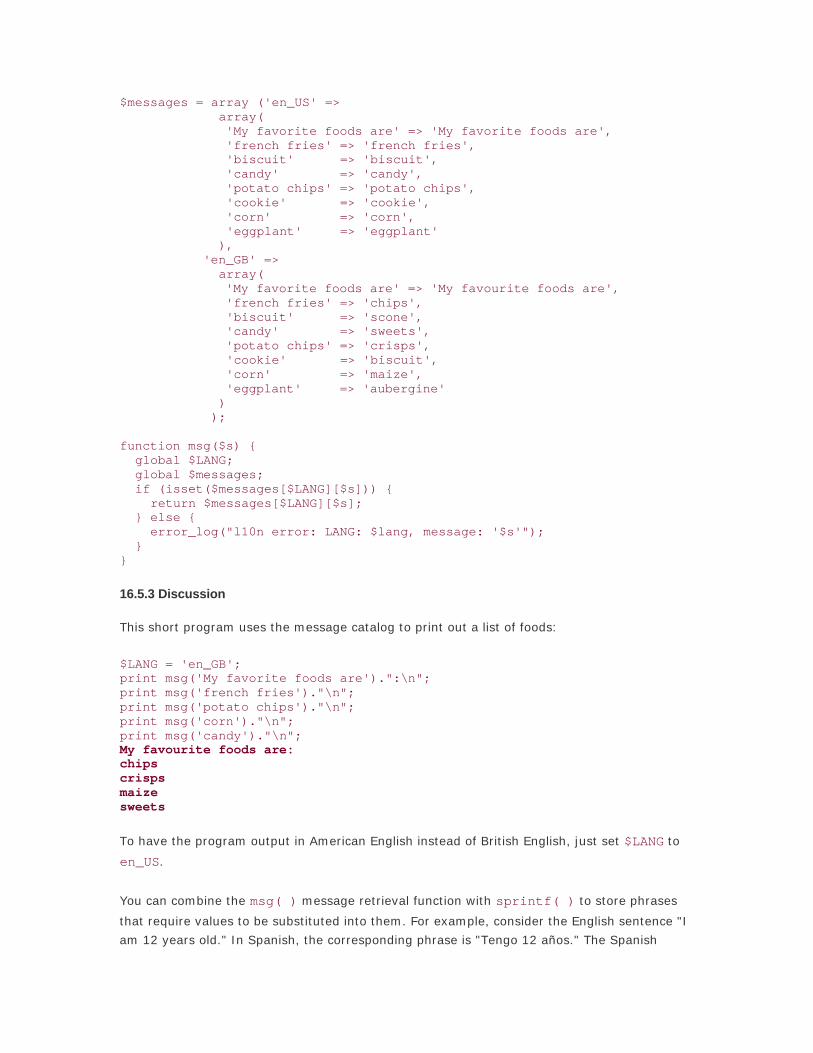
$messages = array ('en_US' => array( 'My favorite foods are' => 'My favorite foods are', 'french fries' => 'french fries', 'biscuit' => 'biscuit', 'candy' => 'candy', 'potato chips' => 'potato chips', 'cookie' => 'cookie', 'corn' => 'corn', 'eggplant' => 'eggplant' ), 'en_GB' => array( 'My favorite foods are' => 'My favourite foods are', 'french fries' => 'chips', 'biscuit' => 'scone', 'candy' => 'sweets', 'potato chips' => 'crisps', 'cookie' => 'biscuit', 'corn' => 'maize', 'eggplant' => 'aubergine' ) ); function msg($s) { global $LANG; global $messages; if (isset($messages[$LANG][$s])) { return $messages[$LANG][$s]; } else { error_log("l10n error: LANG: $lang, message: '$s'"); } }
16.5.3 Discussion
This short program uses the message catalog to print out a list of foods:
$LANG = 'en_GB'; print msg('My favorite foods are').":\n"; print msg('french fries')."\n"; print msg('potato chips')."\n"; print msg('corn')."\n"; print msg('candy')."\n"; My favourite foods are: chips crisps maize sweets
To have the program output in American English instead of British English, just set $LANG to
en_US.
You can combine the msg( ) message retrieval function with sprintf( ) to store phrases
that require values to be substituted into them. For example, consider the English sentence "I
am 12 years old." In Spanish, the corresponding phrase is "Tengo 12 años." The Spanish

phrase can't be built by stitching together translations of "I am," the numeral 12, and "years
old." Instead, store them in the message catalogs as sprintf( )-style format strings:
$messages = array ('en_US' => array('I am X years old.' => 'I am %d years old.'), 'es_US' => array('I am X years old.' => 'Tengo %d años.') );
You can then pass the results of msg( ) to sprintf( ) as a format string:
$LANG = 'es_US'; print sprintf(msg('I am X years old.'),12); Tengo 12 años.
For phrases that require the substituted values to be in a different order in different language,
sprintf( ) supports changing the order of the arguments:
$messages = array ('en_US' => array('I am X years and Y months old.' => 'I am %d years and %d months old.'), 'es_US' => array('I am X years and Y months old.' => 'Tengo %2$d meses y %1$d años.') );
With either language, call sprintf( ) with the same order of arguments (i.e., first years,
then months):
$LANG = 'es_US'; print sprintf(msg('I am X years and Y months old.'),12,7); Tengo 7 meses y 12 años.
In the format string, %2$ tells sprintf( ) to use the second argument, and %1$ tells it to
use the first.
These phrases can also be stored as a function's return value instead of as a string in an
array. Storing the phrases as functions removes the need to use sprintf( ). Functions that
return a sentence look like this:
// English version function i_am_X_years_old($age) { return "I am $age years old."; } // Spanish version function i_am_X_years_old($age) { return "Tengo $age años."; }

If some parts of the message catalog belong in an array, and some parts belong in functions,
an object is a helpful container for a language's message catalog. A base object and two
simple message catalogs look like this:
class pc_MC_Base { var $messages; var $lang; function msg($s) { if (isset($this->messages[$s])) { return $this->messages[$s]; } else { error_log("l10n error: LANG: $this->lang, message: '$s'"); } } } class pc_MC_es_US extends pc_MC_Base { function pc_MC_es_US() { $this->lang = 'es_US'; $this->messages = array ('chicken' => 'pollo', 'cow' => 'vaca', 'horse' => 'caballo' ); } function i_am_X_years_old($age) { return "Tengo $age años"; } } class pc_MC_en_US extends pc_MC_Base { function pc_MC_en_US() { $this->lang = 'en_US'; $this->messages = array ('chicken' => 'chicken', 'cow' => 'cow', 'horse' => 'horse' ); } function i_am_X_years_old($age) { return "I am $age years old."; } }
Each message catalog object extends the pc_MC_Base class to get the msg( ) method, and
then defines its own messages (in its constructor) and its own functions that return phrases.
Here's how to print text in Spanish:
$MC = new pc_MC_es_US; print $MC->msg('cow'); print $MC->i_am_X_years_old(15);
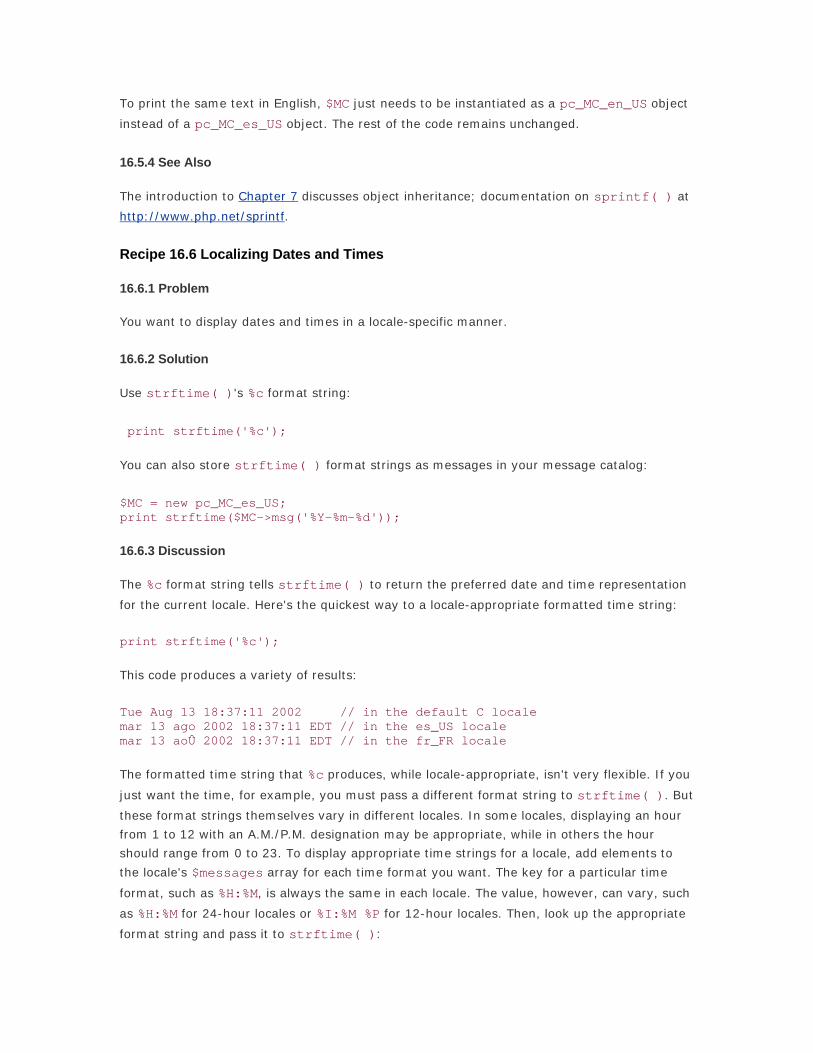
To print the same text in English, $MC just needs to be instantiated as a pc_MC_en_US object
instead of a pc_MC_es_US object. The rest of the code remains unchanged.
16.5.4 See Also
The introduction to Chapter 7 discusses object inheritance; documentation on sprintf( ) at
http://www.php.net/sprintf.
Recipe 16.6 Localizing Dates and Times
16.6.1 Problem
You want to display dates and times in a locale-specific manner.
16.6.2 Solution
Use strftime( )'s %c format string:
print strftime('%c');
You can also store strftime( ) format strings as messages in your message catalog:
$MC = new pc_MC_es_US; print strftime($MC->msg('%Y-%m-%d'));
16.6.3 Discussion
The %c format string tells strftime( ) to return the preferred date and time representation
for the current locale. Here's the quickest way to a locale-appropriate formatted time string:
print strftime('%c');
This code produces a variety of results:
Tue Aug 13 18:37:11 2002 // in the default C locale mar 13 ago 2002 18:37:11 EDT // in the es_US locale mar 13 aoÛ 2002 18:37:11 EDT // in the fr_FR locale
The formatted time string that %c produces, while locale-appropriate, isn't very flexible. If you
just want the time, for example, you must pass a different format string to strftime( ). But
these format strings themselves vary in different locales. In some locales, displaying an hour
from 1 to 12 with an A.M./P.M. designation may be appropriate, while in others the hour
should range from 0 to 23. To display appropriate time strings for a locale, add elements to
the locale's $messages array for each time format you want. The key for a particular time
format, such as %H:%M, is always the same in each locale. The value, however, can vary, such
as %H:%M for 24-hour locales or %I:%M %P for 12-hour locales. Then, look up the appropriate
format string and pass it to strftime( ):

$MC = new pc_MC_es_US; print strftime($MC->msg('%H:%M'));
Changing the locale doesn't change the time zone, it changes only the formatting of the
displayed result.
16.6.4 See Also
Section 3.5 discusses the format strings that strftime( ) accepts; Section 3.12 covers
changing time zones in your program; documentation on strftime( ) at
http://www.php.net/strftime.
Recipe 16.7 Localizing Currency Values
16.7.1 Problem
You want to display currency amounts in a locale-specific format.
16.7.2 Solution
Use the pc_format_currency( ) function, shown in Example 16-1, to produce an
appropriately formatted string. For example:
setlocale(LC_ALL,'fr_CA'); print pc_format_currency(-12345678.45); (12 345 678,45 $)
16.7.3 Discussion
The pc_format_currency( ) function, shown in Example 16-1, gets the currency
formatting information from localeconv( ) and then uses number_format( ) and some
logic to construct the correct string.
Example 16-1. pc_format_currency
function pc_format_currency($amt) { // get locale-specific currency formatting information $a = localeconv(); // compute sign of $amt and then remove it if ($amt < 0) { $sign = -1; } else { $sign = 1; } $amt = abs($amt); // format $amt with appropriate grouping, decimal point, and fractional digits $amt = number_format($amt,$a['frac_digits'],$a['mon_decimal_point'], $a['mon_thousands_sep']); // figure out where to put the currency symbol and positive or negative signs $currency_symbol = $a['currency_symbol'];

// is $amt >= 0 ? if (1 == $sign) { $sign_symbol = 'positive_sign'; $cs_precedes = 'p_cs_precedes'; $sign_posn = 'p_sign_posn'; $sep_by_space = 'p_sep_by_space'; } else { $sign_symbol = 'negative_sign'; $cs_precedes = 'n_cs_precedes'; $sign_posn = 'n_sign_posn'; $sep_by_space = 'n_sep_by_space'; } if ($a[$cs_precedes]) { if (3 == $a[$sign_posn]) { $currency_symbol = $a[$sign_symbol].$currency_symbol; } elseif (4 == $a[$sign_posn]) { $currency_symbol .= $a[$sign_symbol]; } // currency symbol in front if ($a[$sep_by_space]) { $amt = $currency_symbol.' '.$amt; } else { $amt = $currency_symbol.$amt; } } else { // currency symbol after amount if ($a[$sep_by_space]) { $amt .= ' '.$currency_symbol; } else { $amt .= $currency_symbol; } } if (0 == $a[$sign_posn]) { $amt = "($amt)"; } elseif (1 == $a[$sign_posn]) { $amt = $a[$sign_symbol].$amt; } elseif (2 == $a[$sign_posn]) { $amt .= $a[$sign_symbol]; } return $amt;
The code in pc_format_currency( ) that puts the currency symbol and sign in the correct
place is almost identical for positive and negative amounts; it just uses different elements of
the array returned by localeconv( ). The relevant elements of localeconv( )'s returned
array are shown in Table 16-1.
Table 16-1. Currency-related information from localeconv( )
Array element Description
currency_symbol Local currency symbol
mon_decimal_point Monetary decimal point character
mon_thousands_sep Monetary thousands separator
positive_sign Sign for positive values
negative_sign Sign for negative values
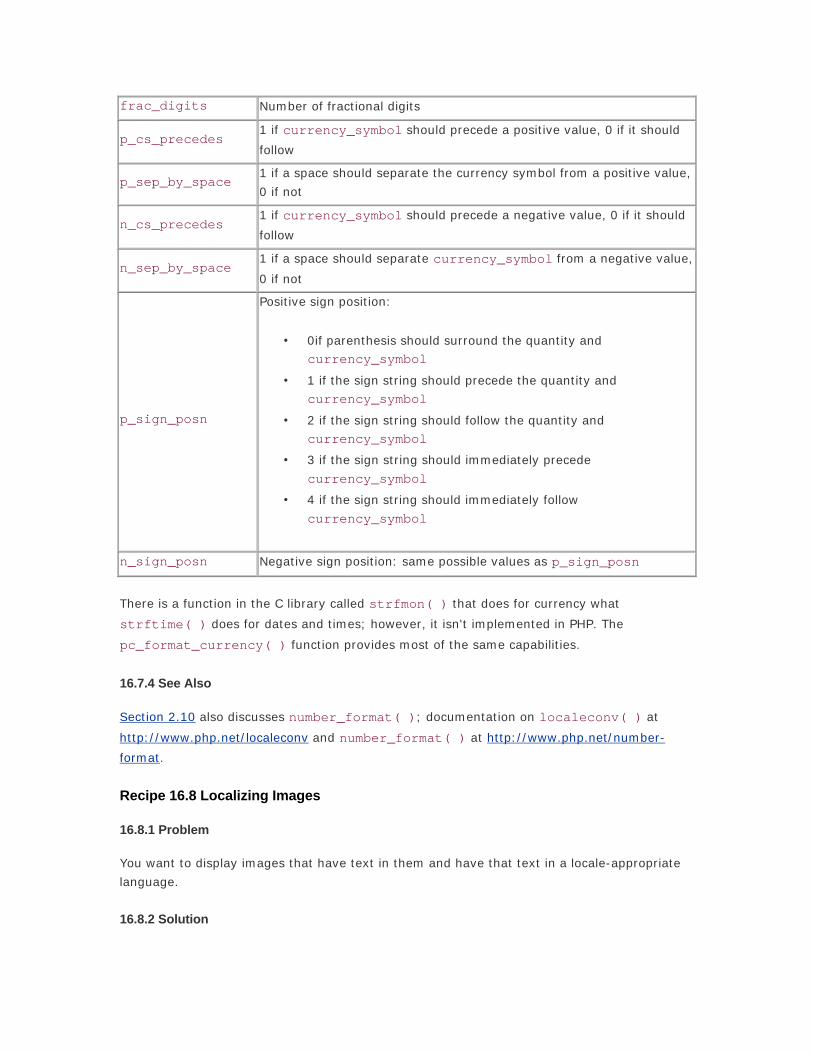
frac_digits Number of fractional digits
p_cs_precedes 1 if currency_symbol should precede a positive value, 0 if it should
follow
p_sep_by_space 1 if a space should separate the currency symbol from a positive value,
0 if not
n_cs_precedes 1 if currency_symbol should precede a negative value, 0 if it should
follow
n_sep_by_space 1 if a space should separate currency_symbol from a negative value,
0 if not
p_sign_posn
Positive sign position:
• 0if parenthesis should surround the quantity and currency_symbol
• 1 if the sign string should precede the quantity and currency_symbol
• 2 if the sign string should follow the quantity and currency_symbol
• 3 if the sign string should immediately precede
currency_symbol
• 4 if the sign string should immediately follow
currency_symbol
n_sign_posn Negative sign position: same possible values as p_sign_posn
There is a function in the C library called strfmon( ) that does for currency what
strftime( ) does for dates and times; however, it isn't implemented in PHP. The
pc_format_currency( ) function provides most of the same capabilities.
16.7.4 See Also
Section 2.10 also discusses number_format( ); documentation on localeconv( ) at
http://www.php.net/localeconv and number_format( ) at http://www.php.net/number-
format.
Recipe 16.8 Localizing Images
16.8.1 Problem
You want to display images that have text in them and have that text in a locale-appropriate
language.
16.8.2 Solution

Make an image directory for each locale you want to support, as well as a global image
directory for images that have no locale-specific information in them. Create copies of each
locale-specific image in the appropriate locale-specific directory. Make sure that the images
have the same filename in the different directories. Instead of printing out image URLs
directly, use a wrapper function similar to the msg( ) function in Section 16.5 that prints out
locale-specific text.
16.8.3 Discussion
The img( ) wrapper function looks for a locale-specific version of an image first, then a global
one. If neither are present, it prints a message to the error log:
$image_base_path = '/usr/local/www/images'; $image_base_url = '/images'; function img($f) { global $LANG; global $image_base_path; global $image_base_url; if (is_readable("$image_base_path/$LANG/$f")) { print "$image_base_url/$LANG/$f"; } elseif (is_readable("$image_base_path/global/$f")) { print "$image_base_url/global/$f"; } else { error_log("l10n error: LANG: $lang, image: '$f'"); } }
This function needs to know both the path to the image file in the filesystem
($image_base_path) and the path to the image from the base URL of your site (/images). It
uses the first to test if the file can be read and the second to construct an appropriate URL for
the image.
A localized image must have the same filename in each localization directory. For example, an
image that says "New!" on a yellow starburst should be called new.gif in both the
images/en_US directory and the images/es_US directory, even though the file
images/es_US/new.gif is a picture of a yellow starburst with "¡ Nuevo!" on it.
Don't forget that the alt text you display in your image tags also needs to be localized. A
complete localized <img> tag looks like:
printf('<img src="%s" alt="%s">',img('cancel.png'),msg('Cancel'));
If the localized versions of a particular image have varied dimensions, store image height and
width in the message catalog as well:
printf('<img src="%s" alt="%s" height="%d" width="%d">', img('cancel.png'),msg('Cancel'), msg('img-cancel-height'),msg('img-cancel-width'));

The localized messages for img-cancel-height and img-cancel-width are not text
strings, but integers that describe the dimensions of the cancel.png image in each locale.
16.8.4 See Also
Section 16.5 discusses locale-specific message catalogs.
Recipe 16.9 Localizing Included Files
16.9.1 Problem
You want to include locale-specific files in your pages.
16.9.2 Solution
Dynamically modify the include_path once you've determined the appropriate locale:
$base = '/usr/local/php-include'; $LANG = 'en_US'; $include_path = ini_get('include_path'); ini_set('include_path',"$base/$LANG:$base/global:$include_path");
16.9.3 Discussion
The $base variable holds the name of the base directory for your included localized files. Files
that are not locale-specific go in the global subdirectory of $base, and locale-specific files go
in a subdirectory named after their locale (e.g., en_US). Prepending the locale-specific
directory and then the global directory to the include path makes them the first two places
PHP looks when you include a file. Putting the locale-specific directory first ensures that
nonlocalized information is loaded only if localized information isn't available.
This technique is similar to what the img( ) function does in the Section 16.8. Here,
however, you can take advantage of PHP's include_path feature to have the directory
searching happen automatically. For maximum utility, reset include_path as early as
possible in your code, preferably at the top of a file loaded via auto_prepend_file on every
request.
16.9.4 See Also
Documentation on include_path at
http://www.php.net/manual/en/configuration.directives.php#ini.include-path and
auto_prepend_file at
http://www.php.net/manual/en/configuration.directives.php#ini.auto-prepend-file.

Recipe 16.10 Managing Localization Resources
16.10.1 Problem
You need to keep track of your various message catalogs and images.
16.10.2 Solution
Two techniques simplify the management of your localization resources. The first is making a
new language's object, for example Canadian English, extend from a similar existing language,
such as American English. You only have to change the words and phrases in the new object
that differ from the original language.
The second technique: to track what phrases still need to be translated in new languages, put
stubs in the new language object that have the same value as in your base language. By
finding which values are the same in the base language and the new language, you can then
generate a list of words and phrases to translate.
16.10.3 Discussion
The catalog-compare.php program shown in Example 16-2 prints out messages that are the
same in two catalogs, as well as messages that are missing from one catalog but present in
another.
Example 16-2. catalog-compare.php
$base = 'pc_MC_'.$_SERVER['argv'][1]; $other = 'pc_MC_'.$_SERVER['argv'][2]; require 'pc_MC_Base.php'; require "$base.php"; require "$other.php"; $base_obj = new $base; $other_obj = new $other; /* Check for messages in the other class that * are the same as the base class or are in * the base class but missing from the other class */ foreach ($base_obj->messages as $k => $v) { if (isset($other_obj->messages[$k])) { if ($v == $other_obj->messages[$k]) { print "SAME: $k\n"; } } else { print "MISSING: $k\n"; } } /* Check for messages in the other class but missing * from the base class */ foreach ($other_obj->messages as $k => $v) { if (! isset($base_obj->messages[$k])) {

print "MISSING (BASE): $k\n"; } }
To use this program, put each message catalog object in a file with the same name as the
object (e.g., the pc_MC_en_US class should be in a file named pc_MC_en_US.php, and the
pc_MC_es_US class should be in a file named pc_MC_es_US.php). You then call the program
with the two locale names as arguments on the command line:
% php catalog-compare.php en_US es_US
In a web context, it can be useful to use a different locale and message catalog on a per-
request basis. The locale to use may come from the browser (in an Accept-Language
header), or it may be explicitly set by the server (different virtual hosts may be set up to
display the same content in different languages). If the same code needs to select a message
catalog on a per-request basis, the message catalog class can be instantiated like this:
$classname = "pc_MC_$locale.php"; require 'pc_MC_Base.php'; require $classname.'.php'; $MC = new $classname;
16.10.4 See Also
Section 16.5 discusses message catalogs; Section 7.11 for information on finding the methods
and properties of an object.
Recipe 16.11 Using gettext
16.11.1 Problem
You want a comprehensive system to create, manage, and deploy message catalogs.
16.11.2 Solution
Use PHP's gettext extension, which allows you to use GNU's gettext utilities:
bindtextdomain('gnumeric','/usr/share/locale'); textdomain('gnumeric'); $languages = array('en_CA','da_DK','de_AT','fr_FR'); foreach ($languages as $language) { setlocale(LC_ALL, $language); print gettext(" Unknown formula")."\n"; }
16.11.3 Discussion

gettext is a set of tools that makes it easier for your application to produce multilingual
messages. Compiling PHP with the --with-gettext option enables functions to retrieve the
appropriate text from gettext-format message catalogs, and there are a number of external
tools to edit the message catalogs.
With gettext, messages are divided into domains, and all messages for a particular domain are
stored in the same file. bindtextdomain( ) tells gettext where to find the message catalog
for a particular domain. A call to:
bindtextdomain('gnumeric','/usr/share/locale')
indicates that the message catalog for the gnumeric domain in the en_CA locale is in the file
/usr/share/locale/en_CA/LC_MESSAGES/gnumeric.mo.
The textdomain('gnumeric') function sets the default domain to gnumeric. Calling
gettext( ) retrieves a message from the default domain. There are other functions, such as
dgettext( ), that let you retrieve a message from a different domain. When gettext( )
(or dgettext( )) is called, it returns the appropriate message for the current locale. If
there's no message in the catalog for the current locale that corresponds to the argument
passed to it, gettext( ) (or dgettext( )) returns just its argument. As a result, if you
haven't translated all your messages, your code prints out English (or whatever your base
language is) for those untranslated messages.
Setting the default domain with textdomain( ) makes each subsequent retrieval of a
message from that domain more concise, because you just have to call gettext('Good
morning') instead of dgettext('domain','Good morning'). However, if even
gettext('Good morning') is too much typing, you can take advantage of an
undocumented function alias: _( ) for gettext( ). Instead of gettext('Good
morning'), use _('Good morning').
The gettext web site has helpful and detailed information for managing the information flow
between programmers and translators and how to efficiently use gettext. It also includes
information on other tools you can use to manage your message catalogs, such as a special
GNU Emacs mode.
16.11.4 See Also
Documentation on gettext at http://www.php.net/gettext; the gettext library at
http://www.gnu.org/software/gettext/gettext.html.
Recipe 16.12 Reading or Writing Unicode Characters
16.12.1 Problem
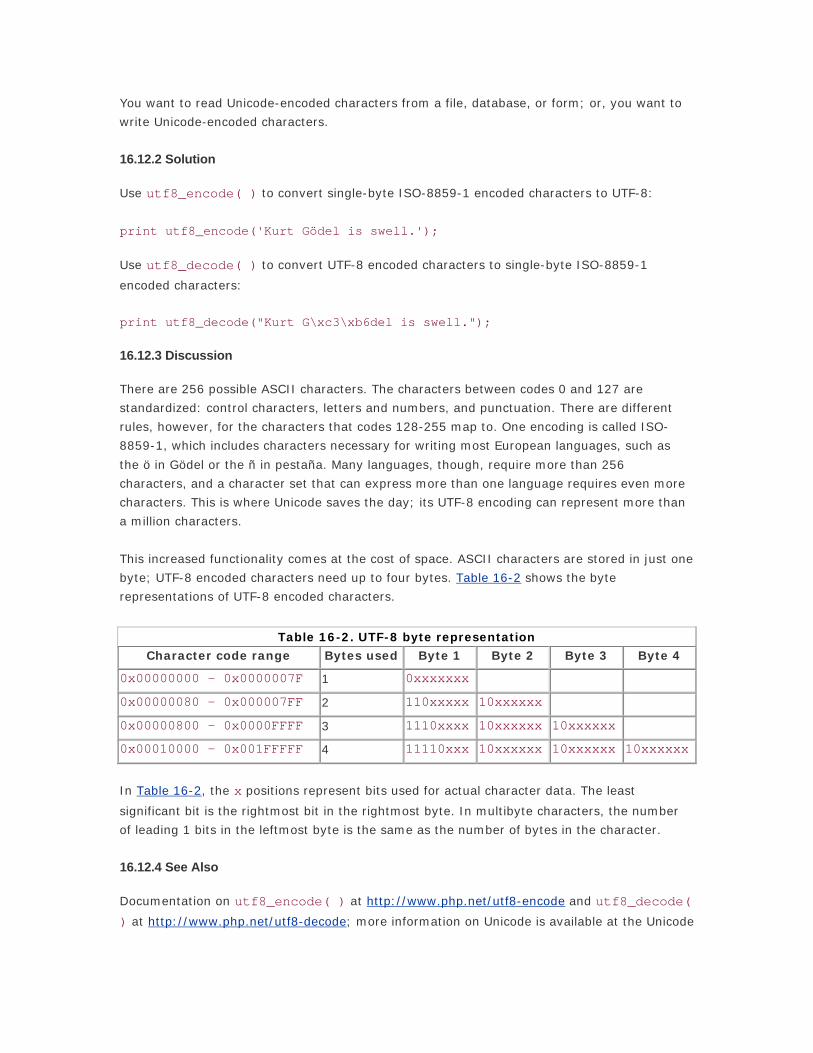
You want to read Unicode-encoded characters from a file, database, or form; or, you want to
write Unicode-encoded characters.
16.12.2 Solution
Use utf8_encode( ) to convert single-byte ISO-8859-1 encoded characters to UTF-8:
print utf8_encode('Kurt Gödel is swell.');
Use utf8_decode( ) to convert UTF-8 encoded characters to single-byte ISO-8859-1
encoded characters:
print utf8_decode("Kurt G\xc3\xb6del is swell.");
16.12.3 Discussion
There are 256 possible ASCII characters. The characters between codes 0 and 127 are
standardized: control characters, letters and numbers, and punctuation. There are different
rules, however, for the characters that codes 128-255 map to. One encoding is called ISO-
8859-1, which includes characters necessary for writing most European languages, such as
the ö in Gödel or the ñ in pestaña. Many languages, though, require more than 256
characters, and a character set that can express more than one language requires even more
characters. This is where Unicode saves the day; its UTF-8 encoding can represent more than
a million characters.
This increased functionality comes at the cost of space. ASCII characters are stored in just one
byte; UTF-8 encoded characters need up to four bytes. Table 16-2 shows the byte
representations of UTF-8 encoded characters.
Table 16-2. UTF-8 byte representation
Character code range Bytes used Byte 1 Byte 2 Byte 3 Byte 4
0x00000000 - 0x0000007F 1 0xxxxxxx 0x00000080 - 0x000007FF 2 110xxxxx 10xxxxxx 0x00000800 - 0x0000FFFF 3 1110xxxx 10xxxxxx 10xxxxxx 0x00010000 - 0x001FFFFF 4 11110xxx 10xxxxxx 10xxxxxx 10xxxxxx
In Table 16-2, the x positions represent bits used for actual character data. The least
significant bit is the rightmost bit in the rightmost byte. In multibyte characters, the number
of leading 1 bits in the leftmost byte is the same as the number of bytes in the character.
16.12.4 See Also
Documentation on utf8_encode( ) at http://www.php.net/utf8-encode and utf8_decode(
) at http://www.php.net/utf8-decode; more information on Unicode is available at the Unicode

Consortium's home page, http://www.unicode.org; the UTF-8 and Unicode FAQ at
http://www.cl.cam.ac.uk/~mgk25/unicode.html is also helpful.

Chapter 17. Internet Services
Introduction
Sending Mail
Sending MIME Mail
Reading Mail with IMAP or POP3
Posting Messages to Usenet Newsgroups
Reading Usenet News Messages
Getting and Putting Files with FTP
Looking Up Addresses with LDAP
Using LDAP for User Authentication
Performing DNS Lookups
Checking if a Host Is Alive
Getting Information About a Domain Name

17.1 Introduction
Before there was HTTP, there was FTP, NNTP, IMAP, POP3, and a whole alphabet soup of other
protocols. Many people quickly embraced web browsers because the browser provided an
integrated program that let them check their email, read newsgroups, transfer files, and view
documents without worrying about the details surrounding the underlying means of
communication. PHP provides functions, both natively and through PEAR, to use these other
protocols. With them, you can use PHP to create web frontend applications that perform all
sorts of network-enabled tasks, such as looking up domain names or sending web-based
email. While PHP simplifies these jobs, it is important to understand the strengths and
limitations of each protocol.
Section 17.2 to Section 17.4 cover the most popular feature of all: email. Section 17.2 shows
how to send basic email messages. Section 17.3 describes MIME-encoded email, which
enables you to send plain-text and HTML-formatted messages. The IMAP and POP3 protocols,
which are used to read mailboxes, are discussed in Section 17.4.
The next two recipes discuss how to read newsgroups with NNTP. Newsgroups are similar to
mailing lists, but instead of every person on the list receiving an email message, people can
access a news server and view just the messages they're interested in. Newsgroups also allow
threaded discussions, so its easy to trace a conversation through the archives. Section 17.5
discusses posting messages, while Section 17.6 covers retrieving messages.
Section 17.7 covers how to exchange files using FTP. FTP, or file transfer protocol, is a method
for sending and receiving files across the Internet. FTP servers can require users to log in with
a password or allow anonymous usage.
Searching LDAP servers is the topic of Section 17.8, while Section 17.9 discusses how to
authenticate users against an LDAP server. LDAP servers are used as address books and as a
centralized store for user information. They're optimized for information retrieval and can be
configured to replicate their data to ensure high reliability and quick response times.
The chapter concludes with recipes on networking. Section 17.10 covers DNS lookups, both
from domain name to IP and vice versa. The final recipe tells how to check if a host is up and
accessible with PEAR's Ping module.
Other parts of the book deal with some network protocols as well. HTTP is covered in detail in
Chapter 11. Those recipes discuss how to fetch URLs in a variety of different ways. Protocols
that combine HTTP and XML are covered in Chapter 12. In that chapter, along with covering
DOM and XSLT, we discuss the emerging area of web services, using the XML-RPC and SOAP
protocols.
Recipe 17.2 Sending Mail
17.2.1 Problem

You want to send an email message. This can be in direct response to a user's action, such as
signing up for your site, or a recurring event at a set time, such as a weekly newsletter.
17.2.2 Solution
Use PEAR's Mail class:
require 'Mail.php'; $to = '[email protected]'; $headers['From'] = '[email protected]'; $headers['Subject'] = 'New Version of PHP Released!'; $body = 'Go to http://www.php.net and download it today!'; $message =& Mail::factory('mail'); $message->send($to, $headers, $body);
If you can't use PEAR's Mail class, use PHP's built-in mail( ) function:
$to = '[email protected]'; $subject = 'New Version of PHP Released!'; $body = 'Go to http://www.php.net and download it today!'; mail($to, $subject, $body);
17.2.3 Discussion
PEAR's Mail class allows you to send mail three ways. You indicate the method to use when
instantiating a mail object with Mail::factory( ).
• To send mail using an external program such as sendmail or qmail, pass sendmail.
• To use an SMTP server, pass smtp.
• To use the built-in mail( ) function, pass mail. This tells Mail to apply the settings
from your php.ini.
To use sendmail or smtp, you have to pass a second parameter indicating your settings. To
use sendmail, specify a sendmail_path and sendmail_args:
$params['sendmail_path'] = '/usr/sbin/sendmail'; $params['sendmail_args'] = '-oi -t'; $message =& Mail::factory('sendmail', $params);
One good value for sendmail_path is /usr/lib/sendmail. Unfortunately, sendmail tends to
jump around from system to system, so it can be hard to track down. If you can't find it, try
/usr/sbin/sendmail or ask your system administrator.
Two useful flags to pass sendmail are -oi and -t. The -oi flag tells sendmail not to think a
single dot (.) on a line is the end of the message. The -t flag makes sendmail parse the file
for To: and other header lines.
If you prefer qmail, try using /var/qmail/bin/qmail-inject or /var/qmail/bin/sendmail.
If you're running Windows, you may want to use an SMTP server because most Windows
machines don't have copies of sendmail installed. To do so, pass smtp:
$params['host'] = 'smtp.example.com'; $message =& Mail::factory('smtp', $params);
In smtp mode, you can pass five optional parameters. The host is the SMTP server
hostname; it defaults to localhost. The port is the connection port; it defaults to 25. To
enable SMTP authentication, set auth to true. To allow the server to validate you, set
username and password. SMTP functionality isn't restricted to Windows; it also works on
Unix servers.
If you don't have PEAR's Mail class, you can use the built-in mail( ) function. The program
mail( ) uses to send mail is specified in the sendmail_path configuration variable in your
php.ini file. If you're running Windows, set the SMTP variable to the hostname of your SMTP
server. Your From address comes from the sendmail_from variable.
Here's an example that uses mail( ):
$to = '[email protected]'; $subject = 'New Version of PHP Released!'; $body = 'Go to http://www.php.net and download it today!'; mail($to, $subject, $body);
The first parameter is the recipient's email address, the second is the message subject, and
the last is the message body. You can also add extra headers with an optional fourth
parameter. For example, here's how to add Reply-To and Organization headers:
$to = '[email protected]'; $subject = 'New Version of PHP Released!'; $body = 'Go to http://www.php.net and download it today!'; $header = "Reply-To: [email protected]\r\n" ."Organization: The PHP Group"; mail($to, $subject, $body, $header);
Separate each header with \r\n, but don't add \r\n following the last header.

Regardless of which method you choose, it's a good idea to write a wrapper function to assist
you in sending mail. Forcing all your mail through this function makes it easy to add logging
and other checks to every message sent:
function pc_mail($to, $headers, $body) { $message =& Mail::factory('mail'); $message->send($to, $headers, $body); error_log("[MAIL][TO: $to]"); }
Here a message is written to the error log, recording the recipient of each message that's
sent. This provides a time stamp that allows you to more easily track complaints that someone
is trying to use the site to send spam. Another option is to create a list of "do not send" email
addresses, which prevent those people from ever receiving another message from your site.
You can also validate all recipient email addresses, which reduces the number of bounced
messages.
17.2.4 See Also
Section 13.6 for a regular expression to validate email addresses; Section 17.3 for sending
MIME email; Section 17.4 for more on retrieving mail; documentation on mail( ) at
http://www.php.net/mail; the PEAR Mail class at http://pear.php.net/package-
info.php?package=Mail; RFC 822 at http://www.faqs.org/rfcs/rfc822.html; O'Reilly publishes
two books on sendmail, called sendmail by Bryan Costales with Eric Allman and sendmail
Desktop Reference by Bryan Costales and Eric Allman.
Recipe 17.3 Sending MIME Mail
17.3.1 Problem
You want to send MIME email. For example, you want to send multipart messages with both
plain-text and HTML portions and have MIME-aware mail readers automatically display the
correct portion.
17.3.2 Solution
Use the Mail_mime class in PEAR:
require 'Mail.php'; require 'Mail/mime.php'; $to = '[email protected], [email protected]'; $headers['From'] = '[email protected]'; $headers['Subject'] = 'New Version of PHP Released!'; // create MIME object $mime = new Mail_mime;

// add body parts $text = 'Text version of email'; $mime->setTXTBody($text); $html = '<html><body>HTML version of email</body></html>'; $mime->setHTMLBody($html); $file = '/path/to/file.png'; $mime->addAttachment($file, 'image/png'); // get MIME formatted message headers and body $headers = $mime->headers($headers); $body = $mime->get(); $message =& Mail::factory('mail'); $message->send($to, $headers, $body);
17.3.3 Discussion
PEAR's Mail_mime class provides an object-oriented interface to all the behind-the-scenes
details involved in creating an email message that contains both text and HTML parts. The
class is similar to PEAR's Mail class, but instead of defining the body as a string of text, you
create a Mail_mime object and call its methods to add parts to the body:
// create MIME object $mime = new Mail_mime; // add body parts $text = 'Text version of email'; $mime->setTXTBody($text); $html = '<html><body>HTML version of email</body></html>'; $mime->setHTMLBody($html); $file = '/path/to/file.txt'; $mime->addAttachment($file, 'text/plain'); // get MIME formatted message headers and body $headers = $mime->headers($headers); $body = $mime->get();
The Mail_mime::setTXTBody( ) and Mail_mime::setHTMLBody( ) methods add the
plaintext and HTML body parts, respectively. Here, we pass in variables, but you can also pass
a filename for Mail_mime to read. To use this option, pass true as the second parameter:
$text = '/path/to/email.txt'; $mime->setTXTBody($text, true);
To add an attachment to the message, such as a graphic or an archive, call
Mail_mime::addAttachment( ) :
$file = '/path/to/file.png'; $mime->addAttachment($file,'image/png');

Pass the function to the location to the file and its MIME type.
Once the message is complete, do the final preparation and send it out:
// get MIME formatted message headers and body $headers = $mime->headers($headers); $body = $mime->get( ); $message =& Mail::factory('mail'); $message->send($to, $headers, $body);
First, you have the Mail_mime object provide properly formatted headers and body. You then
use the parent Mail class to format the message and send it out with Mail_mime::send( )
.
17.3.4 See Also
Section 17.2 for sending regular email; Section 17.4 for more on retrieving mail; the PEAR
Mail_Mime class at http://pear.php.net/package-info.php?package=Mail_Mime.
Recipe 17.4 Reading Mail with IMAP or POP3
17.4.1 Problem
You want to read mail using IMAP or POP3, which allows you to create a web-based email
client.
17.4.2 Solution
Use PHP's IMAP extension, which speaks both IMAP and POP3:
// open IMAP connection $mail = imap_open('{mail.server.com:143}', 'username', 'password'); // or, open POP3 connection $mail = imap_open('{mail.server.com:110/pop3}', 'username', 'password'); // grab a list of all the mail headers $headers = imap_headers($mail); // grab a header object for the last message in the mailbox $last = imap_num_msg($mail); $header = imap_header($mail, $last); // grab the body for the same message $body = imap_body($mail, $last); // close the connection imap_close($mail);
17.4.3 Discussion

The underlying library PHP uses to support IMAP and POP3 offers a seemingly unending
number of features that allow you to essentially write an entire mail client. With all those
features, however, comes complexity. In fact, there are currently 63 different functions in PHP
beginning with the word imap, and that doesn't take into account that some also speak POP3
and NNTP.
However, the basics of talking with a mail server are straightforward. Like many features in
PHP, you begin by opening the connection and grabbing a handle:
$mail = imap_open('{mail.server.com:143}', 'username', 'password');
This opens an IMAP connection to the server named mail.server.com on port 143. It also
passes along a username and password as the second and third arguments.
To open a POP3 connection instead, append /pop3 to the end of the server and port. Since
POP3 usually runs on port 110, add :110 after the server name:
$mail = imap_open('{mail.server.com:110/pop3}', 'username', 'password');
To encrypt your connection with SSL, add /ssl on to the end, just as you did with pop3. You
also need to make sure your PHP installation is built with the --with-imap-ssl configuration
option in addition to --with-imap. Also, you need to build the system IMAP library itself with
SSL support. If you're using a self-signed certificate and wish to prevent an attempted
validation, also add /novalidate-cert. Finally, most SSL connections talk on either port
993 or 995. All these options can come in any order, so the following is perfectly legal:
$mail = imap_open('{mail.server.com:993/novalidate-cert/pop3/ssl}', 'username', 'password');
Surrounding a variable with curly braces inside of a double-quoted string, such as {$var}, is
a way to tell PHP exactly which variable to interpolate. Therefore, to use interpolated variables
in this first parameter to imap_open( ), escape the opening {:
$server = 'mail.server.com'; $port = 993; $mail = imap_open("\{$server:$port}", 'username', 'password');
Once you've opened a connection, you can ask the mail server a variety of questions. To get a
listing of all the messages in your inbox, use imap_headers( ):
$headers = imap_headers($mail);
This returns an array in which each element is a formatted string corresponding to a message:
A 189) 5-Aug-2002 Beth Hondl an invitation (1992 chars)

Alternatively, to retrieve a specific message, use imap_header( ) and imap_body( ) to
pull the header object and body string:
$header = imap_header($message_number); $body = imap_body($message_number);
The imap_header( ) function returns an object with many fields. Useful ones include
subject, fromaddress, and udate. All the fields are listed in Table 17-2 in Section 17.6.
The body element is just a string, but, if the message is a multipart message, such as one
that contains both a HTML and a plain-text version, $body holds both parts and the MIME
lines describing them:
------=_Part_1046_3914492.1008372096119 Content-Type: text/plain; charset=us-ascii Content-Transfer-Encoding: 7bit Plain-Text Message ------=_Part_1046_3914492.1008372096119 Content-Type: text/html Content-Transfer-Encoding: 7bit <html>HTML Message</html> ------=_Part_1046_3914492.1008372096119--
To avoid this occurrence, use imap_fetchstructure( ) in combination with
imap_fetchbody( ) to discover how the body is formatted and to extract just the parts you
want:
// pull the plain text for message $n $st = imap_fetchstructure($mail, $n); if (!empty($st->parts)) { for ($i = 0, $j = count($st->parts); $i < $j; $i++) { $part = $st->parts[$i]; if ($part->subtype == 'PLAIN') { $body = imap_fetchbody($mail, $n, $i+1); } } } else { $body = imap_body($mail, $n)); }
If a message has multiple parts, $st->parts holds an array of objects describing them. The
part property holds an integer describing the main body MIME type. Table 17-1 lists which
numbers go with which MIME types. The subtype property holds the MIME subtype and tells
if the part is plain, html, png, or another type, such as octet-stream.
Table 17-1. IMAP MIME type values
Number MIME type PHP constant Description Examples

0 text TYPETEXT Unformatted text Plain text, HTML, XML
1 multipart TYPEMULTIPART Multipart message Mixed, form data, signed
2 message TYPEMESSAGE Encapsulated message News, HTTP
3 application TYPEAPPLICATION Application data Octet stream, PDF, Zip
4 audio TYPEAUDIO Music file MP3, RealAudio
5 image TYPEIMAGE Graphic image GIF, JPEG, PNG
6 video TYPEVIDEO Video clip MPEG, Quicktime
7 other TYPEOTHER Everything else VRML models
17.4.4 See Also
Section 17.2 and Section 17.4 for more on sending mail; documentation on imap_open( ) at
http://www.php.net/imap_open, imap_header( ) at http://www.php.net/imap-header,
imap-body( ) at http://www.php.net/imap-body, and IMAP in general at
http://www.php.net/imap.
Recipe 17.5 Posting Messages to Usenet Newsgroups
17.5.1 Problem
You want to post a message to a Usenet newsgroup, such as comp.lang.php.
17.5.2 Solution
Use imap_mail_compose( ) to format the message, then write the message to the server
using sockets:
$headers['from'] = '[email protected]'; $headers['subject'] = 'New Version of PHP Released!'; $headers['custom_headers'][] = 'Newsgroups: comp.lang.php'; $body[0]['type'] = TYPETEXT; $body[0]['subtype'] = 'plain'; $body[0]['contents.data'] = 'Go to http://www.php.net and download it today!'; $post = imap_mail_compose($headers, $body); $server = 'nntp.example.com'; $port = 119; $sh = fsockopen($server, $port) or die ("Can't connect to $server."); fputs($sh, "POST\r\n"); fputs($sh, $post); fputs($sh, ".\r\n"); fclose($sh);
17.5.3 Discussion
No built-in PHP functions can post a message to a newsgroup. Therefore, you must open a
direct socket connection to the news server and send the commands to post the message.
However, you can use imap_mail_compose( ) to format a post and create the headers and
body for the message. Every message must have three headers: the From: address, the
message Subject:, and the name of the newsgroup:
$headers['from'] = '[email protected]'; $headers['subject'] = 'New Version of PHP Released!'; $headers['custom_headers'][ ] = 'Newsgroups: comp.lang.php';
Create an array, $headers, to hold the message headers. You can directly assign the values
for the From: and Subject: headers, but you can't do so for the Newsgroups: header.
Because imap_mail_compose( ) is most frequently used to create email messages, the
Newsgroups: header is not a predefined header. To work around this, you must instead add it
with the custom_headers array element.
There is a different syntax for the custom_headers. Instead of placing the lowercase header
name as the element name and the header value as the array value, place the entire header
as an array value. Between the header name and value, add a colon followed by a space. Be
sure to correctly spell Newsgroups: with a capital N and final s.
The message body can contain multiple parts. As a result, the body parameter passed to
imap_mail_compose( ) is an array of arrays. In the Solution, there was only one part, so
we directly assign values to $body[0]:
$body[0]['type'] = TYPETEXT; $body[0]['subtype'] = 'plain'; $body[0]['contents.data'] = 'Go to http://www.php.net and download it today!';
Each message part needs a MIME type and subtype. This message is ASCII, so the type is
TYPETEXT, and the subtype is plain. Refer back to Table 17-1 in Section 17.4 for a listing of
IMAP MIME type constants and what they represent. The contents.data field holds the
message body.
To convert these arrays into a formatted string call imap_mail_compose($body,
$headers). It returns a post that looks like this:
From: [email protected] Subject: New Version of PHP Released! MIME-Version: 1.0 Content-Type: TEXT/plain; CHARSET=US-ASCII Newsgroups: comp.lang.php Go to http://www.php.net and download it today!
Armed with a post the news server will accept, call fsockopen( ) to open a connection:

$server = 'nntp.example.com'; $port = 119; $sh = fsockopen($server, $port) or die ("Can't connect to $server.");
The first parameter to fsockopen( ) is the hostname of the server, and the second is the
port to use. If you don't know the name of your news server, try the hostnames news, nntp,
or news-server in your domain: for example, news.example.com, nntp.example.com, or news-
server.example.com. If none of these work, ask your system administrator. Traditionally, all
news servers use port 119.
Once connected, you send the message:
fputs($sh, "POST\r\n"); fputs($sh, imap_mail_compose($headers, $body)); fputs($sh, ".\r\n");
The first line tells the news server that you want to post a message. The second is the
message itself. To signal the end of the message, place a period on a line by itself. Every line
must have both a carriage return and a newline at the end. Close the connection by calling
fclose($sh).
Every message on the server is given a unique name, known as a Message-ID. If you want
to reply to a message, take the Message-ID of the original message and use it as the value
for a References header:
// retrieved when reading original message $message_id = '<[email protected]>'; $headers['custom_headers'][] = "References: $message_id";
17.5.4 See Also
Section 17.6 for more on reading newsgroups; documentation on imap_mail_compose( )
at http://www.php.net/imap-mail-compose, fsockopen( ) at
http://www.php.net/fsockopen, fputs( ) at http://www.php.net/fputs, and fclose( ) at
http://www.php.net/fclose; RFC 977 at http://www.faqs.org/rfcs/rfc977.html.
Recipe 17.6 Reading Usenet News Messages
17.6.1 Problem
You want to read Usenet news messages using NNTP to talk to a news server.
17.6.2 Solution
Use PHP's IMAP extension. It also speaks NNTP:

// open a connection to the nntp server $server = '{news.php.net/nntp:119}'; $group = 'php.general'; // main PHP mailing list $nntp = imap_open("$server$group", '', '', OP_ANONYMOUS); // get header $header = imap_header($nntp, $msg); // pull out fields $subj = $header->subject; $from = $header->from; $email = $from[0]->mailbox."@".$from[0]->host; $name = $from[0]->personal; $date = date('m/d/Y h:i A', $header->udate); // get body $body = nl2br(htmlspecialchars(imap_fetchbody($nntp,$msg,1))); // close connection imap_close($nntp);
17.6.3 Discussion
Reading news from a news server requires you to connect to the server and specify a group
you're interested in reading:
// open a connection to the nntp server $server = "{news.php.net/nntp:119}"; $group = "php.general"; $nntp = imap_open("$server$group",'','',OP_ANONYMOUS);
The function imap_open( ) takes four parameters. The first specifies the news server to use
and the newsgroup to read. The server here is news.php.net, the news server that mirrors all
the PHP mailing lists. Add /nntp to let the IMAP extension know you're reading news instead
of mail, and specify 119 as a port; that's typically the port reserved for NNTP. NNTP stands for
Network News Transport Protocol; it's used to communicate with news servers, just as HTTP
communicates with web servers. The group is php.general, the main mailing list of the PHP
community.
The middle two arguments to imap_open( ) are a username and password, in case you need
to provide verification of your identity. Because news.php.net is open to all readers, leave
them blank. Finally, pass the flag OP_ANONYMOUS, which tells IMAP you're an anonymous
reader; it will not then keep a record of you in a special .newsrc file.
Once you're connected, you usually want to either get a general listing of recent messages or
all the details about one specific message. Here's some code that displays recent messages:
// read and display posting index $last = imap_num_msg($nntp); $n = 10; // display last 10 messages // table header

print <<<EOH <table> <tr> <th align="left">Subject</th> <th align="left">Sender</th> <th align="left">Date</th> </tr> EOH; // the messages for ($i = $last-$n+1; $i <= $last; $i++) { $header = imap_header($nntp, $i); if (! $header->Size) { continue; } $subj = $header->subject; $from = $header->from; $email = $from[0]->mailbox."@".$from[0]->host; $name = $from[0]->personal ? $from[0]->personal : $email; $date = date('m/d/Y h:i A', $header->udate); print <<<EOM <tr> <td><a href="$_SERVER[PHP_SELF]"?msg=$i\">$subj</a></td> <td><a href="mailto:$email">$name</a></td> <td>$date</td> </tr> EOM; } // table footer echo "</table>\n";
To browse a listing of posts, you need to specify what you want by number. The first post ever
to a group gets number 1, and the most recent post is the number returned from
imap_num_msg( ). So, to get the last $n messages, loop from $last-$n+1 to $last.
Inside the loop, call imap_header( ) to pull out the header information about a post. The
header contains all the metainformation but not the actual text of the message; that's stored
in the body. Because the header is usually much smaller than the body, this allows you to
quickly retrieve data for many posts without taking too much time.
Now pass imap_header( ) two parameters: the server connection handle and the message
number. It returns an object with many properties, which are listed in Table 17-2.
Table 17-2. imap_header( ) fields from a NNTP server
Name Description Type Example
date or Date RFC 822 formatted date: date('r')
String Fri, 16 Aug 2002 01:52:24 -0400
subject or
Subject Message subject String Re: PHP Cookbook Revisions
message_id A unique ID identifying the String <20030410020818.

message [email protected]>
newsgroups The name of the group the
message was posted to String php.general
toaddress The address the message was
sent to String [email protected]
to Parsed version of toaddress
field Object
mailbox: "php-general", host:
"lists-php.net"
fromaddress The address that sent the
message String
Ralph Josephs
from Parsed version of
fromaddress field Object
personal: "Ralph Josephs",
mailbox: "ralph", host:
"example.net"
reply_toaddress The address you should reply
to, if you're trying to contact
the author
String [email protected]
reply_to Parsed version of
reply_toaddress field Object
Mailbox: "rjosephs", host:
"example.net"
senderaddress
The person who sent the
message; almost always
identical to the from field, but
if the from field doesn't
uniquely identify who sent the
message, this field does
String Ralph Josephs
sender Parsed version of
senderaddress field Object
Personal: "Ralph Josephs",
mailbox: "ralph", host:
"example.net"
Recent If the message is recent, or
new since the last time the
user checked for mail
String Y or N
Unseen If the message is unseen String Y or " "
Flagged If the message is marked String Y or " "
Answered If a reply has been sent to this
message String Y or " "
Deleted If the message is deleted String Y or " "
Draft If the message is a draft String Y or " "
Size Size of the message in bytes String 1345
udate Unix timestamp of message
date Int 1013480645
Mesgno The number of the message in
the group String 34943

Some of the more useful fields are: size, subject, the from list, and udate. The size
property is the size of the message in bytes; if it's 0, the message was either deleted or
otherwise removed. The subject field is the subject of the post. The from list is more
complicated. It's an array of objects; each element in the array holds an object with three
properties: personal, mailbox and host. The personal field is the name of the poster:
Homer Simpson. The mailbox field is the part of the email address before the @ sign:
homer. The host is the part of the email address after the @ sign: thesimpsons.com.
Usually, there's just one element in the from list array, because a message usually has just
one sender.
Pull the $header->from object into $from because PHP can't directly access $header-
>from[0]->personal due to the array in the middle. Then combine $from[0]->mailbox
and $from[0]->host to form the poster's email address. Use the ternary operator to assign
the personal field as the poster's name, if one is supplied; otherwise, make it the email
address.
The udate field is the posting time as an Unix timestamp. Use date( ) to convert it from
seconds to a more human-friendly format.
You can also view a specific posting as follows:
// read and display a single message $header = imap_header($nntp, $msg); $subj = $header->subject; $from = $header->from; $email = $from[0]->mailbox."@".$from[0]->host; $name = $from[0]->personal; $date = date('m/d/Y h:i A', $header->udate); $body = nl2br(htmlspecialchars(imap_fetchbody($nntp,$msg,1))); print <<<EOM <table> <tr> <th align=left>From:</th> <td>$name <<a href="mailto:$email">$email</a>></td> </tr> <tr> <th align=left>Subject:</th> <td>$subj</td> </tr> <tr> <th align=left>Date:</th> <td>$date</td> </tr> <tr> <td colspan="2">$body</td> </tr> </table> EOM;
The code to grab a single message is similar to one that grabs a sequence of message
headers. The main difference is that you define a $body variable that's the result of three
chained functions. Innermost, you call imap_fetchbody( ) to return the message body; it
takes the same parameters as imap_header( ). You pass that to htmlspecialchars( )
to escape any HTML that may interfere with yours. That result then is passed to nl2br( ) ,
which converts all the carriage returns to XHTML <br /> tags; the message should now look
correct on a web page.
To disconnect from the IMAP server and close the stream, pass the IMAP connection handle to
imap_close( ):
// close connection when finished imap_close($nntp);
17.6.4 See Also
Section 17.5 for more on posting to newsgroups; documentation on imap_open( ) at
http://www.php.net/imap-open, imap_header( ) at http://www.php.net/imap-header,
imap_body( ) at http://www.php.net/imap-body, and IMAP in general at
http://www.php.net/imap; code to read newsgroups in PHP without using IMAP at
http://cvs.php.net/cvs.php/php-news-web; RFC 977 at http://www.faqs.org/rfcs/rfc977.html.
Recipe 17.7 Getting and Putting Files with FTP
17.7.1 Problem
You want to transfer files using FTP.
17.7.2 Solution
Use PHP's built-in FTP functions:
$c = ftp_connect('ftp.example.com') or die("Can't connect"); ftp_login($c, $username, $password) or die("Can't login"); ftp_put($c, $remote, $local, FTP_ASCII) or die("Can't transfer"); ftp_close($c); or die("Can't close");
You can also use the cURL extension:
$c = curl_init("ftp://$username:[email protected]/$remote"); // $local is the location to store file on local machine $fh = fopen($local, 'w') or die($php_errormsg); curl_setopt($c, CURLOPT_FILE, $fh); curl_exec($c); curl_close($c);
17.7.3 Discussion

FTP stands for File Transfer Protocol and is a method of exchanging files between one
computer and another. Unlike with HTTP servers, it's easy to set up an FTP server to both
send and receive files.
Using the built-in FTP functions doesn't require additional libraries, but you must specifically
enable them with --enable-ftp . Because these functions are specialized to FTP, they're
easy to use when transferring files.
All FTP transactions begin with establishing a connection from your computer, the local client,
to another computer, the remote server:
$c = ftp_connect('ftp.example.com') or die("Can't connect");
Once connected, you need to send your username and password; the remote server can then
authenticate you and allow you to enter:
ftp_login($c, $username, $password) or die("Can't login");
Some FTP servers support a feature known as anonymous FTP. Under anonymous FTP, users
can log in without an account on the remote system. When you use anonymous FTP, your
username is anonymous, and your password is your email address.
Here's how to transfer files with ftp_put( ) and ftp_get( ):
ftp_put($c, $remote, $local, FTP_ASCII) or die("Can't transfer"); ftp_get($c, $local, $remote, FTP_ASCII) or die("Can't transfer");
The ftp_put( ) function takes a file on your computer and copies it to the remote server;
ftp_get( ) copies a file on the remote server to your computer. In the previous code,
$remote is the pathname to the remote file, and $local points at the file on your computer.
There are two final parameters passed to these functions. The FTP_ASCII parameter, used
here, transfers the file as if it were ASCII text. Under this option, linefeed endings are
automatically converted as you move from one operating system to another. The other option
is FTP_BINARY, which is used for nonplaintext files, so no linefeed conversions take place.
Use ftp_fget( ) and ftp_fput( ) to download or upload a file to an existing open file
pointer (opened using fopen( )) instead of to a location on the filesystem. For example,
here's how to retrieve a file and write it to the existing file pointer, $fp:
$fp = fopen($file, 'w'); ftp_fget($c, $fp, $remote, FTP_ASCII) or die("Can't transfer");
Finally, to disconnect from the remote host, call ftp_close( ) to log out:
ftp_close($c); or die("Can't close");
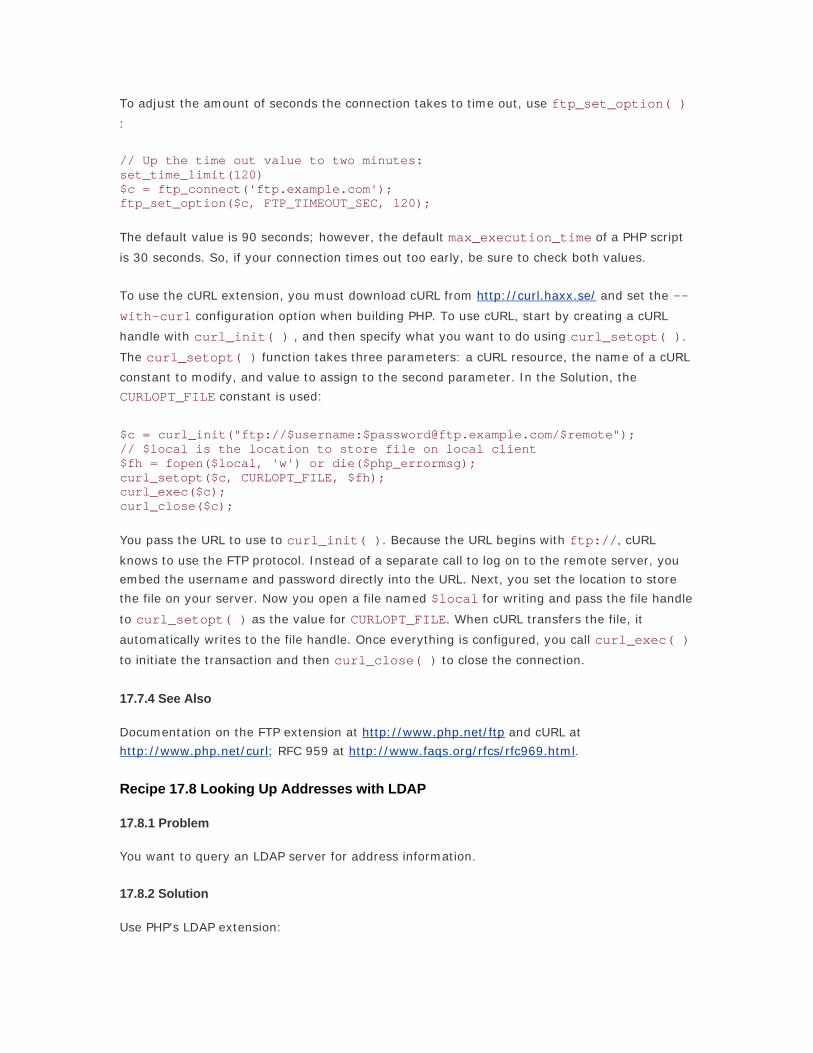
To adjust the amount of seconds the connection takes to time out, use ftp_set_option( )
:
// Up the time out value to two minutes: set_time_limit(120) $c = ftp_connect('ftp.example.com'); ftp_set_option($c, FTP_TIMEOUT_SEC, 120);
The default value is 90 seconds; however, the default max_execution_time of a PHP script
is 30 seconds. So, if your connection times out too early, be sure to check both values.
To use the cURL extension, you must download cURL from http://curl.haxx.se/ and set the --
with-curl configuration option when building PHP. To use cURL, start by creating a cURL
handle with curl_init( ) , and then specify what you want to do using curl_setopt( ).
The curl_setopt( ) function takes three parameters: a cURL resource, the name of a cURL
constant to modify, and value to assign to the second parameter. In the Solution, the
CURLOPT_FILE constant is used:
$c = curl_init("ftp://$username:[email protected]/$remote"); // $local is the location to store file on local client $fh = fopen($local, 'w') or die($php_errormsg); curl_setopt($c, CURLOPT_FILE, $fh); curl_exec($c); curl_close($c);
You pass the URL to use to curl_init( ). Because the URL begins with ftp://, cURL
knows to use the FTP protocol. Instead of a separate call to log on to the remote server, you
embed the username and password directly into the URL. Next, you set the location to store
the file on your server. Now you open a file named $local for writing and pass the file handle
to curl_setopt( ) as the value for CURLOPT_FILE. When cURL transfers the file, it
automatically writes to the file handle. Once everything is configured, you call curl_exec( )
to initiate the transaction and then curl_close( ) to close the connection.
17.7.4 See Also
Documentation on the FTP extension at http://www.php.net/ftp and cURL at
http://www.php.net/curl; RFC 959 at http://www.faqs.org/rfcs/rfc969.html.
Recipe 17.8 Looking Up Addresses with LDAP
17.8.1 Problem
You want to query an LDAP server for address information.
17.8.2 Solution
Use PHP's LDAP extension:

$ds = ldap_connect('ldap.example.com') or die($php_errormsg); ldap_bind($ds) or die($php_errormsg); $sr = ldap_search($ds, 'o=Example Inc., c=US', 'sn=*') or die($php_errormsg); $e = ldap_get_entries($ds, $sr) or die($php_errormsg); for ($i=0; $i < $e['count']; $i++) { echo $info[$i]['cn'][0] . ' (' . $info[$i]['mail'][0] . ')<br>'; } ldap_close($ds) or die($php_errormsg);
17.8.3 Discussion
LDAP stands for Lightweight Directory Access Protocol. An LDAP server stores directory
information, such as names and addresses, and allows you to query it for results. In many
ways, it's like a database, except that it's optimized for storing information about people.
In addition, instead of the flat structure provided by a database, an LDAP server allows you to
organize people in a hierarchical fashion. For example, employees may be divided into
marketing, technical, and operations divisions, or they can be split regionally into North
America, Europe, and Asia. This makes it easy to find all employees of a particular subset of a
company.
When using LDAP, the address repository is called as a data source. Each entry in the
repository has a globally unique identifier, known as a distinguished name. The distinguished
name includes both a person's name, but also their company information. For instance, John
Q. Smith, who works at Example Inc., a U.S. company has a distinguished name of cn=John
Q. Smith, o=Example Inc., c=US. In LDAP, cn stands for common name, o for
organization, and c for country.
You must enable PHP's LDAP support with --with-ldap. You can download an LDAP server
from http://www.openldap.org. This recipe assumes basic knowledge about LDAP. For more
information, read the articles on the O'Reilly Network at
http://www.onlamp.com/topics/apache/ldap.
Communicating with an LDAP server requires four steps: connecting, authenticating, searching
records, and logging off. Besides searching, you can also add, alter, and delete records.
The opening transactions require you to connect to an specific LDAP server and then
authenticate yourself in a process known as binding:
$ds = ldap_connect('ldap.example.com') or die($php_errormsg); ldap_bind($ds) or die($php_errormsg);

Passing only the connection handle, $ds, to ldap_bind( ) does an anonymous bind. To bind
with a specific username and password, pass them as the second and third parameters, like
so:
ldap_bind($ds, $username, $password) or die($php_errormsg);
Once logged in, you can request information. Because the information is arranged in a
hierarchy, you need to indicate the base distinguished name as the second parameter. Finally,
you pass in the search criteria. For example, here's how to find all people with a surname of
Jones at company Example Inc. located in the country US:
$sr = ldap_search($ds, 'o=Example Inc., c=US', 'sn=Jones') or die($php_errormsg); $e = ldap_get_entries($ds, $sr) or die($php_errormsg);
Once ldap_search( ) returns results, use ldap_get_entries( ) to retrieve the specific
data records. Then iterate through the array of entries, $e:
for ($i=0; $i < $e['count']; $i++) { echo $e[$i]['cn'][0] . ' (' . $e[$i]['mail'][0] . ')<br>'; }
Instead of doing count($e), use the precomputed record size located in $e['count'].
Inside the loop, print the first common name and email address for each record. For example:
David Sklar ([email protected]) Adam Trachtenberg ([email protected])
The ldap_search( ) function searches the entire tree equal to and below the distinguished
name base. To restrict the results to a specific level, use ldap_list( ). Because the search
takes place over a smaller set of records, ldap_list( ) can be significantly faster than
ldap_search( ).
17.8.4 See Also
Section 17.8 for authenticating users with LDAP; documentation on LDAP at
http://www.php.net/ldap; RFC 2251 at http://www.faqs.org/rfcs/rfc2251.html.
Recipe 17.9 Using LDAP for User Authentication
17.9.1 Problem
You want to restrict parts of your site to authenticated users. Instead of verifying people
against a database or using HTTP Basic authorization, you want to use an LDAP server.
Holding all user information in an LDAP server makes centralized user administration easier.

17.9.2 Solution
Use PEAR's Auth class, which supports LDAP authentication:
$options = array('host' => 'ldap.example.com', 'port' => '389', 'base' => 'o=Example Inc., c=US', 'userattr' => 'uid'); $auth = new Auth('LDAP', $options); // begin validation // print login screen for anonymous users $auth->start(); if ($auth->getAuth()) { // content for validated users } else { // content for anonymous users } // log users out $auth->logout();
17.9.3 Discussion
LDAP servers are designed for address storage, lookup, and retrieval, and so are better to use
than standard databases like MySQL or Oracle. LDAP servers are very fast, you can easily
implement access control by granting different permissions to different groups of users, and
many different programs can query the server. For example, most email clients can use an
LDAP server as an address book, so if you address a message to "John Smith," the server
replies with John's email address, [email protected].
PEAR's Auth class allows you to validate users against files, databases, and LDAP servers. The
first parameter is the type of authentication to use, and the second is an array of information
on how to validate users. For example:
$options = array('host' => 'ldap.example.com', 'port' => '389', 'base' => 'o=Example Inc., c=US', 'userattr' => 'uid'); $auth = new Auth('LDAP', $options);
This creates a new Auth object that validates against an LDAP server located at
ldap.example.com and communicates over port 389. The base directory name is o=Example
Inc., c=US, and usernames are checked against the uid attribute. The uid field stands for
user identifier. This is normally a username for a web site or a login name for a general
account. If your server doesn't store uid attributes for each user, you can substitute the cn
attribute. The common name field holds a user's full name, such as "John Q. Smith."
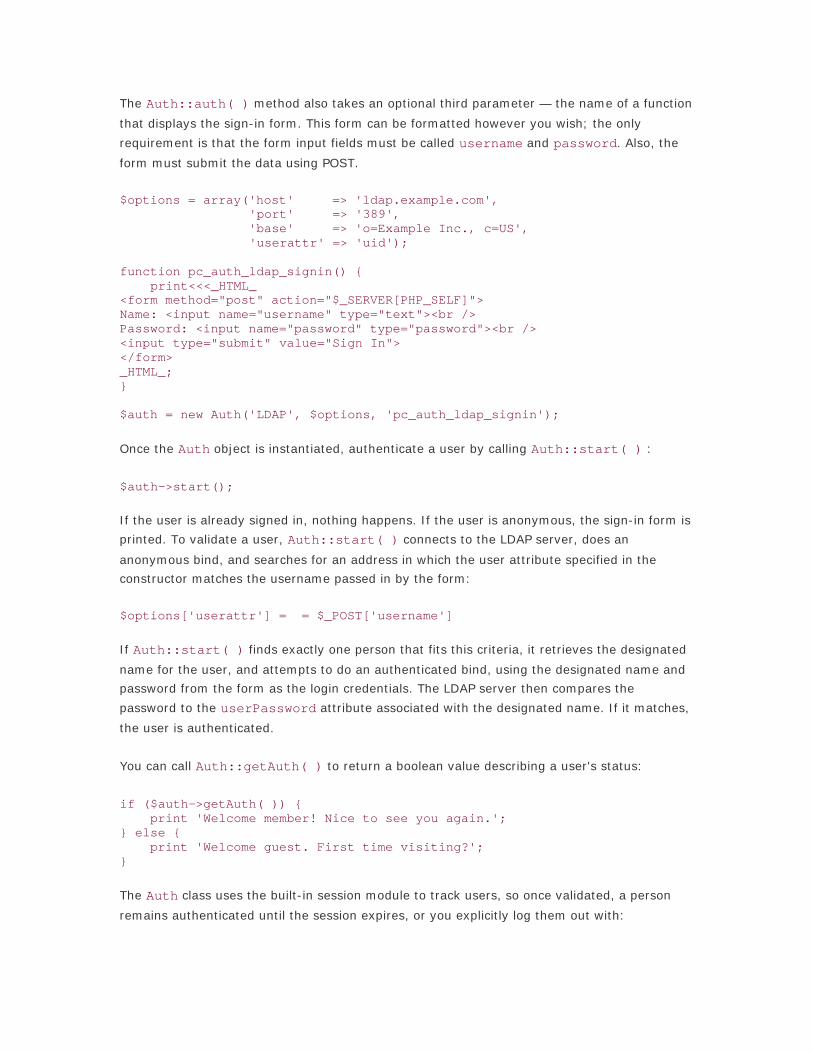
The Auth::auth( ) method also takes an optional third parameter — the name of a function
that displays the sign-in form. This form can be formatted however you wish; the only
requirement is that the form input fields must be called username and password. Also, the
form must submit the data using POST.
$options = array('host' => 'ldap.example.com', 'port' => '389', 'base' => 'o=Example Inc., c=US', 'userattr' => 'uid'); function pc_auth_ldap_signin() { print<<<_HTML_ <form method="post" action="$_SERVER[PHP_SELF]"> Name: <input name="username" type="text"><br /> Password: <input name="password" type="password"><br /> <input type="submit" value="Sign In"> </form> _HTML_; } $auth = new Auth('LDAP', $options, 'pc_auth_ldap_signin');
Once the Auth object is instantiated, authenticate a user by calling Auth::start( ) :
$auth->start();
If the user is already signed in, nothing happens. If the user is anonymous, the sign-in form is
printed. To validate a user, Auth::start( ) connects to the LDAP server, does an
anonymous bind, and searches for an address in which the user attribute specified in the
constructor matches the username passed in by the form:
$options['userattr'] = = $_POST['username']
If Auth::start( ) finds exactly one person that fits this criteria, it retrieves the designated
name for the user, and attempts to do an authenticated bind, using the designated name and
password from the form as the login credentials. The LDAP server then compares the
password to the userPassword attribute associated with the designated name. If it matches,
the user is authenticated.
You can call Auth::getAuth( ) to return a boolean value describing a user's status:
if ($auth->getAuth( )) { print 'Welcome member! Nice to see you again.'; } else { print 'Welcome guest. First time visiting?'; }
The Auth class uses the built-in session module to track users, so once validated, a person
remains authenticated until the session expires, or you explicitly log them out with:

$auth->logout( );
17.9.4 See Also
Section 17.8 for searching LDAP servers; PEAR's Auth class at http://pear.php.net/package-
info.php?package=Auth.
Recipe 17.10 Performing DNS Lookups
17.10.1 Problem
You want to look up a domain name or an IP address.
17.10.2 Solution
Use gethostbyname( ) and gethostbyaddr( ):
$ip = gethostbyname('www.example.com'); // 192.0.34.72 $host = gethostbyaddr('192.0.34.72'); // www.example.com
17.10.3 Discussion
You can't trust the name returned by gethostbyaddr( ) . A DNS server with authority for a
particular IP address can return any hostname at all. Usually, administrators set up DNS
servers to reply with a correct hostname, but a malicious user may configure her DNS server
to reply with incorrect hostnames. One way to combat this trickery is to call gethostbyname(
) on the hostname returned from gethostbyaddr( ) and make sure the name resolves to
the original IP address.
If either function can't successfully look up the IP address or the domain name, it doesn't
return false, but instead returns the argument passed to it. To check for failure, do this:
if ($host == ($ip = gethostbyname($host))) { // failure }
This assigns the return value of gethostbyname( ) to $ip and also checks that $ip is not
equal to the original $host.
Sometimes a single hostname can map to multiple IP addresses. To find all hosts, use
gethostbynamel( ):
$hosts = gethostbynamel('www.yahoo.com'); print_r($hosts); Array ( [0] => 64.58.76.176 [1] => 64.58.76.224 [2] => 64.58.76.177

[3] => 64.58.76.227 [4] => 64.58.76.179 [5] => 64.58.76.225 [6] => 64.58.76.178 [7] => 64.58.76.229 [8] => 64.58.76.223 )
In contrast to gethostbyname( ) and gethostbyaddr( ), gethostbynamel( ) returns
an array, not a string.
You can also do more complicated DNS-related tasks. For instance, you can get the MX
records using getmxrr( ):
getmxrr('yahoo.com', $hosts, $weight); for ($i = 0; $i < count($hosts); $i++) { echo "$weight[$i] $hosts[$i]\n"; } 5 mx4.mail.yahoo.com 1 mx2.mail.yahoo.com 1 mx1.mail.yahoo.com
To perform zone transfers, dynamic DNS updates, and more, see PEAR's Net_DNS package.
17.10.4 See Also
Documentation on gethostbyname( ) at http://www.php.net/gethostbyname,
gethostbyaddr( ) http://www.php.net/gethostbyaddr, gethostbyaddrl( ) at
http://www.php.net/gethostbyaddrl, and getmxrr( ) at http://www.php.net/getmxrr;
PEAR's Net_DNS package at http://pear.php.net/package-info.php?package=Net_DNS; DNS
and BIND by Paul Albitz and Cricket Liu (O'Reilly) .
Recipe 17.11 Checking if a Host Is Alive
17.11.1 Problem
You want to ping a host to see if it is still up and accessible from your location.
17.11.2 Solution
Use PEAR's Net_Ping package:
require 'Net/Ping.php'; $ping = new Net_Ping; if ($ping->checkhost('www.oreilly.com')) { print 'Reachable'; } else { print 'Unreachable'; }

$data = $ping->ping('www.oreilly.com');
17.11.3 Discussion
The ping program tries to send a message from your machine to another. If everything goes
well, you get a series of statistics chronicling the transaction. An error means that ping can't
reach the host for some reason.
On error, Net_Ping::checkhost( ) returns false, and Net_Ping::ping( ) returns the
constant PING_HOST_NOT_FOUND. If there's a problem running the ping program (because
Net_Ping is really just a wrapper for the program), PING_FAILED is returned.
If everything is okay, you receive an array similar to this:
$results = $ping->ping('www.oreilly.com'); foreach($results as $result) { print "$result\n"; } PING www.oreilly.com (209.204.146.22) from 192.168.123.101 : 32(60) bytes of data. 40 bytes from www.oreilly.com (209.204.146.22): icmp_seq=0 ttl=239 time=96.704 msec 40 bytes from www.oreilly.com (209.204.146.22): icmp_seq=1 ttl=239 time=86.567 msec 40 bytes from www.oreilly.com (209.204.146.22): icmp_seq=2 ttl=239 time=86.563 msec 40 bytes from www.oreilly.com (209.204.146.22): icmp_seq=3 ttl=239 time=136.565 msec 40 bytes from www.oreilly.com (209.204.146.22): icmp_seq=4 ttl=239 time=86.627 msec -- - www.oreilly.com ping statistics -- - 5 packets transmitted, 5 packets received, 0% packet loss round-trip min/avg/max/mdev = 86.563/98.605/136.565/19.381 ms
Net_Ping doesn't do any parsing of the data to pull apart the information, such as the packet
loss percentage or the average round-trip time. However, you can parse it yourself:
$results = $ping->ping('www.oreilly.com'); // grab last line of array; equivalent to non-destructive array_pop( ) // or $results[count($results) - 1] $round_trip = end($results); preg_match_all('#[ /]([.\d]+)#', $round_trip, $times); // pull out the data list($min,$avg,$max,$mdev) = $times[1]; // or print it out foreach($times[1] as $time) { print "$time\n"; } 83.229 91.230 103.223 7.485

This regular expression searches for either a space or a slash. It then captures a sequence of
one or more numbers and a decimal point. To avoid escaping /, we use the # nonstandard
character as your delimiter.
17.11.4 See Also
PEAR's Net_Ping package at http://pear.php.net/package-info.php?package=Net_Ping.
Recipe 17.12 Getting Information About a Domain Name
17.12.1 Problem
You want to look up contact information or other details about a domain name.
17.12.2 Solution
Use PEAR's Net_Whois class:
require 'Net/Whois.php'; $server = 'whois.networksolutions.com'; $query = 'example.org'; $data = Net_Whois::query($server, $query);
17.12.3 Discussion
The Net_Whois::query( ) method returns a large text string whose contents reinforce how
hard it can be to parse different Whois results:
Registrant: Internet Assigned Numbers Authority (EXAMPLE2-DOM) 4676 Admiralty Way, Suite 330 Marina del Rey, CA 90292 US Domain Name: EXAMPLE.ORG Administrative Contact, Technical Contact, Billing Contact: Internet Assigned Numbers Authority (IANA) [email protected] 4676 Admiralty Way, Suite 330 Marina del Rey, CA 90292 US 310-823-9358 Fax- 310-823-8649 Record last updated on 07-Jan-2002. Record expires on 01-Sep-2009. Record created on 31-Aug-1995. Database last updated on 6-Apr-2002 02:56:00 EST. Domain servers in listed order: A.IANA-SERVERS.NET 192.0.34.43 B.IANA-SERVERS.NET 193.0.0.236
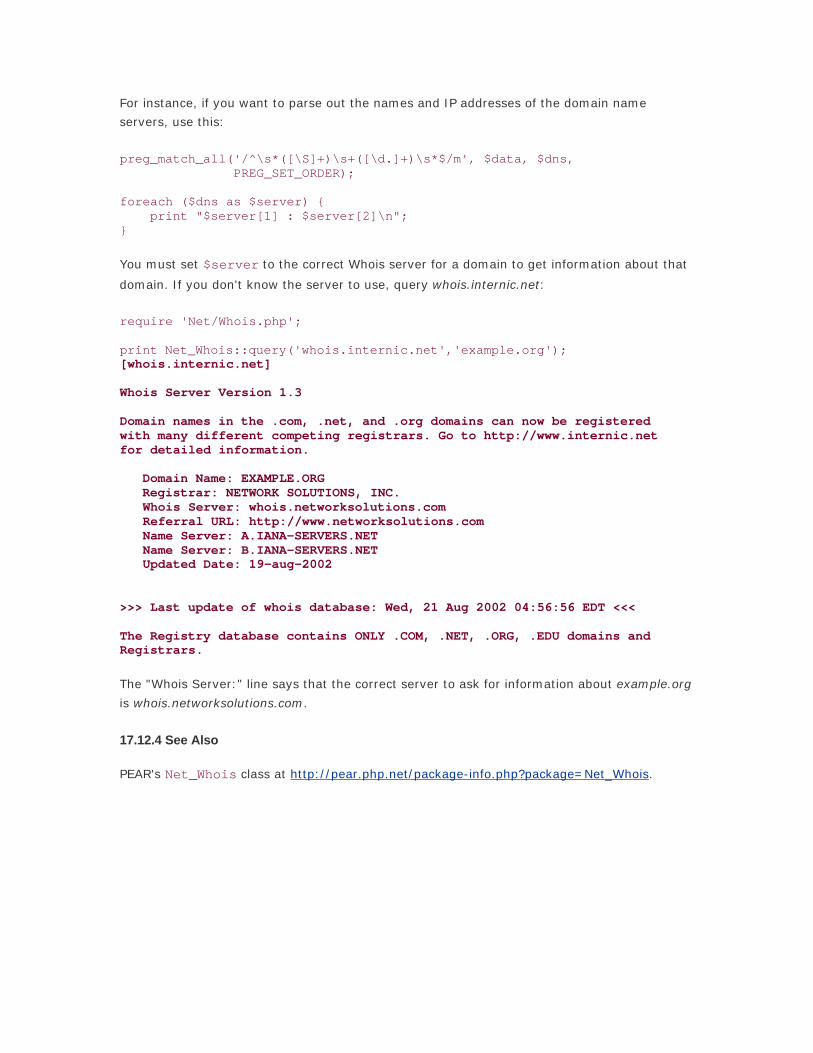
For instance, if you want to parse out the names and IP addresses of the domain name
servers, use this:
preg_match_all('/^\s*([\S]+)\s+([\d.]+)\s*$/m', $data, $dns, PREG_SET_ORDER); foreach ($dns as $server) { print "$server[1] : $server[2]\n"; }
You must set $server to the correct Whois server for a domain to get information about that
domain. If you don't know the server to use, query whois.internic.net:
require 'Net/Whois.php'; print Net_Whois::query('whois.internic.net','example.org'); [whois.internic.net] Whois Server Version 1.3 Domain names in the .com, .net, and .org domains can now be registered with many different competing registrars. Go to http://www.internic.net for detailed information. Domain Name: EXAMPLE.ORG Registrar: NETWORK SOLUTIONS, INC. Whois Server: whois.networksolutions.com Referral URL: http://www.networksolutions.com Name Server: A.IANA-SERVERS.NET Name Server: B.IANA-SERVERS.NET Updated Date: 19-aug-2002 >>> Last update of whois database: Wed, 21 Aug 2002 04:56:56 EDT <<< The Registry database contains ONLY .COM, .NET, .ORG, .EDU domains and Registrars.
The "Whois Server:" line says that the correct server to ask for information about example.org
is whois.networksolutions.com.
17.12.4 See Also
PEAR's Net_Whois class at http://pear.php.net/package-info.php?package=Net_Whois.

Chapter 18. Files
Introduction
Creating or Opening a Local File
Creating a Temporary File
Opening a Remote File
Reading from Standard Input
Reading a File into a String
Counting Lines, Paragraphs, or Records in a File
Processing Every Word in a File
Reading a Particular Line in a File
Processing a File Backward by Line or Paragraph
Picking a Random Line from a File
Randomizing All Lines in a File
Processing Variable Length Text Fields
Reading Configuration Files
Reading from or Writing to a Specific Location in a File
Removing the Last Line of a File
Modifying a File in Place Without a Temporary File
Flushing Output to a File
Writing to Standard Output
Writing to Many Filehandles Simultaneously
Escaping Shell Metacharacters
Passing Input to a Program

Reading Standard Output from a Program
Reading Standard Error from a Program
Locking a File
Reading and Writing Compressed Files
Program: Unzip

18.1 Introduction
The input and output in a web application usually flow between browser, server, and database,
but there are many circumstances in which files are involved too. Files are useful for retrieving
remote web pages for local processing, storing data without a database, and saving
information that other programs need access to. Plus, as PHP becomes a tool for more than
just pumping out web pages, the file I/O functions are even more useful.
PHP's interface for file I/O is similar to C's, although less complicated. The fundamental unit of
identifying a file to read from or write to is a file handle. This handle identifies your connection
to a specific file, and you use it for operations on the file. This chapter focuses on opening and
closing files and manipulating file handles in PHP, as well as what you can do with the file
contents once you've opened a file. Chapter 19 deals with directories and file metadata such
as permissions.
Opening /tmp/cookie-data and writing the contents of a specific cookie to the file looks like
this:
$fh = fopen('/tmp/cookie-data','w') or die("can't open file"); if (-1 == fwrite($fh,$_COOKIE['flavor'])) { die("can't write data"); } fclose($fh) or die("can't close file");
The function fopen( ) returns a file handle if its attempt to open the file is successful. If it
can't open the file (because of incorrect permissions, for example), it returns false. Section
18.2 and Section 18.4 cover ways to open files.
The function fwrite( ) writes the value of the flavor cookie to the file handle. It returns
the number of bytes written. If it can't write the string (not enough disk space, for example),
it returns -1.
Last, fclose( ) closes the file handle. This is done automatically at the end of a request, but
it's a good idea to explicitly close all files you open anyway. It prevents problems using the
code in a command-line context and frees up system resources. It also allows you to check
the return code from fclose( ). Buffered data might not be actually written to disk until
fclose( ) is called, so it's here that "disk full" errors are sometimes reported.
As with other processes, PHP must have the correct permissions to read from and write to a
file. This is usually straightforward in a command-line context but can cause confusion when
running scripts within a web server. Your web server (and consequently your PHP scripts)
probably runs as a specific user dedicated to web serving (or perhaps as user nobody). For
good security reasons, this user often has restricted permissions on what files it can access. If
your script is having trouble with a file operation, make sure the web server's user or group —
not yours — has permission to perform that file operation. Some web serving setups may run
your script as you, though, in which case you need to make sure that your scripts can't
accidentally read or write personal files that aren't part of your web site.

Because most file-handling functions just return false on error, you have to do some
additional work to find more details about that error. When the track_errors configuration
directive is on, each error message is put in the global variable $php_errormsg. Including
this variable as part of your error output makes debugging easier:
$fh = fopen('/tmp/cookie-data','w') or die("can't open: $php_errormsg"); if (-1 == fwrite($fh,$_COOKIE['flavor'])) { die("can't write: $php_errormsg") }; fclose($fh) or die("can't close: $php_errormsg");
If you don't have permission to write to the /tmp/cookie-data, the example dies with this error
output:
can't open: fopen("/tmp/cookie-data", "w") - Permission denied
There are differences in how files are treated by Windows and by Unix. To ensure your file
access code works appropriately on Unix and Windows, take care to handle line-delimiter
characters and pathnames correctly.
A line delimiter on Windows is two characters: ASCII 13 (carriage return) followed by ASCII 10
( linefeed or newline). On Unix, it's just ASCII 10. The typewriter-era names for these
characters explain why you can get "stair-stepped" text when printing out a Unix-delimited
file. Imagine these character names as commands to the platen in a typewriter or character-
at-a-time printer. A carriage return sends the platen back to the beginning of the line it's on,
and a line feed advances the paper by one line. A misconfigured printer encountering a Unix-
delimited file dutifully follows instructions and does a linefeed at the end of each line. This
advances to the next line but doesn't move the horizontal printing position back to the left
margin. The next stair-stepped line of text begins (horizontally) where the previous line left
off.
PHP functions that use a newline as a line-ending delimiter (for example, fgets( )) work on
both Windows and Unix because a newline is the character at the end of the line on either
platform.
To remove any line-delimiter characters, use the PHP function rtrim( ) :
$fh = fopen('/tmp/lines-of-data.txt','r') or die($php_errormsg); while($s = fgets($fh,1024)) { $s = rtrim($s); // do something with $s ... } fclose($fh) or die($php_errormsg);
This function removes any trailing whitespace in the line, including ASCII 13 and ASCII 10 (as
well as tab and space). If there's whitespace at the end of a line that you want to preserve,

but you still want to remove carriage returns and line feeds, use an appropriate regular
expression:
$fh = fopen('/tmp/lines-of-data.txt','r') or die($php_errormsg); while($s = fgets($fh,1024)) { $s = preg_replace('/\r?\n$/','',$s); // do something with $s ... } fclose($fh) or die($php_errormsg);
Unix and Windows also differ on the character used to separate directories in pathnames. Unix
uses a slash (/), and Windows uses a backslash (\). PHP makes sorting this out easy,
however, because the Windows version of PHP also understands / as a directory separator.
For example, this code successfully prints the contents of C:\Alligator\Crocodile Menu.txt:
$fh = fopen('c:/alligator/crocodile menu.txt','r') or die($php_errormsg); while($s = fgets($fh,1024)) { print $s; } fclose($fh) or die($php_errormsg);
This piece of code also takes advantage of the fact that Windows filenames aren't case-
sensitive. However, Unix filenames are.
Sorting out linebreak confusion isn't only a problem in your code that reads and writes files
but in your source code as well. If you have multiple people working on a project, make sure
all developers configure their editors to use the same kind of linebreaks.
Once you've opened a file, PHP gives you many tools to process its data. In keeping with PHP's
C-like I/O interface, the two basic functions to read data from a file are fread( ) , which
reads a specified number of bytes, and fgets( ), which reads a line at a time (up to a
specified number of bytes.) This code handles lines up to 256 bytes long:
$fh = fopen('orders.txt','r') or die($php_errormsg); while (! feof($fh)) { $s = fgets($fh,256); process_order($s); } fclose($fh) or die($php_errormsg);
If orders.txt has a 300-byte line, fgets( ) returns only the first 256 bytes. The next fgets(
) returns the next 44 bytes and stops when it finds the newline. The next fgets( ) moves to
the next line of the file. Examples in this chapter generally give fgets( ) a second argument
of 1048576: 1 MB. This is longer than lines in most text files, but the presence of such an
outlandish number should serve as a reminder to consider your maximum expected line length
when using fgets().
Many operations on file contents, such as picking a line at random (see Section 18.11) are
conceptually simpler (and require less code) if the entire file is read into a string or array.
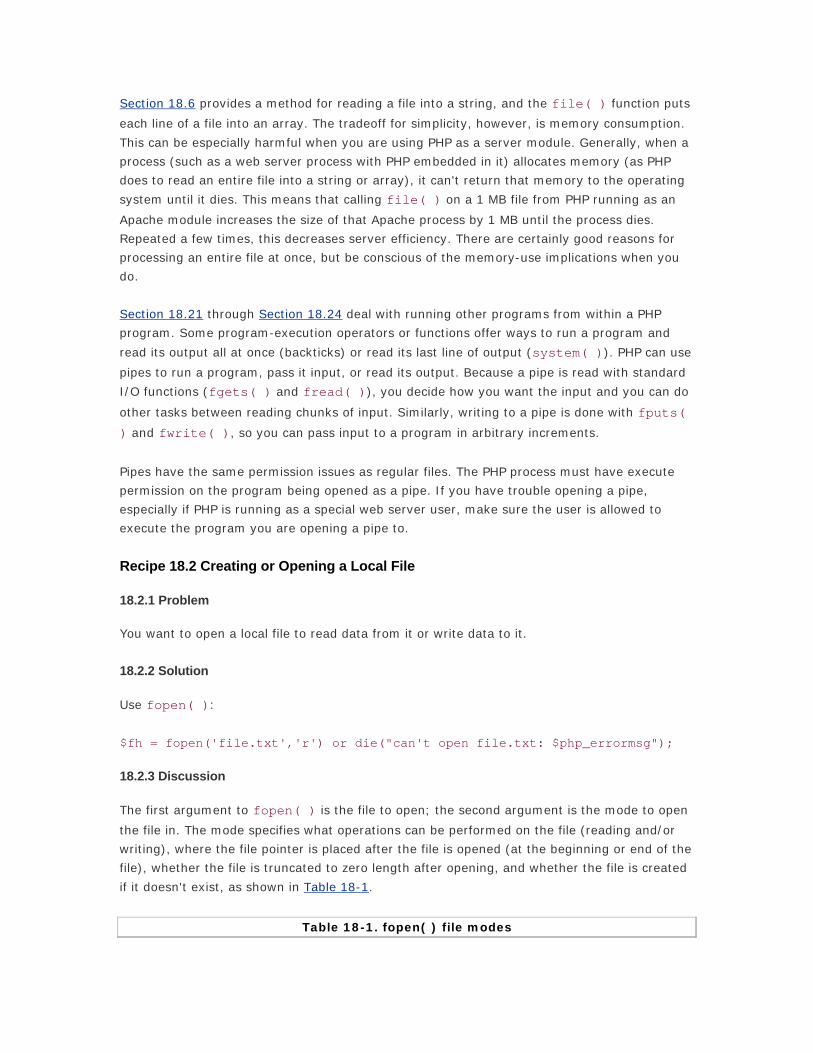
Section 18.6 provides a method for reading a file into a string, and the file( ) function puts
each line of a file into an array. The tradeoff for simplicity, however, is memory consumption.
This can be especially harmful when you are using PHP as a server module. Generally, when a
process (such as a web server process with PHP embedded in it) allocates memory (as PHP
does to read an entire file into a string or array), it can't return that memory to the operating
system until it dies. This means that calling file( ) on a 1 MB file from PHP running as an
Apache module increases the size of that Apache process by 1 MB until the process dies.
Repeated a few times, this decreases server efficiency. There are certainly good reasons for
processing an entire file at once, but be conscious of the memory-use implications when you
do.
Section 18.21 through Section 18.24 deal with running other programs from within a PHP
program. Some program-execution operators or functions offer ways to run a program and
read its output all at once (backticks) or read its last line of output (system( )). PHP can use
pipes to run a program, pass it input, or read its output. Because a pipe is read with standard
I/O functions (fgets( ) and fread( )), you decide how you want the input and you can do
other tasks between reading chunks of input. Similarly, writing to a pipe is done with fputs(
) and fwrite( ), so you can pass input to a program in arbitrary increments.
Pipes have the same permission issues as regular files. The PHP process must have execute
permission on the program being opened as a pipe. If you have trouble opening a pipe,
especially if PHP is running as a special web server user, make sure the user is allowed to
execute the program you are opening a pipe to.
Recipe 18.2 Creating or Opening a Local File
18.2.1 Problem
You want to open a local file to read data from it or write data to it.
18.2.2 Solution
Use fopen( ):
$fh = fopen('file.txt','r') or die("can't open file.txt: $php_errormsg");
18.2.3 Discussion
The first argument to fopen( ) is the file to open; the second argument is the mode to open
the file in. The mode specifies what operations can be performed on the file (reading and/or
writing), where the file pointer is placed after the file is opened (at the beginning or end of the
file), whether the file is truncated to zero length after opening, and whether the file is created
if it doesn't exist, as shown in Table 18-1.
Table 18-1. fopen( ) file modes
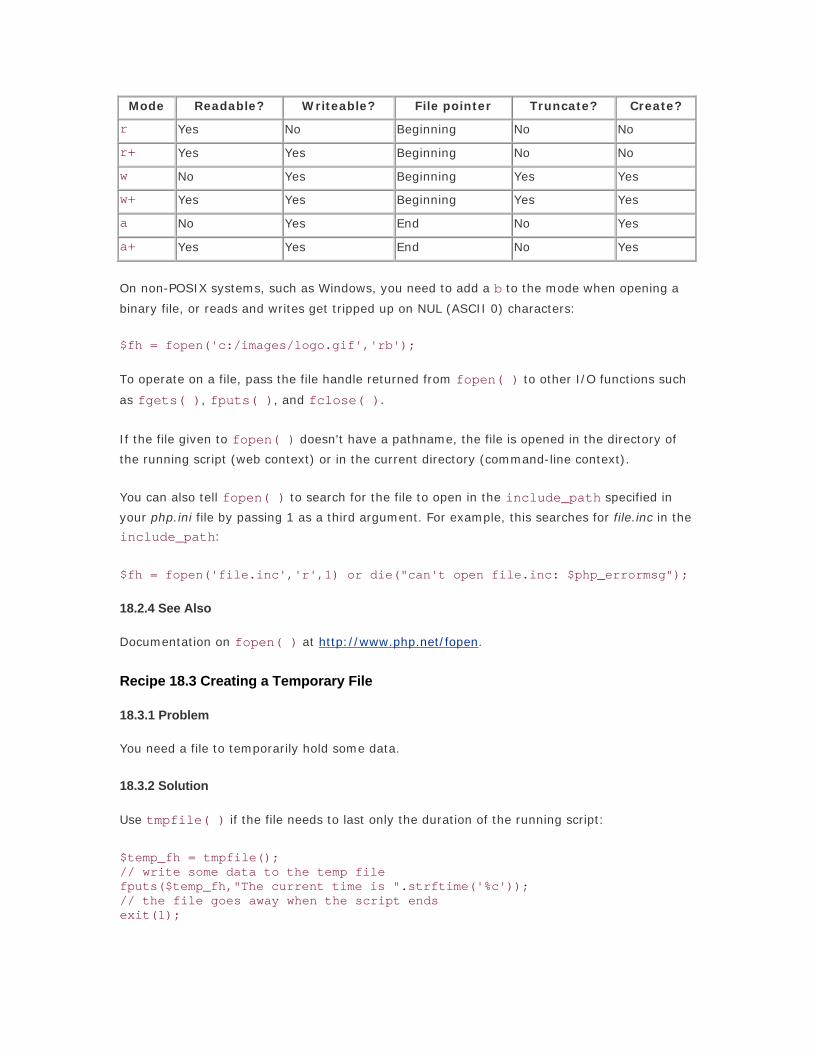
Mode Readable? Writeable? File pointer Truncate? Create?
r Yes No Beginning No No
r+ Yes Yes Beginning No No
w No Yes Beginning Yes Yes
w+ Yes Yes Beginning Yes Yes
a No Yes End No Yes
a+ Yes Yes End No Yes
On non-POSIX systems, such as Windows, you need to add a b to the mode when opening a
binary file, or reads and writes get tripped up on NUL (ASCII 0) characters:
$fh = fopen('c:/images/logo.gif','rb');
To operate on a file, pass the file handle returned from fopen( ) to other I/O functions such
as fgets( ), fputs( ), and fclose( ).
If the file given to fopen( ) doesn't have a pathname, the file is opened in the directory of
the running script (web context) or in the current directory (command-line context).
You can also tell fopen( ) to search for the file to open in the include_path specified in
your php.ini file by passing 1 as a third argument. For example, this searches for file.inc in the
include_path:
$fh = fopen('file.inc','r',1) or die("can't open file.inc: $php_errormsg");
18.2.4 See Also
Documentation on fopen( ) at http://www.php.net/fopen.
Recipe 18.3 Creating a Temporary File
18.3.1 Problem
You need a file to temporarily hold some data.
18.3.2 Solution
Use tmpfile( ) if the file needs to last only the duration of the running script:
$temp_fh = tmpfile(); // write some data to the temp file fputs($temp_fh,"The current time is ".strftime('%c')); // the file goes away when the script ends exit(1);

If the file needs to last longer, generate a filename with tempnam( ), and then use fopen(
):
$tempfilename = tempnam('/tmp','data-'); $temp_fh = fopen($tempfilename,'w') or die($php_errormsg); fputs($temp_fh,"The current time is ".strftime('%c')); fclose($temp_fh) or die($php_errormsg);
18.3.3 Discussion
The function tmpfile( ) creates a file with a unique name and returns a file handle. The file
is removed when fclose( ) is called on that file handle, or the script ends.
Alternatively, tempnam( ) generates a filename. It takes two arguments: the first is a
directory, and the second is a prefix for the filename. If the directory doesn't exist or isn't
writeable, tempnam( ) uses the system temporary directory — the TMPDIR environment
variable in Unix or the TMP environment variable in Windows. For example:
$tempfilename = tempnam('/tmp','data-'); print "Temporary data will be stored in $tempfilename"; Temporary data will be stored in /tmp/data-GawVoL
Because of the way PHP generates temporary filenames, the filename tempnam( ) returns is
actually created but left empty, even if your script never explicitly opens the file. This ensures
another program won't create a file with the same name between the time that you call
tempnam( ) and the time you call fopen( ) with the filename.
18.3.4 See Also
Documentation on tmpfile( ) at http://www.php.net/tmpfile and on tempnam( ) at
http://www.php.net/tempnam.
Recipe 18.4 Opening a Remote File
18.4.1 Problem
You want to open a file that's accessible to you via HTTP or FTP.
18.4.2 Solution
Pass the file's URL to fopen( ):
$fh = fopen('http://www.example.com/robots.txt','r') or die($php_errormsg);
18.4.3 Discussion
When fopen( ) is passed a filename that begins with http://, it retrieves the given page with
an HTTP/1.0 GET request (although a Host: header is also passed along to deal with virtual
hosts). Only the body of the reply can be accessed using the file handle, not the headers. Files
can be read, not written, via HTTP.
When fopen( ) is passed a filename that begins with ftp://, it returns a pointer to the
specified file, obtained via passive mode FTP. You can open files via FTP for either reading or
writing, but not both.
To open URLs that require a username and a password with fopen( ), embed the
authentication information in the URL like this:
$fh = fopen('ftp://username:[email protected]/pub/Index','r'); $fh = fopen('http://username:[email protected]/robots.txt','r');
Opening remote files with fopen( ) is implemented via a PHP feature called the URL fopen
wrapper. It's enabled by default but is disabled by setting allow_url_fopen to off in your
php.ini or web server configuration file. If you can't open remote files with fopen( ), check
your server configuration.
18.4.4 See Also
Section 11.2 through Section 11.6, which discuss retrieving URLs; documentation on fopen(
) at http://www.php.net/fopen and on the URL fopen wrapper feature at
http://www.php.net/features.remote-files.
Recipe 18.5 Reading from Standard Input
18.5.1 Problem
You want to read from standard input.
18.5.2 Solution
Use fopen( ) to open php://stdin:
$fh = fopen('php://stdin','r') or die($php_errormsg); while($s = fgets($fh,1024)) { print "You typed: $s"; }
18.5.3 Discussion
Section 20.4 discusses reading data from the keyboard in a command-line context. Reading
data from standard input isn't very useful in a web context, because information doesn't arrive
via standard input. The bodies of HTTP POST and file-upload requests are parsed by PHP and
put into special variables. They can't be read on standard input, as they can in some web
server and CGI implementations.

18.5.4 See Also
Section 20.4 for reading from the keyboard in a command-line context; documentation on
fopen( ) at http://www.php.net/fopen.
Recipe 18.6 Reading a File into a String
18.6.1 Problem
You want to load the entire contents of a file into a variable. For example, you want to
determine if the text in a file matches a regular expression.
18.6.2 Solution
Use filesize( ) to get the size of the file, and then tell fread( ) to read that many bytes:
$fh = fopen('people.txt','r') or die($php_errormsg); $people = fread($fh,filesize('people.txt')); if (preg_match('/Names:.*(David|Susannah)/i',$people)) { print "people.txt matches."; } fclose($fh) or die($php_errormsg);
18.6.3 Discussion
To read a binary file (e.g., an image) on Windows, a b must be appended to the file mode:
$fh = fopen('people.jpg','rb') or die($php_errormsg); $people = fread($fh,filesize('people.jpg')); fclose($fh);
There are easier ways to print the entire contents of a file than by reading it into a string and
then printing the string. PHP provides two functions for this. The first is fpassthru($fh),
which prints everything left on the file handle $fh and then closes it. The second,
readfile($filename), prints the entire contents of $filename.
You can use readfile( ) to implement a wrapper around images that shouldn't always be
displayed. This program makes sure a requested image is less than a week old:
$image_directory = '/usr/local/images'; if (preg_match('/^[a-zA-Z0-9]+\.(gif|jpeg)$/',$image,$matches) && is_readable($image_directory."/$image") && (filemtime($image_directory."/$image") >= (time() - 86400 * 7))) { header('Content-Type: image/'.$matches[1]); header('Content-Length: '.filesize($image_directory."/$image")); readfile($image_directory."/$image"); } else {

error_log("Can't serve image: $image"); }
The directory in which the images are stored, $image_directory, needs to be outside the
web server's document root for the wrapper to be effective. Otherwise, users can just access
the image files directly. You test the image for three things. First, that the filename passed in
$image is just alphanumeric with an ending of either .gif or .jpeg. You need to ensure that
characters such as .. or / are not in the filename; this prevents malicious users from
retrieving files outside the specified directory. Second, use is_readable( ) to make sure
you can read the file. Finally, get the file's modification time with filemtime( ) and make
sure that time is after 86400 x 7 seconds ago. There are 86,400 seconds in a day, so 86400 x
7 is a week.[1] If all of these conditions are met, you're ready to send the image. First, send
two headers to tell the browser the image's MIME type and file size. Then use readfile( )
to send the entire contents of the file to the user.
[1] When switching between standard time and daylight saving time, there are not 86,400 seconds in a day. See Section 3.11 for details.
18.6.4 See Also
Documentation on filesize( ) at http://www.php.net/filesize, fread( ) at
http://www.php.net/fread, fpassthru( ) at http://www.php.net/fpassthru, and readfile(
) at http://www.php.net/readfile.
Recipe 18.7 Counting Lines, Paragraphs, or Records in a File
18.7.1 Problem
You want to count the number of lines, paragraphs, or records in a file.
18.7.2 Solution
To count lines, use fgets( ). Because it reads a line at a time, you can count the number of
times it's called before reaching the end of a file:
$lines = 0; if ($fh = fopen('orders.txt','r')) { while (! feof($fh)) { if (fgets($fh,1048576)) { $lines++; } } } print $lines;
To count paragraphs, increment the counter only when you read a blank line:
$paragraphs = 0;

if ($fh = fopen('great-american-novel.txt','r')) { while (! feof($fh)) { $s = fgets($fh,1048576); if (("\n" == $s) || ("\r\n" == $s)) { $paragraphs++; } } } print $paragraphs;
To count records, increment the counter only when the line read contains just the record
separator and whitespace:
$records = 0; $record_separator = '--end--'; if ($fh = fopen('great-american-novel.txt','r')) { while (! feof($fh)) { $s = rtrim(fgets($fh,1048576)); if ($s == $record_separator) { $records++; } } } print $records;
18.7.3 Discussion
In the line counter, $lines is incremented only if fgets( ) returns a true value. As fgets(
) moves through the file, it returns each line it retrieves. When it reaches the last line, it
returns false, so $lines doesn't get incorrectly incremented. Because EOF has been
reached on the file, feof( ) returns true, and the while loop ends.
This paragraph counter works fine on simple text but may produce unexpected results when
presented with a long string of blank lines or a file without two consecutive linebreaks. These
problems can be remedied with functions based on preg_split( ). If the file is small and
can be read into memory, use the pc_split_paragraphs( ) function shown in Example
18-1. This function returns an array containing each paragraph in the file.
Example 18-1. pc_split_paragraphs( )
function pc_split_paragraphs($file,$rs="\r?\n") { $text = join('',file($file)); $matches = preg_split("/(.*?$rs)(?:$rs)+/s",$text,-1, PREG_SPLIT_DELIM_CAPTURE|PREG_SPLIT_NO_EMPTY); return $matches; }
The contents of the file are broken on two or more consecutive newlines and returned in the
$matches array. The default record-separation regular expression, \r?\n, matches both
Windows and Unix linebreaks. If the file is too big to read into memory at once, use the

pc_split_paragraphs_largefile( ) function shown in Example 18-2, which reads the
file in 4K chunks.
Example 18-2. pc_split_paragraphs_largefile( )
function pc_split_paragraphs_largefile($file,$rs="\r?\n") { global $php_errormsg; $unmatched_text = ''; $paragraphs = array(); $fh = fopen($file,'r') or die($php_errormsg); while(! feof($fh)) { $s = fread($fh,4096) or die($php_errormsg); $text_to_split = $unmatched_text . $s; $matches = preg_split("/(.*?$rs)(?:$rs)+/s",$text_to_split,-1, PREG_SPLIT_DELIM_CAPTURE|PREG_SPLIT_NO_EMPTY); // if the last chunk doesn't end with two record separators, save it * to prepend to the next section that gets read $last_match = $matches[count($matches)-1]; if (! preg_match("/$rs$rs\$/",$last_match)) { $unmatched_text = $last_match; array_pop($matches); } else { $unmatched_text = ''; } $paragraphs = array_merge($paragraphs,$matches); } // after reading all sections, if there is a final chunk that doesn't * end with the record separator, count it as a paragraph if ($unmatched_text) { $paragraphs[] = $unmatched_text; } return $paragraphs; }
This function uses the same regular expression as pc_split_paragraphs( ) to split the file
into paragraphs. When it finds a paragraph end in a chunk read from the file, it saves the rest
of the text in the chunk in $unmatched_text and prepends it to the next chunk read. This
includes the unmatched text as the beginning of the next paragraph in the file.
18.7.4 See Also
Documentation on fgets( ) at http://www.php.net/fgets, on feof( ) at
http://www.php.net/feof, and on preg_split( ) at http://www.php.net/preg-split.
Recipe 18.8 Processing Every Word in a File
18.8.1 Problem
You want to do something with every word in a file.
18.8.2 Solution
Read in each line with fgets( ), separate the line into words, and process each word:
$fh = fopen('great-american-novel.txt','r') or die($php_errormsg); while (! feof($fh)) { if ($s = fgets($fh,1048576)) { $words = preg_split('/\s+/',$s,-1,PREG_SPLIT_NO_EMPTY); // process words } } fclose($fh) or die($php_errormsg);
18.8.3 Discussion
Here's how to calculate average word length in a file:
$word_count = $word_length = 0; if ($fh = fopen('great-american-novel.txt','r')) { while (! feof($fh)) { if ($s = fgets($fh,1048576)) { $words = preg_split('/\s+/',$s,-1,PREG_SPLIT_NO_EMPTY); foreach ($words as $word) { $word_count++; $word_length += strlen($word); } } } } print sprintf("The average word length over %d words is %.02f characters.", $word_count, $word_length/$word_count);
Processing every word proceeds differently depending on how "word" is defined. The code in
this recipe uses the Perl-compatible regular-expression engine's \s whitespace metacharacter,
which includes space, tab, newline, carriage return, and formfeed. Section 2.6 breaks apart a
line into words by splitting on a space, which is useful in that recipe because the words have
to be rejoined with spaces. The Perl-compatible engine also has a word-boundary assertion
(\b) that matches between a word character (alphanumeric) and a nonword character
(anything else). Using \b instead of \s to delimit words most noticeably treats differently
words with embedded punctuation. The term 6 o'clock is two words when split by
whitespace (6 and o'clock); it's four words when split by word boundaries (6, o, ', and
clock).

18.8.4 See Also
Section 13.3 discusses regular expressions to match words; Section 1.5 for breaking apart a
line by words; documentation on fgets( ) at http://www.php.net/fgets, on preg_split( )
at http://www.php.net/preg-split, and on the Perl-compatible regular expression extension at
http://www.php.net/pcre.
Recipe 18.9 Reading a Particular Line in a File
18.9.1 Problem
You want to read a specific line in a file; for example, you want to read the most recent
guestbook entry that's been added on to the end of a guestbook file.
18.9.2 Solution
If the file fits into memory, read the file into an array and then select the appropriate array
element:
$lines = file('vacation-hotspots.txt'); print $lines[2];
18.9.3 Discussion
Because array indexes start at 0, $lines[2] refers to the third line of the file.
If the file is too big to read into an array, read it line by line and keep track of which line
you're on:
$line_counter = 0; $desired_line = 29; $fh = fopen('vacation-hotspots.txt','r') or die($php_errormsg); while ((! feof($fh)) && ($line_counter <= $desired_line)) { if ($s = fgets($fh,1048576)) { $line_counter++; } } fclose($fh) or die($php_errormsg); print $s;
Setting $desired_line = 29 prints the 30th line of the file, to be consistent with the code in
the Solution. To print the 29th line of the file, change the while loop line to:
while ((! feof($fh)) && ($line_counter < $desired_line)) {
18.9.4 See Also

Documentation on fgets( ) at http://www.php.net/fgets and feof( ) at
http://www.php.net/feof.
Recipe 18.10 Processing a File Backward by Line or Paragraph
18.10.1 Problem
You want to do something with each line of a file, starting at the end. For example, it's easy to
add new guestbook entries to the end of a file by opening in append mode, but you want to
display the entries with the most recent first, so you need to process the file starting at the
end.
18.10.2 Solution
If the file fits in memory, use file( ) to read each line in the file into an array and then
reverse the array:
$lines = file('guestbook.txt'); $lines = array_reverse($lines);
18.10.3 Discussion
You can also iterate through an unreversed array of lines starting at the end. Here's how to
print out the last 10 lines in a file, last line first:
$lines = file('guestbook.txt'); for ($i = 0, $j = count($lines); $i <= 10; $i++) { print $lines[$j - $i]; }
18.10.4 See Also
Documentation on file( ) at http://www.php.net/file and array_reverse( ) at
http://www.php.net/array-reverse.
Recipe 18.11 Picking a Random Line from a File
18.11.1 Problem
You want to pick a line at random from a file; for example, you want to display a selection
from a file of sayings.
18.11.2 Solution
Use the pc_randomint( ) function shown in Example 18-3, which spreads the selection
odds evenly over all lines in a file.
Example 18-3. pc_randomint( )

function pc_randomint($max = 1) { $m = 1000000; return ((mt_rand(1,$m * $max)-1)/$m); }
Here's an example that uses the pc_randomint( ) function:
$line_number = 0; $fh = fopen('sayings.txt','r') or die($php_errormsg); while (! feof($fh)) { if ($s = fgets($fh,1048576)) { $line_number++; if (pc_randomint($line_number) < 1) { $line = $s; } } } fclose($fh) or die($php_errormsg);
18.11.3 Discussion
The pc_randomint( ) function computes a random decimal number between and $max,
including 0 but excluding $max. As each line is read, a line counter is incremented, and
pc_randomint( ) generates a random number between 0 and $line_number. If the
number is less than 1, the current line is selected as the randomly chosen line. After all lines
have been read, the last line that was selected as the randomly chosen line is left in $line.
This algorithm neatly ensures that each line in an n line file has a 1/n chance of being chosen
without having to store all n lines into memory.
18.11.4 See Also
Documentation on mt_rand( ) at http://www.php.net/mt-rand.
Recipe 18.12 Randomizing All Lines in a File
18.12.1 Problem
You want to randomly reorder all lines in a file. You have a file of funny quotes, for example,
and you want to pick out one at random.
18.12.2 Solution
Read all the lines in the file into an array with file( ) , and then shuffle the elements of the
array:
$lines = file('quotes-of-the-day.txt'); $lines = pc_array_shuffle($lines);
18.12.3 Discussion
The pc_array_shuffle( ) function from Section 4.21 is more random than PHP's built-in
shuffle( ) function, because it uses the Fisher-Yates shuffle, which equally distributes the
elements throughout the array.
18.12.4 See Also
Section 4.20 for pc_array_shuffle( ); documentation on shuffle( ) at
http://www.php.net/shuffle.
Recipe 18.13 Processing Variable Length Text Fields
18.13.1 Problem
You want to read delimited text fields from a file. You might, for example, have a database
program that prints records one per line, with tabs between each field in the record, and you
want to parse this data into an array.
18.13.2 Solution
Read in each line and then split the fields based on their delimiter:
$delim = '|'; $fh = fopen('books.txt','r') or die("can't open: $php_errormsg"); while (! feof($fh)) { $s = rtrim(fgets($fh,1024)); $fields = explode($delim,$s); // ... do something with the data ... } fclose($fh) or die("can't close: $php_errormsg");
18.13.3 Discussion
To parse the following data in books.txt:
Elmer Gantry|Sinclair Lewis|1927 The Scarlatti Inheritance|Robert Ludlum|1971 The Parsifal Mosaic|Robert Ludlum|1982 Sophie's Choice|William Styron|1979
Process each record like this:
$fh = fopen('books.txt','r') or die("can't open: $php_errormsg"); while (! feof($fh)) { $s = rtrim(fgets($fh,1024)); list($title,$author,$publication_year) = explode('|',$s); // ... do something with the data ... } fclose($fh) or die("can't close: $php_errormsg");

The line length argument to fgets( ) needs to be at least as long as the longest record, so
that a record doesn't get truncated.
Calling rtrim( ) is necessary because fgets( ) includes the trailing whitespace in the line
it reads. Without rtrim( ), each $publication_year would have a newline at its end.
18.13.4 See Also
Section 1.12 discusses ways to break apart strings into pieces; Section 1.10 and Section 1.11
cover parsing comma-separated and fixed-width data; documentation on explode( ) at
http://www.php.net/explode and rtrim( ) at http://www.php.net/rtrim.
Recipe 18.14 Reading Configuration Files
18.14.1 Problem
You want to use configuration files to initialize settings in your programs.
18.14.2 Solution
Use parse_ini_file( ):
$config = parse_ini_file('/etc/myapp.ini');
18.14.3 Discussion
The function parse_ini_file( ) reads configuration files structured like PHP's main php.ini
file. Instead of applying the settings in the configuration file to PHP's configuration, however,
parse_ini_file( ) returns the values from the file in an array.
For example, when parse_ini_file( ) is given a file with these contents:
; physical features eyes=brown hair=brown glasses=yes ; other features name=Susannah likes=monkeys,ice cream,reading
The array it returns is:
Array ( [eyes] => brown [hair] => brown [glasses] => 1 [name] => Susannah
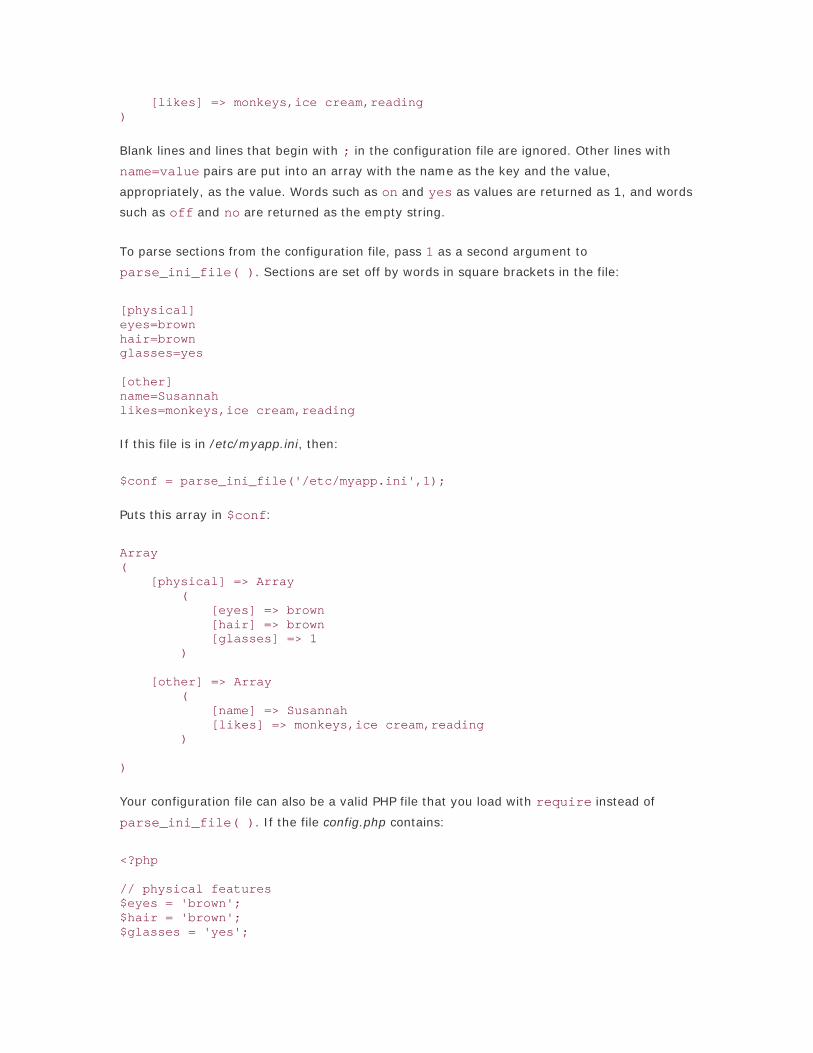
[likes] => monkeys,ice cream,reading )
Blank lines and lines that begin with ; in the configuration file are ignored. Other lines with
name=value pairs are put into an array with the name as the key and the value,
appropriately, as the value. Words such as on and yes as values are returned as 1, and words
such as off and no are returned as the empty string.
To parse sections from the configuration file, pass 1 as a second argument to
parse_ini_file( ). Sections are set off by words in square brackets in the file:
[physical] eyes=brown hair=brown glasses=yes [other] name=Susannah likes=monkeys,ice cream,reading
If this file is in /etc/myapp.ini, then:
$conf = parse_ini_file('/etc/myapp.ini',1);
Puts this array in $conf:
Array ( [physical] => Array ( [eyes] => brown [hair] => brown [glasses] => 1 ) [other] => Array ( [name] => Susannah [likes] => monkeys,ice cream,reading ) )
Your configuration file can also be a valid PHP file that you load with require instead of
parse_ini_file( ). If the file config.php contains:
<?php // physical features $eyes = 'brown'; $hair = 'brown'; $glasses = 'yes';
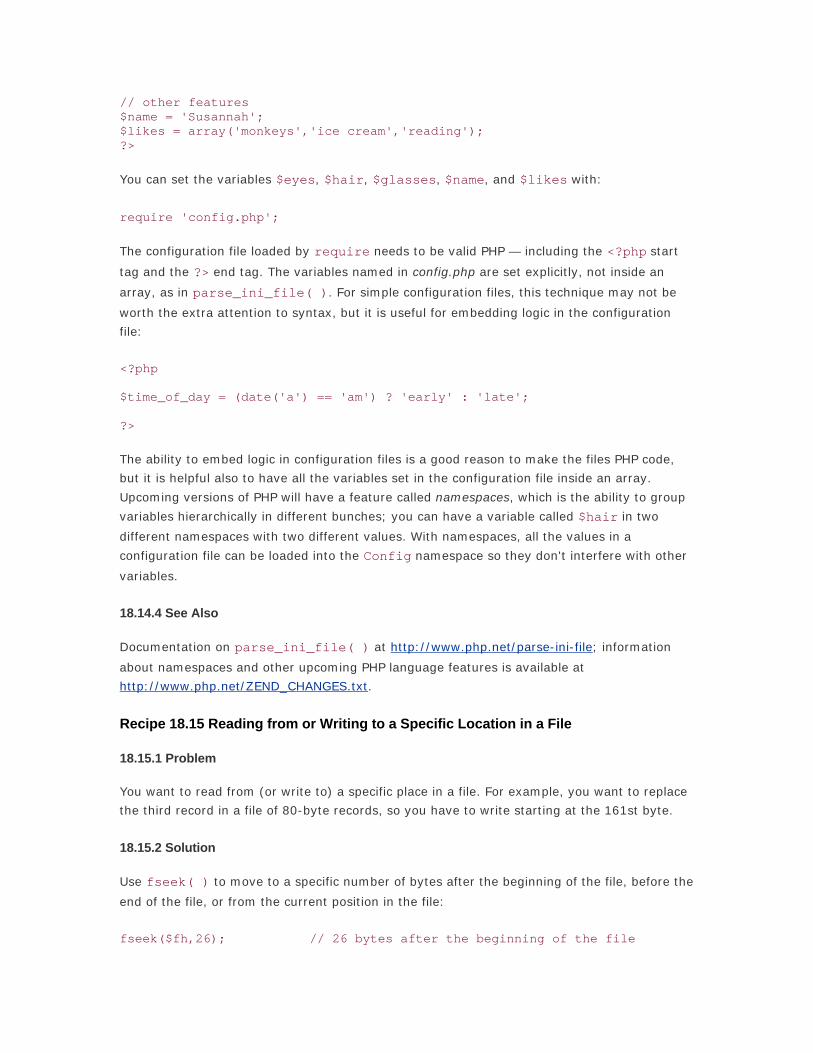
// other features $name = 'Susannah'; $likes = array('monkeys','ice cream','reading'); ?>
You can set the variables $eyes, $hair, $glasses, $name, and $likes with:
require 'config.php';
The configuration file loaded by require needs to be valid PHP — including the <?php start
tag and the ?> end tag. The variables named in config.php are set explicitly, not inside an
array, as in parse_ini_file( ). For simple configuration files, this technique may not be
worth the extra attention to syntax, but it is useful for embedding logic in the configuration
file:
<?php $time_of_day = (date('a') == 'am') ? 'early' : 'late'; ?>
The ability to embed logic in configuration files is a good reason to make the files PHP code,
but it is helpful also to have all the variables set in the configuration file inside an array.
Upcoming versions of PHP will have a feature called namespaces, which is the ability to group
variables hierarchically in different bunches; you can have a variable called $hair in two
different namespaces with two different values. With namespaces, all the values in a
configuration file can be loaded into the Config namespace so they don't interfere with other
variables.
18.14.4 See Also
Documentation on parse_ini_file( ) at http://www.php.net/parse-ini-file; information
about namespaces and other upcoming PHP language features is available at
http://www.php.net/ZEND_CHANGES.txt.
Recipe 18.15 Reading from or Writing to a Specific Location in a File
18.15.1 Problem
You want to read from (or write to) a specific place in a file. For example, you want to replace
the third record in a file of 80-byte records, so you have to write starting at the 161st byte.
18.15.2 Solution
Use fseek( ) to move to a specific number of bytes after the beginning of the file, before the
end of the file, or from the current position in the file:
fseek($fh,26); // 26 bytes after the beginning of the file

fseek($fh,26,SEEK_SET); // 26 bytes after the beginning of the file fseek($fh,-39,SEEK_END); // 39 bytes before the end of the file fseek($fh,10,SEEK_CUR); // 10 bytes ahead of the current position fseek($fh,0); // beginning of the file
The rewind( ) function moves to the beginning of a file:
rewind($fh); // the same as fseek($fh,0)
18.15.3 Discussion
The function fseek( ) returns 0 if it can move to the specified position, otherwise it returns -
1. Seeking beyond the end of the file isn't an error for fseek( ). Contrastingly, rewind( )
returns 0 if it encounters an error.
You can use fseek( ) only with local files, not HTTP or FTP files opened with fopen( ). If
you pass a file handle of a remote file to fseek( ), it throws an E_NOTICE error.
To get the current file position, use ftell( ) :
if (0 === ftell($fh)) { print "At the beginning of the file."; }
Because ftell( ) returns false on error, you need to use the === operator to make sure
that its return value is really the integer 0.
18.15.4 See Also
Documentation on fseek( ) at http://www.php.net/fseek, ftell( ) at
http://www.php.net/ftell, and rewind( ) at http://www.php.net/rewind.
Recipe 18.16 Removing the Last Line of a File
18.16.1 Problem
You want to remove the last line of a file; for example, someone's added a comment to the
end of your guestbook. You don't like it, so you want to get rid of it.
18.16.2 Solution
If the file is small, you can read it into an array with file( ) and then remove the last
element of the array:
$lines = file('employees.txt'); array_pop($lines); $file = join('',$lines);

18.16.3 Discussion
If the file is large, reading it into an array requires too much memory. Instead, use this code,
which seeks to the end of the file and works backwards, stopping when it finds a newline:
$fh = fopen('employees.txt','r') or die("can't open: $php_errormsg"); $linebreak = $beginning_of_file = 0; $gap = 80; $filesize = filesize('employees.txt'); fseek($fh,0,SEEK_END); while (! ($linebreak || $beginning_of_file)) { // save where we are in the file $pos = ftell($fh); /* move back $gap chars, use rewind() to go to the beginning if * we're less than $gap characters into the file */ if ($pos < $gap) { rewind($fh); } else { fseek($fh,-$gap,SEEK_CUR); } // read the $gap chars we just seeked back over $s = fread($fh,$gap) or die($php_errormsg); /* if we read to the end of the file, remove the last character * since if it's a newline, we should ignore it */ if ($pos + $gap >= $filesize) { $s = substr_replace($s,'',-1); } // move back to where we were before we read $gap chars into $s if ($pos < $gap) { rewind($fh); } else { fseek($fh,-$gap,SEEK_CUR); } // is there a linebreak in $s ? if (is_integer($lb = strrpos($s,"\n"))) { $linebreak = 1; // the last line of the file begins right after the linebreak $line_end = ftell($fh) + $lb + 1; } // break out of the loop if we're at the beginning of the file if (ftell($fh) == 0) { $beginning_of_file = 1; } } if ($linebreak) { rewind($fh); $file_without_last_line = fread($fh,$line_end) or die($php_errormsg); } fclose($fh) or die("can't close: $php_errormsg");
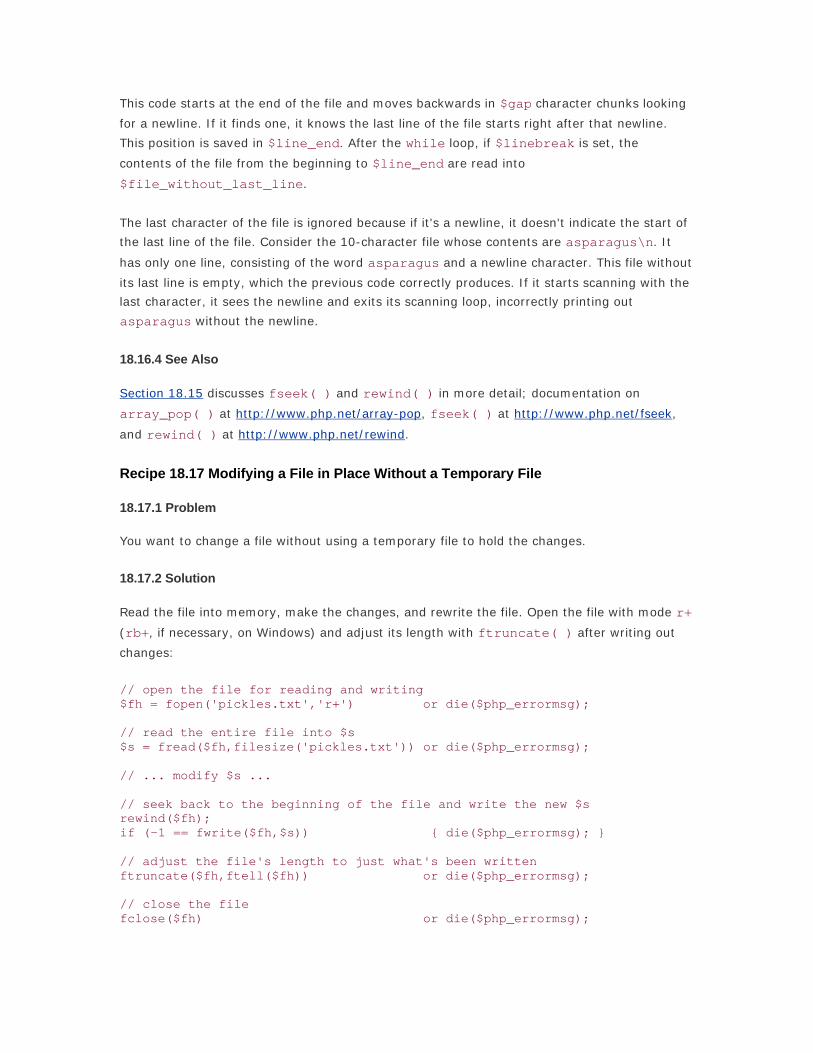
This code starts at the end of the file and moves backwards in $gap character chunks looking
for a newline. If it finds one, it knows the last line of the file starts right after that newline.
This position is saved in $line_end. After the while loop, if $linebreak is set, the
contents of the file from the beginning to $line_end are read into
$file_without_last_line.
The last character of the file is ignored because if it's a newline, it doesn't indicate the start of
the last line of the file. Consider the 10-character file whose contents are asparagus\n. It
has only one line, consisting of the word asparagus and a newline character. This file without
its last line is empty, which the previous code correctly produces. If it starts scanning with the
last character, it sees the newline and exits its scanning loop, incorrectly printing out
asparagus without the newline.
18.16.4 See Also
Section 18.15 discusses fseek( ) and rewind( ) in more detail; documentation on
array_pop( ) at http://www.php.net/array-pop, fseek( ) at http://www.php.net/fseek,
and rewind( ) at http://www.php.net/rewind.
Recipe 18.17 Modifying a File in Place Without a Temporary File
18.17.1 Problem
You want to change a file without using a temporary file to hold the changes.
18.17.2 Solution
Read the file into memory, make the changes, and rewrite the file. Open the file with mode r+
(rb+, if necessary, on Windows) and adjust its length with ftruncate( ) after writing out
changes:
// open the file for reading and writing $fh = fopen('pickles.txt','r+') or die($php_errormsg); // read the entire file into $s $s = fread($fh,filesize('pickles.txt')) or die($php_errormsg); // ... modify $s ... // seek back to the beginning of the file and write the new $s rewind($fh); if (-1 == fwrite($fh,$s)) { die($php_errormsg); } // adjust the file's length to just what's been written ftruncate($fh,ftell($fh)) or die($php_errormsg); // close the file fclose($fh) or die($php_errormsg);

18.17.3 Discussion
The following code turns text emphasized with asterisks or slashes into text with HTML <b> or
<i> tags:
$fh = fopen('message.txt','r+') or die($php_errormsg); // read the entire file into $s $s = fread($fh,filesize('message.txt')) or die($php_errormsg); // convert *word* to <b>word</b> $s = preg_replace('@\*(.*?)\*@i','<b>$1</b>',$s); // convert /word/ to <i>word</i> $s = preg_replace('@/(.*?)/@i','<i>$1</i>',$s); rewind($fh); if (-1 == fwrite($fh,$s)) { die($php_errormsg); } ftruncate($fh,ftell($fh)) or die($php_errormsg); fclose($fh) or die($php_errormsg);
Because adding HTML tags makes the file grow, the entire file has to be read into memory and
then processed. If the changes to a file make each line shrink (or stay the same size), the file
can be processed line by line, saving memory. This example converts text marked with <b>
and <i> to text marked with asterisks and slashes:
$fh = fopen('message.txt','r+') or die($php_errormsg); // figure out how many bytes to read $bytes_to_read = filesize('message.txt'); // initialize variables that hold file positions $next_read = $last_write = 0; // keep going while there are still bytes to read while ($next_read < $bytes_to_read) { /* move to the position of the next read, read a line, and save * the position of the next read */ fseek($fh,$next_read); $s = fgets($fh,1048576) or die($php_errormsg); $next_read = ftell($fh); // convert <b>word</b> to *word* $s = preg_replace('@<b[^>]*>(.*?)</b>@i','*$1*',$s); // convert <i>word</i> to /word/ $s = preg_replace('@<i[^>]*>(.*?)</i>@i','/$1/',$s); /* move to the position where the last write ended, write the * converted line, and save the position for the next write */ fseek($fh,$last_write); if (-1 == fwrite($fh,$s)) { die($php_errormsg); } $last_write = ftell($fh); } // truncate the file length to what we've already written ftruncate($fh,$last_write) or die($php_errormsg);

// close the file fclose($fh) or die($php_errormsg);
18.17.4 See Also
Section 11.10 and Section 11.11 for additional information on converting between ASCII and
HTML; Section 18.15 discusses fseek( ) and rewind( ) in more detail; documentation on
fseek( ) at http://www.php.net/fseek, rewind( ) at http://www.php.net/rewind, and
ftruncate( ) at http://www.php.net/ftruncate.
Recipe 18.18 Flushing Output to a File
18.18.1 Problem
You want to force all buffered data to be written to a filehandle.
18.18.2 Solution
Use fflush( ):
fwrite($fh,'There are twelve pumpkins in my house.'); fflush($fh);
This ensures that "There are twelve pumpkins in my house." is written to $fh.
18.18.3 Discussion
To be more efficient, system I/O libraries generally don't write something to a file when you
tell them to. Instead, they batch the writes together in a buffer and save all of them to disk at
the same time. Using fflush( ) forces anything pending in the write buffer to be actually
written to disk.
Flushing output can be particularly helpful when generating an access or activity log. Calling
fflush( ) after each message to log file makes sure that any person or program monitoring
the log file sees the message as soon as possible.
18.18.4 See Also
Documentation on fflush( ) at http://www.php.net/fflush.
Recipe 18.19 Writing to Standard Output
18.19.1 Problem
You want to write to standard output.
18.19.2 Solution

Use echo or print:
print "Where did my pastrami sandwich go?"; echo "It went into my stomach.";
18.19.3 Discussion
While print( ) is a function, echo is a language construct. This means that print( )
returns a value, while echo doesn't. You can include print( ) but not echo in larger
expressions:
// this is OK (12 == $status) ? print 'Status is good' : error_log('Problem with status!'); // this gives a parse error (12 == $status) ? echo 'Status is good' : error_log('Problem with status!');
Use php://stdout as the filename if you're using the file functions:
$fh = fopen('php://stdout','w') or die($php_errormsg);
Writing to standard output via a file handle instead of simply with print( ) or echo is useful
if you need to abstract where your output goes, or if you need to print to standard output at
the same time as writing to a file. See Section 18.20 for details.
You can also write to standard error by opening php://stderr:
$fh = fopen('php://stderr','w');
18.19.4 See Also
Section 18.20 for writing to many filehandles simultaneously; documentation on echo at
http://www.php.net/echo and on print( ) at http://www.php.net/print.
Recipe 18.20 Writing to Many Filehandles Simultaneously
18.20.1 Problem
You want to send output to more than one file handle; for example, you want to log messages
to the screen and to a file.
18.20.2 Solution
Wrap your output with a loop that iterates through your filehandles, as shown in Example 18-
4.
Example 18-4. pc_multi_fwrite( )

function pc_multi_fwrite($fhs,$s,$length=NULL) { if (is_array($fhs)) { if (is_null($length)) { foreach($fhs as $fh) { fwrite($fh,$s); } } else { foreach($fhs as $fh) { fwrite($fh,$s,$length); } } } }
Here's an example:
$fhs['file'] = fopen('log.txt','w') or die($php_errormsg); $fhs['screen'] = fopen('php://stdout','w') or die($php_errormsg); pc_multi_fwrite($fhs,'The space shuttle has landed.');
18.20.3 Discussion
If you don't want to pass a length argument to fwrite( ) (or you always want to), you can
eliminate that check from your pc_multi_fwrite( ). This version doesn't accept a
$length argument:
function pc_multi_fwrite($fhs,$s) { if (is_array($fhs)) { foreach($fhs as $fh) { fwrite($fh,$s); } } }
18.20.4 See Also
Documentation on fwrite( ) at http://www.php.net/fwrite.
Recipe 18.21 Escaping Shell Metacharacters
18.21.1 Problem
You need to incorporate external data in a command line, but you want to escape out special
characters so nothing unexpected happens; for example, you want to pass user input as an
argument to a program.
18.21.2 Solution
Use escapeshellarg( ) to handle arguments:
system('ls -al '.escapeshellarg($directory));

Use escapeshellcmd( ) to handle program names:
system(escapeshellcmd($ls_program).' -al');
18.21.3 Discussion
The command line is a dangerous place for unescaped characters. Never pass unmodified user
input to one of PHP's shell-execution functions. Always escape the appropriate characters in
the command and the arguments. This is crucial. It is unusual to execute command lines that
are coming from web forms and not something we recommend lightly. However, sometimes
you need to run an external program, so escaping commands and arguments is useful.
escapeshellarg( ) surrounds arguments with single quotes (and escapes any existing
single quotes). To print the process status for a particular process:
system('/bin/ps '.escapeshellarg($process_id));
Using escapeshellarg( ) ensures that the right process is displayed even if it has an
unexpected character (e.g., a space) in it. It also prevents unintended commands from being
run. If $process_id contains:
1; rm -rf /
then:
system("/bin/ps $process_id")
not only displays the status of process 1, but it also executes the command rm -rf /. However:
system('/bin/ps '.escapeshellarg($process_id))
runs the command /bin/ps 1; rm -rf, which produces an error because "1-semicolon-space-
rm-space-hyphen-rf" isn't a valid process ID.
Similarly, escapeshellcmd( ) prevents unintended command lines from execution. This
code runs a different program depending on the value of $which_program:
system("/usr/local/bin/formatter-$which_program");
For example, if $which_program is pdf 12, the script runs /usr/local/bin/formatter-pdf with
an argument of 12. But, if $which_program is pdf 12; 56, the script runs
/usr/local/bin/formatter-pdf with an argument of 12, but then also runs the program 56,
which is an error. To successfully pass the arguments to formatter-pdf, you need
escapeshellcmd( ):
system(escapeshellcmd("/usr/local/bin/formatter-$which_program"));
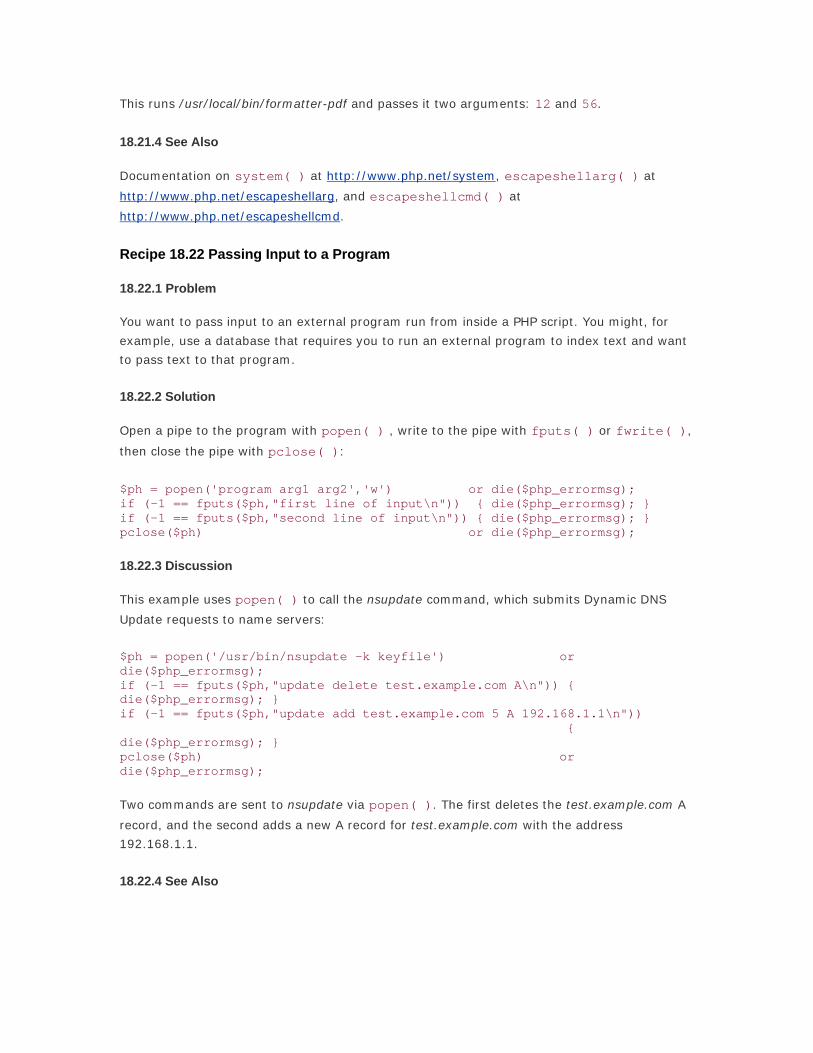
This runs /usr/local/bin/formatter-pdf and passes it two arguments: 12 and 56.
18.21.4 See Also
Documentation on system( ) at http://www.php.net/system, escapeshellarg( ) at
http://www.php.net/escapeshellarg, and escapeshellcmd( ) at
http://www.php.net/escapeshellcmd.
Recipe 18.22 Passing Input to a Program
18.22.1 Problem
You want to pass input to an external program run from inside a PHP script. You might, for
example, use a database that requires you to run an external program to index text and want
to pass text to that program.
18.22.2 Solution
Open a pipe to the program with popen( ) , write to the pipe with fputs( ) or fwrite( ),
then close the pipe with pclose( ):
$ph = popen('program arg1 arg2','w') or die($php_errormsg); if (-1 == fputs($ph,"first line of input\n")) { die($php_errormsg); } if (-1 == fputs($ph,"second line of input\n")) { die($php_errormsg); } pclose($ph) or die($php_errormsg);
18.22.3 Discussion
This example uses popen( ) to call the nsupdate command, which submits Dynamic DNS
Update requests to name servers:
$ph = popen('/usr/bin/nsupdate -k keyfile') or die($php_errormsg); if (-1 == fputs($ph,"update delete test.example.com A\n")) { die($php_errormsg); } if (-1 == fputs($ph,"update add test.example.com 5 A 192.168.1.1\n")) { die($php_errormsg); } pclose($ph) or die($php_errormsg);
Two commands are sent to nsupdate via popen( ). The first deletes the test.example.com A
record, and the second adds a new A record for test.example.com with the address
192.168.1.1.
18.22.4 See Also

Documentation on popen( ) at http://www.php.net/popen and pclose( ) at
http://www.php.net/pclose; Dynamic DNS is described in RFC 2136 at
http://www.faqs.org/rfcs/rfc2136.html.
Recipe 18.23 Reading Standard Output from a Program
18.23.1 Problem
You want to read the output from a program; for example, you want the output of a system
utility such as route(8) that provides network information.
18.23.2 Solution
To read the entire contents of a program's output, use the backtick (') operator:
$routing_table = `/sbin/route`;
To read the output incrementally, open a pipe with popen( ):
$ph = popen('/sbin/route','r') or die($php_errormsg); while (! feof($ph)) { $s = fgets($ph,1048576) or die($php_errormsg); } pclose($ph) or die($php_errormsg);
18.23.3 Discussion
The backtick operator (which is not available in safe mode), executes a program and returns
all its output as a single string. On a Linux system with 448 MB of RAM, this command:
$s = `/usr/bin/free`;
puts this multiline string in $s:
total used free shared buffers cached Mem: 448620 446384 2236 0 68568 163040 -/+ buffers/cache: 214776 233844 Swap: 136512 0 136512
If a program generates a lot of output, it is more memory-efficient to read from a pipe one
line at a time. If you're printing formatted data to the browser based on the output of the
pipe, you can print it as you get it. This example prints information about recent Unix system
logins formatted as an HTML table. It uses the /usr/bin/last command:
// print table header print<<<_HTML_ <table> <tr> <td>user</td><td>login port</td><td>login from</td><td>login time</td> <td>time spent logged in</td>

</tr> _HTML_; // open the pipe to /usr/bin/last $ph = popen('/usr/bin/last','r') or die($php_errormsg); while (! feof($ph)) { $line = fgets($ph,80) or die($php_errormsg); // don't process blank lines or the info line at the end if (trim($line) && (! preg_match('/^wtmp begins/',$line))) { $user = trim(substr($line,0,8)); $port = trim(substr($line,9,12)); $host = trim(substr($line,22,16)); $date = trim(substr($line,38,25)); $elapsed = trim(substr($line,63,10),' ()'); if ('logged in' == $elapsed) { $elapsed = 'still logged in'; $date = substr_replace($date,'',-5); } print "<tr><td>$user</td><td>$port</td><td>$host</td>"; print "<td>$date</td><td>$elapsed</td></tr>\n"; } } pclose($ph) or die($php_errormsg); print '</table>';
18.23.4 See Also
Documentation on popen( ) at http://www.php.net/popen, pclose( ) at
http://www.php.net/pclose, and the backtick operator at
http://www.php.net/language.operators.execution; safe mode is documented at
http://www.php.net/features.safe-mode.
Recipe 18.24 Reading Standard Error from a Program
18.24.1 Problem
You want to read the error output from a program; for example, you want to capture the
system calls displayed by strace(1) .
18.24.2 Solution
Redirect standard error to standard output by adding 2>&1 to the command line passed to
popen( ). Read standard output by opening the pipe in r mode:
$ph = popen('strace ls 2>&1','r') or die($php_errormsg); while (!feof($ph)) { $s = fgets($ph,1048576) or die($php_errormsg); } pclose($ph) or die($php_errormsg);

18.24.3 Discussion
In both the Unix sh and the Windows cmd.exe shells, standard error is file descriptor 2, and
standard output is file descriptor 1. Appending 2>&1 to a command tells the shell to redirect
what's normally sent to file descriptor 2 (standard error) over to file descriptor 1 (standard
output). fgets( ) then reads both standard error and standard output.
This technique reads in standard error but doesn't provide a way to distinguish it from
standard output. To read just standard error, you need to prevent standard output from being
returned through the pipe. This is done by redirecting it to /dev/null on Unix and NUL on
Windows:
// Unix: just read standard error $ph = popen('strace ls 2>&1 1>/dev/null','r') or die($php_errormsg); // Windows: just read standard error $ph = popen('ipxroute.exe 2>&1 1>NUL','r') or die($php_errormsg);
18.24.4 See Also
Documentation on popen( ) at http://www.php.net/popen; see your popen(3) manpage for
details about the shell your system uses with popen( ); for information about shell
redirection, see the Redirection section of the sh(1) manpage on Unix systems; on Windows,
see the entry on redirection in the Command Reference section of your system help.
Recipe 18.26 Reading and Writing Compressed Files
18.26.1 Problem
You want to read or write compressed files.
18.26.2 Solution
Use PHP's zlib extension to read or write gzip'ed files. To read a compressed file:
$zh = gzopen('file.gz','r') or die("can't open: $php_errormsg"); while ($line = gzgets($zh,1024)) { // $line is the next line of uncompressed data, up to 1024 bytes } gzclose($zh) or die("can't close: $php_errormsg");
Here's how to write a compressed file:
$zh = gzopen('file.gz','w') or die("can't open: $php_errormsg"); if (-1 == gzwrite($zh,$s)) { die("can't write: $php_errormsg"); } gzclose($zh) or die("can't close: $php_errormsg");
18.26.3 Discussion

The zlib extension contains versions of many file-access functions, such as fopen( ),
fread( ), and fwrite( ) (called gzopen( ) , gzread( ), gzwrite( ), etc.) that
transparently compress data when writing and uncompress data when reading. The
compression algorithm that zlib uses is compatible with the gzip and gunzip utilities.
For example, gzgets($zp,1024) works like fgets($fh,1024). It reads up to 1023 bytes,
stopping earlier if it reaches EOF or a newline. For gzgets( ), this means 1023
uncompressed bytes.
However, gzseek( ) works differently than fseek( ). It only supports seeking a specified
number of bytes from the beginning of the file stream (the SEEK_SET argument to fseek(
)). Seeking forward (from the current position) is only supported in files opened for writing
(the file is padded with a sequence of compressed zeroes). Seeking backwards is supported in
files opened for reading, but it is very slow.
The zlib extension also has some functions to create compressed strings. The function
gzencode( ) compresses a string and gives it the correct headers and formatting to be
compatible with gunzip. Here's a simple gzip program:
$in_file = $_SERVER['argv'][1]; $out_file = $_SERVER['argv'][1].'.gz'; $ifh = fopen($in_file,'rb') or die("can't open $in_file: $php_errormsg"); $ofh = fopen($out_file,'wb') or die("can't open $out_file: $php_errormsg"); $encoded = gzencode(fread($ifh,filesize($in_file))) or die("can't encode data: $php_errormsg"); if (-1 == fwrite($ofh,$encoded)) { die("can't write: $php_errormsg"); } fclose($ofh) or die("can't close $out_file: $php_errormsg"); fclose($ifh) or die("can't close $in_file: $php_errormsg");
The guts of this program are the lines:
$encoded = gzencode(fread($ifh,filesize($in_file))) or die("can't encode data: $php_errormsg); if (-1 == fwrite($ofh,$encoded)) { die("can't write: $php_errormsg"); }
The compressed contents of $in_file are stored in $encoded and then written to
$out_file with fwrite( ).
You can pass a second argument to gzencode( ) that indicates compression level. Set no
compression with 0 and maximum compression with 9. The default level is 1. To adjust the
simple gzip program for maximum compression, the encoding line becomes:
$encoded = gzencode(fread($ifh,filesize($in_file)),9) or die("can't encode data: $php_errormsg);

You can also compress and uncompress strings without the gzip-compatibility headers by
using gzcompress( ) and gzuncompress( ).
18.26.4 See Also
Section 18.27 for a program that extracts files from a ZIP archive; documentation on the zlib
extension at http://www.php.net/zlib; you can download zlib at http://www.gzip.org/zlib/; the
zlib algorithm is detailed in RFCs 1950 (http://www.faqs.org/rfcs/rfc1950.html) and 1951
(http://www.faqs.org/rfcs/rfc1951.html).
Recipe 18.27 Program: Unzip
The unzip.php program, shown in Example 18-5, extracts files from a ZIP archive. It uses the
pc_mkdir_parents( ) function which is defined in Section 19.11. The program also
requires PHP's zip extension to be installed. You can find documentation on the zip extension
at http://www.php.net/zip.
This program takes a few arguments on the command line. The first is the name of the ZIP
archive it should unzip. By default, it unzips all files in the archive. If additional command-line
arguments are supplied, it only unzips files whose name matches any of those arguments. The
full path of the file inside the ZIP archive must be given. If turtles.html is in the ZIP archive
inside the animals directory, unzip.php must be passed animals/turtles.html, not just
turtles.html, to unzip the file.
Directories are stored as 0-byte files inside ZIP archives, so unzip.php doesn't try to create
them. Instead, before it creates any other file, it uses pc_mkdir_parents( ) to create all
directories that are parents of that file, if necessary. For example, say unzip.php sees these
entries in the ZIP archive:
animals (0 bytes) animals/frogs/ribbit.html (2123 bytes) animals/turtles.html (1232 bytes)
It ignores animals because it is 0 bytes long. Then it calls pc_mkdir_parents( ) on
animals/frogs, creating both animals and animals/frogs, and writes ribbit.html into
animals/frogs. Since animals already exists when it reaches animals/turtles.html, it writes out
turtles.html without creating any additional directories.
Example 18-5. unzip.php
// the first argument is the zip file $in_file = $_SERVER['argv'][1]; // any other arguments are specific files in the archive to unzip if ($_SERVER['argc'] > 2) { $all_files = 0; for ($i = 2; $i < $_SERVER['argc']; $i++) { $out_files[$_SERVER['argv'][$i]] = true;

} } else { // if no other files are specified, unzip all files $all_files = true; } $z = zip_open($in_file) or die("can't open $in_file: $php_errormsg"); while ($entry = zip_read($z)) { $entry_name = zip_entry_name($entry); // check if all files should be unzipped, or the name of // this file is on the list of specific files to unzip if ($all_files || $out_files[$entry_name]) { // only proceed if the file is not 0 bytes long if (zip_entry_filesize($entry)) { $dir = dirname($entry_name); // make all necessary directories in the file's path if (! is_dir($dir)) { pc_mkdir_parents($dir); } $file = basename($entry_name); if (zip_entry_open($z,$entry)) { if ($fh = fopen($dir.'/'.$file,'w')) { // write the entire file fwrite($fh, zip_entry_read($entry,zip_entry_filesize($entry))) or error_log("can't write: $php_errormsg"); fclose($fh) or error_log("can't close: $php_errormsg"); } else { error_log("can't open $dir/$file: $php_errormsg"); } zip_entry_close($entry); } else { error_log("can't open entry $entry_name: $php_errormsg"); } } } }
18.27.1 See Also
Section 18.26 for reading and writing zlib compressed files; Section 19.11 for the
pc_mkdir_parents( ) function; documentation on the zip extension at
http://www.php.net/zip.

Chapter 19. Directories
Section 19.1. Introduction
Recipe 19.2. Getting and Setting File Timestamps
Recipe 19.3. Getting File Information
Recipe 19.4. Changing File Permissions or Ownership
Recipe 19.5. Splitting a Filename into Its Component Parts
Recipe 19.6. Deleting a File
Recipe 19.7. Copying or Moving a File
Recipe 19.8. Processing All Files in a Directory
Recipe 19.9. Getting a List of Filenames Matching a Pattern
Recipe 19.10. Processing All Files in a Directory
Recipe 19.11. Making New Directories
Recipe 19.12. Removing a Directory and Its Contents
Recipe 19.13. Program: Web Server Directory Listing
Recipe 19.14. Program: Site Search

19.1 Introduction A filesystem stores a lot of additional information about files aside from their actual contents.
This information includes such particulars as the file's size, what directory it's in, and access
permissions for the file. If you're working with files, you may also need to manipulate this
metadata. PHP gives you a variety of functions to read and manipulate directories, directory
entries, and file attributes. Like other file-related parts of PHP, the functions are similar to the
C functions that accomplish the same tasks, with some simplifications.
Files are organized with inodes . Each file (and other parts of the filesystem, such as
directories, devices, and links) has its own inode. That inode contains a pointer to where the
file's data blocks are as well as all the metadata about the file. The data blocks for a directory
hold the names of the files in that directory and the inode of each file.
PHP provides two ways to look in a directory to see what files it holds. The first way is to use
opendir( ) to get a directory handle, readdir( ) to iterate through the files, and
closedir( ) to close the directory handle:
$d = opendir('/usr/local/images') or die($php_errormsg); while (false !== ($f = readdir($d))) { // process file } closedir($d);
The second method is to use the directory class. Instantiate the class with dir( ), read
each filename with the read( ) method, and close the directory with close( ):
$d = dir('/usr/local/images') or die($php_errormsg); while (false !== ($f = $d->read())) { // process file } $d->close();
Recipe 19.8 shows how to use opendir( ) or dir( ) to process each file in a
directory. Making new directories is covered in Recipe 19.11 and removing directories in
Recipe 19.12.
The filesystem holds more than just files and directories. On Unix, it can also hold symbolic
links. These are special files whose contents are a pointer to another file. You can delete the
link without affecting the file it points to. To create a symbolic link, use symlink( ):
symlink('/usr/local/images','/www/docroot/images') or die($php_errormsg);
This creates a symbolic link called images in /www/docroot that points to /usr/local/images.

To find information about a file, directory, or link you must examine its inode. The function
stat( ) retrieves the metadata in an inode for you. Recipe 19.3 discusses stat( ).
PHP also has many functions that use stat( ) internally to give you a specific piece of
information about a file. These are listed in Table 19-1.
Table 19-1. File information functions Function name What file information does the function provide?
file_exists( ) Does the file exist?
fileatime( ) Last access time
filectime( ) Last metadata change time
filegroup( ) Group (numeric)
fileinode( ) Inode number
filemtime( ) Last change time of contents
fileowner( ) Owner (numeric)
fileperms( ) Permissions (decimal, numeric)
filesize( ) Size
filetype( ) Type (fifo, char, dir, block, link, file, unknown)
is_dir( ) Is it a directory?
is_executable( ) Is it executable?
is_file( ) Is it a regular file?
is_link( ) Is it a symbolic link?
is_readable( ) Is it readable?
is_writable( ) Is it writeable?
On Unix, the file permissions indicate what operations the file's owner, users in the file's
group, and all users can perform on the file. The operations are reading, writing, and
executing. For programs, executing means the ability to run the program; for directories, it's
the ability to search through the directory and see the files in it.
Unix permissions can also contain a setuid bit, a setgid bit, and a sticky bit. The setuid bit
means that when a program is run, it runs with the user ID of its owner. The setgid bit means
that a program runs with the group ID of its group. For a directory, the setgid bit means that
new files in the directory are created by default in the same group as the directory. The sticky
bit is useful for directories in which people share files because it prevents nonsuperusers with

write permission in a directory from deleting files in that directory unless they own the file or
the directory.
When setting permissions with chmod( ) (see Recipe 19.4), they must be expressed as an
octal number. This number has four digits. The first digit is any special setting for the file
(such as setuid or setgid). The second digit is the user permissions — what the file's owner
can do. The third digit is the group permissions — what users in the file's group can do. The
fourth digit is the world permissions — what all other users can do. To compute the
appropriate value for each digit, add together the permissions you want for that digit using the
values in Table 19-2. For example, a permission value of 0644 means that there are no
special settings (the 0), the file's owner can read and write the file (the 6, which is 4 (read)
+ 2 (write)), users in the file's group can read the file (the first 4), and all other users can
also read the file (the second 4). A permission value of 4644 is the same, except that the
file is also setuid.
Table 19-2. File permission values Value Permission meaning Special setting meaning
4 Read setuid
2 Write setgid
1 Execute sticky
The permissions of newly created files and directories are affected by a setting called the
umask, which is a permission value that is removed, or masked out, from the initial
permissions of a file (0666 or directory (0777). For example, if the umask is 0022, the
default permissions for a new file created with touch( ) or fopen( ) are 0644 and
the default permissions for a new directory created with mkdir( ) are 0755. You can get
and set the umask with the function umask( ). It returns the current umask and, if an
argument is supplied to it, changes the umask to the value of that argument. For example,
here's how to make the permissions on newly created files prevent anyone but the file's owner
(and the superuser) from accessing the file:
$old_umask = umask(0077); touch('secret-file.txt'); umask($old_umask);
The first call to umask( ) masks out all permissions for group and world. After the file is
created, the second call to umask( ) restores the umask to the previous setting. When
PHP is run as a server module, it restores the umask to its default value at the end of each
request. Like other permissions-related functions, umask( ) doesn't work on Windows.

Recipe 19.2 Getting and Setting File Timestamps
19.2.1 Problem
You want to know when a file was last accessed or changed, or you want to update a file's
access or change time; for example, you want each page on your web site to display when it
was last modified.
19.2.2 Solution
The fileatime( ) , filemtime( ), and filectime( ) functions return the
time of last access, modification, and metadata change of a file:
$last_access = fileatime('larry.php'); $last_modification = filemtime('moe.php'); $last_change = filectime('curly.php');
The touch( ) function changes a file's modification time:
touch('shemp.php'); // set modification time to now touch('joe.php',$timestamp); // set modification time to $timestamp
19.2.3 Discussion
The fileatime( ) function returns the last time a file was opened for reading or
writing. The filemtime( ) function returns the last time a file's contents were changed.
The filectime( ) function returns the last time a file's contents or metadata (such as
owner or permissions) were changed. Each function returns the time as an epoch timestamp.
A file's modification time can be updated with touch( ). Without a second argument,
touch( ) sets the modification time to the current date and time. To set a file's
modification time to a specific value, pass that value as an epoch timestamp to touch( )
as a second argument.
This code prints the time a page on your web site was last updated:
print "Last Modified: ".strftime('%c',filemtime($_SERVER['SCRIPT_FILENAME']));
19.2.4 See Also

Documentation on fileatime( ) at http://www.php.net/fileatime, filemtime( )
at http://www.php.net/filemtime, and filectime( ) at http://www.php.net/filectime.
Recipe 19.3 Getting File Information
19.3.1 Problem
You want to read a file's metadata; for example, permissions and ownership.
19.3.2 Solution
Use stat( ), which returns an array of information about a file:
$info = stat('harpo.php');
19.3.3 Discussion
The function stat( ) returns an array with both numeric and string indexes with
information about a file. The elements of this array are in Table 19-3.
Table 19-3. Information returned by stat( ) Numeric index String index Value
0 dev Device
1 ino Inode
2 mode Permissions
3 nlink Link count
4 uid Owner's user ID
5 gid Group's group ID
6 rdev Device type for inode devices (-1 on Windows)
7 size Size (in bytes)
8 atime Last access time (epoch timestamp)
9 mtime Last change time of contents (epoch timestamp)
10 ctime Last change time of contents or metadata (epoch timestamp)
11 blksize Block size for I/O (-1 on Windows)

12 blocks Number of block allocated to this file
The mode element of the returned array contains the permissions expressed as a base 10
integer. This is confusing since permissions are usually either expressed symbolically (e.g., ls's
-rw-r--r-- output) or as an octal integer (e.g., 0644). To convert the permissions to a
more understandable format, use base_convert( ) to change the permissions to
octal:
$file_info = stat('/tmp/session.txt'); $permissions = base_convert($file_info['mode'],10,8);
This results in a six-digit octal number. For example, if ls displays the following about
/tmp/session.txt:
-rw-rw-r-- 1 sklar sklar 12 Oct 23 17:55 /tmp/session.txt
Then $file_info['mode'] is 33204 and $permissions is 100664. The
last three digits (664) are the user (read and write), group (read and write), and other
(read) permissions for the file. The third digit, 0, means that the file is not setuid or setgid.
The leftmost 10 means that the file is a regular file (and not a socket, symbolic link, or other
special file).
Because stat( ) returns an array with both numeric and string indexes, using
foreach to iterate through the returned array produces two copies of each value. Instead,
use a for loop from element 0 to element 12 of the returned array.
Calling stat( ) on a symbolic link returns information about the file the symbolic link
points to. To get information about the symbolic link itself, use lstat( ).
Similar to stat( ) is fstat( ), which takes a file handle (returned from fopen(
) or popen( )) as an argument. You can use fstat( ) only on local files, however,
not URLs passed to fopen( ).
PHP's stat( ) function uses the underlying stat(2) system call, which is expensive. To
minimize overhead, PHP caches the result of calling stat(2). So, if you call stat( ) on a
file, change its permissions, and call stat( ) on the same file again, you get the same
results. To force PHP to reload the file's metadata, call clearstatcache( ), which
flushes PHP's cached information. PHP also uses this cache for the other functions that return
file metadata: file_exists( ), fileatime( ), filectime( ),
filegroup( ), fileinode( ), filemtime( ), fileowner( ),
fileperms( ), filesize( ), filetype( ), fstat( ), is_dir( ),
is_executable( ), is_file( ), is_link( ), is_readable( ),
is_writable( ), and lstat( ).
19.3.4 See Also
Documentation on stat( ) at http://www.php.net/stat, lstat( ) at
http://www.php.net/lstat, fstat( ) at http://www.php.net/fstat, and
clearstatcache( ) at http://www.php.net/clearstatcache.
Recipe 19.4 Changing File Permissions or Ownership
19.4.1 Problem
You want to change a file's permissions or ownership; for example, you want to prevent other
users from being able to look at a file of sensitive data.
19.4.2 Solution
Use chmod( ) to change the permissions of a file:
chmod('/home/user/secrets.txt',0400);
Use chown( ) to change a file's owner and chgrp( ) to change a file's group:
chown('/tmp/myfile.txt','sklar'); // specify user by name chgrp('/home/sklar/schedule.txt','soccer'); // specify group by name chown('/tmp/myfile.txt',5001); // specify user by uid chgrp('/home/sklar/schedule.txt',102); // specify group by gid
19.4.3 Discussion
The permissions passed to chmod( ) must be specified as an octal number.
The superuser can change the permissions, owner, and group of any file. Other users are
restricted. They can change only the permissions and group of files that they own, and can't
change the owner at all. Nonsuperusers can also change only the group of a file to a group
they belong to.

The functions chmod( ), chgrp( ), and chown( ) don't work on Windows.
19.4.4 See Also
Documentation on chmod( ) at http://www.php.net/chmod, chown( ) at
http://www.php.net/chown, and chgrp( ) at http://www.php.net/chgrp.
Recipe 19.5 Splitting a Filename into Its Component Parts
19.5.1 Problem
You want to find a file's path and filename; for example, you want to create a file in the same
directory as an existing file.
19.5.2 Solution
Use basename( ) to get the filename and dirname( ) to get the path:
$full_name = '/usr/local/php/php.ini'; $base = basename($full_name); // $base is php.ini $dir = dirname($full_name); // $dir is /usr/local/php
Use pathinfo( ) to get the directory name, base name, and extension in an associative
array:
$info = pathinfo('/usr/local/php/php.ini');
19.5.3 Discussion
To create a temporary file in the same directory as an existing file, use dirname( ) to
find the directory, and pass that directory to tempnam( ):
$dir = dirname($existing_file); $temp = tempnam($dir,'temp'); $temp_fh = fopen($temp,'w');
The elements in the associative array returned by pathinfo( ) are dirname,
basename, and extension:
$info = pathinfo('/usr/local/php/php.ini'); print_r($info);

Array ( [dirname] => /usr/local/php [basename] => php.ini [extension] => ini )
You can also pass basename( ) an optional suffix to remove it from the filename. This
sets $base to php:
$base = basename('/usr/local/php/php.ini','.ini');
Using functions such as basename( ), dirname( ), and pathinfo( ) is more
portable than just separating a full filename on / because they use an operating-system
appropriate separator. On Windows, these functions treat both / and \ as file and directory
separators. On other platforms, only / is used.
There's no built-in PHP function to combine the parts produced by basename( ),
dirname( ), and pathinfo( ) back into a full filename. To do this you have to
combine the parts with . and /:
$dirname = '/usr/local/php'; $basename = 'php'; $extension = 'ini'; $full_name = $dirname . '/' . $basename . '.' . $extension;
You can pass a full filename produced like this to other PHP file functions on Windows, because
PHP accepts / as a directory separator on Windows.
19.5.4 See Also
Documentation on basename( ) at http://www.php.net/basename, dirname( ) at
http://www.php.net/dirname, and pathinfo( ) at http://www.php.net/pathinfo.
Recipe 19.6 Deleting a File
19.6.1 Problem
You want to delete a file.
19.6.2 Solution

Use unlink( ):
unlink($file) or die ("can't delete $file: $php_errormsg");
19.6.3 Discussion
The function unlink( ) is only able to delete files that the user of the PHP process is able
to delete. If you're having trouble getting unlink( ) to work, check the permissions on
the file and how you're running PHP.
19.6.4 See Also
Documentation on unlink( ) at http://www.php.net/unlink.
Recipe 19.7 Copying or Moving a File
19.7.1 Problem
You want to copy or move a file.
19.7.2 Solution
Use copy( ) to copy a file:
copy($old,$new) or die("couldn't copy $old to $new: $php_errormsg");
Use rename( ) to move a file:
rename($old,$new) or die("couldn't move $old to $new: $php_errormsg");
19.7.3 Discussion
On Unix, rename( ) can't move files across filesystems. To do so, copy the file to the new
location and then delete the old file:
if (copy("/tmp/code.c","/usr/local/src/code.c")) { unlink("/tmp/code.c"); }
If you have multiple files to copy or move, call copy( ) or rename( ) in a loop. You
can operate only on one file each time you call these functions.

19.7.4 See Also
Documentation on copy( ) at http://www.php.net/copy and rename( ) at
http://www.php.net/rename.
Recipe 19.8 Processing All Files in a Directory
19.8.1 Problem
You want to iterate over all files in a directory. For example, you want to create a select
box in a form that lists all the files in a directory.
19.8.2 Solution
Get a directory handle with opendir( ) and then retrieve each filename with
readdir( ):
$d = opendir('/tmp') or die($php_errormsg); while (false !== ($f = readdir($d))) { print "$f\n"; } closedir($d);
19.8.3 Discussion
The code in the solution tests the return value of readdir( ) with the nonidentity
operator (!==) so that the code works properly with filenames that evaluate to false,
such as a file named 0.
The function readdir( ) returns each entry in a directory, whether it is a file, directory,
or something else (such as a link or a socket). This includes the metaentries "." (current
directory) and ".." (parent directory). To just return files, use the is_file( ) function as
well:
print '<select name="files">'; $d = opendir('/usr/local/upload') or die($php_errormsg); while (false !== ($f = readdir($d))) { if (is_file("/usr/local/upload/$f")) { print '<option> ' . $f . '</option>'; } } closedir($d);

print '</select>';
Because readdir( ) returns only the filename of each directory entry, not a full
pathname, you have to prepend the directory name to $f before you pass it to is_file(
).
PHP also has an object-oriented interface to directory information. The dir( ) function
returns an object on which you can call read( ), rewind( ), and close( )
methods, which act like the readdir( ), rewinddir( ), and closedir( )
functions. There's also a $path property that contains the full path of the opened directory.
Here's how to iterate through files with the object-oriented interface:
print '<select name="files">'; $d = dir('/usr/local/upload') or die($php_errormsg); while (false !== ($f = $d->read())) { if (is_file($d->path.'/'.$f)) { print '<option> ' . $f . '</option>'; } } $d->close();
In this example, $d->path is /usr/local/upload.
19.8.4 See Also
Documentation on opendir( ) at http://www.php.net/opendir, readdir( ) at
http://www.php.net/readdir, and the directory class at http://www.php.net/class.dir.
Recipe 19.9 Getting a List of Filenames Matching a Pattern
19.9.1 Problem
You want to find all filenames that match a pattern.
19.9.2 Solution
If your pattern is a regular expression, read each file from the directory and test the name
with preg_match( ):
$d = dir('/tmp') or die($php_errormsg);

while (false !== ($f = $d->read())) { // only match alphabetic names if (preg_match('/^[a-zA-Z]+$/',$f)) { print "$f\n"; } } $d->close();
19.9.3 Discussion
If your pattern is a shell glob (e.g., *.*), use the backtick operator with ls (Unix) or dir
(Windows) to get the matching filenames. For Unix:
$files = explode("\n",`ls -1 *.gif`); foreach ($files as $file) { print "$b\n"; }
For Windows:
$files = explode("\n",`dir /b *.gif`); foreach ($files as $file) { print "$b\n"; }
19.9.4 See Also
Recipe 19.8 details on iterating through each file in a directory; information about shell
pattern matching is available at
http://www.gnu.org/manual/bash/html_node/bashref_35.html.
Recipe 19.10 Processing All Files in a Directory
19.10.1 Problem
You want to do something to all the files in a directory and in any subdirectories.
19.10.2 Solution
Use the pc_process_dir( ) function, shown in Example 19-1, which returns a list of
all files in and beneath a given directory.
Example 19-1. pc_process_dir( )
function pc_process_dir($dir_name,$max_depth = 10,$depth = 0) {

if ($depth >= $max_depth) { error_log("Reached max depth $max_depth in $dir_name."); return false; } $subdirectories = array(); $files = array(); if (is_dir($dir_name) && is_readable($dir_name)) { $d = dir($dir_name); while (false !== ($f = $d->read())) { // skip . and .. if (('.' == $f) || ('..' == $f)) { continue; } if (is_dir("$dir_name/$f")) { array_push($subdirectories,"$dir_name/$f"); } else { array_push($files,"$dir_name/$f"); } } $d->close(); foreach ($subdirectories as $subdirectory) { $files = array_merge($files,pc_process_dir($subdirectory,$max_depth,$depth+1)); } } return $files; }
19.10.3 Discussion
Here's an example: if /tmp contains the files a and b, as well as the directory c, and /tmp/c
contains files d and e, pc_process_dir('/tmp') returns an array with elements
/tmp/a, /tmp/b, /tmp/c/d, and /tmp/c/e. To perform an operation on each file, iterate through
the array:
$files = pc_process_dir('/tmp'); foreach ($files as $file) { print "$file was last accessed at ".strftime('%c',fileatime($file))."\n"; }
Instead of returning an array of files, you can also write a function that processes them as it
finds them. The pc_process_dir2( ) function, shown in Example 19-2, does this by
taking an additional argument, the name of the function to call on each file found.
Example 19-2. pc_process_dir2( )
function pc_process_dir2($dir_name,$func_name,$max_depth = 10,$depth = 0) { if ($depth >= $max_depth) { error_log("Reached max depth $max_depth in $dir_name."); return false; } $subdirectories = array(); $files = array();

if (is_dir($dir_name) && is_readable($dir_name)) { $d = dir($dir_name); while (false !== ($f = $d->read())) { // skip . and .. if (('.' == $f) || ('..' == $f)) { continue; } if (is_dir("$dir_name/$f")) { array_push($subdirectories,"$dir_name/$f"); } else { $func_name("$dir_name/$f"); } } $d->close(); foreach ($subdirectories as $subdirectory) { pc_process_dir2($subdirectory,$func_name,$max_depth,$depth+1); } } }
The pc_process_dir2( ) function doesn't return a list of directories; instead, the
function $func_name is called with the file as its argument. Here's how to print out the
last access times:
function printatime($file) { print "$file was last accessed at ".strftime('%c',fileatime($file))."\n"; } pc_process_dir2('/tmp','printatime');
Although the two functions produce the same results, the second version uses less memory
because potentially large arrays of files aren't passed around.
The pc_process_dir( ) and pc_process_dir2( ) functions use a breadth-
first search . In this type of search, the functions handle all the files in the current directory;
then they recurse into each subdirectory. In a depth-first search , they recurse into a
subdirectory as soon as the subdirectory is found, whether or not there are files remaining in
the current directory. The breadth-first search is more memory efficient; each pointer to the
current directory is closed (with $d->close( )) before the function recurses into
subdirectories, so there's only one directory pointer open at a time.
Because is_dir( ) returns true when passed a symbolic link that points to a
directory, both versions of the function follow symbolic links as they traverse down the
directory tree. If you don't want to follow links, change the line:
if (is_dir("$dir_name/$f")) {
to:

if (is_dir("$dir_name/$f") && (! is_link("$dir_name/$f"))) {
19.10.4 See Also
Recipe 6.10 for a discussion of variable functions; documentation on is_dir( ) at
http://www.php.net/is-dir and is_link( ) at http://www.php.net/is-link.
Recipe 19.11 Making New Directories
19.11.1 Problem
You want to create a directory.
19.11.2 Solution
Use mkdir( ):
mkdir('/tmp/apples',0777) or die($php_errormsg);
19.11.3 Discussion
The second argument to mkdir( ) is the permission mode for the new directory, which
must be an octal number. The current umask is taken away from this permission value to
create the permissions for the new directory. So, if the current umask is 0002, calling
mkdir('/tmp/apples',0777) sets the permissions on the resulting directory to
0775 (user and group can read, write, and execute; others can only read and execute).
PHP's built-in mkdir( ) can make a directory only if its parent exists. For example, if
/tmp/a doesn't exist, you can't create /tmp/a/b until /tmp/a is created. To create a directory
and its parents, you have two choices: you can call your system's mkdir program, or you
can use the pc_mkdir_parents( ) function, shown in Example 19-3. To use your
system's mkdir program, on Unix, use this:
system('/bin/mkdir -p '.escapeshellarg($directory));
On Windows do:
system('mkdir '.escapeshellarg($directory));
You can also use the pc_mkdir_parents( ) function shown in Example 19-3.

Example 19-3. pc_mkdir_parents( )
function pc_mkdir_parents($d,$umask = 0777) { $dirs = array($d); $d = dirname($d); $last_dirname = ''; while($last_dirname != $d) { array_unshift($dirs,$d); $last_dirname = $d; $d = dirname($d); } foreach ($dirs as $dir) { if (! file_exists($dir)) { if (! mkdir($dir,$umask)) { error_log("Can't make directory: $dir"); return false; } } elseif (! is_dir($dir)) { error_log("$dir is not a directory"); return false; } } return true; }
For example:
pc_mkdir_parents('/usr/local/upload/test',0777);
19.11.4 See Also
Documentation on mkdir( ) at http://www.php.net/mkdir; your system's mkdir
documentation, such as the Unix mkdir(1) man page or the Windows mkdir /? help text.
Recipe 19.12 Removing a Directory and Its Contents
19.12.1 Problem
You want to remove a directory and all of its contents, including subdirectories and their
contents.
19.12.2 Solution
On Unix, use rm:
$directory = escapeshellarg($directory); exec("rm -rf $directory");
On Windows, use rmdir:
$directory = escapeshellarg($directory); exec("rmdir /s /q $directory");
19.12.3 Discussion
Removing files, obviously, can be dangerous. Be sure to escape $directory with
escapeshellarg( ) so that you don't delete unintended files.
Because PHP's built-in directory removal function, rmdir( ) , works only on empty
directories, and unlink( ) can't accept shell wildcards, calling a system program is much
easier than recursively looping through all files in a directory, removing them, and then
removing each directory. If an external utility isn't available, however, you can modify the
pc_process_dir( ) function from Recipe 19.10 to remove each subdirectory.
19.12.4 See Also
Documentation on rmdir( ) at http://www.php.net/rmdir; your system's rm or rmdir
documentation, such as the Unix rm(1) manpage or the Windows rmdir /? help text.
Recipe 19.13 Program: Web Server Directory Listing The web-ls.php program shown in Example 19-4 provides a view of the files inside your web
server's document root, formatted like the output of the Unix command ls. Filenames are
linked so that you can download each file, and directory names are linked so that you can
browse in each directory, as shown in Figure 19-1.
Figure 19-1. Web listing

Most lines in Example 19-4 are devoted to building an easy-to-read representation of the file's
permissions, but the guts of the program are in the while loop at the end. The $d-
>read( ) method gets the name of each file in the directory. Then, lstat( )
retrieves information about that file, and printf( ) prints out the formatted information
about that file.
The mode_string( ) functions and the constants it uses turn the octal representation
of a file's mode (e.g., 35316) into an easier-to-read string (e.g., -rwsrw-r--).
Example 19-4. web-ls.php
/* Bit masks for determining file permissions and type. The names and values * listed below are POSIX-compliant, individual systems may have their own * extensions. */ define('S_IFMT',0170000); // mask for all types define('S_IFSOCK',0140000); // type: socket define('S_IFLNK',0120000); // type: symbolic link define('S_IFREG',0100000); // type: regular file define('S_IFBLK',0060000); // type: block device define('S_IFDIR',0040000); // type: directory define('S_IFCHR',0020000); // type: character device define('S_IFIFO',0010000); // type: fifo define('S_ISUID',0004000); // set-uid bit define('S_ISGID',0002000); // set-gid bit define('S_ISVTX',0001000); // sticky bit define('S_IRWXU',00700); // mask for owner permissions define('S_IRUSR',00400); // owner: read permission define('S_IWUSR',00200); // owner: write permission define('S_IXUSR',00100); // owner: execute permission define('S_IRWXG',00070); // mask for group permissions
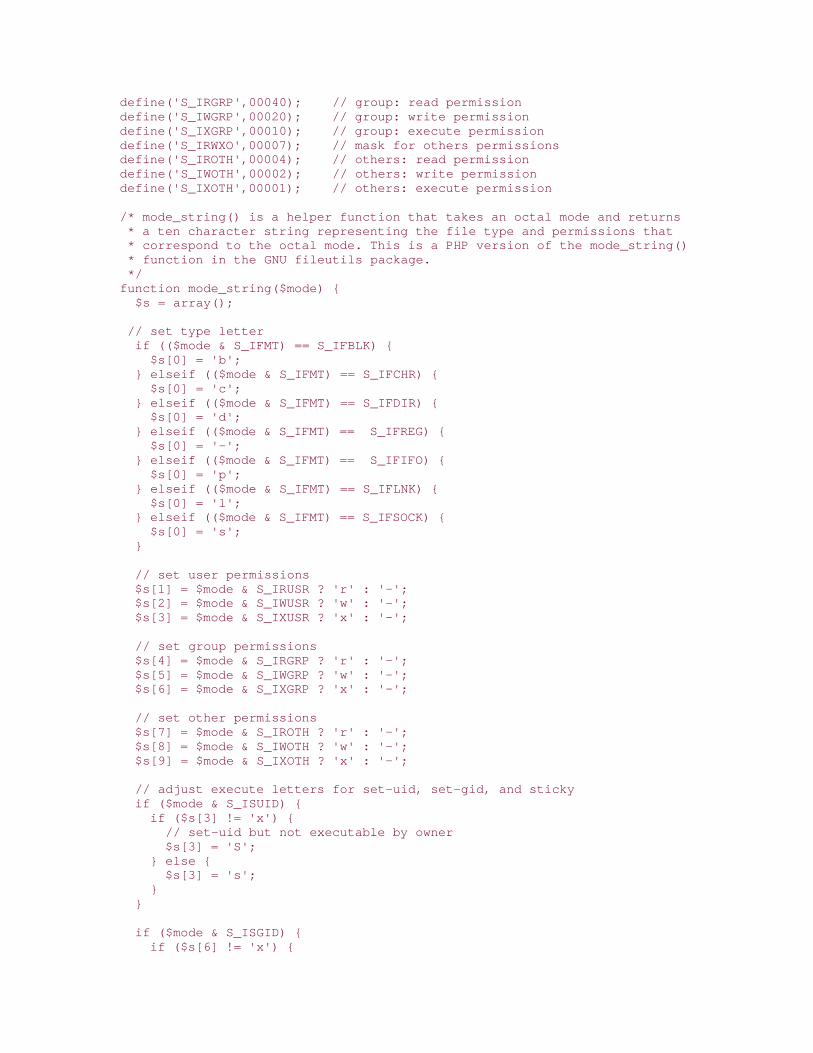
define('S_IRGRP',00040); // group: read permission define('S_IWGRP',00020); // group: write permission define('S_IXGRP',00010); // group: execute permission define('S_IRWXO',00007); // mask for others permissions define('S_IROTH',00004); // others: read permission define('S_IWOTH',00002); // others: write permission define('S_IXOTH',00001); // others: execute permission /* mode_string() is a helper function that takes an octal mode and returns * a ten character string representing the file type and permissions that * correspond to the octal mode. This is a PHP version of the mode_string() * function in the GNU fileutils package. */ function mode_string($mode) { $s = array(); // set type letter if (($mode & S_IFMT) == S_IFBLK) { $s[0] = 'b'; } elseif (($mode & S_IFMT) == S_IFCHR) { $s[0] = 'c'; } elseif (($mode & S_IFMT) == S_IFDIR) { $s[0] = 'd'; } elseif (($mode & S_IFMT) == S_IFREG) { $s[0] = '-'; } elseif (($mode & S_IFMT) == S_IFIFO) { $s[0] = 'p'; } elseif (($mode & S_IFMT) == S_IFLNK) { $s[0] = 'l'; } elseif (($mode & S_IFMT) == S_IFSOCK) { $s[0] = 's'; } // set user permissions $s[1] = $mode & S_IRUSR ? 'r' : '-'; $s[2] = $mode & S_IWUSR ? 'w' : '-'; $s[3] = $mode & S_IXUSR ? 'x' : '-'; // set group permissions $s[4] = $mode & S_IRGRP ? 'r' : '-'; $s[5] = $mode & S_IWGRP ? 'w' : '-'; $s[6] = $mode & S_IXGRP ? 'x' : '-'; // set other permissions $s[7] = $mode & S_IROTH ? 'r' : '-'; $s[8] = $mode & S_IWOTH ? 'w' : '-'; $s[9] = $mode & S_IXOTH ? 'x' : '-'; // adjust execute letters for set-uid, set-gid, and sticky if ($mode & S_ISUID) { if ($s[3] != 'x') { // set-uid but not executable by owner $s[3] = 'S'; } else { $s[3] = 's'; } } if ($mode & S_ISGID) { if ($s[6] != 'x') {

// set-gid but not executable by group $s[6] = 'S'; } else { $s[6] = 's'; } } if ($mode & S_ISVTX) { if ($s[9] != 'x') { // sticky but not executable by others $s[9] = 'T'; } else { $s[9] = 't'; } } // return formatted string return join('',$s); } // Start at the document root if not specified if (isset($_REQUEST['dir'])) { $dir = $_REQUEST['dir']; } else { $dir = ''; } // locate $dir in the filesystem $real_dir = realpath($_SERVER['DOCUMENT_ROOT'].$dir); // make sure $real_dir is inside document root if (! preg_match('/^'.preg_quote($_SERVER['DOCUMENT_ROOT'],'/').'/', $real_dir)) { die("$dir is not inside the document root"); } // canonicalize $dir by removing the document root from its beginning $dir = substr_replace($real_dir,'',0,strlen($_SERVER['DOCUMENT_ROOT'])); // are we opening a directory? if (! is_dir($real_dir)) { die("$real_dir is not a directory"); } // open the specified directory $d = dir($real_dir) or die("can't open $real_dir: $php_errormsg"); print '<table>'; // read each entry in the directory while (false !== ($f = $d->read())) { // get information about this file $s = lstat($d->path.'/'.$f); // translate uid into user name $user_info = posix_getpwuid($s['uid']); // translate gid into group name

$group_info = posix_getgrgid($s['gid']); // format the date for readability $date = strftime('%b %e %H:%M',$s['mtime']); // translate the octal mode into a readable string $mode = mode_string($s['mode']); $mode_type = substr($mode,0,1); if (($mode_type == 'c') || ($mode_type == 'b')) { /* if it's a block or character device, print out the major and * minor device type instead of the file size */ $major = ($s['rdev'] >> 8) & 0xff; $minor = $s['rdev'] & 0xff; $size = sprintf('%3u, %3u',$major,$minor); } else { $size = $s['size']; } // format the <a href=""> around the filename // no link for the current directory if ('.' == $f) { $href = $f; } else { // don't include the ".." in the parent directory link if ('..' == $f) { $href = urlencode(dirname($dir)); } else { $href = urlencode($dir) . '/' . urlencode($f); } /* everything but "/" should be urlencoded */ $href = str_replace('%2F','/',$href); // browse other directories with web-ls if (is_dir(realpath($d->path . '/' . $f))) { $href = sprintf('<a href="%s?dir=%s">%s</a>', $_SERVER['PHP_SELF'],$href,$f); } else { // link to files to download them $href= sprintf('<a href="%s">%s</a>',$href,$f); } // if it's a link, show the link target, too if ('l' == $mode_type) { $href .= ' -> ' . readlink($d->path.'/'.$f); } } // print out the appropriate info for this file printf('<tr><td>%s</td><td>%3u</td><td align="right">%s</td> <td align="right">%s</td><td align="right">%s</td> <td align="right">%s</td><td>%s</td></tr>', $mode, // formatted mode string $s['nlink'], // number of links to this file $user_info['name'], // owner's user name $group_info['name'], // group name $size, // file size (or device numbers) $date, // last modified date and time $href); // link to browse or download

} print '</table>';
Recipe 19.14 Program: Site Search You can use site-search.php, shown in Example 19-5, as a search engine for a small-to-
medium size, file-based site.
The program looks for a search term (in $_REQUEST['term']) in all files within a
specified set of directories under the document root. Those directories are set in
$search_dirs. It also recurses into subdirectories and follows symbolic links but keeps
track of which files and directories it has seen so that it doesn't get caught in an endless loop.
If any pages are found that contain the search term, it prints list of links to those pages,
alphabetically ordered by each page's title. If a page doesn't have a title (between the
<title> and </title> tags), the page's relative URI from the document root is used.
The program looks for the search term between the <body> and </body> tags in each
file. If you have a lot of text in your pages inside <body> tags that you want to exclude
from the search, surround the text that should be searched with specific HTML comments and
then modify $body_regex to look for those tags instead. Say, for example, if your page
looks like this:
<body> // Some HTML for menus, headers, etc. <!-- search-start --> <h1>Aliens Invade Earth</h1> <h3>by H.G. Wells</h3> <p>Aliens invaded earth today. Uh Oh.</p> // More of the story <!-- search-end --> // Some HTML for footers, etc. </body>
To match the search term against just the title, author, and story inside the HTML comments,
change $body_regex to:

$body_regex = '#<!-- search-start -->(.*' . preg_quote($_REQUEST['term'],'#'). '.*)<!-- search-end -->#Sis';
If you don't want the search term to match text that's inside HTML or PHP tags in your pages,
add a call to strip_tags( ) to the code that loads the contents of the file for
searching:
// load the contents of the file into $file $file = strip_tags(join('',file($path)));
Example 19-5. site-search.php
function pc_search_dir($dir) { global $body_regex,$title_regex,$seen; // array to hold pages that match $pages = array(); // array to hold directories to recurse into $dirs = array(); // mark this directory as seen so we don't look in it again $seen[realpath($dir)] = true; // if we can get a directory handle for this directory if (is_readable($dir) && ($d = dir($dir))) { // get each file name in the directory while (false !== ($f = $d->read())) { // build the full path of the file $path = $d->path.'/'.$f; // if it's a regular file and we can read it if (is_file($path) && is_readable($path)) { $realpath = realpath($path); // if we've seen this file already, if ($seen[$realpath]) { // then skip it continue; } else { // otherwise, mark it as seen so we skip it // if we come to it again $seen[$realpath] = true; } // load the contents of the file into $file $file = join('',file($path)); // if the search term is inside the body delimiters if (preg_match($body_regex,$file)) { // construct the relative URI of the file by removing // the document root from the full path $uri = substr_replace($path,'',0,strlen($_SERVER['DOCUMENT_ROOT'])); // If the page has a title, find it

if (preg_match('#<title>(.*?)</title>#Sis',$file,$match)) { // and add the title and URI to $pages array_push($pages,array($uri,$match[1])); } else { // otherwise use the URI as the title array_push($pages,array($uri,$uri)); } } } else { // if the directory entry is a valid subdirectory if (is_dir($path) && ('.' != $f) && ('..' != $f)) { // add it to the list of directories to recurse into array_push($dirs,$path); } } } $d->close(); } /* look through each file in each subdirectory of this one, and add the matching pages in those directories to $pages. only look in a subdirectory if we haven't seen it yet. */ foreach ($dirs as $subdir) { $realdir = realpath($subdir); if (! $seen[$realdir]) { $seen[$realdir] = true; $pages = array_merge($pages,pc_search_dir($subdir)); } } return $pages; } // helper function to sort matched pages alphabetically by title function pc_page_sort($a,$b) { if ($a[1] == $b[1]) { return strcmp($a[0],$b[0]); } else { return ($a[1] > $b[1]); } } // array to hold the pages that match the search term $matching_pages = array(); // array to hold pages seen while scanning for the search term $seen = array(); // directories underneath the document root to search $search_dirs = array('sports','movies','food'); // regular expression to use in searching files. The "S" pattern // modifier tells the PCRE engine to "study" the regex for greater // efficiency. $body_regex = '#<body>(.*' . preg_quote($_REQUEST['term'],'#'). '.*)</body>#Sis'; // add the files that match in each directory to $matching pages foreach ($search_dirs as $dir) { $matching_pages = array_merge($matching_pages,

pc_search_dir($_SERVER['DOCUMENT_ROOT'].'/'.$dir)); } if (count($matching_pages)) { // sort the matching pages by title usort($matching_pages,'pc_page_sort'); print '<ul>'; // print out each title with a link to the page foreach ($matching_pages as $k => $v) { print sprintf('<li> <a href="%s">%s</a>',$v[0],$v[1]); } print '</ul>'; } else { print 'No pages found.'; }
Chapter 20. Client-Side PHP Section 20.1. Introduction
Recipe 20.2. Parsing Program Arguments
Recipe 20.3. Parsing Program Arguments with getopt
Recipe 20.4. Reading from the Keyboard
Recipe 20.5. Reading Passwords
Recipe 20.6. Displaying a GUI Widget in a Window
Recipe 20.7. Displaying Multiple GUI Widgets in a Window
Recipe 20.8. Responding to User Actions
Recipe 20.9. Displaying Menus
Recipe 20.10. Program: Command Shell
Recipe 20.11. Program: Displaying Weather Conditions

20.1 Introduction PHP was created for web programming and is still used mostly for that purpose. However,
newer versions of PHP are increasingly more capable as a general-purpose scripting language.
Using PHP for scripts you run from the command line is especially helpful when they share
code with your web applications. If you have a discussion board on your web site, you might
want to run a program every few minutes or hours to scan new postings and alert you to any
messages that contain certain keywords. Writing this scanning program in PHP lets you share
relevant discussion-board code with the main discussion-board application. Not only does this
save you time, but also helps avoid maintenance overhead down the road.
With the PHP-GTK extension, your command-line PHP programs can be full-featured GUI
applications. These can also share code with PHP web applications and text-based command-
line programs. Like PHP, PHP-GTK is cross-platform, so the same code runs on Unix and
Windows.
The same PHP binary built to be executed as a CGI program can be run from the command
line. To run a script, pass the script filename as an argument:
% php scan-discussions.php
On Unix, you can also use the "hash-bang" syntax at the top of your scripts to run the PHP
interpreter automatically. If the PHP binary is in /usr/local/bin, make the first line of your
script:
#!/usr/local/bin/php
You can then run the script just by typing its name on the command line, as long as the file
has execute permission.
Command-line PHP scripts almost always use the -q flag, which prevents PHP from printing
HTTP response headers at the beginning of its output:
% php -q scan-discussions.php
You can also use this:
#!/usr/local/bin/php -q
Another helpful option on the command line is the -c flag, which lets you specify an alternate
php.ini file to load settings from. If your default php.ini file is /usr/local/lib/php.ini, it can be
helpful to have a separate configuration file at /usr/local/lib/php-commandline.ini with settings
such as max_execution_time = 0; this ensures that your scripts don't quit after
30 seconds. Here's how to use this alternate file:

% php -q -c /usr/local/lib/php-commandline.ini scan-discussions.php
You can also use this :
#!/usr/local/bin/php -q -c /usr/local/lib/php-commandline.ini
If it's likely that you'll use some of your classes and functions both for the web and for the
command line, abstract the code that needs to react differently in those different
circumstances, such as HTML versus plain-text output or access to environment variables that
a web server sets up. A useful tactic is to make your code aware of a global variable called
$COMMAND_LINE. Set this to true at the top of your command-line scripts. You can
then branch your scripts' behavior as follows:
if ($GLOBALS['COMMAND_LINE']) { print "Database error: ".mysql_error()."\n"; } else { print "Database error.<br>"; error_log(mysql_error()); }
This code not only adjusts the output formatting based on the context it's executing in (\n
versus <br>), but also where the information goes. On the command line, it's helpful to the
person running the program to see the error message from MySQL, but on the Web, you don't
want your users to see potentially sensitive data. Instead, the code outputs a generic error
message and stores the details in the server's error log for private review.
Beginning with Version 4.3, PHP builds include a command-line interface (CLI) binary.[1] The
CLI binary is similar to the CGI binary but has some important differences that make it more
shell-friendly. Some configuration directives have hardcoded values with CLI; for example, the
html_errors directive is set to false, and implicit_flush is set to true.
The max_execution_time directive is set to 0, allowing unlimited program runtime.
Finally, register_argc_argv is set to true. This means you can look for argument
information in $argv and $argc instead of in $_SERVER['argv'] and
$_SERVER['argc']. Argument processing is discussed in Recipe 20.2 and Recipe 20.3.
[1] The CLI binary can be built under 4.2.x versions by explicitly configuring PHP with --enable-cli.
The CLI binary accepts a slightly different set of arguments than the CGI binary. It doesn't
accept the -q or -C flags because it does what these flags indicate by default. While -q tells
the CGI binary not to print headers, the CLI binary never prints headers. Even the header(
) function produces no output under CLI. Similarly, the -C flag tells the CGI binary not to

change to the directory of the script being run. The CLI binary never changes to the script
directory.
The CLI binary also takes one new argument: -r. When followed by some PHP code without
<?php and ?> script tags, the CLI binary runs the code. For example, here's how to print
the current time:
% php -r 'print strftime("%c");'
Finally, the CLI binary defines handles to the standard I/O streams as the constants STDIN,
STDOUT, and STDERR. You can use these instead of creating your own file handles with
fopen( ):
// read from standard in $input = fgets(STDIN,1024); // write to standard out fwrite(STDOUT,$jokebook); // write to standard error fwrite(STDERR,$error_code);
If you're using the CLI binary, you can use php_sapi_name( ) instead of
$GLOBALS['COMMAND_LINE'] to test whether a script is running in a web or
command-line context:
if ('cli' == php_sapi_name()) { print "Database error: ".mysql_error()."\n"; } else { print "Database error.<br>"; error_log(mysql_error()); }
You can use the CLI binary or the CGI binary to run programs that use the PHP-GTK
extension. This extension is an interface to the GTK+ toolkit, which is a library of widgets,
screen drawing code, and other necessary functions for building a GUI application.
Widgets are GUI interface elements such as buttons, scrollbars, windows, menus, and select
boxes. To build a PHP-GTK application, your code must create widgets and arrange them on
the screen. Recipe 20.6 shows how to create and display a widget, Recipe 20.7 shows how to
arrange multiple widgets for display together, and Recipe 20.9 explains how to display a menu
bar.
Widgets communicate with each other and with the rest of your program using signals. When
something happens to a widget, it emits a signal; for example, when a button is clicked, it
emits a clicked signal. Recipe 20.8 discusses how to capture these signals and take

action when one is emitted. The sample application in Recipe 20.11 combines PHP-GTK with
some SOAP function calls to display weather conditions around the world.
To install PHP-GTK on Unix, download the latest version of PHP-GTK from
http://gtk.php.net/download.php and the GTK+ libraries from http://www.gtk.org/download.
You also need libtool 1.4.2, automake 1.4, and autoconf 2.13 (available at
http://www.gnu.org/directory/ if they're not already installed on your system).
Once you've downloaded all the necessary files and installed the support libraries and tools,
unpack the PHP-GTK source distribution. In the PHP-GTK directory, run ./buildconf to create
configuration files, ./configure to create makefiles, then make to build the PHP-GTK extension.
Last, run make install to install the PHP-GTK extension in your PHP extensions directory. You
can find detailed Unix installation instructions, including common build problems, at
http://gtk.php.net/manual/en/install.unix.php.
To install PHP-GTK on Windows, no compiling is necessary. From
http://gtk.php.net/download.php, you can download a compiled PHP-GTK extension and
supporting libraries. Once you've downloaded and unzipped the Windows distribution, copy the
files in the php4 subdirectory to your PHP binary directory (or create one if it doesn't already
exist). Copy the files in the winnt\system32 subdirectory to your system32 directory
(C:\WINNT\SYSTEM32 for Windows NT and Windows 2000; C:\WINDOWS\SYSTEM32 for
Windows 95 and Windows 98). If you don't already have a php.ini file in place, copy the
winnt\php.ini file to your Windows directory (C:\WINNT or C:\WINDOWS). If you already have
a php.ini file in place, add these lines to the end of it:
[PHP-GTK] php-gtk.extensions = php_gtk_libglade.dll, php_gtk_sqpane.dll
Detailed Windows installation instructions are at
http://gtk.php.net/manual/en/install.win32.php.
On either platform, once you've installed the PHP-GTK extension, you need to use the dl(
) function to load it in any script in which you want to use GTK functionality. On Windows:
if (! class_exists('gtk')) { dl('php_gtk.dll'); }
On Unix:
if (! class_exists('gtk')) { dl('php_gtk.so'); }
If you want the same script to run unaltered on Unix or Windows, you can load the PHP-GTK
extension like this:
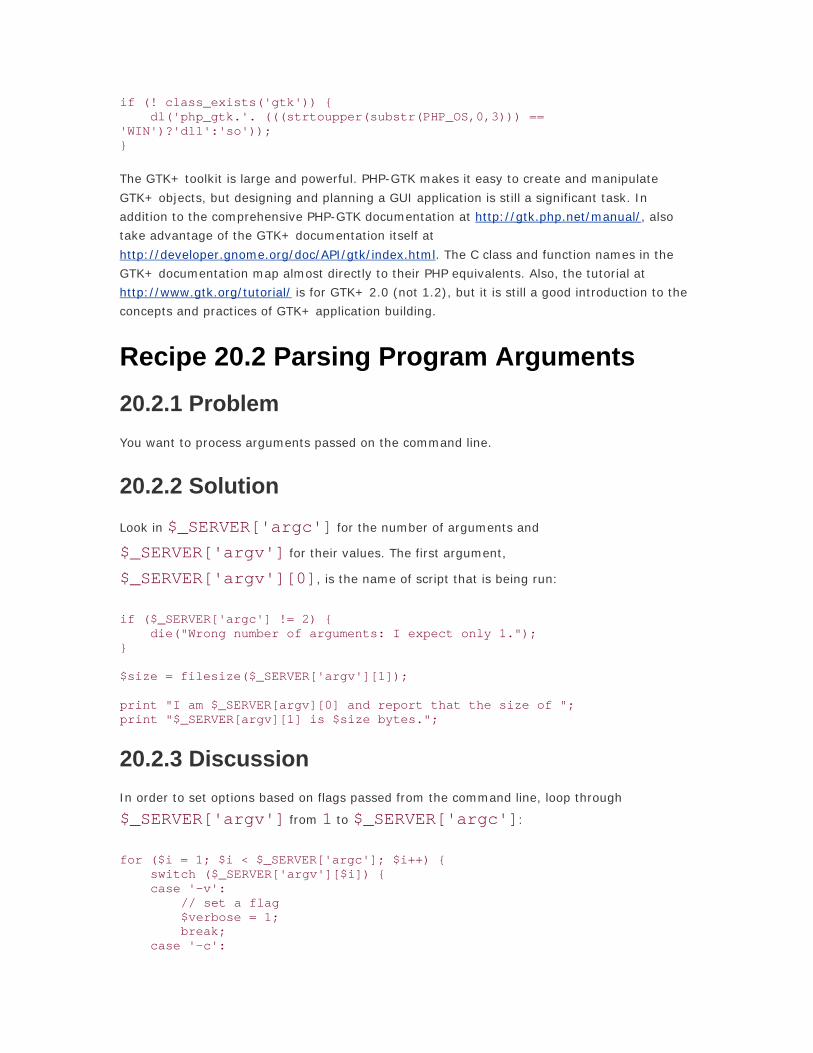
if (! class_exists('gtk')) { dl('php_gtk.'. (((strtoupper(substr(PHP_OS,0,3))) == 'WIN')?'dll':'so')); }
The GTK+ toolkit is large and powerful. PHP-GTK makes it easy to create and manipulate
GTK+ objects, but designing and planning a GUI application is still a significant task. In
addition to the comprehensive PHP-GTK documentation at http://gtk.php.net/manual/, also
take advantage of the GTK+ documentation itself at
http://developer.gnome.org/doc/API/gtk/index.html. The C class and function names in the
GTK+ documentation map almost directly to their PHP equivalents. Also, the tutorial at
http://www.gtk.org/tutorial/ is for GTK+ 2.0 (not 1.2), but it is still a good introduction to the
concepts and practices of GTK+ application building.
Recipe 20.2 Parsing Program Arguments
20.2.1 Problem
You want to process arguments passed on the command line.
20.2.2 Solution
Look in $_SERVER['argc'] for the number of arguments and
$_SERVER['argv'] for their values. The first argument,
$_SERVER['argv'][0], is the name of script that is being run:
if ($_SERVER['argc'] != 2) { die("Wrong number of arguments: I expect only 1."); } $size = filesize($_SERVER['argv'][1]); print "I am $_SERVER[argv][0] and report that the size of "; print "$_SERVER[argv][1] is $size bytes.";
20.2.3 Discussion
In order to set options based on flags passed from the command line, loop through
$_SERVER['argv'] from 1 to $_SERVER['argc']:
for ($i = 1; $i < $_SERVER['argc']; $i++) { switch ($_SERVER['argv'][$i]) { case '-v': // set a flag $verbose = 1; break; case '-c':
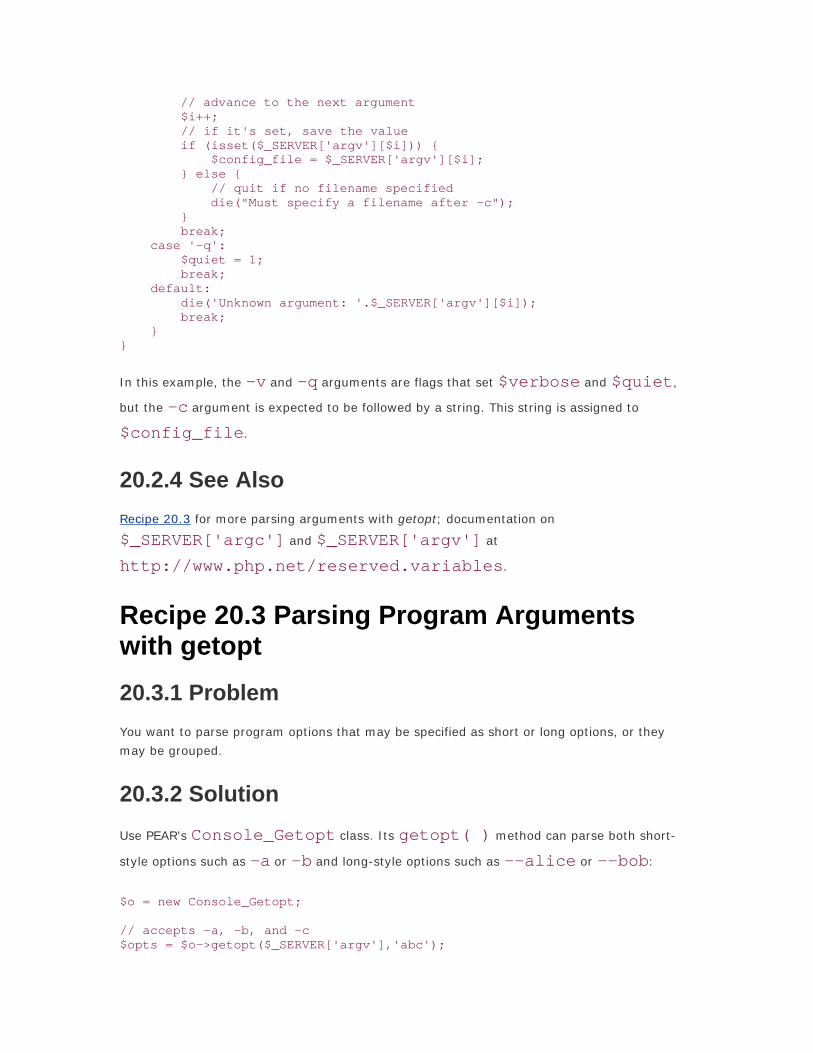
// advance to the next argument $i++; // if it's set, save the value if (isset($_SERVER['argv'][$i])) { $config_file = $_SERVER['argv'][$i]; } else { // quit if no filename specified die("Must specify a filename after -c"); } break; case '-q': $quiet = 1; break; default: die('Unknown argument: '.$_SERVER['argv'][$i]); break; } }
In this example, the -v and -q arguments are flags that set $verbose and $quiet,
but the -c argument is expected to be followed by a string. This string is assigned to
$config_file.
20.2.4 See Also
Recipe 20.3 for more parsing arguments with getopt; documentation on
$_SERVER['argc'] and $_SERVER['argv'] at
http://www.php.net/reserved.variables.
Recipe 20.3 Parsing Program Arguments with getopt
20.3.1 Problem
You want to parse program options that may be specified as short or long options, or they
may be grouped.
20.3.2 Solution
Use PEAR's Console_Getopt class. Its getopt( ) method can parse both short-
style options such as -a or -b and long-style options such as --alice or --bob:
$o = new Console_Getopt; // accepts -a, -b, and -c $opts = $o->getopt($_SERVER['argv'],'abc');

// accepts --alice and --bob $opts = $o->getopt($_SERVER['argv'],'',array('alice','bob'));
20.3.3 Discussion
To parse short-style options, pass Console_Getopt::getopt( ) the array of
command-line arguments and a string specifying valid options. This example allows -a, -b,
or -c as arguments, alone or in groups:
$o = new Console_Getopt; $opts = $o->getopt($_SERVER['argv'],'abc');
For the previous option string abc, these are valid sets of options to pass:
% program.php -a -b -c % program.php -abc % program.php -ab -c
The getopt( ) method returns an array. The first element in the array is a list of all of
the parsed options that were specified on the command line, along with their values. The
second element is any specified command-line option that wasn't in the argument specification
passed to getopt( ). For example, if the previous program is run as:
% program.php -a -b sneeze
then $opts is:
Array ( [0] => Array ( [0] => Array ( [0] => a [1] => ) [1] => Array ( [0] => b [1] => ) ) [1] => Array ( [0] => program.php [1] => sneeze ) )

Put a colon after an option in the specification string to indicate that it requires a value. Two
colons means the value is optional. So, ab:c:: means that a can't have a value, b must,
and c can take a value if specified. With this specification string, running the program as:
% program.php -a -b sneeze
makes $opts:
Array ( [0] => Array ( [0] => Array ( [0] => a [1] => ) [1] => Array ( [0] => b [1] => sneeze ) ) [1] => Array ( [0] => program.php ) )
Because sneeze is now set as the value of b, it is no longer in the array of unparsed
options. Note that the array of unparsed options always contains the name of the program.
To parse long-style arguments, supply getopt( ) with an array that describes your
desired arguments. Put each argument in an array element (leave off the leading --) and
follow it with = to indicate a mandatory argument or = = to indicate an optional argument.
This array is the third argument to getopt( ). The second argument (the string for
short-style arguments) can be left blank or not, depending on whether you also want to parse
short-style arguments. This example allows debug as an argument with no value, name
with a mandatory value, and size with an optional value:
require 'Console/Getopt.php'; $o = new Console_Getopt; $opts = $o->getopt($_SERVER['argv'],'',array('debug','name=','size=='));
These are valid ways to run this program:
% program.php --debug % program.php --name=Susannah

% program.php --name Susannah % program.php --debug --size % program.php --size=56 --name=Susannah % program.php --name --debug
The last example is valid (if counterproductive) because it treats --debug as the value of
the name argument and doesn't consider the debug argument to be set. Values can be
separated from their arguments on the command line by either a = or a space.
For long-style arguments, getopt( ) includes the leading -- in the array of parsed
arguments; for example, when run as:
% program.php --debug --name=Susannah
$opts is set to:
Array ( [0] => Array ( [0] => Array ( [0] => --debug [1] => ) [1] => Array ( [0] => --name [1] => Susannah ) ) [1] => Array ( [0] => program.php ) )
We've been using $_SERVER['argv'] as the array of command-line arguments, which
is fine by default. Console_Getopt provides a method, readPHPArgv( ), to look
also in $argv and $HTTP_SERVER_VARS['argv'] for command-line arguments.
Use it by passing its results to getopt( ):
require 'Console/Getopt.php'; $o = new Console_Getopt; $opts = $o->getopt($o->readPHPArgv(),'',array('debug','name=','size=='));
Both getopt( ) and readPHPArgv( ) return a Getopt_Error object when
these encounter an error; for example, having no option specified for an option that requires

one. Getopt_Error extends the PEAR_Error base class, so you can use familiar
methods to handle errors:
require 'Console/Getopt.php'; $o = new Console_Getopt; $opts = $o->getopt($o->readPHPArgv(),'',array('debug','name=','size==')); if (PEAR::isError($opts)) { print $opts->getMessage(); } else { // process options }
20.3.4 See Also
Recipe 20.2 for parsing of program options without getopt; documentation on
Console_Getopt at http://pear.php.net/manual/en/core.console.getopt.php .
Recipe 20.4 Reading from the Keyboard
20.4.1 Problem
You need to read in some typed user input.
20.4.2 Solution
Use fopen( ) with the special filename php://stdin:
print "Type your message. Type '.' on a line by itself when you're done.\n"; $fh = fopen('php://stdin','r') or die($php_errormsg); $last_line = false; $message = ''; while (! $last_line) { $next_line = fgets($fp,1024); if (".\n" == $next_line) { $last_line = true; } else { $message .= $next_line; } } print "\nYour message is:\n$message\n";
If the Readline extension is installed, use readline( ):
$last_line = false; $message = ''; while (! $last_line) { $next_line = readline();
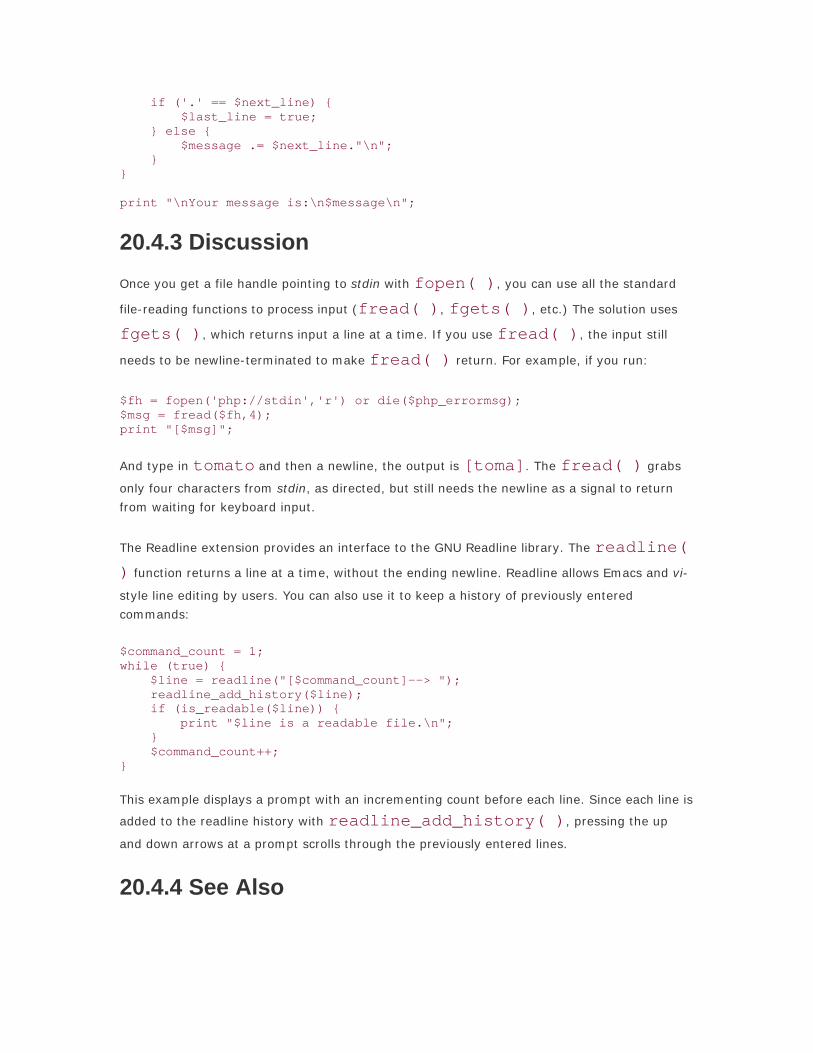
if ('.' == $next_line) { $last_line = true; } else { $message .= $next_line."\n"; } } print "\nYour message is:\n$message\n";
20.4.3 Discussion
Once you get a file handle pointing to stdin with fopen( ), you can use all the standard
file-reading functions to process input (fread( ), fgets( ), etc.) The solution uses
fgets( ), which returns input a line at a time. If you use fread( ), the input still
needs to be newline-terminated to make fread( ) return. For example, if you run:
$fh = fopen('php://stdin','r') or die($php_errormsg); $msg = fread($fh,4); print "[$msg]";
And type in tomato and then a newline, the output is [toma]. The fread( ) grabs
only four characters from stdin, as directed, but still needs the newline as a signal to return
from waiting for keyboard input.
The Readline extension provides an interface to the GNU Readline library. The readline(
) function returns a line at a time, without the ending newline. Readline allows Emacs and vi-
style line editing by users. You can also use it to keep a history of previously entered
commands:
$command_count = 1; while (true) { $line = readline("[$command_count]--> "); readline_add_history($line); if (is_readable($line)) { print "$line is a readable file.\n"; } $command_count++; }
This example displays a prompt with an incrementing count before each line. Since each line is
added to the readline history with readline_add_history( ), pressing the up
and down arrows at a prompt scrolls through the previously entered lines.
20.4.4 See Also

Documentation on fopen( ) at http://www.php.net/fopen, fgets( ) at
http://www.php.net/fgets, fread( ) at http://www.php.net/fread, and the Readline
extension at http://www.php.net/readline; the Readline library at
http://cnswww.cns.cwru.edu/php/chet/readline/rltop.html.
Recipe 20.5 Reading Passwords
20.5.1 Problem
You need to read a string from the command line without it being echoed as it's typed; for
example, when entering passwords.
20.5.2 Solution
On Unix systems, use /bin/stty to toggle echoing of typed characters:
// turn off echo `/bin/stty -echo`; // read password $password = readline(); // turn echo back on `/bin/stty echo`;
On Windows, use w32api_register_function( ) to import _getch( )
from msvcrt.dll:
// load the w32api extension and register _getch() dl('php_w32api.dll'); w32api_register_function('msvcrt.dll','_getch','int'); while(true) { // get a character from the keyboard $c = chr(_getch()); if ( "\r" == $c || "\n" == $c ) { // if it's a newline, break out of the loop, we've got our password break; } elseif ("\x08" == $c) { /* if it's a backspace, delete the previous char from $password */ $password = substr_replace($password,'',-1,1); } elseif ("\x03" == $c) { // if it's Control-C, clear $password and break out of the loop $password = NULL; break; } else { // otherwise, add the character to the password $password .= $c; } }
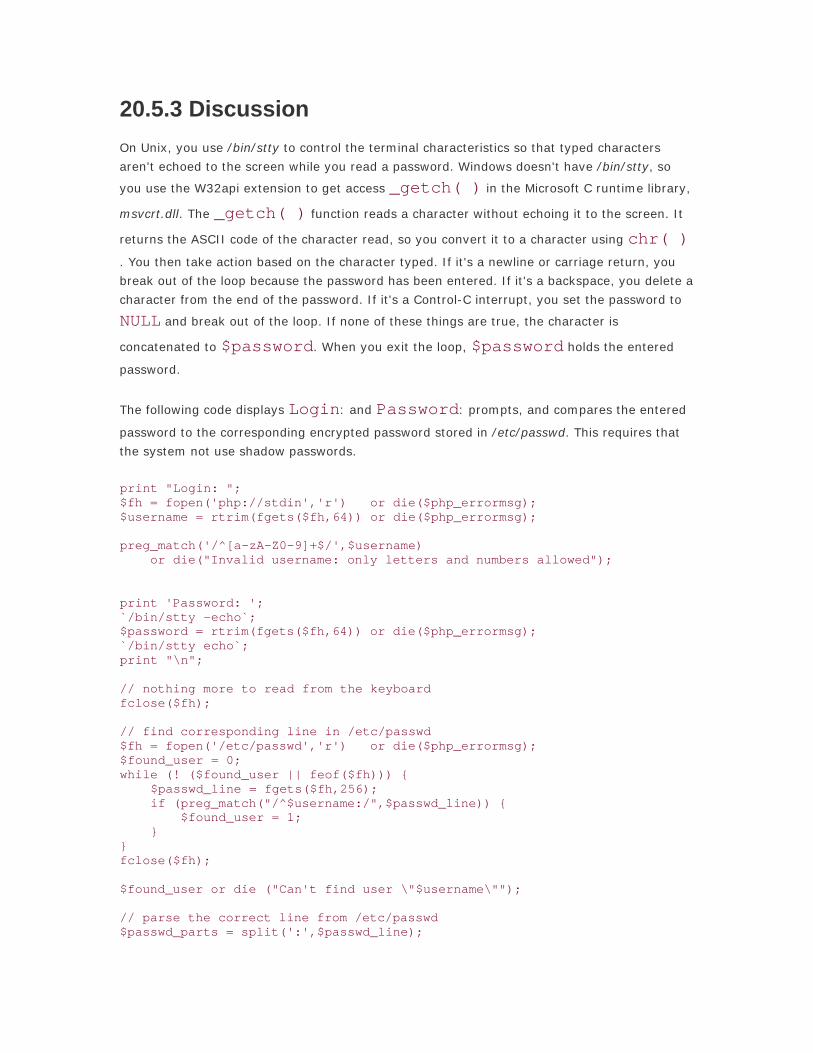
20.5.3 Discussion
On Unix, you use /bin/stty to control the terminal characteristics so that typed characters
aren't echoed to the screen while you read a password. Windows doesn't have /bin/stty, so
you use the W32api extension to get access _getch( ) in the Microsoft C runtime library,
msvcrt.dll. The _getch( ) function reads a character without echoing it to the screen. It
returns the ASCII code of the character read, so you convert it to a character using chr( )
. You then take action based on the character typed. If it's a newline or carriage return, you
break out of the loop because the password has been entered. If it's a backspace, you delete a
character from the end of the password. If it's a Control-C interrupt, you set the password to
NULL and break out of the loop. If none of these things are true, the character is
concatenated to $password. When you exit the loop, $password holds the entered
password.
The following code displays Login: and Password: prompts, and compares the entered
password to the corresponding encrypted password stored in /etc/passwd. This requires that
the system not use shadow passwords.
print "Login: "; $fh = fopen('php://stdin','r') or die($php_errormsg); $username = rtrim(fgets($fh,64)) or die($php_errormsg); preg_match('/^[a-zA-Z0-9]+$/',$username) or die("Invalid username: only letters and numbers allowed"); print 'Password: '; `/bin/stty -echo`; $password = rtrim(fgets($fh,64)) or die($php_errormsg); `/bin/stty echo`; print "\n"; // nothing more to read from the keyboard fclose($fh); // find corresponding line in /etc/passwd $fh = fopen('/etc/passwd','r') or die($php_errormsg); $found_user = 0; while (! ($found_user || feof($fh))) { $passwd_line = fgets($fh,256); if (preg_match("/^$username:/",$passwd_line)) { $found_user = 1; } } fclose($fh); $found_user or die ("Can't find user \"$username\""); // parse the correct line from /etc/passwd $passwd_parts = split(':',$passwd_line);

/* encrypt the entered password and compare it to the password in /etc/passwd */ $encrypted_password = crypt($password, substr($passwd_parts[1],0,CRYPT_SALT_LENGTH)); if ($encrypted_password == $passwd_parts[1]) { print "login successful"; } else { print "login unsuccessful"; }
20.5.4 See Also
Documentation on readline( ) at http://www.php.net/readline, chr( ) at
http://www.php.net/chr, on w32api_register_function( ) at
http://www.php.net/w32api-register-function, and on _getch( ) at
http://msdn.microsoft.com/library/en-us/vccore98/HTML/_crt_ _getch.2c_._getche.asp; on
Unix, see your system's stty(1) manpage.
Recipe 20.6 Displaying a GUI Widget in a Window
20.6.1 Problem
You want to display a window with a GUI widget, such as a button, in it.
20.6.2 Solution
Create the window, create the widget, and then add the widget to the window:
// create the window $window = &new GtkWindow(); // create the button and add it to the window $button = &new GTKButton('Click Me, Alice'); $window->add($button); // display the window $window->show_all(); // necessary so that the program exits properly function shutdown() { gtk::main_quit(); } $window->connect('destroy','shutdown'); // start GTK's signal handling loop gtk::main();
20.6.3 Discussion

First, you create a window by instantiating a new GtkWindow object. GTK objects must be
created as references: &new GtkWindow( ), not new GtkWindow( ). You
then create a new GtkButton object with a label "Click Me, Alice". Passing $button to
the window's add( ) method adds the button to the window. The show_all( )
method displays the window and any widgets inside of it. The only widget inside the window in
this example is the button. The next two lines ensure that the program quits when the window
is closed. The shutdown( ) function is a callback, as is explained later in Recipe 20.8.
The last line is necessary in all PHP-GTK programs. Calling gtk::main( ) starts the
signal-handling loop. This means that the program waits for signals emitted by its GUI widgets
and then responds to the signals as they occur. These signals are activities like clicking on
buttons, resizing windows, and typing in text boxes. The only signal this program pays
attention to is the destroy signal. When the user closes the program's main window, the
destroy signal is emitted, and gtk::main_quit( ) is called. This function exits
the program.
20.6.4 See Also
Documentation on the GtkWindow class at
http://gtk.php.net/manual/en/gtk.gtkwindow.php, on GTKContainer::add( ) at
http://gtk.php.net/manual/en/gtk.gtkcontainer.method.add.php, on
GtkWidget::show_all( ) at
http://gtk.php.net/manual/en/gtk.gtkwidget.method.show_all.php, on the GtkButton
class at http://gtk.php.net/manual/en/gtk.gtkbutton.php, on gtk::main_quit( ) at
http://gtk.php.net/manual/en/gtk.method.main_quit.php, on and gtk::main( ) at
http://gtk.php.net/manual/en/gtk.method.main.php; the tutorial at
http://gtk.php.net/manual/en/tutorials.hellow.php is a helpful introduction to basic GTK
programming.
Recipe 20.7 Displaying Multiple GUI Widgets in a Window
20.7.1 Problem
You want to display more than one widget in a window.
20.7.2 Solution
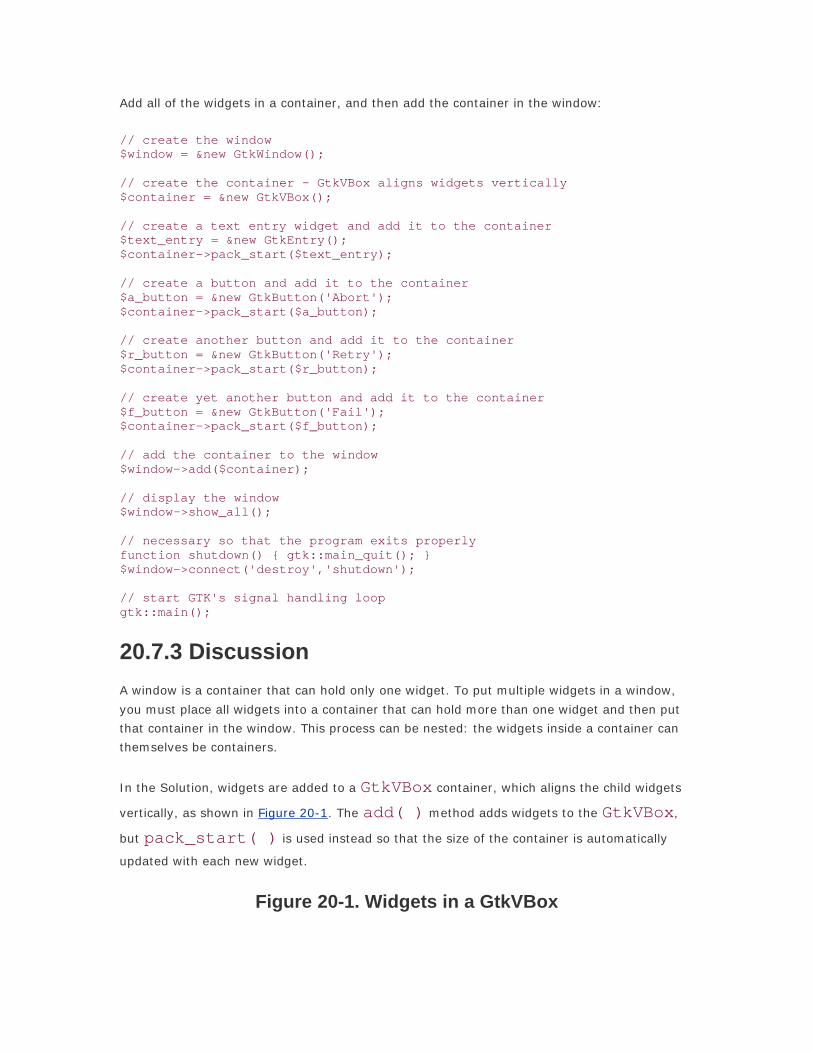
Add all of the widgets in a container, and then add the container in the window:
// create the window $window = &new GtkWindow(); // create the container - GtkVBox aligns widgets vertically $container = &new GtkVBox(); // create a text entry widget and add it to the container $text_entry = &new GtkEntry(); $container->pack_start($text_entry); // create a button and add it to the container $a_button = &new GtkButton('Abort'); $container->pack_start($a_button); // create another button and add it to the container $r_button = &new GtkButton('Retry'); $container->pack_start($r_button); // create yet another button and add it to the container $f_button = &new GtkButton('Fail'); $container->pack_start($f_button); // add the container to the window $window->add($container); // display the window $window->show_all(); // necessary so that the program exits properly function shutdown() { gtk::main_quit(); } $window->connect('destroy','shutdown'); // start GTK's signal handling loop gtk::main();
20.7.3 Discussion
A window is a container that can hold only one widget. To put multiple widgets in a window,
you must place all widgets into a container that can hold more than one widget and then put
that container in the window. This process can be nested: the widgets inside a container can
themselves be containers.
In the Solution, widgets are added to a GtkVBox container, which aligns the child widgets
vertically, as shown in Figure 20-1. The add( ) method adds widgets to the GtkVBox,
but pack_start( ) is used instead so that the size of the container is automatically
updated with each new widget.
Figure 20-1. Widgets in a GtkVBox

GtkHBox is similar to GtkVBox. It aligns its child widgets horizontally instead of
vertically. Figure 20-2 shows the four widgets from the Solution in a CtkHBox.
Figure 20-2. Widgets in a GtkHBox
GtkTable is a more flexible layout container; it aligns its child elements on a grid:
// create the window $window = &new GtkWindow(); // create the container with 3 rows and 2 columns $container = &new GtkTable(3,2); // create a text entry widget and add it to the container $text_entry = &new GtkEntry(); $container->attach($text_entry,0,2,0,1); // create a button and add it to the container $a_button = &new GtkButton('Abort'); $container->attach($a_button,0,1,1,2); // create another button and add it to the container $r_button = &new GtkButton('Retry'); $container->attach($r_button,1,2,1,2); // create yet another button and add it to the container $f_button = &new GtkButton('Fail'); $container->attach($f_button,0,2,2,3); // add the container to the window $window->add($container); // display the window $window->show_all(); // necessary so that the program exits properly function shutdown() { gtk::main_quit(); } $window->connect('destroy','shutdown'); // start GTK's signal handling loop

gtk::main();
Widgets are added to a GtkTable container with the attach( ) method. The first
argument to attach( ) is the widget to add, and the next four arguments describe where
in the grid to put the widget. The second and third arguments are the starting and ending
columns for the widget. The fourth and fifth arguments are the starting and ending rows for
the widget. For example:
$container->attach($text_entry,0,2,0,1)
means that the text-entry widget starts in column zero and ends in column two, spanning two
columns. It starts at row zero and ends at row one, so it spans only one row. Rows and
columns are numbered beginning with zero. The text entry and button widgets aligned in a
GtkTable container are shown in Figure 20-3.
Figure 20-3. Widgets in a GtkTable
20.7.4 See Also
Documentation on containers at http://gtk.php.net/manual/en/gtk.containers.whatare.php,
the GtkVBox class at http://gtk.php.net/manual/en/gtk.gtkvbox.php, the GtkHBox class
at http://gtk.php.net/manual/en/gtk.gtkhbox.php, GtkBox::pack_start( ) at
http://gtk.php.net/manual/en/gtk.gtkbox.method.pack_start.php, the GtkTable class at
http://gtk.php.net/manual/en/gtk.gtktable.php, and GtkTable::attach( ) at
http://gtk.php.net/manual/en/gtk.gtktable.method.attach.php.
Recipe 20.8 Responding to User Actions
20.8.1 Problem
You want to do something when a user clicks a button, chooses an item from a dropdown list,
or otherwise interacts with a GUI widget.
20.8.2 Solution

Write a callback function and then associate the callback function with a signal using the
connect( ) method:
// create the window $window = &new GtkWindow(); // create a button with the current time as its label $button = &new GtkButton(strftime('%c')); // set the update_time() function as the callback for the "clicked" signal $button->connect('clicked','update_time'); function update_time($b) { // the button's text is in a child of the button - a label widget $b_label = $b->child; // set the label text to the current time $b_label->set_text(strftime('%c')); } // add the button to the window $window->add($button); // display the window $window->show_all(); // necessary so that the program exits properly function shutdown() { gtk::main_quit(); } $window->connect('destroy','shutdown'); // start GTK's signal handling loop gtk::main();
20.8.3 Discussion
The code in the Solution displays a window with a button in it. On the button is the time,
rendered by strftime('%c'). When the button is clicked, its label is updated with the
current time.
The update_time( ) function is called each time the button is clicked because
$button->connect('clicked','update_time') makes
update_time( ) the callback function associated with the button's clicked signal.
The first argument to the callback function is the widget whose signal triggered the call as its
first argument. In this case, that means that $button is passed to update_time(
). You tell connect( ) to pass additional arguments to the callback by passing them to
connect( ) after the callback function name. This example displays a window with a
button and a separate label. The time is printed in the label and updated when the button is
clicked:
// create the window

$window = &new GtkWindow(); // create a container for the label and the button $container = &new GtkVBox(); // create a label showing the time $label = &new GtkLabel(strftime('%c')); // add the label to the container $container->pack_start($label); // create a button $button = &new GtkButton('Update Time'); /* set the update_time() function as the callback for the "clicked" signal and pass $label to the callback */ $button->connect('clicked','update_time',$label); function update_time($b,$lb) { $lb->set_text(strftime('%c')); } // add the button to the container $container->pack_start($button); // add the container to the window $window->add($container); // display the window $window->show_all(); // necessary so that the program exits properly function shutdown() { gtk::main_quit(); } $window->connect('destroy','shutdown'); // start GTK's signal handling loop gtk::main();
Because $label is on the list of arguments passed to $button->connect( ),
$label is passed to update_time( ). Calling set_text( ) on $label
updates the text displayed in the label.
20.8.4 See Also
Documentation on signals and callbacks at http://gtk.php.net/manual/en/gtk.signals.php, on
GtkObject::connect( ) at
http://gtk.php.net/manual/en/gtk.gtkobject.method.connect.php, and on GtkButton's
clicked signal at http://gtk.php.net/manual/en/gtk.gtkbutton.signal.clicked.php.

Recipe 20.9 Displaying Menus
20.9.1 Problem
You want to display a menu bar at the top of a GTK window.
20.9.2 Solution
Create a GtkMenu. Create individual GtkMenuItem objects for each menu item you
want to display and add each menu item to the GtkMenu with append( ). Then, create
a root menu GtkMenuItem with the label that should appear in the menu bar (e.g., "File"
or "Options"). Add the menu to the root menu with set_submenu( ). Create a
GtkMenuBar and add the root menu to the menu bar with append( ). Finally, add
the menu bar to the window:
// create the window $window = &new GtkWindow(); // create a menu $menu = &new GtkMenu(); // create a menu item and add it to the menu $menu_item_1 = &new GtkMenuItem('Open'); $menu->append($menu_item_1); // create another menu item and add it to the menu $menu_item_2 = &new GtkMenuItem('Close'); $menu->append($menu_item_2); // create yet another menu item and add it to the menu $menu_item_2 = &new GtkMenuItem('Save'); $menu->append($menu_item_2); // create a root menu and add the existing menu to it $root_menu = &new GtkMenuItem('File'); $root_menu->set_submenu($menu); // create a menu bar and add the root menu to it $menu_bar = &new GtkMenuBar(); $menu_bar->append($root_menu); // add the menu bar to the window $window->add($menu_bar); // display the window $window->show_all(); // necessary so that the program exits properly function shutdown() { gtk::main_quit(); } $window->connect('destroy','shutdown');

// start GTK's signal handling loop gtk::main();
20.9.3 Discussion
A menu involves a hierarchy of quite a few objects. The GtkWindow (or another container)
holds the GtkMenuBar. The GtkMenuBar holds a GtkMenuItem for each top-
level menu in the menu bar (e.g., "File," "Options," or "Help"). Each top-level
GtkMenuItem has a GtkMenu as a submenu. That submenu contains each
GtkMenuItem that should appear under the top-level menu.
As with any GTK widget, a GtkMenuItem object can have callbacks that handle signals.
When a menu item is selected, it triggers the activate signal. To take action when a
menu item is selected, connect its activate signal to a callback. Here's a version of the
button-and-label time display from Recipe 20.8 with two menu items: "Update," which
updates the time in the label, and "Quit," which quits the program:
// create the window $window = &new GtkWindow(); // create a container for the label and the button $container = &new GtkVBox(); // create a menu $menu = &new GtkMenu(); // create a menu item and add it to the menu $menu_item_1 = &new GtkMenuItem('Update'); $menu->append($menu_item_1); // create another menu item and add it to the menu $menu_item_2 = &new GtkMenuItem('Quit'); $menu->append($menu_item_2); // create a root menu and add the existing menu to it $root_menu = &new GtkMenuItem('File'); $root_menu->set_submenu($menu); // create a menu bar and add the root menu to it $menu_bar = &new GtkMenuBar(); $menu_bar->append($root_menu); // add the menu to the container $container->add($menu_bar); // create a label showing the time $label = &new GtkLabel(strftime('%c')); // add the label to the container $container->pack_start($label);

// create a button $button = &new GtkButton('Update Time'); /* set the update_time() function as the callback for the "clicked" signal and pass $label to the callback */ $button->connect('clicked','update_time',$label); function update_time($b,$lb) { $lb->set_text(strftime('%c')); } // add the button to the container $container->pack_start($button); // when the Update menu item is selected, call update_time() $menu_item_1->connect('activate','update_time',$label); // when the Quit menu item is selected, quit $menu_item_2->connect('activate','shutdown'); // add the container to the window $window->add($container); // display the window $window->show_all(); // necessary so that the program exits properly function shutdown() { gtk::main_quit(); } $window->connect('destroy','shutdown'); // start GTK's signal handling loop gtk::main();
Callbacks are connected to the menu items with their connect( ) methods. The
callbacks are connected to the activate signals towards the end of the code because the
call to $menu_item_1->connect( ) passes $label to update_time( )
. For $label to be successfully passed to update_time( ) while the program is
running, connect( ) has to be called after $label is instantiated.
20.9.4 See Also
Documentation on the GtkMenu class at http://gtk.php.net/manual/en/gtk.gtkmenu.php,
GtkMenuShell::append( ) at
http://gtk.php.net/manual/en/gtk.gtkmenushell.method. append.php, the GtkMenuItem
class at http://gtk.php.net/manual/en/gtk.gtkmenuitem. php,
GtkMenuItem::set_submenu( ) at
http://gtk.php.net/manual/en/gtk.gtkmenuitem. method.set_submenu.php,
GtkMenuItem's activate signal at

http://gtk.php.net/manual/en/gtk.gtkmenuitem.signal.activate.php, and the GtkMenuBar
class at http://gtk.php.net/manual/en/gtk.gtkmenubar.php.
Recipe 20.10 Program: Command Shell The command-shell.php program shown in Example 20-1 provides a shell-like prompt to let
you execute PHP code interactively. It reads in lines using readline( ) and then runs
them with eval( ). By default, it runs each line after it's typed in. In multiline mode
(specified with -m or --multiline), however, it keeps reading lines until you enter . on
a line by itself; it then runs the accumulated code.
Additionally, command-shell.php uses the Readline word-completion features to more easily
enter PHP functions. Enter a few characters and hit Tab to see a list of functions that match
the characters you've typed.
This program is helpful for running snippets of code interactively or testing different
commands. The variables, functions, and classes defined in each line of code stay defined until
you quit the program, so you can test different database queries, for example:
% php -q command-shell.php [1]> require 'DB.php'; [2]> $dbh = DB::connect('mysql://user:pwd@localhost/phpc'); [3]> print_r($dbh->getAssoc('SELECT sign,planet,start_day FROM zodiac WHERE element LIKE "water"')); Array ( [Cancer] => Array ( [0] => Moon [1] => 22 ) [Scorpio] => Array ( [0] => Mars [1] => 24 ) [Pisces] => Array ( [0] => Neptune [1] => 19 ) )
The code for command-shell.php is in Example 20-1.
Example 20-1. command-shell.php

// Load the readline library if (! function_exists('readline')) { dl('readline.'. (((strtoupper(substr(PHP_OS,0,3))) == 'WIN')?'dll':'so')) or die("Readline library required\n"); } // Load the Console_Getopt class require 'Console/Getopt.php'; $o = new Console_Getopt; $opts = $o->getopt($o->readPHPArgv(),'hm',array('help','multiline')); // Quit with a usage message if the arguments are bad if (PEAR::isError($opts)) { print $opts->getMessage(); print "\n"; usage(); } // default is to evaluate each command as it's entered $multiline = false; foreach ($opts[0] as $opt) { // remove any leading -s $opt[0] = preg_replace('/^-+/','',$opt[0]); // check the first character of the argument switch($opt[0][0]) { case 'h': // display help usage(); break; case 'm': $multiline = true; break; } } // set up error display ini_set('display_errors',false); ini_set('log_errors',true); // build readline completion table $functions = get_defined_functions(); foreach ($functions['internal'] as $k => $v) { $functions['internal'][$k] = "$v("; } function function_list($line) { return $GLOBALS['functions']['internal']; } readline_completion_function('function_list'); $cmd = ''; $cmd_count = 1; while (true) { // get a line of input from the user $s = readline("[$cmd_count]> "); // add it to the command history
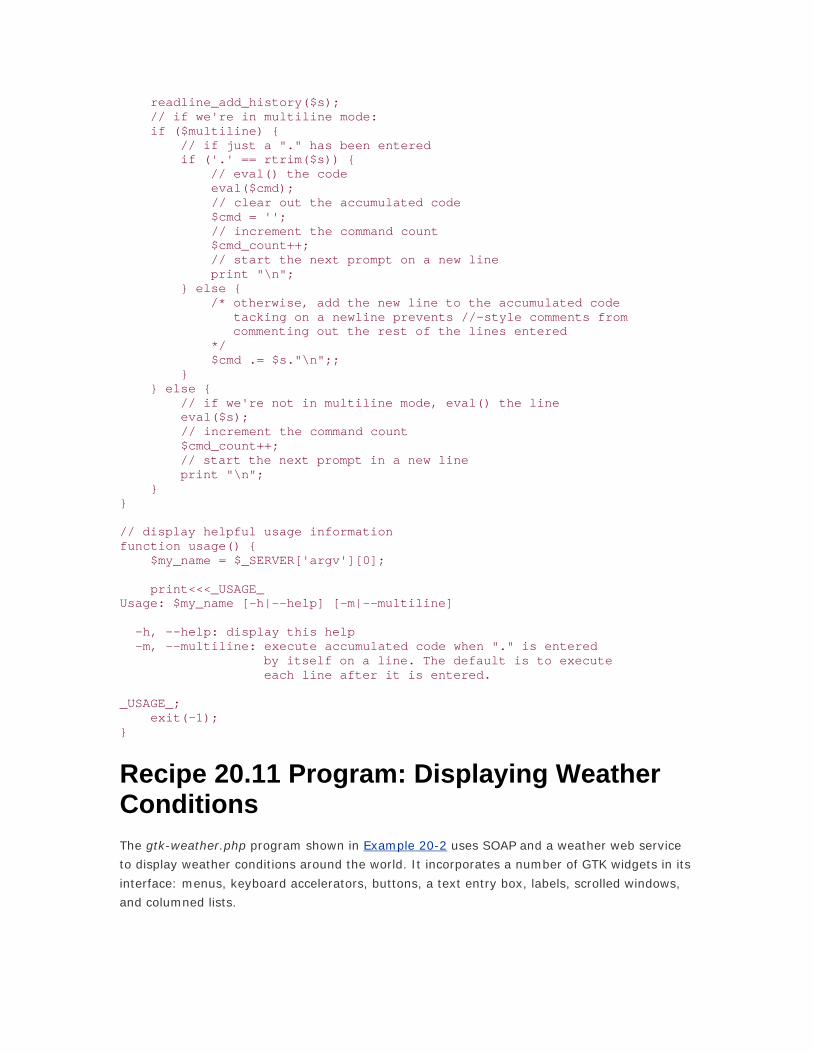
readline_add_history($s); // if we're in multiline mode: if ($multiline) { // if just a "." has been entered if ('.' == rtrim($s)) { // eval() the code eval($cmd); // clear out the accumulated code $cmd = ''; // increment the command count $cmd_count++; // start the next prompt on a new line print "\n"; } else { /* otherwise, add the new line to the accumulated code tacking on a newline prevents //-style comments from commenting out the rest of the lines entered */ $cmd .= $s."\n";; } } else { // if we're not in multiline mode, eval() the line eval($s); // increment the command count $cmd_count++; // start the next prompt in a new line print "\n"; } } // display helpful usage information function usage() { $my_name = $_SERVER['argv'][0]; print<<<_USAGE_ Usage: $my_name [-h|--help] [-m|--multiline] -h, --help: display this help -m, --multiline: execute accumulated code when "." is entered by itself on a line. The default is to execute each line after it is entered. _USAGE_; exit(-1); }
Recipe 20.11 Program: Displaying Weather Conditions The gtk-weather.php program shown in Example 20-2 uses SOAP and a weather web service
to display weather conditions around the world. It incorporates a number of GTK widgets in its
interface: menus, keyboard accelerators, buttons, a text entry box, labels, scrolled windows,
and columned lists.

To use gtk-weather.php, first search for weather stations by typing a search term in the text-
entry box and clicking the Search button. Searching for weather stations is shown in Figure
20-4.
Figure 20-4. Searching for weather stations
Once you've retrieved a list of weather stations, you can get the conditions at a specific station
by selecting the station and clicking the Add button. The station code and its current
conditions are added to the list at the bottom of the window. You can search again and add
more stations to the list. The gtk-weather.php window with a few added stations is shown in
Figure 20-5.
Figure 20-5. Added weather stations

The web service this program uses is called GlobalWeather; look for more information about it
at http://www.capescience.com/webservices/globalweather/index.shtml.
Example 20-2. gtk-weather.php
// Load the GTK extension dl('php_gtk.'. (((strtoupper(substr(PHP_OS,0,3))) == 'WIN')?'dll':'so')); // Load the SOAP client class require 'SOAP/Client.php'; // Create the main window and set its title and size $window = &new GtkWindow(); $window->set_title('PHP Cookbook GTK Demo'); $window->set_default_size(500,200); // The main layout container for the window is a VBox $vbox = &new GtkVBox(); $window->add($vbox); // Create a GtkAccelGroup to hold keyboard accelerators $accelgroup = &new GtkAccelGroup(); $window->add_accel_group($accelgroup); // Build the menu, starting with the GtkMenuBar. The arguments to // pack_start() prevent the menu bar from expanding if the window does. $menubar = &new GtkMenuBar(); $vbox->pack_start($menubar, false, false); // Create the "File" menu and its keyboard accelerator $menu_file_item = &new GtkMenuItem('_File'); $menu_file_item_label = $menu_file_item->child; $menu_file_item->add_accelerator('activate',$accelgroup,

$menu_file_item_label->parse_uline('_File'), GDK_MOD1_MASK,0); // Add the "File" menu to the menu bar $menubar->add($menu_file_item); // Create the submenu for the options under "File" $menu_file_submenu = &new GtkMenu(); $menu_file_item->set_submenu($menu_file_submenu); // Create the "Quit" option under "File" and its accelerator // GDK_MOD1_MASK means that the accelerator is Alt-Q, not Q // GTK_ACCEL_VISIBLE means that the accelerator is displayed in the menu $menu_file_choices_quit = &new GtkMenuItem('_Quit'); $menu_file_choices_quit_label = $menu_file_choices_quit->child; $menu_file_choices_quit->add_accelerator('activate',$accelgroup, $menu_file_choices_quit_label->parse_uline('_Quit'),GDK_MOD1_MASK, GTK_ACCEL_VISIBLE); // Add the "File | Quit" option to the "File" submenu $menu_file_submenu->append($menu_file_choices_quit); // Create the "Help" menu and its keyboard accelerator $menu_help_item = &new GtkMenuItem('_Help'); $menu_help_item_label = $menu_help_item->child; $menu_help_item->add_accelerator('activate',$accelgroup, $menu_help_item_label->parse_uline('_Help'), GDK_MOD1_MASK,0); // Add the "Help" menu to the menu bar $menubar->add($menu_help_item); // Create the submenu for the options under "Help" $menu_help_submenu = &new GtkMenu(); $menu_help_item->set_submenu($menu_help_submenu); // Create the "About" option under "Help" and its accelerator $menu_help_choices_about = &new GtkMenuItem('_About'); $menu_help_choices_about_label = $menu_help_choices_about->child; $menu_help_choices_about->add_accelerator('activate',$accelgroup, $menu_help_choices_about_label->parse_uline('_About'),GDK_MOD1_MASK, GTK_ACCEL_VISIBLE); // Add the "Help | About" option to the "Help" submenu $menu_help_submenu->append($menu_help_choices_about); // Layout the weather station searching widgets in a GtkTable $table_1 = &new GtkTable(2,4); $vbox->pack_start($table_1); // Put a label on the left in the first row $label_sn = &new GtkLabel('Station Name: '); $label_sn->set_alignment(1,0.5); $table_1->attach($label_sn,0,1,0,1, GTK_FILL); // Put a text entry field in the middle of the first row // The accelerator allows you to hit "Return" in the field to submit $entry_sn = &new GtkEntry(); $entry_sn->add_accelerator('activate',$accelgroup,GDK_KEY_Return,0,0); $table_1->attach($entry_sn,1,2,0,1, GTK_FILL);

// Put a scrolled window in the second row of the table $scrolledwindow_1 = &new GtkScrolledWindow(); $scrolledwindow_1->set_policy(GTK_POLICY_AUTOMATIC, GTK_POLICY_AUTOMATIC); $table_1->attach($scrolledwindow_1,0,4,1,2, GTK_EXPAND | GTK_SHRINK | GTK_FILL, GTK_EXPAND | GTK_SHRINK | GTK_FILL); // Put a columned list in the scrolled window. By putting the list inside // the scrolled window instead of directly in the GtkTable, the window doesn't // have to grow to a huge size to let you see everything in the list $clist_sn = &new GtkCList(4,array('Code','Name','Region','Country')); $scrolledwindow_1->add($clist_sn); // Set the columns in the list to resize automatically for ($i = 0; $i < 4; $i++) { $clist_sn->set_column_auto_resize($i,true); } // Add a "Search" button to the first row $button_search =&new GtkButton('Search'); $table_1->attach($button_search,2,3,0,1, GTK_FILL); // Add an "Add" button to the first row $button_add = &new GtkButton('Add'); $table_1->attach($button_add,3,4,0,1, GTK_FILL); // Layout the weather conditions display widgets in another GtkTable $table_2 = &new GtkTable(2,3); $vbox->pack_start($table_2); // Add a label displaying how many stations are shown $label_st = &new GtkLabel('Stations: 0'); $label_st->set_alignment(0,0.5); $table_2->attach($label_st,0,1,0,1, GTK_FILL); // Add a button to update a single station $button_update_sel = &new GtkButton('Update Selected'); $table_2->attach($button_update_sel,1,2,0,1, GTK_FILL); // Add a button to update all stations $button_update_all = &new GtkButton('Update All'); $table_2->attach($button_update_all,2,3,0,1, GTK_FILL); // Add a columned list to hold the weather conditions at the stations // This columned list also goes inside a scrolled window $scrolledwindow_2 = &new GtkScrolledWindow(); $scrolledwindow_2->set_policy(GTK_POLICY_AUTOMATIC, GTK_POLICY_AUTOMATIC); $table_2->attach($scrolledwindow_2,0,3,1,2, GTK_EXPAND | GTK_SHRINK | GTK_FILL, GTK_EXPAND | GTK_SHRINK | GTK_FILL); $clist_st = &new GtkCList(5,array('Code','Temp','Precipitation','Wind','Updated')); $scrolledwindow_2->add($clist_st); // Set the columns in the list to resize automatically for ($i = 0; $i < 5; $i++) { $clist_st->set_column_auto_resize($i,true); } // Connect signals to callbacks

// Clicking on the "Search" button or hitting Return in the text entry field // searches for weather stations whose name match the entered text $button_search->connect('clicked','wx_searchByName',$entry_sn,$clist_sn,$window); $entry_sn->connect('activate','wx_searchByName',$entry_sn,$clist_sn,$window); // Clicking on the "Add" button adds the weather station to the bottom // columned list $button_add->connect('clicked','cb_add_station',$clist_sn,$clist_st,$label_st); // Clicking on the "Update Selected" button updates the bottom columned list // for a single station $button_update_sel->connect('clicked','wx_update_report',$clist_st,$label_st, 'selected'); // Clicking on the "Update All" button updates all stations in the bottom // columned list $button_update_all->connect('clicked','wx_update_report',$clist_st,$label_st, 'all'); // Closing the window or selecting the "File | Quit" menu item exits the program $window->connect('destroy','cb_shutdown'); $menu_file_choices_quit->connect('activate','cb_shutdown'); // Selecting the "Help | About" menu item shows an about box $menu_help_choices_about->connect('activate','cb_about_box',$window); // These callbacks keep track of the currently selected row (if any) // in each columned list $clist_sn->connect('select-row','cb_clist_select_row'); $clist_sn->connect('unselect-row','cb_clist_unselect_row'); $clist_st->connect('select-row','cb_clist_select_row'); $clist_st->connect('unselect-row','cb_clist_unselect_row'); // The interface has been set up and the signals we want to pay attention // to have been connected to callbacks. Time to display the window and start // the GTK signal handling loop. $window->show_all(); gtk::main(); /* * CALLBACKS AND OTHER SUPPORT FUNCTIONS */ // use the searchByName() function over SOAP to get a list of stations // whose names match the given search term function wx_searchByName($button,$entry,$clist,$window) { // instantiate a new SOAP client $sc = new SOAP_Client('http://live.capescience.com/ccx/GlobalWeather'); $search_term = trim($entry->get_text()); if ($search_term) { // call the remote function if a search term is provided

$res = $sc->call('searchByName', array(new SOAP_Value('name','string',$search_term)), 'capeconnect:GlobalWeather:StationInfo', 'capeconnect:GlobalWeather:StationInfo#searchByName'); // pop up an error dialog if the SOAP function fails if (PEAR::isError($res)) { error_dialog($res->getMessage(),$window); return false; } // pop up an error dialog if there are no matches if (! is_array($res)) { error_dialog('No weather stations found.',$window); return false; } // add each station and its info to the columned list // wrapping the calls to append() with freeze() and thaw() // make all of the data appear at once $clist->freeze(); $clist->clear(); foreach ($res as $station) { $clist->append(array($station->icao,$station->name, $station->region,$station->country)); } $clist->thaw(); } } // use the getWeatherReport function over SOAP to get the weather conditions // at a particular station function wx_getWeatherReport($code) { $sc = new SOAP_Client('http://live.capescience.com/ccx/GlobalWeather'); $res = $sc->call('getWeatherReport', array(new SOAP_Value('code','string',$code)), 'capeconnect:GlobalWeather:GlobalWeather', 'capeconnect:GlobalWeather:GlobalWeather#getWeatherReport'); if (PEAR::isError($res)) { error_dialog($res->getMessage()); return false; } else { return $res; } } // add the weather report in $res to the columned list $clist // if $row is null, the report is appended to the list // if $row is not null, the report replaces row $row in the list function wx_add_report($clist,$label,$res,$row = null) { // format the timestamp $timestamp = str_replace('T',' ',$res->timestamp); $timestamp = str_replace('Z',' GMT',$timestamp); $timestamp = strftime('%H:%M:%S %m/%d/%Y',strtotime($timestamp)); // format the wind information

$wind = sprintf("%.2f m/s from %s", $res->wind->prevailing_speed, $res->wind->prevailing_direction->compass); $clist->freeze(); if (! is_null($row)) { // replace the information in row number $row $clist->set_text($row,1,$res->temperature->string); $clist->set_text($row,2,$res->precipitation->string); $clist->set_text($row,3,$wind); $clist->set_text($row,4,$timestamp); } else { // add the information to the end of the columned list $clist->append(array($res->station->icao, $res->temperature->string, $res->precipitation->string, $wind, $timestamp)); // update the columned list's internal row count $rows = 1 + $clist->get_data('rows'); $clist->set_data('rows',$rows); // update the label that displays a station count $label->set_text("Stations: $rows"); } $clist->thaw(); } // update conditions for one station or all stations, depending on $mode function wx_update_report($button,$clist,$label,$mode) { switch ($mode) { case 'selected': // if there is a row selected $selected_row = $clist->get_data('selected_row'); if (($selected_row >= 0) && (! is_null($selected_row))) { $code = $clist->get_text($selected_row,0); // get the report and update the columned list if ($res = wx_getWeatherReport($code)) { wx_add_report($clist,$label,$res,$selected_row); } } break; case 'all': // for each row in the columned list for ($i = 0, $j = $clist->get_data('rows'); $i < $j; $i++) { // get the report and update the list if ($res = wx_getWeatherReport($clist->get_text($i,0))) { wx_add_report($clist,$label,$res,$i); } } break; } } // add a station to the bottom list of weather reports function cb_add_station($button,$clist,$clist_2,$label) { $selected_row = $clist->get_data('selected_row'); // if there's a selected row in the top list of stations

if ($selected_row >= 0) { $code = $clist->get_text($selected_row,0); // get the weather report for that station if ($res = wx_getWeatherReport($code)) { // find the row if this code is already in the list $row = null; for ($i = 0, $j = $clist_2->get_data('rows'); $i < $j; $i++) { if ($clist_2->get_text($i,0) == $code) { $row = $i; } } // add the station and its report to the bottom list of // reports (or update the existing row) wx_add_report($clist_2,$label,$res,$row); } } } // update a columned list's internal selected row value when a row is selected function cb_clist_select_row($clist,$row,$col,$e) { $clist->set_data('selected_row',$row); } // clear a columned list's internal selected row value when a row is unselected function cb_clist_unselect_row($clist) { $clist->set_data('selected_row',-1); } // display the "About Box" function cb_about_box($menu_item,$window) { $about_box = &new GtkDialog(); $vbox = $about_box->vbox; $action_area = $about_box->action_area; $about_box->set_title('About'); $label = &new GtkLabel("This is the PHP Cookbook PHP-GTK Demo."); $button = &new GtkButton('OK'); $button->connect('clicked','cb_dialog_destroy',$about_box); $vbox->pack_start($label); $action_area->pack_start($button); $about_box->set_modal(true); $about_box->set_transient_for($window); $about_box->show_all(); } // display an error dialog box function error_dialog($msg,$window) { $dialog = &new GtkDialog(); $vbox = $dialog->vbox; $action_area = $dialog->action_area; $dialog->set_title('Error'); $label = &new GtkLabel("Error: $msg"); $button = &new GtkButton('OK'); $button->connect('clicked','cb_dialog_destroy',$dialog); $vbox->pack_start($label); $action_area->pack_start($button); $dialog->set_modal(true); $dialog->set_transient_for($window); $dialog->show_all();

} // close a dialog box function cb_dialog_destroy($button,$dialog) { $dialog->destroy(); } // quit the main program function cb_shutdown() { gtk::main_quit(); }

Chapter 21. PEAR
Section 21.1. Introduction
Recipe 21.2. Using the PEAR Package Manager
Recipe 21.3. Finding PEAR Packages
Recipe 21.4. Finding Information About a Package
Recipe 21.5. Installing PEAR Packages
Recipe 21.6. Installing PECL Packages
Recipe 21.7. Upgrading PEAR Packages
Recipe 21.8. Uninstalling PEAR Packages
Recipe 21.9. Documenting Classes with PHPDoc
21.1 Introduction PEAR is the PHP Extension and Application Repository, a collection of open source classes that work
together. Developers can use PEAR classes to generate HTML, make SOAP requests, send MIME
mail, and a variety of other common tasks. A pear is also a tasty fruit.
To find general information on PEAR, read the PEAR manual; to discover the latest PEAR packages,
go to http://pear.php.net. A summary of each week's happenings can be found at
http://pear.php.net/weeklynews.php.
Only a few core PEAR packages are bundled with the main PHP release. However, part of PEAR is a
program called, appropriately enough, pear, that makes it easy for you to download and install
additional PEAR packages. This program is also known as the PEAR package manager. Recipe 21.2
shows how to use the PEAR package manager.
PEAR packages divide into two major parts. One is the PHP Foundation Classes — object-oriented
code written in PHP that's high quality and usable in production environments on any platform and
web server. The other is PECL, or PHP Extension Code Library. PECL, pronounced pickle, is a series
of extensions to PHP written in C. These extensions are just like ones distributed with the main PHP
release, but they're of more specialized interest — such as an interface to the XMMS multimedia
player or the ImageMagick graphics library.
Additionally, the PEAR package manager allows you to use the PEAR class management
infrastructure with your personal projects. By creating your own packages that follow the PEAR
format, your users can use pear to download and install the files from your project's web site.
This chapter explains how to find a PEAR package you may want to use and how to install it on your
machine. Because PEAR has many classes, you need an easy way to browse them. Recipe 21.3
covers the different ways to find PEAR packages; once you've found a package's name, Recipe 21.4
shows how to view package details and information.
Once you locate a class you want to use, you need to run pear to transfer the class to your machine
and install it in the correct location on your server. Installing PEAR packages and PECL extensions
are the subjects of Recipe 21.5 and Recipe 21.6, respectively. Recipe 21.7 shows how discover if
any upgrades are available to packages on your machine and how to install the latest versions. If
you want to remove a package, see Recipe 21.8.
Finally, Recipe 21.9 describes how PEAR developers can write classes that abide by PEAR's coding
standards and how to document your class with PHPDoc.
PHP 4.3 includes the first stable release of PEAR. Earlier copies of PHP bundled versions of PEAR
prior to PEAR 1.0, but pear and the other packages weren't guaranteed to work, as they were still in
beta. If you are having problems using PEAR, you should remove any old files that may be
interfering with the release version. This includes the pear application itself; it can't always upgrade
itself to the latest release.
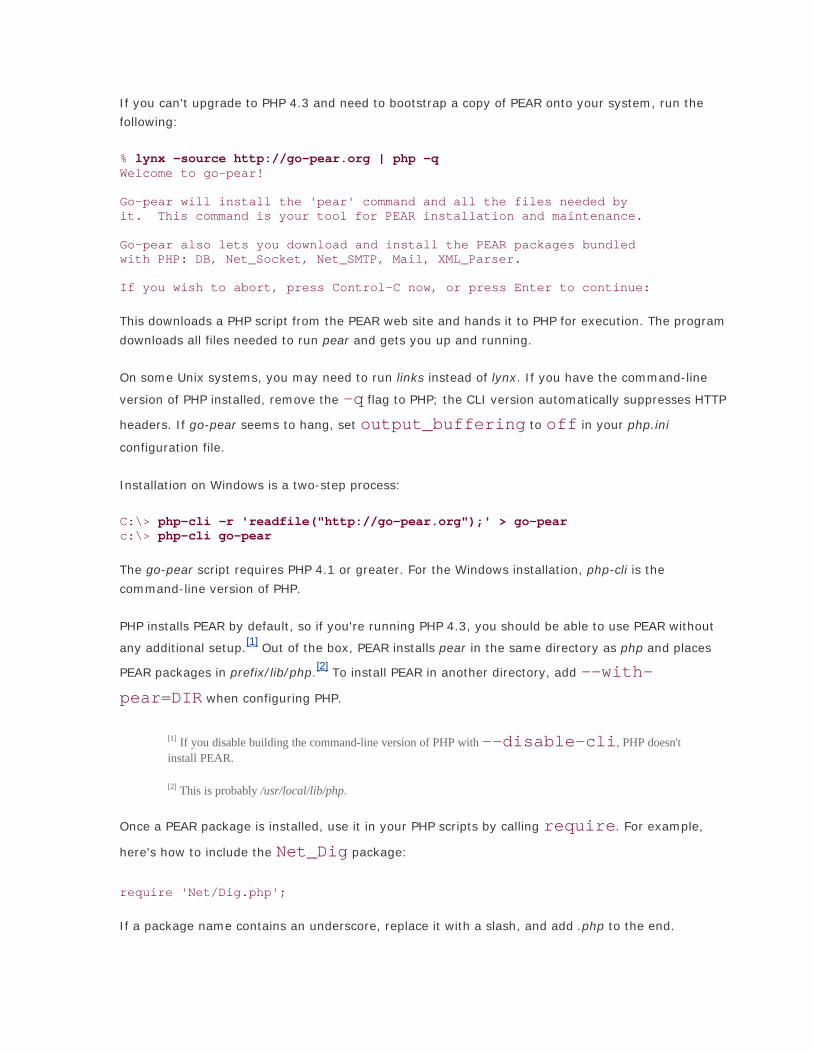
If you can't upgrade to PHP 4.3 and need to bootstrap a copy of PEAR onto your system, run the
following:
% lynx -source http://go-pear.org | php -q Welcome to go-pear! Go-pear will install the 'pear' command and all the files needed by it. This command is your tool for PEAR installation and maintenance. Go-pear also lets you download and install the PEAR packages bundled with PHP: DB, Net_Socket, Net_SMTP, Mail, XML_Parser. If you wish to abort, press Control-C now, or press Enter to continue:
This downloads a PHP script from the PEAR web site and hands it to PHP for execution. The program
downloads all files needed to run pear and gets you up and running.
On some Unix systems, you may need to run links instead of lynx. If you have the command-line
version of PHP installed, remove the -q flag to PHP; the CLI version automatically suppresses HTTP
headers. If go-pear seems to hang, set output_buffering to off in your php.ini
configuration file.
Installation on Windows is a two-step process:
C:\> php-cli -r 'readfile("http://go-pear.org");' > go-pear c:\> php-cli go-pear
The go-pear script requires PHP 4.1 or greater. For the Windows installation, php-cli is the
command-line version of PHP.
PHP installs PEAR by default, so if you're running PHP 4.3, you should be able to use PEAR without
any additional setup.[1] Out of the box, PEAR installs pear in the same directory as php and places
PEAR packages in prefix/lib/php.[2] To install PEAR in another directory, add --with-
pear=DIR when configuring PHP.
[1] If you disable building the command-line version of PHP with --disable-cli, PHP doesn't install PEAR.
[2] This is probably /usr/local/lib/php.
Once a PEAR package is installed, use it in your PHP scripts by calling require. For example,
here's how to include the Net_Dig package:
require 'Net/Dig.php';
If a package name contains an underscore, replace it with a slash, and add .php to the end.

Some packages may require you to include multiple classes, such as SOAP, so instead of requiring
SOAP.php, you include SOAP/Client.php or SOAP/Server.php. Read the documentation to discover if
a particular package requires nonstandard file includes.
Because PEAR packages are included as regular PHP files, make sure the directory containing the
PEAR classes is in your include_path. If it isn't, include and require can't find PEAR
classes.
To view instructions and examples showing how to use a particular PEAR class, check the PEAR
Manual at http://pear.php.net/manual/en/packages.php or read the top section of the package's
PHP files. For an example of a full-featured PEAR class in action, see the discussion of PEAR's
database library in Recipe 10.4.
Recipe 21.2 Using the PEAR Package Manager
21.2.1 Problem
You want to use the PEAR package manager, pear. This allows you to install new packages, and
upgrade and get information about your existing PEAR packages.
21.2.2 Solution
To execute a command with the PEAR package manager, type the command name as the first
argument on the command line:
% pear command
21.2.3 Discussion
Here's how to list all installed PEAR packages with the list command:[3]
[3] In early versions of pear, this command was list-installed.
% pear list Installed packages: = == == == == == == == == == +-----------------+----------+--------+ | Package | Version | State | | Archive_Tar | 0.9 | stable | | Console_Getopt | 0.11 | beta | | DB | 1.3 | stable | | HTTP | 1.2 | stable | | Mail | 1.0.1 | stable | | Mail_Mime | 1.2.1 | stable | | Net_SMTP | 1.0 | stable | | Net_Socket | 1.0.1 | stable |

| Net_URL | 1.0.4 | stable | | PEAR | 0.91-dev | beta | | XML_Parser | 1.0 | stable | | XML_RPC | 1.0.3 | stable | +-----------------+----------+--------+
For a list of all valid PEAR commands, use list-commands . Many commands also have
abbreviated names; for example, list is also just l. These names are usually the first few letters
of the command name. See Table 21-1 for a list of frequently used commands.
Table 21-1. PEAR package manager commands Command name Shortcut Description
install i Download and install packages
upgrade up Upgrade installed packages
uninstall un Remove installed packages
list l List installed packages
list-upgrades lu List all available upgrades for installed packages
search None Search for packages
pear has commands both for using and for developing PEAR classes; as a result, you may not need
all the commands. The package command, for example, creates a new PEAR package. If you
only run other peoples' packages, you can safely ignore this command.
Like all programs, if you want to run pear, you must have permission to execute it. If you can run
pear while running as root, but not as a regular user, make sure the group- or world-execute bit is
set. Similarly, for some actions, pear creates a lock file in the directory containing the PEAR files.
You must have write permission to the file named .lock located in that directory.
To find where your PEAR packages are located, run the config-get php_dir command.
You can check the value of the include_path by calling
ini_get('include_path') from within PHP or by looking at your php.ini file. If you
can't alter php.ini because you're in a shared hosting environment, add the directory to the
include_path at the top of your script before including the file. See Recipe 8.24 for more on
setting configuration variables from within PHP.
If you're behind a HTTP proxy server, configure PEAR to use it with the command:
% pear config-set http_proxy proxy.example.com:8080
You can configure PEAR package manager settings using:

% pear set-config setting value
Here setting is the name of the parameter to modify and value is the new value. To see all
your current settings, use the config-show command:
% pear config-show Configuration: = == == == == == == = +---------------------+-----------------+-------------------------------------+ | PEAR executables | bin_dir | /usr/local/bin | | directory | | | | PEAR documentation | doc_dir | /usr/local/lib/php/docs | | directory | | | | PHP extension | ext_dir | /usr/local/lib/php/extensions/no-de | | directory | | bug-non-zts-20020429 | | PEAR directory | php_dir | /usr/local/lib/php | | PEAR data directory | data_dir | /usr/local/lib/php/data | | PEAR test directory | test_dir | /usr/local/lib/php/tests | | HTTP Proxy Server | http_proxy | <not set> | | Address | | | | PEAR server | master_server | pear.php.net | | PEAR password (for | password | <not set> | | maintainers) | | | | PEAR username (for | username | <not set> | | maintainers) | | | | Preferred Package | preferred_state | stable | | State | | | | Unix file mask | umask | 18 | | Debug Log Level | verbose | 1 | +---------------------+-----------------+-------------------------------------+
For a brief description of each configuration option, use the config-help command.
Recipe 21.3 Finding PEAR Packages
21.3.1 Problem
You want a listing of PEAR packages. From this list you want to learn more about each package and
decide if you want to install the package.
21.3.2 Solution
Browse packages at http://pear.php.net/packages.php or search for packages at
http://pear.php.net/package-search.php. Use pear 's remote-list command to get listing of
PEAR packages or the search command to search for packages.
21.3.3 Discussion

There are a few ways to review PEAR's packages. First, to browse the listings in a directory-style
fashion, go to http://pear.php.net/packages.php. From there you can burrow into each individual
PEAR category.
Alternatively, you can search through the listings at http://pear.php.net/package-search.php. The
search page allows you to search by package name, author, category, and release date.
You can ask the PEAR package manager to provide you with a listing using the remote-list
command:
% pear remote-list Available packages: = == == == == == == == == == +----------------------+---------+ | Package | Version | | Archive_Tar | 0.9 | | Auth | 1.0.2 | ... | XML_Transformer | 0.3 | | XML_Tree | 1.1 | +----------------------+---------+
The short form of remote-list is rl.
To search for package names from the command line, use the search command:
% pear search auth Matched packages: = == == == == == == == == +-----------+--------+-------+------------------------------------+ | Package | Latest | Local | | | Auth | 1.0.2 | 1.0.2 | Creating an authentication system. | | Auth_HTTP | 1.0.1 | 1.0.1 | HTTP authentication for PHP | +-----------+--------+-------+------------------------------------+
This does a case-insensitive search of package names and returns the package name, the latest
version number, the version you have installed (if any), and a short description about the package.
21.3.4 See Also
Recipe 21.4 to find out more information about a package.

Recipe 21.4 Finding Information About a Package
21.4.1 Problem
You want to gather information about a package, such a description of what it does, who maintains
it, what version you have installed, and which license it's released under.
21.4.2 Solution
If the package is installed on your machine, use the PEAR package manager's info command:
% pear info Net_URL
Otherwise, use the remote-info command:
% pear remote-info SOAP
You can also view the package's home page on http://pear.php.net.
21.4.3 Discussion
The info command provides summary information about a package:
% pear info Net_URL About Net_URL-1.0.4 = == == == == == == == == == +-----------------+-----------------------------------------+ | Package | Net_URL | | Summary | Easy parsing of Urls | | Description | Provides easy parsing of URLs and their | | | constituent parts. | | Maintainers | Richard heyes <[email protected]> (lead) | | Version | 1.0.4 | | Release Date | 2002-07-27 | | Release License | BSD | | Release State | stable | | Release Notes | License change | | Last Modified | 2002-08-23 | +-----------------+-----------------------------------------+
If you don't have the package installed, ask the remote server for a description:
% pear remote-info Net_URL Package details: = == == == == == == == = +-------------+-----------------------------------------+
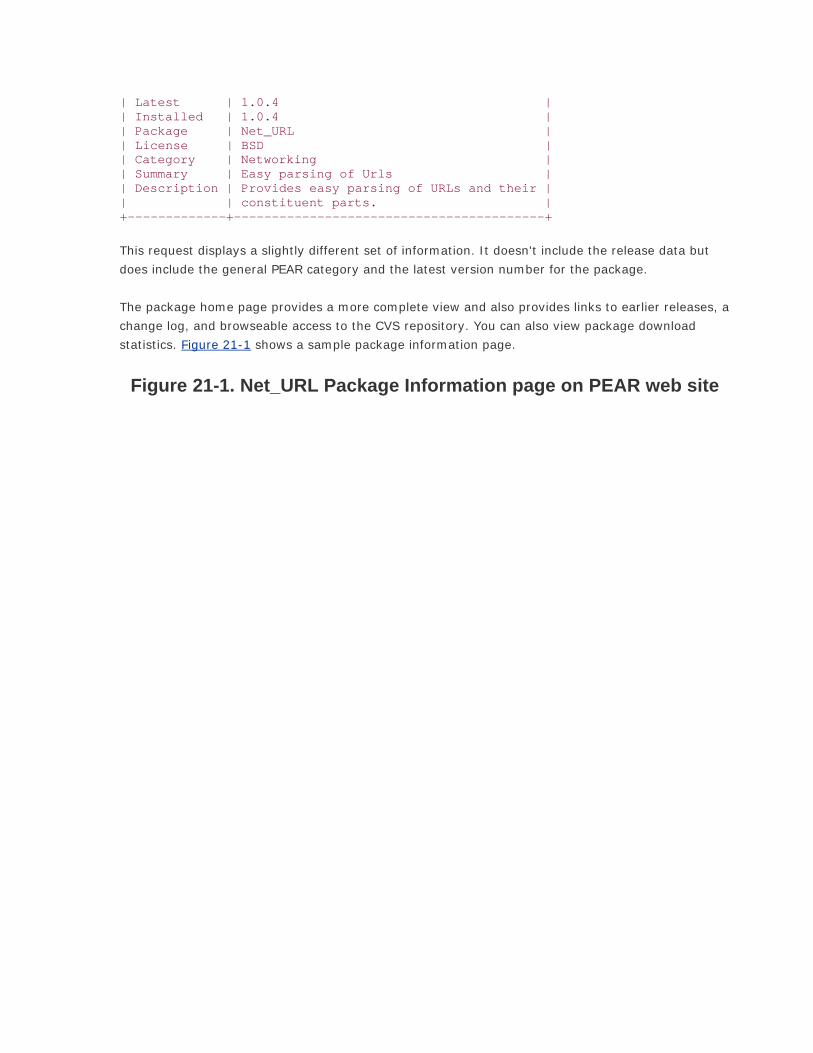
| Latest | 1.0.4 | | Installed | 1.0.4 | | Package | Net_URL | | License | BSD | | Category | Networking | | Summary | Easy parsing of Urls | | Description | Provides easy parsing of URLs and their | | | constituent parts. | +-------------+-----------------------------------------+
This request displays a slightly different set of information. It doesn't include the release data but
does include the general PEAR category and the latest version number for the package.
The package home page provides a more complete view and also provides links to earlier releases, a
change log, and browseable access to the CVS repository. You can also view package download
statistics. Figure 21-1 shows a sample package information page.
Figure 21-1. Net_URL Package Information page on PEAR web site

21.4.4 See Also
Recipe 21.3 to search for packages.
Recipe 21.5 Installing PEAR Packages
21.5.1 Problem
You want to install a PEAR package.
21.5.2 Solution

Download and install the package from your PEAR server using the PEAR package manager:
% pear install Package_Name
You can also install from any location on the Internet:
% pear install http://pear.example.com/ Package_Name-1.0.tgz
Here's how to install if you have a local copy of a package:
% pear install Package_Name-1.0.tgz
21.5.3 Discussion
To install PEAR packages, you need write permission where the packages are stored; this defaults to
/usr/local/lib/php/.
You can also request multiple packages at the same time:
% pear install HTML_Common HTML_Javascript downloading HTML_Common-1.0.tgz ... ...done: 2,959 bytes install ok: HTML_Common 1.0 downloading HTML_Javascript-1.0.0.tgz ... ...done: 4,141 bytes install ok: HTML_Javascript 1.0.0
When installing a package, PEAR checks that you have all the necessary PHP functions and PEAR
packages the new package depends on. If this check fails, PEAR reports on the dependencies:
% pear install HTML_Table downloading HTML_Table-1.1.tgz ... ...done: 5,168 bytes requires package `HTML_Common' >= 1.0 HTML_Table: dependencies failed
To fix this problem, download and install the missing packages first. If you want to ignore these
dependencies, force installation with -n or --nodeps. You can then later install the required
package.
21.5.4 See Also
Recipe 21.6 for information on installing PECL packages; Recipe 21.7 for more on upgrading an
existing package; Recipe 21.8 to uninstall a package.

Recipe 21.6 Installing PECL Packages
21.6.1 Problem
You want to install a PECL package; this builds a PHP extension written in C to use inside PHP.
21.6.2 Solution
Make sure you have all the necessary extension libraries and then use the PEAR package manager
install command:
% pear install xmms
To use the extension from PHP, load it using dl( ):
dl('xmms.so');
21.6.3 Discussion
The frontend process for installing PECL packages is just like installing PEAR packages for code
written in PHP. However, the behind-the-scenes tasks are very different. Because PECL extensions
are written in C, the package manager needs to compile the extension and configure it to work with
the installed version of PHP. As a result, at present, you can build PECL packages on Unix machines
and on Windows machines if you use MSDev.
Unlike PHP-based PEAR packages, PECL extensions don't automatically inform you when you lack a
library necessary to compile the extension. Instead, you are responsible for correctly preinstalling
these files. If you are having trouble getting a PECL extension to build, check the README file and
the other documentation that comes with the package. The package manager installs these files
inside the docs directory under your PEAR hierarchy.
When you install a PECL extension, the PEAR package manager downloads the file, extracts it, runs
phpize to configure the extension for the version of PHP installed on the machine, and then makes
and installs the extension. It may also prompt you for the location of libraries:
% pear install xmms downloading xmms-0.2.tgz ... ...done: 11,968 bytes 4 source files, building running: phpize PHP Api Version : 20020307 Zend Module Api No : 20020429 Zend Extension Api No : 20020731 Xmms library install dir? [autodetect] : building in /var/tmp/pear-build-adam/xmms-0.2 running: /tmp/pearKIv63P/xmms-0.2/configure --with-xmms

running: make xmms.so copied to /tmp/pearKIv63P/xmms-0.2/xmms.so install ok: xmms 0.2
If these libraries are in a standard location, hitting Return selects the autodetect option. PHP
then searches for the libraries and selects them; you don't need to enter an explicit pathname, as in
the case of the xmms library shown earlier.
PECL extensions are stored in different places than non-PECL packages. If you want to run pear, you
must be able to write inside the PHP extensions directory. Some PECL packages, such as xmms,
install files in the same directory as the PHP binary. Because of this, you may want to install these
packages while running as the same user you used to install PHP. Also, check the execute
permissions of these files; because most PEAR files aren't executable, your umask may not provide
those executable files with the correct set of permissions.
21.6.4 See Also
Recipe 21.5 for information on installing PEAR packages; Recipe 21.7 for more on upgrading an
existing package; Recipe 21.8 to uninstall a package.
Recipe 21.7 Upgrading PEAR Packages
21.7.1 Problem
You want to upgrade a package on your system to the latest version for additional functionality and
bug fixes.
21.7.2 Solution
Find out if any upgrades are available and then tell pear to upgrade the packages you want:
% pear list-upgrades % pear upgrade Package_Name
21.7.3 Discussion
Upgrading to a new version of a package is a simple task with the PEAR Package Manager. If you
know a specific package is out of date, you can upgrade it directly. However, you may also want to
just periodically check to see if any new releases are available.
To do this, user the list-upgrades command, which prints out a table showing package
names, the new version number, and the size of the download:
% pear list-upgrades
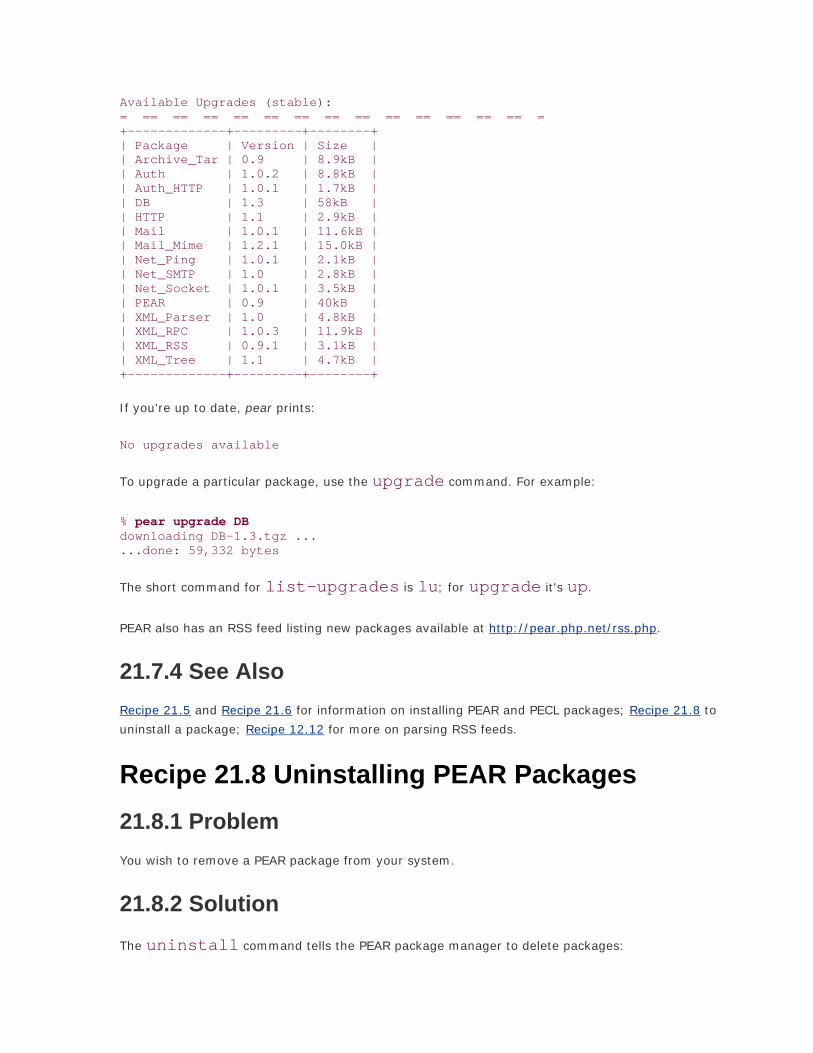
Available Upgrades (stable): = == == == == == == == == == == == == == = +-------------+---------+--------+ | Package | Version | Size | | Archive_Tar | 0.9 | 8.9kB | | Auth | 1.0.2 | 8.8kB | | Auth_HTTP | 1.0.1 | 1.7kB | | DB | 1.3 | 58kB | | HTTP | 1.1 | 2.9kB | | Mail | 1.0.1 | 11.6kB | | Mail_Mime | 1.2.1 | 15.0kB | | Net_Ping | 1.0.1 | 2.1kB | | Net_SMTP | 1.0 | 2.8kB | | Net_Socket | 1.0.1 | 3.5kB | | PEAR | 0.9 | 40kB | | XML_Parser | 1.0 | 4.8kB | | XML_RPC | 1.0.3 | 11.9kB | | XML_RSS | 0.9.1 | 3.1kB | | XML_Tree | 1.1 | 4.7kB | +-------------+---------+--------+
If you're up to date, pear prints:
No upgrades available
To upgrade a particular package, use the upgrade command. For example:
% pear upgrade DB downloading DB-1.3.tgz ... ...done: 59,332 bytes
The short command for list-upgrades is lu; for upgrade it's up.
PEAR also has an RSS feed listing new packages available at http://pear.php.net/rss.php.
21.7.4 See Also
Recipe 21.5 and Recipe 21.6 for information on installing PEAR and PECL packages; Recipe 21.8 to
uninstall a package; Recipe 12.12 for more on parsing RSS feeds.
Recipe 21.8 Uninstalling PEAR Packages
21.8.1 Problem
You wish to remove a PEAR package from your system.
21.8.2 Solution
The uninstall command tells the PEAR package manager to delete packages:

% pear uninstall HTML_Common uninstall HTML_Common ok
21.8.3 Discussion
Uninstalling a package removes it completely from your system. If you want to reinstall it, you must
begin as if the package was never installed. PEAR doesn't warn you if you try to remove a package
that's dependent on another package, so be careful when you uninstall.
There is no way to automatically roll back an upgrade to an earlier version of a package using
uninstall. Also, PEAR complains if you try to install an earlier version over a later one. To
force PEAR to overwrite a newer version, use install -f or install --force:
% pear install --force Net_URL downloading Net_URL-1.0.4.tgz ... ...done: 3,540 bytes install ok: Net_URL 1.0.4
The short command for uninstall is un.
21.8.4 See Also
Recipe 21.5 and Recipe 21.6 for information on installing PEAR and PECL packages.
Recipe 21.9 Documenting Classes with PHPDoc
21.9.1 Problem
You want to be able to integrate documentation with your code.
21.9.2 Solution
Use PHPDoc. This allows PEAR to accurately list your class, and you can use the PHPDoc tools to
automatically generate API documentation in HTML and XML.
PHPDoc syntax is based on Javadoc. The following tags are available for use: @access ,
@author, @package, @param, @return, @since, @var, and @version.
You can then use PEAR's PHPDoc utility to generate documentation.
21.9.3 Discussion

PHPDoc has a special inline documentation style. By formatting your comments in a particular way,
the PHPDoc script can parse your code to not only generate which parameters a function take and
what type of variable it returns, but also associate comments and other useful information with
objects, functions, and variables.
PHPDoc comments are based on the same formatting and naming conventions as Javadoc. So, to
flag a comment block to grab PHPDoc's attention, use a traditional C-style comment but use two
asterisks after the opening slash:
/** * This is a PHPDoc comment block */
Inside of a block, certain keywords have special meaning. These keywords all begin with an at sign.
Table 21-2 lists the keywords and what they stand for.
Table 21-2. PHPDoc keywords Keyword Meaning
@access Method access: public or private
@author Package author
@package Package name
@param Function parameter
@return Function return value
@see See also reference
@since Debut version of PHP
@var Object variable
@version Package release number
A more fully fleshed out example looks like this:
/** * Example_Class is a sample class for demonstrating PHPDoc * * Example_Class is a class that has no real actual code, but merely * exists to help provide people with an understanding as to how the * various PHPDoc tags are used. * * Example usage: * if (Example_Class::example()) { * print "I am an example."; * } * * @package Example * @author David Sklar <[email protected]>

* @author Adam Trachtenberg <[email protected]> * @version $Revision: 1.4 $ * @access public * @see http://www.example.com/pear */ class Example extends PEAR { /** * returns the sample data * * @param string $sample the sample data * @return array all of the exciting sample options * @access private */ function _sampleMe($sample) {
Any text following a keyword is treated as the value assigned to it. So, in this example, the value of
@package is "Example." It can be okay to have two instances of the same keyword, depending
upon the situation. For instance, it's perfectly legal to have multiple @param keywords, but it's
illegal to have multiple @return keywords.
PHPDoc and the PEAR web site use this information to generate hyperlinked references, so it's
important to use a consistent naming scheme, or the cross-references won't work correctly.
To generate PHPDoc, first install the PHPDoc PEAR package. Inside that package is a program
named phpdoc; run it from the command line, and use the -s flag to pass in the directory of the
source files. By default, documentation is generated in /usr/local/doc/pear/, so be sure the phpdoc
program has write permission to that location, or use -d to alter the destination directory.
To permanently modify the default values, edit the values at the top of the script. Pass -h for a
listing of all possible command-line parameters.
PHPDoc isn't very efficient, so be patient. Generating documentation may take a while, depending
upon the size of your files. A faster program is currently under development.
21.9.4 See Also
PEAR coding standards at http://pear.php.net/manual/en/standards.php; PHPDoc at
http://pear.php.net/package-info.php?package=PHPDoc.

Colophon
Our look is the result of reader comments, our own experimentation, and feedback from distribution
channels. Distinctive covers complement our distinctive approach to technical topics, breathing
personality and life into potentially dry subjects.
The animal on the cover of PHP Cookbook is a Galapagos land iguana (Conolophus subcristatus).
Once abundant in the Galapagos Islands, this iguana proved tasty to the settlers of the early 1800s,
and domestic animals later introduced on the islands played further havoc with the reptile's home
and food supply. Today there are no iguanas left on Santiago Island and very few left on the other
islands.
Distantly related to the green iguana of the South American continent, Galapagos land iguanas can
be over three feet long, with males weighing up to 30 pounds. Their tough, scaly skin is yellow with
scattered patches of white, black, brown, and rust. These lizards resemble mythical creatures of the
past-dragons with long tails, clawed feet, and spiny crests. In reality, however, they are harmless.
Land iguanas live in the drier areas of the islands and in the morning are found basking in the sun.
During midday, however, they seek the shade of cactus, rocks, and trees. To conserve body heat at
night, they sleep in burrows dug in the ground.
These reptiles are omnivores, but they generally depend on low-growing plants and shrubs, as well
as the fallen fruits and pads of cactus trees. These plants provide most of the moisture they need;
however, they will drink fresh water whenever it's available.
Depending on their size, land iguanas reach maturity between 8 and 15 years of age. They
congregate and mate during specific periods, which vary from island to island. The females then
migrate to suitable areas to nest. After digging a burrow, the female lays 2 to 20 eggs in the nest.
She then defends the covered nest site to prevent other females from nesting in the same spot.
Young iguanas hatch 85 to 110 days later and take about a week to dig their way out of the nest.
Normally, if hatchlings survive the first year when food is often scarce and native predators such as
hawks, egrets, herons, and snakes are a danger, they can live for more than 60 years. In reality,
predation by feral cats is far worse because the young must survive and grow for at least three to
four years before becoming large enough that cats can't kill them.
Mary Anne Weeks Mayo was the production editor and copyeditor for PHP Cookbook. Sarah Jane
Shangraw proofread the book. Darren Kelly and Jane Ellin provided quality control. Julie Flanagan,
Brian Sawyer, Genevieve d'Entremont, and Judy Hoer provided production assistance. Ellen
Troutman-Zaig wrote the index.
Emma Colby designed the cover of this book, based on a series design by Edie Freedman. The cover
image is a 19th-century engraving from the Dover Pictorial Archive. Emma produced the cover
layout with QuarkXPress 4.1 using Adobe's ITC Garamond font.

David Futato designed the interior layout. This book was converted to FrameMaker 5.5.6 with a
format conversion tool created by Erik Ray, Jason McIntosh, Neil Walls, and Mike Sierra that uses
Perl and XML technologies. The text font is Linotype Birka; the heading font is Adobe Myriad
Condensed; and the code font is LucasFont's TheSans Mono Condensed. The illustrations that
appear in the book were produced by Robert Romano and Jessamyn Read using Macromedia
FreeHand 9 and Adobe Photoshop 6. This colophon was compiled by Mary Anne Weeks Mayo.
The online edition of this book was created by the Safari production group (John Chodacki, Becki
Maisch, and Madeleine Newell) using a set of Frame-to-XML conversion and cleanup tools written
and maintained by Erik Ray, Benn Salter, John Chodacki, and Jeff Liggett.

Index
[SYMBOL] [A] [B] [C] [D] [E] [F] [G] [H] [I] [J] [K] [L] [M] [N] [O] [P] [Q] [R] [S] [T] [U] [V] [W] [X] [Z]
. (dot) in HTML field name, converting to PHP variable !== (nonidentity) operator 2nd " (quotes, double) converting to HTML entities 2nd 3rd in double-quoted strings escaping for SQL escaping in queried data in strings variable interpolation in a double-quoted string "Undefined variable" error message #! (hash-bang) syntax, PHP scripts beginning with $ (dollar sign) $_ in superglobal array names in double-quoted strings end of line anchor for patterns $_COOKIE superglobal array 2nd 3rd $_ENV superglobal array 2nd $_FILES superglobal array uploaded file processing $_GET superglobal array 2nd $_POST superglobal array 2nd 3rd $_REQUEST superglobal array 2nd $_SERVER superglobal array $_SESSION superglobal array 2nd 3rd $parent( ) $pc_timezones array % (percent sign) SQL wildcard character strftime( ), formatting characters preceded by & (ampersand) & (logical AND) operator argument separator for URLs before function name, returning values by reference before function parameter names, passing parameters by reference converting to HTML entity 2nd 3rd placeholder in database queries < > (angle brackets) >& (redirection) operator < and >, converting to HTML entities 2nd 3rd <<< in heredocs 2nd <? and ?>, PHP start and end tags programming conventions in this book <br /> tags (XHTML), converting carriage returns to <img> tag (localized) ' (quotes, single) escaping for SQL

in command-line arguments in function return values marking strings in queried data in strings ( ) (parentheses) embedding comments in email addresses grouping characters and capturing in patterns * (asterisk) regular expression metacharacter SQL and shell globbing wildcard + (plus sign) + operator, merging arrays regular expression metacharacter , (comma) array elements, separating data separated by, parsing -> operator, accessing methods or member variables . (dot) . (current directory) and .. (parent directory) recreating full filename from parts regular expression metacharacter string concatenation operator / (slash) /** and */ in PHPDoc comments pathname separator on Unix 2nd recreating full filename from parts regular expression pattern delimiters 2nd /bin/stty (controlling terminal characteristics) /dev/null (Unix), redirecting output to /i (case-insensitive) pattern modifier /tmp directory, cookie storage in /usr/bin/last command :: (colon) operator, accessing class methods or member variables ; (semicolon) argument separator for URLs end of statement character = (equal sign) = (assignment) operator, == vs. =& (assignment) operator 2nd => operator instructing arrays to use different index specifying key/value pairs for arrays == (equality) operator === (identity) operator ? (question mark) ?\: (ternary) operator after quantifiers, for nongreedy matching placeholder in database queries regular expression metacharacter @ (at sign) in PHPDoc commands [ ] (brackets) character classes in regular expressions in double-quoted strings variables, treating as arrays \ (backslash) double-quoted string escape sequence

escaping for SQL escaping regular expression pattern delimiters escaping SQL and shell globbing wildcards pathname separator on Windows 2nd \b (word boundary), regular expression metasymbol 2nd \d (digit) metasymbol in regular expressions \ddd (octal codes for characters) \n [See newlines] \s (whitespace) metasymbol 2nd \w (word) metasymbol 2nd ^ (caret) beginning of line anchor for patterns inverting character class _ (underscore) _ _FILE_ _ and _ _LINE_ _ constants _( ) alias for gettext( ) replacing . (dot) in variable names SQL wildcard character _getch( ) _write( ) (pc_DB_Session) ` (backtick) operator using with ls (Unix) or dir (Windows) { } (braces) array elements, resolving ambiguity about dereferencing objects in double-quoted strings empty set expressions between, evaluation in PHP in variable interpolation | for alternation in pattern matching ~ (logical NOT) 0 (zero) as empty variable numbers beginning with return values from functions in string escape sequences
A
abstraction layer for databases abusive users, program checking for Accept-Encoding header Accept-Language header access time for files access_log variables accounts, activating/deactivating for web site actions by user, responding to activate signal add( ) GtkVBox class GtkWindow class addAttachment( ) (Mail_mime) addcslashes( ) addHeader( ) (HTTP_Request) 2nd adding to a date

addObjectMap( ) (SOAP_Server) address repository (LDAP) addresses IP, looking up with DNS looking up with LDAP addslashes( ) ADOdb (database abstraction layer) advisory file locking affectedRows( ) (DB) aliases _( ) for gettext( ) for common locales allow_call_time_pass_reference configuration directive allow_url_fopen configuration directive alternation in regular expression pattern matching analog (web site statistics program) anchors for regular expression pattern matching angle, text rotation 2nd anonymous arrays anonymous binds (LDAP) anonymous FTP antialiasing, PS font text graphics Apache web servers browscap file communicating within httpd.conf file, setting environment variables passwords stored in environment variables, protecting apache_note( ) append( ) GtkMenu class GtkMenuBar class append_child( ) appending one array to another arcs, drawing argument separator, changing from & (ampersand) to ; (semicolon) arithmetic adding to/subtracting from a date BCMath library array( ) constructing arrays from individual values different index, using the => syntax mixing and matching numeric and string keys in array_diff( ) 2nd combining with array_map( ) array_filter( ) 2nd array_flip( ) array_intersection( ) array_keys( ) 2nd array_map( ) combining with array_diff( ) array_merge( ) 2nd 3rd array_multisort( ) array_pad( ) array_pop( ) 2nd grabbing end element in array merging array_push( ) 2nd

merging arrays and array_reverse( ) 2nd array_search( ) array_shift( ) array_splice( ) 2nd array_unique( ) 2nd 3rd array_values( ) 2nd array_walk( ) arrays $_COOKIE $_ENV $_SESSION { }, resolving ambiguity with appending one to another of arrays 2nd associative 2nd [See also associative arrays] changing size of padding checking for certain element checking for certain key class variables stored in commas separating elements, printing with converting to strings data types for elements defining with string keys deleting elements from encoding form data as fetch modes for database queries 2nd 3rd file information returned by stat( ) iterating through of files, returned by pc_process_dir( ) finding all element combinations of finding all permutations of finding elements meeting certain requirements finding largest or smallest valued element in finding position of an element finding union, intersection, or difference between form errors, storing in index not starting at (zero) initializing to range of integers interpolating elements into strings iterating through with each( ) in reverse looping through with foreach multiple return values for functions numeric 2nd removing duplicate elements of objects passing to functions with variable arguments printing HTML table with horizontal columns processing and merging multiple with functions randomizing order of elements reading configuration file into reading file into reading file into and removing last element

reading file into and then reversing reading file into and then shuffling lines removing duplicate elements from returned by localtime( ) reversing order of elements sorting by a computable field method, using instead of function multiple shuffling deck of cards storing multiple elements per key string representation of superglobal $_FILES swapping the keys and values of testing for with is_array( ) treating variables as variables, coercing into array form arsort( ) 2nd ASCII character values in ereg patterns or replacements characters, codes for converting HTML to converting to hexadecimal for preg functions converting to/from HTML FTP_ASCII parameter line-delimiter characters on Windows asin( ) asort( ) 2nd asp_tags configuration directive assignment = and =& operators = operator =& operator 2nd function returns to variables associative arrays 2nd checking for specific array element configuration variables in function parameter as with integer keys iterating through with for loops, recomputing count removing duplicate elements returned by getdate( ) returned by pathinfo( ) atan2( ) atanh( ) attach( ) (GtkTable) attributes adding to DOM XML nodes XML Auth class Auth::auth( ) Auth::getAuth( ) Auth::start( ) authentication based on cookies

embedding username and password in URLs HTTP, basic PHP as CGI LDAP, using for personal questions for users that attackers can't answer SMTP auto_prepend_file configuration directive autoPrepare( ) (DB)
B
background color, setting backslash [See \, under Symbols] backtick ( ` ) operator 2nd bar charts generated from poll results base 10 logs base e logs base e numbers base objects, adding properties to base_convert( ) 2nd Base64 encoded encrypted data base64_decode( ) base64_encode( ) basename( ) 2nd BCMath library 2nd Benchmark module Benchmark_Iterate class Benchmark_Iterate::get( ) biased random numbers binary data floating-point numbers represented as storing in strings transforming into plaintext binary files FTP_BINARY option opening on non-POSIX systems reading on Windows bindec( ) binding (to LDAP server) bindtextdomain( ) birthdate, checking validity of block sizes for encryption algorithms body of email messages body of newsgroup postings booleans constants and function return values false and true values for variables braces [See { }, under Symbols] brackets [See [ ], under Symbols] breadth-first search break statements browscap configuration directive browsers accepting compressed responses (Accept-Encoding header) buffering output to detecting different
browser capability object properties user-configurable capabilities such as javascript or cookies flushing output to PHP acting as sending images to 2nd BSD systems, locales on buffered data flushing to file locked files HTTP output, mixing headers and body text output to browser build( ) (DB_Pager) buttons GtkButton class byte representations of UTF-8 encoded characters
C
C language Microsoft C runtime library (msvcrt.dll) PECL (PHP Extension Code Library) 2nd strftime( ) function, use in PHP Cache/DB.php file Cache_DB class caching database queries and results stat( ) system call and file information function results calendars conversion functions for different non-Gregorian calendars gregoriantojd( ) non-Gregorian, using pc_calendar(), printing out month with unixtojd( ) and jdtounix( ) call( ) (SOAP_Client) callback functions handling signals with menus in GTK windows output buffer processing running when database error is raised capitalization [See case] capturing data without printing it capturing in patterns carriage returns converting to XHTML <br /> tags in double-quoted strings trimming from strings case case-insensitive matching eregi( ) case-sensitivity in array_diff( ) in heredocs in XML i (case-insensitive) pattern modifier locales, setting for

modifying in strings catalog for messages in different locales catalog-compare.php program catchable errors CBC (Cipher Block Chaining) mode centered text, drawing in an image CGI binary CGI scripts, PHP as change to files, time of character class inverting or matching complement of character encodings ASCII Unicode UTF-8 character sets in locale aliases specifying for locales characters processing individually in strings reversing in strings checkdate( ) checkhost( ) (Net_Ping) chgrp( ) child classes child_nodes( ) chmod( ) 2nd chop( ) chown( ) chr( ) (Windows) Cipher Block Chaining (CBC) mode Cipher Feedback (CFB) mode circles, drawing filled class constructor class keyword classes creating dynamically database errors defining and creating extending hierarchy methods pc_ in names properties of subclassing or extending clearstatcache( ) CLI [See command-line interface binary] client-side PHP command-shell.php program displaying menus in window displaying multiple GUI widgets in a window gtk-weather.php program GUI widgets, displaying in a window parsing program arguments with getopt( )

reading from the keyboard reading passwords without echoing responding to user actions clients FTP LDAP SOAP Usenet web-based, for email XML-RPC cloning objects close( ) closedir( ) closing XML parser manually XSLT processors code, profiling colors arcs, ellipses, and circles, specifying for graphical bar chart ImageColorAllocate( ) lines, rectangles, and polygons, specifying for shapes drawn with patterned lines alternating white and black pixels text drawn as graphic PostScript fonts transparent web-safe, codes for combinations of array elements, finding all combine( ) comma-separated values (CSV) explode( ) and command line, incorporating external data in command-line PHP programs $COMMAND_LINE command-line interface (CLI) binary PHP-GTK extension, running programs that use testing if scripts are running in web or command-line context php-cli script command-shell.php program commands history of PEAR, listing all valid PHPDoc comments debugging, priority levels for embedded in email addresses PHPDoc common names (LDAP) 2nd compact( ) comparison functions, in sorting routine comparison operators (== and ===) comparisons, constants on left side of compressed files extracting from ZIP archive gzip, for web output

reading and writing concatenation operator (.) for strings config-get php_dir command (PEAR) config-help command (PEAR) configuration files namespaces and reading configuration variables, PHP access values setting connect( ) Cache_DB class DB class 2nd GtkButton class Console_Getopt class readPHPArgv( ) method constants assigning constant values to class properties encryption modes M_E M_PI putting on left side of comparison _ _construct( ) constructors object, calling for parent object, defining containers for cached data containers for GUI widgets GtkHBox GtkTable GtkVBox menu bar Content-Length header Content-Type header images, sending to browser PNG image, sending to browser setting for XML Cookie header cookies "headers already sent" error message adding verification hash to authentication based on browser capabilities information and deleting expiration time and other values fetching URLs with reading values of redirecting to different location sending only over SSL connections session tracking, use in setting domain, specifying expiration time paths for pages SSL connections, specifying writing specific cookie to file
Coordinated Universal Time [See UTC] coordinates, graphic images arcs centered text in an image centered text in GD built-in fonts centered text in PostScript Type 1 fonts centered text in TrueType fonts lines, rectangles, and polygons copy( ) copying files cos( ) cosecant cosh( ) 2nd cotangent count( ), recomputing in array loops counting lines, paragraphs, or records in a file country (LDAP) create_function( ) create_text_node( ) crypt( ) encrypting passwords one-way encryption, use of cryptography [See encryption] CSV [See comma-separated values] cURL extension downloading and using with FTP HTTPS URL, retrieving including response headers in output from curl_exec( ) Òcookie jarÓ feature redirects to another web page retrieving remote URLs with cookies retrieving URL contents retrieving URLs with headers retrieving web pages for stale-links.php program username and password in URL curl_close( ) printing debugging information to standard error curl_exec( ) 2nd printing debugging information to standard error curl_init( ) curl_setopt( ) 2nd CURLOPT_COOKIE option CURLOPT_HEADER option CURLOPT_HTTPHEADER option CURLOPT_VERBOSE option curly braces [See { }, under Symbols] currency formats for locales 2nd current directory current position in a file curves, drawing open or filled custom error handling functions
D
data source (LDAP)

data source name (DSN) 2nd data types array elements checking numbers for specific complex, encapsulating as strings converting between with unpack( ) database abstraction layers available for PHP database connection handles database_interface (DSN) databases caching queries and results DB abstraction layer DB database abstraction layer backends supported by PEAR DB DBM accessing with DBA abstraction layer handlers compiled into your PHP installation handlers, differing behavior of username and password database escaping quotes in queried data finding number of rows returned by a query logging debugging information and errors MySQL [See MySQL] nonrelational databases supported by PHP Oracle (OCI8 interface) paginated links for series of records persistent connections plaintext files as queries, building programmatically relational databases supported by PHP repeating queries efficiently retrieving rows without a loop serialized data going into SQL connecting to modifying data in portability of querying storing and retrieving threaded messages storing sessions in pc_DB_Session class php_session table text files as unique IDs, assigning automatically user accounts date( ) 2nd 3rd 4th converting Unix timestamp to human-friendly format day of week, month, or year, week of the year formatting dates and times dates and times adding to/subtracting from a date button displaying current time 2nd converting to/from epoch timestamps Coordinated Universal Time [See UTC] current, finding printing todayÕs date in month/day/year format

daylight saving time [See daylight saving time] difference between two dates difference between two dates with Julian days dropdown menus based on current date expiration time for cookies file modification times finding day in a week, month, year or week number in a year forcing user to log out after fixed time interval formatting for locales generating high-precision time generating time ranges inserting current date and time with NOW( ) ISO 8601 string, returned by XML-RPC application last modified time for URLs localizing microtime( ) 2nd non-Gregorian calendars, using parsing from strings printing in specified format printing out monthÕs calendar with pc_calendar() requests in web server access logs sorting dates start date for time ranges time zones, calculating times in different offsets between time zones timeouts for FTP connections timestamps for files timing code execution timing programs for performance tuning validating dates day of the week, month, or year daylight saving time 2nd adding to/subtracting from dates difference between two dates with Julian days differences between two epoch timestamps, effect on DST flag zoneinfo time zones, information about DAYOFWEEK( ) (MySQL) days, calculating variable numbers in months and years for time ranges DB abstraction layer 2nd DB::affectedRows( ) DB::autoPrepare( ) DB::connect( ) DB::execute( ) 2nd DB::getAll( ) DB::getAssoc( ) DB::getCol( ) DB::getOne( ) DB::getRow( ) DB::isError( ) DB::modifyLimitQuery( ) DB::nextId( ) DB::prepare( ) 2nd DB::query( ) 2nd 3rd DB::quote( ) 2nd

calling strtr( ) after DB::setFetchMode( ) DB_Error class 2nd DB_Pager class fetchRow( ) DB_Pager::build( ) DB_Result::fetchInto( ) DB_Result::fetchRow( ) DB_Result::numRows( ) DB_Sql class in PHPLib DBA abstraction layer dba_close( ) dba_exists( ) dba_fetch( ) dba_firstkey( ) dba_nextkey( ) dba_open( ) 2nd dba_optimize( ) dba_replace( ) dba_sync( ) DBM databases 2nd handlers compiled into your PHP installation handlers, differing behavior of username and password database debugging database problems error logging, use in HTTP request/response cycle logging information for printing information for cURL module to standard error decbin( ) dechex( ) decimal numbers formatting for dollar amounts declare construct declaring/defining class properties class variables classes functions static variables decoct( ) decoding data base64_decode( ) pc_decode( ) utf8_decode( ) decrypting data [See also encryption]2nd decryption modes get-crypt.php program mcrypt_decrypt( ) default values assigning to function parameters setting for function parameters for variables deg2rad( ) degrees

DELETE command (SQL) finding number of rows returned by a query delete-user.php program 2nd deleting [See also removing] array elements cookies files delta delta values rounding off numbers dependencies for PEAR packages, checking depth-first search destroy signal destroying images dgettext( ) dictionary attacks dictionary words, keeping out of passwords differences between arrays array_diff( ), getting simple difference creating your own algorithm for reversing symmetric difference digit (\d) metasymbol Dijkstra, Edsger dir command (Windows) dir( ) 2nd dir::read( ) directories 2nd [See also files] copying or moving a file creating new deleting files as exclusive lock indicators file information, getting file permissions or ownership, changing file timestamps, getting and setting filenames matching a pattern filenames, splitting into component parts processing all files in 2nd program listing web server files removing with all contents site-search.php program directory class dirname( ) display( ) distinguished names (LDAP) divisor, greatest common dl( ) loading PECL packages DNS (Domain Name Service) checking validity of email addresses dynamic update requests Net_DNS package performing lookups documentation MySQLÕs UNIX_TIMESTAMP( ) PEAR classes

PHP-GTK extension shared memory segments and semaphores strftime( ) options DOM generating XML with libxml parser parsing XML with searching through tree for specific elements tree-based parsing top-level or root node W3C specification, web site for domain names, getting information about domains [See also DNS] cookies, specifying for gettext messages top-level, in email addresses Dominus, Mark-Jason double quotes [See ", under Symbols] drawing arcs, ellipses, and circles centered text GD built-in fonts PostScript Type 1 fonts TrueType fonts lines, rectangles, and polygons patterned lines, using text as a graphic dropdown menus based on current date DSN (data source name) 2nd DST [See daylight saving time] dump_file( ) DOM XML documents generating well-formed XML document dump_mem( ) formatting DOM XML output generating well-formed XML document dumping variable contents as strings duplicate elements, removing from arrays dynamic classes dynamic functions dynamic images button page (in HTML) dynamic object instantiation dynamic variable names
E
E_USER_ERROR E_USER_NOTICE E_USER_WARNING each( ) array values and sparsely filled arrays using with list( ) and while loops for array iteration ECB (Electronic Code Book) mode

echo elapsed time between two dates execution time for each line of PHP code since epoch, high precision times Electronic Code Book (ECB) mode elements array [See arrays] HTML, with multiple options (in forms) XML creating new for document nodes searching DOM tree for ellipses, drawing filled email encrypting with GPG sending text addresses, converting to mailto\: hyperlinks web-based client for email addresses "do not send" list comments embedded in hiding from address-harvesting robots matching valid with regular expressions RFC 822-compliant address parser in IMAP extension emphasized text, using <b> or <i> HTML tags empty set empty strings assigning as default function parameter value assigning to array elements error messages empty variables, unset variables as enable-ftp encoding base64 encoding format strings for HTML entities in HTML-formatted RSS item pc_encode( ) URL variables and values into textual form encryption checking password strength email, encrypting with GPG encrypting/decrypting data, algorithms for listing of mcrypt algorithms keeping passwords out of site files lost passwords, dealing with mcrypt library mhash module, hash algorithms obscuring data with encoding one-way sharing encrypted data with another web site SSL storing encrypted data in file or database
storing passwords verifying data with hashes end tags, PHP end-of-string identifier end_element( ) entities, HTML encoding encoding for HTML-formatted RSS item encoding in user-entered data environment variables HOME and USER, setting for GPG HTTP_USER_AGENT LC_ALL ORACLE_SID reading setting storing passwords in epoch timestamps 2nd altering by amount of time zoneÕs offset from UTC converting human-readable date and time strings to converting Julian days to/from converting to/from time and date parts cookies expiration times and finding difference between localtime( ), use of equality operator (==) ereg functions converting to preg escaping metacharacters preg functions vs. ereg( ) ereg_replace( ) eregi( ) case-insensitive matching error handling custom error handler, using eliminating "headers already sent" errors error types, listing of HTML errors, disabling logging program errors _ _FILE_ _ and _ _LINE_ _ constants reporting levels tuning by altering error-logging sensitivity error messages default or empty hiding from users error_log( ) error_reporting( ) errors database, logging classes for functions with identical names Getopt_Error class logging misspelling parameter names standard error, reading from a program writing to standard error

escape sequences, string escapeshellarg( ) 2nd escaping HTML entities 2nd metacharacters in regular expressions quotes in query data regular expression pattern delimiters SQL and shell globbing wildcards user-entered data on HTML page European languages, characters for eval( ) Event Log (Windows NT) event-based parsing exclusive locks execute permission execute( ) execute( ) (DB) 2nd executeMultiple( ) (DB) exp( ) expat library processing an RSS feed and transforming to HTML WDDX, use with expiration time for cookies past, for deleting cookies explode( ) bar chart graphic, sizing lines comma-separated data and generating time parts with date parsing hash from cookie value splitting on strings instead of regular expressions strings, breaking into pieces exponents 2nd expressions between { and }, evaluating interpolating within strings ext/standard/parsedate.y extended regular expressions [See ereg functions regular expressions] extending classes extends keyword extensions DOM XML parsing XML encryption functions FTP GD 2nd [See also GD library] gettext getting configuration variables for IMAP 2nd LDAP mcrypt PHP Extension and Application Repository (PEAR) PHP-GTK 2nd Readline WDDX XML XML-RPC

xmlrpc-epi XSLT zip zlib extensions, filename external programs, running passing input to
F
factory( ) (Mail) failure returned from functions false values fatal errors caused by functions with identical names E_USER_ERROR fclose( ) 2nd feof( ) fetchInto( ) DB class 2nd DB_Result class fetchRow( ) DB class 2nd DB_Pager class DB_Result class fflush( ) 2nd fgetcsv( ) skipping selected return values fgets( ) counting lines, paragraphs, and records in a file line length argument for variable length records fgetss( ) fields hidden form fields, hashes in variable length text fields, processing from a file _ _FILE_ _ constant file descriptors for standard error and standard output file extensions, matching with regular expressions file handles [See also files; input/output]2nd creating with standard I/O streams in CLI binary database connections database connections and statements for writing CURLOUT_STDERR writing to many simultaneously writing web page to file file transfer protocol [See FTP] file( ) 2nd 3rd 4th reading file into an array reading lines of file into an array file_exists( ) fileatime( ) filectime( ) filemtime( ) 2nd filenames matching a pattern

splitting into component parts files 2nd [See also directories] compressed extracting from ZIP archive reading and writing configuration, reading cookies, writing to copying or moving counting lines, paragraphs, or records in creating or opening local deleting escaping shell metacharacters in finding all lines that match a pattern flushing output to functions for information about getting file information inodes localizing locking advisory locking DBM databases directory as lock indicator exclusive locks file as lock indicator nonblocking file locks text files vs. databases unlocking modifying in place without temporary file outputting DOM XML document to permissions [See permissions] picking random line from processing all in a directory 2nd processing backward by line or paragraph processing each word in processing variable length text fields randomizing all lines in reading data from reading into a string reading particular line in reading to/writing from specific location in reading XML from with DOM remote, opening removing last line of site-search.php program storing encrypted data in retrieving file and decrypting data symbolic links temporary, creating uploaded, processing writing to many filehandles simultaneously filesize( ) filled images ellipses and circles lines, rectangles, and polygons polygons rectangles 2nd

rectangles for bars on bar chart first week in a year Fisher-Yates shuffle for arrays 2nd fixed-width records, parsing in strings flat-file databases [See DBM databases] flipping arrays floating-point numbers comparing numbers too large or small for poll results, calculating precision of rounding flock( ) advisory locking with nonblocking locks with unlocking files flush( ) Cache_DB class flushing buffered data to file fonts GD built-in drawing centered text 2nd graphical bar chart, use in PostScript Type 1 drawing centered text 2nd TrueType drawing centered text 2nd fopen( ) 2nd 3rd 4th default permission values file handle for writing response headers to file file modes redirects, following remote files standard I/O streams, using with 2nd stdin, opening temporary files username and password in URL for loops hexadecimal numbers in inverting to reverse array element order iterating through arrays iterating through file information array iterating through LDAP address entries using instead of range( ) forcing destruction of an object forcing PEAR to overwrite a newer version foreach loops cycling through arrays and operating on elements finding all combinations of array elements finding array elements that meet certain requirements iterating through arrays merging arrays sparsely filled arrays format strings for binary data encoding formatter-pdf program formatting

dates and times numbers printing hexadecimal numbers sprintf( ), using time strings forms creating dropdown menus based on current date elements with multiple options handling remote variables with periods in names multipage, working with multiple submissions, preventing processing input redisplaying with preserved information and error messages secure processing uploaded files, processing validating input verifying with hashes in hidden fields fpassthru( ) fputs( ) fread( ) 2nd 3rd FreeType library 2nd 3rd French Republican calendar converting to/from Julian Days frenchtojd( ) fresh-links.php program fseek( ) 2nd fsockopen( ) 2nd 3rd fstat( ) ftell( ) FTP anonymous FTP copying files between remote server and your computer cURL extension, using with downloading or uploading file to existing open file pointer transferring files with ftp_close( ) ftp_fget( ) ftp_fput( ) ftp_get( ) ftp_put( ) ftp_set_option( ) ftruncate( ) func_get_arg( ) func_num_args( ) function alias, _( ) for gettext( ) function keyword function prototype accessing function parameters assigning default values to parameters function_defined( ) functions calendar conversion callback [See callback functions] class constructor DB declarations, mixing with invocations

declaring directories, manipulating DOM drawing arcs and ellipses dynamic, creating encryption ereg (extended regular expressions) converting to preg error handling file information FTP global variables, accessing inside gzipped files helper (PHP), for XML-RPC hyperbolic interpolating within strings mail, sending mcrypt extension, supported by PHP mean execution time per iteration parameters accessing named passing by reference setting default values variable number of pc_ in names PHP, associating with XML-RPC methods 2nd preg (Perl-compatible regular expressions) processing array elements, handing off elements to return values, skipping selected returning failure from returning localized messages returning more than one value returning values by reference shell-execution, escaping characters appropriately switch statement within taking generic objects trigonometric variable, calling wrapper, for debugging information XML parsing XML-RPC extension fwrite( ) 2nd 3rd
G
GCD (greatest common divisor) GD library 2nd [See also graphics] coordinates for images features in different versions file formats supported fonts transparent color version 2.x, functions for arcs and ellipses version and configuration, checking with phpinfo( )

gdbm_reorganize( ) GET method building query string for requests fetching URLs with redirecting users to another URL retrieving remote file get-crypt.php program get_browser( ) get_cfg_var( ) get_class_methods( ) get_class_vars( ) get_elements_by_tagname( ) get_gmtime( ) get_html_translation_table( ) get_lock( ) get_object_vars( ) get_parent_class( ) get_time( ) getAll( ) (DB) 2nd getAssoc( ) (DB) 2nd getAuth( ) (Auth) getChannelInfo( ) (XML_RSS) getCol( ) (DB) 2nd getdate( ) 2nd 3rd 4th getenv( ) gethostbyaddr( ) gethostbyname( ) gethostbynamel( ) getItems( ) (XML_RSS) getMessage( ) (DB_Error) getmicrotime( ) getmxrr( ) getOne( ) (DB) 2nd getopt( ) (Console_Getopt) Getopt_Error class getProxy( ) (SOAP_WSDL) getResponseBody( ) (HTTP_Request) getResponseHeader( ) (HTTP_Request) getResult( ) (DB) getRow( ) (DB) 2nd gettext extension gettext( ) function alias GIF support, removal from GD global variables accessing inside functions COMMAND_LINE multiple function return values, using for GlobalWeather web service gmdate( ) 2nd gmmktime( ) 2nd GMP library 2nd gmstrftime( ) 2nd GNU gettext utilities Privacy Guard (GPG) Readline library

go-pear script Google SOAP objects SOAP_WSDL objects GPG (GNU Privacy Guard) gradians graphical user interfaces [See GUIs] graphics coordinates for images destroying images drawing arcs, ellipses, and circles drawing centered text GD built-in fonts PostScript Type 1 fonts TrueType fonts drawing lines, rectangles, and polygons drawing text drawing with patterned lines dynamic images file format supported by GD filled rectangle, creating generating bar charts from poll results image generation process localizing images pc_Image class PNG image, writing with PHP serving images securely transparent color greatest common divisor (GCD) greedy matching Gregorian calendar [See also calendars] checkdate( ) dates gregoriantojd( ) 2nd grid layout for widgets grid_horizontal( ) group permissions 2nd changing ownership of files grouping characters for matching GTK+, online documentation gtk-weather.php program gtk::main( ) gtk::main_quit( ) GtkButton class GtkMenu class GtkMenuBar class GtkMenuItem class GtkTable class attach( ) GtkVBox class GtkWindow class GUIs (graphical user interfaces) responding to actions by users widgets creating and displaying displaying in a window gunzip

gzcompress( ) gzencode( ) gzgets( ) gzip utility, compressing web output gzipped files, reading and writing gzopen( ) gzread( ) gzseek( ) gzuncompress( ) gzwrite( )
H
handler functions error handling property overloading handles [See file handles] hashes [See also associative arrays] verifying data with HEAD method 2nd header( ) 2nd 3rd eliminating "headers already sent" errors PNG image, sending to browser headers HTTP "headers already sent" error message Accept-Language Content-Length Content-type 2nd 3rd Cookie fetching URLs with Host Location 2nd 3rd request response using with cURL extension Window-target header WWW-Authenticate header mail newsgroup messages metainformation about postings References header headline or article syndication format in XML (RSS) helper functions (PHP) for XML-RPC heredocs initializing strings with interpolating with strings in hexadecimal values converting ASCII character codes to escape sequences in double-quoted strings hexdec( ) hidden form fields hashes in session tracking with

unique identifier in hierarchy, class high-precision time, generating history of commands HOME environment variable horizontal columns in HTML table horizontally aligned widgets Host header hostnames DNS lookups for news servers hosts finding all pinging HTML capturing text inside tags color values, printing out converting to/from ASCII email containing emphasized text, converting with <b> or <i> tags escaping control characters from user data escaping special characters in newsgroup messages extracting links from file highlighting search results parsing, using nongreedy matching printing array in horizontally columned searching for image tag with regular expressions Smarty templates for tags, removing from string or file transforming RSS feed to Unix system logins formatted as table XML vs. HTML entities 2nd 3rd URL encoding and html_errors configuration variable htmlentities( ) 2nd 3rd htmlspecialchars( ) 2nd 3rd HTTP basic authentication debugging request/response cycle exchanging information over with SOAP headers [See headers, HTTP] methods GET 2nd 3rd 4th HEAD 2nd POST 2nd 3rd 4th 5th 6th mixing headers and body text in buffered output proxy server, configuring PEAR to use with reading files via requests, stateless nature of status codes ÒRequest-URI Too LongÓ (414) program unable to retrieve URL web page moved elsewhere (302) HTTP_Request class addHeader( ) method 2nd

getResponseHeader( ) and getResponseBody( ) redirects and retrieving URL contents retrieving URLs in fresh-links.php username and password in URL HTTP_USER_AGENT environment variable httpd.conf file session ID, writing to access_log for each request HTTPS hyperbolic functions
I
I18N [See internationalization] ibase_execute( ) ibase_prepare( ) identity operator (===) ImageArc( ) ImageColorAllocate( ) ImageColorsForIndex( ) ImageColorTransparent( ) ImageCreate( ) ImageCreateFrom( ) ImageCreateFromPNG( ) ImageDestroy( ) 2nd ImageEllipse( ) ImageFilledArc( ) ImageFilledEllipse( ) ImageFilledPolygon( ) ImageFilledRectangle( ) 2nd drawing bars for bar chart ImageFillToBorder( ) ImageFtBBox( ) ImageLine( ) coordinates for lines ImagePNG( ) 2nd ImagePolygon( ) coordinates for polygons ImagePSBBox( ) ImagePSFreeFont( ) ImagePSLoadFont( ) 2nd ImagePSText( ) 2nd ImageRectangle( ) coordinates for rectangles images [See graphics] ImageSetStyle( ) ImageString( ) coordinates text for bar chart ImageStringUp( ) ImageSX( ) ImageSY( ) ImageTTFBBox( ) ImageTTFText( ) options, order of

imagetypes( ) IMAP extension MIME type values NNTP capabilities RFC 822-compliant address parser imap_body( ) imap_close( ) imap_fetchbody( ) 2nd imap_fetchstructure( ) imap_header( ) fields from NNTP server imap_headers( ) imap_mail_compose( ) 2nd imap_num_msg( ) imap_open( ) NNTP server connections imap_rfc822_parse_adrlist( ) img( ) wrapper function in_array( ) 2nd duplicate elements and include directive include files localizing whitespace in include_path directive checking for PEAR packages incrementing array initialization to range of integers indexed links displaying indexes array not starting at 0 (zero) redoing with array_splice( ) DBM files inequality, comparing for infinite loops infinite numbers info command (PEAR) inheritance, class implementing by extending classes ini_get( ) 2nd ini_get_all( ) ini_set( ) initialization vector (IV) with encryption/decryption modes functions for creating passing with encrypted text inodes file information functions input/output (I/O) CLI binary, standard I/O streams flushing output to a file flushing output to browser passing input to a program pipes reading data from files

reading standard input 2nd reading to/writing from compressed files standard error, reading from a program standard output from a program, reading writing output to many filehandles simultaneously writing to standard output INSERT command (SQL) finding number of rows returned by query inserting unique IDs into database querying unique ID database install command (PEAR) instantiating objects dynamically instantiation, defined new keyword, using integers 0 (zero), as empty variable converting floating-point numbers to incrementing for unique ID sequence initializing an array to range on left side of comparisons operating on a range of rounding floating-point numbers to Interbase DB backend internal errors internationalization default locale, setting listing available locales locale, using localization resources, managing localizing currency values localizing dates and times localizing images localizing included files localizing text messages message catalogs, handling with gettext reading or writing Unicode characters Internet services DNS lookups domain names, getting information about LDAP looking up addresses with Internet Services LDAP user authentication with Internet services mail [See also email; mail] MIME reading with IMAP or POP3 sending ping program checking if host is alive posting messages to Usenet newsgroups reading Usenet newsgroup messages SOAP receiving requests

sending requests transferring files with FTP XML-RPC receiving requests sending requests interpolating variables functions and expressions within strings HTML with interpolated variables, printing with heredocs into double-quoted strings interpreter, running automatically intersection of arrays array_intersection( ) inverting all quantifiers from greedy to nongreedy with U modifier 2nd IP addresses of domain name servers looking up with DNS is_array( ) is_bool( ) is_double( ) is_file( ) is_float( ) is_int( ) is_long( ) is_numeric( ) 2nd is_readable( ) is_real( ) is_uploaded_file( ) isError( ) (DB) isset( ) 2nd 3rd assigning default values to variables iterations through arrays each( ), using starting at end through file, line-by-line through files in a directory function, mean execution time for each IV [See initialization vector]
J
jdtofrench( ) jdtogregorian( ) jdtojewish( ) jdtojulian( ) jdtounix( ) Jewish calendar converting to/from Julian Days jewishtojd( ) join( ) adding verification hash to a cookie creating GET query string empty strings used with merging arrays JPEGs

Julian calendar Julian days converting to/from epoch timestamps converting to/from non-Gregorian calendars difference between two dates overview of system juliantojd( )
K
kerning words and letters key/value pairs for DBM databases key/value pairs, array preserving association between in array sorting relationship between, preserving in sorts specifying with => operator swapping keys and values with array_flip( ) keys, array associative vs. numeric arrays checking arrays for specific merged arrays and numeric negative numbers in storing multiple elements in single key strings as 2nd uniqueness of keys, encryption [See encryption] keywords class extends function 2nd new instantiating objects parent:: in PHPDoc comment blocks var
L
L10N [See localization] labels for buttons, setting text for language codes languages stored in objects last access time for files last command (Unix) last line of a file, removing LC_ALL environment variable LDAP address repository (data source) looking up addresses server communicating with downloading

user authentication with ldap_bind( ) ldap_get_entries( ) ldap_list( ) ldap_search( ) leap years least significant bit libxml for DOM parsing 2nd Lightweight Directory Access Protocol [See LDAP] _ _LINE_ _ constant line styles for graphics line-delimiter characters, Windows and Unix linefeeds converting from ereg to preg functions Windows systems lines counting in a file drawing dashed line alternating between black and transparent finding all in a file that match a pattern patterned, drawing with picking random line from a file randomizing all in a file reading particular in a file removing last line of a file links extracting from HTML file fresh, finding paginated, for series of database records stale, finding to shared memory segments Linux ` (backtick) operator, use on locale program list command (PEAR) list( ) assigning values from array to individual values breaking array apart into individual variables separating elements in array returned by function skipping selected function return values using with each( ) and while loops for array iteration list-upgrades command (pear) local scope locale program localeconv( ) currency-related information locales aliases for common default, setting image directories for languages, country codes, and character set specifiers listing available using a particular locale word definitions and localization currency formats

dates and times of included files managing resources message catalogs, handling with gettext text messages text with images localtime( ) 2nd 3rd current DST observance status Location header 2nd sending other headers with locking files advisory file locking DBM databases directory as lock indicator exclusive locks file as lock indicator nonblocking locks text files vs. databases threaded message board database unlocking log( ) log_errors configuration directive log10( ) logarithms logging altering error-logging to control error reporting database debugging information and errors debugging information error messages (PHP), hiding from user flushing output and page views per user parsing web server log files program errors logging out cookie authentication and forcing user logout after fixed time interval HTTP basic authentication and login form for cookie authentication logins OCILogin( ) Unix system, formatted as HTML table loops 2nd through every day in a month exiting with break statement for [See for loops] foreach [See foreach loops] infinite inverting to reverse array element order iterating through arrays merging arrays while [See while loops] ls command (Unix) ` (backtick) operator, using with octal file permissions displayed lstat( ) ltrim( )

M
M_E built-in constant magic quotes feature 2nd quoting of placeholder values and unserializing data and mail MIME reading with IMAP or POP3 sending sending using external programs Mail class mail( ) Mail::factory( ) Mail_mime class Mail_mime::addAttachment( ) Mail_mime::send( ) Mail_mime::setHTMLBody( ) Mail_mime::setTXTBody( ) mailto\: hyperlinks, converting text email addresses to main( ) (gtk) man strftime mangle_email( ) mantissa Manual (PEAR), web site marking up a web page markup languages HTML [See HTML] XML [See XML] max( ) maximal matching [See greedy matching] mcrypt extension 2nd listing of encryption/decryption algorithms Versions 2.2 and 2.4 mcrypt_create_iv( ) mcrypt_decrypt( ) mcrypt_encrypt( ) mcrypt_get_block_size( ) mcrypt_get_iv_size( ) 2nd mcrypt_list_algorithms( ) mcrypt_list_modes( ) MD5 hash algorithm md5( ) median( ) passing array with variable arguments to memory, shared segments menus displaying in GTK window dropdown, based on current date merging arrays to find union message catalogs catalog-compare.php program creating, managing, and deploying with gettext storing in objects

strftime( ) format strings as messages Message-ID message.php program messages formatting text messages for locales localizing posting to Usenet newsgroups reading from Usenet newsgroups threaded, storing and retrieving Metabase (database abstraction layer) metacharacters escaping in Perl-compatible regular expressions shell, escaping in external files URL, escaping metadata change of a file metasymbols method_exists( ) methods 2nd [See also functions] calling on object returned by another method class inheritance by child classes parent:: (prefacing parent methods) constructors class defining for objects namespaces and object dynamic object instantiation and finding profiling execution of overridden, accessing polymorphism of sorting arrays XML-RPC associating with server and PHP functions differences from PHP in naming mhash module Microsoft C runtime library, msvcrt.dll Windows [See Windows systems] microtime( ) 2nd 3rd MIME types IMAP values in newsgroup messages sending to browser for image file min( ) minimal matching [See nongreedy matching] mkdir( ) 2nd 3rd mktime( ) 2nd 3rd converting local time zone dates/times to epoch timestamp pre-epoch dates, handling mode_string( ) modes encryption 2nd CBC (Cipher Block Chaining) CFB (Cipher Feedback)

ECB (Electronic Code Book) initialization vectors with OFB (Output Feedback) file permissions converting octal to easier-reading strings mode element of file information array modification times for files 2nd updated with touch( ) modifiers for patterns [See pattern modifiers] modifyLimitQuery( ) (DB) monetary formats for locales move_uploaded_file( ) moving files msg( ) combining with sprintf( ) msvcrt.dll (Microsoft C runtime library) mt_getrandmax( ) mt_rand( ) multiple arrays, sorting simultaneously multiple dimensions within a single array, sorting multithreaded systems, high-precision time and MX records, getting MySQL DAYOFWEEK( ) inheritance in REPLACE INTO command threaded message board UNIX_TIMESTAMP( ) WEEK( ) WEEKDAY( ) mysql_connect( ) mysql_fetch_object( ) mysql_fetch_row( ) mysql_pconnect( ) mysql_query( ) mysql_select_db( )
N
named function parameters names class variables constructors cookie storing session ID of domain name servers DSN (data source name) LDAP, distinguished and common namespaces SOAP 2nd upcoming PHP feature natsort( ) NCSA Combined Log Format lines, parsing negative numbers in array keys Net_DNS class Net_Ping class

Net_Ping::checkhost( ) Net_Ping::ping( ) Net_Whois class Net_Whois::query( ) Network News Transport Protocol [See NNTP] new keyword instantiating objects newlines \n \n \n, for double spacing in double-quoted strings in file-handling functions on Windows systems trimming from strings news.php.net server for PHP mailing lists newsgroups [See Usenet newsgroups] nextId( ) (DB) nl2br( ) NNTP imap_header( ) fields from NNTP server nodes DOM XML adding attributes to creating and appending root node, getting top-level or root XML non-true values nonblocking file locks nongreedy matching nonidentity operator (!==) 2nd nonrelational databases supported by PHP notices, error messages flagged as notify-user.php program 2nd NOW( ) (SQL) nsupdate command nth occurrence of a match, finding NUL characters opening binary files and Windows, redirecting output to null characters escaping for SQL trimming from strings number_format( ) 2nd numbers bases other than decimal beginning with zero, PHP treatment of checking for specific data type checking strings for valid number converting between bases converting to/from strings exponents floating-point comparing for equality rounding formatting
formatting for different locales 2nd [See also locales; localization] integers [See integers] logarithms printing correct plurals random biased, generating generated within a range sources for initialization vectors trigonometric functions degrees, using very large or very small numeric arrays DB fetch mode merging merging, duplicate values and mixing and matching with string keys removing duplicate elements numeric sorting of arrays numeric strings numRows( ) (DB_Result)
O
ob_end_flush( ) ob_start( ) object-oriented interface to directory information object-oriented programming, PHP objects vs. objects arrays of base, adding properties to cloning constructor method, defining destroying DOM nodes GTK instantiation of 2nd dynamic languages stored in for message catalogs methods array sorting, use in methods and properties, finding PHP, traditional OO vs. properties of browser capabilities interpolating into strings references to returned by another method, calling methods on Simple Object Access Protocol [See SOAP] string representation of Zend Engine 2 (ZE2) object model OCI8 interface (Oracle database) OCIBindByName( ) OCIExecute( ) 2nd OCIFetch( )

OCILogin( ) OCIParse( ) 2nd OCIPLogon( ) OCIResult( ) octal values \ddd, indicating with converting mode element of file information array to in double-quoted strings, escape sequence file permissions written in converting to easier-reading strings permissions passed to chmod( ) permissions written in octdec( ) ODBC standard PHP support of weeks of the year offsets between time zones modifying hardcoded for DST ÒLook and SayÓ sequence one-way encryption crypt( ) function, use in opendir( ) 2nd OpenSSL library operators assignment 2nd backtick ( ` ) 2nd comparison 2nd logical NOT (~) merging arrays with + redirection string concatenation ternary (?\:) optimization of DBM files Oracle databases DSN for OCI8 backend functions to prepare and execute queries retrieving data from ORACLE_SID environment variable organization (LDAP) output [See also input/output; standard output] buffering to browser mixing HTTP headers and body text standard error and web, compressing with gzip Output Feedback (OFB) mode output_buffering configuration directive output_handler configuration directive overloading properties overridden methods, accessing ownership of files changing superuser time of last change

P
pack( ) format characters listing of format strings storing binary data in strings pack_start( ) (GtkVBox) package command (PEAR) package manager, PEAR [See pear application] packages, PEAR finding PHP Extension Code Library (PECL) PHP Foundation Classes removing requiring upgrading padding arrays strings 2nd paginating PEAR DB query results paragraphs, counting in a file problems with parameters, function accessing direct access in PHP named passing by reference setting default values variable number of parent class identifying parent directory creating parent node object parent:: (prefacing method name) 2nd parent_node( ) parse_ini_file( ) by sections parsing comma-separated data command-line program arguments dates and times from strings DOM fixed-width records in strings HTML, using nongreedy matching ping program data program arguments with getopt( ) RSS feeds strings with binary data web server log file XML with DOM with SAX passing by reference

function parameters multiple function return values into arrays passing by value passwords anonymous FTP checking strength of DBM database of encrypting and storing HTTP authentication keeping out of site files lost, dealing with PEAR DB backends reading from command line without echoing URLs protected by pathinfo( ) pathnames, Unix and Windows 2nd paths for cookies pattern delimiters 2nd pattern modifiers preg functions patterned lines, drawing with patterns [See also regular expressions; wildcards] filenames matching separating records, matching with regular expression pc_array_power_set( ) pc_array_shuffle( ) 2nd 3rd pc_array_to_comma_string( ) 2nd pc_ascii2html( ) pc_assign_defaults( ) pc_auth_ldap_signin() pc_bar_chart( ) pc_build_query( ) pc_calendar() pc_check_the_count( ) pc_checkbirthdate( ) pc_date_sort( ) pc_DB_Session class 2nd pc_DB_Session::_write( ) pc_debug( ) pc_decode( ) pc_encode( ) pc_error_handler( ) pc_fixed_width_substr( ) pc_format_currency( ) 2nd pc_html2ascii( ) pc_ImagePSCenter( ) 2nd 3rd pc_ImageStringCenter( ) 2nd pc_ImageTTFCenter( ) 2nd pc_indexed_links( ) 2nd pc_link_extractor( ) 2nd 3rd pc_log_db_error pc_logn( ) pc_mail( ) pc_may_pluralize( ) pc_MC_Base class
pc_message_save( ) pc_mkdir_parents( ) 2nd pc_mktime( ) pc_multi_fwrite( ) pc_next_permutation( ) pc_passwordcheck( ) pc_permute( ) pc_post_request( ) pc_print_address( ) pc_print_link( ) 2nd pc_process_dir( ) pc_process_dir2( ) pc_randomint( ) pc_RSS_item class pc_RSS_item::character_data( ) 2nd pc_RSS_item::display( ) pc_RSS_item::end_element( ) pc_RSS_item::start_element( ) pc_RSS_parser class 2nd pc_split_paragraphs( ) pc_split_paragraphs_largefile( ) pc_tab_unexpand function pc_user class pc_validate( ) 2nd pc_validate_zipcode( ) pc_Web_Abuse_Check class pclose( ) 2nd PEAR Auth class Benchmark module Cache_DB package commands, listing of configuring to use with HTTP proxy server Console_Getopt class DB database abstraction layer 2nd [See also DB] backends supported by DB_Pager class documenting classes with PHPDoc finding packages gathering information about a package HTTP_Request class [See HTTP_Request class] installing on Unix and Windows installing packages installing PECL packages Mail class Mail_mime class manual, web site for Net_DNS package Net_Ping package Net_Whois class older versions, problems with package manager [See pear application] packages, finding location of removing packages SOAP classes SOAP_Server class

upgrading packages web site information on XML_RSS class XML_Transform package pear application 2nd commands configuring settings downloading and installing packages from server info command install command installation of list-upgrades command older versions, problems with phpize command remote-info command remote-list command search command uninstall command upgrade command PEAR::Error PEAR_Error base class PEAR_ERROR_CALLBACK constant PEAR_ERROR_DIE constant PEAR_ERROR_PRINT constant PECL (PHP Extension Code Library) installing packages performance tuning, wrapper functions for information on period (.) , under Symbols) [See . (dot] Perl chop( ) (deprecated) regular expressions compatible with preg functions for web site for permissions 2nd changing converting octals to easier-reading strings mode element of file information array, converting to octals semaphores for shared memory segments setuid, setgid, and sticky bits superuser time of last change values for permutations of an array persistent database connections closing for DBMs pg_connect( ) pg_exec( ) pg_fetch_row( ) pg_numrows( ) pg_pconnect( ) PGP (Pretty Good Privacy) Phorum (message board package) PHP client-side [See client-side PHP] DOM XML extension DOM XML material in online PHP Manual

Extension and Application Repository [See PEAR] LDAP support message board packages random number generators relational databases supported tags, removing from string or file Unicode support web sites for reference materials Zend Engine 2 (ZE2) php-cli script PHP-GTK extension 2nd displaying menu bar in window online documentation running programs with CLI binary php.ini file browscap configuration directive checking original configuration variable value configuration values for PHP, persistent changes in include path for PEAR packages mail settings reading session.save_handler, setting for user session storage session.save_path php.ini-recommended configuration file PHP_AUTH_PW global variable PHP_AUTH_USER global variable php_sapi_name( ) php_session table PHPDoc comments tags phpdoc program phpinfo( ) checking GD version passwords stored in environment variables phpize command (pear) ping program ping( ) (Net_Ping) pipes opening in r mode to read standard output opening to external program and writing to program output placeholders in database queries 2nd quoting values plaintext files as databases pluralizing words PNG file format bar chart image poll results, bar charts generated from polygons, drawing filled open polygon polymorphism, method POP3 popen( ) 2nd 3rd position

array elements, finding for getting current in a file POSIX regular expression functions regular expressions, web site information on POST method fetching URLs with maximum size of files sign-in form for LDAP SOAP requests URL redirection and XML-RPC requests post_max_size configuration directive PostgreSQL database DSN for handler using PostScript Type 1 fonts drawing centered text 2nd t1lib pow( ) power set precision floating-point numbers, rounding to nearest integer high-precision time, generating preg functions converting ereg functions to pattern delimiters pattern modifiers escaping metacharacters preg_grep( ) preg_match( ) filenames matching a pattern parsing Combined Log Format lines parsing date formats preg_match_all( ) ping program output, parsing pulling all matches into an array preg_quote( ) preg_replace( ) 2nd preg_split( ) 2nd prepare( ) (DB) 2nd Pretty Good Privacy (PGP) print( ) print_r( ) displaying everything in error object printing object variable values printf( ) hexadecimal numbers, formatting printing array in horizontally columned HTML table array with commas database errors formatted data to browser based on the pipe output text in Spanish UTC time XML tags manually

priority levels for different debugging comments private keys processes, sharing variables between profile( ) profiling code programs reading standard error from reading standard output from properties class assigning constant values to assigning non-constant values to declaring 2nd naming object adding to base object finding overloading protocols pseudo-constructors public key encryption pushing new value on top of array stack putenv( ) calling before mktime( ) to fool system zoneinfo library, using
Q
qmail quantifiers, greedy and nongreedy matching query( ) Cache_DB class DB class 2nd 3rd 4th Net_Whois class querying databases building queries programatically caching queries and results finding number of rows returned by without a loop placeholders in queries repeating queries efficiently SQL quote( ) (DB) 2nd calling strtr( ) after quotemeta( ) quotes "magic quotes" feature in PHP 2nd escaping in data for queries
R
\r (carriage return) in double-quoted strings

r mode, opening pipe in rad2deg( ) radians rand( ) random numbers biased, generating computing with pc_randomint( ) generating within a range sources for initialization vectors randomizing all lines in a file arrays range( ) 2nd 3rd ranges integers, initializing array to time, generating RDF Site Summary [See RSS feeds] read permission read( ) dir class readdir( ) 2nd readfile( ) reading file into a string from specific location in a file from standard input Readline extension readline( ) readline_add_history( ) readPHPArgv( ) (Console_Getopt) records counting in a file fixed-width, in strings rectangles, drawing filled rectangle bars on bar chart recursive functions depth-first recursion to process nodes in DOM XML document dumping variable contents to strings redirecting cookies to different location HTTP requests 2nd input/output cURL debugging output standard error to standard output References header references to objects assigning GTK windows Referer header register_globals configuration directive 2nd disabling for security register_tick_function( ) regular expressions \s (whitespace) metacharacter capturing text inside HTML tags

converting from ereg functions to preg pattern delimiters in preg pattern modifiers in preg converting text email addresses to mailto\: hyperlinks equivalent for trim( ) for file extensions filenames matching a pattern finding all lines in a file that match a pattern finding the nth occurrence of a match greedy or nongreedy matching HTML string, searching for image tag matching pattern separator for records matching Unix and Windows linebreaks 2nd matching valid email addresses matching words metacharacters in escaping metasymbols in parsing dates and times from strings pattern modifiers pc_link_extractor( ), using with Perl-compatible, preg functions for POSIX and Perl-compatible, web site information on preg_match( ), using with matching Combined Log Format lines search terms for site-search.php program for separators in string splitting relational databases supported by PHP remote files, opening remote-info command (pear) remote-list command (pear) removing [See also deleting] directory and all contents duplicate elements from arrays first and last array elements HTML and PHP tags last element from an array and returning it last line of a file line delimiter characters PEAR packages rename( ) REPLACE INTO command (MySQL) requests HTTP debugging GET method, building query string for recorded in web server access log redirecting stateless nature of SOAP receiving sending XML-RPC receiving sending require directive

reset( ) moving pointer back to start of an array returning value of first array element responses, HTTP debugging headers and body, retrieving with HTTP_Request class return values for functions assigning to variables failure multiple, from one function returning by reference skipping selected return_time( ) associating XML-RPC methods with reversing array difference array iteration arrays rewind( ) 2nd RGB color combinations defining for graphical bar charts rm -rf command rmdir( ) root element (XML) root node (DOM XML) getting rotating text 2nd round( ) rounding floating-point numbers RPC [See XML, XML-RPC] rsort( ) RSS feeds processing with expat library and transforming to HTML reading rtrim( ) 2nd removing line delimiter characters trimming newlines with
S
Sablotron XSLT processor salt characters added to encrypted passwords save-crypt.php program SAX scalar variables, array processing and scope, variables scripts GTK functionality, loading with d1( ) web or command-line context, checking for search command (pear) searches breadth-first depth-first site-search.php program secant

secure URLs (HTTPS), retrieving security cookie jar storage and encryption and checking password strength encrypting email with GPG encryption/decryption algorithms keeping passwords out of site files levels of encryption lost passwords obscuring data with encoding protecting encryption keys sharing encrypted data with another web site SSL storing encrypted data in file or database storing passwords verifying data with hashes form processing hiding PHP error messages from user serving images seed for random number generation SELECT command (SQL) caching query results finding number of rows returned by query sem_acquire( ) sem_get( ) sem_release( ) semaphores documentation on guaranteeing exclusive access to shared memory send( ) (Mail_mime) sendmail sendRequest( ) (HTTP_Request) serialize( ) 2nd storing complex data in DBM files storing complex data in text file database serializing WDDX variables servers DNS, parsing out names and IP addresses of HTTP proxy server, configuring PEAR to use with IMAP LDAP communicating with downloading parsing log file POP3 SMTP SOAP_Server class timeouts on request waiting length unencrypted data, snooping on web server directory listing (web-ls.php) writing PHP error messages to log XML-RPC service( ) (SOAP_Server) session IDs correlating to usernames

session module tracking users with session tracking multipage forms, using with storing sessions in database pc_DB_Session class session.entropy_file configuration directive session.entropy_length configuration directive session_name( ) session_save_path( ) session_set_save_handler( ) session_start( ) 2nd set_attribute( ) set_error_handler( ) 2nd set_submenu( ) (GtkMenuItem) set_text( ) (GtkButton) setcookie( ) deleting cookies eliminating "headers already sent" errors sending only over SSL connections setErrorHandling( ) (DB) setFetchMode( ) (DB) setgid bit 2nd setHTMLBody( ) (Mail_mime) setlocale( ) 2nd setMarker( ) (Benchmark::Timer) setTXTBody( ) (Mail_mime) settype( ) setuid bit 2nd shapes, drawing [See graphics] shared locks shared memory segments documentation on storing shared variables in shells globbing filenames wildcards in metacharacters, escaping redirecting standard error to standard output shifting array elements shm_attach( ) shm_detach( ) shm_get_var( ) shm_put_var( ) short_open_tag configuration directive show_all( ) (GtkWindow) shuffle( ) 2nd shuffling deck of cards shutdown( ) (GtkWindow) signals associating with callback functions to handle user actions from GUI widgets, handling from menu items in GTK window Simple API for XML [See SAX] simple difference between arrays 2nd Simple Object Access Protocol [See SOAP]

sin( ) single quotes [See ', under Symbols] sinh( ) site-search.php program Smarty templates displaying rows retrieved from database SMTP server SOAP creating server and responding to SOAP requests requests, sending SOAP_Client class SOAP_Server class SOAP_Server::addObjectMap( ) SOAP_Server::service( ) SOAP_Value class SOAP_WSDL class SOAP_WSDL::getProxy( ) sockets connections to news server opening with fsockopen( ) SSL (Secure Sockets Layer) 2nd 3rd Solaris systems, locale program sort( ) sorting arrays by a computable field copying first to retain original order method, using instead of a function modifying sort type multiple in reverse order shuffling deck of cards text for different locales space-padded strings 2nd spaces [See also whitespace] changing to/from tabs in strings sparsely filled arrays special characters escaping in HTML escaping in queried data in regular expressions [See metacharacters metasymbols] in SQL SQL and shell globbing wildcards, escaping in URL encoding split( ) splitting a string on a regular expression sprintf( ) combining with msg( ) converting decimal numbers to binary, octal and hexadecimal numbers formatting poll result numbers SQL (Structured Query Language) databases connecting to modifying data in paired with PHP querying

portability of special characters in wildcard characters, quoting in database queries square brackets [See [ ], under Symbols] srand( ) SSL (Secure Sockets Layer) cookies, sending over cURL extension, using with IMAP and POP3 connections stale-links.php program standard error printing cURL module debugging information to reading from a program writing to standard input reading from reading from the keyboard standard output reading from a program redirecting standard error to writing to start tags, PHP start( ) (Auth) start_element( ) starting and ending angles (in degrees) for arcs stat( ) function 2nd calling on symbolic links file information returned by statement handles static variables stdclass class adding properties to base object sticky bit str_replace( ) switching tabs to/from spaces strace( ) strftime( ) 2nd %c format string (for localization) button displaying current time day of week, month, or year, week of the year formatting dates and times start date for time ranges string concatenation operator(.) strings as array keys mixing with numeric arrays for multiple return values merging binary data, storing in breaking into smaller pieces case, controlling checking for valid number complex data types, encapsulating as serializing strings compressing converting arrays to

converting to/from numbers double-quoted, variable interpolation in dumping variable contents as empty assigning as default value of function parameter escape sequences expanding and compressing tabs in heredocs initializing interpolating functions and expressions numeric outputting DOM XML document to parsing comma-separated data parsing dates and times from parsing fixed-width records in processing one character at a time quoting in queried data reading files into returning all program output as single string reversing by word or character splitting on regular expression substrings accessing replacing trimming blanks from wrapping text strip_tags( ) 2nd stripslashes( ) strnatcmp( ) strpos( ) strrev( ) strtolower( ) 2nd strtotime( ) adding to/subtracting from a date parsing date formats strtoupper( ) 2nd strtr( ) structured access to databases stylesheets, XSL subclassing substr( ) parsing fixed-width records in strings unpack( ), substituting for in fixed-width field extraction substr_replace( ) substrings [See strings] subtracting from a date summer time [See daylight saving time] superglobal arrays superuser, changing file permissions and ownership switch statements in method polymorphism emulation symbolic links calling stat( ) on is_dir( ) function and symmetric difference between arrays 2nd syslog(3) (Unix)

system calls displayed by strace( ), capturing fooling system function mktime( ) for time zones stat( ) system( )
T
t1lib (PostScript Type 1 fonts) tabs \t, in double-quoted strings 2nd ASCII representation of in ereg pattern or replacement values expanding and compressing in strings trimming from strings tags HTML <b> or <i> for emphasized text capturing text inside removing PHP removing start and end PHPDoc XML looping through data and printing out tan( ) tanh( ) template images for buttons templating system (Smarty) displaying rows retrieved from database tempnam( ) 2nd temporary files creating modifying file in place without using temporary variables assigning objects to exchanging variable values without terminals, controlling characteristics on Unix ternary (?\:) operator text capturing inside HTML tags drawing as graphic bar chart program centered drawing vertically fonts drawing with GD library email addresses, converting to mailto\: hyperlinks emphasized localized, displaying with images localizing messages message catalogs for locales, using gettext sorting for different locales transforming binary data to plaintext wrapping at a particular line length

XML nodes text fields (variable-length), processing from a file text files (as databases) 2nd structured access, lacking in textdomain( ) thread_pos values, calculating threaded message board, storing ticks directive 2nd tightness between letters PS font text graphics time [See dates and times] time zones calculating time in different offsets between time zones time( ) time_parts( ) timeouts adjusting for FTP connections web servers, waiting for requests timestamps epoch [See epoch timestamps]2nd getting and setting Unix, converting to human-friendly format timing execution of database query tmpfile( ) top-level domains in email addresses top-level node touch( ) default permission value for files file modification time, changing updating file modification time track_vars configuration directive transforming XML documents with XSLT translation tables, HTML transparencies transparent color tree-based parsing (DOM XML) trigger_error( ) trigonometric functions in degrees trim( ) 2nd regular expression equivalent of TrueType fonts drawing centered text 2nd Free Type library for truth values of variables
U
U pattern modifier quantifiers, converting to/from greedy or nongreedy U.S. Naval Observatory, time zone information ucfirst( ) ucwords( ) umask (permission setting)

umask( ) Unicode reading or writing uninstall command (pear) union of arrays merging arrays to create uniqid( ) unique IDs assigning automatically and maintaining database of database of, building programmatic queries LDAP Unix downloading and installing PHP-GTK file permissions files, line delimiters and pathnames man strftime matching filenames, using ls with ` MySQLÕs UNIX_TIMESTAMP( ) function pathnames PEAR, installing on redirecting standard error to standard output system logins formatted as HTML table terminal characteristics zoneinfo library time zones, listed unixtojd( ) unlink( ) 2nd unlocking locked files unpack( ) extracting binary data from strings format characters, listing of format strings parsing fixed-width records in strings substituting for substr( ) in extracting fixed-width fields unregister_tick_function( ) unserialize( ) unset( ) 2nd 3rd array elements, using on variables brought into local scope with global keyword unzip.php program UPDATE command (SQL) finding number of rows returned by a query unique ID database, querying update_time( ) 2nd upgrade command (pear) upgrading PEAR packages uploaded files, processing URL fopen wrapper urlencode( ) 2nd URLs embedding authentication information in encoding FTP protocol password-protected retrieving remote cookies, fetching with

GET method, fetching with headers, fetching with HTTPS POST method, fetching with Usenet newsgroups posting messages to reading messages from USER environment variable user permissions 2nd User-Agent header usernames anonymous DBM database of excluding from passwords PEAR DB backends users abusive, cutting off responding to actions by usort( ) 2nd 3rd UTC (Coordinated Universal Time) converting to epoch timestamp gmdate( ) and gmstrftime( ) functions offsets between time zones time zone offsets from DST calculation and UTF-8 encoding (Unicode) utf8_decode( ) utf8_encode( )
V
validating dates form input var keyword var_dump( ) recursion, handling viewing object variables var_export( ) variable variables calling different functions, depending on variable value creating dynamic variable names function-private default values, setting global variable names, specifying iterating through similarly named variables variables assigning array values to assigning function return values to class assigning non-constant value to property names stored in an array coercing all into array form comparing, avoiding errors with = and == operators complex data types, encapsulation as strings creating dynamic name

default value, establishing dumping contents as strings empty, evaluation to boolean false value environment variables exchanging values without using temporary variables function parameters [See functions parameters, function] interpolating into double-quoted strings interpolating into strings object, finding passing by reference passing by value or by reference with . (period) in names PHP_AUTH_USER and PHP_AUTH_PW reading XML from with DOM returning by reference set and unset sharing between processes static temporary, assigning objects to treating as arrays truth values of undefined, error handling and variables_order configuration directive verify-user.php page 2nd vertical text, drawing vertically aligned widgets very large or very small numbers
W
W3C DOM specification warnings suppressing for GPG WBMPs WDDX (Web Distributed Data eXchange) wddx_serialize_value weather program web programming abusive user checking automating web processes converting ASCII to HTML debugging HTTP request/response cycle extracting links from HTML file finding fresh links finding stale links marking up a web page parsing web server log file removing HTML and PHP tags retrieving remote URLs Smarty templates buffering output to browser communicating within Apache compressing web output with gzip cookie authentication cookies

deleting reading redirecting to different location setting detecting different browsers environment variables reading setting error handling custom handler, using eliminating "headers already sent" errors tuning flushing output to browser GET query string, building hiding error messages from users HTTP basic authentication logging debugging information logging errors profiling code program to activate/deactivate web site accounts reading PHP configuration variables session tracking storing sessions in database setting PHP configuration values web services [See Internet services] Web Services Definition Language (WSDL) web-ls.php program web-safe colors week number in a year WEEK( ) (MySQL) WEEKDAY( ) (MySQL) weeks ISO standard for ODBC standard while loops iterating through file line-by-line using with each( ) and list( ) for array iteration whitespace \s metasymbol in regular expressions 2nd in HTML and XML in include files removing trailing space in a font 2nd trimming from strings Whois queries about domains widgets displaying in a window displaying multiple in a window user actions on wildcards in shell globbing shell, matching filenames SQL, quoting in queries Window-target header windows creating in client-side PHP

displaying menu bar displaying multiple GUI widgets Windows systems chr( ) function dir command downloading and installing PHP-GTK Even Log on Windows NT files, line delimiters and pathnames flock( ) function line-delimiter characters 2nd 3rd locales changing listing available matching filenames, using dir command with ` pathname separators pathnames PEAR, installing on permission-related functions and reading binary files redirecting output redirecting standard error to standard output shared memory and SMTP server, using strftime( ) formatting characters supported options, documentation for typing passwords on command line without echoing word boundaries (\b regular expression operator) word list used for dictionary checking words \w (word) metasymbol capitalizing first character of in strings matching with regular expressions pluralizing processing all in file reversing in strings wordwrap( ) 2nd wrap_html_tag( ) wrapper functions, additional debugging information in write _ _get( ) and _ _set( ) methods write permission writing input to an external program to many filehandles simultaneously to specific location in a file to standard error to standard output WSDL (Web Services Definition Language) WWW-Authenticate header
X
XHTML, converting carriage returns to <br /> tags XML exchanging data with WDDX

exchanging messages with server generating manually generating with DOM creating new document top-level or root node HTML vs. parsing parsing with DOM searching through tree for specific elements tree-based parsing parsing with SAX root element RSS feeds, reading SOAP requests receiving tags looping through data and printing out rules for XML-RPC clients PHP helper functions for receiving requests sending requests XSLT 2nd XML-RPC [See XML] XML_ATTRIBUTE_NODE XML_ELEMENT_NODE xml_parser_free( ) XML_RSS class XML_RSS::getChannelInfo( ) XML_RSS::getItems( ) XML_RSS::parse( ) xml_set_character_data_handler( ) xml_set_element_handler( ) XML_TEXT_NODE XML_Transform package xmlrpc-epi extension xmlrpc_server_register_method( ) XSL stylesheets XSLT [See XML, XSLT] xslt_close( ) xslt_create( ) xslt_errno( ) xslt_error( ) xslt_process( ) xu_rpc_http_concise( ) 2nd
Z
Zend Engine 2 (ZE2) constructor naming ZIP archive, extracting files from zip extension zlib extension zlib.output_compression configuration directive zlib.output_compression_level configuration directive

zoneinfo library time zones, listed


