Photography editing presentation
5
Photography Edi.ng Phoenix Smith
-
Upload
phoenix-smith -
Category
Business
-
view
302 -
download
0
Transcript of Photography editing presentation
Photography Edi.ng
Phoenix Smith
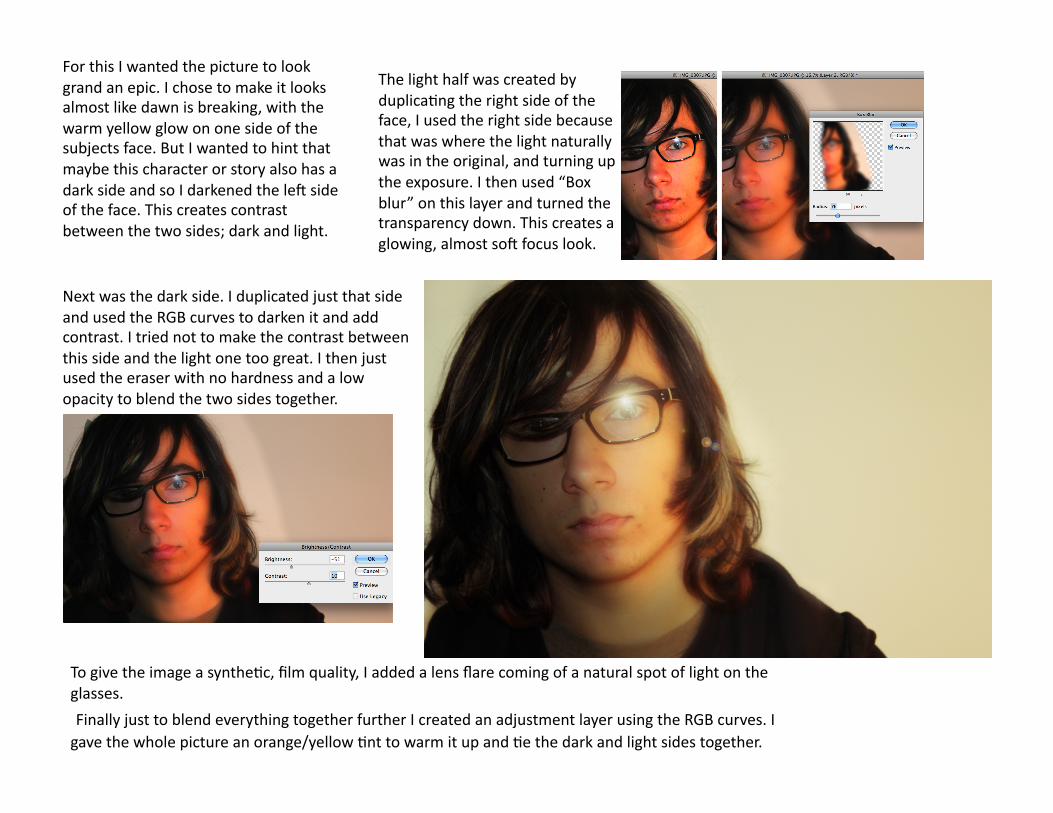
For this I wanted the picture to look grand an epic. I chose to make it looks almost like dawn is breaking, with the warm yellow glow on one side of the subjects face. But I wanted to hint that maybe this character or story also has a dark side and so I darkened the leB side of the face. This creates contrast between the two sides; dark and light.
The light half was created by duplica.ng the right side of the face, I used the right side because that was where the light naturally was in the original, and turning up the exposure. I then used “Box blur” on this layer and turned the transparency down. This creates a glowing, almost soB focus look.
Next was the dark side. I duplicated just that side and used the RGB curves to darken it and add contrast. I tried not to make the contrast between this side and the light one too great. I then just used the eraser with no hardness and a low opacity to blend the two sides together.
To give the image a synthe.c, film quality, I added a lens flare coming of a natural spot of light on the glasses.
Finally just to blend everything together further I created an adjustment layer using the RGB curves. I gave the whole picture an orange/yellow .nt to warm it up and .e the dark and light sides together.
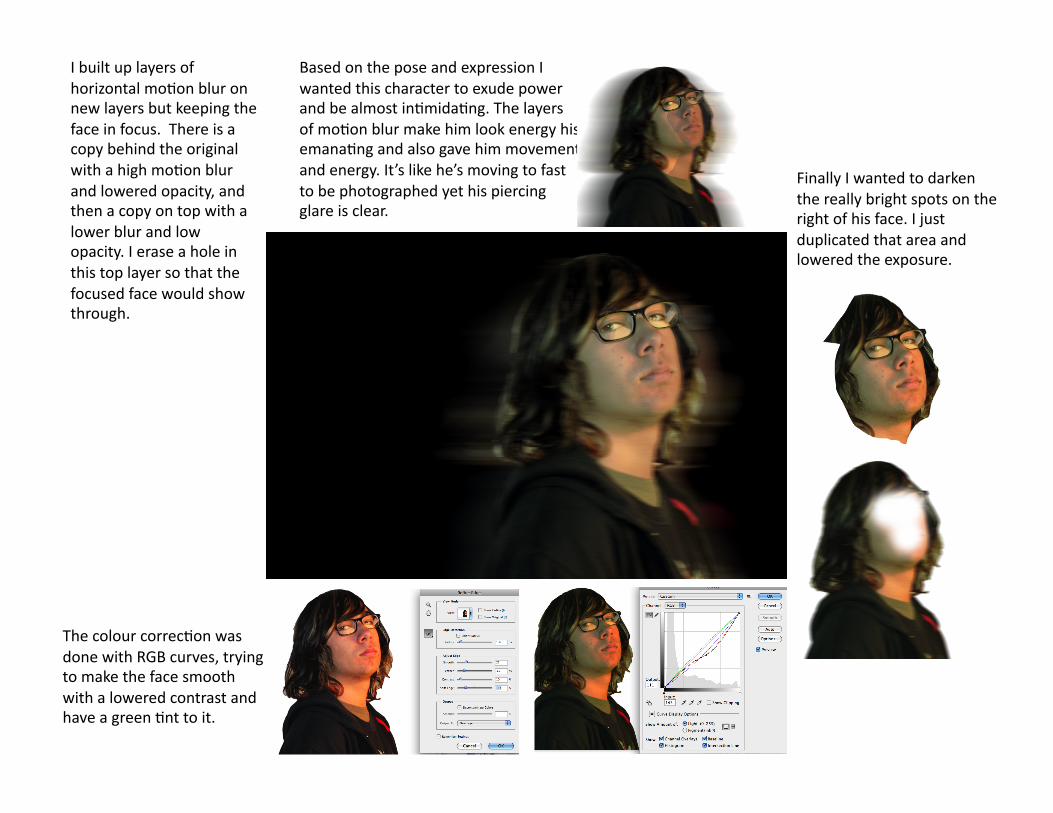
I built up layers of horizontal mo.on blur on new layers but keeping the face in focus. There is a copy behind the original with a high mo.on blur and lowered opacity, and then a copy on top with a lower blur and low opacity. I erase a hole in this top layer so that the focused face would show through.
Based on the pose and expression I wanted this character to exude power and be almost in.mida.ng. The layers of mo.on blur make him look energy his emana.ng and also gave him movement and energy. It’s like he’s moving to fast to be photographed yet his piercing glare is clear.
The colour correc.on was done with RGB curves, trying to make the face smooth with a lowered contrast and have a green .nt to it.
Finally I wanted to darken the really bright spots on the right of his face. I just duplicated that area and lowered the exposure.

What I wanted to create was a mysterious figure emerging from the fog, perhaps something supernatural about him. The genre here would be dark fantasy, going towards horror.
I first cut out the figure from his original background and refined the edges. I then used the RGB curves to increase the contrast and lower the brightness to try and make the figure striking and solid, almost like a silhoueRe.
However this ended up crushing the face into darkness and I thought that given the product I was edi.ng for it was important to clearly see the characters face. So I selected the face area with the lasso and duplicated it onto a new layer. I used the curves, hue and satura.on, and brightness and contrast, trying to make the face smooth and defined. I then just blended it into with the eraser.
Next was to render clouds in the background, use curves to .nt them blue, and then erase them so that they faded out around the edges. A white glow around the figure picks him out from the background.
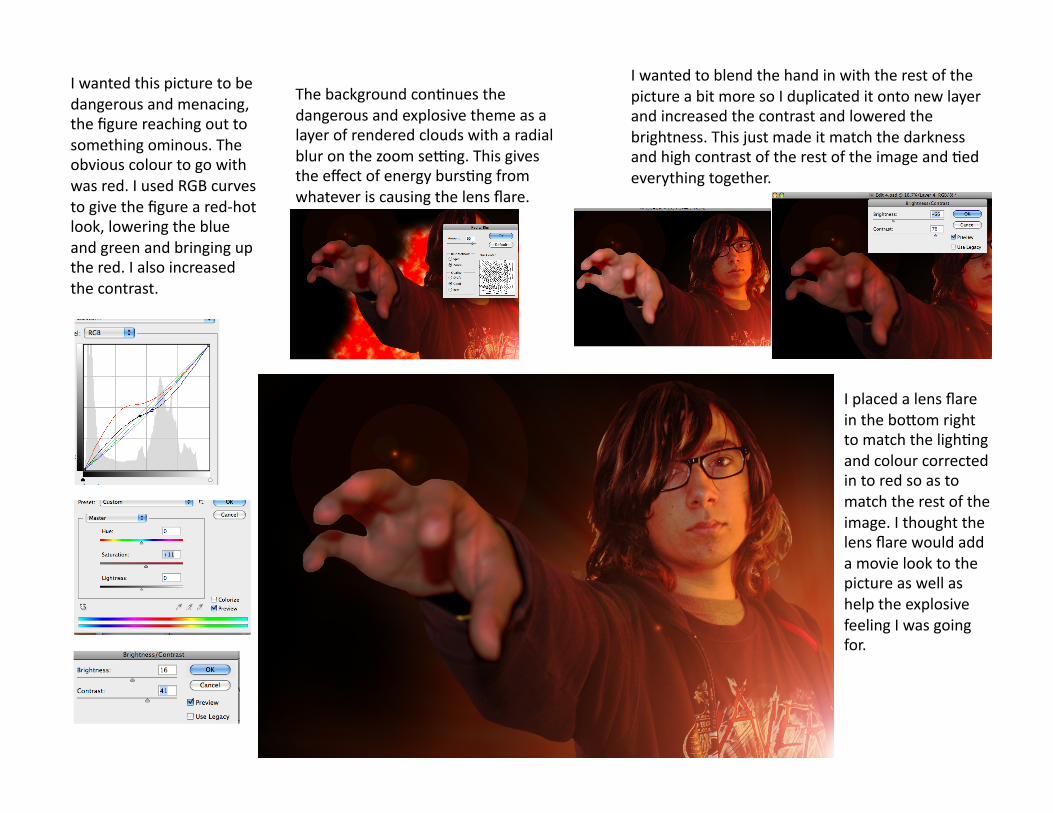
I wanted this picture to be dangerous and menacing, the figure reaching out to something ominous. The obvious colour to go with was red. I used RGB curves to give the figure a red‐hot look, lowering the blue and green and bringing up the red. I also increased the contrast.
I placed a lens flare in the boRom right to match the ligh.ng and colour corrected in to red so as to match the rest of the image. I thought the lens flare would add a movie look to the picture as well as help the explosive feeling I was going for.
I wanted to blend the hand in with the rest of the picture a bit more so I duplicated it onto new layer and increased the contrast and lowered the brightness. This just made it match the darkness and high contrast of the rest of the image and .ed everything together.
The background con.nues the dangerous and explosive theme as a layer of rendered clouds with a radial blur on the zoom seVng. This gives the effect of energy burs.ng from whatever is causing the lens flare.