Philips 720 and 725 User Manual - Wizard Electronics
21
Philips 720 and 725 User Manual Due to continuous product improvements, design and specifications are subject to change without notice.
Transcript of Philips 720 and 725 User Manual - Wizard Electronics

Philips 720 and 725 User Manual
Due to continuous product improvements, design and specifications are subject to change without notice.

1
LEGEND
1 Cassette tray2 Built in loudspeaker
CONTROLS
3 Power key POWER
4 Speed control SPEED
5 Volume control VOL
6 Tone Control TONE
7 Fast rewind key REWIND
8 Play/stop key STOP/PLAY
9 Fast forwards key WIND
10 Search key SEARCH
11 LCD Display12 Cassette compartment
CASSETTE COMPARTMENT SWITCHES
13 Telephone recording switch REC
14 Automatic rewind switch AR
15 Automatic backspace switch ABS
16 Loudspeaker switch LS
17 Eject button EJECT
MICROPHONE
18 Hand-held microphone19 Four-position switch20 Microphone loudspeaker21 Microphone22 Record standby button23 Record LED REC
24 End of letter/Priority index L / P
25 Special instruction index S
26 Sensitivity switch DICT/CONF
SOCKETS
27 Telephone/microphone TEL/MIC
28 Microphone MIC
29 Footswitch FOOTSW.
30 Headphones HEADPH.
31 Power POWER 12 V DC
PHILIPS 01.06.1999 13:45 Uhr Seite 1
INTRODUCTION
The Philips Dictation System 725 has been designed with one sole
objective in mind: to make the tasks of dictation and transcription as
convenient as possible for the user.
The 725 can be used for both dictation and transcription. The system has
an LCD display giving you all the information you need about the
system at any time during dictation and transcription.
Please take the time to look through these instructions for use.
The time invested now will be amply rewarded later, since you will be
able to use the 725 quickly and effectively for dictation and transcription
purposes.
Keep these instructions as a handy source of reference about the 725
which you can refer to again in future.
A compact set of instructions for the 725 is provided on a set of self-
adhesive labels. You can stick these mini instructions in the language of
your choice inside the cassette compartment lid where you can refer to
them instantly at any time just by flipping open the compartment.
2
PHILIPS 01.06.1999 13:45 Uhr Seite 2

3
CONTENTS
LEGEND 1
LCD-DISPLAY 5
GENERAL INSTRUCTIONS 7CONNECTING TO THE MAINS 7SWITCHING ON AND OFF 7CASSETTE COMPARTMENT 7
AUTOREWIND 7LOUDSPEAKER 7AUTOMATIC BACKSPACE (ABS) 7
LOADING A CASSETTE 8REMOVING A CASSETTE 8FAST FORW / FAST REW 8PLAYBACK 8VOLUME / TONE / SPEED 9RESET TAPE COUNTER 9CASSETTE TRAY 9
DICTATION 10MICROPHONE CONNECTION 10SENSITIVITY SWITCH 10VOICE LEVEL 10RECORDING 10PAUSE / STOP RECORDING 11PLAYBACK DICTATION 11CORRECTION 11INDEX MARKS 11
END OF LETTER INDEX 11PRIORITY INDEX 11SPECIAL INDEX 12
WARNING 12RECORD PROTECTION 12
PHILIPS 01.06.1999 13:45 Uhr Seite 3
4
TRANSCRIPTION 12CONNECTIONS 12AUTOREWIND SWITCH 13SEARCH 13
SEARCH FORWARDS 13SKIP 13PREVIEW 13
PLAYBACK 14SPEAKER ON / OFF 14AUTOMATIC BACKSPACE 14BACKSPACE 14REWIND 14CUE 15FAST ERASE 15
– FORWARDS 15– BACKWARDS 15
SPECIAL FUNCTIONS 16TELEPHONE RECORDING 16EXTERNAL MICROPHONE 17
WARNING TONES 17
ACCESSORIES 17
TROUBLESHOOTING 18
PHILIPS 01.06.1999 13:45 Uhr Seite 4

5
LCD DISPLAY
The LCD display gives you all the information you need for dictation and
transcription, offering both author and transcriptionist optimal convenience
and ease of use.
The LCD display gives you the following information,
depending on the mode of operation at any particular time.
CASSETTE:
The cassette symbol shows that there is a cassette in the
machine.
RECORD PROTECTION:
The padlock symbol shows you that this side of the cassette
has been record protected.
TAPE COUNTER:
Reset to 0.0 when you insert a cassette.
PLAY:
This symbol is shown in playback and record modes.
RECORD:
Indicates that a recording is being made on the 725 with the
hand-held microphone or via telephone.
TELEPHONE RECORD MODE:
Shows that recording is made using a telephone coupler or
external microphone. The word tEL is shown alternating with
the tape counter.
WIND:
These two arrows light up when the tape is being wound.
SEARCH FORWARDS:
The two arrows and the line show that a forward search,
preview or skip is in progress.
PHILIPS 01.06.1999 13:45 Uhr Seite 5
6
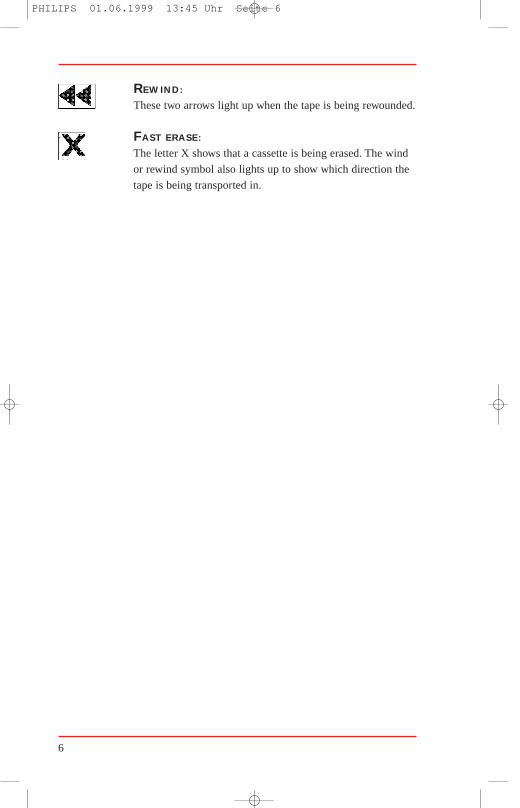
REWIND:
These two arrows light up when the tape is being rewounded.
FAST ERASE:
The letter X shows that a cassette is being erased. The wind
or rewind symbol also lights up to show which direction the
tape is being transported in.
PHILIPS 01.06.1999 13:45 Uhr Seite 6

7
GENERAL INSTRUCTIONS
CONNECTING TO THE MAINS
Connect the Dictation System to a power socket using the power supply 155.
The power supply socket (31) is at the rear of the machine. Ensure that the
voltage shown on the power supply unit
corresponds to your local mains voltage.
SWITCHING ON AND OFF
Press the POWER key (3) on the left-hand side
of the machine. This key has an on-off
function: after use, pressing it turns the 725 off again. The machine switches
off automatically if it remains unused for 15 minutes.
CASSETTE COMPARTMENT
Flip open the cassette compartment (12) with
your finger. This reveals a number of switches
which can be set to suit your personal
preferences.
• AUTOREWIND (14)Set this switch to AR if you wish to take
advantage of the 725’s automatic rewind
function. When set to AR, the 725 auto-
matically rewinds a cassette to the beginning
when it is inserted.
• LOUDSPEAKER (16)The setting of this switch determines whether
you wish to listen to recordings via the 725’s
built-in loudspeaker ( ), the microphone
loudspeaker (MIC ), or via headphones
( ).
• AUTOMATIC BACKSPACE (ABS)The ABS slider (15) gives you complete
control over the automatic backspace function
when transcribing a cassette. Turn it off by
setting this slider to 0, or set a backspace value
of anything up to a maximum of approximately
8 seconds.
PHILIPS 01.06.1999 13:46 Uhr Seite 7

8
Whenever you pause during transcription using a foot control, the automatic
backspace function plays back the last few seconds of a recording each time
you resume.
LOADING A CASSETTE
Mini-Cassettes are inserted in the tape drive
with the tape towards you as shown by the
cassette symbol. It is easier to keep track of
your dictation and transcription if you make a
habit of always inserting cassettes with side
one uppermost so that all recordings start at the beginning of side one.
A cassette symbol appears on the LCD display and the counter is set to 0.0.
If the automatic rewind switch (14) is set to AR, the cassette is automatically
rewound to the beginning.
The 725 is now ready for use.
REMOVING A CASSETTE
A cassette can be removed simply by opening
the cassette compartment and pressing the
EJECT key or simply lifting the cassette out
with your fingers.
FAST FORWARDS / FAST REWIND
Press the WIND key (9) to wind the tape
forwards at 20x playback speed, or the
REWIND key (7) to rewind it . Fast forwards
and rewind modes are indicated by the arrows
on the LCD display.
Fast forward or rewind can be stopped at any time by pressing the STOP key
(8) or any other function key.
PLAYBACK
Press the STOP/PLAY key (8) to play back a
recording. This key has a stop/start function .
The playback arrow is shown in the LCD
display, and the counter is incremented.
If the cassette is inserted in the middle and the
autorewind function is off, the counter is incremented.
PHILIPS 01.06.1999 13:46 Uhr Seite 8

9
VOLUME / TONE / SPEED
Adjust the volume and tone sliders (5&6) for
maximum playback quality . The speed cannot
be adjusted during recording, and playback
speed can only be adjusted during playback
using the STOP/PLAY key (8) or foot control.
RESET TAPE COUNTER
The tape counter can be reset to zero at any
time by pressing the fast forward and fast
rewind keys simultaneously.
CASSETTE TRAY
The cassette tray (1) can be used to keep the
cassettes you are currently working with in a
convenient place.
PHILIPS 01.06.1999 13:46 Uhr Seite 9
10
DICTATION
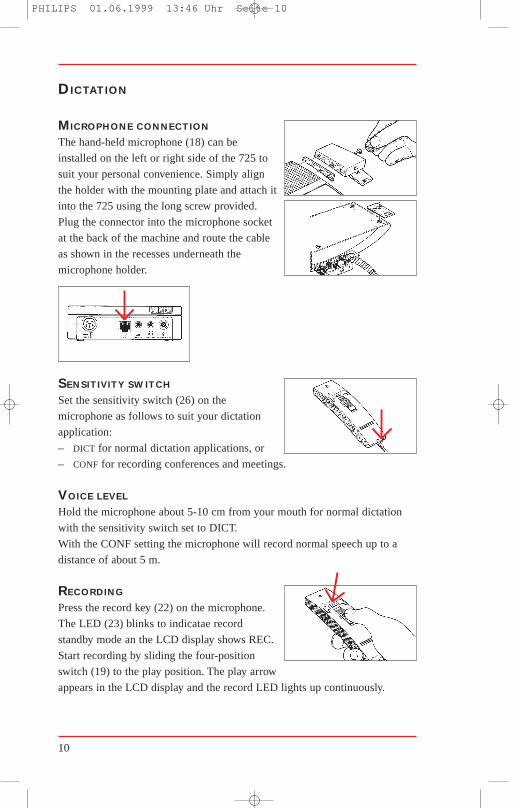
MICROPHONE CONNECTION
The hand-held microphone (18) can be
installed on the left or right side of the 725 to
suit your personal convenience. Simply align
the holder with the mounting plate and attach it
into the 725 using the long screw provided.
Plug the connector into the microphone socket
at the back of the machine and route the cable
as shown in the recesses underneath the
microphone holder.
SENSITIVITY SWITCH
Set the sensitivity switch (26) on the
microphone as follows to suit your dictation
application:
– DICT for normal dictation applications, or
– CONF for recording conferences and meetings.
VOICE LEVEL
Hold the microphone about 5-10 cm from your mouth for normal dictation
with the sensitivity switch set to DICT.
With the CONF setting the microphone will record normal speech up to a
distance of about 5 m.
RECORDING
Press the record key (22) on the microphone.
The LED (23) blinks to indicatae record
standby mode an the LCD display shows REC.
Start recording by sliding the four-position
switch (19) to the play position. The play arrow
appears in the LCD display and the record LED lights up continuously.
PHILIPS 01.06.1999 13:46 Uhr Seite 10
11
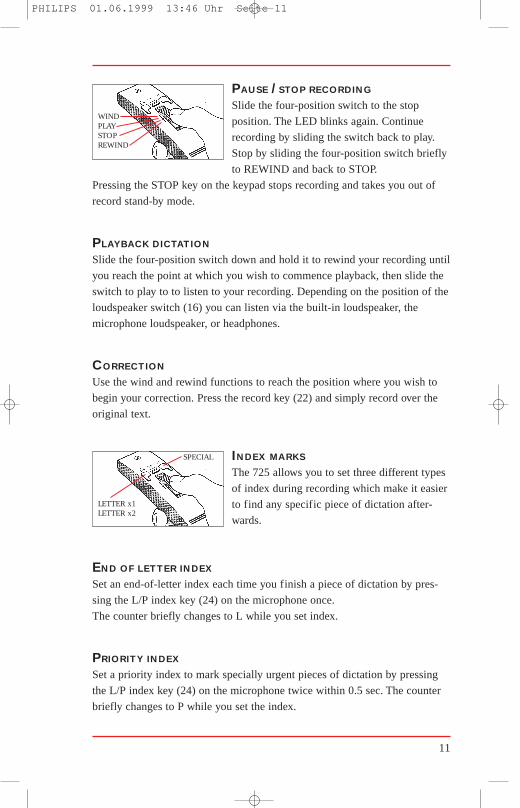
PAUSE / STOP RECORDING
Slide the four-position switch to the stop
position. The LED blinks again. Continue
recording by sliding the switch back to play.
Stop by sliding the four-position switch briefly
to REWIND and back to STOP.
Pressing the STOP key on the keypad stops recording and takes you out of
record stand-by mode.
PLAYBACK DICTATION
Slide the four-position switch down and hold it to rewind your recording until
you reach the point at which you wish to commence playback, then slide the
switch to play to to listen to your recording. Depending on the position of the
loudspeaker switch (16) you can listen via the built-in loudspeaker, the
microphone loudspeaker, or headphones.
CORRECTION
Use the wind and rewind functions to reach the position where you wish to
begin your correction. Press the record key (22) and simply record over the
original text.
INDEX MARKS
The 725 allows you to set three different types
of index during recording which make it easier
to find any specific piece of dictation after-
wards.
END OF LETTER INDEX
Set an end-of-letter index each time you finish a piece of dictation by pres-
sing the L/P index key (24) on the microphone once.
The counter briefly changes to L while you set index.
PRIORITY INDEX
Set a priority index to mark specially urgent pieces of dictation by pressing
the L/P index key (24) on the microphone twice within 0.5 sec. The counter
briefly changes to P while you set the index.
WINDPLAYSTOPREWIND
LETTER x1LETTER x2
SPECIAL
PHILIPS 01.06.1999 13:46 Uhr Seite 11

12
SPECIAL INDEX
Set a special index to mark special instructions or urgent messages for your
secretary by pressing the S index key on the microphone once. The counter
briefly changes to S while you set the index.
WARNING
The 725 beeps six times when you reach the end of tape and the machine
switches automatically to stop. Continue by turning the cassette to side two
or inserting another cassette.
The 725 beeps also if the selected function can not be executed.
RECORD PROTECTION
You can protect valuable recordings from being
recorded over by breaking out the small tab at
the front of the cassette with a paper clip or
similar object.
Inserting a record-protected cassette in the 725
causes the padlock symbol to appear in the
LCD display,
TRANSCRIPTION
The LCD display makes the 725 ideally suited for
transcription. Using the autorewind function means that
each cassette is automatically at the beginning when you
start.
CONNECTIONS
The 725 is set up for transcription by
connecting a set of headphones and a foot
control to the HEADPH. (30) and FOOTSW.
(29) sockets at the rear of the machine. The
feet of the 725 have cross cuts in them which
enable you to route the headphone and foot
control cables for optimal convenience of use.
PHILIPS 01.06.1999 13:46 Uhr Seite 12

13
AUTOREWIND SWITCH
Especially for transcription, it is recommended
that the autorewind switch (14) be set to AR to
take advantage of the 725«s autorewind
function. When set to AR, the 725 auto-
matically rewinds the cassette to the beginning
as soon as it is inserted. The rewind arrows in the LCD display show you that
the tape is being rewound.
Set the autorewind switch to OFF if you do not wish to take advantage of this
feature.
SEARCH
The SEARCH key (10) has three different fun-
ctions which make it particularly easy to move
to any specific piece of dictation on a cassette.
The LCD display shows you that a search
function is in progress by displaying the search
symbol (the wind arrows together with a vertical line).
SEARCH FORWARDS
Pressing the SEARCH key once causes the tape to be wound automatically to
the next index marking from the current position. Then play back the text as
normal.
SKIP
For example press the SEARCH key 3 times to skip automatically to the 3rd
index marking from the current position. Then play back the text as normal.
Or press search key the bequiers number of times.
PREVIEW
Preview the contents of a cassette by holding the SEARCH key down till the
tape starts moving (approx. 0.5 seconds). The search symbol in the LCD
display blinks while the tape is wound to the next index. This piece of
dictation is played back for approximately 5 seconds, during which time the
preview symbol (arrow plus blinking arrow and line) is displayed. The tape is
then wound in fast forwards mode to the next index mark, and so on till the
end of the cassette is reached. Interrupt the preview process by pressing any
function key on the keypad. This function is then implemented, e.g. stop,
play, rewind, etc.
PHILIPS 01.06.1999 13:46 Uhr Seite 13
14
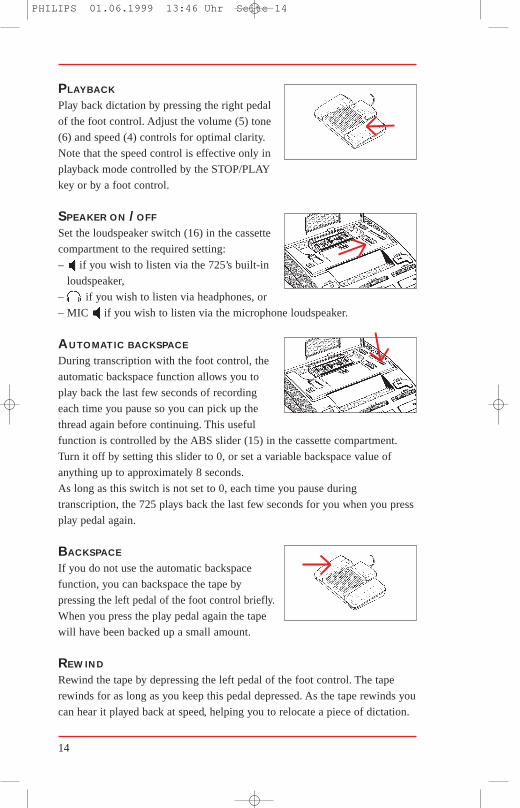
PLAYBACK
Play back dictation by pressing the right pedal
of the foot control. Adjust the volume (5) tone
(6) and speed (4) controls for optimal clarity.
Note that the speed control is effective only in
playback mode controlled by the STOP/PLAY
key or by a foot control.
SPEAKER ON / OFF
Set the loudspeaker switch (16) in the cassette
compartment to the required setting:
– if you wish to listen via the 725’s built-in
loudspeaker,
– if you wish to listen via headphones, or
– MIC if you wish to listen via the microphone loudspeaker.
AUTOMATIC BACKSPACE
During transcription with the foot control, the
automatic backspace function allows you to
play back the last few seconds of recording
each time you pause so you can pick up the
thread again before continuing. This useful
function is controlled by the ABS slider (15) in the cassette compartment.
Turn it off by setting this slider to 0, or set a variable backspace value of
anything up to approximately 8 seconds.
As long as this switch is not set to 0, each time you pause during
transcription, the 725 plays back the last few seconds for you when you press
play pedal again.
BACKSPACE
If you do not use the automatic backspace
function, you can backspace the tape by
pressing the left pedal of the foot control briefly.
When you press the play pedal again the tape
will have been backed up a small amount.
REWIND
Rewind the tape by depressing the left pedal of the foot control. The tape
rewinds for as long as you keep this pedal depressed. As the tape rewinds you
can hear it played back at speed, helping you to relocate a piece of dictation.
PHILIPS 01.06.1999 13:46 Uhr Seite 14
15
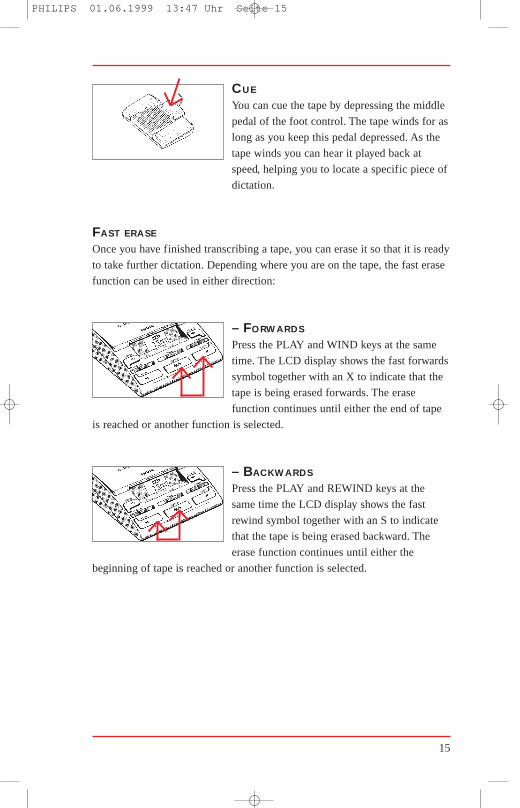
CUE
You can cue the tape by depressing the middle
pedal of the foot control. The tape winds for as
long as you keep this pedal depressed. As the
tape winds you can hear it played back at
speed, helping you to locate a specific piece of
dictation.
FAST ERASE
Once you have finished transcribing a tape, you can erase it so that it is ready
to take further dictation. Depending where you are on the tape, the fast erase
function can be used in either direction:
– FORWARDS
Press the PLAY and WIND keys at the same
time. The LCD display shows the fast forwards
symbol together with an X to indicate that the
tape is being erased forwards. The erase
function continues until either the end of tape
is reached or another function is selected.
– BACKWARDS
Press the PLAY and REWIND keys at the
same time the LCD display shows the fast
rewind symbol together with an S to indicate
that the tape is being erased backward. The
erase function continues until either the
beginning of tape is reached or another function is selected.
PHILIPS 01.06.1999 13:47 Uhr Seite 15
16
TELEPHONE COUPLER
INSTRUCTION FOR USE
Please note - These instruction should be used in conjunction with your
Philips LFH 0725 desk top machine. The Philips Telephone Coupler DDC2
makes it possible to record telephone conversations on a Desk top Dictation
System . The Telephone coupler is designed for use only with the Philips 725
desk top Dictation System.
Important, please retain these instructions for future reference.
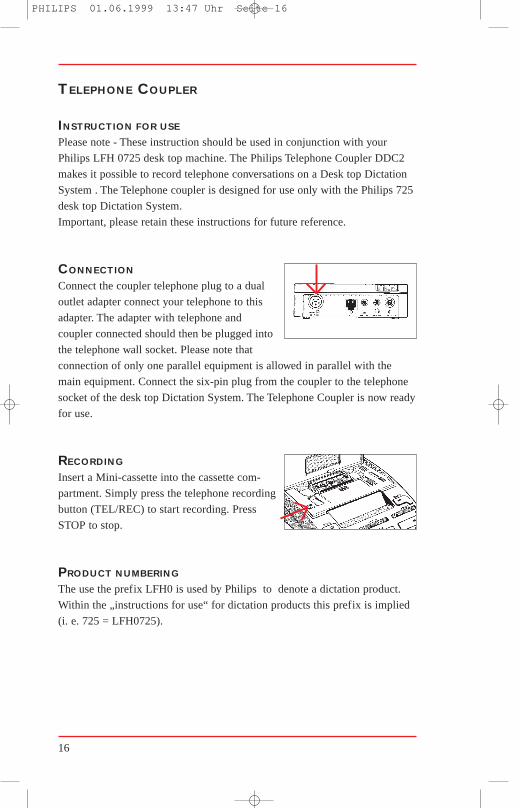
CONNECTION
Connect the coupler telephone plug to a dual
outlet adapter connect your telephone to this
adapter. The adapter with telephone and
coupler connected should then be plugged into
the telephone wall socket. Please note that
connection of only one parallel equipment is allowed in parallel with the
main equipment. Connect the six-pin plug from the coupler to the telephone
socket of the desk top Dictation System. The Telephone Coupler is now ready
for use.
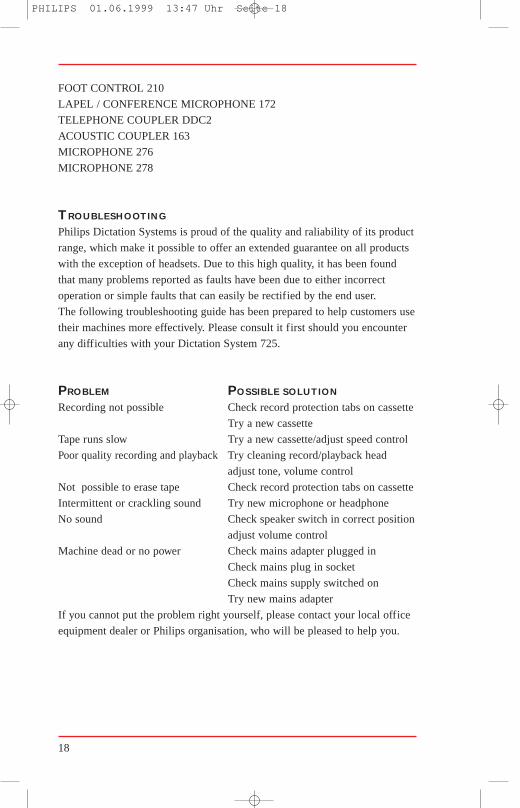
RECORDING
Insert a Mini-cassette into the cassette com-
partment. Simply press the telephone recording
button (TEL/REC) to start recording. Press
STOP to stop.
PRODUCT NUMBERING
The use the prefix LFH0 is used by Philips to denote a dictation product.
Within the „instructions for use“ for dictation products this prefix is implied
(i. e. 725 = LFH0725).
PHILIPS 01.06.1999 13:47 Uhr Seite 16

17
EXTERNAL MICROPHONE
The Philips microphone 172 can be used to
make recordings on the 725. Connect the
microphone to the TEL/MIC socket (27) at the
rear of the 725 Start recording by pressing the
telephone REC key (13) in the cassette com-
partment. The LCD display shows tEL REC and the play arrow to indicate
that a recording is taking place. The word tEL is shown alternating
with the tape counter.
Press the STOP key (8) to end recording.
WARNING TONES
The 725 gives warning tones in the following circumstances:
- A recording is attempted with a record protected cassette.
- The telephone recording mode selected without a telephone adapter.
- Fast ease is attempted with a record protected cassette.
- The end of tape is reached.
- The beginning of tape is reached.
- A recording is attempted after the end of tape is reached.
ACCESSORIES
Philips Dictation Systems produces a complete range of dictation and
transcription accessories for use with the 725. Use only genuine Philips
accessories to ensure maximum reliability and best results. Please consult
your local Philips Dictation Systems dealer for further details.
MINI-CASSETTES
The following Mini-cassettes are avaiblie for use with the 725 System.
005 – 30 minutes, 007 – 60 minutes
MAINS ADAPTER 155
EARPHONES
Four types of earphones are available for playback of recordings.
232 – Stethoscopic earphones
233 – Standard earphones
234 – Deluxe earphones
236 – Headphone
PHILIPS 01.06.1999 13:47 Uhr Seite 17
18
FOOT CONTROL 210
LAPEL / CONFERENCE MICROPHONE 172
TELEPHONE COUPLER DDC2
ACOUSTIC COUPLER 163
MICROPHONE 276
MICROPHONE 278
TROUBLESHOOTING
Philips Dictation Systems is proud of the quality and raliability of its product
range, which make it possible to offer an extended guarantee on all products
with the exception of headsets. Due to this high quality, it has been found
that many problems reported as faults have been due to either incorrect
operation or simple faults that can easily be rectified by the end user.
The following troubleshooting guide has been prepared to help customers use
their machines more effectively. Please consult it first should you encounter
any difficulties with your Dictation System 725.
PROBLEM POSSIBLE SOLUTION
Recording not possible Check record protection tabs on cassette
Try a new cassette
Tape runs slow Try a new cassette/adjust speed control
Poor quality recording and playback Try cleaning record/playback head
adjust tone, volume control
Not possible to erase tape Check record protection tabs on cassette
Intermittent or crackling sound Try new microphone or headphone
No sound Check speaker switch in correct position
adjust volume control
Machine dead or no power Check mains adapter plugged in
Check mains plug in socket
Check mains supply switched on
Try new mains adapter
If you cannot put the problem right yourself, please contact your local office
equipment dealer or Philips organisation, who will be pleased to help you.
PHILIPS 01.06.1999 13:47 Uhr Seite 18
19
Congratulation on choosing this model from Philips Dictation
Systems’ latest range of desk-top dictation an transcription
equipment. We are convinced that you will be more than satisfied
with your choice!
Every care has been taken to produce an instruction booklet that will
make ist easy for you to become familiar with all the functions of
this mode, so that in no time at all you will be able to get the most
out of it. However, any publication as extensive as this may possibly
contain errors.
Should you come across such an error in this instruction manual,
please contact your local office equipment dealer of Philips
organisation and inform them of it. We will then ensure that any such
errors are corrected as soon as the manual is reprinted.
Thank you for your co-operation!
PHILIPS 01.06.1999 13:47 Uhr Seite 19

20
PHILIPS 01.06.1999 13:47 Uhr Seite 20