Periscope Producer Broadcasting Guide - help.twitter.com · Step 5: Title your broadcast, select...
6
Producer Broadcasting Guide 1
Transcript of Periscope Producer Broadcasting Guide - help.twitter.com · Step 5: Title your broadcast, select...

Producer Broadcasting Guide
1

�2
Starting a Producer Broadcast Available for Available for iOS, Android, and web.
Step 1: From the Settings area in the app, select Advanced Sources. Tap to create an additional source, and take note of the RTMP publishing information (Publishing URL, Stream Name). Alternately, on web, click on your avatar and select Producer to access this information.
Step 2: Configure your encoder (such as OBS, etc) to point to the publishing point from Step 1. Configure the streaming settings with the exact specifications listed on page 5.
Step 3: Start streaming from the encoder configured in Step 2.
Step 4: In the app, the Preview Broadcast button should turn on. Press or click it.
Step 5: Title your broadcast, select the Twitter option to Tweet, and hit “Start Broadcast” to go LIVE, at which point your followers will be notified and the broadcast will be posted to Twitter. If you want to turn off chat, please use Producer web and select the box to turn off chats and hearts.
�3
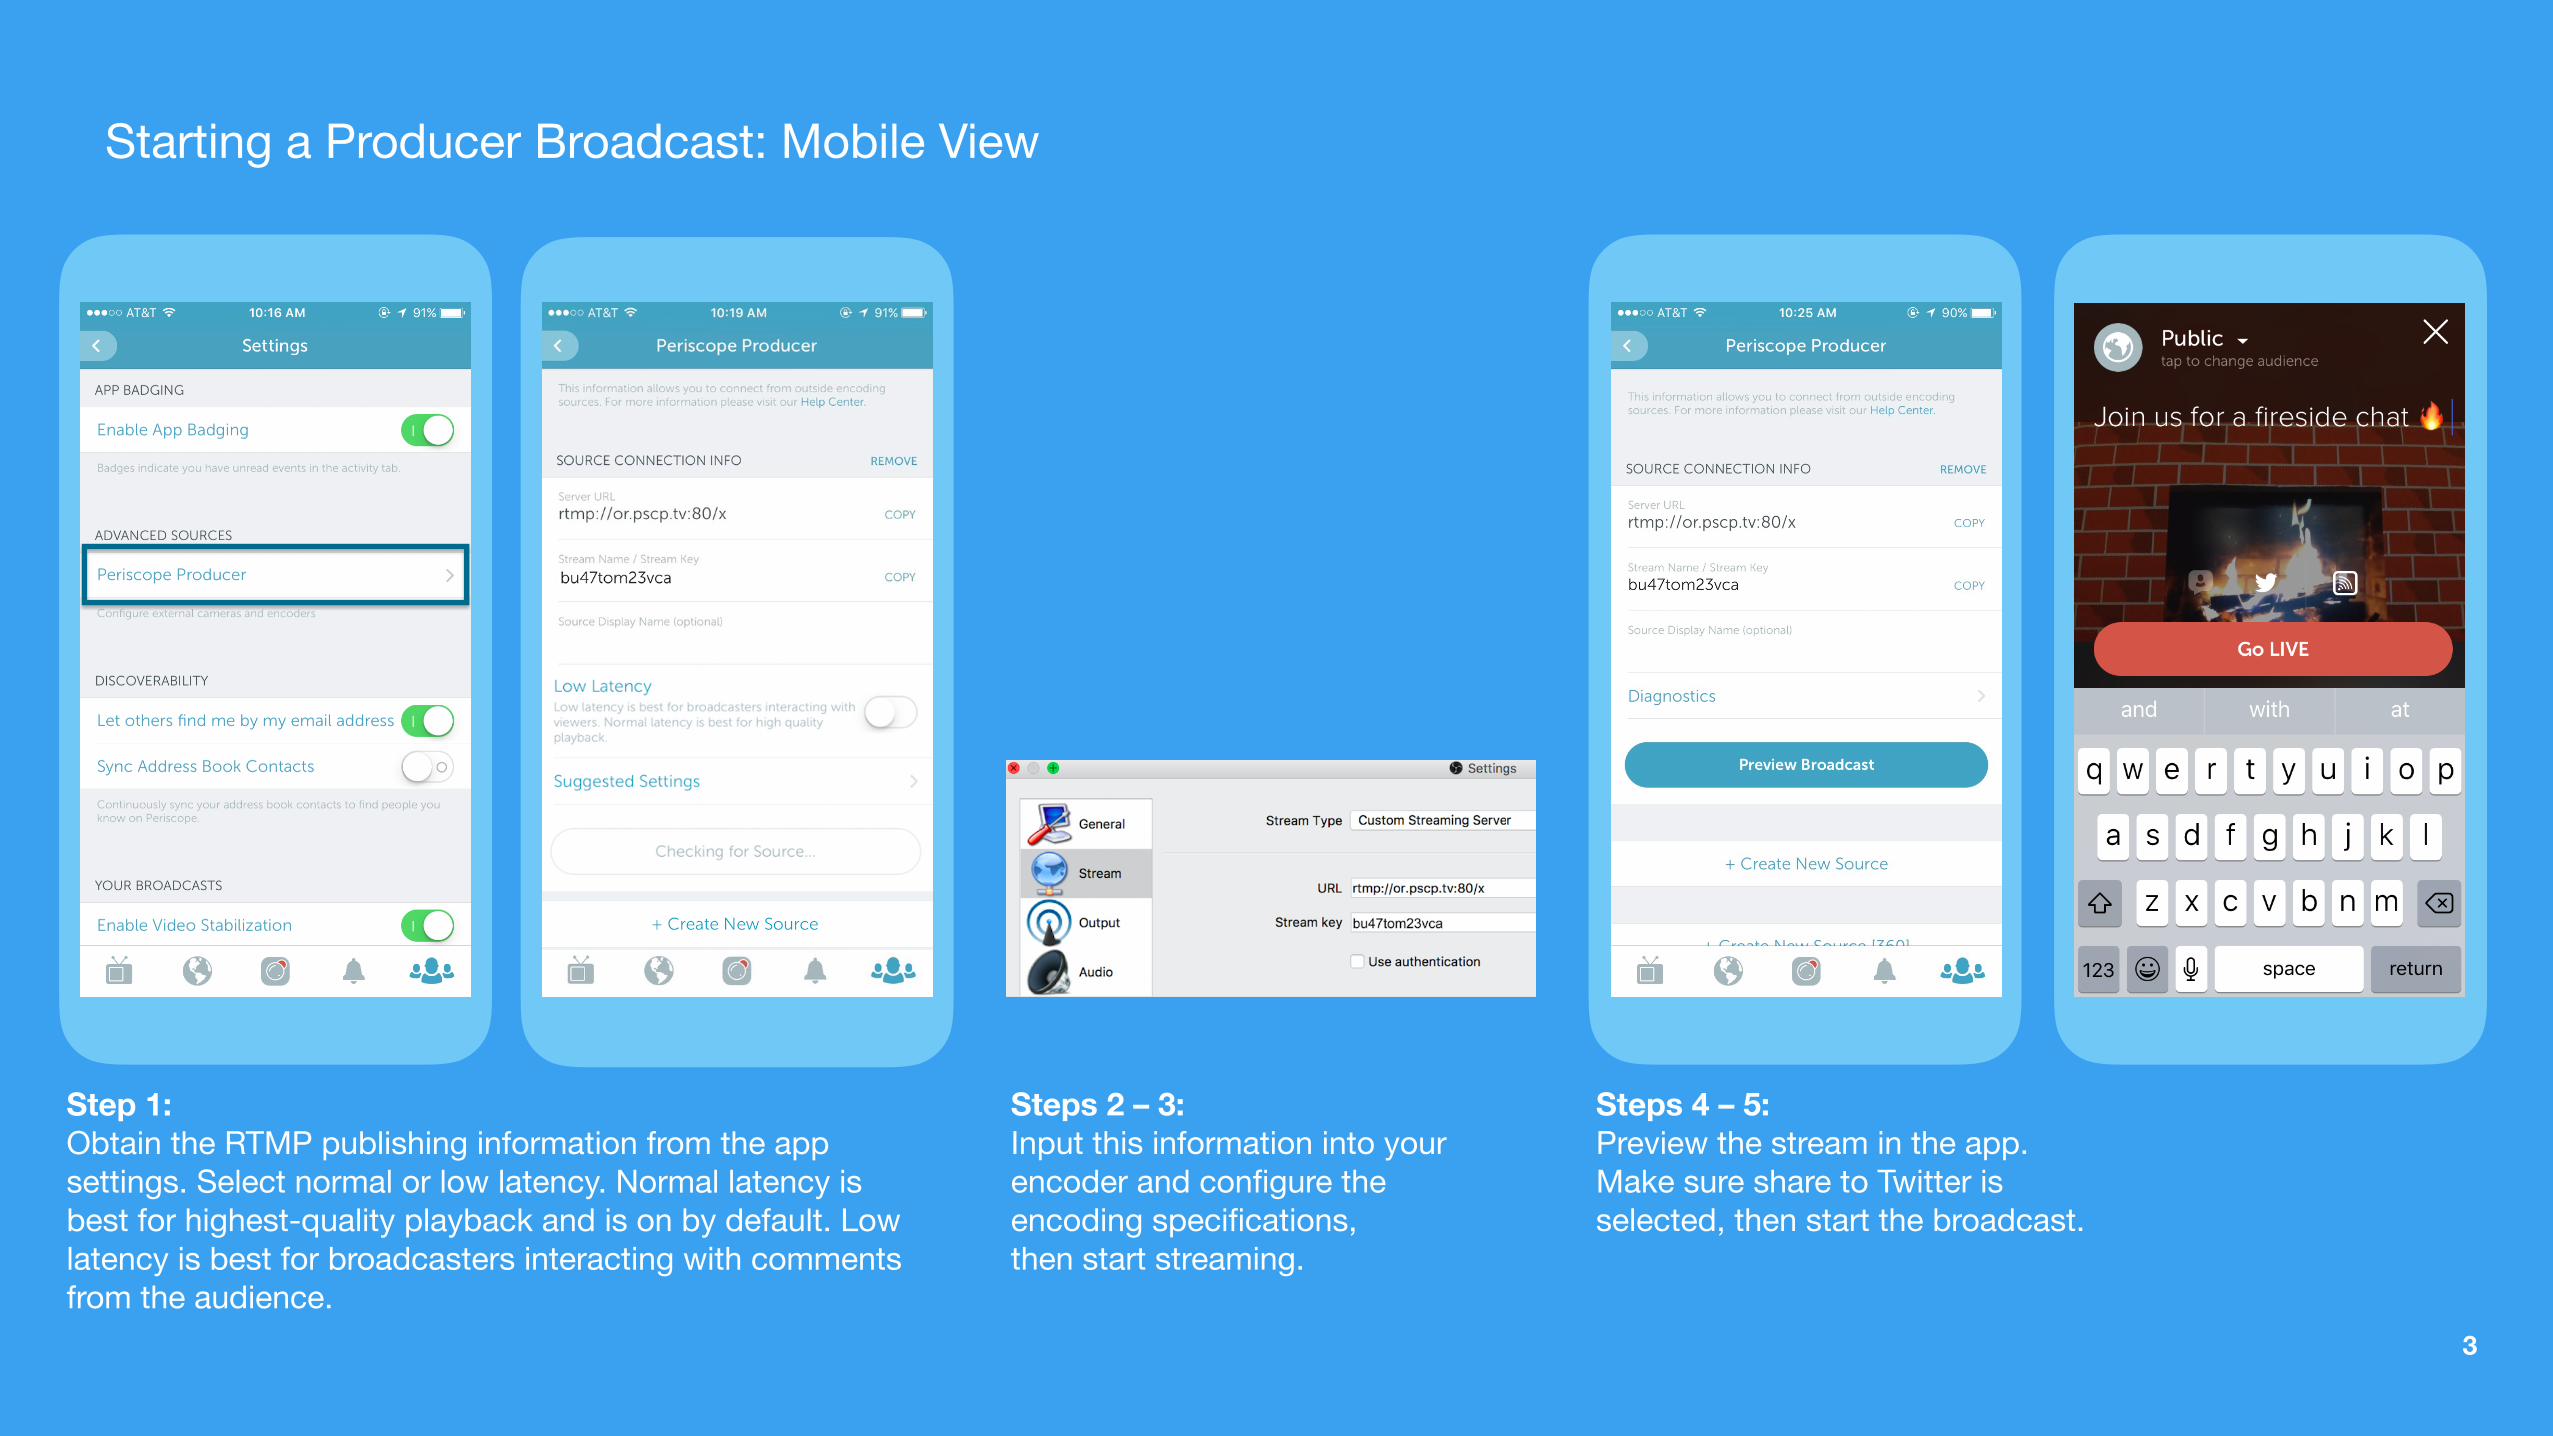
Step 1:Obtain the RTMP publishing information from the app settings. Select normal or low latency. Normal latency is best for highest-quality playback and is on by default. Low latency is best for broadcasters interacting with comments from the audience.
Steps 2 – 3: Input this information into your encoder and configure the encoding specifications, then start streaming.
Steps 4 – 5:Preview the stream in the app. Make sure share to Twitter is selected, then start the broadcast.
Starting a Producer Broadcast: Mobile View
�4
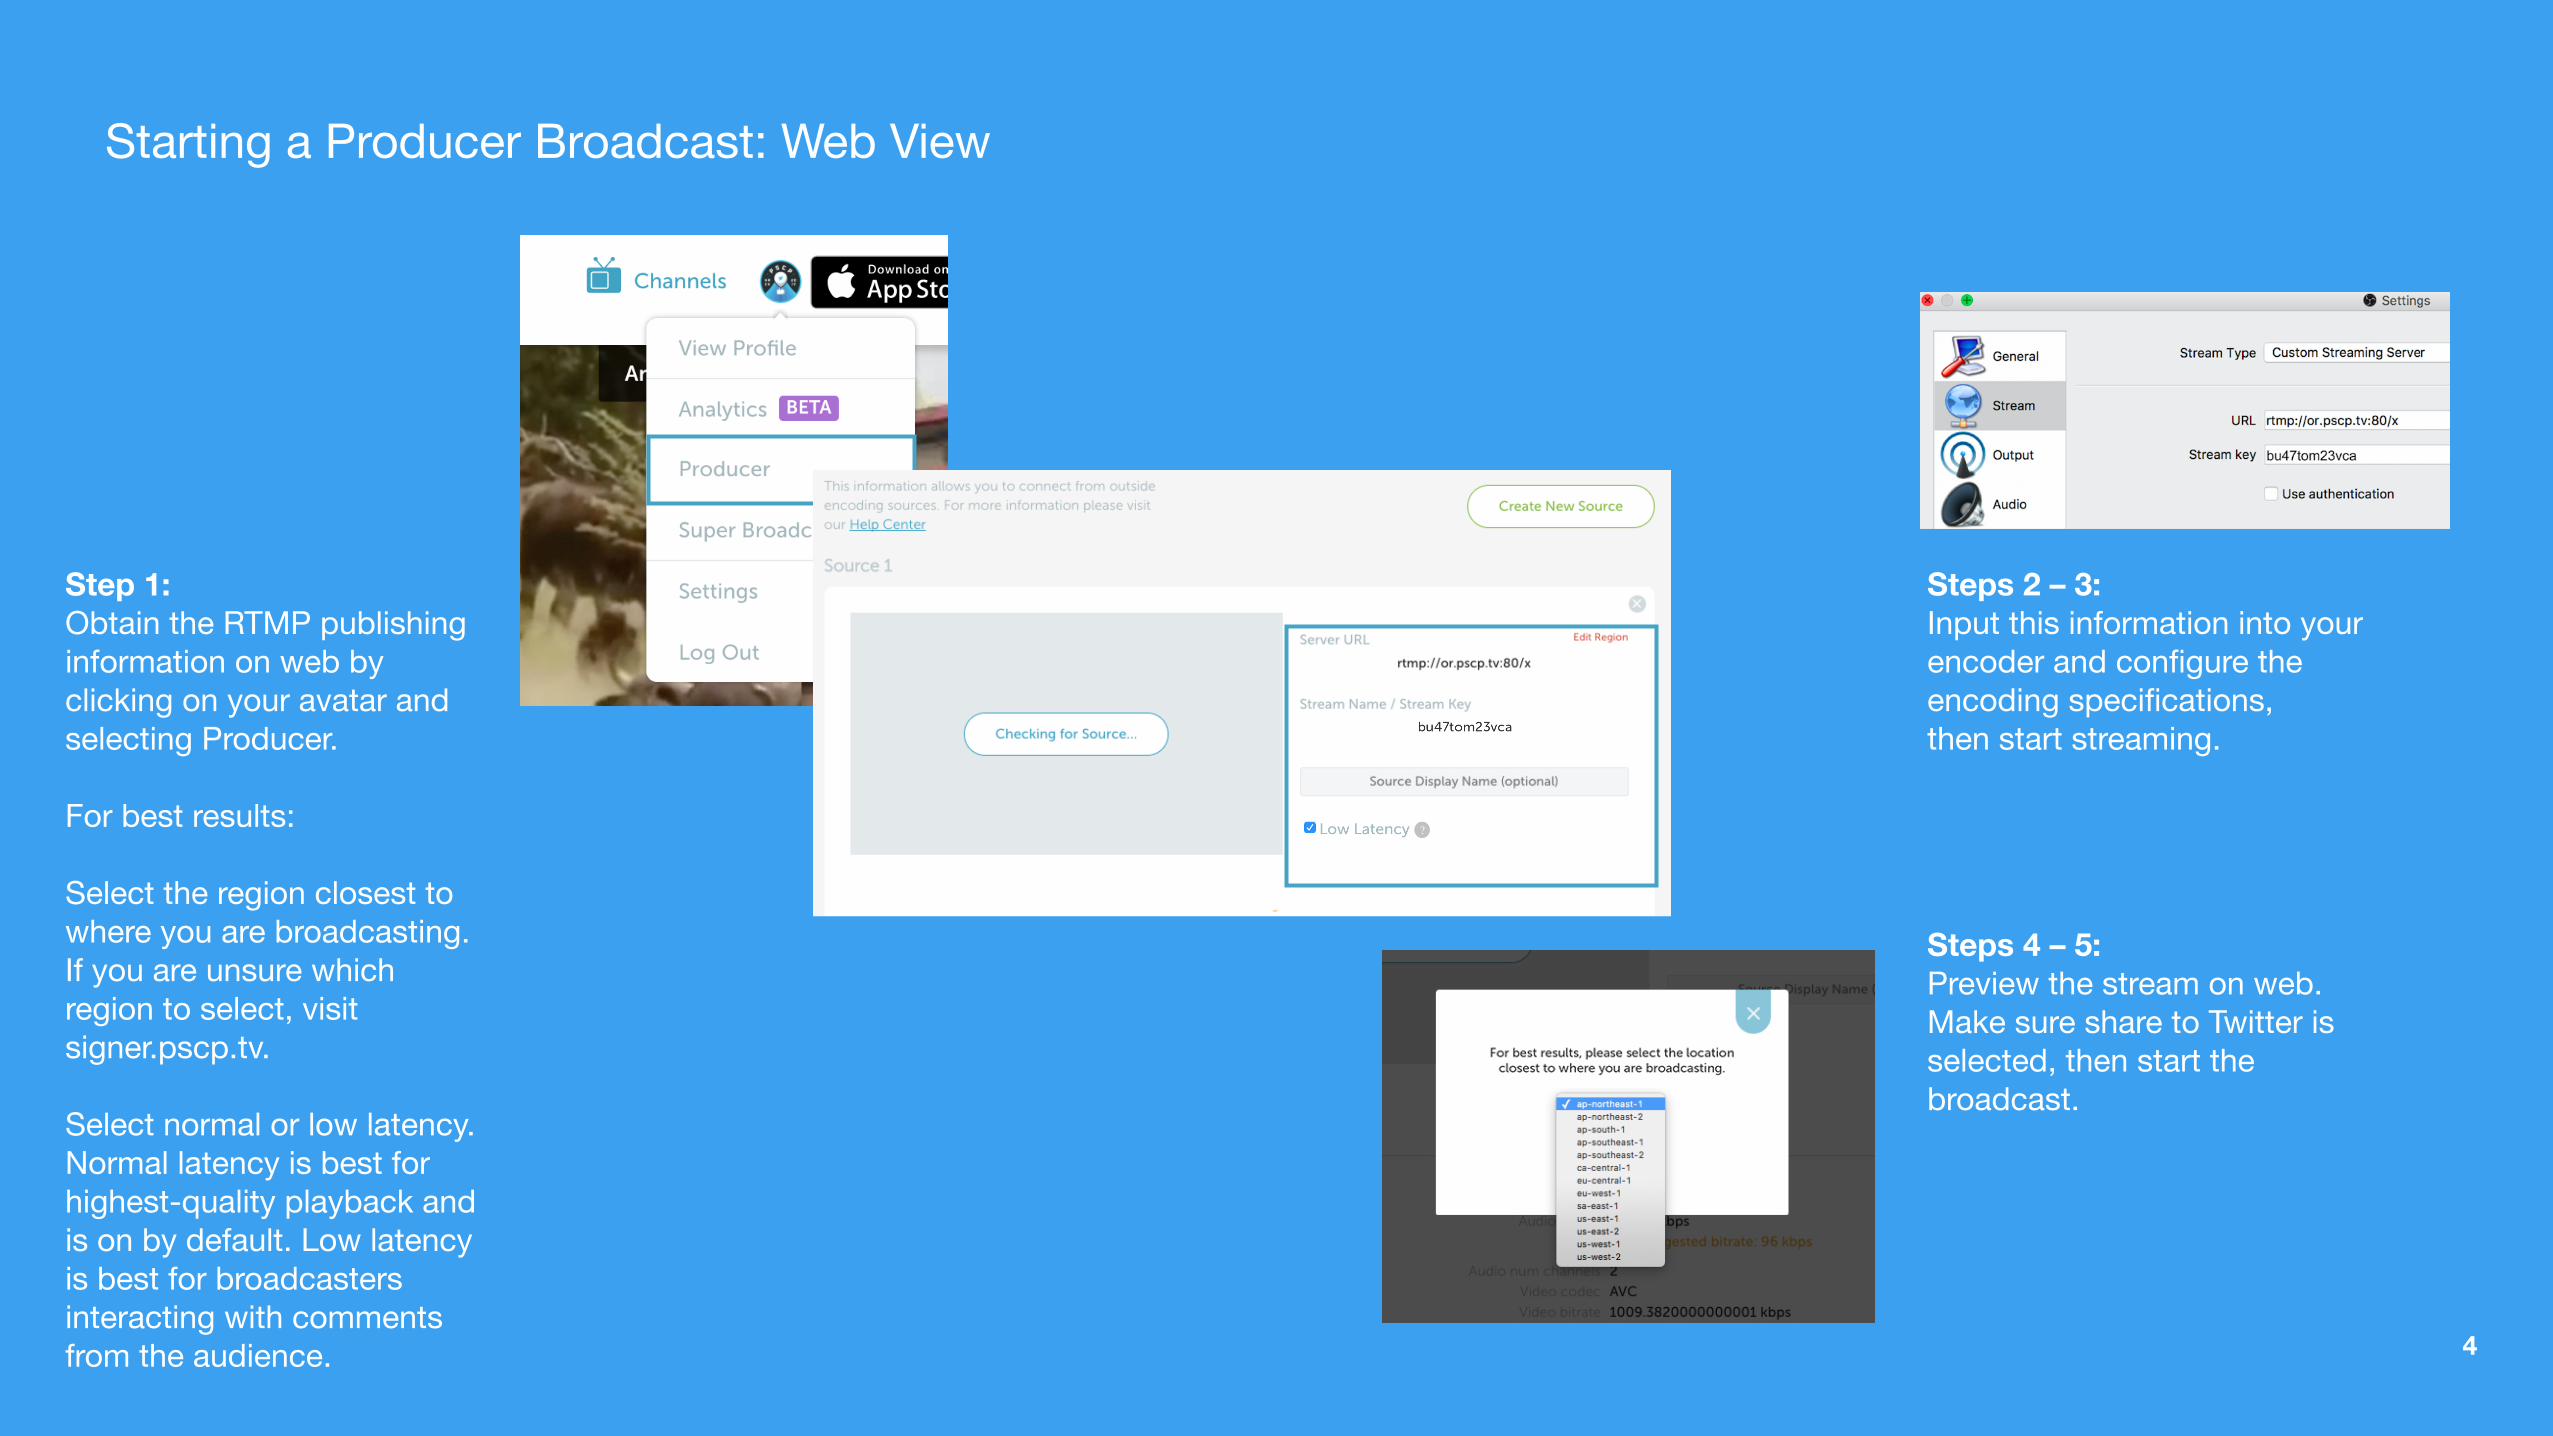
Starting a Producer Broadcast: Web View
Steps 4 – 5:Preview the stream on web. Make sure share to Twitter is selected, then start the broadcast.
Steps 2 – 3: Input this information into your encoder and configure the encoding specifications, then start streaming.
Step 1:Obtain the RTMP publishing information on web by clicking on your avatar and selecting Producer.
For best results:
Select the region closest to where you are broadcasting. If you are unsure which region to select, visit signer.pscp.tv.
Select normal or low latency. Normal latency is best for highest-quality playback and is on by default. Low latency is best for broadcasters interacting with comments from the audience.
�5
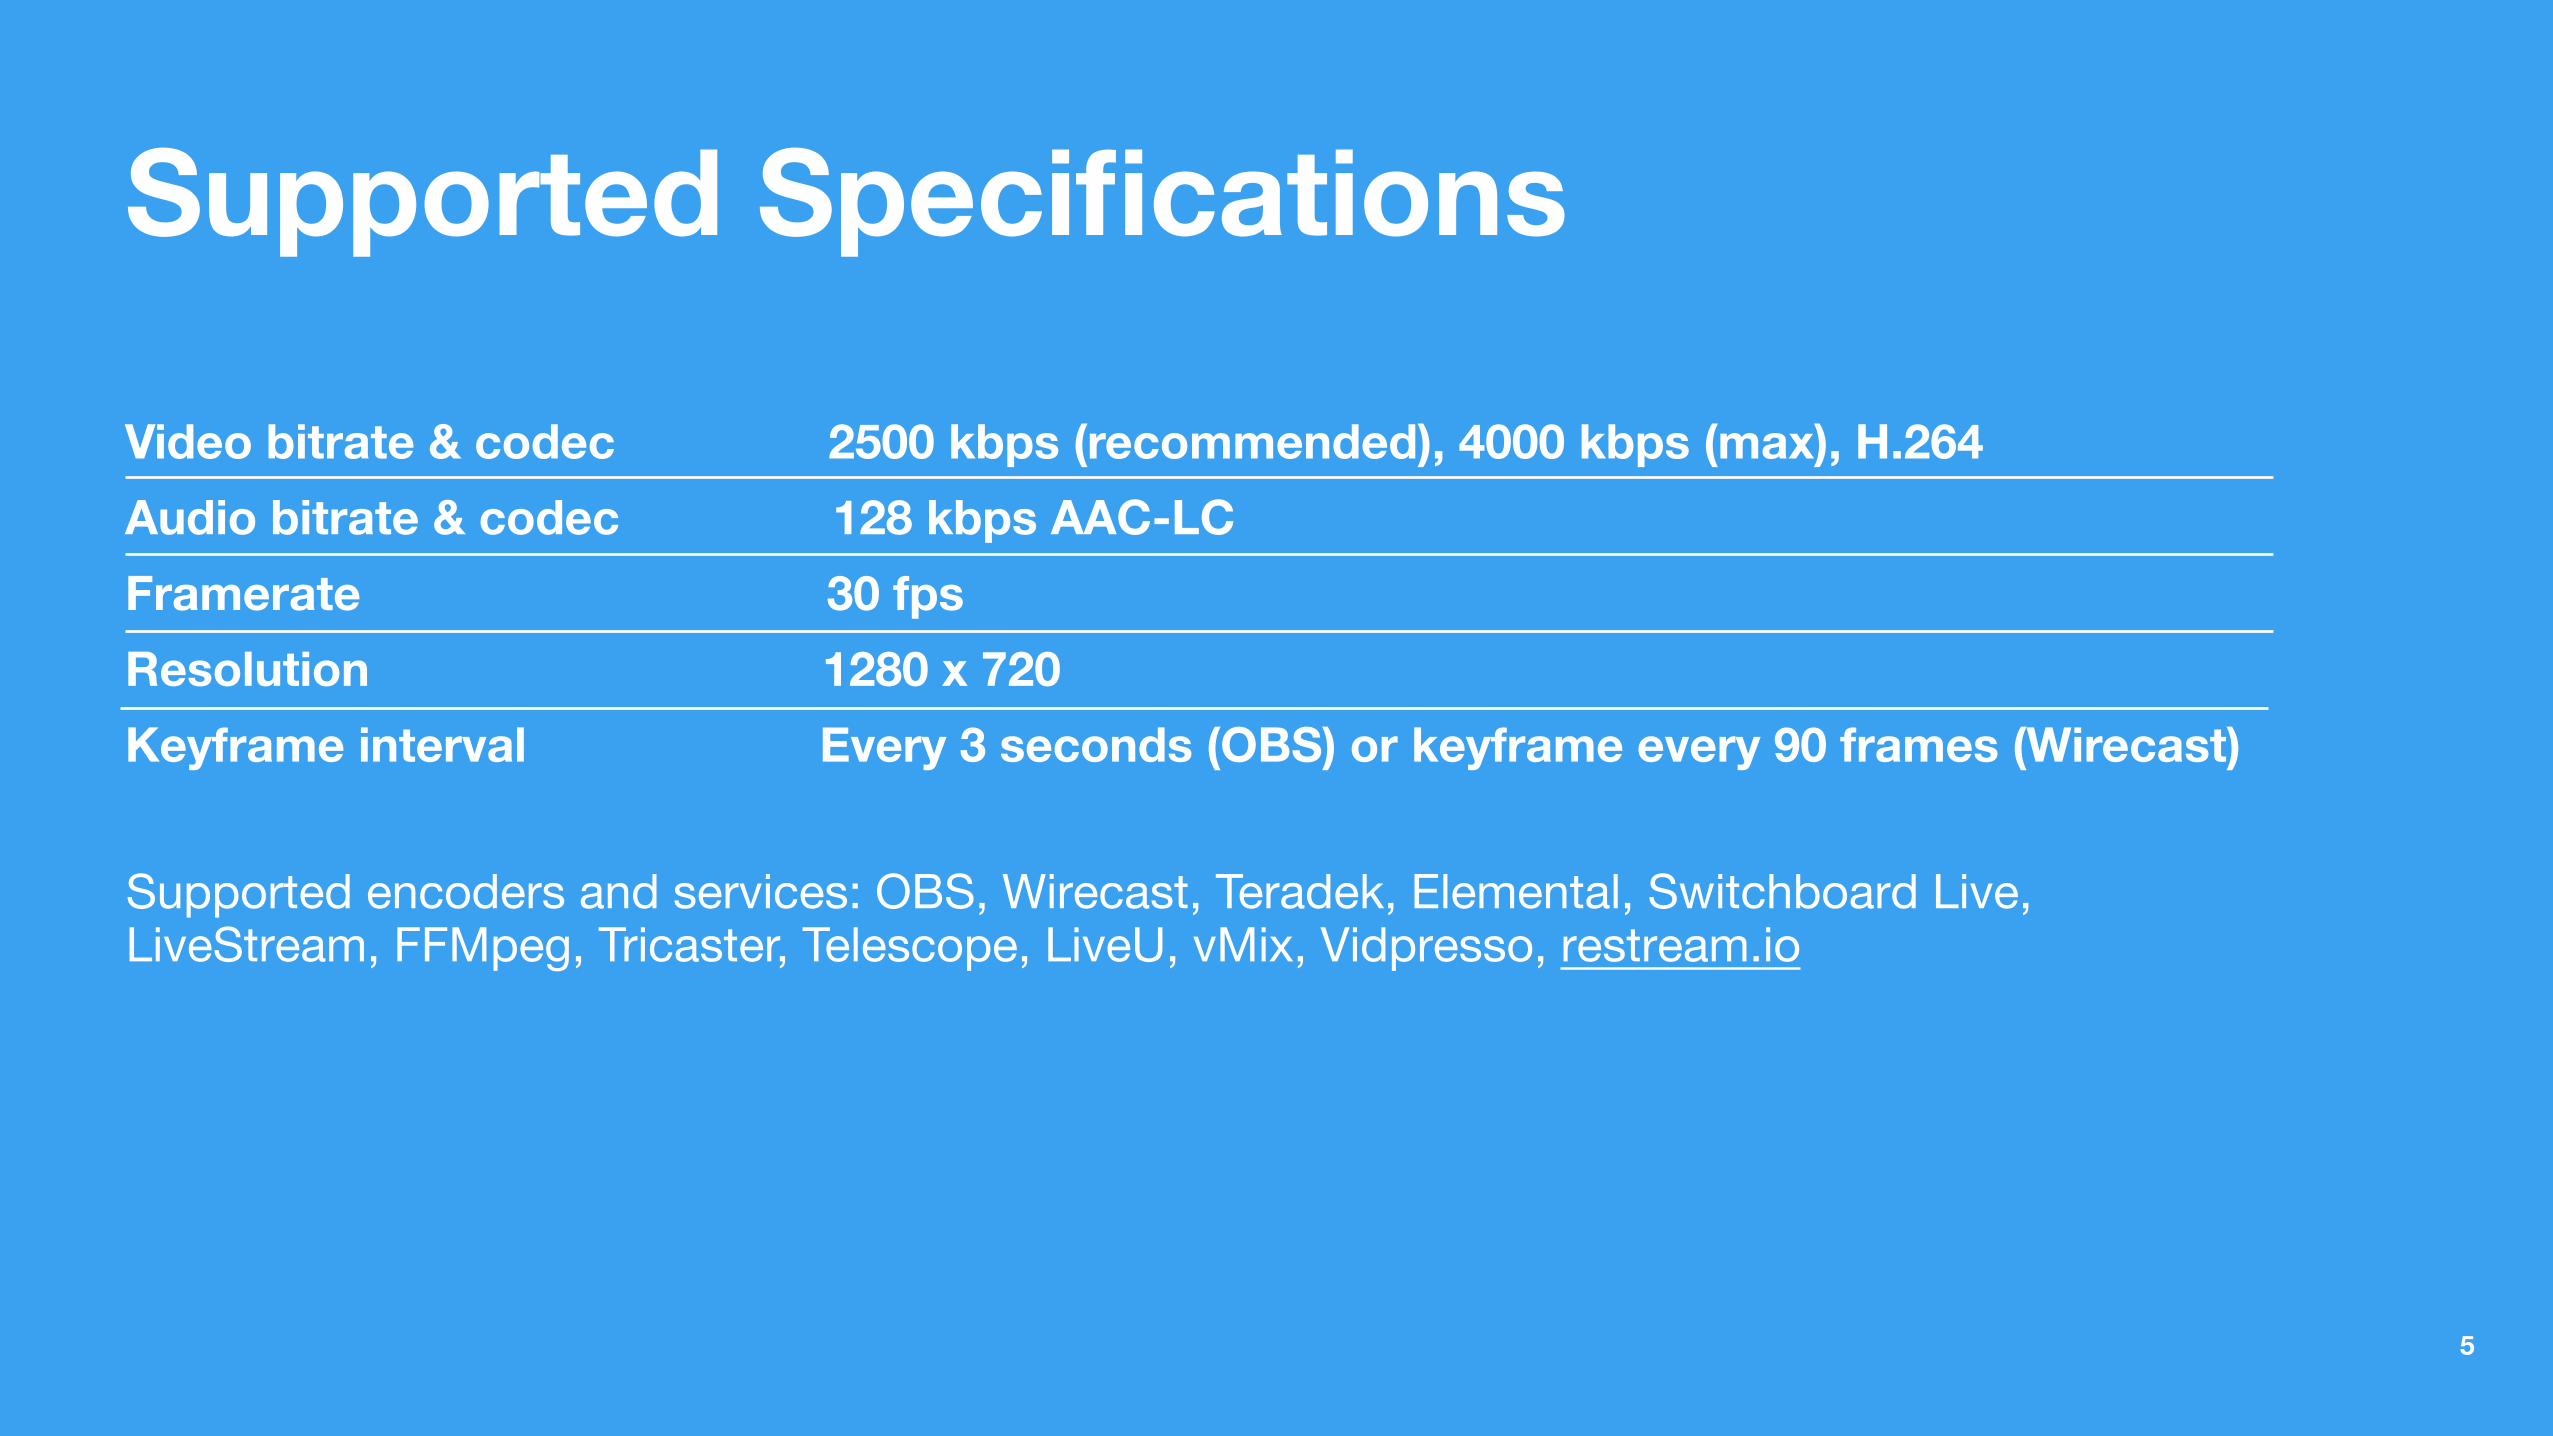
Supported Specifications
Video bitrate & codec 2500 kbps (recommended), 4000 kbps (max), H.264 Audio bitrate & codec 128 kbps AAC-LC Framerate 30 fps Resolution 1280 x 720 Keyframe interval Every 3 seconds (OBS) or keyframe every 90 frames (Wirecast)
Supported encoders and services: OBS, Wirecast, Teradek, Elemental, Switchboard Live, LiveStream, FFMpeg, Tricaster, Telescope, LiveU, vMix, Vidpresso, restream.io

�6
Detailed view of OBS advanced output settings. Note: some encoders refer to Keyframe interval in frames, in which case set to every 60 frames.
Detailed view of OBS video settings.
Support: For issues that cannot be fixed using these resources, please get in touch via [email protected] and include your username, the device you’re using, a detailed description of the problem, and screenshots.
Encoder Specifications: Detailed View