
PeopleSoft Infosync Client 8.9 Implementation …hosteddocs.ittoolbox.com/JS040108.pdfIntegration...
25
Product for Smart Sales Manager PeopleSoft Infosync Client 8.9 Implementation (PeopleTool 8.45) By: Jitendra Singh Technical Consultant PeopleSoft CRM Practice Satyam Computer Services Ltd. Purpose This document enables PeopleSoft Developer to understand the functionality of Infosync Client 8.9, required configuration & setups, common errors and their solution. I hope if developer goes through this document, he or she will be able to implement Infosync client 8.9 successfully. Introduction to Infosync Client 8.9 PeopleSoft CRM integrates with PIM (Personal Information Manager) clients (viz. Microsoft outlook, Lotus note) to provide data synchronization capabilities for end users, such as field service executives and sales executives to manage Contacts, Calendar, Email and Task more effectively. PeopleSoft Infosync Client 8.9 consists of three parts: PeopleSoft Infosync Client 8.9, message People Code, Integration Broker. In this data synchronization solution, field sales and field service personnel use PeopleSoft Infosync Client 8.9 to make any synchronization requests. PeopleSoft uses Integration Broker to handle the XML-based communication between PeopleSoft CRM and the PIM application. When an end user clicks the Sync button from PeopleSoft Infosync Client 8.9, an XML request message is generated and sent to Integration Broker, which initiates a message People Code to gather the changed data in PeopleSoft CRM and sends the reply back to the client application. Next, the client polls the PIM application for changes. It then performs a comparison between the two sets of data and resolves any data conflict that occurs. At the end, the data pertaining to PeopleSoft CRM is formatted in XML and sent back to PeopleSoft CRM as an XML message. Changes that are specific to the PIM client get updated simultaneously.
Transcript of PeopleSoft Infosync Client 8.9 Implementation …hosteddocs.ittoolbox.com/JS040108.pdfIntegration...
Product for Smart Sales Manager
PeopleSoft Infosync Client 8.9 Implementation
(PeopleTool 8.45)
By: Jitendra Singh
Technical Consultant
PeopleSoft CRM Practice
Satyam Computer Services Ltd.
Purpose
This document enables PeopleSoft Developer to understand the functionality of Infosync
Client 8.9, required configuration & setups, common errors and their solution. I hope if
developer goes through this document, he or she will be able to implement Infosync
client 8.9 successfully.
Introduction to Infosync Client 8.9 PeopleSoft CRM integrates with PIM (Personal Information Manager) clients (viz.
Microsoft outlook, Lotus note) to provide data synchronization capabilities for end users,
such as field service executives and sales executives to manage Contacts, Calendar,
Email and Task more effectively.
PeopleSoft Infosync Client 8.9 consists of three parts:
PeopleSoft Infosync Client 8.9,
message People Code,
Integration Broker.
In this data synchronization solution, field sales and field service personnel use
PeopleSoft Infosync Client 8.9 to make any synchronization requests. PeopleSoft uses
Integration Broker to handle the XML-based communication between PeopleSoft CRM
and the PIM application. When an end user clicks the Sync button from PeopleSoft
Infosync Client 8.9, an XML request message is generated and sent to Integration Broker,
which initiates a message People Code to gather the changed data in PeopleSoft CRM
and sends the reply back to the client application. Next, the client polls the PIM
application for changes. It then performs a comparison between the two sets of data and
resolves any data conflict that occurs. At the end, the data pertaining to PeopleSoft CRM
is formatted in XML and sent back to PeopleSoft CRM as an XML message. Changes
that are specific to the PIM client get updated simultaneously.
Product for Smart Sales Manager
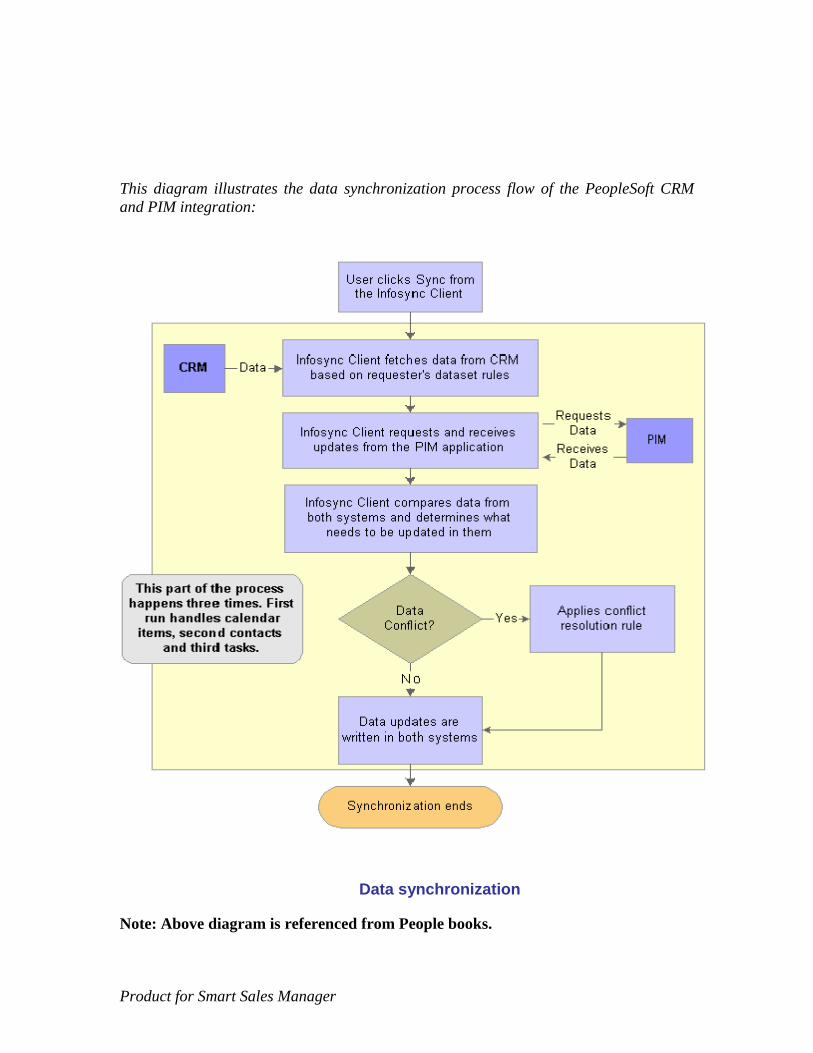
This diagram illustrates the data synchronization process flow of the PeopleSoft CRM
and PIM integration:
Data synchronization
Note: Above diagram is referenced from People books.

Product for Smart Sales Manager
Set Up and Configuration
For proper functioning of Infosync Application following setups and
configurations were done.
Set Up the PeopleSoft Integration Broker
A complete PeopleSoft Integration Broker setup is required as part of the
PeopleSoft Enterprise Infosync Client product to perform data synchronization between
PeopleSoft Enterprise CRM and PIM Client. The setup delivers the PeopleSoft
Integration Broker objects that are used in this integration. The information I set up in the
PeopleSoft Integration Broker is required to set up the URI specified in the PeopleSoft
Enterprise Infosync installation:
Three nodes: PSFT_CR, PSFT_INFOSYNC and PSFT_PIM.
One transaction message: PIM_CONTACT_SYNC.
Two code sets for data translation: INFOSYNC TO PIM and PIM TO INFOSYNC.
Preparing to Set Up PeopleSoft Enterprise Infosync with the PeopleSoft
Integration Broker:
I have to perform the following tasks before using PeopleSoft Integration Broker:
1. Select PeopleTools Integration Broker Node Definitions to change the
default password used in the node (PSFT_PIM, PSFT_INFOSYNC, and
PSFT_CR). After I have made the password (value in the password field is
password) change on the Node Definitions page, click Save.
2. Modified the integrationGateway.properties file under:
c:\<ps_home>\webserv\peoplesoft\applications\peoplesoft\PSIGW\WEB-INF:
•Set up the integrationGateway.properties file with the default Application
server like this:
ig.isc.serverURL=//<yourappserver:jsl_port>
ig.isc.userid=<User ID>
ig.isc.password=Ez6NDsqOkxI= <Encrypted password>
ig.isc.toolsRel=8.45
Product for Smart Sales Manager
3. If I change the Integration Broker user ID and password, I ensured they were
updated in the integrationGateway.properties file. For the password, enter it in the
encrypted form. PeopleSoft provides a utility that returns an encrypted version for
the password you provide.
4. Select PeopleTools Integration Broker Gateways to access the Gateways
page. Click Search for the local Gateways page and verify that the gateway URL
is updated with the web server name on which the Integration Broker resides.
Click the Load Gateway Connectors button to populate the connector information
and click Save.
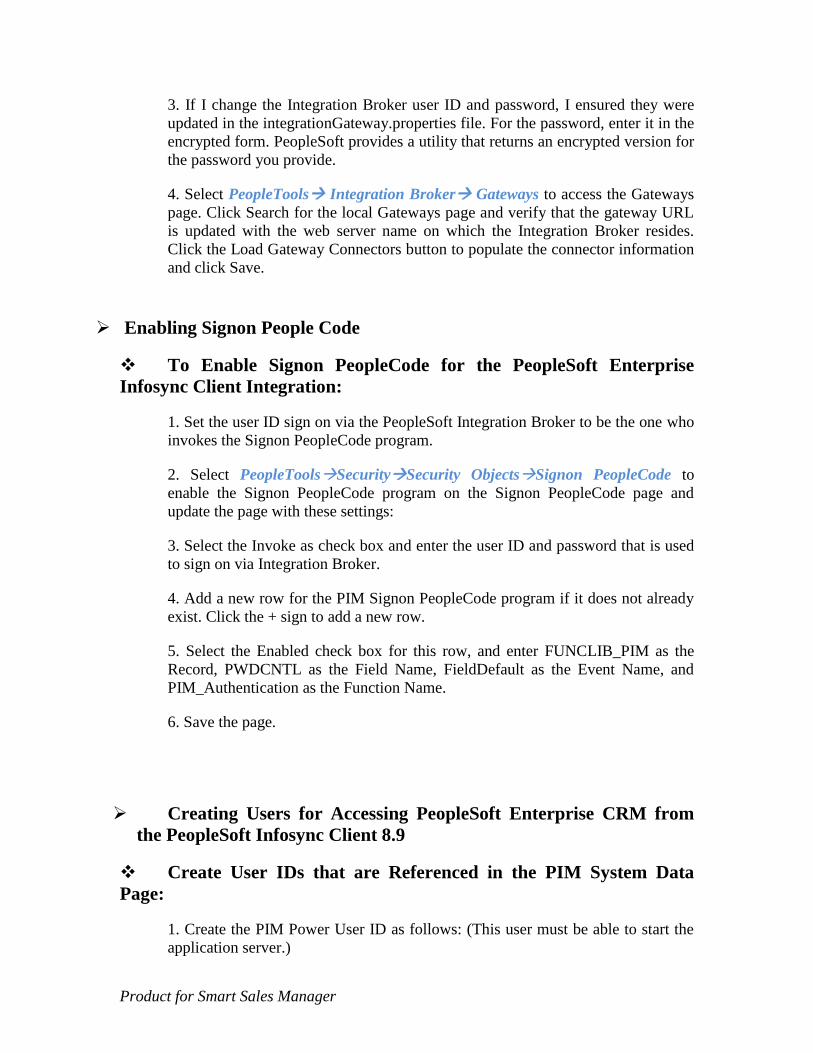
Enabling Signon People Code
To Enable Signon PeopleCode for the PeopleSoft Enterprise
Infosync Client Integration:
1. Set the user ID sign on via the PeopleSoft Integration Broker to be the one who
invokes the Signon PeopleCode program.
2. Select PeopleToolsSecuritySecurity ObjectsSignon PeopleCode to
enable the Signon PeopleCode program on the Signon PeopleCode page and
update the page with these settings:
3. Select the Invoke as check box and enter the user ID and password that is used
to sign on via Integration Broker.
4. Add a new row for the PIM Signon PeopleCode program if it does not already
exist. Click the + sign to add a new row.
5. Select the Enabled check box for this row, and enter FUNCLIB_PIM as the
Record, PWDCNTL as the Field Name, FieldDefault as the Event Name, and
PIM_Authentication as the Function Name.
6. Save the page.
Creating Users for Accessing PeopleSoft Enterprise CRM from
the PeopleSoft Infosync Client 8.9
Create User IDs that are Referenced in the PIM System Data
Page:
1. Create the PIM Power User ID as follows: (This user must be able to start the
application server.)
Product for Smart Sales Manager
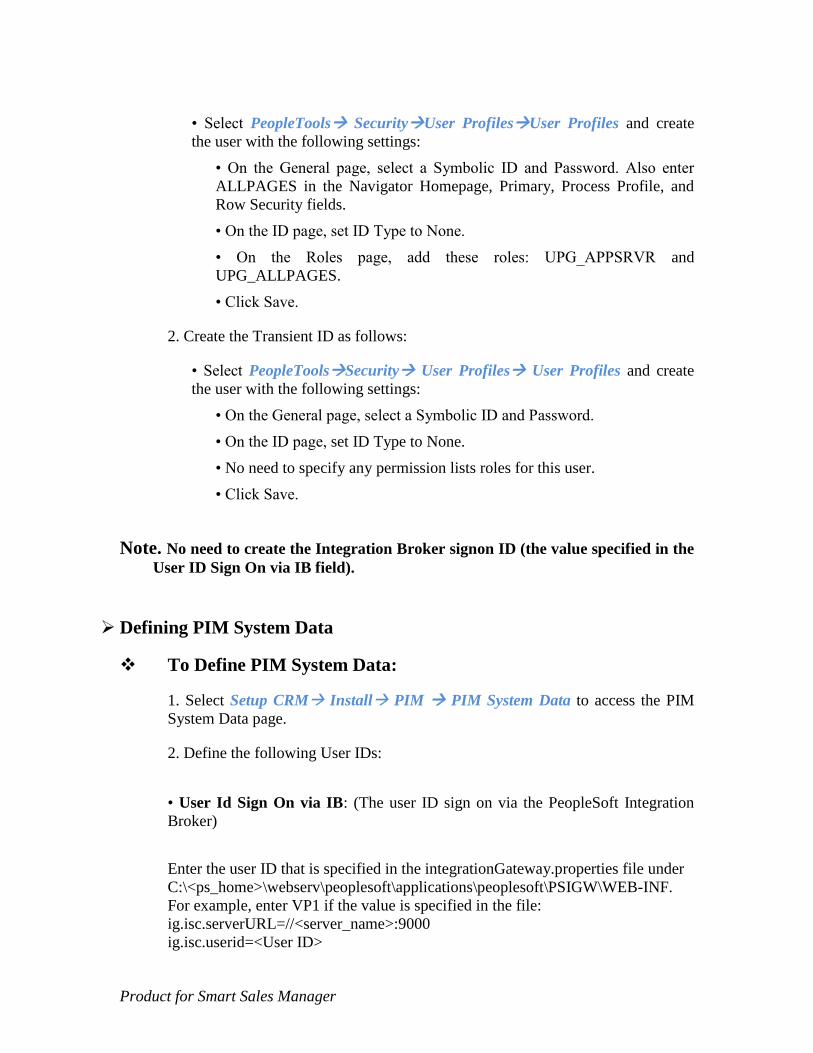
• Select PeopleTools SecurityUser ProfilesUser Profiles and create
the user with the following settings:
• On the General page, select a Symbolic ID and Password. Also enter
ALLPAGES in the Navigator Homepage, Primary, Process Profile, and
Row Security fields.
• On the ID page, set ID Type to None.
• On the Roles page, add these roles: UPG_APPSRVR and
UPG_ALLPAGES.
• Click Save.
2. Create the Transient ID as follows:
• Select PeopleToolsSecurity User Profiles User Profiles and create
the user with the following settings:
• On the General page, select a Symbolic ID and Password.
• On the ID page, set ID Type to None.
• No need to specify any permission lists roles for this user.
• Click Save.
Note. No need to create the Integration Broker signon ID (the value specified in the
User ID Sign On via IB field).
Defining PIM System Data
To Define PIM System Data:
1. Select Setup CRM Install PIM PIM System Data to access the PIM
System Data page.
2. Define the following User IDs:
• User Id Sign On via IB: (The user ID sign on via the PeopleSoft Integration
Broker)
Enter the user ID that is specified in the integrationGateway.properties file under
C:\<ps_home>\webserv\peoplesoft\applications\peoplesoft\PSIGW\WEB-INF.
For example, enter VP1 if the value is specified in the file:
ig.isc.serverURL=//<server_name>:9000
ig.isc.userid=<User ID>

Product for Smart Sales Manager
• PIM Power User Id: Enter a user ID that has the privilege to start the
application server. This user was created in the previous section.
• PIM Transient User Id: Enter a user ID that serves as a transient user. This
user was created in the previous section.
• PIM Transient User Password: Enter the password of the transient user.
Note:
None of these user IDs should be subject to synchronization. In other words, I
did not specify any sales or field service users who use PeopleSoft Infosync
Server for data synchronization, on the PIM System Data page.
The PIM Power User ID and PIM Transient User ID cannot be identical.
Similarly, the PIM Power User ID and the Integration Broker User ID
(specified in User Id Sign on via IB) must be different.
Defining PIM Preferences
A PIM Preference ID must be assigned to a user before they can synchronize their data.
To Set a User’s PIM Preference ID in PeopleSoft Enterprise CRM
1. Log in to the CRM 8.9 database using PIA.
2. Select Set Up CRM SecurityUser Preferences.
3. Search for the User ID and select the PIM Preference ID for the user.
4. Click Save.
5. Select Set Up CRM Install PIM PIM Preferences to access the PIM
Preferences page.
6. Search for the PIM Preference ID that the user is assigned.
7. On the Setup page, select the PIM Application Type for your mail application
(Exchange Server).
• If Exchange Server is selected, enter the Mail Domain Name (e.g. ABC)
8. Click Save.
Product for Smart Sales Manager
Prepare for the PeopleSoft Enterprise Infosync Client Installation
I verified that the following tasks have been completed. They are prerequisites for setting
up the install workstation.
• The PeopleSoft Enterprise Infosync Client is supported on the Windows NT or 2000
platform.
• I had administrative access to install software on the workstation. The software
install would write files to directories and update registry settings.
Apart from that-
• Verified that the PeopleSoft Integration Broker gateway is running on our
PeopleSoft Enterprise CRM 8.9 database.
• Verified that during the setup of the PeopleSoft Integration Broker, the Gateway
URL points to the PeopleSoftListening Connector. (I.e. http
:/<webserver>/PSIGW/PeopleSoftListeningConnector).
• Verified that the IntegrationGateway.properties file had been updated.
Install the PeopleSoft Enterprise Infosync Client
This software need not be installed on a workstation that has PeopleTools
installed. However it will not hurt anything if it is installed on a workstation with
PeopleTools.
The CD installs a setup folder that contains an InfosyncClient directory. The
InfosyncClient directory will contain 2 files. I sent this file out to your end-users and for
installation on their workstations. However, each end-user must configure the software.
Product for Smart Sales Manager
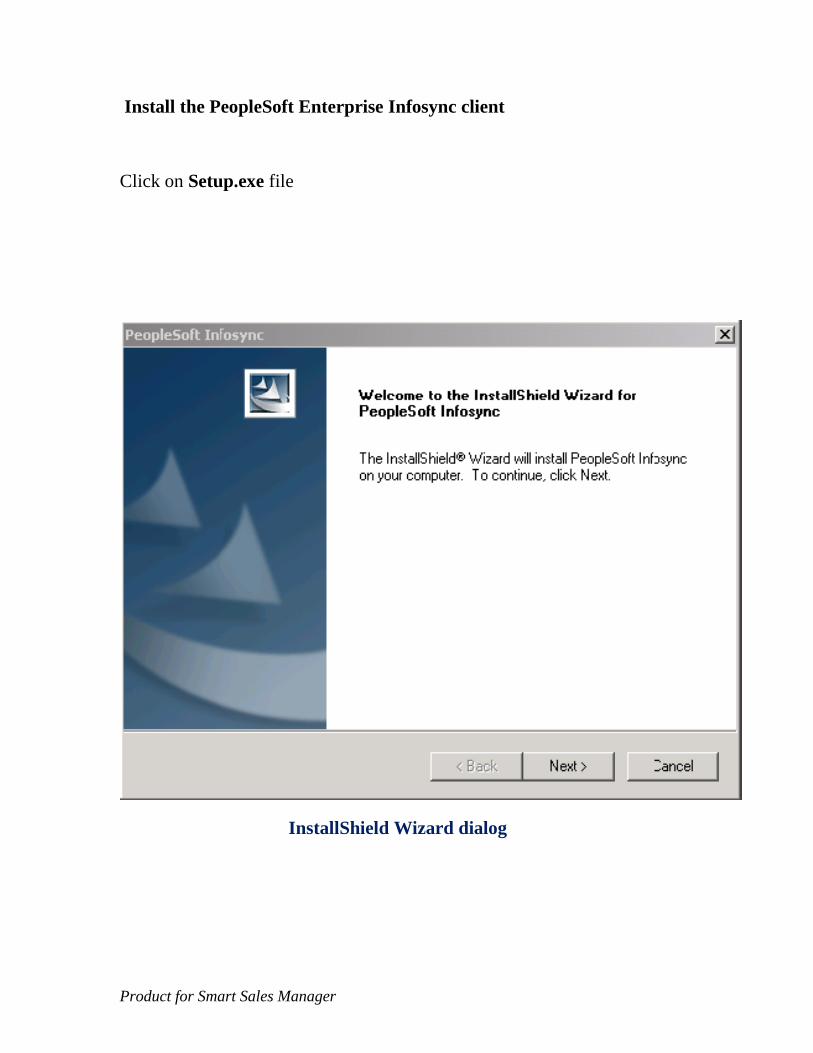
Install the PeopleSoft Enterprise Infosync client
Click on Setup.exe file
InstallShield Wizard dialog
Product for Smart Sales Manager
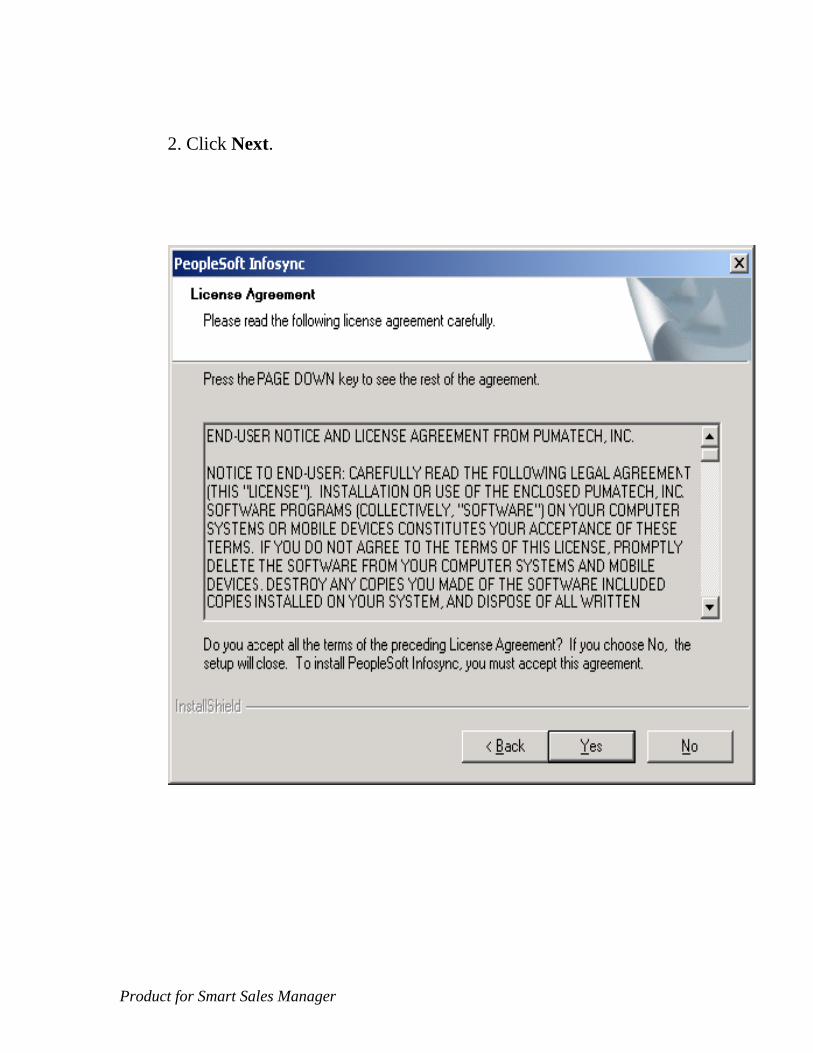
2. Click Next.
Product for Smart Sales Manager
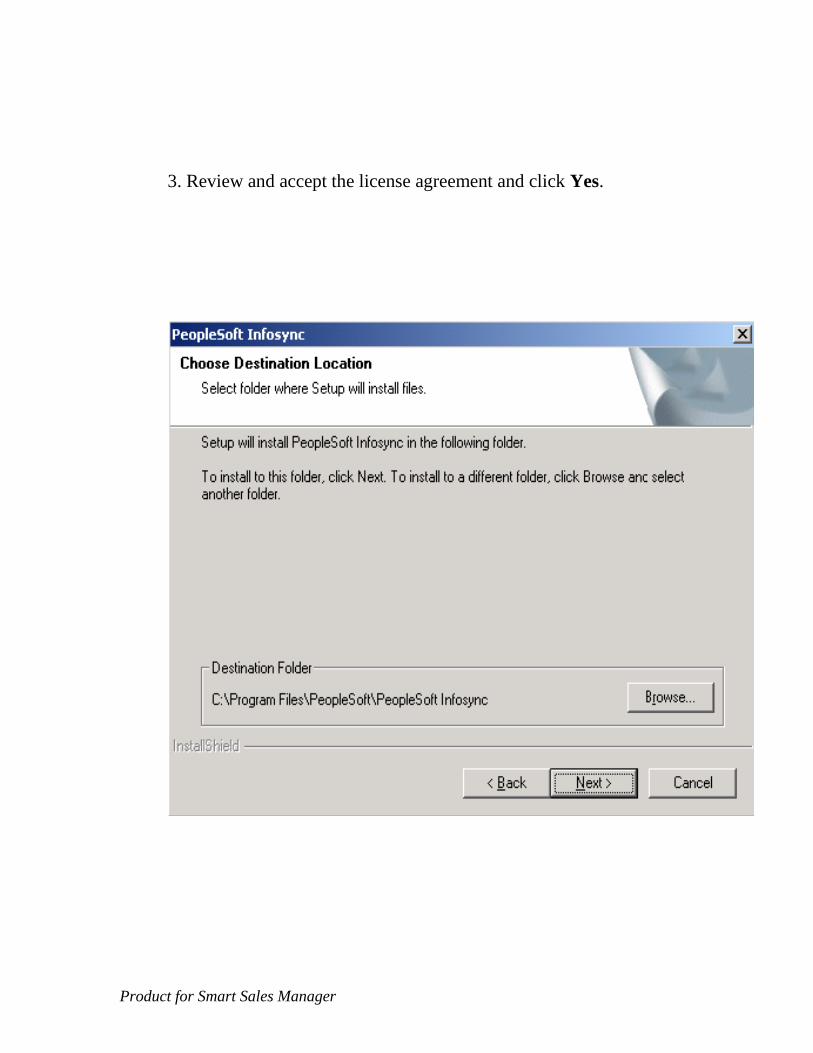
3. Review and accept the license agreement and click Yes.

Product for Smart Sales Manager
4. Choose the Destination Location and click Next.
Select Program Folder dialog
Product for Smart Sales Manager
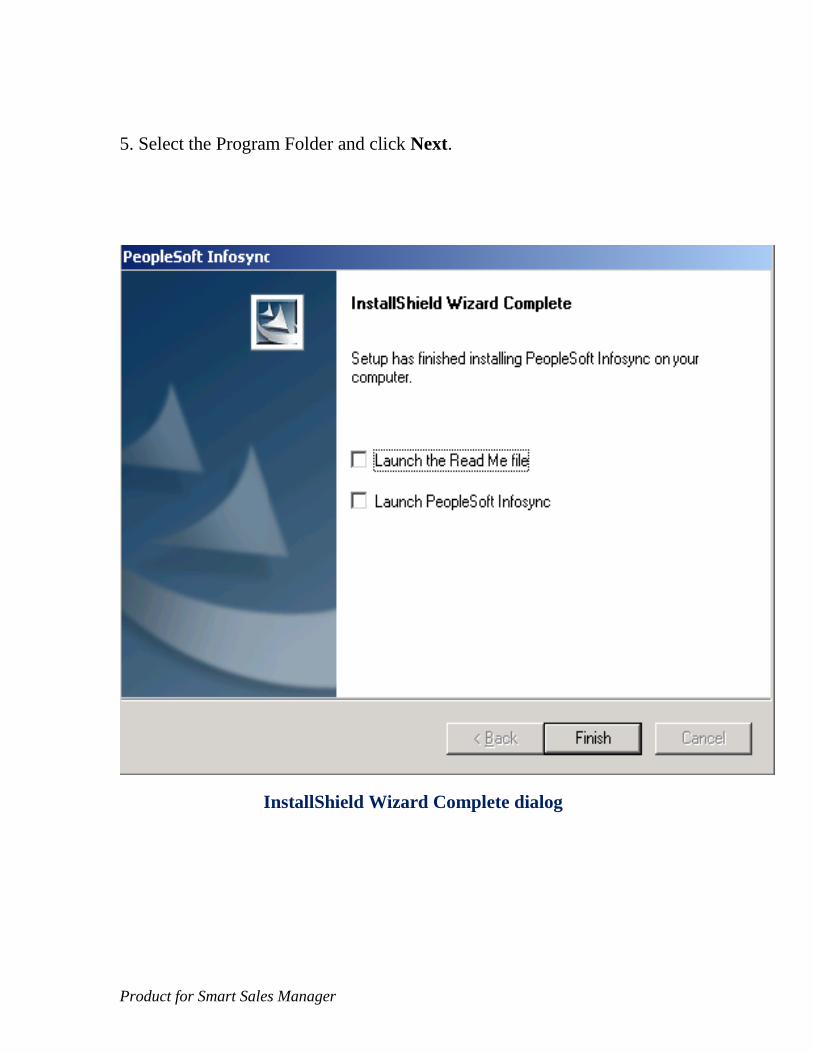
5. Select the Program Folder and click Next.
InstallShield Wizard Complete dialog

Product for Smart Sales Manager
6. After the PeopleSoft Infosync Client 8.9 completes the install, click Finish.
7. Use any text editor to modify the configuration file named DCSSettings.cfg
under c:\program files\PeopleSoft\PeopleSoft Infosync and change the Server
URL, Port and URI to match the system setup for the Integration Broker and
default node.
For example,
Run the PeopleSoft Enterprise Infosync Client
The first task in configuring the PeopleSoft Enterprise Infosync solution is to
select which PIM applications our end-users are running.
To Set Up the PeopleSoft Enterprise Infosync Client:
1. From Task pane Select Start, Programs, PeopleSoft Inc, PeopleSoft
Infosync, PeopleSoft Infosync to start the PeopleSoft Enterprise Infosync Client.
2. PeopleSoft Enterprise Infosync Client window will have two button-Setup and
Sync.
Click the Setup Button to specify synchronization settings.
Server URL=172.16.186.86 Port=1212
URI=/PSIGW/HttpListeningConnector?From=PSFT_PIM&To=PSFT_CR&Mess
ageName=PIM_CONTACT_SYNC&MessageType=sync&Password=password
Product for Smart Sales Manager
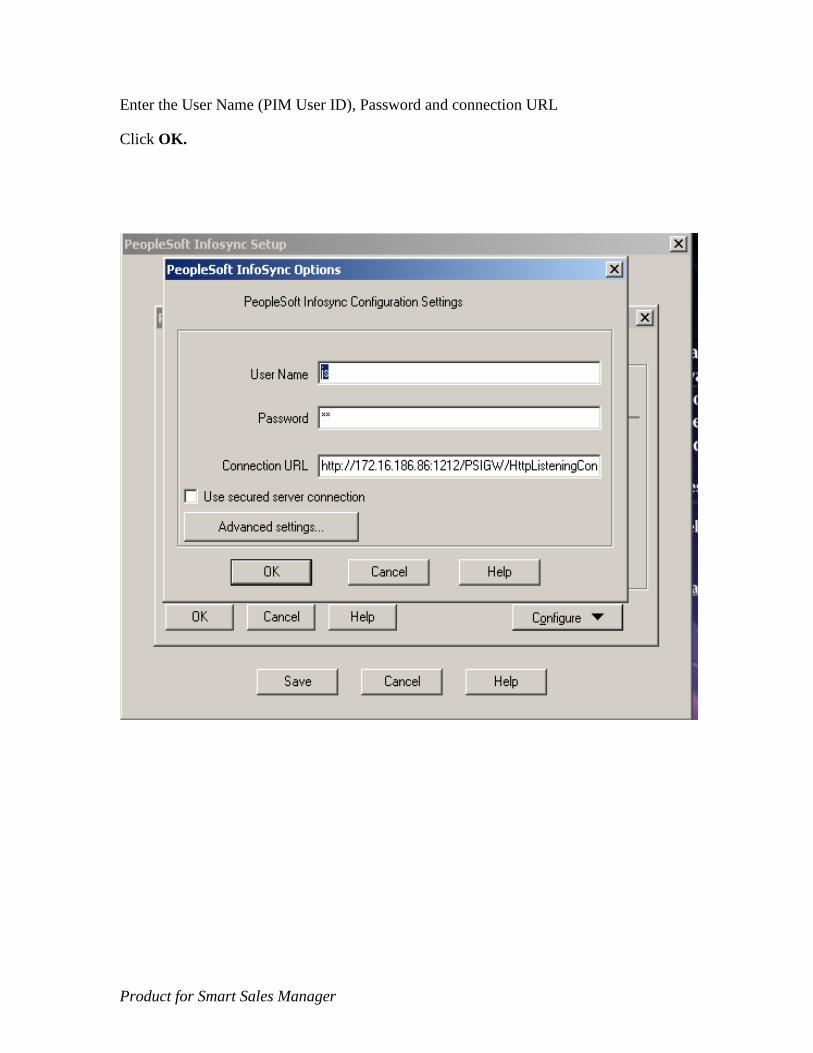
Enter the User Name (PIM User ID), Password and connection URL
Click OK.
Product for Smart Sales Manager
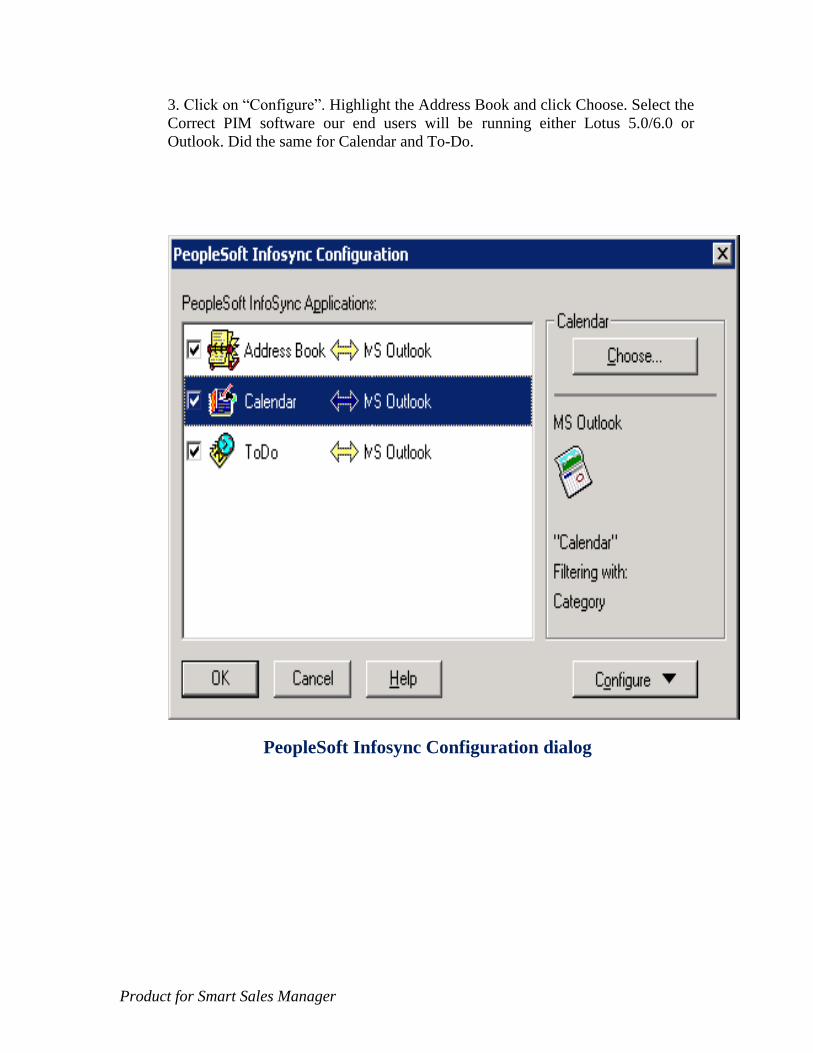
3. Click on “Configure”. Highlight the Address Book and click Choose. Select the
Correct PIM software our end users will be running either Lotus 5.0/6.0 or
Outlook. Did the same for Calendar and To-Do.
PeopleSoft Infosync Configuration dialog

Product for Smart Sales Manager
4. Highlight Address Book and select Configure, Advanced Settings.
• Select the Confirmation tabs then go to Options, Two check boxes are there.
Checked both of them as they are recommended.
• Select the Conflict Resolution tab.

Product for Smart Sales Manager
Out of these options third one is most appropriate. If application finds any
confliction during the synchronization process, it will prompt one window for
notification. Thereafter based on the user discretion it will process the items.
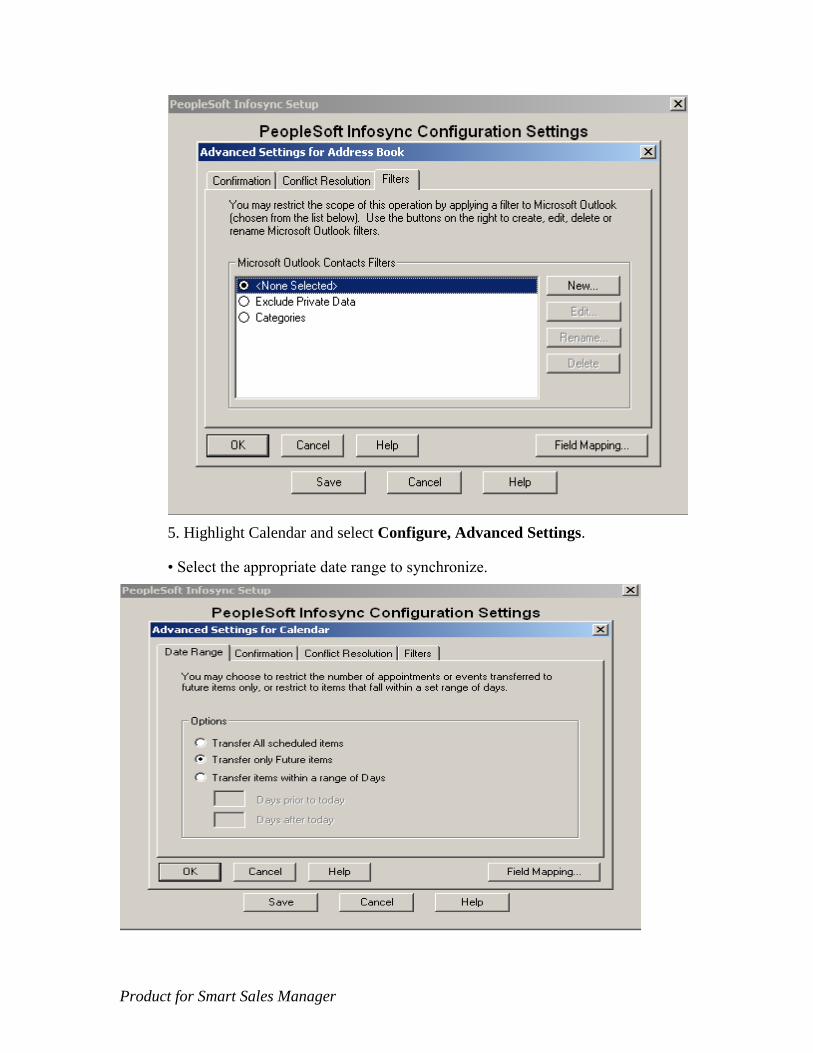
• Select the filters tab. The three filters that are delivered are Exclude Private.
Include Category and Category/Private. Selected the appropriate filter (we can
create our own filter too).
Product for Smart Sales Manager
5. Highlight Calendar and select Configure, Advanced Settings.
• Select the appropriate date range to synchronize.
Product for Smart Sales Manager
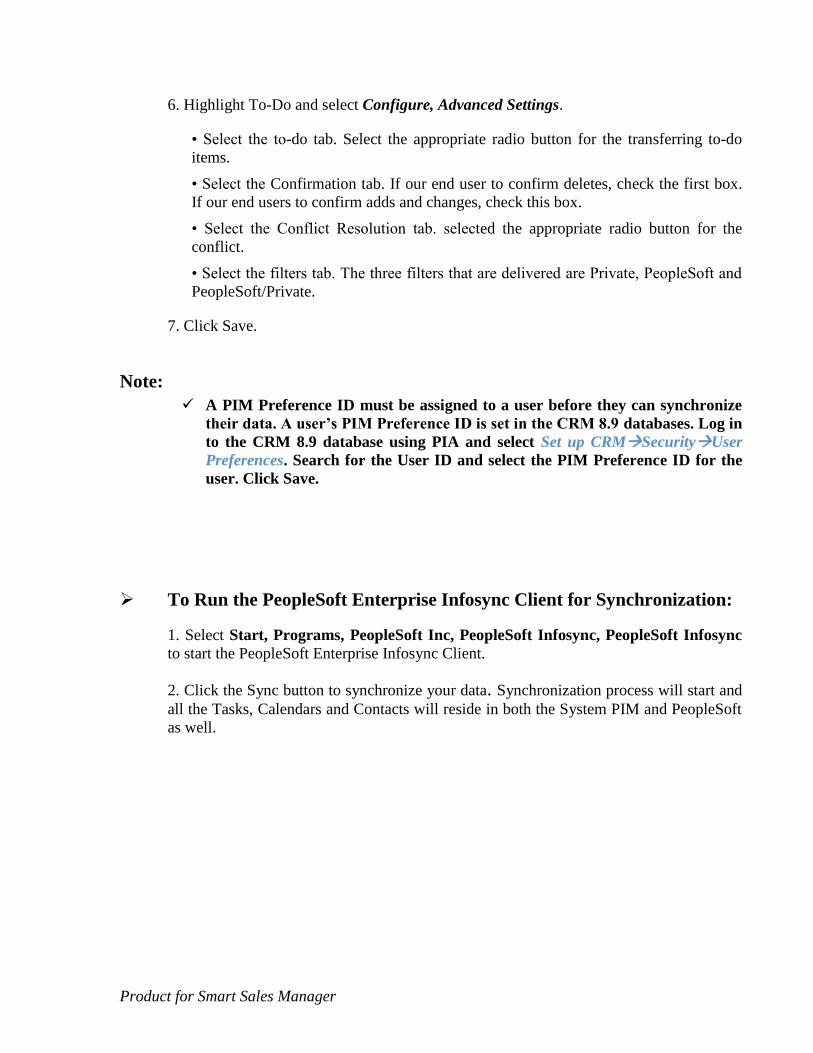
6. Highlight To-Do and select Configure, Advanced Settings.
• Select the to-do tab. Select the appropriate radio button for the transferring to-do
items.
• Select the Confirmation tab. If our end user to confirm deletes, check the first box.
If our end users to confirm adds and changes, check this box.
• Select the Conflict Resolution tab. selected the appropriate radio button for the
conflict.
• Select the filters tab. The three filters that are delivered are Private, PeopleSoft and
PeopleSoft/Private.
7. Click Save.
Note:
A PIM Preference ID must be assigned to a user before they can synchronize
their data. A user’s PIM Preference ID is set in the CRM 8.9 databases. Log in
to the CRM 8.9 database using PIA and select Set up CRMSecurityUser
Preferences. Search for the User ID and select the PIM Preference ID for the
user. Click Save.
To Run the PeopleSoft Enterprise Infosync Client for Synchronization:
1. Select Start, Programs, PeopleSoft Inc, PeopleSoft Infosync, PeopleSoft Infosync
to start the PeopleSoft Enterprise Infosync Client.
2. Click the Sync button to synchronize your data. Synchronization process will start and
all the Tasks, Calendars and Contacts will reside in both the System PIM and PeopleSoft
as well.

Product for Smart Sales Manager
Some Common problem and issues in the Infosync Client 8.9:
Solution:
1. Changing Regional setting of the user—
My PersonalizationRegional SettingPersonalize option Local Time Zone
to <your local time zone> and Use Local Time Zone to “Yes”
2. Applied patch PRJ608715.
3. Applied patch PRJ607839
Solution:
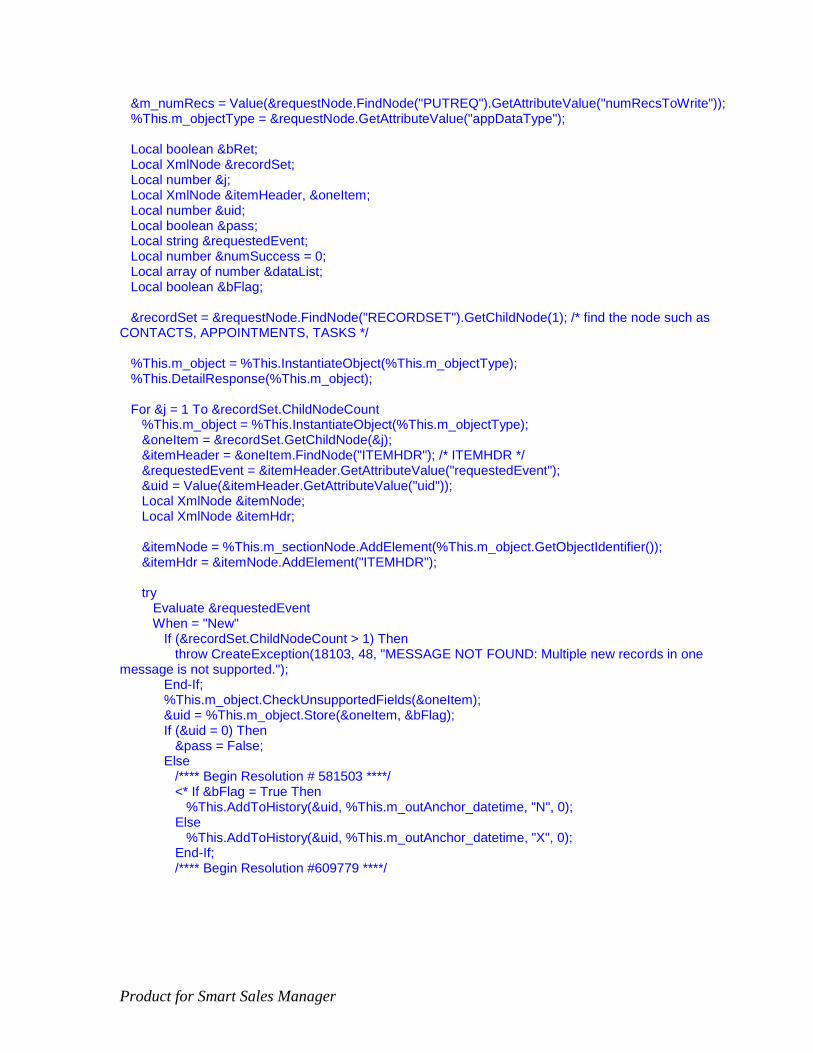
In Application Package PIM_XMLDOC.XMLMessage.PutMessage add two line of code.
Code is added below in green font color.
PIM_XMLDOC.XMLMessage.PutMessage method Process /+ Returns XmlDoc +/ /+ Extends/implements PIM_XMLDOC:XMLBase.Process +/ Local XmlNode &requestNode; If ( Not %This.Authenticate()) Then Return (%This.RootErrorMessage(%This._RESYNC_BLOCK, %This._BAD_SESSION, "")); End-If; &requestNode = %This.GetInRootNode().FindNode("COMMAND");
Problem1: Time Difference in the Calendar and Task item while synching calendar from
outlook to PIA
Problem 2: Any of the Objects (Task, Calendar, and Contact) is not deleting first time.
Product for Smart Sales Manager
&m_numRecs = Value(&requestNode.FindNode("PUTREQ").GetAttributeValue("numRecsToWrite")); %This.m_objectType = &requestNode.GetAttributeValue("appDataType"); Local boolean &bRet; Local XmlNode &recordSet; Local number &j; Local XmlNode &itemHeader, &oneItem; Local number &uid; Local boolean &pass; Local string &requestedEvent; Local number &numSuccess = 0; Local array of number &dataList; Local boolean &bFlag; &recordSet = &requestNode.FindNode("RECORDSET").GetChildNode(1); /* find the node such as CONTACTS, APPOINTMENTS, TASKS */ %This.m_object = %This.InstantiateObject(%This.m_objectType); %This.DetailResponse(%This.m_object); For &j = 1 To &recordSet.ChildNodeCount %This.m_object = %This.InstantiateObject(%This.m_objectType); &oneItem = &recordSet.GetChildNode(&j); &itemHeader = &oneItem.FindNode("ITEMHDR"); /* ITEMHDR */ &requestedEvent = &itemHeader.GetAttributeValue("requestedEvent"); &uid = Value(&itemHeader.GetAttributeValue("uid")); Local XmlNode &itemNode; Local XmlNode &itemHdr; &itemNode = %This.m_sectionNode.AddElement(%This.m_object.GetObjectIdentifier()); &itemHdr = &itemNode.AddElement("ITEMHDR"); try Evaluate &requestedEvent When = "New" If (&recordSet.ChildNodeCount > 1) Then throw CreateException(18103, 48, "MESSAGE NOT FOUND: Multiple new records in one message is not supported."); End-If; %This.m_object.CheckUnsupportedFields(&oneItem); &uid = %This.m_object.Store(&oneItem, &bFlag); If (&uid = 0) Then &pass = False; Else /**** Begin Resolution # 581503 ****/ <* If &bFlag = True Then %This.AddToHistory(&uid, %This.m_outAnchor_datetime, "N", 0); Else %This.AddToHistory(&uid, %This.m_outAnchor_datetime, "X", 0); End-If; /**** Begin Resolution #609779 ****/
Product for Smart Sales Manager
*>
/**** End Resolution #609779 ****/ %This.AddToHistory(&uid, %This.m_outAnchor_datetime, "N", 0, "M"); /**** End Resolution # 581503 ****/ End-If; Break; When = "Modify" If (&oneItem.AttributesCount > 0) Then &pass = %This.m_object.Modify(&uid, &oneItem); If (&pass = True) Then %This.m_object.ProcessSpecificInfo(&uid, &oneItem); End-If; Else /* protect against no changes */ &pass = True; End-If; Break; When = "HardDelete" throw CreateException(18103, 49, "MESSAGE NOT FOUND: %1 of PUT Request is not supported.", "HardDelete"); rem Return (%This.RootErrorMessage(%This._RESYNC_ALL, %This._NOT_SUPPORT, "")); /* don't support hard delete */ Break; When = "Delete" &pass = %This.m_object.Delete(&uid); Break; When-Other throw CreateException(18103, 50, "MESSAGE NOT FOUND: %1 of PUT Request is not a known event.", &requestedEvent); rem Return (%This.RootErrorMessage(%This._RESYNC_ALL, %This._UNKNOWN_PUT, "")); Break; End-Evaluate; If (&pass) Then /* 649453 Begin 12/19/05 */ %This.m_object.SendBackSpecificInfo(&itemNode); /* 649453 End 12/19/05 */ &itemHdr.AddAttribute("uid", String(&uid)); &itemHdr.AddAttribute("lastEvent", &requestedEvent); &itemHdr.AddAttribute("putRequestIndex", String(&j - 1)); &itemHdr.AddAttribute("syncanchor", %This.m_outAnchor); &numSuccess = &numSuccess + 1; If (%This.m_object.Message <> "") Then /* add warning message */ Local string &totalMessage = %This.m_object.Message | %This.m_object.ConstructKeyMessage(&uid, &oneItem);
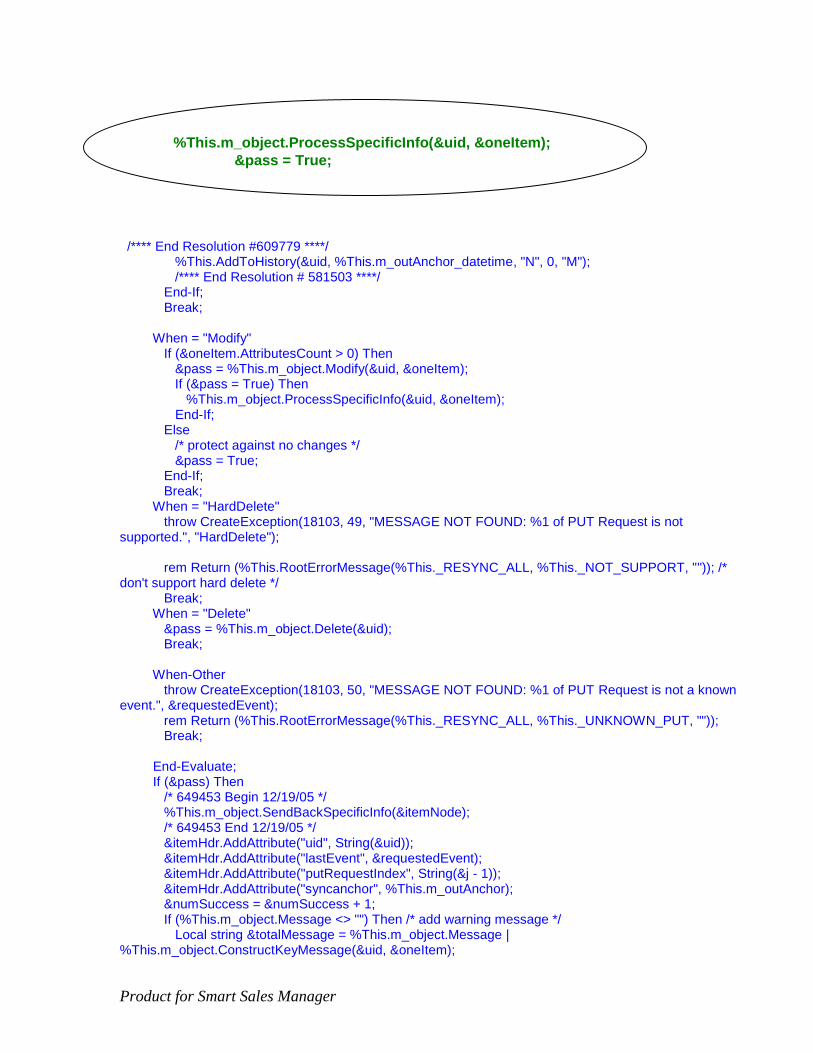
%This.m_object.ProcessSpecificInfo(&uid, &oneItem);
&pass = True;
Product for Smart Sales Manager
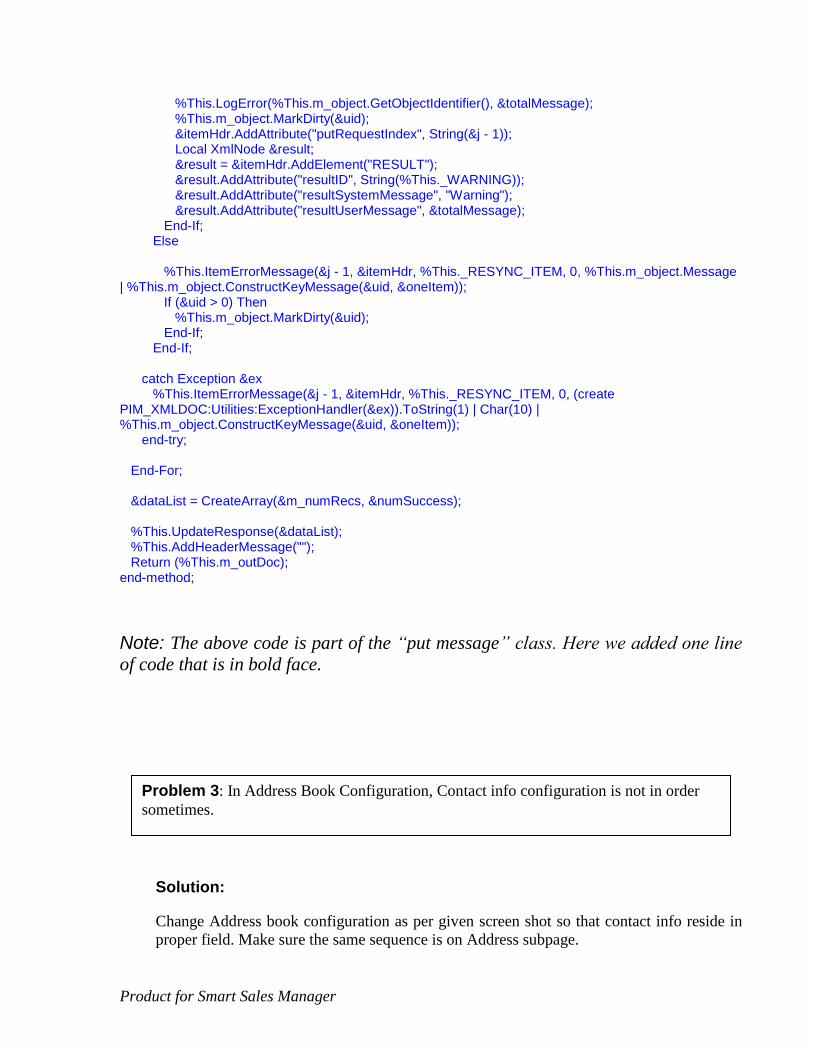
%This.LogError(%This.m_object.GetObjectIdentifier(), &totalMessage); %This.m_object.MarkDirty(&uid); &itemHdr.AddAttribute("putRequestIndex", String(&j - 1)); Local XmlNode &result; &result = &itemHdr.AddElement("RESULT"); &result.AddAttribute("resultID", String(%This._WARNING)); &result.AddAttribute("resultSystemMessage", "Warning"); &result.AddAttribute("resultUserMessage", &totalMessage); End-If; Else %This.ItemErrorMessage(&j - 1, &itemHdr, %This._RESYNC_ITEM, 0, %This.m_object.Message | %This.m_object.ConstructKeyMessage(&uid, &oneItem)); If (&uid > 0) Then %This.m_object.MarkDirty(&uid); End-If; End-If; catch Exception &ex %This.ItemErrorMessage(&j - 1, &itemHdr, %This._RESYNC_ITEM, 0, (create PIM_XMLDOC:Utilities:ExceptionHandler(&ex)).ToString(1) | Char(10) | %This.m_object.ConstructKeyMessage(&uid, &oneItem)); end-try; End-For; &dataList = CreateArray(&m_numRecs, &numSuccess); %This.UpdateResponse(&dataList); %This.AddHeaderMessage(""); Return (%This.m_outDoc); end-method;
Note: The above code is part of the “put message” class. Here we added one line
of code that is in bold face.
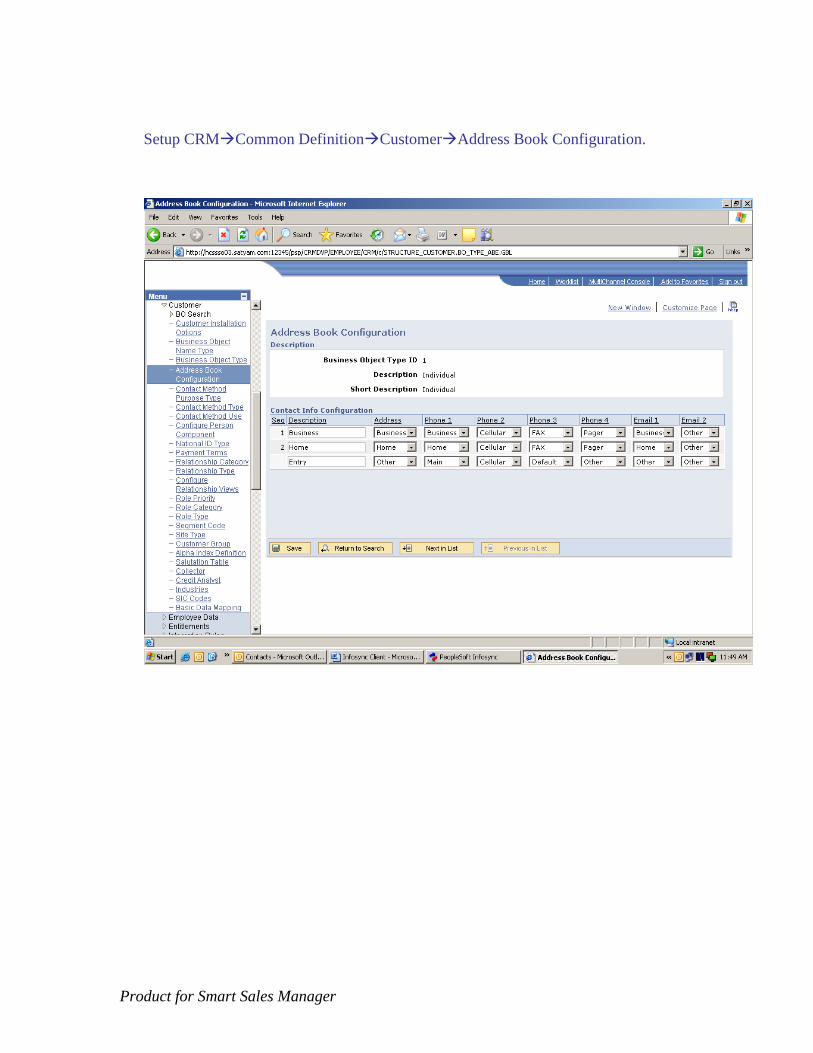
Solution:
Change Address book configuration as per given screen shot so that contact info reside in
proper field. Make sure the same sequence is on Address subpage.
Problem 3: In Address Book Configuration, Contact info configuration is not in order
sometimes.
Product for Smart Sales Manager
Setup CRMCommon DefinitionCustomerAddress Book Configuration.
Product for Smart Sales Manager
Summary
What does Infosync Client do?
How to Setup Integration broker?
How to configure PIM?
How to install Infosync Client?
How to Configure Infosync Application?
How to rectify some basic errors?
Reference
Introduction and functional knowledge of Infosync Application is referenced from People
Book 8.9. All the screen shots and configuration part belong to my own technical repository and
not subjected to any technical document or user guide.


![8.9 Supervision Users Guide[1]](https://static.fdocuments.in/doc/165x107/545d7fafb0af9fa42c8b5164/89-supervision-users-guide1.jpg)


