Restaurant Management System - EasyPOS user’s guide 1 Restaurant Management System Developed by:...
41
RMS user’s guide 1 Restaurant Management System Developed by: Card Transaction Services Inc. 250 Cochrane Drive, Unit 5, Markham, Ont. Canada Tel: (905) -513-7088 Website: http://www.cardtransac.com
Transcript of Restaurant Management System - EasyPOS user’s guide 1 Restaurant Management System Developed by:...

RMS user’s guide
1
Restaurant Management System
Developed by: Card Transaction Services Inc. 250 Cochrane Drive, Unit 5, Markham, Ont. Canada
Tel: (905) -513-7088 Website: http://www.cardtransac.com

RMS user’s guide
2
1. Install the software
1) Where to get the software We provide a free demo version of RMS. Go to http://www.easypos.ca/rms/rmssetup.exe download it. Or contact us to ask for an installation CD. Log on to http://www.easypos.ca to get more information. 2) Installation We provide two methods to install RMS, a) installation through a CD; b) installation through a downloaded program RMSsetup.EXE. Either method a) or b), it will take two steps to complete the installation. First, install the demo version. Second, run the RMS, and click [Activate] button in [Backoffice] to activate it to become a full version. • If you install RMS from the installation CD, please follow the installation guide README.TXT in the CD. • If you download the software from our website, you can just simply double click the RMSsetup.EXE you downloaded, and then follow the instruction to install it. An installation window appears as below:

RMS user’s guide
3
3) How to get the activation code Contact us to buy an Activation Code or buy it online at: http://www.easypos.ca/rms.htm or click the [Register] button in the demo version of RMS as below:
[Register] button [Activate] button
4) Activate the software After you have bought an Activation Code, you will receive an email that includes a file like activexxxx.zip (xxxx should be 4 digits) or an activation key. To activate the software RMS, run the RMS demo version and simply click [Activate] button, and then activate over Internet or provide where the activexxxx.zip stored path. Click [ok], everything will have been done. When you restart RMS, a new full version will appear in front of you. 5) Set up a remote environment The RMS is designed for not only running in a single computer, but also with multi store and multi cashier networking via Internet/Intranet. If you want RMS

RMS user’s guide
4
to run on Internet, you have to set up a remote environment. That includes the conditions, a) A server connecting to Internet with a static IP address or a domain name
which can be accessed over Internet, or have a hosting of SQL server. b) Install a Database in the server, such as MySQL, MS SQL Server, Oracle, or
etc. and its ODBC interface in your client computer. For the detail of Database server installation, please consult for the Database administrator.
c) Have a database account with the privilege to access a created database and set up an ODBC DSN in your client computer.
(Ask the Database Administrator to prepare for all these things)

RMS user’s guide
5
2. System Functions Overview
System Menu
Dine In Take Out Delivery AllYouCanEat Table Status Order Status Delivery Status Server Status Settled No Sale Void Bill Refund Password Guest Info Cashier In Cashier Out Time Card Report Back Office Menu Setup Table Setup Printer Setup Modifier Setup Return to POS Report Items Sales Report Cashier Sales Report Location Sales Report Period Sales Report Sales/Purchase Report Category Sales Report Cashier Closing Report Cashier Current Report Inventory Inventory Items Check-in Items Check-in Revise

RMS user’s guide
6
Show Inventory Status Print Inventory Status Items Coding Items Pricing Modify Items Modify Category Customers New Customers Display Customers Search Customers Suppliers New Suppliers Display Suppliers Search Suppliers Accounting Account Receivable Account Payable Cust. Pymy Pending Lists Invo. Pymt Pending Lists Cancel Invoice Tools New/Edit Connection Switch System System Synchronizing User Management Backup Database Restore Database Export to Excel Menu Items Item Codes Customers Suppliers Invoices Sales Check for Update Configuration Global Parameters Local Parameters Return Exit

RMS user’s guide
7
Place Order Select Item Guest Name Number of Guest Change Table Half Modifier Split Merge Void Items Void Order More Order Re-send Item Quantity Discount Print Bill SEND PAY Revise Code Return

RMS user’s guide
8
3. Operation guide
• Getting start
This is the main screen of the system. Every time touch the button on the main screen, you will be asked for entering a access code unless you save the access code last time,

RMS user’s guide
9
1) <Dine In>, <AllYouCanEat> A table layout will appear as below,
Table layout Zone name Select a table, system then asks the guest number, enter the number, the place-order screen appears. 2) <Take Out> The place-order screen appears. 3) <Delivery> You will be asked for entering the customer information. Whatever enter the customer’s name or phone#, or address. If the customer exists in database, the place-order screen appears. Otherwise ask you enter the customer information as below,

RMS user’s guide
10
After completing the customer’s information, the place-order screen appears,

RMS user’s guide
11
Place-order Screen:
Menu items Menu category Items order lists . Description of the buttons: <Guest Name> Enter or change a guest name <Number of Guest> Enter or change the number of guest <Change Table> Change table <Revise> Revise the quantity, description, price, tax, and discount

RMS user’s guide
12
<Code> Find the menu item by code
<Return> Return to Main screen <Half> Change the item to half size <Modifier> Add materials to the menu item <Split/Merge> Split or merge order(s) <Void Item> Delete an item
<Void Order> Delete the order <More order> Display another order. Right click or hold, the order lists
will pop up for choosing,

RMS user’s guide
13
<Re-send Item> Send the item to print again <Quantity(-)> Decrease the quantity <Quantity(1)> Reset the quantity to 1 <Quantity(-)> Increase the quantity <Discount(-5%)> Subtract 5% of discount <Discount(0%)> Reset discount to 0 <Discount(-5%)> Add 5% of discount <Print Bill> Print the bill <Send> Send all items to printer

RMS user’s guide
14
<Pay> Make the payment If the cashier hasn’t entered the opening amount, a message box pops up:
* Usually click [Yes] at the beginning of a shift for the cashier Click [Yes] to enter the open amount. And then a payment method window
pops up,
Choose a payment method, and then pay,

RMS user’s guide
15
Click [Multipay], you can choose paying by multiple methods.
RMS user’s guide
16
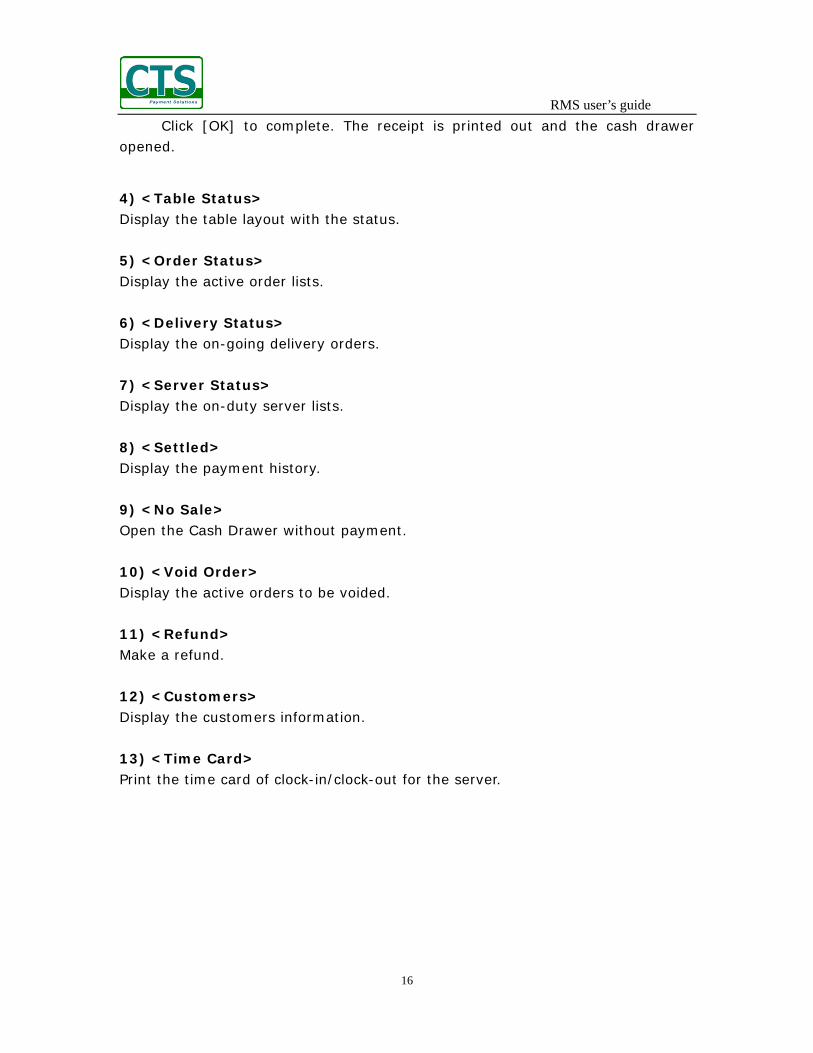
Click [OK] to complete. The receipt is printed out and the cash drawer opened.
4) <Table Status> Display the table layout with the status. 5) <Order Status> Display the active order lists. 6) <Delivery Status> Display the on-going delivery orders. 7) <Server Status> Display the on-duty server lists. 8) <Settled> Display the payment history. 9) <No Sale> Open the Cash Drawer without payment. 10) <Void Order> Display the active orders to be voided. 11) <Refund> Make a refund. 12) <Customers> Display the customers information. 13) <Time Card> Print the time card of clock-in/clock-out for the server.

RMS user’s guide
17
14) <Cashier In> At the beginning of day, the cashier must open the drawer and enter the amount of opening balance.

RMS user’s guide
18
15) <Cashier Out> At the end of day, the cashier must enter the amount of closing balance.
16) <Report> Print the summary report in a specific period. 17) <Password> Change the access code and password.

RMS user’s guide
19
18) <Back Office> Back office management.
Restaurant information Management functions System information Check update

RMS user’s guide
20
<Menu Setup>
Menu Categories Menu Items (Hold or right click to pop up menu) (Hold or right click to pop up menu) Click the category button to select. Hold or right click the category button, a pop-up menu appears, [EDIT] button to edit the category information.
Double click to select a background picture. Stretch the picture. Remove the picture. Set the font color. Set the background color

RMS user’s guide
21
Click the item button to edit the item information,
Printers to be sent to Double click to set the picture, color, and etc. of the button.

RMS user’s guide
22
<Table Setup>
Click to edit a table Hold or right click to pop up menu
Double click to edit the picture, color, and etc.

RMS user’s guide
23
<Printer Setup>
Double click to select a printer 1 – First language, 0 – one ticket with one item 2 – Second language 1 – on ticket with more items

RMS user’s guide
24
<Modifier Setup>
Click to edit.

RMS user’s guide
25
<Global Params>
Comments page can input the comments that will be printed on the invoice and receipt over company-wide.
RMS user’s guide
26
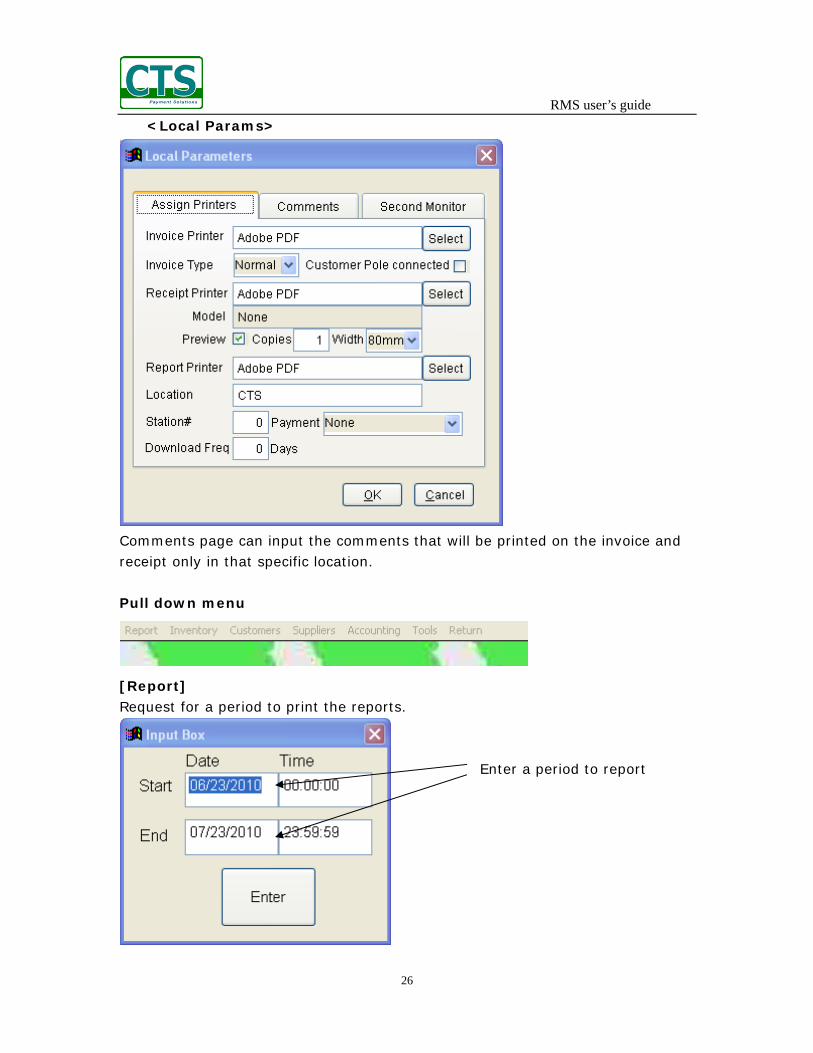
<Local Params>
Comments page can input the comments that will be printed on the invoice and receipt only in that specific location. Pull down menu
[Report] Request for a period to print the reports.
Enter a period to report

RMS user’s guide
27
Items Sales Report – report the sales volumes sort by items Cashier Sales Report – report the sales volumes sort by cashier Location Sales Report - report the sales volumes sort by location Period Sales Report – report the sales volumes ort by date Sales/Purchase Report – report the Purchase vs Sales net income and tax Category Sales Report – report the sales volumes sort by category Cashier Closing Report – report the Cashier sales history Cashier Current Report – report the cashier current status [Inventory]
• Inventory Items Check-in
Enter data directly or double click to select a value from
the pop-up window Double click if it is a new item, then the more products’ information can be input.

RMS user’s guide
28
• Items Check-in Revising You may high light a record to display detail, edit, or delete.

RMS user’s guide
29
• Show Inventory Status Choose a location of the inventory from the box as below
And then it will show you the in-stock situation as below

RMS user’s guide
30
• Print Inventory Status Print out the in stock situation in report format
• Items Coding Code for each item which can be entered directly or by barcode scanner
Note: In case of the prefix of Product ID is $ sign, that means this product’s quantity is countless, for example, services, installation fee, unlimited copy of software, and etc. Once you code it, no need to check in the product any more.

RMS user’s guide
31
• Items Pricing You can set a unit price and PST/GST rate for each item. Also you can set them in batch depends on you assign the rules such as setting a relation between unit price and capital.

RMS user’s guide
32
• Modify Items Input the barcode, product ID, and any information of an item, and find out and display the detail.
• Modify Category
Double to modify the picture

RMS user’s guide
33
[Customers] • New Customers

RMS user’s guide
34
• Display Customers You may high light a customer record to display detail, edit, or delete.
• Search Customers
Search a keyword from the customer database and display the details Show more
information about the
customer as below
Show the purchase
record of the
customer

RMS user’s guide
35
. More customer information
Attachment can be any type of file, such as PDF, DOC, JPG and etc. Double click to open it.

RMS user’s guide
36
[Suppliers] • New Suppliers

RMS user’s guide
37
• Display Supplier You may high light a customer record to display detail, edit, or delete.
• Search Suppliers Search a keyword from the supplier database and display the detail

RMS user’s guide
38
[Account] • Accounts Receivable
Double click to pop up a window in which Double click to pop up a window displays all the customers who still have in which display the unpaid invoices unpaid bill. Collection of credit card information Here displays the unpaid invoices relevant if the customer pays by credit card to the customer to be selected.
• Accounts Payable Print out all invoices we have to pay for
• Cust. Pymt. Pending Lists Print out all customers who still have unpaid bill
• Invo. Pymt. Pending Lists Print out all unpaid invoices from customers
• Cancel Invoice Delete an existing invoice

RMS user’s guide
39
[Tools] • New/Edit Connection
The default value is the last switching name. If empty this field, the operation system box will appear to ask the DSN.
After click the Enter button, a box pops up as blow: The database server’s IP/Domain Default value of UserID, Password, and Database is the last remote connection, those are issued by the database administrator.
• Switch System Switch the system between Multi-user version and Stand-alone version. • System Synchronizing Transfer all data between SQL Server database and File database. The box will appear as below.

RMS user’s guide
40
• User Management
Double click to lead a function box pops up as below, Click [+] to expand the subfunctions and click the check box to select the function. The menu code may be generated.

RMS user’s guide
41
• Backup Database Back the data from the computer. If the data is in the remote server, you must synchronize from the server in advance, and then do backup. • Restore Database Restore the data to the computer • Export Data to Excel Export Items, Customers, Suppliers, and Invoices information to an Excel file. • Check for updates Check the updates from the website. It will show you the current version and the latest version. You can download the latest one to update the application. • Configuration Set up the basic parameter including Global Parameters and Local Parameters.
Global Parameters Set up the parameters apply to the whole system. Local Parameters Set up the parameters apply to the current station.
• Return 19) Exit Exit the system