Firefighter Review: Self-Contained Breathing … Review: Self-Contained Breathing Apparatus...
22
Firefighter Review: Self-Contained Breathing Apparatus Instructor Guide Session Reference: 1 Topic: Self-Contained Breathing Apparatus Level of Instruction: 3.0 Time Required: 3 Hours Materials: • Personal Protective Clothing • Personal Alert Safety System (PASS) Device • Self-Contained Breathing Apparatus References: • Essentials of Fire Fighting, Fourth Edition, IFSTA, Chapter 4 • NFPA 1500 • 29 CFR 1910.134 ================================================================= PREPARATION: Motivation: Instructor should stress the need for safety in all aspects of emergency service duties and impress upon the students the roles of attitude, training, and awareness. Proper knowledge and use of self-contained breathing apparatus is necessary to help provide a safe working environment for the emergency service provider. Objective (SPO): The student will be able to describe important aspects of safety and demonstrate practical application as it pertains to emergency service provider operations from memory, without assistance, to an accuracy of 70% and the instructor's satisfaction. The student will be able to identify the basic functions and uses of and properly don and doff self-contained breathing apparatus. Overview: Self-Contained Breathing Apparatus • Operation, maintenance, inspection, and cleaning • Donning and doffing procedures and safety check • Controlled breathing techniques • Emergency procedures • Changing cylinders • Practical exercises Page 1 www.mfri.org
Transcript of Firefighter Review: Self-Contained Breathing … Review: Self-Contained Breathing Apparatus...
Firefighter Review: Self-Contained Breathing ApparatusInstructor Guide
Session Reference: 1
Topic: Self-Contained Breathing Apparatus
Level of Instruction: 3.0
Time Required: 3 Hours
Materials:• Personal Protective Clothing• Personal Alert Safety System (PASS) Device• Self-Contained Breathing Apparatus
References:• Essentials of Fire Fighting, Fourth Edition, IFSTA, Chapter 4• NFPA 1500• 29 CFR 1910.134
=================================================================
PREPARATION:
Motivation:Instructor should stress the need for safety in all aspects of emergency service duties andimpress upon the students the roles of attitude, training, and awareness. Proper knowledgeand use of self-contained breathing apparatus is necessary to help provide a safe workingenvironment for the emergency service provider.
Objective (SPO): The student will be able to describe important aspects of safety and demonstrate practicalapplication as it pertains to emergency service provider operations from memory, withoutassistance, to an accuracy of 70% and the instructor's satisfaction. The student will be ableto identify the basic functions and uses of and properly don and doff self-containedbreathing apparatus.
Overview:
Self-Contained Breathing Apparatus• Operation, maintenance, inspection, and cleaning• Donning and doffing procedures and safety check• Controlled breathing techniques• Emergency procedures• Changing cylinders• Practical exercises
Page 1 www.mfri.org
SELF-CONTAINED BREATHING APPARATUS
SPO The student will be able to describe important aspects of safety and demonstrate practicalapplication as it pertains to emergency service provider operations from memory, withoutassistance, to an accuracy of 70% and the instructor's satisfaction. The student will beable to identify the basic functions and uses of and properly don and doff self-containedbreathing apparatus.
EO 1-1 For each component of the SCBA, identify its function, safety feature, and limitations.
EO 1-2 Demonstrate and document maintenance for SCBA.
EO 1-3 Demonstrate donning and doffing the SCBA while wearing full protective clothing andensure that it is ready for safe use (NFPA 1001 (1997) 3-3.1).
EO 1-4 Demonstrate controlled breathing techniques to utilize during work and emergencyconditions (NFPA 1001 (1997) 3-3.1).
EO 1-5 Demonstrate proper emergency procedures to use in case the SCBA fails (NFPA 1001(1997) 3-3.1).
Use of emergency quick-fill system
EO 1-6 Demonstrate changing the cylinder on an SCBA assembly (NFPA 1001 (1997) 3-3.1).
EO 1-7 Demonstrate the use of SCBA in the following evolutions (NFPA 1001 (1997) 3-3.1):
a. Following a hose line with obstacles and vision obscured.
b. Conducting a simulated search of a structure charged with smoke, locating andinterrupting utility service, and attacking a simulated fire using a standpipesystem.
c. Moving in a forward direction and successfully overcoming obstacles to enterand exit a maze.
Page 2 www.mfri.org
Instructor Guide Notes
I. Open Circuit/Positive Pressure (1-1)
A. Method of Operation
1. Compressed air from cylinder is supplied to wearer
a. Inhalation opens valve in regulator
b. Regulator allows air to flow to facepiece
c. Exhalation closes valve in regulator, stoppingflow and opens exhalation valve in facepiece toatmosphere
2. Air from cylinder is allowed to pass throughregulator. Upon inhalation, pressure is reduced infacepiece. Regulator supplies more air tocompensate for pressure drops. Exhalation valveforced closed by spring tension causing slightpressure buildup inside facepiece
a. Maintains slightly higher than atmospherepressure
b. Prevents leaks from outside into facepiece
B. SCBA Components
1. Cylinder
a. Types
1) 30 minute high pressure system
a) Volume - 45 cu. ft. at 4,500 psi
b) Cylinder is about half the size of a 30minute low pressure cylinder, providingsmall firefighter profile
c) Average unit weight - 23 lbs.
2) 60 minute high pressure system
a) Volume - 88 cu. ft. at 4,500 psi
b) Cylinder is slightly larger than 30 minutelow pressure
c) Average unit weight - 30 lbs.
Page 3 www.mfri.org
Instructor Guide Notes
b. Cylinder valve and gauge
c. Markings - serial number, hydrostatic test date,DOT markings, fill pressure
d. Safety or over-pressure plug - if, during filling,the cylinder is over filled, a small metal disc willrupture and the air will escape to the outside
e. A full cylinder rated at 30 minutes by theNIOSH/MSHA (Federal non-fire serviceagencies) will last about 15 to 20 minutesdepending on
1) Physical condition
2) Psychological stability or make-up
3) Ability to control breathing
4) Training and experience
5) Work activity
6) Other factors
2. Harness - a device to hold and carry the breathingapparatus assembly on the back
a. Backplate - holds the cylinder in place with acylinder strap; equipped with adjustable band for30- and 60-minute cylinders
b. Shoulder strap - straps to carry the assembly onthe back
c. Chest strap - holds the shoulder straps inposition
d. Waist strap - holds the harness on the back andto prevent the assembly from sliding
e. Approval label - NIOSH/MSHA
3. Low pressure warning device
a. Device to warn that your air supply is runninglow
Page 4 www.mfri.orgPage 4 www.mfri.orgPage 4 www.mfri.org
Instructor Guide Notes
b. Activates at approximately 25% of rated workingpressure (3 to 5 minutes) of air left in thecylinder, depending on
1) Physical condition
2) Psychological stability or make-up
3) Ability to control breathing
4) Training and experience
5) Work activity
6) Other factors
c. Location and type of device
4. High pressure hose
a. Carries air, at cylinder pressure, from cylinder tofirst and second stage regulators
b. Connector from high pressure hose
1) Should be finger tight. If the connector stillleaks, snug up with hand. If it still leaks,check "O" ring. Never over tighten. It willdamage "O" ring
2) Keep spare "O" rings with apparatus, replaceas necessary
3) Never use wrench, or full hand power onconnector
5. Regulator assembly - a device which reduces thehigh pressure air from the cylinder to a lowerpressure
a. First stage mounted on side of backpack
b. Gauge - tells how much air is remaining in thecylinder
1) Connected to high pressure hose and fastenedto left shoulder strap
2) Shows pressure reading whenever pressureon system
Page 5 www.mfri.orgPage 5 www.mfri.orgPage 5 www.mfri.org
Instructor Guide Notes
3) Have student compare cylinder and regulatorgauge, go by lowest pressure
4) Should never be more than 100 psidifference. If so, have checked by servicepersonnel
c. Facepiece mount regulators
1) No mainline valve - system is activated bypurging facepiece and then inhaling
2) Does not have by-pass valve - system isdesigned to fail in the open position
3) Purge valve - for purging contaminants fromthe facepiece
4) Donning switch - shuts off air to facepieceprior to doffing
5) Locking device - to assure regulator tofacepiece connection
6) Gasket - sealing regulator to facepiece
6. Facepiece assembly
a. Facepiece - covers/protects the face and providesfor inhalation and exhalation of low pressure air
b. Exhalation valve - allows exhaled air to leave thefacepiece and stops smoke and toxic gases fromentering facepiece on inhalation
1) Can sometimes become stuck, preventingexhaled air leaving by way of the exhalationvalve; causes air to blow out around the faceseal
2) To correct, try blowing out hard while holdingfacepiece tight to face
3) Positive pressure - exhalation valve on thefacepiece is equipped with a pressurebalancing mechanism - air does notcontinuously flow, but does maintain apositive pressure inside the facepiece
Page 6 www.mfri.orgPage 6 www.mfri.orgPage 6 www.mfri.org
Instructor Guide Notes
c. Speaking diaphragm - allows wearer tocommunicate more clearly
d. Nose cup - deflects exhalation away from lens toprevent fogging
e. Spider or facepiece harness - strap which holdsthe facepiece firmly against the face. Be surestraps are fully extended when putting away(check for wear and tear)
II. Maintenance and Inspection (1-2)
A. After Use Maintenance
1. Recharge/replace cylinder if at 90% capacity or less
2. Inspect "O" ring and gasket
3. Inspect facepiece
4. Clean facepiece
a. Submerge in approved cleaner/disinfectant withwarm water
b. Rinse in warm water
c. Air dry - do not connect to regulator when lowpressure hose is wet
5. Inspect and clean harness
6. Check operation of all gauges and valves
B. Cylinder Recharging
1. Secure SCBA cylinder in a fragment proofcharging station when possible
2. Connect SCBA to cascade high pressure line
3. Open SCBA valve
4. Open cascade valve with the least pressure, butmore than the SCBA pressure
a. Watch gauges
Page 7 www.mfri.orgPage 7 www.mfri.orgPage 7 www.mfri.org
Instructor Guide Notes
b. Cascade cylinders will follow a numerical orother predetermined order. Lowest pressurecylinder corresponds with the lowest numberedcylinder
c. Never open more than one cascade cylinder at atime - this will cause cylinders to equalize
5. Close valve of cascade cylinder when pressure isequal to SCBA
6. Open valve of cascade cylinder with next highestpressure (next in predetermined order) andcontinue procedure until SCBA is fully charged
7. Shut valves
8. Bleed high pressure line
9. Disconnect SCBA - remove from charging station
C. Recommended Daily Inspection and Maintenance
1. Cylinder pressure
2. High pressure hose coupled to cylinder - should befinger tight
3. Operation of low pressure alarm
a. Open cylinder valve
b. Alarm should activate when pressure builds upand stops afterwards
c. Check gauge on shoulder strap
d. Alarm - Note pressure at which alarm starts tosound. Should be 1/4 of working pressure andcontinue until pressure reaches approximately 5to 10% of working pressure
4. Straps fully extended
5. Check complete unit
a. Cracks
b. Cuts
Page 8 www.mfri.orgPage 8 www.mfri.orgPage 8 www.mfri.org
Instructor Guide Notes
c. Abrasions
d. Dents
e. Missing parts
6. Cylinder secured to backplate and harness
D. Monthly Inspection and Maintenance - same asdaily/weekly plus
1. Visually inspect all rubber parts for damage
2. Test cylinder and valves for air tightness with soapywater solution
3. Don and operate unit and check
a. Airflow
b. Noises
c. Gauge readings
d. Exhalation valve
e. Anything else the manufacturer recommends
E. Defective Units
1. Remove from service
2. Tag
3. Repair or replace
F. Testing Schedule - Hydrostatic
1. Composite - every 3 years
NOTE: As per DOT regulations, 49 CFR173.34(e), cylinder life on composite cylinders onlyis restricted to a fixed number of hydrostatic testdates. That number should be five
2. Regulator/high pressure hose assembly must betested by an approved service center every 2-1/2years
Page 9 www.mfri.orgPage 9 www.mfri.orgPage 9 www.mfri.org
Instructor Guide Notes
III. Donning and DoffingProcedures/Safety Checks (1-3)
A. Student Preparation
1. Harness and facepiece - all should be the same
a. Cylinder upb. Cylinder valve at feetc. Straighten and extend all strapsd. Facepiece on right of cylinder
2. Check apparatus to see if the cylinder valve is offand system bled
B. Pre-Donning Inspection
1. All straps (harness and facepiece)
a. Take out twists
b. Fully loosened
2. Valves - all connections hand tight
3. Read cylinder gauge (out loud during drills)
4. Open cylinder valve
a. Listen for low pressure
1) Will not activate if regulator has not been bledfrom previous use
2) Remind students not to use SCBA if warningdevice does not activate
b. Read regulator gauge and compare to cylindergauge
C. Donning (two suggested methods)
1. Coat method
a. Stand or kneel at valve end of cylinder
b. With left hand, cross over backplate and graspshoulder strap that will be worn on left shoulder
Page 10 www.mfri.orgPage 10 www.mfri.orgPage 10 www.mfri.org
Instructor Guide Notes
c. Control the regulator (if applicable) with righthand
d. Lift harness assembly and swing so that graspedshoulder strap is resting on left shoulder whileright should strap comes across the back to reston right shoulder
e. Secure harness
2. Over the head
a. Kneel at the end opposite the cylinder valve
b. Grasp backplate/cylinder with both hands
c. Lift harness assembly overhead - let straps hangfree, they will fall into place over the elbows
d. Slide harness onto back in proper position
e. Slide harness according to manufacturer'sprocedure
3. Don facepiece (five piece webbing)
a. Chin first
b. Place webbing over head
c. Secure straps (in order)
1) Neck
2) Temple
3) Top (if needed)
d. Helmet chin straps must be used
4. Safety check
a. Facepiece seal
1) Hold hand over regulator connection onfacepiece
2) Inhale slightly and hold your breathmomentarily (10 seconds)
Page 11 www.mfri.orgPage 11 www.mfri.orgPage 11 www.mfri.org
Instructor Guide Notes
3) Facepiece should slightly collapse and thereshould not be any leakage or air. If leak issuspected - readjust facepiece and head strapsand retry
b. Exhalation valve check
1) With hose in the regulator coupling, inhaleand exhale to assure function
2) Foreign matter may lodge in spring assembly
D. Operator
1. Connect regulator to facepiece according tomanufacturer's procedure
2. Inhale to check regulator gauge function. Gaugereading should be equal to or within 100 psi.Believe the lessor of the two
3. Positive pressure check - break seal with twofingers; check for outward rush of air
4. Open purge valve to check for function
NOTE: Make sure that the student's helmet issitting properly on the head, and chin strap issecured.
E. SCBA Doffing
1. Facepiece doffing
a. Remove regulator from facepiece and secure inholder on waist strap
b. Loosen facepiece spider straps by pullingforward the buckles provided
c. Pull facepiece down so as to allow the chin to beremoved, then lift facepiece over head. Finishloosening spider straps as in "ready position"
d. Place in a clean area by right foot so as toprotect the lens from scratching and the inside offacepiece and breathing tube from becoming wetor contaminated from dirt, dust, grit, or liquids
Page 12 www.mfri.orgPage 12 www.mfri.orgPage 12 www.mfri.org

Instructor Guide Notes
e. Clean facepiece as described by manufacturer orsee cleaning and stowing
2. Doffing the harness
a. Unbuckle waist and chest straps
b. Loosen waist strap and fully let out usingappropriate buckles. Loosen and let outshoulder straps all the way. Remove rightshoulder strap from shoulder
c. Reach to left shoulder strap with left hand
d. Slide harness off left shoulder
e. Place harness on floor with cylinder towardsfloor
f. Extend all straps on the harness assembly
g. Lay out straps and check to see that they are nottangled or twisted; straighten as necessary
h. Shut off cylinder and bleed with purge valve
NOTE: Upon completion of the last donningand doffing drill, have students remain in SCBAand sit on floor. Have them practice controlledbreathing methods as they are described in nextsection.
F. Donning Drill
1. Have students spread out in a large circle
2. While in full protective clothing, each student shalldon and place their SCBA in full operation with 1-1/2 minutes, using the four-step method
a. Procedure: Students shall stand erect withhands above head. Donning and timing startson the word "go." Students shall kneel or raiseone hand in the air to indicate completion of task
b. Instructor should call out time at one minute andeach ten second interval thereafter until eachstudent has completed task
c. Repeat as necessary
Page 13 www.mfri.orgPage 13 www.mfri.orgPage 13 www.mfri.org
Instructor Guide Notes
IV. Controlled Breathing Techniques (1-4)
A. Breathing must be kept on a conscious level.Subconscious patterns result in breathing onlythrough the mouth or nose
1. Nose breathing results in
a. Short breaths
b. Lungs not filled to capacity
2. Mouth breathing results in
a. Rapid breathing
b. Body cannot take full advantage of oxygenbefore exhalation
B. Suggested Patterns
1. In through nose - out through mouth
a. Easy to learn and remember
b. Close to normal pattern when speaking
c. Technique
1) Breathe in slow and deep
2) Hold in lungs 3-4 seconds for maximumoxygen/carbon dioxide exchange
2. In through mouth - out through nose
a. Allows for good air exchange without holdingbreath
b. Techniques
1) Inhale rapid and full
2) Exhale slowly
3) Best method for strenuous work
3. Five-second count method
Page 14 www.mfri.orgPage 14 www.mfri.orgPage 14 www.mfri.org
Instructor Guide Notes
a. Technique
1) Inhale for 5 seconds using either of first twomethods - slowly and fully
2) Hold for 5 seconds
3) Exhale for 5 seconds
4) Hold for 5 seconds
5) Repeat cycle
b. Best for short rest breaks
4. Skip breathing
a. Emergency only - for conservation of air
b. 30 minute SCBA may be extended to two hours
c. Technique
1) Inhale fully
2) Hold breath for normal exhalation time
3) Take additional breath before exhaling
4) Exhale slowly
5) Repeat cycle
d. Important to remain mentally and physicallycalm
V. Emergency Procedures (5-5)
NOTE: In the course of normal emergency operations,personnel may find themselves in a situation where theymay become trapped; run out of air; or experience anequipment malfunction. While there are a number of non-approved methods of survival, or buddy breathing and arereadily available for reference in several fire servicetraining publications, this outline will target a method ofreceiving emergency breathing air that is specific to certainbrands or models of SCBA.
Page 15 www.mfri.orgPage 15 www.mfri.orgPage 15 www.mfri.org
Instructor Guide Notes
The instructor should modify this section to suit thepurposes of his or her department and should beconsistent with departmental procedures.
A. Quick Fill Procedure
1. Remove quick fill hose from pouch
2. Remove protective caps and connect quick fill hoseto male connection near regulator on left shoulderstrap of donor unit
a. Female connection should snap in place
b. Green ring should appear near femaleconnection
3. Remove protective caps and connect quick fill hoseto male connection on receiver unit pressure of twocylinders will equalize within one minute
4. Disconnect hose, replace all protective caps, andbleed hose by pressing against solid surface, andreplace in pouch with connections downward
VI. Changing Cylinders (1-6)
A. Spread apparatus out on floor with cylinder up
B. Point cylinder valve at feet
C. Extend and straighten all straps
D. Turn cylinder valve off
E. Bleed air off regulator by slowly opening purge valve
F. Disconnect H/P hose from cylinder (check "O" ringin H/P connector)
G. Loosen cylinder strap or holding device
H. Remove cylinder from backplate
I. Insert new cylinder to cylinder stop
J. Tighten cylinder holding device; securing cylinder tobackplate
Page 16 www.mfri.orgPage 16 www.mfri.orgPage 16 www.mfri.org
Instructor Guide Notes
K. Check "O" ring in H/P connector before connectinghigh pressure hose
L. Check proper position of regulator and straps bydonning apparatus
M. Turn cylinder valve on to check for leaks
N. Bleed system as in D and E above
VII. Practical Exercises (1-7)
A. Obscured Vision Practical Exercise
1. Students are to follow a hoseline going from oneend (nozzle to water source or water source tonozzle) without losing contact with hoseline orbecoming disoriented.
2. Nomex hoods should be removed until thefacepiece is in place. They should then be put onbackwards so as to obscure vision.
3. Students will be spread on the hoseline at sufficientintervals to avoid working as a team.
B. Smoke Environment Practical Exercise
1. Preparation
a. Area divided into rooms with furniture arrangedto simulate an actual conditions. Connectingdoor(s) separates rooms
b. Smoke will be produced by smoke machine
c. At least one instructor will be with the studentsat all times
d. Explain to the students that they will be assignedtasks to perform in the smoke area
e. Tasks will be conducted with proper systematicprocedures
1) Team of two
2) First person to the right and second person tothe left
Page 17 www.mfri.orgPage 17 www.mfri.orgPage 17 www.mfri.org

Instructor Guide Notes
3) Remind team members to communicate
2. Smoke evolution
a. Student orientation - the exercise is designed to
1) Expose the student to smoke
2) Learn to use his/her hands for his/her eyes
3) Increase the student's confidence in his/herbreathing apparatus
4) Learn to work as a member of a team
b. Assigned team will report to the instructor incharge of smoke evolutions in order of theirassigned numbers. Instructor will prepare teamto enter smoke area. Accountability tags will becollected prior to entry into smoke area.
c. Each team will appoint a leader who will assignthe tasks to be performed
d. All will conduct a systematic search
e. When search is completed, team leader willindicate so and team will exit smoke area
3. Communication will be confined to each assignedtask
a. Have the students call out to the instructor wheneach task is completed
b. Have the students guide and direct other teammember to their assignments
4. Instructor should insure that
a. All students stay in smoke area until all tasks arecompleted
b. Students exit the smoke area when all tasks arecompleted to the satisfaction of the instructor
c. Students function with the complete apparatuson for a few minutes before removing facepiece
Page 18 www.mfri.orgPage 18 www.mfri.orgPage 18 www.mfri.org
Instructor Guide Notes
5. At the conclusion of the smoke evolution, thestudent will
a. Collect accountability tag after the smokeevolution has been completed
b. Refill the SCBA cylinder
c. Return the SCBA to its proper place
C. Maze Evolution
1. Students assemble at entrance of maze area withfacepiece in place and regulator ready forconnection
2. At signal of instructor, next student placeaccountability tag at designated area and entersdoor to maze
3. Student proceeds through maze in a forwarddirection, attempting to recognize area using hands
4. Any obstacle that is suppose to open will openeasily (no forced entry is required)
5. Students exits maze at completion of evolution andretrieves accountability tag
6. Students continue to repeat steps until all havesuccessfully completed.
D. Wrap-Up
1. Cleaning: Take a small amount of the cleaningliquid provided and wet the material provided forcleaning. Wipe out the inside of the facepiece toremove all sweat and other foreign materials. Allowto dry. Check once again to be certain that allforeign material has been removed and that theinside of the facepiece is dry. Check thecleanliness of the regulator connector, the regulator,and the exhalation valve for dirt and other foreignmaterial and clean as necessary.
2. Stowing Apparatus: After changing the cylinder,ensure that the cylinder is filled and that all strapsare extended.
Page 19 www.mfri.orgPage 19 www.mfri.orgPage 19 www.mfri.org
Instructor Guide Notes
3. Stowing must be done under the supervision of aninstructor.
4. Instructor should critique the whole class
a. After all equipment has been stowed, assemblestudents in appropriate area
b. An overall review of the class and individualstudent's performance, should be made by eachinstructor. Comments should be made onstrong points and weak points. Weak pointsshould include:
- Donning and doffing proficiency- Controlled breathing- Psychological comfort (discomfort) while
wearing breathing apparatus in a smokeyatmosphere
- Inability to recognize objects by feel- Teamwork
Page 20 www.mfri.org
SUMMARY:
Review:
Self-Contained Breathing Apparatus• Operation, maintenance, inspection, and cleaning• Donning and doffing procedures and safety check• Controlled breathing techniques• Emergency procedures• Changing cylinders• Practical exercises
Remotivation:
Assignment:
=================================================================
EVALUATION:
Page 21 www.mfri.org
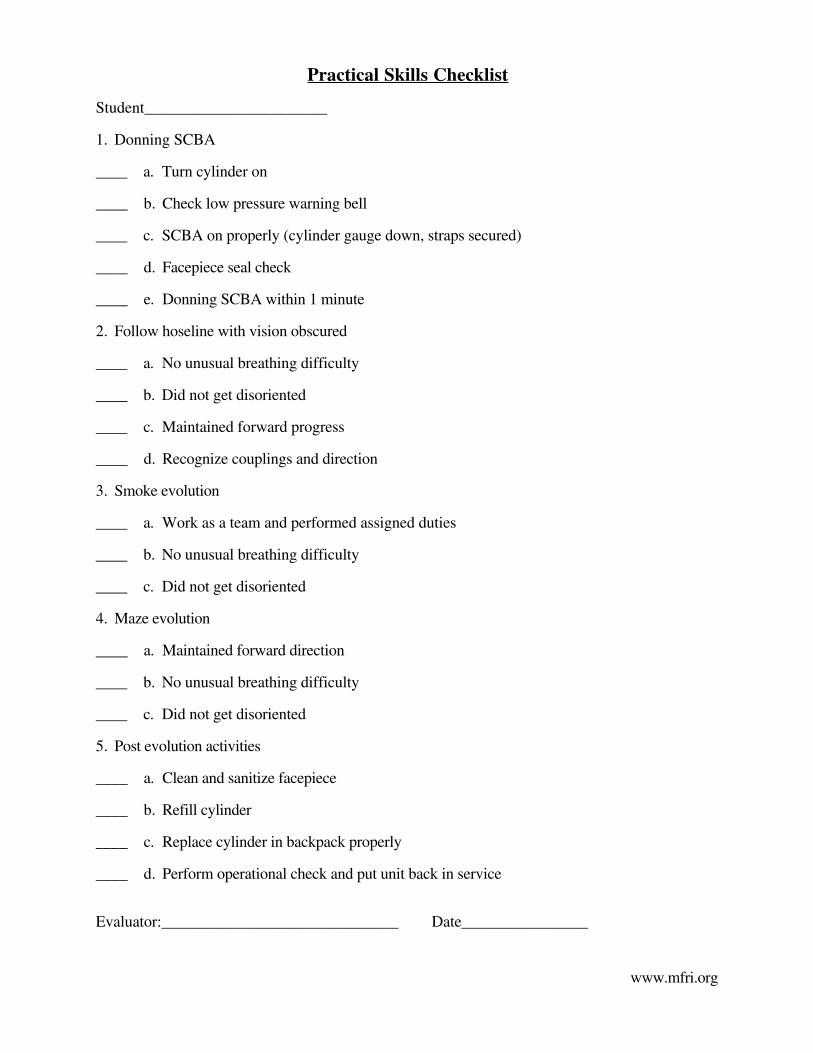
Practical Skills Checklist
Student_______________________
1. Donning SCBA
____ a. Turn cylinder on
____ b. Check low pressure warning bell
____ c. SCBA on properly (cylinder gauge down, straps secured)
____ d. Facepiece seal check
____ e. Donning SCBA within 1 minute
2. Follow hoseline with vision obscured
____ a. No unusual breathing difficulty
____ b. Did not get disoriented
____ c. Maintained forward progress
____ d. Recognize couplings and direction
3. Smoke evolution
____ a. Work as a team and performed assigned duties
____ b. No unusual breathing difficulty
____ c. Did not get disoriented
4. Maze evolution
____ a. Maintained forward direction
____ b. No unusual breathing difficulty
____ c. Did not get disoriented
5. Post evolution activities
____ a. Clean and sanitize facepiece
____ b. Refill cylinder
____ c. Replace cylinder in backpack properly
____ d. Perform operational check and put unit back in service
Evaluator:______________________________ Date________________
www.mfri.org