PDF Accessibility Editor Accessibility Editor provides the tools to have PDF documents read in...
7
June 2012 1 PDF Accessibility Editor Read&Write Gold incorporates PDF Aloud to provide speech support for PDF documents. PDF Accessibility Editor provides the tools to have PDF documents read in exactly the way you want. While PDF Aloud works with Adobe Reader, Acrobat Standard, or Professional, PDF Accessibility Editor is only available to users of Adobe Acrobat Standard or Professional (not Adobe Reader). In this guide, we will be using a sample PDF to review the features of PDF Accessibility Editor. You can follow along with any PDF document. Check how a PDF document is read 1. Click on the button on the Read&Write Gold toolbar and open the PDF file you wish to read. This will open Adobe Reader and you will see the PDF Aloud toolbar displayed: Note: In Adobe Acrobat X, the PDF Aloud toolbar will be located in a separate tab called ‘Extended’. 2. Click on the button on the toolbar. PDF Aloud starts to read aloud the PDF document. 3. You may notice that the document is not read in the order that you would like or that some words are pronounced incorrectly. You can use PDF Accessibility Editor to make the document read exactly the way you want it to or correct pronunciations. Changing how the document reads paragraphs and sentences 1. Click on Start on the Windows desktop. Select All Programs, Texthelp , then Accessibility Editor. Alternatively, you can double click on the Accessibility Editor shortcut on your Desktop if available. The PDF Accessibility Editor Toolbar will be displayed: Speech buttons Click-and- Speak button
Transcript of PDF Accessibility Editor Accessibility Editor provides the tools to have PDF documents read in...
June 2012 1
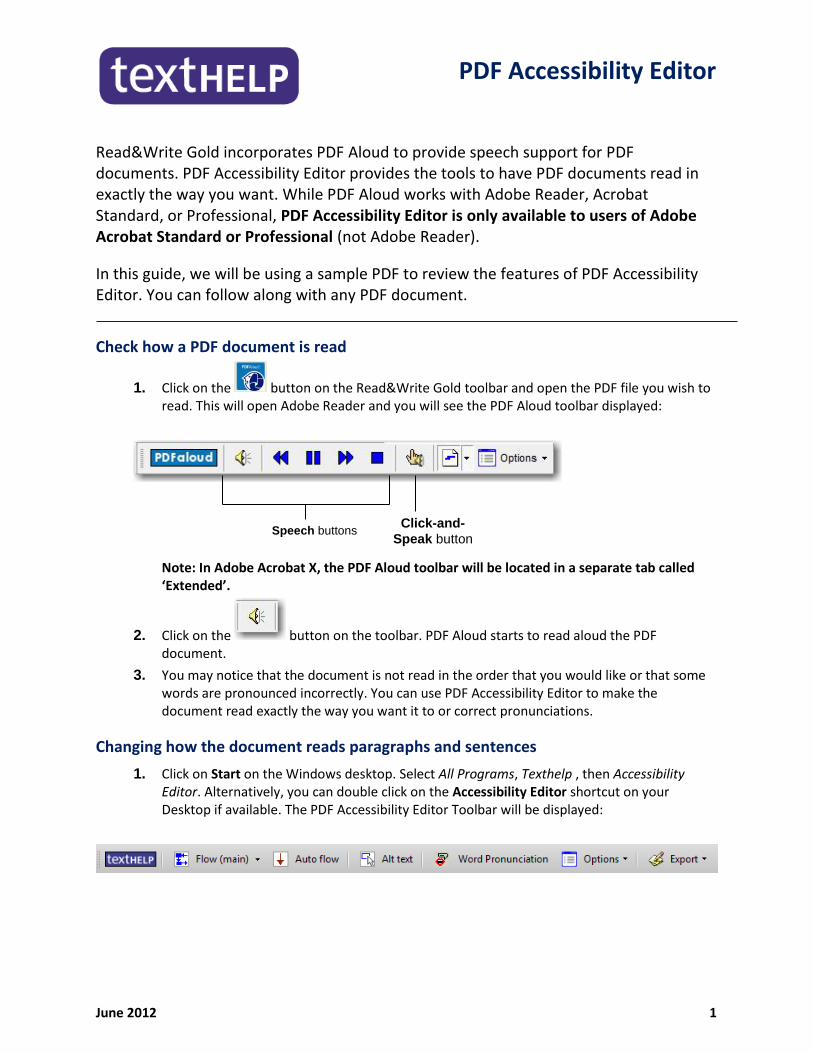
PDF Accessibility Editor
Read&Write Gold incorporates PDF Aloud to provide speech support for PDF documents. PDF Accessibility Editor provides the tools to have PDF documents read in exactly the way you want. While PDF Aloud works with Adobe Reader, Acrobat Standard, or Professional, PDF Accessibility Editor is only available to users of Adobe Acrobat Standard or Professional (not Adobe Reader).
In this guide, we will be using a sample PDF to review the features of PDF Accessibility Editor. You can follow along with any PDF document.
Check how a PDF document is read
1. Click on the button on the Read&Write Gold toolbar and open the PDF file you wish to read. This will open Adobe Reader and you will see the PDF Aloud toolbar displayed:
Note: In Adobe Acrobat X, the PDF Aloud toolbar will be located in a separate tab called ‘Extended’.
2. Click on the button on the toolbar. PDF Aloud starts to read aloud the PDF document.
3. You may notice that the document is not read in the order that you would like or that some words are pronounced incorrectly. You can use PDF Accessibility Editor to make the document read exactly the way you want it to or correct pronunciations.
Changing how the document reads paragraphs and sentences
1. Click on Start on the Windows desktop. Select All Programs, Texthelp , then Accessibility Editor. Alternatively, you can double click on the Accessibility Editor shortcut on your Desktop if available. The PDF Accessibility Editor Toolbar will be displayed:
Speech buttons Click-and-
Speak button
June 2012 2
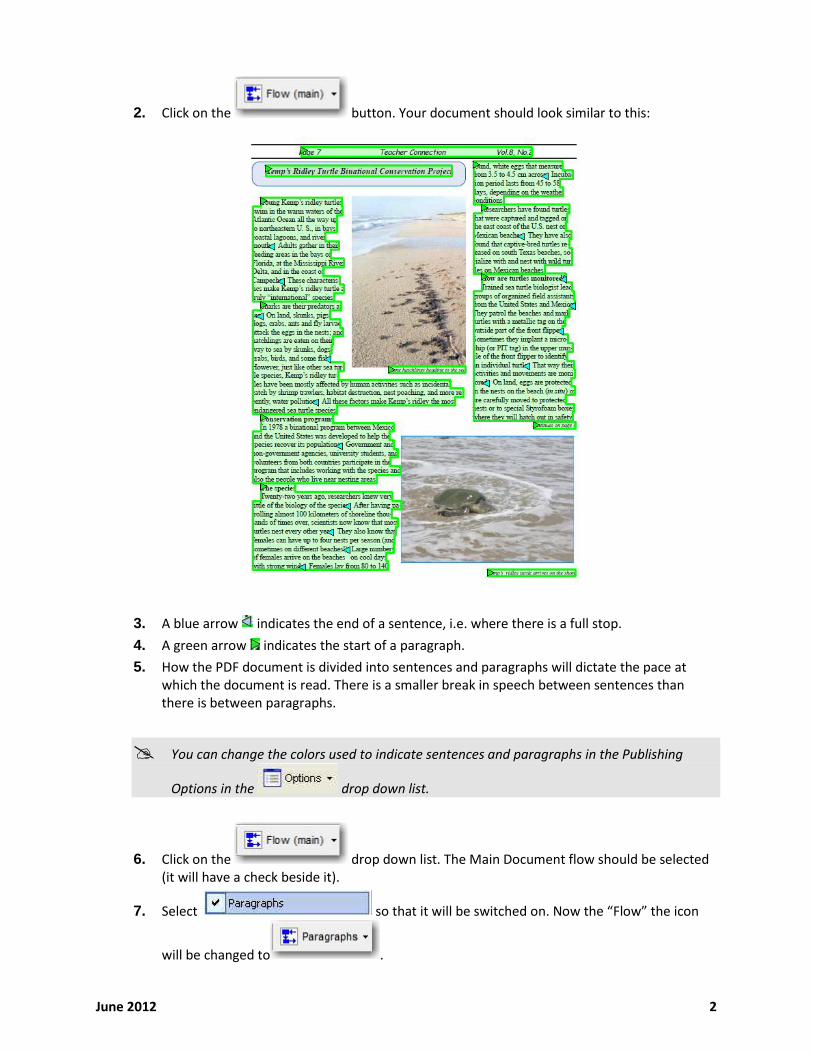
2. Click on the button. Your document should look similar to this:
3. A blue arrow indicates the end of a sentence, i.e. where there is a full stop.
4. A green arrow indicates the start of a paragraph.
5. How the PDF document is divided into sentences and paragraphs will dictate the pace at which the document is read. There is a smaller break in speech between sentences than there is between paragraphs.
You can change the colors used to indicate sentences and paragraphs in the Publishing
Options in the drop down list.
6. Click on the drop down list. The Main Document flow should be selected (it will have a check beside it).
7. Select so that it will be switched on. Now the “Flow” the icon
will be changed to .

June 2012 3
8. Click on the button to activate paragraph editing. Here you can add a paragraph arrow by clicking in the document to add a pause in the speech as necessary. See the example below, where an extra paragraph arrow was added:
9. Select so that it will be switched on. Now the “Flow” icon will
be changed to .
10. If you click on any of the blue arrows it will remove the stop at the end of the sentence and continue on to the next sentence. Alternatively, you can add a blue arrow to add a pause in the speech by clicking in the document. In the example below, the extra sentence pauses around “U.S.” can be removed by clicking on the blue arrows so it will read as “U S” with no pauses.
11. To hear the effect of any changes you make, click on the button to hear the text read aloud.

June 2012 4
Set up alternative text for an image
Many PDF documents contain images. By setting up alternative text for any image, PDF Aloud will then read that alt text aloud when a user clicks on that image.
1. Click on the button. When you put the cursor over the PDF document, it will
appear like this .
2. Click and hold down the left button on your mouse and draw a box round the image. When you release the button, the Alt text dialog box is displayed.
3. Type in the alt text you would like to use for the image.
4. Repeat these steps for all the images within your document.
5. To hear the effect of this change, click on the button and then click on any of the images you added alt text for to hear the text read aloud.
Altering how PDF Aloud reads a word
You may have noticed that when PDF Aloud reads the document, it may pronounce some words incorrectly. With the PDF Accessibility Editor, you can change how these mispronunciations are read with Word Pronunciation. These can be changed individually or globally.
Select and then click on the word you would like to change. The Pronunciation panel is displayed:
1. Spell the word as it should sound, then click on to hear how the word will now be pronounced. Click OK.
June 2012 5
2. To hear the effect of this change, click on the button and then the word you just changed.
3. Other options in the Word Pronunciation Panel include:
You may find some years are pronounced incorrectly. For example, 2007 might be pronounced two zero zero seven instead of being pronounced two thousand and seven. If this is the case you can use this option to correct it.
Where acronyms are used (e.g. BBC, TUC, ITN etc.) you may find that they are pronounced as words. In this case you can use this option to correct them.
If you find a certain word is being read too quickly before the next word, you can add a pause after it using this option.
If you find a certain word is being read too quickly after the previous word, you can add a pause before it by using this option.
In certain cases you may find that a word is being broken up into 2 sections. In this case, you simply select the first section and click on this check box.
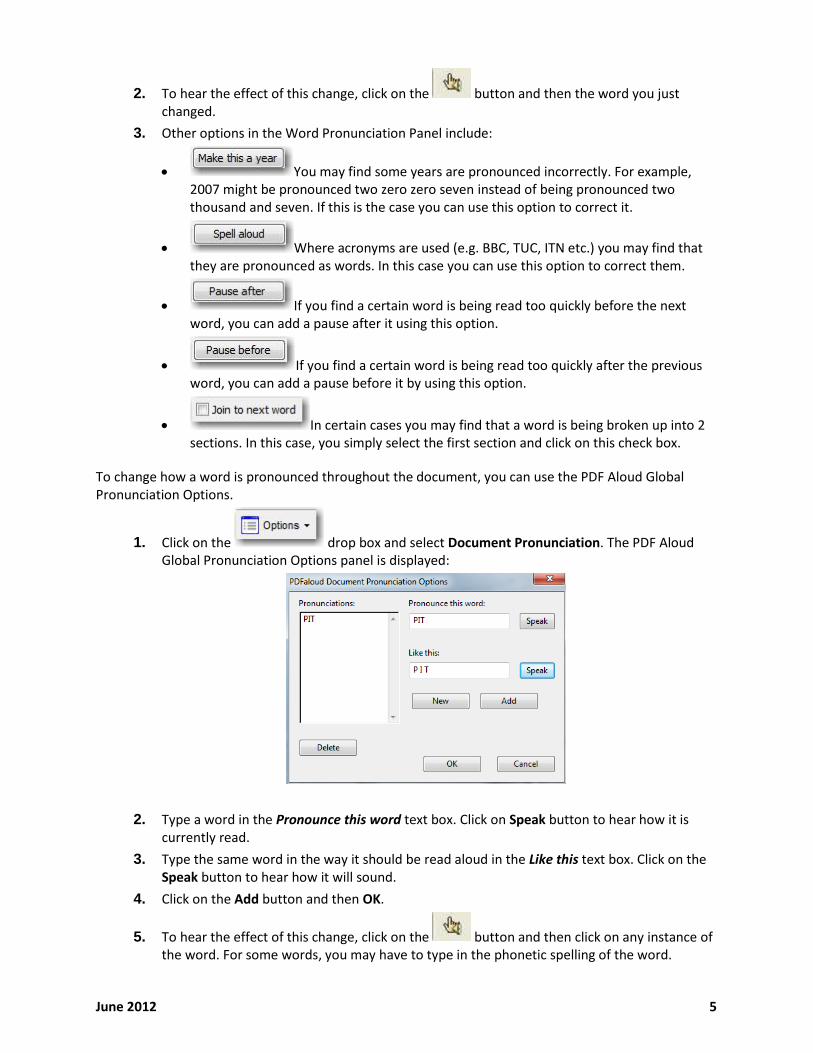
To change how a word is pronounced throughout the document, you can use the PDF Aloud Global Pronunciation Options.
1. Click on the drop box and select Document Pronunciation. The PDF Aloud Global Pronunciation Options panel is displayed:
2. Type a word in the Pronounce this word text box. Click on Speak button to hear how it is currently read.
3. Type the same word in the way it should be read aloud in the Like this text box. Click on the Speak button to hear how it will sound.
4. Click on the Add button and then OK.
5. To hear the effect of this change, click on the button and then click on any instance of the word. For some words, you may have to type in the phonetic spelling of the word.

June 2012 6
Altering the order your PDF document is read
You may have noticed that the PDF Aloud reads the Header before starting to read the content and page number. Also, if you have added alternative text for images they are incorporated into the reading flow of the document. With the PDF Accessibility Editor, you can change what text is read and in what order it is read.
1. Click on the in the drop down list and select Main document flow as shown below:
2. In this example, “Page 7” is chosen first, then the title ‘Kemp’s Ridley Turtle Binational
Conservation Project”, followed by the first paragraph.
3. If you make a mistake, right click at the start of the text you have added incorrectly and select Remove from Flow.
4. Continue to add all of the other areas of text starting with a green arrow until your PDF looks like this:

June 2012 7
5. To hear the effect of this change, click on the button and then click on the date. The PDF will be read in exactly the order you have specified.
6. Users may want to have additional text outside of the main document flow read aloud in a particular order. This could include text in a chart, or text in the page margins. To set an
additional flow on a page click on and select Page Flow 1 as shown below:
7. Follow the same steps you used to create the main document flow to create your additional
page flow. You can set up to 10 additional page flows. Text already included in a flow will not be available for selection in additional flows as seen below:
Need Help? If you require any further help with using PDF Accessibility Editor, please refer to the Online Help. This can be accessed by clicking on the Options drop down and selecting Help.