Patching and Upgrades - Springer · PDF fileCHAPTER 11 N PATCHING AND UPGRADES 333 How It...
23
331 CHAPTER 11 Patching and Upgrades As Exadata is engineered as a complete and integrated system, Oracle periodically releases certified Exadata patches to facilitate patch and upgrade management on Exadata. Similar to other Oracle-engineered systems (and unlike traditional, disparate vendor solutions), Oracle’s Exadata patches are pre-tested sets of patches designed to applied in a non-disruptive, rolling fashion and yield a comprehensive, validated end result. The goal of the Exadata patching is to remove uncertainty and non-compliance; for example, an Exadata DMA wouldn’t download “one-off” patches for a database tier or storage server firmware. Exadata patches are intended to be all encompassing and typically include fixes for both the storage servers and compute servers, and optionally InfiniBand switches. In the real world, patching Exadata is typically one of the chief concerns of the Exadata administrator. The patches have a high likelihood of “touching everything,” so properly planning and executing patch application is paramount to the availability of Exadata. In this chapter, we will present an Exadata patching overview and provide real-world examples of how to apply patches on an Exadata Database Machine. This chapter will walk you through an Exadata patching exercise, recipe by recipe, giving you a comprehensive understanding of how to confidently patch your Exadata Database Machine. 11-1. Understanding Exadata Patching Definitions, Alternatives, and Strategies Problem You wish to better understand the landscape of patching on Exadata to enable yourself to confidently prepare for and apply patches to your Exadata environment. Solution In this recipe, we will provide an overview of how patching works on Exadata and present a list of Exadata patching definitions and use cases. The first place to learn about how patching on Exadata works is My Oracle Support note 888828.1. Oracle continuously updates this support note, and it contains information about the latest Exadata patch updates, introduces new patching methods, and provides links to other patches and related software products. Oracle provides patches for the Exadata compute nodes, storage cells, InfiniBand switches, and the associated Enterprise Manager agents and software. Table 11-1 outlines several key Exadata patching definitions and use cases. J. Clarke, Oracle Exadata Recipes © John Clarke 2013
Transcript of Patching and Upgrades - Springer · PDF fileCHAPTER 11 N PATCHING AND UPGRADES 333 How It...

331
CHAPTER 11
Patching and Upgrades
As Exadata is engineered as a complete and integrated system, Oracle periodically releases certified Exadata patches to facilitate patch and upgrade management on Exadata. Similar to other Oracle-engineered systems (and unlike traditional, disparate vendor solutions), Oracle’s Exadata patches are pre-tested sets of patches designed to applied in a non-disruptive, rolling fashion and yield a comprehensive, validated end result. The goal of the Exadata patching is to remove uncertainty and non-compliance; for example, an Exadata DMA wouldn’t download “one-off” patches for a database tier or storage server firmware. Exadata patches are intended to be all encompassing and typically include fixes for both the storage servers and compute servers, and optionally InfiniBand switches. In the real world, patching Exadata is typically one of the chief concerns of the Exadata administrator. The patches have a high likelihood of “touching everything,” so properly planning and executing patch application is paramount to the availability of Exadata.
In this chapter, we will present an Exadata patching overview and provide real-world examples of how to apply patches on an Exadata Database Machine. This chapter will walk you through an Exadata patching exercise, recipe by recipe, giving you a comprehensive understanding of how to confidently patch your Exadata Database Machine.
11-1. Understanding Exadata Patching Definitions, Alternatives, and StrategiesProblemYou wish to better understand the landscape of patching on Exadata to enable yourself to confidently prepare for and apply patches to your Exadata environment.
SolutionIn this recipe, we will provide an overview of how patching works on Exadata and present a list of Exadata patching definitions and use cases.
The first place to learn about how patching on Exadata works is My Oracle Support note 888828.1. Oracle continuously updates this support note, and it contains information about the latest Exadata patch updates, introduces new patching methods, and provides links to other patches and related software products.
Oracle provides patches for the Exadata compute nodes, storage cells, InfiniBand switches, and the associated Enterprise Manager agents and software. Table 11-1 outlines several key Exadata patching definitions and use cases.
J. Clarke, Oracle Exadata Recipes© John Clarke 2013

CHAPTER 11 PATCHING AND UPGRADES
332
Table 11-1. Exadata Patching Definitions
Description and Definition
Storage server patches Patches applied to Exadata Storage Servers using the patchmgr utility. Storage server patches apply operating system, firmware, and driver updates and update both the storage cells and compute nodes. These are usually released quarterly.
Database server yum channels
Database servers are patched using yum; there is a yum channel for each Exadata image version. Recently, this functionality replaced the “minimal pack.”
Database “minimal pack”
The database minimal pack is defined as the minimal version of Oracle RDBMS, Grid Infrastructure, and diskmon software required to operate with a specific storage server patch. Minimal packs were phased out in favor of using yum channels for patching.
QDPE QDPE = Quarterly Database Patch for Exadata. These patches are released quarterly in 11.2.0.2 and monthly in 11.2.0.3 and are applied using OPatch. Each QDPE patch includes three patches—one for the RDBMS binaries, one for the Grid Infrastructure binaries, and one for diskmon. QDPE patches are cumulative in nature and were previously called bundle patches. QDPE patches are always rolling patches and applied with the opatch auto command.
Bundle patches Bundle patches are patches designed to patch Oracle RDBMS, Grid Infrastructure, and diskmon software. These have recently been renamed QDPE patches.
Patch set upgrades These are full-upgrade patches on the compute node; for example, patching 11.2.0.2 to 11.2.0.3. Grid Infrastructure patches are always rolling in nature, and RDBMS patches require an outage.
InfiniBand patches These are patches released annually that update your InfiniBand switches. These are always rolling in nature, and the patch mechanism depends on your InfiniBand version.
QFSDP QFSDP = Quarterly Full Stack Download Patch. These patches contain all of the patches for each stack in your Exadata Database Machine, including your infrastructure, database, and Oracle Enterprise Manager. The patches inside a QFSDP patch are still applied individually, but they are downloadable from the same patch file.
OPlan OPlan creates a patch deployment report customized for your environment and includes step-by-step instructions for patching your environment. Details of OPlan are discussed in MOS note 1306814.1 and delivered as part of patch 11846294.
When patching Exadata, we recommend following these steps:
1. Carefully read MOS note 888828.1 and become familiar with its contents. An Exadata DMA responsible for patching should bookmark note 888828.1 in his or her browser and refer to it often.
2. Determine if you will use a QFSDP patch or QDPE patches combined with storage server and other infrastructure patches.
3. Download the patches to a compute node and patch the storage servers first using patchmgr.
4. Apply the QDPE patches to the compute nodes.
5. Apply the QDPE patches to the compute nodes.

CHAPTER 11 PATCHING AND UPGRADES
333
How It WorksPatching Exadata is generally a matter of carefully reading MOS note 888828.1 and fully understanding the various patch definitions, scope, and application methods. Table 11-1 in the Solution of this recipe provides a list of Exadata patching definitions and descriptions.
An example of the contents of a QFSDP patch are listed, along with descriptions about what each of the patch contents represent:
14207418 -> Main QFSDP Patch- Infrastructure/ -> Storage server, InfiniBand, and PDU patches --ExadataStorageServer/ -> Storage server patches to be applied to cells and compute nodes --InfiniBandSwitchSoftware/ -> InfiniBand Switch patch --SunRackIIPDUMeteringUnitFirmware/ PDU patch- Database/ --11.2.0.3_QDPE_Jul2012/ -> Database QDPE patch --OPatch/ -> Required OPatch --OPlan/ -> Required OPlan- SystemsManagement/ -> Enterprise Manager patches --CloudControl12/ -> EM patches for Cloud Control --OMS/ --Agent/ --WLS/ --GridControl11/ -> EM patches for Grid Control --OMS/ --Agent/ --EMPlugins/
Recipes 11-2, 11-3, 11-4, and 11-5 provide detailed steps for patching the various Exadata components.
11-2. Preparing to Apply Exadata PatchesProblemYou wish to adequately prepare for patching your Exadata Database Machine.
SolutionIn this recipe, you will learn how to find the most recent Exadata patches available from My Oracle Support, determine your current software, image, and firmware versions, download the Exadata patches, and prepare a plan for patching your Exadata Database Machine.
Start by logging in to My Oracle Support, opening document 888828.1, and clicking on the Latest Releases link as displayed at the bottom of Figure 11-1.

CHAPTER 11 PATCHING AND UPGRADES
334
As of October 2012, Quarterly Full Stack Download for Exadata (QFSDP) patch 14207418 was released. This is the version we will base our planning on in this recipe and the other recipes in this chapter. Under the Individual Components section on MOS note 888828.1, you can see the following:
QFSDP patch 14207418 contains patch 14212264 for the Exadata storage cells
The 11.2.0.3 QDPE patch 14084153 patch for Exadata
Oracle 11gR2 Patch Set 2 (10404530)
InfiniBand switch patch 12373676
Patches for the PDUs and KVM switch
Download QFSDP patch 14207418, or the latest patch offered at the time you read this recipe, from My Oracle Support, and take some time to read the QFSDP patch README file as well as the individual README files in each component patch included in the QFSDP patch. To access the individual patch README files, download the patch from My Oracle Support and stage to a directory on your first compute node.
We typically recommend reading through the various patch README files in this order:
1. First read the contents of the <patch>/ExadataStorageServer/<release>/README*.html. For recent storage server patches, you will usually have two patches in this location, one for the storage server patch and one containing the ISO image for the compute node patches.
2. Look for references to required InfiniBand patches in the ExadataStorageServer patch README.html files. If your InfiniBand switch firmware version is lower than the recommended version, you should patch your InfiniBand switches first, as discussed in Recipe 11-5.
3. Next, examine the README contents in the <patch>/Database/<QDPE Patch number> directory.
4. Finally, read the <patch>/SystemsManagement README files and plan accordingly.
Figure 11-1. Latest releases from MOS Note 888828.1

CHAPTER 11 PATCHING AND UPGRADES
335
After reading through all the assorted README files under the QFSDP patch directories, compile a list of steps required for your specific environment. On our Exadata Quarter Rack running image version 11.2.2.4.2.111221 on both the compute and storage nodes and Oracle 11.2.0.3, our action plan is as follows:
1. Validate and apply required InfiniBand patches per instructions in README-13998727.html
2. Prepare your Exadata cells for patch application using the instructions in README-13998727.html
3. Apply the Exadata Storage Server patches using patchmgr
4. Apply the database server updates using yum, per instructions in README-13998727.html
5. Update PDU metering firmware
6. Apply 11.2.0.3_QDPE_Jul2012 patch to compute nodes using OPatch
7. Apply the Cloud Control OMS, WLS, and Agent patches to the Cloud Control management server and Exadata Compute Nodes
How It WorksMy Oracle Support note 888828.1 is your first reference when planning for Exadata patching. This note contains the list of most recent patches, QDPEs, and QFSDPs.
We recommend reading all of the various patch README files prior to beginning the patch process to understand interdependencies and known issues. There will be a number of patches that make up a QFSDP patch, and many of these patches reference each other. In our experience, it is best to begin with the Exadata Storage Server patches, taking special care to ensure that your InfiniBand switches are patched first, followed by the database server QDPE patches, and finally, the systems management (Enterprise Manager) patches.
Note Recipes 11-3 through 11-6 will show patch application steps for QFSDP patch 14207418 and will guide you through a real-life Exadata patching exercise.
11-3. Patching Your Exadata Storage ServersProblemYou wish to apply Exadata Storage Server patches and need step-by-step examples of how to prepare your storage servers for patching, using patchmgr to apply the patches, and how to confirm that the patches have been applied successfully.
SolutionIn this recipe, you will learn how to prepare your Exadata storage cells and compute nodes for applying storage server patches, perform each of the steps required to apply storage software on your Exadata storage cells, and validate a successful patch application.

CHAPTER 11 PATCHING AND UPGRADES
336
Note In this recipe, as well as Recipes 11-4, 11-5, and 11-6, we will be showing examples for applying the July 2012 QFSDP, patch 14207418. The steps in this recipe are specific to the patch contents and README instructions of this patch, but they should provide an overview of a typical Exadata patching. Where possible, we will attempt to only present “common” storage server patching activities and leave it to the Exadata DMA to confirm specific patch steps required for specific Exadata software versions.
1. Start by transferring the QFSDP patch to a directory on your first compute node and unzipping the file. Using the instructions in the ExadataStorageServer/<version>/README-<version>.html file, go to Section 3: “Preparing Exadata Cells for Patch Application.” The first paragraph in this section will likely say that your InfiniBand switches need to be on a specific version; before continuing, please see Recipe 11-5 for instructions on how to apply InfiniBand patches.
2. After ensuring that your InfiniBand switches are patched to the proper firmware level, a handful of preparation tasks are typically required. The first of these tasks is to start an ILOM console on each storage cell so that you can monitor the patch application log files and connect to the server in the event of patch failure or to troubleshoot. To start the ILOM console, log in to each storage cell’s ILOM address and do the following:
Macintosh-8:~ jclarke$ ssh root@cm01cel01-ilomPassword:Oracle(R) Integrated Lights Out ManagerVersion 3.0.16.10 r65138Copyright (c) 2011, Oracle and/or its affiliates. All rights reserved.-> start /SP/consoleAre you sure you want to start /SP/console (y/n)? ySerial console started. To stop, type ESC (cm01cel01.centroid.com login: rootPassword:Last login: Wed Oct 10 13:46:59 from cm01dbm01[root@cm01cel01 ~]#
3. The next step is usually to validate the version of the ofa package on your storage cells and take appropriate actions, per the patch README file, to ensure that your ofa binaries are at a high enough level to avoid file-system corruption. This step is typically done using the following rpm command, and if your version is lower than the expected version, you will be required to perform a number of steps to provide a workaround:
[root@cm01dbm01 ~]# rpm -qa|grep ofaofa-2.6.18-238.12.2.0.2.el5-1.5.1-4.0.53[root@cm01dbm01 ~]#
4. Next, run ipconf –verify on your storage cells to validate your current configuration and address any issues prior to patching:
[root@cm01cel01 ~]# ipconf -verifyVerifying of Exadata configuration file /opt/oracle.cellos/cell.confDone. Configuration file /opt/oracle.cellos/cell.conf passed all verification checks[root@cm01cel01 ~]#

CHAPTER 11 PATCHING AND UPGRADES
337
5. Before initiating the storage server patches, you will need to set up SSH equivalence from the compute node where the patches are staged with the root user on all of your storage cells. Use the following steps to set up and validate root SSH equivalence. In this example, the cell_group file is a text file containing the hostnames of each storage cell in your Exadata Database Machine:
[root@cm01dbm01 ~]# ssh-keygen -t rsaGenerating public/private rsa key pair.Enter file in which to save the key (/root/.ssh/id_rsa):Enter passphrase (empty for no passphrase):Enter same passphrase again:Your identification has been saved in /root/.ssh/id_rsa.Your public key has been saved in /root/.ssh/id_rsa.pub.The key fingerprint is:77:79:b7:aa:65:86:ed:11:e7:fe:f7:de:1e:82:79:cd [email protected][root@cm01dbm01 ~]# dcli -g ./cell_group -l root -kThe authenticity of host 'cm01cel02 (172.16.1.13)' can't be established.RSA key fingerprint is 29:6a:01:bb:67:c8:b9:6e:47:97:50:15:03:23:d4:46.Are you sure you want to continue connecting (yes/no)? yesWarning: Permanently added 'cm01cel02,172.16.1.13' (RSA) to the list of known hosts.root@cm01cel02's password:... Output omitted for brevity[root@cm01dbm01 ~]# dcli -g ./cell_group -l root 'hostname -i'cm01cel01: 172.16.1.12cm01cel02: 172.16.1.13cm01cel03: 172.16.1.14[root@cm01dbm01 ~]#
6. Next, unzip the QFSDP patch on your first compute node, navigate to the ExadataStorageServer patch directory, and run patchmgr to confirm that the patch can be applied in a rolling fashion. You should see SUCCESS on all operations:
[root@cm01dbm01 patch_11.2.3.1.1.120607]# pwd/u01/stg/14207418/Infrastructure/ExadataStorageServer/11.2.3.1.1/patch_11.2.3.1.1.120607[root@cm01dbm01 patch_11.2.3.1.1.120607]# ./patchmgr -cells ~/cell_group -patch_check_prereq -rollingLinux cm01dbm01.centroid.com 2.6.18-238.12.2.0.2.el5 #1 SMP Tue Jun 28 05:21:19 EDT 2011 x86_64 x86_64 x86_64 GNU/Linux2012-10-10 14:02:50 :Working: DO: Check cells have ssh equivalence for root user. Up to 10 seconds per cell ...2012-10-10 14:03:03 :SUCCESS: DONE: Check cells have ssh equivalence for root user.2012-10-10 14:03:03 :Working: DO: Check space and state of Cell services on target cells. Up to 1 minute ...2012-10-10 14:03:45 :SUCCESS: DONE: Check space and state of Cell services on target cells.2012-10-10 14:03:45 :Working: DO: Copy, extract prerequisite check archive to cells. If required start md11 mismatched partner size correction. Up to 40 minutes ...

CHAPTER 11 PATCHING AND UPGRADES
338
2012-10-10 14:04:20 Wait correction of degraded md11 due to md partner size mismatch. Up to 30 minutes.2012-10-10 14:04:31 :SUCCESS: DONE: Copy, extract prerequisite check archive to cells. If required start md11 mismatched partner size correction.2012-10-10 14:04:31 :Working: DO: Check prerequisites on all cells. Up to 2 minutes ...2012-10-10 14:05:05 :SUCCESS: DONE: Check prerequisites on all cells.[root@cm01dbm01 patch_11.2.3.1.1.120607]#
7. Before starting the patch application process, optionally adjust your disk_repair_time ASM disk group attribute on each of your ASM disk groups to a higher value than 3.6 hour default. This is often considered a “best practice” before patching to provide ASM more time before dropping ASM disks from a disk group in the event a patch runs longer than expected or encounters issues. Log in to your ASM instance as SYSASM and run the script in Listing 11-1.
Listing 11-1. lst11-01-asm-repairtime.sql
SQL> @lst11-01-asm-repairtime.sqlSQL> alter diskgroup &&diskgroup_name set attribute 'disk_repair_time'='&&disk_repair_time';Enter value for diskgroup_name: DATA_CM01Enter value for disk_repair_time: 3.6hold 1: alter diskgroup &&diskgroup_name set attribute 'disk_repair_time'='&&disk_repair_time'new 1: alter diskgroup DATA_CM01 set attribute 'disk_repair_time'='3.6h'Diskgroup altered.SQL>
8. At this point, you’re ready to patch your storage cells. While logged in as root on the compute node, change directories to the ExadataStorageServer patch directory and run the following patchmgr command to patch your storage cells.
Note When applying storage server patches using the –rolling option, patchmgr will iteratively apply the patches to each storage cell defined in the cell_group file provided to the –cells command line argument. Storage server patches can take quite a bit of time to apply, so be patient while the patch is applying.
[root@cm01dbm01 patch_11.2.3.1.1.120607]# pwd/u01/stg/14207418/Infrastructure/ExadataStorageServer/11.2.3.1.1/patch_11.2.3.1.1.120607[root@cm01dbm01 patch_11.2.3.1.1.120607]#[root@cm01dbm01 patch_11.2.3.1.1.120607]# ./patchmgr -cells ~/cell_group -patch -rollingLinux cm01dbm01.centroid.com 2.6.18-238.12.2.0.2.el5 #1 SMP Tue Jun 28 05:21:19 EDT 2011 x86_64 x86_64 x86_64 GNU/LinuxCells will reboot during the patch or rollback process.For non-rolling patch or rollback, ensure all ASM instances usingthe cells are shut down for the duration of the patch or rollback.For rolling patch or rollback, ensure all ASM instances using... Output omitted

CHAPTER 11 PATCHING AND UPGRADES
339
2012-10-10 16:28:58 cm01cel03 Wait for patch finalization and reboot2012-10-10 17:29:24 4 Done cm01cel03 :SUCCESS: Wait for cell to reboot and come online.2012-10-10 17:29:24 5 Do cm01cel03 :Working: DO: Check the state of patch on cell. Up to 5 minutes ...2012-10-10 17:29:33 5 Done cm01cel03 :SUCCESS: Check the state of patch on cell.2012-10-10 17:29:36 3-5 of 5 :SUCCESS: DONE: Finalize patch and check final status on cells.[root@cm01dbm01 patch_11.2.3.1.1.120607]#
9. After the patches are applied and the storage cells are rebooted, validate the image on each of the cells to confirm a successful patch application:
[root@cm01cel02 ~]# imageinfo Kernel version: 2.6.18-274.18.1.0.1.el5 #1 SMP Thu Feb 9 19:07:16 EST 2012 x86_64Cell version: OSS_11.2.3.1.1_LINUX.X64_120607Cell rpm version: cell-11.2.3.1.1_LINUX.X64_120607-1Active image version: 11.2.3.1.1.120607Active image activated: 2012-10-10 16:25:12 -0400Active image status: successActive system partition on device: /dev/md5Active software partition on device: /dev/md7In partition rollback: ImpossibleCell boot usb partition: /dev/sdm1Cell boot usb version: 11.2.3.1.1.120607Inactive image version: 11.2.2.4.2.111221Inactive image activated: 2012-02-11 20:58:06 -0500Inactive image status: successInactive system partition on device: /dev/md6Inactive software partition on device: /dev/md8Boot area has rollback archive for the version: 11.2.2.4.2.111221Rollback to the inactive partitions: Possible [root@cm01cel02 ~]# imagehistoryVersion : 11.2.2.2.0.101206.2Image activation date : 2011-02-21 11:20:58 -0800Imaging mode : freshImaging status : success... Multiple historical images omitted for brevityVersion : 11.2.2.4.2.111221Image activation date : 2012-02-11 20:58:06 -0500Imaging mode : out of partition upgradeImaging status : successVersion : 11.2.3.1.1.120607Image activation date : 2012-10-10 16:25:12 -0400Imaging mode : out of partition upgradeImaging status : success[root@cm01cel02 ~]#

CHAPTER 11 PATCHING AND UPGRADES
340
10. Next, run the following cellcli command with dcli to ensure that all of your Exadata grid disks are online. The grep –v will omit all lines that do not contain the text ONLINE; in other words, you want to confirm that the following command returns no output:
[root@cm01dbm01 ~]# dcli -g ./cell_group -l root cellcli -e list griddisk attributes name,status,asmmodestatus | grep -v ONLINE[root@cm01dbm01 ~]#
11. Confirm that there are no errors reported by the storage cell’s validation framework using the following dcli command. The command should show no output:
[root@cm01dbm01 ~]# dcli -g cell_group -l root grep -i fail \ /var/log/cellos/validations.log[root@cm01dbm01 ~]#
12. After confirming a successful patch application, run the patch cleanup utility using patchmgr to delete any interim patch files from each storage cell:
[root@cm01dbm01 patch_11.2.3.1.1.120607]# ./patchmgr -cells ~/cell_group -cleanupLinux cm01dbm01.centroid.com 2.6.18-238.12.2.0.2.el5 #1 SMP Tue Jun 28 05:21:19 EDT 2011 x86_64 x86_64 x86_64 GNU/Linux2012-10-10 18:18:57 :DONE: Cleanup[root@cm01dbm01 patch_11.2.3.1.1.120607]#
13. The last step is typically to check your InfiniBand switch software and OpenSM configuration from each storage cell using the following CheckSWProfile.sh command:
[root@cm01cel01 ~]# /opt/oracle.SupportTools/CheckSWProfile.sh -I \ cm01sw-ib2,cm01sw-ib3Checking if switch cm01sw-ib2 is pingable...Checking if switch cm01sw-ib3 is pingable...Use the default password for all switches? (y/n) [n]: nUse same password for all switches? (y/n) [n]: yEnter admin or root password for All_Switches:Confirm password:[INFO] SUCCESS Switch cm01sw-ib2 has correct software and firmware version: SWVer: 1.3.3-2[INFO] SUCCESS Switch cm01sw-ib2 has correct opensm configuration: controlled_handover=TRUE polling_retry_number=5 routing_engine=ftree sminfo_polling_timeout=1000 sm_priority=5[INFO] SUCCESS Switch cm01sw-ib3 has correct software and firmware version: SWVer: 1.3.3-2[INFO] SUCCESS Switch cm01sw-ib3 has correct opensm configuration: controlled_handover=TRUE polling_retry_number=5 routing_engine=ftree sminfo_polling_timeout=1000 sm_priority=5[INFO] SUCCESS All switches have correct software and firmware version: SWVer: 1.3.3-2

CHAPTER 11 PATCHING AND UPGRADES
341
[INFO] SUCCESS All switches have correct opensm configuration: controlled_handover=TRUE polling_retry_number=5 routing_engine=ftree sminfo_polling_timeout=1000 sm_priority=5 for non spine and 8 for spine switch5[root@cm01cel01 ~]#
How It WorksExadata Storage Servers are patched using the patchmgr utility. patchmgr is included with each storage server patch and is located in the <staging directory>/Infrastructure/ExadataStorageServer/<version>/patch_<version> directory.
Prior to applying Exadata Storage Server patches, you typically need to perform a few prerequisite tasks, including the following:
1. Starting an ILOM console on each storage cell
2. Running ipconf –verify to validate your storage cell network configuration
3. Establishing SSH user equivalence between root on your compute node and root on each storage cell
4. Running patchmgr with the –check_prereq –rolling option to ensure that your cells can be patched in a rolling manner
5. Adjusting your ASM disk group’s disk_repair_time attribute
Applying the Exadata Storage Server patches on the storage cells is performed using the patchmgr utility, as presented in the solution of this recipe. As the storage servers are patched, Oracle will first apply the patch to the inactive system partition, which is part of Exadata’s System Area or system volumes. If the patch fails for whatever reason, the cells are still bootable from the active, unpatched partition. If a patch succeeds, the inactive partition, patched via patchmgr, is made the active partition and the active partition that holds the previous image is swapped to the active partition. patchmgr performs these tasks automatically and also performs one or more reboots during the process.
Note In the README for each storage server patch, Oracle provides detailed rollback instructions that are to be followed in the event of a patch failure. We will not discuss these steps in this recipe, as the nature of the failure could vary from one patch to the next. Our recent experience has shown that it is becoming increasingly rare for a storage server patch to fail.
The steps in this recipe have only covered the storage cell components of an Exadata Storage Server patch. When storage cells are patched, there is almost always a set of storage server patches that need to be applied to the Exadata Compute Nodes as well. Historically, these were called “minimal packs,” but recent improvements to the compute node patching process deliver these updates using yum channels on Oracle’s Unbreakable Linux Network (ULN). Regardless, these patches on the compute nodes update software binaries and libraries, RPMs, and install a new image on the compute node that is certified with the images on the storage cells. When patching a storage server, always make sure you understand the compute node patching requirements and apply accordingly. Recipe 11-4 presents details on how to patch Exadata Compute Nodes using yum and Oracle’s ULN.

CHAPTER 11 PATCHING AND UPGRADES
342
11-4. Patching Your Exadata Compute Nodes and DatabasesProblemYou wish to apply Exadata Storage Server patches to your compute nodes, apply a Quarterly Database Patch for Exadata (QDPE), and apply the latest PSU patches to your Oracle software homes on the compute nodes.
SolutionIn this recipe, you will learn how to install the latest operating system patches and images on your compute nodes using yum and Oracle’s ULN, how to apply the QDPE patches on your Exadata Compute Nodes using OPatch, how to apply the latest PSU patches to your Oracle databases, and how to validate the patch installation.
Note In this recipe, as well as Recipes 11-3, 11-5, and 11-6, we will be showing examples for applying the July 2012 QFSDP, patch 14207418. The steps in this recipe are specific to the patch contents and README instructions of this patch, but they should provide an overview of a typical Exadata patching. Where possible, we will attempt to only present “common” storage server patching activities and leave it to the Exadata DMA to confirm specific patch steps required for specific Exadata software versions.
Registering with ULN and Setting Up a yum RepositoryThe first step required to update your compute node image, kernel, and RPMs is to register your compute nodes with Oracle’s ULN and set up a yum repository. Follow the instructions in www.oracle.com/technetwork/topics/linux/yum-repository-setup-085606.html to register your compute nodes with ULN. Detailed instructions for how to configure a yum repository and register your systems with ULN are provided both in the previous link as well as the README file with patch 13741363.
Note As the specific instructions, patch numbers, and configuration details are subject to change, we will omit the steps required to register your systems with ULN and configure a yum repository; refer to the patch instructions in your QFSDP or storage server patch README files for recent, version-specific information.
Once your compute nodes are registered with ULN, you need to define which channels you wish to subscribe to using the Manage Subscriptions link on the ULN web site. The storage server patch README will instruct you which channels to subscribe to; in Figure 11-2, we are subscribing to the Enterprise Linux 5 Add ons (x86_64), Exadata release 11.2 Latest (x86_64), and Oracle Linux 5 Latest (x86_64) channels based on instructions in the QFSDP storage server README file.

CHAPTER 11 PATCHING AND UPGRADES
343
After your system is registered and subscribed to the proper channels, you will need to create the following directory on each compute node:
[root@cm01dbm01 11.2.3.1.0]# mkdir -p /var/www/html/yum
Once this is complete, download script 167283.sh from www.oracle.com/technetwork/topics/linux /yum-repository-setup-085606.html to retrieve the RPMs based on the channels you’ve subscribed to and run the script on each compute node. Following is an example execution of 167283.sh:
[root@cm01dbm01 stg]# sh ./167283.shFetching Obsoletes list for channel: el5_x86_64_addons...########################################Fetching Obsoletes list for channel: ol5_x86_64_latest...########################################Fetching rpm headers...######... output omittedDigesting rpms 98 % complete: xz-devel-4.999.9-0.3.beta.20091007git.el5.x86_64.rDigesting rpms 98 % complete: xz-libs-4.999.9-0.3.beta.20091007git.el5.x86_64.rpDigesting rpms 99 % complete: xz-lzma-compat-4.999.9-0.3.beta.20091007git.el5.x8Digesting rpms 99 % complete: yum-NetworkManager-dispatcher-1.1.16-21.el5.noarchDigesting rpms 100 % complete: zsh-html-4.2.6-6.el5.x86_64.rpm Total: 3696 Used: 3696 Src: 0Writing header.info file## END PROCESSING ol5_x86_64_latest ##[root@cm01dbm02 stg]#
Next, enable HTTP on your compute nodes in preparation for using yum to download updates:
[root@cm01dbm01 ~]# chkconfig --add httpd[root@cm01dbm01 ~]# chkconfig httpd on
Figure 11-2. ULN subscriptions for compute node patching

CHAPTER 11 PATCHING AND UPGRADES
344
[root@cm01dbm01 ~]# service httpd startStarting httpd: [ OK ][root@cm01dbm01 ~]#
After this is complete, open a browser and ensure you can navigate to http://yourserver.yourdomain.com/yum/unknown/EXADATA/dbserver/11.2/latest/x86_64.
The patch instructions may, at this point, require you to remove some or many existing RPMs on your system; as these requirements may vary for different patches, please following the instructions in the README file to identify and remove any packages that the patch requires removing.
Typically, after removing unnecessary patches, the README will instruct you to install yum support. This is accomplished by installing a number of packages in the yum_essential_rpms directory from patch 13741363:
[root@cm01dbm02 yum_essential_rpms]# pwd/u01/stg/13741363/11.2.3.1.0/yum_essential_rpms[root@cm01dbm02 yum_essential_rpms]# rpm -Uvh --force --nodeps *rpm-nodeps: unknown option[root@cm01dbm02 yum_essential_rpms]# rpm -Uvh --force --nodeps *rpmPreparing... ########################################### [100%] 1:rpm-python ########################################### [ 13%] 2:yum-metadata-parser ########################################### [ 25%] 3:rhpl ########################################### [ 38%] 4:curl ########################################### [ 50%] 5:gnupg ########################################### [ 63%] 6:rhnlib ########################################### [ 75%] 7:up2date ########################################### [ 88%] 8:yum ########################################### [100%][root@cm01dbm02 yum_essential_rpms]#
After this is complete, import the RPM key for signature validation and remove the yum rhn plugin:
[root@cm01dbm02]# rpm --import /usr/share/rhn/RPM-GPG-KEY[root@cm01dbm02 yum_essential_rpms]# rpm -q yum-rhn-pluginpackage yum-rhn-plugin is not installed[root@cm01dbm02 yum_essential_rpms]#
The next step is to copy the repository file from the yum patch, 13741363, to /etc/yum.repos.d/Exadata-computenode.repo and edit it to match Oracle’s instructions in the storage server README file.
Note When editing the information in the following file, use the instructions supplied in the Exadata Storage Server patch, not those in patch 13741363. The latter patch provides generic instructions that are not release-specific to the Exadata patch you are applying, and the patch you are applying should have instructions in its README file that identify alternative steps to those in 13741363.
[root@cm01dbm02 11.2.3.1.0]# cp etc_yum.repos.d_Exadata-computenode.repo \/etc/yum.repos.d/Exadata-computenode.repo [root@cm01dbm01 ~]# cat /etc/yum.repos.d/Exadata-computenode.repo[exadata_dbserver_11.2_x86_64_latest]

CHAPTER 11 PATCHING AND UPGRADES
345
name=Oracle Exadata DB server 11.2 Linux $releasever - $basearch - latestbaseurl=http://cm01dbm01.centroid.com/yum/unknown/EXADATA/dbserver/11.2/latest/x86_64/gpgcheck=1enabled=1[root@cm01dbm01 ~]#
Next, empty your yum cache using the following command:
[root@cm01dbm02 11.2.3.1.0]# yum clean allCleaning up Everything[root@cm01dbm02 11.2.3.1.0]#
Next, enable your repository using a command similar to the following command based on instructions in the storage server’s patch README:
[root@cm01dbm02 11.2.3.1.0]# yum --enablerepo=exadata_dbserver_11.2_x86_64_latest repolistexadata_dbserver_11.2_x86_64_latest | 1.9 kB 00:00exadata_dbserver_11.2_x86_64_latest/primary_db | 1.1 MB 00:00repo id repo name statusexadata_dbserver_11.2_x86_64_latest Oracle Exadata DB server 11.2 Linux 5 - x86_64 - latest enabled: 482repolist: 482[root@cm01dbm02 11.2.3.1.0]#
When this is complete, you may be instructed to install RPMs that are missing, as listed:
[root@cm01dbm02 11.2.3.1.0]# yum --enablerepo=exadata_dbserver_11.2_x86_64_latest \ install elfutils-libelf.i386 libstdc++-devel.i386 libX11.i386 \ libXau.i386 libXdmcp.i386 libXext.i386 libXp.i386 libXtst.i386Setting up Install ProcessPackage elfutils-libelf-0.137-3.el5.i386 already installed and latest versionPackage libXp-1.0.0-8.1.el5.i386 already installed and latest versionPackage libXtst-1.0.1-3.1.i386 already installed and latest versionResolving Dependencies--> Running transaction check---> Package libX11.i386 0:1.0.3-11.el5_7.1 set to be updated---> Package libXau.i386 0:1.0.1-3.1 set to be updated---> Package libXdmcp.i386 0:1.0.1-2.1 set to be updated---> Package libXext.i386 0:1.0.1-2.1 set to be updated
Updating Your Compute Nodes Using yumPrior to applying the latest firmware and package updates on the compute nodes, stop and disable CRS on the node you wish to patch.
Note Exadata storage patches are typically applied one compute node at a time, and we recommend following all of the steps in this section's recipe on a single node first before continuing to the next one.

CHAPTER 11 PATCHING AND UPGRADES
346
[root@cm01dbm02 bin]# $GI_HOME/bin/crsctl stop crs[root@cm01dbm02 bin]# $GI_HOME/bin/crsctl disable crs
Once your cluster resources are down, update your kernel using a command similar to the following:
[root@cm01dbm02 11.2.3.1.0]# yum --enablerepo=exadata_dbserver_11.2_x86_64_latest install kernel-2.6.18-308.8.2.0.1.el5Setting up Install ProcessResolving Dependencies--> Running transaction check---> Package kernel.x86_64 0:2.6.18-308.8.2.0.1.el5 set to be installed--> Finished Dependency Resolution--> Running transaction check---> Package kernel.x86_64 0:2.6.18-194.3.1.0.3.el5 set to be erased--> Finished Dependency ResolutionDependencies Resolved... Kernel dependency information omittedInstall 1 Package(s)Upgrade 0 Package(s)Remove 1 Package(s)Reinstall 0 Package(s)Downgrade 0 Package(s) Total download size: 21 MIs this ok [y/N]: y... Additional output omitted
When this is complete, you are ready to install the main Exadata database server RPMs. Run the following command, which will download all software updates, resolve dependencies, and reboot your compute node:
# yum --enablerepo=exadata_dbserver_11.2_x86_64_latest install exadata-sun-computenode Dependency Updated: Lib_Utils.noarch 0:1.00-09 MegaCli.noarch 0:8.02.21-1 compat-dapl.x86_64... Detailed information omitted for brevityReplaced: kernel-headers.x86_64 0:2.6.18-238.12.2.0.2.el5Complete![root@cm01dbm02 11.2.3.1.0]#Remote broadcast message (Thu Oct 11 02:07:51 2012):Exadata post install steps started.It may take up to 2 minutes.The db node will be rebooted upon successful completion.Remote broadcast message (Thu Oct 11 02:08:15 2012):Exadata post install steps completed.Initiate reboot in 10 seconds to apply the changes.
When finished, log in to your compute node and validate your kernel version:
[root@cm01dbm02 ~]# uname -r2.6.32-400.1.1.el5uek[root@cm01dbm02 ~]#

CHAPTER 11 PATCHING AND UPGRADES
347
Assuming that your versions are correct and expected, update the remaining RPMs using the following command:
# yum --enablerepo=exadata_dbserver_11.2_x86_64_latest update
After a successful validation, you will typically be required to verify your kernel and ofa versions, clear the yum cache, relink your Oracle binaries, and reboot your server.
Applying QDPE PatchesIn this section, you will learn how to apply a typical QDPE patch to the Oracle RDBMS, Grid Infrastructure (GI), and diskmon binaries on the Exadata Compute Nodes. First, change directories to the database patch staging directory and install the OPatch patch into each of your RDBMS and GI homes. OPatch is delivered in p6880880_112000_Linux-x86-64.zip; you will very likely already have OPatch installed in each Oracle home, but before applying the QDPE patches, you will need the version that is included in the QDPE patch installed in each home.
Once OPatch is installed, create your Oracle Configuration Management response file in each RDBMS and GI home to avoid being prompted for your My Oracle Support credentials when opatch runs:
[oracle@cm01dbm01 bin]$ cd $ORACLE_HOME/OPatch/ocm/bin[oracle@cm01dbm01 bin]$ ./emocmrspOCM Installation Response Generator 10.3.4.0.0 - ProductionCopyright (c) 2005, 2010, Oracle and/or its affiliates. All rights reserved.Provide your email address to be informed of security issues, install andinitiate Oracle Configuration Manager. Easier for you if you use your MyOracle Support Email address/User Name.Visit http://www.oracle.com/support/policies.html for details.Email address/User Name: [email protected] your My Oracle Support password to receive security updates via your My Oracle Support account.Password (optional):The OCM configuration response file (ocm.rsp) was successfully created.[oracle@cm01dbm01 bin]$... Repeat on all nodes for both the RDBMS and GI Home
Next, validate the inventory on each RDBMS and GI home using the following commands. Use the Oracle software owner when validating the RDBMS Oracle Home and the Grid Infrastructure owner when validating the GI Home, and run the validation against each patch contained under the unzipped patch directory according to the patch README file:
[grid@cm01dbm02 ]$ $GI_HOME/OPaych/opatch lsinventory -detail -oh /u01/app/11.2.0.3/grid[oracle@cm01dbm01 ~]$ $ORACLE_HOME/OPatch/opatch lsinventory -detail -oh \ /u01/app/oracle/product/11.2.0.3/dbhome_1
After unzipping the individual QDPE patch contents, check for patch conflicts using opatch on both the RDBMS and GI Oracle Homes:
[grid@cm01dbm01 ~]$ /u01/app/11.2.0.3/grid/OPatch/opatch prereq CheckConflictAgainstOHWithDetail \> -phBaseDir /u01/stg/14207418/Database/11.2.0.3_QDPE_Jul2012/14103267/14103267Oracle Interim Patch Installer version 11.2.0.3.0... Output omittedInvoking prereq "checkconflictagainstohwithdetail"
CHAPTER 11 PATCHING AND UPGRADES
348
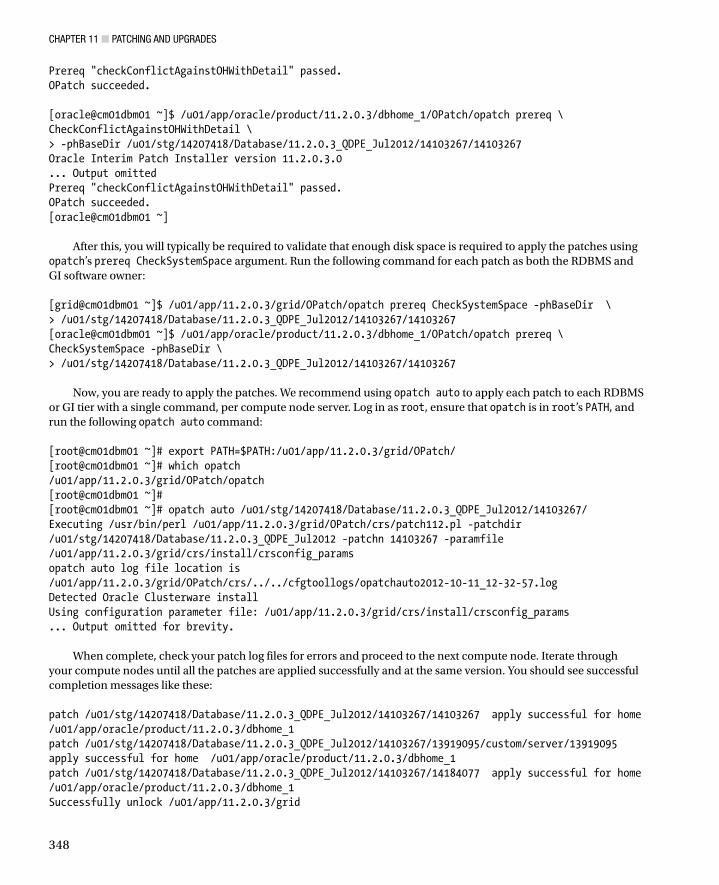
Prereq "checkConflictAgainstOHWithDetail" passed.OPatch succeeded. [oracle@cm01dbm01 ~]$ /u01/app/oracle/product/11.2.0.3/dbhome_1/OPatch/opatch prereq \ CheckConflictAgainstOHWithDetail \> -phBaseDir /u01/stg/14207418/Database/11.2.0.3_QDPE_Jul2012/14103267/14103267Oracle Interim Patch Installer version 11.2.0.3.0... Output omittedPrereq "checkConflictAgainstOHWithDetail" passed.OPatch succeeded.[oracle@cm01dbm01 ~]
After this, you will typically be required to validate that enough disk space is required to apply the patches using opatch’s prereq CheckSystemSpace argument. Run the following command for each patch as both the RDBMS and GI software owner:
[grid@cm01dbm01 ~]$ /u01/app/11.2.0.3/grid/OPatch/opatch prereq CheckSystemSpace -phBaseDir \> /u01/stg/14207418/Database/11.2.0.3_QDPE_Jul2012/14103267/14103267[oracle@cm01dbm01 ~]$ /u01/app/oracle/product/11.2.0.3/dbhome_1/OPatch/opatch prereq \ CheckSystemSpace -phBaseDir \> /u01/stg/14207418/Database/11.2.0.3_QDPE_Jul2012/14103267/14103267
Now, you are ready to apply the patches. We recommend using opatch auto to apply each patch to each RDBMS or GI tier with a single command, per compute node server. Log in as root, ensure that opatch is in root’s PATH, and run the following opatch auto command:
[root@cm01dbm01 ~]# export PATH=$PATH:/u01/app/11.2.0.3/grid/OPatch/[root@cm01dbm01 ~]# which opatch/u01/app/11.2.0.3/grid/OPatch/opatch[root@cm01dbm01 ~]#[root@cm01dbm01 ~]# opatch auto /u01/stg/14207418/Database/11.2.0.3_QDPE_Jul2012/14103267/Executing /usr/bin/perl /u01/app/11.2.0.3/grid/OPatch/crs/patch112.pl -patchdir /u01/stg/14207418/Database/11.2.0.3_QDPE_Jul2012 -patchn 14103267 -paramfile /u01/app/11.2.0.3/grid/crs/install/crsconfig_paramsopatch auto log file location is /u01/app/11.2.0.3/grid/OPatch/crs/../../cfgtoollogs/opatchauto2012-10-11_12-32-57.logDetected Oracle Clusterware installUsing configuration parameter file: /u01/app/11.2.0.3/grid/crs/install/crsconfig_params... Output omitted for brevity.
When complete, check your patch log files for errors and proceed to the next compute node. Iterate through your compute nodes until all the patches are applied successfully and at the same version. You should see successful completion messages like these:
patch /u01/stg/14207418/Database/11.2.0.3_QDPE_Jul2012/14103267/14103267 apply successful for home /u01/app/oracle/product/11.2.0.3/dbhome_1patch /u01/stg/14207418/Database/11.2.0.3_QDPE_Jul2012/14103267/13919095/custom/server/13919095 apply successful for home /u01/app/oracle/product/11.2.0.3/dbhome_1patch /u01/stg/14207418/Database/11.2.0.3_QDPE_Jul2012/14103267/14184077 apply successful for home /u01/app/oracle/product/11.2.0.3/dbhome_1Successfully unlock /u01/app/11.2.0.3/grid

CHAPTER 11 PATCHING AND UPGRADES
349
patch /u01/stg/14207418/Database/11.2.0.3_QDPE_Jul2012/14103267/14103267 apply successful for home /u01/app/11.2.0.3/gridpatch /u01/stg/14207418/Database/11.2.0.3_QDPE_Jul2012/14103267/13919095 apply successful for home /u01/app/11.2.0.3/gridpatch /u01/stg/14207418/Database/11.2.0.3_QDPE_Jul2012/14103267/14184077 apply successful for home /u01/app/11.2.0.3/grid
Updating Your Oracle DatabasesAfter your Oracle binaries have been patched with the QDPE patches, you typically will need to update your Oracle registry information. Log in to a compute node as the Oracle software owner, change directories to $ORACLE_HOME, and for each database log in to SQL*Plus as SYSDBA and run the following:
SQL> connect / as sysdba SQL> @rdbms/admin/catbundle.sql exa apply
How It WorksWhen patching your Exadata Database Machine using a QFSDP or other storage server patch, there are generally three distinct activities required for patching your compute nodes:
1. First, you must update your compute nodes with the image, RPMs, and software required to coexist with the images on your storage cells. As discussed in Recipe 11-1, these were historically referred as “minimal packs,” but Oracle has phased out the minimal pack concept in preference of using Oracle’s ULN and yum.
2. Next, you would typically apply patches to your RDBMS, Grid Infrastructure, and diskmon binaries using OPatch. These patches are usually delivered as part of a QPDE (Quarterly Database Patch for Exadata).
3. Finally, you would update each database’s registry using catbundle.sql exa apply.
The QDPE patches are not necessarily required to coexist with the updated versions of your compute node firmware, kernel, and RPMs unless specified in the patch README file, but we generally recommend that when applying a QFSDP patch that the Exadata DMA apply the QDPE patches along with storage server and compute node updates.
11-5. Patching the InfiniBand SwitchesProblemYou wish to patch your InfiniBand switches.
SolutionIn this recipe, you will learn how to patch your InfiniBand switches. We will demonstrate by showing an example of applying an InfiniBand patch.

CHAPTER 11 PATCHING AND UPGRADES
350
Note In this recipe, as well as Recipes 11-3, 11-4, and 11-6, we will be showing examples for applying the July 2012 QFSDP, patch 14207418. The steps in this recipe are specific to the patch contents and README instructions of this patch, but they should provide an overview of a typical Exadata patching.
1. Begin by reading the patch README file. Unzip the patch contents from the <patch_stage>/14207418/Infrastructure/InfiniBandSwitchSoftware/1.3.3-2 directory and transfer to your first InfiniBand switch's /tmp directory, as outlined:
[root@cm01dbm01 1.3.3-2]# unzip p11891229_133_Generic.zip Archive: p11891229_133_Generic.zip inflating: NM2_SW_1.3.3_THIRDPARTYLICENSE.txt inflating: readme_SUN_DCS_36p_1.3.3.txt inflating: SUN_DCS_36p_1.3.3.tar.gz[root@cm01dbm01 1.3.3-2]# unzip p12373676_112100_Linux-x86-64.zip Archive: p12373676_112100_Linux-x86-64.zip creating: 12373676/ inflating: 12373676/ibswitchcheck.sh inflating: 12373676/README.txt[root@cm01dbm01 1.3.3-2]#[root@cm01dbm01 1.3.3-2]# tar -zxvf SUN_DCS_36p_1.3.3.tar.gzENTITY-MIB.txtSUN-DCS-IB-MIB.txtSUN-HW-TRAP-MIB.mibSUN-ILOM-CONTROL-MIB.mibSUN-ILOM-PET-MIB.mibSUN-PLATFORM-MIB.txtsundcs_36p_repository_1.3.3_2.pkg[root@cm01dbm01 1.3.3-2]#[root@cm01dbm01 1.3.3-2]# scp -r 12373676/ root@cm01sw-ib2:/tmpThe authenticity of host 'cm01sw-ib2 (172.16.1.23)' can't be established.RSA key fingerprint is be:6b:01:27:90:91:0a:f9:ab:7f:fd:99:81:76:4a:45.Are you sure you want to continue connecting (yes/no)? yesWarning: Permanently added 'cm01sw-ib2,172.16.1.23' (RSA) to the list of known hosts.root@cm01sw-ib2's password:ibswitchcheck.sh 100% 14KB 13.6KB/s 00:00README.txt 100% 8634 8.4KB/s 00:00[root@cm01dbm01 1.3.3-2]# scp sundcs_36p_repository_1.3.3_2.pkg root@cm01sw-ib2:/tmproot@cm01sw-ib2's password:sundcs_36p_repository_1.3.3_2.pkg 100% 112MB 5.3MB/s 00:21[root@cm01dbm01 1.3.3-2]#
2. Log in as root to your InfiniBand switch and disable your InfiniBand subnet manager:
[root@cm01sw-ib2 12373676]# disablesmStopping partitiond daemon. [ OK ]Stopping IB Subnet Manager.. [ OK ][root@cm01sw-ib2 12373676]#

CHAPTER 11 PATCHING AND UPGRADES
351
3. Run the patch prerequisite steps by executing ibswitchchecksh pre from the /tmp directory:
[root@cm01sw-ib2 12373676]# ./ibswitchcheck.sh pre|grep ERROR[ERROR] Switch is at target patching level[ERROR] Entry in /etc/hosts for FQN cm01sw-ib2.centroid.com does not match hostname=cm01sw-ib2Overall status of pre check is ERROR[root@cm01sw-ib2 12373676]#
In the previous output, we see errors with fully qualified name resolution in /etc/hosts as well as a message indicating that our switch is already at the current patch level. You can ignore the FQN error message. Normally, if your switch is already at the proper patch level, you would stop now, but for the purposes of this recipe we will apply the patch anyway. To proceed, type spsh to enter the ILOM command line interface and load the patch:
[root@cm01sw-ib2 tmp]# spshOracle(R) Integrated Lights Out ManagerVersion ILOM 3.0 r47111Copyright (c) 2010, Oracle and/or its affiliates. All rights reserved.-> load -source /tmp/sundcs_36p_repository_1.3.3_2.pkgNOTE: Firmware upgrade will upgrade the SUN DCS 36p firmware. ILOM will enter a special mode to load new firmware. No other tasks should be performed in ILOM until the firmware upgrade is complete.Are you sure you want to load the specified file (y/n)? ySetting up environment for firmware upgrade. This will take few minutes.Starting SUN DCS 36p FW update==========================Performing operation: I4 A==========================I4 A: I4 is already at the given version.===========================Summary of Firmware update===========================I4 status : FW UPDATE - SUCCESSI4 update succeeded on : noneI4 already up-to-date on : AI4 update failed on : none=========================================Performing operation: SUN DCS 36p firmware update=========================================INFO: SUN DCS 36p is already at the given version.Firmware update is complete.->
These messages indicate that our switch is already patched to this firmware level. Upon successful completion and based on directions in the README file, validate that /conf/configvalid file contains a single line with the number 1 in it:
[root@cm01sw-ib2 tmp]# cat /conf/configvalid1[root@cm01sw-ib2 tmp]#

CHAPTER 11 PATCHING AND UPGRADES
352
Different subnet manager priorities need to be set based on whether the patched switch is a spine switch or leaf switch. Make sure to follow the instructions in the patch README based on which type of switch you are patching. When complete, reboot your switch and enable the subnet manager by typing enablesm:
[root@cm01sw-ib2 tmp]# enablesmStarting IB Subnet Manager. [ OK ]Starting partitiond daemon. [ OK ][root@cm01sw-ib2 tmp]#
4. Finally, run ibswitchcheck.sh post to validate that your switch is healthy and patched to the proper firmware level.
How It WorksPatching Exadata’s InfiniBand switches is a relatively straightforward process. After downloading and staging the patches, the following steps are typically required:
Run ibswitchcheck.sh pre to perform a pre-patching validation
Disable the subnet manager
Load the patch package file using the ILOM CLI
Configure or reset subnet manager priorities
Reboot your switch
Enable the subnet manager
Run ibswitchcheck.sh post to validate the switch
As mentioned in Recipe 11-1, InfiniBand patches are released relatively infrequently and though they are always included with QFSDPs and storage server patches, you will likely not need to apply them very often.
11-6. Patching Your Enterprise Manager Systems Management SoftwareProblemYou wish to patch the various Enterprise Manager systems management software deployments on your Exadata Database Machine.
SolutionIn this recipe, you will learn some general guidelines for patching the Systems Management software along with an Exadata patch.
The Systems Management (that is, Enterprise Manager) software patches are typically included in the SystemsManagement directory under your Exadata patch, as listed in bold:
[root@cm01dbm01 14207418]# pwd/u01/stg/14207418[root@cm01dbm01 14207418]# ls
CHAPTER 11 PATCHING AND UPGRADES
353
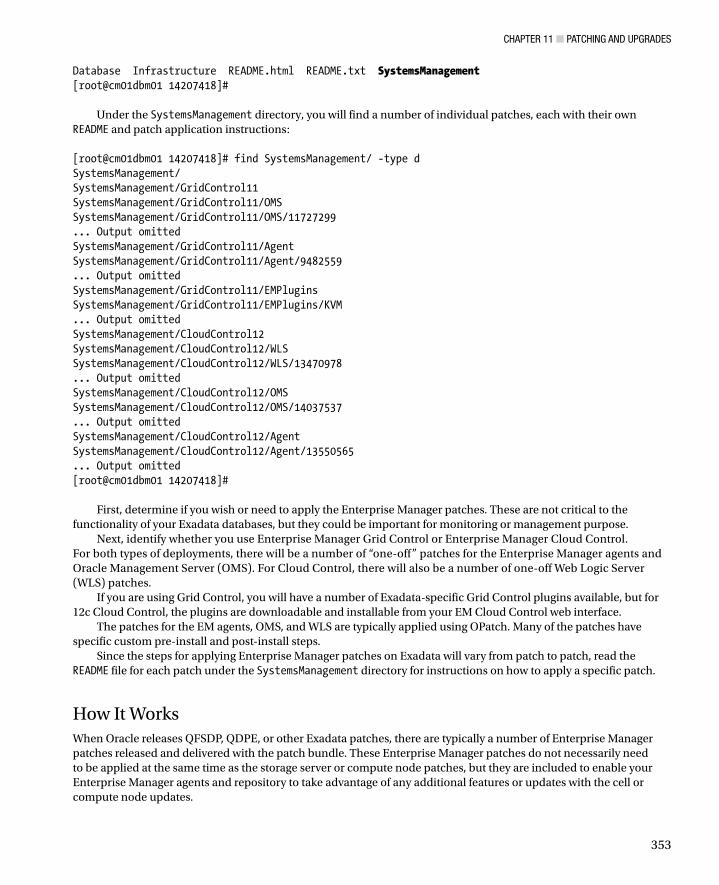
Database Infrastructure README.html README.txt SystemsManagement[root@cm01dbm01 14207418]#
Under the SystemsManagement directory, you will find a number of individual patches, each with their own README and patch application instructions:
[root@cm01dbm01 14207418]# find SystemsManagement/ -type dSystemsManagement/SystemsManagement/GridControl11SystemsManagement/GridControl11/OMSSystemsManagement/GridControl11/OMS/11727299... Output omittedSystemsManagement/GridControl11/AgentSystemsManagement/GridControl11/Agent/9482559... Output omittedSystemsManagement/GridControl11/EMPluginsSystemsManagement/GridControl11/EMPlugins/KVM... Output omittedSystemsManagement/CloudControl12SystemsManagement/CloudControl12/WLSSystemsManagement/CloudControl12/WLS/13470978... Output omittedSystemsManagement/CloudControl12/OMSSystemsManagement/CloudControl12/OMS/14037537... Output omittedSystemsManagement/CloudControl12/AgentSystemsManagement/CloudControl12/Agent/13550565... Output omitted[root@cm01dbm01 14207418]#
First, determine if you wish or need to apply the Enterprise Manager patches. These are not critical to the functionality of your Exadata databases, but they could be important for monitoring or management purpose.
Next, identify whether you use Enterprise Manager Grid Control or Enterprise Manager Cloud Control. For both types of deployments, there will be a number of “one-off” patches for the Enterprise Manager agents and Oracle Management Server (OMS). For Cloud Control, there will also be a number of one-off Web Logic Server (WLS) patches.
If you are using Grid Control, you will have a number of Exadata-specific Grid Control plugins available, but for 12c Cloud Control, the plugins are downloadable and installable from your EM Cloud Control web interface.
The patches for the EM agents, OMS, and WLS are typically applied using OPatch. Many of the patches have specific custom pre-install and post-install steps.
Since the steps for applying Enterprise Manager patches on Exadata will vary from patch to patch, read the README file for each patch under the SystemsManagement directory for instructions on how to apply a specific patch.
How It WorksWhen Oracle releases QFSDP, QDPE, or other Exadata patches, there are typically a number of Enterprise Manager patches released and delivered with the patch bundle. These Enterprise Manager patches do not necessarily need to be applied at the same time as the storage server or compute node patches, but they are included to enable your Enterprise Manager agents and repository to take advantage of any additional features or updates with the cell or compute node updates.