Part 05 – Code First Migrations and Azure Deployment Entity Framework and MVC Series Tom Perkins...
32
Part 05 – Code First Migrations and Azure Deployment Entity Framework and MVC Series Tom Perkins NTPCUG
-
Upload
thomas-marcus-stone -
Category
Documents
-
view
238 -
download
4
Transcript of Part 05 – Code First Migrations and Azure Deployment Entity Framework and MVC Series Tom Perkins...
Part 05 – Code First Migrations and Azure Deployment
Entity Framework and MVC SeriesTom Perkins
NTPCUG

SOURCE
• See Getting Started with Entity Framework 6 Code First using MVC 5
• http://www.asp.net/mvc/tutorials/getting-started-with-ef-using-mvc/creating-an-entity-framework-data-model-for-an-asp-net-mvc-application
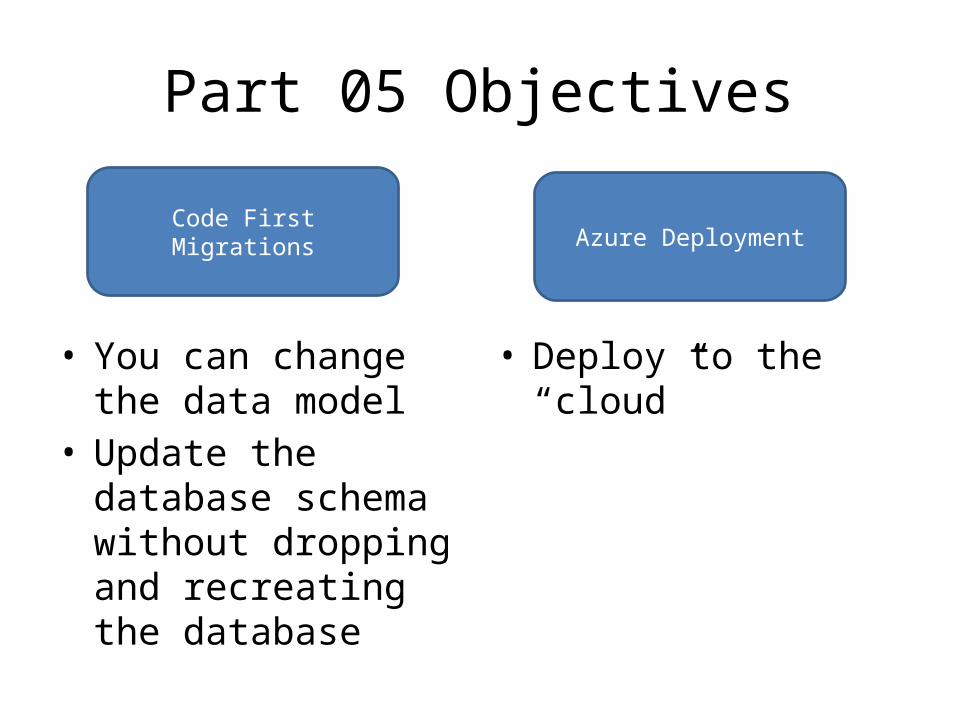
Part 05 Objectives
• You can change the data model
• Update the database schema without dropping and recreating the database
• Deploy to the “cloud”
Code First Migrations Azure Deployment

Code First “Migrations” Feature
• In development– the data model changes frequently– Model gets out of sync with the database– When the data model changes, we have been:
• Dropping and recreating the database• Reseeding the database with test data
• In production– We want to keep the data in the database– Use Code First Migrations to
• Update the database schema without dropping and recreating the database

Enable Migrations
• Follow the steps outlined in Timesaver 05 – Activity 1 (Enable Code First Migrations)
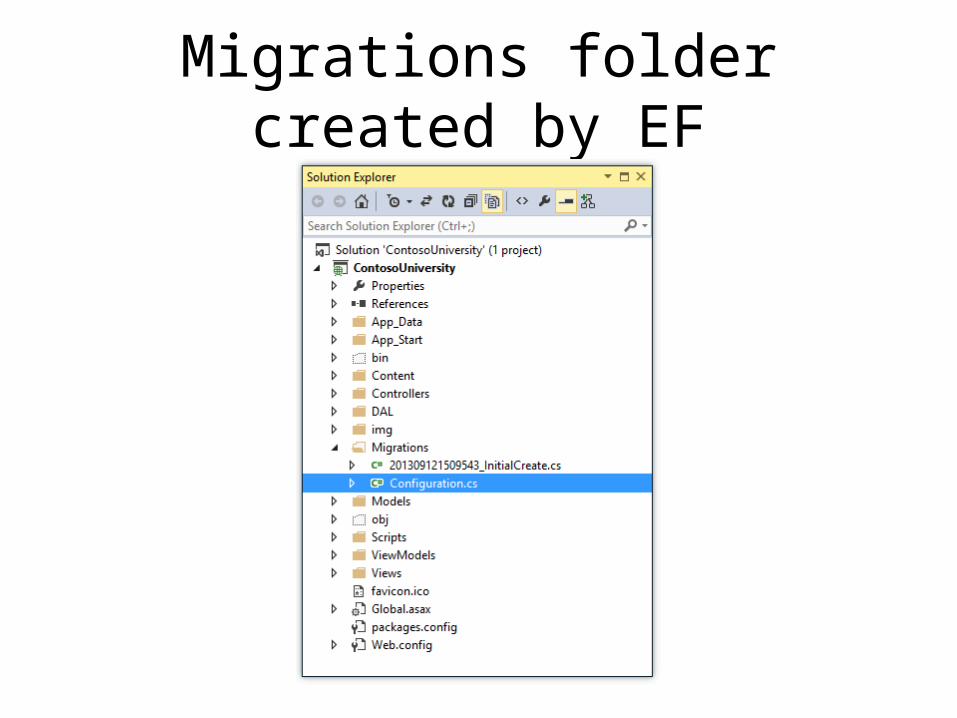
Migrations folder created by EF

Default Seed Method in Configuration Class
internal sealed class Configuration : DbMigrationsConfiguration<ContosoUniversity.DAL.SchoolContext>{ public Configuration() { AutomaticMigrationsEnabled = false; }
protected override void Seed(ContosoUniversity.DAL.SchoolContext context) { // This method will be called after migrating to the latest version.
// You can use the DbSet<T>.AddOrUpdate() helper extension method // to avoid creating duplicate seed data. E.g. // // context.People.AddOrUpdate( // p => p.FullName, // new Person { FullName = "Andrew Peters" }, // new Person { FullName = "Brice Lambson" }, // new Person { FullName = "Rowan Miller" } // ); // }}
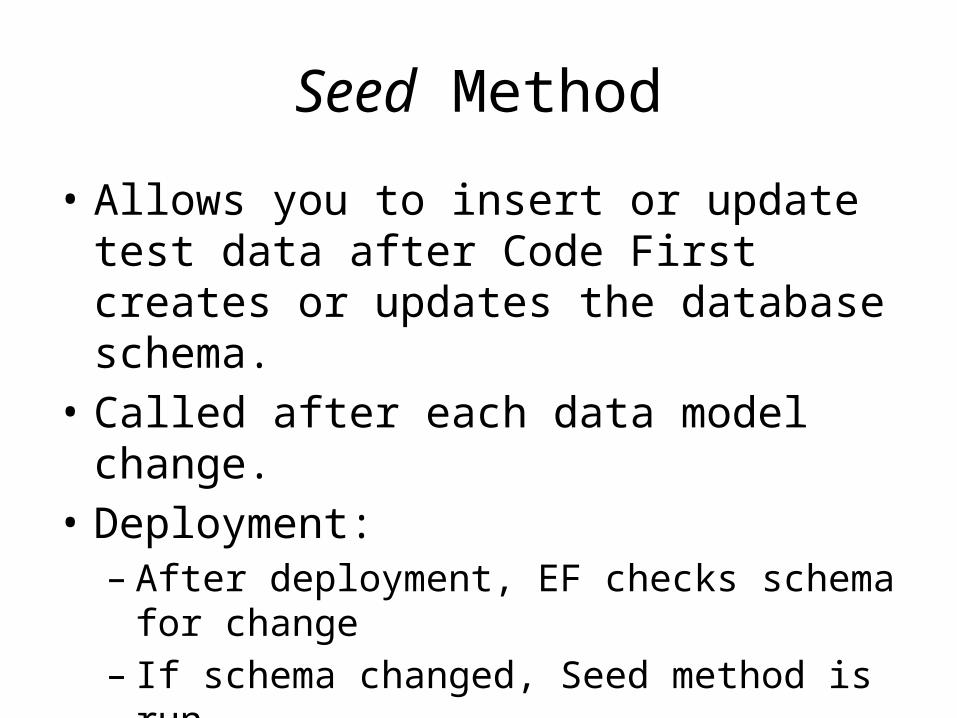
Seed Method
• Allows you to insert or update test data after Code First creates or updates the database schema.
• Called after each data model change.• Deployment:– After deployment, EF checks schema for change– If schema changed, Seed method is run.– Test data should be commented out.
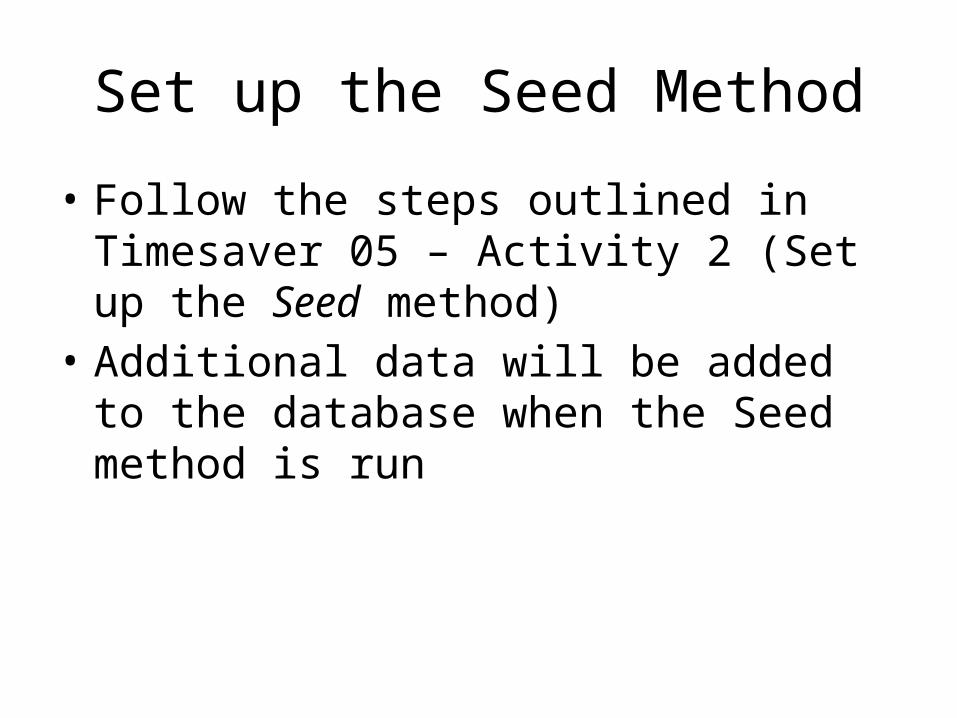
Set up the Seed Method
• Follow the steps outlined in Timesaver 05 – Activity 2 (Set up the Seed method)
• Additional data will be added to the database when the Seed method is run
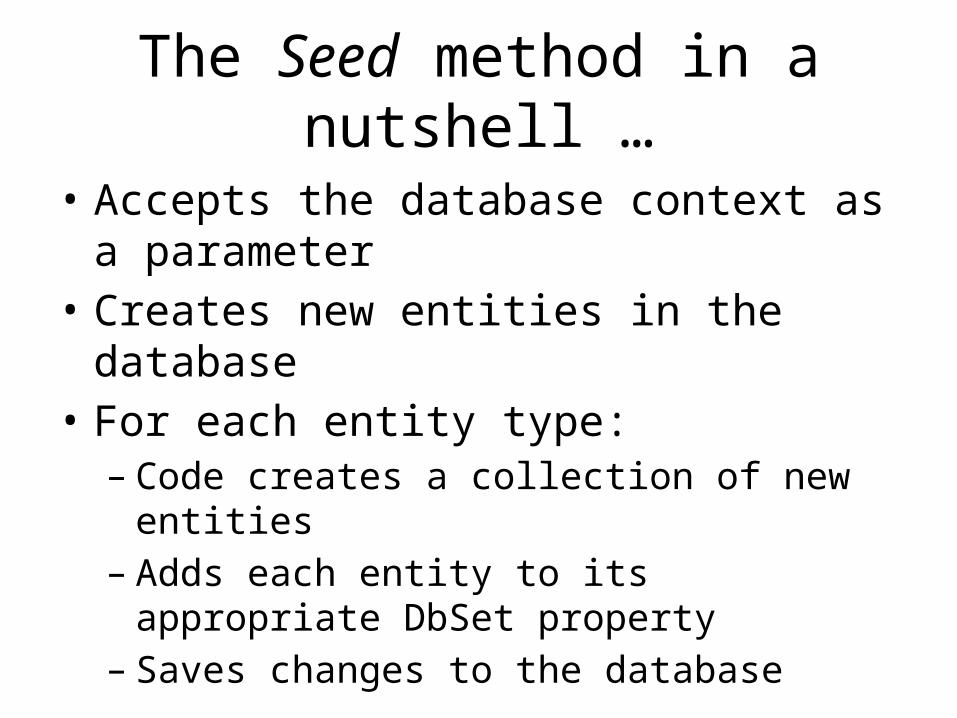
The Seed method in a nutshell …
• Accepts the database context as a parameter• Creates new entities in the database• For each entity type:– Code creates a collection of new entities– Adds each entity to its appropriate DbSet property– Saves changes to the database

AddOrUpdate Method
• AddOrUpdate method – “upsert” operation– Insert or update – see Students, Courses
• courses.ForEach(s => context.Courses.AddOrUpdate(p => p.Title, s));
• First parameter passed (Title) used to check whether entity exists. May cause error if duplicates. See http://blogs.msdn.com/b/rickandy/archive/2013/02/12/seeding-and-debugging-entity-framework-ef-dbs.aspx

Execute the first Migration
• When add-migration command was entered– EF generated code to build the database from scratch– This code is available in a .cs file in the Migrations folder.
• C:\ContosoUniversity\ContosoUniversity\Migrations\201410161535324_InitialCreate.cs
• Up() method in this file creates database tables corresponding to data model entity sets
• Down() method deletes them• The parameter after add-migration
(InitialCreate)names the migration.

First migration …• In Package Manager Console– Type update-database
• Use the Server Explorer to verify the update

DEPLOY TO WINDOWS AZURE
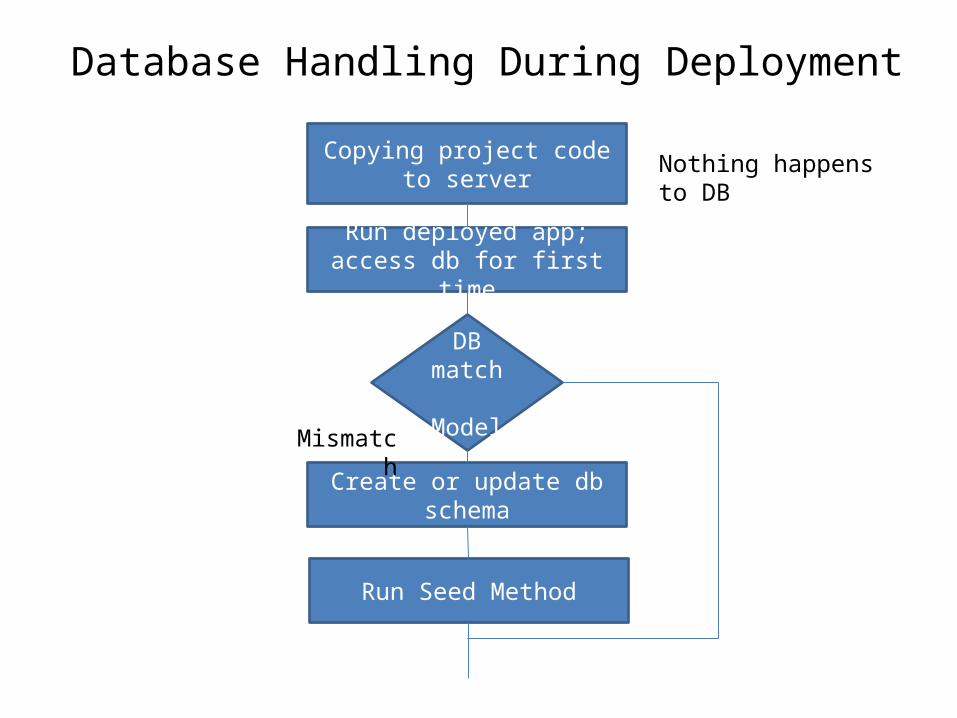
Database Handling During Deployment
Copying project code to server Nothing happens to DB
Run deployed app; access db for first time
DB match Model
Create or update db schema
Run Seed Method
Mismatch

Get an Azure Account
• MSDN Subscriber– Activate MSDN benefits• http://www.windowsazure.com/en-us/pricing/member
-offers/msdn-benefits-details/?WT.mc_id=A443DD604
• Windows Azure Free Trial– http://www.windowsazure.com/en-us/pricing/fre
e-trial/?WT.mc_id=A443DD604

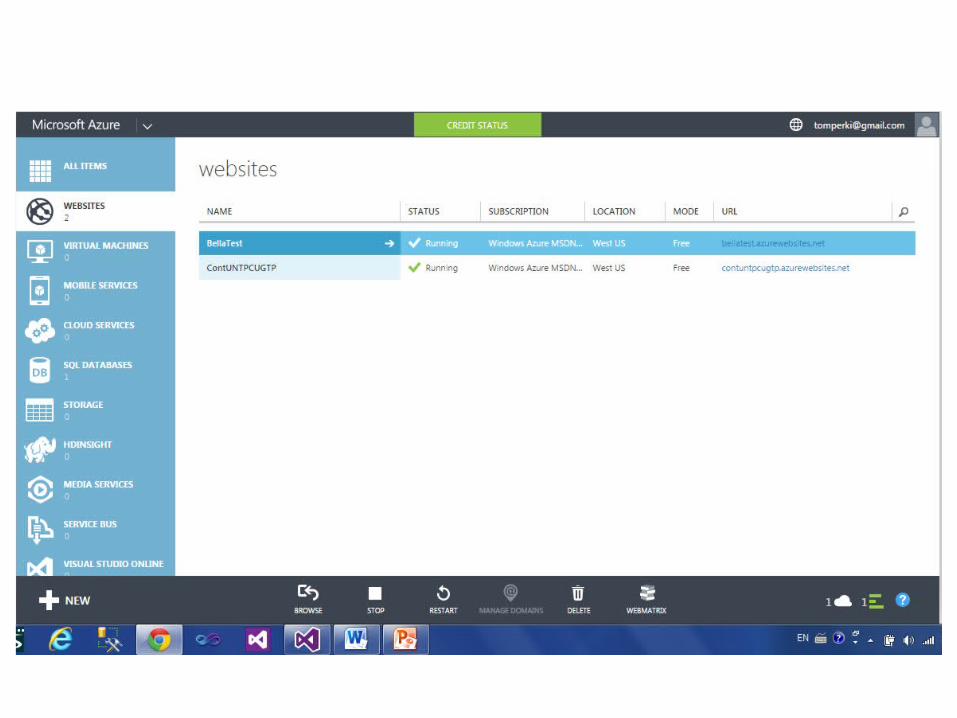
Create a website in Azure
• 1. Open the Windows Azure Management Portal– https://manage.windowsazure.com/– Click Web Sites– Click New

• Click Custom Create

• Enter unique URL (I used ContUNTPCUGTP)• Region – use default• Database – Select free 20 MB SQL• DB Connection String Name – use SchoolContext• Click arrow at bottom for Database Settings

Database Settings
• Name – I used ContosoUniversityDB• Server – select New SQL Server• Login Name (remember these) – used for server admin• Password – strong requires 3 – upper, lower,numeric, special char• Region – leave default• Click check to exit
Deploy App from VS to Azure
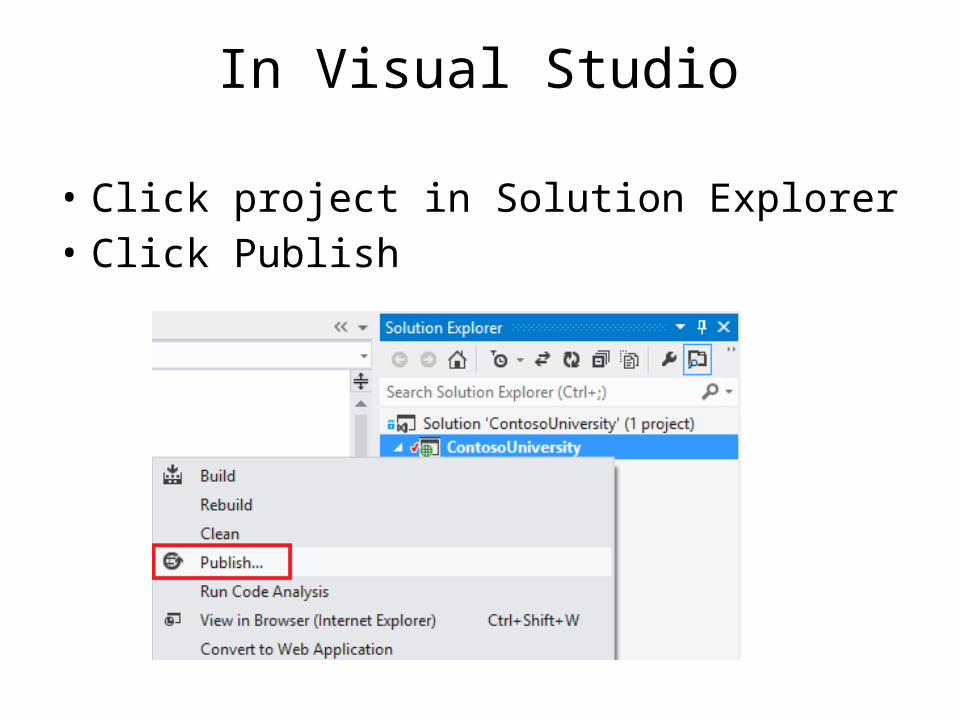
In Visual Studio
• Click project in Solution Explorer• Click Publish

Disclaimer
• VS has updated the dialog boxes since the MSDN tutorial was published.
• I used my MSDN subscription Azure benefits to access Azure; if you use a free subscription the dialogs may be different
• (Important) Remember to check the “Code First Migration” check box

Connect to your Azure account• If you haven’t connected to Azure through Visual Studio, you
have to set up a profile to connect to your web site.• Try to muddle through to get a connection set up until your
Azure website appears in the dialog box below and following.


Click Validate, then Next.Do not click Publish yet!

Click the Execute Code First Migrations checkbox, then Next.

Click the Start Preview button. This will display all files being sent to Azure.

Now! Click Publish!
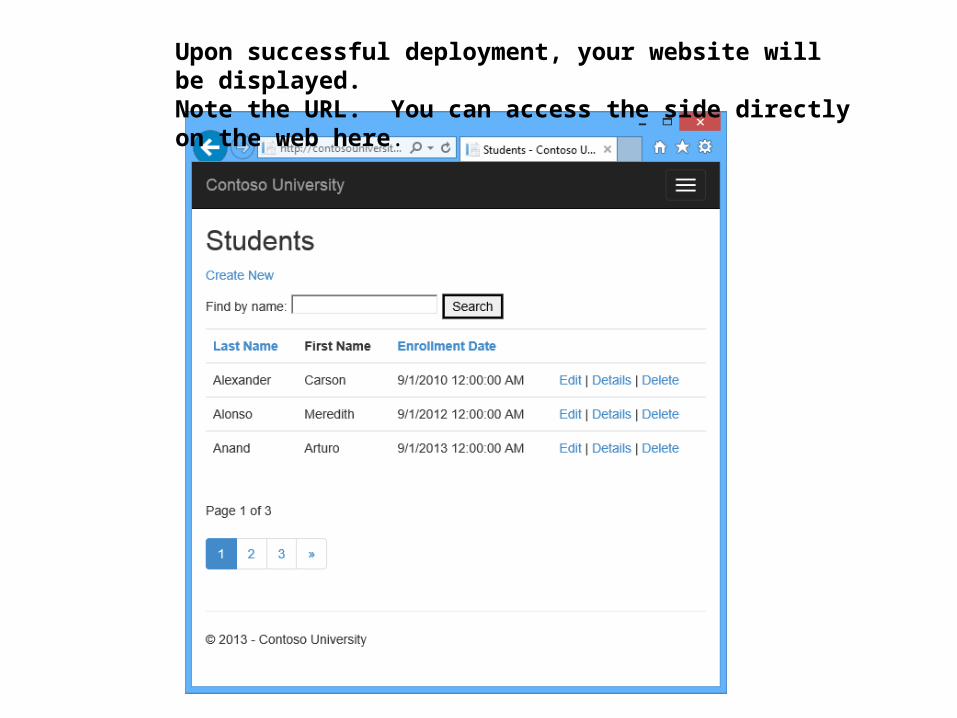
Upon successful deployment, your website will be displayed.Note the URL. You can access the side directly on the web here.

CONGRATULATIONS!!!