Pantera Electronics LED Side Marker lamp Installation … · Pantera Electronics Rev. 11/24/2017 3...
8
1 Pantera Electronics Rev. 11/24/2017 Pantera Electronics LED Side Marker lamp Installation Manual This installation manual is to assist in the installation of Pantera-Electronics Side Marker LED lamp. The Side Marker LED lamp is a replacement for the incandescent bulb in both the rear and front the side marker lights. Many times the bulb socket is in poor condition and may need to be replaced. This might not be noticed until the bulb is removed and disturbs the position of the spring contacts in the bulb socket. There might only be part of the contact left and will not have enough spring tension after the bulb is removed to contact the side marker LED lamp. Note: Silicon grease is a good preventative measure to keep water and dirt away from the contacts in the bulb socket. NOTE: It’s important to keep this installation manual for future reference since revisions to this product change the contents of the installation manual. Do not replace the bulbs with the Side Marker LED lamps while the lights are “ON”. Side Marker LED lamps are manufactured with red and yellow LED’s. Yellow LED’s for the front side marker lights and the red are for the rear side marker lights. Notice the side marker LED lamp is marked with a red or yellow dot on a small black box on each lamp. The LED Side Marker lamps can be installed in the socket either direction without damage. One complete set of LED Side Marker lamps LED Side Marker lamps specs: 24 Lumens 67mA 13.8 Volts 50,000 hours
Transcript of Pantera Electronics LED Side Marker lamp Installation … · Pantera Electronics Rev. 11/24/2017 3...
1 Pantera Electronics Rev. 11/24/2017
Pantera Electronics LED Side Marker lamp Installation Manual
This installation manual is to assist in the installation of Pantera-Electronics Side Marker LED lamp. The Side Marker LED lamp is a replacement for the incandescent bulb in both the rear and front the side marker lights. Many times the bulb socket is in poor condition and may need to be replaced. This might not be noticed until the bulb is removed and disturbs the position of the spring contacts in the bulb socket. There might only be part of the contact left and will not have enough spring tension after the bulb is removed to contact the side marker LED lamp. Note: Silicon grease is a good preventative measure to keep water and dirt away from the contacts in the bulb socket.
NOTE: It’s important to keep this installation manual for future reference
since revisions to this product change the contents of the installation manual.
Do not replace the bulbs with the Side Marker LED lamps while the lights are “ON”.
Side Marker LED lamps are manufactured with red and yellow LED’s. Yellow LED’s for the front side marker lights and the red are for the rear side marker lights. Notice the side marker LED lamp is marked with a red or yellow dot on a small black box on each lamp. The LED Side Marker lamps can be installed in the socket either direction without damage.
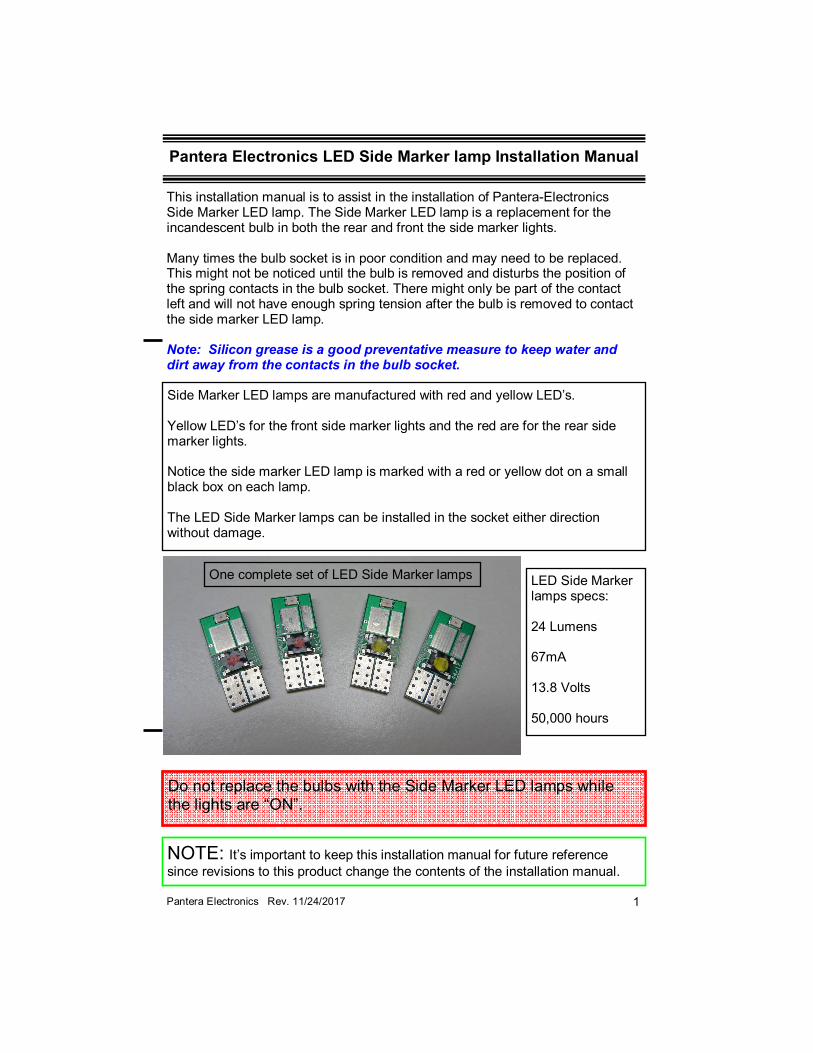
One complete set of LED Side Marker lamps LED Side Marker lamps specs: 24 Lumens 67mA 13.8 Volts 50,000 hours

2 Pantera Electronics Rev. 11/24/2017
Replacing the left hand yellow front side marker lamps
Turn the steering wheel to the far left hand direction, this will provide clearance for installing the left hand front LED side marker lamp. Turn the steering wheel to the far right hand direction, this will provide clearance for installing the right hand front LED side marker lamp.
Pull back the sleeve to reveal the boot.
Remove (3) screws that retain splash shield.
Pull the lamp socket boot back.

3 Pantera Electronics Rev. 11/24/2017
Grasp the lamp socket and rotate counter clockwise 1/4 turn.
Remove the light bulb by pulling out. Use a rubber band to increase grip if necessary.
Select the LED side marker lamp with the yellow dot. Add silicon grease to the LED side marker lamp base.
4 Pantera Electronics Rev. 11/24/2017
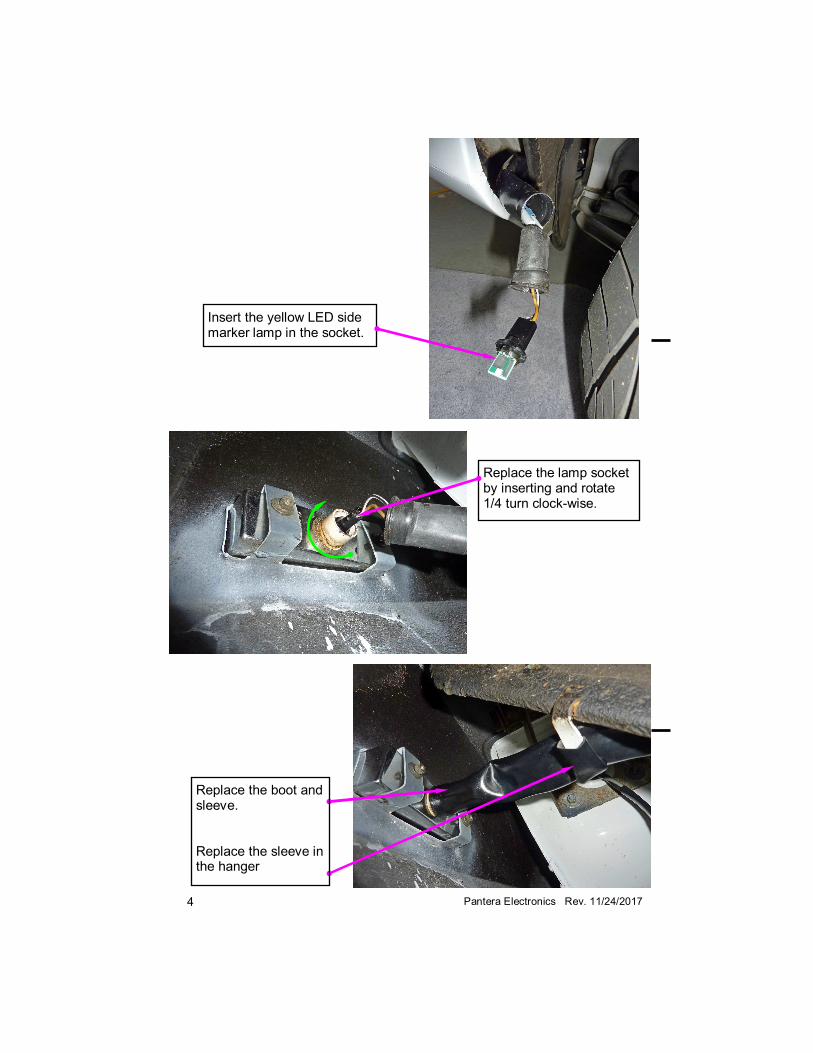
Replace the lamp socket by inserting and rotate 1/4 turn clock-wise.
Replace the boot and sleeve. Replace the sleeve in the hanger
Insert the yellow LED side marker lamp in the socket.

5 Pantera Electronics Rev. 11/24/2017
The rear side marker lamp can be reached within the wheel well. If the shock spacers are still install as in this picture you may be able to side your arm on top of the tire. If shock spacers were removed possibly reach behind the tire or remove the wheel.
Replacing the rear left hand side marker lamps
Repeat the procedure for the front right hand side
Replace splash shield and (3) screws that retain it.
6 Pantera Electronics Rev. 11/24/2017
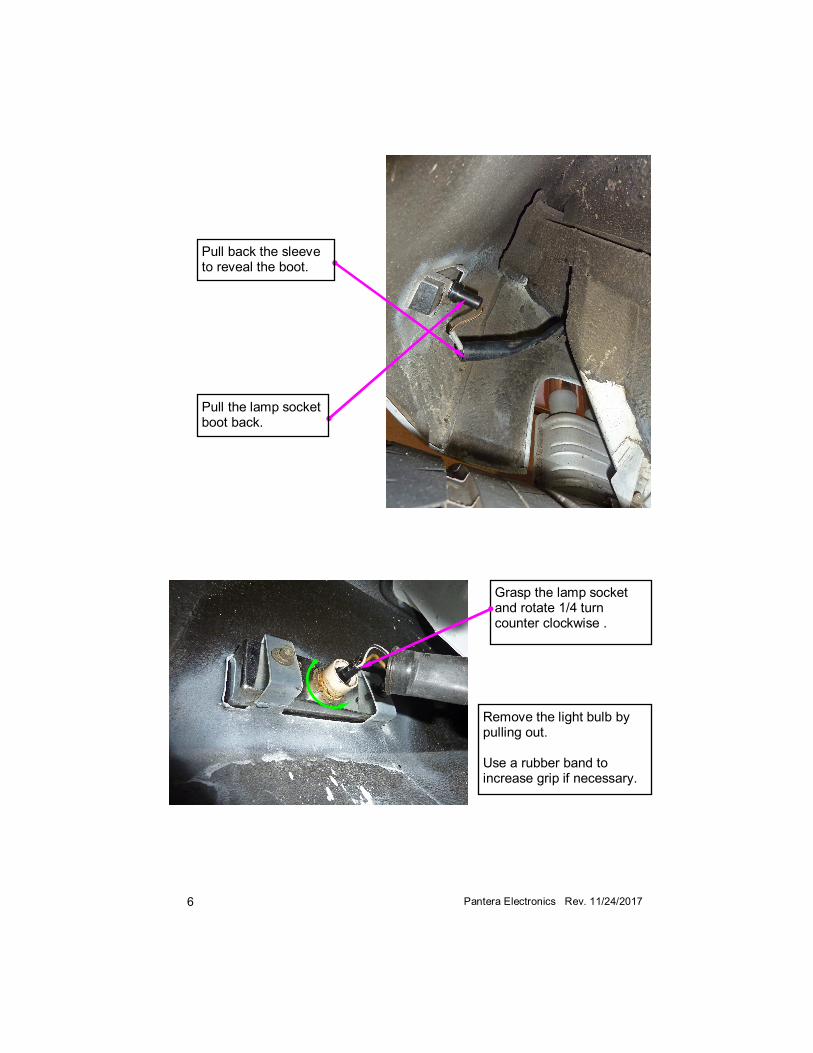
Grasp the lamp socket and rotate 1/4 turn counter clockwise .
Remove the light bulb by pulling out. Use a rubber band to increase grip if necessary.
Pull back the sleeve to reveal the boot.
Pull the lamp socket boot back.

7 Pantera Electronics Rev. 11/24/2017
Replace the lamp socket by inserting and rotate 1/4 turn clock-wise.
Select the LED side marker lamp with the red dot. Add silicon grease to the LED side marker lamp base.
Insert the red LED side marker lamp in the socket.
8 Pantera Electronics Rev. 11/24/2017
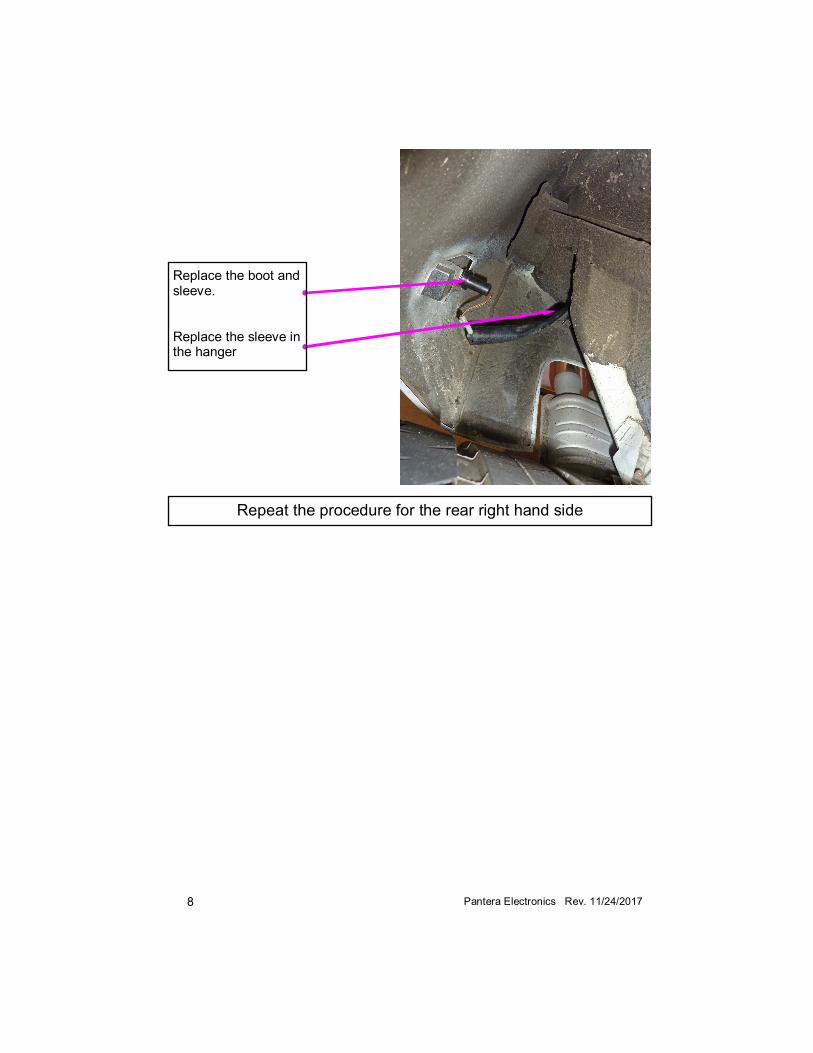
Replace the boot and sleeve. Replace the sleeve in the hanger
Repeat the procedure for the rear right hand side