p file · Web viewSIMPLE LED BLINKING USING PIC16F877A Used Software : Proteus 7.1 &...
17
SIMPLE LED BLINKING USING PIC16F877A Used Software : Proteus 7.1 & Mikro C Pro for PIC 2011 ______________________________________________________________________ _______________ 1) Open up Proteus 7.1 and Right Click on design area 2) 2) Place component by right click.
Transcript of p file · Web viewSIMPLE LED BLINKING USING PIC16F877A Used Software : Proteus 7.1 &...

SIMPLE LED BLINKING USING PIC16F877A Used Software : Proteus 7.1 & Mikro C Pro for PIC 2011_____________________________________________________________________________________
1) Open up Proteus 7.1 and Right Click on design area
2)
2) Place component by right click.

3) Select PIC16F877A at Keywords: , then click Ok.

3) Whenever PIC16F877A is selected then left click on mouse to place it.
5) Repeat the component placement for “resistor”

6) Select RESISTOR at Keywords: , then click Ok.
7)Whenever RESISTOR is selected then left click on mouse to place it.
Double click on Resistor to change its value.

8) Repeat the component placement for “LED BIRG”
9) Select LED BIRG at Keywords: , then click Ok

10) Whenever LED BIRG is selected then left click on mouse to place it
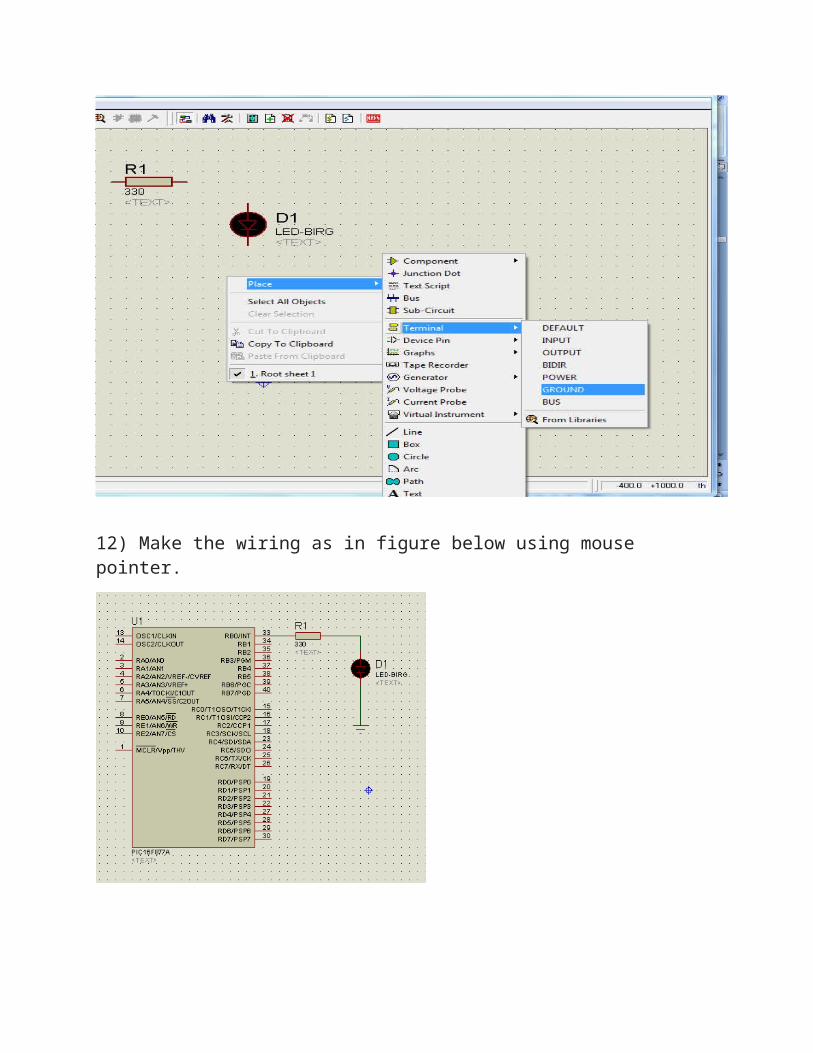
11) Place a Ground terminal.
12) Make the wiring as in figure below using mouse pointer.

13) Click on mikroC Pro for PIC
14)Close the current sample programming
15) Create up new Project.15)

16)

17)
Replace the current coding using coding below.
SOURCE CODE:
void main() {PORTB = 0; //Clear all the PortBTRISB = 0; //set up PortB as Output Port.
Delay_ms(500); //delay 5mSwhile(1) { //endless loopPORTB = 0B00000001; //set up voltage pattern for PORTB..1=HIGH,0= LOWDelay_ms(300); // delay 3mSPORTB = 0B00000000; //set up voltage pattern for PORTB..1=HIGH,0= LOWDelay_ms(300); // delay 3mSPORTB = 0B00000001; //set up voltage pattern for PORTB..1=HIGH,0= LOWDelay_ms(300); // delay 3mSPORTB = 0B00000000; //set up voltage pattern for PORTB..1=HIGH,0= LOW}}

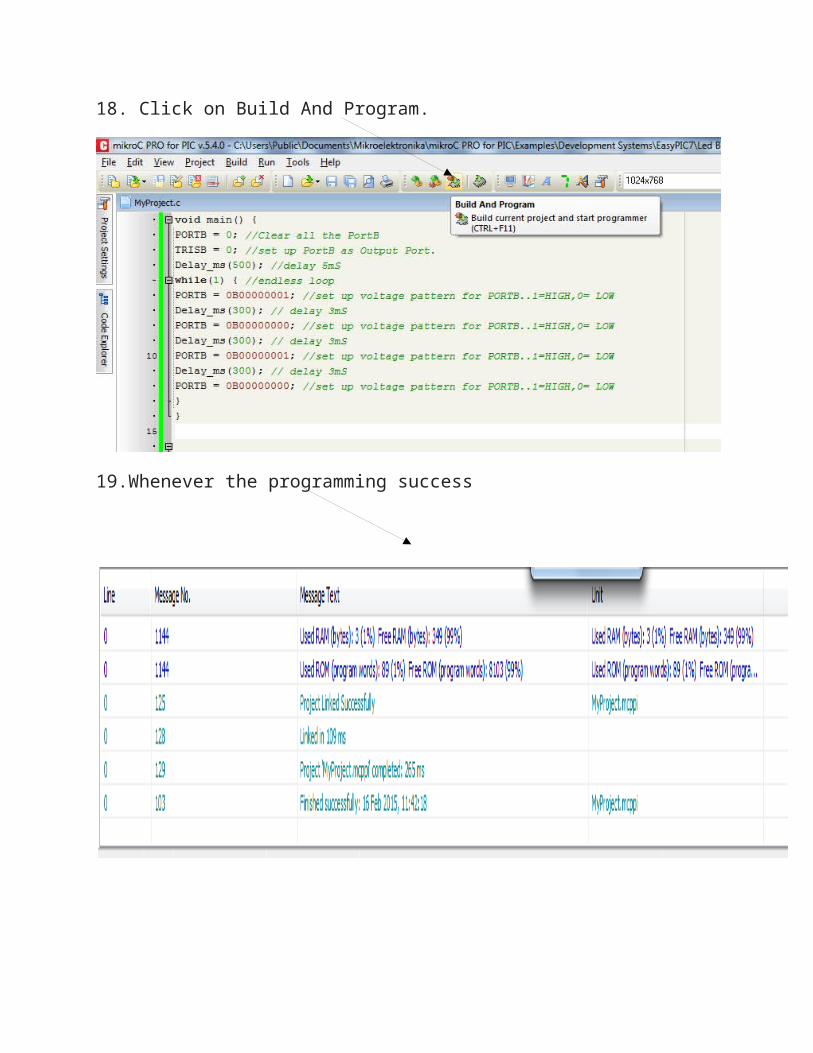
18. Click on Build And Program.
19.Whenever the programming success

20. Create the hex file.Click on Save.
21. Save the file at any destination wanted .
22. Double click on PIC to load up the hex file.

23) Locate up the Test file.Hex
24) Processor Clock Freq : 8 MHz

25. Click On Play Button.
26. Result
Led will start blinking.
Hope you Enjoyed your Programming