Original Z1 - files.ecommercedns.uk · Original Z1 I have been wanting to do another original Z1...
107
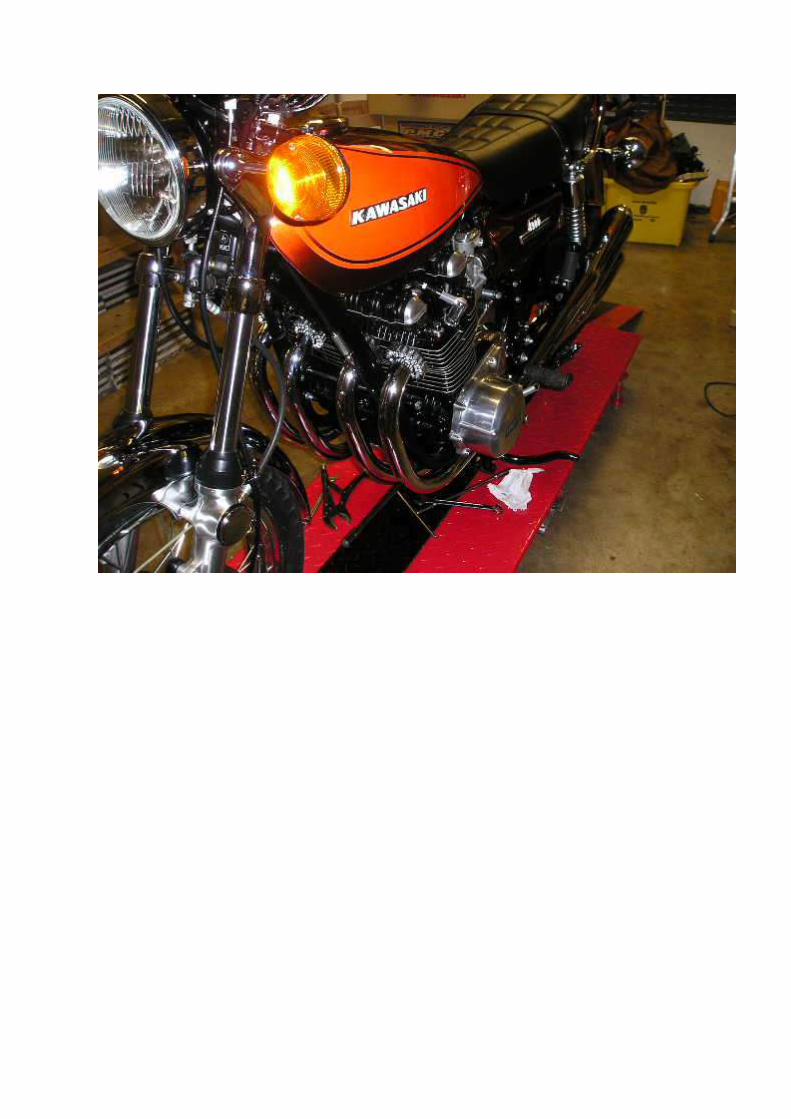
Original Z1 I have been wanting to do another original Z1 for ages but all these orders for blue Z1-B`s have stopped me!! Well not any more! For over 20 years i have been collecting New genuine parts with the intentions of building another Z1 from as many new parts as possible. The last one i did was in the mid eighties and this got sold back to Kawasaki Japan! My mate Rick Brett (him of kawasaki Triple fame) did it with the H2-750 Triple a few years ago so i thought i would have another go. I am starting with a 1973 Orange/brown Z1, just the frame and crankcases really and will try to use as many genuine parts as possible. This should silence some of the critics that say we use too many of our pattern replica parts that we source in Japan even though most of them come out of the same factory that Kawasaki bought them from in the first place!! My only problem is that some of the genuine parts i have stocked up on are actually worse than the pattern parts!!!! So the final result, while being correct, may be worse than our normal projects? We will see! GUIDE PRICE FOR SALE WILL BE £14,000 FRAME NUMBER: Z1F-02476 ENGINE NUMBER: Z1E-02499 REG NUMBER: KLG 79L DATE OF REG: 07/08/1972 I Bought this bike way back in 1986 as a basket case and registered it it my name in 1994.
Transcript of Original Z1 - files.ecommercedns.uk · Original Z1 I have been wanting to do another original Z1...

Original Z1
I have been wanting to do another original Z1 for ages but all these orders for blue Z1-B`s have stopped me!!
Well not any more!
For over 20 years i have been collecting New genuine parts with the intentions of building another Z1 from as many new parts as possible. The last one i did was in the mid eighties and this got sold back to Kawasaki Japan!
My mate Rick Brett (him of kawasaki Triple fame) did it with the H2-750 Triple a few years ago so i thought i
would have another go.
I am starting with a 1973 Orange/brown Z1, just the frame and crankcases really and will try to use as many
genuine parts as possible. This should silence some of the critics that say we use too many of our pattern replica
parts that we source in Japan even though most of them come out of the same factory that Kawasaki bought
them from in the first place!!
My only problem is that some of the genuine parts i have stocked up on are actually worse than the pattern
parts!!!!
So the final result, while being correct, may be worse than our normal projects?
We will see!
GUIDE PRICE FOR SALE WILL BE £14,000
FRAME NUMBER: Z1F-02476
ENGINE NUMBER: Z1E-02499
REG NUMBER: KLG 79L
DATE OF REG: 07/08/1972
I Bought this bike way back in 1986 as a basket case and registered it it my name in 1994.
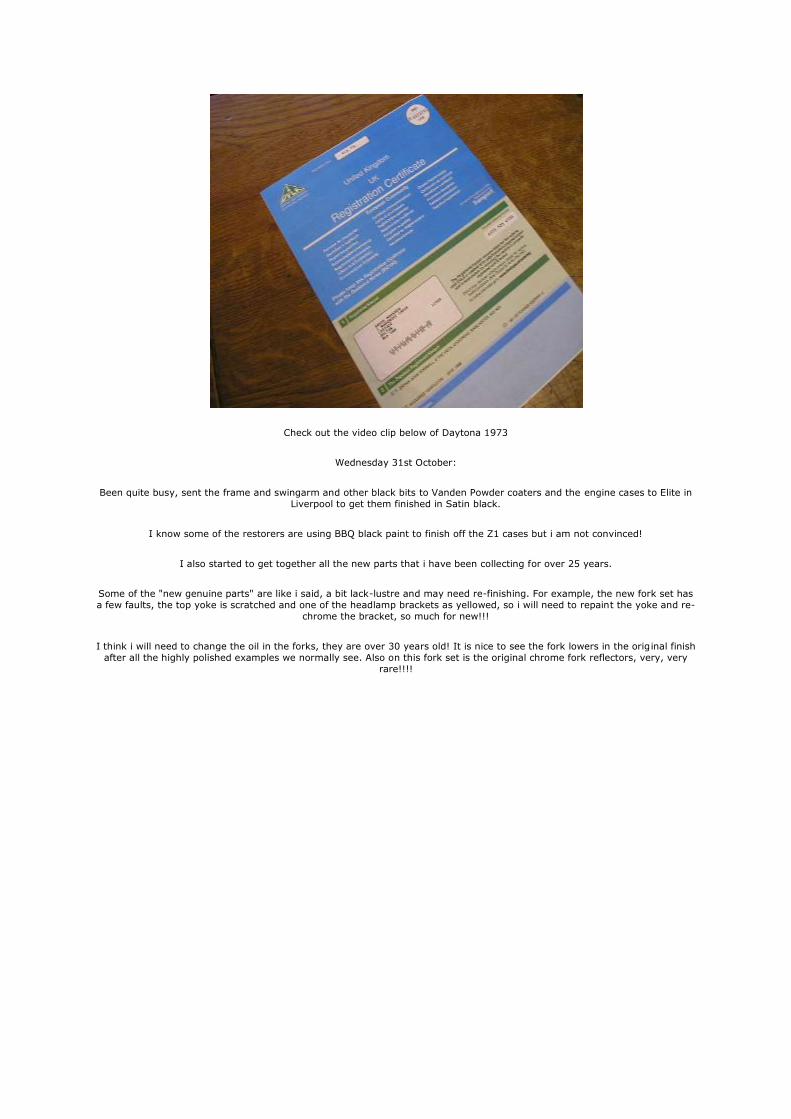
Check out the video clip below of Daytona 1973
Wednesday 31st October:
Been quite busy, sent the frame and swingarm and other black bits to Vanden Powder coaters and the engine cases to Elite in
Liverpool to get them finished in Satin black.
I know some of the restorers are using BBQ black paint to finish off the Z1 cases but i am not convinced!
I also started to get together all the new parts that i have been collecting for over 25 years.
Some of the "new genuine parts" are like i said, a bit lack-lustre and may need re-finishing. For example, the new fork set has
a few faults, the top yoke is scratched and one of the headlamp brackets as yellowed, so i will need to repaint the yoke and re-
chrome the bracket, so much for new!!!
I think i will need to change the oil in the forks, they are over 30 years old! It is nice to see the fork lowers in the original finish
after all the highly polished examples we normally see. Also on this fork set is the original chrome fork reflectors, very, very
rare!!!!

***************************************************************
Thursday 1st November:
Been looking at the paintwork i have. Instead of using the paint sets we get in from Japan i have decided to use
the new original side panels and tail-piece i have but the problem is the tank! I have a used original tank that i
bought in the late 80`s but the paint has faded. So i am going to send the whole lot back to Japan to the guys who originally painted then for Kawasaki in the 70`s. They have agreed to paint the tank to match the other new
parts i have. I know it would be a lot easier and cheaper to just use the new paint sets but as i have already said,
i want to do this right!!
I also have a new tailpiece tray with the original wiring loom decal on it. I bought this in 1978 from Knott Mill
Kawasaki in Manchester, they had broken a new Z1 to convert it to a Rickman CR900 and had quite a few parts
left over. I intended in using it on my first ever Z1 restoration in 1979 but never did. funny how things turn out!


My next problem is the date stamps that everybody is talking about. Certain items on the Z1 were date stamped
to show when they were manafactured but because i am using new parts that i have bought over a period of 30 odd years this may cause a few discrepences?
I know that some owners have been grinding off the stamps and re-stamping them just to be clever but i think i
will be as honest as possible and just use what i have.
I think most people will realise that there as to be a bit of a compromise on a project like this!
Another example of how things really were are the carbs. I have the new set i bought in 1984 and a set that Steve
Smethurst has re-furbished for me. No prizes for guessing which look best?
The new ones look old and dull in comparison!
Which do i use??

Well the option has been taken away from me!, Just minutes after updating this page, the guy who has just paid
me €30,000 for my "new" frame number 0007 1972 Z1 rang me to offer me another €1000 for the new carbs for spares just in case!!!!!! Has the world gone mad??? I thought £100 for my book on EBAY was mad enough!!!!!!
************************************************************
Friday 2nd November:
Picked the frame and other black bits up from Vanden today, excellent job as usual!
First job was to run a tap through all the threads to make sure they were ok.
Then i fitted the new bottom yoke. Because i am doing this as original as possible, i used the cones/races and ball
bearings in the headstock instead of the normal taper roller kits we use.

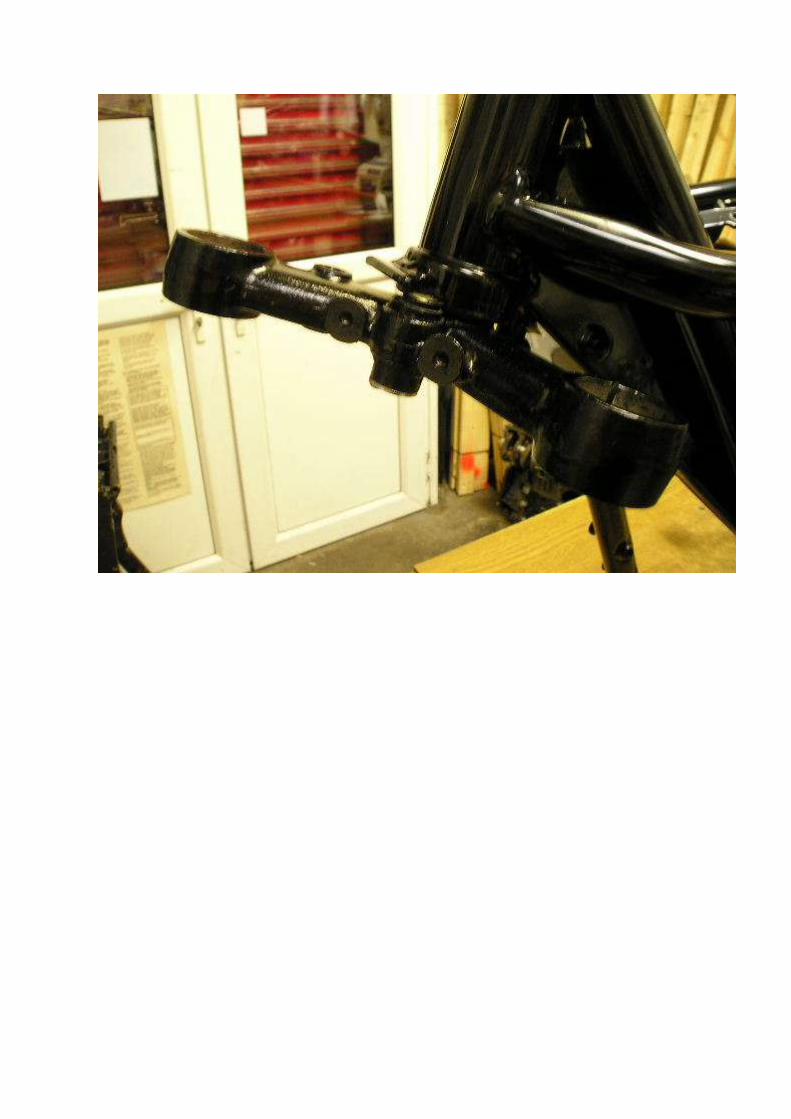
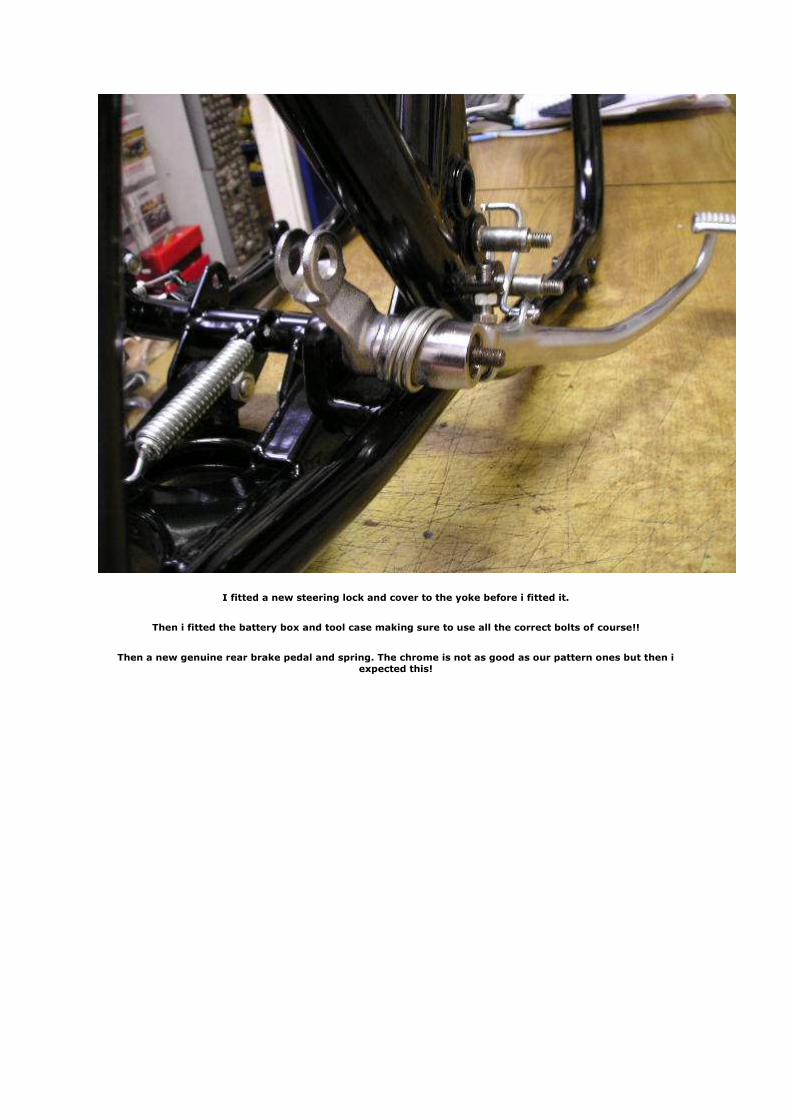
I fitted a new steering lock and cover to the yoke before i fitted it.
Then i fitted the battery box and tool case making sure to use all the correct bolts of course!!
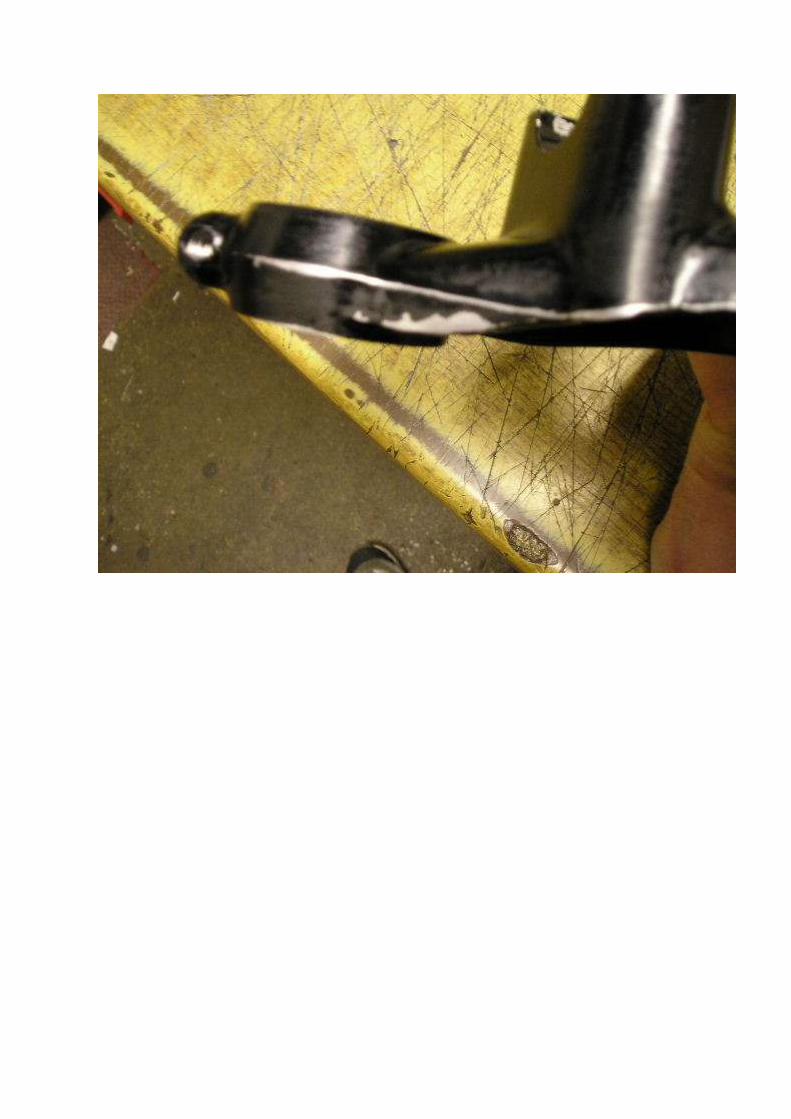
Then a new genuine rear brake pedal and spring. The chrome is not as good as our pattern ones but then i
expected this!


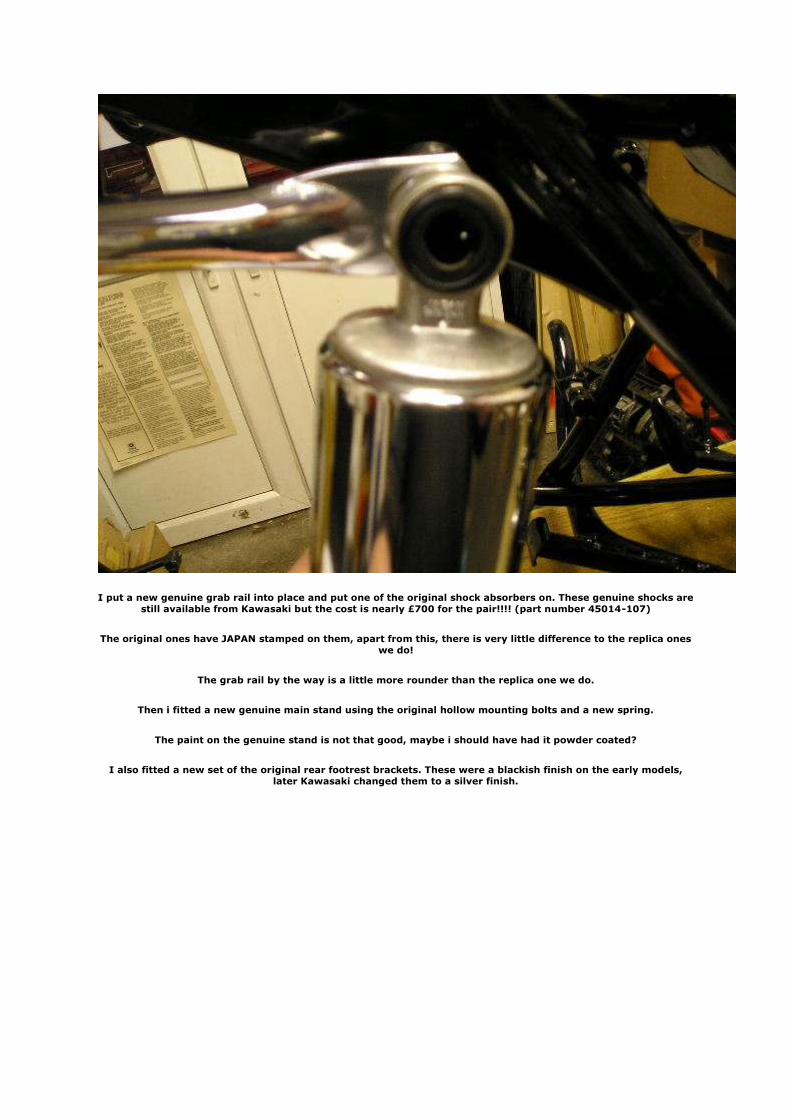
I put a new genuine grab rail into place and put one of the original shock absorbers on. These genuine shocks are
still available from Kawasaki but the cost is nearly £700 for the pair!!!! (part number 45014-107)
The original ones have JAPAN stamped on them, apart from this, there is very little difference to the replica ones
we do!
The grab rail by the way is a little more rounder than the replica one we do.
Then i fitted a new genuine main stand using the original hollow mounting bolts and a new spring.
The paint on the genuine stand is not that good, maybe i should have had it powder coated?
I also fitted a new set of the original rear footrest brackets. These were a blackish finish on the early models,
later Kawasaki changed them to a silver finish.


Then i fitted the seat lock assembly with the relevant plates and springs and then the seat stopper bar. All new of
course!
Then i spent a hour or so digging out all my genuine new original bolts and fasteners.
I intend to use the correct type of bolts on this bike, the ones with the number 4 and 7 on thier heads. Sad i know
but it as to be done!


For those who dont know the difference, if you look in the parts book, all bolts with the letter `G` in the part
number are the ones with the numbers on them, normally the number 4 on 6mm bolts and 7 on the 8mm bolts. If the part number has a `B` in it then the head is just plain. If it has a `N` in it then it is chrome headed. See how
educational this site is!!!
Ok, enough of the "anorak" stuff!!!
You will note on the pictures that i have used the original battery strap, note the double ended metal loop. Very
rare part indeed!!
Talking of rare parts, i loosely assembled the long rear fender to the frame to make sure i had the correct tail-
light bracket. This the proper fender without the reflector holes (Z900).
I have had this fender for over 22 years. It came from Huddersfield Kawasaki when i was manager there in the
80`s. My old boss there, John Smith, was a wise old guy, he bought out nearly every other Kawasaki dealer from
the 70`s and 80`s. One of the dealers he bought out was POULTON Kawasaki in Blackpool. They were probably
the first real parts distributors for Kawasaki parts in the early 70`s and thier stock of early triple and Z1 stuff was
very impressive. I sourced many parts from that pile of bits and when we (z-power) finally bought out
Huddersfields stocks in the late 90`s we still were finding some of thier old parts!
One of the few parts i have not got new is the UK tail light bracket. Really hard to find even used!
So i had to use a used one on this bike which i had painted "flat" black.

Tuesday 6th November:
You know, sometimes i think i must be the luckiest man alive?, after my comments about the tail light bracket,
one of my good friends and customer in Germany sent me a new one! Un-believable!
The paint on my top yoke was well dry now so i loosely fitted it to the bottom yoke and fastened the new cable
clamps and bolts to it. More new rare parts include the 4 handlebar clamp bolts. These are the original 13mm
headed items (92007-002), later ones are 12mm heads.
Another rare find is the rectifier rubber seats, these have not been available from Kawasaki for many years. I
fitted two of these to the electric base plate.


I sent the tank back to Japan today for re-painting, should get it back in around 2 weeks!
Next rare part was the clocks. I managed to obtain a new set many years ago. Kawasaki never did a clock set as
such, they sold everything seprately. However, in the early 90`s i was invited by Russel Kawasaki in leicester to
come visit them with a view to buying some of thier old stock. Not sure when this was but i do remember it was
the day Freddie Mercury of Queen died!
Jenny Russel showed me what she thought was a set of KH500 clocks but was in fact a set of Z1 clocks. In those
early days (1973) the supply of Kawasaki parts was very patchy and many early dealers actually broke new bikes
just for the parts. They had obviously done this themselves and she was a bit confused. I paid £100 for them
which was a bit steep at that time for what was supposed to be KH items but on reflection it was a good deal. I
also got a new chain oiler tank from them as well that they thought was off a 2-stroke!!! I paid £10 for that which
considering that used ones are selling on EBAY for over £150 was a good deal as well!!! Did i say how lucky i
am???

The only problem with the clocks is that the Tacho bottom cover is scratched but i can replace that with a new
one. Not sure which market they were intended for but the ignition switch has a extra wire on it??? The speedo has 2 miles on it which is normal for new clocks.
*******************************************************************
Wednesday 7th November:
I got the headlamp bracket back from the chrome platers today.
It now makes the other look a bit dull!
I replaced the fork oil with new stuff and basically that was it for today. I really need to finish off the Z1-B so i
may have a few days off this bike.
The difference between replica and genuine brackets by the way is in the seam. See the picture below. The
replicas are a one piece tube.

Friday 9th November:
Spent a few hours on the bike today. I replaced the fork oil in the legs and fitted them to the yokes along with the brackets
and various rubbers. Then i fitted a new front fender and brake hose bracket.
I also fitted a set of new genuine rear indicators and stems and chrome bolts, with the correct writing on the lens covers of
course!!
These stems are not available anymore but i have 5 in stock of which i need 4, so 1 is spare???

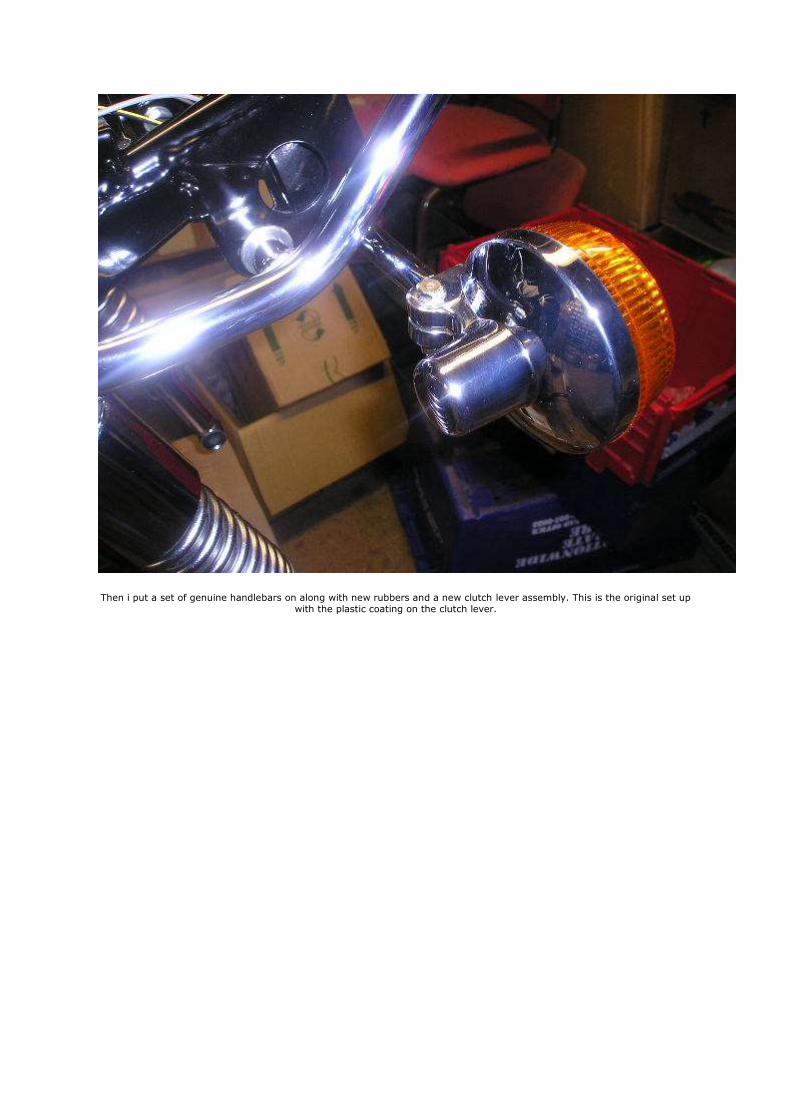
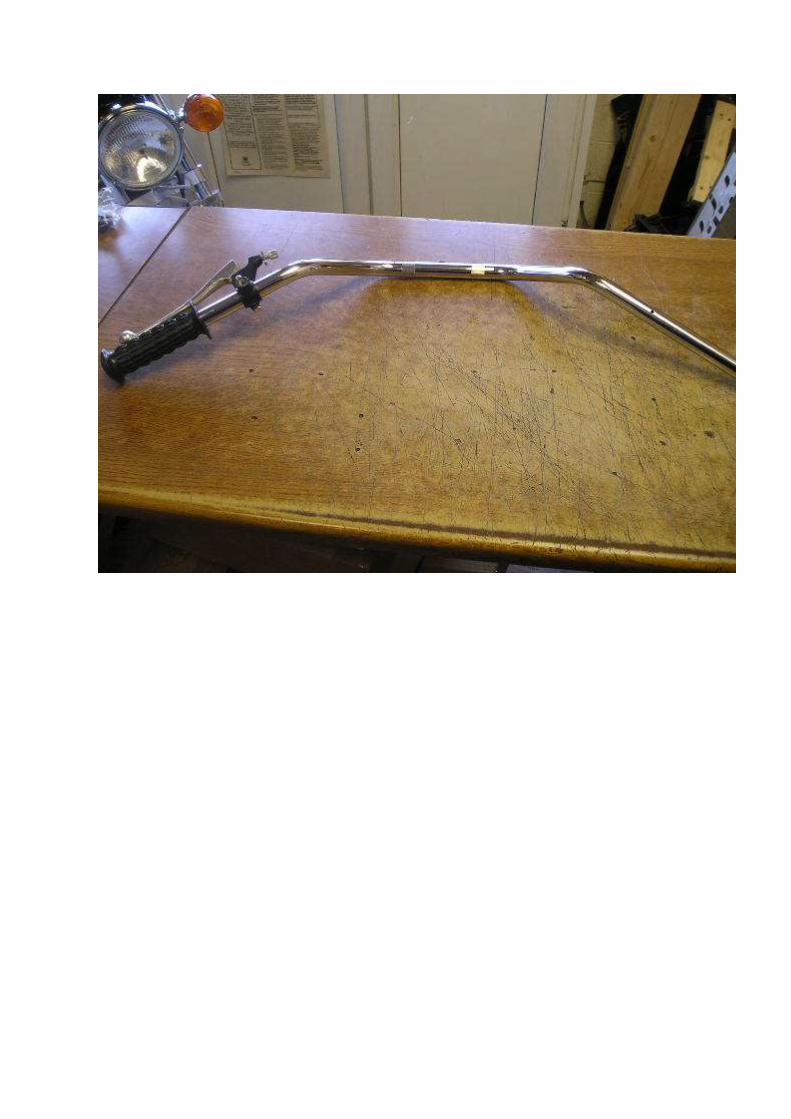
Then i put a set of genuine handlebars on along with new rubbers and a new clutch lever assembly. This is the original set up
with the plastic coating on the clutch lever.

Then i fitted two new original switches. Very rare parts again but i had these in my collection for many years.
The Right side one is the switch with the friction damper screw under neath it.
I fitted a new set of genuine throttle cables to the right side switch as well.


Then i fitted a new master cylinder and top brake hose. I even had one of the original rubber covers with the ribbing on it!!!
Now that is rare!!!!!


Next bit was a new bracket for the chain oiler. I was going to send this away to be copied but could not risk losing it!


Saturday 10th November:
I assembled the new chain oiler with a cap and dipstick and fitted it to the bracket. Then i fitted the clocks to the top yoke and
then the headlamp shell and front indicator stems. Then i put the brake junction box onto the bottom yoke with the headlamp
adjuster. A new brake light switch was used of course. Then the brake hoses and relevant clamps were fitted.


I then fitted the swing arm. Because i am using the original non o`ring chain which is endless, i needed to fit the chain around
the arm before i could fit it. Then i fitted the bottom bolts in the rear shocks, then the torque arm and then the rear brake rod. I assembled the rear axel and put it into place in readiness for the rear wheel to be fitted. Because this is the early model the
chain adjuster bolts are the smaller 8mm items, another rare part.


The rear brake rod is a genuine one, very rare these days. Then i fitted the new rear footrest.


Then some more very rare parts, a genuine main wiring loom (26001-072) and a genuine UK spec KOITO headlamp (23004-
058).
More parts that i have been saving up for this project!!


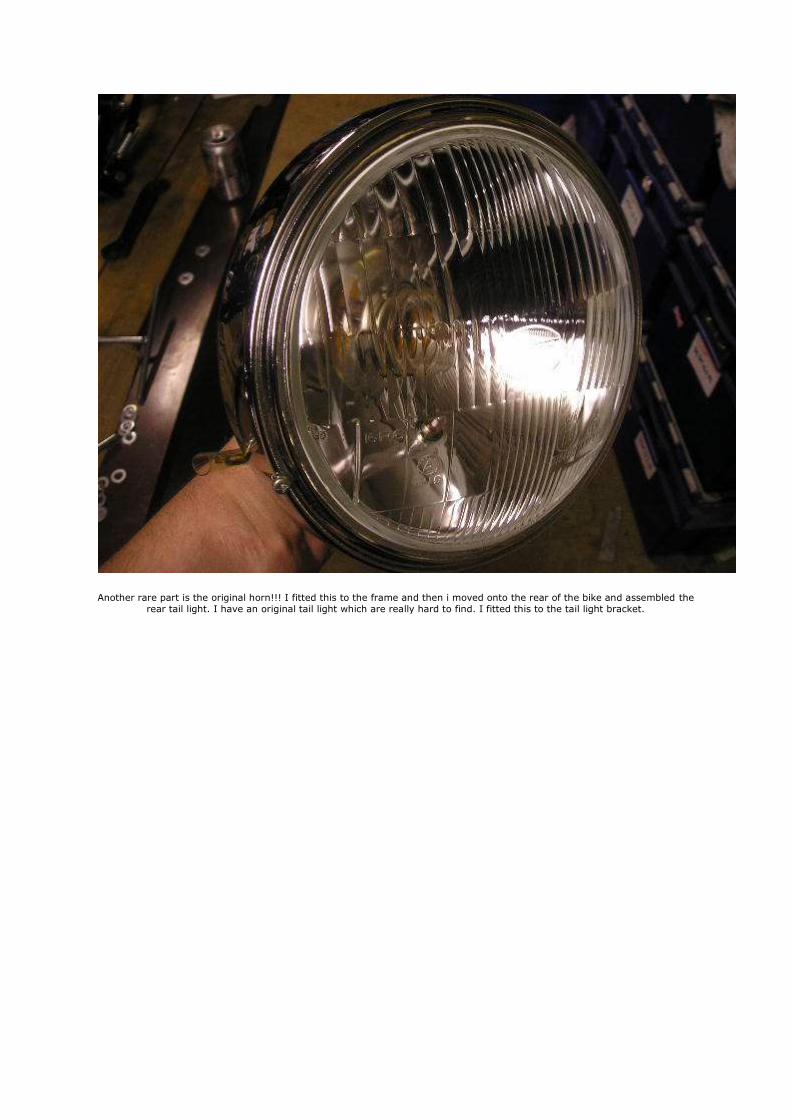
Another rare part is the original horn!!! I fitted this to the frame and then i moved onto the rear of the bike and assembled the
rear tail light. I have an original tail light which are really hard to find. I fitted this to the tail light bracket.


************************************************************************
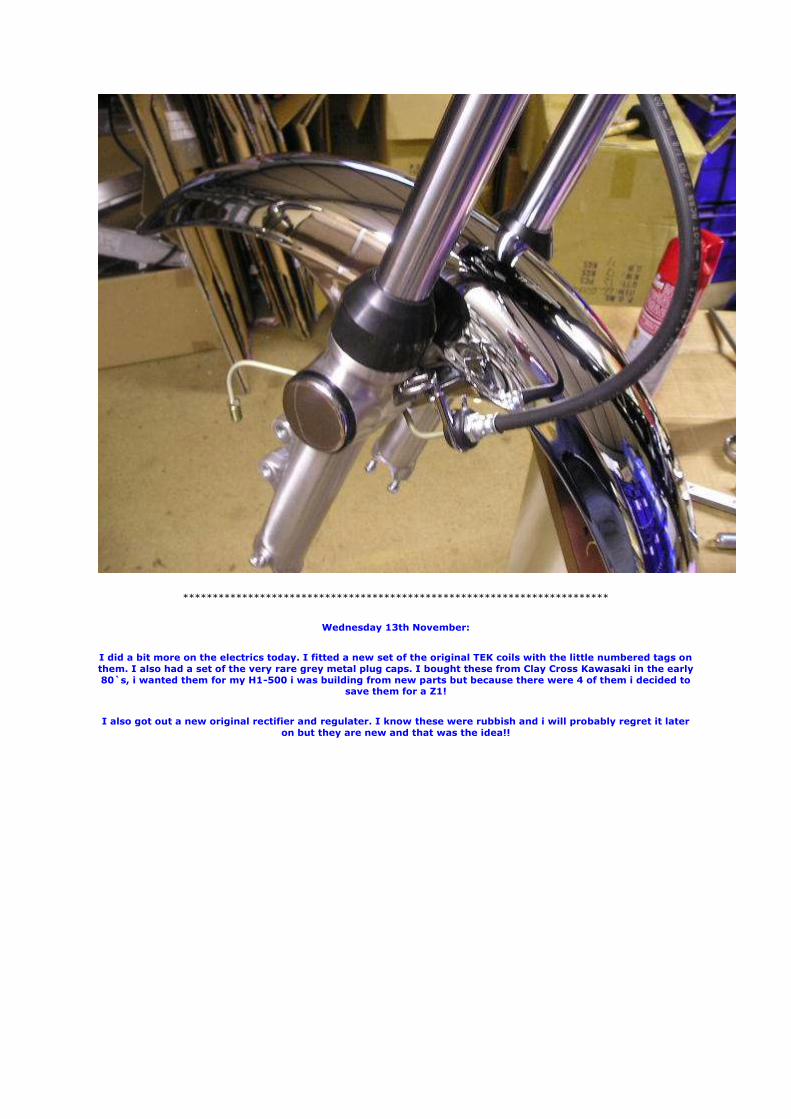
Wednesday 13th November:
I did a bit more on the electrics today. I fitted a new set of the original TEK coils with the little numbered tags on
them. I also had a set of the very rare grey metal plug caps. I bought these from Clay Cross Kawasaki in the early
80`s, i wanted them for my H1-500 i was building from new parts but because there were 4 of them i decided to save them for a Z1!
I also got out a new original rectifier and regulater. I know these were rubbish and i will probably regret it later
on but they are new and that was the idea!!


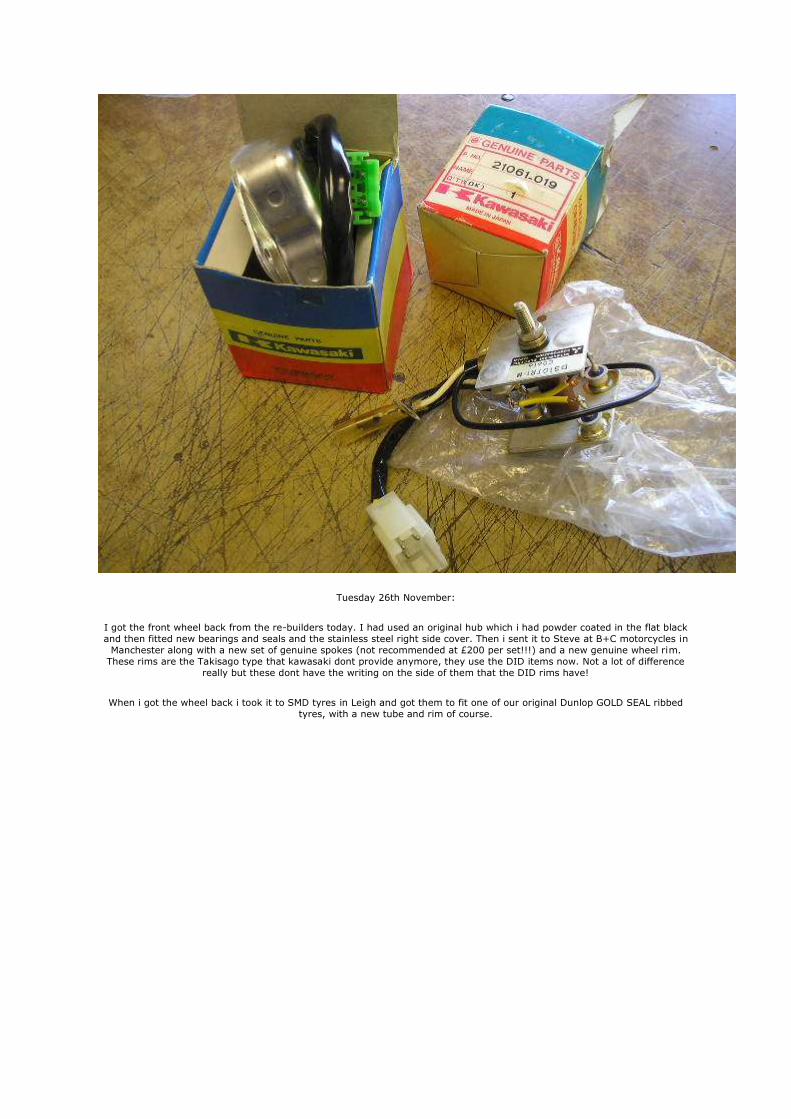
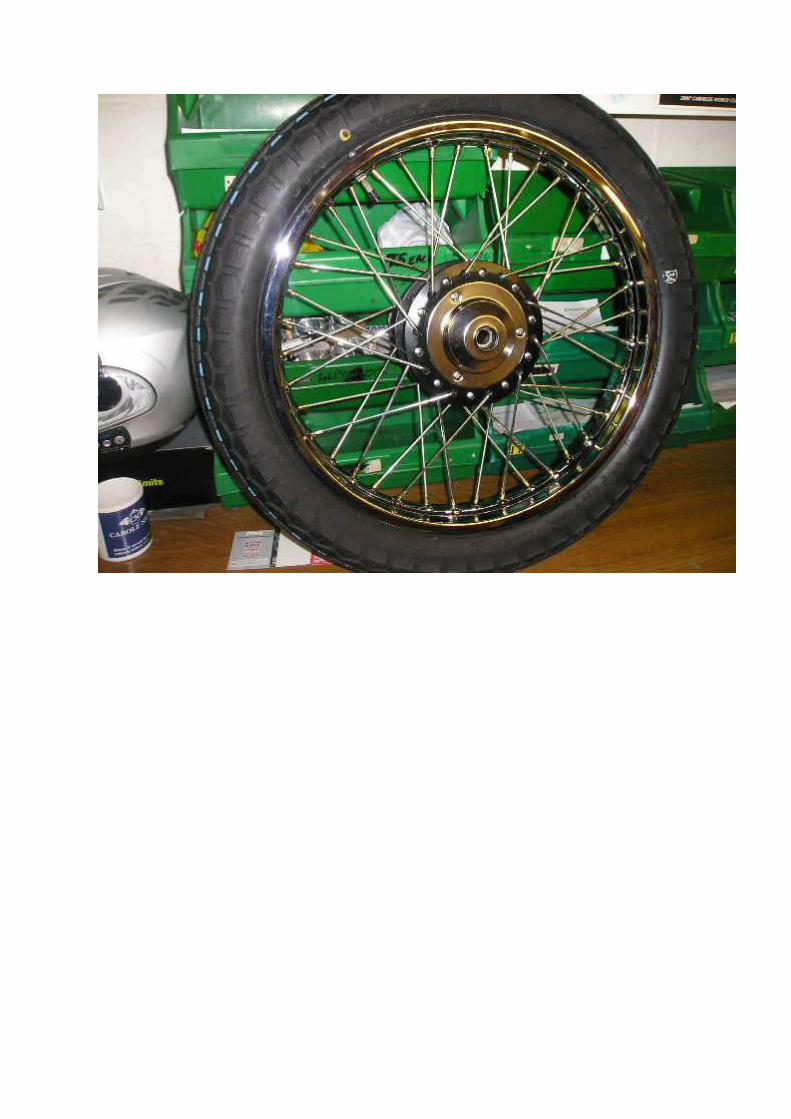
Tuesday 26th November:
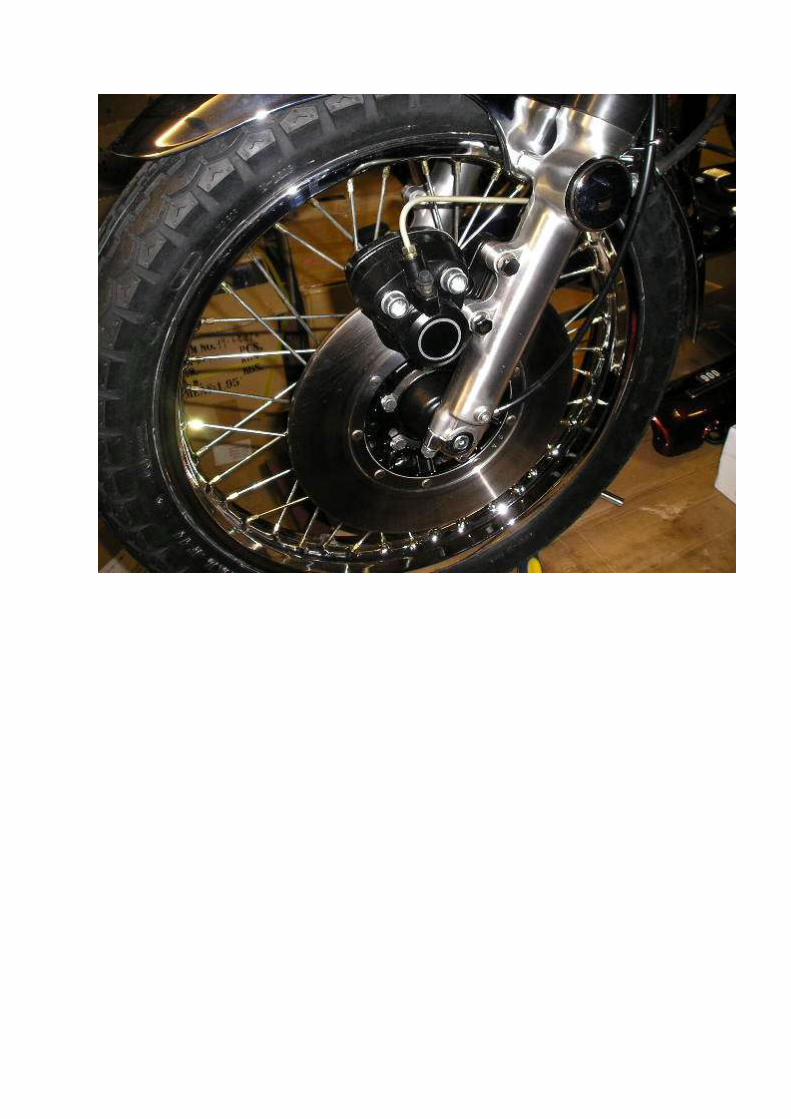
I got the front wheel back from the re-builders today. I had used an original hub which i had powder coated in the flat black
and then fitted new bearings and seals and the stainless steel right side cover. Then i sent it to Steve at B+C motorcycles in
Manchester along with a new set of genuine spokes (not recommended at £200 per set!!!) and a new genuine wheel rim.
These rims are the Takisago type that kawasaki dont provide anymore, they use the DID items now. Not a lot of difference
really but these dont have the writing on the side of them that the DID rims have!
When i got the wheel back i took it to SMD tyres in Leigh and got them to fit one of our original Dunlop GOLD SEAL ribbed
tyres, with a new tube and rim of course.

Then i fitted the front disc to the hub with the new bolts and tab washers and then the speedo gearbox and new axel and
spacer and fitted it into the forks. The new fork set did not come with the bottom axel clamps so i had 2 used ones polished by Steve Smethurst earlier which i now used.
Once the wheel was in place i fitted the new front brake caliper to the fork leg and then connected the brake hoses and the
speedo cable.

Then i fitted the new tail piece and the side panels and the number plate.
Then i finished off the front end with two new front indicaters.


I need to sort out the rear wheel now. I have the hub already polished so i can just send it off now for re-building. Again a new
set of genuine spokes and rim will be used.
*********************************************************
Tueday 4th December:
I started work on the engine today. The casings have been coated satin black by Elite Engineering in Liverpool and look
excellent.
I assembled the bottom end of the motor using new 6mm and 8mm bolts, new tab washers and o-rings.
The original gearbox had done around 35,000 miles but i had one that i took out of a 1974 bike that had only done 1600 miles
before the owner stuffed it into a tree at the isle of man in 1975. I bought the remains from him in the early 80`s and only
managed to salvage the engine internals and electrics. I used this bikes crankshaft as well along with a new cam chain to build
the bottom end. The clutch should also be ok but i think i will fit new plates and springs just to be sure.
Next job was to fit a new set of cylinder studs and the oil pressure housing. Then a new oil pump and then the sump plate. I had an original hollow sump plug to hand so i used this as well.


I also got the rear wheel back from the wheel builders so i got SMD to fit one of our new Dunlop MK11 K87 gold
seals to it with a new tube. Then i assembled the rear brake panel with a new set of genuine brake shoes, springs and pins. This is the early model of course so the brake panel has no wear limit mark on it and the lever bolts
on from the right side. Then i assembled a sprocket carrier using a new bearing, seal and a genuine 35 tooth
sprocket along with 6 new bolts, nuts and tab washers.


Next job was to fit the kickstart spring and guide and then the outer cover. Then i fitted another rare part a NEW kickstart
lever!! Been saving this up for a while, nearly sold it a few times but resisted the offers (not like me!!). I must say our re-chromed levers are much better finish!!!!
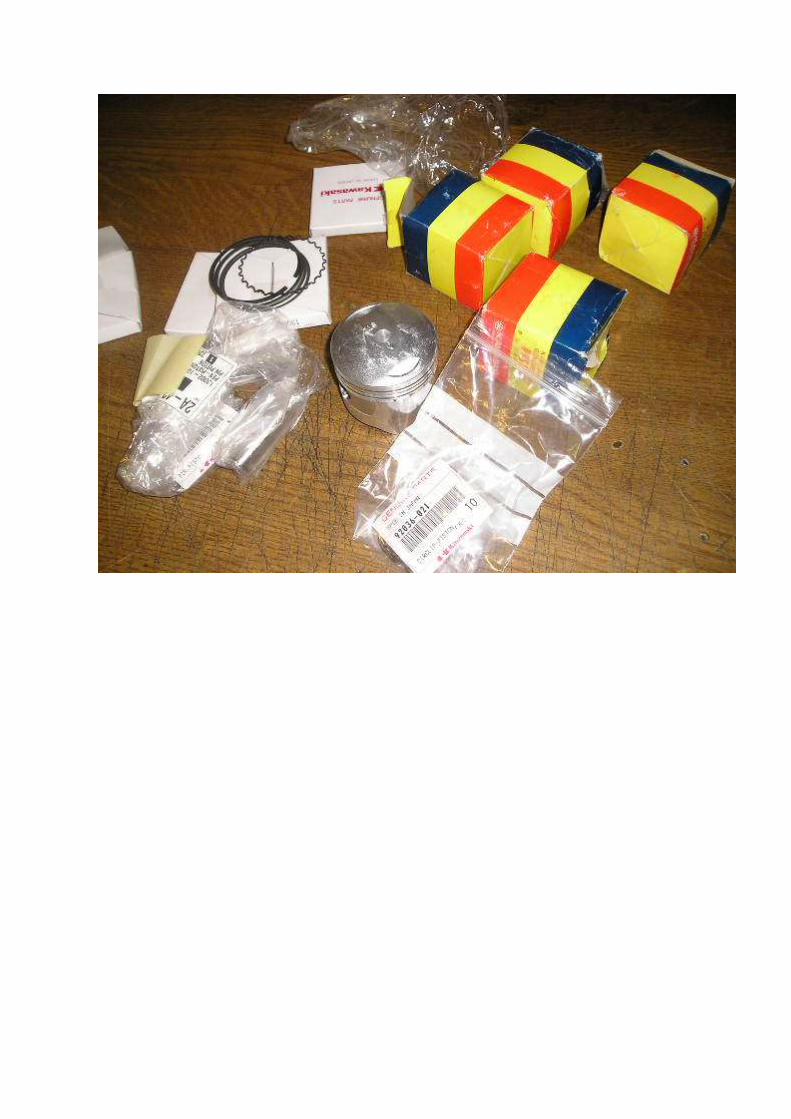
Then i fitted a new set of standard 66mm pistons with new rings, pins and circlips to the con rods. The barrel is at Engine
Teknics in Westhoughton having the bores checked and honed. When i get this back i can set about the polishing of the outer
fins. They also have the head, fitting new guides and re-cutting the valve seats.


Thursday 6th December:
Got the cylinder back and started to polish the end fins. The powder coat was really thick and this job alone took me over 2
hours! good job i dont charge extra labour charges!!
Once i finished this off i fitted them to the cases using the Kawasaki special tool. A new gasket, o`rings and front and
lower cam guide was fitted of course.


Monday 10th December:
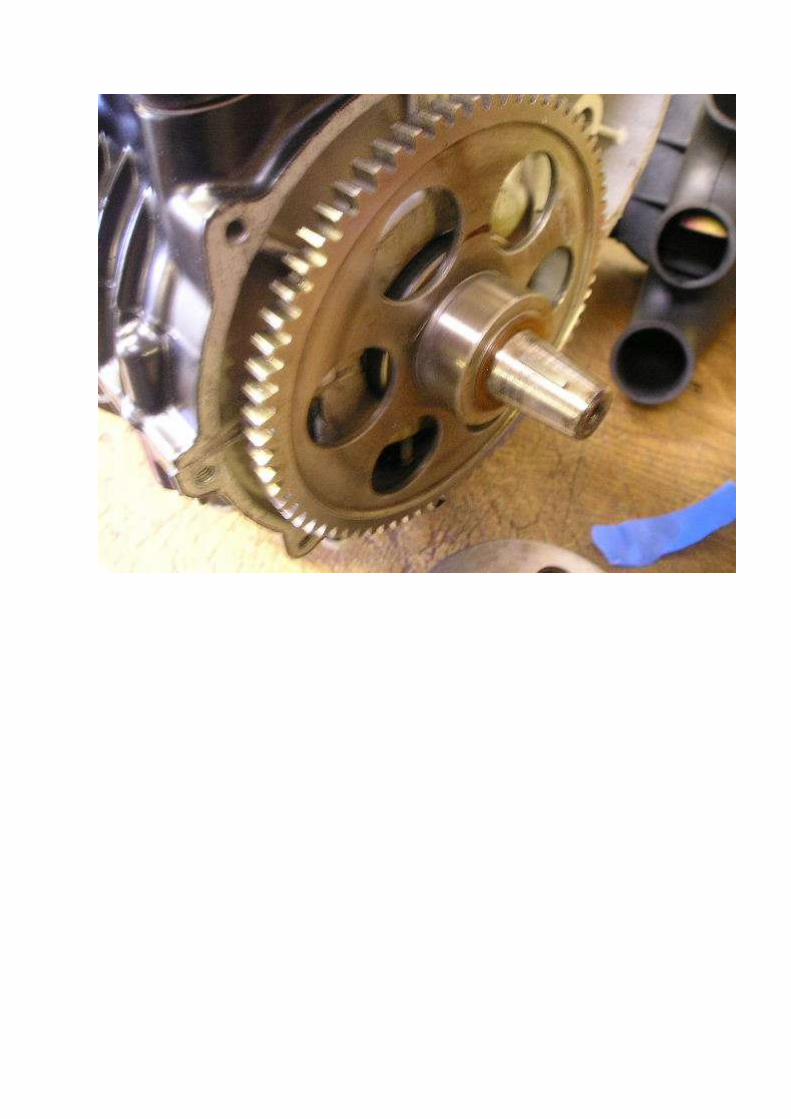
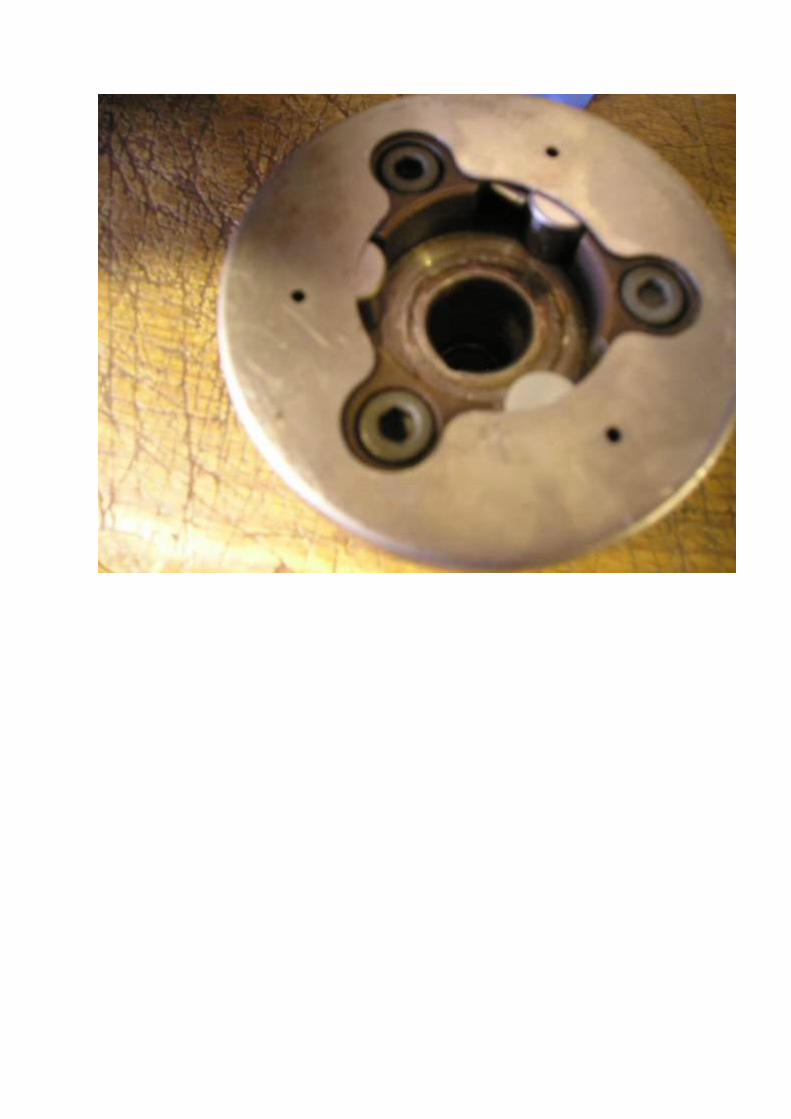
I fitted the rotor and starter clutch today to the left side of the crankshaft. A new starter clutch along with new
pins/springs/rollers were used and a new starter gear. Because of the new parts i will need to mess around with the distance
rubber and thrust washers until i get it right.
Then i fitted the inner transmission cover and the front sprocket using new seals of course. Because i am using the original type chain i do not need to fit the modified sprocket with the boss on the rear of it. This is only required if a wider o`ring chain
is fitted. I then fitted a new neutral switch, new oil pressure switch and a new clutch push rod.


I also got the head back today so i can start to assemble this with all new parts.
**********************************************************************
Tuesday 18th December:
I fitted the motor into the frame today. Once this was in i fitted the starter motor and the alternator cover and then the
sprocket cover and starter motor cover. I had already fitted the clutch release into the cover and fitted a new clutch cable. The
sprocket cover on these early models did not have the gear pattern on them.
The alternator was a new one but the rubber for the oil pressure switch was a bit grubby so i did my best to clean this and the
wires up. They look fine now.
I also fitted the chain oiler pump and then connected it to the chain oiler tank. I attatched the chain to the front sprocket and
tightened everything up. Then i fitted a new plastic chain gaurd.


Then i did a bit of work on the cylinder head. New valves, seals, springs and collars were fitted along with a new set of cam
shell bearings and 4 new inlet rubbers. Then a new tacho guide and gear. Then i polished up the outer fins.

I fitted a new set of cam chain tensioners and guides and a new head gasket and then fitted the cylinder head.
I also fitted the front non folding footrest and a new gear lever.


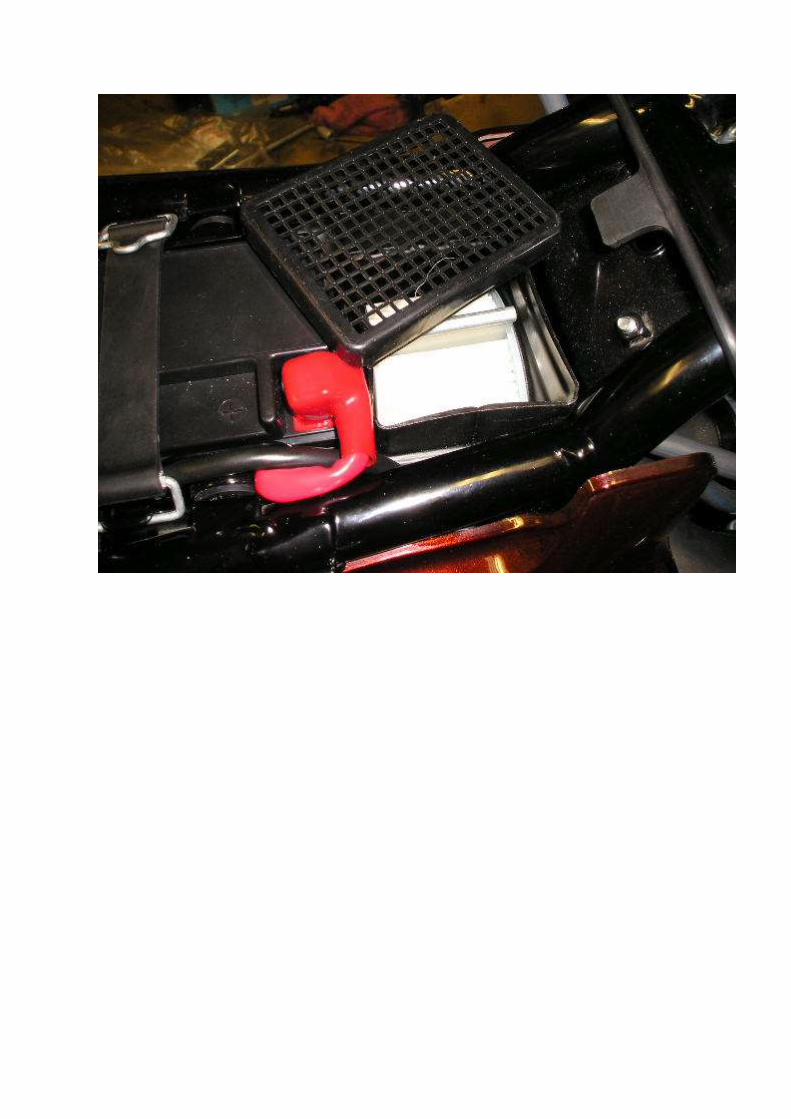
I then finished off the electrics and fitted the air box and a new genuine seat. I used a genuine air box but to be honest our
replica boxes are just as good. The only difference i can see is that the Kawasaki one as the KHI stamping on it.


Then i fitted the cam chain external tensioner. These early models used a smaller thinner body which was modified to a bigger
unit later on.

*******************************************************************
Sunday 11th May
It`s been a while!!!!!!
Having finished the "GOOSE" i got the Z1 back onto the ramp!
There really is not much to do on this bike!, somebody came into the shop and remarked that the new rear fender let the bike
down so i took it off and had it re-chromed. It looks a lot brighter now.
I will fit the carbs this week and then the exhaust and then really it will be almost finished.
Still pondering on fitting one of our combined regulater-rectifiers instead of the original parts, we had another customer telling
us tales of burnt out wiring due to a knackered original regulater!
I think i will fit one and give the buyer of the bike the originals as well!
**********************************************************
Monday 12th May
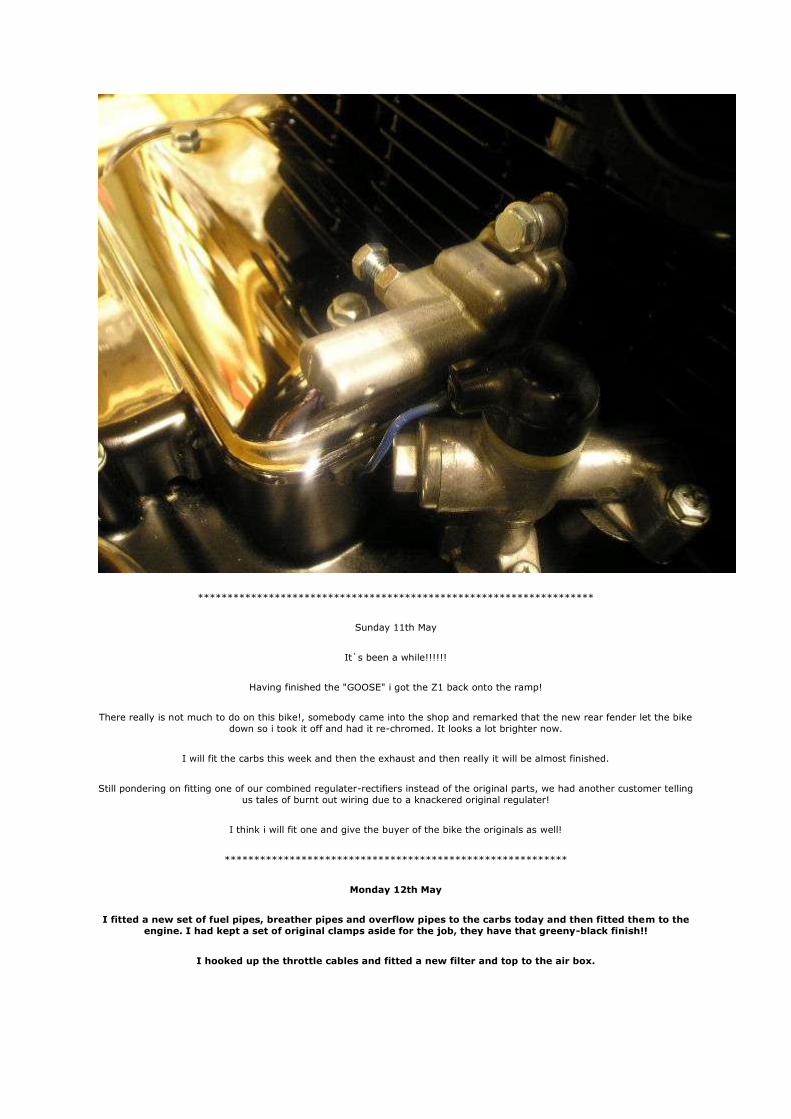
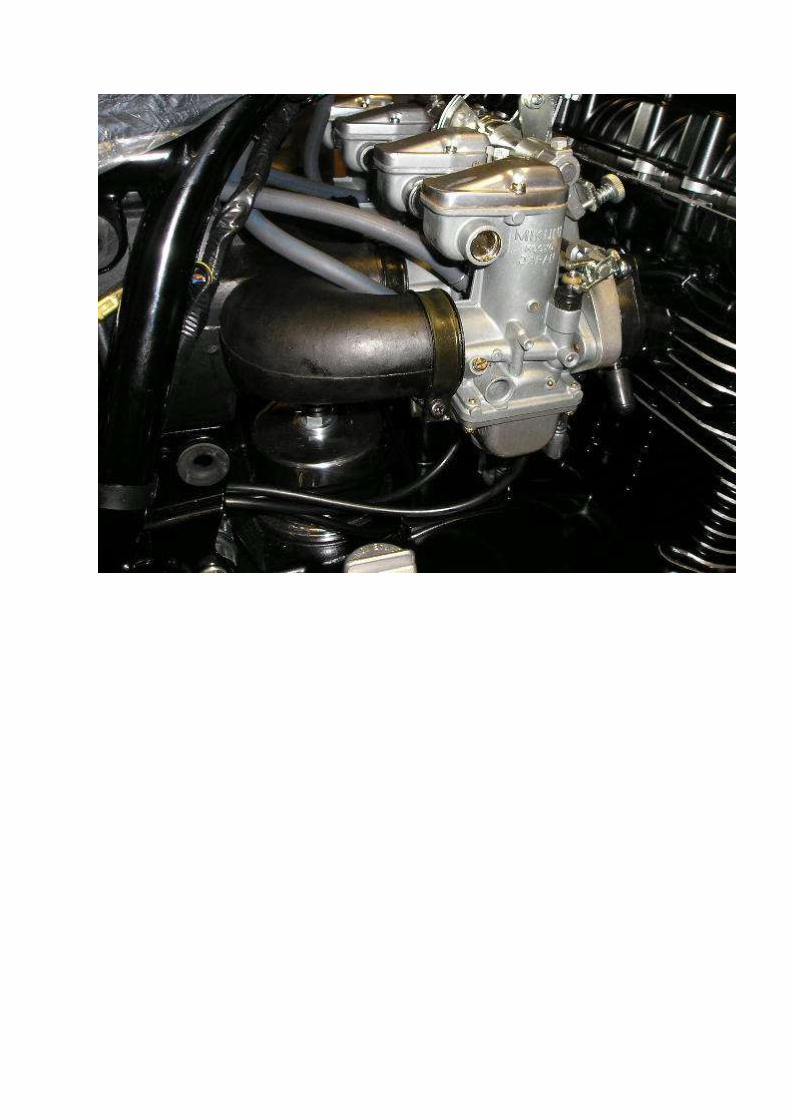
I fitted a new set of fuel pipes, breather pipes and overflow pipes to the carbs today and then fitted them to the
engine. I had kept a set of original clamps aside for the job, they have that greeny-black finish!!
I hooked up the throttle cables and fitted a new filter and top to the air box.
*******************************************************************
Thursday 15th May
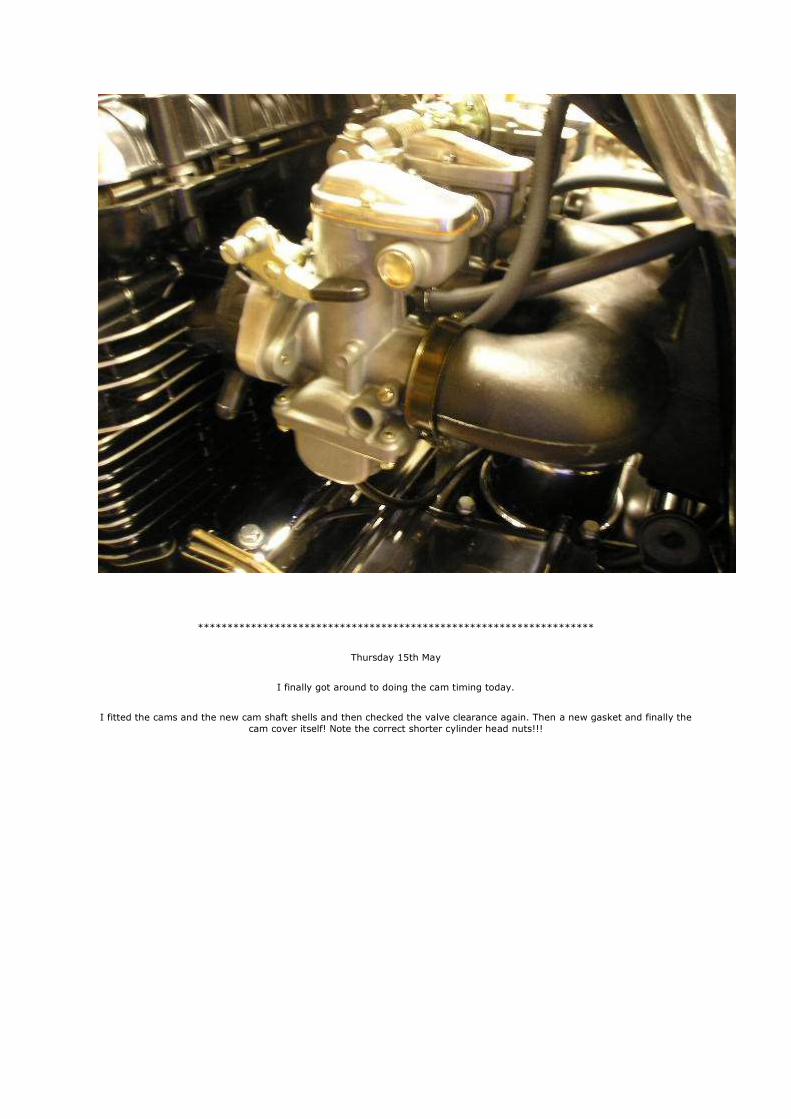
I finally got around to doing the cam timing today.
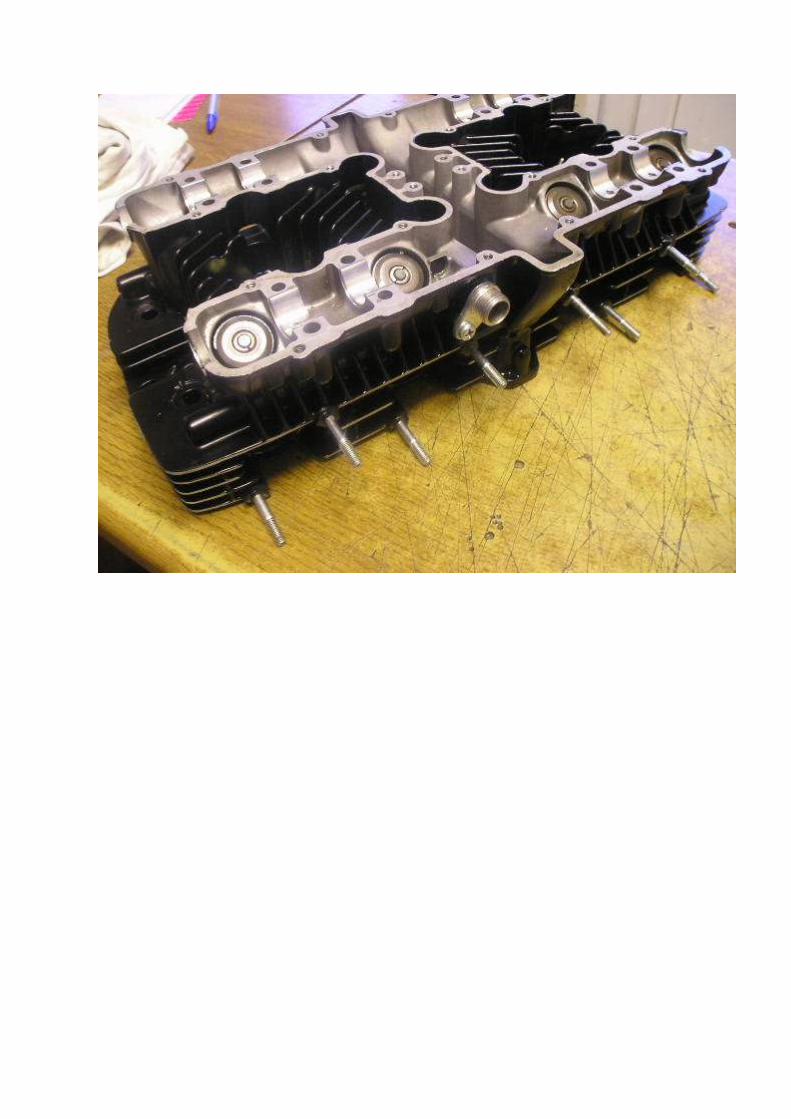
I fitted the cams and the new cam shaft shells and then checked the valve clearance again. Then a new gasket and finally the
cam cover itself! Note the correct shorter cylinder head nuts!!!


******************************************************************
Saturday 17th May
I was going to go out on my bike for a ride this weekend, but the weather has turned wet again!!!
So i decided to finish off the Z1 instead!
I fitted a new battery and finished off the electrics, making sure everything was working! It was then that i realised that there
were no bulbs in the idiot lights!!! So i had to strip the clock down to fit new bulbs, everything else worked ok. I have decided
to keep the original reg/rect units!
I also fitted a new set of points/condensors along with a new backing plate and wiring.
Then i fitted a new set of Exhausts and fittings, then a new air filter and a new original air box top, a very rare part indeed!!!


Then i fitted a new tacho cable and guides and then the extremely rare original type mirrors. Most people have never even
seen these types of mirrors, they were only fitted for a short time in 1972-1973.
Then i fitted a new set of badges and cap to the tank and then a replica black tap. We have been selling these taps for a few
years now and i have to admit that we have a 75% failure rate on them!!! So i guess i will regret fitting it but it is worth a try,
if it fails then i will have to fit a genuine Z1-B silver tap to it!


I also have a original owners hand book to go with it and a complete new original tool kit with all the correct tools
including the little feeler gauge.
I turned down an offer of £500 for these two parts!!!

UTTOXETER SHOW 2008