Oracle Spares Management · Oracle Spares Management Concepts and Procedure Release 11i July 2001...
54
Oracle Spares Management Concepts and Procedure Release 11i July 2001 Part No. A86126-03
Transcript of Oracle Spares Management · Oracle Spares Management Concepts and Procedure Release 11i July 2001...

Oracle Spares Management
Concepts and Procedure
Release 11i
July 2001
Part No. A86126-03
Oracle Spares Management Concepts and Procedures, Release 11i
Part No. A86126-03
Copyright © 1996, 2001, Oracle Corporation. All rights reserved.
The Programs (which include both the software and documentation) contain proprietary information of Oracle Corporation; they are provided under a license agreement containing restrictions on use and disclosure and are also protected by copyright, patent, and other intellectual and industrial property laws. Reverse engineering, disassembly, or decompilation of the Programs is prohibited.
The information contained in this document is subject to change without notice. If you find any problems in the documentation, please report them to us in writing. Oracle Corporation does not warrant that this document is error free. Except as may be expressly permitted in your license agreement for these Programs, no part of these Programs may be reproduced or transmitted in any form or by any means, electronic or mechanical, for any purpose, without the express written permission of Oracle Corporation.
If the Programs are delivered to the U.S. Government or anyone licensing or using the programs on behalf of the U.S. Government, the following notice is applicable:
Restricted Rights Notice Programs delivered subject to the DOD FAR Supplement are "commercial computer software" and use, duplication, and disclosure of the Programs, including documentation, shall be subject to the licensing restrictions set forth in the applicable Oracle license agreement. Otherwise, Programs delivered subject to the Federal Acquisition Regulations are "restricted computer software" and use, duplication, and disclosure of the Programs shall be subject to the restrictions in FAR 52.227-19, Commercial Computer Software - Restricted Rights (June, 1987). Oracle Corporation, 500 Oracle Parkway, Redwood City, CA 94065.
The Programs are not intended for use in any nuclear, aviation, mass transit, medical, or other inherently dangerous applications. It shall be the licensee's responsibility to take all appropriate fail-safe, backup, redundancy, and other measures to ensure the safe use of such applications if the Programs are used for such purposes, and Oracle Corporation disclaims liability for any damages caused by such use of the Programs.
Oracle is a registered trademark of Oracle Corporation. Other names may be trademarks of their respective owners.

Contents
Send Us Your Comments .................................................................................................................... v
Preface........................................................................................................................................................... vii
Intended Audience ............................................................................................................................... viiStructure................................................................................................................................................. viiRelated Documents............................................................................................................................... viiConventions........................................................................................................................................... viii
1 Oracle Spares Management
1.1 Understanding Oracle Spares Management ..................................................................... 1-11.1.1 Oracle Spares Management Overview ....................................................................... 1-11.1.2 Integration with Field Service ...................................................................................... 1-21.1.3 Spares Management Logistics ...................................................................................... 1-31.1.4 Spares Management Planning...................................................................................... 1-61.1.5 Summary of Spares Management Key Features........................................................ 1-81.2 Using Oracle Spares Management Logistics ................................................................... 1-101.2.1 Logistics Business Process Flows............................................................................... 1-101.2.2 Using the Parts Search Hierarchy to Find a Part ..................................................... 1-121.2.3 Creating Move Orders................................................................................................. 1-131.2.4 Updating Move Orders ............................................................................................... 1-151.2.5 Creating Manual Allocations...................................................................................... 1-151.2.6 Printing Picklists........................................................................................................... 1-171.2.7 Confirming Picklists .................................................................................................... 1-181.2.8 Creating, Printing and Confirming Packlists ........................................................... 1-19
iii

1.2.9 Receiving Shipments.................................................................................................... 1-211.2.10 Viewing the Status of Move Orders .......................................................................... 1-221.3 Using Spares Management Planning................................................................................ 1-241.3.1 Using Parts Loop Planning ......................................................................................... 1-241.3.2 Using Location Planning ............................................................................................. 1-271.3.3 Using Forecasting ......................................................................................................... 1-281.4 Administering Oracle Spares Management..................................................................... 1-301.4.1 Administering Planners .............................................................................................. 1-301.4.2 Administering Inventory Organizations .................................................................. 1-311.4.3 Administering Subinventories ................................................................................... 1-311.4.4 Administering Items .................................................................................................... 1-321.4.5 Administering Calculation Rules............................................................................... 1-321.4.6 Administering Forecast Rules .................................................................................... 1-341.4.7 Administering Parts Loops ......................................................................................... 1-351.4.8 Administering Master Stock Lists.............................................................................. 1-381.4.9 Administering Authorized Stock Lists...................................................................... 1-391.4.10 Administering Reporting Hierarchies....................................................................... 1-42
iv

Send Us Your Comments
Oracle Spares Management Concepts and Procedures, Release 11i
Part No. A86126-03
Oracle Corporation welcomes your comments and suggestions on the quality and usefulness of this document. Your input is an important part of the information used for revision.
■ Did you find any errors?■ Is the information clearly presented?■ Do you need more information? If so, where?■ Are the examples correct? Do you need more examples?■ What features did you like most?
If you find any errors or have any other suggestions for improvement, please indicate the document title and part number, and the chapter, section, and page number (if available). You can send com-ments to:
Oracle Corporation CRM Content Development Manager500 Oracle ParkwayRedwood Shores, CAU.S.A.
If you would like a reply, please give your name, address, telephone number, and (optionally) elec-tronic mail address.
If you have problems with the software, please contact your local Oracle Support Services.
v

vi

Preface
Welcome to Oracle Spares Management, Release 11.5i.
This Concepts and Procedures Guide provides information and instructions to help you work effectively with Oracle Spares Management.
Intended AudienceThis guide is aimed at the following users:
■ Technical Service Representatives
■ Customer Service Agents
StructureThis manual contains the following chapters:
■ "Understanding Oracle Spares Management" provides overviews of the application and its components, explanations of key concepts, features, and functions, as well as the application’s relationships to other Oracle applications.
■ "Using Oracle Spares Management" provides process-oriented, task-based procedures for using the application to perform essential business tasks.
Related DocumentsFor more information, see the following manuals:
■ Oracle Spares Management Implementation Guide
vii

■ Oracle Inventory User’s Guide
■ Oracle Field Service Concepts and Procedures Guide
■ Oracle Field Service Implementation Guide
ConventionsThe following conventions are used in this manual:
Convention Meaning
. . .
Vertical ellipsis points in an example mean that information not directly related to the example has been omitted.
. . . Horizontal ellipsis points in statements or commands mean that parts of the statement or command not directly related to the example have been omitted
boldface text Boldface type in text indicates a term defined in the text, the glossary, or in both locations.
< > Angle brackets enclose user-supplied names.
[ ] Brackets enclose optional clauses from which you can choose one or none.
viii

Oracle Spares Manage
1
Oracle Spares Management1.1 Understanding Oracle Spares ManagementThis chapter provides overviews of the application and its components, explanations of key concepts, features, and functions, as well as the application’s relationships to other Oracle or third-party applications.
Topics covered are:
■ Oracle Spares Management Overview
■ Integration with Field Service
■ Spares Management Logistics
■ Spares Management Planning
■ Summary of Spares Management Key Features
1.1.1 Oracle Spares Management OverviewOracle Spares Management draws on the core functionality of Oracle Inventory to provide additional logistics and planning features required to manage a service parts inventory in a multi-location environment.
Spares Management is closely integrated with the Oracle Field Service group of products. Management of the field service task requires that the parts operation be closely coordinated with the scheduling and dispatching of service representatives. Orders for parts, status of orders and location of parts inventories are issues of special interest to the field service organization.
As part of the Oracle Service suite of products, Spares Management is classified as an Installable Module provided with the Field Service solution. Oracle Inventory is the only prerequisite product specifically required for a Spares
ment 1-1
Understanding Oracle Spares Management
Management implementation. Oracle Inventory provides the essential foundation functionality for the Item Master or part number, inventory organizations, subinventories, parts inventory balance tracking, cycle counting and so forth. Spares Management uses inventory organizations as a structure for subinventories which contain spare parts. Spares Management uses subinventories for tracking usable and defective spare parts. Spares Management uses Items as Part Numbers.
The following sections provide additional detail in the following areas:
■ Integration with Field Service
■ Spares Management Logistics
■ Spares Management Planning
1.1.2 Integration with Field ServiceThe dispatch and arrival of both the field service engineer and the parts must be closely monitored and managed in the fast cycle service environment. Easy to use parts reporting procedures for the field engineer are also a key requirement where accurate, up-to-date information on inventories is a priority component of the service organization.
Key integration features with Field Service include:
■ View inventory balances
■ Create Move Orders
■ View Move Order status
■ Create parts usage and recovery transactions
■ Assign field engineers to subinventories
1.1.2.1 View Inventory BalancesA detailed view of parts inventory balances by part number and by location is accessible from the Field Service Control Tower. This view of inventory can be organized into a customized search hierarchy for easy to use point and click parts searches across geographical nodes and down to individual field engineer inventories.
1-2 Oracle Spares Management Concepts and Procedures

Understanding Oracle Spares Management
1.1.2.2 Create Move OrdersThe Move Order can be created directly from the Parts Search Hierarchy. Relevant data is populated into the Move Order form directly from the search hierarchy. The move order functionality includes the ability to enter a special one-time ship-to address when shipment to an address other than a standard subinventory is required.
1.1.2.3 View Move Order StatusThe view of the status of a move order from Field Service provides a detailed step by step view of the order as it goes through the pick, pack, ship and receive activities.
1.1.2.4 Create Parts Usage and Recovery TransactionsThe Field Service Report form includes parts reporting capabilities the field engineer or dispatcher uses to record parts used and recovered. Disposition instructions are automatically provided for the recovered part.
1.1.2.5 Assign Field Engineers to SubinventoriesField engineers are assigned one or more subinventories which they can use to perform parts transactions. To increase efficiency in parts tracking, a field engineer can be assigned a default usable and defective subinventory.
1.1.3 Spares Management LogisticsThe positioning and maintenance of spare parts inventories at required levels is essential to maintain the service level and cost expectations of the field service organization. If the right parts are not available at the right place at the right time, additional cost and customer dissatisfaction can occur.
Spares Management provides spares tracking functionality which is required to track both usable and defective inventory. Each subinventory location is designated for either usable or defective inventory. When a recovered part is reported by the field engineer, a transaction is automatically created to place the defective part in the field engineer’s designated defective subinventory. When parts usage is reported, the transaction to reduce the designated usable subinventory is automatically created.
Parts in transit from one subinventory to another are also tracked as part of the total view of inventory. The in-transit transaction is created when the shipment is confirmed.
Oracle Spares Management 1-3

Understanding Oracle Spares Management
Spares Management supports the spares replenishment process for both subinventory replenishment and field engineering orders. For replenishment orders, maximum consolidation with cost effective results is the primary objective. For field engineering orders, speed and precision in delivery are the primary objectives.
The Spares Management replenishment process uses the following steps:
■ Create Move Orders, manually or automatically from Min-Max Planning
■ Create Manual Allocations (optional)
■ Create Picklists
■ Confirm Picklists
■ Create Packlists
■ Confirm Shipments
■ Receive Parts
■ View Move Order Status
1.1.3.1 Create Move OrdersThe Move Order can be generated for planner review automatically from the Oracle Inventory Min-Max Planning replenishment concurrent program. The Move Order can also be generated manually by the field engineering organization to support a service request task or by the planner who may require a special replenishment order to supplement min - max activity. The parts can be transferred among subinventories within one inventory organization. The parts can be shipped to a special ship-to address for drop shipment to a location other than a standard subinventory.
1.1.3.2 Create Manual AllocationsThe move order can optionally be manually allocated. The allocation is the link between the Move Order and the inventory. This functionality is typically used to ensure that the Move Order which has been generated to support a service request task will be shipped as a priority if inventories are limited. If inventory is not manually allocated, the Create Picklists process allocates the inventory automatically.
1-4 Oracle Spares Management Concepts and Procedures

Understanding Oracle Spares Management
1.1.3.3 Create PicklistsThe picklist is used to execute the physical pick of the parts at the source location. The picks can be organized so that service task move orders pick separately and more frequently to facilitate faster execution and potentially, a different method of shipment. Routine replenishment for a location can be consolidated on a single picklist involving multiple move orders to enable maximum economy in transportation.
1.1.3.4 Confirm PicklistsThe confirm picklist step is required to verify the exact quantity picked.
1.1.3.5 Create PacklistsThe packlist is used to describe the contents of containers that are physically shipped. A packlist can include single or multiple picklists depending on consolidation opportunities. A picklist can be split into multiple packlists. The packlist functionality prevents picklists with different destinations from being assigned to the same packlist.
1.1.3.6 Confirm ShipmentsThe confirm shipment step is required to verify that the physical shipment has occurred. The confirm shipment is also used to relieve inventory at the source location and increment the intransit subinventory.
1.1.3.7 Receive PartsReceiving is executed at the packlist level for the recording of parts received into a subinventory location. Receiving functionality provides for the manual entry of the physical receipt quantity if it is different than the shipped quantity. The auto receipt feature can be set for either the subinventory location or the move order and if used, causes the receipt to automatically occur at the destination location. The auto receipt mode is often used for drop ship orders to field engineers when intransit control is not necessary.
1.1.3.8 View Move Order StatusThe view of the status of a move order provides a comprehensive view of each step of the order throughout the logistics process. Quantities as well as dates and times are provided in this view. The Move Order window can be accessed directly from the view.
Oracle Spares Management 1-5
Understanding Oracle Spares Management
1.1.4 Spares Management PlanningDemanding service level agreements often require that service parts inventories be deployed in numerous locations across a broad geography as close to the anticipated point of use as is economically feasible. As a result, opportunities to implement physical consolidation strategies as a way to reduce inventory may be limited. On the other hand, the financial pressures to reduce the cost of carrying inventory dictates that the inventories must be tightly controlled with respect to overall quantity and positioning.
Oracle Spares Management supports planning at both the aggregate and location level. Aggregate or multi-location planning in Spares Management is referred to as Parts Loop Planning.
Reviewed in more detail is:
■ Parts Loop Planning
■ Location Planning
■ Planner’s Desktop
1.1.4.1 Parts Loop PlanningAt the aggregate level, Spares Management supports the approach where individual subinventories are organized into Parts Loops for control of the total inventory. The parts loop becomes the primary planning entity which is used to coordinate planning and execution activities across multiple locations.
Spares Management has the flexibility to configure multiple, non-overlapping parts loops within a single service organization. The number of unique loops can be tailored to meet the specific needs of the organization.
Spares Management uses a Master Stock List (MSL) to define the stocking plan for the planning loop. The MSL defines the parts and total quantities to be stocked in the loop. In addition the MSL provides for a minimum usable quantity to ensure that the loop maintains a reasonable balance of usable parts.
Notifications are generated automatically when the total available quantity is above or below plan conditions. Notifications are also generated when the level of usable parts has dropped below the minimum on-hand level as designated in the MSL.
1.1.4.2 Location PlanningEffective management of the service parts inventory requires that inventories be well planned at the location level. Planning at the location is primarily
1-6 Oracle Spares Management Concepts and Procedures

Understanding Oracle Spares Management
determined by parts cost and usage activity, however, inventories are also planned and deployed based on customer requirements or Service Level Agreements (SLA). In many cases these SLA inventories would not be supported by actual usage activity.
Spares Management uses an Authorized Stock List (ASL) to define the stocking plan for each location. Using the min-max approach, the ASL defines the parts and quantities required for stocking at each location, including the field engineer’s truck stock.
In the Spares Management ASL, a replenishment location is designated for each part. While it is often the case that most items would be replenished from the same location, this feature provides for the exceptions that are often needed. Strategies that call for replenishment directly from suppliers would use this planning method.
1.1.4.3 Planner’s DesktopThe Planner’s Desktop provides for an organized presentation of the functionality used for planning and execution at the location and loop levels. Included on the desktop are the parts loops, reporting hierarchies, notifications and a forecasting tool.
Parts LoopsIn the Parts Loop area of the Planner’s Desktop, you can administer the Master Stock List for the loop. You can also define and maintain the loop parameters such as the calculation and forecast rule. You can view part availability for the loop. Finally, you can assign, update and view the usable and defective subinventories that are included in the parts loop.
Location PlanningWhen you navigate to a subinventory location in the parts loop, you can define, update and view the Authorized Stock Lists for each location. You can also view part availability for the location.
Reporting HierarchiesIn the Reporting Hierarchy area of the Planner’s Desktop, you can create hierarchies that can be used to summarize inventory, on-order, usage and forecast information. This hierarchy consists of reporting nodes, designed around your organizational or geographical reporting structure, and can be created with subinventories attached to the appropriate nodes.
Oracle Spares Management 1-7
Understanding Oracle Spares Management
NotificationsNotifications are used for advising the planner that the parts inventory does not meet the criteria defined in the parts loop. The planner can view and take action on open notifications in the Planner’s Desktop. Pending and closed notifications are also available.
ForecastingA forecasting tool is available on the Planner’s Desktop to aid the planner in the aggregate and location planning processes. Multiple forecasting techniques are provided and the forecast for the part is viewable by location, loop, and reporting hierarchy.
1.1.5 Summary of Spares Management Key FeaturesSpares Management can serve the specific needs of a field service organization where service parts support is required. It is a broad based product that covers essential process functionality in both planning and logistics. Integration with field service covers the key operational activities associated with creating and viewing the move order status, viewing inventories and processing parts transactions from the service representative. Oracle Inventory provides foundation logistics functionality.
Key features include:
■ Integration with Field Service
■ Logistics
■ Planning
Integration with Field Service■ Detailed view of move order status from Field Service
■ Ability to create Move Orders from the Field Service Report form
■ Parts reporting in the Field Service Report form for consumption and recovery of defective parts
■ Hierarchical view of inventories for point and click parts search
Logistics■ Ability to track parts at the warehouse, subinventory, or locator levels
1-8 Oracle Spares Management Concepts and Procedures

Understanding Oracle Spares Management
■ Visibility of inventory across multiple locations with point and click parts search function
■ Ability to track both usable and defective parts using subinventory controls
■ Order processing suitable for both automated replenishment and service task move orders
■ Drop shipment capability to special ship to addresses
■ Capability to track serial numbers, lots, revisions, and locators
■ Ability to track parts that are in transit between subinventories
■ Automated replenishment for subinventory locations
■ Ability to track parts throughout the entire logistics process
Planning■ Planning Loops using the Master Stock List
■ Location Planning using the Authorized Stock List
■ Planner’s Desktop including presentation of usage history and forecast
■ Notifications for the planner when loop inventories are out of tolerance from plan
■ Reporting hierarchies that can be structured to facilitate a parts search
Oracle Spares Management 1-9
Using Oracle Spares Management Logistics
1.2 Using Oracle Spares Management LogisticsThis chapter provides process-oriented, task-based procedures for using Oracle Spares Management to perform business tasks that are essential for logistics functionality.
Topics covered are:
■ Logistics Business Process Flows
■ Using the Parts Search Hierarchy to find a part
■ Creating Move Orders
■ Updating Move Orders
■ Creating manual allocations
■ Printing Picklists
■ Confirming Picklists
■ Creating, printing and confirming Packlists
■ Receiving shipments
■ Viewing the status of Move Orders
1.2.1 Logistics Business Process FlowsSpares Management provides two methods for logistics functionality:
■ Automated replenishment for parts inventories at any location by using the Oracle Inventory Min - Max Planning concurrent program
■ Manual replenishment for parts inventories by the processing of Move Orders generated from the field
A summarized business flow for each of these logistics methods follows.
1.2.1.1 Business Process Flow for Automated Replenishment 1. Run the Oracle Inventory Min - Max Planning concurrent program on a
regularly scheduled basis. For an explanation of how to run this program, refer to Running the Min - Max Planning concurrent program.
2. If the Min - Max Planning program is run with the Restock parameter set to Yes, then Move Orders are automatically created.
1-10 Oracle Spares Management Concepts and Procedures

Using Oracle Spares Management Logistics
a. If the Min - Max Planning program is run with the Restock parameter set to No, then no Move Orders are created. A report is generated which is designed for review by a planner, followed by the manual creation of Move Orders.
3. Print Picklists to product a report to notify the picker what parts need to be shipped.
4. Confirm Picklists to verify the quantities picked.
5. Create Packlists to describe the contents of shipping containers.
6. Print Packlists to generate a report to accompany the parts.
7. Confirm the shipments to record inventory quantities shipped.
8. Receive the shipments manually or automatically.
You can view the Move Order status before or after any of the above steps.
1.2.1.2 Business Process Flow for Manual Move Orders from the Field1. Receive a request from the field for parts.
2. Use the Parts Search Hierarchy to find a location that has an inventory balance that can fulfill the request from the field.
3. Create a Move Order to move the requested quantity of the part to the requested location. Usually the parts are shipped to the field engineer’s subinventory or drop shipped to a customer address.
4. Print the Picklist to product a report to notify the picker what parts need to be shipped.
5. Confirm the Picklist to verify the quantities picked.
6. Create the Packlist to describe the contents of shipping containers.
7. Print the Packlist to generate a report to accompany the parts.
8. Confirm the shipments to record the inventory quantities shipped.
9. Receive the shipment manually or automatically.
You can view the Move Order status before or after any of the above steps.
For background and general features, see Oracle Spares Management Logistics.
The following sections focus on each of the above steps in more detail.
Oracle Spares Management 1-11

Using Oracle Spares Management Logistics
1.2.2 Using the Parts Search Hierarchy to Find a PartThe Parts Search Hierarchy is used to locate parts that are needed for a service task. The Parts Search Hierarchy uses the structure defined in Reporting Hierarchies, which is described in Defining Reporting Hierarchies. You can see all of the locations in your hierarchy. You can search by part number to see all locations which have the part or you can search by location and see all parts in the requested location. You can view parts information at the subinventory location level or the node level.
From the Parts Search Hierarchy window, you can optionally navigate directly to the Move Order window. If you choose to take this shortcut, the item and source subinventory information defaults to the Move Order window from the Parts Search Hierarchy window.
PrerequisitesNone
ProcedureUse this procedure to search for a location that contains a sufficient quantity of a part so that you can process a move order for the part.
1. Navigate to the Parts Search Hierarchy.
(N) Field Service Dispatcher > Spares Management > Spares Logistics > Parts Search Hierarchy
2. If the Select Organizations window appears, select an inventory organization.
3. Optionally click the hierarchy name from which you want to search for the part.
4. To search for a specific part from the top level of the hierarchy, click the flashlight in the tool bar. The Find Items window opens.
5. Enter a part number in the Item field.
6. Click Find. The Parts Status tab displays the nodes that contain the part you searched for.
7. Click node names to see a list of subinventories that contain the part you searched for.
8. Click a subinventory name to see the updated On-hand and Available quantity for this part. On the spreadtable, the Onhand column shows the
1-12 Oracle Spares Management Concepts and Procedures
Using Oracle Spares Management Logistics
quantity as of the last time the Create Part Availability Data program was run. The updated values are displayed at the bottom of the window. The On Hand quantity includes reserved quantities. The Available quantity does not include reserved quantities.
9. If you want to create a Move Order from this window, click Order Part. The Order Part button is enabled only when you are in a subinventory which has an available quantity that is greater than or equal to the quantity you are trying to order.
Note: You can navigate to a specific node or subinventory first before you search for a part.
Note: You can display selected nodes and subinventories in the navigator tree. A red X in front of a subinventory indicates a defective subinventory. A green X in front of a subinventory indicates a usable subinventory.
1.2.3 Creating Move OrdersMove Orders are used to request transfers of parts between subinventories within the same inventory organization.
Special Features■ You can drop ship the parts on a Move Order to a one time address, if
needed.
■ You can override the automatic receipt setting at the Move Order level. Automatic receipt is typically set at the subinventory level.
■ You can change the source subinventory after the Move Order is approved.
■ You can reference a service request and task number.
■ You can access Move Orders from the Field Service Control Tower.
Prerequisites■ You may order only from a source subinventory which has an available
quantity that is greater than or equal to the quantity you are trying to order.
■ A move order can move parts only between subinventories within one inventory organization.
Procedure
Use this procedure to create a Move Order to move a part between two subinventories within one inventory organization.
Oracle Spares Management 1-13

Using Oracle Spares Management Logistics
1. Navigate to the Move Order window from the Navigator or by clicking the Order Part button in the Parts Search Hierarchy window.
2. If the Select Organizations window appears, select an inventory organization.
3. Optionally enter the Source Subinventory and Destination Subinventory in the Default section of the Move Order window if you want this information to default to your move order. This defaulting feature is useful when you are entering multiple Move Orders with the same source and destination.
4. Enter the part number in the Item field. This field is case sensitive. If you entered the Move Order window from Parts Search Hierarchy, the part number defaults into the Item field.
5. As soon as you tab to the Unit of Measure (UOM) field, the Unit of Measure and the Date Required fields default.
6. You can change the Date Required value by using the list of values or by entering a new date.
7. Enter the move order quantity in the Quantity field.
8. In the Source tab, enter or select a source subinventory from the list of values. If you entered the Move Order window from Parts Search Hierarchy, the Source Subinventory defaults.
9. Optionally enter Locator, Lot Number, Serial from and Serial to if your part is using these features from Oracle Inventory.
10. Unit Number is not used for Spares Management.
11. In the Destination tab, select a destination subinventory from the list of values.
12. The Project and Task tab and the Control tab are not used for Spares Management.
13. In the Service Controls tab, optionally select the Service Request and Task numbers from the list of values.
14. Optionally enter the Customer PO and Comments.
15. If you want to override the automatic receipt setting for this move order, click the Special Ship To button. Check or uncheck the Auto Receipt check box. The default value comes from the destination subinventory. The automatic receipt feature is used when the shipment needs to be automatically transacted into the destination subinventory at the Confirm
1-14 Oracle Spares Management Concepts and Procedures
Using Oracle Spares Management Logistics
Ship step. Automatic receipt is often used along with a special ship to address when a drop shipment is required.
16. If you want to ship the parts to a one time address, click the Special Ship To button. The Special Ship to address is used when the Move Order needs to ship to an address other than the standard address assigned to the destination subinventory. You can enter a special address or click the Address button and select from a list of addresses previously entered for customers or locations.
17. Optionally select the Shipment Method and Carrier from the list of values.
18. Click OK to close the window.
19. Save your work. The Move Order number is displayed.
20. Click Approve to change the status of the Move Order to Approved. The Move Order must in an Approved status for further processing to continue. If you click Approve before saving your move order, the save and the approval both occur.
1.2.4 Updating Move Orders
Procedure1. Navigate to the Create Move Orders window and query on your move order
number. You can also find your move order in the View Move Order Status window.
2. If your move order is not approved, you can update any field in the move order.
3. If your move order is approved, you can update any field except Quantity and Destination Subinventory.
4. Save your changes.
1.2.5 Creating Manual AllocationsAllocations are used to reserve parts in a specific subinventory location for a move order. The allocation is the link between the Move Order and inventory. This functionality is typically used to ensure that the Move Order which has been generated to support a service request task will be shipped as a priority if inventories are limited. This step is optional because the Create Picklists process allocates the inventory automatically.
Oracle Spares Management 1-15

Using Oracle Spares Management Logistics
Special Features■ You can view On-hand and Available quantities.
■ You can allocate the inventory with two mouse clicks if you do not need to view the quantities.
PrerequisiteThe Move Order must be in an Approved status to create an allocation.
ProceduresUse this procedure to view inventory quantities and then create a manual allocation for a move order.
1. Navigate to the Create Allocations window.
2. If the Select Organizations window appears, select an inventory organization.
3. The Find Move Order Lines window opens.
4. Enter the Move Order number in the Number field of the Headers tab.
5. Click Find to open the Create Allocations window.
6. Click View/Update Details to open the Transact Move Order Line Allocations window.
7. Enter a quantity in the Quantity field and click Update.
8. Optionally click View/Update Details again to verify the allocated quantity. The allocation was created successfully if the Allocated Quantity field displays the allocated quantity.
9. Save your work.
Use this procedure to create a manual allocation for a move order if you do not need to view inventory quantities.
1. Navigate to the Create Allocations window.
2. If the Select Organizations window appears, select an inventory organization.
3. The Find Move Order Lines window opens.
4. Enter the Move Order number in the Number field of the Headers tab.
5. Click Find to open the Create Allocations window.
1-16 Oracle Spares Management Concepts and Procedures

Using Oracle Spares Management Logistics
6. Click the Select box.
7. Click Create Allocations.
8. Save your work.
1.2.6 Printing PicklistsPicklists are used to produce a report that specifies the parts to be removed from their location to be shipped. Printing the picklist changes the Move Order status to Printed.
Special features■ If an allocation was not previously created, printing the Picklist creates the
allocation automatically.
■ You can print a picklist for an individual move order or you can print a picklist for a batch of move orders.
Prerequisites■ The Move Order must be in an Approved status.
■ The quantity on hand must be greater than or equal to the quantity ordered on the Move Order.
ProcedureUse this procedure to print picklists.
1. Navigate to the Print Picklists window.
2. If the Select Organizations window appears, select an inventory organization.
3. The Submit Requests window opens.
4. To print a picklist for an individual Move Order, enter a Move Order number and click OK.
5. To print picklists for a batch of Move Orders, enter appropriate values in one or more of these parameters: Source Subinventory, Destination Subinventory, Date Required and Requestor. Click OK.
6. Click Submit to run the concurrent program which creates the picklist.
7. Click No in the Decision window if you are finished printing picklists.
Oracle Spares Management 1-17

Using Oracle Spares Management Logistics
8. You can optionally verify that the picklist was created by navigating to the View Move Order Status window. Enter your move order number in the Find window and click Find. The line status should indicate Printed, the Picklist number should be assigned to the Move Order and the picked quantity should display the correct quantity.
1.2.7 Confirming PicklistsPicklists must be confirmed so that the correct pick quantity is verified before shipping the parts. You must confirm the Picklist so that the Picklist will be available for inclusion on the Packlist. Confirming the Picklist changes the Move Order line status to Confirmed.
Special Features■ You can change the picked quantity during the confirmation step if it is in
error on the Picklist.
■ You can split picklist lines into multiple lines for shipping.
PrerequisitesThe Picklist must be in Printed status before it can be confirmed.
ProcedureFollow this procedure to confirm a picklist.
1. Navigate to the Confirm Picklists window.
2. If the Select Organizations window appears, select an inventory organization.
3. The Find Picklists window opens. Enter a picklist number or select from the list of values and click Find.
4. The Confirm Picklist window opens and is populated with data from the selected picklist.
5. Optionally enter the Quantity Picked if it is different from the original picklist quantity.
6. Optionally click Split Line to split your shipment into more than one line. A new line is added and you can enter a quantity for the next line.
7. Click Confirm Pick to confirm the Picklist.
1-18 Oracle Spares Management Concepts and Procedures

Using Oracle Spares Management Logistics
8. You can optionally verify that the picklist was confirmed by navigating to the View Move Order Status window. Enter your move order number or your picklist number in the Find window and click Find. The line status should indicate Confirmed and the picked quantity should display the correct quantity.
1.2.8 Creating, Printing and Confirming PacklistsA packlist is used to describe the contents of a box and to execute the physical shipment. Picklists are assigned to boxes and packlists are created for each box. Packlists must be printed and then confirmed. The confirmation process transacts inventory out of the source subinventory, relieves the allocated quantity and transacts inventory into the destination subinventory if the auto receipt feature is enabled. If auto receipt is disabled, the shipment is transacted into the intransit subinventory.
Special Features■ You can find consolidation opportunities by viewing all pick lines destined
for the same ship to address.
■ You can assign multiple pick lines to one box.
■ You can split pick lines into multiple boxes.
■ The ship to address from the Picklist is automatically assigned to the packlist header.
■ You can print the packlist and confirm the shipment from the same window.
PrerequisiteThe Picklist must be in a Confirmed status to be available for selection in a packlist.
ProcedureFollow this procedure to confirm a packlist.
1. Navigate to the Create Packlists window.
2. If the Select Organizations window appears, select an inventory organization.
3. Click the + sign in front of Packing Lists. The Packing Lists folder expands to display the Open, Received and Shipped status folders.
Oracle Spares Management 1-19
Using Oracle Spares Management Logistics
4. Click the + sign in front of the Open folder to display open packing lists.
5. Click the Open folder and then right click it. A pop-up menu appears.
6. Select Create Packing List. The Define Packlist window appears with the Packlist Details tab displayed.
7. Optionally enter shipping information including Carrier, Shipment Method, Waybill, Comments, Ship to Subinventory and Location Address. You can also enter this information later when you are finalizing your packlist.
8. Save your work to create the Packlist. Your packlist appears under the Open folder.
9. Click the + sign in front of your packlist to display Box 001.
10. Click Box 001 to open the Box Details tab. You can enter the weight here.
11. Open the Picked Items tab. The Find Picklists window opens.
12. Enter the picklist number and click Find, or leave the picklist number blank and click Find to execute a blind query for all picklists that have not been previously assigned to a packlist.
13. To add the entire contents of a picklist to a box, click the picklist number.
14. Click Add to assign the picklist to the selected box. The selected pick line disappears from the Picked Items tab and is transferred to the selected box. All other pick lines that are assigned to a ship to address that differs from the pick line just selected, disappear from the Picked Items tab.
15. To add more pick lines to the same box, repeat steps 10 through 14.
16. To add a second box to your packlist, click your packlist folder and then right click it. A pop-up menu appears.
17. Select Create Box, optionally enter the weight in the Box Details tab and click Save. Your new box number appears under your packlist.
18. To split the quantity on a pick line into more than one box, click the quantity value of a pick line in the Picked Items tab. The Split Quantity window opens.
19. Enter the quantity to be assigned to the first box and click OK.
20. To add the remaining quantity to another box, click on the other box number.
21. Click the picklist number containing the remaining quantity and click Add.
1-20 Oracle Spares Management Concepts and Procedures

Using Oracle Spares Management Logistics
22. To finalize the packlist, click the packlist number.
23. Enter values for carrier, shipment method, waybill and comments in the Pack List Header tab if you did not previously enter these values.
24. Enter the box weight in the Box Details tab if you did previously enter this.
25. Save your work to create the packlist.
26. Click Print in the Pack List Header tab to the print the Packlist. The Submit Request window opens.
27. Click Submit to print the Packlist and click No in the decision window.
28. Click Confirm in the Pack List Header tab to confirm the shipment.
1.2.9 Receiving ShipmentsReceiving parts is executed automatically if the auto receipt flag is enabled. If the auto receipt flag is disabled, use the Receive Parts window to receive parts manually. Receiving is performed at the packing list level. The receipt transaction relieves the instransit subinventory and increments the destination subinventory.
Special Features■ You can correct the quantity received if it differs from the quantity shipped.
■ If the quantity received is correct, you can receive the entire shipment with one click.
■ You can close the receipt with a short quantity, in the case of lost parts, for example.
PrerequisiteThe Packlist must be in a Shipped status for receiving.
ProcedureFollow this procedure to manually record a receipt of parts.
1. Navigate to the Receive Shipments window. The Find Packlists window opens.
2. Enter a Packlist and click Find or leave the Packlist field blank and click Find to execute a blind query. The Receive Parts window opens with a list of shipments that match your search criteria.
Oracle Spares Management 1-21

Using Oracle Spares Management Logistics
3. If the quantity shipped is the same as the quantity received, select the packlist number and click Receive.
4. If the quantity shipped is different from the quantity received, click the quantity value under the This Receipt column.
5. Enter the actual quantity received and click Receive.
6. Optionally close the partially received line by selecting the line and clicking Close Line.
1.2.10 Viewing the Status of Move OrdersThe View Move Order Status window allows the viewing of move order details at every step in the logistics process.
Special Features■ You can track Move Order quantities throughout the logistics process.
■ You can view the date and time of each step of the logistics process.
■ You can view details such as picklist number, packlist number, carrier and waybill number.
■ You can navigate directly to the Move Order window by clicking on the move order number.
■ You can view multiple move orders by using combinations of the parameters in the Find window, including Move Order number, Source Subinventory, Destination Subinventory, Picklist number, Packlist number, Waybill number and Line Status.
ProcedureFollow this procedure to view the status of one or more move orders.
1. Navigate to the View Move Order Status window. The Find window opens.
2. Enter the criteria that you want to use to limit the results of your search in the Find window and click Find. A list of move orders that match your search criteria is displayed.
3. The quantities that appear in the bottom of the window for On-hand and Available reflect real-time quantities that are updated whenever a transactions occurs.
4. Scroll to the right to view all details for move orders.
1-22 Oracle Spares Management Concepts and Procedures
Using Oracle Spares Management Logistics
5. Optionally click on a move order number to navigate to the Move Order window.
Oracle Spares Management 1-23

Using Spares Management Planning
1.3 Using Spares Management PlanningThis chapter provides process-oriented, task-based procedures for using Oracle Spares Management to perform spare parts planning tasks.
Topics covered are:
■ Using Parts Loop Planning
■ Parts Loop Business Process
■ Running the Create Availability Data concurrent program
■ Running the Create Notifications concurrent program
■ Processing notifications
■ Using Location Planning
■ Location Planning Business Process
■ Running the Min-Max Planning concurrent program
■ Using Forecasting
1.3.1 Using Parts Loop PlanningPlanning at the parts loop level involves the comparison of available parts to the Master Stock List. When the available quantities of parts do not meet the inventory levels defined for the parts loop, a notification is created for review and processing by the planner.
The steps for defining a parts loop are described in detail in the Oracle Spares Management Implementation Guide and are summarized below:
1. Create the Parts Loop
a. Select a calculation rule for the parts loop to determine how the Actual Available quantity is calculated for the loop
b. Select a forecast rule for the parts loop to define how the forecast is created for the loop
2. Assign subinventory locations to the Parts Loop
3. Create the Master Stock List for the Parts Loop
a. Define the parts to be stocked in the loop
b. Define the total loop quantity for each part
1-24 Oracle Spares Management Concepts and Procedures

Using Spares Management Planning
c. Define the minimum usable quantity for each part
1.3.1.1 Parts Loop Business Process1. Run the Create Part Availability Data concurrent program.
2. Run the Create Notifications concurrent program.
3. View the Notifications.
4. Take the appropriate action to respond to the Notifications.
5. Update the status of the Notifications.
The following sections focus on each of the above steps in more detail.
1.3.1.2 Running the Create Part Availability Data Concurrent ProgramThe Create Part Availability Data concurrent program compiles part availability data for all spare parts. This availability data is used to update summary quantities that are displayed in planning loops and hierarchies. The summary data that appears at the node levels in the Planner’s Desktop are updated only by this concurrent program. The availability data is also used to determine whether Notifications should be generated.
PrerequisiteNone
Procedure1. Navigate to the menu to run the program.
(N) Field Service Dispatcher > Spares Management > Spares Planning > Create Part Availability Data
2. Click Submit.
3. Click No in the Decision window.
4. To see the status of your concurrent request, click View from the Tools menu and click Requests.
5. Click Find to view the status of all your requests.
1.3.1.3 Running the Create Notifications Concurrent ProgramThe Create Notifications concurrent program compares the Available quantities that are calculated by the Create Part Availability Data concurrent program and
Oracle Spares Management 1-25
Using Spares Management Planning
compares these quantities to the desired quantities that were defined by the MSL in the parts loop. Notifications to the planner are created when one of the following conditions occurs:
■ The Available quantity for this part is above the total loop quantity by more than the allowable percentage
■ The Available quantity for this part is below the total loop quantity by more than the allowable percentage.
■ The usable quantity for this part is below the minimum usable quantity
PrerequisiteRun the Create Part Availability concurrent program first, so the notifications are based on the most recent quantities.
Procedure1. Navigate to the menu to run the program.
(N) Field Service Dispatcher > Spares Management > Spares Planning > Create Notifications
2. Click Submit.
3. Click No in the Decision window.
4. To see the status of your concurrent request, click View from the Tools menu and click Requests.
5. Click Find to view the status of all your requests.
1.3.1.4 Processing NotificationsNotifications can be viewed and updated in the Planner’s Desktop. Notifications have a status of either Open, Pending or Closed.
PrerequisiteRun the Create Notifications concurrent program.
Procedure1. Navigate to the Planner’s Desktop.
(N) Field Service Dispatcher > Spares Management > Spares Planning > Planner’s Desktop (T) Notifications (bottom tab on the left)
1-26 Oracle Spares Management Concepts and Procedures

Using Spares Management Planning
2. Click the + sign in front of Notifications.
3. Click the + sign in front of the parts loop name to open the loop folder.
4. Click the + sign in front of the notification category you want to view. The choices are Above, Below and Not Enough Usable Parts. For example, to view open notifications, click the + sign in front of Open.
5. Click on the Item number in the Open folder to view the notification.
6. Open the Master Stock List tab to view the Master Stock List parameters for the Item in the notification.
7. Open the Parts Status tab to view the details of the part’s status. The detailed view of the status includes the availability elements for the part.
8. There are five different actions you can take on an open notification:
a. You can change the quantity on the Master Stock List.
b. You can create a move order to transfer parts to the location that needs them.
c. You can create an external requisition to purchase an additional quantity of parts.
d. You can create a WIP order to have the parts repaired internally.
e. You can create an external requisition to have the parts repaired externally.
9. After taking the appropriate action regarding the notification, you can update the status of the notification to Pending or Closed.
1.3.2 Using Location PlanningPlanning at the subinventory location level is accomplished by running the Oracle Inventory Min - Max Planning concurrent program which compares the quantity of available parts to the quantities designated in the Authorized Stock List. The Min - Max Planning program can be run in automated mode so that Move Orders are automatically created. The program can also be run in manual mode so a report is generated to assist in determining which parts need replenishment. The Move Orders are then created manually by a planner.
1.3.2.1 Location Planning Business Process1. Run the Min - Max Planning concurrent program.
Oracle Spares Management 1-27

Using Spares Management Planning
2. If the Min - Max Planning program is run in manual mode, review the report and manually create move orders.
3. If the Min - Max Planning program is run in automatic mode, move orders are automatically created.
4. From either mode, proceed to the Logistics Process after move orders are created.
1.3.2.2 Running the Min - Max Planning Concurrent Program
PrerequisiteNone
Procedure1. Select an Inventory responsibility to run the Min - Max Planning concurrent
program.
Inventory Responsibility (N) Planning > Min - Max Planning
2. The Parameters window opens.
3. Select Subinventory in the Planning Level parameter.
4. Enter or select the subinventory name in the Subinventory parameter.
5. Select Yes in the Restock parameter if you want to run in the automated mode that creates move orders. Select No if you want to run in manual mode.
6. Click Submit and then click No in the Decision window.
7. To check the status of your concurrent request, select View from the Tools menu and then select Requests.
8. Click Find to view all of your concurrent requests.
9. To view the output of the Min - Max Planning report, select this request and then click View Output.
1.3.3 Using ForecastingForecasting information can be based on four different methods of forecast calculations. Run the Create Usage History concurrent program to gather usage statistics and then view the forecast and usage information.
1-28 Oracle Spares Management Concepts and Procedures
Using Spares Management Planning
PrerequisitesNone
ProcedureUse this procedure to update the usage history information and view the forecast and usage information.
1. Navigate to the Create Usage History concurrent program.
(N) Field Service Dispatcher > Spares Management > Spares Planning > Create Usage History
2. Click Submit.
3. Click No in the Decision window.
4. To see the status of your concurrent request, select View from the menu bar and select Requests.
5. Click Find to view the status of all your requests.
6. When your concurrent request is complete, navigate to the Parts Loop in the Planner’s Desktop.
(N) Field Service Dispatcher > Spares Management > Spares Planning > Planner’s Desktop (T) Parts Loop (top tab on the left)
7. Click the + sign next to Parts Loop.
8. Click on the parts loop for which you want to view forecasting information.
9. Open the Parts Status tab.
10. Click Find in the Find Items window to execute a blind query for all parts.
11. Click on an Item number and view the Usage/Forecast information in the bottom of the window.
12. Open the Graph tab to view the usage data, represented by a red line, and the forecast data, represented by a green line.
Oracle Spares Management 1-29

Administering Oracle Spares Management
1.4 Administering Oracle Spares ManagementThis chapter provides task-based procedures for administering Oracle Spares Management.
Topics covered are:
■ Administering Planners
■ Administering Inventory Organizations
■ Administering Subinventories
■ Administering Items
■ Administering Calculation Rules
■ Administering Forecast Rules
■ Administering Parts Loops
■ Administering Master Stock Lists
■ Administering Authorized Stock Lists
■ Administering Reporting Hierarchies
1.4.1 Administering PlannersUse this procedure to define planners. In Spares Management, inventory planners are required to be associated with parts loops.
PrerequisiteThe employee to be defined as a planner must have already been defined in Oracle Human Resources or Oracle Inventorty. Please refer to the Oracle Inventory User’s Guide for additional information about planners.
Procedure1. Navigate to the Planners setup form.
(N) Field Service Dispatcher > Spares Management > Standard Inventory > Setup > Planners
2. Enter the name of the planner in the Name field.
3. Enter the user role in the Description field.
4. Select the employee name from the Employee list of values.
1-30 Oracle Spares Management Concepts and Procedures
Administering Oracle Spares Management
5. Save your work.
1.4.2 Administering Inventory OrganizationsInventory organizations are defined in Oracle Inventory. Spares Management uses inventory organizations as a structure subinventories which contain spare parts. Refer to the following sections of the Oracle Inventory User’s Guide for detailed instructions on how to setup and administer inventory organizations:
■ Overview of Inventory Structure
■ Creating an Organization
■ Defining Organization Parameters
In the Organization Classification section, each Spares Management organization needs to include Inventory Organization as a classification. Otherwise the setup is standard.
1.4.3 Administering SubinventoriesStandard setup is required in Oracle Inventory for subinventories. Subinventories are unique physical or logical separations of material inventory. Spares Management uses subinventories for tracking usable and defective spare parts. The minimum setup for subinventories to be used in Spares Management follows. For detailed information regarding subinventories, please refer to the Oracle Inventory User’s Guide.
ProcedureUse this procedure and refer to the complete procedure in the Oracle Inventory User’s Guide define a subinventory.
1. Navigate to the Subinventory setup form.
(N) Field Service Dispatcher > Spares Management > Standard Inventory > Setup > Organization > Subinventories
2. Enter a name for the subinventory.
3. Enter a description for the subinventory.
4. Check the following check boxes so the subinventory can be used by Spares Management:
■ Qty Tracked
Oracle Spares Management 1-31

Administering Oracle Spares Management
■ Asset Subinventory
■ Allow Reservation
1.4.4 Administering ItemsStandard setup in Oracle Inventory is required for Items. Spares Management uses Items as Part Numbers. For detailed information about administering items, please refer to the Oracle Inventory User’s Guide. The specific requirements needed for items to be used by Spares Management are as follows:
1. Inventory Item should be checked in the Inventory tab.
1. The Billing Type is used for field service invoices. The choices in the list of values are Material, Expense and Labor.
2. The Recovered Part Disposition field is used to define items as spare parts. The choices in the list of values are Fast Return, Slow Return and No Return. If this field is not populated, the item will not be available in Spares Management.
1.4.5 Administering Calculation RulesCalculation rules are used to determine which availability elements are included when calculated the Actual Available quantity. Calculation rules are assigned to parts loops. For additional information regarding calculation rules, please refer to the Oracle Spares Management Implementation Guide.
The following tasks can be performed to administer calculation rules.
■ Defining a calculation rule
■ Updating a calculation rule
■ Deleting a calculation rule
1.4.5.1 Defining a Calculation Rule
PrerequisitesNone
Procedure1. Enter a rule name in the Name field.
2. Optionally enter a description in the Description field.
1-32 Oracle Spares Management Concepts and Procedures
Administering Oracle Spares Management
3. Select the appropriate availability elements. The choices are Usable on-hand, Defective on-hand, Purchase orders, WIP orders, Requisitions, Sales Orders, Move Orders, Inter Org transfers, and In-transit Move Orders.
4. Enter a tolerance percent. This is used in loop planning to filter notifications that are within the tolerance percent. If a 10 is entered, a notification will be sent whenever the quantity is higher or lower than the desired quantity by 10%, for example.
5. Enter the time fence in days. This is used in loop planning to filter incoming and outgoing orders scheduled beyond a specified time period.
1.4.5.2 Updating a Calculation Rule
PrerequisitesNone
Procedure1. Query for the calculation rule you want to change or use Control-F11 to
query all existing calculation rules.
2. If you queried for all rules, arrow down to the calculation rule to be changed.
3. Enter changes as appropriate in the window and save your work.
1.4.5.3 Deleting a Calculation Rule
PrerequisitesDo not delete any calculation rule that is currently assigned to a Parts Loop. If the calculation rule to be deleted is currently assigned to a Loop, assign another calculation rule to the Loop before deleting the calculation rule.
Procedure1. Query for the calculation rule you want to delete or use Control-F11 to query
all existing calculation rules.
2. If you queried for all rules, arrow down to the calculation rule to be deleted.
3. Click the Red X in the Toolbar to delete and save your work.
Oracle Spares Management 1-33
Administering Oracle Spares Management
1.4.6 Administering Forecast RulesForecast rules are used to define how the forecast information is calculated. For additional information regarding forecast rules, please refer to the Oracle Spares Management Implementation Guide.
The following tasks can be performed to administer forecast rules:
■ Defining forecast rules
■ Updating forecast rules
■ Deleting forecast rules
1.4.6.1 Defining a Forecast Rule
PrerequisiteNone
Procedure 1. Enter a rule name in the Name field.
2. Optionally enter a description in the Description field.
3. Select a forecast method from the Forecast Method list of values. The choices are Simple Average, Weighted Average, Exponential Smoothing and Trend Enhanced.
4. In the Period Type field, select Weekly or Periodic. Periodic refers to accounting periods.
5. Depending on which forecast method you chose, the remaining fields in the window vary.
1.4.6.2 Updating Forecast Rules
PrerequisiteNone
Procedure 1. Query for the forecast rule you want to change or use Control-F11 to query
all existing forecast rules.
2. If you queried for all rules, arrow down to the forecast rule to be changed.
1-34 Oracle Spares Management Concepts and Procedures
Administering Oracle Spares Management
3. Enter changes as appropriate in the window and save your work.
1.4.6.3 Deleting Forecast Rules
Prerequisite
Do not delete any Forecast Rule that is currently assigned to a Parts Loop. If the Forecast Rule to be deleted is currently assigned to a Loop, assign another Forecast Rule to the Loop before deleting the Forecast Rule.
Procedure 1. Query for the forecast rule you want to delete or use Control-F11 to query all
existing forecast rules.
2. If you queried for all rules, arrow down to the forecast rule to be deleted.
3. Click the Red X in the Toolbar to delete and save your work.
1.4.7 Administering Parts LoopsThe following tasks can be performed to administer parts loops:
■ Creating a parts loop
■ Updating a parts loop
■ Adding subinventories to a parts loop
■ Updating subinventories in a parts loops
■ Deleting subinventories from a parts loop
■ Deleting a parts loop
1.4.7.1 Creating a Parts Loop
PrerequisitesYou must have defined a planner, calculation rule and forecast rule to be used in the parts loop. Refer to Administering Planners, Administering Calculation Rules and Administering Forecast Rules for additional information.
Steps1. Navigate to the Parts Loop on the Planner’s Desktop.
Oracle Spares Management 1-35

Administering Oracle Spares Management
(N) Field Service Dispatcher > Spares Management > Spares Planning > Planner’s Desktop > (T) Parts Loops (top tab on the left)
2. Highlight the Parts Loops folder in the Navigator tree.
3. Right-click the Parts Loops folder to open a pop-up menu.
4. Select Create Parts Loop in the menu. The Loop Details tab is active.
5. Enter a parts loop name in the Loop Details tab.
6. Optionally, enter a description for the parts loop.
7. Select a Planner from the list of values.
8. Select a Calculation Rule from the list of values.
9. Select a Forecast Rule from the list of values.
10. Save your work. The new parts loop appears in the Navigator.
1.4.7.2 Updating a Parts Loop1. Navigate to the Parts Loop on the Planner’s Desktop.
(N) Field Service Dispatcher > Spares Management > Spares Planning > Planner’s Desktop > (T) Parts Loops (top tab on the left)
2. Highlight the Parts Loops folder in the Navigator tree.
3. Click the specific loop to be changed.
4. Enter the changes in the Location Details tab and save your work.
1.4.7.3 Adding Subinventories to a Parts Loop1. Navigate to the Parts Loop on the Planner’s Desktop.
(N) Field Service Dispatcher > Spares Management > Spares Planning > Planner’s Desktop > (T) Parts Loops (top tab on the left)
2. Highlight the Parts Loops folder in the Navigator tree.
3. Right-click the specific loop to which you want to add a subinventory to open a pop-up menu.
4. Select Add Subinventory from the menu. The Location Details tab is active.
5. In the Location Details tab, select an organization name from the Organization list of values.
1-36 Oracle Spares Management Concepts and Procedures
Administering Oracle Spares Management
6. Select a condition type of Usable or Defective from the Condition Type list of values.
7. Optionally check the Autoreceipt check box. If you select this feature, parts shipments are received automatically during Ship Confirm at the destination subinventory.
8. Select the Spares Location check box.
9. Save your work.
1.4.7.4 Updating Subinventories in a Parts Loop1. Navigate to the Parts Loop on the Planner’s Desktop.
(N) Field Service Dispatcher > Spares Management > Spares Planning > Planner’s Desktop > (T) Parts Loops (top tab on the left)
2. Highlight the Parts Loops folder in the Navigator tree.
3. Double click the specific loop to view the subinventories assigned.
4. Click the subinventory to be changed.
5. Enter changes in the Location Details tab and save your work.
1.4.7.5 Deleting Subinventories from a Parts Loop1. Navigate to the Parts Loop on the Planner’s Desktop.
(N) Field Service Dispatcher > Spares Management > Spares Planning > Planner’s Desktop > (T) Parts Loops (top tab on the left)
2. Highlight the Parts Loops folder in the Navigator tree.
3. Click the subinventory to be deleted.
4. Right click the subinventory and select Delete from the pop-up menu.
5. Click OK to delete the subinventory and save your work.
1.4.7.6 Deleting a Parts Loop1. Navigate to the Parts Loop on the Planner’s Desktop.
(N) Field Service Dispatcher > Spares Management > Spares Planning > Planner’s Desktop > (T) Parts Loops (top tab on the left)
2. Highlight the Parts Loops folder in the Navigator tree.
Oracle Spares Management 1-37

Administering Oracle Spares Management
3. Click the specific loop to be deleted.
4. Right click the loop and select Delete from the pop-up menu.
5. Click OK to delete the loop and save your work.
1.4.8 Administering Master Stock ListsA Master Stock List is the component of a parts loop that defines the allowable quantity of usable and defective parts. The following tasks can be performed to administer Master Stock Lists:
■ Defining Master Stock Lists
■ Updating Master Stock Lists
■ Deleting an item from a Master Stock List
1.4.8.1 Defining Master Stock Lists
PrerequisitesYou must define a parts loop before you can create a master stock list.
Procedure1. Navigate to the parts loop.
(N) Field Service Dispatcher > Spares Management > Spares Planning > Planner’s Desktop > (T) Parts Loops (first tab on the left)
2. Highlight the appropriate parts loop in the Navigator tree.
3. Open the Master Stock List tab.
4. Enter an item number or select an item from the list of values that you want to add to the Master Stock List. The Item field is case sensitive.
5. Select the revision from the list of values, if applicable.
6. Select a planner from the Planner list of values.
7. Enter the desired loop quantity for this item.
8. Optionally enter the minimum usable quantity for this item in the Minimum Good field.
9. The Plan Type field defaults based on the item definition.
10. Save your work.
1-38 Oracle Spares Management Concepts and Procedures

Administering Oracle Spares Management
1.4.8.2 Updating Master Stock Lists
PrerequisiteNone
Procedure1. Navigate to the parts loop.
(N) Field Service Dispatcher > Spares Management > Spares Planning > Planner’s Desktop > (T) Parts Loops (first tab on the left)
2. Highlight the appropriate parts loop in the Navigator tree.
3. Open the Master Stock List tab.
4. Click on the specific line to be changed.
5. Enter the desired changes in the Item record and save your work.
1.4.8.3 Deleting an Item from a Master Stock List
PrerequisiteNone
Procedure1. Navigate to the parts loop.
(N) Field Service Dispatcher > Spares Management > Spares Planning > Planner’s Desktop > (T) Parts Loops (first tab on the left)
2. Click on the specific line to be deleted.
3. Click the red X in the Toolbar and click OK.
4. Save your work to delete the item from the Master Stock List.
1.4.9 Administering Authorized Stock ListsAn Authorized Stock List is setup at the subinventory level and defines the minimum and maximum quantities of parts to be stocked in the subinventory. The following tasks can be performed to administer Authorized Stock Lists:
■ Defining Authorized Stock Lists
Oracle Spares Management 1-39

Administering Oracle Spares Management
■ Updating Authorized Stock Lists
■ Deleting an item from a Authorized Stock List
1.4.9.1 Defining an Authorized Stock List
PrerequisitesNone
Procedure1. Navigate to the Parts Loop on the Planner’s Desktop.
(N) Field Service Dispatcher > Spares Management > Spares Planning > Planner’s Desktop > (T) Parts Loops (top tab on the left)
2. Click on the parts loop that contains the subinventory for which you want to create an Authorized Stock List.
3. Highlight the subinventory in the parts loop.
4. Open the Authorized Stock List tab.
5. Select an item from the list of values.
6. Select the Min-Max Planning check box.
7. Select the source type from these options:
■ Subinventory indicates another subinventory in the same organization
■ Inventory indicates another subinventory not in the same organization
■ Vendor indicates an external supplier
8. Enter a value in the Organization field if you selected Inventory as the source type.
9. Optionally, enter a value in the Subinventory field if you selected either Subinventory or Inventory as the source type.
10. Enter minimum and maximum quantities.
11. Optionally, enter minimum and maximum order quantities.
1-40 Oracle Spares Management Concepts and Procedures

Administering Oracle Spares Management
1.4.9.2 Updating an Authorized Stock List
PrerequisitesNone
Procedure1. Navigate to the Parts Loop on the Planner’s Desktop.
(N) Field Service Dispatcher > Spares Management > Spares Planning > Planner’s Desktop > (T) Parts Loops (top tab on the left)
2. Click on the parts loop that contains the subinventory for which you want to update an Authorized Stock List.
3. Highlight the subinventory in the parts loop.
4. Open the Authorized Stock List tab.
5. Click on the specific line to be changed.
6. Enter changes in the Item record and save your work.
1.4.9.3 Deleting an Item from an Authorized Stock List
PrerequisitesNone
Procedure1. Navigate to the Parts Loop on the Planner’s Desktop.
(N) Field Service Dispatcher > Spares Management > Spares Planning > Planner’s Desktop > (T) Parts Loops (top tab on the left)
2. Click on the parts loop that contains the subinventory from which you want to delete an item.
3. Highlight the subinventory in the parts loop.
4. Open the Authorized Stock List tab.
5. Click on the specific line to be deleted.
6. Click the red X in Toolbar menu and click OK.
7. Click Save in Toolbar menu to delete record.
Oracle Spares Management 1-41

Administering Oracle Spares Management
1.4.10 Administering Reporting HierarchiesThe following tasks can be performed to administer reporting hierarchies:
■ Defining a Reporting Hierarchy
■ Updating a Reporting Hierarchy name
■ Deleting a Reporting Hierarchy
■ Updating a Reporting Hierarchy node
■ Deleting a Reporting Hierarchy node
■ Updating subinventory parameters
■ Deleting a subinventory from a Reporting Hierarchy
1.4.10.1 Defining a Reporting Hierarchy
Prerequisites■ Subinventories must be defined so you can add subinventories to your
reporting hierarchy.
■ Hierarchy nodes must be created from top to bottom.
Procedure1. Navigate to the Reporting Hierarchy.
(N) Field Service Dispatcher > Spares Management > Spares Planning > Planner’s Desktop > (T) Reporting Hierarchy (second tab on left)
2. Highlight the Reporting Hierarchy folder in the Navigator tree.
3. Right-click the Reporting Hierarchy folder to open a pop-up menu.
4. Select Create Reporting Hierarchy from the menu. The Hierarchy Details tab is active.
5. Enter the node name and save your work. The Hierarchy node appears in the Navigator.
1.4.10.2 Updating a Reporting Hierarchy Name
PrerequisitesNone
1-42 Oracle Spares Management Concepts and Procedures
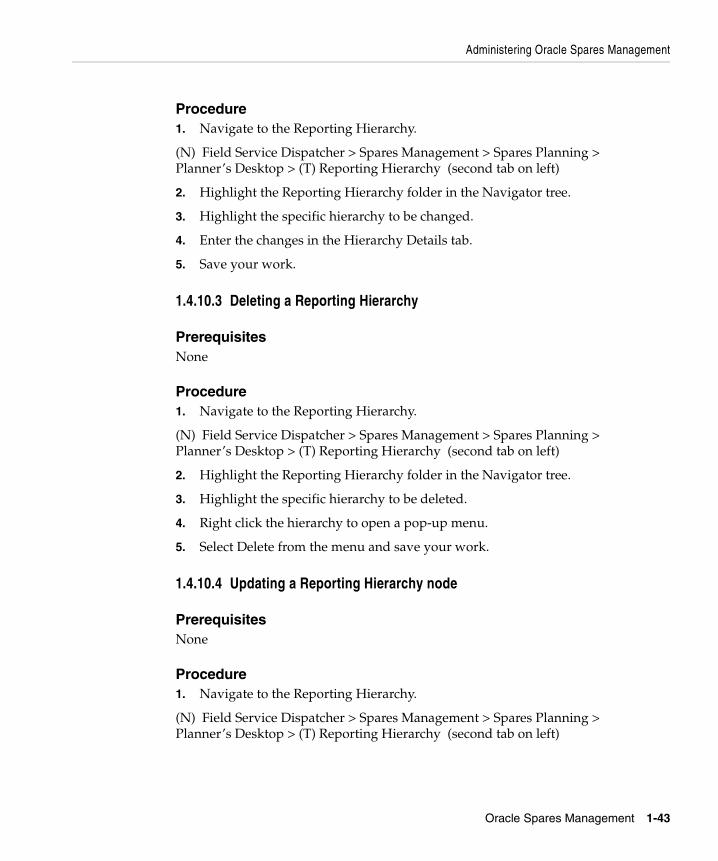
Administering Oracle Spares Management
Procedure1. Navigate to the Reporting Hierarchy.
(N) Field Service Dispatcher > Spares Management > Spares Planning > Planner’s Desktop > (T) Reporting Hierarchy (second tab on left)
2. Highlight the Reporting Hierarchy folder in the Navigator tree.
3. Highlight the specific hierarchy to be changed.
4. Enter the changes in the Hierarchy Details tab.
5. Save your work.
1.4.10.3 Deleting a Reporting Hierarchy
PrerequisitesNone
Procedure1. Navigate to the Reporting Hierarchy.
(N) Field Service Dispatcher > Spares Management > Spares Planning > Planner’s Desktop > (T) Reporting Hierarchy (second tab on left)
2. Highlight the Reporting Hierarchy folder in the Navigator tree.
3. Highlight the specific hierarchy to be deleted.
4. Right click the hierarchy to open a pop-up menu.
5. Select Delete from the menu and save your work.
1.4.10.4 Updating a Reporting Hierarchy node
PrerequisitesNone
Procedure1. Navigate to the Reporting Hierarchy.
(N) Field Service Dispatcher > Spares Management > Spares Planning > Planner’s Desktop > (T) Reporting Hierarchy (second tab on left)
Oracle Spares Management 1-43
Administering Oracle Spares Management
2. Highlight the Reporting Hierarchy folder in the Navigator tree.
3. Highlight the specific hierarchy to be changed.
4. Double click on the hierarchy to see the nodes.
5. Click on the specific node to be changed.
6. Enter changes in the Hierarchy Details tab and save your work.
1.4.10.5 Deleting a Reporting Hierarchy node
PrerequisitesNone
Procedure1. Navigate to the Reporting Hierarchy.
(N) Field Service Dispatcher > Spares Management > Spares Planning > Planner’s Desktop > (T) Reporting Hierarchy (second tab on left)
2. Highlight the Reporting Hierarchy folder in the Navigator tree.
3. Highlight the specific hierarchy to be changed.
4. Double click on the hierarchy to see the nodes.
5. Click on the specific node to be deleted.
6. Right click on the node and select Delete from the pop-up menu.
7. Click OK to delete the node.
1.4.10.6 Updating Subinventory Parameters in a Reporting Hierarchy
PrerequisitesNone
Procedure1. Navigate to the Reporting Hierarchy.
(N) Field Service Dispatcher > Spares Management > Spares Planning > Planner’s Desktop > (T) Reporting Hierarchy (second tab on left)
2. Highlight the Reporting Hierarchy folder in the Navigator tree.
1-44 Oracle Spares Management Concepts and Procedures

Administering Oracle Spares Management
3. Highlight the specific hierarchy to be changed.
4. Double click on the specific hierarchy node to view subinventories.
5. Click on the subinventory to be changed.
6. Enter changes in the Location Details tab and save your work.
1.4.10.7 Deleting a Subinventory from a Reporting Hierarchy
PrerequisitesNone
Procedure1. Navigate to the Reporting Hierarchy.
(N) Field Service Dispatcher > Spares Management > Spares Planning > Planner’s Desktop > (T) Reporting Hierarchy (second tab on left)
2. Highlight the Reporting Hierarchy folder in the Navigator tree.
3. Highlight the specific hierarchy to be changed.
4. Double click on the specific hierarchy node to view subinventories.
5. Right-click on the subinventory to be deleted and select Delete from the pop-up menu.
6. Enter changes in the Location Details tab.
7. Click OK to delete the subinventory and save your work.
Oracle Spares Management 1-45

Administering Oracle Spares Management
1-46 Oracle Spares Management Concepts and Procedures