OperatingInstructions Tumbledryer
28
Dear Customer, Thank you for choosing this quality product from ASKO. We hope it will meet your expectations and fulfil your needs for many years to come. Scandinavian design combines clean lines, everyday functionality and high quality. These are key characteristics of all our products and the reason they are greatly appreciated throughout the world. To ensure that you get the most out of your new machine, we recommend that you read the operating instructions before using the machine. The operating instructions also contain information on how to avoid damaging the environment. Operating Instructions Tumble dryer ASKO T754C
Transcript of OperatingInstructions Tumbledryer

Dear Customer,
Thank you for choosing this quality product from ASKO.
We hope it will meet your expectations and fulfil your needsfor many years to come. Scandinavian design combines cleanlines, everyday functionality and high quality. These are keycharacteristics of all our products and the reason they aregreatly appreciated throughout the world.
To ensure that you get the most out of your new machine, werecommend that you read the operating instructions beforeusing the machine. The operating instructions also containinformation on how to avoid damaging the environment.
Operating InstructionsTumble dryer
ASKO T754C

3Before using your machine forthe first time
4Safety instructions4Safety4Transport/Winter storage4Packing material4Recycling
5
To minimize the risk of fire in atumble dryer, the following shouldbe observed:
6Child safety6General7Description of the tumble dryer
8Advice and tips before youtumble-dry
8Materials that can be tumble-dried
8Materials that must not betumble-dried
8Static electricity9Tumble drying9Sort your fabrics
10Select the program12Selecting Options12Press the Start button13Drying program finished14Care and cleaning14Cleaning the lint filter
15Emptying the condensed watercontainer
15Cleaning the outside of themachine
16Cleaning the condenser
18Troubleshooting18The machine will not start
18The machine loses all powerduring a program
18Drying takes too long18Error messages19Technical information19Technical data19Standard tests20Service
20Before contacting the servicedivision
21Installation21Positioning the tumble dryer22Adjusting the feet23Condensed water23Electrical installation24Door hanging25Follow these instructions:28Quick guide
2
Contents
Laundry labelsCertain materials are not suitable fortumble-drying. Always check and follow theinstructions on each item’s laundry label. You canfindmore information in theAdvice and tips beforeyou tumble-dry chapter.
NOTE!
When starting the tumble dryer for the first timeor after a long periodwithout use, youmay noticea slight thumping noise. This noise is completelynormal and will disappear after a few loads.
3
Before using your machine for the first time

Read the operating instructions andkeep them in a safe place!
• Electrical installation, if required, should becarried out by a qualified electrician.
• The machine should only be used fortumble-drying as described in theseinstructions.
• Repairs and maintenance must be carried outby a qualified professional.
• Damagedmains cablesmust only be replacedby a qualified electrician.
• Sufficient ventilation is required to preventsmoke from open fires or fumes fromequipment burning other fuels being suckedinto the roomwhen the tumble dryer is running.
• Do not dry dirty laundry in the tumble dryer.• Items that are stained with e.g. cooking oil,
acetone, alcohol, petrol, kerosene, stainremover, turpentine, wax and wax removershould be washed in hot water with extradetergent before they go in the tumbler dryer.
• Items such as foam rubber, latex, plastic,waterproof textiles, rubber-coated items andclothes and foam-rubber filled cushions mustnot be dried in the tumbler dryer.
• Fabric softener or similar products should beused as per the recommendations of thedetergent manufacturer.
• The machine is not designed to be used bypersons (even children) that are physically ormentally handicapped or lack experience andknowledge. Such persons must receiveinstruction in how to use the machine from theperson responsible for their safety.
• Children must be watched to ensure they donot play with the machine.
Safety• Themachinemust not be used for drying items
that have been dry-cleaned at home or fabricsthatmay contain residues of flammable liquids.
• The tumble dryer is protected by anoverheating cut-out. This shuts off themachineif the temperature gets too high.
• The appliance is not intended for use by youngchildren or infirm personswithout supervision.
• The machine automatically cuts off if thecondenser water tank is full or outlet hose isblocked.
WARNING!
When the tumble dryer is operating, the back ofthe tumble dryer will get very hot. Leave themachine to cool completely before touching theback.
InstallationSee the section Installation.
Transport/Winter storageIf you need to move your machine or store it overthe winter in unheated premises, make sure thatyou drain the condensed water containerbeforehand.
Packing materialSort waste materials in accordance with localguidelines.
RecyclingThis machine is manufactured and labelled forrecycling. In order to prevent personal injury, themachinemust bemade inoperable after decidingto take it out of service. Contact your localauthority for information about where and howyour machine should be correctly recycled.
4
Safety instructions

To minimize the risk of fire in atumble dryer, the following shouldbe observed:• Items that have been spotted or soaked with
vegetable or cooking oil constitute a fire hazardand should not be placed in a tumble dryer.Oil-affected items can ignite spontaneously,especially when exposed to heat sources suchas in a tumble dryer. The items becomewarm,causing an oxidation reaction in the oil.Oxidation creates heat. If the heat cannotescape, the items can become hot enough tocatch fire. Piling, stacking or storing oil-affecteditems can prevent heat from escaping and socreate a fire hazard. If it is unavoidable thatfabrics that contain vegetable or cooking oil orhave been contaminated by hair care productsbe placed in a tumble dryer they should firstbe washed in hot water with extra detergent -this will reduce, but not eliminate, the hazard.The ’cool down’ cycle of tumble dryers shouldbe used to reduce the temperature of the items.They should not be removed from the tumbledryer or piled or stacked while hot.
• Items that have been previously cleaned in,washed in, soaked in or spotted withpetrol/gasoline, dry-cleaning solvents or otherflammable or explosive substances should notbe placed in a tumble dryer. Highly flammablesubstances commonly used in domesticenvironments include acetone, denaturedalcohol, petrol/gasoline, kerosene, spotremovers (some brands), turpentine, waxesand wax removers.
• Items containing foam rubber (also known aslatex foam) or similarly textured rubberlikematerials should not be dried in a tumble dryeron a heat setting. Foam rubber materials can,when heated, produce fire by spontaneouscombustion.
• Fabric softeners or similar products should notbe used in a tumble dryer to eliminate theeffects of static electricity unless this practiceis specifically recommended by themanufacturer of the fabric softener or product.
• Undergarments that contain metalreinforcements should not be placed in atumbledryer. Damage to the tumble dryer canresult if metal reinforcements come looseduring drying. When available a drying rackcould be used for such items.
• Plastic articles such as shower caps or babies’waterproof napkin covers should not be placedin a tumble dryer. Rubber-backed articles,clothes fitted with foam rubber pads, pillows,galoshes and rubber-coated tennis shoesshould not be placed in a tumble dryer.
Vented dryers• There has to be adequate ventilation to avoid
the back flow of gases into the room fromappliances burning other fuels, including openfires, when operating the tumble dryer.
• The exhaust air must not be discharged into aflue which is used for exhausting fumes fromappliances burning gas or other fuels.
CAUTION!
Air from the tumble dryermust not be fed throughducts used for equipment that burns gas or otherfuels.
5
Safety instructions
General
WARNING!
Do not allow children to play withthe tumble dryer.• If the door is opened when a program is
running the garments may be very hot, with arisk of burn injuries.
• The tumble dryer does not start automaticallywhen the door is closed (if a child pulls thedoor shut from the inside, for example).
6
Child safety

1 2 3 4 5 6
7
Lint filter5.Main power switch1.Outer door6.Condensed water container2.Condenser7.Panel3.
Serial Number4.
7
Description of the tumble dryer
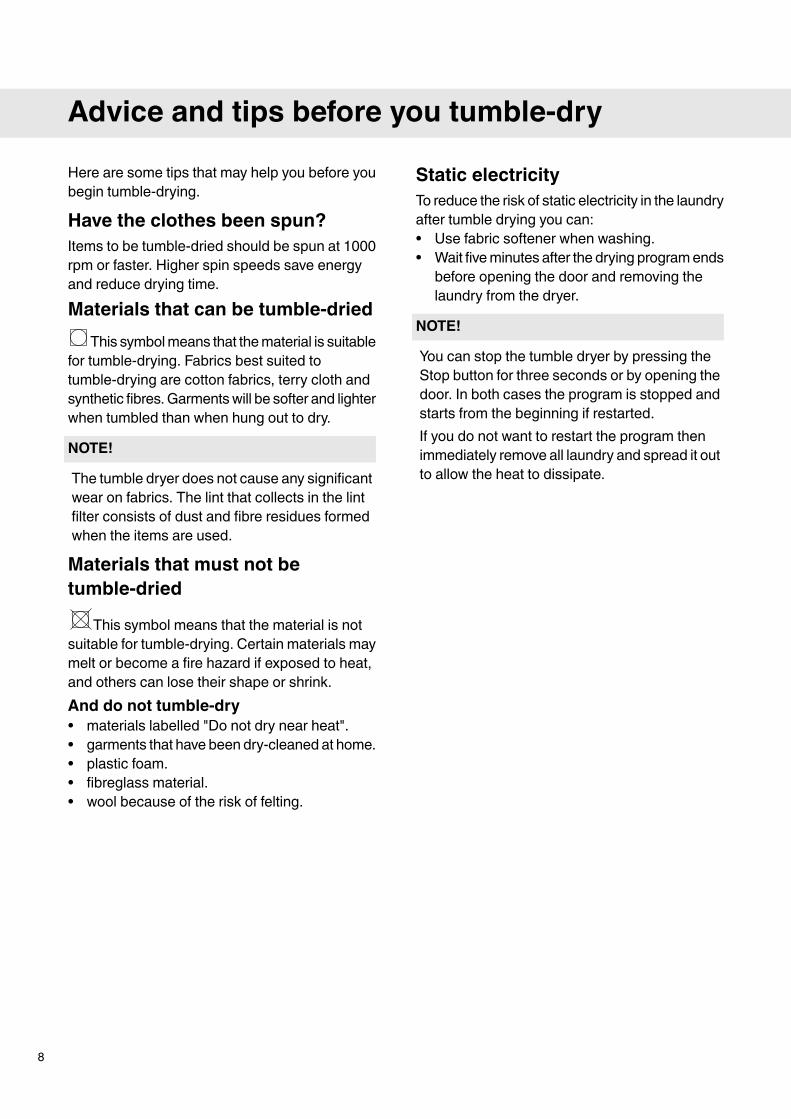
Here are some tips that may help you before youbegin tumble-drying.
Have the clothes been spun?Items to be tumble-dried should be spun at 1000rpm or faster. Higher spin speeds save energyand reduce drying time.
Materials that can be tumble-driedThis symbolmeans that thematerial is suitable
for tumble-drying. Fabrics best suited totumble-drying are cotton fabrics, terry cloth andsynthetic fibres.Garmentswill be softer and lighterwhen tumbled than when hung out to dry.
NOTE!
The tumble dryer does not cause any significantwear on fabrics. The lint that collects in the lintfilter consists of dust and fibre residues formedwhen the items are used.
Materials that must not betumble-dried
This symbol means that the material is notsuitable for tumble-drying. Certain materials maymelt or become a fire hazard if exposed to heat,and others can lose their shape or shrink.And do not tumble-dry• materials labelled "Do not dry near heat".• garments that have been dry-cleaned at home.• plastic foam.• fibreglass material.• wool because of the risk of felting.
Static electricityTo reduce the risk of static electricity in the laundryafter tumble drying you can:• Use fabric softener when washing.• Wait fiveminutes after the drying programends
before opening the door and removing thelaundry from the dryer.
NOTE!
You can stop the tumble dryer by pressing theStop button for three seconds or by opening thedoor. In both cases the program is stopped andstarts from the beginning if restarted.If you do not want to restart the program thenimmediately remove all laundry and spread it outto allow the heat to dissipate.
8
Advice and tips before you tumble-dry

Below are step-by-step instructions to help youachieve the best possible tumble-drying results.
1Sort your fabricsYou will achieve the most uniform dryingresults if the items are made of the same
type of material. Do up zips and buttons, fastenbelts, sort the items and adjust the load andtemperature.
2Press the main power switchuntil the display lights.
3Open the door, load the itemsand then close the door
9
Tumble drying
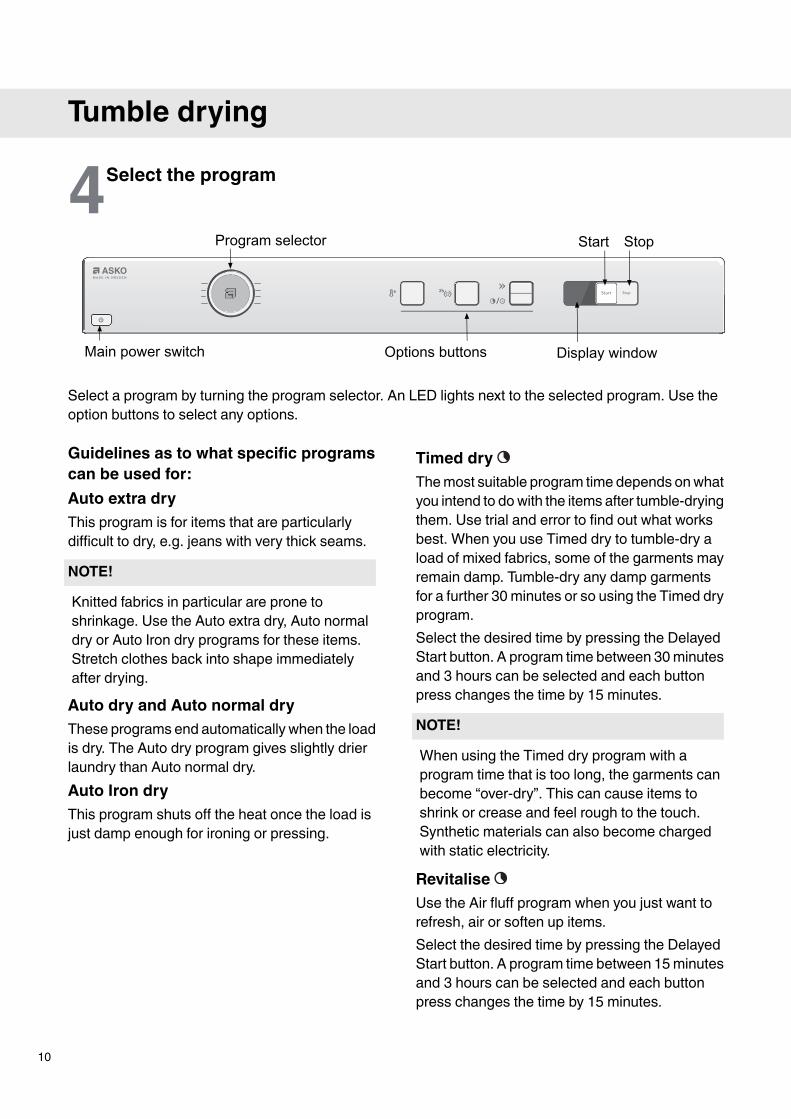
4Select the program
/
Main power switch
Program selector Start Stop
Display windowOptions buttons
Select a program by turning the program selector. An LED lights next to the selected program. Use theoption buttons to select any options.
Guidelines as to what specific programscan be used for:Auto extra dryThis program is for items that are particularlydifficult to dry, e.g. jeans with very thick seams.
NOTE!
Knitted fabrics in particular are prone toshrinkage. Use the Auto extra dry, Auto normaldry or Auto Iron dry programs for these items.Stretch clothes back into shape immediatelyafter drying.
Auto dry and Auto normal dryThese programs end automatically when the loadis dry. The Auto dry program gives slightly drierlaundry than Auto normal dry.Auto Iron dryThis program shuts off the heat once the load isjust damp enough for ironing or pressing.
Timed dryThemost suitable program time depends onwhatyou intend to dowith the items after tumble-dryingthem. Use trial and error to find out what worksbest. When you use Timed dry to tumble-dry aload of mixed fabrics, some of the garments mayremain damp. Tumble-dry any damp garmentsfor a further 30minutes or so using the Timed dryprogram.Select the desired time by pressing the DelayedStart button. A program time between 30minutesand 3 hours can be selected and each buttonpress changes the time by 15 minutes.
NOTE!
When using the Timed dry program with aprogram time that is too long, the garments canbecome “over-dry”. This can cause items toshrink or crease and feel rough to the touch.Synthetic materials can also become chargedwith static electricity.
RevitaliseUse the Air fluff program when you just want torefresh, air or soften up items.Select the desired time by pressing the DelayedStart button. A program time between 15minutesand 3 hours can be selected and each buttonpress changes the time by 15 minutes.
10
Tumble drying

Program chartHere we present the energy and time consumption of a few different programs. The table shows theeffect of using different spin speeds when washing the load. Consumption can vary depending on roomtemperature, humidity, load, variations in the power supply and selected options.
For the consumption values given below, the requirements are as follows:
23 °CTemperature of intake air:
55 %Moisture content of intake air:
NormalDrying temperature:
1950W, 10AHeater output:
Program time, approx. (min)Energy consumption, approx.(kWh)
Spin speed (rpm)LoadMaterialProgram
2:154,2800 rpm1/1Cotton, linenAuto extra dry
2:053,91000 rpm
1:503,41400 rpm
1:453,31600 rpm
2:054,0800 rpm1/1Cotton, linenAuto dry
1:553,61000 rpm
1:453,21400 rpm
1:403,01600 rpm
1:051,91000 rpm1/2Crease-resistant,polyester/cotton
2:003,9800 rpm1/1Cotton, linenAuto normaldry
1:503,61000 rpm
1:403,11400 rpm
1:252,61600 rpm
0:401,31000 rpm1/2Crease-resistant,polyester/cotton
1:553,8800 rpm1/1Cotton, linenAuto Iron dry
1:403,31000 rpm
1:252,61400 rpm
1:052,01600 rpm
11
Tumble drying

5Selecting OptionsBy selecting options, you can tailor a dryingprogram to suit your requirements. The
available options depend on the selectedprogram.Once you have started the program, theoptions you selected are saved for the next timeyou use the same program. The exception isDelayed Start, which is not saved for the nexttime.
Energy SaveYou can select Energy Save with all programsexcept Revitalise.• Select Energy Save by pressing the button
next to the symbol.• The lamp next to the button lightswhenEnergy
Save is selected.
Time saverYou can select Time saver with all programsexcept Revitalise. The program is shortened byabout 12 minutes.• Press the button next to the symbol.• The lamp next to the button lights when Time
saver is selected.
Anti creaseThis option means that the drum will rotate forthree seconds per minute for two hours after thedrying program has finished. The option preventsthe fabrics from remaining in the same positionand becoming creased, if you are unable toremove them immediately after tumble-drying hasfinished. Cannot be selected with the Air fluffprogram.• Select Anti crease by pressing the button next
to the symbol.• The lamp next to the button lights when Anti
crease is selected.
Delayed StartSelect a program and then press Delayed Start.Press the button to select a delayed start of 1 to24 hours. The lamp next to the button lights whenthis option is activated. Next press Start and themachine counts down 1 hour at a time and startsafter the selected delay. To cancel Delayed Startpress and hold Stop for three seconds. DelayedStart cannot be selected with Timed dry orRevitalise.
6Press the Start buttonRemaining drying timeAn estimate of the remaining drying time
will be shown on the display a few minutes afterthe drying program starts. 1:35 means that it willtake approximately 1 hour and 35 minutes for theload to dry.The actual remaining timemay be longer than theestimated time shown on the display. Theremaining time is then shown as 0:15 until theload is sufficiently dry. If you selected Time saverthe display will show 0:05 instead.You can stop the tumble dryer by pressing theStop button or by opening the door. In both casesthe program is stopped and starts from thebeginning if restarted.
NOTE!
The program will not be affected if you changethe program selector after the program hasstarted.
12
Tumble drying

7Drying program finishedThe text End appears on the display whenthe program is finished. If the Anti crease
option has been selected, the drum will rotate forthree seconds per minute for two hours after theprogram is finished.Condensed waterThe condensedwater containermust be emptiedafter each load. Remove the condensed watercontainer, empty out the water and replace thecontainer. If the condensed water containerbecomes full to overflowing, the program isinterrupted. Empty the container and press theStart button to start a new program.
TIP!
The condensed water is decalcified and can beused in steam irons. Pour it through a coffeefilter.
NOTE!
• Clean the lint filter in the outer door after eachload. See the Care and cleaning chapter.
• Empty the condensed water container aftereach load.
WARNING!
If the lint filter becomes clogged, the machine’sautomatic overheating cut-outmay be triggered.Clean the filter, wait until the machine hascooled then try starting it. If it still does not start:call the service division.
Once drying has finishedTurn off the main power switch. Remove theclothes and close the door to prevent smallchildren from climbing into the machine.
13
Tumble drying

Cleaning the lint filterThe lint filter must be cleaned after each load.1. Lift the filter from the holder in the door.
2. Open the lint filter. Use your thumb to press onthe edge as illustrated and pull it out.
3. Use your hand or a soft cloth to remove the lintfrom all sides of the filter. If necessary, use adamp sponge and a small amount ofwashing-up liquid to remove any deposits. Drythe filter thoroughly with a towel.
4. Close the lint filter and put it back in thedoor.Close the lint filter before closing the door.
14
Care and cleaning

Emptying the condensed watercontainer
If you have not connected the machine to aseparate drain the condensed water containermust be emptied after each load. Remove thecondensed water container, empty out the waterand replace the container.If the condensed water container becomes toofull, the program is interrupted and F10 is shownin the display. Empty the container and press theStart button to restart the program.For connection to a separate drain, see theinstallation instructions in the set of documents.
Cleaning the outside of themachineClean the outside of themachine and the programpanel with a mild cleaner. Do not use solvents,as these can damage the machine. Do not hosedown or spray the machine with water.
NOTE!
Do not allow dust to accumulate around themachine. Keep the area around the tumble dryerclean and cool; dust, heat and moisture prolongdrying times.
15
Care and cleaning
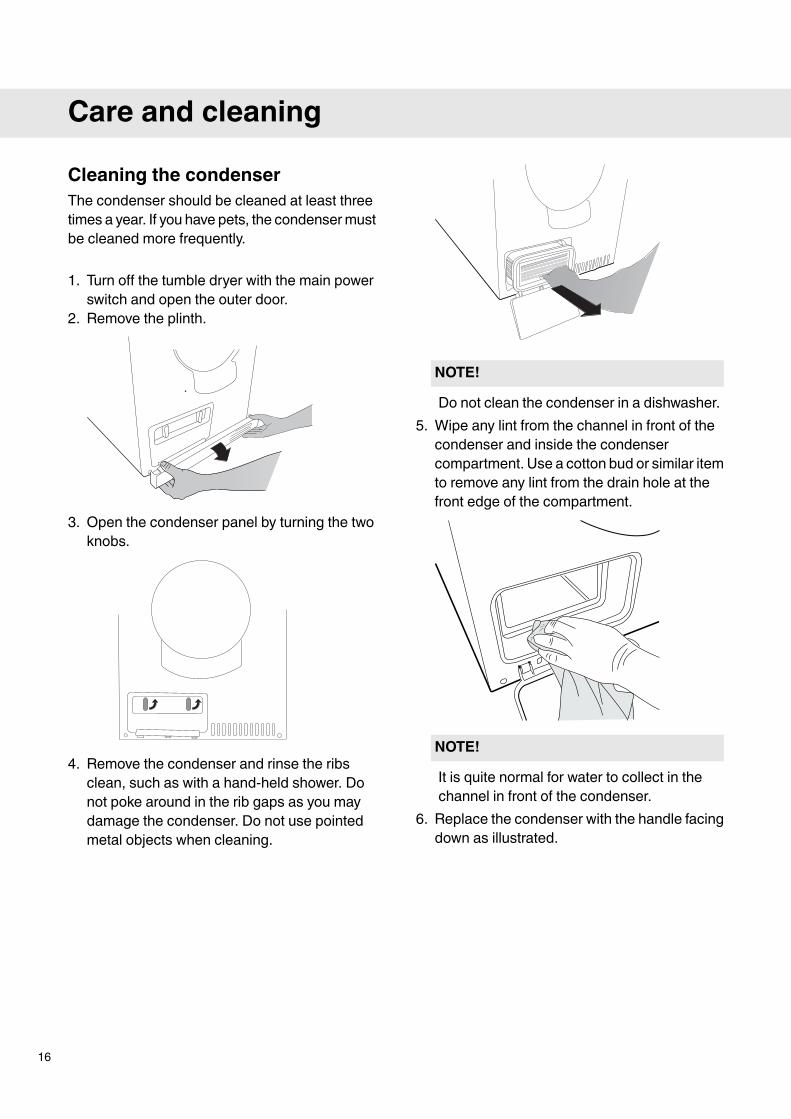
Cleaning the condenserThe condenser should be cleaned at least threetimes a year. If you have pets, the condensermustbe cleaned more frequently.
1. Turn off the tumble dryer with the main powerswitch and open the outer door.
2. Remove the plinth.
3. Open the condenser panel by turning the twoknobs.
4. Remove the condenser and rinse the ribsclean, such as with a hand-held shower. Donot poke around in the rib gaps as you maydamage the condenser. Do not use pointedmetal objects when cleaning.
NOTE!
Do not clean the condenser in a dishwasher.5. Wipe any lint from the channel in front of the
condenser and inside the condensercompartment. Use a cotton bud or similar itemto remove any lint from the drain hole at thefront edge of the compartment.
NOTE!
It is quite normal for water to collect in thechannel in front of the condenser.
6. Replace the condenser with the handle facingdown as illustrated.
16
Care and cleaning
UPP
UP
OBEN
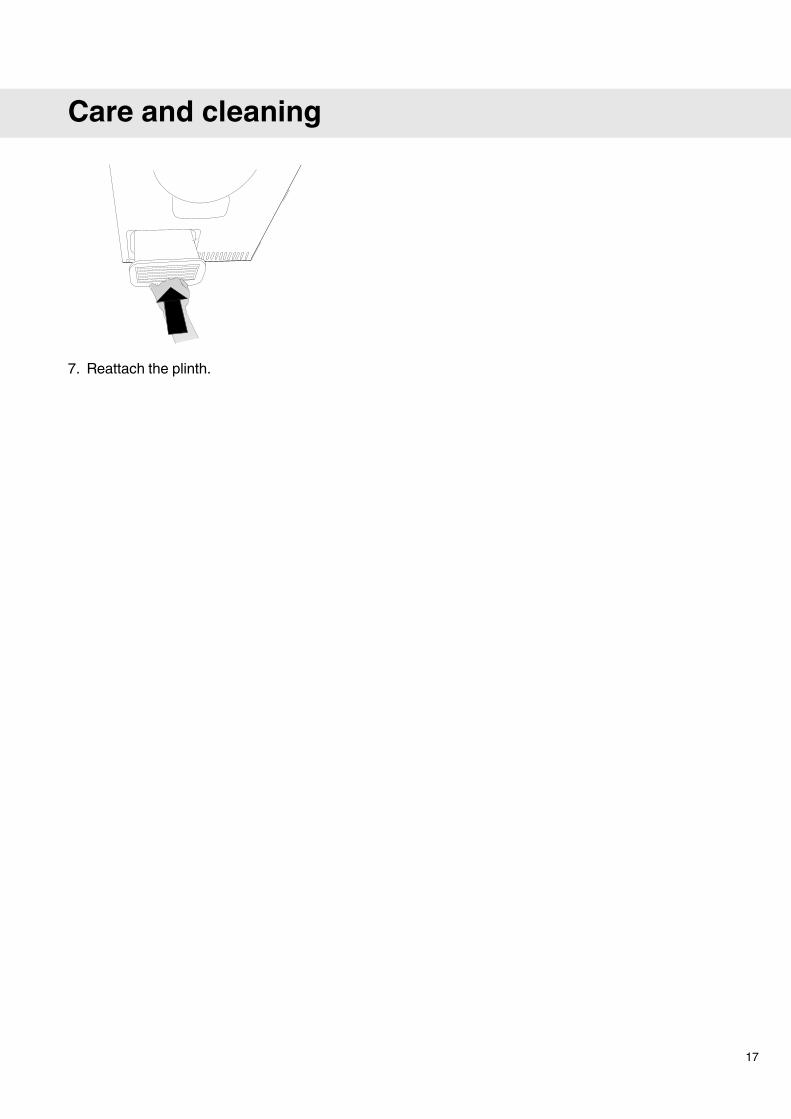
7. Reattach the plinth.
17
Care and cleaning
The machine will not startCheck• that the door is properly closed.• that the main power switch is on.• that the Delayed Start option has not been
selected. To cancel Delayed Start, press theStop button for three seconds.
• that the plug is connected.• that the main fuses have not blown.• that the overheating cut-out has not been
triggered.
Themachine loses all power duringa programThe overheating cut-out shuts off the tumble dryerif the temperature is too high, e.g. because dustis clogging the lint filter.• Clean the lint filter.• Check also that the condensedwater container
is not full and, if necessary, clean thecondenser. See theCare and cleaning chapter.
• Wait until the machine has cooled then trystarting it. If it still does not start: Call theservice division.
Drying takes too long• Check that the lint filter is not blocked. See the
Care and cleaning chapter.• Empty the condensed water container and
check that the condenser is not blocked. Seethe Care and cleaning chapter.
• Overly long drying times may also be due tothe tumble dryer being located in a confinedarea or in a room that is too small, causing theair to become too hot.
• Make sure that the tumble dryer has accessto more cold air, open doors and/or windows,for example.
Error messagesIf F10flashes in the display, the condensed watercontainer is full. Empty the container and restartthe program.If F30 is flashing on the display, the maximumpermitted program time has been reached. Emptythe condensed water container and check thatneither the lint filter nor the condenser areblocked. See the Care and cleaning chapter.
18
Troubleshooting

Technical data850 mmHeight:
595 mmWidth:
585 mmDepth:
44 kgWeight (net):
112 lCylinder volume:
6,5 kgMax. drying capacity:
50-55 rpmSpeed:
See type plate.Rated power:
Stainless steelDrum material:
Powder-coated and hot-galvanized sheet steel orstainless steel.
Outer casing material:
Stacking or freestandingSetup
Standard testsFor the standard test the machine’s condensed water hose must be connected to a drain.
Australia:
AS/NZS2442.1:1996.Auto normal dry,6,5 kg cotton, temperatureNormal, Time saver.
Drying performance:
AS/NZS 2442.1:1996.Auto normal dry,6,5 kg cotton, temperature Normal, Time saver.
Energy declaration:
IEC 60 704-2-6.Test method for noise measurement:
19
Technical information

Before contacting the servicedivisionSee the Troubleshooting and Care and cleaningchapters to see whether you can rectify theproblem. If you need to contact the servicedivision, make sure that you know the modeldesignation, type designation and serial number.The model designation (1) can be found on thefirst page of the operating instructions and on themachine panel. The type designation (2) andserial number (3) can be found on the type plate,which is found on the front of the tumble dryerinside the outer door.
1
TYPE TD70.1
2
3
20
Service

Positioning the tumble dryerThe tumble dryer can be free-standing or in astack. Remember that the tumble dryer producesheat and should therefore not be located in a roomthat is too small. If the room is very small, dryingwill take longer due to the limited quantity of air.
WARNING!• Any electrical installation must be carried out
by qualified professionals.• The machine must not be installed behind a
lockable door, a sliding door or a door withhinges on the opposite side to those of thetumble dryer.
• The tumble dryer's plinth ventilation must notbe blocked by a rug or the like.
NOTE!
To improve ventilation, leave the door to theroom where the tumble dryer is located open.
FreestandingThe tumble dryer can be positioned beside thewashing machine.StackingThe tumble dryer can be placed on top of a ASKOwashing machine. Use the two foot cups found inthe document bag includedwith themachine andthe two tip guards attached to the bottom leftcorner of the back of the machine.
How to assemble the stack:1. Remove the two tip guards from the back of
the tumble dryer. Replace the screws that heldthe tip guards in place.
2. Undo the two screws indicated on the back ofthe washing machine.
3. Secure the anti-tilt device using the screws asshown in the picture.
4. Attach the plastic cups for fixing the tumbledryer’s front feet to the washing machine’s topcover. This is essential, as only when the
21
Installation

tumble dryer’s feet are resting in the plasticcups can you be sure that the tumble dryer iscorrectly positioned on the washing machine.Break off tag A on the cup fitted on theright-hand side and tag B on the cup fitted onthe left-hand side. Then remove the paper fromthe self-adhesive surface under the plasticcups.
A
B
A
B
5. Fit the plastic cups so that the “tags” markedwith arrows are against the front edge or sideedge of the cover and press them firmly ontothe cover. Then break off the remaining tags.
6. Push out the knock-out hole on the back of thetumble dryer (youmust not remove it, just openit) using a hammer and screwdriver.
7. Push the tumble dryer in under the metalbrackets. At the same time keep the front edgeraised by 10 mm to 20 mm.
8. Lower the tumble dryer’s front feet into theplastic cups and adjust the tumble dryer toensure it is level.
Adjusting the feetScrew the feet in or out so that the tumble dryeris both stable and level.
22
Installation

Condensed waterThe machine is supplied as shown in Option 1(inset). This means that the condensed water ispumped into the condensed water container,which must be removed and emptied by hand.Option 2 allows you to remove the small shorthose from the nipple. Attach the rubber hosesupplied to the same nipple. The water can thenbe pumped out into a sink or a floor drain (2a).
2
1
2a
Max 1000 mm
Electrical installationConnect the machine by plugging it into anearthed wall socket. The electrical wall socketmust be placed outside of the installation area tobe easily accessible.If this appliance is supplied froma cord extensionsset or electrical portable outlet device, the cordextension ser or electrical portable outlet devicemust be positioned so that it is not subject tosplashing or ingress of moisture.Connection on delivery• 230V, 1-Phase, 10A• 50Hz• Heat output 1950W, 10A• Use a type A residual current device.
23
Installation

1
6 5
2 3 4
Locking hook4.Hinge pins (top and bottom)1.Hinges (left + right side)5.Cover plate2.Plinth6.Plastic plugs (on the upper
and lower edges)3.
24
Door hanging

You can choose whether the door is hung on theright or the left.
Follow these instructions:1. Remove the plinth.
2. Remove the hinge, two screws.
3. Lift the door up and remove it. Support the doorat the same time.
4. Remove both door pins (top and bottom). Fitthem on the other side of the machine. Refitthe hinge.
5. Loosen and remove the catch (lift up and pullout) and the cover plate on the door and themachine. Switch the catch and the cover plate.
1
2
6. Move the plastic plugs on the upper and loweredges of the door. Use a flat-bladedscrewdriver to remove the plugs.
7. Refit the door by loosening the hinge screwsslightly, affixing the door and closing it.Retighten the hinges. Replace the plinth.
25
Door hanging

26
Your notes

27
Your notes

1Fabrics• Dry fabrics of the same type together to
ensure that they dry as evenly aspossible.
2Turn on the main power switch
3Load the garments• Close the door.
4Select a program and anyoptions• Turn the program selector to the required
program.• Select any options and settings.
5Press the Start button
6Drying program finished• End appears on the display when the
program is finished. If the Anti creaseoption has been selected, the drum willrotate for three seconds per minute fortwo hours after the drying program isfinished.
• Clean the lint filter after each load.
7Once drying has finished• Turn off the mains power switch and
close the door.
Art. No.: 8092894. Rev. 02. We reserve the right to make changes.
28
Quick guide