Operating and Installation Instructions Refrigerators · 2018-06-18 · Operating and Installation...
96
Operating and Installation Instructions Refrigerators To prevent accidents and machine damage, read these instructions be- fore installation or use. en-US M.-Nr. 10 950 490
Transcript of Operating and Installation Instructions Refrigerators · 2018-06-18 · Operating and Installation...

Operating and Installation InstructionsRefrigerators
To prevent accidents and machine damage, read these instructions be-fore installation or use.
en-US M.-Nr. 10 950 490
Contents
2
IMPORTANT SAFETY INSTRUCTIONS ................................................................ 5
Caring for the environment ................................................................................ 12
How to save energy............................................................................................. 13
Guide to the appliance ........................................................................................ 15Control panel ......................................................................................................... 15Explanation of symbols ......................................................................................... 16Accessories ........................................................................................................... 18
Accessories supplied ....................................................................................... 18Optional accessories........................................................................................ 19
Switching on and off ........................................................................................... 20Before first use ...................................................................................................... 20
Cleaning the refrigerator................................................................................... 20Operating the appliance ........................................................................................ 20Switching on the appliance ................................................................................... 20Switching off the appliance................................................................................... 21Turning off for longer periods of time .................................................................... 21
The correct temperature..................................................................................... 22. . . in the refrigerator section and in the PerfectFresh zone.................................. 22
Automatic cold air circulation (DynaCool) ........................................................ 22Temperature display .............................................................................................. 23Setting the temperature......................................................................................... 23
Temperature range ........................................................................................... 23Adjusting the temperature in the PerfectFresh zone ............................................. 24
Using Automatic SuperCool ............................................................................... 25
Door alarm ........................................................................................................... 26Cancelling the door alarm ..................................................................................... 26
Selecting additional settings .............................................................................. 27Safety lock ........................................................................................................ 27Temperature unit (Celsius or Fahrenheit) ............................................................... 28Audible signals ................................................................................................. 30Display brightness ............................................................................................ 31Sabbath mode ................................................................................................... 32Carbon filter replacement indicator .................................................................. 34
Storing food in the refrigerator section............................................................. 35Various cooling zones ........................................................................................... 35Food which is not suitable for storage in the refrigerator section ......................... 36

Contents
3
What to be aware of when shopping for food....................................................... 36Storing food correctly............................................................................................ 36
Storing food in the PerfectFresh zone............................................................... 37Dry compartment ............................................................................................... 38Humidity-controlled compartment , ................................................................ 38
Adjusting the interior fittings.............................................................................. 40Adjusting the door shelf/bottle shelf ..................................................................... 40Adjusting the bottle holder .................................................................................... 40Moving the shelf/shelf with lighting....................................................................... 40Adjusting the bottle rack ....................................................................................... 41PerfectFresh drawers............................................................................................. 41Moving the carbon filter ........................................................................................ 42
Defrosting............................................................................................................. 43
Cleaning and care ............................................................................................... 44Cleaning agents..................................................................................................... 44Preparing the appliance for cleaning..................................................................... 45Cleaning the interior and accessories ................................................................... 47Cleaning the door seal .......................................................................................... 49Cleaning the ventilation grilles............................................................................... 49Starting up the appliance after cleaning ............................................................... 49Replacing the carbon filters .................................................................................. 50
Frequently Asked Questions .............................................................................. 51
Causes of noises ................................................................................................. 59
Technical Service................................................................................................. 60Contact in case of fault ......................................................................................... 60Warranty ................................................................................................................ 60
Information for dealers ....................................................................................... 61Demo mode ........................................................................................................ 61
Electrical connection .......................................................................................... 63
Installation............................................................................................................ 65Side-by-side.......................................................................................................... 65Installation location ............................................................................................... 65
Climate class .................................................................................................... 66Ventilation.............................................................................................................. 66Before installing the appliance .............................................................................. 68
Wall spacer at the back.................................................................................... 69

Contents
4
Installation dimensions ....................................................................................... 70
Limiting the opening angle of the appliance door............................................ 71
Changing the door hinging ................................................................................. 72
Building in the appliance .................................................................................... 76Fitting the cabinet door ......................................................................................... 84Fitting the cabinet doors ....................................................................................... 87

IMPORTANT SAFETY INSTRUCTIONS
5
This appliance complies with all statutory safety requirements.Please note that inappropriate use can lead to personal injury anddamage to property.
To avoid the risk of accidents and damage to the appliance,please read these instructions carefully before using it for the firsttime. They contain important notes on installation, safety, use andmaintenance.
Miele cannot be held liable for non-compliance with these instruc-tions.
Keep these instructions in a safe place and ensure that new usersare familiar with the contents. Pass them on to any future owner.
Appropriate use
This appliance is intended for use in the home and similar environ-ments.This appliance is not intended for use outdoors, in damp environ-ments or in places exposed to rain.
The oven is intended for domestic use only: cooking, baking,roasting, broiling, defrosting and heating of food.Only use this appliance for its intended purpose.
This appliance is not suitable for storing and keeping coolmedicines, blood plasma, laboratory preparations or other such ma-terials or products. Incorrect use of the appliance for such purposescan cause deterioration of the items stored. The appliance is notsuitable for use in areas where there is a risk of explosion.Miele cannot be held liable for damage resulting from improper or in-correct use of the appliance.
Persons (including children) which lack physical, sensory or men-tal abilities or experience with the machine should not use it withoutsupervision or instruction by a responsible person.

IMPORTANT SAFETY INSTRUCTIONS
6
Safety with children
To reduce the risk of injury, do not allow children to play in, on ornear the appliance.
Ensure that any packing material is disposed of safely and keptout of the reach of children. DANGER of suffocation!
Technical safety
The refrigerant system is tested for leaks. This appliance complieswith statutory safety requirements.
This appliance contains the refrigerant Isobutane (R600a), a natu-ral gas which is environmentally friendly. Although it is combustible,it does not damage the ozone layer and does not increase the green-house effect.The use of this refrigerant has, however, led to a slight increase inthe noise level of the appliance. In addition to the noise of the com-pressor, you might be able to hear the refrigerant flowing around thesystem. This is unavoidable, and does not have any adverse effecton the performance of the appliance.Care must be taken during the transportation and setting up of theappliance that no parts of the cooling system are damaged. Leakingrefrigerant can cause severe irritation to the eyes.In the event of any damage:
– avoid open flames and anything that creates a spark,
– disconnect the appliance from the electrical power supply,
– ventilate the room where the appliance is located for several min-utes, and
– contact Miele Technical Service.

IMPORTANT SAFETY INSTRUCTIONS
7
The more coolant there is in an appliance, the larger the room itshould be installed in. In the event of a leakage, if the appliance is ina small room, there is the danger of combustible gases building up.For every 11 g of coolant at least 1 m3 of room space is required. Theamount of coolant in the appliance is stated on the data plate insidethe appliance.
To avoid the risk of damage to the appliance, make sure that theconnection data (fuse rating, frequency and voltage) on the dataplate corresponds to the household supply.Check that this is the case before connecting the appliance. Consulta qualified electrician if in any doubt.
The electrical safety of the appliance can only be guaranteedwhen correctly grounded. It is essential that this standard safety re-quirement is met. If in any doubt please have the electrical installa-tion tested by a qualified electrician.
Reliable and safe operation of this appliance can only be assuredif it has been connected to the electricity supply.
If the power cord is damaged, it must be replaced by a Miele au-thorized technician in order to protect the user from harm.
Do not connect the appliance to the electrical supply with a powerbar or extension cord. These are a fire hazard and do not guaranteethe required safety of the appliance.
If moisture gets into electrical components or into the power cord,it could cause a short circuit. Therefore, do not operate the machinein areas where there may be moisture or splashing water (e.g.,garages, laundry rooms).
This appliance must not be installed and operated in mobile in-stallations (e.g. on a ship).
Do not use a damaged appliance. It could be dangerous. Checkthe appliance for visible signs of damage.
IMPORTANT SAFETY INSTRUCTIONS
8
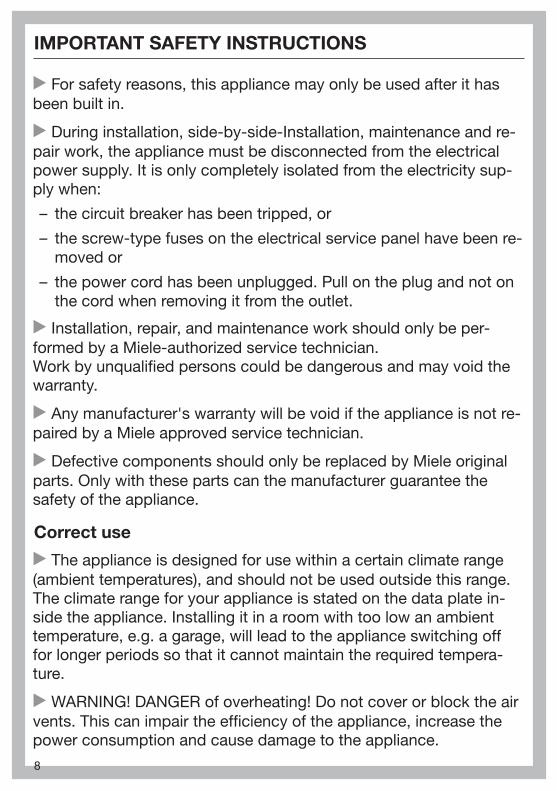
For safety reasons, this appliance may only be used after it hasbeen built in.
During installation, side-by-side-Installation, maintenance and re-pair work, the appliance must be disconnected from the electricalpower supply. It is only completely isolated from the electricity sup-ply when:
– the circuit breaker has been tripped, or
– the screw-type fuses on the electrical service panel have been re-moved or
– the power cord has been unplugged. Pull on the plug and not onthe cord when removing it from the outlet.
Installation, repair, and maintenance work should only be per-formed by a Miele-authorized service technician.Work by unqualified persons could be dangerous and may void thewarranty.
Any manufacturer's warranty will be void if the appliance is not re-paired by a Miele approved service technician.
Defective components should only be replaced by Miele originalparts. Only with these parts can the manufacturer guarantee thesafety of the appliance.
Correct use
The appliance is designed for use within a certain climate range(ambient temperatures), and should not be used outside this range.The climate range for your appliance is stated on the data plate in-side the appliance. Installing it in a room with too low an ambienttemperature, e.g. a garage, will lead to the appliance switching offfor longer periods so that it cannot maintain the required tempera-ture.
WARNING! DANGER of overheating! Do not cover or block the airvents. This can impair the efficiency of the appliance, increase thepower consumption and cause damage to the appliance.

IMPORTANT SAFETY INSTRUCTIONS
9
If storing food which contains a lot of fat or oil in the appliance,make sure that it does not come into contact with plastic compo-nents as this could cause stress cracks or break the plastic.
Do not store explosive materials in the appliance or any productscontaining propellants (e.g. spray cans). Electrical components couldcause flammable vapors to ignite.DANGER of fire and explosion.
Do not operate any electrical equipment (e.g. an electric ice creammaker) inside the appliance.DANGER of sparking and explosion.
When eating stored food, there is a danger of food poisoning. Storage times will depend on several factors, including the freshnessand quality of the food, as well as the temperature at which it isstored. Observe the manufacturer's “use-by” dates and storage in-structions.
Use only genuine original Miele parts. If parts or accessories fromother manufacturers are used, the warranty may become invalid.
Cleaning and maintenance
Do not use any oil or grease on the door seals. They can cause the seals to deteriorate over time.
Never use a steam cleaner to clean the appliance. The steam can reach the electrical components and cause a shortcircuit.
Sharp edged or pointed objects will damage the evaporator, caus-ing irreversible damage to the appliance. Do not use sharp edged orpointed objects to
– remove frost or ice,
– separate frozen foods or remove ice trays.
Never place electric heaters or candles in the appliance to defrostit. These can damage the plastic parts.

IMPORTANT SAFETY INSTRUCTIONS
10
Do not use defrosting sprays or de-icers, as they could containsubstances which could damage the plastic parts or which mightcause the build-up of gases and pose a danger to health.
California Proposition 65– This product contains chemicals known to the state of California
to cause cancer or reproductive harm.
– This product can expose you to chemicals including DiisononylPhthalate (DINP) which is known to the State of California tocause cancer. For more information go to www.P65Warn-ings.ca.gov.
– This product can expose you to chemicals including Di-isodecylPhthalate (DIDP) which is known to the State of California tocause birth defects or other reproductive harm. For more informa-tion go to www.P65Warnings.ca.gov.
Transport
To avoid damage to the appliance, always transport it upright andin its packaging.
DANGER of injury and damage. The appliance is very heavy andmust be transported by two people.
Disposal of your old appliance
Children could become trapped in the machine and could suffo-cate.
– Remove the machine doors.
– Remove the drawers.
– Leave the adjustable shelves in the machine so children cannotclimb inside.
DANGER of electric shock!
– Cut the plug off the power cord.
– Cut the power cord off the old appliance.

IMPORTANT SAFETY INSTRUCTIONS
11
Dispose of them separately from the appliance.
Ensure that the appliance is not stored in the vicinity of gasoline orinflammable gases and liquids during and after disposal.
Make sure that the coolant pipework is not damaged during dis-posal to avoid uncontrolled leakage of oil and coolant (see data platefor coolant type).
Before disposing of an old appliance, first make the door latchesor locks unusable.This way you will prevent children from accidentally locking them-selves in and endangering their lives.
Splashes of coolant can cause damage to the eyes. Be careful notto damage any part of the pipework while awaiting disposal, e.g. by
– puncturing the coolant channels in the evaporator,
– kinking any pipework,
– scratching the surface coating.
Symbol on the compressor (depending on model)
This information is only relevant for recycling. In normal operation there is no risk.
The oil in the compressor can be fatal if swallowed or if it pene-trates the airways.

Caring for the environment
12
Disposal of packaging materialThe packaging is designed to protectthe appliance from damage duringtransportation. The packaging materialsused are selected from materials whichare environmentally friendly for disposaland should be recycled.
Ensure that any plastic wrappings,bags, etc. are disposed of safely andkept out of the reach of children. Returnthe packaging to your dealer.
Disposal of your old applianceElectrical and electronic appliancescontain valuable materials. They alsocontain certain substances, compoundsand components which were essentialfor the proper functioning and safe useof the equipment. Handling these mate-rials improperly by disposing of them inyour household waste can be harmful toyour health and the environment. There-fore, please do not dispose of your oldappliance with regular household wasteand follow local regulations on properdisposal.
Consult with local authorities, dealers orMiele in order to dispose of and recycleelectrical and electronic appliances.Miele assumes no responsibility fordeleting any personal data left on theappliance being disposed.
Take care not to damage the pipeworkat the back of your appliance before orduring transportation to an authorized,environmentally friendly collection de-pot.This way, coolant in the pipework andoil in the compressor will be contained,and will not leak into the environment.
Please ensure that your old appliancedoes not pose a danger to childrenwhile being stored prior to disposal.See “IMPORTANT SAFETY INSTRUC-TIONS” for more information.

How to save energy
13
Normal energy consumption
Increased energy consumption
Installation /Maintenance
In a well-ventilated room. In an enclosed, poorly venti-lated room.
Protected from direct sun-light.
In direct sunlight.
Away from heat sources (ra-diator, range/oven).
Near a heat source (radiator,oven).
Where the ideal room tem-perature is approx. 68°F(20°C).
Where the ambient roomtemperature is above 77°F(25°C).
Air vents uncovered anddusted regularly.
Where the ventilation open-ings are blocked and full ofdust.
Temperature setting
39°F to 41°F (4°C to 5°C) inthe refrigerator section
The lower the temperature inthe appliance, the higher theenergy consumption.
PerfectFresh zone 32 °F(0 °C)

How to save energy
14
Normal energy consumption
Increased energy consumption
Use The drawers and shelves arein the original arrangement.
Only open the door whennecessary and for as short atime as possible. Store foodin an organized way.
Frequent opening of thedoor for long periods willcause a loss of coldness.The appliance will cool downand the compressor will runfor longer periods.
Take an insulated cool bagwhen shopping and loadfood in the appliance assoon as possible.Replace any food removedas quickly as possible, be-fore it begins to thaw.Allow hot food and drinks tocool down before placingthem in the appliance.
Hot food or food at roomtemperature raises the tem-perature inside the appli-ance. The appliance will cooldown and the compressorwill run for longer periods.
Store food covered orwrapped.
The evaporation or conden-sation of liquids will cause aloss of coldness.
Place frozen food in the re-frigerator to defrost.
Do not overfill the appliancein order to allow the air tocirculate.
Overfilling the appliance willcause poor air circulationand a loss of coldness.

Guide to the appliance
15
Control panel
a On/Off buttonfor the whole appliance
b Optical interface(for Miele Technical Service only)
c For switching the Automatic SuperCool function onand off
d For setting the temperature( for colder);selection button in settings mode
e For confirming your selection (OKbutton)
f For setting the temperature( for warmer);selection button in settings mode
g For selecting and deselecting set-tings mode
h For switching off the door alarm
i Display with temperature and sym-bols (symbols only visible in settingsmode, in the event of an alarm/mes-sage; see table for explanation ofsymbols)

Guide to the appliance
16
Explanation of symbols
Symbol Meaning Function
Safety lock Prevents the user from unintentionallyswitching off the appliance, adjusting thetemperature, switching on the AutomaticSuperCool functions, or entering settings
Acoustic signals Choice of sensor tone and door alarm tone
Display BrightnessSettings
For adjusting the brightness of the display
Carbon filter replace-ment indicator (ActiveAirClean)
This function must be activated after in-stalling a carbon filter; it lights up to remindyou to replace it
PerfectFreshtemperature
For adjusting the temperature in thePerfectFresh zone
Sabbath Mode For turning Sabbath mode on and off
Power connection Confirms that the appliance is connected tothe electrical supply when it is not switchedon
Alarm Lights up when the door alarm is activated;flashes in the event of fault messages
Demo mode (only visible whenDemo mode is active)
For turning off Demo mode

Guide to the appliance
17
This drawing shows an example of an appli-ance model.
a Control panel
b Fan
c Shelf withlighting (FlexiLight)
d Egg tray/door shelf
e Adjustable rack
f Bottle rack
g Bottle shelf
h PerfectFresh zone dry compartment
i Condensate channel and drain hole
j Regulator for setting the moisturelevel in the humidity-controlled com-partments
k PerfectFresh zone humidity-con-trolled compartment (depending onmodel)

Guide to the appliance
18
Accessories
Accessories supplied
Bottle holder
The non-slip fins of the bottle holder jutout into the bottle shelf and make bot-tles more secure when you open andclose the appliance door.
Butter dish
Egg tray
Bottle rack
Bottles can be stored horizontally in therefrigerator section using the bottle rackto save space.The bottle rack can be placed at differ-ent positions in the refrigerator section.

Guide to the appliance
19
Optional accessories
A range of useful Miele accessories andcare products are available for your ap-pliance.
KKF-FF Active AirClean carbon filterwith holder
Carbon filters neutralize unpleasantodors in the refrigerator section for im-proved air quality.
The carbon filter holder clips onto theprotective strip at the back of the shelfand can be moved as necessary.
Now activate the carbon filter replace-ment indicator in Settings mode (see“Selecting additional settings” - “Car-bon filter replacement indicator ”).
KKF-RFActive AirClean replacement filters
Replacement filters to fit the Active Air-Clean holder are available. We recom-mend replacing the carbon filters every6 months.
Accessories are available to order viathe Miele Webstore, from Miele di-rectly (see back cover for contact de-tails) or from your Miele dealer.

Switching on and off
20
Before first use
Packaging material
Remove all packaging material fromthe inside of the appliance.
Protective film
The stainless steel trim on the interiorshelves and door shelves in the appli-ance has a layer of protective film toprevent scratching in transit.
Remove this protective film once theappliance has been installed.
Cleaning the refrigerator
Please refer to the relevant instruc-tions in “Cleaning and care”.
Clean the inside of the appliance andthe accessories.
Operating the applianceA light touch on the sensors is all that isrequired to operate this appliance.
A tone will sound each time a sensor istouched. You can deactivate this if youwish (see “Selecting additional settings- Audible signals”).
Switching on the applianceOnce the appliance is connected to theelectricity supply, the power supplysymbol will soon appear on the dis-play.
Touch the On/Off button.
The power connection symbol goesout and the temperature appears in thedisplay.
The appliance starts cooling.
When the door is opened, the interiorlighting comes on and the LED lightingon the shelves becomes brighter until itreaches its maximum brightness.
To enable the temperature to get suf-ficiently cold inside the appliance, al-low the appliance to run for a fewhours before placing food in it.

Switching on and off
21
Switching off the appliance
Touch the on/off button.If this is not possible, the safety lockis activated.
The temperature shown on the displaywill go out and the power supply sym-bol will appear.
The interior lighting will go out andcooling will be turned off.
Turning off for longer periodsof time
If, during a long absence, the ap-pliance is switched off but notcleaned and the door(s) left shut,there is a danger of bacteria buildingup inside the appliance.It is essential to clean the appliance.
If the appliance is not going to be usedfor a longer period of time, e.g. while onvacation:
switch the appliance off,
unplug the power cord or trip the cir-cuit breaker,
clean the appliance and
leave the door(s) ajar to air the appli-ance and avoid odors building up in-side the appliance.

The correct temperature
22
It is very important to set the correcttemperature for storing food in the ap-pliance. Bacteria will cause food whichis not stored at the correct temperatureto deteriorate rapidly.
The temperature in the appliance willrise:
– if you open the door frequently orkeep it open too long,
– the more food that is stored in it
– if you put food in it that is too warm,
– the higher the ambient temperaturesurrounding the appliance. The appli-ance is designed for use within spe-cific ambient temperatures (climaterange). Do not use in ambient tem-peratures for which it is not designed.
. . . in the refrigerator sectionand in the PerfectFresh zoneWe recommend a temperature of 39°F(4°C) in the refrigerator section.
The temperature in the PerfectFreshzone is controlled automatically, and ismaintained at 32°F to 37°F (0°C to3°C).
Automatic cold air circulation (Dyna-Cool)
The fan automatically turns on when thecooling system for the refrigerator sec-tion turns on. It distributes the tempera-ture in the refrigerator section to all ar-eas evenly so that all the food inside willbe chilled to about the same degree.

The correct temperature
23
Temperature display
In normal operation, the temperaturedisplay shows the current averagerefrigerator temperature.
Depending on the ambient temperatureand the temperature setting, it can takethe appliance a few hours to reach thetemperature required and for this tem-perature to then be shown as a con-stant temperature in the display.
Setting the temperature Use the two sensor buttons below
the display to set the temperature.
When you touch the sensor button
– The temperature decreases.
– The temperature increases.
The temperature value flashes while thetemperature is being set.
The following changes will be seen onthe display when the sensor buttons aretouched:
– With the first touch: The last temper-ature set flashes.
– Each subsequent touch: The temper-ature changes in 1° increments.
– Keeping your finger on the sensorbutton: The temperature changescontinuously.
Approximately 5 seconds after the lasttime a sensor button was touched, theactual temperature inside the appliancewill automatically be displayed.
Or
Touch the OK button to confirm theselection.
If you have adjusted the temperature,wait for approximately 6 hours if theappliance is not very full and for ap-proximately 24 hours if the applianceis full before checking the temperaturedisplay. It will take this long for an accu-rate reading to be given.
If, after this time, the temperature isstill too high or too low, adjust itagain.
Temperature range
The temperature in the refrigerator sec-tion can be set between 37°F (3°C) and49°F (9°C).

The correct temperature
24
Adjusting the temperature inthe PerfectFresh zoneIn the PerfectFresh zone, the tempera-ture is automatically maintained be-tween 32°F (0°C) and 37°F (3°C). How-ever, if you would like it to be warmer orcolder, e.g., when storing fish, you canadjust the temperature slightly.
The default setting for the tempera-ture in the PerfectFresh zone is 5.Under certain circumstances, a set-ting from 1 to 4 can cause negativetemperatures to be reached. This cancause food to freeze.
Touch the settings button.
All symbols available for selection willappear on the display and the sym-bol will flash.
Touch the buttons for setting the tem-perature ( or ) repeatedly until the symbol flashes on the display.
Touch the OK button to confirm theselection.
The most recently selected settingflashes and the symbol lights up inthe display.
You can now adjust the temperaturein the PerfectFresh zone by touchingthe or button. You can choosefrom settings 1 to 9:1: lowest temperature,9: highest temperature.
Touch the OK button to confirm theselection.
The selected setting is applied; the symbol flashes.
Touch the settings button to exit Set-tings mode.If you do not do this, the applianceelectronics will exit Settings modeautomatically after approximately oneminute.
The newly set temperature for the Per-fectFresh zone will gradually bereached.

Using Automatic SuperCool
25
Automatic SuperCool functionThe Automatic SuperCool function canbe used to rapidly reduce the tempera-ture in the refrigerator section to its low-est setting (depending on the roomtemperature).
Switching on Automatic SuperCool
Automatic SuperCool is particularly rec-ommended for the rapid chilling of largeamounts of fresh food or drink.
Touch the Automatic SuperCool but-ton; it will light up yellow.
The appliance will work at full power tolower the temperature in the refrigeratorsection.
Switching off Automatic SuperCool
The Automatic SuperCool function willswitch itself off automatically after ap-proximately 12 hours. The appliance willthen run at normal power again.
To save energy, you can switch the Au-tomatic SuperCool function off yourselfonce food and drinks are sufficientlychilled.
Touch the Automatic SuperCool but-ton; the yellow light will go out.
The appliance will then continue run-ning at normal power.

Door alarm
26
The appliance is fitted with a warningsystem to avoid increased energy con-sumption and food becoming warm ifthe door is left open.
An alarm will sound if the door is leftopen for too long. The alarm symbol will light up.
The amount of time until the door alarmis triggered depends on the setting se-lected and can be either 2 minutes (fac-tory default) or 4 minutes. However, thedoor alarm can also be turned off (see“Additional settings - Acoustic signals”).
As soon as the door is closed, thealarm goes off and the alarm symbol disappears from the display.
If no alarm sounds even though thereis a door alarm, the alarm has beenturned off in settings mode (see “Addi-tional settings - Acoustic signals”).
Cancelling the door alarmIf the alarm is disturbing you, it can beswitched off.
Touch the sensor to turn off the dooralarm.
The alarm will stop.The alarm symbol will continue to bedisplayed until the door is closed.

Selecting additional settings
27
Certain settings for the appliance canonly be selected in settings mode.
While you are in settings mode, thedoor alarm and any other fault mes-sages are suppressed automatically,but the alarm symbol lights up onthe display.
Available settings
Activate and deactivate thesafety lock
°C°F
Select the temperature unit(Celsius or Fahrenheit)
Switch audible signals on/off
Change the brightness of thedisplay
Adjust the temperature in thePerfectFresh zone
Switch Sabbath mode on/off
Replace the carbon filters (Ac-tive AirClean)
The process of adjusting the tempera-ture in the PerfectFresh zone is de-scribed in “The correct temperature”.
All other available settings are de-scribed below.
Safety lock The safety lock can be activated to pre-vent:
– the appliance being switched off bymistake,
– the temperature being changed bymistake,
– Automatic SuperCool being selectedby mistake,
– settings being adjusted by mistake (itis only possible to deactivate thesafety lock).
This prevents the appliance beingswitched off or settings adjusted with-out your knowledge; for example, bychildren.
Activating and deactivating the safetylock
Touch the settings sensor.
All symbols available for selection willappear in the display and the symbolflashes.
Touch the OK sensor to confirm yourselection.
The last selected setting flashes andthe symbol lights up in the display.

Selecting additional settings
28
By touching the or sensor, youcan now select whether the safetylock is activated or deactivated: 0: the safety lock is deactivated 1 : the safety lock is activated.
Touch the OK sensor to confirm yourselection.
The selected setting will be adoptedand the symbol will flash.
Touch the settings sensor to leave thesettings mode.Otherwise the appliance will exit thesettings mode automatically after ap-proximately one minute.
The symbol will appear in the displaywhen the safety lock is activated.
Temperature unit (Celsius orFahrenheit)The temperature can be displayed in ei-ther Fahrenheit °F or Celsius °C. De-grees Fahrenheit °F is the factory set-ting.
Setting the temperature display toCelsius
Touch the settings button.
All symbols available for selection willappear on the display and the sym-bol will flash.
Touch the buttons for setting the tem-perature ( or ) repeatedly until °Cand °F flash on the display.
Touch the OK button to confirm yourselection.
°F will flash on the display.

Selecting additional settings
29
You can now select °C by touchingthe or button.
Touch the OK button to confirm yourselection.
The selected setting will be saved.
Touch the settings button to exit set-tings mode.If you do not, the appliance will exitsettings mode automatically after ap-proximately one minute.
The temperature will now be displayedin Celsius.
Setting the temperature display toFahrenheit
Touch the settings button.
All symbols available for selection willappear on the display and the sym-bol will flash.
Touch the buttons for setting the tem-perature ( or ) repeatedly until °Cand °F flash on the display.
Touch the OK button to confirm yourselection.
°C will flash on the display.

Selecting additional settings
30
You can now select °F by touchingthe or button.
Touch the OK button to confirm yourselection.
The selected setting will be saved.
Touch the settings button to exit set-tings mode.If you do not, the appliance will exitsettings mode automatically after ap-proximately one minute.
The temperature will now be displayedin Fahrenheit.
Audible signals The appliance features audible signalssuch as a keypad tone and door alarmtone.
The keypad tone and door alarm tonecan be switched on or off.
There are four settings to choose from.Option 3 is set at the factory; thismeans that the keypad tone and thedoor alarm are switched on.
Turning acoustic tones on or off
Touch the settings sensor.
All symbols available for selection willappear in the display and the sym-bol flashes.
Touch the sensors for setting thetemperature ( or ) repeatedly untilthe symbol flashes in the display.
Touch the OK sensor to confirm yourselection.
The last selected setting flashes andthe symbol lights up in the display.

Selecting additional settings
31
By touching the or sensors youcan now select the following:0 : Sensor tone off; Door alarm off1 : Sensor tone off; Door alarm on(after 4 minutes)2: Sensor tone off; Door alarm on(after 2 minutes)3 : Sensor tone on; Door alarm on(after 2 minutes).
Touch the OK sensor to confirm yourselection.
The selected setting will be adoptedand the symbol will flash.
Touch the settings sensor to leave thesettings mode.Otherwise the appliance will exit thesettings mode automatically after ap-proximately one minute.
Display brightness You can adjust the brightness of thedisplay to suit the ambient light condi-tions in the room.
The display brightness can be adjustedincrementally from 1 to 3. The factorydefault setting is 3 (maximum bright-ness).
Changing the brightness of the dis-play
Touch the settings sensor.
All symbols available for selection willappear in the display and the sym-bol flashes.
Touch the sensors for setting thetemperature ( or ) repeatedly untilthe symbol flashes in the display.
Touch the OK sensor to confirm yourselection.
The last selected setting flashes andthe symbol lights up in the display.

Selecting additional settings
32
By touching the or sensor, youcan now alter the brightness of thedisplay:1 : Dimmest setting2 : Medium setting3 : Brightest setting.
Touch the OK sensor to confirm yourselection.
The selected setting will be adoptedand the symbol will flash.
Touch the settings sensor to leave thesettings mode.Otherwise the appliance will exit thesettings mode automatically after ap-proximately one minute.
Sabbath mode The appliance offers a Sabbath modefor the purposes of religious obser-vance.
The following are switched off:
– the interior lighting when the appli-ance door is opened,
– all audible and visual signals,
– the temperature display,
– Automatic SuperCool (if previouslyswitched on).
The following can be selected:
– the settings button for switching offSabbath mode
– and the On/Off button.
The Sabbath mode function will switchitself off automatically after approxi-mately 120 hours.
Ensure that the appliance door isproperly closed, as visual and audiblealarms are switched off.
Danger of food poisoning!Any power failure during Sabbathmode will not be shown on the dis-play. After a power failure, the appli-ance will restart in Sabbath mode.When power is restored, no notifica-tion of the power failure will appearon the display.If there is a power failure during Sab-bath mode, check the quality of thefood. Do not consume any defrostedfood.
Selecting additional settings
33
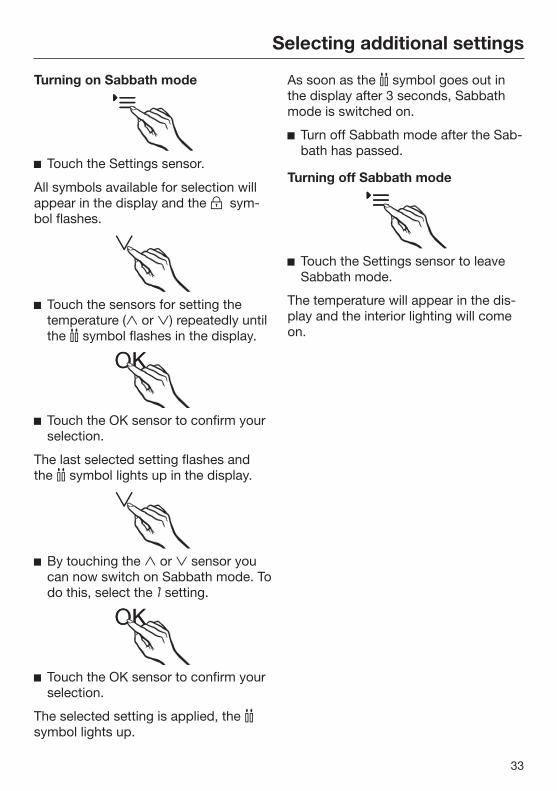
Turning on Sabbath mode
Touch the Settings sensor.
All symbols available for selection willappear in the display and the sym-bol flashes.
Touch the sensors for setting thetemperature ( or ) repeatedly untilthe symbol flashes in the display.
Touch the OK sensor to confirm yourselection.
The last selected setting flashes andthe symbol lights up in the display.
By touching the or sensor youcan now switch on Sabbath mode. Todo this, select the 1 setting.
Touch the OK sensor to confirm yourselection.
The selected setting is applied, the symbol lights up.
As soon as the symbol goes out inthe display after 3 seconds, Sabbathmode is switched on.
Turn off Sabbath mode after the Sab-bath has passed.
Turning off Sabbath mode
Touch the Settings sensor to leaveSabbath mode.
The temperature will appear in the dis-play and the interior lighting will comeon.

Selecting additional settings
34
Carbon filter replacement indi-cator
This appliance is not supplied withcarbon filters with a KKF-FF holder(Active AirClean). The holder is avail-able as an optional accessory (see“Accessories – Optional accessories”).
The carbon filter replacement indicatormust be activated once the filters havebeen installed.
You will be reminded to replace the fil-ters after approx. 6 months (see “Clean-ing and maintenance - Replacing car-bon filters”). The symbol is illumi-nated in the display.
After replacing the filter(s), the countermust be reset. The indicator will then goout.
Activating the carbon filter replace-ment indicator or resetting thecounter
Touch the settings sensor button.
All symbols available for selection willappear on the display and the sym-bol will flash.
Touch the sensor buttons for settingthe temperature ( or ) repeatedlyuntil the symbol flashes on thedisplay.
Touch the OK sensor button to con-firm the selection.
The most recently selected settingflashes and the symbol lights up inthe display.
Touch or to make your selection: Carbon filter replacement indicatordeactivated1: Carbon filter replacement indicatoractivated2: Counter reset.
Touch the OK sensor button to con-firm the selection.
The selected setting is applied; the symbol flashes.
Touch the settings sensor button toexit Settings mode.If you do not do this, the applianceelectronics will exit Settings modeautomatically after approximately oneminute.

Storing food in the refrigerator section
35
Do not load more than a maximum of35 lb (16 kg) of food in the appliancedoor.
WARNING! Fire hazard!Do not operate any electrical equip-ment inside the appliance. This cancause sparking.
DANGER of explosion!Do not store any explosive materialsor products containing flammablepropellants (e.g., spray cans) in themachine.
If storing food which contains fator oil in the machine or the machinedoor, stress cracks may be caused inthe plastic, resulting in it breaking.Make sure that no oil or fat leaksonto the plastic parts of the machine.
Various cooling zonesDue to natural air circulation there aredifferent temperature zones in the re-frigerator section.
Cold, heavy air sinks to the lowest sec-tion of the appliance. Make use of thedifferent temperature zones when plac-ing food in the appliance.
To allow air to circulate efficiently, donot pack food too closely together inthe refrigerator.
If there is insufficient air circulationthe cooling performance will de-crease and energy consumption willincrease.Do not cover the fan in the rear wallof the refrigerator.
Food must not touch the back of therefrigerator section as it may freeze tothe back wall.
This appliance has DynamicCooling,which helps to keep an even tempera-ture when the fan is running. WhenDynamicCooling is turned on, the dif-ference between the various zones isless pronounced.
Warmest area
The warmest area in the refrigeratorsection is in the top section of the door.Use this for storing butter so that it re-mains spreadable and cheese so that itretains its flavor.
Coldest area
The coldest area in the refrigerator sec-tion is directly above the dividing plateof the PerfectFresh zone and againstthe rear wall. However, inside the Per-fectFresh zone is even colder.
Use these areas in the refrigerator sec-tion and in the PerfectFresh zone for alldelicate and highly perishable food,e.g.:
– fish, meat, poultry,
– cold cuts
– dishes or baked goods containingeggs or cream,

Storing food in the refrigerator section
36
– fresh dough, cake mixtures, pizza orpie dough,
Food which is not suitable forstorage in the refrigerator sec-tionNot all food is suitable for refrigerationat temperatures below 41°F (5°C) be-cause it is sensitive to cold. Dependingon the type of food, the appearance,consistency, flavor and/or vitamin con-tent may be altered if stored at too colda temperature.
Food that is sensitive to cold includes:
– pineapple, avocados, bananas,pomegranates, mangos, melons, pa-paya, passion fruit, citrus fruit (suchas lemons, oranges, mandarins,grapefruit),
– fruit that is not yet ripe,
– eggplant, cucumbers, potatoes, pep-pers, tomatoes, zucchini,
– hard cheeses, e.g. Parmesan.
What to be aware of whenshopping for foodThe freshness of food when first placedin the appliance is the most importantfactor in determining how long it staysfresh, and how long it can be kept in theappliance.Always observe the use-by date andthe recommended storage temperature.Time out of the refrigerator should bekept to a minimum, for example, whentransporting food in a hot car.
Tip: Take a cool bag with you whenshopping and on return place food intothe appliance immediately.
Storing food correctlyFood should generally be stored cov-ered or packaged in the refrigeratorsection (there are some exceptions tothis rule in the PerfectFresh zone - seebelow). This will prevent food smellsfrom affecting other foods, food fromdrying out, and also any cross-contami-nation of bacteria. This is especially im-portant for storing animal products. The shelf life of food can be significantlyincreased by setting the correct tem-perature and maintaining good stan-dards of hygiene.

Storing food in the PerfectFresh zone
37
The PerfectFresh zone provides idealstorage conditions for fruit, vegetables,fish, meat, and dairy products. Foodstays fresh considerably longer whileretaining both flavor and vitamins.
The temperature in the PerfectFreshzone is controlled automatically, and ismaintained at 32°F to 37°F (0°C to 3°C).While lower than the temperature in astandard refrigerator, this is the opti-mum temperature range for storingfresh food which is not sensitive tocold. The deterioration process is de-celerated at this temperature range sofood can be stored without loss offreshness for considerably longer thanin a standard refrigerator.
The humidity level in the PerfectFreshzone can also be regulated to suit thefood being stored. Food retains its ownmoisture if stored at a higher humidityand so does not dry out as quickly. Thisallows it to stay crisp and fresh forlonger.
Remember that the fresher the foodwhen it is placed in the appliance, thelonger it will stay fresh.
Take food out of the PerfectFresh zoneapproximately 30 to 60 minutes beforeusing it. The aroma and taste do notfully develop until the food hasreached room temperature.
The PerfectFresh zone is di-vided into two compartments:– The upper dry compartment has a
temperature of between 32°F and37°F (0°C and 3°C). The humiditylevel in this compartment is not in-creased .You should use this compartment tostore fish, meat, dairy products, andany other type of food, as long as it ispackaged.
– The lower humidity-controlled com-partment (or compartments, de-pending on model) has a temperatureof 32°F to 37°F (0°C to 3°C). The hu-midity can be kept at a reduced orincreased level by positioning theslide control accordingly.If the humidity level is increased, usethis compartment to store fruit andvegetables.

Storing food in the PerfectFresh zone
38
Dry compartment The dry compartment is suitable forstoring perishable foods such as:
– fresh fish and shellfish;
– meat and poultry;
– salads;
– dairy products such as yogurt,cheese, cream, etc.;
– any type of food can in fact be storedin this compartment, as long as it ispackaged.
The low temperature in the dry com-partment is its most distinctive feature.The humidity level is similar to that in aconventional refrigerator.
Please note that foods rich in proteindeteriorate faster than others.Shellfish, for example, deteriorate fasterthan fish, and fish deteriorates fasterthan meat.
For hygiene reasons, you should alwayskeep these foods covered or wrapped.
Humidity-controlled compart-ment , The humidity-controlled compartmenthas a slide control which is used to reg-ulate the humidity in this compartment.
Slide the control to the or humiditysetting.

Storing food in the PerfectFresh zone
39
The following tips may help if youfind that food you have stored doesnot keep well (for example, the foodwilts or becomes withered after onlya short storage time):
Only place fresh food in the applianceas the initial condition of the food iscrucial to maintaining freshness.
Clean the compartments in the Per-fectFresh zone before storing food inthem.
Very wet food should be dried off be-fore storing it.
Do not store any food in the Perfect-Fresh zone which is sensitive to cold(see “Food which is not suitable forstorage in the refrigerator section”).
For the type of food being stored, se-lect the correct PerfectFresh com-partment and the appropriate posi-tion of the slide control for the humid-ity-controlled compartment (reducedor increased humidity).
An increased humidity level in thehumidity-controlled compartment isachieved by the moisture present inthe food being stored; i.e., the morefood stored in the compartment, thehigher the humidity.If too much moisture has gathered onthe base of the compartment and thisis affecting the food, select the setting. Otherwise, dry the compartment –particularly the base and underneaththe lid – with a cloth, and place a rackor similar item in the compartment sothat excess moisture can drain away.If the humidity level becomes too low,wrap the food in airtight packaging.
If you think that the temperature inthe PerfectFresh zone is not correct,try regulating it first by adjusting thetemperature in the refrigerator sectionslightly (1–2°). To prevent frost dam-age to food, a higher temperaturemust be set if ice crystals begin toform on the bases of the PerfectFreshcompartments.

Adjusting the interior fittings
40
Adjusting the door shelf/bottleshelf
Danger of injury!Only move the door shelves/bottleshelves in the door when they areempty.
Push the door/bottle shelf upwards,then remove it by pulling it forwards.
Replace the shelf at the requiredheight. Ensure that it is securelypushed back into position.
Adjusting the bottle holder
The bottle holder can be moved left orright to create more room for drink car-tons.
The bottle holder can be removed com-pletely, for example for cleaning:
Lift up the bottle shelf and pull it out.
Detach the bottle holder from theback edge of the bottle shelf.
Moving the shelf/shelf withlightingThe shelves can be adjusted accordingto the height of the food.
Lift the shelf at the front, pull it for-wards slightly, lift the recess over theshelf supports and move the shelf upor down.
Push in the shelf until it clicks into po-sition.
The stop at the back of the shelf mustface upwards so that food does nottouch the rear wall and freeze to it.
Stops prevent the shelves from beingdislodged by mistake.
Shelf with lighting
The LED lighting is located on the stain-less steel trim of the shelf. By adjustingthe position of the shelf in the refrigera-tor section, you can change the illumi-nation in this section as required.

Adjusting the interior fittings
41
Adjusting the bottle rack
The bottle rack can be placed at differ-ent positions in the appliance.
Lift the bottle rack slightly at the front,pull it forward a little, lift the recessover the shelf supports, and move theshelf up or down.
The stop bar at the back must face up-ward to prevent the bottles from touch-ing the back wall.
PerfectFresh drawersThe drawers in the PerfectFresh zoneare on telescopic rails, and can be re-moved for filling, emptying, or cleaningpurposes:
To make it easier to pull out the draw-ers, remove the bottle shelf from theappliance door.
Pull the drawers out as far as they willgo.
Holding the sides of the drawer at theback, lift it up and then pull it forwardand out.
Push the runners back in again toavoid damaging them!
Carefully pull out the lid between thedrawers slightly, and lift it down andout.
Be careful not to wash away the spe-cial lubricant in the telescopic run-ners during cleaning.Wipe the telescopic runners with adamp cloth to clean them.
To replace the drawer lid, insert itfrom beneath into the holders, andpush it back until it clicks into place.
Inserting the fruit and vegetable drawer
Push the runners back in completelyand then place the drawers on them.
Push the drawer into the applianceuntil it clicks into position.

Adjusting the interior fittings
42
Moving the carbon filter
The carbon filter with KKF-FF holder(Active AirClean) is available as an op-tional accessory (see “Accessories -Optional accessories”).
When you are storing very strong-smelling food (e.g., cheese):
– Place the holder with the carbon fil-ters on the adjustable shelf where thisfood is being kept.
– Change the carbon filters sooner ifnecessary.
– Use additional carbon filters (withholders) in the appliance (see “Acces-sories – Optional accessories”).
The holder for the carbon filters sits onthe protective strip at the back of theadjustable shelf.
To move the carbon filter, pull theholder up and off the protective strip.
Refit it on the protective strip of theadjustable shelf you wish to use it on.

Defrosting
43
WARNING! DANGER of injuryand damage!Do not use any mechanical or othertypes of aids which are not recom-mended by the manufacturer to ac-celerate the defrosting process.
Refrigerator section and PerfectFresh zoneThe refrigerator section and the Perfect-Fresh zone defrost automatically.
Condensate and ice can build up on theback wall of the refrigerator section andthe PerfectFresh zone while the com-pressor is running. You do not need toremove this, as it will defrost and evap-orate automatically with the warmthgenerated by the compressor.
The condensate drains through a chan-nel and drain pipe into an evaporationsystem at the back of the appliance.
The condensate must always beable to drain properly.Keep the condensate channel anddrain hole clean to enable this.

Cleaning and care
44
WARNING! DANGER of electricshock!Unplug the appliance or trip the cir-cuit breaker.
WARNING! Fire hazard!Do not damage the coolantpipework.
Make sure that water cannot get intothe electronic unit or into the lightingor the metal discs (contacts) in theleft-hand shelf supports.
Cleaning water must not get into thedrain hole.
Do not use a steam cleaner. Steamfrom a steam cleaning appliancecould reach the electrical compo-nents and cause a short circuit.
The data plate located inside the ap-pliance must not be removed. It con-tains information which is required inthe event of a service call.
Cleaning agents
Cleaning and conditioning agentsused inside the refrigerator must befood-safe.
To avoid damaging the surfaces of yourappliance, do not use the following:
– cleaning agents containing soda, am-monia, acid, or chloride,
– cleaning agents containing lime scaleremover,
– abrasive cleaning agents, such asscouring powder, scouring liquid, orpumice stones,
– cleaning agents containing solvents,
– stainless steel cleaning agents,
– dishwasher cleaner,
– oven sprays,
– glass cleaners
– hard, abrasive sponges and brushes,such as pot scrubbers,
– eraser sponges,
– sharp metal scrapers.
We recommend treating the stainlesssteel surfaces of the refrigerator withthe Miele stainless steel conditioningagent (see “Optional accessories”).This product contains substances thatare gentle to stainless steel surfacesand, unlike stainless steel cleaners, itdoes not contain polishing agents.Soiling is gently removed and eachtime the Miele stainless steel condi-tioning agent is used, it forms a pro-tective film against dirt and water.

Cleaning and care
45
We recommend using lukewarm waterand a little liquid dish soap for cleaning.
The following pages contain importantinformation on cleaning.
Preparing the appliance forcleaning Switch the appliance off.
The display goes out and cooling isturned off.If this does not happen, then the safetylock is still activated (see “Selecting ad-ditional settings - Activating/deactivat-ing the lock”).
Unplug the appliance or trip the cir-cuit breaker.
Take any food out of the applianceand store it in a cool place.
Remove the door shelf/bottle shelffrom the door.
Remove the PerfectFresh zone draw-ers and the lid (see “Adjusting the in-terior fittings – PerfectFresh zonedrawers”).
Remove the glass plate from the di-vider panel.
Take out all other removable parts forcleaning.

Cleaning and care
46
Adjustable shelf/Adjustable shelfwith lighting
The stainless steel trim with LEDlighting and stainless steel trims onthe shelves are not suitable for dish-washers!
The stainless steel trim with LEDlighting must not be placed in waterfor cleaning!
Proceed as follows to remove the stain-less steel trim with LED lighting or thestainless steel trim and rear protectivestrip:
Place the shelf on a soft surface (e.g.,a dish towel) with the top side facingdownward.
Stainless steel trim with LED light-ingWarning! Ensure that you alwaysloosen the side on which the con-tacts (metal discs) for the LED light-ing are not located first.
Grasp the plastic surround on theleft-hand side of the stainless steeltrim at its rearmost point.
1. Pull the plastic surround from theshelf and
2. pull the trim off at the same time.Then do the same on the oppositeside.
3. Then pull the protective strip off.
After cleaning, reattach the stainlesssteel trim/protective strip by followingthe same procedure in reverse.

Cleaning and care
47
Door shelves and bottle shelves
The stainless steel trim on the bottleand door shelves is not suitable fordishwashers!
To remove the stainless steel trim, pro-ceed as follows:
Place the door/bottle shelf with thefront side on the work surface.
Take hold of one end of the trim andpull it off the shelf. The entire sectionof stainless steel trim will now comeoff the shelf.
After cleaning, reattach the stainlesssteel trim to the shelf by following thesame procedure in reverse.
Cleaning the interior and ac-cessories
Clean the appliance at least once amonth.
Clean up any spills, stains or food im-mediately. Do not allow them to dryand stick to the appliance.
Clean the interior with a cleansponge, lukewarm water, and a littleliquid dish soap.
After cleaning, wipe with clean waterand dry with a soft cloth.
The stainless steel trim on the bottleand door shelves is not suitable fordishwashers.Remove the stainless steel trim andstrips before putting the shelves inthe dishwasher.
The following parts cannot be cleanedin a dishwasher:
– the stainless steel trim or strips
– the protective strips at the back ofthe adjustable shelves
– all compartments and the compart-ment lid (depending on model)
– the bottle rack
Clean these parts by hand.

Cleaning and care
48
The following parts can be cleaned inthe dishwasher:
The maximum temperature of thedishwasher program selected mustnot exceed 131°F (55°C)!
Contact with natural dyes from car-rots, tomatoes, and ketchup, etc. maydiscolor the plastic parts in the dish-washer.This discoloration does not affect thestability of the parts.
– Bottle holder, butter dish, egg tray(depending on model)
– Bottle shelves and door shelves onthe inside of the door (without stain-less steel trim)
– Adjustable shelves (with trim andstrips removed)
Clean the condensate channel anddrain opening frequently using a cot-ton swab or similar item to ensurethat condensate can drain awayfreely.
To do this, remove the PerfectFreshzone drawers.
Be careful not to wash out the spe-cial lubricant in the telescopic run-ners during cleaning.
The PerfectFresh zone drawers are ontelescopic runners. Wipe the tele-scopic runners with a damp cloth toclean them.
Leave the door open to air the appli-ance for a short while and to preventodors developing.

Cleaning and care
49
Cleaning the door seal
If the door seal is damaged orhas come out of the groove, the doorwill not close properly and this willaffect cooling.Condensation will form in the insideand this can cause a build-up of ice.Do not damage the door seal, andmake sure that it does not come outof its groove.
Do not use any grease or oil on thedoor seal as this will cause the sealto deteriorate and become porousover time.
The door seal should be cleaned reg-ularly with clean water and thenwiped thoroughly dry with a cloth.
Cleaning the ventilation grilles
A build-up of dust will increase the en-ergy consumption of the appliance.
The air vents should be cleaned on aregular basis with a brush or vacuumcleaner (you could use a Miele vac-uum cleaner dusting brush, for exam-ple).
Starting up the appliance aftercleaning Replace all shelves and accessories
in the appliance.
Reconnect to the power supply andswitch the appliance back on.
Switch on the automatic SuperCoolfunction for a while so that the refrig-erator section can cool down quickly.
Put the food back in the applianceand close the door.

Cleaning and care
50
Replacing the carbon filters
The carbon filter with KKF-FF holder(Active AirClean) is available as an op-tional accessory (see “Guide to theappliance” section “Optional acces-sories”).
Replace the carbon filters in the holderaround every 6 months.
Replacement KKF-RF carbon filterscan be obtained from the Miele Tech-nical Service, from your dealer, or fromMiele's website.
Tip: The carbon filter holder is dish-washer safe.
Pull the carbon filter holder upward toremove it from the adjustable shelf.
When in position, the carbon filtersmust not touch the back wall of themachine, as the moisture couldcause them to stick to it.Insert the new carbon filters deepenough in the holder to ensure thatthey do not protrude over the edgeof the holder.
Remove both carbon filters and placethe new filters with the surroundingedge pointing downward in theholder.
Place the holder in the middle of theraised edge at the back of any of theadjustable shelves, so that it clicksinto position.

Frequently Asked Questions
51
With the help of the following guide minor faults in the performance of the ma-chine, some of which may result from incorrect operation, can be remedied with-out contacting the Service Department.
This guide may help you to find the reason for the fault, and how to correct it.
To prevent cold from escaping, open the appliance doors as little as possible un-til the fault has been corrected.
Problem Possible cause and solution
The appliance is notgetting cold, the interiorlighting does not comeon when the door isopened, and the displayis not lit up.
The appliance is not switched on and the power sup-ply symbol is lit up in the display. Switch the appliance on.
The plug is not properly plugged into the electricaloutlet. Insert the plug correctly into the socket. The power
supply symbol appears in the display when theappliance is switched off.
Check whether the fuse has tripped. There could be afault with the appliance, the household electricalwiring or another electrical appliance. Contact a qualified electrician or Miele Technical
Service for assistance.
The symbol has lit upon the display and theappliance is not coolingalthough the controlsand the interior lightingare working.
Demo mode is on. This allows the appliance to bepresented in the showroom without the cooling sys-tem being switched on. Do not activate this setting fordomestic use. Turn off demo mode (see “Information for dealers -
Demo mode”).

Frequently Asked Questions
52
Problem Possible cause and solution
The compressor runscontinuously.
This is not a fault. To save energy, the compressorruns at a lower speed, but for longer, when less cool-ing is required. In this way, the running time of thecompressor is extended.
The compressor is turn-ing on more frequentlyand for longer periodsof time; the temperaturein the appliance is toolow.
The ventilation grille is obstructed or dusty. Do not block the ventilation grille. Clean the ventilation grille on a regular basis to re-
move any dust.The door has been opened too frequently, or a largeamount of food has just been put in at once. Only open the door when necessary and for as
short a time as possible.
After a while, the temperature will return to normal byitself.The ambient temperature is too high. The higher theambient temperature, the longer the compressor hasto run. See “installation location” in the “Installation” sec-
tion.The temperature setting is too low. Correct the temperature setting.
The Automatic SuperCool function is still turned on. To save energy, you can turn off Automatic Super-
Cool early yourself.
The compressor comeson less and less oftenand for shorter periodsof time. The tempera-ture in the appliancerises.
Not a fault. The temperature setting is too high. Correct the temperature setting. Check the temperature again after 24 hours.

Frequently Asked Questions
53
Problem Possible cause and solution
An LED indicator light isflashing at the back ofthe refrigerator at thebottom near the com-pressor (depending onmodel). The electronic unit forthe compressor isequipped with an oper-ation and fault diagno-sis LED indicator light.
The indicator light flashes several times every 5 sec-onds. A fault has occurred. Contact the Technical Service department.
The indicator light flashes regularly every 15 sec-onds. Not a fault. This flashing is normal.
The door seal is dam-aged and needs to bereplaced.
No tools are required to change the door seal. Contact Miele Service.
Ice or condensation hasbuilt up inside the appli-ance.
The door seal has come out of its groove. Check that the door seal is correctly positioned in
the groove.The door seal is damaged. Check whether the door seal is damaged.

Frequently Asked Questions
54
Messages in the display
Message Possible cause and solution
The alarm symbol lights up in the displayand an alarm tonesounds.
The door alarm has been activated. Close the appliance door. The alarm symbol
will go out, and the alarm tone will stop.
The symbol lights upin the display. You can-not switch the appli-ance off.
The safety lock has been activated. Completely deactivate the safety lock (see “Select-
ing additional settings”, section “Activating and de-activating the safety lock”).
lights up in the dis-play.
The Replace carbon filter reminder setting has beenactivated. This is the reminder to change the filter (Ac-tive AirClean). Replace the carbon filter in the holder (see “Clean-
ing and maintenance - Replacing the filter”). Reset the counter (see “Selecting further settings –
Carbon filter replacement indicator ”).
“F0 to F9” appears inthe display.
There is a fault. Contact Miele Technical Service.

Frequently Asked Questions
55
The interior lighting is not working.
Problem Possible cause and solution
The interior lighting isnot working.
The appliance has not been turned on. Turn the appliance on.
Sabbath mode is on: The display is black and the ap-pliance is cooling. Touch the settings sensor buttons to exit Sabbath
mode.
The temperature will then appear on the display andthe interior lighting will come on (see “Selecting fur-ther settings” – “Switching Sabbath mode on/off”).To avoid overheating, the interior lighting switches it-self off automatically after approx. 15 minutes if theappliance door is left open. If this is not the cause,there is a fault.
Risk of electric shock!There are live electrical components under thelighting cover.The LED lighting may only be repaired or replacedby Technical Service.
Risk of injury from LED lighting! The light inten-sity corresponds to laser beam class 1/1M.The lighting covers must not be removed or dam-aged, or be removed due to damage. This couldcause injury to your eyes.Do not look into the LED lighting (laser beam class1/1M) with optical instruments (e.g., a magnifyingglass).
Contact Technical Service.

Frequently Asked Questions
56
Problem Possible cause and solution
The LED lighting on oneof the shelves is notwork working.
The shelf is not sitting correctly in the shelf supports. Check that the shelf is positioned correctly on the
shelf supports. The shelf has metal discs (con-tacts) at the front left corner which supply powerto the LED lighting.
Push in the shelf until it clicks into position.
The metal disc is not clean and dry. Clean it with a damp cloth and dry with a lint-free
cloth.The LED lighting on the stainless steel strip is faulty.
Danger of electric shock.There are live electrical components under thelighting cover.The LED lighting may only be repaired or replacedby Miele Service.
Risk of injury from LED lighting. Light intensitycorresponds to laser beam class 1/1M.The lighting covers must not be removed or dam-aged, or be removed due to damage. This couldcause injury to your eyes.Do not look into the LED lighting (laser beam class1/1M) with optical instruments (e.g. a magnifyingglass).
Replace the shelf with LED lighting (available fromMiele Service).

Frequently Asked Questions
57
Problem Possible cause and solution
The LED lighting is notworking on any of theshelves.
Liquid has spilt onto the LED lighting on one of theshelves or the metal discs (contacts) in the left-handshelf supports. The safety switch-off mechanism has switched off theLED lighting on all the shelves. Wipe the stainless steel strip with LED lighting with
a damp cloth and dry it or let it dry outside the ap-pliance. Clean the metal discs (contacts) in theshelf support in the same way.
Ensure that the contacts are clean and dry beforereplacing the shelves with LED lighting.
Push in the shelf until it clicks into position. Close the appliance door.
When the door is opened again, the interior lightingwill come on.If this does not happen, there is a fault. Contact Miele Service.

Frequently Asked Questions
58
Other problems
Problem Possible cause and solution
There is no acousticalarm although the doorhas been open for along time.
This is not a fault. The alarm tone has been turned offin settings mode (see “Selecting additional settings -Acoustic signals”).
The external walls ofthe appliance feelwarm.
This is not a fault. The warmth created by the evapo-rator is used to prevent condensation.
The floor of the refriger-ator section is wet.
The drain hole is blocked. Clean the condensate channel and the drain hole.

Causes of noises
59
Normalnoises
Cause
Brrrrr... A humming noise is made by the motor (compressor). This noisecan get louder for brief periods when the motor switches on.
Blub, blub... A gurgling noise can be heard when the coolant circulatesthrough the pipes.
Click... Clicking sounds occur whenever the thermostat switches themotor on or off.
Crack... A cracking sound can be heard when materials expand insidethe appliance.
Please bear in mind that a certain amount of noise is unavoidable (from the com-pressor and the coolant circulating through the system).
Noises Possible cause and solution
Rattling,clinking
The appliance is uneven. Realign the appliance using a spiritlevel, by raising or lowering the screw feet underneath the appli-ance or place something underneath it.
The appliance is touching another appliance or piece of furni-ture. Move it away.
Drawers, baskets or shelves are unstable or sticking. Check allremovable items and refit them correctly.
Bottles or containers are touching each other. Separate them.
The transport cable clips are hanging loose at the back of theappliance. Remove the cable clips.

Technical Service
60
Contact in case of faultIn the event of a fault which you cannotremedy yourself, please contact yourMiele dealer or Miele Technical Service.
Contact information for Miele Techni-cal Service can be found at the end ofthis document.
Please quote the model and serial num-ber of your appliance when contactingMiele. Both pieces of information canbe found on the data plate.
You will find the data plate inside yourappliance.
WarrantyFor more information about warrantyconditions, please contact Miele Tech-nical Service.

Information for dealers
61
Demo mode The appliance can be demonstrated inthe showroom or at exhibitions in“Demo mode”. In this mode, the controlpanel and interior lighting are active butthe compressor remains off.
Turning on demo mode
Switch the appliance off using the on/off button.If this does not work, the safety lockis still activated.
The temperature shown on the displaywill go out and the power supply sym-bol will appear.
Touch and hold the button.
At the same time, briefly touch theon/off button (without letting go ofthe button!).
Keep your finger on the button un-til the symbol appears on the dis-play.
Release the button.
Demo mode is on and the symbol isilluminated on the display.

Information for dealers
62
Turning off Demo mode
The symbol is illuminated in the dis-play.
Touch the settings sensor.
All symbols available for selection willappear in the display and the symbolflashes.
Touch the sensors for setting thetemperature ( or ) repeatedly un-til the symbol flashes in the display.
Touch the OK sensor to confirm yourselection.
The 1 symbol flashes in the display(meaning: Demo mode is active) andthe symbol is illuminated.
Touch the or sensor so that thesymbol 0 appears in the display(meaning: Demo mode is inactive).
Touch the OK sensor to confirm yourselection.
The selected setting will be adoptedand the symbol will flash.
Touch the settings sensor to leave thesettings mode.Otherwise the appliance will exit thesettings mode automatically after ap-proximately one minute.
Demo mode is turned off andthe symbol disappears.

Electrical connection
63
Danger of electric shock!The appliance must only be switchedon when it has been installed in ac-cordance with the installation in-structions.Ground the appliance.The appliance must not be groundedvia a gas pipe.If in doubt, have a suitably qualifiedand experienced electrician checkthat the installation complies with rel-evant regulations.Do not install a fuse into neutral cur-rent or grounding electrical circuit.Do not use extension cords or un-grounded (two prong) adapters.Do not use a frayed or damagedpower cord.
Danger of electric shock!For protection against electric shockthis appliance is equipped with apole-free plug which is protectedagainst reverse polarity. The plugmust be grounded in the usual way.Do not remove the round groundingconnector pin from the plug.Use only a grounded plug adapter.
Wait for 1 hour after installation beforeplugging the appliance into the powersupply. This allows coolant and refriger-ator oil to settle in accordance with reg-ulations.
Ensure that the voltage of the mainpower supply corresponds with theconnection voltage of the appliance. Apower supply of 110 - 120 V, 60 Hz and15 Amp (20 Amp for side-by-side instal-lation) with a NEMA 5-15 molded plug,which is protected by a main switch ora fuse, is required to operate the appli-ance.
The manufacturer recommends operat-ing the appliance on a separate circuitto avoid overloading the electrical cir-cuit.
All relevant legal electrical, fire andbuilding regulations must be observedwhen installing the socket and/or theappliance.
In certain countries appliances are re-quired to be connected to the electricalsupply via a wall-mounted ON/OFFswitch.
To avoid the risk of fire, electric shockor other injuries installation and connec-tion of the appliance must be carriedout by a suitably qualified electrician inaccordance with all relevant local andnational regulations and standards, in-cluding fire prevention.

Electrical connection
64
The outlet must be easily accessible inan emergency so that the appliance canbe quickly disconnected from the elec-trical supply in case of an emergency.
The socket must be located so that theupper edge is a maximum82" (2100 mm) distance from the upperedge of the base of the kitchen cabinet.
If the outlet is no longer accessibleonce the appliance has been installed,an all-pole disconnect device with acontact opening of at least 1/8" (3 mm)must be present on site. The discon-nect device may be circuit breaker, afuse, or a contactor (compliant with lo-cal regulations).
The plug and power cord must notcome into contact with the back of theappliance as vibrations can cause dam-age to these components. This, in turn,could result in a short circuit.
Do not plug in other devices behind thisappliance.
Do not connect the appliance to an in-verter such as those used with an au-tonomous energy source e.g. solarpower. When switched on, peak loadsin the system can cause the safetyswitch-off mechanism to be triggered.This can damage the electronic unit. The appliance must not be used withso-called energy-saving devices ei-ther. These reduce the amount of en-ergy supplied to the appliance, causingit to overheat.
If the power cord needs to be replaced,this must be done by a qualified techni-cian.

Installation
65
Side-by-sideThe KS 37472 iD appliance has twofoamed-in side-wall heaters, enabling itto be installed side-by-side with allother appliances. Each appliance mustbe installed in its own housing unit.
Please contact your dealer for specificinformation about which combinationswill work with your appliance.
WARNING! This appliance mustbe built in, otherwise it could tipover!Install the appliance in accordancewith the installation instructions.
Fire hazard and risk of damage!The appliance must not be installedunderneath a cooktop.
Installation locationThis appliance should be installed in adry, well-ventilated room.
When deciding where to install your ap-pliance, please bear in mind that theenergy consumption will increase if in-stalled near to a heater, a cooker, orother appliance that gives off heat. Di-rect sunlight should also be avoided.The higher the room temperature, thelonger the compressor has to run andthe higher the energy consumption is.
When installing the appliance, pleasenote:
– The electrical socket must be easilyaccessible in an emergency and notconcealed behind the appliance.
– The plug and power cord must nottouch the back of the appliance asthey could be damaged by vibrationsfrom the appliance.
– Do not plug other appliances intoelectrical sockets behind this appli-ance.
Risk of damage!In environments with high humid-ity, condensation may appear on theexternal surfaces of the appliance.This condensate can cause corrosionon external appliance panels.To prevent this, it is advisable to in-stall the appliance with sufficientventilation in a dry and/or air-condi-tioned room.After installation, please make surethat the appliance door closes prop-erly, that the specified ventilationgaps are adhered to, and that theappliance is installed in accordancewith these installation instructions.

Installation
66
Climate class
The appliance is designed for use withina certain climate range (ambient tem-peratures) and should not be used out-side this range. The climate range of theappliance is stated on the data plate in-side the appliance.
Climateclass
Room temperature
SN 50°F to 90°F / 10°C to 32°C
N 60°F to 90°F / 16°C to 32°C
ST 60°F to 100°F / 16°C to38°C
T 60°F to 109°F / 16°C to43°C
Operating in a room which is too coldwill cause the compressor to turn off fortoo long, causing the internal tempera-ture in the appliance to rise, resulting indamage.
Ventilation
WARNING! Fire hazard!Operation of the appliance is limited.Keep the ventilation slits free fromobstruction.
If the ventilation slits are not keptfree and unobstructed the compres-sor will switch on more often and willrun for longer.This can cause higher energy con-sumption and to an increased com-pressor operating temperature,which can result in damage to thecompressor.Do not block the ventilation slits.
The air at the back wall of the appliancewarms up. Therefore the cabinet mustbe constructed in such a way that en-sures unhindered ventilation (see “Built-in dimensions”).
– The air influx enters via the toe-kick and the air outlet is at the topat the rear of the cabinet.
– To ensure ventilation an air channel ofa minimum 9/16" (40 mm) depthmust be provided at the back of theappliance.
– The ventilation slits in the toe-kick, inthe cabinet and under the top of thecabinet must provide a total passagevolume of at least 31 square inchesto allow the warm air to dissipateunimpeded.

Installation
67
If you wish to fit a grille in the ventila-tion openings, the ventilation open-ings must be larger than 31 squareinches. The passage volume of 31square inches is the total area of theopening slits in the grille.
– Important! The larger the ventilationslits, the more economically the ap-pliance will work.
The ventilation slits must not beblocked or obstructed in any way.Clean the ventilation slits on a regu-lar basis.
Top ventilation gap
The ventilation gap at the top of the ap-pliance can be constructed in differentways:
a Directly above the appliance with aventilation grille (free airflow of atleast 31 sq inches (200 cm²))
b Between the kitchen cabinetry andthe ceiling
c In a suspended ceiling
Lower ventilation slit
The appliance can be ventilated via thecabinet plinth with the ventilation grillesupplied or with a minimum ventilationopening of 31 square inches cross-sec-tion area. When using the grille sup-plied, please proceed as follows:
Cut an opening in plinth as shownin the diagram.
Place ventilation grille in the open-ing.
Push snap fasteners into the venti-lation grille from behind until thehooks touch the plinth.
Reinstall the plinth with the ventilationgrille.

Installation
68
Before installing the appliance Before installation, remove the bag of
installation and other accessoriesfrom the appliance and remove theprofile strip from the outer appliancedoor.
Do not remove the following fromthe back of the appliance
– the spacers (depending on themodel). They ensure the distance re-quired between the back of the appli-ance and the wall.
– the bags located in the metal grille(heat exchanger, depending onmodel).These are required for the functioningof the appliance. Their contents arenot toxic or hazardous.
Remove the cable clips from the backof the appliance.
Remove red transport safety de-vice (depending on model) and usethe stopper supplied to cover thehole .

Installation
69
Wall spacer at the back
At a furniture depth of less than21 3/4'' (553 mm), you can remove thewall spacer from the back of the appli-ance so that you can push the appli-ance right into the niche.
Removing the wall spacer can in-crease energy consumption as thereis then a smaller ventilation area.
Loosen the screw and remove thewall spacer.

Installation dimensions
70
* The declared energy consumption was achieved with a niche depth of22 1/16“ (560 mm). The appliance is fully capable of functioning at a niche depthof 21 5/8” (550 mm), but will consume slightly more energy.
If the appliance is suitable for installation in a niche, ensure before installationthat it has precisely the correct dimensions. The specified ventilation grille dimen-sions must be observed to ensure that the appliance functions correctly.
Niche height A
KS 37472 iD 69 3/4"-70 3/8" (1,772-1,788 mm)

Limiting the opening angle of the appliance door
71
The door hinges are set to enable theappliance door to be opened wide.
However, if the opening angle of thedoor needs to be limited for any reason,the hinge can be adjusted to accommo-date this.
If, for example, the appliance door hitsan adjacent wall when it is opened, youshould limit the opening angle of theappliance door to 90°.
The locking pins for limiting the dooropening must be fitted before the ap-pliance is installed.
Insert the locking pins supplied forlimiting the door opening into thehinges from above.
The door opening angle is now limitedto approx. 90°.

Changing the door hinging
72
Always change the door hinging withthe assistance of another person.
The appliance is supplied with right-hand hinging. If left-hand hinging is re-quired, the hinges must be changed:
To change the door hinging, you willneed the following tools:
Open the appliance door.
Remove the adjustable shelves/bottleshelf from the appliance door.
Lift off the covers: , , and .
Slightly loosen the hinge screws: and .
Push the door outward and take itoff its hinges.

Changing the door hinging
73
Undo the screws completely.
Fit the bracket on the oppositeside and attach the screws loosely.
Undo the screws completely andloosely screw them in on the oppositeside.
If you have inserted pins into the hingesto limit the door’s opening angle:
Remove the locking pins from the topof the hinges.
Removing the soft-closemechanism
Warning! The soft-close mecha-nism folds in when dismantled!Danger of injury!
Place the door on a stable surfacewith the front facing down.
Remove the soft-close mechanism from the ball joint.
Unscrew the mount and pull thesoft-close mechanism toward youand off.

Changing the door hinging
74
Using a screwdriver, remove the balljoint and screw it into the adjacenthole.
Now turn over the appliance door sothat the front is facing up (hinges re-main open).
Danger of injury!Do not close the hinges.
Remove the screws .
Replace the hinges in their diagonallyopposite corners .
Fastening the soft-close mech-anism Now turn over the appliance door so
that the outer side faces downward.
Screw the mount onto the hingeand firmly tighten.
Open out the soft-close mecha-nism , and hook it onto the balljoint.

Changing the door hinging
75
Hang the appliance door onto thepre-fitted screws and , and se-curely tighten the screws and .
Replace the covers: , , and .
Refit the locking pins into the top ofthe hinges to prevent the door fromopening too far.

Building in the appliance
76
Two people are required to install theappliance.
Install the appliance in a stable, solidhousing unit, positioned on an evenand level floor.
Secure the cabinetry against tipping.
Use a spirit level to align the appli-ance. The cabinet corners must be at90° angles to each other, otherwisethe cabinet door will not sit straighton all 4 corners.
The required ventilation gaps must beprovided (see “Installation information– Ventilation” and “Installation dimen-sions”).
To install the appliance, you will needthe following tools:

Building in the appliance
77
Parts required for installation:
All installation parts are number-coded.This coding is also used in the installa-tion instructions.
– For building the appliance into theniche:
* These parts are only supplied with ap-pliances with a niche height of55 1/8" (140 cm) or more.
** Number depends on niche height;maximum number applies to appliancesrequiring a niche height of55 1/8" (140 cm) or more (also containsadditional installation parts for fittinglarge or divided cabinet doors).
– For installing the cabinet door:
8 4
** Number depends on niche height.Also contains additional installationparts for fitting large or divided cabinetdoors.
All installation instructions given arefor a right-hand hinged appliance. Ifyou have converted the appliance toleft-hand hinging, you will need toadapt these instructions accordingly.

Building in the appliance
78
Preparing the appliance Position the appliance directly in front
of the cabinet niche.
Push the filler strip lugs into theholders from the front.
Use the Allen key to screw the fix-ing brackets into the pre-drilledholes in the appliance door.
Screw a second pair of fixing brack-ets into the handle area of thedoor. Use the pre-drilled holes in theappliance door.
Push the appliance two-thirds of theway into the building-in niche. Takecare not to trap the power cord whenpushing the appliance into its niche!
Tip: Tie a piece of string to the plug to“lengthen” the power cord; this will helpyou to push the appliance into position.Pull the power cord through the cabinetby the other end of the string so thatthe appliance can be connected to thepower supply easily after installation.

Building in the appliance
79
With 5/8" (16 mm) thick unit wallsonly:
Clip the spacers and onto theright of the hinges.
Open the appliance door. Remove the cover .
Screw the fixing plate loosely intothe top left of the appliance using thescrews . So that you can adjust theposition of this part, do not tightenthe screws yet.
Push the contact component ontothe fixing bracket .
Screw the fixing bracket looselyinto the bottom of the appliance us-ing the screws . So that you canadjust the position of this part, do nottighten the screws yet.

Building in the appliance
80
Carefully remove the protective filmfrom the profile strip .
Stick the profile strip onto the sideof the appliance on which the doorwill open, flush with the front.
1. Align the profile strip with the bottomedge of the top fixing bracket.
2. Stick it down along its entire length.
Building in the appliance
If the appliance is pushed too far intothe niche, the doors may not closeproperly once the cabinet door hasbeen fitted. This can cause ice tobuild up and condensate to accumu-late, and cause the appliance to mal-function. These issues can all lead toincreased energy consumption.Push the appliance into the building-in niche, making sure a gap of1 5/8" (42 mm) is maintained allaround between the appliance cas-ing and the front of the cabinet sidewalls.

Building in the appliance
81
Now push the appliance into theniche until all fixing brackets at thetop and bottom are touching the frontedge of the cabinet side wall.
This ensures a distance of1 5/8" (42 mm) to the front edges ofthe cabinet side walls all the wayround.
– 5/8" (16 mm) thick walls:The spacers should touch the frontedge of the cabinet side walls at thetop and bottom.
– 3/4" (19 mm) thick walls:The front edges of the top and bot-tom hinges should be flush with thefront edge of the cabinet side wall.
Important for cabinetry with doorfittings (e.g., knobs, raised seals,etc.): The dimensions of these must betaken into account to ensure there is agap of 1 5/8" (42 mm) all the wayround.
Pull the appliance forward by the ap-propriate dimension.
Check again to make sure there is agap of 1 5/8" (42 mm) to the frontedges of the door fittings all the wayround.
Tip: If possible, remove the door fittingsand push the appliance into the nicheuntil all fixing brackets at the top andbottom are touching the front edge ofthe cabinet unit side wall.
Align the appliance on both sides viathe adjustable feet using the wrenchsupplied, so that it stands upright.

Building in the appliance
82
Securing the appliance in theniche
Push the appliance onto the cabinetwall on the hinge side.
Screw the particle board screws through the hinge plates at the topand bottom to secure the applianceto the housing unit.
Push the loose securing bracketagainst the cabinet wall.
Fix the securing bracket to thecabinet wall with the screw . Pre-drill the hole in the cabinet wall if nec-essary.
Fix the securing bracket to thecabinet wall with the screws . Pre-drill the holes in the cabinet wall ifnecessary.Warning! The appliance must not pullback into the unit. Push the protrud-ing bracket toward the cabinet wallusing your thumb while tightening thescrews.
Re-tighten screws and .

Building in the appliance
83
Snap off any protruding ends fromthe securing bracket. They are nolonger required and can be disposedof.
Place the covers and on the se-curing bracket.
Only for an appliance with a nicheheight greater than 55" (140 cm)
To give the appliance additional securityin the niche, push the batons suppliedbetween the appliance and the cabinetbase:
First secure the handle to one ofthe batons .
Use the handle to push the baton intothe guide as far as it will go. Removethe handle and fit it to the other ba-ton, and push this into its guide as faras it will go.Important! Keep the handle some-where safe in case you ever need tofit the appliance into a new housingunit.
Close the appliance door.

Building in the appliance
84
Fitting the cabinet doorThe cabinet door must be at least5/8" (16 mm) and no more than3/4" (19 mm) thick.
The following gaps are required:
– The gap between the cabinet doorand the unit door above it must be atleast 1/8" (3 mm).
– The vertical gap between the cabinetdoors should be approximately1/8" (3 mm). The exact value will de-pend on the radius of the edge of thecabinet door.
If fitted in a run of units, make sure thatthe top edge of the cabinet door is atthe same height as neighboring unitdoors.
The cabinet door must be fitted cor-rectly and not under tension.
Fitted cabinet doors that exceed thepermissible weight can cause damageto the hinges. This can cause subse-quent functional problems.
Before installing the cabinet door, en-sure that the weight of the door doesnot exceed the maximum permittedweight:
Appliance Maximum weightof cabinet door in
lb (kg)
KS 37472 iD 57 (26)
An installation set or an extra pair ofsecuring brackets is available fromMiele Technical Service or from spe-cialist retailers for the installation oflarge or divided cabinet doors.

Building in the appliance
85
The distance between the appliancedoor and the mounting frame is set to5/16" (8 mm) at the factory. Checkthis distance and adjust it if neces-sary.
Push the installation aids to theheight of the cabinet door. The lowercontact edge X of the installation aidsmust be at the same height as theupper edge of the cabinet door to befitted ( symbol).
Tip: Push up the installation aids to-gether with the cabinet front until theyare at the same height as the neighbor-ing unit doors.
Unscrew the nuts and remove themounting frame together with theinstallation aids .

Building in the appliance
86
Place the cabinet door on a stablesurface with the outer side facingdownward.
Draw a faint central line with a pencilon the inside of the cabinet door .
Hang the mounting frame with theinstallation aids on the inside of thecabinet door. Align the mountingframe centrally.
Attach the mounting frame securelyusing at least 6 short chipboardscrews . (On raised paneled doors,only use 4 screws on the edges.) Pre-drill holes into the cabinet door if nec-essary.
Pull the installation aids upward to re-move them .Turn them around and push them allthe way into the middle slots on themounting frame for safe keeping.
Fit the side cover to the mountingframe on the opposite side of thehinge.
Turn the cabinet door over and attachthe handle (if required).

Building in the appliance
87
Open the appliance door.
Hang the cabinet door on the adjust-ing bolts .
Screw the nuts loosely onto theadjusting bolts.
Close the door and check the dis-tance between the door and adjacentcabinet doors. The distance shouldbe the same.
Fitting the cabinet doors
An installation set or an extra pair ofsecuring brackets is available fromMiele Service or from specialist retail-ers for the installation of large and di-vided cabinet doors.
The distance between the appliancedoor and the mounting frame is set to5/16" (8 mm). Check this distanceand adjust it if necessary.
Push the installation aids to theheight of the cabinet: the lower con-tact edge X of the installation aidsmust be at the same height as theupper edge of the cabinet door to befitted ( symbol).

Building in the appliance
88
Tip: Push installation aids to theheight of the adjacent cabinet doorswith the cabinet front.
Unscrew nuts and remove mount-ing frame together with installationaids .
Place the cabinet door with the outerside downwards on a stable surface.
Draw a faint central line with a pencilon the inside of cabinet door .
Hang mounting frame with the in-stallation aids on the inside of thecabinet door. Align the mountingframe centrally.
Secure the mounting frame with atleast 6 short fixing plate screws .(for cassette doors use only 4 screwsat the edge). Pre-drill the holes in thecabinet door if necessary.
Pull the installation aids upwards andout .Turn the installation aids and pushthem all the way into the middle slotof the mounting frame for safe keep-ing.

Building in the appliance
89
Push side cover onto the mountingframe opposite the hinge side.
Turn the cabinet door over and attachthe handle (if required).
Open the appliance door.
Hang the cabinet doors on adjustingbolts .
Screw nuts loosely onto the ad-justing bolts.
Close the door and check the dis-tance between the door and adjacentcabinets and fixtures. The gapsshould be even.

Building in the appliance
90
Adjusting the position of thedoor
- Adjusting the sides (X)
Move the cabinet door.
- Adjusting the height (Y)
Turn the adjusting bolts with ascrewdriver.
The distance between the appliancedoor and the mounting frame is set to5/16" (8 mm). Only adjust the distancewithin the specified range.
While counterholding the adjustingbolts with a screwdriver, tightenthe nuts on the appliance doorwith a box wrench .
The filler strip must not protrude; itmust completely disappear into theniche.

Building in the appliance
91
Pre-drill fixing holes in the cabinetdoor and fasten the screws . Makesure both metal edges are flush(// symbol).
Close the appliance door and thecabinet door.
- Adjusting the depth (Z)
Loosen the screws at the top ofthe appliance door, and loosen thehexagon-headed screw at the bot-tom of the fixing bracket. By movingthe cabinet door, create a gap of1/16" (2 mm) between the cabinetdoor and the housing unit.
Tighten all the screws again.
Replace the upper cover and clickit into place.
Push up the side covers so thatthey audibly click into place.

Building in the appliance
92
The appliance is properly installed inthe niche if:
– the door closes properly
– the door does not touch the housingunit
– the seal on the top corner of the han-dle side is firmly seated
To double check place a torch in theappliance and close the door.Turn the lights out in the room. If youcan see any light shining out from thesides, double check the individual in-stallation steps.


9 Independence WayPrinceton, NJ 08540Phone:Fax:www.mieleusa.com
U.S.A.Miele, Inc.
National Headquarters
Please have the model and serial numberof your appliance available whencontacting Technical Service.
CanadaImporterMiele Limited
Headquarters and Miele Centre
800-843-7231609-419-4298
Technical Service & SupportPhone:Fax:[email protected]
161 Four Valley DriveVaughan, ON L4K 4V8www.miele.ca
800-999-1360888-586-8056
Customer Care CentrePhone:
800-565-6435905-532-2272
International HeadquartersMiele & Cie. KGCarl-Miele-Straße 2933332 GüterslohGermany

M.-Nr. 10 950 490 / 00en-US
KS 37472 iD