OpenCart - it361ksu.files.wordpress.com fileOpenCart is free open source ecommerce platform for...
12
Page 1 Introduction OpenCart is free open source ecommerce platform for online merchants. It is a module based system which allows users to easily extend the functionality for their needs. It comes with 11 modules that are quick and easy to configure like bestsellers, cart and category modules. Installation steps Before start using Opencart you have to follow the following 3 basic steps: 1. Order a web hosting (000webhost). 2. Installing and configuring the FTP client (FileZilla client). 3. Downloading opencart (version 1.5.6). Step1: Order a web hosting (000webhost) 000webhost is a free web hosting services supports PHP and MySQL. Go to http://www.000webhost.com/ and order web hosting as shown in figure 1. Choose your subdomain and OpenCart E-commerce platform Prepared by: Abeer AlDayel and Nouf AlRomaih
Transcript of OpenCart - it361ksu.files.wordpress.com fileOpenCart is free open source ecommerce platform for...
Page 1
Introduction OpenCart is free open source ecommerce platform for online merchants.
It is a module based system which allows users to easily extend the
functionality for their needs. It comes with 11 modules that are quick and
easy to configure like bestsellers, cart and category modules.
Installation steps
Before start using Opencart you have to follow the following 3 basic steps:
1. Order a web hosting (000webhost).
2. Installing and configuring the FTP client (FileZilla client).
3. Downloading opencart (version 1.5.6).
Step1: Order a web hosting (000webhost)
000webhost is a free web hosting services supports PHP and MySQL. Go to
http://www.000webhost.com/ and order web hosting as shown in figure 1. Choose your subdomain and
OpenCart
E-commerce platform
Prepared by: Abeer AlDayel and Nouf AlRomaih

OpenCart Installation
Page 2
complete the requested information.
Figure 1 choose subdomain
Step 2: Installing and configuring the FTP client (FileZilla client)
The FileZilla client (not the server) can be downloaded from http://filezilla-project.org/ . After the
FileZilla client installed, open it and connect to the web server by entering the following information the
host name, username and the password (leave the port empty) and click on Quick connect Figure 2. You
can find the information about your website from 000webhosting under the CPanel as shown in Figure
3. In the CPanel page you will find the needed information at the right side of web page as presented in
figure 4.

OpenCart Installation
Page 3
Figure 2 the connection to web server
Figure 3 .000webhost CPanel
Figure 4 website information
Page 4
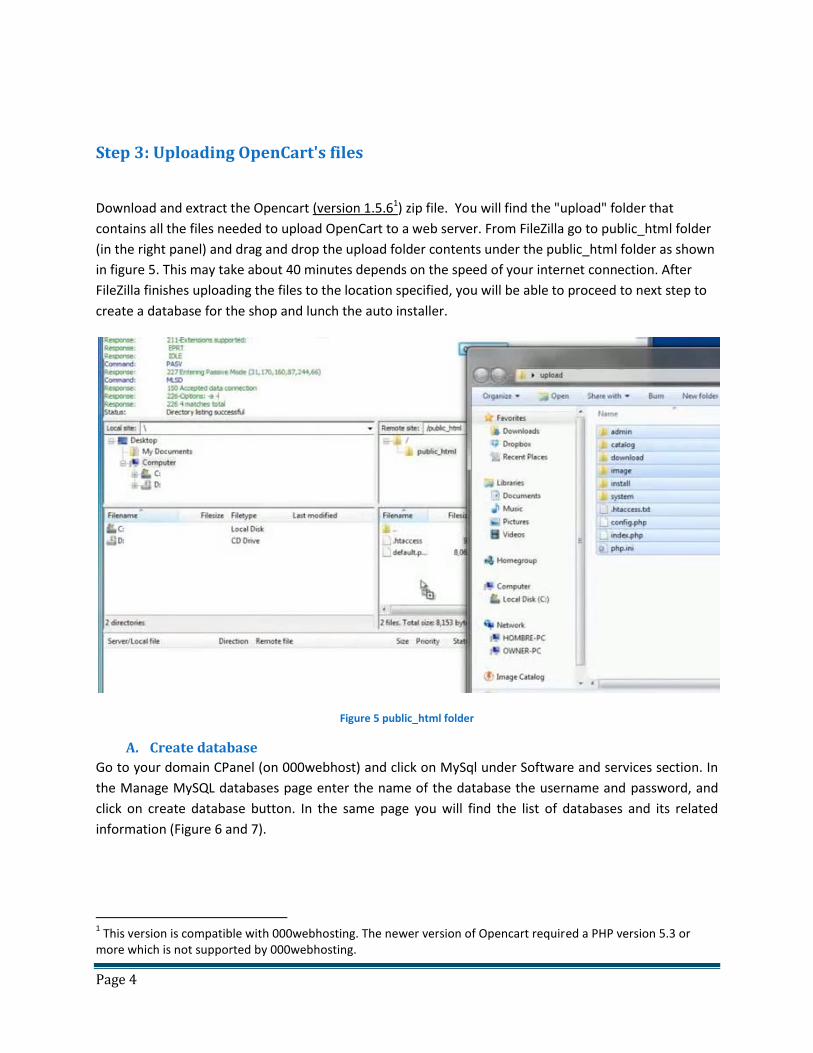
Step 3: Uploading OpenCart's files
Download and extract the Opencart (version 1.5.61) zip file. You will find the "upload" folder that
contains all the files needed to upload OpenCart to a web server. From FileZilla go to public_html folder
(in the right panel) and drag and drop the upload folder contents under the public_html folder as shown
in figure 5. This may take about 40 minutes depends on the speed of your internet connection. After
FileZilla finishes uploading the files to the location specified, you will be able to proceed to next step to
create a database for the shop and lunch the auto installer.
Figure 5 public_html folder
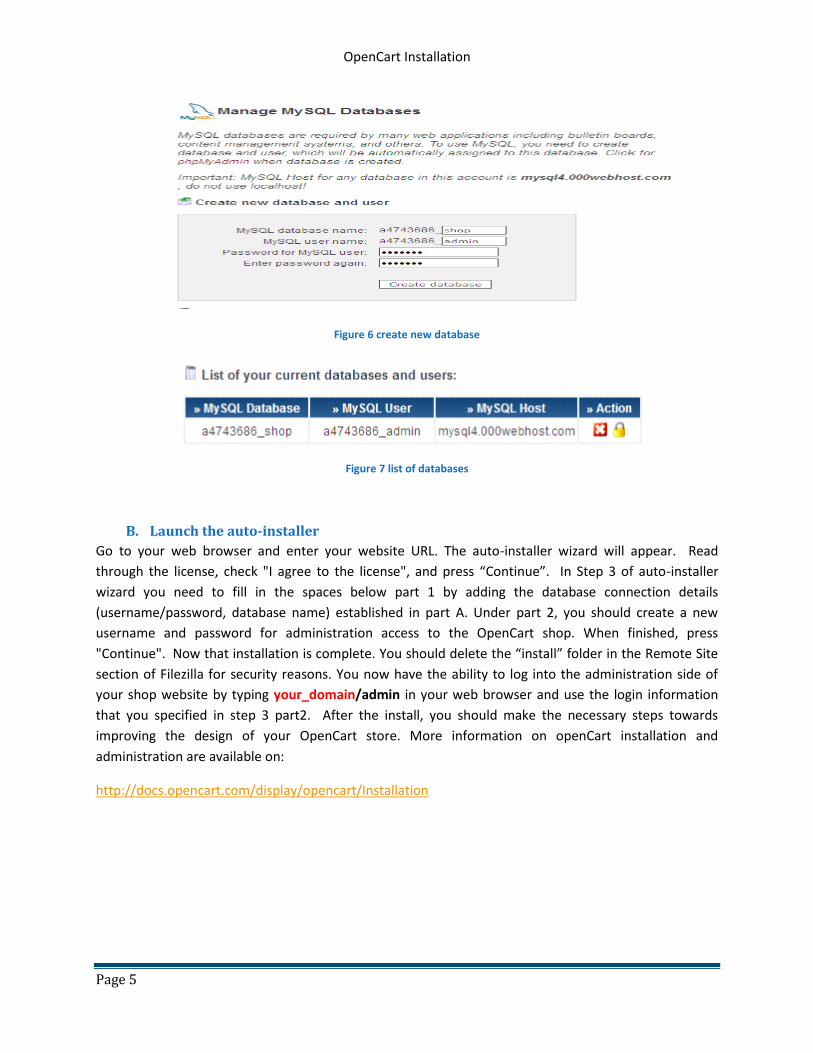
A. Create database
Go to your domain CPanel (on 000webhost) and click on MySql under Software and services section. In
the Manage MySQL databases page enter the name of the database the username and password, and
click on create database button. In the same page you will find the list of databases and its related
information (Figure 6 and 7).
1 This version is compatible with 000webhosting. The newer version of Opencart required a PHP version 5.3 or
more which is not supported by 000webhosting.
OpenCart Installation
Page 5
Figure 6 create new database
Figure 7 list of databases
B. Launch the auto-installer
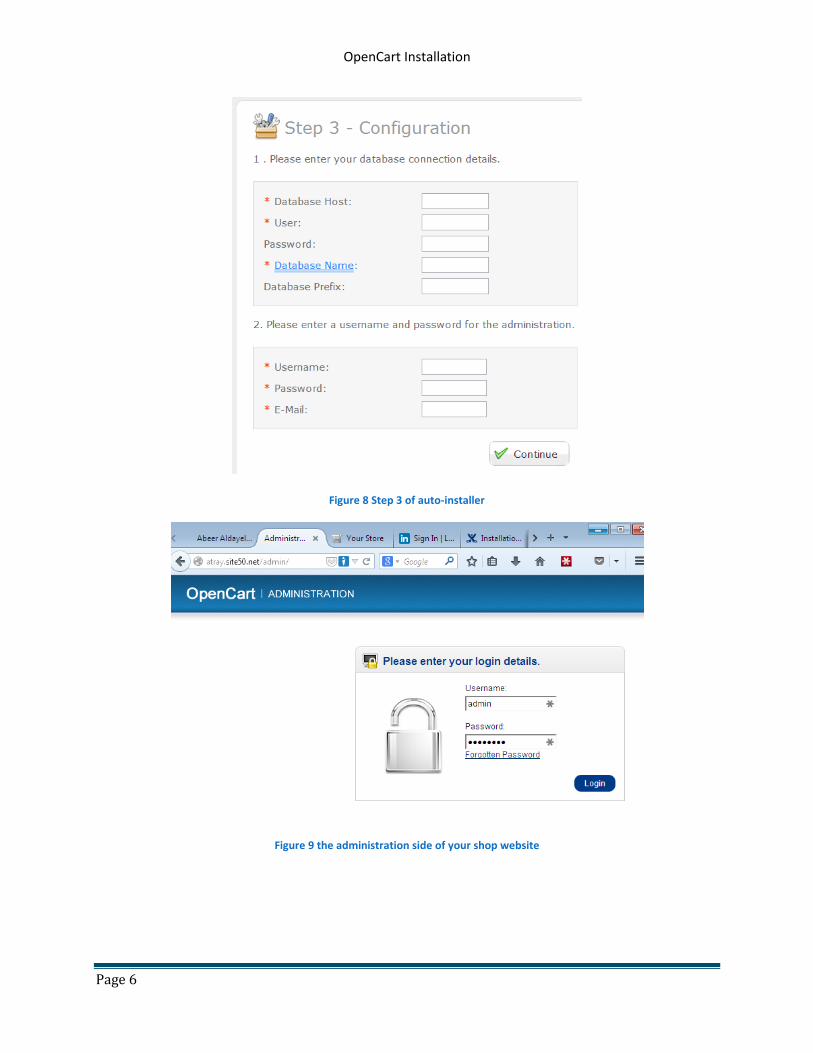
Go to your web browser and enter your website URL. The auto-installer wizard will appear. Read
through the license, check "I agree to the license", and press “Continue”. In Step 3 of auto-installer
wizard you need to fill in the spaces below part 1 by adding the database connection details
(username/password, database name) established in part A. Under part 2, you should create a new
username and password for administration access to the OpenCart shop. When finished, press
"Continue". Now that installation is complete. You should delete the “install” folder in the Remote Site
section of Filezilla for security reasons. You now have the ability to log into the administration side of
your shop website by typing your_domain/admin in your web browser and use the login information
that you specified in step 3 part2. After the install, you should make the necessary steps towards
improving the design of your OpenCart store. More information on openCart installation and
administration are available on:
http://docs.opencart.com/display/opencart/Installation
OpenCart Installation
Page 6
Figure 8 Step 3 of auto-installer
Figure 9 the administration side of your shop website

OpenCart Installation
Page 7
Getting Started
There are a number of steps required after installing OpenCart to get started selling from your online
store. An OpenCart store is comprised of a Frontend and Admin interface. This section will primarily
focus on Admin interface functions and settings. These settings should be tested on the frontend before
your site is launched. Following the steps in this guide will get your store to a ready to use state from
installation. This guide assumes that you have admin login credentials and are able to login to your
store's Admin interface as shown in Figure 9.
System Settings
The first thing a new OpenCart store requires is correct settings. Store settings include your store's logo,
name, contact details, some tax, stock and product settings, and server settings. For a full coverage of
these please see the Settings documentation page. It is recommended that you go through all these
settings to make sure they are correct for your store's requirements. This guide will only cover those
which will always need to be set for a new OpenCart store. Settings are under the System menu in your
OpenCart admin, and are unique to each store in a multistore setup.
General Settings
Most General Settings are required. Under General Settings you will need to set your store's name,
owner, address, email and phone number. These will be used for your store's contact page and order
invoices Figure 10.
Figure 10 the administration side of your shop website
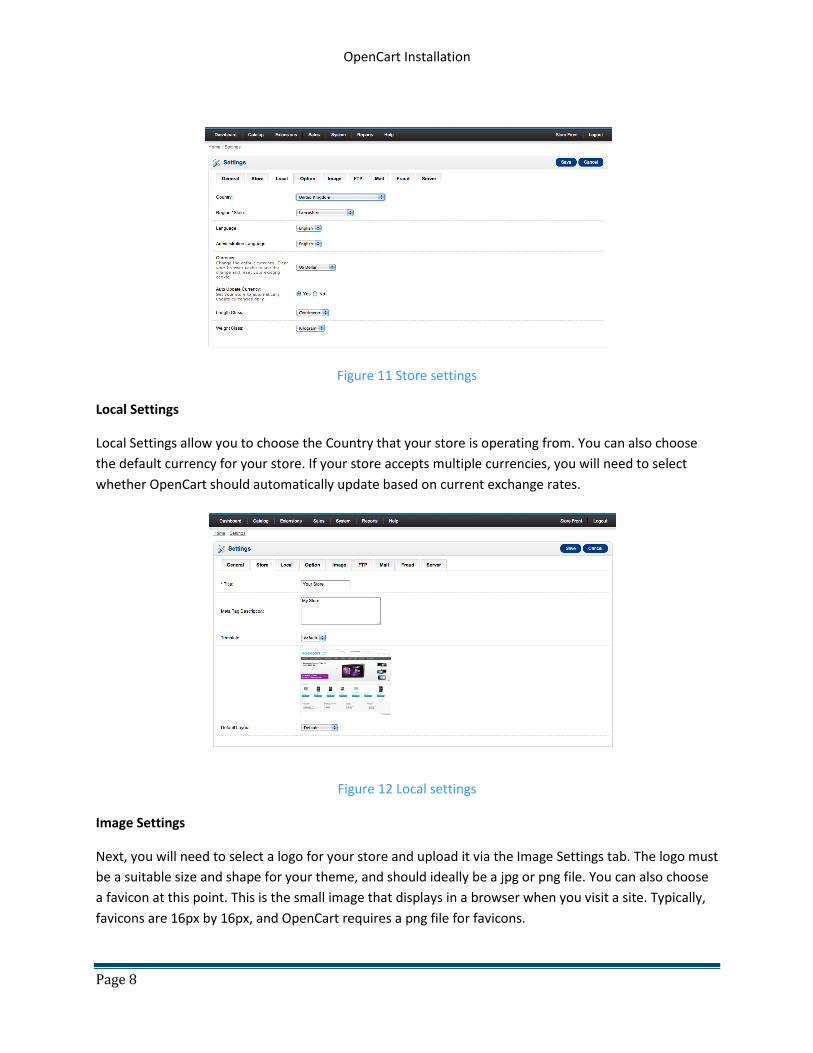
Store Settings
Store Settings need to be changed from the default settings of "Your Store", etc., to your actual Store
Name and a description of your store for search engines Figure 11.
OpenCart Installation
Page 8
Figure 11 Store settings
Local Settings
Local Settings allow you to choose the Country that your store is operating from. You can also choose
the default currency for your store. If your store accepts multiple currencies, you will need to select
whether OpenCart should automatically update based on current exchange rates.
Figure 12 Local settings
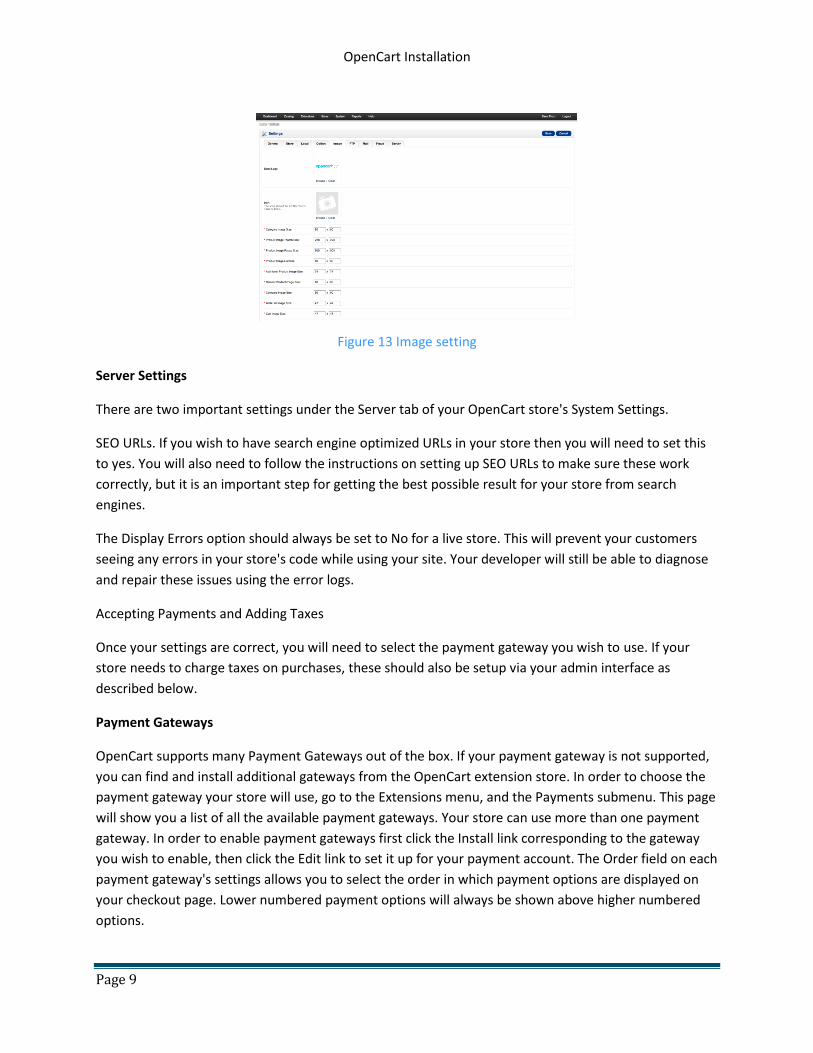
Image Settings
Next, you will need to select a logo for your store and upload it via the Image Settings tab. The logo must
be a suitable size and shape for your theme, and should ideally be a jpg or png file. You can also choose
a favicon at this point. This is the small image that displays in a browser when you visit a site. Typically,
favicons are 16px by 16px, and OpenCart requires a png file for favicons.
OpenCart Installation
Page 9
Figure 13 Image setting
Server Settings
There are two important settings under the Server tab of your OpenCart store's System Settings.
SEO URLs. If you wish to have search engine optimized URLs in your store then you will need to set this
to yes. You will also need to follow the instructions on setting up SEO URLs to make sure these work
correctly, but it is an important step for getting the best possible result for your store from search
engines.
The Display Errors option should always be set to No for a live store. This will prevent your customers
seeing any errors in your store's code while using your site. Your developer will still be able to diagnose
and repair these issues using the error logs.
Accepting Payments and Adding Taxes
Once your settings are correct, you will need to select the payment gateway you wish to use. If your
store needs to charge taxes on purchases, these should also be setup via your admin interface as
described below.
Payment Gateways
OpenCart supports many Payment Gateways out of the box. If your payment gateway is not supported,
you can find and install additional gateways from the OpenCart extension store. In order to choose the
payment gateway your store will use, go to the Extensions menu, and the Payments submenu. This page
will show you a list of all the available payment gateways. Your store can use more than one payment
gateway. In order to enable payment gateways first click the Install link corresponding to the gateway
you wish to enable, then click the Edit link to set it up for your payment account. The Order field on each
payment gateway's settings allows you to select the order in which payment options are displayed on
your checkout page. Lower numbered payment options will always be shown above higher numbered
options.
OpenCart Installation
Page 10
Figure 14 Image setting
Taxes
OpenCart offers a number of different Tax options by default. Taxes are location dependent, so you can
charge different tax rates to customers in different geographical locations, according to local tax rules.
Tax rates are set up under System > Localisation > Taxes > Tax Rates. If your required tax rate is not
already present, you will need to create a new tax rate and add it. For example, the Tax Rate applicable
to New Zealand is GST which is currently at 15%. New Zealand stores should therefore create a new Tax
Rate called GST, set to 15%, and applicable to customers in the Geo Zone of New Zealand.
If you have product specific tax rates, you need to define each of these tax rates under the Tax Rates
page. You will later choose which tax rate applies to each product, so you will be able to manage your
product specific taxes at the product level.
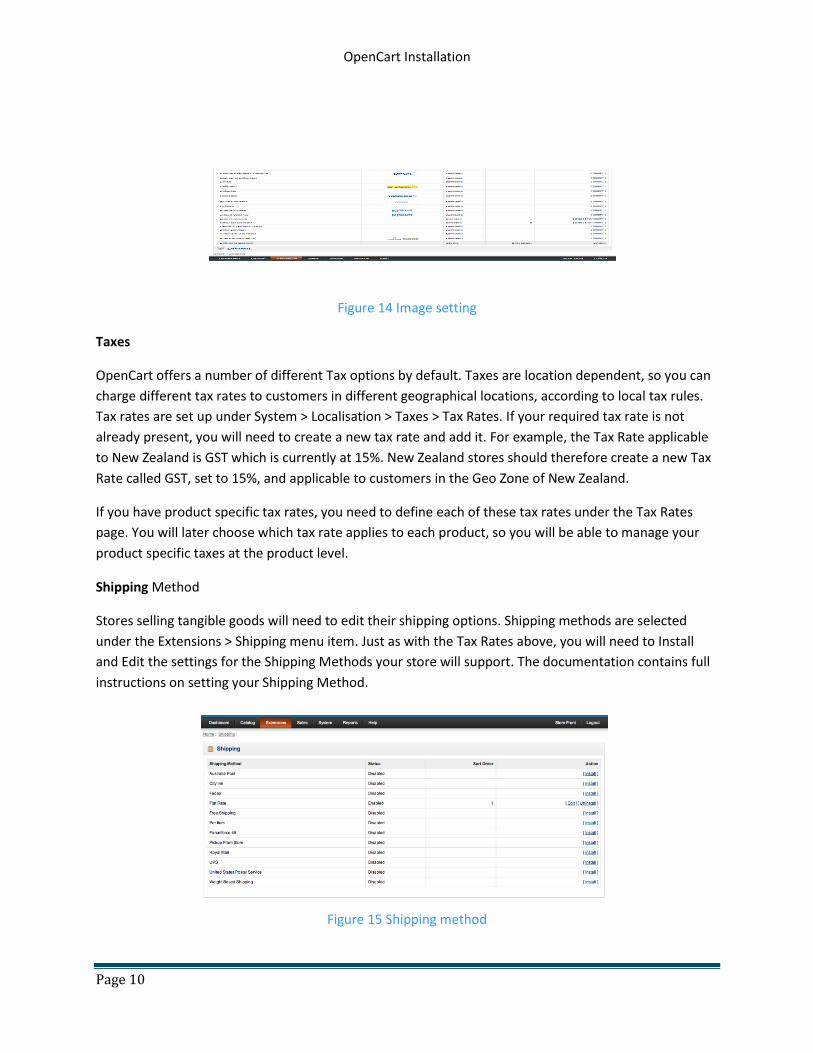
Shipping Method
Stores selling tangible goods will need to edit their shipping options. Shipping methods are selected
under the Extensions > Shipping menu item. Just as with the Tax Rates above, you will need to Install
and Edit the settings for the Shipping Methods your store will support. The documentation contains full
instructions on setting your Shipping Method.
Figure 15 Shipping method
OpenCart Installation
Page 11
Inventory Management
OpenCart's installation includes demonstration data to help you see how to setup your OpenCart store's
inventory. This includes Categories, Manufacturers, Options, Attributes and Products and some home
page Banners. These are the Apple iPods that you see when you first visit your store's frontend after
installation. In order to get started with your store, you will need to replace these demo items with the
actual categories, manufacturers and products your store will sell. There are two recommended ways to
do this: You can manually edit these under the Catalog menu in your OpenCart store's admin.You can
use an import tool to simplify the upload of your products in bulk. This is more practical for larger
inventories or dropshippers, and will allow you to remove all existing items and replace them at the
same time.
Extensions, Modules and Themes
OpenCart functionality, look and feel are all controlled by modules and themes. The final step to get
started with OpenCart is to check your Extensions > Modules page to ensure the functionality you want
is enabled. The default banners can be modified under System > Banners, or removed via the Slideshow
module at this point. You can also choose other modules that you wish to display, and the pages you
wish to display them. The OpenCart defaults are sensible and will not necessarily need editing to get
started, except for the default home page banners, which are for demonstration purposes only. If you
do not find the functionality you need in your store, you can often add it as a 3rd Party Extension.
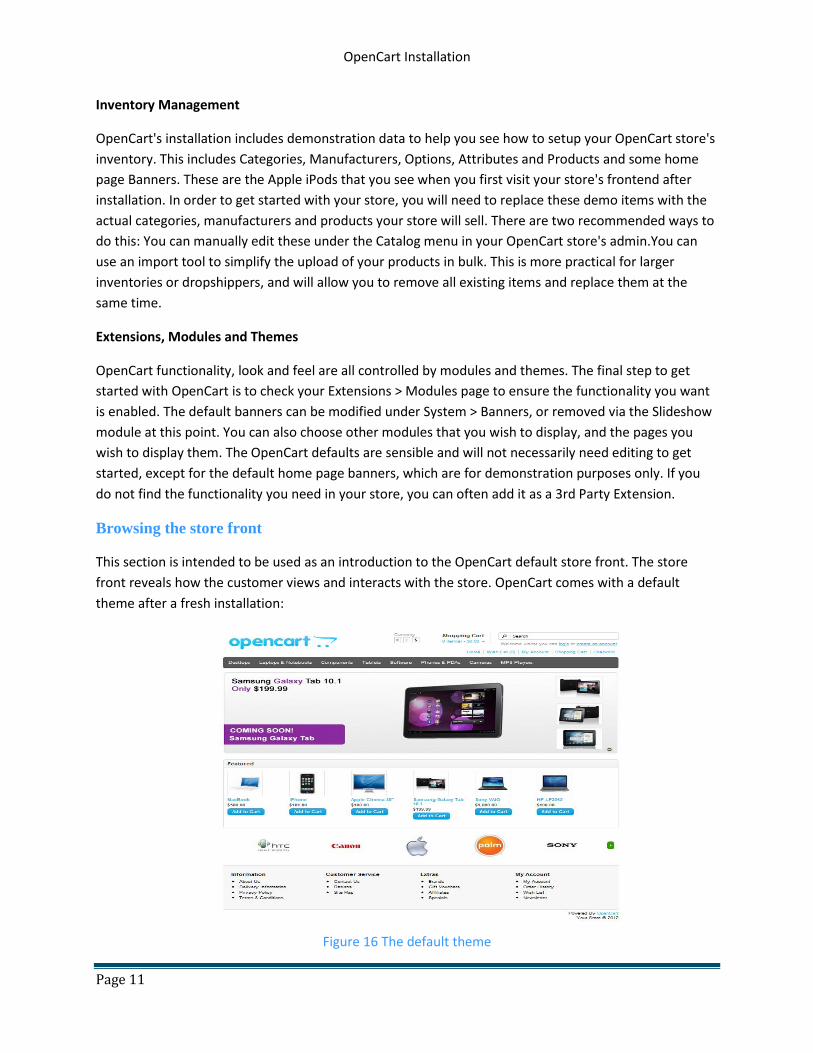
Browsing the store front
This section is intended to be used as an introduction to the OpenCart default store front. The store
front reveals how the customer views and interacts with the store. OpenCart comes with a default
theme after a fresh installation:
Figure 16 The default theme

OpenCart Installation
Page 12
The products seen above are included as sample data with the OpenCart installation. These products
can easily be removed and replaced with the shop's products later. You can find an ever expanding list
of available themes at the OpenCart Extension Directory available here:
http://www.opencart.com/index.php?route=extension/extension&path=1
Navigating the shop
The OpenCart default theme makes navigating a shop's products easily accessible to its customers. More
information about the anatomy of the home page, the product pages, the shopping cart page, creating a
customer account and the checking out process is clearly available in this link:
http://docs.opencart.com/display/opencart/Browsing+the+store+front
References
Jennifer, (2013), ‘OpenCart 1.5 Home’, *Online+ Available from:
http://docs.opencart.com/display/opencart, [Accessed: 1h Nov 2014].