
One Size Fits All Apron - Day Dreams · PDF fileOne Size Fits All Apron And Adjustable...
15
FREE Learn to Sew Pattern Simplicity #0507 One Size Fits All Apron And Adjustable Chef’s Hat The apron is a basic pattern generally used to start with when first learning to sew. Easy to follow directions for the apron & hat (detailed) will guide you step by step through the sewing process for hems, curves, top stitching and measuring and add- ing seam binding. Why not make a few sets for the cooks you appreciate and give as gifts this season ? Included: Apron Pattern & Directions Chef Hat Pattern & Directions Picture , directions and pattern all Simplicity. About the Patterns: Wishing you success & inspiration today, Sher, Day Dreams
Transcript of One Size Fits All Apron - Day Dreams · PDF fileOne Size Fits All Apron And Adjustable...

FREE Learn to Sew Pattern
Simplicity #0507
One Size Fits All Apron
And
Adjustable Chef’s Hat
The apron is a basic pattern generally used to start with when first learning to sew.
Easy to follow directions for the apron & hat (detailed) will guide you step by step
through the sewing process for hems, curves, top stitching and measuring and add-
ing seam binding.
Why not make a few sets for the cooks you appreciate and give as gifts this season ?
Included:
Apron Pattern & Directions
Chef Hat Pattern & Directions
Picture , directions and pattern all Simplicity. About the Patterns:
Wishing you success & inspiration today,
Sher,
Day Dreams
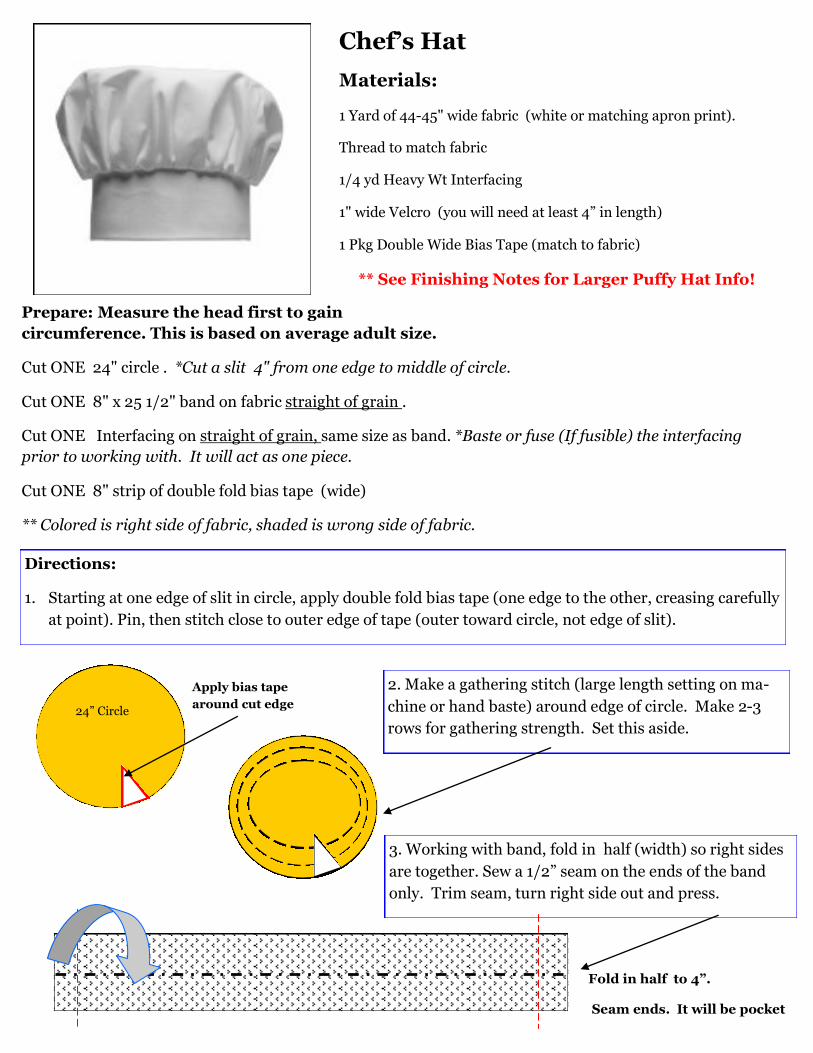
Chef’s Hat
Materials:
1 Yard of 44-45" wide fabric (white or matching apron print).
Thread to match fabric
1/4 yd Heavy Wt Interfacing
1" wide Velcro (you will need at least 4” in length)
1 Pkg Double Wide Bias Tape (match to fabric)
Prepare: Measure the head first to gain
circumference. This is based on average adult size.
Cut ONE 24" circle . *Cut a slit 4" from one edge to middle of circle.
Cut ONE 8" x 25 1/2" band on fabric straight of grain .
Cut ONE Interfacing on straight of grain, same size as band. *Baste or fuse (If fusible) the interfacing
prior to working with. It will act as one piece.
Cut ONE 8" strip of double fold bias tape (wide)
** Colored is right side of fabric, shaded is wrong side of fabric.
Directions:
1. Starting at one edge of slit in circle, apply double fold bias tape (one edge to the other, creasing carefully
at point). Pin, then stitch close to outer edge of tape (outer toward circle, not edge of slit).
2. Make a gathering stitch (large length setting on ma-
chine or hand baste) around edge of circle. Make 2-3
rows for gathering strength. Set this aside.
3. Working with band, fold in half (width) so right sides
are together. Sew a 1/2” seam on the ends of the band
only. Trim seam, turn right side out and press.
Apply bias tape
around cut edge
Fold in half to 4”.
Seam ends. It will be pocket
** See Finishing Notes for Larger Puffy Hat Info!
24” Circle
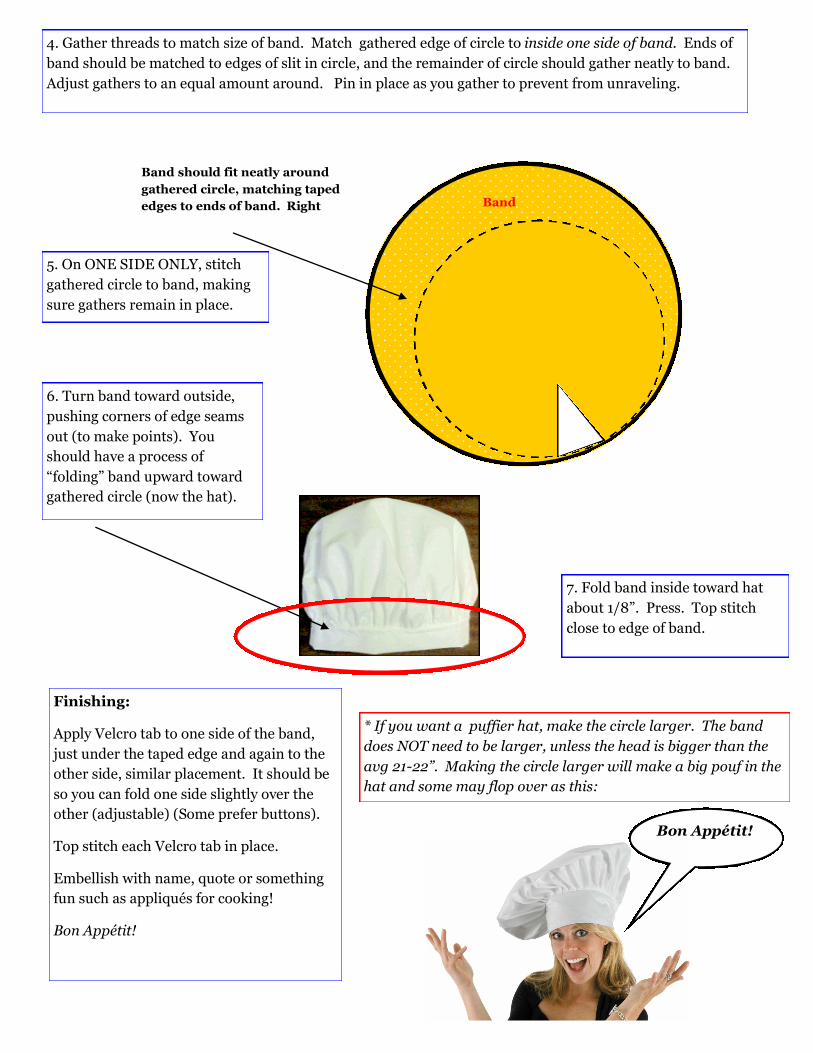
4. Gather threads to match size of band. Match gathered edge of circle to inside one side of band. Ends of
band should be matched to edges of slit in circle, and the remainder of circle should gather neatly to band.
Adjust gathers to an equal amount around. Pin in place as you gather to prevent from unraveling.
Band should fit neatly around
gathered circle, matching taped
edges to ends of band. Right
5. On ONE SIDE ONLY, stitch
gathered circle to band, making
sure gathers remain in place.
6. Turn band toward outside,
pushing corners of edge seams
out (to make points). You
should have a process of
“folding” band upward toward
gathered circle (now the hat).
7. Fold band inside toward hat
about 1/8”. Press. Top stitch
close to edge of band.
Finishing:
Apply Velcro tab to one side of the band,
just under the taped edge and again to the
other side, similar placement. It should be
so you can fold one side slightly over the
other (adjustable) (Some prefer buttons).
Top stitch each Velcro tab in place.
Embellish with name, quote or something
fun such as appliqués for cooking!
Bon Appétit!
* If you want a puffier hat, make the circle larger. The band
does NOT need to be larger, unless the head is bigger than the
avg 21-22”. Making the circle larger will make a big pouf in the
hat and some may flop over as this:
Band
Bon Appétit!
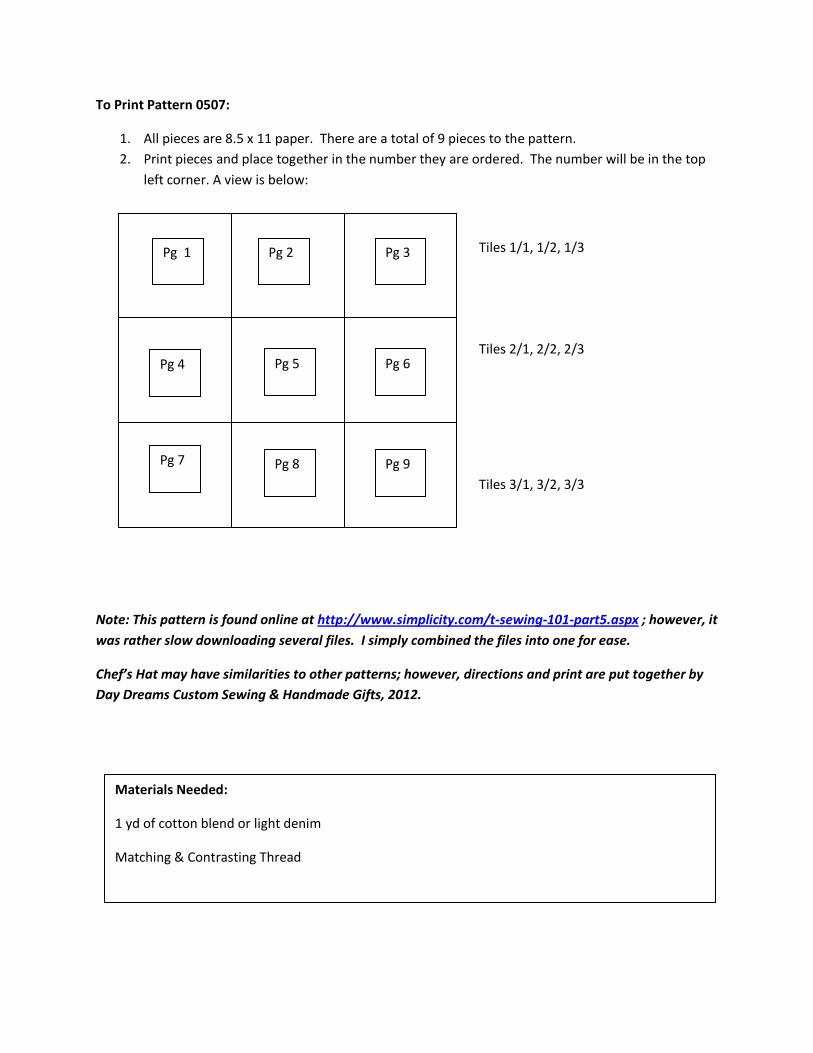
To Print Pattern 0507:
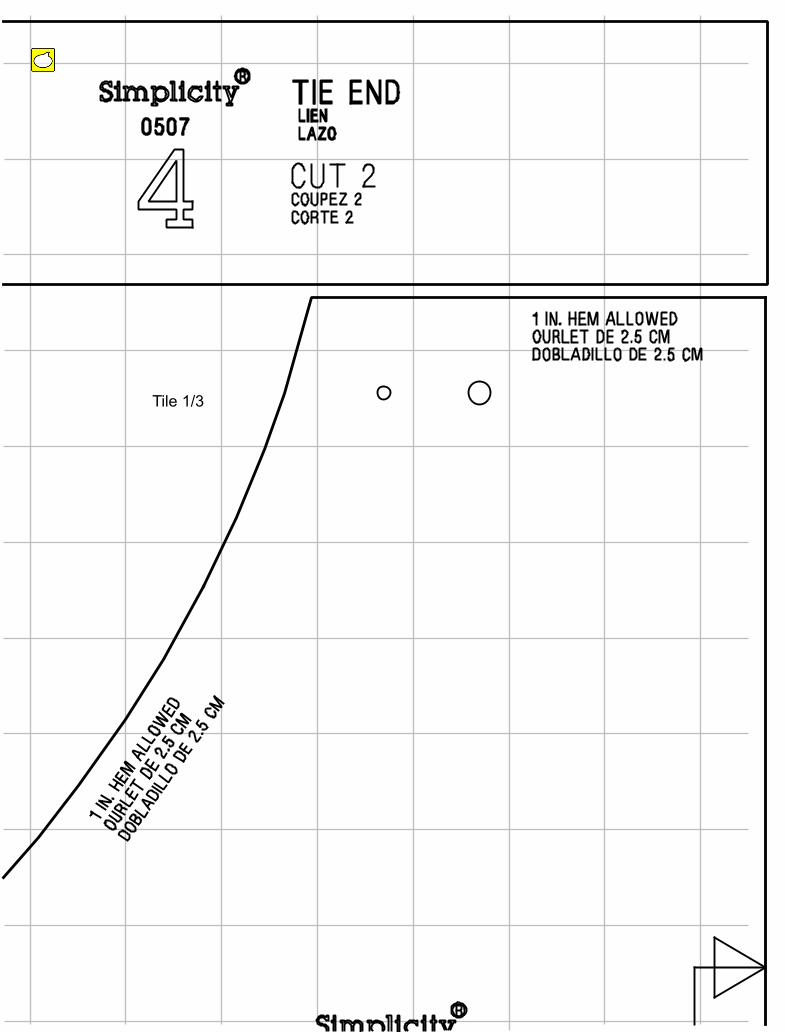
1. All pieces are 8.5 x 11 paper. There are a total of 9 pieces to the pattern.
2. Print pieces and place together in the number they are ordered. The number will be in the top
left corner. A view is below:
Tiles 1/1, 1/2, 1/3
Tiles 2/1, 2/2, 2/3
Tiles 3/1, 3/2, 3/3
Note: This pattern is found online at http://www.simplicity.com/t-sewing-101-part5.aspx ; however, it
was rather slow downloading several files. I simply combined the files into one for ease.
Chef’s Hat may have similarities to other patterns; however, directions and print are put together by
Day Dreams Custom Sewing & Handmade Gifts, 2012.
Pg 1 Pg 2 Pg 3
Pg 6 Pg 5 Pg 4
Pg 7 Pg 8 Pg 9
Materials Needed:
1 yd of cotton blend or light denim
Matching & Contrasting Thread
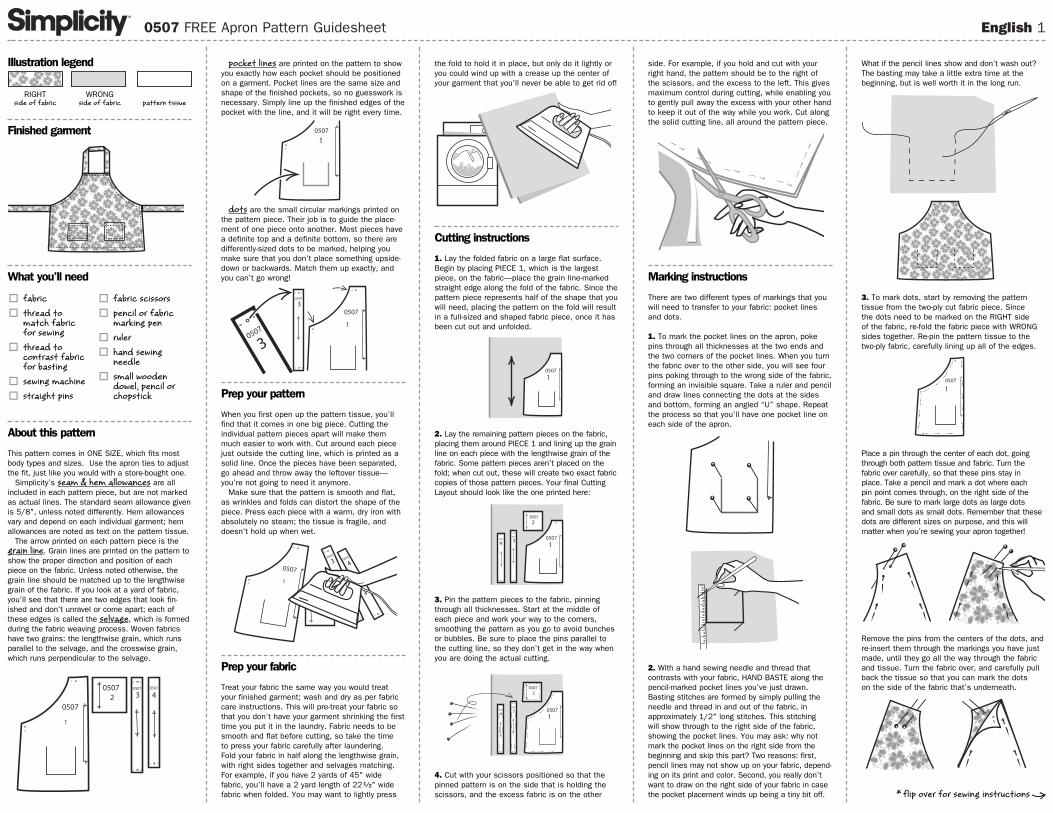
0507 FREE Apron Pattern Guidesheet English 1
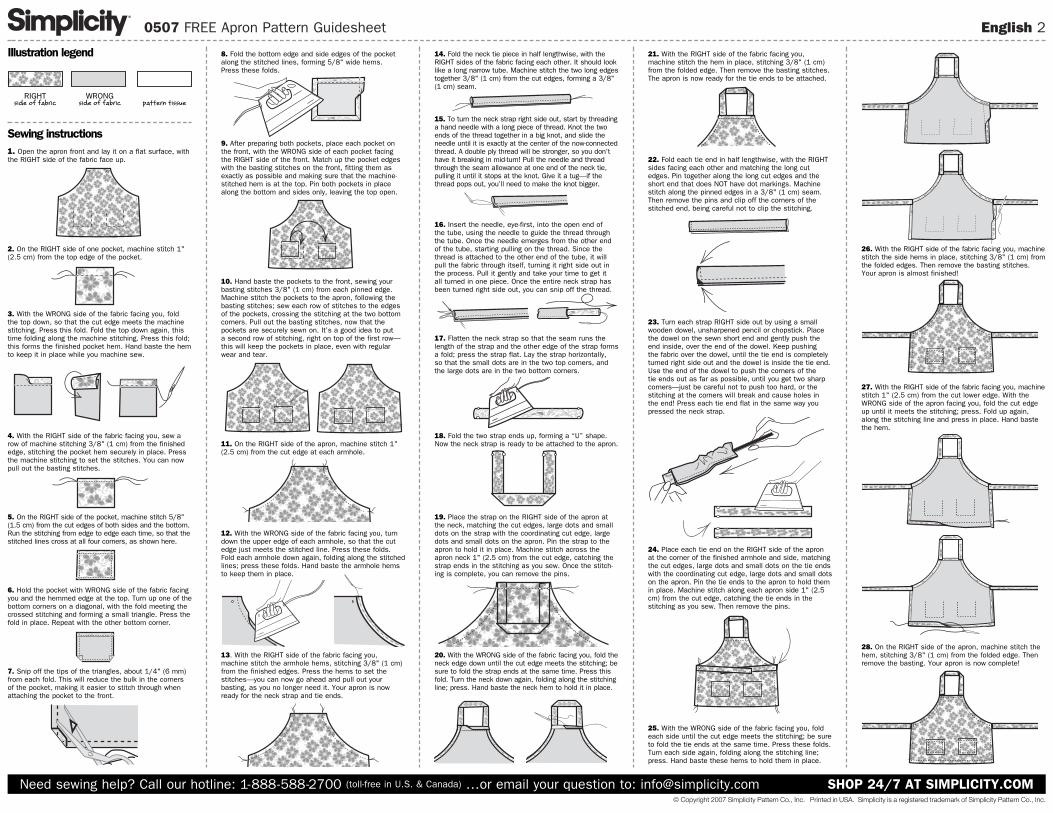
Illustration legend
Finished garment
What you’ll need
About this pattern
This pattern comes in ONE SIZE, which fits mostbody types and sizes. Use the apron ties to adjustthe fit, just like you would with a store-bought one.
Simplicity’s seam & hem allowances are allincluded in each pattern piece, but are not markedas actual lines. The standard seam allowance givenis 5/8", unless noted differently. Hem allowancesvary and depend on each individual garment; hemallowances are noted as text on the pattern tissue.
The arrow printed on each pattern piece is thegrain line. Grain lines are printed on the pattern toshow the proper direction and position of eachpiece on the fabric. Unless noted otherwise, thegrain line should be matched up to the lengthwisegrain of the fabric. If you look at a yard of fabric,you’ll see that there are two edges that look fin-ished and don’t unravel or come apart; each ofthese edges is called the selvage, which is formedduring the fabric weaving process. Woven fabricshave two grains: the lengthwise grain, which runsparallel to the selvage, and the crosswise grain,which runs perpendicular to the selvage.
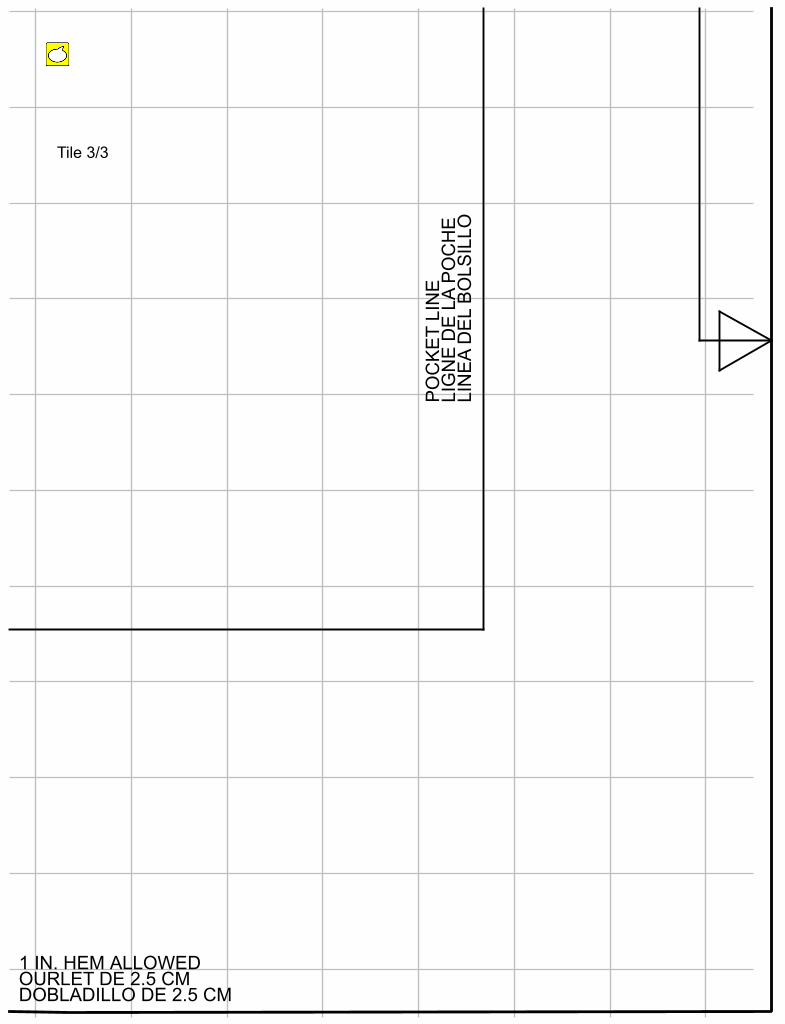
pocket lines are printed on the pattern to showyou exactly how each pocket should be positionedon a garment. Pocket lines are the same size andshape of the finished pockets, so no guesswork isnecessary. Simply line up the finished edges of thepocket with the line, and it will be right every time.
dots are the small circular markings printed onthe pattern piece. Their job is to guide the place-ment of one piece onto another. Most pieces havea definite top and a definite bottom, so there aredifferently-sized dots to be marked, helping youmake sure that you don’t place something upside-down or backwards. Match them up exactly, andyou can’t go wrong!
Prep your pattern
When you first open up the pattern tissue, you’llfind that it comes in one big piece. Cutting the individual pattern pieces apart will make themmuch easier to work with. Cut around each piecejust outside the cutting line, which is printed as asolid line. Once the pieces have been separated,go ahead and throw away the leftover tissue—you’re not going to need it anymore.
Make sure that the pattern is smooth and flat,as wrinkles and folds can distort the shape of thepiece. Press each piece with a warm, dry iron withabsolutely no steam; the tissue is fragile, anddoesn’t hold up when wet.
Prep your fabric
Treat your fabric the same way you would treatyour finished garment; wash and dry as per fabriccare instructions. This will pre-treat your fabric sothat you don’t have your garment shrinking the firsttime you put it in the laundry. Fabric needs to besmooth and flat before cutting, so take the time to press your fabric carefully after laundering. Fold your fabric in half along the lengthwise grain,with right sides together and selvages matching.For example, if you have 2 yards of 45" wide fabric, you’ll have a 2 yard length of 22 1⁄2" widefabric when folded. You may want to lightly press
the fold to hold it in place, but only do it lightly oryou could wind up with a crease up the center ofyour garment that you’ll never be able to get rid of!
Cutting instructions
1. Lay the folded fabric on a large flat surface.Begin by placing PIECE 1, which is the largestpiece, on the fabric—place the grain line-markedstraight edge along the fold of the fabric. Since thepattern piece represents half of the shape that youwill need, placing the pattern on the fold will resultin a full-sized and shaped fabric piece, once it hasbeen cut out and unfolded.
2. Lay the remaining pattern pieces on the fabric,placing them around PIECE 1 and lining up the grainline on each piece with the lengthwise grain of thefabric. Some pattern pieces aren’t placed on thefold; when cut out, these will create two exact fabriccopies of those pattern pieces. Your final CuttingLayout should look like the one printed here:
3. Pin the pattern pieces to the fabric, pinningthrough all thicknesses. Start at the middle ofeach piece and work your way to the corners,smoothing the pattern as you go to avoid bunchesor bubbles. Be sure to place the pins parallel tothe cutting line, so they don’t get in the way whenyou are doing the actual cutting.
4. Cut with your scissors positioned so that thepinned pattern is on the side that is holding thescissors, and the excess fabric is on the other
side. For example, if you hold and cut with yourright hand, the pattern should be to the right of the scissors, and the excess to the left. This givesmaximum control during cutting, while enabling youto gently pull away the excess with your other handto keep it out of the way while you work. Cut alongthe solid cutting line, all around the pattern piece.
Marking instructions
There are two different types of markings that youwill need to transfer to your fabric: pocket linesand dots.
1. To mark the pocket lines on the apron, pokepins through all thicknesses at the two ends andthe two corners of the pocket lines. When you turnthe fabric over to the other side, you will see fourpins poking through to the wrong side of the fabric,forming an invisible square. Take a ruler and penciland draw lines connecting the dots at the sidesand bottom, forming an angled “U” shape. Repeatthe process so that you’ll have one pocket line oneach side of the apron.
2. With a hand sewing needle and thread that contrasts with your fabric, HAND BASTE along thepencil-marked pocket lines you’ve just drawn.Basting stitches are formed by simply pulling theneedle and thread in and out of the fabric, inapproximately 1/2" long stitches. This stitching will show through to the right side of the fabric,showing the pocket lines. You may ask: why notmark the pocket lines on the right side from thebeginning and skip this part? Two reasons: first,pencil lines may not show up on your fabric, depend-ing on its print and color. Second, you really don’twant to draw on the right side of your fabric in casethe pocket placement winds up being a tiny bit off.
What if the pencil lines show and don’t wash out?The basting may take a little extra time at thebeginning, but is well worth it in the long run.
3. To mark dots, start by removing the pattern tissue from the two-ply cut fabric piece. Since the dots need to be marked on the RIGHT side of the fabric, re-fold the fabric piece with WRONGsides together. Re-pin the pattern tissue to thetwo-ply fabric, carefully lining up all of the edges.
Place a pin through the center of each dot, goingthrough both pattern tissue and fabric. Turn the fabric over carefully, so that these pins stay in place. Take a pencil and mark a dot where each pin point comes through, on the right side of the fabric. Be sure to mark large dots as large dots and small dots as small dots. Remember that thesedots are different sizes on purpose, and this will matter when you’re sewing your apron together!
Remove the pins from the centers of the dots, andre-insert them through the markings you have justmade, until they go all the way through the fabricand tissue. Turn the fabric over, and carefully pullback the tissue so that you can mark the dots on the side of the fabric that’s underneath.
0507
1
0507
4
05072
30507
05071
0507
4
05072
30507 0507
1
05071
0507
430507
05072
0507
1
0507
1
30507
30507
0507
1
0507
1
0507
4305070507
2
� fabric� thread to
match fabric for sewing
� thread to contrast fabricfor basting
� sewing machine� straight pins
� fabric scissors� pencil or fabric
marking pen� ruler� hand sewing
needle� small wooden
dowel, pencil orchopstick
RIGHTside of fabric
WRONGside of fabric pattern tissue
* flip over for sewing instructions ) >
0507 FREE Apron Pattern Guidesheet English 2
Illustration legend
Sewing instructions1. Open the apron front and lay it on a flat surface, withthe RIGHT side of the fabric face up.
2. On the RIGHT side of one pocket, machine stitch 1"(2.5 cm) from the top edge of the pocket.
3. With the WRONG side of the fabric facing you, fold the top down, so that the cut edge meets the machinestitching. Press this fold. Fold the top down again, thistime folding along the machine stitching. Press this fold;this forms the finished pocket hem. Hand baste the hemto keep it in place while you machine sew.
4. With the RIGHT side of the fabric facing you, sew arow of machine stitching 3/8" (1 cm) from the finishededge, stitching the pocket hem securely in place. Pressthe machine stitching to set the stitches. You can nowpull out the basting stitches.
5. On the RIGHT side of the pocket, machine stitch 5/8"(1.5 cm) from the cut edges of both sides and the bottom.Run the stitching from edge to edge each time, so that thestitched lines cross at all four corners, as shown here.
6. Hold the pocket with WRONG side of the fabric facingyou and the hemmed edge at the top. Turn up one of thebottom corners on a diagonal, with the fold meeting thecrossed stitching and forming a small triangle. Press thefold in place. Repeat with the other bottom corner.
7. Snip off the tips of the triangles, about 1/4" (6 mm)from each fold. This will reduce the bulk in the corners of the pocket, making it easier to stitch through whenattaching the pocket to the front.
8. Fold the bottom edge and side edges of the pocketalong the stitched lines, forming 5/8" wide hems. Press these folds.
9. After preparing both pockets, place each pocket on the front, with the WRONG side of each pocket facing the RIGHT side of the front. Match up the pocket edgeswith the basting stitches on the front, fitting them asexactly as possible and making sure that the machine-stitched hem is at the top. Pin both pockets in placealong the bottom and sides only, leaving the top open.
10. Hand baste the pockets to the front, sewing yourbasting stitches 3/8" (1 cm) from each pinned edge.Machine stitch the pockets to the apron, following thebasting stitches; sew each row of stitches to the edgesof the pockets, crossing the stitching at the two bottomcorners. Pull out the basting stitches, now that the pockets are securely sewn on. It’s a good idea to put a second row of stitching, right on top of the first row—this will keep the pockets in place, even with regularwear and tear.
11. On the RIGHT side of the apron, machine stitch 1"(2.5 cm) from the cut edge at each armhole.
12. With the WRONG side of the fabric facing you, turndown the upper edge of each armhole, so that the cutedge just meets the stitched line. Press these folds. Fold each armhole down again, folding along the stitchedlines; press these folds. Hand baste the armhole hemsto keep them in place.
13. With the RIGHT side of the fabric facing you,machine stitch the armhole hems, stitching 3/8" (1 cm)from the finished edges. Press the hems to set thestitches—you can now go ahead and pull out your basting, as you no longer need it. Your apron is nowready for the neck strap and tie ends.
14. Fold the neck tie piece in half lengthwise, with theRIGHT sides of the fabric facing each other. It should looklike a long narrow tube. Machine stitch the two long edgestogether 3/8" (1 cm) from the cut edges, forming a 3/8"(1 cm) seam.
15. To turn the neck strap right side out, start by threadinga hand needle with a long piece of thread. Knot the twoends of the thread together in a big knot, and slide theneedle until it is exactly at the center of the now-connectedthread. A double ply thread will be stronger, so you don’thave it breaking in mid-turn! Pull the needle and threadthrough the seam allowance at one end of the neck tie,pulling it until it stops at the knot. Give it a tug—if thethread pops out, you’ll need to make the knot bigger.
16. Insert the needle, eye-first, into the open end of the tube, using the needle to guide the thread throughthe tube. Once the needle emerges from the other end of the tube, starting pulling on the thread. Since thethread is attached to the other end of the tube, it will pull the fabric through itself, turning it right side out inthe process. Pull it gently and take your time to get it all turned in one piece. Once the entire neck strap hasbeen turned right side out, you can snip off the thread.
17. Flatten the neck strap so that the seam runs thelength of the strap and the other edge of the strap formsa fold; press the strap flat. Lay the strap horizontally, so that the small dots are in the two top corners, andthe large dots are in the two bottom corners.
18. Fold the two strap ends up, forming a “U” shape.Now the neck strap is ready to be attached to the apron.
19. Place the strap on the RIGHT side of the apron atthe neck, matching the cut edges, large dots and smalldots on the strap with the coordinating cut edge, largedots and small dots on the apron. Pin the strap to theapron to hold it in place. Machine stitch across theapron neck 1" (2.5 cm) from the cut edge, catching thestrap ends in the stitching as you sew. Once the stitch-ing is complete, you can remove the pins.
20. With the WRONG side of the fabric facing you, fold theneck edge down until the cut edge meets the stitching; besure to fold the strap ends at the same time. Press thisfold. Turn the neck down again, folding along the stitchingline; press. Hand baste the neck hem to hold it in place.
21. With the RIGHT side of the fabric facing you,machine stitch the hem in place, stitching 3/8" (1 cm)from the folded edge. Then remove the basting stitches.The apron is now ready for the tie ends to be attached.
22. Fold each tie end in half lengthwise, with the RIGHTsides facing each other and matching the long cutedges. Pin together along the long cut edges and theshort end that does NOT have dot markings. Machinestitch along the pinned edges in a 3/8" (1 cm) seam.Then remove the pins and clip off the corners of thestitched end, being careful not to clip the stitching.
23. Turn each strap RIGHT side out by using a smallwooden dowel, unsharpened pencil or chopstick. Placethe dowel on the sewn short end and gently push theend inside, over the end of the dowel. Keep pushing the fabric over the dowel, until the tie end is completelyturned right side out and the dowel is inside the tie end.Use the end of the dowel to push the corners of the tie ends out as far as possible, until you get two sharp corners—just be careful not to push too hard, or thestitching at the corners will break and cause holes in the end! Press each tie end flat in the same way youpressed the neck strap.
24. Place each tie end on the RIGHT side of the apronat the corner of the finished armhole and side, matchingthe cut edges, large dots and small dots on the tie endswith the coordinating cut edge, large dots and small dotson the apron. Pin the tie ends to the apron to hold themin place. Machine stitch along each apron side 1" (2.5cm) from the cut edge, catching the tie ends in thestitching as you sew. Then remove the pins.
25. With the WRONG side of the fabric facing you, foldeach side until the cut edge meets the stitching; be sureto fold the tie ends at the same time. Press these folds.Turn each side again, folding along the stitching line;press. Hand baste these hems to hold them in place.
26. With the RIGHT side of the fabric facing you, machinestitch the side hems in place, stitching 3/8" (1 cm) fromthe folded edges. Then remove the basting stitches.Your apron is almost finished!
27. With the RIGHT side of the fabric facing you, machinestitch 1" (2.5 cm) from the cut lower edge. With theWRONG side of the apron facing you, fold the cut edgeup until it meets the stitching; press. Fold up again,along the stitching line and press in place. Hand bastethe hem.
28. On the RIGHT side of the apron, machine stitch thehem, stitching 3/8" (1 cm) from the folded edge. Thenremove the basting. Your apron is now complete!
Need sewing help? Call our hotline: 1-888-588-2700 (toll-free in U.S. & Canada) …or email your question to: [email protected] SHOP 24/7 AT SIMPLICITY.COM
RIGHTside of fabric
WRONGside of fabric pattern tissue
© Copyright 2007 Simplicity Pattern Co., Inc. Printed in USA. Simplicity is a registered trademark of Simplicity Pattern Co., Inc.
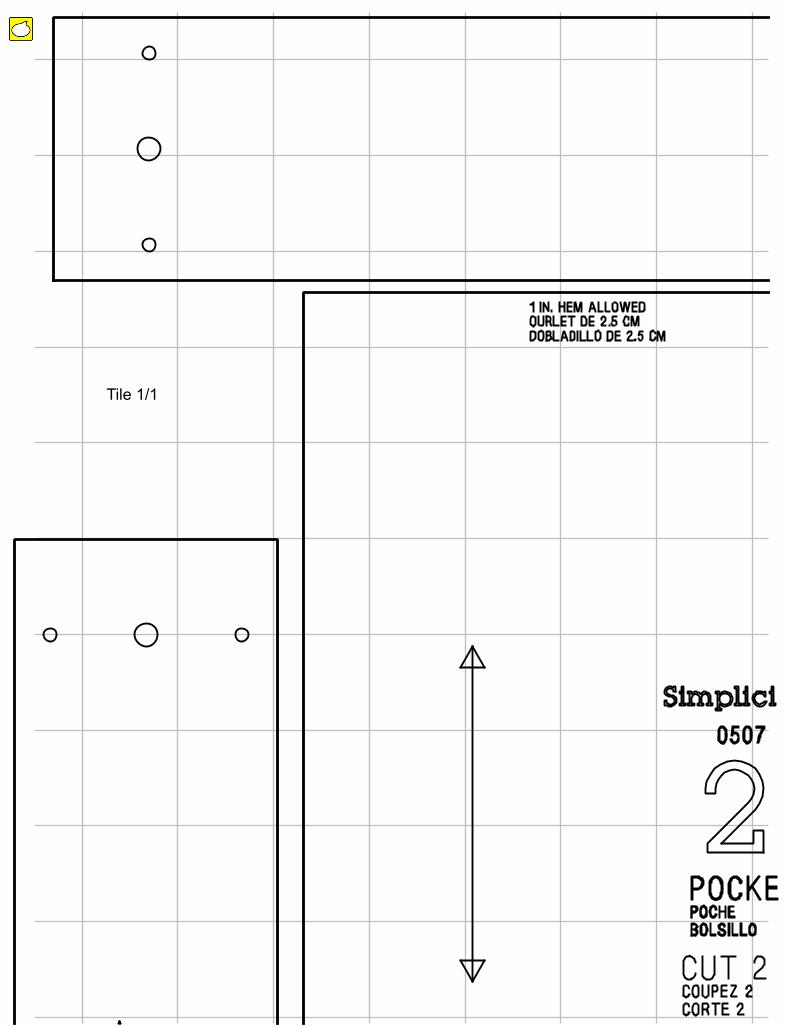
Tile 1/1
Sher
Sticky Note
Page 1
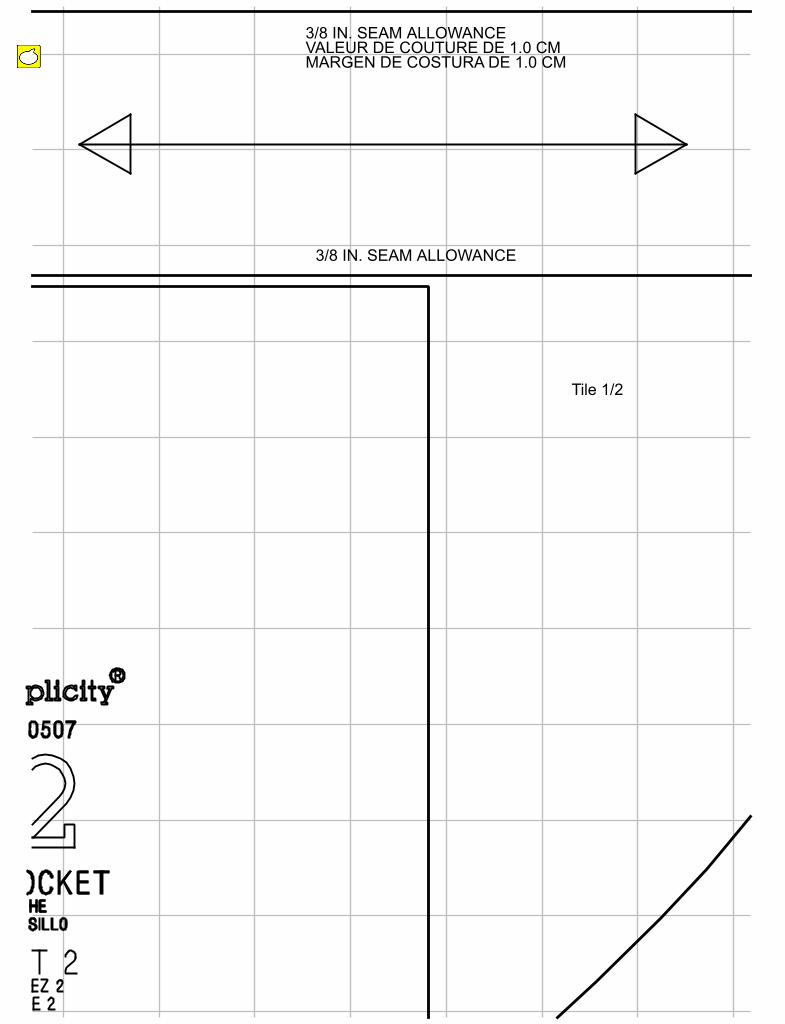
3/8 IN. SEAM ALLOWANCEVALEUR DE COUTURE DE 1.0 CMMARGEN DE COSTURA DE 1.0 CM
3/8 IN. SEAM ALLOWANCE
Tile 1/2
Sher
Sticky Note
Page 2
Tile 1/3
Sher
Sticky Note
Page 3
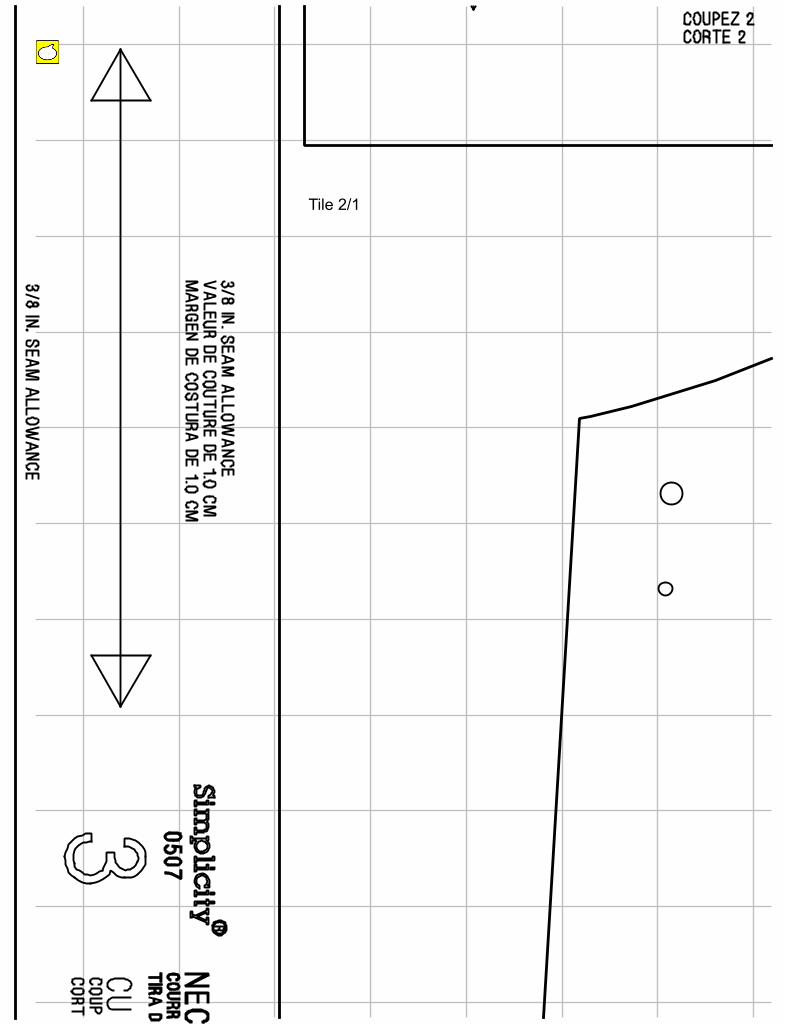
Tile 2/1
Sher
Sticky Note
Page 4
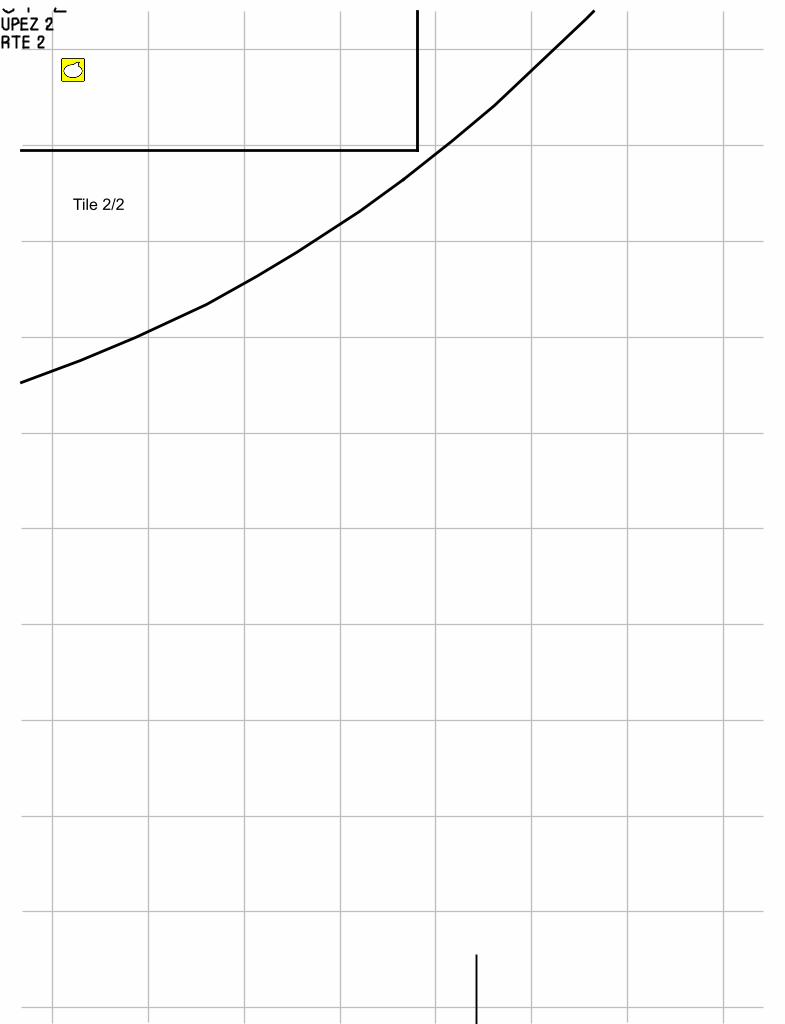
Tile 2/2
Sher
Sticky Note
Page 5
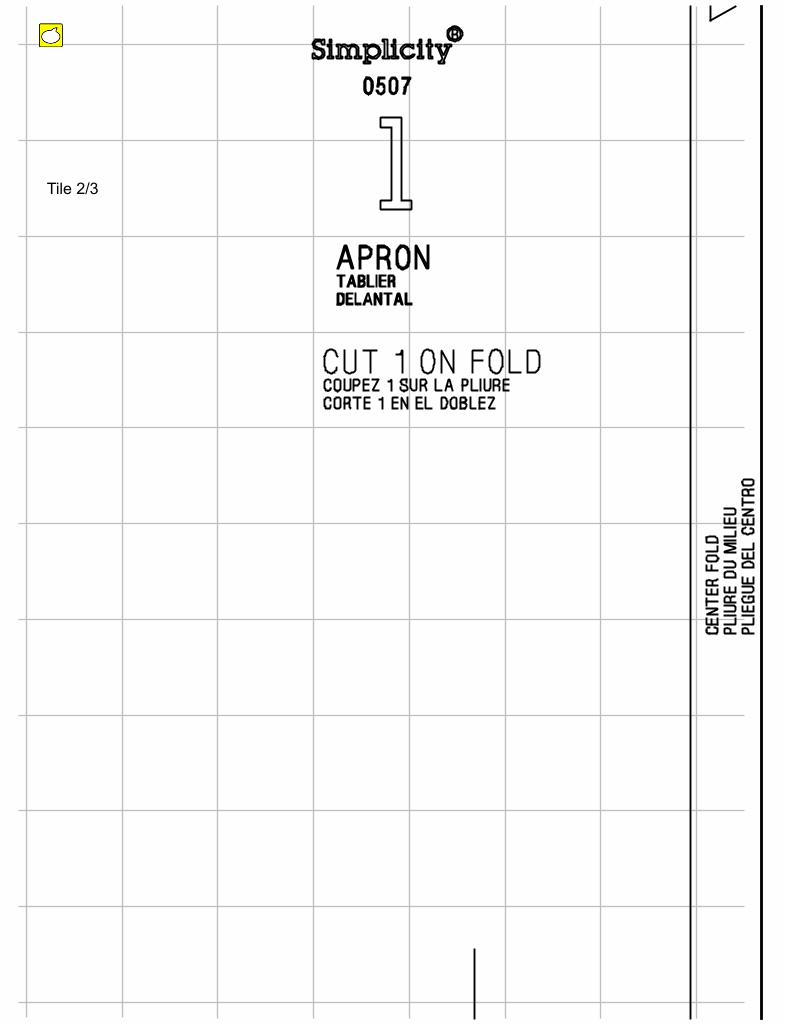
Tile 2/3
Sher
Sticky Note
Page 6
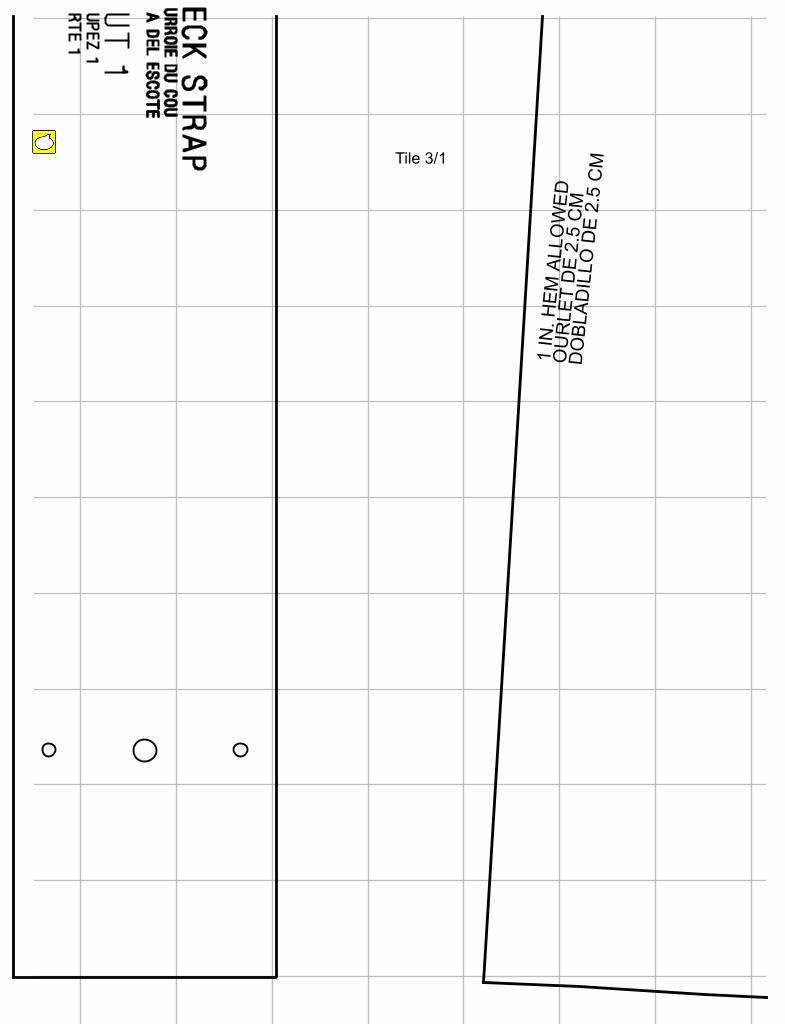
1 IN
. HE
M A
LLO
WE
DO
UR
LET
DE
2.5
CM
DO
BLA
DIL
LO D
E 2
.5 C
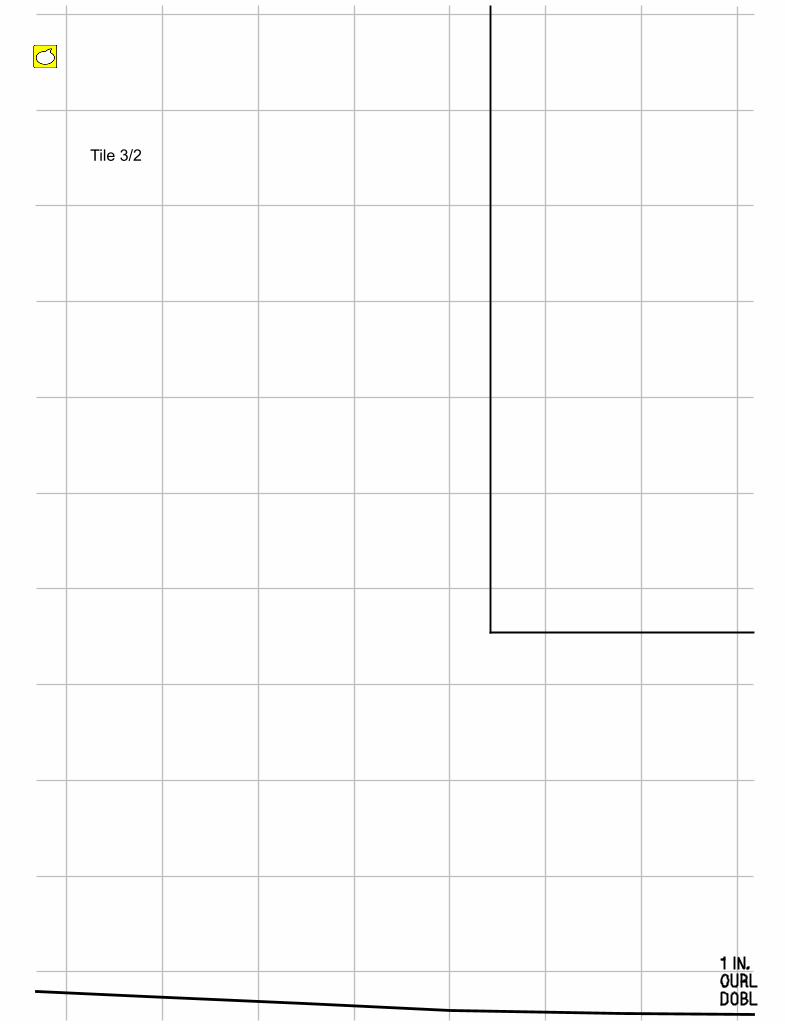
MTile 3/1
Sher
Sticky Note
Page 7
Tile 3/2
Sher
Sticky Note
Page 8
PO
CK
ET
LIN
ELI
GN
E D
E L
A P
OC
HE
LIN
EA
DE
L B
OLS
ILLO
1 IN. HEM ALLOWEDOURLET DE 2.5 CMDOBLADILLO DE 2.5 CM
Tile 3/3
Sher
Sticky Note
Page 9