OD ALLERS C OF ARKORIS S - Welby Bumpus House of ... of Sarkoris v2.pdfMurder Hole, Rocky Cliff,...
27
OD ALLERS OF ARKORIS G S by Ron Lundeen A Complete Variant Adventure Path for C
Transcript of OD ALLERS C OF ARKORIS S - Welby Bumpus House of ... of Sarkoris v2.pdfMurder Hole, Rocky Cliff,...

OD ALLERSOF ARKORIS
GS
by Ron Lundeen
A Complete VariantAdventure Path for
C
God Callers of Sarkoris
0 Moonglade Marauders1 Band of the Bull2 The Dyinglight Investigation3 Dark Deeds on Lake Ipona4 House of Reflections5 Balemoon Revelations6 The Serpents’ Coils
COMPLETE THESE ADVENTURES, IN THIS ORDER
The Worldwound devastated the barbarian nation of Sarkoris, but before that cataclysm, Sarkoris had its own heroes and its own deadly villains. Journey back to the final days of Sarkoris, where demon cults skulked in the shadows, proud barbarians ruled their clans and cities, and fabled god callers bound living fragments of divine power. Wield these divine fragments against secret cults and serpentine demons as God Callers of Sarkoris!
Each character gains a card feat
REWARD
This adventure path uses the Revised Rules and the New Rules set forth on the following pages.
During play of each adventure in this adventure path, the game box should only include cards with a set indicator equal to the adventure number and lower (for example, during Band of the Bull, only cards with a set indicator of B, C, P, or 1 should be present; during House of Reflections, only cards with a set indicator of B, C, P, 1, 2, 3, or 4 should be present). These cards come from the Wrath of the Righteous set, as modified by the Revised Rules on the next page. This card restriction does not apply when setting up scenarios; in fact, scenarios often call for specific locations, ships, villains, or other cards with a higher set indicator.
After you begin Dark Deeds on Lake Ipona, when you would banish a bane with the Basic trait, remove it from the game; when you would banish a boon with the Basic trait, you may remove it from the game. After you begin Balemoon Revelations, do the same for cards with the Elite trait.
DURING THIS ADVENTURE PATH
IntroductionI was not a big fan of the Wrath of the Righteous set, even though I played it all the way through with two different groups. I thought it had several cool twists, but mythic paths scaled awkwardly. The initial adventures were much too difficult, and after adventure deck 2, the mythic paths made many combats trivial, even against villains.
So I said I wouldn’t make a variant Wrath of the Righteous game, along the lines of my Shield of Rannick for Rise of the Runelords set, or Bloodlust Corsairs for the Skull and Shackles set. And I meant it. But something went wrong with that—because here we are. The more I discussed and considered why I didn’t like Wrath of the Righteous, I kept coming back to removing mythic paths. But could I jettison the Worldwound, too?
Yes, as it turns out. The Worldwound is recent, and the nation that it replaced, Sarkoris, had barbarian tribes, towering cities, and decadent pleasure-barges, all in the vein of Conan stories. And their summoners’ eidolons were fragments of gods! There are many good stories in “turning back the clock” to the days of doomed Sarkoris. But as the usual banes are pretty tough, I needed a way to improve characters without mythic paths. I decided to let every character tap the awesome powers of god callers, and the adventure path had its theme (and name).
I had to cut pretty deep to remove the now-inapplicable cards and I decided to fold in some of the locations, foes, and blessings from Skull and Shackles. That also gave a lot more diversity in the design, and I’m quite happy with that decision. Armies, Demonic Hordes and Arboreal Blights are also gone, if only because I didn’t ever like them (particularly in large parties). You’re welcome.
Pick characters you haven’t played before (Wrath of the Righteous characters work best, but don’t feel constrained that way), and quest through the doomed barbarian nation as God Callers of Sarkoris!
— Ron Lundeen, March 2017
The God Callers of Sarkoris adventure path requires the Pathfinder Adventure Card Game—Wrath of the Righteous Base Set and all six of the Wrath of the Righteous adventure decks. It also requires cards from the Pathfinder Adventure Card Game—Skull and Shackles Base Set and all six of the Skull and Shackles adventure decks.
This product uses trademarks and/or copyrights owned by Paizo Inc., which are used under Paizo's Community Use Policy. We are expressly prohibited from charging you to use or access this content. This product is not published, endorsed, or specifically approved by Paizo Inc. For more information about Paizo's Community Use Policy, please visit paizo.com/communityuse. For more information about Paizo Inc. and Paizo products, please visit paizo.com.
IMPORTANT NOTICE
Version 2. God Callers of Sarkoris, Copyright 2017 by Ron Lundeen
REQUIRED FOR PLAY
Adventure Path

God Callers of Sarkoris uses the Wrath of the Righteous base set and adventure decks, but it doesn’t use all the concepts or all the cards. Cards from the Skull and Shackles base set and adventure decks are used to supplement the game.
Cards to RemoveTo prepare to play God Callers of Sarkoris, remove the following cards from your Wrath of the Righteous set. Find someplace to put them aside—you won’t need them at all. Sometimes there is more than one copy of these cards; if so, remove them all. You also won’t need some of the locations, villains, henchmen, support cards, or loot, but since you only draw those when needed, there isn’t any reason to set those aside.
Monsters: Boar Demon (Deck 6), Elder Fire Demon (Deck 6), Incubus (Deck 2), Spite Demon (Deck 3)Barriers: Arboreal Blight (Deck B and C), Compelling Offer (Deck 3), Corrupted Crusaders (Deck B and C),
Demonic Horde (Deck B and C), Gift of Nocticula (Deck 4), Gift of Shamira (Deck 4), Temptation of Favor (Deck 3)Weapons: Anarchy Hammer (Deck 4), Blackaxe (Deck 4), Dragonbreath Bow (Deck 6), Rod of the Viper (Deck 3),
Skirmishing Spear (Deck 3), Spellbreaker (Deck 5), Stalker’s Crossbow (Deck 4), Traitor’s Blade (Deck 5), Unholy Aspergillum +3 (Deck 2), Vorpal Blade (Deck 6)
Spells: Elemental Bombardment (Deck 5), Lend Mythic Path (Deck 4), Miracle (Deck 6), Restore Mythic Power (Deck 3), Steal Mythic Power (Deck 5), Terraform (Deck 4), Time Stop (Deck 6)
Armors: Bastion of the Inheritor (Deck 5), Corroded Helm (Deck B), Ghoul Hide (Deck 1), Helm of the Serpent King (Deck 5), Horns of Naraga (Deck 6), Immolation Cloak (Deck 6), Imperial Army Greathelm (Deck 2), Pauldrons of Unflinching Fortitude (Deck 5), Spiritwalk Armor (Deck 5), Tarnhelm (Deck 6)
Items: Book of the Damned (Deck 5), Bountiful Bottle (Deck 6), Fortune’s Arrow (Deck 3), Holy Phylactery (Deck B), Horn of Assured Victory (Deck 2), Lyre of Storms (Deck 4), Monkey’s Paw (Deck C), Nectar of the Gods (Deck B), Nahyndrian Elixir (Deck 2), Pauper’s Thighbone (Deck 3), Planar Tuning Fork (Deck 2), Skinstitcher’s Manual (Deck 4), Staff of the Hierophant (Deck 6), Talisman of Good (Deck 3), Thorncrown of Iomedae (Deck 6), Torc of the Heavens (Deck 5)
Allies: Celestial Unicorn (Deck 4), Dire Griffon (Deck 6), Eliandra (Deck 6), Jesker Helton (Deck 3), Kamilo Dann (Deck 2), Orengofta (Deck 5), Redeemer Blacksmith (Deck 3), Verbovezzor (Deck 6)
Blessings: Blessing of Ascension (Deck B and C), Blessing of Sifkesh (Deck 5)
Revised Rules
Cards to AddNext, add the following cards from your Skull and Shackles set. Add villains, henchmen, and locations when the scenario calls for them; add the other cards when you add cards from the appropriate deck (for example, add the Norgorber Cultist monsters when you add Deck 5 cards). If there is more than one copy of these cards, add them all.
Locations: Alehouse, Beach, Chapel, Coastline, Dinosaur Corral, Docks, Festhall, Fishing Village, Fog Bank, Great Stone Bridge, Hall of Champions, Harbor, Hatchery, House of Stolen Kisses, Jasperleaf Apothecary, Merchant Marina, Murder Hole, Rocky Cliff, Sacred Spring, Safe House, Sea Caves, Sea Fort, Theater of Corruption, Tidewater Rock, Torture Pit, Tower, Windward Isle
Villains: Arron Ivy, Brinebrood Queen, Hyapatia, Isawyn the Diva, Nefti Unwesha, Omara Culverin, Selissa, Shrouded Queen, The Whale
Henchmen: Abyssal Scavenger, Aretta Bansion, Blackwater Charda, Blink Spider, Botfly Swarm, Breath of Dagon, Buccaneer, Cryptic Runes, Curse of the Flesheaters, Draugr Captain, Drowning Devil, Erinyes Devil, Eye of Dagon, Fipps Chumlett, Fishpork, Gilbrok the Tongue, Giles Halmis, Gorebeard Trench, Jakaw Razorbeak, Jalhazar’s Curse, Jaundiced Jape, Kipper, Knuckles Grype, Lady Nightshade, Lightning Elemental, Luccaria, Maheem, Owlbear Hartshorn, Rampaging Triceratops, Riaris Krine, Ruffian, Sentinel Devil, Shimerae, Vrykolakas, Witch Doctor
Monsters: Manticore (Deck 3), Will-O’-Wisp (Deck 3), Norgorber Cultist (Deck 5)Barriers: Ambush (Deck B and C), Assassination Attempt (Deck 6), Barroom Brawl (Deck B), Electricity Arc Trap
(Deck 4), Illusory Wall (Deck B), Large Chest (Deck B)Weapons: Flaming Musket +2 (Deck 6), Keen Falcata +1 (Deck 2), Keen Rapier +3 (Deck 5)Spells: Dimension Leap (Deck 3), Raise Dead (Deck 5), Resist Energy (Deck 4), Safe Harbor (Deck 2), Shapechange
(Deck 6) Armors: Animated Shield (Deck 4), Benevolent Buckler (Deck 1), Fortified Breastplate (Deck 5), Shark Skin Armor
(Deck 2)Items: Emerald of Dexterity (Deck B), Helpful Haversack (Deck 1), Onyx of Constitution (Deck B), Pearl of Magic
(Deck 6), Pearl of Wisdom (Deck B), Potion of Flying (Deck 3), Potion of Heroism (Deck 1), Ruby of Charisma (Deck B), Sapphire of Intelligence (Deck B), Topaz of Strength (Deck B)
Allies: Baby Triceratops (Deck 6), Monkey (Deck 3), Pteranodon (Deck 4)Blessings: Blessing of the Gods (Deck B and C), Blessing of Gozreh (Decks B and C, but don’t add them until you
add Deck 4 cards), Blessing of Norgorber (Deck 5)
Modified TraitsSome traits have a slightly different effect in God Callers of Sarkoris than they do in the standard Wrath of the Righteous game.
Abyssal is a trait on some locations. This trait indicates a region of Sarkoris where the borders between Golarion and the Abyss are thin and outsiders can slip through. If you examine cards at a location with the Abyssal trait and examine a monster with the Outsider trait, you must immediately encounter that monster; its difficulty to defeat is increased by 3. (If you are familiar with certain monsters with the Trigger trait from the Mummy’s Mask set, this is intended to mimic that rule.)
Mythic has no effect on either banes or boons. Servitor is a trait on some henchmen. Servitors are particularly loyal demonic minions, willing to protect their
masters even after their defeat. If you would banish a henchman with the Servitor trait from a location deck, put it next to the blessings deck instead. When you would defeat a villain while a henchman with the Servitor trait is displayed, return a Servitor henchman to the box and the villain is undefeated; instead of escaping as normal, however, shuffle the villain back into the location deck where it was encountered. Ignore any effect on cards that refers to an adventure’s servitor demon, as that concept isn’t used in God Callers of Sarkoris.
Unusued RulesIgnore references to mythic paths, mythic charges, redeeming cards, ships, structural damage, or related rules. Those rules elements aren’t used in God Callers of Sarkoris.
God CallersAfter completing Moonglade Marauders, the characters receive powerful fragments of a benevolent deity to help them in times of need. At the beginning of each game, each character gains a cohort to represent the godcalled eidolon bound to that character. Use the Unfettered Eidolon henchman card as a placeholder for this cohort (although they have no powers on that card, are cohorts instead of monsters, and have none of the powers Padraig or other eidolon cohorts do). Each character receives only one of these godcalled eidolon cohorts, in addition to any other cohorts the character has. These godcalled eidolon cohorts are returned to the box at the end of each scenario (or if banished) and then added to the character’s starting hand at the beginning of each new scenario.
Unlike normal cohorts, godcalled eidolons don’t have any predetermined powers; they instead use the powers that the character has chosen for them. Print out a Godcalled Eidolon Powers Sheet for each character. When the
New Rules

You may display this card to reduce all damage dealt to you before you act or after you act to zero ( or all damage dealt to you to zero). While this card is displayed, reduce damage dealt to you before you act by 1; if you have a role card, reduce damage dealt to you before you act by 2 instead.
You may display this card to succeed at your check to defeat a non-villain, non-henchman barrier ( or to banish a non-villain, non-henchmen barrier displayed in front of any character or any location). While this card is displayed, add 1 to your checks to defeat barriers; if you have a role card, add 2 instead.
You may display this card to succeed at your check to defeat a non-villain, non-henchman monster ( or a non-villain monster). While this card is displayed, add 1 to your checks to defeat monsters; if you have a role card, add 2 instead.
You may display this card to evade a monster ( and you may put it on the top or bottom of its location deck, if it came from one). While this card is displayed, when you would evade a monster or barrier, you may also move; if you have a role card, you may ignore movement restrictions.
You may display this card to choose a character at your location and shuffle 1d4 cards from that character’s discard pile into his deck ( and shuffle 2 cards from your discard pile into your deck). While this card is displayed, when you would shuffle one or more random cards from your discard pile into your deck, you may choose 1 of those cards; if you have a role card, you may choose up to 2 of those cards.
GODCALLED EIDOLON POWERS SHEET
character gains his godcalled eidolon at the end of Moonglade Marauders, he immediately checks off two boxes to reflect his godcalled eidolon’s basic powers. These initial powers must be on two different lines; they can’t be a power and an upgrade to that power. At the end of each subsequent adventure, the characters gain a “god caller feat” as an adventure reward. This reward allows the character to check off another box on the Godcalled Eidolon Powers Sheet. This can be a basic power or the upgraded version of an existing power, just as with a normal power feat selection.
A godcalled eidolon provides only those powers selected by the character when it is played. For example, even if Seelah gives her Unfettered Eidolon card to Alain, when Alain uses it, it functions based on Alain’s choices, not Seelah’s.
NemesesAdventurers make many enemies, and some of these foes thirst for revenge. Certain villains in God Callers of Sarkoris reappear in later scenarios and are more powerful against characters that have beaten them before. The villains below are potential nemeses. If your character succeeds at a check to defeat one of these villains and the villain does not escape, write your character’s name on the line next to the villain’s name. If a villain requires multiple checks to defeat (such as Odeenka) and two different characters succeed at these checks, list both characters. That villain becomes the nemesis of the character (or characters). A character may have multiple villains as nemeses; in fact, over the course of the adventure path, this is likely!
The scenarios in which the Nemesis rules apply are noted with each villain below.When a character attempts any check against a villain that is his nemesis, increase the difficulty of that check by
1d6. On the other hand, the character is bolstered by his previous success against his nemesis: he may recharge a card from his hand to reduce damage dealt to him by a nemesis by 3. He may do this once each time he is dealt damage; for example, a character with Millorn as a nemesis may recharge a card to reduce Millorn’s damage before he acts and then recharge another card if he fails the combat check to defeat Millorn.
Millorn (0-A, 0-C) Nefti Unwesha (1-C, 2-E) Maugla (3-B, 3-E) Skulgrym (3-D, 3-E) Isawyn the Diva (4-A, 4-D) Omara Culverin (see 5-A, 5-E) Odeenka (6-A, 6-E) Ylleshka (6-B, 6-E)
I Don’t Like These New RulesThat’s okay. Feel free to ignore either or both rules; God Callers of Sarkoris runs just fine without them, but it’s harder.

Adventure 0: Moonglade Marauders
0-A The Moonglade Ambush0-B Tracking the Marauders0-C The Looming Castle0-D Prisoner of the Castle Caverns0-E The Godtrap
COMPLETE THESE SCENARIOS, IN THIS ORDER
You live peaceful lives of ease in Moonglade, a large town surrounded by forest in the Sarkorian Steppes. Although skilled with sword or spell—as fell beasts and raiders are not unknown even in this bountiful land—you consider yourselves settled and looked forward to many long, peaceful years.
Your peace is shattered when you returned to Moonglade to find the outskirts of the town—the part of town that held your homes and friends—burned to the ground. The frantic survivors told of raiders that came to Moonglade when you were gone, demanding tribute from the community. Their leader was a dwarven wizard named Millorn who made no secret of his powers, a testament to his bravado in a land where wizardry is seen as suspicious and dangerous. When the citizens resisted, Millorn’s group of raiders set fire to the town and fled. Although the citizens were able to douse the flames and spare much of Moonglade—all except the neighborhood containing your homes—they were too preoccupied to chase Millorn’s band into the woods. Someone must find this evil dwarf, track him and his marauders to their lair, and put an end to his villainy.
Each character gains a godcalled eidolon cohort for the rest of the adventure path. Each character takes a Godcalled Eidolon Powers Sheet and makes two selections on it, as described in the God Callers rule.
REWARD
0-A: The Moonglade AmbushThe marauders’ path leads through the village of Moonglade, then through an ancient cemetery and into the surrounding cliffs and forests. As you question locals about the attack and grimly set yourselves to follow the marauders, cries rise up from around you—an ambush! It seems Millorn and his raiders didn’t go far, but instead set a trap for those daring enough to follow.
When you encounter a villain or henchman, before you act, succeed at a Wisdom or Perception 6 check or subtract 1 from each die rolled on your check.
Millorn is a Nemesis.
DURING THIS SCENARIOVillain MillornHenchmen Fipps Chumlett,
Maheem, Corrupted Soldier, Wenduag, Ruffians
Players Locations1 Alehouse1 Cemetery1 Marketplace2 Manor House3 Sacred Spring4 Canyon5 Sacristy6 Dark Forest
REWARD
Each character gains a random weapon from the box
Before you can strike the killing blow against the villainous Millorn, he utters a magical phrase and vanishes. No doubt he’s fled Moonglade for now, but you’re determined to find him.

0-B: Tracking the MaraudersYou’ve turned the tables on Millorn’s marauders and captured all of them—all but the wizard Millorn himself, that is. In order to find the marauders’ base of operations, you retrace their steps into the surrounding forest. Massive trees cloak the forested hills in mist and shadow, making footing treacherous. Furthermore, the forest’s malevolent vegetation and massive bats dislike intruders.
If you fail to defeat a monster, shuffle a Tangle Trap henchman into your location.
DURING THIS SCENARIOVillain FihralazHenchmen Carnivorous Stump,
Fiendish Tree, Giant Bats
Players Locations1 Abyssal River1 Dark Forest1 Fog Bank2 Canyon3 Rocky Cliff4 Collapsing Bridge5 Hatchery6 Wounded Lands
REWARD
Each character gains a skill feat
You’ve quelled the forest’s malevolent denizens for now, allowing you to resume your hunt for the marauders’ base. Dwarf tracks reveal that Millorn fled this direction—you’re on the villain’s trail!
0-C: The Looming CastleHigh on a rocky scarp thrusting above the forest stands an ancient, crumbling castle. Built in ages past by settlers from Ustalav, the forlorn castle has stood looking over Moonglade and the surrounding communities for ages. Despite the castle’s haunted reputation, the marauders seem to have found it to be an ideal base. Strike at them in their haven and put an end to Millorn’s marauders!
When you permanently close a location, move to the Guardpost.
Millorn is a Nemesis.
DURING THIS SCENARIOVillain MillornHenchmen Owlbear Hartshorn,
Aretta Bansion, Jaundiced Jape, Ruffians
Players Locations1 Cell1 Guardpost1 Watchtower2 Torture Chamber3 Tower4 Armory5 Hall of Champions6 Laboratory
REWARD
Loot: Sacred Prism, Vindictive Harpoon
You’ve eliminated the threat of Millorn’s marauders, but the ancient castle stands above extensive catacombs. Perhaps there’s forgotten treasure for the taking down there…

0-D: Prisoner of the Castle CavernsYou’ve driven Millorn’s marauders from the crumbling castle and begun investigating its catacombs for treasure. You now suspect that the castle’s reputation for being haunted is surprisingly well-founded; you hear shuffling noises from below and smell the dry odor of bone dust and grave dirt. As you balance the opportunity for treasure against the risks of encountering undead, you hear a terrified scream from below. Your decision has been made for you: someone is in trouble down there!
If you would banish the Fortune Teller or return her to the box, shuffle her into a random open location instead. If there is no open location, you automatically acquire her.
DURING THIS SCENARIOVillain Arron IvyHenchmen Fortune Teller ally,
Ilzek and Jadiss, Ghalcor, Wights
Players Locations1 Cathedral of Chaos1 Family Tomb1 Maze2 Abattoir3 Befouled Altar4 Chapel5 Cavern6 Prison Vault
REWARD
Each character gains a power feat
The fortune teller, Adranna, admits she got in far over her head. She’d snuck into the castle catacombs seeking an ancient, magical maze used to trap powerful entities.
0-E: The GodtrapThe fortune teller you rescued explained why she’d come to the ancient castle. Deep in the bedrock below the catacombs lies a series of twisting caverns reinforced with eldritch runes and magical scales to serve as a powerful trap. The cavern complex was designed to snare a long-forgotten benevolent god, but undoubtedly lesser creatures have been pulled into its maze-like tunnels as well. Free the trapped god by prying loose the magical scales.
When a location would send you to Blackburgh, go to the Celestial Beacon location instead. When you acquire a loot card from a location deck, you may attempt to close your location.
To win, close all locations.
DURING THIS SCENARIOVillain NoneHenchmen Scale of Resistance,
Scale of Sacred Weaponry, Scale of Disguise, Scale of Cloud- walking, Fiendish Minotaurs
Players Locations1 Cavern1 Celestial Beacon1 Ivory Labyrinth1 Lightless Maze2 Fog Bank3 Maze4 Shrine of Baphomet5 Molten Pool6 Cell
REWARD
Each character gains a card feat
As you close the godtrap, you feel the rushing departure of the benevolent god once trapped within. A piece of this presence—no more than a spark—appears at your side to protect and serve you forevermore.

Adventure 1: Band of the Bull
1-A Tracking the Bull Cultists1-B Consulting the Sage1-C The Smuggler’s Gambit1-D Fiendish Researchers1-E Inside the Flesh Factory
COMPLETE THESE SCENARIOS, IN THIS ORDER
Your eidolon has only a fragment of divine power, but it has a fragment of divine prophecy as well. You have long heard that evil cults and demon-worshippers lurk throughout Sarkoris, and your eidolon grants you prophetic glimpses of these cults and urges you to uncover and defeat them. Your eidolon calls you to action. It cannot fight these evils alone, but only in the service of a willing master. Your life of ease is over; you’re now an agent of the benevolent god at your side.
Once you commit to this quest and accept your fate, the fragmented images sort themselves into three prophetic visions. First, you see a bull-headed demon rising above the city of Undarin. Second, you glimpse a winged demon leading an army of undead on the misty shores of Lake Ipona. Finally, you spy a pleasure barge filled with laughing aristocrats, each secretly holding a bloody dagger. You don’t yet know what these visions mean, or how they relate to each other. You’re determined to find out, though, even if it takes you across all of Sarkoris.
You’ll start your quest in the city of Undarin. If there is a bull-demon cult hiding in Undarin, you’re determined to root it out.
Each character gains a god caller feat
REWARD
1-A: Tracking the Bull CultistsYour investigations in Undarin lead you to a dockside weapons shop called Sophini’s Armaments, wedged between a brothel and a soldier’s tenement. You’ve heard rumors of bull-masked figures in the shops and shrines of this neighborhood; you suspect that Sophini might be a high-ranking cultist. So long as you can get past her menacing bodyguard, Grype, you can ask Sophini a few pointed questions about the cult.
Summoned monsters may not be evaded.
DURING THIS SCENARIOVillain SophiniHenchmen Knuckles Grype,
Cultists of Baphomet
Players Locations1 Armory1 Guardpost1 House of Stolen Kisses2 Docks3 Cathedral of St. Clydewell4 Defender's Heart5 Temple of Iomedae6 Befouled Altar
REWARD
Each character gains a skill feat
Sophini spits in your face. “The Band of the Bull arises! Our cultists are limitless in number!” Although “limitless” seems unlikely, there’s something definitely strange about the bull-masked warriors. They are mindlessly loyal and seem not entirely human, as though sculpted rather than grown. You’ll need more information.

1-B: Consulting the SageHaving identified the strange bull cultists as being not quite human, you seek more information from a reputable sage. But since sages are not both reputable and cheap without being a bit eccentric, your only option is to consult the erratic scholar Tancred Desimire. Tancred lives in a sprawling manor on a forlorn, rocky beach upriver from Undarin, but he’s being plagued by his latest research subjects—swarms of nasty insects—and it’s made him more paranoid and irascible than usual.
Villain Tancred DesimireHenchmen Vescavor Swarm, Botfly
Swarm
Players Locations1 Beach1 Manor House1 Occult Library2 Laboratory3 Fog Bank4 Rocky Cliff5 Canyon6 Tower
You’ve calmed the eccentric Tancred. He doesn’t know anything about bull-masked cultists, but he does know of an unsavory smuggler named Nefti Unwesha. If anyone is smuggling not-quite-human creatures into Undarin, she’ll know who.
1-C: The Smuggler's GambitYou learned that the smuggler Nefti Unwesha might have information about the source of the bull-demon cultists. Once you start asking around Undarin for her, though, the cultists find you! If you didn’t know better, you’d think they were keeping you from reaching the smuggler—so you must be on the right track. Fight past the cultists and convince Nefti to tell you what she knows.
Add the number of closed locations to your checks to defeat Nefti Unwesha.
Nefti Unwesha is a Nemesis.
DURING THIS SCENARIOVillain Nefti UnweshaHenchmen Corrupted Soldier,
Cultists of Baphomet
Players Locations1 Befouled Altar1 Harbor1 Marketplace2 Festhall3 Safe House4 Chapel5 Tower of Estrod6 Armory
REWARD
Loot: FarglassEach character gains a power feat
Nefti insists she doesn’t know who is behind the Band of the Bull. She identifies them as being akin to mongrelfolk, a rare race of near-human creatures. A cabal of pitborn scholars outside of Undarin may know more.
Add “or Charisma Diplomacy 12” to the checks to defeat Tancred Desimire.
DURING THIS SCENARIO
REWARD
Loot: Radiance, Ring of Forcefangs

1-D: Fiendish ResearchersA group of pitborn scholars studying a ruin outside of Undarin use mongrelfolk as guards. Although they don’t appear to be connected with the Band of the Bull—as they are absorbed in unlocking the secrets of an abyssal runestone in the ruins—they might be able to tell you who else in the area is using mongrelfolk. Maybe they obtain mongrelfolk from the same vile source.
Faxon offers knowledge in exchange for his life and for his promise to depart Sarkoris for good. He says the Band of the Bull worships Baphomet, demon lord of beasts, and that the cultists originate from a watchtower built into the cliffs above Undarin.
1-E: Inside the Flesh FactoryYou’ve discovered the source of Undarin’s cult of Baphomet. In a crumbling watchtower high above the city, a goblin fleshwarper cobbles together mongrelfolk and binds their souls to Baphomet in an unholy foundry. This horrid “queen” is well-protected by mutants, demon servants, and minions, but you must put her to the sword to crush the source of the vile cultists.
Villain Brinebrood QueenHenchmen Sloth Demon,
Ceustodaemon, Mongrel Traitors
Players Locations1 Hatchery1 Mongrel Village1 Soul Foundry2 Watchtower3 Cathedral of Chaos4 Befouled Altar5 Torture Chamber6 Tower of Estrod
Although you’ve stopped the flood of malformed cultists of Baphomet, clues point to a cult master in town. Unfortunately, this mysterious leader has been warned and has already fled Undarin for the distant frontier town of Dyinglight.
Villain FaxonHenchmen Uziel, Othirubo,
Mongrel Traitors
Players Locations1 Canyon1 Dark Forest1 Qlippoth Runestone2 Family Tomb3 Cemetery4 Citadel5 Abyssal River6 Gray Garrison
If you defeat a henchman with the Pitborn trait and would banish it, instead display it by your character. If you have a henchman with the Pitborn trait displayed by your character, you automatically succeed at Fortitude checks to close the Qlippoth Runestone location.
DURING THIS SCENARIO
REWARD
Each character gains a skill feat, which must be in a different skill than the reward for scenario 1-A
Replace the When Closing box on the Soul Foundry with “Each character at this location must summon and defeat the henchman Cultist of Baphomet.”
DURING THIS SCENARIO
REWARD
Each character gains a card feat

2-A A Dangerous Road2-B False Prophets2-C Summoner’s Challenge2-D The Trapper’s Clue2-E The Mastermind Revealed
COMPLETE THESE SCENARIOS, IN THIS ORDER
You traveled to Undarin to quash a cult of Baphomet called the Band of the Bull. Although you eliminated the source of Undarin’s cultists by defeating the mutated goblin fleshcrafter creating them, you have no real information about the Band of the Bull’s leadership. You know only that the cult’s leader fled to the frontier community of Dyinglight with several elite agents. That’s not much to go on, but your eidolon assures you that, once in Dyinglight, you’ll be able to unmask and defeat the cult as effectively as you did in Undarin.
Dyinglight stands in the Frostmire Fen, a marsh inhabited by only the hardiest settlers. These settlers survive under the grace of Pulura, kindly goddess of the aurora and the cold night sky. If you can show these resilient frontier folk that you are honest, brave, and tenacious in your fight against evil, they will surely aid you against the Band of the Bull.
But first, you must reach Dyinglight, and that means a long journey northward through the Frostmire Fen.
Each character gains a god caller feat
REWARD
If you would discard a Blessing of Pulura for its power, recharge it instead.
DURING THIS ADVENTURE
Adventure 2: The Dyinglight Investigation
2-A: A Dangerous RoadDyinglight is surrounded by the Frostmire Fen, an expanse of treacherous bogs inhabited by barbaric marsh giants. Although the marsh giants normally avoid the road from Undarin, something has stirred them up. They now monitor the stone roads and waterways, keeping intruders away from Dyinglight…or preventing the people of Dyinglight from leaving. Discover what creature commands the marsh giants and put a stop to their predations, and the light of Pulura will shine upon you.
Display the henchman Fishpork by the blessing deck. Treat any Ulkreth henchman as though it were the henchman Fishpork. Ignore Fishpork’s power that occurs after you act.
DURING THIS SCENARIOVillain SelissaHenchmen Ulkreths (see During
This Scenario)
Players Locations1 Abyssal River1 Great Stone Bridge1 Wounded Lands2 Dark Forest3 Beach4 Watchtower5 Hatchery6 Rocky Cliff
REWARD
Loot: all Blessings of Pulura in the box
The naga Selissa has a hoard filled with trinkets stamped with Baphomet’s unholy symbol—proof that her increased aggression was purchased by the Band of the Bull. Clearly, they didn’t want anyone following them to Dyinglight.

Two firebrand inquisitors—Hosilla and Nulkineth—have come to Dyinglight, seeking converts to a new offshoot of Pulura’s faith. With insight provided by your godcalled eidolon, you see past their lies. Both inquisitors are members of the Band of the Bull, and Nulkineth is not even human, despite his handsome illusory façade. Eliminate these false prophets and show the people of Dyinglight the truth of their evil cult.
You have earned the hard-won respect of the hardy locals. You are now welcome in their community, if grudgingly, and they promise to inform you of any signs of the Baphomet’s cult.
Villain Hosilla, NulkinethHenchmen Cultists of Baphomet
Players Locations1 Defender's Heart1 Festhall1 Occult Library2 Safehouse3 Tower of Estrod4 Gray Garrison5 Befouled Altar6 Guardpost
When you would corner and defeat a villain, banish it.
To win this scenario, corner and defeat both villains.
DURING THIS SCENARIO
REWARD
Loot: Barding of Pleated LightEach character gains a skill feat
2-C: Summoner's ChallengeA pugnacious dwarf summoner named Thurl stops you in Dyinglight’s town square, amid the standing stones dedicated to Pulura. “No god callers these!” he cries to the crowd, “I am the only god caller in Dyinglight! These are pretenders, and no better than the false inquisitors you recently sheltered!” Thurl insists that you overcome traps he’s set around town to prove yourselves “true god callers.” Although you have no time for games, you have little choice. But proving your resourcefulness to the townspeople might prove valuable.
You may reveal your godcalled eidolon cohort from your hand to add 1d6 to your check against a barrier henchman.
DURING THIS SCENARIOVillain Thurl and InhazHenchmen Tangle Trap, Cryptic
Runes
Players Locations1 Alehouse1 Marketplace1 Tower2 Hall of Champions3 Cemetery4 Collapsing Bridge5 Laboratory6 House of Stolen Kisses
REWARD
Loot: FiendsplitterEach character gains a card feat
You have gained both the welcome and the respect of the people of Dyinglight. Among offers of hospitality and hearth, you press for more clues of the secretive Band of the Bull.
2-B: False Prophets

Deep in the Frostmire Fen stands an old fortress repurposed into the bastion of the Band of the Bull. In this stronghold, the cult’s elite soldiers serve the will of their high priestess—Nefti Unwesha. Nefti tricked you in Undarin, masquerading as a simple smuggler and sending you against a pitborn cabal she’d hoped would eliminate you. But now you have tracked her down. You must corner the treacherous Nefti, force her to assume her true demonic form, and put an end to her evil.
When you would defeat Nefti Unwesha, a character at your location must summon and defeat the henchman Demoniac of Baphomet, or she is undefeated.
Nefti Unwesha is a Nemesis. In addition, treat the henchman Demoniac of Baphomet as Nefti Unwesha for purposes of the Nemesis rule.
DURING THIS SCENARIOVillain Nefti UnweshaHenchmen Ivory Templars
Players Locations1 Befouled Altar1 Chapel1 Shrine to Baphomet2 Murder Hole3 Manor House4 Tower of Estrod5 Abattoir6 Guardpost REWARD
Loot: Brine’s Sting. Each character gains a skill feat, which must be in a different skill than the reward for scenario 2-B
You have crushed the Band of the Bull, dealing Baphomet’s cultists throughout Sarkoris a great blow. The first of your three visions is fulfilled, but your eidolon urges you on to Lake Ipona to confront the evil there.
2-D: The Trapper's ClueAfter proving your skill to the hardy folk of Dyinglight, a proud local trapper comes to you with valuable information. She says that she’s seen Hosilla and Nulkineth travel from Dyinglight to an abandoned fortress deeper in the Frostmire Fen. She’ll tell you the way, but she won’t do it for free; she asks that you first clear her hunting lands of an infestation of monstrous spiders.
Villain Vescavor QueenHenchmen Blink Spiders
Players Locations1 Canyon1 Fog Bank1 Sacred Spring2 Hatchery3 Molten Pool4 Rocky Cliff5 Wounded Lands6 Qlippoth Runestone
Following the grateful trapper’s directions, you learn the abandoned fortress is abandoned no longer. Banners bearing Baphomet’s symbol hang from its walls. You’ve located the high command of the Band of the Bull.
If you are dealt poison damage and that damage is not reduced to 0, treat your hand size as 3 until the start of your next turn.
DURING THIS SCENARIO
REWARD
Each character gains a power feat
2-E: The Mastermind Revealed

2-A An Odd Village2-B The Headman's Treachery2-C In the Pit2-D Maugla's Master2-E Last Stand at the Bridge
COMPLETE THESE SCENARIOS, IN THIS ORDER
Lake Ipona is in the center of Sarkoris, but wise travelers avoid it. Its fog-shrouded shores hide several small villages and ominous mysteries. You’ve learned that nabasu demons, or “death demons” that command undead such as ghouls, lurk on the lake’s misty shores. So far, these death demons haven’t become organized enough to be much of a threat—they would terrorize the occasional village but do not range far from the lake.
This has changed. According to your visions, one of these death demons has enlisted several other demons and undead into a fearsome fighting force. However, there isn’t any evidence of an army of demons or undead around Lake Ipona. You’re suspicious that they’re plotting something out of sight. This would be particularly difficult if, as rumors suggest, the death demons have enlisted the services of ulkreths, massive juggernaut demons that relish destruction. How can so many demons and undead remain hidden in Lake Ipona’s mists? Something is definitely suspicious here, and you’re determined to uncover the truth.
Each character gains a god caller feat
REWARD
If you fail a check to defeat a bane with the Curse or Ghoul trait while your godcalled eidolon cohort is displayed, you may recharge your godcalled eidolon cohort card.
DURING THIS ADVENTURE
Adventure 3: Dark Deeds on Lake Ipona
3-A: An Odd VillageYou reach the village of Frundle on the shores of Lake Ipona. The villagers are surly and furtive, casting glances over their shoulder at the lake as though afraid of something within it. The only people who will look you in the eye are the village’s totem-wearing shamans, who seem to have a strange authority. Half-heard curses drift on the wind, foretelling trouble. Something odd is at work here.
Villain noneHenchmen Jalhazar’s Curse,
Breath of Dagon, Curse of the Flesheaters, Eye of Dagon, Witch Doctors
Players Locations1 Docks1 Fishing Village1 Harbor2 Marketplace3 Rocky Cliff4 Cemetery5 Abyssal River6 Family Tomb
Having scoured Frundle, you’ve learned of its reclusive headman, Gilbrok the Tongue. Perhaps he can provide some further information about his curse-shrouded village—if you can find him.
If you are at a closed location and do not explore during your explore step, you may summon and encounter a Witch Doctor henchman.
To win this scenario, close all locations.
DURING THIS SCENARIO
REWARD
Each character gains a skill feat

You’ve learned that the headman of the village of Frundle, a toothless old shaman named Gilbrok the Tongue, might be able to tell you more about the mysteries of the lake. Gilbrok’s response to your inquiries is a vacant, useless stare. As you turn away from him, massive creatures lurch from the lake’s depths, dripping foul water and reeking of brine and decay. It is then Gilbrok breaks his silence, only to utter a throaty cackle of glee. “Maugla comes!” he cries, “And you are his!”
You’ve learned that Gilbrok the Tongue serves a death demon named Maugla. As you force Maugla to flee, Gilbrok utters one final, powerful curse, and all goes dark…
Villain MauglaHenchmen Gilbrok the Tongue,
Blackwater Charda, Ulkreths
Players Locations1 Beach1 Fishing Village1 Tower2 Watchtower3 Manor House4 Occult Library5 Docks6 Laboratory
Treat Gilbrok the Tongue as though he had the Servitor trait (see Revised Rules).
Maugla is a Nemesis.
DURING THIS SCENARIO
REWARD
Loot: Ring of the Iron Skull, Scoundrel’s Sword Cane. Each character gains a card feat
3-C: In the PitYou wake to the sounds of shrieks and sobs. You are in an underground complex of torture chambers, each filled with devices better left undescribed and piteous souls with flayed skin, broken bones, and hopeless gazes. You wriggle free of your bonds, but your options are limited: you have no choice but to defeat the fiendish wardens and make your escape.
Build a number of Torture Pit locations equal to the number of characters + 1; when you close a location, do not flip over the Torture Pit card. When you corner and defeat a villain, banish it.
To win this scenario, corner and defeat both villains.
DURING THIS SCENARIOVillain Savash, KarsosHenchmen Fiendish Minotaurs
Players Locations1–6 Torture Chamber
REWARD
Each character gains a skill feat, which must be in a different skill than the reward for scenario 3-A
You’ve escaped the sprawling torture pit, but you have no idea where you are. The gentle lapping of waves indicates you must be near a large lake, but the ruins surrounding you are unfamiliar.
3-B: The Headman's Treachery

You’ve escaped from your horrible prison, only to find that you are still trapped. You are on a ruin-choked island in the middle of misty Lake Ipona. By creeping within and beneath the ruins, you identify demonic activity all over the island. You see your old foe Maugla ferrying messages from the shore to a larger death demon in a ruined hall. Defeat Maugla’s master, and you might find a way to escape the island.
You’ve chased Skulgrym away and discovered a bridge to the mainland, but you can’t leave yet—Skulgrym left evidence of his scheme: armies of ghouls standing ready to march at his command.
Villain SkulgrymHenchmen Blood Demon, Ulkreths
Players Locations1 Citadel1 Fog Bank1 Hall of Champions2 Cathedral of Chaos3 Cavern4 Cell5 Wounded Lands6 Armory
3-E: Last Stand at the BridgeYou’ve uncovered the master plan of the death demons of Lake Ipona. They have amassed armies of ghouls to march across Lake Ipona on an ancient bridge. You must hold this bridge at all costs, to provide escape for your fellow prisoners but halt the undead army. This will surely draw the death demons to you, allowing you to stop them for good. Only then can you destroy the bridge and prevent their undead army from overrunning Sarkoris.
Villain Maugla, SkulgrymHenchmen Theruk Nul, Undead
Companies
Players Locations1 Collapsing Bridge1 Great Stone Bridge1 Windward Isle2 Beach3 Watchtower4 Rocky Cliff5 Tower6 Qlippoth Runestone
You destroy the bridge to the mainland, causing the few surviving ghouls to tumble into the lake. Ghouls cannot drown, but neither can they swim, so they remain trapped and leaderless for now. The second of your visions is fulfilled, and your eidolon directs you onward.
3-D: Maugla's Master
You may recharge your hand to evade a non-villain monster.
Skulgrym is a Nemesis.
DURING THIS SCENARIO
REWARD
Each character gains a card feat
If you defeat Maugla, he does not escape; display him next to the Great Stone Bridge location instead. If you would defeat Skulgrym and Maugla is not displayed next to the Great Stone Bridge, Skulgrym is undefeated but does not escape as normal; instead, shuffle him into the Great Stone Bridge location (opening that location if it is closed). To win the scenario, corner and defeat Skulgrym.
Maugla and Skulgrym are Nemeses.
DURING THIS SCENARIO
REWARD
Loot: Spherewalker’s Staff, Starbow, Swallowtail Bracers. Each character selects a role card and gains a power feat

4-A Aboard the Pleasure Barge4-B The Devil Game4-C Chains of Velvet4-D Assault on the House of Reflections4-E Pit of Compulsions
COMPLETE THESE SCENARIOS, IN THIS ORDER
In northeast Sarkoris, near the border contested by the nomadic Mammoth Lords, lie two immense, clear lakes. Collectively called the First Rains, Sarkorian legends say these two lakes were formed by Pulura’s tears, crying over the first evil she saw in the world.
Floating on the larger lake is a massive barge called the House of Reflections. The size of a small city, this opulent floating palace is a popular vacation destination for Sarkorian aristocrats. Mirrors adorn every room in the House of Reflections, magically enhancing the beauty of those reflected within. Here, the wealthy flit between the palace’s ballrooms, drug dens, and brothels. The most popular of these is called the Yearning House, where delightful pleasure and exquisite pain are discreetly dispensed to its patrons.
A charismatic elf named Imaloka Ghalmont-Neverhome is the mayor-madam of the House of Reflections. Obtaining an audience with Imaloka is difficult, but you must meet with her to learn what’s really going on in the floating pleasure palace. Your eidolon assures you that there is more here than aristocratic dalliances and moral laxity. True evil lies within the House of Reflections, and you’re determined to destroy it.
Each character gains a god caller feat
REWARD
When you attempt a Diplomacy check, you may bury a card to gain the skill Diplomacy: Charisma +5 for that check.
DURING THIS ADVENTURE
Adventure 4: House of Reflections
4-A: Aboard the Pleasure BargeSmiling servants stand ready to fill any desire of the visiting Sarkorian aristocrats. The imperious bard Isawyn has brought her own retinue, and you have a feeling that they are more than they appear. You’re not sure why Isawyn views your group as rivals, but you’ve caught her murderous attention—and the attentions of her enchantingly comely entourage. Weapons are frowned upon in the House of Reflections, hampering your attacks, but you must defend yourselves against the diva.
If you reveal a weapon, recharge it. Isawyn the Diva is a Nemesis.
DURING THIS SCENARIOVillain Isawyn the DivaHenchmen Kiranda, Janeamine,
Luccaria, Lust Demon, Lady Nightshade, Cryptic Runes
Players Locations1 Theater of Corruption1 Festhall1 Merchant Marina2 Docks3 Jasperleaf Apothecary4 Alehouse5 House of Stolen Kisses6 Cathedral of Chaos
REWARD
Loot: Lady Agasta Smithee, Talisman of True Faith. Each character gains a skill feat
You’ve shown Isawyn that you’re not to be pushed around; furthermore, you've unmasked her entourage as fiends. Isawyn claims her retinue duped her; you don’t believe that for a second, but the other aristocrats seem mollified. Watch your backs.

4-B: The Devil Game“God callers!” cries a well-dressed aristocrat named Zanedra. Zanedra reclines upon a massive reptilian beast you recognize as her own eidolon. With a wave of a hand, she dismisses several attendants. Her eyes sparkle as she looks you over. “Kindred souls! How about a little game just among us god callers? I’ll summon up several creatures, and you see if you can hunt them down around the barge and dispatch them. If you’re quick enough, and can best me as well, I’ll introduce you to Imaloka, my personal friend.”
Zanedra’s “game” of setting summoned devils loose in the House of Reflections was dangerous and ill-advised, but Zanedra is true to her word. She provides you a formal introduction to Imaloka.
4-C: Chains of VelvetFinally, you meet Imaloka, owner and proprietor of the House of Reflections, at the Yearning House, the largest and most opulent brothel on the barge. Imaloka laughed “the Queen will see to you.” You did not like the ominous sound of that, and soon it became clear that she’d trapped you in the Yearning House. The patrons and workers in the Yearning House seem disinclined to let you leave through any door or window, so you’ll have to smash your way through the bottom of the barge and swim to safety—but Imaloka has guardians under the barge as well.
Villain noneHenchmen Vrykolakas
Players Locations1 Yearning House1 Tidewater Rock2 Sea Fort3 Beach4 Coastline5 Sea Caves6 Windward Isle
You’ve fled the House of Reflections after Imaloka’s treachery, but you don’t intend to stay gone for long. There is a wicked presence hidden in the Yearning House, and you’re determined to eliminate it.
Villain Zanedra and SvennarobethHenchmen Drowning Devil,
Sentinel Devil, Erinyes Devil, Sentinel Devil, Erinyes Devils
Players Locations1 Alehouse1 Cathedral of Chaos1 House of Stolen Kisses2 Harem of Ardent Dreams3 Hall of Champions4 Chapel5 Festhall6 Jasperleaf Apothecary
You may put your Godcalled Eidolon card on top of your deck from your hand to add 1d8 to a check against a monster with the Devil trait.
DURING THIS SCENARIO
REWARD
Loot: Transmogrify. Each character gains a power feat
Do not shuffle a henchman into the Yearning House. All characters start at the Yearning House. Characters cannot move from the Yearning House until it is closed. If the Yearning House is empty, it closes automatically.
To win, close all locations.
DURING THIS SCENARIO
REWARD
Each character gains a skill feat

You now see the truth: the Yearning House is no mere brothel, but a strange quasi-dimension of lust and pain. Its geometries are strange and different, slowly spreading to draw in nearby items and creatures like grasping tendrils. The fiendish Queen at the heart of the Yearning House is pulling in reinforcements to shield herself from your fury. You must not allow her to succeed: you can enlist aid at nearby locations to prevent her relentless pull, then corner her within the Yearning House and put an end to her evil.
Rather than distributing villains and henchmen normally, shuffle the Shrouded Queen into the Yearning House. At the start of each turn, choose a random location other than the Yearning House and shuffle its bottom card into the Yearning House.
When you acquire an ally from any location other than the Yearning House, you may attempt to close that location.
DURING THIS SCENARIOVillain Shrouded QueenHenchmen none
Players Locations1 Yearning House1 Defender’s Heart1 Harem of Ardent Dreams1 House of Stolen Kisses2 Chapel3 Laboratory4 Cathedral of Chaos5 Guardpost6 Murder Hole
REWARD
Loot: Howling Skull Armor. Each character gains a card feat
The Shrouded Queen shrieks telepathically as you finally slay her. In her telepathic death-cries, you see she was an agent of a much larger plot; a cabal of serpentine demons seeks to overthrow Sarkoris’s capital city of Iz. It is your destiny to stop them.
4-D: Assault on the House of ReflectionsYou’ll have to fight your way back into the House of Reflections to uncover what villainy Imaloka is hiding there and who this “Queen” of the Yearning House is. This time, you’ll enter the barge on your own terms, weapons in hand. Imaloka has selected a powerful ally to see you driven from the barge: your enemy Isawyn the bard. Never one to repeat a performance, Isawyn has an all-new entourage of demons and monsters. Even the mortal guests of the House of Reflections obey her compelling voice.
Villain Isawyn the DivaHenchmen Vulture Demon,
Shadow Demon, Abyssal Scavenger, Lady Nightshade, Alrys Harnaste, Kestoglyr Mantel, Lightning Elemental
Players Locations1 Abattoir1 Docks2 Harbor3 Armory4 Defender’s Heart5 Jasperleaf Apothecary6 Harem of Ardent Dreams
You have bested Isawyn and her minions; the opulent Yearning House is before you, where you plan to find the secret evil lurking at the heart of the House of Reflections.
Shuffle an additional ally into each location deck. If you acquire an ally from a location deck, the ally deals you 1 point of mental damage that many not be reduced.
Isawyn the Diva is a Nemesis.
DURING THIS SCENARIO
REWARD
Each character gains a power feat
4-E: Pit of Compulsions

5-A Proof of Strength5-B Marhevok’s Honor5-C Jaruunicka’s Ruse5-D Hyapatia’s Family5-E Against the Godhunter
COMPLETE THESE SCENARIOS, IN THIS ORDER
As you slew the Shrouded Queen at the center of the House of Reflections, you received a telepathic burst from the dying monstrosity. You are sure the Shrouded Queen intended to take this secret to her grave, but your eidolon’s prophetic powers allowed you to peer into the vile Queen’s final thoughts.
The Shrouded Queen was placed at the House of Reflections to lure Sarkorian aristocrats from the capital city of Iz. Located deep in the mountainous Northmounds, Iz is a city of great power and secrets. Unknown to the leaders of Sarkoris, Iz harbors a powerful cult of serpentine demons called mariliths. These mariliths work in secret to bring down the leadership of Sarkoris from within. They are the greatest threats facing Sarkoris.
Such powerful fiends cannot be easily overcome by mortal magics. The most legendary weapons in Sarkoris are held by the mighty Balemoon clan, leaders of the city of Valahuv. You must petition the Balemoon clan-lieges to grant you these weapons before you can face the demons that are secretly working to topple Sarkoris.
Earning the favor of the Balemoon clan-lieges will not be easy. They are a proud, powerful clan known to train dinosaurs and other beasts to prove their might. The path of your destiny leads you to Valahuv.
Each character gains a god caller feat
REWARD
If you defeat a monster with the Animal trait, recharge a random card from your discard pile.
DURING THIS ADVENTURE
Adventure 5: Balemoon Revelations
5-A: Proof of StrengthBefore any leaders of the Balemoon clan will speak with you, you must prove your strength to the people of Valahuv. A powerful chimera named Soltengrebbe is terrifying residents of a nearby mountainous hot spring, and defeating the beast in single combat will sufficiently demonstrate your might—unfortunately, a motley band of mercenaries loyal to a gunslinger named Omara Culverin is also hunting the chimera, and they don’t like competition.
Other characters at your location can’t attempt sequential combat checks on banes you encounter.
If you defeat Jakaw Razorbeak, Riaris Krine, Kipper, or Giles Halmis, you gain Omara Culverin as a Nemesis.
DURING THIS SCENARIOVillain SoltengrebbeHenchmen Jakaw Razorbeak,
Riaris Krine, Kipper, Giles Halmis, Ash Giant Thugs
Players Locations1 Canyon1 Cavern1 Molten Pool2 Dark Forest3 Abyssal River4 Rocky Cliff5 Wintersun Hall6 Tower
REWARD
Each character gains a power feat
Although you have earned the right to speak to the Balemoon clan-lieges, you learn that several of them have recently retreated from public view. You must track them down and persuade them of your worthiness.

Marhevok Wintersun has asked you to confirm that his clan-mate Talitha is safe. Her retainers say she has fallen under the sway of a witch named Jaruunicka. But in your brief audience with Talitha—just before the sultry barbarian woman dismisses you—there is no sign of the crone Jaruunicka. Something seems suspicious. You secretly investigate Talitha’s estate and make a surprising find in a hidden laboratory: Talitha’s weeks-old corpse. This is the work of shapeshifters, and you suspect Jaruunicka is at this plot’s heart.
After setting up the locations, shuffle a Blessing of Nocticula loot card into the first three locations listed.
Display the henchman Minagho by the blessing deck. Treat any Ulkreth henchman as though it were the henchman Minagho. When Minagho would allow you to draw the cohort Yaniel, instead draw the ally you used to increase Minagho’s difficulty to defeat.
DURING THIS SCENARIOVillain JaruunickaHenchmen Ulkreths
Players Locations1 Dinosaur Corral1 Laboratory1 Torture Pit2 Defender’s Heart3 Safe House4 Great Stone Bridge5 Hall of Champions6 Manor House REWARD
Each character gains a card feat
Talitha’s household is thrown into disarray by your revelation that a hag had replaced her; Marhevok is grateful for your service but saddened by the loss. He asks you to inform their clan-mate Hyapatia of the dark news, and of your good deeds.
5-B: Marhevok's HonorMarhevok Wintersun is the leader of the Balemoon clan of Valahuv. Marhevok hasn’t been seen in weeks, though—he has retreated to his walled estate in the city. Rumors say he’s had several ominous bull-masked visitors during his isolation. You know these to be members of the evil Band of the Bull, no doubt attempting to corrupt Marhevok and regain their power after the crushing defeat you dealt them. Fight your way through these minions—including Marhevok’s brutish right-hand man, Gorebeard Trench—and free Marhevok from their demonic influence.
Villain Marhevok WintersunHenchmen Gorebeard Trench,
Jestak, Ivory Templars
Players Locations1 Dinosaur Corral1 Hall of Champions1 Wintersun Hall2 Shrine to Baphomet3 Fishing Village4 Hatchery5 Watchtower6 Befouled Altar
After subduing Marhevok and chasing away the cultists attempting to influence him, the barbarian lord thanks you with a pair of trained dinosaurs. He asks you to check in on his fellow clan-mates, who may be similarly beset by fiendish cults.
5-C: Jaruunicka’s Ruse
If you would banish an Ivory Templar from a location deck, display it next to the blessings deck. For each Ivory Templar displayed next to the blessings deck, increase the difficulty to defeat Marhevok Wintersun by 2.
DURING THIS SCENARIO
REWARD
Loot: 2 Baby Triceratops allies (Deck 6). Each character gains a skill feat

The gunslinger Omara Culverin is one of the world’s best hunters. You foiled her unscrupulous team hunting the chimera Soltengrebbe, so Omara came to Valahuv herself for revenge. When she learned that you were god callers, she immediately planned a new hunt: to kill your god-fragments and you with them. Omara ranges all throughout Valahuv, sniping at you from rooftops before slipping away again. She sees you merely as prey, and you must prove yourselves the better hunters by defeating her. Only then will the Balemoon clan relinquish the weapons you seek.
Do not build location decks as normal. Instead, shuffle together 1 monster, 1 barrier, 1 weapon, 1 armor, 1 item, 1 spell, 1 ally, and 1 blessing for each pair of locations listed above, then deal 4 cards to each location in the pair. Do this for each pair of locations. Shuffle together Omara Culverin and random monsters from the box equal to the number of locations minus 1, then shuffle one card from this pile into each location.
If you would defeat Omara Culverin at a location where its paired location is not permanently closed, she is undefeated. Omara Culverin does not escape as normal; instead, if she escapes from a location with the Abyssal trait, she escapes only into locations without the Abyssal trait; if she escapes from a location without the Abyssal trait, she escapes only into locations with the Abyssal trait. If she can't do so, she is defeated.
DURING THIS SCENARIOVillain Omara CulverinHenchmen random monsters
Players Locations1 Befouled Altar, Festhall1 Prison Vault, Manor House2 Abyssal River, Chapel3 Shrine to Baphomet,
Alehouse4 Wounded Lands, Occult
Library5 Harem of Ardent Dreams,
Marketplace6 Molten Pool, Maze
REWARD
Loot: Banner of Valor, Blancher, Skyrocket Crossbow. Each character gains a skill feat, which must be in a different skill than the reward for scenario 5-B
You are worthy of the Balemoon clan’s relics. Proudly bearing them, you travel to Iz.
5-D: Hyapatia's FamilyHyapatia’s household is in disarray, as she has fled Valahuv. You learn that Hyapatia is not a human, but a half-human, half-animal creature called a lamia. Despite her monstrous nature, Hyapatia has served Marhevok faithfully and adopted into the Balemoon clan years ago. But recently, Hyapatia’s wicked sister, Ursathella, lured her away to her “proper family” downriver from Valahuv, using sorcerous enchantments. You suspect this Ursathella doesn’t have her sister’s best interests in mind. You must overcome the enchanted Hyapatia and return her to her adopted clan.
Villain HyapatiaHenchmen Ursathella, Tangle
Trap, Brimorak, Tangle Trap, Brimorak, Tangle Traps
Players Locations1 Coastline1 Fog Bank1 Tower2 Hatchery3 Qlippoth Runestone4 Canyon5 Laboratory6 Cathedral of Chaos
Marhevok is pleased to have Hyapatia returned to the Balemoon clan. One more hurdle stands in your way: a dangerous foe has come to Valahuv seeking you...
If you defeat a Tangle Trap henchman by at least 12, you may immediately attempt to close the location the Tangle Trap came from.
DURING THIS SCENARIO
REWARD
Loot: Quickened Ray, Aiger’s Kiss. Each character gains a power feat
5-E: Against the Godhunter

6-A Into the Northmounds6-B Threshold of the Cult6-C The Ankou’s Claws6-D Death in the Iron Armory6-E Nest of Snakes
COMPLETE THESE SCENARIOS, IN THIS ORDER
With the mighty ancestral weapons of the Balemoon Clan, you are ready to uncover the cult of serpent-demons slithering through Iz, the mighty capital of Sarkoris. Despite being the nation’s capital, the fortress-city of Iz lies within the forbidding Northmounds, a remote fastness that harbors the most influential chieftains and aristocrats of Sarkoris. The denizens of Iz dictate many facts of Sarkorian life: religion, economy, and justice. If the mariliths can subvert Iz, they can overrun all of Sarkoris, bringing the entire country into decadent demon-worship, just as the Shrouded Queen did at the Palace of Reflections. You must stop these evil creatures.
Although the people of Sarkoris are ignorant of the danger emanating from Iz, you see the signs: debased criminals receiving unusually light punishments, commands to replace sacred sigils with serpentine shapes, and accolades heaped upon warlords that would have been reviled for their honorless butchery in better days.
Only the desperate or brave risk the treacherous roads through the Northmounds to Iz, but this is the path before you. You know that Sarkoris’s most notorious prison, Threshold, lies along the way. The wardens of Threshold are wise druids and priests, and you have decided to seek their counsel on your way to confront the cult festering in Iz.
Each character gains a god caller feat
REWARD
At the end of your turn, you may recharge your displayed godcalled eidolon cohort.
DURING THIS ADVENTURE
Adventure 6: The Serpents' Coils
6-A: Into the NorthmoundsOnly the hardiest of souls visit proud Iz, traveling along winding roads past ancient ruins built by long-dead chieftains. The Rolling River tumbles through the Northmounds below the road, a cold river through cold lands. You spy strange travelers in these mist-shrouded mountain passes, bundled in thick cloaks and furs. When they spot you, they throw aside their furs and reveal themselves as demons and monsters, seeking prey for their vile amusements.
If you fail to defeat a monster, move to the Torture Pit and end your turn.
Odeenka is a Nemesis.
DURING THIS SCENARIOVillain OdeenkaHenchmen Treachery Demon,
Rampaging Triceratops, Kralisq, Demoniacs of Baphomet
Players Locations1 Fog Bank1 Torture Pit1 Wounded Lands2 Tower3 Canyon4 Abyssal River5 Coastline6 Rocky Cliff
REWARD
Each character chooses to gain a power feat, skill feat, or card feat
As you loose your final attack on the marilith Odeenka, she cackles “We of the Serpent Coils know you are coming—and we are ready!” With a flash, she disappears in acrid smoke.
You have attracted some powerful and unwelcome attention. The Serpent Coils have hired a powerful fey assassin named Nezirrius to prevent you from reaching the city of Iz. You race through difficult mountain passes and underground passages, but cannot be sure of losing the assassin. You can trust the few human travelers you meet on the roads around Iz, but can they trust you, when a supernatural killer is dogging your steps?
When you acquire an ally from a location deck, you may attempt to close your location.
When you would close a location, summon and encounter the henchman Nezirrius. If you do not defeat Nezirrius, the location is not closed.
To win, close all locations.
DURING THIS SCENARIOVillain noneHenchmen random allies
Players Locations1 Canyon1 Great Stone Bridge2 Rocky Cliff3 Cavern4 Locust Shrine5 Gray Garrison6 Threshold
REWARD
Each character chooses to gain a power feat, skill feat, or card feat
With the fey assassin defeated for the final time, you enter the proud city of Iz. The Serpent Coils cult is hidden here, and you are determined to find them.
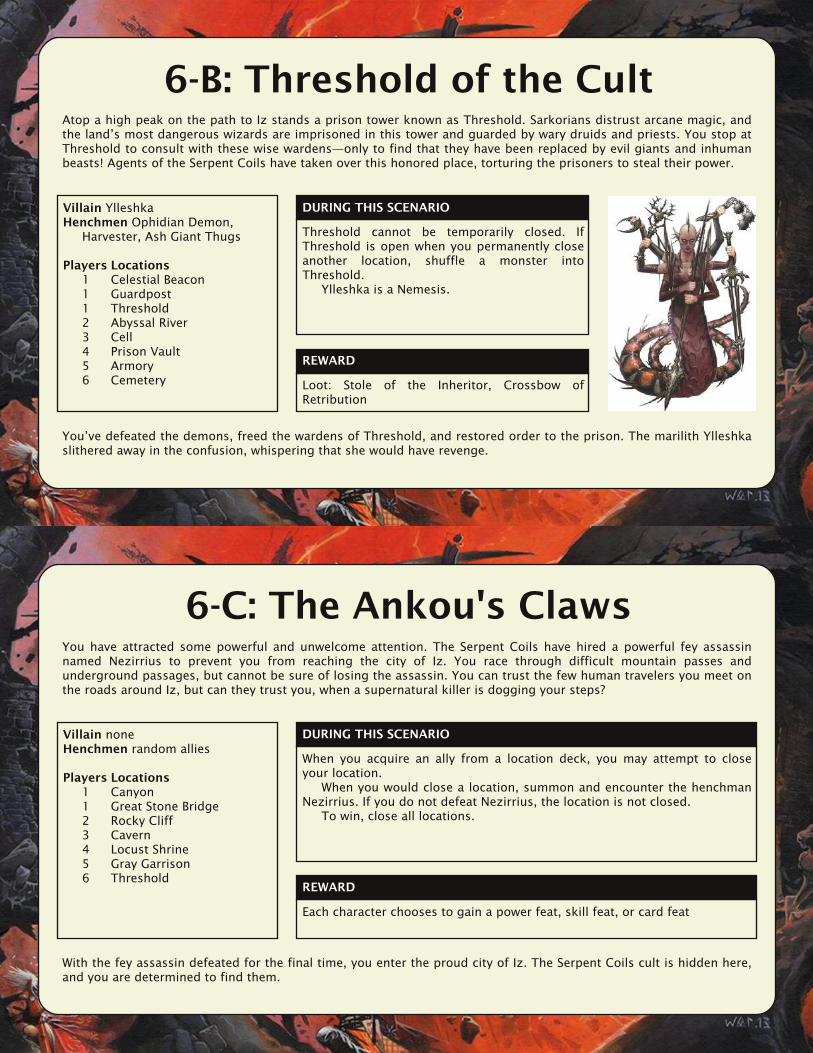
6-B: Threshold of the CultAtop a high peak on the path to Iz stands a prison tower known as Threshold. Sarkorians distrust arcane magic, and the land’s most dangerous wizards are imprisoned in this tower and guarded by wary druids and priests. You stop at Threshold to consult with these wise wardens—only to find that they have been replaced by evil giants and inhuman beasts! Agents of the Serpent Coils have taken over this honored place, torturing the prisoners to steal their power.
Villain YlleshkaHenchmen Ophidian Demon,
Harvester, Ash Giant Thugs
Players Locations1 Celestial Beacon1 Guardpost1 Threshold2 Abyssal River3 Cell4 Prison Vault5 Armory6 Cemetery
You’ve defeated the demons, freed the wardens of Threshold, and restored order to the prison. The marilith Ylleshka slithered away in the confusion, whispering that she would have revenge.
Threshold cannot be temporarily closed. If Threshold is open when you permanently close another location, shuffle a monster into Threshold.
Ylleshka is a Nemesis.
DURING THIS SCENARIO
REWARD
Loot: Stole of the Inheritor, Crossbow of Retribution
6-C: The Ankou's Claws

6-D: Death in the Iron ArmoryYour eidolon directs you to the Iron Armory, the most prestigious fighting academy in Sarkoris. The war-captains of the Iron Armory train Sarkoris’s most powerful chieftains. But something is very wrong at the war academy. The hulking giant priestess Hepzamirah lurks in the cavernous chambers of the Iron Armory, murdering the war-captains and animating them as loyal undead minions. The serpentine brands on Hepzamirah’s flesh indicate that she has something to do with the Serpent Coils—defeat her and discover what she knows.
Hepzamirah is powerful, but once defeated, she quickly spills what she knows. The leader of the Serpent Coils is the marilith Aponavicius at the Temple of Storms.
6-E: Nest of SnakesThe Serpent Coils operate out of the Temple of Storms, an ancient, sprawling temple to the most powerful of Sarkoris’s nature gods. The Serpent Coils, disguised as priestesses of the temple, dispense their venomous advice to Sarkorian chieftains and aristocrats, enhancing their “suggestions” with evil magic. Their leader, Aponavicius, preserves the public entry of the Temple of Storms in order to preserve her ruse, but she has perverted the rest of the building into her evil playground. Eliminate the Serpent Coils for good!
Villain Aponavicius, Odeenka, Ylleshka
Henchmen Ophidian Demon, Grimslakes
Players Locations1 Abattoir1 Chapel1 Locust Shrine2 Torture Pit3 Cell4 Cathedral of Chaos5 Shrine to Baphomet6 Torture Chamber
You have destroyed the Serpent Coils and brought peace and stability to Sarkoris again. You can return to your peaceful village at last, certain that Sarkoris is safe from demonic influence…for now.
Villain HepzamirahHenchmen Draugr Captains
Players Locations1 Watchtower1 Hall of Champions1 Prison Vault2 Gray Garrison3 Murder Hole4 Armory5 Guardpost6 Citadel
When you banish or display a weapon, you must also banish the top card of your deck.
DURING THIS SCENARIO
REWARD
Each character gains a power feat, a skill feat, and a card feat
After you defeat a villain that can't escape, any character at that villain’s location may immediately move. To win, corner and defeat all 3 villains. If you lose this scenario, banish 3 cards from your deck.
Odeenka and Ylleshka are Nemeses.
DURING THIS SCENARIO
REWARD
Each character gains two god caller feats

AcknowledgementsThis product would not what it is without the help of many people.
I'm grateful for the assistance of Gregory Hanigan, Shanyce Henley, and Stephanie Lundeen for playtesting. I'm also grateful for the many people on the Paizo forums who looked over the ideas here, particularly the God Caller rules, and provided such valuable feedback!
Most of all, thanks as ever to my wife Stephanie, for her support, encouragement, and tireless editing. There's very little anyone sees with my name on it that she hasn't looked over, and she does so cheerfully despite having our three increasingly rambunctious children to wrangle.