
Notes on Tuning and Maintenance of Ibis Bicycles, … · Notes on Tuning and Maintenance of Ibis...
26
Instruction Manual Notes on Tuning and Maintenance of Ibis Bicycles, Rev. D (Mojos Edition) Reprinting Permitted if Source Quoted
Transcript of Notes on Tuning and Maintenance of Ibis Bicycles, … · Notes on Tuning and Maintenance of Ibis...

Instruction Manual
Notes on Tuning and Maintenance of Ibis Bicycles, Rev. D (Mojos Edition)
Reprinting Permitted if Source Quoted

2
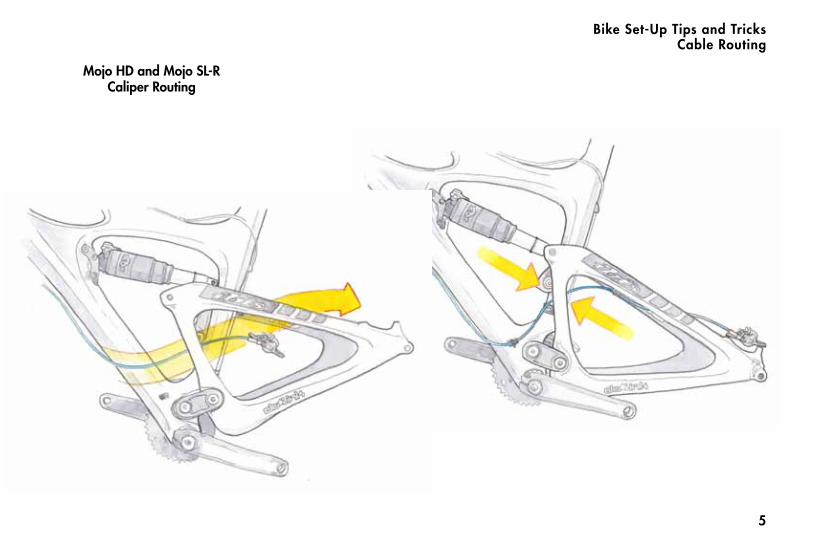
First, remove the rear shock eye bolt and move the swingarm to its most forward position. Then, remove one set of bolts from the upper link. (The forward ones where they attach to the front triangle are easiest.) At that point the rear caliper should just fit through the space between them and on back to its place on the rear dropout. Keep the line between the swingarm and the frame as short as possible or it could get pinched by the upper link bolt.
HD Cable GuardWe’ve designed a cable bash guard to protect the cable housing along the downtube from rocks. The guard is optional, but should be used if you are riding in areas where big rocks might crush or slice the cable housing. It’s available in the Ibis store on our website or through your Ibis retailer. You can also use this cable guard on the Mojo and Mojo SL and SL-R. On the Mojo and Mojo SL, you will need to secure the upper end of the guard, as the original Mojos do not have the upper mounting bolt on the
down tube. We use double-stick tape for this when mounting the guard on a Mojo or Mojo SL.
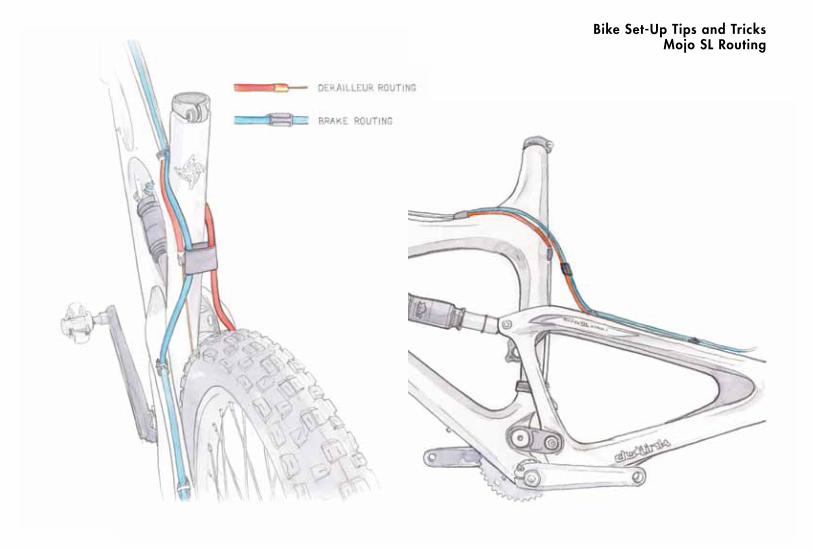
Mojo / Mojo SL:The derailleur housing and rear brake hydraulic hose can be routed around the opposite side of the stem. The length of housing between the rear top-tube stop and the upper swing arm stop for the rear derailleur should be kept as short as possible to keep it from bowing out and contact-ing your leg. We recommend you use a piece of innertube about 3 cm long, feeding the rear brake and derailleur cables through it just behind the seat tube as shown. Zip Ties work well too.
Cable RoutingBike Set-Up Tips and Tricks
Cable Routing for Mojo HD and SL-RIt’s designed to run full housing to the rear derailleur. This means that the housing has no interruptions, and runs as one continuous piece from the shifter to the rear derailleur. The top-tube cable stops work best with front derailleur or adjustable height seatpost cables. See page 10 for an illustration of the proper rear derailleur cable routing. On the Mojo HD, if you’re not going to be using them, remove the cable stops and screw the Allen head bolt back in place for a clean look.
Rear Brake Hydraulic Hose Routing for Mojo HD and SL-RThe easiest way to get the brake hose between the main frame and swing-arm is to feed it through when you dis-connect the hose to cut down the lines. If you do not have to cut down the line the rear caliper can be fed between the main frame and swingarm without disconnecting the line. This saves hav-ing to bleed the brake system.
3
Mojo SL RoutingBike Set-Up Tips and Tricks

4
Mojo HD and Mojo SL-R Routing
Cable RoutingBike Set-Up Tips and Tricks
5
Mojo HD and Mojo SL-R Caliper Routing
Bike Set-Up Tips and TricksCable Routing
6
MRP and Ibis have designed two custom single ring chain guides for the Mojo HD and Mojo SL. They are called the G3 SL and the Lopes SL. Both mount directly to the frame via the bottom bracket and the main pivot shaft. This fixes the guide in place so it won’t rotate. The pivot shaft on the HD is already drilled and threaded to accept either guide. For the Mojo SL, we make a special main pivot shaft that facilitates mounting of either chain guide.If you’re converting your triple crankset to be compatible with either guide, we recommend a non–ramped replace-ment chainring (34 and 36 tooth rings are available in our webstore.) To do this conversion you should start with a triple crank and remove the inner and outer rings. Double cranks do not have the right chainline to make the guides work. The G3 SL is designed for a 32t–36t single chainring and features bash pro-tection as well as chain retention. The Lopes SL will accommodate chain-rings from 32t–38t. (34 and 36 tooth rings are available in our webstore.)
Dual Ring GuidesThe Ibis/MRP 2x dual ring guide works on the Ibis Mojo HD and Mojo SL (and is not compatible with the Mojo SL-R). It’s available in our online store: http://store.ibiscycles.com/product166This guide will work with:• SRAM 2x10 cranks with a 26/39 or
28/42 ring combo, using a SRAM dedicated 2x10 front derailleur.
• Shimano 2x10 XTR/XT cranks with a 28/40 ring combo and a Shimano 2x10 front derailleur.
• Shimano 2x10 XT cranks with a 26/38 ring combo and a SRAM 2x10 34-38 front derailleur. (SRAM X.0 2x10 38/36t High Direct Mount Dual Pull Front Derailleur).
NOTE: MTB triple cranks down convert-ed to a 2x10 (in the middle and granny positions) won't work with the 2x guide. This also includes the XTR 26/38 combo (which is built on 3x spacing).To mount the guide, use the 1mm (extra thin) BB spacer provided with the guide between the BB shell and the guide, then a 2.5mm BB spacer between the guide and the BB cup. Use the provided
Bike Set-Up Tips and TricksChain Guides M8x12 bolt to bolt the guide directly to
the main pivot shaft on the front triangle. Use blue Loctite on this bolt.On a Mojo SL, replace the stock main pivot shaft with a "Mojo SL-MRP Chain-guide Adapter" pivot shaft available from our store: http://store.ibiscycles.com/product120. Then attach the guide to the main pivot shaft with the included M8x12 bolt. Spacing on the HD and SL is identical.
Single Ring Guides For you 1X10 lovers, we’ve found that Shimano’s Shadow Plus and SRAM’s Type II rear derailleur virtually elimi-nates the need for the lower half of your chain guide, while making your bike nearly silent. Both derailleurs provide heavier chain tension plus a friction stabilizer to dampen the cage and thus chain movement (chain slap), which dramatically reduces derailing of chains. Combine either rear derail-leur with an e*thirteen XCX-ST D-Type or an MRP 1X upper guide and you should have very few chain issues.

7
* We do our best to test as many possible combinations as possible, but we simply can’t get to mocking up every permutation.
Front Derailleur CompatibilityBike Set-Up Tips and Tricks
If You Use This Crank: Use This Front Derailleur:Mojo HD w/ 35mm Seat Tube OD:
Sram 38/24 Sram 2x10 High Direct Mount 38/36 w/ Problemsolvers adapterSram 39/26 Sram 2x10 High Direct Mount X.O/X.9 (XX does not exist) w/ Problem Solvers 68mm Direct Mount AdapterSram 42/28 Sram 2x10 High Direct Mount X.O/X.9 w/ Problem Solvers Adapter or XX High Clamp Top Pull 34.9, ModifiedXTR 38/26 Shimano 2x9 Down Swing Dual Pull 34.9 SLX (M667L5)XTR 40/28 Shimano 2x9 Down Swing Dual Pull 34.9 SLX (M667L5)Shimano & Sram 3x10 Shimano & Sram 3x10 Down Swing Dual Pull 34.9 (M981L6 / M77110L6 / M66110L6)
Mojo/SL/Tranny w/ 35mm Seat Tube OD:Sram 36/22 Sram 38/24
Sram 38/36 High Direct Mount with Problemsolvers adapter Sram 38/36 High Direct Mount with Problemsolvers adapter
Sram 39/26 Sram 2x10 High Direct Mount X.O/X.9 (XX does not exist) w/ Problem Solvers 68mm Direct Mount AdapterSram 42/28 Sram 2x10 High Direct Mount X.O/X.9 w/ Problem Solvers Adapter or XX High Clamp Top Pull 34.9, ModifiedXTR 38/26 Shimano 2x9 Down Swing Dual Pull 34.9 SLX (M667L5)XTR 40/28 Shimano 2x10 Down Swing Dual Pull 34.9 XTR (M986L6)
Mojo HD w/ Direct FD mounting:
Sram 38/24 Sram 2x10 High Direct Mount 38/36Sram 42/28 and 39/26 Sram 2x10 High Direct Mount X.O/X.9 (XX does not exist)Shimano 38/26 Not CompatibleShimano 40/28 Shimano 2x10 Direct Mount (M986-D / M786-D) not E-type
Shimano & Sram 3x10 Direct Mount (M981-D / M77110-D / M66110-D) not E-type
Mojo SL-R (Direct Mount):
Ripley:
Sram 38/24 Sram 38/36 High Direct MountSram 42/28 and 39/26 Sram 2x10 High Direct Mount X.O/X.9 (XX does not exist)Shimano 38/26 Not CompatibleShimano 40/28 Shimano 2x10 Direct Mount (M986-D / M786-D) not E-type
Shimano & Sram 3x10 Direct Mount (M981-D / M77110-D / M66110-D) not E-type
Not Compatible Sram 36/22
Sram 36/22 Not Compatible
Sram 36/22 Sram 38/36 High Direct Mount
The Ripley is compatible with all high direct mount double and triple derailleurs
Shimano & Sram 3x10 Shimano & Sram 3x10 Down Swing Dual Pull 34.9 (M981L6 / M77110L6 / M66110L6)
Shimano & Sram 3x10
Shimano & Sram 3x10

8
Chain Length To get the correct chain length shift into the large chainring and largest cog and let all the air out of your shock. Thread the chain through the gears and derail-leurs, compress the suspension all the way to bottom out, and cut the chain at the minimum length needed with the rear derailleur stretched out.
Tapered Head TubeThe HD and SL-R feature a tapered headtube that works with new tapered steerer forks. Known as mixed tapered, or “ZS44/28.6 | EC49/40” in the Standardized Headset Identifica-tion System. This standard is compatible with both the Chris King IS3 and certain Cane Creek headsets (see our webstore for the offerings.) The Hakkalügi Disc features a tapered steerer too, with the following S.H.I.S identification: IS41/IS52. If you want information about these standards visit www.bicycleheadsets.com.This standard is compatible with both the Chris King Mixed Tapered and certain
Cane Creek headsets (see our webstore for the offerings.) If you are getting a King headset for your HD, be sure to order the ‘five over’ version.If you’ve already got a perfectly usable fork with a traditional 11/8” steerer tube that you’d like to use, simply install an adapter that will make your fork work on the Mojos HD and SL-R. Both Chris King and Cane Creek make adapter style headsets that will adapt our 1.5 cup to your 11/8” fork.For those who like to experiment with head angle and changing steering geometry, Cane Creek now offers a headset called the AngleSet, which is compatible with the Mojos HD and SL-R. The AngleSet allows you to adjust the head tube angle of the bike in 1/2” degree increments, from +1.5̊ to –1.5̊ . Rear Dropouts and Disc Brake MountsThe one–piece disc brake boss/non drive side dropout on the HD and SL-R is molded carbon. The rear axle is called a Maxle, and it’s very similar to the new
through axle fork axles. All mountain bikes except the Mojo SL and Tranny are designed to bolt a post–mount stan-dard caliper directly to the frame for a 160mm rotor or to a 180mm or 185mm rotor with a post to post style adapter (The Hakkalügi disc is a 140mm post mount).The derailleur hanger for the Mojo HD, SL-R, and Tranny are different than the one found on the Mojo Carbon, Mojo SL, and Tranny. Replacements are available via your Ibis retailer or in the online Ibis store. Depending on date of manufacture, the Mojo HD could have a 135mm or 142mm Maxle, easy to determine with a measurement. The Mojo SL-R has a 142mm x 12mm Maxle.
Tire ClearanceThe Mojo HD will fit tires up to 685mm (26.95”) in diameter and most tires up to 2.5” width. Please note that there really isn’t much of a standard for measuring tire width, so not all 2.5” or smaller tires will fit. (We’ve found width has little to do with height.)
Bike Set-Up Tips and Tricks

140mm Fork 150mm Fork 160mm Fork 180mm Fork
n/aRipley
Low Speed, Tight And Twisty, Technical High Speed, Steeps, Jumps
69°
68.5°
68.5°
120mm Fork
70°
68.5°
68°
68°
67.5°
67°
67°
n/a
n/a
n/a
n/an/a
Mojo SL
Mojo HD140
Mojo HD 160 66°
n/an/a68.5°
Bike Set-Up Tips and Tricks
average screw. We suggest using a heavy–duty cage for holding batter-ies since the lighter weight cages don‘t seem to hold up to this sort of abuse.
Mojo Head Angle Chart
The rim width will also affect the fit; wider rims tend to make the tires a bit larger in diameter.The Mojo HD 140 is approved for use with 650b wheels. Mud clearance is minimal, so take that into account before you make the plunge. You can squeeze a Pacenti 2.3 Neo Moto in there with about 4mm of mud clearance–fine for Arizona, bad for the U.K. A search of the Ibis forum on mtbr.com will give you a lot of user generated reporting on 650b wheel sizes.
BottlecageThere are two heavy duty Riv–Nut inserts on the underside of the down tube of most of our bikes, to allow the mounting of a bottle cage. We’ve put them there primarily for a spare water bottle, a tool kit or for a battery if you’re night riding.Please do not attempt to retrieve a water bottle from this cage location during riding!There are extra long socket head screws provided for your use in these holes. They are longer than your
9
140mm Fork 150mm Fork 160mm Fork 180mm Fork
n/aRipley
Low Speed, Tight And Twisty, Technical High Speed, Steeps, Jumps
69°
68.5°
68.5°
120mm Fork
70°
68.5°
68°
68°
67.5°
67°
67°
n/a
n/a
n/a
n/an/a
Mojo SL
Mojo HD140
Mojo HD 160 66°
n/an/a68.5°
10
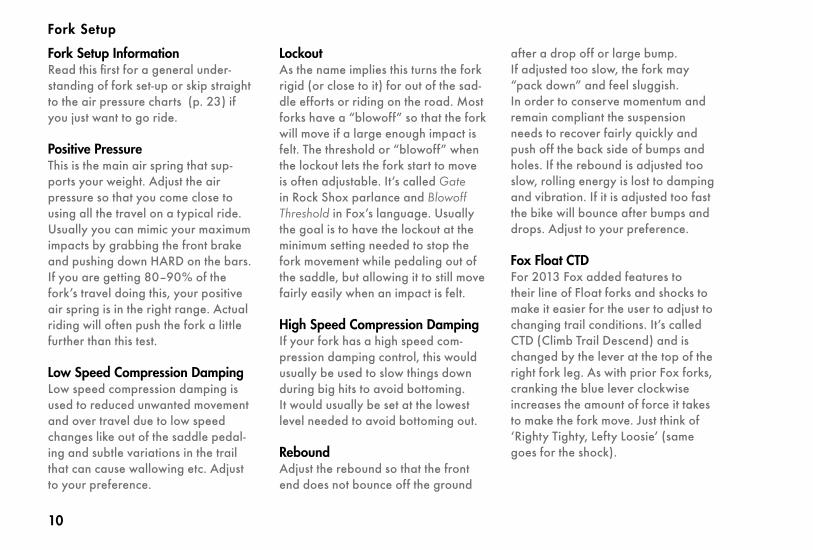
Fork Setup InformationRead this first for a general under-standing of fork set-up or skip straight to the air pressure charts (p. 23) if you just want to go ride.
Positive PressureThis is the main air spring that sup-ports your weight. Adjust the air pressure so that you come close to using all the travel on a typical ride. Usually you can mimic your maximum impacts by grabbing the front brake and pushing down HARD on the bars. If you are getting 80–90% of the fork’s travel doing this, your positive air spring is in the right range. Actual riding will often push the fork a little further than this test.
Low Speed Compression DampingLow speed compression damping is used to reduced unwanted movement and over travel due to low speed changes like out of the saddle pedal-ing and subtle variations in the trail that can cause wallowing etc. Adjust to your preference.
LockoutAs the name implies this turns the fork rigid (or close to it) for out of the sad-dle efforts or riding on the road. Most forks have a “blowoff” so that the fork will move if a large enough impact is felt. The threshold or “blowoff” when the lockout lets the fork start to move is often adjustable. It’s called Gate in Rock Shox parlance and Blowoff Threshold in Fox’s language. Usually the goal is to have the lockout at the minimum setting needed to stop the fork movement while pedaling out of the saddle, but allowing it to still move fairly easily when an impact is felt.
High Speed Compression DampingIf your fork has a high speed com-pression damping control, this would usually be used to slow things down during big hits to avoid bottoming. It would usually be set at the lowest level needed to avoid bottoming out.
ReboundAdjust the rebound so that the front end does not bounce off the ground
after a drop off or large bump. If adjusted too slow, the fork may “pack down” and feel sluggish. In order to conserve momentum and remain compliant the suspension needs to recover fairly quickly and push off the back side of bumps and holes. If the rebound is adjusted too slow, rolling energy is lost to damping and vibration. If it is adjusted too fast the bike will bounce after bumps and drops. Adjust to your preference.
Fox Float CTDFor 2013 Fox added features to their line of Float forks and shocks to make it easier for the user to adjust to changing trail conditions. It’s called CTD (Climb Trail Descend) and is changed by the lever at the top of the right fork leg. As with prior Fox forks, cranking the blue lever clockwise increases the amount of force it takes to make the fork move. Just think of ‘Righty Tighty, Lefty Loosie’ (same goes for the shock).
Fork Setup
11
Fork Setup
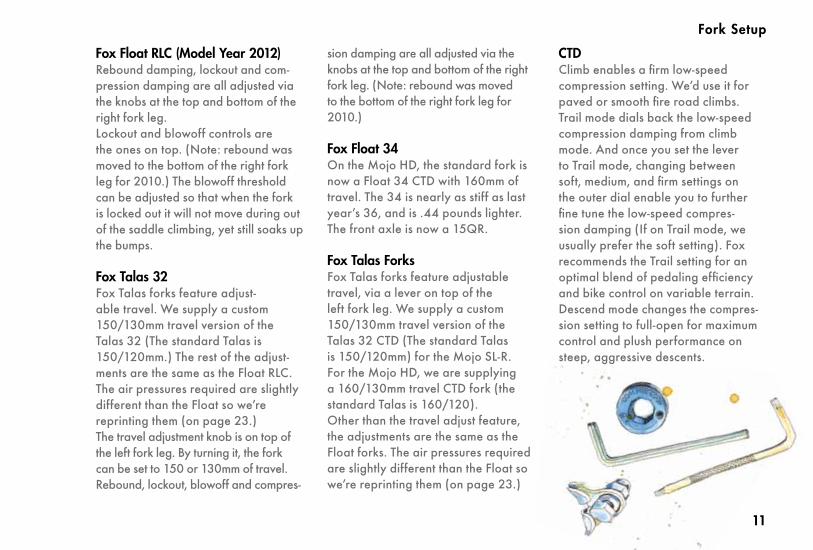
Fox Float RLC (Model Year 2012)Rebound damping, lockout and com-pression damping are all adjusted via the knobs at the top and bottom of the right fork leg. Lockout and blowoff controls are the ones on top. (Note: rebound was moved to the bottom of the right fork leg for 2010.) The blowoff threshold can be adjusted so that when the fork is locked out it will not move during out of the saddle climbing, yet still soaks up the bumps.
Fox Talas 32Fox Talas forks feature adjust-able travel. We supply a custom 150/130mm travel version of the Talas 32 (The standard Talas is 150/120mm.) The rest of the adjust-ments are the same as the Float RLC. The air pressures required are slightly different than the Float so we’re reprinting them (on page 23.)The travel adjustment knob is on top of the left fork leg. By turning it, the fork can be set to 150 or 130mm of travel. Rebound, lockout, blowoff and compres-
sion damping are all adjusted via the knobs at the top and bottom of the right fork leg. (Note: rebound was moved to the bottom of the right fork leg for 2010.)
Fox Float 34On the Mojo HD, the standard fork is now a Float 34 CTD with 160mm of travel. The 34 is nearly as stiff as last year’s 36, and is .44 pounds lighter. The front axle is now a 15QR.
Fox Talas ForksFox Talas forks feature adjustable travel, via a lever on top of the left fork leg. We supply a custom 150/130mm travel version of the Talas 32 CTD (The standard Talas is 150/120mm) for the Mojo SL-R. For the Mojo HD, we are supplying a 160/130mm travel CTD fork (the standard Talas is 160/120).Other than the travel adjust feature, the adjustments are the same as the Float forks. The air pressures required are slightly different than the Float so we’re reprinting them (on page 23.)
CTDClimb enables a firm low-speed compression setting. We’d use it for paved or smooth fire road climbs. Trail mode dials back the low-speed compression damping from climb mode. And once you set the lever to Trail mode, changing between soft, medium, and firm settings on the outer dial enable you to further fine tune the low-speed compres-sion damping (If on Trail mode, we usually prefer the soft setting). Fox recommends the Trail setting for an optimal blend of pedaling efficiency and bike control on variable terrain.Descend mode changes the compres-sion setting to full-open for maximum control and plush performance on steep, aggressive descents.

1. Add recommended air for rider weight (see chart on facing page). With bike on level ground, bounce up and down a bit to overcome stock stiction. Settle into your riding position.
2. Slide o-ring until it rests on wiper, then dismount without disturbing o-ring's position.
3. Measure sag–the distance from o-ring to wiper. Start with sag of 25% of travel and adjust to your preference.
12
Fork Setup

Fork Setup Air Pressure Charts
13
Ibis’
Han
dy S
ag M
easu
rer i
n Mi
limet
ers
RIDER WEIGHT 29”/120mm 26”/140mm lb kg psi bar psi bar ζ125 50 55 125-135 50 60 135-145 55 65 145-155 65 75 155-170 75 80 170-185 80 85 185-200 85 90 200-215 95 100 215-230 100 110 230Ǧη250 110 120
<5757-6161-6666-7170-7778-8484-9191-9798-104104-113
2013 32 Float CTDRIDER WEIGHT 160mm-26” 160mm-650blb kg psi bar psi bar ζ125 45 45125-135 50 50135-145 55 55145-155 65 65155-170 70 70170-185 75 75185-200 80 80200-215 90 90215-230 100 100230Ǧη250 110 110
<5757-6161-6666-7170-7778-8484-9191-9798-104104-113
3.103.453.794.484.835.175.526.216.907.58
2013 34 Float 160
3.103.453.794.484.835.175.526.216.907.58
RIDER WEIGHT 26” 650blb kg psi bar psi bar ζ125 50 45125-135 55 50135-145 60 55145-155 65 60155-170 70 65170-185 75 70185-200 80 75200-215 85 80215-230 90 90230Ǧη250 95 100
<5757-6161-6666-7170-7778-8484-9191-9798-104104-113
3.103.453.794.484.835.175.526.216.907.58
2013 34 Talas 130-160
3.103.453.794.484.835.175.526.216.907.58
RIDER WEIGHT 26”lb kg psi bar ζ125 45 125-135 50 135-145 55 145-155 65 155-170 70 170-185 75 185-200 80 200-215 90 215-230 100 230Ǧη250 110
<5757-6161-6666-7170-7778-8484-9191-9798-104104-113
3.103.453.794.484.835.175.526.216.907.58
2013 32 Talas 130-150
3.453.453.794.485.175.525.866.556.907.58
3.794.144.485.175.525.866.216.907.588.27
2013 34 Float 140RIDER WEIGHT 26”lb <125125-135135-145145-155155-170170-185185-200200-215215-230230-250>
kg<5757-6161-6666-7170-7778-8484-9191-9798-104104-113
bar3.103.313.453.653.794.144.835.526.216.90
psi454850535560708090100
2013 36 Talas 140-180 RIDER WEIGHT 26”lb <125125-135135-145145-155155-170170-185185-200200-215215-230230-250>
kg<5757-6161-6666-7170-7778-8484-9191-9798-104104-113
bar3.103.313.453.653.794.144.835.526.216.90
psi454850535560708090100
*Compression ratios and thus pressures have changed from 2012 to 2013.

14
Mojo SL, and SL-R SagWe recommend starting with air pres-sure in the RP23 equal to 90% of your riding weight in pounds. Shoot for .5” (~13mm) of sag on the shock.
Mojo HD SagWe recommend starting with air pres-sure in the RP23 equal to your riding weight in pounds. Shoot for .625” (~16mm) of sag on the shock. Also, see the chart on page 31
Check the SagWith the shock in descend mode (or ProPedal turned off for earlier shocks), sit on your bike in a normal riding position. Reach down and slide the o–ring up the shock shaft against the wiper seal. Next, gently step off of the bike taking care not to further compress the suspension. For the Mojos up to HD140, the distance from the o–ring to the wiper seal should be about 10–13mm for XC type rid-ing and 13–15mm for more gravity oriented off road riding. On the Mojo HD, sag should be
about 16mm for XC and 19–21mm for gravity rides. Experiment and see what works best for your trails and riding style.
Trail AdjustThe new RP23 CTD (Climb, Trail, Descend) is set-up much like the Float CTD fork:Climb mode enables a firm low-speed compression setting. We’d use it for paved or smooth fire road climbs. Trail mode dials back the low-speed compression damping from climb mode. And once you set the lever to Trail mode, changing between soft, medium, and firm settings on the dark outer dial enable you to further fine tune the low-speed compression damping. Descend mode changes the compres-sion setting to full-open for maximum control and plush performance on steep, aggressive descents. The pedaling efficiency of the dw-link suspension renders many of the features of the RP23 CTD superfluous.
Rear Shock Setup
15
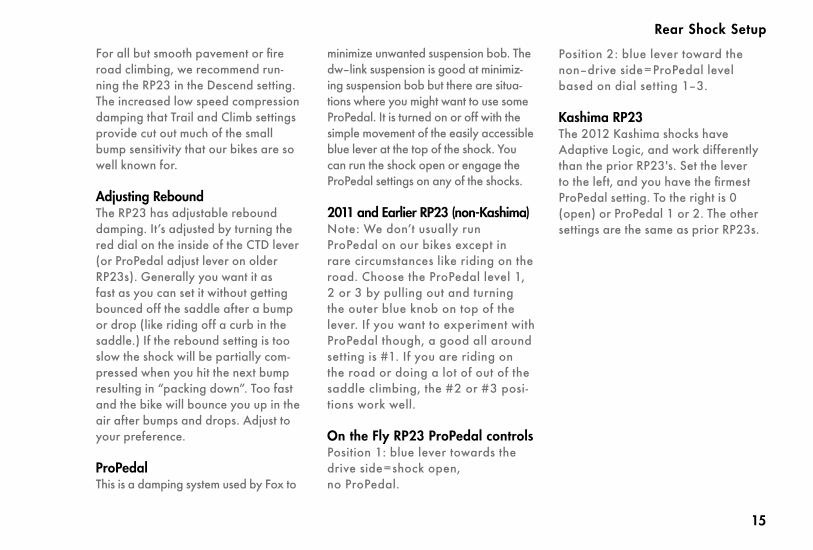
For all but smooth pavement or fire road climbing, we recommend run-ning the RP23 in the Descend setting. The increased low speed compression damping that Trail and Climb settings provide cut out much of the small bump sensitivity that our bikes are so well known for.
Adjusting Rebound The RP23 has adjustable rebound damping. It’s adjusted by turning the red dial on the inside of the CTD lever (or ProPedal adjust lever on older RP23s). Generally you want it as fast as you can set it without getting bounced off the saddle after a bump or drop (like riding off a curb in the saddle.) If the rebound setting is too slow the shock will be partially com-pressed when you hit the next bump resulting in “packing down”. Too fast and the bike will bounce you up in the air after bumps and drops. Adjust to your preference.
ProPedalThis is a damping system used by Fox to
Rear Shock Setup
minimize unwanted suspension bob. The dw–link suspension is good at minimiz-ing suspension bob but there are situa-tions where you might want to use some ProPedal. It is turned on or off with the simple movement of the easily accessible blue lever at the top of the shock. You can run the shock open or engage the ProPedal settings on any of the shocks.
2011 and Earlier RP23 (non-Kashima) Note: We don’t usually run ProPedal on our bikes except in rare circumstances like riding on the road. Choose the ProPedal level 1, 2 or 3 by pulling out and turning the outer blue knob on top of the lever. If you want to experiment with ProPedal though, a good all around setting is #1. If you are riding on the road or doing a lot of out of the saddle climbing, the #2 or #3 posi-tions work well.
On the Fly RP23 ProPedal controlsPosition 1: blue lever towards the drive side=shock open, no ProPedal.
Position 2: blue lever toward the non–drive side=ProPedal level based on dial setting 1–3.
Kashima RP23The 2012 Kashima shocks have Adaptive Logic, and work differently than the prior RP23's. Set the lever to the left, and you have the firmest ProPedal setting. To the right is 0 (open) or ProPedal 1 or 2. The other settings are the same as prior RP23s.

16
Rear Shock Set-Up
The Mojos uses the following shocks and shock hardware:
Upper Hardware: • 21.8mm wide with an 8mm bore
Lower Hardware:• 40mm wide with an 8mm bore
Mojo HD shock:8.5” eye to eye 2.5” shaft travel
Mojo SL shock:7.875” eye to eye 2.0” shaft travel.
If you really want to Harness the Gnarness of the Mojo HD If you generally like how the RP23 feels, but wish for a bit more end stroke resis-tance, you may want to try an air can volume reducer kit from Fox. By making the volume of air the RP23 smaller, the spring rate will become much more progressive. The stock RP23 is quite linear, which is why aggressive riding can often result in
bottoming. By making the shock more progressive, you won't give up much (if any) small bump compliance at the beginning of the stroke, but you'll get a much firmer feel towards the end of the stroke. Contact Fox for an Air Can Volume Reducer Kit. Want to go bigger still? We offer the optional DHX RC4. See ‘tuning the RC4’, below. If you want to source your own shock, the Cane Creek Double Barrel Air, X-Fusion Vector Air, X-Fushion Vector Coil HLR, the RockShox Monarch Plus RC3 and the RockShox Vivid Air R2C are all great options. Note that the stock tunes of the Fox (that we provide) and Cane Creek shocks work well. The X-Fusion benefits from a custom tuning, and the RockShox units work best with a low compression, medium rebound tune (with low comp/low rebound being the second best Rock-Shox tune).
Balance That ThingA balanced bike will ride best. If you are planning on using an aggressive fork, such as a Fox unit with the RC2
damper, or a RockShox with an RC2 DH damper, a larger rear shock will create a well-balanced ride. However, if you're planning on sticking with the stock Fox 34 CTD 160 fork, a much larger rear shock will result in an unbalanced bike. Opinions on the aftermarket shocks differ greatly. That said, a shock where the progressivity can be adjusted will usually work best. Air shocks often are easily adjusted via changing the air can volume- a smaller volume is more pro-gressive, and will better resist bottom-ing. More linear shocks, with a higher air volume, will bottom more easily. If using a coil, be sure you have good late stroke damping control so you can mimic the progressive nature of an air shock at the end of the stroke. Note: the RC4 will not fit on a small Mojo HD. A great option for a shock more aggressive than the RP23 is the RockShox Monarch Plus. The Monarch Plus is also the only reservoir shock that will fit on the small Mojo HD. It'll fit with the reservoir down and toward the back of the

17
Rear Shock Set-Up
bike. We've ridden the Monarch quite a bit on the HD, and we prefer the low compression, medium rebound high volume can shock.

18
Tuning the RC4There is a wide range of adjustment on the RC4 and you can control damper movement very precisely. Make the adjustments in this order–and make only one change at a time so you know how each adjustment affects ride.
1) Check sag and make sure the spring rate is correct first. If you can’t get sag in the ballpark within 1-2 turns of preload you’ll need a different spring rate.
2) Set rebound to personal preference. We always go as fast as possible without getting bucked.
3) At first, leave Boost Valve pressure where it comes from the factory–160psi. We’ve found 160psi works great on most bikes so don’t touch this adjustment until you’ve had a chance to ride first. On DHX RC shocks, BV pressure only controls the last 1/3 of the stroke. Chang-ing BV pressure will not affect your pedaling feel or mid stroke feel–only deep stroke & bottom out.
4) Set the low speed compression adjuster to control pedaling & corner-ing feel. This is personal preference, but it’s probably good to start in the middle. There are normally 18-20 detents of adjustment here so start halfway… 9 clicks out from full closed. If you find that’s too harsh on the small stuff then back off another halfway… 4-5 clicks to make a notice-able difference. Conversely if you feel the bike is wallowing or too mushy, or geometry is changing too much in the corners you can firm it up 4 clicks. The key is to make each adjustment about half of what the last adjust-ment was, continually narrowing down the range until you arrive at the best setting. This technique is called bracketing and can be used on all shock tuning adjustments in turn to get a very precise setup.
5) Set the high speed compression adjuster (a 2.5m hex key fits in the holes) to control feel on big spiky hits and square-edged bumps. Again this is personal preference and can be
tuned by bracketing. Faster, aggres-sive riders or courses with really big hits require more HSC damping to keep from using excessive travel and rebounding harshly. There are around 12 detents of adjustment here so start in the middle at 6. If it’s too harsh then back off 3. Too soft, increase by 3. Then narrow your changes to 1-2 clicks each time.
6) Once you have high & low speed dialed, use the bottom out volume adjuster (blue cylinder on the end of the reservoir) to increase or decrease bottom out resistance. Turning the adjuster in – clockwise – increases bottom out resistance and vice-versa. Again, start in the middle and bracket. If you’re bottoming too hard turn the adjuster all the way in and re-test. If that’s too much and prevents full travel go halfway. If you then find halfway is too soft then go halfway between half and full in, etc.
7) If you find you’re still bottoming too hard with the volume adjuster all the
Rear Shock Set-Up

19
way in, raise Boost Valve pressure to max–200psi–and re-test. Conversely if you’re unable to achieve full travel at the factory spec 160psi with the bottom out volume adjuster all the way out, lower BV pressure to the minimum 125psi and re-test. Chang-ing BV pressure will probably require going back to re-bracket the bottom out volume adjustment since they are related. A warning on BV pressure: whatever you do, DO NOT GO BE-LOW 125psi. Too little pressure in the reservoir will cause the damping oil to emulsify (foam up). 125psi is the bare minimum to keep the shock functional.
Rear Shock Set-Up
MOJO, SL, HD140psi bar
100 45 90 6.2 105 7.2 110 50 99 6.8 116 8.0 120 55 108 7.4 126 8.7 130 59 117 8.1 137 9.4 140 64 126 8.7 147 10.1 150 68 135 9.3 158 10.9 160 73 144 9.9 168 11.6 170 77 153 10.6 179 12.3 180 82 162 11.2 189 13.0 190 86 171 11.8 200 13.8 200 91 180 12.4 210 14.5 210 95 189 13.0 221 15.2 220 100 198 13.7 231 15.9 230 105 207 14.3 242 16.7 240 109 216 14.9 252 17.4 250 114 225 15.5 263 18.1
HD 160 lbs kg psi bar
RIDER WEIGHTRP23 Rear Shock Pressure
105 7.2 116 8.0 126 8.7 137 9.4 147 10.1 158 10.9 168 11.6 179 12.3 189 13.0 200 13.8 210 14.5 221 15.2 231 15.9 242 16.7 252 17.4 263 18.1
RIPLEYpsi bar

20
Working on your Mojo SL, SL-R, HDThe link assemblies on the Mojos are designed to be easily removed and replaced. Be sure to purchase a fresh link set before removing the old ones to skip any downtime. There are no bear-ings to press out, nor any axles to ham-mer. New Lopes Link (upper) and lower pivot assemblies are available in the buy section of our website, or you can have your dealer order them from Ibis for you. Replacement is super simple and requires these common tools:• 2x 4mm Allen wrenches• 2x 6mm Allen wrenches• 2x 5mm Allen wrenches• Loctite 242 blue thread locker or
anti–seize (depending on model of bike)
Linkages The upper and lower links for the HD are more robust versions of the ones used on the original Mojo and Mojo SL. Please don’t try to mix and match them. It looks like they might fit but they are not interchangeable. Removal and instal-
lation procedures are identical. Please refer to the section on Mojo SL and Mojo Carbon link maintenance in this manual (PP 38–39.)
Bearing Replacement:If you’re handy with a bench vice and have a good supply of sockets, you can attempt the replacement of the bearings in the Lopes Link and lower link yourself. While we don’t have step–by–step in-structions, you are welcome to purchase the bearings and try it yourself. New links with bearings installed are avail-able in the Ibis webstore as well. The current version of the Mojo SL lower link has been extensively redesigned and provides a 100% increase in torsional stiffness along with a 7.5% increase in lateral stiffness. You may want to con-sider this upgrade rather than replacing your bearings.
Mojo Bearing Specs:Mojo, Mojo SL, SL-R, HD Upper Link• 608 2RS 8 ID x 22 OD x 7 W
(Enduro P/N 608 2RS MAX)
Mojo, Mojo SL, SL-R Lower Link• Front: 15 ID x 28 OD x 7 W
(Enduro P/N 6902 2RS)• Rear: 10 ID x 22 OD x 6 W
(Enduro P/N 6900 2RS)
Mojo HD Lower Link• Front: 15 ID x 26 OD x 10 W Dual
Row Angular Contact (Enduro DR 1526 RS)
• Rear: 15 ID x 28 OD x 7 W (Enduro P/N 6902 2RS)
You can find bearings used on the Mojo here: www.endurobearings.com/bicycle/enduro_bearings.html on the Enduro website. Here’s the direct link to the Ibis Mojo/SL bearing kit:www.enduroforkseals.com/id245.htmlThe kit includes bearings for the upper and lower links.
Maintenance

21
Maintenance

22
Frame Hardware Mojo HD
hd front triangle
front lower pivot bushing
m8 swingarm insert
lower shock piv lhs
lower shock piv rhs
upper shock pin
m3 nut insert
m4 rivnut
m5x8 shcs
m5x8 shcs
m8x60 shcs
m8x16 bhcs
der cable stop
hd cable guide
hd cable guide
r 6.3 shock mount
l 6.3 shock mount
hd upper link
lower pivot shaft
lower pivot nut
chainsuck plate
bash guard
r rear dropout
deraileur hanger
l rear dropout
upper link bearings
lower link bearings
qr seat collar
ibis head badge
chainring boltchaninring nut
llb angular contact bearing
hd lower link
m4x8 bhcs

Frame Hardware Mojo SL
23
shaft-pivot-lower-ft
nut-piv-shft-lwr-ft
lwrlink-m6-washer
bolt-button-m8
pin-upper-shockeye
washer-m6-immt
m6-pin-lwrlnk-sa
chainsuck-plate
bolt-m8x60-shcs
ibis-assy-lwrlink
ibis-assy-uprlink
m5-lo-shcs-bolt
shock-reducer-fox-uprpiv
seat-binder

25
Frame HardwareTorque Specs
17 N·m 18 N·m 19 N·m 20 N·m
Mojo, Mojo SL:Front Derailleur Bolt (Clamp Style)
Forward Shock Mount BoltsRear Shock Bolt
Upper Link BoltsBoth Lower Link Bolts
Mojo HD and SL-R: Front Derailleur Bolt (Direct Mount)
Rear Brake Caliper BoltsBoth Lower Link Bolts
Forward Shock Mount BoltsNon QR Seat Binder Bolts
Tranny:Seat Stay Bolts
Slot Machine Bolt (See p. 37)
4 N·m(3 ft·lbs)
5 N·m(3.68 ft·lbs)
10 N·m(7 ft·lbs)
16 N·m(11.8 ft·lbs)
Frame Hardware Torque Specs, by Model
6 N·m(4.5 ft·lbs) (4.5 ft·lbs)
7 N·m 8 N·m(TK ft·lbs)
9 N·m(TK ft·lbs)
16 N·m (12 ft·lbs) for Geared Riding 20 N·m 15 ft·lbs for Single Speed Riding
3-4 N·m
RipleyUpper And Lower Eccentric Core Bolts M8 w/5mm Hex
8 N·m5 N·m
5 N·m
6 N·m
Use with Loctite 242
Use with Loctite 242
Use with Loctite 242
Use with grease for a ss bolt and anti-seize for a titanium bolt.Use with Loctite 242 for a steel pin and anti-seize for a titanium bolt.
Use with Loctite 2425-7N·m with a dab of grease
Use with Loctite 242 for a steel pin and anti-seize for a titanium pin.
Upper Link BoltsRear Shock Bolt Use with grease for a ss bolt and anti-seize for a titanium bolt.
Use with Loctite 242 for a steel pin and anti-seize for a titanium bolt.
Eccentric Shaft BoltsLower Shock to Clevis Bolts
Clevis To Swingarm Bolts4 N·mUpper Shock Mount Bolts
6mm Hex
26
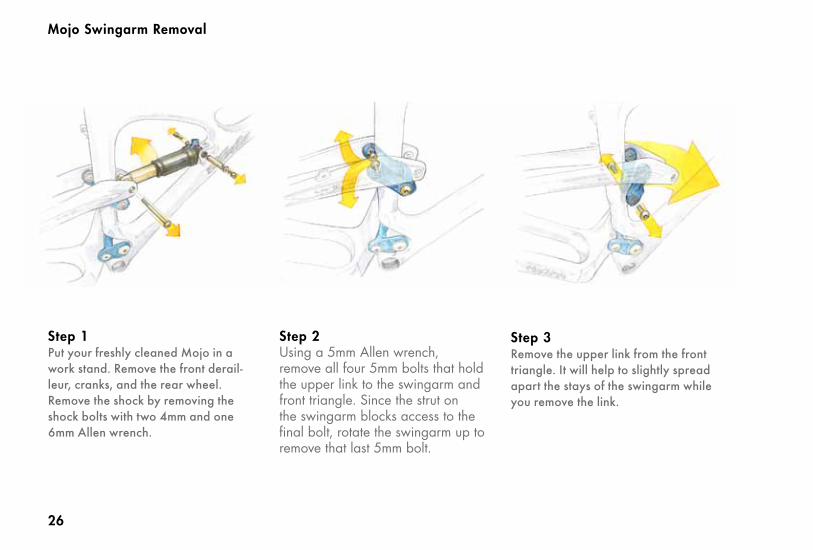
Step 1 Put your freshly cleaned Mojo in a work stand. Remove the front derail-leur, cranks, and the rear wheel.Remove the shock by removing the shock bolts with two 4mm and one 6mm Allen wrench.
Step 3 Remove the upper link from the front triangle. It will help to slightly spread apart the stays of the swingarm while you remove the link.
Mojo Swingarm Removal
Step 2 Using a 5mm Allen wrench, remove all four 5mm bolts that hold the upper link to the swingarm and front triangle. Since the strut on the swingarm blocks access to the final bolt, rotate the swingarm up to remove that last 5mm bolt.
27
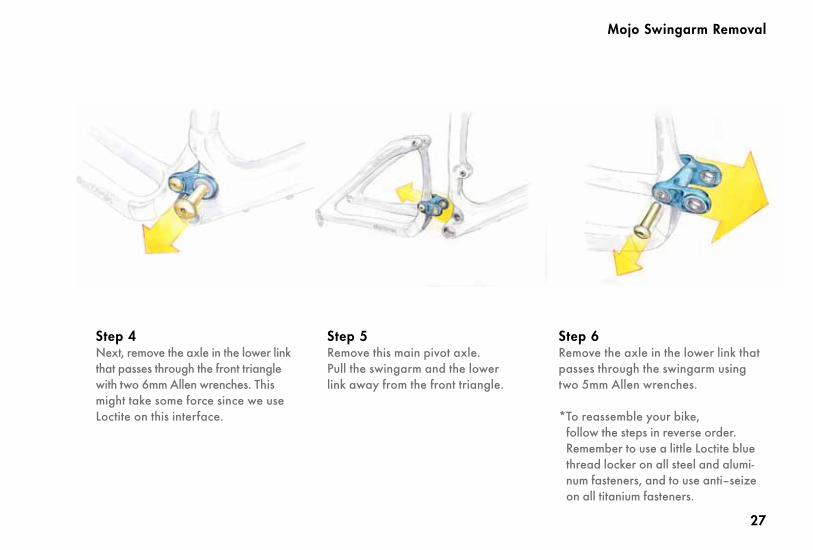
Step 4 Next, remove the axle in the lower link that passes through the front triangle with two 6mm Allen wrenches. This might take some force since we use Loctite on this interface.
Step 5 Remove this main pivot axle. Pull the swingarm and the lower link away from the front triangle.
Step 6 Remove the axle in the lower link that passes through the swingarm using two 5mm Allen wrenches.
* To reassemble your bike, follow the steps in reverse order. Remember to use a little Loctite blue thread locker on all steel and alumi-num fasteners, and to use anti–seize on all titanium fasteners.
Mojo Swingarm Removal