NOTE - Carson-Newman College
234
Transcript of NOTE - Carson-Newman College

Uncomplicated Online Course Design and Instruction
By Valerie Stephens, MBA

Uncomplicated Online Course Design and Instruction:
Edvance360 for Designers and Instructors
Copyright © 2013 by Valerie Stephens
Trademarks
Edvance360TM is a trademark of Edvance360 Company, Virginia
Beach, VA
Edvance360 Live!™
Google Docs™
Firefox is a trade mark
Microsoft Office
Respondus LockDown Browser is a trademark of
http://www.respondus.com/products/lockdown-browser/
BigBlueButton http://www.bigbluebutton.org/
http://www.food.com/rssapi.do?page_type=26&slug=appetizers
(RSS Feed Picture)


Table of Contents
Chapter 1 The Adventure Begins _________________________________ 5
Getting Started with Edvance360-LMS™ _________________________ 5
Log In __________________________________________________________________ 6
Personal Home Page _________________________________________________ 6
Chapter 2 Get Personal _____________________________________________ 5
Setting your Personal Program Preferences and Information
Sharing Items _______________________________________________________ 12
ePortfolio____________________________________________________________ 15
My Widgets __________________________________________________________ 20
Personal Settings __________________________________________________ 22
Chapter 3 The End from the Beginning ________________________ 26
Backward Course Design _________________________________________ 27
Chapter 4 Get Your Content Together __________________________ 34
Before Adding Content to Edvance360 _________________________ 35
The Edvance360 Personal Repository File System ___________ 37
A Tale of Two Tabs – The Files Tab______________________________ 39
A Tale of Two Tabs – The Questions Tab _______________________ 51
Going Global– The Edvance360 Global Repository ___________ 65
Chapter 5 Front and Center ______________________________________ 67
Exploring the Course Home Page ________________________________ 68
Developing the Course Home Page ______________________________ 70
Chapter 6 What’s It Worth? - Setting Up The Gradebook ___ 77
Rubrics ______________________________________________________________ 78
Gradebook Categories _____________________________________________ 80

Chapter 1 ii
Chapter 7 Can We Talk? –Discussions Forums and Posts __ 84
Discussions _________________________________________________________ 85
Chat __________________________________________________________________ 90
Mailbox ______________________________________________________________ 90
Chapter 8 Score - Automated Test Based Student
Assessments _________________________________________________________ 91
Tests _________________________________________________________________ 92
Surveys _____________________________________________________________ 102
Chapter 9 Just Add Water _______________________________________ 106
Reusable Content _________________________________________________ 107
Chapter 10 Finishing Touches _________________________________ 111
Dropbox ____________________________________________________________ 112
Lessons _____________________________________________________________ 113
Chapter 11 Ready, Set, Teach __________________________________ 120
Course Tools _______________________________________________________ 121
Customizing Lessons _____________________________________________ 124
Resources __________________________________________________________ 125
Set Course Deadlines _____________________________________________ 127
Manage the Course Calendar ____________________________________ 130
Establish Communication _______________________________________ 134
Set Up Automated Communication _____________________________ 139
Discussion Posts __________________________________________________ 149
Chat _________________________________________________________________ 152
Chapter 12 More than One _____________________________________ 156
Team Teaching ____________________________________________________ 157
Student Collaboration ____________________________________________ 160

Table of Contents
Chapter 13 Recording & Reporting ___________________________ 163
Grading _____________________________________________________________ 164
Grading Discussions ______________________________________________ 170
Grading Manually _________________________________________________ 172
Progress Tracking ________________________________________________ 174
Lesson Progress ___________________________________________________ 177
Test Statistics ______________________________________________________ 178
Survey Reports ____________________________________________________ 179
Discussion Post Reports _________________________________________ 181
Chapter 14 Good Housekeeping: Closing the Course ______ 184
Close the Gradebook _____________________________________________ 185
Archive Conversations ___________________________________________ 189
Chapter 15 Outside of the Classroom ________________________ 192
Communities_______________________________________________________ 193
Blogs ________________________________________________________________ 195
Contacts ____________________________________________________________ 196
Chapter 16 Options ______________________________________________ 197
Browser Lock ______________________________________________________ 198
Edvance360 Live!™ _______________________________________________ 200
TurnItIn™ Integration ____________________________________________ 201
Parental Resources Tool _________________________________________ 201
Chapter 17 Designer’s Took Kit _______________________________ 202
HTML vs. RAW HTML _____________________________________________ 203
HTML WYSIWYG Editor __________________________________________ 203

Chapter 1 iv
HTML RAW Editor ________________________________________________ 216
Content Copying ___________________________________________________ 221
Chapter 18 Resources ___________________________________________ 223

Chapter 1 The Adventure Begins


Adventure Begins 5
Getting Started with Edvance360-LMS™
>NOTE Begin with the right Internet browser.
Although you may find Edvance360 performs most functions using
any Internet browser, it is most compatible with Firefox®. If you
experience difficulties with Edvance360, the first thing to do is make
sure you are using the Firefox browser.
Open a new Internet session.
Before we start exploring the navigation of the personal home page,
let’s all get on the same page. One of the most common causes of
confusion for anyone using a computer is their screen setup. It has
been my experience that those whose job is not primarily working
on computers, i.e. instructors, have a tendency not to maximize their
screen real-estate.
--Instruction
Windows®
Maximize the screen by selecting the
center square button in the upper right corner of the
browser window.
Mac®
Maximize the screen by selecting the green
button in the upper left corner of the browser window.

Chapter 1 6
Log In
Edvance360 is housed on a very secure
network. No one has access without the
proper login credentials, aka user name
and password. You will need to check
with your institution’s Edvance360 administrator to find out what to
use for your log in credentials as well as the URL to access your
institutions Edvance360 site. The administrator will also be able to
tell you if you can change your password within Edvance360 or if
you will need to use another method.
Personal Home Page
After a successful log in all Edvance360 users are presented with
their Personal Home Page.
Personal Navigation Tabs
These tabs will remain constant throughout the Edvance360 visit, no
matter which page has focus.
Any time you wish to return to your Personal Home
Page, select the Home tab.
The Courses tab is the entryway to any active course
which you have access to design, facilitate, assist, or participate. The
Contacts and Mailbox tabs are doorways to connect to other
Edvance360 members. Grades is a tab which only appears on your
Personal Navigation bar is you are a student.
Your Personal Repository is accessed through the Repository tab and
should be one of the first tools of Edvance360 you become familiar
with using. Two tabs access the real social aspect of the program.
Adventure Begins 7
They are the Blog tab and the Communities tab. Although you may
have a personal information system with its own calendar, you may
find using the Edvance360 personal calendar a great place to keep
track of appointments, to-do items, and events specific to your
course and community involvement.
Do not avoid the Help tab! Edvance360 is continually adding new
self-service “how-to” resources. The Help tab is also where
designers can access sample files for importing questions files and
rosters. Check out the Help tab to find the latest software and plugin
requirements to help Edvance360 run at peak performance.
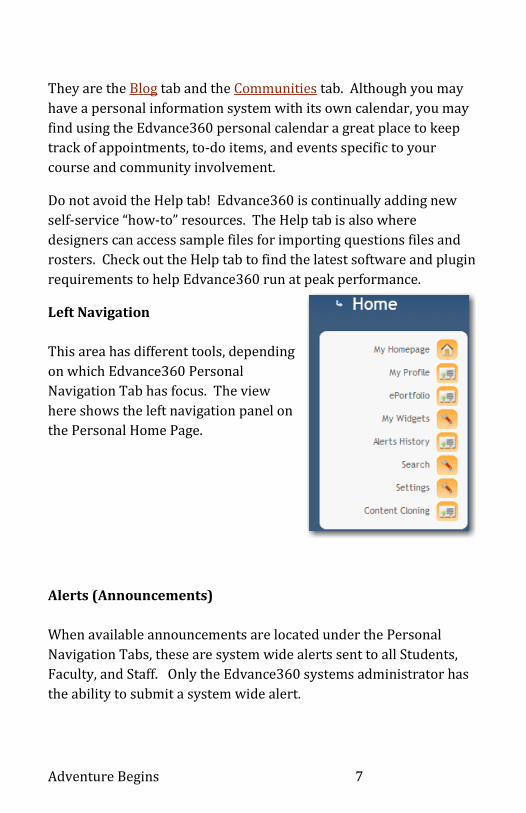
Left Navigation
This area has different tools, depending
on which Edvance360 Personal
Navigation Tab has focus. The view
here shows the left navigation panel on
the Personal Home Page.
Alerts (Announcements)
When available announcements are located under the Personal
Navigation Tabs, these are system wide alerts sent to all Students,
Faculty, and Staff. Only the Edvance360 systems administrator has
the ability to submit a system wide alert.

Chapter 1 8
>NOTE The Alerts (Announcements) shown on the Personal Home
Page are not course announcements. Course announcements appear
after the student enters the course through the Courses tab.
--INSTRUCTION
Once the alert has been read, select Mark Read. This will
archive the alert under the Alert History in the Left
Navigation panel.
Personal and Course Alerts
Personal and Course alerts are located
under any announcements and just to the
right of the Left Navigation panel.
Personal Alerts links, when selected, jump to any open
messages in your Edvance360 Mailbox. This notification may
be cleared all at once by selecting the [clear] link. Messages
read using an outside mail system will still appear as unread in
this list. The New Friends alert links to profiles of people who
have put you on their friends list in their contact list.
Adventure Begins 9
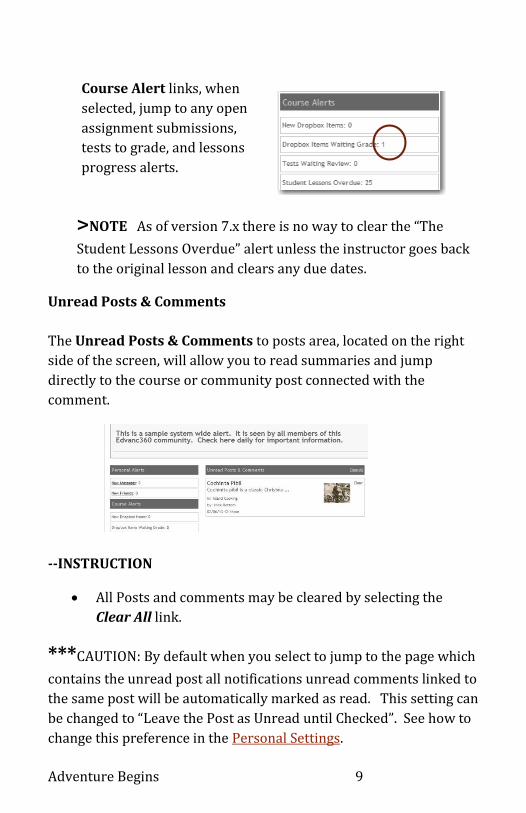
Course Alert links, when
selected, jump to any open
assignment submissions,
tests to grade, and lessons
progress alerts.
>NOTE As of version 7.x there is no way to clear the “The
Student Lessons Overdue” alert unless the instructor goes back
to the original lesson and clears any due dates.
Unread Posts & Comments
The Unread Posts & Comments to posts area, located on the right
side of the screen, will allow you to read summaries and jump
directly to the course or community post connected with the
comment.
--INSTRUCTION
All Posts and comments may be cleared by selecting the
Clear All link.
***CAUTION: By default when you select to jump to the page which
contains the unread post all notifications unread comments linked to
the same post will be automatically marked as read. This setting can
be changed to “Leave the Post as Unread until Checked”. See how to
change this preference in the Personal Settings.

Chapter 1 10
RSS Feed
The RSS Feed, should you choose to have one running, will be located
at the top right of the screen under any System Wide Alerts. See how
to include/remove in the My Widgets instruction.

Chapter 2 Get Personal

Chapter 2 12
Setting your Personal Program Preferences
and Information Sharing Items
My Profile Setup
All of the following actions are performed
after selecting the My Profile link on the
Left Navigation panel.
Upload Profile Photo
Edvance360 will automatically resize the photo you select to upload
as your profile photo. The original file remains intact since the
conversion happens after the upload. Your hardest job to uploading
a photo is choosing the right one! If you don’t want to load an actual
photo find a photo which says something about you and upload it.
Any picture you upload will be more inviting to people in the
Edvance360 communities and courses than no picture at all.
--INSTRUCTION
1. Identify the photo you will use. 2. Select the Edit Photo link. 3. Select the Browse… button. 4. Browse to the location on your local computer,
network, or removable storage device where the photo
image is located. 5. Select the Submit button.
Change Profile Photo
Should you decide you would like a different photo; repeat the 5 steps above.

Get Personal 13
Bio/About Me Information
Your Bio/About Me is NOT your vitae or extended biography. This
should be a short introduction of yourself to others using
Edvance360. If you have writers block there are a lot of great sites
on the Internet you can Google® about “How to write a bio”.
My suggestion is for you to write in first person using “I am” and
“When I” instead of “Billy Bob Instructor is” or “When she”. Do your
writing in a word processing program first. Check for spelling and
grammar. Select the text and copy before going back to Edvance360
to submit.
--INSTRUCTION
1. Select the Edit Bio link.
2. Either type in the text or paste copy from text in your word
processor.
3. Use the HTML editing tools to change the font appearance or
include hyperlinks.
>NOTE For more information on how to use the HTML
editing box see the Designer’s Tool Kit section of this book.
4. When you are satisfied with the way the Bio/About me text
looks >Select the Submit button.
Edit Profile Bio
Keep your bio information fresh! It should be reviewed and edited at
least once an academic year. Change by repeating the 4 steps above.

Chapter 2 14
View Your Own Profile
To view your profile you may either select the Profile link in the
Profile Setup Left Navigation panel or at any time double click on
your picture throughout any community or course roster and posts.
Account Information
The use of this option is really dependent on how your system
integrates with the Human Resources module of your institution’s
enterprise software. If the integration populates the information for
the First Name, Last Name and Email fields, which are the required
fields, editing these in Edvance360 may not do any good.
If the integration between the two systems hand-shakes several
times a day; each time the hand-shake happens any edits you
perform will be overwritten. What this means is your first name, is
your “official name” as seen in your institution’s enterprise resource
software you are not going to be able to edit it to reflect your
preferred name. As of version 7 there is no option to enter a
preferred name.
If the integration takes place only once during the semester or only
on an initial upload of information any changes made to the First
Name, Last Name, and Email fields to your personal choices will
remain until overwritten by a new upload or synchronization.
All non-starred fields, except City and State will only be visible to the
Edvance360 administrator. The City and State will appear under
your name and status in the member directory.
Edit Account Information
--INSTRUCTION
1. Select the Edit Account Info link.
2. Edit fields to input/edit information.
3. Select the Submit button.

Get Personal 15
ePortfolio
The ePortfolio is used if many different ways by both employees and
students. It may be used in its basic form as a type of résumé. The
ePortfolio allows the user to share their educational background
along with their employment experiences and skillsets.
The Edvance360 electronic portfolio can be so much more! It can be
a tool which helps the user identify their own strengths (or
weaknesses) in their educational and professional development. It
can be used as a true 360 examination of learning with the capability
of gathering authentic feedback. Users may select whether or not to
publish comments provided by their instructors and/or peers in a
public version of their ePortfolio.
Everything in this section is found under the ePortfolio link on the
Left Navigation panel of the Personal Home Page.

Chapter 2 16
Introduction Link
The introduction should give the reading audience an idea of who
you are and why they should continue reading the ePortfolio. Use
this area to vocalize the objectives of the ePortfolio. Is it being used
as a continual examination of your educational or professional
development?
--INSTRUCTION
1. Select the Edit Intro link at the top of the ePortfolio page.
2. Either type the introductory information in the space
provided, or copy and paste information from a word
processed document.
3. Press the Update button when finished
Body Blocks
The body of the ePortfolio is built on blocks
of information. The default blocks
available are: Education, Experience,
Groups and Associations, Honors and
Awards, Publications, Documents,
Leadership Experiences, Community
Service, Training and Contact Information.
Ask your Edvance360 administrator if your

Get Personal 17
selections differ as he or she may have modified these labels or
turned off blocks of information altogether.
Add ePortfolio Information
--INSTRUCTION
To add information to a block:
1. Select the Add link located at the upper right of the block
label.
2. Type in a Title for the block of information in the Block Type*
field.
3. Fill in the date(s) for the new item and any other parts
prompted to fill. (Such as the figure below. There is a prompt
for the type of publication).
4. Use the HTML editing box to compose the narrative of the
Details: field.
>NOTE For more information on how to use the HTML
editing box see the Designer’s Tool Kit section of this book.
5. Select the Save Settings button.
6. Change the sort order if necessary to place this item within
the block of information.
7. Press the Submit button when finished.

Chapter 2 18
You say you haven’t published any works or do not belong to Groups
and Associations? No problem. Unused ePortfolio blocks will not be
visible on the published eportfolio.
ePortfolio Photo
The ePortfolio photo does not pull from the same file as your
Edvance360 profile picture. Portfolio pictures should be of a more
professional nature while profile pictures should show your
personality. You will need to add the picture in both locations if you
choose to use the same image for both your Personal Profile Picture
and your ePortfolio picture.
Add ePortfolio Picture
--INSTRUCTION
To add or update the ePortfolio photo:
1. Identify the photo you will use. 2. Select the Edit Photo link located at the top of the ePortfolio
panel. 3. Select the Browse… button. 4. Browse to the location on the storage device and select the
photo. 5. Select the Update button.
Change ePortfolio Photo
Should you decide you would like a different photo; repeat the 5 steps above.
Get Personal 19
Publish ePortfolio
--INSTRUCTION
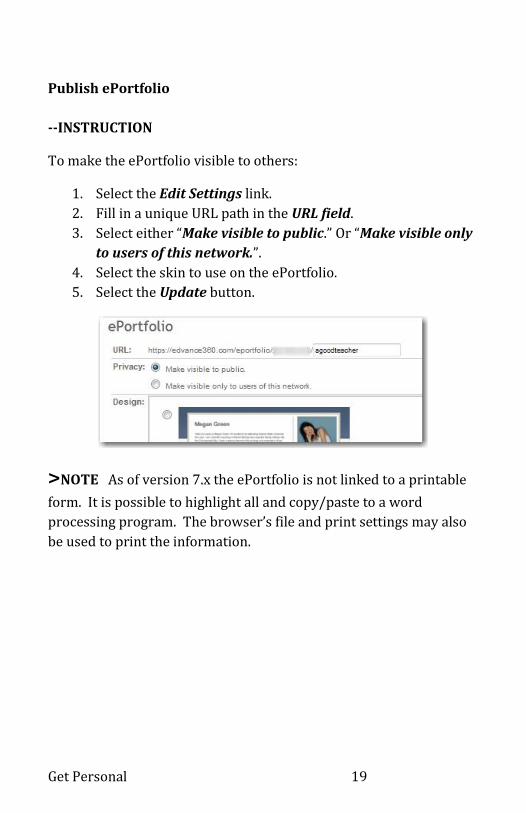
To make the ePortfolio visible to others:
1. Select the Edit Settings link.
2. Fill in a unique URL path in the URL field.
3. Select either “Make visible to public.” Or “Make visible only
to users of this network.”.
4. Select the skin to use on the ePortfolio.
5. Select the Update button.
>NOTE As of version 7.x the ePortfolio is not linked to a printable
form. It is possible to highlight all and copy/paste to a word
processing program. The browser’s file and print settings may also
be used to print the information.

Chapter 2 20
My Widgets
The Widget section allows you to personalize your Personal
Edvance360 Homepage as well as add a pop up calculator to all
course pages.
Everything in this section is found under the My Widgets link on the
Left Navigation panel of the Personal Home Page.
Add a Basic Calculator (all pages)
--INSTRUCTION
To add the Basic Calculator to all Edvance360 pages:
1. Select the On radio button located to the left of the Basic
Calculator widget.
2. Select the Save Widget Settings button.
Turn Off (Remove) Home Page Discussion Summaries
This removes the Discussion Summary links from the Personal Home
Page.
--INSTRUCTION
1. Select the Off radio button located to the left of Discussion
Summaries widget.
2. Select the Save Widget Settings button.

Get Personal 21
Add Personal Home Page RSS Feed
--INSTRUCTION
1. Browse to the RSS feed on the Internet you would like to
have placed on your Personal Home Page of Edvance360.
2. Copy the URL of the feed.
3. Return to Edvance360 Personal Home Page.
4. Select the My Widget link.
5. Select the On radio button located to the left of the RSS
Reader widget.
6. Select the Save Widget Settings button.
7. Select the Edit Settings link that now appears to the right of
the RSS Reader widget.
8. Paste the RSS feed URL into the empty field.
9. Select the Add RSS Feed button.
>NOTE RSS feeds may also be added to individual Course Home
Pages.
Delete Personal Home Page RSS Feed
--INSTRUCTION
1. Select the My Widget link.
2. Select the Edit Settings link located to the right of the RSS
Reader widget.
3. Select the Delete Feed button.

Chapter 2 22
Personal Settings
Screen Font and Contrast
Although it is possible to change the zoom settings with the browser,
you may find you would rather just change the default font size on
the screen specific to Edvance360.
--INSTRUCTION
1. Select the Settings tool from the Left Navigation on the
Personal Home Page.
2. Select the Font Size button next to the desired font size in the
Font Preferences section.
3. Optionally select High Contrast in the Font Color and
Contrast section.
4. Scroll to the bottom of the page.
5. Select the Save Settings button.
Defaults for Multiple Choice Questions
When creating multiple choice test questions Edvance360 defaults to
four answers per question.

Get Personal 23
--INSTRUCTION
1. Select the Settings tool from the Left Navigation on the
Personal Home Page.
2. Type the number of desired question in the How many
options by default for multiple-choice questions? field
located in the Tests section.
3. Scroll to the bottom of the page.
4. Select the Save Settings button.
Grade Mapping Defaults
Your institution’s Edvance360 system
administrator inputs the universal Grade
Mapping scheme for all courses. You can
change your personal Grade Map settings
for all courses assigned to you which do not
fit with the institution’s universal Grade
Map. If your grading scheme is different for
certain courses you have the option of
changing the Grade Map for those courses in
the Course Settings.
--INSTRUCTION
1. Select the Settings tool from the Left
Navigation on the Personal Home
Page.
2. Type the minimum percentage
values equivalent to the Letter
grades in the applicable Min Value fields.
3. Type the percentage at which a student if they receive a
lower average grade will be at the threshold of failing the
course in the Pass/Fail Threshold field.
4. Scroll to the bottom of the page.
5. Select the Save Settings button.
Chapter 2 24
Turn Email Alert Off/On
Each user can change the option of sending an alert to an email
account which resides outside of the Edvance360 messaging system.
--INSTRUCTION
1. Select the Settings tool from the Left Navigation on the
Personal Home Page.
2. Scroll to the Email Alerts section of the Settings page.
3. Select the applicable choice button On/Off.
4. Select the Save Settings button.
>NOTE You can change which outside email address to which the
alerts are sent in your Personal Account Settings.
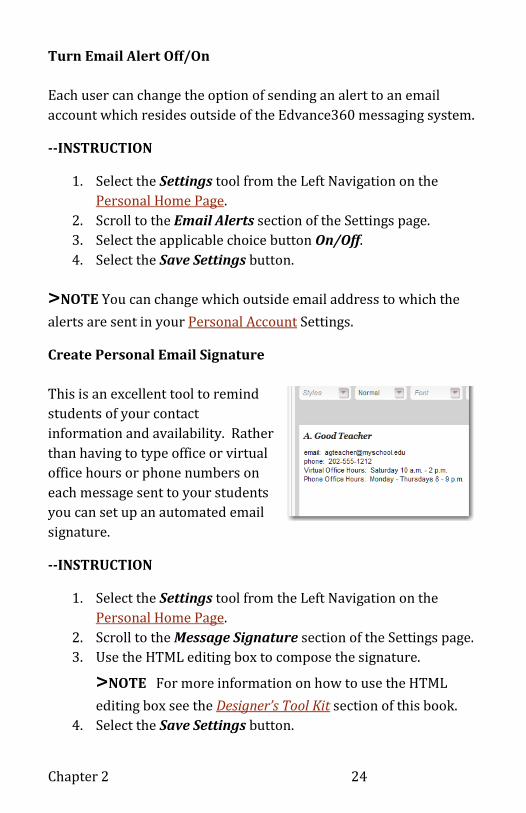
Create Personal Email Signature
This is an excellent tool to remind
students of your contact
information and availability. Rather
than having to type office or virtual
office hours or phone numbers on
each message sent to your students
you can set up an automated email
signature.
--INSTRUCTION
1. Select the Settings tool from the Left Navigation on the
Personal Home Page.
2. Scroll to the Message Signature section of the Settings page.
3. Use the HTML editing box to compose the signature.
>NOTE For more information on how to use the HTML
editing box see the Designer’s Tool Kit section of this book.
4. Select the Save Settings button.

Get Personal 25
Change “Marked as Read” Option
This option allows you to change the default of removing the New
Discussion summaries from the Personal Home Page after visiting
the page of posts. By changing this option the summary will remain
until you check the discussion response or post off as read.
--INSTRUCTION
1. Select the Settings tool from the Left Navigation on the
Personal Home Page.
2. Scroll to the Discussion Posts section located at the bottom
of the page.
3. Select the Mark Read: preference.
4. Select the Save Settings button.

Chapter 3 The End from the Beginning
End From the Beginning 27
Backward Course Design
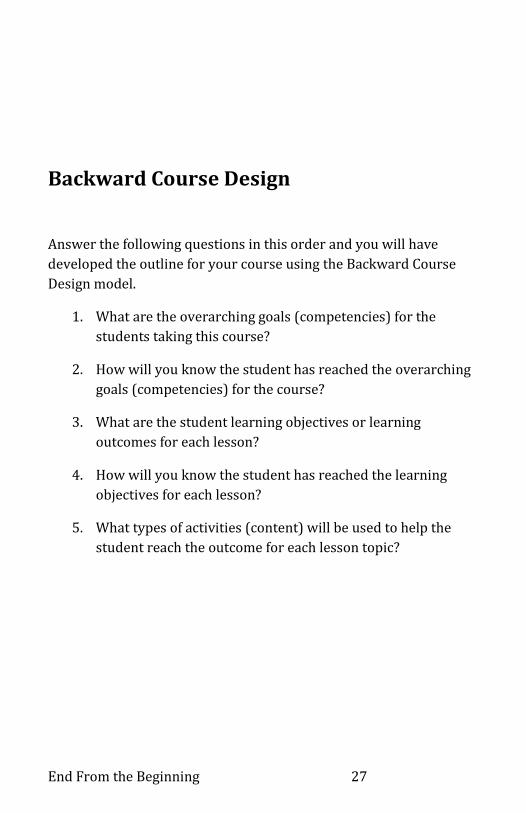
Answer the following questions in this order and you will have
developed the outline for your course using the Backward Course
Design model.
1. What are the overarching goals (competencies) for the
students taking this course?
2. How will you know the student has reached the overarching
goals (competencies) for the course?
3. What are the student learning objectives or learning
outcomes for each lesson?
4. How will you know the student has reached the learning
objectives for each lesson?
5. What types of activities (content) will be used to help the
student reach the outcome for each lesson topic?

Chapter 3 28
What are the Overarching Course Goals?
How will the student be changed after completing this course in
reference to his knowledge, skill level or personal attitude?
When answering this question don’t get bogged down in detail of
specific things the student will do which identifies their knowledge.
These goals are developed with broad strokes and need to tie in with
the academic program major goals and vision.
Let’s use the breakdown an example of a course titled Island Cooking.
This course would not be offered by a school, college, or university
just because someone “feels” like they would like to teach this
course. The reason this course would be developed and taught
would need to tie into the mission and goals of the institution’s
culinary program.
If the program’s goal or mission is this: “The program will develop
professionals who can successfully communicate and practice
culinary techniques in a global world and provide those students
with practical education food preparation and food industry
management.” This particular class may have, among others, the
following two overarching goals:

End From the Beginning 29
1. The student will be able to name and describe the primary
island culinary traditions, foods, flavors, ingredients, and
cooking techniques.
2. The student will be able to integrate flavors, ingredients,
seasonings, and techniques of both the traditional and the
current trends of island cuisine.
After clearly identifying the overarching course goals, these can be
placed into Edvance360 and tied to the Gradebook. When followed
through by each instructor, Competency Scoring is performed at the
end of the course which will clearly indicate the student’s mastery of
the course goals.
Add Course Competencies (Learning Outcomes)
--INSTRUCTION
Within the Course, select the
Gradebook course tool located in the
Left Navigation panel.
1. Select the Competencies link.
2. Select the + New Competency
link.
3. Type a short name in the Title
field.
4. Type a Version number. Usually this would start with the
number one.
5. Select the Grade Level from the dropdown Grade Level
menu.
6. Select the Add button.
>NOTE If no Competencies link is available, check with your
Edvance360 Administrator and ask that this feature be activated.
The Administrator must turn on the Competencies and set grade
level selections before a course designer can utilize this tool.

Chapter 3 30
How will you know the student has reached the course
competencies?
This may be a list of items which present a portfolio of tests, projects,
surveys, interviews and other activities which when compiled
produce evidence of the student’s level of mastery of the course
goals.
Using our example of the Island Cooking course goal number two
answer to this question may look like this:
Goal: The Student will be able to integrate flavors, ingredients,
seasonings, and techniques of both the traditional and the
current trends of island cuisine.
Final Assessment: The student will plan and prepare a meal
using ingredients from both traditional and current trends in
island cuisine. The meals will be identified by the student as
either traditional or modern with a discussion presentation
identifying the details which indicate which type of meal is being
served. The meal will be assessed for integration of flavors,
seasonings, and techniques using the criteria of the American
Culinary Federation competition manual.

End From the Beginning 31
What are the student learning objectives each lesson?
Course lessons are a collection of activities which help the student
progress in reaching the overarching course goals. The lesson
objectives may focus on what the student will be able to do, know, or
believe which will contribute to meeting the final goals. Continuing
our Island Cooking example the lesson objectives may look like this:
Goal: The Student will be able to integrate flavors, ingredients,
seasonings, and techniques of both the traditional and the
current trends of island cuisine.
Lesson Objectives: 1. Be able to identify seasonings used in
Jamaican jerk spice. 2. Be able to describe the origins of the
Jamaican jerk spice. 3. Be able to prepare a dish using modern
methods, which includes Jamaican Jerk spices which have been
blended by the student.
You can see how the lesson objectives when met successfully
become building blocks for the student to meet the course goals.

Chapter 3 32
How will you know the student has reached the learning
objectives for each lesson?
You will know the student has reached the learning objectives for
each lesson by asking them to complete an assignment.
Lesson Objectives: 1. Be able to identify seasonings used in
Jamaican jerk spice. 2. Be able to describe the origins of the
Jamaican jerk spice. 3. Be able to prepare a dish using modern
methods, which includes Jamaican Jerk spices which have been
blended by the student.
Lesson Objective Assessment: 1. Fill-in-the-blank, multiple
choice and matching test which will require the student to recall
or recognize seasonings belonging to Jamaican jerk spice. 2.
Prepare/Present a PowerPoint presentation comparing and
contrasting traditional versus modern Jamaican Jerk spices,
including in the presentation the evolution and
timeline/causation of the changes. 3. Prepare a Jamaican Jerk
dish which includes chicken or pork, which includes spices
blended gathered and blended by the student. A pre-approved
independent evaluator, using a grading rubric with the elements
of the American Culinary Federation competition manual, will
evaluate the dish.

End From the Beginning 33
What types of activities (content) will be used to help the
student reach the outcome for each lesson topic?
Now that you know why you are
teaching the course (Course Competencies), how
you will know if the student is successful in reaching
those goals, and what steps you will use to help the
student reach the goals (Lesson Objectives) it is time to decide how
to present the content. Content is the subject matter pertaining to a
particular lesson objective. Presentation of the content is the list of
activities the student will be engaged in to learn the subject matter.
Because you know exactly what the student should know, do, or
believe when they end each lesson module it will be easier to select
the learning activity. Activities may include textbook readings,
audio, video, or traditional lectures, structured computer aided
tutorials, PowerPoint® presentations, group discussions, role
playing, flash-cards, hands-on experiments, and more.
Lesson Objectives: 1. Be able to identify seasonings used in
Jamaican jerk spice.
Learning Activities (Items): 1. Read the text chapter on
Jamaican Jerk Spices. 2. Purchase the ingredients for a
traditional Jamaican Jerk spice blend. 3. Taste each spice and
discuss likes / dislikes with course mates. 4. Complete a
practice exam until 100% accurate.

Chapter 4 Get Your Content Together

Get Your Content Together 35
Before Adding Content to Edvance360
Gathering content ready for classes should be done within the best
practices of online course design. If you have not read the previous
chapter, The End from the Beginning and/or have a good
understanding of why you are adding content to Edvance360; take a
step back and do it now!
--INSTRUCTION
1. Complete the 5 steps of Backward Course Design.
2. Organize content files and resources into folders on a storage
device on your computer or network. Content files are the
materials needed to present the subject matter, support student
learning activities, and give students direction. These may
include such items as: •the course syllabus •calendar •files for
reading, listening or viewing subject matter • test or quiz
questions • writing guidelines •presentation examples
•institutional & course policies.
3. Edit files to their “final” state. To avoid confusion and
frustration it is best to edit any documents before uploading
them to Edvance360. Files cannot be edited from the
Edvance360 servers. The exception to this rule is valid when the
instructor uses the Google Docs™ feature of the Personal
Repository.
>NOTE To avoid creating files that are useable only one time do
not insert specific dates, deadlines, or other term identifiable
characteristics when creating documents and course materials.

Chapter 4 36

Get Your Content Together 37
The Edvance360 Personal Repository File
System
Think of the Repository as your personal storage space in
Edvance360.
Before you begin uploading randomly to the Repository you should
have already organized your files on a storage device on your
computer or network.
The beauty of the Repository lies in the fact that a document only
needs to be uploaded once and then may be used in many different
courses and sections. Most instructors will have a file of documents
which they use in all of their courses such as writing guides or ice-
breaker documents. These can all go into sets of general folders
which are not tied to any one course. It is important to break them
down into folders. At a minimum break it down into at least four: 1.
General Student Resources 2. Course Activity and Learning Content
3. Assessment Materials 4. Instructor Support Files
How do you decide what is a student resource? Ask yourself the
question: “How am I expecting to use this file?” If the answer is
student supporting material that will be used to facilitate best
practices, course information, or institutional policy, it is most likely
a student resource. If it is going to be used in a lesson but not
necessarily is used or needed for the assessment or in the
subsequent chapters it is most likely a course content file. If it is
something for the instructor’s eyes only it is an instructor support
file.
Chapter 4 38
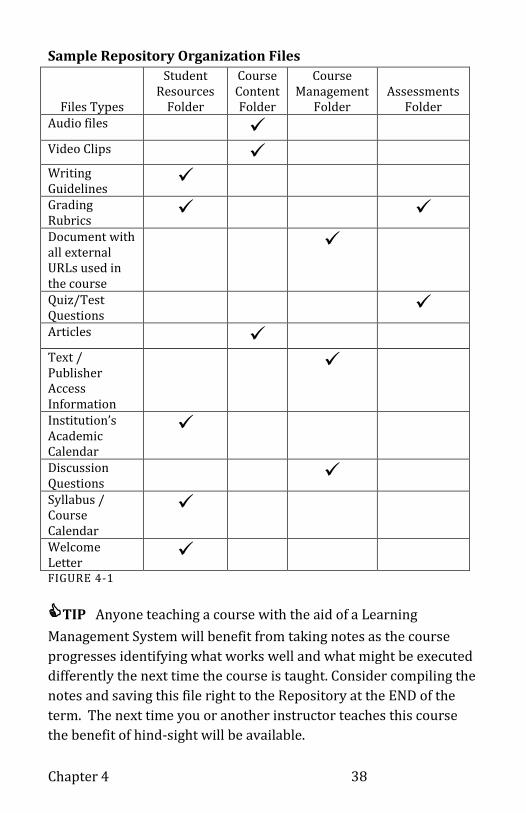
Sample Repository Organization Files
Files Types
Student Resources
Folder
Course Content Folder
Course Management
Folder
Assessments
Folder Audio files
Video Clips
Writing Guidelines
Grading Rubrics
Document with all external URLs used in the course
Quiz/Test Questions
Articles
Text / Publisher Access Information
Institution’s Academic Calendar
Discussion Questions
Syllabus / Course Calendar
Welcome Letter
FIGURE 4-1
TIP Anyone teaching a course with the aid of a Learning
Management System will benefit from taking notes as the course
progresses identifying what works well and what might be executed
differently the next time the course is taught. Consider compiling the
notes and saving this file right to the Repository at the END of the
term. The next time you or another instructor teaches this course
the benefit of hind-sight will be available.

Get Your Content Together 39
A Tale of Two Tabs – The Files Tab
Imagine for a moment that the Personal Repository is a physical
filing cabinet. I have not seen too many filing cabinets that have only
one drawer. The Personal Repository has two drawers. One for the
types of files we have previously discussed. The other drawer is for
test questions only.
Select the Repository Tab located in the Personal Navigation Tabs at
the top of any page in Edvance360. Here you will see two tabs
available. The Files tab should be active and the Questions tab
lurking behind. This next section will cover the Files tab.
For more discussion and explanation of the Questions tab see:
A Tale of Two Tabs – The Questions Tab section.
Creating Folders
In this section the following actions are performed after selecting the
Repository Tab on the Personal Navigation menu and making sure
the focus is on the correct tab, either Files tab or Question. The one
with focus will appear to be in front of the other.

Chapter 4 40
--INSTRUCTION
1. Select the +New Folder link in the upper left corner under
the Files and Questions tabs.
2. Type a name for the folder in the Folder Name: field.
3. It is optional to type a description for the folder in the
Description: field
4. Select from the In: drop down menu and the location for the
folder which will be
a. Top level of the file system
b. Inside of another folder already created.
5. Select the Submit button.

Get Your Content Together 41
Renaming or Moving Repository Folders
It happens to all of us, that is, mistakenly placing a folder inside the
wrong folder or realizing that we have just mistyped the name.
Renaming or moving the Repository folders is an easy task.
--INSTRUCTION
1. Select the Folder Name.
2. Select the Rename/Move Folder link located on the right
side of the screen.
3. Type the correct name in the Folder Name: field if renaming
the folder.
4. Type or re-type in the Description: field if information in this
box needs adding or changing.
5. Select the correct folder location in the Move To: field.
6. Select the Submit button.
Working with Document Files
Most common file types can be added to the Edvance360 Personal
Repository. As new programs evolve you may encounter a file which
will just not upload.
Should this happen you will want to contact your Edvance360
Administrator. He can request an exception be made by the
Edvance360 programming group. In some instances, because of
certain security risks which a file may pose, the programming group
will deny exception.
A work-around to exceptions, should you need to share files with
students which are not loading would be to put the files in zip
format. How to do this depends on your operating system. You can
find an easy how-to by doing a quick Internet search.
Chapter 4 42
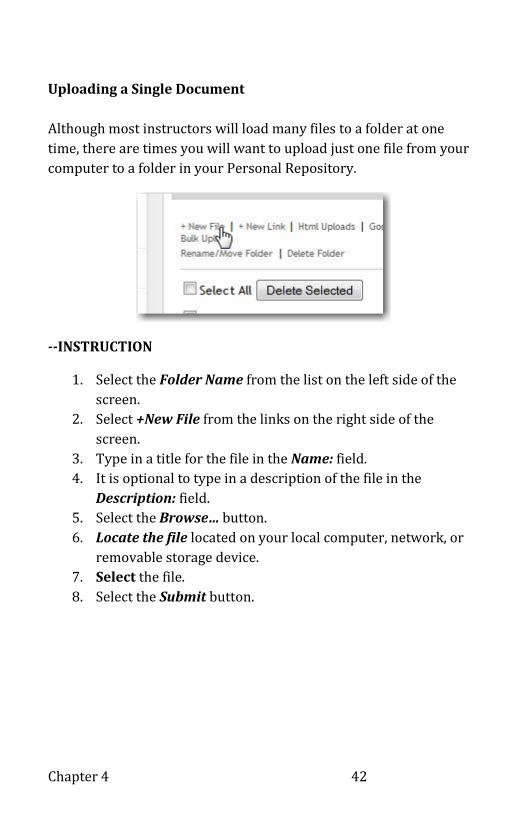
Uploading a Single Document
Although most instructors will load many files to a folder at one
time, there are times you will want to upload just one file from your
computer to a folder in your Personal Repository.
--INSTRUCTION
1. Select the Folder Name from the list on the left side of the
screen.
2. Select +New File from the links on the right side of the
screen.
3. Type in a title for the file in the Name: field.
4. It is optional to type in a description of the file in the
Description: field.
5. Select the Browse… button.
6. Locate the file located on your local computer, network, or
removable storage device.
7. Select the file.
8. Select the Submit button.
Get Your Content Together 43
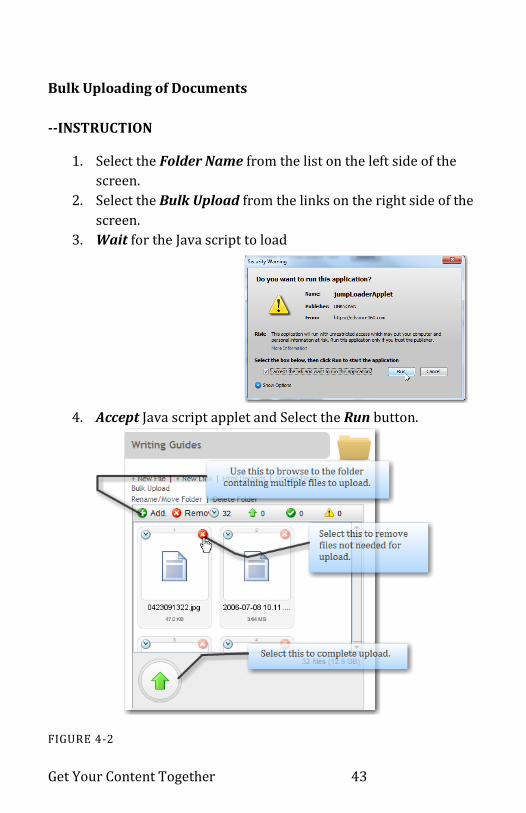
Bulk Uploading of Documents
--INSTRUCTION
1. Select the Folder Name from the list on the left side of the
screen.
2. Select the Bulk Upload from the links on the right side of the
screen.
3. Wait for the Java script to load
4. Accept Java script applet and Select the Run button.
FIGURE 4-2

Chapter 4 44
5. Select the +Add link to browse for the files your local
computer, network, or removable storage device for upload.
6. Select the Folder which contains the files to upload
7. Select the Open button
All of the files which were located in the local folder will now appear
in the upload window.
8. Remove any files you do not wish to upload by selecting the
Red X in the upper corner of the file.
9. To complete the bulk upload select the Green Arrow located
in the lower left corner of the bulk upload box.
>NOTE Wait for the upload bar to complete before closing the
window. The transfer time will depend on the size and amount of
files selected for uploading.
Rename or Move Documents
Once a file has been uploaded you may wish to change the document
file name or location. This is especially true if you have bulk loaded
the files since they are titled with the same file name as the file itself
and no description is provided.
--INSTRUCTION
1. Select the Folder Name from the list on the left side of the
screen
2. Select the Edit link to the right of the file which you wish to
rename or add a description.
3. Select the folder in the Move To: field you wish to have the
file located.
4. Type in a title for the file in the Name: field.
5. Type in a description of the file in the Description: field.
6. Scroll down to the bottom of the page.
7. Select the Update button.

Get Your Content Together 45
Edit Documents
Using the term Edit is a misnomer for these actions. You cannot edit
a document on the Edvance360 server. Any changes you make to a
document must be done on a local version of the document. This is
true of word processed documents, spreadsheets, video files or
audio files. The exception to this rule is when using Google Docs.
Google Docs allows for editing directly on the Google Docs server
which can then be linked to the Edvance360 repository.
What can be edited on the Edvance360 server is the title of the
document, the document’s location, and the document’s description.
The document itself can be replaced by a new file, but the file itself
must have a new name.
Example:
I have uploaded a document called Course XYZ Syllabus and
then I see I need to make changes. I will open the original
document located on my computer, network, or removable
storage device and make the changes. I must save the
document with a new name. In this case I will save it as, save
it as Course XYZ Syllabus v2 to indicate it is the second
version of that file. Now it is ready to upload to Edvance360.
--INSTRUCTION
1. Open the original file located on your computer, jump drive,
network drive or other local storage device.
2. Make changes as needed to the document.
3. Save As when saving the document.
4. Re-name the document with a different name.

Chapter 4 46
FIGURE 4-3
5. In the Edvance360 Personal Repository: Select the Folder
Name from the list on the left side of the screen that contains
the document which you will replace.
6. Select the Edit link to the right of the file which you wish to
replace.
9. Select the Browse button.
10. Locate the file you just renamed and saved.
11. Select the file by double-clicking the file.
12. Select the Open button.
13. Scroll down to the bottom of the page.
14. Select the Update button.
15. Remove the original file from the Edvance360 Repository.
Using Personal Web Sites with Edvance360
Some instructors have been teaching online for years and started by
using their own web sites. Most K-12 schools and many colleges and
universities have policies which require the instructor to use their
designated course management system as because the use of
consistency across curriculums is an online learning best practice.
Edvance360 has solved the dilemma by creating a simple way for the
instructor to upload a copy of the HTML files to the Personal

Get Your Content Together 47
Repository. Once uploaded the instructor and students can access
the useable set of web pages within an Edvance360 Lesson!
--INSTRUCTION
1. Download a complete local copy of the web site to your
computer, network drive, or portable storage device.
2. Place all of these files in a ZIP folder. How to do this
depends on your operating system. You can find an easy
how-to by doing a quick Internet search.
3. In the Edvance360 Personal Repository: Select the Folder
Name from the list on the left side of the screen which will
hold all the files from the web site.
>NOTE You should have previously created a folder to hold
only these files.
4. Select the Html Uploads link located on the right side of the
screen.
5. Select the New Upload link.
6. Select the Browse… Button.
7. Locate the zip file located on your local computer, network,
or removable storage device.
8. Select the file by double-clicking the file.
9. Select the Open button.
10. Type a title in the Display Name: field.
11. Select the Submit button.
Google Docs™ Integration
Do you use Google Docs™ and love it because of the portability and
sharing capabilities. Good news! You can access your documents
from within Edvance360. This is especially good news for adjunct
professors who may be teaching at more than one institution but
need access to the same documents.
Chapter 4 48
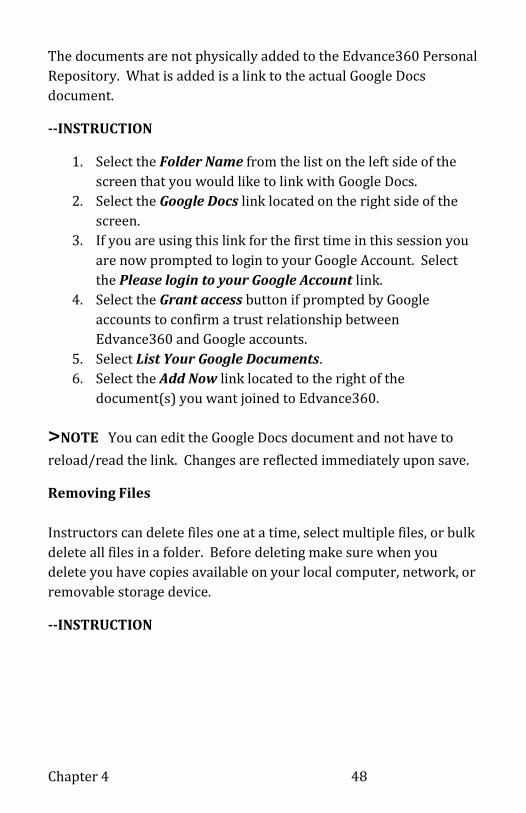
The documents are not physically added to the Edvance360 Personal
Repository. What is added is a link to the actual Google Docs
document.
--INSTRUCTION
1. Select the Folder Name from the list on the left side of the
screen that you would like to link with Google Docs.
2. Select the Google Docs link located on the right side of the
screen.
3. If you are using this link for the first time in this session you
are now prompted to login to your Google Account. Select
the Please login to your Google Account link.
4. Select the Grant access button if prompted by Google
accounts to confirm a trust relationship between
Edvance360 and Google accounts.
5. Select List Your Google Documents.
6. Select the Add Now link located to the right of the
document(s) you want joined to Edvance360.
>NOTE You can edit the Google Docs document and not have to
reload/read the link. Changes are reflected immediately upon save.
Removing Files
Instructors can delete files one at a time, select multiple files, or bulk
delete all files in a folder. Before deleting make sure when you
delete you have copies available on your local computer, network, or
removable storage device.
--INSTRUCTION

Get Your Content Together 49
1. Select the Folder Name from the list on the left side of the
screen which contains the documents to be deleted.
2. Single file deletion:
a. Select the Delete link located on the right side of the
screen just beneath the file to be removed.
3. Multiple file deletion:
a. Select the Check Boxes to the left of the file name.
b. Select the Delete Selected button.
4. Bulk delete:
a. Select the Select All Check Box
b. Select the Delete Selected button.
Removing Folders from Personal Repository
It is especially important to confirm you have chosen the correct
folder to delete. Look twice. Delete once.
1. In the Edvance360 Personal Repository: Select the Folder
Name from the list on the left side of the screen that you
would like to
2. Select the Delete Folder link located on the right side of the
screen.
3. Confirm Deletion by selecting the OK button.
***CAUTION: Before deleting verify the presence of a local copy
of the file or folders of files on local computer, network, or
removable storage device. Retrieval of mistakenly deleted
cannot be retrieved.

Chapter 4 50

Get Your Content Together 51
A Tale of Two Tabs – The Questions Tab
The Questions area of the Personal Repository holds the questions
used on automated test assessments. Creating test questions can be
a tedious process. By placing the files in the Repository once the
same question which can be used on multiple exams. After creating
or importing the questions see the Tests, Quizzes, and Surveys section
for information on creating the exam.
Open Repository tab on the Personal Navigation Tabs. Here you will
see two tabs available. The Questions tab should be active and the
Files tab lurking behind. This next section will cover the Questions
tab. For more discussion and explanation of the Files tab see the A
Tale of Two Tabs – The Files Tab section.
Creating Folders
In this section the following actions are performed after selecting the
Repository Tab on the Top Navigation menu and making sure the
focus is on the correct tab, either Files tab or Question. The one with
focus will appear to be in front of the other.

Chapter 4 52
--INSTRUCTION
1. Select the +New Folder link in the upper left corner under
the Files and Questions tabs.
2. Type a name for the folder in the Folder Name: field.
3. Optionally type a description for the folder in the
Description: field
4. Select from the In: drop down menu whether the folder is to
go at the top level of the file system or inside of another
folder that has already been created.
5. Select the Submit button.
Organize and label folders in a manner which will allow you to easily
find the questions when ready to use later.
Get Your Content Together 53
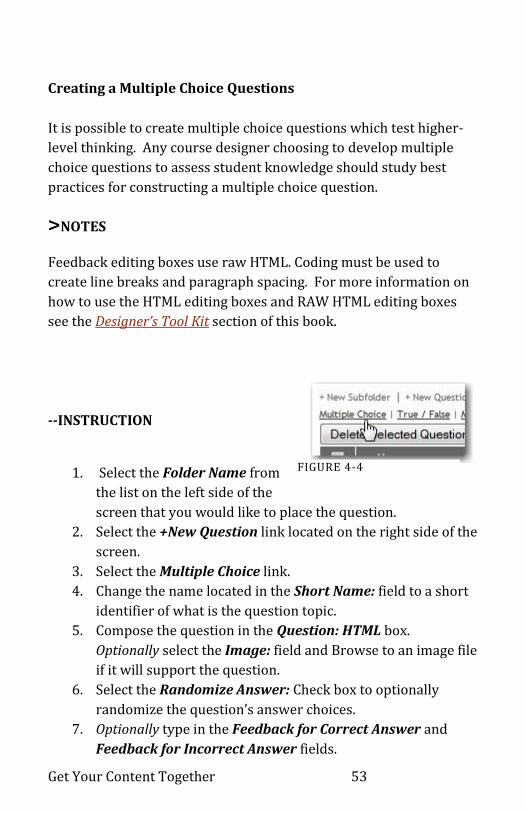
FIGURE 4-4
Creating a Multiple Choice Questions
It is possible to create multiple choice questions which test higher-
level thinking. Any course designer choosing to develop multiple
choice questions to assess student knowledge should study best
practices for constructing a multiple choice question.
>NOTES
Feedback editing boxes use raw HTML. Coding must be used to
create line breaks and paragraph spacing. For more information on
how to use the HTML editing boxes and RAW HTML editing boxes
see the Designer’s Tool Kit section of this book.
--INSTRUCTION
1. Select the Folder Name from
the list on the left side of the
screen that you would like to place the question.
2. Select the +New Question link located on the right side of the
screen.
3. Select the Multiple Choice link.
4. Change the name located in the Short Name: field to a short
identifier of what is the question topic.
5. Compose the question in the Question: HTML box.
Optionally select the Image: field and Browse to an image file
if it will support the question.
6. Select the Randomize Answer: Check box to optionally
randomize the question’s answer choices.
7. Optionally type in the Feedback for Correct Answer and
Feedback for Incorrect Answer fields.

Chapter 4 54
8. Type in the first answer choice in the Answer 1 HTML box.
9. Optionally type in the Feedback field for Answer 1. This will
supply a reaction to the student if this answer is chosen and
should be used to reinforce the validity of the answer.
10. Repeat steps 9 and 10 until all choices are completed.
11. Optionally select the Add a New Answer if more choices are
desired for, select the Add a New Answer button.
>NOTE The default number of answers for multiple choice
questions is set to four. You can change your personal
default using the Personal Settings menu.
12. Select a Correct Answer by clicking the round radio button
under the Answer label of the Answer which is correct.
13. Select Save and Return to Question Bank button
Get Your Content Together 55
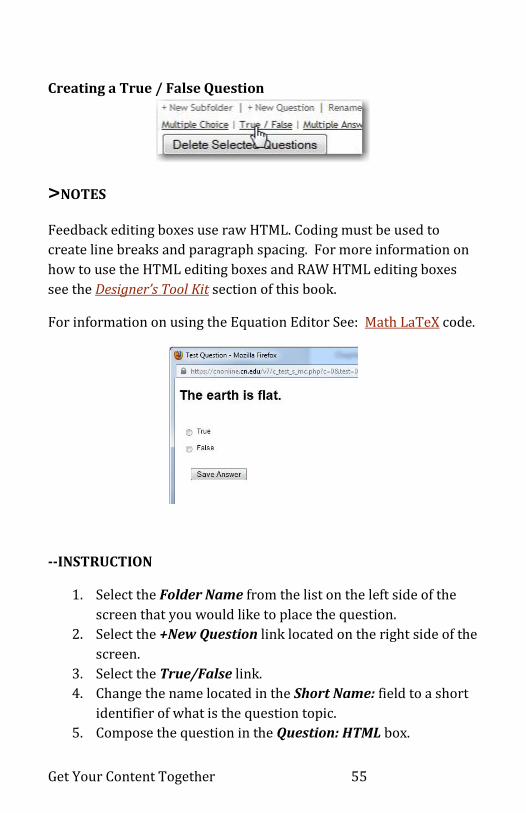
Creating a True / False Question
>NOTES
Feedback editing boxes use raw HTML. Coding must be used to
create line breaks and paragraph spacing. For more information on
how to use the HTML editing boxes and RAW HTML editing boxes
see the Designer’s Tool Kit section of this book.
For information on using the Equation Editor See: Math LaTeX code.
--INSTRUCTION
1. Select the Folder Name from the list on the left side of the
screen that you would like to place the question.
2. Select the +New Question link located on the right side of the
screen.
3. Select the True/False link.
4. Change the name located in the Short Name: field to a short
identifier of what is the question topic.
5. Compose the question in the Question: HTML box.

Chapter 4 56
6. Optionally select the Image: field and Browse to an image file
if it will support the question.
7. Optionally type in the Feedback for Correct Answer and
Feedback for Incorrect Answer fields.
8. Type in the first answer choice in the Answer 1 HTML box.
9. Optionally type in the Feedback field for Answer 1 and
Answer 2. This will supply a reaction to the student if this
answer is chosen and should be used to reinforce the validity
of the answer.
10. Select a Correct Answer by clicking the round radio button
under the Answer label of the Answer which is correct.
11. Select Save and Return to Question Bank button
Creating a Multiple Answer Question
The designer uses this type of question when more than one answer
may be correct to the question. Since it is still a version of a multiple
choice question; the course designer choosing to develop multiple
choice questions to assess student
knowledge should study best practices for
constructing a multiple choice question.
There are several articles available on the
Internet that will help the designer decide how and when to use
multiple choice questions.
-- INSTRUCTION
1. Select the Folder Name from the list on the left side of the
screen that you would like to place the question.
2. Select the +New Question link located on the right side of the
screen.
Get Your Content Together 57
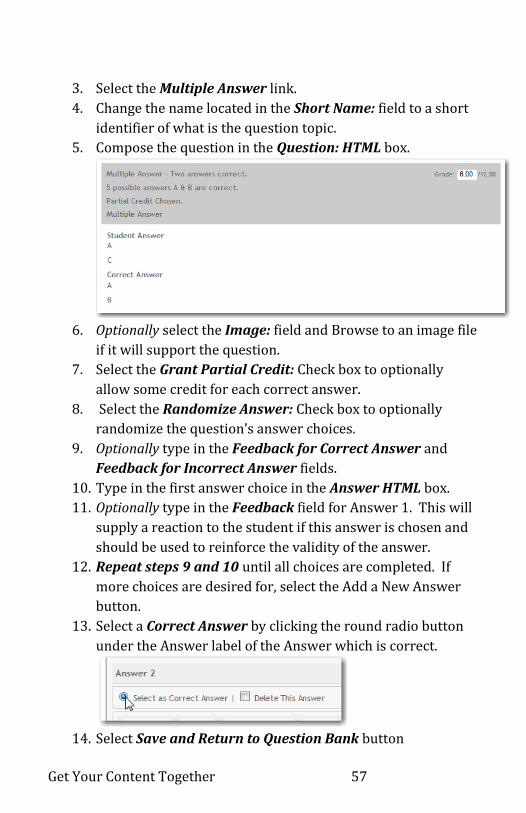
3. Select the Multiple Answer link.
4. Change the name located in the Short Name: field to a short
identifier of what is the question topic.
5. Compose the question in the Question: HTML box.
6. Optionally select the Image: field and Browse to an image file
if it will support the question.
7. Select the Grant Partial Credit: Check box to optionally
allow some credit for each correct answer.
8. Select the Randomize Answer: Check box to optionally
randomize the question’s answer choices.
9. Optionally type in the Feedback for Correct Answer and
Feedback for Incorrect Answer fields.
10. Type in the first answer choice in the Answer HTML box.
11. Optionally type in the Feedback field for Answer 1. This will
supply a reaction to the student if this answer is chosen and
should be used to reinforce the validity of the answer.
12. Repeat steps 9 and 10 until all choices are completed. If
more choices are desired for, select the Add a New Answer
button.
13. Select a Correct Answer by clicking the round radio button
under the Answer label of the Answer which is correct.
14. Select Save and Return to Question Bank button

Chapter 4 58
>NOTES
Feedback editing boxes use raw HTML. Coding must be used to
create line breaks and paragraph spacing. For more information on
how to use the HTML editing boxes and RAW HTML editing boxes
see the Designer’s Tool Kit section of this book.
For information on using the Equation Editor See: Math LaTeX code.
Creating a Matching Question
Matching questions are used when the relationship perspective
between two items of are associated by the test taker. These
questions are usually used to test simple recall knowledge.
--INSTRUCTION
1. Select the Folder Name from the list on the left side of the
screen that you would like to place the question.
Get Your Content Together 59
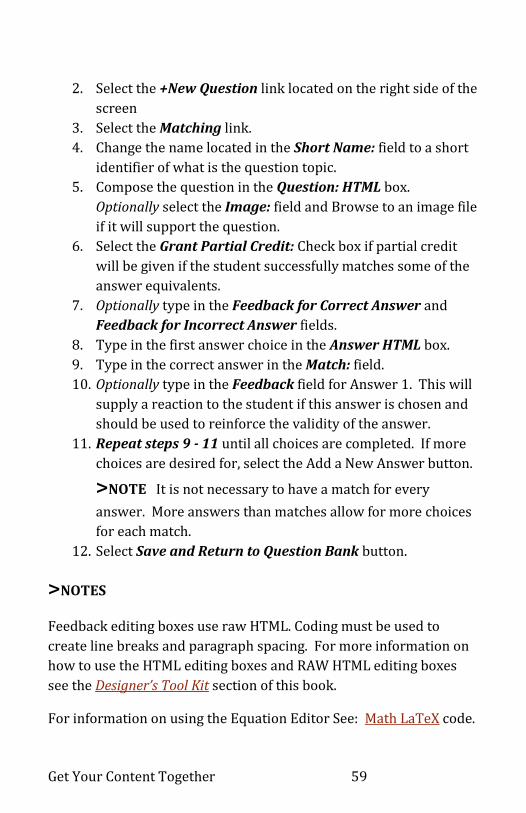
2. Select the +New Question link located on the right side of the
screen
3. Select the Matching link.
4. Change the name located in the Short Name: field to a short
identifier of what is the question topic.
5. Compose the question in the Question: HTML box.
Optionally select the Image: field and Browse to an image file
if it will support the question.
6. Select the Grant Partial Credit: Check box if partial credit
will be given if the student successfully matches some of the
answer equivalents.
7. Optionally type in the Feedback for Correct Answer and
Feedback for Incorrect Answer fields.
8. Type in the first answer choice in the Answer HTML box.
9. Type in the correct answer in the Match: field.
10. Optionally type in the Feedback field for Answer 1. This will
supply a reaction to the student if this answer is chosen and
should be used to reinforce the validity of the answer.
11. Repeat steps 9 - 11 until all choices are completed. If more
choices are desired for, select the Add a New Answer button.
>NOTE It is not necessary to have a match for every
answer. More answers than matches allow for more choices
for each match.
12. Select Save and Return to Question Bank button.
>NOTES
Feedback editing boxes use raw HTML. Coding must be used to
create line breaks and paragraph spacing. For more information on
how to use the HTML editing boxes and RAW HTML editing boxes
see the Designer’s Tool Kit section of this book.
For information on using the Equation Editor See: Math LaTeX code.
Chapter 4 60
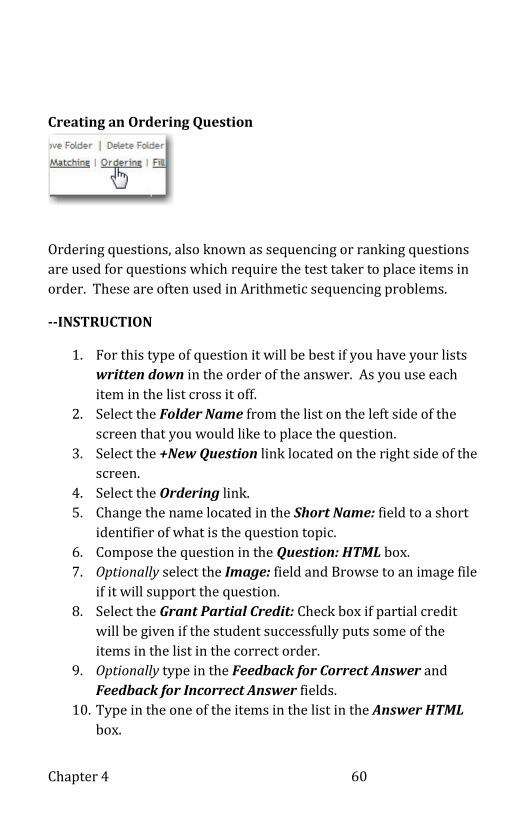
Creating an Ordering Question
Ordering questions, also known as sequencing or ranking questions
are used for questions which require the test taker to place items in
order. These are often used in Arithmetic sequencing problems.
--INSTRUCTION
1. For this type of question it will be best if you have your lists
written down in the order of the answer. As you use each
item in the list cross it off.
2. Select the Folder Name from the list on the left side of the
screen that you would like to place the question.
3. Select the +New Question link located on the right side of the
screen.
4. Select the Ordering link.
5. Change the name located in the Short Name: field to a short
identifier of what is the question topic.
6. Compose the question in the Question: HTML box.
7. Optionally select the Image: field and Browse to an image file
if it will support the question.
8. Select the Grant Partial Credit: Check box if partial credit
will be given if the student successfully puts some of the
items in the list in the correct order.
9. Optionally type in the Feedback for Correct Answer and
Feedback for Incorrect Answer fields.
10. Type in the one of the items in the list in the Answer HTML
box.

Get Your Content Together 61
11. It the Correct Order: box above the answer, type the position
in the list this item belongs.
13. Repeat steps 10 - 11 until all choices are completed. If more
choices are desired for, select the Add a New Answer button.
14. Select Save and Return to Question Bank button
>NOTE Feedback editing boxes use raw HTML. Coding must be used
to create line breaks and paragraph spacing. For more information
on how to use the HTML editing boxes and RAW HTML editing boxes
see the Designer’s Tool Kit section of this book.
For information on using the Equation Editor See: Math LaTeX code.
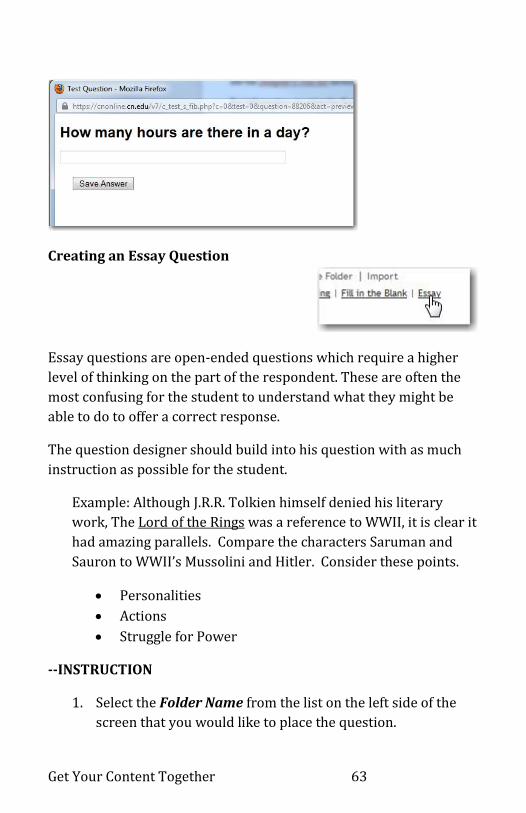
Creating a Fill in the Blank Question
Fill in the blank or short answer questions would look something
like these:
The grass is green and the ___ is blue.
What is the sum total of 144 + 97+292?
>NOTE This type of question will be automatically graded. Fill in
as many of answer possibilities which you will accept. For example:
The answer to the question is Mr. Smith. You would accept Mr.
Smith, Mister Smith, Mr Smith. The computer would see all three of
these answers as deserving full credit.

Chapter 4 62
1. Select the Folder Name from the list on the left side of the
screen that you would like to place the question.
2. Select the +New Question link located on the right side of the
screen.
3. Select the Fill in the Blank link.
4. Change the name located in the Short Name: field to a short
identifier of what is the question topic.
5. Compose the question in the Question: HTML box.
6. Optionally select the Image: field and Browse to an image file
if it will support the question.
7. Optionally type in the Feedback for Correct Answer and
Feedback for Incorrect Answer fields.
8. Type in an acceptable response for the answer in the Answer
1 box.
9. Optionally select Add A New Answer button which will add a
space to type in a second acceptable answer.
10. Repeat steps 8 -10 until all choices are completed.
11. Select Save and Return to Question Bank button
>NOTE Feedback editing boxes use raw HTML. Coding must be
used to create line breaks and paragraph spacing. For more
information on how to use the HTML editing boxes and RAW HTML
editing boxes see the Designer’s Tool Kit section of this book.
For information on using the Equation Editor See: Math LaTeX code.
Get Your Content Together 63
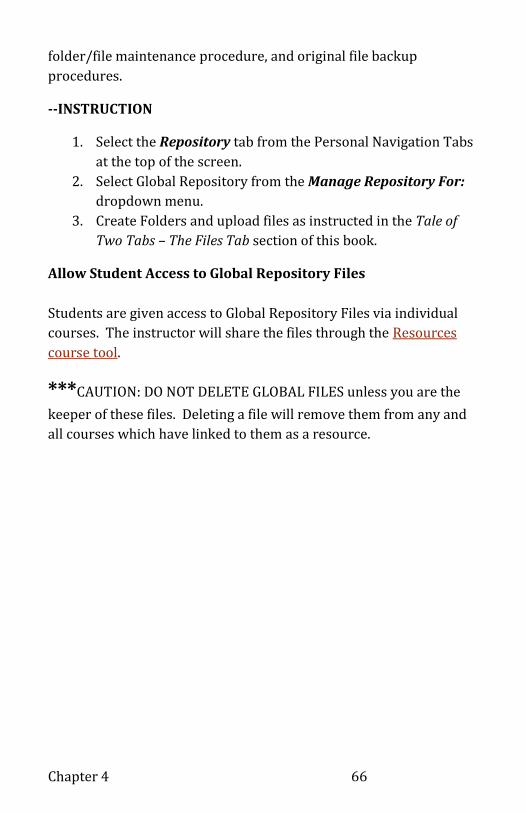
Creating an Essay Question
Essay questions are open-ended questions which require a higher
level of thinking on the part of the respondent. These are often the
most confusing for the student to understand what they might be
able to do to offer a correct response.
The question designer should build into his question with as much
instruction as possible for the student.
Example: Although J.R.R. Tolkien himself denied his literary
work, The Lord of the Rings was a reference to WWII, it is clear it
had amazing parallels. Compare the characters Saruman and
Sauron to WWII’s Mussolini and Hitler. Consider these points.
Personalities
Actions
Struggle for Power
--INSTRUCTION
1. Select the Folder Name from the list on the left side of the
screen that you would like to place the question.

Chapter 4 64
2. Select the +New Question link located on the right side of the
screen.
3. Select the Essay link.
4. Change the name located in the Short Name: field to a short
identifier of what is the question topic.
5. Compose the question in the Question: HTML box.
6. Optionally select the Image: field and Browse to an image file
if it will support the question.
7. Select Save and Return to Question Bank button
>NOTES
Feedback editing boxes use raw HTML. Coding must be used to
create line breaks and paragraph spacing. For more information on
how to use the HTML editing boxes and RAW HTML editing boxes
see the Designer’s Tool Kit section of this book.
For information on using the Equation Editor See: Math LaTeX code.

Get Your Content Together 65
Going Global– The Edvance360 Global
Repository
The Global Repository is the storage location for files which may be
used by multiple courses or institutional wide resources.
To access all files in the Global Repository select the Repository tab
from the Personal Navigation Tabs and select Global Repository from
the Manage Repository For: dropdown menu.
Download Files from Global Repository
--INSTRUCTION
1. Select the Folder Name from the list on the left side of the
screen which contains the file for download.
2. Select the Title Link of the document to open or save.
>NOTE Video files will open if the computer used has a
video codec installed. Video files are NOT downloadable
once uploaded to Edvance360.
Upload files to the Global Repository
It is very important to contact your Edvance360 administrator for a
consultation concerning any institutional file upload protocol for the
Edvance360 repository. There may be rules for naming conventions,
Chapter 4 66
folder/file maintenance procedure, and original file backup
procedures.
--INSTRUCTION
1. Select the Repository tab from the Personal Navigation Tabs
at the top of the screen.
2. Select Global Repository from the Manage Repository For:
dropdown menu.
3. Create Folders and upload files as instructed in the Tale of
Two Tabs – The Files Tab section of this book.
Allow Student Access to Global Repository Files
Students are given access to Global Repository Files via individual
courses. The instructor will share the files through the Resources
course tool.
***CAUTION: DO NOT DELETE GLOBAL FILES unless you are the
keeper of these files. Deleting a file will remove them from any and
all courses which have linked to them as a resource.

Chapter 5 Front and Center

Chapter 5 68
Exploring the Course Home Page
FIGURE 5-1
Access any of the courses in which you have access by selecting the
Courses Tab from the Personal Navigation Tabs at the top of the
screen in Edvance360 and then selecting the Course Link.
Edvance360 has taken the guess work of knowing what makes a
good design for a course home page. All of the elements of “walking”
into an online classroom are front and center for the instructor and
the student. Right away anyone entering an Edvance360 classroom
can have the following five questions answered immediately:
1. “Who’s teaching this course?”
o The instructor’s profile and picture appear in the
Instructor area of the course. This information is
pulled in from the instructor’s Personal Profile.
2. “Who’s enrolled in this course?”
o The Course Roster introduces the student to others
who are also enrolled in the course. It gives the
instructor and the student immediate ability to
contact other’s in the course by selecting their name
and reading more about them or emailing them
through the Edvance360 message service.
3. “What’s this course about?”
o As you will see next, the Course Description is very
important! Not only does it reassure the student they
are working in the intended class but it also invites
them to become involved and engaged.
Front and Center 69
4. “Where can I find the course syllabus?”
o Since the Syllabus and the Course Assignment
Schedule are essentially the maps to navigating the
online course Edvance360 has located front and
center.
5. “How do I get started?”
o This isn’t a question the student asks only the first
day of class. The student, when entering the
classroom (the Edvance360 course) may ask this
every time they enter. Edvance360 has offered the
Announcements section as the most prominent piece
of real-estate on the Course Home Page with a front-
center-and top-of-the-page alert.
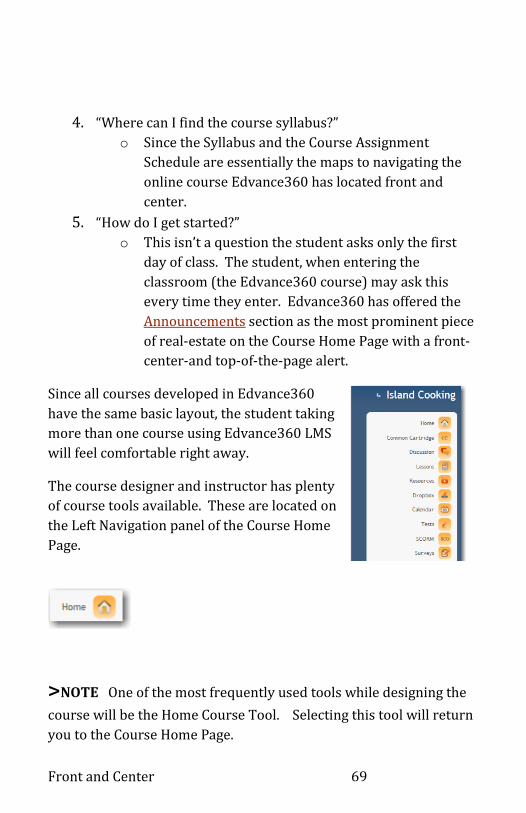
Since all courses developed in Edvance360
have the same basic layout, the student taking
more than one course using Edvance360 LMS
will feel comfortable right away.
The course designer and instructor has plenty
of course tools available. These are located on
the Left Navigation panel of the Course Home
Page.
>NOTE One of the most frequently used tools while designing the
course will be the Home Course Tool. Selecting this tool will return
you to the Course Home Page.

Chapter 5 70
Developing the Course Home Page
Course Description
A good course description should never be boring. Do not repeat the
description used in the institution catalogs as these tend to be
clinical and uninviting. Instead make the course description catch
the student’s attention by using action verbs, “What’s in it for me?”
benefit statements, interesting facts, and humor.
Here are two descriptions of the same course. Which course would
you rather enroll and be involved?
Description A
CULINARY ARTS 1234
CULINARY ARTS: ISLAND COOKING
In this course you will learn to create authentic Caribbean Island
dishes. Included in this course will be island culture, history.
Description B
CULINARY ARTS 1234
CULINARY ARTS: ISLAND COOKING
Take an unforgettable 12-week virtual trip to the Caribbean Islands.
While there, you will experience the taste and aroma of Caribbean
Island food.
Hear the multi-faceted sounds of the island dialect.
Encounter a colorful island reef while hunting for the edible
Queen Triggerfish.
Discover which Caribbean Island has the most churches per
square mile than any other country in the world!

Front and Center 71
The trip’s climax will have you cooking a three course island meal
that will be the delight of your friends and family.
--INSTRUCTION
1. Develop and word smith the course description using a word
processor. When you are satisfied with the text: Highlight
and Copy the course description.
2. Select the Settings course tool on the Left Navigation panel
of the Course Home Page.
3. Scroll down to the Course Description section of the page.
4. MS Word users – use the Word Paste
Clipboard to paste the text into the HTML
editing box.
Other word processor users may paste directly into the
HTML editing box.
5. Scroll dow to the bottom of the screen.
6. Select the Save Settings button.
>NOTE For more information on how to use the HTML editing box
see the Designer’s Tool Kit section of this book.
Chapter 5 72
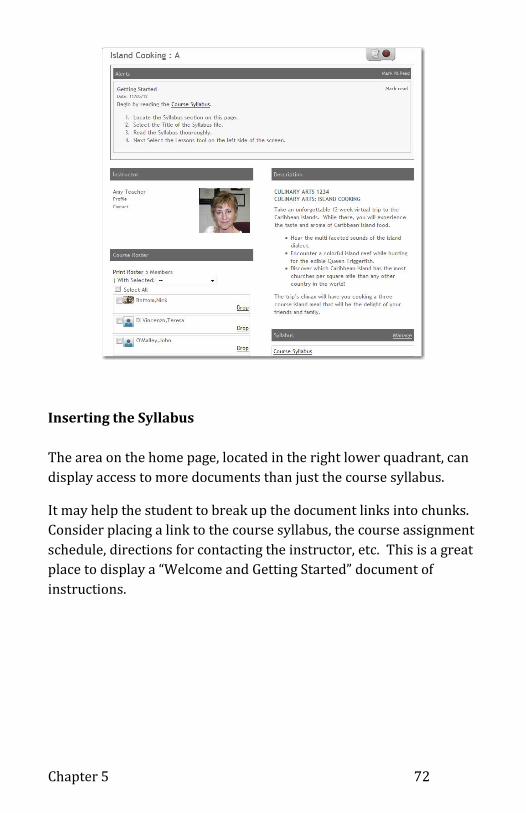
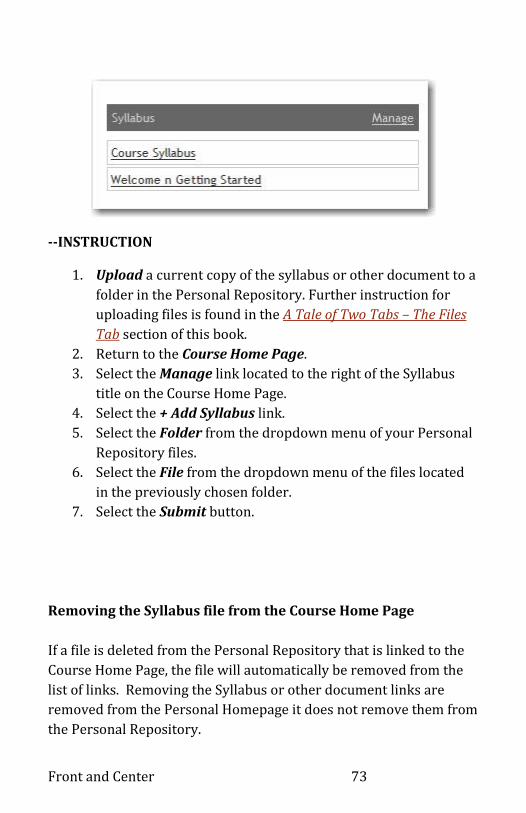
Inserting the Syllabus
The area on the home page, located in the right lower quadrant, can
display access to more documents than just the course syllabus.
It may help the student to break up the document links into chunks.
Consider placing a link to the course syllabus, the course assignment
schedule, directions for contacting the instructor, etc. This is a great
place to display a “Welcome and Getting Started” document of
instructions.
Front and Center 73
--INSTRUCTION
1. Upload a current copy of the syllabus or other document to a
folder in the Personal Repository. Further instruction for
uploading files is found in the A Tale of Two Tabs – The Files
Tab section of this book.
2. Return to the Course Home Page.
3. Select the Manage link located to the right of the Syllabus
title on the Course Home Page.
4. Select the + Add Syllabus link.
5. Select the Folder from the dropdown menu of your Personal
Repository files.
6. Select the File from the dropdown menu of the files located
in the previously chosen folder.
7. Select the Submit button.
Removing the Syllabus file from the Course Home Page
If a file is deleted from the Personal Repository that is linked to the
Course Home Page, the file will automatically be removed from the
list of links. Removing the Syllabus or other document links are
removed from the Personal Homepage it does not remove them from
the Personal Repository.

Chapter 5 74
--INSTRUCTION
1. Select the Manage link located to the right of the Syllabus
title on the Course Home Page.
2. Select the Delete link located to the right of the file link being
removed from the Course Home Page.
>NOTE If you have discovered you have uploaded the wrong file
you will need to first remove the incorrect file from your Personal
Repository, upload a new one, and then insert the correct file link on
the Course Home Page.
Add a Course Logo
The Course Logo is usually an image of the text book cover or
something which visual describes what the course is about. To add
continuity across a major or track of courses consider adding an
image which lets the student know the course he is taking is a part of
the program which he is enrolled.

Front and Center 75
--INSTRUCTION
1. Select the Settings course tool on the Left Navigation panel
of the Course Home Page.
2. Scroll down to the bottom of the page.
3. Select the Browse button to upload an image.
4. Locate the file located on your local computer, network, or
removable storage device.
5. Select the file.
6. Select the Open button.
7. Select the Upload Image button.
Remove a Course Logo
--INSTRUCTION
1. Select the Settings Course Tool on the Left Navigation panel
of the Course Home Page.
2. Select the Remove link located next to the Current Image:
Add a Course RSS Feed
Adding an RSS feed to the Course
Home Page offers the students a
real-world connection with the
course and gives them the
opportunity to take further
control of their learning process.
--INSTRUCTION
1. Locate an RSS feed URL to share.
2. Copy the URL.
3. Select the Settings Course Tool on the Left Navigation panel
of the Course Home Page.
4. Scroll down to the bottom of the page.

Chapter 5 76
5. Select On in the Show RSS Feed box.
6. Select the Save Settings button.
7. Return to the Course Home Page
8. An RSS Feeds part is now located in the lower right quadrant
of the Course Home Page.
Select the Edit Feeds link.
9. Paste the previously copied RSS feel URL into the Add RSS
Feed field.
10. Select the Add RSS Feed button.
>NOTE Get really personal and add an RSS Feed of your personal
Twitter Posts!

Front and Center 77
Chapter 6 What’s It Worth? - Setting Up The Gradebook
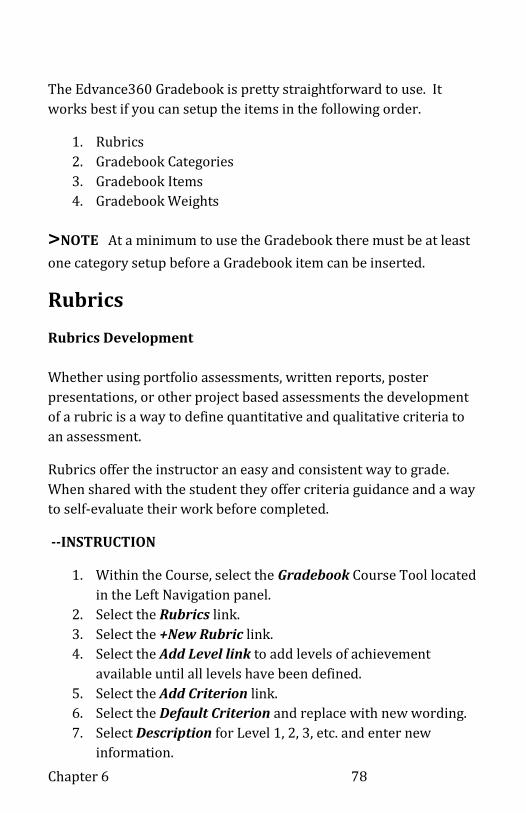
Chapter 6 78
The Edvance360 Gradebook is pretty straightforward to use. It
works best if you can setup the items in the following order.
1. Rubrics
2. Gradebook Categories
3. Gradebook Items
4. Gradebook Weights
>NOTE At a minimum to use the Gradebook there must be at least
one category setup before a Gradebook item can be inserted.
Rubrics
Rubrics Development
Whether using portfolio assessments, written reports, poster
presentations, or other project based assessments the development
of a rubric is a way to define quantitative and qualitative criteria to
an assessment.
Rubrics offer the instructor an easy and consistent way to grade.
When shared with the student they offer criteria guidance and a way
to self-evaluate their work before completed.
--INSTRUCTION
1. Within the Course, select the Gradebook Course Tool located
in the Left Navigation panel.
2. Select the Rubrics link.
3. Select the +New Rubric link.
4. Select the Add Level link to add levels of achievement
available until all levels have been defined.
5. Select the Add Criterion link.
6. Select the Default Criterion and replace with new wording.
7. Select Description for Level 1, 2, 3, etc. and enter new
information.

What’s It Worth 79
8. Type in the Criteria field what is being measured. Examples:
Organization, Writing Mechanics, Content Knowledge,
Technology Use
9. Type in the points received for Level 1 in the Points: field.
10. Type in a description of what would be the minimum criteria
to reach level 1 in the Description: field.
11. Repeat steps 6 and 7 for levels 2 and any additional levels
added by the designer.
12. Select the Save as New link.
13. Fill in the Name: field.
14. Select the Save button.
>NOTE The rubrics in Edvance360 are reusable. The
instructor/designer need only build the rubric once. It can then be
used over for multiple assignments and courses.

Chapter 6 80
Change Rubric Point Values or Criteria Descriptions
--INSTRUCTION
1. Within the Course, select the Gradebook Course Tool located
in the Left Navigation panel.
2. Select the Rubrics link.
3. Select the Title of the rubric.
4. Select the Points or Description to change.
5. Make changes.
6. Select the Update link located at the top right of the rubric.
Gradebook Categories
Using Categories in the Gradebook will assist the instructor view a
report which lets him know which students may need extra help in
certain types of graded assessments.
For example if the categories are assignments, tests, and
participation, at the instructor can run the Gradebook Category
Averages. When interpreted the data highlights which students may
be struggling with tests but doing well on assignments. This may be
a flag the student needs a different sort of assessment or cause for
further investigation.
Adding Gradebook Categories
Even if you choose not to use categories; the Gradebook requires at
least one category before adding Gradebook items.
--INSTRUCTION
1. Within the Course, select the Gradebook course tool located
in the Left Navigation panel.

What’s It Worth 81
2. Select the Gradebook Categories link.
3. Fill in the empty field with the Category Title.
4. Select the Add button.
5. Repeat steps 3 and 4 until all assessment types have been
added.
6. Select the Update button.
Adding a Gradebook Item
As of version 7.0 grade book items does not allow for manual entry
of anything but points. If you are keeping a grade book which
requires a letter, such a I for “incomplete” or E for excused: Open the
Full Gradebook and input the comments in the feedback field for the
Gradebook item.
--INSTRUCTION
1. Within the Course, select
the Gradebook Course
Tool located in the Left
Navigation panel.
2. Select the + New
Gradebook Item link.
3. Fill in the Name * field.
4. Fill in the Possible
Points* field.
5. Optionally select a Rubric, Category, Weighting Exempt, and
Exclude from Grading options from the drop down menus.
6. Optionally fill in the Description/Notes field. This field is for
your records.
7. Select whether or not to Allow the Student to View Grade by
selecting yes or no from the drop down menu.
8. Unless you have previously created Discussion Posts you
cannot select the Map to Discussion Posts option.

Chapter 6 82
9. Select the Submit button.
Adding Gradebook Weights
Before beginning to work with weighting grades it is important to
understand some things about weighting. Weighting means one
category or item(s) is worth more because of their level of
importance when measuring whether the student has successfully
met the learning objectives.
>NOTE Categories must be added first. It is important to
remember when weighting by category or by item or both, the
combined total of all categories must equal 100%.
--INSTRUCTION
1. Within the Course, select the Gradebook Course Tool located
in the Left Navigation panel.
2. Select the Gradebook Weights link.
3. Enter the percentage each category is worth in their
corresponding Weight field.
4. Optionally enter the weight of each item within a category.
>NOTE Keep in mind: All items in a category must be given
a weight, and the total must equal 100% See the following
example:

What’s It Worth 83
Grade Weights Example
The Final test within the test category holds more weight that the
weekly quiz/test grades. The total of all the items within the test
category must equal 100%. Because the other items are of equal
value within their respective categories there is no need to divide
their percentages.

Chapter 6 84
Chapter 7 Can We Talk? –Discussions Forums and Posts

Can We talk 85
Discussions
The Discussion tool may be used in a variety of ways in an online
course. Ice breakers, peer reviews, reflection statements are all
ways of helping the student take a collaborative and active role in
their own learning.
Before posting a discussion questions you will want to organize your
questions into categories, also known as forums. Consider the forum
like the big hanging file folder you are going to store your manila
folders in, which will then contain all the individual papers related to
that topic.
Those instructors not using discussions as a form of content delivery,
review, or assessment should consider setting up at least three
forums to help the students. Make one forum specifically designated
for technology related questions. Instructors will discover that one
student who is a little more technology literate than the rest. Ask
him or her to monitor this forum.
Create the second discussion forum for assignment or “homework”
questions. If one student has a question about an assignment there
are many who have the same question. This helps lower the need to
reply to several people with the same answer.

Chapter 7 86
A third “must-have” discussion forum is the social forum. This will
be used for personal discussions. For Christian institutions, this is
one way to incorporate spiritual components such as prayer
requests or bible studies.
Adding a New Forum
Posts do not have to be placed in forums any more that documents
need separate folders within a drive on the computer. It does,
however make it easier to manage and find posts you will search for
in the future.
--INSTRUCTION
1. Within the Course, select the Discussion Course Tool located
in the Left Navigation panel.
2. Select the +New Forum link.
3. Fill in the title of the forum in the Name* field.
4. Optionally fill in the Description field.
5. Select who may post new messages within the forum by
selecting the To create a post, the user must be at least
drop down menu.
6. Fill in the Sort Order field to place the forum within the list
in the desired position.
7. Select the Submit button.
Delete a Selected Forum
Be cautious when deleting forums. Once deleted the posts which
were in them will be irretrievable.
--INSTRUCTION
1. Within the Course, select the Discussion Course Tool located
in the Left Navigation panel.
2. Select the Check Box next to the forum to be deleted.
3. Select the Delete Selected Forums button.
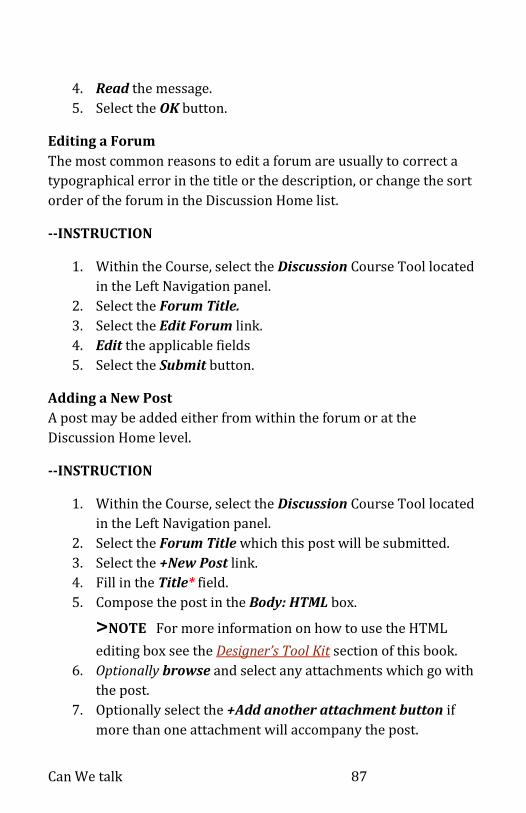
Can We talk 87
4. Read the message.
5. Select the OK button.
Editing a Forum
The most common reasons to edit a forum are usually to correct a
typographical error in the title or the description, or change the sort
order of the forum in the Discussion Home list.
--INSTRUCTION
1. Within the Course, select the Discussion Course Tool located
in the Left Navigation panel.
2. Select the Forum Title.
3. Select the Edit Forum link.
4. Edit the applicable fields
5. Select the Submit button.
Adding a New Post
A post may be added either from within the forum or at the
Discussion Home level.
--INSTRUCTION
1. Within the Course, select the Discussion Course Tool located
in the Left Navigation panel.
2. Select the Forum Title which this post will be submitted.
3. Select the +New Post link.
4. Fill in the Title* field.
5. Compose the post in the Body: HTML box.
>NOTE For more information on how to use the HTML
editing box see the Designer’s Tool Kit section of this book.
6. Optionally browse and select any attachments which go with
the post.
7. Optionally select the +Add another attachment button if
more than one attachment will accompany the post.
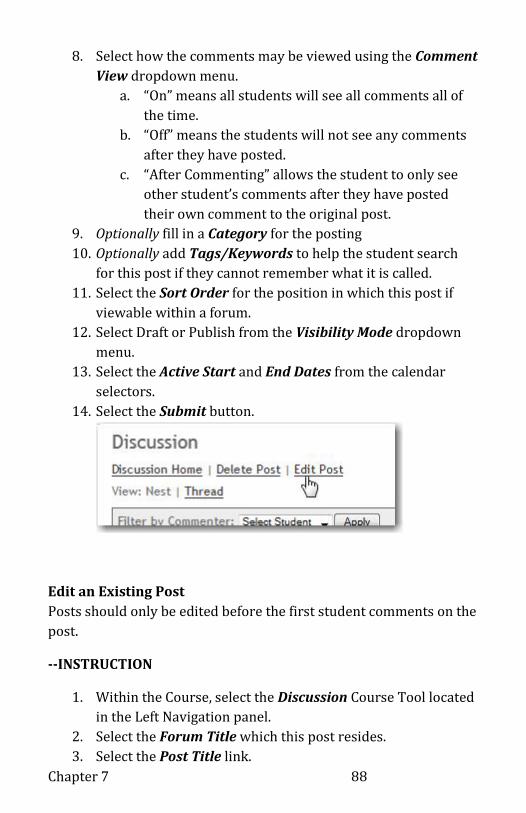
Chapter 7 88
8. Select how the comments may be viewed using the Comment
View dropdown menu.
a. “On” means all students will see all comments all of
the time.
b. “Off” means the students will not see any comments
after they have posted.
c. “After Commenting” allows the student to only see
other student’s comments after they have posted
their own comment to the original post.
9. Optionally fill in a Category for the posting
10. Optionally add Tags/Keywords to help the student search
for this post if they cannot remember what it is called.
11. Select the Sort Order for the position in which this post if
viewable within a forum.
12. Select Draft or Publish from the Visibility Mode dropdown
menu.
13. Select the Active Start and End Dates from the calendar
selectors.
14. Select the Submit button.
Edit an Existing Post
Posts should only be edited before the first student comments on the
post.
--INSTRUCTION
1. Within the Course, select the Discussion Course Tool located
in the Left Navigation panel.
2. Select the Forum Title which this post resides.
3. Select the Post Title link.
Can We talk 89
4. Select the Edit Post link.
5. Edit the posting.
6. Select the Submit button.
Change Post View
Posts are viewed in either “Nested” or “Threaded” views. Nested
views are the default normal view in Edvance360. This means the
viewer will see the initial post and the full text of any comments.
Threaded view reveals to the viewer only the initial post in its
entirety and the commenter’s name and first several words of the
comment. For the viewer to see a full text of any comment they need
to select anywhere on the words revealed.
--INSTRUCTION
1. Within the Course, select the Discussion Course Tool located
in the Left Navigation panel.
2. Select the Forum Title.
3. Select the Post Title.
4. To change between the two types of posts, select the desired
view link: Threaded or Nested.
Delete Selected Posts
Be cautious when deleting posts. Once deleted all comments which
were in them will be irretrievable.
--INSTRUCTION
1. Within the Course, select the Discussion Course Tool located
in the Left Navigation panel.
2. Select the Forum in which the post is located.
3. Select the Check Box next to the post to be deleted.
4. Select the Delete Selected Posts button.
5. Read the question.

Chapter 7 90
6. Select the OK button.
Discussion Comments
See the Ready Set Teach chapter for information on adding, replying
to, and deleting comments to discussion posts.
Chat
Chats are not used in the designing of the course. A chat, since it is a
synchronous communication is part of facilitating a class session.
For more information see Chat located in the Ready Set Teach
chapter..
Mailbox
The Mailbox Tab on the Personal Home Page gives the user direct
access to the Edvance360 internal messaging system. The designer
does not use the Mailbox. The instructor will setup folders within his
or her Mailbox for Archiving course related messages.

Automated Assessments 91
Chapter 8 Score - Automated Test Based Student Assessments
Chapter 8
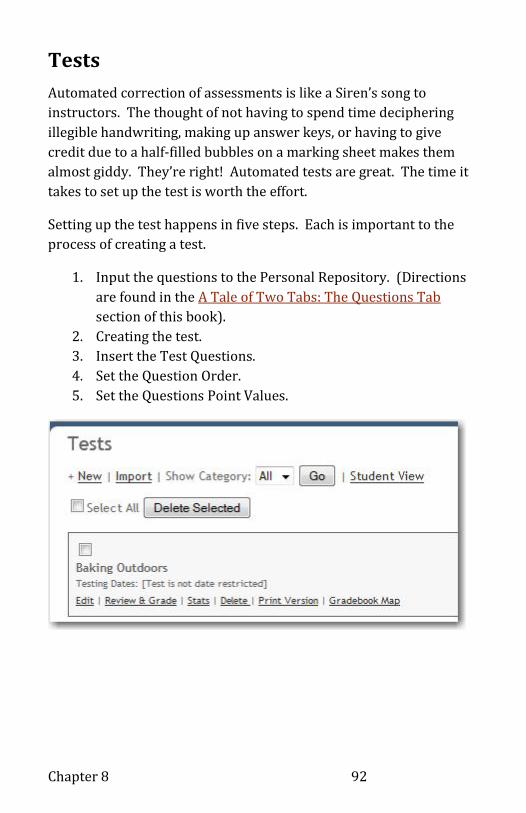
Chapter 8 92
Tests
Automated correction of assessments is like a Siren’s song to
instructors. The thought of not having to spend time deciphering
illegible handwriting, making up answer keys, or having to give
credit due to a half-filled bubbles on a marking sheet makes them
almost giddy. They’re right! Automated tests are great. The time it
takes to set up the test is worth the effort.
Setting up the test happens in five steps. Each is important to the
process of creating a test.
1. Input the questions to the Personal Repository. (Directions
are found in the A Tale of Two Tabs: The Questions Tab
section of this book).
2. Creating the test.
3. Insert the Test Questions.
4. Set the Question Order.
5. Set the Questions Point Values.
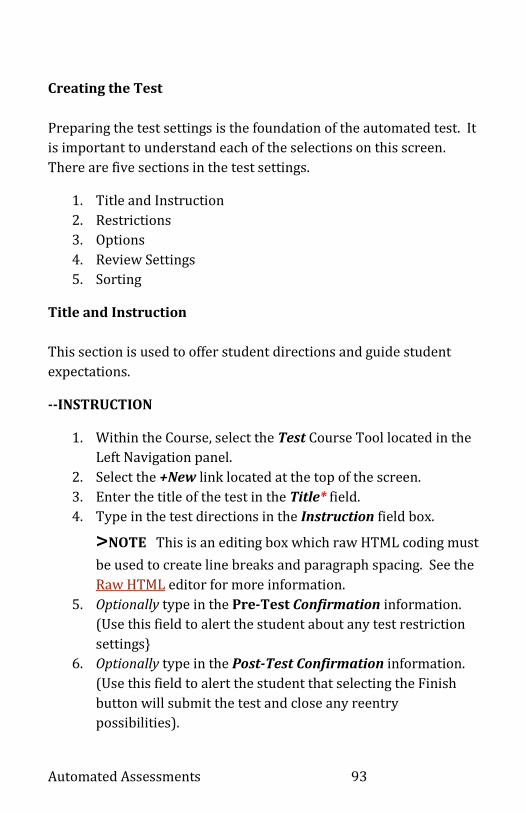
Automated Assessments 93
Creating the Test
Preparing the test settings is the foundation of the automated test. It
is important to understand each of the selections on this screen.
There are five sections in the test settings.
1. Title and Instruction
2. Restrictions
3. Options
4. Review Settings
5. Sorting
Title and Instruction
This section is used to offer student directions and guide student
expectations.
--INSTRUCTION
1. Within the Course, select the Test Course Tool located in the
Left Navigation panel.
2. Select the +New link located at the top of the screen.
3. Enter the title of the test in the Title* field.
4. Type in the test directions in the Instruction field box.
>NOTE This is an editing box which raw HTML coding must
be used to create line breaks and paragraph spacing. See the
Raw HTML editor for more information.
5. Optionally type in the Pre-Test Confirmation information.
(Use this field to alert the student about any test restriction
settings}
6. Optionally type in the Post-Test Confirmation information.
(Use this field to alert the student that selecting the Finish
button will submit the test and close any reentry
possibilities).
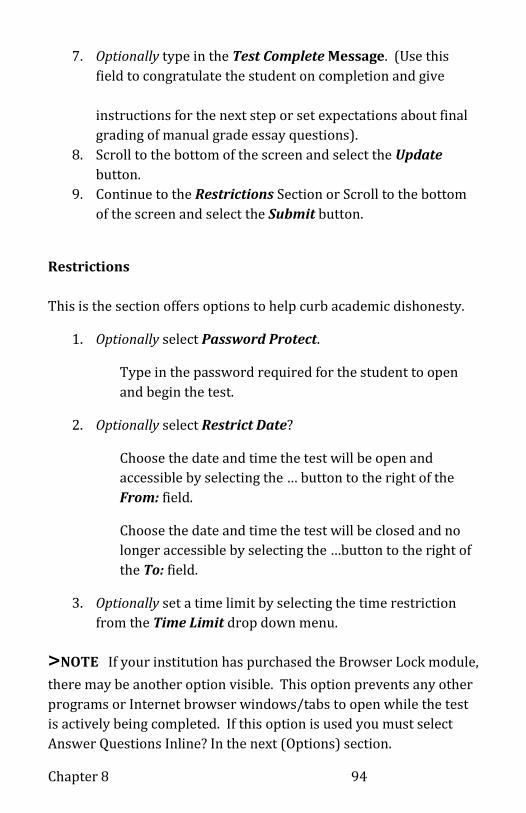
Chapter 8 94
7. Optionally type in the Test Complete Message. (Use this
field to congratulate the student on completion and give
instructions for the next step or set expectations about final
grading of manual grade essay questions).
8. Scroll to the bottom of the screen and select the Update
button.
9. Continue to the Restrictions Section or Scroll to the bottom
of the screen and select the Submit button.
Restrictions
This is the section offers options to help curb academic dishonesty.
1. Optionally select Password Protect.
Type in the password required for the student to open
and begin the test.
2. Optionally select Restrict Date?
Choose the date and time the test will be open and
accessible by selecting the … button to the right of the
From: field.
Choose the date and time the test will be closed and no
longer accessible by selecting the …button to the right of
the To: field.
3. Optionally set a time limit by selecting the time restriction
from the Time Limit drop down menu.
>NOTE If your institution has purchased the Browser Lock module,
there may be another option visible. This option prevents any other
programs or Internet browser windows/tabs to open while the test
is actively being completed. If this option is used you must select
Answer Questions Inline? In the next (Options) section.

Automated Assessments 95

Chapter 8 96
Options
This section addresses how the questions are presented and how
many times the student may take the exam.
1. Select how the Questions Display by selecting the applicable
radio button:
- Normal displays the questions in the order in which
they are designated by the test designer.
- Random displays the test questions in a computer
generated random sequence.
- Random Block of ____ questions. Select this and type in
the number of questions which will be displayed on the
test. Example: If there are 100 questions included in the
test and the designer selects this option and types in a
Block of 10 questions, the student will be presented with
10 questions randomly drawn from the 100.
2. Optionally select Answer Questions Inline? to present the
students with a block of questions per page instead of one
question at a time which “pops up” on the screen.
3. Optionally type in How many questions per page? if the
Answer Questions Inline? option is selected.
4. Optionally Select Allow users to automatically retake the
test and type in the number of test ___ times AND (the screen
says or) type in the percentage out of 100 percent that limits
the retake of the test should the student reach that score.
5. Scroll to the bottom of the screen and select the Update
button.

Automated Assessments 97
Review Settings
This section sets the options for allowing the student to go over the
test after completion.
1. Set the options for allowing the student to review the test
answers by selecting from the Feedback/Review dropdown
menu.
2. Optionally change whether the student is allowed to view the
correct answers by select Yes or No from the Display Correct
Answers to Student dropdown menu.
3. Scroll to the bottom of the screen and select the Update
button.
Sorting
This is the last section of the Test settings. It is this section sets
which sets the view and order of the test list.
1. Optionally type in a type in the Category field. These help
the instructor sort the tests by category for viewing in their
test list.
2. If the administrator has designated different institutions
which conduct tests, optionally select the Administering
Institution from the dropdown menu.
3. Optionally type in a number of the Sort Order in which this
test will appear in the Student Tests View.
4. Select the Update button.
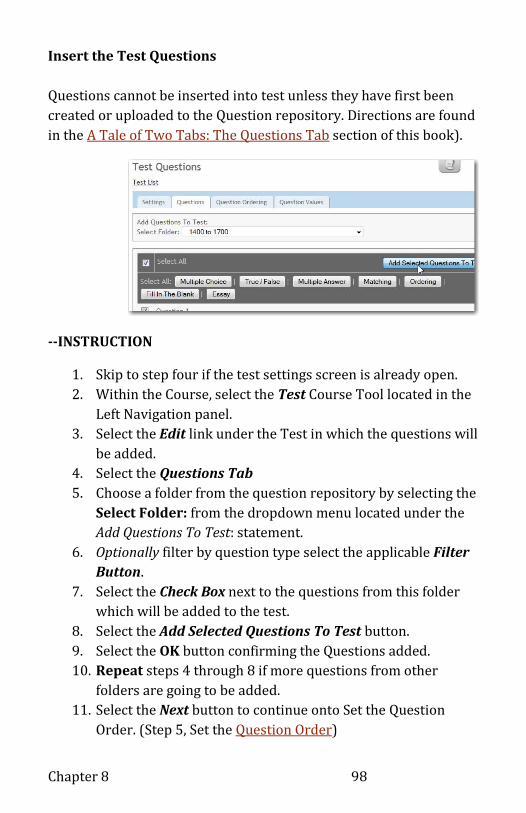
Chapter 8 98
Insert the Test Questions
Questions cannot be inserted into test unless they have first been
created or uploaded to the Question repository. Directions are found
in the A Tale of Two Tabs: The Questions Tab section of this book).
--INSTRUCTION
1. Skip to step four if the test settings screen is already open.
2. Within the Course, select the Test Course Tool located in the
Left Navigation panel.
3. Select the Edit link under the Test in which the questions will
be added.
4. Select the Questions Tab
5. Choose a folder from the question repository by selecting the
Select Folder: from the dropdown menu located under the
Add Questions To Test: statement.
6. Optionally filter by question type select the applicable Filter
Button.
7. Select the Check Box next to the questions from this folder
which will be added to the test.
8. Select the Add Selected Questions To Test button.
9. Select the OK button confirming the Questions added.
10. Repeat steps 4 through 8 if more questions from other
folders are going to be added.
11. Select the Next button to continue onto Set the Question
Order. (Step 5, Set the Question Order)

Automated Assessments 99
Test Question Order
Question ordering is used when the course designer intends for
questions to be presented to all students in the same order but not
necessarily the order in which they were inserted into the exam.
--INSTRUCTION
1. Skip to step four if the test settings screen is already open.
2. Within the Course, select the Test Course Tool located in the
Left Navigation panel.
3. Select the Edit link under the Test in which the questions
need sorting.
4. Select the Question Ordering
5. Change the numbers in the Order fields to suit the order in
which the questions should be displayed.
6. Select the Reorder button.

Chapter 8 100
Set the Questions Point Values
All point values default to a point value of one. This step is necessary
to weight each question according to its contribution toward the
tests total assessment value.
--INSTRUCTION
1. Skip to step four if the test settings screen is already open.
2. Within the Course, select the Test Course Tool located in the
Left Navigation panel.
3. Select the Edit link under the Test in which the questions will
be deleted.
4. Select the Question Values Tab.
5. Type in the value of each question in the points fields located
to the left of the Question or the Set all questions to: ____
points. field.
6. Optionally de-select any question in which there will be no
points associated by selecting the Check box next to the point
field of the question.
7. Select the Save button.
>NOTE Setting the Questions Point Values is extremely important.
This is what ties the test to the course Gradebook. If the values are
not set and the Save button is not selected there is no automatic
Gradebook map to the test.
Delete Test Questions
These steps delete the questions from the test but not from the
Personal Question Repository.
--INSTRUCTION
1. Skip to step four if the test screen is already open.
2. Within the Course, select the Test course tool located in the
Left Navigation panel.

Automated Assessments 101
3. Select the Edit link under the Test in which the questions will
be deleted.
4. Select the Questions Tab.
5. Select the Check box next to the questions to be deleted.
6. Select the Remove Selected Questions From Test button.
Proof-read / Test the Test
Before beginning this procedure, remove any date/time Restrictions
from the test.
--INSTRUCTION
1. Within the Course, select the Test Course Tool located in the
Left Navigation panel.
2. Select the Student View link located at the top of the screen.
3. Select the Start Test button.
4. Read any Pre Test Confirmation message and note any
needed corrections.
5. Select the Confirm Start button.
6. Read any Instructions given for the test and note any needed
corrections.
7. Answer each question to view and test how the student will
view.
8. Select the Finish Test button.
9. Read the optionally written Confirmation message and note
any needed corrections.
10. Select the Confirm Finish button.
11. Read the optionally written Testing Complete message and
note any needed corrections.
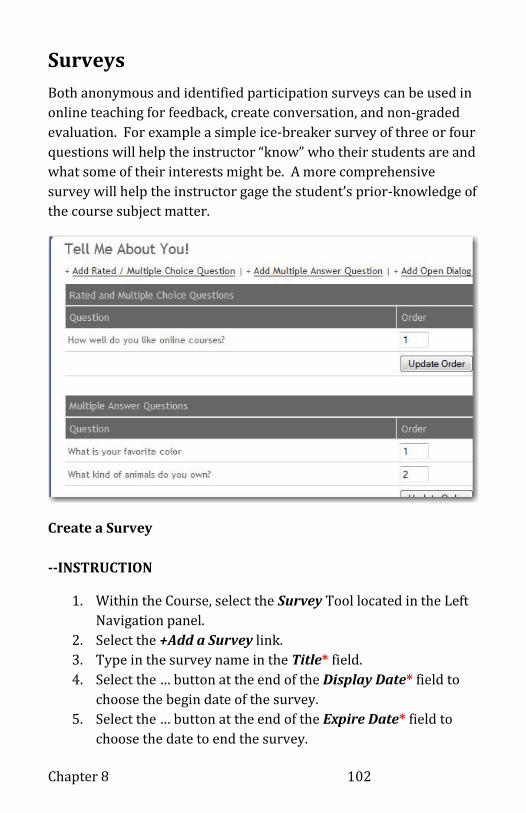
Chapter 8 102
Surveys
Both anonymous and identified participation surveys can be used in
online teaching for feedback, create conversation, and non-graded
evaluation. For example a simple ice-breaker survey of three or four
questions will help the instructor “know” who their students are and
what some of their interests might be. A more comprehensive
survey will help the instructor gage the student’s prior-knowledge of
the course subject matter.
Create a Survey
--INSTRUCTION
1. Within the Course, select the Survey Tool located in the Left
Navigation panel.
2. Select the +Add a Survey link.
3. Type in the survey name in the Title* field.
4. Select the … button at the end of the Display Date* field to
choose the begin date of the survey.
5. Select the … button at the end of the Expire Date* field to
choose the date to end the survey.

Automated Assessments 103
6. Select either Yes or No from the Anonymous* drop down
menu.
7. Select the Submit button.
Add Questions to the Survey.
After creating a survey Edvance360 automatically advances to the
add questions screen. There are three types of questions which can
be asked added to the survey. They are rated, multiple choice or
open dialog question
Add Rated Survey Question
--INSTRUCTION
1. Select the + Add Rated / Multiple Choice Question link.
1. Type the question in the Question: box.
>NOTE The Question: box is a RAW HTML editor. For more
information on how to use the HTML editing boxes and RAW
HTML editing boxes see the Designer’s Tool Kit section of this
book.
2. Select from one of the following options:
a. Rate from 1-5
b. Rate from 1-10
c. 'Highly Unsatisfied' through 'Highly Satisfied'
d. 'Very Poor' through 'Excellent'
e. 'Very Difficult' through 'Very Easy'
f. 'Never' through 'Always'
3. Select the Submit button.

Chapter 8 104
Add Multiple Choice Survey Question
--INSTRUCTION
1. Select the + Add Rated / Multiple Choice Question link.
2. Type the question in the Question: box.
>NOTE The Question: is a RAW HTML editor. For more
information on how to use the HTML editing boxes and RAW
HTML editing boxes see the Designer’s Tool Kit section of this
book.
2. Select the Custom - Enter options in the text box below,
separated by commas (ex: Option 1, Option 2,Option 3)
option.
3. Type Choices in the blank line, separating each choice with a
comma. Examples:
a. True, False
b. Yes, No
c. One, Two, Three, Four, Five.
4. Select the Submit button.
Add Open Dialog Survey Question
All open dialog questions will appear at the bottom of the survey.
--INSTRUCTION
1. Select the + Add Open Dialog Question link.
2. Type the question in the Question: box.
>NOTE The Question: is a RAW HTML editor. For more
information on how to use the HTML editing boxes and RAW
HTML editing boxes see the Designer’s Tool Kit section of this
book.
3. Select the Submit button.
Automated Assessments 105
Edit Survey Settings
--INSTRUCTION
1. Within the Course, select the Survey Tool located in the Left
Navigation panel.
2. Select the Settings link located on the same line as the survey
title.
3. After making changes to the settings, select the Update
button.
Edit Survey Questions
--INSTRUCTION
1. Within the Course, select the Survey Tool located in the Left
Navigation panel.
2. Select the Questions link located same line as the survey
title.
3. Select the Edit link located on the same line as the question.
4. After making changes, select the Submit button.

Chapter 9 Just Add Water
Just Add Water 107
Reusable Content
Whether you want to reuse instructional materials and assessments
of your own or use content created by a professional author,
Edvance360 has it covered. Two of the most acceptable formats for
reusing online content are available; they are SCORM and Course
Cartridges.
SCORM
Sharable Content Object Reference Model (SCORM). “What?” you
say. SCORM is the computer programming set of standards that
allows online learning content to be packaged in a format that can be
used by most learning management systems. This gives professional
content instruction designers the ability to create instructional
materials which can be sold or shared with other course designers.
Edvance360 is a SCORM compliant learning management system.
Designers who use SCORM materials have “instant content”. This
content is offered through instructional resource repositories such
as MERLOT, (http://www.merlot.org) Open Educational Resources
Commons (OER), (http://www.oercommons.org) or Connections.
There are many educational software companies and textbook
authors that also sell SCORM compliant packages.
Install SCORM Content
--INSTRUCTION
1. Within the Course, select the SCORM tool located in the Left
Navigation panel.
2. Type the name of the module in the SCO Title field.
3. Optionally type a description in the Description: field.
4. Select the Browse… button.
5. Browse to locate and Select the File.
6. Select the Open button.
Chapter 9 108
7. Optionally select the Grade SCO? if this is gradable content.
8. Optionally select a Gradebook Category:
9. If grading type a number in the Point Value: field.
10. Select the Upload button.
11. Go to Next step: Test SCORM Content.
Test SCORM Content
The SCORM files now appear at the top of the SCORM files section of
the screen.
--INSTRUCTION
1. Within the Course, select the SCORM tool located in the Left
Navigation panel.
2. Select the Launch link located across from the SCORM Files
title.
Delete SCORM Content
--INSTRUCTION
1. Within the Course, select the SCORM tool located in the Left
Navigation panel.
2. Select the Launch link located across from the SCORM Files
title.
Course Cartridge
Common Cartridge, like SCORM, allows online learning content to be
packaged in a form that can be shared by many learning
management systems (LMS). Unlike SCORM, Edvance360 exports
entire courses in the Common Course Cartridge format that can then
be imported by another LMS.
Some learning management systems develop their own proprietary
cartridges that can only be used by their software. Edvance360 uses
standard cartridges. To you, this means it allows you to import and
Just Add Water 109
export courses which come in the standard format. Because of old
partnerships many textbook publishers package courses which only
work with those proprietary systems. Most will not import to
common standard packages. Check with the individual text
publishers and ask for sample cartridges before purchasing their
materials.
Install Common Cartridge Content
Before installing the Common Cartridge, the Edvance360
Administrator must first upload the cartridge to the Bulk Repository.
--INSTRUCTION
1. Contact your Edvance360 Systems Administrator to verify
the cartridge has been uploaded to the Bulk Repository.
2. Note the Cartridge Name.
***CAUTION: Make certain you have chosen the right
cartridge from the Bulk Uploader. If you select the wrong
one not only will your course be populated with content you
do not want to use; your repository will have folders of
content you did not intend.
3. Within the Course, select the Common Cartridge tool located
in the Left Navigation panel.
4. Select the Cartridge Link listed in the Bulk Uploader.
The screen will go blank, but if no error is returned, your
upload is successful.
5. Select the Browser’s Back Button to return to the course.
6. Select the Lessons tool located in the Left Navigation panel to
view the content.

Chapter 9 110
Export Course to Common Cartridge
Designers and instructors may wish to export to a Common
Cartridge for personal archival reasons or to share content among
more than one LMS.
--INSTRUCTION
1. Within the Course, select the Common Cartridge tool located
in the Left Navigation panel.
2. Select the Export this course in Common Cartridge format
link.

Chapter 10 Finishing Touches

Chapter 10 112
As the course designer, your job is almost done! There are two steps
left in course design. First is to prepare a place for the students to
submit their documents and receive instructor feedback. The second
is pulling the lesson modules together in an orderly, organized
sequence. This type of sequencing is necessary for the analytical
learner. It helps the global learner understand the purpose of the
lesson and how each item relates to the other.
Dropbox
Dropboxes are dedicated file repositories. Much better than email
for document management, Dropboxes keep student submissions
compiled in relationship to the course. With email submitted
assignments and communication the instructor must manually filter
and organize the submissions.
When the Dropbox is used by design across courses there is a
consistency. Consistency translates to ease-of-use for the online
student. The Dropbox permits the sharing of larger sized digital files
than email systems allow.
Creating a Drop Box
--INSTRUCTION
1. Within the Course, select the Lessons tool located in the Left
Navigation panel.
2. Select the +Add New Dropbox link.
3. Type a title for the drop box in the FolderName field.
4. Optionally if you would like all files to be tagged a designated
prefix type it in the File Prefix field.
5. Select the grade book item the drop box ties into by selecting
it from the Gradebook Item drop down menu. The grade
book item must be created prior to creating the drop box

Finishing Touches 113
6. Most course designers stop here by selecting the Submit
button.
7. If the designer is also the instructor, continue on to the
Dropbox Display and Submission Restrictions.
Edit Dropbox Settings
--INSTRUCTION
1. Within the Course, select the Dropbox tool located in the
Left Navigation panel.
2. Select the Manage Dropboxes link located just under the
word Dropbox.
3. Select the Edit link located on the same line as the drop box
name in the Folder Name column.
4. After making changes, select the Submit button.
Lessons
The use of the lesson module tool offers consistency in content
presentation. There are three steps to creating a lesson.
1. Add the lesson
2. Add lesson items
3. Publish the lesson.
The most commonly forgotten step is the “Publish”.
Chapter 10 114
Add a Lesson
--INSTRUCTION
1. Within the Course, select the Lessons tool located in the Left
Navigation panel.
2. Select the +Add New Lesson link.
3. Type the theme of the lesson in the Title: field.
4. Optionally select a Start Date: from the ... button pop up
calendar.
5. Optionally select a Due Date: from the … button pop up
calendar.
3. Type a description, which may be the learning objectives, for
this lesson in the Description: field.
>NOTE The Description: box is a RAW HTML editor. For
more information on how to use the HTML editing boxes and
RAW HTML editing boxes see the Designer’s Tool Kit section
of this book.
6. Select the Publish or Draft options in the Status: field to
designate whether or not to make the lesson visible to the
student.
7. Select the Save button.
8. Populate the lesson: Add Lesson Content Items items.

Finishing Touches 115
Add a Lesson Content Items
--INSTRUCTION
1. Within the Course, select the Lessons tool located in the Left
Navigation panel.
2. Either select the Lesson Title link or the Content link located
in the content column directly to the right of the lesson title.
3. Select the Add Content link at the top of the Lesson Content
panel.
4. Type the title of this content item in the Title: field.
4. Type the directions for the student describing how to
proceed in the Instructions: HTML editing box.
>NOTE For more information on how to use the HTML
editing boxes and RAW HTML editing boxes see the
Designer’s Tool Kit section of this book.
5. Select digital content available to the student by using the
Content Selector: dropdown menu. For information on how
to use the embed code options see the Designer’s Tool Kit
section of this book.
>NOTE If the content is coming from an outside text or off-
line source, you may wish to create a document with these
sources cited and place it in the course Repository files.

Chapter 10 116
6. Select the Submit button.
Edit Lesson Settings
--INSTRUCTION
1. Within the Course, select the Lessons tool located in the Left
Navigation panel.
2. Select the Settings link located in the settings column
directly to the right of the lesson title.
3. Make Changes any of the fields.
4. Select the Save button.
Reorder Lessons
The course designer may choose to build the lessons as the content
becomes available rather than in a logical sequential order to the
course. It is important however to present the lessons to the student
in a sequence which will shape their understanding building one
precept upon another. Reordering of the Lessons are the last step of
course design before the course teaching begins.
--INSTRUCTION
1. Within the Course, select the Lessons tool located in the Left
Navigation panel.
2. Highlight the number in the order column across from each
lesson and Edit each number to designate which place in the
order the lesson should come.
3. Select the Reorder button.
Hide a Lesson
The lesson can be hidden from student view by selecting the draft
status in the lesson settings.
Edit Lesson Content Items

Finishing Touches 117
--INSTRUCTION
1. Within the Course, select the Lessons tool located in the Left
Navigation panel.
2. Either select the Lesson Title link or the Content link located
in the content column directly to the right of the lesson title.
3. Scroll to the Lesson Item if necessary.
4. Select the Edit link located above the Lesson Item Title.
5. Make Changes to any of the fields.
6. Select the Submit button.
Reorder Lesson Content Items
--INSTRUCTION
1. Within the Course, select the Lessons tool located in the Left
Navigation panel.
2. Either select the Lesson Title link or the Content link located
in the content column directly to the right of the lesson title.
3. Select the Drag and Drop Display link located at the top of
the Lesson Content panel.
Drag-n-Drop
Reordering

Chapter 10 118
4. Move the lesson items by clicking and holding and dragging
the mouse pointer (or tapping, holding, and dragging on a
touch screen)to the lesson item’s new location.
5. Select the Normal Display link located at the top of the
lesson Content panel.
Hide (Deactivate) a Lesson Content Item
Usually an entire lesson is developed with the intent of using the
lesson for wholly online instruction. If the same content is used to
supplement traditional face-to-face learning or in a hybrid course
the option to hide or deactivate the content item is available.
--INSTRUCTION
1. Within the Course, select the Lessons tool located in the Left
Navigation panel.
2. Either select the Lesson Title link or the Content link located
in the content column directly to the right of the lesson title.
3. Select the Activate[Deactivate] link above the target content
item to hide.
Delete a Lesson Content Item
--INSTRUCTION
1. Within the Course, select the Lessons tool located in the Left
Navigation panel.
2. Select either the Lesson Title link or the Content link located
in the content column directly to the right of the lesson title.
3. Select the Selection Box located above the Edit link above the
Lesson Title.
***Caution! Make sure the box you have selected is within
the box surrounding the lesson content item you are
deleting.
Finishing Touches 119
4. Select the Delete Selected button located at the top of the
Lesson Content panel.
Delete an Entire Lesson
***Caution! Make sure the box you have selected is next to the
Lesson Title you wish to delete.
--INSTRUCTION
1. Within the Course, select the Lessons tool located in the Left
Navigation panel.
2. Select the Selection Box located left of the Lesson title link.
3. Select the Delete Selected button.
4. Confirm the deletion by selecting the OK button.

Chapter 10 120
Chapter 11 Ready, Set, Teach
Ready-Set-Teach 121
Before opening a new course up to the student the instructor needs
to prepare the online course room. If you have not done so already
set up your Personal Profile, Upload Your Profile Photo and inserting
a short Bio/About Me information for the student to read. Next
upload course documents to your Personal Repository and discover
what student resources may be available in the Global Repository.
Finally set the stage by modifying the Course Description, uploading
and managing your Course Syllabus and inserting a topical RSS feed
to the course home page.
Course Tools
Not every course lends itself to using all of the tools available in
Edvance360. If the tools are not going to be used they should be
turned off.
Activating/Deactivating Course Tools
--INSTRUCTION
1. Within the Course, select the Settings tool located in the Left
Navigation panel.
2. Either select the On or Off activation link located to the left of
the tool listed in the Module Name column.
3. Select Save button located at the bottom of the Modules | +
New Module box.

Chapter 11 122
Add New Course Tool Module
This action is especially useful if you are using an outside system
such as a text book publisher’s content system in conjunction with
Edvance360.
--INSTRUCTION
1. Within the Course, select the Settings tool located in the Left
Navigation panel.
2. Select the + New Module link in the title bar of the Modules
section.
3. Type a name for the new tool in the Module Name: field.
4. Select Create and Edit button.
5. Select the type of tool from the Content Type drop down
menu.
6. Select the style of icon from the
Link/Button Style drop down menu.
7. Optionally, if this tool accesses
another site on the web, type the
URL in the External Link field.
8. Optionally, if this tool is simple page
content, compose the page using the
HTML editor.
>NOTE For more information on how to use the HTML
editing box see the Designer’s Tool Kit section of this book.

Ready-Set-Teach 123
9. From the drop down menus select who will have Access to
this tool when they access the course.
10. Select the Submit button.
Change Course Tool Order
If your institution does not have a policy for changing the order of
the course tools, you can easily change them in the Course Settings.
It may be policy for all the tools to be presented to the students in
the same order in all courses. It is a best online course design
practice to keep layout and tools in the same locations across the
institution.
--INSTRUCTION
1. Within the Course, select the Settings tool located in the Left
Navigation panel.
2. In the Tab Order column type in the number for each tool
designating the position in which it will appear.
3. Select Save button located at the bottom of the Modules | +
New Module box.
Show or Hide Inactive Modules for the Instructor Only
--INSTRUCTION
1. Within the Course, select the Settings tool located in the Left
Navigation panel.
2. Select the Show or Hide Inactive Module Display link
located in the Inactive Module Display section.
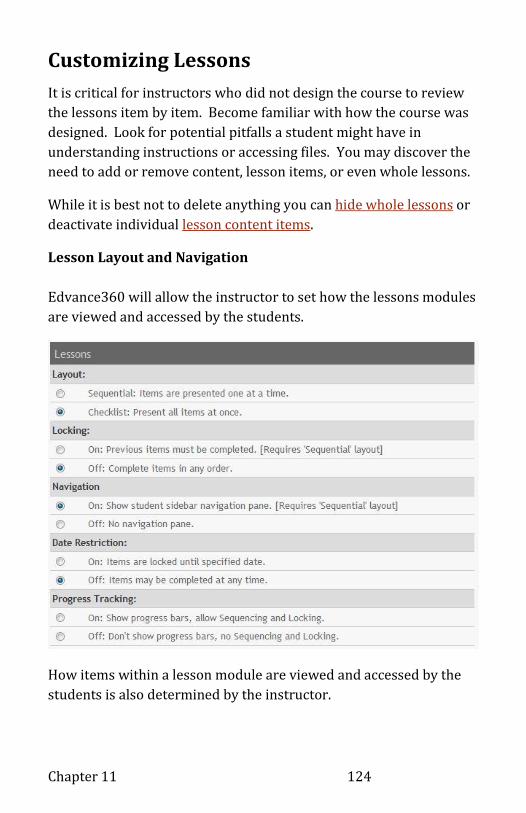
Chapter 11 124
Customizing Lessons
It is critical for instructors who did not design the course to review
the lessons item by item. Become familiar with how the course was
designed. Look for potential pitfalls a student might have in
understanding instructions or accessing files. You may discover the
need to add or remove content, lesson items, or even whole lessons.
While it is best not to delete anything you can hide whole lessons or
deactivate individual lesson content items.
Lesson Layout and Navigation
Edvance360 will allow the instructor to set how the lessons modules
are viewed and accessed by the students.
How items within a lesson module are viewed and accessed by the
students is also determined by the instructor.

Ready-Set-Teach 125
Change Lesson Item Layout and Navigation
--INSTRUCTION
1. Within the course, select the Settings tool located in the Left
Navigation panel.
2. Scroll down to the Lessons section.
3. Select either Layout:, Locking:, Navigation, Date
Restriction:, and Progress Tracking: preferences.
4. Scroll to the bottom and select the Save Settings button.
Resources
Many instructors assume the student comes to the course with
institutional policy and culture knowledge. In truth, silos of
untapped knowledge and policy resources lay seemingly unavailable
to the student. Edvance360 makes it easy to provide the student
with these resources. And today students expect the resources to be
readily available in a click.
The course Resource tool allows the student to access designated
folders in the instructor’s Personal Repository and the institution’s
Global Repository.
Resources are pieces of supporting information useful to the student
to help them succeed in completing the course but they are not
usually course content. Good resources to provide are links to
course catalogs, institution policies, writing guides, and the academic
calendar.
Instructor Resources
Instructor’s resources are the documents and links which the
instructor keeps in a folder of their Personal Repository. Before
inserting these materials into the course Resources Tool, upload the
documents to an individual folder of the Personal Repository.

Chapter 11 126
Global Resources
Global resources are those documents and links to outside sources
available to all users of the Edvance360 LMS-SN. Before managing
the course Resource Tool, make note of which folders in the Global
Repository hold the information you wish to share.
Add Resources
--INSTRUCTION
1. Within the course, select the Resource tool located in the Left
Navigation panel.
2. Select the Manage Resources link.
3. Select either your Personal Resource folders or the Global
Resources folders from the Show Folders From: drop down
menu.
4. Select the folder(s) to include in the course resources by
clicking on the check box located to the left of the folder.
5. Select the Save button.
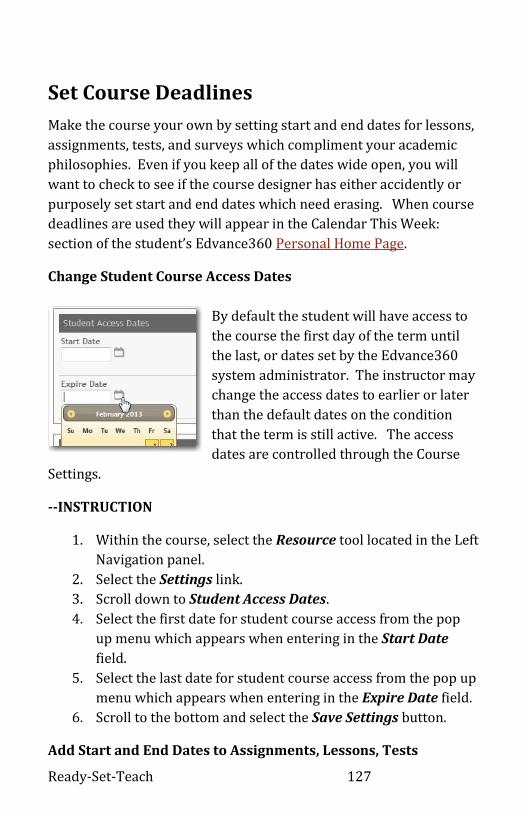
Ready-Set-Teach 127
Set Course Deadlines
Make the course your own by setting start and end dates for lessons,
assignments, tests, and surveys which compliment your academic
philosophies. Even if you keep all of the dates wide open, you will
want to check to see if the course designer has either accidently or
purposely set start and end dates which need erasing. When course
deadlines are used they will appear in the Calendar This Week:
section of the student’s Edvance360 Personal Home Page.
Change Student Course Access Dates
By default the student will have access to
the course the first day of the term until
the last, or dates set by the Edvance360
system administrator. The instructor may
change the access dates to earlier or later
than the default dates on the condition
that the term is still active. The access
dates are controlled through the Course
Settings.
--INSTRUCTION
1. Within the course, select the Resource tool located in the Left
Navigation panel.
2. Select the Settings link.
3. Scroll down to Student Access Dates.
4. Select the first date for student course access from the pop
up menu which appears when entering in the Start Date
field.
5. Select the last date for student course access from the pop up
menu which appears when entering in the Expire Date field.
6. Scroll to the bottom and select the Save Settings button.
Add Start and End Dates to Assignments, Lessons, Tests

Chapter 11 128
--INSTRUCTION
1. Within the course, select the Start & End Dates tool located
in the Left Navigation panel.
2. Select Start and Due Date dates and times in the applicable
fields.
3. Select the Save button.
Delete Start and End Dates on Assignments, Lessons, Tests
--INSTRUCTION
1. Within the course, select the Start & End Dates tool located
in the Left Navigation panel.
2. Highlight all data in the field to be deleted. [Ignore the
calendar pop-ups.]
3. Tap the Delete key on the computer keyboard.
4. Select the Save button.

Ready-Set-Teach 129
Dropbox Display and Submission Restrictions
Hide/Show Dropboxes
Optionally change when students can view the drop box by selecting
the
--INSTRUCTION
1. Within the Course, select the Dropbox tool located in the
Left Navigation panel.
2. Select the Manage Dropboxes link located just under the
word Dropbox.
3. Select the Edit link located on the same line as the drop box
name in the Folder Name column.
4. Between Following Dates from the Restrict Display? drop
down menu.
a. Select the first date the students will have access
from the pop up calendar by clicking in the Start
Date field.
b. Select the Time of day the drop box will first be
viewable from the drop down menu to the right the
Start Date field.
c. Select the last date the students will have access from
the pop up calendar by clicking in the End Date field.
d. Select the Time of day the drop box will first be
viewable from the drop down menu to the right the
End Date field.
Restrict Dropbox Submissions
Change when the students can actually submit to the drop box
--INSTRUCTION
1. Within the Course, select the Dropbox tool located in the
Left Navigation panel.
Chapter 11 130
2. Select the Manage Dropboxes link located just under the
word Dropbox.
3. Select the Edit link located on the same line as the drop box
name in the Folder Name column.
4. Between Following Dates from the Restrict Submissions?
field.
e. Select the first date the students will have access to
submit from the pop up calendar by clicking in the
Start Date field.
f. Select the Time of day the drop box will first be open
for submission from the drop down menu to the right
the Start Date field.
g. Select the last date the students will have access to
submit from the pop up calendar by clicking in the
End Date field.
h. Select the Time of day the drop box will first be last
open for submission from the drop down menu to the
right the End Date field.
5. Select the Submit button.
Manage the Course Calendar
Place events on the course calendar which are not tied to a lesson,
Dropbox, test, or survey. Appointments for a synchronous chat with
the class or individual students, point-of-completion deadlines for
major assignments, and important institution deadlines are just
some examples. When these events are recorded on the course
calendar they automatically appear in the Calendar This Week:
section of their Edvance360 Personal Home Page.
Add a Single Calendar Event
There are three sections to adding a single calendar event, they are:
1. Event Details
2. Settings

Ready-Set-Teach 131
3. ePortfolio Settings.
Event Details
--INSTRUCTION
1. Within the course, select the Calendar tool located in the Left
Navigation panel.
2. Select the View by clicking on the Year Month Week Day or
Today links located at the top of the Calendar screen.
3. Select the Month and Day to add the event.
4. Select the Time for the event to begin.
5. Type the name of the event in the Title* field.
6. Type in a description of the event in the Details field.
>NOTE The Details field is a RAW HTML editor. For more
information on how to use the HTML editing boxes and RAW
HTML editing boxes see the Designer’s Tool Kit section of this
book.
7. Optionally Change the Start Date, Start Time, End Date,
and End Times in their respective fields.
8. Optionally Select the type if this is a Recurring event from
the drop down menu.
Event Settings
9. Optionally select if participation/attendance will be recorded
for this event by select On or Off from the Record
Attendance? drop down menu.
10. Select whether or not users may mark themselves as having
attended by selecting the option from the Who may mark
attended? drop down menu.
11. If attendees are required to RSVP for the event, select to turn
it on or off from the RSVP drop down menu.

Chapter 11 132
12. If your institution has purchased E360 Live! You will
optionally turn on or off video conferencing from the Live
Meeting drop down menu.
13. Optionally select to send invitations to nobody, the whole
roster, or certain students by selecting the applicable option
from the Send Invites To drop down menu and the select
roster members check boxes.
ePortfolio Settings
Calendar events can be easily added to your portfolio. Two
scenarios of when you might use this setting: One, your class is
attending a professional development seminar or two you are
presenting a paper at a conference.
14. Optionally select Yes from the Store to ePortfolio? drop
down menu.
15. Choose which section of the ePortfolio to store the detailed
information by selecting it from the Store to drop down
menu.
16. Designate a name for the event by typing it in the ePortfolio
Title field.
17. Type in the Organization field the sponsor of the event.
18. Type in your title at this event in the Participant Position
field. Examples: Presenter, Master of Ceremonies, Speaker.
19. Compose the details of the event which will be added to the
ePortfolio in the Details HTML box.
>NOTE For more information on how to use the HTML
editing box see the Designer’s Tool Kit section of this book.
20. Select the Submit button.
Add Multiple Event Dates
This option is awesome for setting up class meeting dates for those
instructors using Edvance360 as a tool with their traditional or

Ready-Set-Teach 133
hybrid courses. Not only will setting up a Bulk Calendar Entry place
the date and time of the events on the student calendar it will also
optionally setup the attendance grid for the instructor’s use.
--INSTRUCTION
1. Within the course, select the Calendar tool located in the Left
Navigation panel.
2. Select the Bulk Calendar Entry link located under the
Calendar title and above the thumbnail image of the current
month.
3. Type the name of the event in the Title* field.
4. Type in a description of the event in the Details field.
>NOTE The Details field is a RAW HTML editor. For more
information on how to use the HTML editing boxes and RAW
HTML editing boxes see the Designer’s Tool Kit section of this
book.
5. Select the Start Time and End Times from their respective
drop down menus.
6. Select the date of the first occurrence of this event from the
Between Dates * drop down menu.
7. Select the date of the last occurrence of this event from the
Through * drop down menu.
8. Select which days of the week these events occur in the
Falling on: check boxes.
Chapter 11 134
9. Optionally select whether or not to record attendance by
keeping the Create attendance tracker entries for all dates
field checked.
10. Select the Submit button.
Establish Communication
Online learning is usually not independent study for the student.
Whether your title is instructor, facilitator, teacher, or professor you
will need to be actively involved throughout the course duration.
I have seen hundreds of course evaluations completed by students.
By far one of the most noted complaints is lack of feedback by the
faculty. Coupled with lack of feedback comes criticism concerning
the timing of the feedback. Students want, and expect faculty
participation and immediate responses to their questions and
assignment submissions.
Get to know your students and let them know how to begin the
course. Set expectations for communication, deadlines, and
discussion participation. Edvance360 has built into each course the
ability for the instructor to contact each student privately or email all
students and assistants on the roster.
Mail All Students
--INSTRUCTION
1. Select the Select All box located above the list of members on
the course home page.
2. From the |With Selected: drop down menu select Send Mail.
3. Type in the subject in the Subject: field.
4. Compose the comment in the Add Comment: HTML box.
>NOTE For more information on how to use the HTML
editing box see the Designer’s Tool Kit section of this book.
5. Optionally Browse… and select any attachments to add to
the post.

Ready-Set-Teach 135
6. Select the Submit button.
After submission the focus of the Edvance360 automatically
switches to the Mailbox. To return to the course, you will need to
select the course again from the Courses tab.
Student Roster
Whether your student information system integrates with
Edvance360 to add and drop students or the students are manually
enrolled; you will want to compare the Edvance360 roster to the
official roster in the student information system.
Tip! Edvance360 makes it easy to print out the course roster as it
shows on Edvance360. Print several copies of the roster for jotting
down notes about student personalities, concerns and group
dynamics.
--INSTRUCTION
1. On the Course Home Page select the Print Roster link
located under the Course Roster title bar.
2. Open the Firefox browser’s File menu.
3. Select the Print option.
4. Select the OK button.
Create a Start Here Welcome Video
There are two ways to create and use a welcome video note for
Edvance360. The first is to use the Video Note Recorder and the
second is to record the video with a third party resource and insert
the file into the Course Description or Course Announcement. Either
way is acceptable. The Video Note Recorder does have a 1 minute
and 30 second limitation.

Chapter 11 136
Video Note Recorder
The Video Note Recorder uses Adobe Flash technology. If your
device is unable to use this technology you may opt for a third party
recording source, such as iMovie on the Mac or the built in video
camera tools found on most of today’s tablets and smart phones.
--INSTRUCTION
1. On the Course Home Page select the Record Icon located in
the upper right corner of the Edvance360 Course Home Page.
(Also found in the upper right corner of the Dropbox and Add
Lesson Item pages as well as to the left of each item
submission in the Dropbox).
2. Accept the Adobe Flash Player settings.
3. Select the Record button to begin the recording.
4. Click on the Play button to stop recording (up to 1 minute
and 30 seconds).
5. After the video/audio plays back, select the Save button.
6. Playback the video/audio by selecting the Play button to
confirm the recording.
7. Select the Close link to exit the Video Note Recorder.
>NOTE There is no way for the instructor to replay the
note or delete it once it is closed. The student will be able to
play the note as many times as they wish.
Third Party Video/Audio Insertion
For the Course Welcome Note you may wish to record the

Ready-Set-Teach 137
video/audio and insert a link for access into the Course Description
or Course Announcement.
--INSTRUCTION
1. Upload the third party video/audio file to a folder in your
Personal Repository.
2. Right-Click on the file name (Windows) or Command-Click
on the file name (Mac).
3. Copy the link location.
4. Return to the Course Home Page.
5. Open the new Announcement or the Course Description
6. Compose the comment in the Add Comment: HTML box.
7. Highlight the words which describe the video, such as:
“Open the Welcome Video.
8. Select the Link option on the HTML tools menu.
9. Paste the copied link location in the URL box.
10. Select the OK button.
11. Select the Submit button.
>NOTE For more information on how to use the HTML
editing box see the Designer’s Tool Kit section of this book.
Announcements
Banner announcements are brief statements which give direction or
call attention to something unique. Use the announcement as a form
of communication which has a special emphasis on its importance.
Banner announcements, also known as alerts, are not meant for
complete lesson content or instruction.
Add Announcement
Announcements, or alerts, will appear at the top of the course home
page for all members of the course. They will appear in the order in
which they expire, with the ones expiring first on the bottom. If
there is not expiration date it will appear on the bottom of the list.
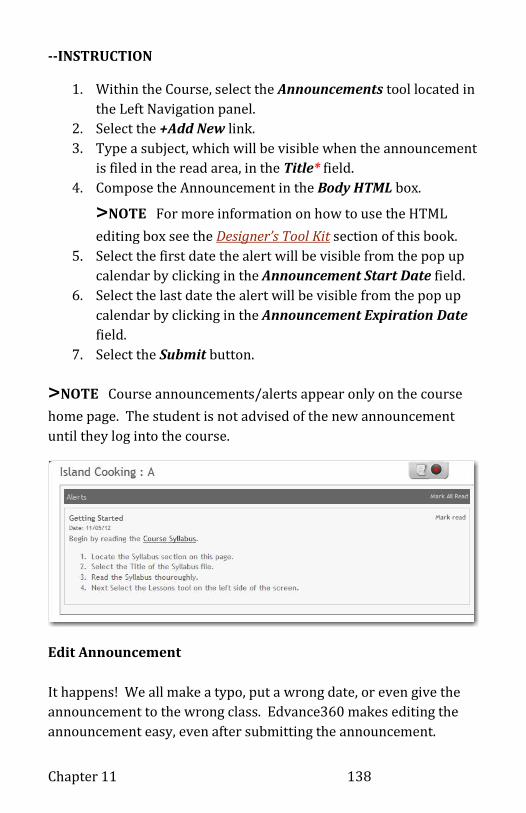
Chapter 11 138
--INSTRUCTION
1. Within the Course, select the Announcements tool located in
the Left Navigation panel.
2. Select the +Add New link.
3. Type a subject, which will be visible when the announcement
is filed in the read area, in the Title* field.
4. Compose the Announcement in the Body HTML box.
>NOTE For more information on how to use the HTML
editing box see the Designer’s Tool Kit section of this book.
5. Select the first date the alert will be visible from the pop up
calendar by clicking in the Announcement Start Date field.
6. Select the last date the alert will be visible from the pop up
calendar by clicking in the Announcement Expiration Date
field.
7. Select the Submit button.
>NOTE Course announcements/alerts appear only on the course
home page. The student is not advised of the new announcement
until they log into the course.
Edit Announcement
It happens! We all make a typo, put a wrong date, or even give the
announcement to the wrong class. Edvance360 makes editing the
announcement easy, even after submitting the announcement.

Ready-Set-Teach 139
--INSTRUCTION
1. Within the Course, select the Announcements tool located in
the Left Navigation panel.
2. Select the Edit link located in the bottom left corner of the
target announcement box.
3. Make Edits to the title, body, or start and expiration dates.
4. Select the Submit button.
Delete Announcement
--INSTRUCTION
1. Within the Course, select the Announcements tool located in
the Left Navigation panel.
2. Select the Delete link located in the bottom left corner of the
target announcement box.
3. Confirm the deletion by selecting the OK button.
Set Up Automated Communication
Wouldn’t it be great if you had a personal assistant who would send
your student a reminder when an assignment is about due or they
have missed it all together? How about having your assistant give
the student warnings when they are not making adequate progress
on their lessons or their average is dangerously close to the failing
mark? Edvance360 can be your personal assistant. You can have it
do these things and more through the Agents course tool!

Chapter 11 140
Assignment Due Reminder
This option has Edvance360 send a reminder to only those students
who have not yet submitted an assignment that is coming due.
--INSTRUCTION
1. Within the Course, select the Agents tool located in the Left
Navigation panel.
2. Select the Assignment Due Reminder option located in the
drop down menu of the Scheduled Tasks | field.
3. Type in a name for this reminder in the Title * field.
4. Select the start date from the pop-up calendar in the Date to
Run * field.
5. Select the time of day for the message to send from the drop
down menu in the Time to Run field.
6. Select the drop box which has a date due for an assignment
attached from the drop down menu in the Assignment field.
7. Select to whom the reminder message should be sent by
check the applicable check box next to the Send to Students
or Send Summary to Instructor labels.

Ready-Set-Teach 141
8. Type a captivating message headline in the Subject field.
9. Compose the reminder message in the Message field box.
>NOTE The Message field is a RAW HTML editor. For more
information on how to use the HTML editing boxes and RAW
HTML editing boxes see the Designer’s Tool Kit section of this
book.
10. Select the Submit button.
Assignment Overdue Alert
This automated reminder is especially effective when the instructor
allows partial credit for overdue assignments. The message should
convey to the student three things:
1. The assignment is overdue.
2. There is still an opportunity for the student to complete the
assignment.
3. When the last is the last possible date for the assignment to
be submitted for any credit.
--INSTRUCTION
1. Within the Course, select the Agents tool located in the Left
Navigation panel.
2. Select the Assignment Overdue Alert option located in the
drop down menu of the Scheduled Tasks | field.
3. Type in a name for this reminder in the Title * field.

Chapter 11 142
4. Select the start date from the pop-up calendar in the Date to
Run * field.
5. Select the time of day for the message to send from the drop
down menu in the Time to Run field.
6. Select the drop box which has a date due for an assignment
attached from the drop down menu in the Assignment field.
7. Select to whom the reminder message should be sent by
check the applicable check box next to the Send to Students
or Send Summary to Instructor labels.
8. Type a captivating message headline in the Subject field.
9. Compose the reminder message in the Message field box.
>NOTE The Message field is a RAW HTML editor. For more
information on how to use the HTML editing boxes and RAW
HTML editing boxes see the Designer’s Tool Kit section of this
book.
10. Select the Submit button.
New Login Inactivity Alert
Many institutions base their attendance policy for online students in
part by the number of logins to the course in a certain period of time.
This alert option sends a message automatically throughout the term
alerting the student to the fact that they have not logged into the
course for a definite period of time. Include in this message:
1. The urgency for the student to log in.
2. Your contact information outside of Edvance360.
3. Any consequences of non-action by the student.
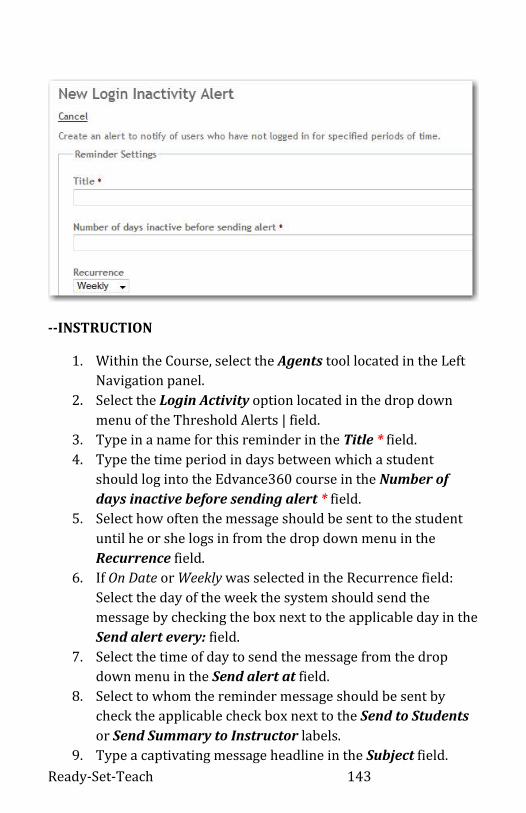
Ready-Set-Teach 143
--INSTRUCTION
1. Within the Course, select the Agents tool located in the Left
Navigation panel.
2. Select the Login Activity option located in the drop down
menu of the Threshold Alerts | field.
3. Type in a name for this reminder in the Title * field.
4. Type the time period in days between which a student
should log into the Edvance360 course in the Number of
days inactive before sending alert * field.
5. Select how often the message should be sent to the student
until he or she logs in from the drop down menu in the
Recurrence field.
6. If On Date or Weekly was selected in the Recurrence field:
Select the day of the week the system should send the
message by checking the box next to the applicable day in the
Send alert every: field.
7. Select the time of day to send the message from the drop
down menu in the Send alert at field.
8. Select to whom the reminder message should be sent by
check the applicable check box next to the Send to Students
or Send Summary to Instructor labels.
9. Type a captivating message headline in the Subject field.

Chapter 11 144
10. Compose the reminder message in the Message field box.
>NOTE The Message field is a RAW HTML editor. For more
information on how to use the HTML editing boxes and RAW
HTML editing boxes see the Designer’s Tool Kit section of this
book.
11. Select the Submit button.
Lesson Progress Alert
Send an automated message to students who have not completed a
certain percentage of a lesson module which has been assigned a due
date for completion. Remember lesson progress is self-identified by
the student marking each lesson item complete. Include in this
message:
1. Concern about the percentage showing complete.
2. Instructions and reminders to mark items complete.
3. Any consequences of non-action by the student.
--INSTRUCTION
1. Within the Course, select the Agents tool located in the Left
Navigation panel.
2. Select the Lesson Progress option located in the drop down
menu of the Threshold Alerts | field.
3. Type in a name for this reminder in the Title * field.
4. Select from the drop down menu in the Send alert when
lesson progress is field an option that describes what

Ready-Set-Teach 145 FIGURE 11-1
percentage the lesson needs to be complete when the
message is sent.
5. Select the percentage of completion from the drop down
menu in the percent: field.
6. Select how often the message should be sent to the student
(until he or she meets the description criteria) from the drop
down menu in the Recurrence field.
7. If On Date or Weekly was selected in the Recurrence field:
Select the day of the week the system should send the
message by checking the box next to the applicable day in the
Send alert every: field.
8. Select the time of day to send the message from the drop
down menu in the Send alert at field.
9. Select to whom the reminder message should be sent by
check the applicable check box next to the Send to Students
or Send Summary to Instructor labels.
10. Type a captivating message headline in the Subject field.
11. Compose the reminder message in the Message field box.
>NOTE The Message field is a RAW HTML editor. For more
information on how to use the HTML editing boxes and RAW
HTML editing boxes see the Designer’s Tool Kit section of this
book.
12. Select the Submit button.
Gradebook Progress Alert
This option for automatically
monitoring the student’s
progress is most helpful when
the student is not working
sequentially through the
Chapter 11 146
lessons. This option sends an alert to those students who have a
certain percentage of items in Gradebook with a grade. It could
easily be used for “pat-on-the-back” or a stern warning depending on
how the percentage descriptor is used.
--INSTRUCTION
1. Within the Course, select the Agents tool located in the Left
Navigation panel.
2. Select the Gradebook Progress option located in the drop
down menu of the Threshold Alerts | field.
3. Type in a name for this reminder in the Title * field.
4. Select from the drop down menu in the Send alert when the
number of graded items is field an option that describes
what number of items in the Gradebook should have been
complete and graded when the message is sent.
5. Select the percentage of completion from the drop down
menu in the percent: field.
6. Select how often the message should be sent to the student
(until he or she meets the description criteria) from the drop
down menu in the Recurrence field.
7. If On Date or Weekly was selected in the Recurrence field:
Select the day of the week the system should send the
message by checking the box next to the applicable day in the
Send alert every: field.
8. Select the time of day to send the message from the drop
down menu in the Send alert at field.
9. Select to whom the reminder message should be sent by
check the applicable check box next to the Send to Students
or Send Summary to Instructor labels.
10. Type a captivating message headline in the Subject field.
11. Compose the reminder message in the Message field box.
>NOTE The Message field is a RAW HTML editor. For more
information on how to use the HTML editing boxes and RAW
HTML editing boxes see the Designer’s Tool Kit section of this
book.

Ready-Set-Teach 147
12. Select the Submit button.
Running Average Alert
For this automated alert to work, the instructor needs to first have
set up their Grade Map in either their Personal Settings or the Course
Settings with a Pass / Fail Threshold.
--INSTRUCTION
1. Within the Course, select the Agents tool located in the Left
Navigation panel.
2. Select the Running Average option located in the drop down
menu of the Threshold Alerts | field.
3. Type in a name for this reminder in the Title * field.
4. Select from the drop down menu in the Send alert when
running average is field an option that describes what
percentage the grade needs to be when the message is sent.
5. Select the percentage the grade average is when the message
is sent from the drop down menu in the following percent:
field.
6. Select how often the message should be sent (until the
student meets the description criteria) from drop down
menu in the Recurrence field .
7. If On Date or Weekly was selected in the Recurrence field:
Select the day of the week the system should send the
message by checking the box next to the applicable day in the
Send alert every: field.
8. Select the time of day to send the message from the drop
down menu in the Send alert at field.
9. Select to whom the reminder message should be sent by
check the applicable check box next to the Send to Students
or Send Summary to Instructor labels.
10. Type a captivating message headline in the Subject field.

Chapter 11 148
11. Compose the reminder message in the Message field box.
>NOTE The Message field is a RAW HTML editor. For more
information on how to use the HTML editing boxes and RAW
HTML editing boxes see the Designer’s Tool Kit section of this
book.
12. Select the Submit button.
Grade Change Alert
Before using this automated alert, make sure the item being
monitored has already been setup in the Gradebook. This alert is
especially useful if the student is working on a project that is allowed
multiple submissions. If each submission is graded the student can
see how each submission is progressing his or her grade.
--INSTRUCTION
1. Within the Course, select the Agents tool located in the Left
Navigation panel.
2. Select the Grade Change option located in the drop down
menu of the Content Alerts | field.
3. Type in a name for this reminder in the Title * field.
4. Select from the drop down menu in the Gradebook Item field
which assignment is being monitored for automated message
communication.
5. Select to whom the reminder message should be sent by
check the applicable check box next to the Send to Students
or Send Summary to Instructor labels.
6. Type a captivating message headline in the Subject field.
7. Compose the reminder message in the Message field box.
>NOTE The Message field is a RAW HTML editor. For more
information on how to use the HTML editing boxes and RAW
HTML editing boxes see the Designer’s Tool Kit section of this
book.
8. Select the Submit button.

Ready-Set-Teach 149
Discussion Posts
Mazzolini and Maddison in their 2005 article “When to jump in: The
role of the instructor in online discussion forums” noted there may
be a correlation between the frequency of the instructor comments
on the discussion posts and low student involvement.
In other words, the instructor needs to let the students do the
discussing. But beware; those instructors who did not comment at
all received poor instructor evaluations. The students saw the lack
of discussion participation as lack of enthusiasm for the material and
the course.
>NOTE Create a Discussion Forum and Post before Adding it as a
Lesson Item.
Adding a Comment to a Post
Use caution when commenting on a post. If you offer “too much” the
students may decide they do not need to add more to the
conversation. If you don’t comment at all, they may feel you are not
even “listening” to the discussion.
--INSTRUCTION
1. If selecting a post or comment from your Personal Home
Page – skip to step 6.

Chapter 11 150
2. Within the Course, select the Discussion Course Tool located
in the Left Navigation panel.
3. Select the Forum in which the post is located.
4. Select the Post in which the comment is located.
5. Select the Comment to reply to.
6. Compose the comment in the Add Comment: HTML box.
>NOTE For more information on how to use the HTML
editing box see the Designer’s Tool Kit section of this book.
7. Optionally Browse… and select any attachments to add to
the post.
8. Select the Submit button.

Ready-Set-Teach 151
Replying to a Comment
You have the option to reply publicly for all the students to see or
privately if your comment is of a more personal nature.
1. If selecting a comment from the Personal Home Page skip to
step 5.
2. Within the Course, select the Discussion Course Tool located
in the Left Navigation panel.
3. Select the Forum in which the post is located.
4. Select the Post in which the comment is located.
5. Select the Reply or Submit Private Feedback links from
beneath the student’s comment.
6. Compose the comment in the Comment: HTML box.
7. Optionally Browse… and select any attachments to add to
the post.
8. Select the Submit button.
Deleting a Comment
***Use EXTREME caution here. When you delete an initial
comment you delete not only the initial comment but any other
comments which are attached to the post.
1. Within the Course, select the Discussion Course Tool located
in the Left Navigation panel.
2. Select the Forum in which the post is located.
3. Select the Post in which the comment is located.
4. Select the Delete link from beneath the comment.
5. Read the question.
6. Select the OK button.
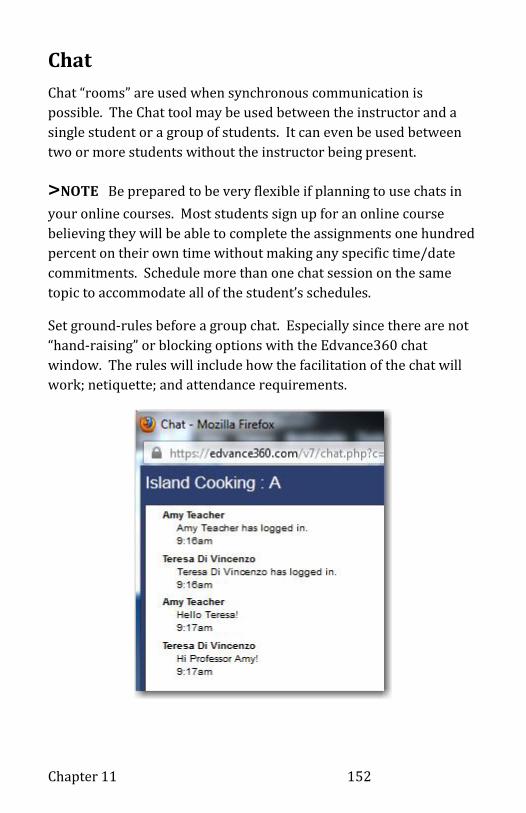
Chapter 11 152
Chat
Chat “rooms” are used when synchronous communication is
possible. The Chat tool may be used between the instructor and a
single student or a group of students. It can even be used between
two or more students without the instructor being present.
>NOTE Be prepared to be very flexible if planning to use chats in
your online courses. Most students sign up for an online course
believing they will be able to complete the assignments one hundred
percent on their own time without making any specific time/date
commitments. Schedule more than one chat session on the same
topic to accommodate all of the student’s schedules.
Set ground-rules before a group chat. Especially since there are not
“hand-raising” or blocking options with the Edvance360 chat
window. The rules will include how the facilitation of the chat will
work; netiquette; and attendance requirements.
Ready-Set-Teach 153
Start a Chat Session
--INSTRUCTION
1. Within the Course, select the Chat tool located in the Left
Navigation panel.
2. Select the Launch Chat Window link option located at the
top of the Chat panel.
Facilitating Chats
After someone logs in you will see a time stamp below the user name
showing the time they logged into the chat.
--INSTRUCTION
1. After logging into the Chat room, type a welcome message in
the Message field located at the bottom of the screen.
2. Either tap the [Enter] key on the keyboard, or select the Send
button located to the right of the Message field.
3. Repeat steps one and two for each student as they log in the
room as they cannot see messages posted before they join
the chat.
Ending a Chat
There is no “end-chat” feature in Edvance360 chats. You will wait
until the last student logs out of the room. When you log out it ends
the session.
--INSTRUCTION
1. To log out of a Chat room; select the Log Out link located at
the top right of the Chat room window.

Chapter 11 154
Ready-Set-Teach 155
Retrieve Chat Logs
Any student unable to attend a synchronous chat has the
opportunity to review the conversation. You as the instructor may
also go on and review any logs that happened while you were not
“in” the chat room. Remind the students that all general chats are
logged and can be retrieved by anyone in the course. Group logs can
be reviewed by the instructor and the members of the groups.
--INSTRUCTION
1. Within the Course, select the Chat tool located in the Left
Navigation panel.
2. Choose the date of the chat log to review by selecting the …
button to the right of the Select Date: field.
3. Select the date from the Calendar pop up.
4. Select the Show Logs button.

Chapter 11 156
Chapter 12 More than One

More Than One 157
Team Teaching
There can be only one official instructor listed in Edvance360. If the
course is team taught the secondary instructor is listed as an
assistant. He or she will need to be added by the Edvance360 system
administrator. Some administrators allow the instructor access to
add the student or by the instructor of record.
Add a Co-Instructor or Teaching Assistant
--INSTRUCTION
1. Within the Course, select the Add Assistant Admin tool
located in the Left Navigation panel.
2. Type in the last name of the person to add as the co-
instructor or teaching assistant in the Search field.
3. Select the Search button.
4. Select the Check Box next to the correct person in the
returned search list.
5. Select the Add Members button.
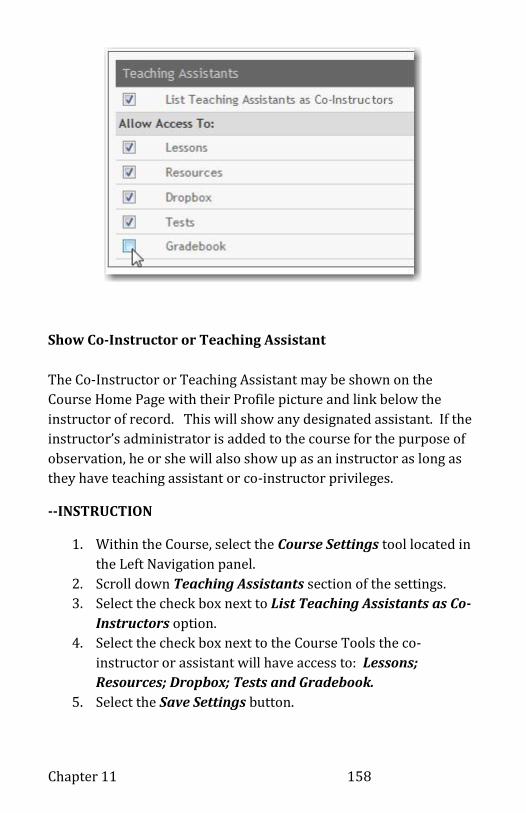
Chapter 11 158
Show Co-Instructor or Teaching Assistant
The Co-Instructor or Teaching Assistant may be shown on the
Course Home Page with their Profile picture and link below the
instructor of record. This will show any designated assistant. If the
instructor’s administrator is added to the course for the purpose of
observation, he or she will also show up as an instructor as long as
they have teaching assistant or co-instructor privileges.
--INSTRUCTION
1. Within the Course, select the Course Settings tool located in
the Left Navigation panel.
2. Scroll down Teaching Assistants section of the settings.
3. Select the check box next to List Teaching Assistants as Co-
Instructors option.
4. Select the check box next to the Course Tools the co-
instructor or assistant will have access to: Lessons;
Resources; Dropbox; Tests and Gradebook.
5. Select the Save Settings button.

More Than One 159
***CAUTION: If the course has a co-instructor and a teaching
assistant: Access is granted to any tools selected for sharing. This
includes the Gradebook.
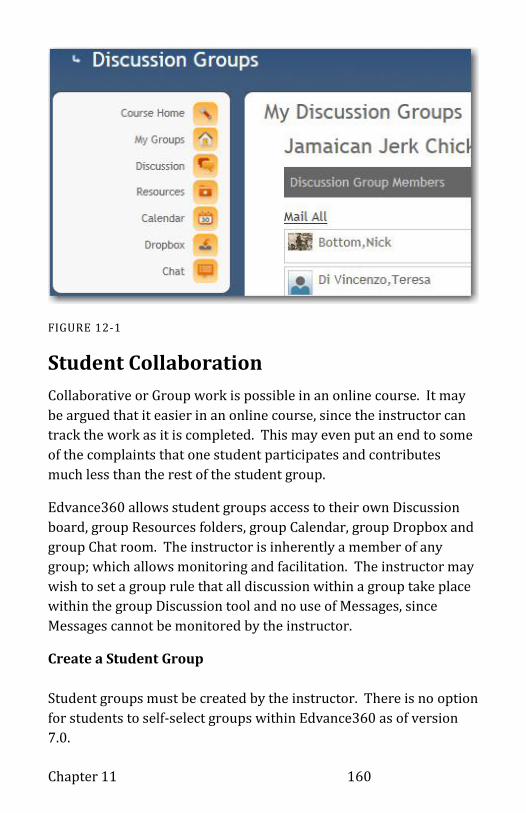
Chapter 11 160
FIGURE 12-1
Student Collaboration
Collaborative or Group work is possible in an online course. It may
be argued that it easier in an online course, since the instructor can
track the work as it is completed. This may even put an end to some
of the complaints that one student participates and contributes
much less than the rest of the student group.
Edvance360 allows student groups access to their own Discussion
board, group Resources folders, group Calendar, group Dropbox and
group Chat room. The instructor is inherently a member of any
group; which allows monitoring and facilitation. The instructor may
wish to set a group rule that all discussion within a group take place
within the group Discussion tool and no use of Messages, since
Messages cannot be monitored by the instructor.
Create a Student Group
Student groups must be created by the instructor. There is no option
for students to self-select groups within Edvance360 as of version
7.0.
More Than One 161
--INSTRUCTION
1. Within the Course, select the Groups tool located in the Left
Navigation panel.
2. Select the +Add Discussion Group link located at the top of
the Discussion Groups panel.
3. Type a title for the group in the Group Name: field.
4. Optionally remove the check in the Enable Group check box
to make the group invisible to the students.
5. Select the Create Group button.
Add Group Members
The instructor or Community leader adds members to a group.
There is no self-select to groups available as of version 7.0 of
Edvance360. Using the Survey tool, the instructor may wish to first
survey the students as to their preference of group membership.
--INSTRUCTION
1. Within the Course, select the Groups tool located in the Left
Navigation panel.
2. Select the Edit link in the Members column which is located
on the same line as the applicable group listed in the
Discussion Group column.
3. Holding the [CTRL] key down on the key board; Select from
the roster list in the Available column the course Members
who will be in this group.
4. Select the > Greater Than button to move the members to
the Group Members column.
5. Select the Update Membership button.

Chapter 11 162
Remove Group Members
1. Within the Course, select the Groups tool located in the Left
Navigation panel.
2. Select the Edit link in the Members column which is located
on the same line as the applicable group listed in the
Discussion Group column.
3. Holding the [CTRL] key down on the key board; Select from
the roster list in the Group Members column the course
Members who will be removed from this group.
4. Select the <Lesser Than button to move the members to the
Available column.
5. Select the Update Membership button.

Chapter 13 Recording & Reporting

Chapter 13 164
Recording grades, taking attendance, and reporting learning
outcomes and course statistics may be the one part of teaching an
instructor likes the least. Edvance360 has some easy-to-use tools
which make documentation work simpler for the instructor more
anxious to teach than report. The key to making the grade and
student outcome reporting easier is making sure the up-front setup
and recording is complete.
Grading
Examine the Gradebook to verify the setup of the weighting and
categories make sense for your department’s reporting needs. Next,
if any Tests or Dropboxes have been created verify the link or map
between the Test or Dropbox item and the applicable Gradebook
Item exists.
Verify Test Mapping
When a test is created a Gradebook Item should be created
automatically. Sometimes this mapping is lost due to user error
when making changes in Test or Gradebook settings. Make sure to
verify the link between a Test and the Gradebook before the test is
taken by the students.
--INSTRUCTION
1. Within the Course, select the Tests tool located in the Left
Navigation panel.
2. Select the Gradebook Map link located in the applicable Test
box.
3. Optionally change the Gradebook Item that appears in the
Gradebook Entry: field by selecting the item from the
>NOTE The Gradebook Item and the Test will be dynamically
linked upon selecting a new item.

Recording & Reporting 165
Verify Dropbox Mapping
FIGURE 13-1
The course designer may create Dropboxes for use in linking them
to the Lesson Items and not have made a Gradebook Item in which to
link it with first. If this happened, it is easy to inadvertently forget to
go back and create the Gradebook Item for Dropbox Item grading.
--INSTRUCTION
1. Within the Course, select the Dropbox tool located in the
Left Navigation panel.
2. Select the Manage Dropboxes link located in the upper left
top of the Dropboxes panel.
3. Locate any Dropboxes with Caution Symbol next to the
Dropbox title. This symbol indicates no Gradebook Item is
associated with this particular Dropbox.
4. Select the Edit link located to the right of the Dropbox title.
5. Select the applicable Gradebook Item from the Gradebook
Item: drop down menu.
6. Select the Submit button.

Chapter 13 166
Grading Dropbox Items
FIGURE 13-2
If the Dropbox is mapped to a Gradebook Item the assignments can
be graded and commented on at the time the instructor accesses
each assignment.
>NOTE Dropbox Items which are new and/or awaiting grading
may be easily accessed from the instructor’s Personal Home page
Course Alerts section.
--INSTRUCTION
1. If not accessing the Dropbox Item from the Course Alerts
section of the Personal Home Page: Within the Course, select
the Dropbox tool located in the Left Navigation panel.
2. Select the Dropbox Title link.
3. Only those Dropbox Items not yet graded are expanded and
waiting review. Optionally change the view items in the
Dropbox by selecting the desired option. Expand: All |
Graded | Ungraded | None links.
4. Download and open any attachment by selecting the
Attachment link located in the upper right corner of the
student’s submission
or

Recording & Reporting 167
Optionally: download all of the attachments by selecting the
Download All Files as Zip link located in the upper left
corner of the Dropbox panel.
5. After reviewing the assignment file: Optionally Save the file
individually (by student’s name) to a local folder on your
computer’s hard disk or removable media.
6. Locate in the Dropbox section for the individual student you
are now grading.
7. Optionally compose any comments or messages in the
Respond HTML box.
>NOTE For more information on how to use the HTML
editing box see the Designer’s Tool Kit section of this book.
8. Place the numeric number in the Grade field which
translates to the number of points the assignment is worth
out the total possible points of the assignments value.
9. Optionally compose a video/audio note with the feedback
using the Video Note Recorder.
10. Optionally attach the noted document previously saved as an
attachment.
11. Select the Submit Feedback button.
See Grading Manually for more options.

Chapter 13 168
>NOTE A zero must be placed in any student not submitting an
assignment, completing a test, or presenting their discussion post. A
Blank Grade Field DOES NOT equal zero. By not manually entering
a zero for the student, a false positive average is calculated for the
student’s running Gradebook average.
Grading Tests
Before grading tests, verify the test was Mapped to a Gradebook
Item. Although all but the essay type questions are automatically
graded instructors should always review tests and manually adjust
grades for short answer/fill in the blank questions. The computer
looks for exact matches in the student’s answers. The instructor will
most of the time give credit for typos or other minor violations of the
exact match.
--INSTRUCTION
1. Within the Course, select the Tests tool located in the Left
Navigation panel.
2. Select the Review & Grade link located in the applicable Test
box.
3. Using the legend at the top of the Test: panel review what
actions you may need to take to complete the grading
process.
>NOTE If any question values were changed after the test
was begun by the students you will need to select the Auto
Grade link to reassign the corrected grades.
4. If the tests show “pink”, this means there are essay questions
which require review and manual grading.
a. One – At – Time Essay Grading
i. Select the Review Test in the Graded column for
each student.
ii. Manually type a grade in the Grade: field located
in the upper left corner of the essay question’s
title bar.
Recording & Reporting 169
b. Grade All Essay Questions
i. Select the Grade Essays link located at the top of
the Test: panel.
i. Review the student’s essay. Compose any
feedback for the student in the HTML editing box
located under the student’s answer.
>NOTE For more information on how to use the
HTML editing box see the Designer’s Tool Kit
section of this book.
ii. Enter a point value in the Score: field.
iii. Repeat i. and ii. for each student’s essay.
iv. Scroll down to the bottom of the Test Essay
Question Review panel.
v. Select the Submit Feedback and Score button.
See Grading Manually for more options.
***CAUTION: A zero must be placed in any student not submitting
an assignment, completing a test, or presenting their discussion post.
A Blank Grade Field DOES NOT equal zero. By not manually
entering a zero for the student, a false positive average is calculated
for the student’s running Gradebook average.
Chapter 13 170
Grading Discussions
There are several ways to grade discussion posts. Some instructors
like to give a participation grade. Some give points for each post
while others give an average of points for all posts assigned to an
individual Gradebook item. However you choose to grade the posts,
you will want to follow best practice by communicating to the
students your expectations for posts. Include in your
communication an example of a “good, better, best” discussion post.
Share expectations for number of postings, and date/time
requirements for the posts.
Auto Grading Discussion Posts
Auto grading allows the instructor to give a number of points to each
post while Edvance360 keeps track of the points for each student.
When setting up the Gradebook item the instructor selects either a
sum of the points or an average of the points per post.
--INSTRUCTION
Step One: Activate Gradebook Item Mapping
1. Within the Course, select the Gradebook tool located in the
Left Navigation panel.
2. Select the Edit link located on the line to the right of the
applicable Gradebook Item which will hold the Discussion
Post grades.
3. Scroll down to the Discussion Post Mapping section.
4. Select the check box next to Map to Discussion Posts if it is
not already checked.
5. Select which Discussion Items: will be graded by selecting
the check box next to the Discussion Post title, or optionally
click in the Select All check box if summing or averaging all
posts.
6. Select the Submit button.
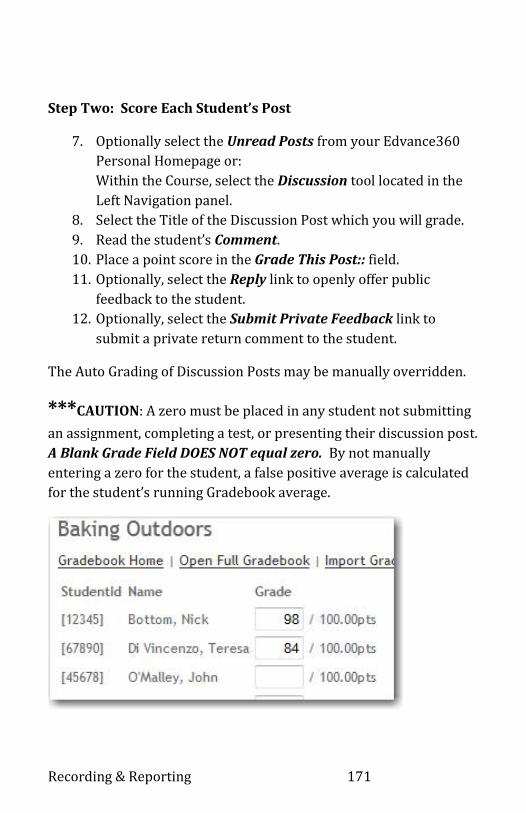
Recording & Reporting 171
Step Two: Score Each Student’s Post
7. Optionally select the Unread Posts from your Edvance360
Personal Homepage or:
Within the Course, select the Discussion tool located in the
Left Navigation panel.
8. Select the Title of the Discussion Post which you will grade.
9. Read the student’s Comment.
10. Place a point score in the Grade This Post:: field.
11. Optionally, select the Reply link to openly offer public
feedback to the student.
12. Optionally, select the Submit Private Feedback link to
submit a private return comment to the student.
The Auto Grading of Discussion Posts may be manually overridden.
***CAUTION: A zero must be placed in any student not submitting
an assignment, completing a test, or presenting their discussion post.
A Blank Grade Field DOES NOT equal zero. By not manually
entering a zero for the student, a false positive average is calculated
for the student’s running Gradebook average.
Chapter 13 172
Grading Manually
There may be times you will wish to manually enter grades directly
to a Gradebook Item. This can be done in two ways. Either by
viewing and grading one Gradebook Item at a time, or opening the
full Gradebook view in editing mode entering grades for a number of
items at once.
Single Gradebook Item Manual Entry
--INSTRUCTION
1. Within the Course, select the Gradebook tool located in the
Left Navigation panel.
2. Select the Title link located in the Item Title column of the
applicable Gradebook Item which will be graded.
3. Enter the grades in the Grade field for each student.
4. Select the Submit All Grades button.
***CAUTION: A zero must be placed in any student not submitting
an assignment, completing a test, or presenting their discussion post.
A Blank Grade Field DOES NOT equal zero. By not manually
entering a zero for the student, a false positive average is calculated
for the student’s running Gradebook average.
Full Gradebook View Manual Entry
By using the full Gradebook view, the instructor can visually see
relationships and make instinctual inferences of a student progress
or lack thereof.
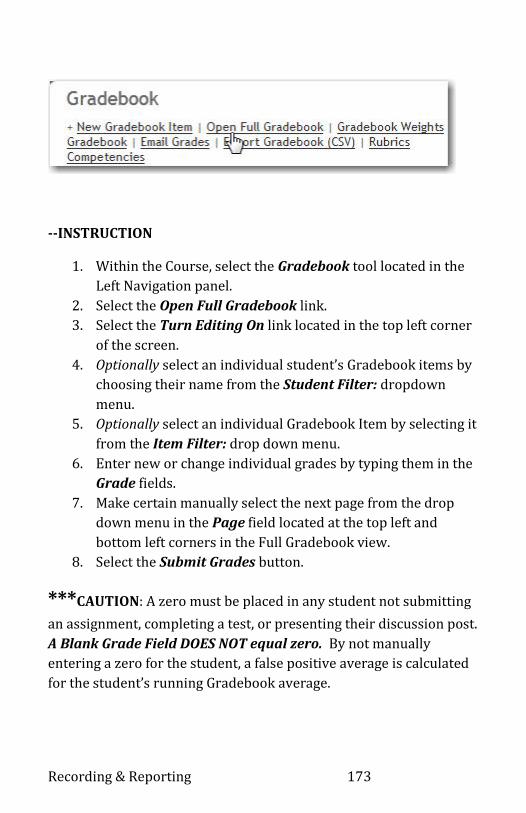
Recording & Reporting 173
--INSTRUCTION
1. Within the Course, select the Gradebook tool located in the
Left Navigation panel.
2. Select the Open Full Gradebook link.
3. Select the Turn Editing On link located in the top left corner
of the screen.
4. Optionally select an individual student’s Gradebook items by
choosing their name from the Student Filter: dropdown
menu.
5. Optionally select an individual Gradebook Item by selecting it
from the Item Filter: drop down menu.
6. Enter new or change individual grades by typing them in the
Grade fields.
7. Make certain manually select the next page from the drop
down menu in the Page field located at the top left and
bottom left corners in the Full Gradebook view.
8. Select the Submit Grades button.
***CAUTION: A zero must be placed in any student not submitting
an assignment, completing a test, or presenting their discussion post.
A Blank Grade Field DOES NOT equal zero. By not manually
entering a zero for the student, a false positive average is calculated
for the student’s running Gradebook average.

Chapter 13 174
Progress Tracking
Helping a student stay on track and advance through the online
learning process is a key to student retention and success.
Edvance360 has several locations peppered throughout which assist
the instructor in their efforts to track a student’s progress.
Attendance Monitoring
Course Log In and Page Visits
The instructor is able to produce a report identifying which students
have logged in and actually viewed the different course tool pages.
This is very useful when reporting “no-shows” to the Registrar,
Bursar, or Attendance officer. The syllabus should clearly state the
log-in expectations. In a higher education institution the student’s
federal aid may be affected if the student does not log into an online
course for which they are registered by a certain date.
--INSTRUCTION
1. Within the Course, select the Reports tool located in the Left
Navigation panel.
2. Select the Course Logins & Page Visits from the drop down
menu of the Select Report: field.
3. Optionally select a specific student from the drop down menu
of the Select User: field.
4. Using the … buttons to access the popup calendars, select the
beginning and ending dates for the report in the Select Date
Range: fields.
5. Select the Submit button.
Each login date and each page visited is marked with a date and time
of access. There is no export option for the report as of version 7.0
of Edvanc360. The report can however be printed by using the
browser’s print option.

Recording & Reporting 175
Manual Attendance Tracking
Edvance360 has a built-in attendance tracking tool which can be
used by instructors teaching traditional face-to-face classes or
blended online courses which have an on-campus attendance
requirement. If the Attendance Tracker is not visibly available in
your Gradebook link options, contact your Edvance360 systems
administrator.
--INSTRUCTION
Step One: Setup Attendance Calendar
1. Within the Course, select the Gradebook tool located in the
Left Navigation panel.
2. Select the Attendance Tracker link.
a. Option One: Set Single Date.
i. Select a date from the popup calendar, access by
clicking in the New Day field.
ii. Select the Save Day button.
b. Option Two: Set Multiple (Recurring) Dates.
i. Select the Add Multiple Days link.
ii. Select the first date of attendance by clicking in the
Between Dates * field and selecting the date in the
popup calendar.
iii. Select the last date for the course by clicking in the
Through field and selecting the date in the popup
calendar.

Chapter 13 176
iv. Select the checkbox to the left of each day of the week
the class will meet and attendance will be taken in the
Falling On day fields.
v. Select the Submit button.
>NOTE An alternative to setting the attendance calendar in this
manner, the Course Calendar may be used to activate attendance
reporting options.
Step Two: Recording Attendance
3. Within the Course, select the Gradebook tool located in the
Left Navigation panel.
4. Select the Attendance Tracker link.
5. Select the Turn Editing On link.
6. Select from the following choices: Present; Absent; Tardy;
Excused, from the drop down menus in each individual
student’s labeled cell for that day.
7. Close the Attendance Tab.
Importing and Exporting Attendance Tracking
--INSTRUCTION
1. Download the CSV sample file available in the Gradebook
tool.
2. Replace the sample data with actual data.
3. Save file to your local computer, network, or removable
storage device.
4. Import using the Import Attendance link available in the
Gradebook tool.
Export Attendance File
--INSTRUCTION
1. Within the Course, select the Gradebook tool located in the
Left Navigation panel.
2. Select the Attendance Tracker link.
Recording & Reporting 177
3. Select the Export Attendance (.xls) link.
4. Save file to your local computer, network, or removable
storage device.
Lesson Progress
The instructor can track the percentage of a lesson completed by the
student only if the student self-identifies the completion of that item
by manually marking it complete. The expectation of the student to
do this should be communicated before lessons begin with follow up
reminders as needed.
View Lesson Progress Bar
>NOTE To visually view progress bars, the instructor’s device must
have Adobe Flash Player installed and enabled.
--INSTRUCTION
1. Within the Course, select the Lessons tool located in the Left
Navigation panel.
2. Select the Lesson Progress Overview tab located at the top
of the Lessons panel.
3. Optionally use the Search field filter to view a specific
student’s progress.
4. Hover mouse pointer over the item sections on any student’s
Progress Bar for details.
Time on Lessons Report
Reviewing how much time a student spends on each lesson may be
an indication of the effort put forth by the student. Caution, however
should be taken when using report. Time spent is actually calculated
by how long from the time the student spends with the Lessons tool
open on their computer. It does not calculate how long they are
actually spending on the content outside of the Lesson tool.

Chapter 13 178
--INSTRUCTION
1. Within the Course, select the Reports tool located in the Left
Navigation panel.
2. Select the Time Taken on Lessons from the drop down menu
of the Select Report: field.
3. Optionally select a specific student from the drop down menu
of the Select User: field.
4. Using the … buttons to access the popup calendars, select the
beginning and ending dates for the report in the Select Date
Range: fields.
5. Select the Submit button.
Test Statistics
If using automated test scoring it is easy to overlook students who
may be missing the mark on a specific concept. It is important to
investigate not only how each student performed at taking a specific
exam but also take a look at how well the examination actually tests
the learning objectives. Edvance360 provides statistics which will
help inspect both.
Edvance360 aggregates the test scores into models which can be
examined by the instructor. From here the instructor may wish to
investigate further before making inferences about either the
student or the test and its questions. It is a great starting point,
especially for those instructors not skilled in creating their own
statistical graphs and formulas.
Accessing Test Statistics
--INSTRUCTION
1. Within the Course, select the Tests tool located in the Left
Navigation panel.
2. Select the Stats link located in the applicable Test Box.
3. Select the Discrimination Index or Distractor Analysis to
examine the validity of the test and test questions.
Recording & Reporting 179
4. Select Test Stats to view a graph of all student scores, overall
test statistics, and the percentage of students who correctly
answered each question.
>NOTE The Test Stats option is only available after
accessing the Discrimination Index or Distractor Analysis
links, which causes an overall calculation.
Accessing Student Time on Tests Reports
Reviewing how much time a student spends completing his or her
exams may be another indication of how valid the examination is in
testing the learning competency. Time spent on an exam may also
indicate if a student is struggling with a specific topic or test taking
altogether.
--INSTRUCTION
1. Within the Course, select the Reports tool located in the Left
Navigation panel.
2. Select the Time Taken on Tests from the drop down menu of
the Select Report: field.
3. Optionally select a specific student from the drop down menu
of the Select User: field.
4. Using the … buttons to access the popup calendars, select the
beginning and ending dates for the report in the Select Date
Range: fields.
5. Select the Submit button.
>NOTE As of Edvance360 version 7.0 there is no print or export
option for the Tests Statistics or Reports.
Survey Reports
There are two types of reporting options for the Surveys in
Edvance360. They are for member participation and survey results.
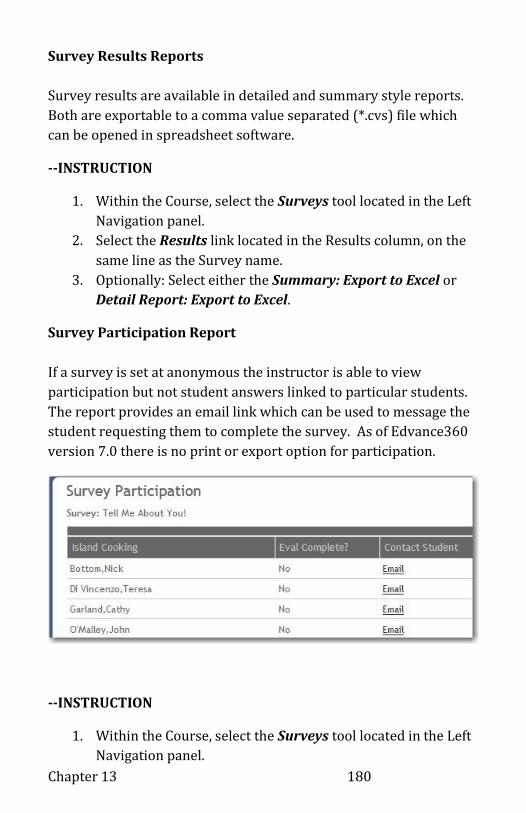
Chapter 13 180
Survey Results Reports
Survey results are available in detailed and summary style reports.
Both are exportable to a comma value separated (*.cvs) file which
can be opened in spreadsheet software.
--INSTRUCTION
1. Within the Course, select the Surveys tool located in the Left
Navigation panel.
2. Select the Results link located in the Results column, on the
same line as the Survey name.
3. Optionally: Select either the Summary: Export to Excel or
Detail Report: Export to Excel.
Survey Participation Report
If a survey is set at anonymous the instructor is able to view
participation but not student answers linked to particular students.
The report provides an email link which can be used to message the
student requesting them to complete the survey. As of Edvance360
version 7.0 there is no print or export option for participation.
--INSTRUCTION
1. Within the Course, select the Surveys tool located in the Left
Navigation panel.

Recording & Reporting 181
2. Select the Participation link located in the Results column,
on the same line as the Survey name.
3. Optionally select the Email link to contact any student who
has not completed the survey.
Discussion Post Reports
Two Discussion Post aggregated reports are available. The first
gives a total of posts and comments made by the individual students.
The Discussions Comment Details report comes with the added
benefit of allowing the instructor to grade the comments as well as
view collectively all of an individual student’s posts.
Discussion Participation Report
--INSTRUCTION
1. Within the Course, select the Reports tool located in the Left
Navigation panel.
2. Select the Participation – Posts & Comments from the drop
down menu of the Select Report: field.
3. Optionally select a specific student from the drop down menu
of the Select User: field.
4. Using the … buttons to access the popup calendars, select the
beginning and ending dates for the report in the Select Date
Range: fields.
5. Select the Submit button.

Chapter 13 182
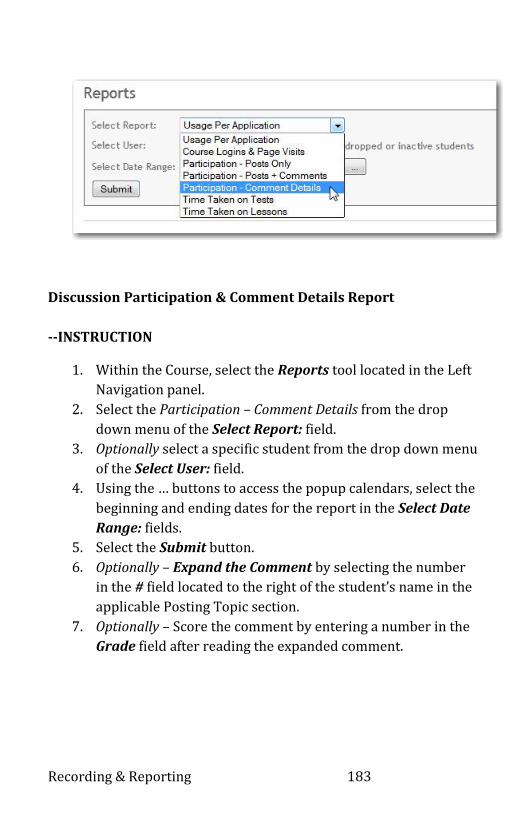
Recording & Reporting 183
Discussion Participation & Comment Details Report
--INSTRUCTION
1. Within the Course, select the Reports tool located in the Left
Navigation panel.
2. Select the Participation – Comment Details from the drop
down menu of the Select Report: field.
3. Optionally select a specific student from the drop down menu
of the Select User: field.
4. Using the … buttons to access the popup calendars, select the
beginning and ending dates for the report in the Select Date
Range: fields.
5. Select the Submit button.
6. Optionally – Expand the Comment by selecting the number
in the # field located to the right of the student’s name in the
applicable Posting Topic section.
7. Optionally – Score the comment by entering a number in the
Grade field after reading the expanded comment.

Chapter 13 184
Chapter 14 Good Housekeeping: Closing the Course
Closing the Course 185
The end-of-course checklist includes submission of final grades,
archiving of student conversations, the Gradebook and send students
goodbye messages. Immediately following the completion of the
course is also the best time for reflection about the success course.
What went wrong? What went right? It is important to assess if the
learning objectives (competencies) were achieved.
Course assessment can be completed from a statistical point of view
using the Edvance360 Competency Reports. The Edvance360
Systems Administrator also has the option to post a more subjective
student survey which can be made available to all students in all
courses.
Close the Gradebook
Finalize Grades
The Finalize Grades option allows the instructor or teaching
assistant to view a single column from the Gradebook with just the
final grades. This makes it simpler for the recording of the grades to
the institutions student information system. As of version 7.0 this
view does not have an export or print option. It can be printed using
the browser’s print option.
--INSTRUCTION
1. Within the Course, select the Gradebook tool located in the
Left Navigation panel.
2. Select the Final Grades link.
3. Select the Import and Finalize Grades from Gradebook link
to update the final calculation.

Chapter 14 186
Export Gradebook
The Export Gradebook option exports to a spreadsheet compatible
file. It is complete with a breakdown of the points each item was
assigned as well as the percentage of achievement for each student.
Once exported the Gradebook it can be used for graphing, letter
conversion, and further calculations using the spreadsheet tools.
--INSTRUCTION
1. Within the Course, select the Gradebook tool located in the
Left Navigation panel.
2. Select the Export Gradebook link.
3. Either Open or Save with the default spreadsheet program or
Save the file to your computer, jump drive, network drive or
other local storage device.
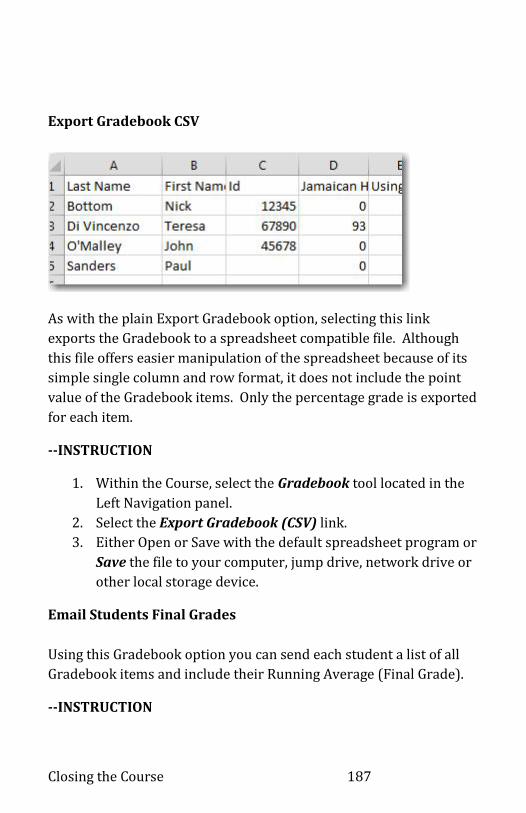
Closing the Course 187
Export Gradebook CSV
As with the plain Export Gradebook option, selecting this link
exports the Gradebook to a spreadsheet compatible file. Although
this file offers easier manipulation of the spreadsheet because of its
simple single column and row format, it does not include the point
value of the Gradebook items. Only the percentage grade is exported
for each item.
--INSTRUCTION
1. Within the Course, select the Gradebook tool located in the
Left Navigation panel.
2. Select the Export Gradebook (CSV) link.
3. Either Open or Save with the default spreadsheet program or
Save the file to your computer, jump drive, network drive or
other local storage device.
Email Students Final Grades
Using this Gradebook option you can send each student a list of all
Gradebook items and include their Running Average (Final Grade).
--INSTRUCTION

Chapter 14 188
1. Within the Course, select the Gradebook tool located in the
Left Navigation panel.
2. Select the Email Grades link.
3. Select the Select All check box in the Gradebook Items panel.
4. Select the Include Running Average check box.
5. Select the Select All check box in the Students panel.
6. Select the Send Emails button.
Export Attendance Records
If you used the Gradebook Attendance option you will need to export
the Attendance to a spreadsheet compatible file for archiving.
--INSTRUCTION
1. Within the Course, select the Gradebook tool located in the
Left Navigation panel.
2. Select the Attendance Tracker link.
3. Select the Export Attendance (.xls) link.
4. Either Open or Save with the default spreadsheet program or
Save the file to your computer, jump drive, network drive or
other local storage device.
Competency Reports
The only way to statistically measure the success of a course is by
Scoring each student’s completion of meeting the course’s learning
objectives (competencies). After scoring two reports are become
available. They are Competency Average by Objective and
Competency Average by Student. These reports can be exported to
a spreadsheet file.
--INSTRUCTION
1. Within the Course, select the Gradebook tool located in the
Left Navigation panel.
2. Select the Competencies link.
3. Select the Score Competencies link.

Closing the Course 189
4. Select EACH individual competency from the Select
Objective drop down menu.
5. Select the Reports link located at the top of the panel.
6. Select the report for viewing and export from the Report
drop down menu.
7. Select the Submit button.
8. Select the Export to Excel link.
9. Either Open or Save with the default spreadsheet program or
Save the file to your computer, jump drive, network drive or
other local storage device.
10. Repeat steps 5 through 9 to export the other report.
Archive Conversations
A great thing about Edvance360 is the past courses are not deleted.
They are just deactivated by the Edvance360 system administrator.
If there is a challenge to anything in the course, it can easily be
reactivated at any point in time for accessing grades, discussion
conversations, chat logs, etc.
Discussion Post Archiving
If your institution requires paper or separate digital documentation
of the conversation it can be done. As of version 7.0 there is no clean
way to export or print Discussion posts. For now you can use the
Discussion Posts Report.
--INSTRUCTION

Chapter 14 190
1. Run the Report: Discussion Participation & Comment Details
one student at a time.
2. Expand the Comments next to the student’s posts by
selecting each # link.
3. Print using the browser’s print option.
Email Message Archiving
Again, assuming you have kept all of your email messages with your
student internal to Edvance360 you do not have to delete any of the
conversations. You will however want to create a folder in which to
move all conversations pertaining to the course.
--INSTRUCTION
1. Select the Mail Box tab located on the Top Navigation menu.
2. Select the Mail Folders link located in the left navigation
panel.
3. Select the +New Folder link.
4. Enter a name of the course along with the term designation
in the New Folder: field.
5. Select the Submit button.
6. Select the Return to Inbox link.
7. Place a Check in each box next to the emails related to this
course.
8. Select the newly created mailbox from the Move Selected To:
drop down menu.
9. Select the Move button.
Chat Logs Archiving
Closing the Course 191
If your institution requires paper or separate digital documentation
of Chat conversation it can be done. As of version 7.0 you cannot
view chat logs for a range of dates. You must know the exact date
the Chat conversation occurred.
--INSTRUCTION
1. Within the Course, select the Chat tool located in the Left
Navigation panel.
2. Choose the date of the chat log to review by selecting the …
button to the right of the Select Date: field.
3. Select the date from the Calendar pop up.
4. Select the Show Logs button.
5. Use the browser’s Print option to print the log to paper or
digital file.

Chapter 14 192
Chapter 15 Outside of the Classroom
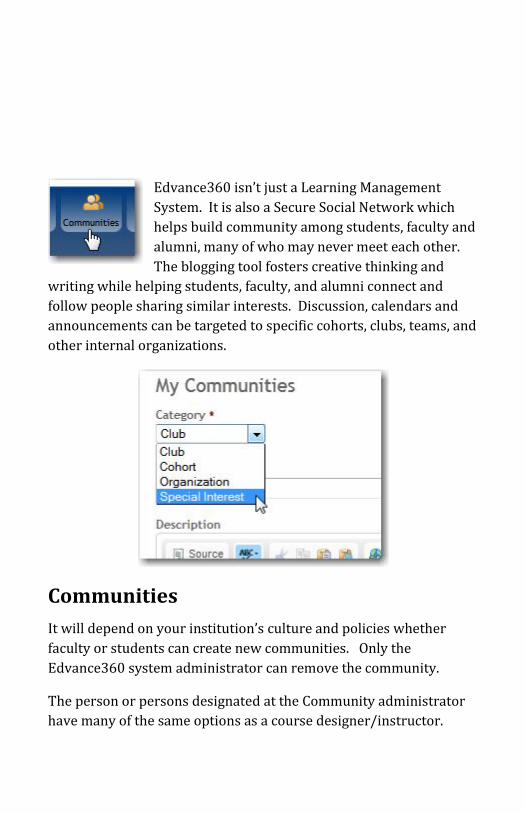
Edvance360 isn’t just a Learning Management
System. It is also a Secure Social Network which
helps build community among students, faculty and
alumni, many of who may never meet each other.
The blogging tool fosters creative thinking and
writing while helping students, faculty, and alumni connect and
follow people sharing similar interests. Discussion, calendars and
announcements can be targeted to specific cohorts, clubs, teams, and
other internal organizations.
Communities
It will depend on your institution’s culture and policies whether
faculty or students can create new communities. Only the
Edvance360 system administrator can remove the community.
The person or persons designated at the Community administrator
have many of the same options as a course designer/instructor.

Chapter 15 194
These tools will include, among other things, a Community Calendar,
Survey tools, Chat, Discussion Forums, and Community Resources.
Create a Community
If the Create Community option is not available, contact your
Edvance360 system administrator.
--INSTRUCTION
1. Select Communities tab from the Personal Navigation Tabs
located at the top of any page in Edvance360.
2. Select the +Create New Community link located at the top of
the My Communities panel.
3. Select a predefined category from the Category* field’s drop
down menu.
4. Type the title for the Community in the Name field.
5. Optionally use the HTML editor to type a description for the
new Community.
>NOTE For more information on how to use the HTML
editing box see the Designer’s Tool Kit section of this book.
6. Optionally Select the Browse… button.
7. Locate an image file on your local computer, network, or
removable storage device.
8. Select the file and Open.
9. Select from the Privacy drop down menu the status of the
new community. Private communities only allow invited
members.
10. Select the Submit button.

Outside the Classroom 195
Blogs
Students may have full access or no access to the Blog feature. You
need to check with your Edvance360 administrator to find out if
students will see the Blogs.
Create New Blog
--INSTRUCTION
1. Select Blog tab from the Personal Navigation Tabs located at
the top of any page in Edvance360.
2. Select the +New Post link.
3. Type the title for the Blog in the Title* field.
4. Using the HTML editor to compose the blog in the Body field.
>NOTE For more information on how to use the HTML
editing box see the Designer’s Tool Kit section of this book.
5. Optionally type in the Tags/Keywords field words which
best describe the Blog theme. Separate each word with
commas.
6. Optionally change the Blog’s visibility status from the
Visibility Mode drop down menu.
Chapter 15 196
7. Select the Submit button.
Contacts
Profile information on all people in your organization is available
through the Contacts tab located on the Personal Navigation Tabs
located at the top of any page in Edvance360. Along with their
Profile are links for messaging, blog following, and ePortfolio
viewing.
Add a Personal Contact
Although you have access to all members with access to Edvance360
at your institution, there may be some which you contact or follow
most often. You may also “bookmark” your favorite contacts by
adding them as a Personal Contact.
--INSTRUCTION
1. Select Contact tab from the Personal Navigation Tabs located
at the top of any page in Edvance360.
2. Select the Member Directory link.
3. Type the first or last name of the person in the Search: field.
4. Select the Search button.
5. Locate the person from the Search Results list.
6. Select the person by Clicking on their picture or Name link.
7. Select the Relationship from the drop down menu located
under the person’s name and to the right of their image.
>NOTE the person is automatically added as your contact
when the term “Success” appears under their image.

Outside the Classroom 197
Chapter 16 Options
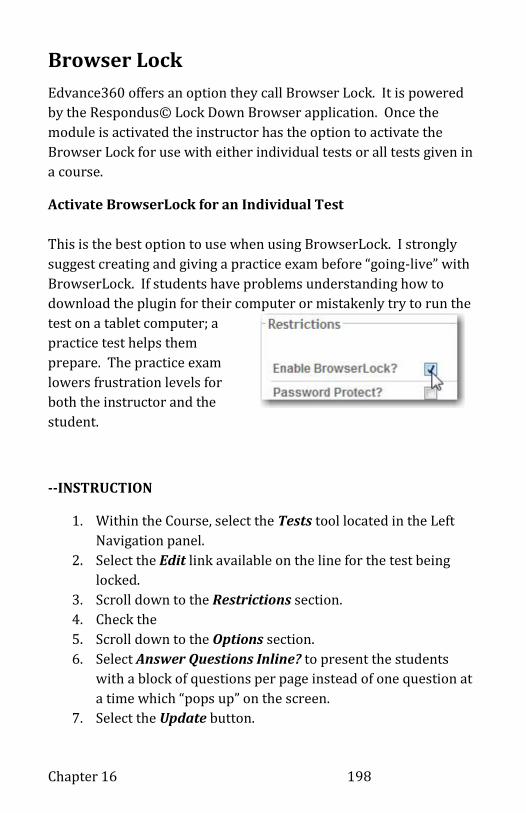
Chapter 16 198
Browser Lock
Edvance360 offers an option they call Browser Lock. It is powered
by the Respondus© Lock Down Browser application. Once the
module is activated the instructor has the option to activate the
Browser Lock for use with either individual tests or all tests given in
a course.
Activate BrowserLock for an Individual Test
This is the best option to use when using BrowserLock. I strongly
suggest creating and giving a practice exam before “going-live” with
BrowserLock. If students have problems understanding how to
download the plugin for their computer or mistakenly try to run the
test on a tablet computer; a
practice test helps them
prepare. The practice exam
lowers frustration levels for
both the instructor and the
student.
--INSTRUCTION
1. Within the Course, select the Tests tool located in the Left
Navigation panel.
2. Select the Edit link available on the line for the test being
locked.
3. Scroll down to the Restrictions section.
4. Check the
5. Scroll down to the Options section.
6. Select Answer Questions Inline? to present the students
with a block of questions per page instead of one question at
a time which “pops up” on the screen.
7. Select the Update button.

Outside the Classroom 199
Use BrowserLock for all tests
This is not recommended!
--INSTRUCTION
1. Within the Course, select the Settings tool located in the Left
Navigation panel.
2. Scroll down to the Tests section.
3. Select Use BrowserLock for all tests option.
4. Select the Save Settings button located near the bottom of
the page.
***CAUTION: Make certain if using the BrowserLock for all tests
option that each of the tests have the Answer Questions Inline?
option activated. If this isn’t activated, the student’s computer will
lock on a blank screen.

Chapter 16 200
Edvance360 Live!™
Edvance360 Live! is the video conference option for Edvance360.
This option allows the students to collaborate in real-time with their
instructor and course mates. Although desktop sharing is not an
option in the Edvance360 module, the video, audio, and enhanced
chat features make for engaging presentations.
This module is developed with the open source video conferencing
software Big Blue Button. Visit www.bigbluebutton.org to watch
video tutorials for instructors and students.
If Edvance360 Live! Is activated you will have the option when
adding a new Calendar item to select “Live Meeting” and invite
attendees to join using Edvance360 Live!

Outside the Classroom 201
TurnItIn™ Integration
Plagiarism Detection Powered by TurnItIn™ can be integrated with
Edvance360. If your institution uses TurnItIn, the instructor has the
option to check for plagiarism directly from the Dropbox or
Discussion post.
--INSTRUCTION
1. Within the Course, select the Test Essay, Dropbox item, or
Discussion comment post item to be scanned.
2. Select the Check Originality link.
3. Wait for scan.
4. Select the Percentage Original link for more information
concerning the document.
Parental Resources Tool
The Parental Resources option used by some institutions give
parents access files in a special location in the course or community.
Speak with your Edvance360! System administrator for further
instructions. The parent will need to be able to log into the
Edvance360! System and must be setup as designated as a “Parent
Type” in the system to access these parent only files.

Chapter 16 202
Chapter 17 Designer’s Took Kit
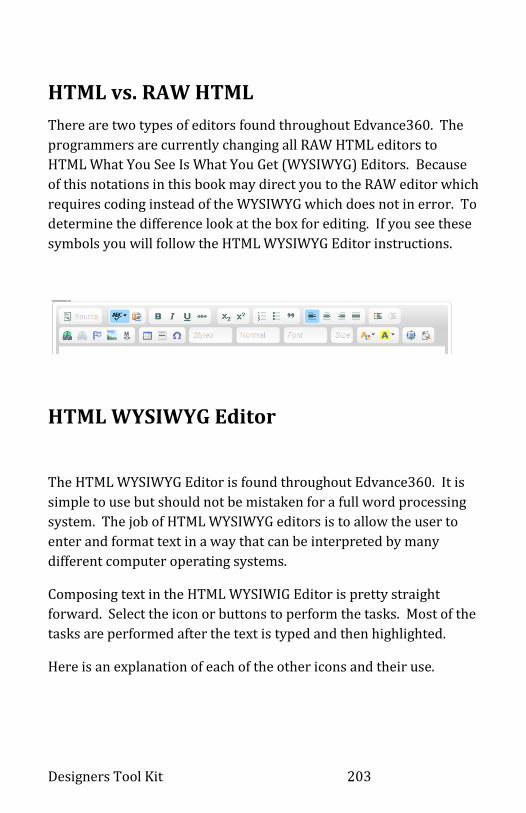
Designers Tool Kit 203
HTML vs. RAW HTML
There are two types of editors found throughout Edvance360. The
programmers are currently changing all RAW HTML editors to
HTML What You See Is What You Get (WYSIWYG) Editors. Because
of this notations in this book may direct you to the RAW editor which
requires coding instead of the WYSIWYG which does not in error. To
determine the difference look at the box for editing. If you see these
symbols you will follow the HTML WYSIWYG Editor instructions.
HTML WYSIWYG Editor
The HTML WYSIWYG Editor is found throughout Edvance360. It is
simple to use but should not be mistaken for a full word processing
system. The job of HTML WYSIWYG editors is to allow the user to
enter and format text in a way that can be interpreted by many
different computer operating systems.
Composing text in the HTML WYSIWIG Editor is pretty straight
forward. Select the icon or buttons to perform the tasks. Most of the
tasks are performed after the text is typed and then highlighted.
Here is an explanation of each of the other icons and their use.

Chapter 17 204
Source
This button gives access to the true HTML Source Code. The tool is
usually used by people with more advanced knowledge of HTML
coding and advanced techniques. Because of the database
integration and programming. Not all true HTML source commands
will perform as an HTML programmer may expect.
ABC Spell Checking
This tool should be accessed most of the time when composing
HTML. It is the built in spell checker. It will save many
embarrassing moments for the designer composing directly in the
editor. You may however want to disable the SCAYTC (spell
checking as you go)option if your course uses trade specific words.
The ABC spell checking button also offers options for changing
preferences, languages and personal dictionaries.
Disable or Enable by selecting the SCAYT option from the
ABC drop-down menu.
Select preferences by checking the applicable boxes in the
menus presented when selecting the Options or Languages
choices.
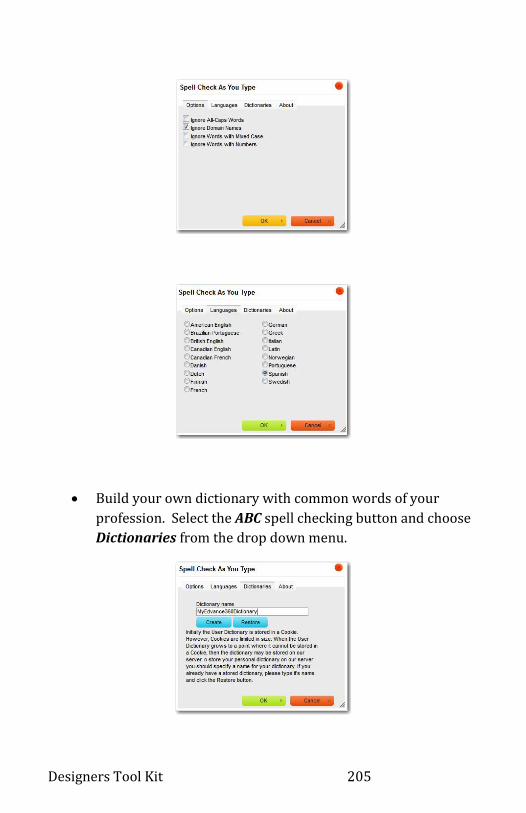
Designers Tool Kit 205
Build your own dictionary with common words of your
profession. Select the ABC spell checking button and choose
Dictionaries from the drop down menu.

Chapter 17 206
Add words to your personal dictionary by Right-Clicking
(Windows) or Control-Click (Mac) on the word recognized by
Edvance360 as being misspelled and selecting Add Word (to
Dictionary).
Plain Text Paste
Always use this tool to paste anything text being pasted from
Microsoft Word® or other word processing programs as often
contain proprietary coding which will not work with most HTML
editors. Failure to use this pasting tool will cause the text pasted to
visually lose much of its original formatting.

Designers Tool Kit 207
Copy text from Word or other word processing program.
Return to Edvance360 HTML WYSIWYG Editor.
Select the Paste as Plain Text button.
Use Windows user use the: [CTRL] +[V] key combination or
Mac users use the [Command] + [V] key combination to
paste the text.
Select the OK button.
Common Font Style Formats
Highlight the text and select the B icon to give a strong
emphasis on the characters
Highlight the text and select the I icon to italicize the
characters.
Highlight the text and select the U icon to underline the
characters.
Highlight the text and select the abc icon to place a strike
through the characters.
Highlight the text and select the X2 icon to subscript the text
Highlight the X2 icon to superscript the text.
FIGURE 17-1

Chapter 17 208
FIGURE 17-2
Select the 1,2,3 with lines icon to create an indented,
numbered, single spaced list. Each time you select the
enter/return key a new line with the next number in the
sequence will be created. To end the list and resume regular
text, select the icon again.
Select the three dots with lines icon to create an indented,
bulleted, single spaced list. Each time you select the
enter/return key a new indented line complete with a bullet
will be created. To end the list and resume regular text,
select the icon again.
Highlight a paragraph or more of text. Select the “Block
Quotes icon. Use this when quoting large blocks of text. It
will indent both the left and right margins of the text.
Justification Tools Left, Center, Right and Full justification control
the alignment of the text.
Highlight the text, select the applicable icon to justify the text
in the desired direction.
Indent and Out dent tools are used in the place of traditional word
tabs. The indentation measurements are preset and
cannot be changed without using the Source Code
access.
Select the line to be either indented or
realigned.
Select the applicable Indent or Out dent icon.

Designers Tool Kit 209
Hyperlink Insert
You may wish to have the reader’s Internet browser jump to another
Internet page or a place somewhere else within the page. To do this
the text needs to by hyperlinked. A hyperlink can also open the
system’s default email and place an email address in the “to” field.
Link to URL
Highlight the text to be linked.
Select the Link button.
Type in the URL.
Select the OK key.
Remove Hyperlink
Highlight the hyperlinked text.
Select the Remove Hyperlink button.
Link to Location on the Page
Place Cursor on the location which the hyperlink will go to
when selected.
Select the Anchor Flag button.
Type in a unique name in the Anchor field.
Select the OK button.
Highlight the Text to hyperlink.
Select the Link button.
Select Link to Anchor in the Text from the Link Type drop
down menu.
Select the previously typed unique name from the By Anchor
Name drop down menu.
Select the OK button.
Insert an Image
>NOTE The Insert Image icon is not available at all locations of the
HTML WYSIWIG Editor in Edvance360.

Chapter 17 210
Image files used with the HTML WYSIWIG Editor must first be placed
in a folder of your Personal Repository Files. This can be done “on-
the-fly”, however it also might mean a student will not be able to
insert an image. Verify this with your Edvance360 systems
administrator before assigning anything which will require students
to insert images to HTML.
Place the Cursor in the desired location for the image.
Select the Image Add Image icon.
o Select the folder from the Select Folder drop down menu.
Select the Image file.
or
o Select the +New link. Browse to the image on your local
computer, network, or removable storage device. Submit
for uploading.
Math LaTeX
This is a special HTML source editing box which accepts LaTeX code
to produce high quality mathematical symbols. I have included in
the reference section a URL to a document by the American
Mathematics Society explaining the uses of the code and symbols.

Designers Tool Kit 211
FIGURE 17-3
FIGURE 17-4
Insert Table
Place Cursor on the location which the table will begin.
Select the Insert Table tool.
Make Changes to any/all the fields.
Select the OK button.
>NOTE Once a table is created using this HTML WYSIWYG,
Rows and Columns cannot be merged without accessing the
Source Code editor.
Insert Horizontal Line
Place Cursor on the location which the line will
begin.
Select the Insert Horizontal Line tool.
Insert Symbols
Place Cursor on the location which the symbol will be
inserted.
Select the Insert Symbol tool.
Select the Special Character symbol.

Chapter 17 212
Predefined Text Selections
Styles
Predefined contrasts in font, weight, and color for text.
Select the Styles drop down menu.
Select the Style Type desired.
Format
Predefined text size, fonts, and weights and line spacing which will
affect an entire computer paragraph. (Computer paragraphs are
defined by hard returns or break commands).
Select the Format drop down menu.
Select the Select Text Style desired.
Font
Standard font families visible on all current operating systems and
browsers.
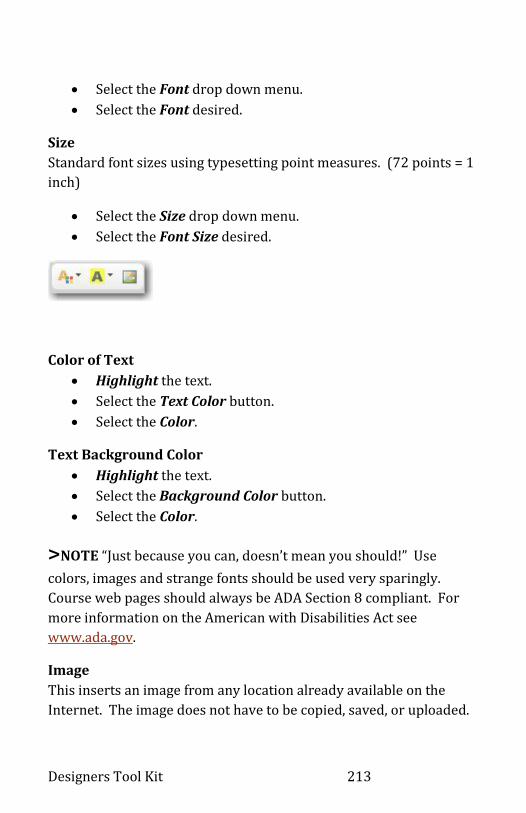
Designers Tool Kit 213
Select the Font drop down menu.
Select the Font desired.
Size
Standard font sizes using typesetting point measures. (72 points = 1
inch)
Select the Size drop down menu.
Select the Font Size desired.
Color of Text
Highlight the text.
Select the Text Color button.
Select the Color.
Text Background Color
Highlight the text.
Select the Background Color button.
Select the Color.
>NOTE “Just because you can, doesn’t mean you should!” Use
colors, images and strange fonts should be used very sparingly.
Course web pages should always be ADA Section 8 compliant. For
more information on the American with Disabilities Act see
www.ada.gov.
Image
This inserts an image from any location already available on the
Internet. The image does not have to be copied, saved, or uploaded.

Chapter 17 214
Browse on the Internet to the location which has the image
you will be using.
Right-Click (Windows) or Control-Click (Mac) on the image.
Select Copy Image Location.
Return to Edvance360 and the HTML WYSIWYG Editor.
Place Cursor on the location to insert the image.
Select the Image tool.
Use Windows user use the: [CTRL] + [V] key combination or
Mac users use the [Command] + [V] key combination to paste
location in the URL field.
Type a short description of the image in the Alternative Text
field.
Change the Width and Height using the pixel points
Select the OK button.
Maximize the editing screen
The Maximize button is a toggle switch. Select the button to make
the editing box full screen. Select it again to return to the default
size.
Show blocks of Text
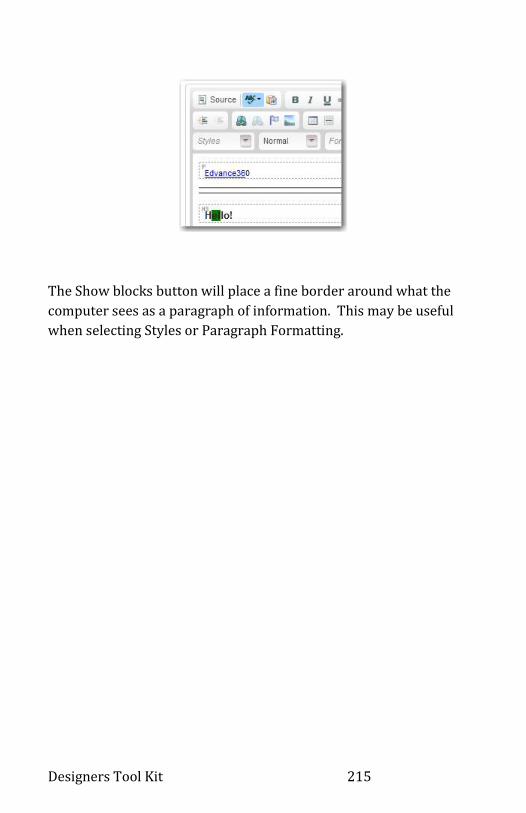
Designers Tool Kit 215
The Show blocks button will place a fine border around what the
computer sees as a paragraph of information. This may be useful
when selecting Styles or Paragraph Formatting.
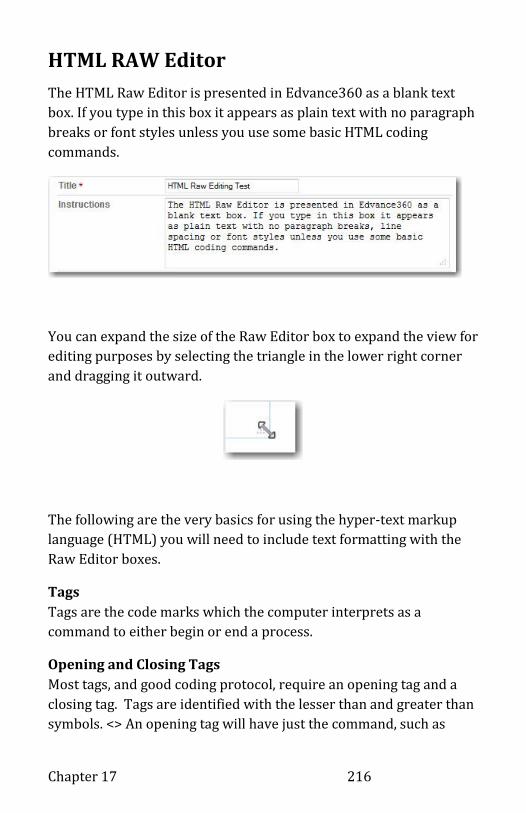
Chapter 17 216
HTML RAW Editor
The HTML Raw Editor is presented in Edvance360 as a blank text
box. If you type in this box it appears as plain text with no paragraph
breaks or font styles unless you use some basic HTML coding
commands.
You can expand the size of the Raw Editor box to expand the view for
editing purposes by selecting the triangle in the lower right corner
and dragging it outward.
The following are the very basics for using the hyper-text markup
language (HTML) you will need to include text formatting with the
Raw Editor boxes.
Tags
Tags are the code marks which the computer interprets as a
command to either begin or end a process.
Opening and Closing Tags
Most tags, and good coding protocol, require an opening tag and a
closing tag. Tags are identified with the lesser than and greater than
symbols. <> An opening tag will have just the command, such as
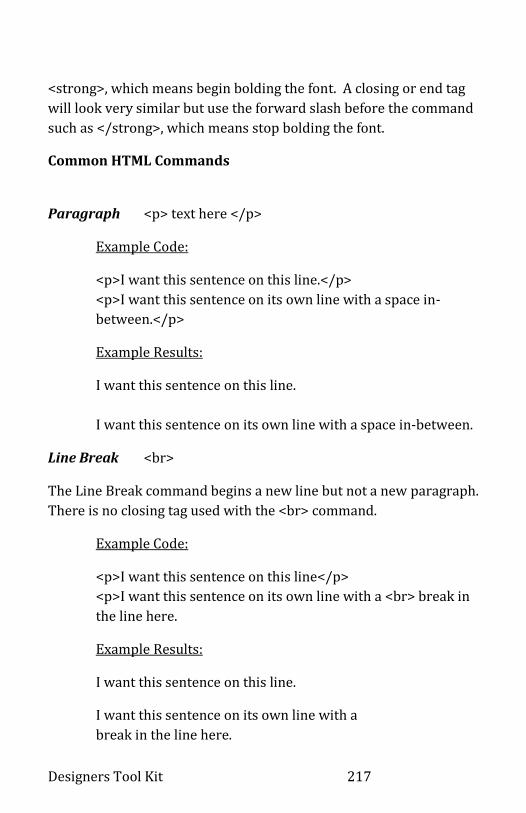
Designers Tool Kit 217
<strong>, which means begin bolding the font. A closing or end tag
will look very similar but use the forward slash before the command
such as </strong>, which means stop bolding the font.
Common HTML Commands
Paragraph <p> text here </p>
Example Code:
<p>I want this sentence on this line.</p>
<p>I want this sentence on its own line with a space in-
between.</p>
Example Results:
I want this sentence on this line.
I want this sentence on its own line with a space in-between.
Line Break <br>
The Line Break command begins a new line but not a new paragraph.
There is no closing tag used with the <br> command.
Example Code:
<p>I want this sentence on this line</p>
<p>I want this sentence on its own line with a <br> break in
the line here.
Example Results:
I want this sentence on this line.
I want this sentence on its own line with a
break in the line here.
Chapter 17 218
Numbered (Ordered) List
The ordered list command <ol> </ol> is always used in conjunction
with a new line or list line break command. <li> </li>.
Example Code:
<ol> <li>Apples</li> <li>Oranges</li> <li>Bananas</li
</ol> Example Results:
1. Apples
2. Oranges
3. Bananas
Bulleted (Unordered) List
The unordered list command <ul> </ul> is always used in
conjunction with a new line or list line break command. <li> </li>.
Example Code:
<ul> <li>Apples</li> <li>Oranges</li> <li>Bananas</li
</ul>
Example Results:
Apples
Oranges
Bananas
Horizontal Line <hr />

Designers Tool Kit 219
The Horizontal Line places a line across the page beginning at the
next line. There is no closing tag used with the <hr /> command.
Example Code:
I would like the exact space after this sentence to have a
viewable horizontal rule. <hr />
Example Results:
I would like the exact space after this sentence to have a
viewable horizontal rule.
Bold Font <strong> text here </strong>
Example Code:
The assignment is due no later than
<strong>Tuesday</strong>. Late assignments will
<strong>NOT</strong> be accepted.
Example Results:
The assignment is due no later than Tuesday. Late
assignments will NOT be accepted.
Italics <em> text here </em>
Example Code:
After watching the film, <em>The Hobbit: An Unexpected
Journey </em> complete the four following items in this
week’s lesson.
Example Results:

Chapter 17 220
After watching the film, The Hobbit: An Unexpected Journey
complete the four following items in this week’s lesson.
Underline <u> text here </u>
Example Code:
The song “Smoke on the Water” was recorded firs on the
album <ul>Machine Head</ul>. It later appeared on the
album <ul>Very Best of Deep Purple</ul>.
Example Results:
The song “Smoke on the Water” was recorded firs on the
album Machine Head. It later appeared on the album Very
Best of Deep Purple.

Designers Tool Kit 221
Content Copying
Content Cloning
When a course is designed with the student learning outcomes
(competencies) in mind the course is somewhat timeless. Without
regard to the text book or the instructor the course should be able to
be re-used and shared with only minor updates. Edvance360 has
included for all instructors a tool to copy the content and have put it
right on the designer/instructor’s Personal Home Page in the left
navigation panel.
Copy Content to Your Own Course
You have the option of copying all of the content from one course to
another or selecting different elements. If a course which you
designed/taught in the past is no longer visible in your list, you may
need to contact your Edvance360 system administrator and ask that
it be reactivated temporarily.
--INSTRUCTION
1. From the Personal Home Page select the Content Cloning
tool located in the Left Navigation panel.
2. Select the course listed in the Select Course to Copy From:
section which has the content to be copied.
3. Select the course to copy the information to listed in the
Select Course to Copy To: section
4. Select exactly which content items to duplicate by checking
each in the Select Content to Copy: section.
5. Select the Submit button.

Chapter 17 222
Copy Content for another Designer/Instructor
Occasionally you will create content items, such as tests which you
will want to share with a colleague. Edvance360 has made sharing
easy! The person in which you are sharing the information must
already have a course available in Edvance360. The duplicated items
will then be placed within that designer/instructor’s course.
--INSTRUCTION
1. From the Personal Home Page select the Content Cloning
tool located in the Left Navigation panel.
2. Select the course listed in the Select Course to Copy From:
section which has the content to be copied.
3. Select the Change Instructor box.
4. Select the designer/instructor from the Select an instructor
drop down menu.
5. Select the course to copy the information to listed in the
Select Course to Copy To: section
6. Select exactly which content items to duplicate by checking
each in the Select Content to Copy: section.
7. Select the Submit button.
Export to Common Cartridge
Designers and instructors may wish to export to a Common
Cartridge for personal archival reasons or to share content among
more than one LMS.
--INSTRUCTION
1. Within the Course, select the Common Cartridge tool located
in the Left Navigation panel.
2. Select the Export this course in Common Cartridge format
link.

Chapter 18 Resources
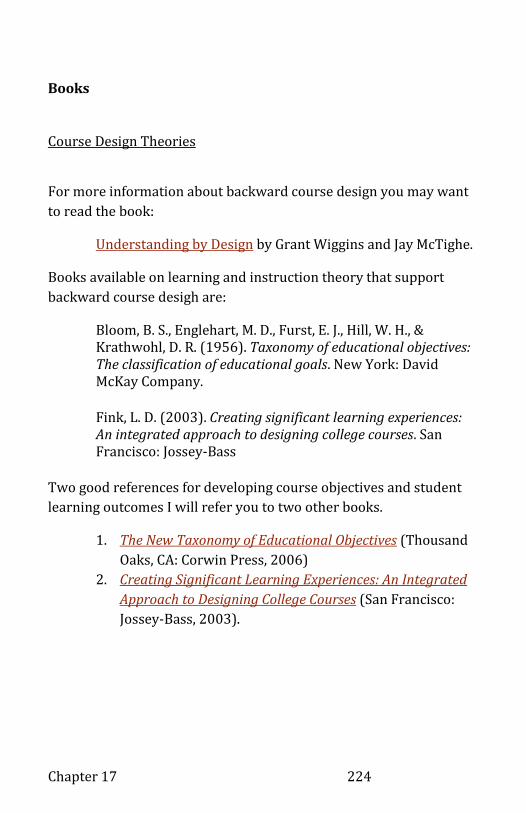
Chapter 17 224
Books
Course Design Theories
For more information about backward course design you may want
to read the book:
Understanding by Design by Grant Wiggins and Jay McTighe.
Books available on learning and instruction theory that support
backward course desigh are:
Bloom, B. S., Englehart, M. D., Furst, E. J., Hill, W. H., & Krathwohl, D. R. (1956). Taxonomy of educational objectives: The classification of educational goals. New York: David McKay Company.
Fink, L. D. (2003). Creating significant learning experiences: An integrated approach to designing college courses. San Francisco: Jossey-Bass
Two good references for developing course objectives and student
learning outcomes I will refer you to two other books.
1. The New Taxonomy of Educational Objectives (Thousand
Oaks, CA: Corwin Press, 2006)
2. Creating Significant Learning Experiences: An Integrated
Approach to Designing College Courses (San Francisco:
Jossey-Bass, 2003).
Resources 225
Web Resources
I know we are all becoming proficient in using our favorite search
engine to find topics of interest on the Internet. Here are a few I
recommend.
Assessment Options and Question Building
Student Learning Assessment, Options and Resources. 2nd
Edition. (2007). Philadelphia: Middle States Commission on
Higher Education.
Last Edited 2008
http://www.msche.org/publications/SLA_Book_080808072
8085320.pdf
Dickinson Mike. (2011, December 5). Writing Multiple Choice
Questions for Higher-level Thinking. Learning Solutions
Magazine (Online).
http://www.learningsolutionsmag.com/articles/804/writin
g-multiple-choice-questions-for-higher-level-thinking
Soares, John. (2012, January 24). How to Write Multiple-
Choice Questions. [Higher Education Freelance Writer].
http://writingcollegetextbooksupplements.com/blog/2012/
01/24/multiple-choice-questions/
Chapter 17 226
Discussions and Collaboration
Curtis, David D., Lawson, Michael J. (2001, May). Exploring
Collaborative Online Learning. Journal of Asynchronous
Learning Networks. 5(1)
http://wikieducator.org/images/6/60/ALN_Collaborative_L
earning.pdf
Mazzolini, Margaret., Madision, Sara. (2007, September).
When to jump in: The role of the instructor in online
discussion forums. 49(2), 193-213.
http://www.tlu.ee/~kpata/haridustehnoloogiaTLU/instruct
or.pdf
Best Practices
Sunal, Dennis W., Sunal, Cynthia S., Odell, Michael R.,
Sundberg, Cheral A. (2012, July 16). Research-Supported
Best Practices for Developing Online Learning. The Journal of
Interactive Online Learning, 2(1), Online.
http://www.ncolr.org/issues/jiol/v2/n1/research-
supported-best-practices-for-developing-online-
learning#.URvFY2f3SSo
Hill, Christopher, Editor. 10 Principles of Effective Online
Teaching: Best Practices in Distance Education. Faculty Focus,
Magna Publications, Inc. Madison, Wisconsin:
www.magnapubs.com.
http://www.facultyfocus.com/free-reports/principles-of-
effective-online-teaching-best-practices-in-distance-
education/

Resources 227
HTML and Code
Downes, Michael. (2002, March 22). Short Math Guide for
LATEX. American Mathematical Society. 109
http://www.ams.org/tex/short-math-guide.html
VanFossen, Lorelle. (2012, January 6). The 10 HTML Tags
You Must Know to Blog. WordPress|Learning from Lorelle.
http://lorelleteaches.com/2012/01/06/the-10-html-tags-
you-must-know-to-blog/
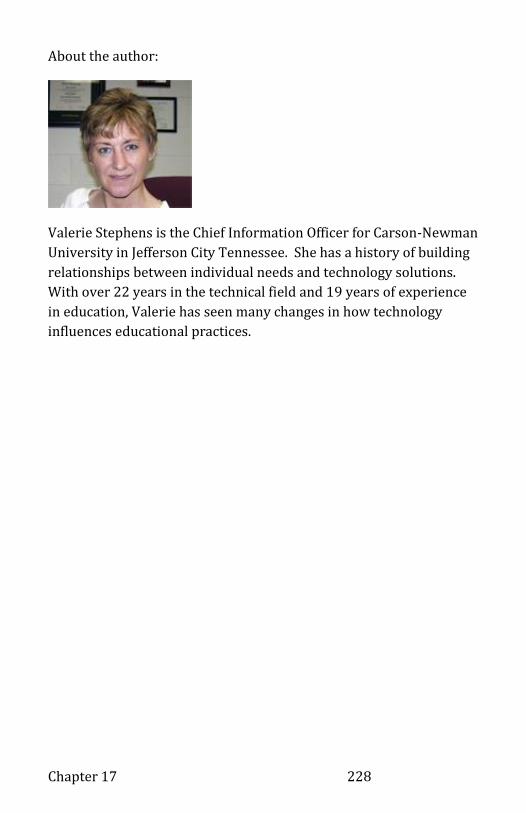
Chapter 17 228
About the author:
Valerie Stephens is the Chief Information Officer for Carson-Newman
University in Jefferson City Tennessee. She has a history of building
relationships between individual needs and technology solutions.
With over 22 years in the technical field and 19 years of experience
in education, Valerie has seen many changes in how technology
influences educational practices.