NOT 10400X 2013-09q9bgh9q08416907ck9fxol3z-wpengine.netdna-ssl.com/.../AHP...Antho… · Anthogyr...
6
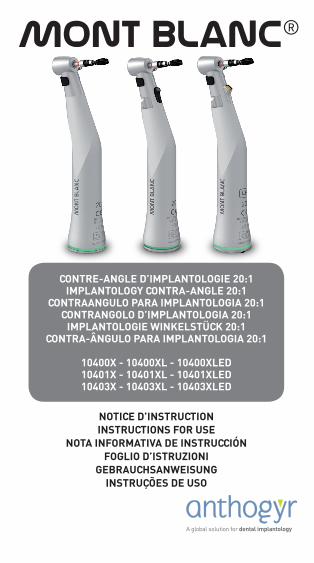
MONT BLANC ® CONTRE-ANGLE D’IMPLANTOLOGIE 20:1 IMPLANTOLOGY CONTRA-ANGLE 20:1 CONTRAANGULO PARA IMPLANTOLOGIA 20:1 CONTRANGOLO D’IMPLANTOLOGIA 20:1 IMPLANTOLOGIE WINKELSTÜCK 20:1 CONTRA-ÂNGULO PARA IMPLANTOLOGIA 20:1 10400X - 10400XL - 10400XLED 10401X - 10401XL - 10401XLED 10403X - 10403XL - 10403XLED NOTICE D’INSTRUCTION INSTRUCTIONS FOR USE NOTA INFORMATIVA DE INSTRUCCIÓN FOGLIO D’ISTRUZIONI GEBRAUCHSANWEISUNG INSTRUÇÕES DE USO
-
Upload
truongxuyen -
Category
Documents
-
view
218 -
download
0
Transcript of NOT 10400X 2013-09q9bgh9q08416907ck9fxol3z-wpengine.netdna-ssl.com/.../AHP...Antho… · Anthogyr...
MONT BLANC®
CONTRE-ANGLE D’IMPLANTOLOGIE 20:1IMPLANTOLOGY CONTRA-ANGLE 20:1
CONTRAANGULO PARA IMPLANTOLOGIA 20:1CONTRANGOLO D’IMPLANTOLOGIA 20:1
IMPLANTOLOGIE WINKELSTÜCK 20:1CONTRA-ÂNGULO PARA IMPLANTOLOGIA 20:1
10400X - 10400XL - 10400XLED10401X - 10401XL - 10401XLED10403X - 10403XL - 10403XLED
NOTICE D’INSTRUCTIONINSTRUCTIONS FOR USE
NOTA INFORMATIVA DE INSTRUCCIÓNFOGLIO D’ISTRUZIONI
GEBRAUCHSANWEISUNGINSTRUÇÕES DE USO
anthogyr2237, Avenue André Lasquin
74700 SallanchesFRANCE
Tel +33 (0)4 50 58 02 37Fax +33 (0)4 50 93 78 60
www.anthogyr.com
Tel SAV: +33 (0)4 50 58 50 [email protected]
Made in France NOT 10400– 2013-09
M

19
In the event of prolonged non use of the device, do not leave it connected to the motor. Risk of damaging the motor.
v.5 – connection/disconnection of rotary instrument
For all handling of rotary instruments, wear protective gloves. Risk of cutting and contamination.
Only use rotary instruments in good condition. Risk of necrosis.
As the maxi torque given by this Md is very high, this may damage the tool’s driving part. In any case, the compatibility of your instruments has to be checked. Please follow the manufacturer’s instructions and limit the torque of the unit if necessary. We strongly advise that you use instruments having a shaft made out of hardened steel.
Check regularly that the push button is set properly by applying a slight unscrewing torque.
Insertion of rotary instrument• Apply pressure using your thumb to the centre of the push button and simultaneously insert the rotary tool up to the stop in the claw of the MD.• Release the thumb pressure on the push button (fig 6)
For tool replacement: check the good condition of the rotary tool with light axial traction.
v.6 – Adjustment of the depth stop
It is imperative that the depth stop is adjusted outside of the patient’s mouth.
To adjust the depth stop: move the sliding block backward (1) and move the stop to the required position (2). Loosen the sliding block.• After each adjustment, check the the stop has been correctly placed using the ruler.• Before each use, exercise a slight traction on the stop in order to verify that it is correctly installed.• Do not use the depth stop for tapping: the bone may be damaged in the event of late stop of the driving motor.
The specific depth stops marked AX may only be used for placing Axiom® implants with the Axiom® guided surgery. Verify the position of the depth stop properly in relation to the instrument reference lines.
vI.hYGIEnE And MAInTEnAncE
Sterilisation of medical devices must be done by properly trained and protected staff, in compliance with current regulations. The sterilisation protocol must be appropriate to the infectious risk.
Wear appropriate protective clothing: risk of infection and injury.
D
xr
E
E
fRA
nçA
ISEn
GlI
ShES
PAn
Ol
ITA
lIA
nO
dEU
Tch
POR
TUGU
êS
20
Only use products for the maintenance of medico-surgical equipment compatible with stainless steel (no chlorinated content). Forbid antiseptics that are intended for use on skin and mucous. Forbid products containing aldehyde, alcohol or other products likely to bind proteins.
For each product used: refer to the manufacturer’s instructions. Comply with the concentrations, exposure durations, and life span of products. Do not mix the products and follow the instructions for
their disposal.
Spraying nozzles Ref. 10476 (the green ones) cannot be sterilised: change them after each surgery.
After patient care, the Md should be processed within the next two hours.
vI.1 – Preparation of Md in the place of use
To be done immediately after surgery:• Disconnect the Md from the motor,• Remove the rotary tool (see § v.6),• Remove the largest organic contaminants with disinfectant wipes.
vI.2 – Preparation for sterilisation
disassembly of Md (fig 1):• Remove the rotary instrument,• Disconnect the Md from the motor,• Remove the rotary instrument and the spraying nozzle.• Pivot the F lever up to the stop (indifferently towards the right or towards the left),• Pull the A head,• Remove the collar cartridge D.
vI.2.1 – Manual preparation for sterilisation
cleaning of irrigation pipe:Carefully clean the irrigation pipe and remove any impurities and deposits from it using the caustic cleaner spray.
Risk of injury: use protective glasses.
by brushing:• Brush each part under running water with a soft brush.
Lighting lens (LED or Fibre optic):• Absolutely avoid all scratches to the LED or the fibre optic,
• Wipe a disinfectant wipe over each of the Md’s sub-units,• Or Spray disinfectant on the Md and wipe with a clean cloth.
E
d b
D
W
21
Or: by Ultrasound• Use a low frequency ultrasound tank (25 to 50 kHz) and a detergent-disinfectant product compatible with this process and with the Md,
• Friction of parts between them or with the tank can cause appearance defects,
• Install light input/output protections on the body (fig 7) to protect the fronts of the fibre optic or the emitting surface of the LED,• Immerse the components.
Rinsing and drying:• Empty the spray pipe (fig 4).• Rinse well5,then dry each part.
vI.2.2 - Automatic preparation for sterilisation
• Only in a washing and disinfecting machine, appropriate for the treatment of this type of Md. Follow the manufacturer’s instructions for the device.
• If the device is not equipped with pipes for contra angles / handpieces, then disassemble the Md (see § V.2) and immobilise each part. Otherwise, put the Md mounted on the pipe.• The disinfection thermo cycle must be at least 10 minutes at 93°C (203°F).
• Check there is no residue and that all the parts of the Md are completely dry at the end of the cycle.• If the washing and disinfecting machine is near the place of use, it is possible to also do step vI.1.
Re-assembly of Md:Only assemble parts with the same serial number6.• Attach the collar cartridge D to A head (only one direction possible) until it completely plates (turn the cog until connection if required),• Insert the head – collar cartridge unit in the G sleeve (connect a clean tool in the head and turn it slightly so that the cog connects),• Bring the F lever to the central position, until ratcheting. Make sure that the depth stop system is in the right position.
Systematically check the condition of the front part by applying axial traction.
vI.3 - lubrication
Follow the spray lubricant manufacturer’s instructions.
Wear appropriate protective clothing (splashes, etc.).Keep away from all sources of heat or ignition. In particular: do not smoke. Risk of inflammation.
5 Temperature < 38°C, distilled water is recommended instead of running water if this has too much chlorine (cf. FD98-135 standard).6 Exception : If the After-Sales Service has to replace a part, the serial number may be different.
D
D
e
x
E
E
fRA
nçA
ISEn
GlI
ShES
PAn
Ol
ITA
lIA
nO
dEU
Tch
POR
TUGU
êS

22
After cleaning and before each sterilisation (once a day minimum):• Remove the rotary instrument,• Insert the tip to the back of the Md (fig 8),• Cover the head of the Md with a soft cloth or paper or a wipe.• Point the head towards the bottom,• Spray several times by firmly holding the instrument,• Wipe excess oil with a cloth or a wipe.
vI.4 – Operational test
• Connect the Md to a micro-motor, point the head towards the bottom.• Turn the micro-motor on at low speed for 30s. Gradually bring up to maximum speed.• Wipe excess oil with a cloth or a wipe
If you notice overheating, irregularities, vibrations, abnormal noises when using the Md, immediately contact your AS.
vI.5 - Sterilisation
• The instruments are to be sterilised before first use and after each use.• Only sterilise cleaned, lubricated and tested instruments.• We recommend sterilisation that complies with the EN 13060 standard, class B. All other methods are forbidden.• Independently put each Md in a sterilisation sachet that complies with current standards and the size of the Md.• Comply with the space between the sachets and do not overload the autoclave.
• These Mds and their accessories (apart from accessories with the logo W which are single use) must be sterilised at 135°C for 18 minutes minimum (sterilisation time).
• Check that the device is completely dry at the end of the cycle.
vI.6 - Storage
Keep the Md in a sterilisation sachet in a clean and dry place.
vII.REPAIR
In the event of breakdown, please contact your approved distributor or our after-sales department directly.
Repairs must only be carried out by an approved repairer or by Anthogyr After Sales Department, only with Anthogyr original replacement parts.E
g
x
x
D

MONT BLANC®
CONTRE-ANGLE D’IMPLANTOLOGIE 20:1IMPLANTOLOGY CONTRA-ANGLE 20:1
CONTRAANGULO PARA IMPLANTOLOGIA 20:1CONTRANGOLO D’IMPLANTOLOGIA 20:1
IMPLANTOLOGIE WINKELSTÜCK 20:1CONTRA-ÂNGULO PARA IMPLANTOLOGIA 20:1
10400X - 10400XL - 10400XLED10401X - 10401XL - 10401XLED10403X - 10403XL - 10403XLED
NOTICE D’INSTRUCTIONINSTRUCTIONS FOR USE
NOTA INFORMATIVA DE INSTRUCCIÓNFOGLIO D’ISTRUZIONI
GEBRAUCHSANWEISUNGINSTRUÇÕES DE USO
anthogyr2237, Avenue André Lasquin
74700 SallanchesFRANCE
Tel +33 (0)4 50 58 02 37Fax +33 (0)4 50 93 78 60
www.anthogyr.com
Tel SAV: +33 (0)4 50 58 50 [email protected]
Made in France NOT 10400– 2013-09
M