Nordic eye Contrast HD · Contrast is a standalone magnifying camera system to be used by people...
23
Nordic eye Contrast HD Nordiceye Contrast V11115‐1
Transcript of Nordic eye Contrast HD · Contrast is a standalone magnifying camera system to be used by people...

Nordic eye
Contrast HD
Nordiceye Contrast V11115‐1

Congratulation to your choice of magnifying aid, we hope this will help you in your everyday life.
Contents
Introduction ……………………………………….page 2
System information……………………………… page 3
Unpacking and assembly………………………..page 4
Functions and setting……………………….……page 10
Safety information………………………………...page 14
Maintenance……………………………………....page 15
Technical data…………………………………….page 17
1

Introduction to Contrast.
Contrast is a standalone magnifying camera system to be used by people with low vision.
The camera system has functions such as Autofocus, many false color options, High contrast mode, can be mixed with PC and also with Distance camera if needed.
To a Contrast it is possible to choose any monitor that has a DVI, VGA or HDMI input.
When connecting to VGA monitor an adapter is needed (Included) also when using a monitor with HDMI an adapter is needed (Not included).
2

System Information Contrast is a stand-alone camera system that can create an ergonomic environment in school, at home or in a working situation.
Assembly.
Read more under assembly.
Individual assembly.
Contrast can easily be assembled to suit different people with different needs or length.
Accessories.
To Contrast there is a lot of options to make the everyday life better: arms for monitors, table, etc.
Contact your supplier.
Warranty.
Contrast delivered with 3 years warranty.
TCO .
To Contrast we suggest to use monitors that have the TCO-03 labeling. This labeling tells about the radiation.
More information about TCO can be found at www.tcodevelopment.com
3

Part Name Part No#
Camera unit 40110010
Remote control 9540003
Powersupply 9540002
Contrast is delivered with the following items.
4
Unpacking and assembly

XY table
9540001
4
Included are also a manual, cables and adapters.
At arrival, check that the box has no visible damage.
If so, report to transport company.
Packaging.
Packing Materials (EPP)
Carton (CORRUGATED PAPER)
Wrap around bag ( LDPE4)
Contact your community to recycle the packaging material in a proper way.
5

Installation It is important that you sit properly at the working table. A comfortable chair is to prefer to be able to avoid stress on neck and shoulders and to make it possible to work during a longer time. Notice the points below that can be useful to think about.
• The chair shall be near the working table. Preferable is a chair that can be adjusted in many ways.
• The chair seat shall be adjusted so that the legs are in a angle and the feet shall be resting on the floor.
• The Desk shall be in a height so that the underarms can rest horizontally.
• The Monitor shall be in front of the eyes and a height and angle under eyesight.
• Shade of daylight, lights in roof, windows can give reflexes into the screen or direct in the eyes.
• Alternate positions, if possible from sitting to standing.
6

7
Assembly
Place the camera unit on proper location.
Place the XY table if you prefer to use it at the same location as the camera unit.
Connect the monitor cable from the monitor to the camera unit.
Connect the power cable from power supply to a power outlet and connect the dc cable from the power supply to power connector at the camera unit.
You can now start the system by pressing the button at the top of the camera unit.

Remote control
8
Functions and settings
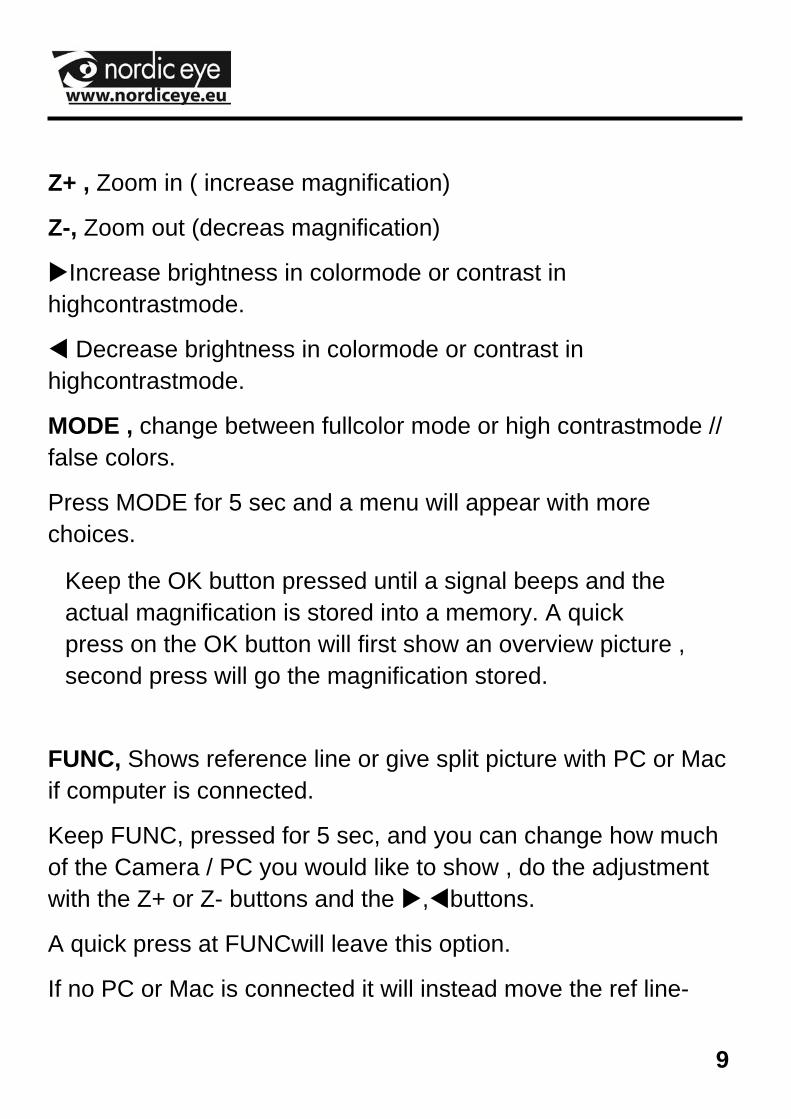
Z+ , Zoom in ( increase magnification)
Z-, Zoom out (decreas magnification)
Increase brightness in colormode or contrast in highcontrastmode.
Decrease brightness in colormode or contrast in highcontrastmode.
MODE , change between fullcolor mode or high contrastmode // false colors.
Press MODE for 5 sec and a menu will appear with more choices.
FUNC, Shows reference line or give split picture with PC or Mac if computer is connected.
Keep FUNC, pressed for 5 sec, and you can change how much of the Camera / PC you would like to show , do the adjustment with the Z+ or Z- buttons and the , buttons.
A quick press at FUNCwill leave this option.
If no PC or Mac is connected it will instead move the ref line-
9
Keep the OK button pressed until a signal beeps and the actual magnification is stored into a memory. A quick press on the OK button will first show an overview picture , second press will go the magnification stored.

Menusystem
Keep the MODE button pressed to get in to the menu system. To navigate use Z+,Z-, , .
To confirm a choice or function press OK.
To leave the menu press MODE again.
3 of the menus are important for the daily using. It is RefLine, Split choice settings and False colors. The other menus are mainly for service to qualified personnel.
10

Then press MODE again to leave the menu options.
11
Settings , split camera / PC
When a PC is connected to the camera system there is a choice in the menu to choose what positions that should be visible when pressing the MODE button. Press MODE button for 5 sec, move in the menu by pressing Z+ or Z-. Go to the alternative “split choice” and press OK.
The following Picture appears on the screen.

False colors
At delivery the system has full color , white on black and black on white as default mode.
Full color is always available.
The following color combinations can be stored to the mode button.
12

RefLine (Reference line)
Choose the menu Ref line and the following menu will appear.
With the OK button you can choose to activate or deactivate the refline.
When the ref line is activated it is also possible to change the lines position and ref line color.
Press the button Z+ or Z – and the position will be changed.
To go back to the main menu press ok.
Reference line can be showed with or without PC.
All choices made through the menus will be stored to the unit.
13
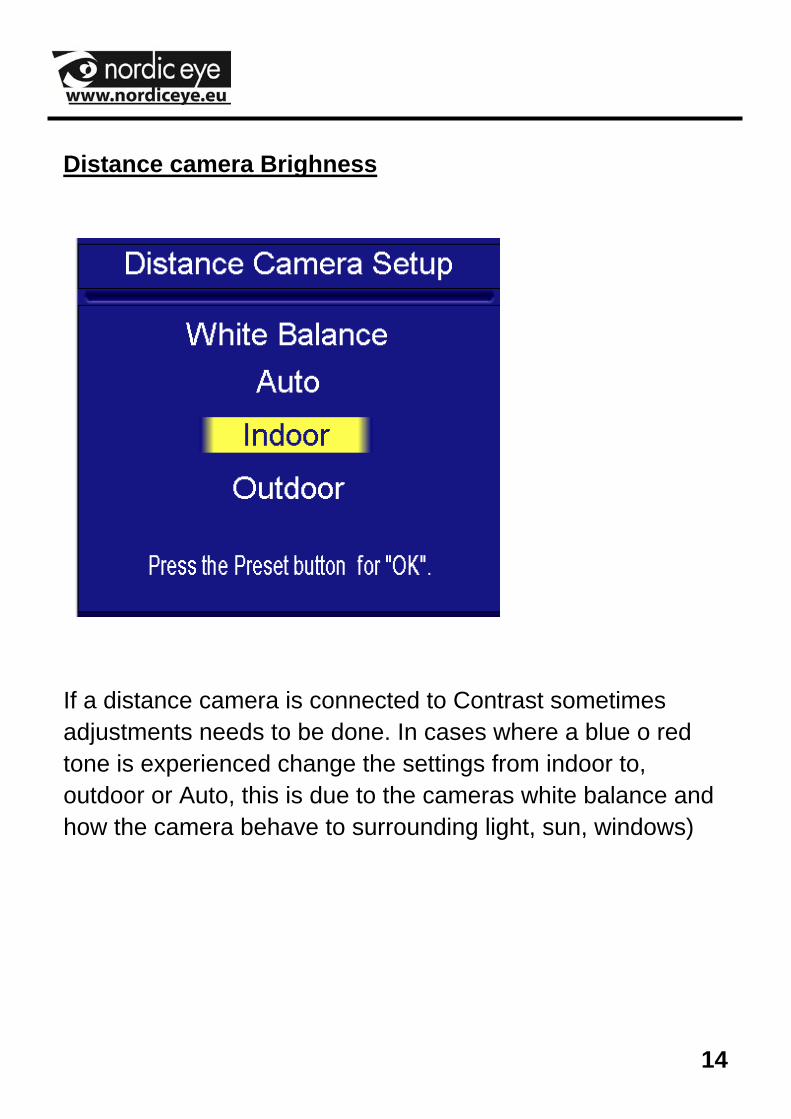
Distance camera Brighness
If a distance camera is connected to Contrast sometimes adjustments needs to be done. In cases where a blue o red tone is experienced change the settings from indoor to, outdoor or Auto, this is due to the cameras white balance and how the camera behave to surrounding light, sun, windows)
14

Lever to the left, XY table is locked in both X and Y direction.
Lever centered XY is locked in X direction.
Lever to the right, free movement.
XY
15

Art nr Name 9531006 Joystick
32000000 32110001
Distance camera SD Distance camera HD
Picture shows distance
camera SD
Distance camera
The 3 following pages will inform regarding when a distance camera is attached to the Contrast.
There are 2 different distance cameras, Standard (SD) and High Definition (HD).
The functions for the system are the same, difference in format and performance.
In picture above the cable between camera pole and the contrast are not illustrated.
To the HD camera an extra power supply is needed.
16

Setup
Place the distance camera to the table and tighten the table clamp.
Connect the cable to the pole of the distance camera and the other end to CAM2 on the Contrast. If a HD distance camera is used, connect the power supply to the pole.
Connect the joystick to JOY on the Contrast.
17

Change speed on the cameras movement. Memory, stores
positions and magnification.
Recall position and magnification
Up, Down, Left , Right.
Split between reading and distance camera when no computer is connected
Also handles the change between the 2 cameras when a computer is connected.
Zoom.
Increase or decrease magnification.
Memory
Save: Hold A,B or C until a beep indicates that magnification and position is saved
Recall: Press A,B or C, camera will go to the stored posistion and magnification.
Other functions ( Press until a beep sounds).
A-C, Change Up/Down to Down / Up.
A-B, Change Left / Right to Right / Left.
B-C, Change light compensation when looking to a windows etc.
18

Service Instructions.
Maintenance and service.
Only perform the servicing and maintenance tasks specified in this manual. All other service, change and service must be performed by qualified personnel. Always contact a qualified service personnel or Nordiceye if you are unsure.
Cleaning. Turn off the system and unplug the power cord. Do not use cleaning methods that can cause moisture in the electronics. All parts that the equipment consists can be wiped with a damp cloth with mild soapy water or glass clean. The equipment should be treated the same way as computer equipment.
If the product is reconditioned, it should be reviewed. Clean as above. Contact the supplier or nordiceye directly.
Troubleshooting
No picture.
Make sure the system is switched on and the power cord is in the socket. Possibly check the voltage in the mains, e.g. an ordinary bulb.
If LED light on top is lightning blue, the light is on from the camera, and the screen is black. Check the cable to the monitor and that the monitor is on.
19

Safety information
• Never connect the product with power if it has been exposed to water, rain or other liquids. Contact your supplier before using the product.
• Place the power cord in such a way that no pinching occurs.
• If the product is moved from cold to warm, condensation may occur. Wait about 30 minutes before using the product.
• When moving the xy table from one place to another lock the movement with the lever.
• When the xy table is at its maximum position it, should not be overloaded so the product can tip over and cause injury.
• When placing the product choose a stable table with at least 45 cm depth.
• If no normal function can be set after troubleshooting, turn power off and contact your local supplier.
• Always turn the power off when not in use. • If in doubt, always contact your supplier. • The unpacking of this product is enclosed in a plastic bag.
Keep the bag out of reach of children to prevent suffocation.
• Never expose your product to rain or moisture. • Inside there are parts that only qualified personnel may
change. Refer all service to qualified personnel.
20

Household users should contact the dealer who sold the product or their local government for details of where and how they can recycle in an environmentally manner
Contact us Nordic eye AB Telefon: 0470 72 98 88
Illervägen 15 Fax: 0470 74 95 80
352 45 Växjö mail: [email protected]
Sweden www.nordiceye.eu
Register your product by sending a mail to [email protected]
21

Technical data Contrast HD
Article number………………………………………. 40110010
Magnification 20” monitor…………………………..1.7-65x
Focus………………………………………………...Autofocus
Focus area……………………………………………80 mm
Free working distance under camera………………280mm
Resolution …………..Depends on monitor Max 1920x1200
Frame rate…………………………………….………...60 Hz
Output…………………………………………DVI-I Single link
Effect……………………………………………………….29 W
Effect stand by……………………………………………..4 W
Power…………………………………………….100-240 VAC
Lightning …………………………..…………………..LED
Weight ……… ……………………………….………...4,5 Kg
EMC:
Product is tested according to EMC immunity and emission. 93/42/EEG
22