Nokia 303 User Guide
50
Nokia 303 User Guide Issue 1.1
Transcript of Nokia 303 User Guide
Nokia 303 User Guide
Issue 1.1

Contents
Safety 4
Get started 5Keys and parts 5Write with the keyboard 5Insert a SIM card and battery 6Insert a memory card 8Charge the battery 9Attach a strap 10Switch the phone on or off 10Antenna locations 11
Basic use 11Access codes 11Lock the keys and screen 12Touch screen actions 12Indicators 14Copy contacts or pictures from yourold phone 14Change the volume of a call, song, orvideo 15
Calls 15Make a call 15Call the last dialled number 15View your missed calls 15About internet calls 16Make an internet call 16
Contacts 17Save a name and phone number 17Use speed dial 17
Write text 18Text input features 18Write using the keyboard 18Predictive text input 19
Messaging 19
Send a message 19View a conversation 20Messaging key 20Listen to voice messages 20Send an audio message 21
Personalise your phone 21About the home screen 21Personalise the home screen 21Personalise your phone tones 22
Time management 23Change the time and date 23Set an alarm 23Add an appointment 23
Connectivity 24Bluetooth 24USB data cable 25Connect to a WLAN 26
Music and audio 27FM radio 27Media player 29Media key 29
Pictures and videos 30Take a picture 30Record a video 30Send a picture or video 30
Web 31About the web browser 31Browse the web 31Fit a web page to your phone display 32Add a bookmark 32Clear your browsing history 33
Keep in touch with your onlinefriends 33About Social 33
2 Contents

Mail and chat 33About Mail 33Send a mail 34Read and reply to mail 34About Chat 34Chat with your friends 34
Nokia Maps 35About Maps 35Download maps 35View your current location on themap 35Find a place 36Share your location or a place 36Create a walking route 37
Nokia Services 37Availability and costs of NokiaServices 37Access Nokia Services 37
Find help 37Support 37Subscribe to the Tips and Offersservice 38Keep your phone up to date 38
Protect the environment 40Save energy 40Recycle 41
Product and safety information 41
Index 48
Contents 3

Safety
Read these simple guidelines. Not following them may be dangerous or illegal. Forfurther information, read the complete user guide.
SWITCH OFF IN RESTRICTED AREASSwitch the device off when mobile phone use is not allowed or when it maycause interference or danger, for example, in aircraft, in hospitals or nearmedical equipment, fuel, chemicals, or blasting areas. Obey all instructionsin restricted areas.
ROAD SAFETY COMES FIRSTObey all local laws. Always keep your hands free to operate the vehicle whiledriving. Your first consideration while driving should be road safety.
INTERFERENCEAll wireless devices may be susceptible to interference, which could affectperformance.
QUALIFIED SERVICEOnly qualified personnel may install or repair this product.
KEEP YOUR DEVICE DRYYour device is not water-resistant. Keep it dry.
PROTECT YOUR HEARINGListen to a headset at a moderate level, and do not hold the device nearyour ear when the loudspeaker is in use.
4 Safety

Get started
Keys and parts
1 Earpiece2 Touch screen3 Messaging key4 Call key5 Keyboard6 Volume up/Zoom in key7 Volume down/Zoom out key8 Key lock button9 Media key10 End/Power key11 Nokia AV connector (3.5 mm)12 Micro-USB connector13 Charger connector14 Camera lens. Before using the camera, remove the protective tape from the lens.15 Wrist strap hole16 Back cover release latch17 Loudspeaker
Write with the keyboardYour phone has a full keyboard.
1 Function key. To insert special characters printed at the top of keys, press thefunction key, and then press the corresponding key. To enter several special
Get started 5

characters in a row, press the function key twice. To return to normal mode, pressthe function key.
2 Shift key. To switch between the upper and lower case modes, press the shiftkey twice. To enter a single upper case letter in lower case mode, or a single lowercase letter in upper case mode, press the shift key, and then press the desiredalphabet key.
3 Sym key. To insert special characters not shown on the keyboard, press thesym key, and select the desired character.
4 Backspace key. To delete a character, press the backspace key. To deleteseveral characters, press and hold the backspace key.
5 Enter key. To move the cursor to the next row or text input field, press theenter key. Additional functions are based on the current context. For example, inthe web address field of the web browser, the enter key acts as the Go icon.
6 Ctrl key
Insert a variation of a letterYou can insert, for example, letters with accents. To insert á, press and hold the symkey, and then press A repeatedly, until the desired letter is displayed. The order andavailability of letters depends on the selected writing language.
Insert a SIM card and battery
Note: Switch the device off and disconnect the charger and any other devicebefore removing any covers. Avoid touching electronic components while changingany covers. Always store and use the device with any covers attached.
Important: This device is designed to be used with a standard SIM card (see figure)only. Use of incompatible SIM cards may damage the card or the device, and maycorrupt data stored on the card. Please consult your mobile operator for the use ofa SIM card that has a mini-UICC cutout.
This phone is intended for use with a BP-3L battery. Always use original Nokiabatteries.
The SIM card and its contacts can be easily damaged by scratches or bending, so becareful when handling, inserting, or removing the card.
1 Switch the phone off.2 Pull the back cover release latch towards the bottom of the phone, and remove
the cover.
6 Get started

3 Remove the battery, if inserted.
4 Lift the SIM card holder cover, make sure the contact area of the SIM card is facingdown, and place the card in the holder.
5 Lower the SIM card holder cover.6 Line up the battery contacts, and insert the battery.
Get started 7
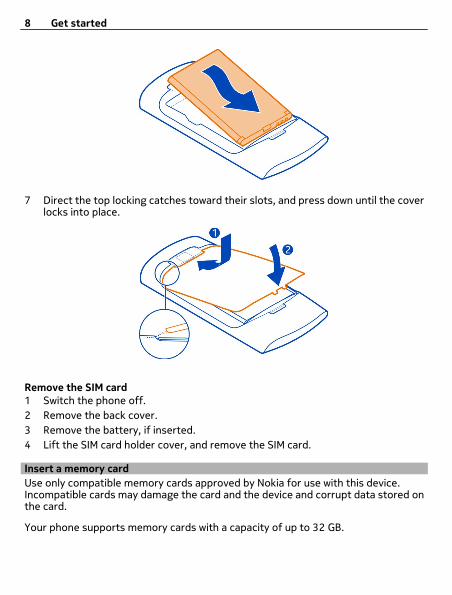
7 Direct the top locking catches toward their slots, and press down until the coverlocks into place.
Remove the SIM card1 Switch the phone off.2 Remove the back cover.3 Remove the battery, if inserted.4 Lift the SIM card holder cover, and remove the SIM card.
Insert a memory cardUse only compatible memory cards approved by Nokia for use with this device.Incompatible cards may damage the card and the device and corrupt data stored onthe card.
Your phone supports memory cards with a capacity of up to 32 GB.
8 Get started

1 Switch the phone off, and remove the back cover and battery.2 To release the memory card holder, slide the holder in the direction indicated by
the arrow on the holder. Lift the memory card holder (1).3 Make sure the contact area of the memory card would face down, and insert the
card (2).4 Lower the memory card holder (3).5 To lock the memory card holder, slide the holder to its original position (4).
Remove the memory card1 Switch the phone off.2 Remove the back cover and battery.3 To release the memory card holder, slide the holder in the direction indicated by
the arrow on the holder. Open the memory card holder, and remove the memorycard.
Charge the batteryYour battery has been partially charged at the factory, but you may need to rechargeit before you can switch on your phone for the first time. If the phone indicates a lowcharge, do the following:
Get started 9

1 Connect the charger to a wall outlet.2 Connect the charger to the phone.3 When the phone indicates a full charge, disconnect the charger from the phone,
then from the wall outlet.
You do not need to charge the battery for a specific length of time, and you can usethe phone while it is charging.
If the battery is completely discharged, it may take several minutes before thecharging indicator is displayed or before any calls can be made.
If the battery has not been used for a long time, to begin charging, you may need toconnect the charger, then disconnect and reconnect it.
Attach a strapRemove the back cover, thread the strap through the hole, and loop the strap aroundthe wrist strap peg.
The strap may be available separately.
Switch the phone on or offPress and hold the power key until the phone vibrates.
10 Get started

You may be prompted to get the configuration settings from your network serviceprovider. For more information on this network service, contact your network serviceprovider.
Antenna locations
The antenna area is highlighted.
Avoid touching the antenna area while the antenna is in use. Contact with antennasaffects the communication quality and may reduce battery life due to higher powerlevel during operation.
Basic use
Access codes
PIN or PIN2 code
(4-8 digits)
These protect your SIM card against unauthorised use or arerequired to access some features.
You can set your phone to ask for the PIN code when you switchit on.
If not supplied with your SIM card or you forget the codes,contact your service provider.
If you enter the code incorrectly three times in a row, you needto unblock the code with the PUK or PUK2 code.
PUK or PUK2 code
(8 digits)
These are required to unblock a PIN or PIN2 code.
If not supplied with your SIM card, contact your serviceprovider.
Basic use 11

IMEI number
(15 digits)
This is used to identify valid phones in the network. Thenumber can also be used to block, for example, stolen phones.
To view your IMEI number, dial *#06#.
Lock code (securitycode)
(min. 5 digits)
This helps you protect your phone against unauthorised use.
You can set your phone to ask for the lock code that youdefine. The default lock code is 12345.
Keep the code secret and in a safe place, separate from yourphone.
If you forget the code and your phone is locked, your phonewill require service. Additional charges may apply, and all thepersonal data in your phone may be deleted.
For more information, contact a Nokia Care Point or yourphone dealer.
Lock the keys and screen To avoid accidentally making a call when your phone is in your pocket or bag, lock thekeys and screen of your phone.
Press the key lock button.
Unlock the keys and screenPress the key lock button, and select Unlock.
Touch screen actionsTo interact with the touch screen user interface, tap or tap and hold the touch screen.
Open an application or other screen elementTap the application or element.
Access item-specific optionsTap and hold the item. A pop-up menu with available options opens.
12 Basic use

Scroll in a list or menuPlace your finger on the screen, slide it quickly up or down the screen, and then liftyour finger. The content of the screen scrolls with the speed and direction it had atthe moment of release. To select an item from a scrolling list and to stop themovement, tap the item.
SwipePlace a finger on the screen, and steadily slide your finger in the desired direction.
Basic use 13

For example, when you are viewing a picture, to view the next picture, swipe left. Toquickly browse through your pictures, swipe the screen quickly, and then scroll leftor right through the thumbnails.
Indicators
You have unread messages.You have unsent, cancelled, or failed messages.The keypad is locked.The phone does not ring for incoming calls or text messages.An alarm is set.
or The phone is registered to the GPRS or EGPRS network. or A GPRS or EGPRS connection is open. or The GPRS or EGPRS connection is suspended (on hold).
The phone is registered to a 3G (UMTS) network. or The phone is registered to a 3.5G (HSDPA) network.
Bluetooth is activated.WLAN is activated.If you have two phone lines, the second line is in use.All incoming calls are diverted to another number.The currently active profile is timed.A headset is connected to the phone.The phone is connected to another device, using a USB data cable.
Copy contacts or pictures from your old phoneWant to copy your content from your previous compatible Nokia phone and startusing your new phone quickly? You can copy, for example, contacts, calendar entries,and pictures to your new phone, free of charge.
1 Activate Bluetooth in both phones.
14 Basic use
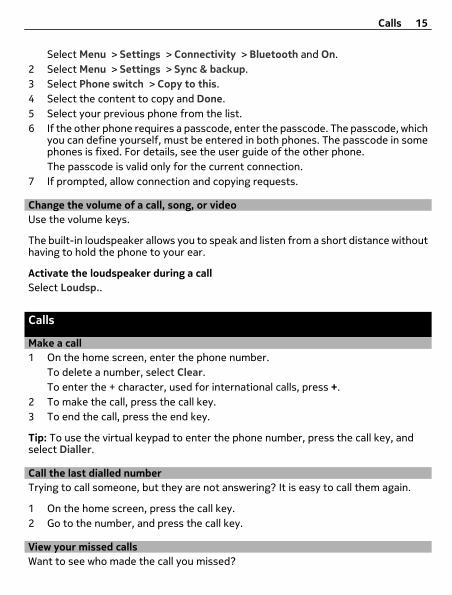
Select Menu > Settings > Connectivity > Bluetooth and On.2 Select Menu > Settings > Sync & backup.3 Select Phone switch > Copy to this.4 Select the content to copy and Done.5 Select your previous phone from the list.6 If the other phone requires a passcode, enter the passcode. The passcode, which
you can define yourself, must be entered in both phones. The passcode in somephones is fixed. For details, see the user guide of the other phone.The passcode is valid only for the current connection.
7 If prompted, allow connection and copying requests.
Change the volume of a call, song, or videoUse the volume keys.
The built-in loudspeaker allows you to speak and listen from a short distance withouthaving to hold the phone to your ear.
Activate the loudspeaker during a callSelect Loudsp..
Calls
Make a call1 On the home screen, enter the phone number.
To delete a number, select Clear.To enter the + character, used for international calls, press +.
2 To make the call, press the call key.3 To end the call, press the end key.
Tip: To use the virtual keypad to enter the phone number, press the call key, andselect Dialler.
Call the last dialled numberTrying to call someone, but they are not answering? It is easy to call them again.
1 On the home screen, press the call key.2 Go to the number, and press the call key.
View your missed callsWant to see who made the call you missed?
Calls 15
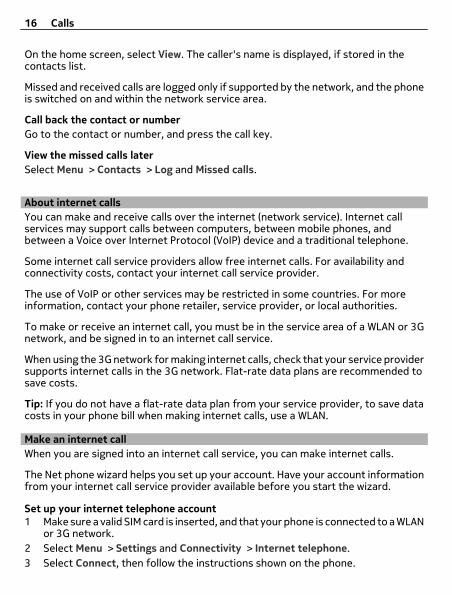
On the home screen, select View. The caller's name is displayed, if stored in thecontacts list.
Missed and received calls are logged only if supported by the network, and the phoneis switched on and within the network service area.
Call back the contact or numberGo to the contact or number, and press the call key.
View the missed calls laterSelect Menu > Contacts > Log and Missed calls.
About internet callsYou can make and receive calls over the internet (network service). Internet callservices may support calls between computers, between mobile phones, andbetween a Voice over Internet Protocol (VoIP) device and a traditional telephone.
Some internet call service providers allow free internet calls. For availability andconnectivity costs, contact your internet call service provider.
The use of VoIP or other services may be restricted in some countries. For moreinformation, contact your phone retailer, service provider, or local authorities.
To make or receive an internet call, you must be in the service area of a WLAN or 3Gnetwork, and be signed in to an internet call service.
When using the 3G network for making internet calls, check that your service providersupports internet calls in the 3G network. Flat-rate data plans are recommended tosave costs.
Tip: If you do not have a flat-rate data plan from your service provider, to save datacosts in your phone bill when making internet calls, use a WLAN.
Make an internet callWhen you are signed into an internet call service, you can make internet calls.
The Net phone wizard helps you set up your account. Have your account informationfrom your internet call service provider available before you start the wizard.
Set up your internet telephone account1 Make sure a valid SIM card is inserted, and that your phone is connected to a WLAN
or 3G network.2 Select Menu > Settings and Connectivity > Internet telephone.3 Select Connect, then follow the instructions shown on the phone.
16 Calls

When the wizard has finished, your account is displayed in the accounts list.
If the internet telephone settings do not work, contact your service provider.
Call a contact1 Select Menu > Contacts and Names.2 Select the contact and Internet call.
Call a phone numberType in the phone number, then select Options > Internet call.
For emergency calls, only the cellular network is used.
Contacts
Save a name and phone numberSelect Menu > Contacts.
Select Add new, and enter the number and name.
Add or edit the details of a contact1 Select Names and a contact.2 Select Options > Add detail.
Tip: To add a ringtone or picture for a contact, select the contact and Options > Adddetail > Multimedia.
Use speed dialYou can quickly call your friends and family when you assign your most-used phonenumbers to the number keys of your phone.
Select Menu > Contacts > Speed dials.
Assign a phone number to a number key1 Select a number key. 1 is reserved for the voice mailbox.2 Enter a number or search for a contact.
Remove or change a phone number assigned to a number keySelect and hold the number key, and from the pop-up menu, select Delete orChange.
Make a callOn the home screen, press and hold a number key.
Contacts 17
Deactivate speed diallingSelect Menu > Settings and Call > Speed dialling > Off.
Write text
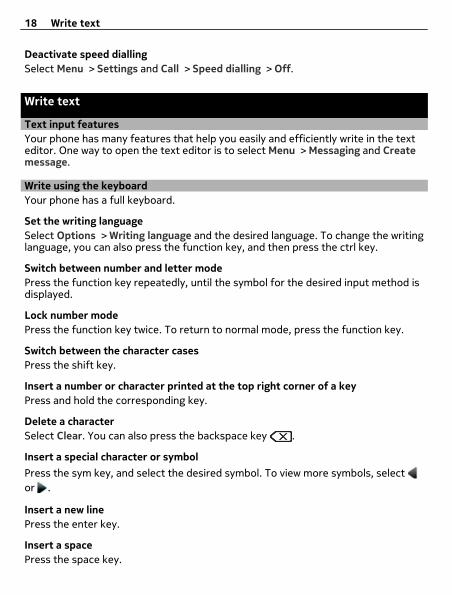
Text input featuresYour phone has many features that help you easily and efficiently write in the texteditor. One way to open the text editor is to select Menu > Messaging and Createmessage.
Write using the keyboardYour phone has a full keyboard.
Set the writing languageSelect Options > Writing language and the desired language. To change the writinglanguage, you can also press the function key, and then press the ctrl key.
Switch between number and letter modePress the function key repeatedly, until the symbol for the desired input method isdisplayed.
Lock number modePress the function key twice. To return to normal mode, press the function key.
Switch between the character casesPress the shift key.
Insert a number or character printed at the top right corner of a keyPress and hold the corresponding key.
Delete a characterSelect Clear. You can also press the backspace key .
Insert a special character or symbolPress the sym key, and select the desired symbol. To view more symbols, select or .
Insert a new linePress the enter key.
Insert a spacePress the space key.
18 Write text
Copy or cut textPress and hold the shift key, and scroll to highlight a word, phrase, or section of text.Press and hold the ctrl key, and then press C (copy) or X (cut).
Paste textGo to the desired location, press and hold the ctrl key, and then press V.
Predictive text inputPredictive text input is based on a built-in dictionary. Not all languages are supported.
Activate or deactivate predictive text inputSelect Options > Prediction sett. > On or Off.
Switch between predictive and traditional text inputPress and hold the ctrl key, and then press the space key.You can also select and hold Options.
Write text with predictive text input1 Start writing a word, using the character keys. Your phone suggests possible
words.2 To confirm a word, press the space key.
If the word is not correct, scroll through the list of suggested words, and selectthe desired word.
3 Start writing the next word.
Messaging
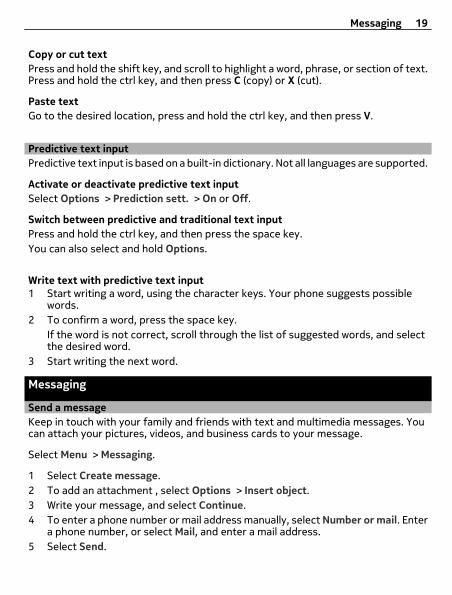
Send a messageKeep in touch with your family and friends with text and multimedia messages. Youcan attach your pictures, videos, and business cards to your message.
Select Menu > Messaging.
1 Select Create message.2 To add an attachment , select Options > Insert object.3 Write your message, and select Continue.4 To enter a phone number or mail address manually, select Number or mail. Enter
a phone number, or select Mail, and enter a mail address.5 Select Send.
Messaging 19

Tip: To insert a special character or smiley, select Options > Insert symbol.
Sending a message with an attachment may be more expensive than sending a normaltext message. For more information, contact your service provider.
You can send text messages that are longer than the character limit for a singlemessage. Longer messages are sent as two or more messages. Your service providermay charge accordingly.
Characters with accents, other marks, or some language options, take more space,limiting the number of characters that can be sent in a single message.
If the item you insert in a multimedia message is too large for the network, the devicemay automatically reduce the size.
Only compatible devices can receive and display multimedia messages. Messagesmay look different in different devices.
View a conversationYou can see the messages you have sent to and received from a particular contactfrom a single view, and continue the conversation from that view.
Select Menu > Messaging.
Read a message in a conversationSelect Conversations, a conversation, and a message.
Switch to the traditional Inbox viewSelect Options > Inbox view.
Messaging keyTo write a message or check your message inbox, press the messaging key .
Listen to voice messagesWhen you can't answer, you can divert calls to your voice mailbox and listen to yourmessages later.
You may need a voice mailbox subscription. For more information on this networkservice, contact your service provider.
1 Select Menu > Messaging > Voice messages > Voice call messages and Voicemailbox no..
2 Enter your voice mailbox number, and select OK.3 To call your voice mailbox, on the home screen, press and hold 1.
20 Messaging
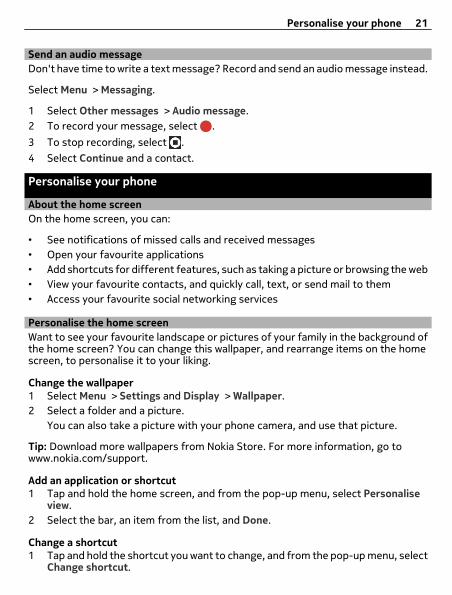
Send an audio message Don't have time to write a text message? Record and send an audio message instead.
Select Menu > Messaging.
1 Select Other messages > Audio message.2 To record your message, select .
3 To stop recording, select .
4 Select Continue and a contact.
Personalise your phone
About the home screenOn the home screen, you can:
• See notifications of missed calls and received messages• Open your favourite applications• Add shortcuts for different features, such as taking a picture or browsing the web• View your favourite contacts, and quickly call, text, or send mail to them• Access your favourite social networking services
Personalise the home screenWant to see your favourite landscape or pictures of your family in the background ofthe home screen? You can change this wallpaper, and rearrange items on the homescreen, to personalise it to your liking.
Change the wallpaper1 Select Menu > Settings and Display > Wallpaper.2 Select a folder and a picture.
You can also take a picture with your phone camera, and use that picture.
Tip: Download more wallpapers from Nokia Store. For more information, go towww.nokia.com/support.
Add an application or shortcut1 Tap and hold the home screen, and from the pop-up menu, select Personalise
view.2 Select the bar, an item from the list, and Done.
Change a shortcut1 Tap and hold the shortcut you want to change, and from the pop-up menu, select
Change shortcut.
Personalise your phone 21

2 Select an item from the list.
Tip: To increase the font size in the Messaging and Contacts applications, or in themain menu, select Menu > Settings and Display > Font size.
Personalise your phone tonesYou can personalise the ringtones and key and warning tones for each profile.
Select Menu > Settings and Tones.
Change the ringtoneSelect Ringtone:, then select a ringtone from Gallery or from your downloaded tones.
Tip: Download more ringtones from Nokia Store. To learn more about Nokia Store,go to www.nokia.com/support.
After selecting a ringtone, you can mark a section of the ringtone, and set the sectionas your ringtone. The original ringtone or sound clip is not copied or modified. Presetringtones cannot be modified, and not all formats of ringtones are supported.
Mark the section to use1 Select a ringtone. When prompted, select Yes.2 Drag the start marker to the start point.
3 Drag the end marker to the end point.
When a marker is moved to a new point, the selection plays.4 To manually play the selection, select Play.5 Select Done.
Tip: To fine-tune the start and end points of the selection, select or , and selectand hold or .
22 Personalise your phone
Change the volume of the keypad tonesSelect Keypad tones:, and drag the volume bar.
Time management
Change the time and dateSelect Menu > Settings and Date and time.
Change the time zone when travelling1 Select Date & time settings > Time zone:.2 Select the time zone of your location.3 Select Save.
The time and date are set according to the time zone. This makes sure that yourphone displays the correct sending time of received text or multimedia messages.
For example, GMT -5 denotes the time zone for New York (USA), 5 hours west ofGreenwich, London (UK).
Set an alarmYou can use your phone as an alarm clock.
On the home screen, select the clock.
1 Set the alarm time.2 Select to set the alarm.
3 To set the alarm to sound, for example, at the same time every day, selectSettings > Alarm repeat > On and the days.
Tip: To open the alarm clock, you can also select Menu > Apps > Alarm clock.
Add an appointmentSave your important appointments to your calendar as meeting entries.
Select Menu > Calendar.
1 Go to the desired date, and select Options > Add new entry.2 Select Meeting, and fill in the fields.
Time management 23

Connectivity
BluetoothAbout Bluetooth connectivitySelect Menu > Settings > Connectivity > Bluetooth.
You can connect wirelessly to other compatible devices, such as phones, computers,headsets, and car kits.
You can use the connection to send items from your phone, copy files from yourcompatible PC, and print files with a compatible printer.
Since devices with Bluetooth wireless technology communicate using radio waves,they do not need to be in direct line-of-sight. However, they must be within 10 metres(33 feet) of each other, although the connection may be subject to interference fromobstructions such as walls or from other electronic devices.
When your phone is locked, it is only possible to connect to a paired device that hasbeen set to Auto-connect.
Tip: To quickly access the Bluetooth settings, on the home screen, press and holdthe Bluetooth key .
Send a picture or other content to another device using BluetoothUse Bluetooth to send pictures, videos, business cards, and other content createdby you to your computer or a friend's compatible phone or device.
1 Select and hold the item to send, and from the pop-up menu, select Send > ViaBluetooth.
2 Select the device to connect to. If the desired device is not displayed, to searchfor it, select Options > New search. Bluetooth devices within range are displayed.
24 Connectivity

3 If the other device requires a passcode, enter the passcode. The passcode, whichyou can define yourself, must be entered in both devices. The passcode in somedevices is fixed. For details, see the user guide of the device.The passcode is valid only for the current connection.
The available options may vary.
USB data cableCopy content between your phone and a computerYou can use a USB data cable to copy your pictures and other content between yourphone and a compatible computer.
1 Use a USB data cable to connect your phone to a computer.2 Select from the following modes:
Nokia Suite — Nokia Suite is installed on your computer.Media transfer — Nokia Suite is not installed on your computer. If you want toconnect your phone to a home entertainment system or printer, use this mode.Mass storage — Nokia Suite is not installed on your computer. The phone isdisplayed as a portable device on your computer. Make sure a memory card isinserted. If you want to connect your phone to other devices, such as a home orcar stereo, use this mode.
3 To copy the content, use the file manager of the computer.To copy your contacts, music files, videos, or pictures, use Nokia Suite.
Copy a picture or other content between your phone and a USB memory stickYou can copy pictures from your phone to a compatible USB memory stick. Use thisto create backups of pictures that you take when travelling.
1 Connect a compatible USB OTG adapter cable to the micro-USB connector of yourphone.
2 Connect a memory stick to the USB OTG adapter cable.
Connectivity 25

3 Select Menu > Apps > Gallery, and select and hold a file or folder.4 Select if you want to copy or move the file or folder.5 Select the target folder.
Connect to a WLANAbout WLAN connectionsSelect Menu > Settings > Connectivity > WLAN.
Connect to a wireless local area network (WLAN) and manage your WLAN connections.
Tip: To quickly access the WLAN settings, on the home screen, press and hold theWLAN key .
Important: Use encryption to increase the security of your WLAN connection.Using encryption reduces the risk of others accessing your data.
Connect to a WLAN at homeTo help save data costs, connect to your home WLAN when you are at home and wantto browse the web on your phone.
Select Menu > Settings > Connectivity > WLAN.
Connect for the first time1 To search for your home WLAN, select Available WLANs.2 To connect, select your home WLAN.3 If the WLAN is secured , enter the password.
4 If you save your home WLAN, you do not always have to search for it in future.Select and hold the WLAN, and from the pop-up menu, select Save.
indicates a saved WLAN.
Connect to your saved home WLAN1 Select Saved WLANs.2 Select and hold your home WLAN, and from the pop-up menu, select Connect.
Disconnect from a WLANSelect and hold the connected WLAN , and from the pop-up menu, selectDisconnect.
Connect to a WLAN on the moveConnecting to a WLAN is a handy way of accessing the internet when not at home.Connect to public WLANs in public places, such as a library or internet café.
26 Connectivity

Select Menu > Settings > Connectivity > WLAN.
You need a password to connect to secured WLANs .
1 To search for available WLANs, select Available WLANs.2 Select a WLAN.3 If the WLAN is secured, enter the password.
Disconnect from a WLANSelect and hold the connected WLAN , and from the pop-up menu, selectDisconnect.
Connect to a hidden WLANSelect Menu > Settings > Connectivity > WLAN.
You can connect to a hidden WLAN, if you know the name (SSID) and password.
1 To search for available WLANs, select Available WLANs.2 Select (Hidden network).3 Enter the name (SSID) and the password.
Disconnect from a WLANSelect and hold the connected WLAN , and from the pop-up menu, selectDisconnect.
Music and audio
FM radioAbout the FM radioSelect Menu > Music > Radio.
You can listen to FM radio stations using your phone - just connect a headset, andselect a station.
To listen to the radio, you need to connect a compatible headset to the device. Theheadset acts as an antenna.
It is not possible to listen to the radio through a Bluetooth headset.
Music and audio 27

Listen to the radioConnect a compatible headset to your phone. The headset acts as an antenna.
Select Menu > Music > Radio.
Change the volumeUse the volume keys.
Close the radioPress the end key.
Set the radio to play in the backgroundSelect Options > Play in backgr..
Close the radio when it is playing in the backgroundPress and hold the end key.
Find and save radio stationsSearch for your favourite radio stations, and save them, so you can easily listen tothem later.
Select Menu > Music > Radio.
Search for the next available stationSelect and hold or .
Save a stationSelect Options > Save station.
28 Music and audio
Automatically search for radio stationsSelect Options > Search all stat.. For best results, search when outdoors or near awindow.
Switch to a saved stationSelect or .
Rename a station1 Select Options > Stations.2 Select and hold the station, and from the pop-up menu, select Rename.
Automatically switch to a frequency with better reception1 Select Options > Settings > RDS > On.2 Select Options > Settings > Auto-frequency > On.
Tip: To access a station directly from the saved station list, press the number keythat corresponds to the number of the station.
Media playerPlay a songPlay music stored in the phone memory or on the memory card.
Select Menu > Music > My music and All songs.
1 Select a song.2 To pause playing, select ; to resume, select .
Play a videoPlay videos stored in the phone memory or on the memory card.
Select Menu > Photos > My videos.
1 Select a video.2 To pause playback, select ; to resume, select .
Media keyTo open either the media player or the radio, depending on which was last used, pressthe media key .
Music and audio 29

Pictures and videos
Take a picture1 Select Menu > Photos > Camera.2 To zoom in or out, use the volume keys.3 Select .
The pictures are saved in Menu > Photos > My photos.
Close the cameraSelect .
Record a videoBesides taking pictures with your phone, you can also capture your special momentsas videos.
Select Menu > Photos > Video camera.
1 To switch from image mode to video mode, if necessary, select > Video c..2 To start recording, select .
To zoom in or out, use the volume keys.3 To stop the recording, select .
Videos are saved in Gallery.
Close the cameraSelect .
Send a picture or videoWant to share your pictures and videos with friends and family? Send a multimediamessage or send a picture using Bluetooth.
Select Menu > Photos.
1 Select the folder containing the picture or video.2 Select and hold the picture or video, and from the pop-up menu, select Send and
the sending method.
Send several pictures at the same time1 Select the folder containing the pictures.2 Select > Mark, and mark the pictures.
30 Pictures and videos

3 Select > Send marked and the sending method.
Send several videos at the same time1 Select the folder containing the videos.2 Select Options > Mark, and mark the videos.3 Select Options > Send marked and the sending method.
Web
About the web browserSelect Menu > Internet.
Catch up on the news, and visit your favourite websites. You can use the web browserto view web pages on the internet.
The web browser compresses and optimises web content for your phone, so you canbrowse the web more quickly and save on data costs.
To browse the web, you must be connected to the internet.
For availability, pricing, and instructions, contact your service provider.
You may receive the configuration settings required for browsing as a configurationmessage from your service provider.
Browse the webSelect Menu > Internet.
Tip: If you do not have a flat-rate data plan from your service provider, to save datacosts in your phone bill, you can use a WLAN to connect to the internet.
View your browsing history, featured sites, or your bookmarksTo switch between the History, Featured, and Favourites tabs, swipe left or right.
Go to a websiteSelect the address bar, and enter the address.
Move on the web pageDrag the page with your finger.
Zoom inSelect the desired section of the web page.
Web 31

Zoom outDouble-tap the screen.
Search the internetSelect the search field, and enter a search word. If prompted, select your defaultsearch engine.
Return to a previously visited web pageOpen the History tab, and select the web page.
Tip: You can download web apps from Nokia Store. When you first open a web app, itis added as a bookmark. For more information, go to www.nokia.com.
Fit a web page to your phone displayYour web browser can optimise web pages for your phone display. Instead of havingto zoom in, the web page is arranged into a single column of larger, readable text andpictures.
Select Menu > Internet.
Select > Tools > Column view.
To quickly go to different sections of a web page, select from the following:
/ Go to the previous or next section of the web page.Sign in to the web page.Go to the main section of the web page.Search the web page.Read RSS feeds.
The available options may vary.
This view is not available for web sites designed for mobile use.
Add a bookmarkIf you visit the same websites all the time, add them as bookmarks, so you can easilyaccess them.
Select Menu > Internet.
While browsing, select > Add to favourites.
Go to a bookmarked websiteOpen the Favourites tab, and select a bookmark.
32 Web
Clear your browsing historySelect Menu > Internet.
Open the History tab, and select > Clear history.
Clear stored cookies or text saved in web formsSelect > Tools > Settings > Clear cookies or Clear auto-fill.
Keep in touch with your online friends
About SocialSelect Menu > Apps > Apps and games > Social, and sign in to your relevant socialnetworking services.
With the Social application, you can enhance your social networking experience. Theapplication may not be available in all regions. When signed in to social networkingservices, such as Facebook or Twitter, you can do the following:
• See your friends' status updates• Post your own status update• Instantly share pictures you take with the camera
Only those features that are supported by the social networking service are available.
Using social networking services requires network support. This may involve thetransmission of large amounts of data and related data traffic costs. For informationabout data transmission charges, contact your service provider.
The social networking services are third party services and not provided by Nokia.Check the privacy settings of the social networking service you are using as you mayshare information with a large group of people. The terms of use of the socialnetworking service apply to sharing information on that service. Familiarise yourselfwith the terms of use and the privacy practices of that service.
Mail and chat
About MailSelect Menu > Mail.
You can use your phone to read and send mail from your mail accounts from differentmail service providers.
Keep in touch with your online friends 33
If you do not already have a mail account, you can create a Nokia Mail account. Formore information, go to www.nokia.com/support.
Send a mailSelect Menu > Mail and a mail account.
1 Select Options > Compose new.2 Enter the recipient’s mail address and the subject, and write your message.3 To attach a file, for example, a picture, select Options > Attach > From Gallery.4 To take a picture to attach to the mail, select Options > Attach > From
Camera.5 Select Send.
Read and reply to mailSelect Menu > Mail and a mail account.
1 Select a mail.2 To reply to or forward a mail, select Options.
About ChatSelect Menu > Chat.
You can exchange instant messages with your friends. Chat is a network service. Ifyou do not have a chat account, you can create a Nokia account, and use Nokia's OviChat.
You can leave the Chat application running in the background while you use otherfeatures of your phone, and still be notified of new instant messages.
Using services or downloading content may cause transfer of large amounts of data,which may result in data traffic costs.
Chat with your friendsSelect Menu > Chat.
You can sign in to and chat in several services at the same time. You must separatelysign in to each service.
You can have ongoing conversations with several contacts at the same time.
1 If several chat services are available, select the desired service.2 Sign in to the service.3 In your contacts list, select the contact you want to chat with.
34 Mail and chat

4 Write your message in the text box at the bottom of the display.5 Select Send.
Nokia Maps
About MapsSelect Menu > Maps.
Maps shows you what is nearby and helps you plan your route, free of charge. Youcan:
• View your current location• Plan a route to a nearby place• Search for a place or specific address, and save it• Send your location or a place to a friend in a text message
Your phone may have a memory card with preloaded maps for your country. Insertthe memory card into the phone before using Maps.
Using services or downloading content may cause transfer of large amounts of data,which may result in data traffic costs.
Contents of digital maps may sometimes be inaccurate and incomplete. Never relysolely on the content or the service for essential communications, such as inemergencies.
Download mapsIf you browse to an area of the map which is not saved on your memory card, and youhave an active data connection to the internet, a map for the area is automaticallydownloaded.
Using services or downloading content may cause transfer of large amounts of data,which may result in data traffic costs.
Tip: Save new street maps to your phone before a journey, so you can browse themaps without an internet connection when travelling. Use the Nokia Suite PC app todownload the latest maps, then copy them to your phone. To download and installNokia Suite, go to www.nokia.com/support.
View your current location on the mapSelect Menu > Maps and My position.
Update your current locationSelect Options > Update position.
Nokia Maps 35

Save your current locationSelect Options > Save as favourite.
Tip: After finding your location, you can search for nearby places. Select Options >Search nearby.
An internet connection may be required to find your current location.
Using services or downloading content may cause transfer of large amounts of data,which may result in data traffic costs.
Find a placeMaps helps you find specific locations and addresses.
Select Menu > Maps.
1 Select Search.2 Enter the name of the place or address.3 Select Go. A list of matching places or addresses is displayed.
Refine your search1 Select Advanced > Find place or Find address.2 Define more details for your search, and follow the instructions.
Tip: To search from the entire category of places, leave all name fields blank.
Tip: If you can't find the place you are looking for, try to search from an onlinedatabase. Select Search online for. Additional charges may apply. For details, contactyour service provider.
Share your location or a placeWhen you want to show your friends where a place is on the map, you can send theplace to them in a text message.
Select Menu > Maps.
To view the place on the map, your friends don't need to have a Nokia phone, but aninternet connection is required.
1 Select My position or a place on the map and Options > Send this place.2 Write your message. The address and a link to the location are automatically
added.
36 Nokia Maps

Create a walking routeCreate a walking route to a nearby place. You can view the route and all the turningson the map before setting off.
Select Menu > Maps.
1 Select Plan route.2 Select Starting location and a saved or recent location, a place from the map, or
a specific address as the start point of your walking route. To start from yourcurrent position, select My position.
3 Select Destination and the end point of the walking route.The maximum distance between the start and end points is 10 kilometres,measured in a straight line. Using ferries and some special tunnels for walkingroutes is restricted.
4 Select Go > Start.5 To cancel the route, select Options > Cancel route.
Nokia Services
Availability and costs of Nokia ServicesThe availability of Nokia Services may vary by region.
Using services or downloading content may cause transfer of large amounts of data,which may result in data traffic costs.
To learn more, go to www.nokia.com/support.
Access Nokia ServicesSelect Menu > Apps > Apps and games and the desired service.
Find help
SupportWhen you want to learn more about how to use your product or you are unsure howyour phone should function, read the user guide thoroughly.
You may also be interested in the Nokia Support Video channel in YouTube.
If this does not resolve your issue, do one of the following:
• Reboot your phone. Switch off the phone, and remove the battery. After about aminute, replace the battery, and switch on the phone.
• Update your phone software
Nokia Services 37

• Restore the original factory settings
If your issue remains unsolved, contact Nokia for repair options. Go towww.nokia.com/repair. Before sending your phone for repair, always back up yourdata, as all personal data in your phone may be deleted.
Subscribe to the Tips and Offers serviceTips and Offers is a convenient service to help you get the most out of your phone,providing you with tips and support messages, as well as updates for your games andapplications.
Select Menu > Apps > Apps and games > Tips and offers.
Text message charges may apply when you subscribe or unsubscribe. For terms andconditions, see the documentation supplied with your phone, or go towww.nokia.com/mynokia.
Keep your phone up to dateUpdate phone software using your phoneWant to improve the performance of your phone and get application updates andgreat new features? Update the software regularly to get the most out of your phone.You can also set your phone to automatically check for updates.
Warning:If you install a software update, you cannot use the device, even to make emergencycalls, until the installation is completed and the device is restarted.
Using services or downloading content may cause transfer of large amounts of data,which may result in data traffic costs.
Before starting the update, connect a charger or make sure the device battery hasenough power.
Select Menu > Settings.
38 Find help

1 Select Device > Device updates.2 To display the current software version and check whether an update is available,
select Current sw details.3 To download and install a software update, select Downl. device sw. Follow the
displayed instructions.4 If the installation was cancelled after the download, select Install sw update.
The software update may take several minutes. If there are problems with theinstallation, contact your network service provider.
Check for software updates automaticallySelect Automatic SW update, and define how often to check for new softwareupdates.
Your network service provider may send phone software updates over the air directlyto your phone. For more information on this network service, contact your networkservice provider.
Update phone software using your PCYou can use the Nokia Suite PC app to update your phone software. You need acompatible PC, a high-speed internet connection, and a compatible USB cable toconnect your phone to the PC.
To get more info and to download the Nokia Suite app, go to www.nokia.com/support.
Restore original settingsIf your phone is not working properly, you can reset some settings to their originalvalues.
Find help 39

1 End all calls and connections.2 Select Menu > Settings and Rest. fact. sett. > Settings only.3 Enter the security code.
This does not affect documents or files stored on your phone.
After restoring the original settings, your phone switches off and then on again. Thismay take longer than usual.
Organise filesYou can move, copy, and delete files and folders, or create new folders in your phonememory or on the memory card. If you organise your files into their own folders, itmight help you find the files in future.
Select Menu > Apps > Gallery.
Create a new folderIn the folder where you want to create a sub-folder, select Options > Add folder.
Copy or move a file to a folderSelect and hold the file, and from the pop-up menu, select the appropriate option.
Tip: You can also play music or videos, or view pictures in Gallery.
Back up your pictures and other content to a memory cardWant to make sure you will not lose any important files? You can back up your phonememory to a compatible memory card.
Select Menu > Settings > Sync & backup.
Select Create backup.
Restore a backupSelect Restore backup.
Protect the environment
Save energyYou do not need to charge your battery so often if you do the following:
• Close applications and data connections, such as your WLAN or Bluetoothconnection, when not in use.
• Set your phone to enter power saver mode after the minimum period of inactivity.
40 Protect the environment

• Deactivate unnecessary sounds, such as touch screen and key tones.
Recycle
When this phone has reached the end of its working life, all of its materials can berecovered as materials and energy. To guarantee the correct disposal and reuse,Nokia co-operates with its partners through a program called We:recycle. Forinformation on how to recycle your old Nokia products and where to find collectionsites, go to www.nokia.com/werecycle, or call the Nokia Care contact centre.
Recycle packaging and user guides at your local recycling scheme.
The crossed-out wheeled-bin symbol on your product, battery, literature, orpackaging reminds you that all electrical and electronic products, batteries, andaccumulators must be taken to separate collection at the end of their working life.This requirement applies in the European Union. Do not dispose of these products asunsorted municipal waste. For more information on the environmental attributes ofyour phone, go to www.nokia.com/ecoprofile.
Product and safety information
Network services and costsYour device is approved for use on the WCDMA 850/900/1700/1900/2100 (Pentaband, HSPA) and EGSM850/900/1800/1900 (Quadband).
To use the device, you need a subscription with a service provider.
Using network services and downloading content to your device requires a network connection and may result in data trafficcosts. Some product features require support from the network, and you may need to subscribe to them.
Take care of your deviceHandle your device, battery, charger and accessories with care. The following suggestions help you protect your warrantycoverage.
• Keep the device dry. Precipitation, humidity, and all types of liquids or moisture can contain minerals that corrodeelectronic circuits. If your device gets wet, remove the battery, and allow the device to dry.
• Do not use or store the device in dusty or dirty areas. Moving parts and electronic components can be damaged.
• Do not store the device in high temperatures. High temperatures can shorten the life of the device, damage thebattery, and warp or melt plastics.
Product and safety information 41

• Do not store the device in cold temperatures. When the device warms to its normal temperature, moisture can forminside the device and damage electronic circuits.
• Do not attempt to open the device other than as instructed in the user guide.
• Unauthorised modifications may damage the device and violate regulations governing radio devices.
• Do not drop, knock, or shake the device. Rough handling can break internal circuit boards and mechanics.
• Only use a soft, clean, dry cloth to clean the surface of the device.
• Do not paint the device. Paint can clog moving parts and prevent proper operation.
• Switch off the device and remove the battery from time to time for optimum performance.
• Keep your device away from magnets or magnetic fields.
• To keep your important data safe, store it in at least two separate places, such as your device, memory card, orcomputer, or write down important information.
During extended operation, the device may feel warm. In most cases, this is normal. If you suspect the device is not workingproperly, take it to the nearest authorised service facility.
RecycleAlways return your used electronic products, batteries, and packaging materials to dedicated collection points. This wayyou help prevent uncontrolled waste disposal and promote the recycling of materials. Check how to recycle your Nokiaproducts at www.nokia.com/recycling.
About Digital Rights ManagementWhen using this device, obey all laws and respect local customs, privacy and legitimate rights of others, including copyrights.Copyright protection may prevent you from copying, modifying, or transferring pictures, music, and other content.
Content owners may use different types of digital rights management (DRM) technologies to protect their intellectualproperty, including copyrights. This device uses various types of DRM software to access DRM-protected content. With thisdevice you can access content protected with WMDRM 10 and OMA DRM 2.0. If certain DRM software fails to protect thecontent, content owners may ask that such DRM software's ability to access new DRM-protected content be revoked.Revocation may also prevent renewal of such DRM-protected content already in your device. Revocation of such DRMsoftware does not affect the use of content protected with other types of DRM or the use of non-DRM-protected content.
Digital rights management (DRM) protected content comes with an associated licence that defines your rights to use thecontent.
If your device has OMA DRM-protected content, to back up both the licences and the content, use the backup feature ofNokia Suite.
Other transfer methods may not transfer the licences which need to be restored with the content for you to be able tocontinue the use of OMA DRM-protected content after the device memory is formatted. You may also need to restore thelicences if the files on your device become corrupted.
If your device has WMDRM-protected content, both the licences and the content are lost if the device memory is formatted.You may also lose the licences and the content if the files on your device become corrupted. Losing the licences or thecontent may limit your ability to use the same content on your device again. For more information, contact your serviceprovider.
Batteries and chargersBattery and charger informationYour device is intended for use with a BP-3L rechargeable battery. Nokia may make additional battery models available forthis device. Always use original Nokia batteries.
This device is intended for use when supplied with power from the following chargers: AC-3, AC-8, AC-10, AC-11, AC-15.The exact Nokia charger model number may vary depending on the plug type, identified by E, X, AR, U, A, C, K, or B.
42 Product and safety information
The battery can be charged and discharged hundreds of times, but it will eventually wear out. When the talk and standbytimes are noticeably shorter than normal, replace the battery.
Battery safetyAlways switch the device off and disconnect the charger before removing the battery. When you unplug a charger or anaccessory, hold and pull the plug, not the cord.
When your charger is not in use, unplug it from the electrical plug and the device. Do not leave a fully charged batteryconnected to a charger, as overcharging may shorten the battery’s lifetime. If left unused, a fully charged battery will loseits charge over time.
Always keep the battery between 15°C and 25°C (59°F and 77°F). Extreme temperatures reduce the capacity and lifetimeof the battery. A device with a hot or cold battery may not work temporarily.
Accidental short-circuiting can happen when a metallic object touches the metal strips on the battery, for example, if youcarry a spare battery in your pocket. Short-circuiting may damage the battery or the connecting object.
Do not dispose of batteries in a fire as they may explode. Dispose of batteries according to local regulations. Recycle whenpossible. Do not dispose as household waste.
Do not dismantle, cut, open, crush, bend, puncture, or shred cells or batteries. If a battery leaks, do not let battery liquidtouch skin or eyes. If this happens, immediately flush the affected areas with water, or seek medical help.
Do not modify, remanufacture, attempt to insert foreign objects into the battery, or immerse or expose it to water or otherliquids. Batteries may explode if damaged.
Use the battery and charger for their intended purposes only. Improper use, or use of unapproved batteries or incompatiblechargers may present a risk of fire, explosion, or other hazard, and may invalidate any approval or warranty. If you believethe battery or charger is damaged, take it to a service centre for inspection before continuing to use it. Never use a damagedbattery or charger. Only use the charger indoors.
Additional safety informationMake an emergency call1 Make sure the device is switched on.
2 Check for adequate signal strength. You may also need to do the following:
• Insert a SIM card.
• Deactivate call restrictions you have activated for your device, such as call barring, fixed dialling, or closed usergroup.
• Make sure the flight profile is not activated.
• If the device screen and keys are locked, unlock them.
3 Press the end key repeatedly, until the home screen is displayed.
4 Enter the official emergency number for your present location. Emergency call numbers vary by location.
5 Press the call key.
6 Give the necessary information as accurately as possible. Do not end the call until given permission to do so.
Important: Activate both cellular and internet calls, if your device supports internet calls. The device may attempt tomake emergency calls both through cellular networks and through your internet call service provider. Connections in allconditions cannot be guaranteed. Never rely solely on any wireless device for essential communications like medicalemergencies.
Product and safety information 43

Small childrenYour device and its accessories are not toys. They may contain small parts. Keep them out of the reach of small children.
Medical devicesOperation of radio transmitting equipment, including wireless phones, may interfere with the function of inadequatelyprotected medical devices. Consult a physician or the manufacturer of the medical device to determine whether they areadequately shielded from external radio frequency energy.
Implanted medical devicesManufacturers of medical devices recommend a minimum separation of 15.3 centimetres (6 inches) between a wirelessdevice and an implanted medical device, such as a pacemaker or implanted cardioverter defibrillator, to avoid potentialinterference with the medical device. Persons who have such devices should:
• Always keep the wireless device more than 15.3 centimetres (6 inches) from the medical device.
• Not carry the wireless device in a breast pocket.
• Hold the wireless device to the ear opposite the medical device.
• Turn the wireless device off if there is any reason to suspect that interference is taking place.
• Follow the manufacturer directions for the implanted medical device.
If you have any questions about using your wireless device with an implanted medical device, consult your health careprovider.
Hearing
Warning:When you use the headset, your ability to hear outside sounds may be affected. Do not use the headset where it can endangeryour safety.
Some wireless devices may interfere with some hearing aids.
NickelThe surface of this device is nickel-free.
Protect your device from harmful contentYour device may be exposed to viruses and other harmful content. Take the following precautions:
• Be cautious when opening messages. They may contain malicious software or otherwise be harmful to your device orcomputer.
• Be cautious when accepting connectivity requests, browsing the internet, or downloading content. Do not acceptBluetooth connections from sources you do not trust.
• Only install and use services and software from sources that you trust and that offer adequate security and protection.
• Install antivirus and other security software on your device and any connected computer. Only use one antivirusapplication at a time. Using more may affect performance and operation of the device and/or computer.
• If you access preinstalled bookmarks and links to third party internet sites, take the appropriate precautions. Nokiadoes not endorse or assume liability for such sites.
Operating environmentThis device meets radio frequency exposure guidelines in the normal use position at the ear or at least 1.5 centimetres (5/8inch) away from the body. Any carry case, belt clip, or holder for body-worn operation should not contain metal and shouldposition the device the above-stated distance from your body.
44 Product and safety information

To send data files or messages requires a quality connection to the network. Data files or messages may be delayed untilsuch a connection is available. Follow the separation distance instructions until the transmission is completed.
VehiclesRadio signals may affect improperly installed or inadequately shielded electronic systems in motor vehicles such aselectronic fuel injection, electronic antilock braking, electronic speed control, and air bag systems. For more information,check with the manufacturer of your vehicle or its equipment.
Only qualified personnel should install the device in a vehicle. Faulty installation or service may be dangerous and mayinvalidate your warranty. Check regularly that all wireless device equipment in your vehicle is mounted and operatingproperly. Do not store or carry flammable liquids, gases, or explosive materials in the same compartment as the device, itsparts, or accessories. Remember that air bags inflate with great force. Do not place your device or accessories in the airbag deployment area.
Potentially explosive environmentsSwitch off your device in any area with a potentially explosive atmosphere, for example near gas pumps at service stations.Sparks in such areas could cause an explosion or fire resulting in bodily injury or death. Observe restrictions in fuel servicestations, storage, and distribution areas; chemical plants; or where blasting operations are in progress. Areas with apotentially explosive atmosphere are often, but not always, clearly marked. They include areas where you would be advisedto turn off your vehicle engine, below deck on boats, chemical transfer or storage facilities and where the air containschemicals or particles such as grain, dust, or metal powders. You should check with the manufacturers of vehicles usingliquefied petroleum gas (such as propane or butane) to determine if this device can be safely used in their vicinity.
Certification information (SAR)This mobile device meets guidelines for exposure to radio waves.
Your mobile device is a radio transmitter and receiver. It is designed not to exceed the limits for exposure to radio wavesrecommended by international guidelines. These guidelines were developed by the independent scientific organisationICNIRP and include safety margins designed to assure the protection of all persons, regardless of age and health.
The exposure guidelines for mobile devices employ a unit of measurement known as the Specific Absorption Rate or SAR.The SAR limit stated in the ICNIRP guidelines is 2.0 watts/kilogram (W/kg) averaged over 10 grams of tissue. Tests for SARare conducted using standard operating positions with the device transmitting at its highest certified power level in all testedfrequency bands. The actual SAR level of an operating device can be below the maximum value because the device is designedto use only the power required to reach the network. That amount changes depending on a number of factors such as howclose you are to a network base station.
The highest SAR value under the ICNIRP guidelines for use of the device at the ear is 0.79 W/kg.
Use of device accessories may result in different SAR values. SAR values may vary depending on national reporting andtesting requirements and the network band. Additional SAR information may be provided under product information atwww.nokia.com.
Copyright and other notices
DECLARATION OF CONFORMITY
Hereby, NOKIA CORPORATION declares that this RM-763 product is in compliance with the essential requirements and otherrelevant provisions of Directive 1999/5/EC. A copy of the Declaration of Conformity can be found at http://www.nokia.com/global/declaration.
Copyright and other notices 45

© 2011 Nokia. All rights reserved.
Nokia, Nokia Connecting People, Ovi, and WE: logo are trademarks or registered trademarks of Nokia Corporation. Nokiatune is a sound mark of Nokia Corporation. Other product and company names mentioned herein may be trademarks ortradenames of their respective owners.
Reproduction, transfer, distribution, or storage of part or all of the contents in this document in any form without the priorwritten permission of Nokia is prohibited. Nokia operates a policy of continuous development. Nokia reserves the right tomake changes and improvements to any of the products described in this document without prior notice.
Includes RSA BSAFE cryptographic or security protocol software from RSA Security.
Oracle and Java are registered trademarks of Oracle and/or its affiliates.
Portions of the Nokia Maps software are ©1996-2011 The FreeType Project. All rights reserved.
The Bluetooth word mark and logos are owned by the Bluetooth SIG, Inc. and any use of such marks by Nokia is under license.
This product is licensed under the MPEG-4 Visual Patent Portfolio License (i) for personal and noncommercial use inconnection with information which has been encoded in compliance with the MPEG-4 Visual Standard by a consumer engagedin a personal and noncommercial activity and (ii) for use in connection with MPEG-4 video provided by a licensed videoprovider. No license is granted or shall be implied for any other use. Additional information, including that related topromotional, internal, and commercial uses, may be obtained from MPEG LA, LLC. See http://www.mpegla.com.
To the maximum extent permitted by applicable law, under no circumstances shall Nokia or any of its licensors be responsiblefor any loss of data or income or any special, incidental, consequential or indirect damages howsoever caused.
The contents of this document are provided "as is". Except as required by applicable law, no warranties of any kind, eitherexpress or implied, including, but not limited to, the implied warranties of merchantability and fitness for a particularpurpose, are made in relation to the accuracy, reliability or contents of this document. Nokia reserves the right to revisethis document or withdraw it at any time without prior notice.The availability of products, features, applications and services may vary by region. For more information, contact yourNokia dealer or your service provider. This device may contain commodities, technology or software subject to export lawsand regulations from the US and other countries. Diversion contrary to law is prohibited.Nokia does not provide a warranty for or take any responsibility for the functionality, content, or end-user support of third-party applications provided with your device. By using an application, you acknowledge that the application is provided asis. Nokia does not make any representations, provide a warranty, or take any responsibility for the functionality, content,or end-user support of third-party applications provided with your device.The availability of Nokia services may vary by region.
FCC/INDUSTRY CANADA NOTICE
Your device may cause TV or radio interference (for example, when using a telephone in close proximity to receivingequipment). The FCC or Industry Canada can require you to stop using your telephone if such interference cannot beeliminated. If you require assistance, contact your local service facility. This device complies with part 15 of the FCC rulesand Industry Canada licence-exempt RSS standard(s). Operation is subject to the following two conditions: (1) This devicemay not cause harmful interference, and (2) this device must accept any interference received, including interference that
46 Copyright and other notices

may cause undesired operation. Any changes or modifications not expressly approved by Nokia could void the user'sauthority to operate this equipment.
Some operations and features are SIM card and/or network dependent, MMS dependent, or dependent on the compatibilityof devices and the content formats supported. Some services are subject to a separate charge.
/Issue 1.1 EN
Copyright and other notices 47

Index
Aaccess codes 11alarm clock 23alarms 23antennas 11
Bbacking up data 40battery 6, 42, 43— charging 9Bluetooth 24bookmarks 32browser
See web browserbusiness cards 24
Ccable connection 25Calendar 23calls— emergency 43— internet calls 16— log 15— making 15camera— recording videos 30— sending pictures and videos 30— taking pictures 30charging the battery 42chat services (IM) 34clock 23connectivity 26contacts— adding 17— copying 14— saving 17conversations 20copying content 14, 25
Ddata connections— Bluetooth 24— WLAN 26date and time 23
Ee-mail 33emergency calls 43environmental tips 40
Ffactory settings, restoring 39file management 40FM radio 27, 28
Hhome screen 21
IIM (instant messaging) 34IMEI number 11inbox, messages 20indicators 14internet
See web browserinternet calls 16
Kkeyboard 5, 18keyguard 12keys and parts 5
Llock code 11locking— keys 12— screen 12loudspeaker 15
48 Index

Mmail 33— creating 34— reading and replying to 34— sending 34mailbox— voice 20Maps 35— creating routes 37— current location 35— downloading maps 35— searching 36— sharing 36media key 29meeting entries 23memory card 8messages 20— audio 21— sending 19messaging key 20MMS (multimedia message service) 19multimedia messages 19music 29
NNokia Services 37Nokia support information 37
Ppersonalising your phone 21, 22phone— switching on/off 10Phone switch 14pictures— copying 14, 25— sending 24, 30— taking 30PIN codes 11powering on/off 10predictive text input 19
profiles— personalising 22PUK codes 11
Rradio 27, 28recording— videos 30recycling 40restoring data 40restoring settings 39ringtones 22
Ssearching— radio stations 28security code 11settings— restoring 39SIM card 6SMS (short message service) 19social networks 33software updates 38, 39speed dialling 17strap 10support 37switching on/off 10
Ttaking pictures
See cameratext input 5, 18, 19text messages 19themes 21time and date 23Tips and Offers 38tones— personalising 22touch screen 12transferring content 14, 25turning on/off 10
Index 49

Uupdates— phone software 38, 39USB connection 25
Vvideos— copying 14, 25— playing 29— recording 30— sending 24, 30voice messages 20volume 15
Wweb browser 31— bookmarks 32— browsing pages 31, 32— cookies 33WLAN (wireless local area network)26, 27
50 Index