Nimble Portfolio Plugin User Guide...Nimble Portfolio Plugin User Guide Contents 1. Downloading the...
15
Nimble Portfolio Plugin User Guide Contents 1. Downloading the plugin 2. Installation 3. Setting up item types 4. Adding portfolio items 5. Displaying the portfolio 6. Plugin support
Transcript of Nimble Portfolio Plugin User Guide...Nimble Portfolio Plugin User Guide Contents 1. Downloading the...

Nimble Portfolio Plugin
User Guide
Contents
1. Downloading the plugin
2. Installation
3. Setting up item types
4. Adding portfolio items
5. Displaying the portfolio
6. Plugin support

1. Downloading the plugin
You can download the plugin by going to the URL below
http://wordpress.org/plugins/nimble-portfolio/
2. Installation
a) Dashboard Search and Install Method
You can do this by going to PLUGINS>>ADD NEW in your wodpress dashboard and then by
searching for 'filterable jquery portfolio' , this should bring up our plugin.
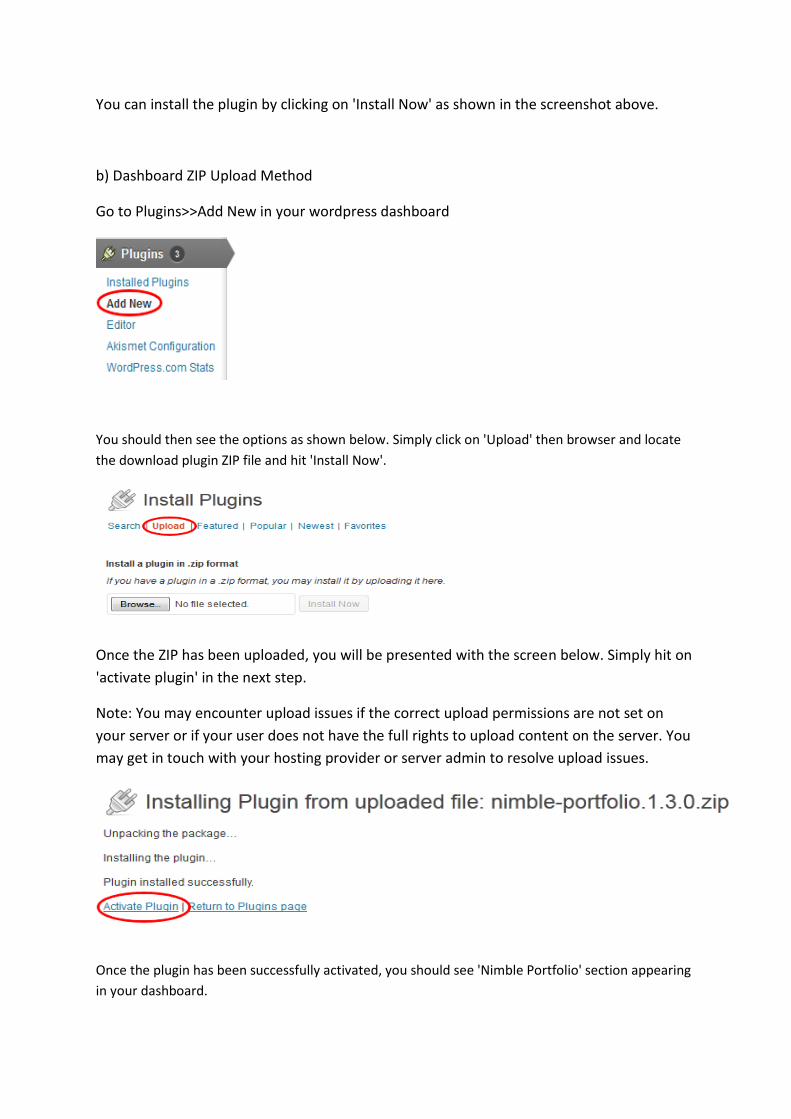
You can install the plugin by clicking on 'Install Now' as shown in the screenshot above.
b) Dashboard ZIP Upload Method
Go to Plugins>>Add New in your wordpress dashboard
You should then see the options as shown below. Simply click on 'Upload' then browser and locate
the download plugin ZIP file and hit 'Install Now'.
Once the ZIP has been uploaded, you will be presented with the screen below. Simply hit on
'activate plugin' in the next step.
Note: You may encounter upload issues if the correct upload permissions are not set on
your server or if your user does not have the full rights to upload content on the server. You
may get in touch with your hosting provider or server admin to resolve upload issues.
Once the plugin has been successfully activated, you should see 'Nimble Portfolio' section appearing
in your dashboard.

c) FTP Upload Method
Download the latest version of our plugin by going to the URL below
http://wordpress.org/plugins/nimble-portfolio/
Once you have download the plugin ZIP, you can extract the ZIP file and find folder 'nimble-
portfolio'.
Upload the entire folder 'nimble-porfolio' to your website's 'wp-content/plugins' folder.
Go to your website's dashboard and navigate to PLUGINS>>PLUGINS
You should see the plugin listed as shown below in the screenshot.

Simply hit activate to turn it on.
Once you have activated the plugin you should see in the sidebar as shown below

3. Setting up item types
The very first thing you need to do is to setup the types or categories for your portfolio.
Note - These item types become the tabs/filters on your portfolio.
Navigate to NIMBLE PORTFOLIO>>ITEM TYPE , once you are presented with the screen as
shown below simply enter the name of the item type and click ADD NEW CATEGORY. The
field for SLUG basically controls how you want the URL to be so this is optional. The PARENT
field can be set to none and the DESCRIPTION field can be left blank in this instance.
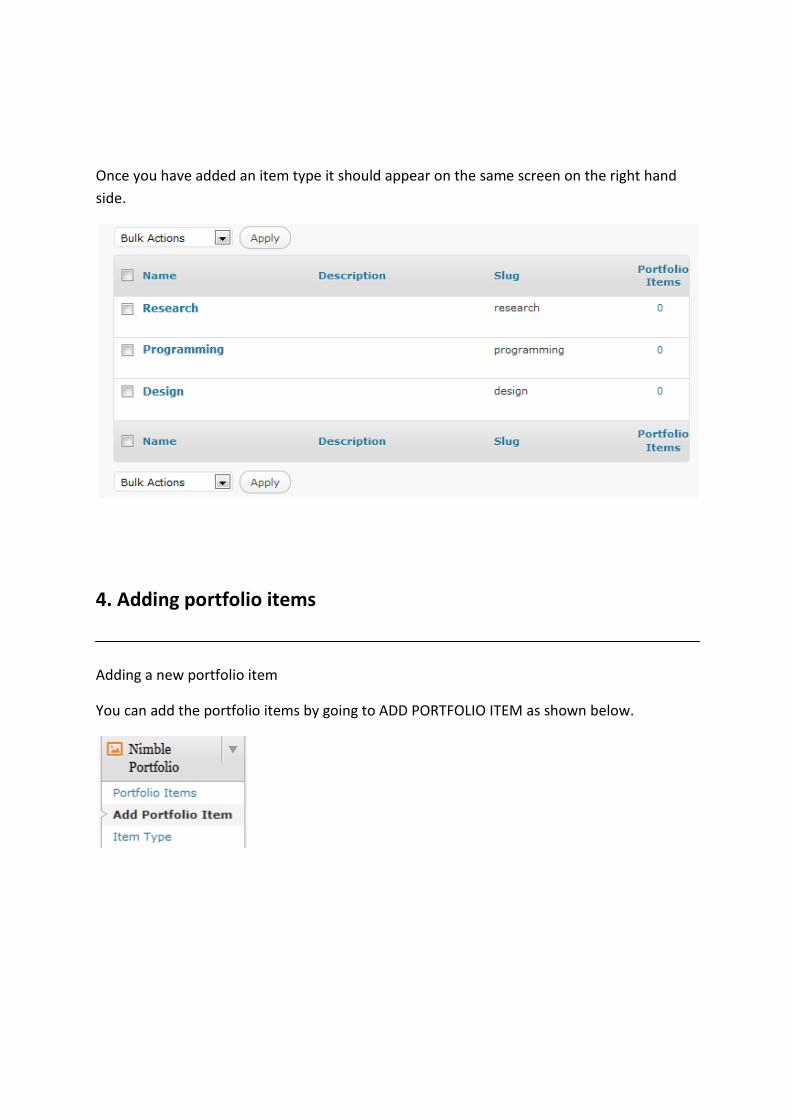
Once you have added an item type it should appear on the same screen on the right hand
side.
4. Adding portfolio items
Adding a new portfolio item
You can add the portfolio items by going to ADD PORTFOLIO ITEM as shown below.
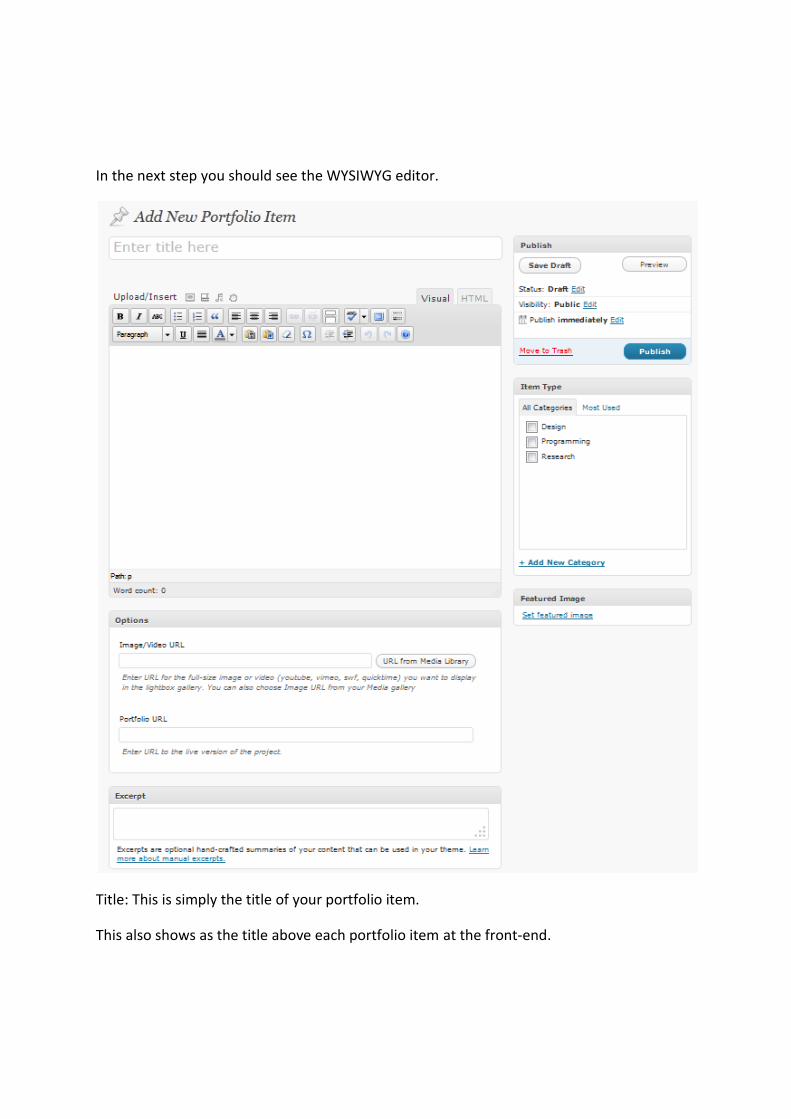
In the next step you should see the WYSIWYG editor.
Title: This is simply the title of your portfolio item.
This also shows as the title above each portfolio item at the front-end.

Featured Image: On the far right bottom you should see a section to select an image to
create the thumbnail for your portfolio item.
Once you click on it, it should bring up a screen as shown below.
Hit 'SELECT FILES' to browse and upload an image from your computer.
In the next step if your upload is successful you will be shown the screen as below. Hit 'USE
AS FEATURED IMAGE' close this window.

Note: If your upload fails then chances are that your folder permissions are not setup
correctly and you need to make your uploads folder writable. If you are non-technical then
perhaps your server admin or hosting providers can do this for you.
Once you have uploaded the image it should show the image as 'checked' then simply click
the button at the bottom 'set featured image'.
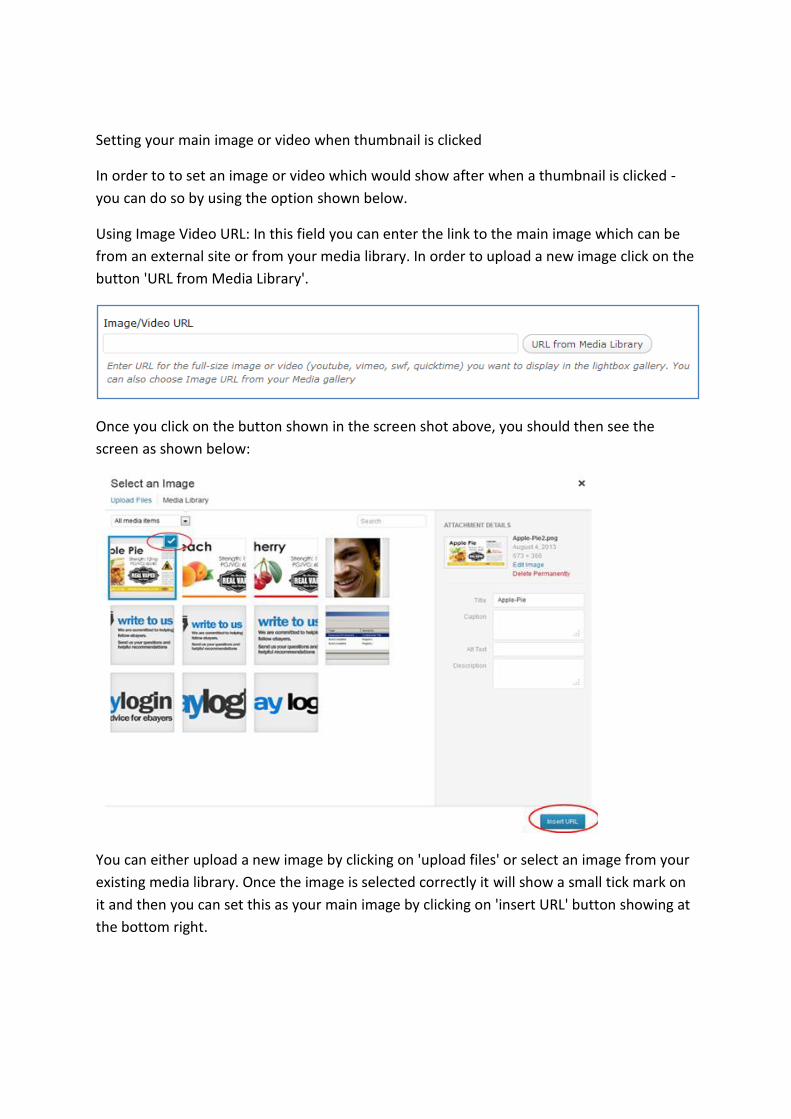
Setting your main image or video when thumbnail is clicked
In order to to set an image or video which would show after when a thumbnail is clicked -
you can do so by using the option shown below.
Using Image Video URL: In this field you can enter the link to the main image which can be
from an external site or from your media library. In order to upload a new image click on the
button 'URL from Media Library'.
Once you click on the button shown in the screen shot above, you should then see the
screen as shown below:
You can either upload a new image by clicking on 'upload files' or select an image from your
existing media library. Once the image is selected correctly it will show a small tick mark on
it and then you can set this as your main image by clicking on 'insert URL' button showing at
the bottom right.

In order to show a video all you need to do is paste the Youtube or Vimeo video URL in the
same field as discussed above.
Portfolio URL: You can enter a URL here if you want to send the users to an external site or
even a different section of your website.
5. Displaying the portfolio
To call the portfolio on a page or a post all you need to do is create a post or page, call it
portfolio or whatever you may like and write this bit of code [nimble-portfolio] in HTML
view mode of the editor.
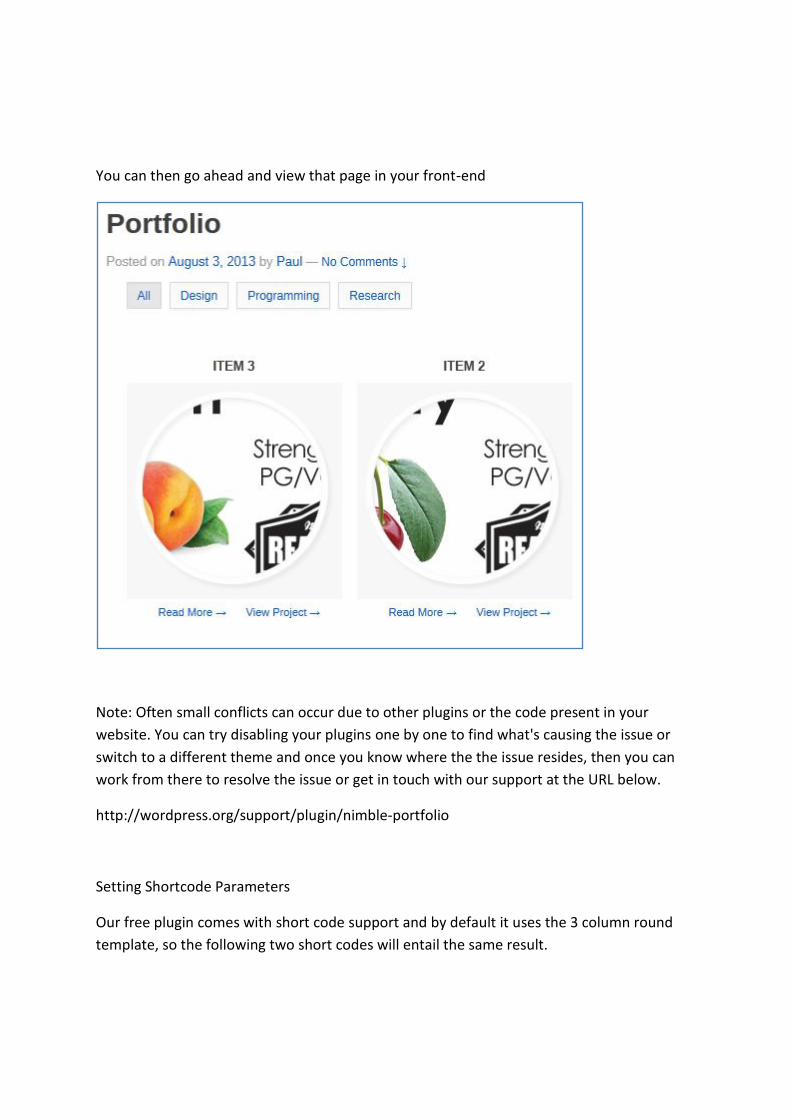
You can then go ahead and view that page in your front-end
Note: Often small conflicts can occur due to other plugins or the code present in your
website. You can try disabling your plugins one by one to find what's causing the issue or
switch to a different theme and once you know where the the issue resides, then you can
work from there to resolve the issue or get in touch with our support at the URL below.
http://wordpress.org/support/plugin/nimble-portfolio
Setting Shortcode Parameters
Our free plugin comes with short code support and by default it uses the 3 column round
template, so the following two short codes will entail the same result.

[nimble-portfolio]
[nimble-portfolio template="3colround"]
You can see from the above shotcode that the later part of the code refers to the use of
template.
Additional Templates
Fluid columns - round template
[nimble-portfolio template="round-1"]
Fluid columns - square template
[nimble-portfolio template="rect-1"]
6. Support
We do provide free of charge support to all our free plugin users on Wordpress.org at the
URL below.
http://wordpress.org/support/plugin/nimble-portfolio
Premium Portfolio
We also have a premium version of the plugin available which can be purchased from our
website at the URL below:
http://www.nimble3.com/shop/premium-nimble-portfolio-plugin/