Nexpose - Rapid7download2.rapid7.com/download/NeXpose-v4/Nexpose_Quick_Start.pdf · Nexpose...
14
Nexpose Quick-start Guide Product version: 6.0
Transcript of Nexpose - Rapid7download2.rapid7.com/download/NeXpose-v4/Nexpose_Quick_Start.pdf · Nexpose...
Nexpose
Quick-start Guide
Product version: 6.0

Revision history 2
Revision history
Copyright © 2015 Rapid7, LLC. Boston, Massachusetts, USA. All rights reserved. Rapid7 and Nexpose are trademarksof
Rapid7, Inc. Other namesappearing in this content maybe trademarksof their respective owners.
For internal use only.
Revision date Description
October 10, 2014 Added revision history table.
January 5, 2015 Updated due to changes in the site configuration interface.
April 8, 2015 Nexpose 5.13: Updated product version.
April 8, 2015 Nexpose 5.14: Updated product version.
June 24, 2015 Nexpose 5.15: Updated product version.
July 29, 2015 Nexpose 5.16: Updated product version.
August 26, 2015 Nexpose 5.17: Updated product version.
October 8, 2015 Nexpose 6.0: Updated to reflect new look and feel.
Discover 3
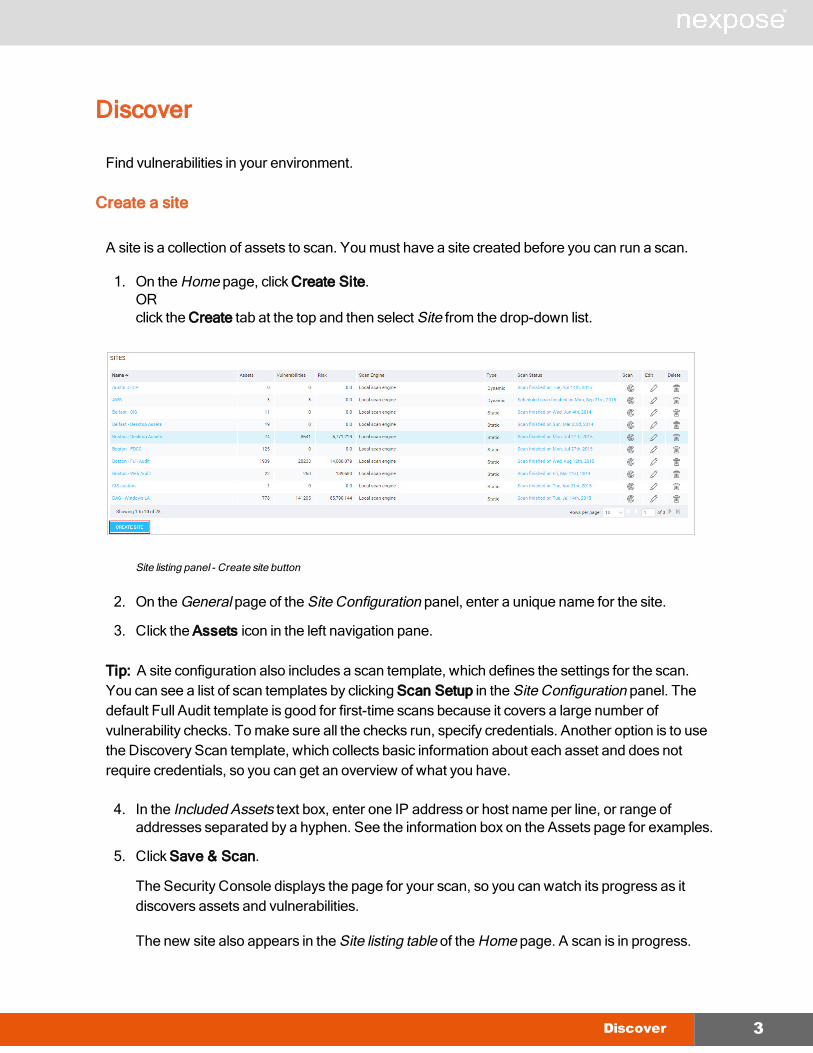
Discover
Find vulnerabilities in your environment.
Create a site
A site is a collection of assets to scan. Youmust have a site created before you can run a scan.
1. On the Home page, click Create Site.ORclick the Create tab at the top and then select Site from the drop-down list.
Site listing panel - Create site button
2. On theGeneral page of the Site Configuration panel, enter a unique name for the site.
3. Click the Assets icon in the left navigation pane.
Tip: A site configuration also includes a scan template, which defines the settings for the scan.You can see a list of scan templates by clicking Scan Setup in the Site Configuration panel. Thedefault Full Audit template is good for first-time scans because it covers a large number ofvulnerability checks. Tomake sure all the checks run, specify credentials. Another option is to usethe Discovery Scan template, which collects basic information about each asset and does notrequire credentials, so you can get an overview of what you have.
4. In the Included Assets text box, enter one IP address or host name per line, or range ofaddresses separated by a hyphen. See the information box on the Assets page for examples.
5. Click Save & Scan.
The Security Console displays the page for your scan, so you can watch its progress as itdiscovers assets and vulnerabilities.
The new site also appears in the Site listing table of the Home page. A scan is in progress.
Create a site 4
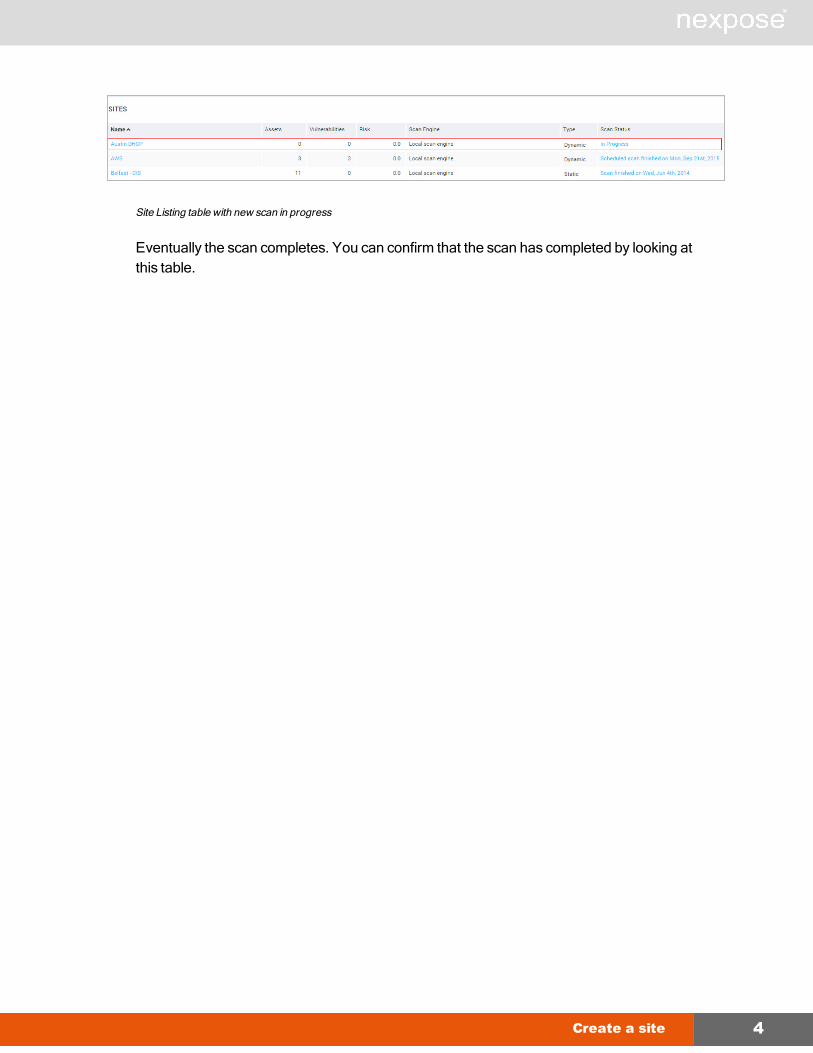
Site Listing table with new scan in progress
Eventually the scan completes. You can confirm that the scan has completed by looking atthis table.

Assess 5
Assess
View and sort scan results to find out your security posture and remediation priorities.
You can drill down through scan data two different ways:
Option A
Click the Vulnerabilities icon to view and compare discovered vulnerabilities and then find outwhich assets are affected by each vulnerability. This approach is useful if you are concernedabout specific vulnerabilities.
Home tool bar–Vulnerabilities icon
Option B
Click the Assets icon to see specific assets and then find out which vulnerabilities affect them.This approach is useful if you are concerned about certain sensitive assets. This guide shows theasset-based approach.

Assess 6
Home tool bar–Assets icon
1. After a scan completes, click the Assets icon.
Assets panel
2. To see specific assets and find out which vulnerabilities affect them, select a viewing category.

Assess 7
Asset tab–View by categories
3. Drill down to the subset of assets that you want to see.
4. Compare assets by different securitymetrics: Click column headings to sort assets bymalware or exploit exposures, total vulnerabilities, or risk scores.
Assets tab–Asset listing table
5. Click an asset’s IP address or host name to view details about it.

Assess 8
Asset tab–Asset listing table detail
6. View details about the asset, including all discovered vulnerabilities.
l To sort vulnerabilities by name, click the Title heading in the Vulnerabilities table.
l To compare and prioritize vulnerabilities, click other column headings and sort them bydifferent securitymetrics.
Asset details
7. Click the name of a listed vulnerability to view details about it.

Assess 9
Vulnerability Listing details
The Security Console displays a page with details about the vulnerability, including itssecuritymetrics, affected assets, and remediation solutions.
Vulnerability details
8. Click the Back arrow on your browser to return to the asset details page.

Act 10
Act
Create a report so that your organization can view it’s security posture and start to prioritize andremediate vulnerabilities.
You can start to create a report two different ways:
Option A
If you want to share urgent information about a sensitive asset, click on the Createdropdownmenu on the top of the page for that asset, then click Report.
Option B
If you want to report onmultiple assets, click the Reports icon. This guide shows themultiple-asset approach for creating an audit report in PDF format.
Home tool bar–Reports tab
1. Click the Reports icon.ORClick the Create tab at the top and then select Report from the drop-down list.The Reports page lists any reports that have been created.Click the New button.
Report panel—Create a Report tab

Act 11
2. Select the Audit Report template. Each template controls what specific information is includedin the report.
3. Select the PDF format under the File format dropdownmenu.
4. Click Select Sites, Assets, or Asset Groups to view the Select Report Scope page.
5. Select Assets from the drop-down list.
Act 12
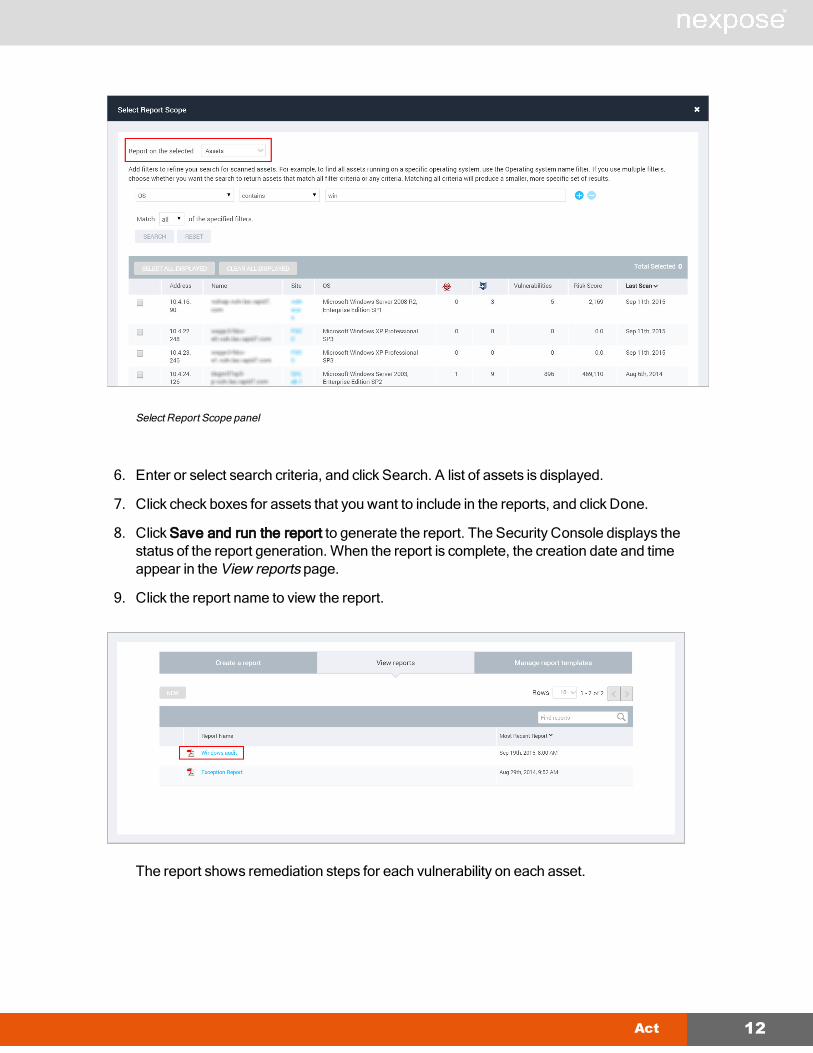
Select Report Scope panel
6. Enter or select search criteria, and click Search. A list of assets is displayed.
7. Click check boxes for assets that you want to include in the reports, and click Done.
8. Click Save and run the report to generate the report. The Security Console displays thestatus of the report generation.When the report is complete, the creation date and timeappear in the View reports page.
9. Click the report name to view the report.
The report shows remediation steps for each vulnerability on each asset.

Act 13
Audit report–remediation steps
Tip: You can schedule reports to run automatically. This is useful if you createmultiple sites andrun scans on a regular basis. You can schedule reports to run after these scans are complete. Tosee scheduling options, click the Schedule tab in the Report Configuration panel.
10. Click the View Reports tab to access the report again, if you want to edit it or generate a newinstance.

Act 14
View reports tab–tools drop-downmenu