Neuron 3.1 (3.1.0.170) - Business Technology Solutions ... · Web viewNeuron ESB 3.1 introduces...
42
Neuron 3.1 (3.1.0.170) Neuron ESB 3.1 Release Themes The Neuron ESB 3.1 release contains a number of enhancements and features that continue to make it the easiest, most cost effective and intuitive Application and Service Integration platform to use for the Microsoft .NET environment. There are significant UX improvements as well as new performance, connectivity and scalability options, the predominate focus of this release is developer productivity. Neuron ESB 3.1 provides significant UX, debugging tools and features that make building, testing, debugging and managing complex business processes far easier than in previous versions. More details of these features are included below but here are some highlights: Step by step debugging of Business Processes Support for Categories, Folders and Filters Design time support for all Business Process Steps Set Breakpoints, F5/F11 support and Disable Process Steps Tabbed view for multiple Processes Tabbed view for multiple Code Step Editors Language support for VB.NET, JavaScript and full C# classes Neuron ESB 3.1 also provides new connectivity options with Salesforce.com and Microsoft Dynamics CRM 2013 adapters that support full metadata harvesting and sample message generation.
Transcript of Neuron 3.1 (3.1.0.170) - Business Technology Solutions ... · Web viewNeuron ESB 3.1 introduces...

Neuron 3.1 (3.1.0.170)
Neuron ESB 3.1 Release ThemesThe Neuron ESB 3.1 release contains a number of enhancements and features that continue to make it the easiest, most cost effective and intuitive Application and Service Integration platform to use for the Microsoft .NET environment.
There are significant UX improvements as well as new performance, connectivity and scalability options, the predominate focus of this release is developer productivity.
Neuron ESB 3.1 provides significant UX, debugging tools and features that make building, testing, debugging and managing complex business processes far easier than in previous versions. More details of these features are included below but here are some highlights:
Step by step debugging of Business Processes Support for Categories, Folders and Filters Design time support for all Business Process Steps Set Breakpoints, F5/F11 support and Disable Process Steps Tabbed view for multiple Processes Tabbed view for multiple Code Step Editors Language support for VB.NET, JavaScript and full C# classes
Neuron ESB 3.1 also provides new connectivity options with Salesforce.com and Microsoft Dynamics CRM 2013 adapters that support full metadata harvesting and sample message generation.
In addition, Neuron ESB has extended support for RabbitMQ. By supporting full clustered/mirrored environments with zero message loss and interruption of the Neuron ESB messaging pub/sub system.
Many more feature enhancements and additions have been detailed below:

User ExperienceThere was significant work done in the Neuron ESB 3.1 release to support users running the desktop display mode at 125%. Previously, Neuron ESB only supported 100% display mode. This would cause many of the UI elements, text and dialogs within the Neuron ESB Explorer to appear either somewhat distorted and, in some cases, nonfunctional. Below are some before and after images:

Almost every feature of Neuron ESB 3.1 has a significant UX enhancement, or was influenced by UX. This section is intended to highlight more of the general UX work delivered with Neuron ESB 3.1. It does not in any way express the full extent of that work. More examples of the UX work can be found in many, if not all of the sections of this document.
Environmental Variables Neuron ESB has always shipped with the ability to use Environmental Variables for configuration of any adapter or service endpoint, database connection string or process step. By using the bindings expression dialog box, users can bind environmental variables directly to the properties exposed by those entities. Many developers access the values of environmental variables directly in code steps within processes. However, in previous versions of Neuron users were required to manually type in the names of those variables with the proper formatting.
In Neuron ESB 3.1, intellisense has been added to the dialog. By pressing ctrl+space, a drop down list of all available environmental variables (filtered by the category filter) will be displayed for selection.
Security ConfigurationOne of the most obvious changes previous users of Neuron ESB will find is that Neuron ESB Parties (i.e. Publishers and Subscribers) are locked down by default. When Publishers or Subscribers are created in Neuron ESB 3.1, the Microsoft Windows accounts that can host and use them are restricted to those accounts that are members of the local (“BUILTIN”) Administrators and Users group that exists on the Neuron ESB server. If hosting the Neuron ESB Client API on remote machines, the user account hosting the API must either be a member of those groups on the Neuron ESB server, or the user account must be added to the Party’s security membership through the Security Tab of either the Publisher or

Subscriber role within the Neuron ESB Explorer. Security can also be removed entirely, the default behavior in previous versions of Neuron ESB.
In addition to locking down Publishers and Subscribers, most of the Security section within the Neuron ESB Explorer has been refactored to simplify the user experience related to creating and managing the accounts and certificates that can be used to configure endpoints and other elements with Neuron ESB.
In previous versions of Neuron ESB, users were required to manually type in search criteria for certificates that existed in a specific store, a troublesome and error prone process. This was required when creating certificate type of Credential in the Security store as well as when a certificate would be required for service or client connector endpoint. In some cases, the Neuron ESB Security Credential store was essentially disconnected from the Service Endpoints for Issuer Credentials, requiring duplicate information to be entered in many different places.
In Neuron ESB 3.1, all certificate selections within Neuron ESB have been linked back into the Neuron ESB
Security store located in the Security->Authentication->Credential section of the Neuron ESB Explorer. Additionally, all certificate selection is controlled through a new UX experience, eliminating the need for users to manually search for and type in search criteria.
In previous versions of Neuron ESB, when user credentials were required for service connector endpoints, users would have to manually enter in account information within the Service Connector tab of the endpoint, rather than use the user credential created and stored in the Security->Authentication->Credential section of the Neuron ESB Explorer. This happened in other areas as well.

In Neuron ESB 3.1 we’ve standardized on the Active Directory selector dialog to allow users to select Windows accounts when creating Windows Account type credentials in the security store. When used, Neuron ESB will also resolve and store the associated SID of the account. All account selections within Neuron ESB have been linked back into the Neuron ESB Security store.
One last area where Neuron ESB 3.1 normalizes the security experience is during the creation of Access Control Lists. In previous versions of Neuron ESB the credentials that comprised this list were entirely disconnected from the Security store. Meaning, when a list was created, users were not prompted to select an existing Credential from the Security store. Instead they were forced to create entirely new ones, with a different UX experience, that were often duplicates of what already existing in the Credential store. In Neuron ESB 3.1 we’ve unified the experience so that Access Control Lists are now comprised of a selection of Credentials that already exist in the Security Store:
Consistent Entity Management Neuron ESB 3.1 delivers a new consistent Entity Management experience throughout the Neuron ESB Explorer. Regardless of the entities, such as Topics, Publishers/Subscribers, WSDL, XML, Databases, etc., users should find a consistent interface that varies little from one entity to another.
For example:
Text boxes representing entity names as well as other properties have been extended to support long entity names.
Dropdown controls that display category, entity or other information have been modified to automatically widen to support the longest entry in the list.
Descriptions have been modified to support multiple lines and scroll bars. Some entity interfaces (such as Service Endpoints) have been reorganized to make data entry
and the selection of options more intuitive. In many entity interfaces, user selection is enabled/disabled based on context and user entry to
reduce opportunities of configuration errors.

MSMQ Management Neuron ESB 3.1 provides users a way to manage, view and edit pending messages awaiting delivery when using MSMQ based topics. Although this capability exists in Neuron ESB 3.0 r, the user experience was overwhelming in that it provided unnecessary information to the general user.
In Neuron ESB 3.1, we simplified the experience by making queue paths an optional visible feature and eliminating the display of non-active infrastructure queues. For example, the following 2 images demonstrate the Neuron ESB 3.0 interface on the left, while the new Neuron ESB 3.1 interface is on the right. In Neuron ESB 3.1, there’s a new context menu to optionally display the underlying queue path.
Client Meta data ConfigurationThe dialog that allowed users to associate WSDL (metadata) with Neuron ESB hosted services has been redesigned to make it more intuitive and easier to use. When a service endpoint (specifically a client connector) is hosted using either http or http (non REST), WSDL can be configured for the endpoint by clicking on the Metadata button located on the Client Connector tab. This is only enabled if the URL prefix is either http or https.
Endpoint HealthPreviously, Client and Service connectors which were not configured would be displayed in Neuron ESB Explorer’s Endpoint Health. In Neuron ESB 3.1 only configured Client and Service connectors are listed.

Neuron Auditing/Reporting/Viewing Messages
New Submission Count PropertyThis has been added to both Message History and Failed Message reports. If a message is resubmitted using the message viewer, its Submission Count Property will automatically be incremented on the message that is resubmitted. Once the message is audited again, the Submission Count property can be viewed within the Neuron Properties tab of the Message Viewer, highlighted in yellow.
Users can use the filter feature of both the Failed Message and Message History reports to query for any messages that have been resubmitted more than once:
Message Viewer navigationMessage Viewer navigation within the Message History and Failed Message reports has been added. Now, when viewing a message using the Message Viewer, users can click on message records in the underlying report and that record will be displayed in the Message Viewer. There is no longer a need to close and reopen the Message Viewer to view a different record.

Extending Neuron ESB Test ClientThe Neuron ESB Test Client has been enhanced to show all Neuron ESB Header, Custom Properties and HTTP Header properties in the Message History window:
We have updated the viewing binary messages within the Message Viewer, the hex editor would not resize correctly if the Message Viewer dialog was resized. This has been corrected.
In previous versions of Neuron ESB, if the solution’s bootstrap address had been changed to anything other than 5000, republishing messages from either the Message History or Failed Message reports would fail.
Developer Productivity and Business ProcessesNeuron ESB has always provided a way for developers to test the Business Processes that are created within the Neuron ESB Explorer’s Process Designer. Testing entailed submitting a message using the

“Edit Test Message” dialog and watching, as each Process Step in the Business Process executed. Users would see a green marker move through the Business Process, highlighting each Process Step as it was executed. However, the testing process lacked true debugging support. For example, there was no way to stop at a specific point in the Business Process and actually inspect the state and context of the Process and/or a specific Process Step. There was no way to debug custom code written within a C# Code Process Step. This required developers to insert custom trace and logging statements prior to testing. There was also no ability to disable branches or Process Steps within a Process. If extra Process Steps were included during testing, these would have to be removed from the Process before deployment.
Neuron ESB 3.1 introduces true Business Process debugging support at design time so that developers can quickly test, diagnose and fix the Business Processes AS they are developing them. The Business Process debugging experience within Neuron ESB 3.1 is synonymous to the experience provided by Microsoft Visual Studio for debugging .NET applications. For example, developers can set Breakpoints, disable Process Steps, use F5/F10/F11 keys, view exceptions and view the context of the Process and Process Steps.
BreakpointsSetting Breakpoints is easy, intuitive and can be set on both on Process Steps as well as within any code editor belonging to a C#, C# Class and VB.NET Process Step. Within a Business Process, Breakpoints can be set on any Process Step and selecting “Add BreakPoint” from the context menu. Once a breakpoint is added, the Process Step will change to a reddish brown color. To retain all Breakpoints between opening and closing of the Business Process, the Process must be saved.
Within a VB.NET, C# or C# Class Code Editor, setting Breakpoints is as easy as clicking to the left of the line of code that the debugger should stop on. A red dot will be displayed to the left of the line of code
(Breakpoint Indicator Margin) and the line of code will be highlighted in red.
Once a Breakpoint is set and the debugging process has started (by selecting the new “Start/Resume Debugging” toolbar button), the green marker will move to the first Process Step that has a Breakpoint. Once the green marker moves to a Code Process Step (whether or not it has a Process Step level Breakpoint set on it) that has Breakpoints set within its Code Editor, the
debugger will automatically open the Code Editor and stop on the line of code that has the Breakpoint. The line stopped on will be highlighted in yellow and the debug toolbar of the Code Editor will appear.

From there, F5 (continue), F10 (step over) or F11 (step into) keys can be used to walk through each line of code in the editor. The debugger can also be stopped by clicking the “Stop Debugging” toolbar button (F1 key). Once on the last line and F5 (or the continue toolbar button is pressed) the debugger will move to the next Process Step that has a Breakpoint set on it.
If an unhandled exception occurs, the line will immediately be highlighted in orange. By moving the mouse cursor over the Breakpoint Indicator Margin to the left of the line of code, a tooltip will appear with the error message. If an unhandled exception occurs on a Process Step, the debugger will stop on that Step and highlight it in red. The exception information can be viewed in the Trace Window.
To
remove all Breakpoints in a Code Step, there’s a red “X” icon on the toolbar. It clears all Breakpoints. The Process Designer has a similar toolbar button that does the same, but for Process Steps.

Disabling Process StepsDisabling Process Steps has been enabled for both design time and runtime environments. If a user disables a Process Step, that Process Step will be stepped over and not executed, either when testing in the Process Designer or at runtime.
Within a Business Process, disabling a Process Step is as easy as selecting “Disable” from the context menu. Once a Process Step is disabled, the Process Step will change to a dark grew color. To retain the disabled condition at runtime, the Business Process must be saved.
Quick Watch WindowNeuron ESB 3.1 introduces support for a Quick Watch window that provides the ability for developers to view local variable information (much like Microsoft Visual Studio Auto window). If a Breakpoint is hit during the debugging process, the state of the ESB Message can be evaluated in the Quick Watch.
The state of custom variables, Environment Variables and various context properties like context.Data.Properties, context.Properties, context.States, etc. can also be examined as the user steps through each Process Step within a Process.

Tabbed View of Business ProcessesIn previous versions of Neuron ESB, only one Business Process could be opened within the Process Designer at time in order to be worked on. If a user needed to copy elements of one process over to another, the first process would have to be closed before the second process could be opened and viewed.

Neuron ESB 3.1 introduces a new Tabbed Dialog view of Processes within the Process Designer. This allows multiple Processes to be opened at the same time, allowing the user to navigate between them all by simply selecting their respective tabs. Additionally, the tabs are dock able and detachable, allowing several processes to be arranged within the same window.
Or processes can be detached and worked on in dedicated windows:

Lastly, when a user navigates to another part of the Neuron ESB Explorer to work on any other part of the solution and later navigates back to the Process Designer, all previously opened Processes will still be opened in their respective tabs and locations. If there was a test message submitted for a specific process using the “Edit Test Message” dialog, that message will still be maintained and loaded in the “Edit Test Message” dialog when used with the specific Process.
Tabbed View of Language Code EditorsIn previous versions of Neuron ESB, the C# Code Process Step opened as a Modal window within the Neuron ESB Explorer. This required users to close the editor before any other activity could be done within the Neuron ESB Explorer.
Neuron ESB 3.1 adds the Code Editors to the same shared Tabbed Dialog view that the Processes use. Now multiple Code editors (JavaScript, C#, C# Class and VB.NET) can be opened side by side in their own tabs, allowing users to navigate easily between Code Editors and Processes

Extended Language SupportNeuron ESB 3.1 introduces support for new languages as well as expanded support for C# and the overall code writing experience. Users can now write VB.NET, JavaScript or full C# classes directly within a Business Process without any need to generate and reference .NET assemblies. All languages are represented by individual process steps under the Languages folder of the Process Step library
A new developer toolbar has been included with all the Code Steps
This provides developers access to common tasks such as undo, comment, format, indent, delete all breakpoints, add assembly references, display line numbers, etc.
We have also added support for adding breakpoints on a specific line of C# (within the C# or C# Class Code Steps) and VB.NET Code Step. Developers can add breakpoints on code lines which will cause the Neuron ESB debugger to stop on the specific line when it hits, similar to what developers experience within Microsoft Visual Studio. Once broken into the debugger, a modified Toolbar will appear allowing the user to continue, step over or stop the debugging process. While in Debug mode, developers can view the state of context and process within the Debug Window.

Also, a new compile window has been added to all the Code Steps that allow users to see the design time compile error, line number and column where the error is occurring as shown in the C# Code Editor Image below:
VB.NETWriting VB.NET code within a Process is as simple as dragging the VB.NET Code Step onto the Process Designer, right click and selecting edit. Users will receive the same experience as if using the C# Code Step:

JavaScriptWriting JavaScript directly in a Process is just as easy. Drag a JavaScript Code Step directly onto the surface of the Process Designer, right click and select edit to open the Code Editor:

C# ClassesThe new C# Class Code Step offers some advantages over the existing C# Code Step that previously shipped with Neuron ESB. The C# Class offers developers a way to more easily organize their code, reducing its complexity. It also allows developers to add using statements and define their own name spaces and new classes. The C# Class Code Step provides an existing template that developers can modify by changing the namespace and class names. From there developers can add additional methods or new classes:
Category and Descriptions All processes now have both a category and description property. If assigned a category, the category selected in the Category Filter toolbar dropdown of the Neuron ESB Explorer will automatically filter the view of processes in the Process Library.

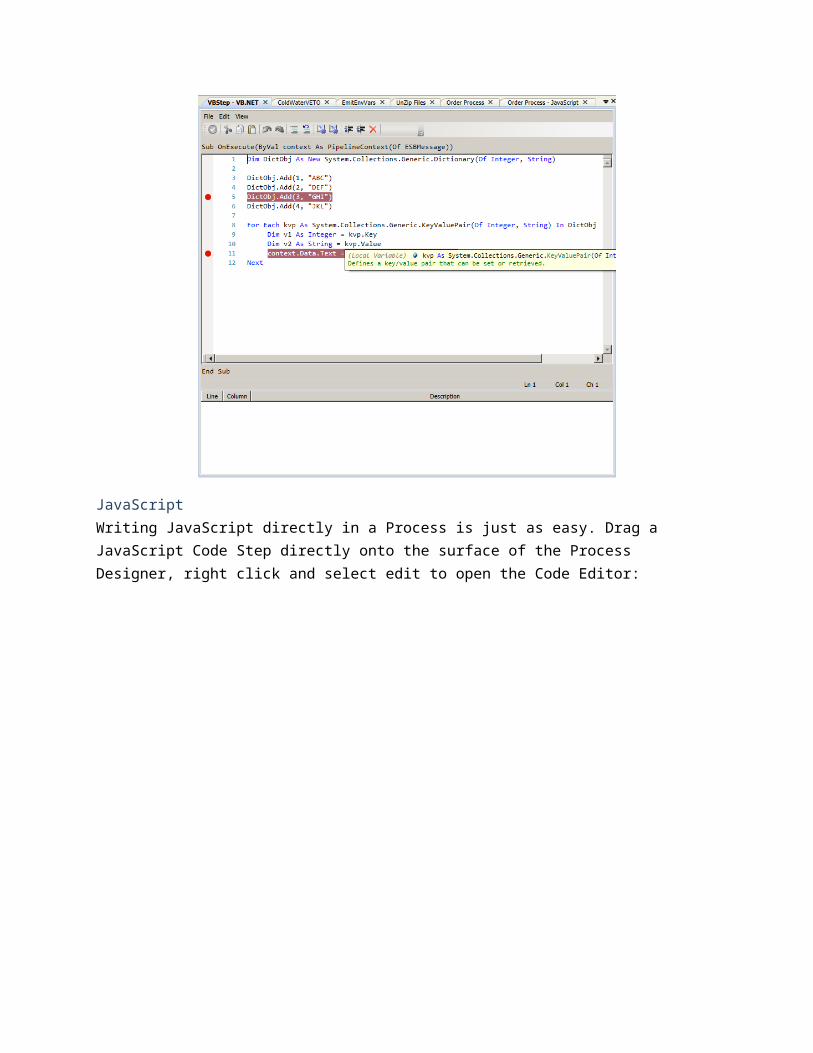
Business Process FoldersUsers can now create folders to organize and store their processes in. An “Add Folder” button has been added to the Process library toolbar. Sub folders can be created by right clicking on an existing folder and selecting “Create Folder” from the context menu. Users can also rename the folder by simply clicking on the name and in the process library for it to become editable.
Once folders are created, existing processes can be dragged and dropped into the folders. Once the folder organization is complete, the solution must be saved.
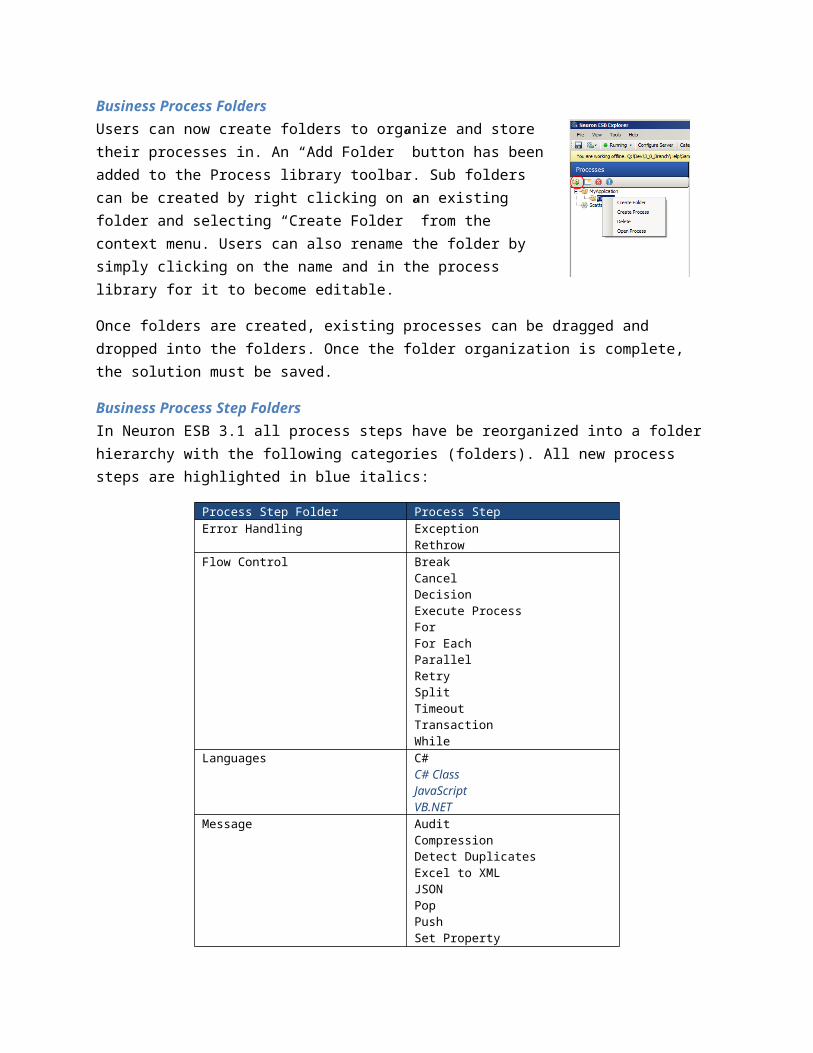
Business Process Step FoldersIn Neuron ESB 3.1 all process steps have be reorganized into a folder hierarchy with the following categories (folders). All new process steps are highlighted in blue italics:
Process Step Folder Process StepError Handling Exception
RethrowFlow Control Break
CancelDecisionExecute ProcessForFor EachParallelRetrySplitTimeoutTransaction

WhileLanguages C#
C# ClassJavaScriptVB.NET
Message AuditCompressionDetect DuplicatesExcel to XMLJSONPopPushSet PropertyTrace
Security Decrypt XMLEncrypt XMLSign XMLVerify Signed XML
Services PublishRules – WFServiceWorkflow
Storage MSMQODBCStoreTable QueryXml Query
XML Transform – XSLTValidate - Schema
Business Process NavigationReusable processes are an important development pattern. Neuron ESB Processes can be reused/called by other existing processes by using the Process Execution Process Step. If a user double clicks on this Process Step, the Process that it calls will be displayed along with a Back button on the toolbar. This provides the developer a way to easily navigate back and forth between parent and child processes.
Business Process Printing and Save ImageAll processes within the Neuron ESB Process Designer can now be saved as a JPEG or Printed as a report through the new Process Designer’s toolbar:
Clicking the “Save” button will prompt the user for a location to save the JPEG image of the process to.
Clicking the “Print” button will display a Print Preview form with an image of the process along with any custom code that any Process Step may contain. All custom code is separated in the report by the name of the Process step that contains it and is formatted with Rich Text.

Business Process Steps
Extended Design Time Testing SupportIn Previous versions of Neuron ESB, almost all Process Steps could be tested directly in the Process Designer with the exception of the Audit and Publish Steps. In Neuron ESB 3.1, the Audit and Publish process steps have been modified to support design time debugging within the Neuron ESB Business Process Designer. The only requirement is that the solution which is to be tested must be hosted and running in a Neuron ESB runtime on the local machine. The Neuron ESB Explorer can be opened in either online or offline mode for this to work. Additionally, when submitting a message to test, a valid SourceId and Topic must be provided in the “Edit Test Message” dialog. These are used to create a connection to the live Neuron ESB runtime service hosting the solution:
Extended Xml Schema Validation Process StepIn previous versions of Neuron ESB the “Validate-Schema” process step only supported file based locations for the “schemaLocation” attribute for schemas that contained import or include references. For example, when a WSDL is downloaded, the schemas included in that WSDL will often import from a different schema, using a “schemaLocation” attribute to direct the schema parser on where to find it. Neuron ESB previously only supported a file-based location, such as this:
<xsd:schema xmlns:tns="urn:partner.soap.sforce.com" xmlns:ens="urn:sobject.partner.soap.sforce.com"

xmlns="http://www.w3.org/2001/XMLSchema" elementFormDefault="qualified" targetNamespace="urn:partner.soap.sforce.com" xmlns:xsd="http://www.w3.org/2001/XMLSchema">
<xsd:import schemaLocation="C:\SchemaS\Account_sObject" namespace="urn:sobject.partner.soap.sforce.com" />
At runtime, if there was a Validate-Schema process step, the import (or include) would be resolved to the local file system.
In Neuron ESB 3.1 support has been added to resolve schema locations to the ESB Repository, like this:
<xsd:schema xmlns:tns="urn:partner.soap.sforce.com" xmlns:ens="urn:sobject.partner.soap.sforce.com" xmlns="http://www.w3.org/2001/XMLSchema" elementFormDefault="qualified" targetNamespace="urn:partner.soap.sforce.com" xmlns:xsd="http://www.w3.org/2001/XMLSchema">
<xsd:import schemaLocation="esb:Account_sObject" namespace="urn:sobject.partner.soap.sforce.com" />
At runtime, if the schemaLocation attribute starts with esb: Neuron ESB will look for the schema in the configuration’s repository. The name following the esb: is the name of the schema in the repository.
Exception Pattern built into Audit Process StepIn previous versions of Neuron ESB, users were encouraged to adopt a reusable exception management pattern to employ in all of their processes. Generally this would entail creating a generic process that would handle and audit the exception and that process could be called from the Catch block of any other process using the Process Execution process step. Part of that pattern included the enrichment of the original exception using a C# Code Process step similar to this:
PipelineException parentEx = (PipelineException)context.Properties["PipelineException"];
string newExceptionMessag = String.Format(System.Globalization.CultureInfo.InvariantCulture,
"\r\n\r\nProcess Error Message: {0} \r\n\r\nSource Process: {1}\r\nSource Process Step: {2}\r\nSource Error Message: {3}\r\n\r\n", parentEx.Message,
parentEx.Pipeline, parentEx.PipelineStep,
parentEx.InnerException.Message);
context.Properties["CurrentException"] = new System.Exception(newExceptionMessag);
With Neuron ESB 3.1 this is no longer necessary. When a failure occurs and the message is audited using the Audit process step, the parent process name, source process name (where the error occurred) and the process step name that generated the exception are now captured. Also, the appropriate inner exception is retrieved if a child process generated the exception. All of this information is now recorded in the Failed Message Report and can be viewed in the Message Viewer.
The source process name (where the error occurred is also captured within the database as a custom property when using the Audit Process Step in Failure mode (action property).
When using the Audit Process step in either Receive or Send mode (action property), the property will contain the name of the current process the Audit Process step is executing in.
Simplifying Pop/Push Process StepsThe Pop and Push Process Steps allow users to simplify the saving and restoration of a message at runtime within a Business Process. In many occasions, it may be desirable to save the original incoming message (Push) before it is transformed, enriched or otherwise changed as part of the process and when finished, restore (Pop) the message to its original state.

In previous versions of Neuron ESB, developers would be required to use a C# Code Step directly following the Push Process Step. This Code Step would have one line of code i.e.:
context.Data = context.Data.Clone(true);
In Neuron ESB 3.1 this is no longer required.
Extending the Service Process StepIn Neuron ESB 3.1 the Service Process Step has been extended to support WSDL extensions as well as maintaining its current support for WCF “Metadata Exchange Endpoints”. In previous versions of Neuron ESB, if the either the Metadata Url property was used or, a user selected to import the metadata by selecting “Select Endpoint…” from the context menu, only “Metadata Exchange Endpoints” could be used.
In Neuron ESB 3.1, WSDL support has been added, allowing non WCF services to be easily accessed through use of WSDL at runtime. If using the Select Endpoint metadata wizard (displayed below), if an endpoint is entered without either a WSDL or Metadata Exchange Endpoint, WSDL will be assumed and that extension will be automatically entered for the user:
Also, if a WSDL or Metadata Exchange Endpoint is not found, an error will be displayed to the user. In previous versions of Neuron ESB, the wizard would silently fail, displaying no error at all.

Lastly, the Service Process Step can still be manually configured to call any WCF or NON WCF service endpoint using its associated property grid. This allows service calls to be made without have to retrieve and parse the Metadata for each call.
New Timeout Process StepThe Timeout Process Step executes the contained Process Steps on a background thread. To succeed, the contained Process Steps needs to complete successfully before the timeout period expires, otherwise a timeout exception will be raised on the Business Process.
For example, if the Timeout Process Step is configured for 5 seconds, the contained steps must complete their execution before the 5 seconds expires, otherwise a timeout exception will be raised and the Business Process may terminate. Even though the contained Process Steps are executed on a background thread, the Timeout process step executes synchronously. The Business Process will not continue until either the contained Process Steps complete or a timeout occurs.
The Timeout Process Step is compatible with the use of transactions, such as transactional MSMQ topics. If a transaction is active when the Business Process runs, the contained Process Steps will execute within the context of the transaction that the Business Process is participating in. Failure of the contained Process Steps will cause the transaction to roll back and the message will be returned to the party’s message queue.
Although this cannot generally be used to abort a poorly constructed looping scenario, a cancellation token has been built into the context object which can trigger the termination of the processing occurring in the background thread. This will only happen between Process Steps.
For example, the Timeout Process Step would not terminate the following constructed loop if used in a C# Code Process Step:
while (true){ // Do something here System.Threading.Thread.Sleep(1000); context.Instance.TraceInformation("hi");
}However, if the loop were reconstructed to use the Cancellation Token, the loop (and the background processing thread) will be terminated directly by the Timeout Process Step by using the IsCancellationRequested property of the CancellationToken object of the context object.
while (!context.CancellationToken.IsCancellationRequested){ // Do something here System.Threading.Thread.Sleep(1000); context.Instance.TraceInformation("hi");
}

New Decrypt/Encrypt Message Process StepsThe Encrypt Message and Decrypt Message steps employ the XML Encryption standard to protect XML messages being sent between parties. The Encrypt Message and Decrypt Message process steps employ the AES encryption standard based on the Rijndael encryption algorithm to protect sensitive data from being exposed to unauthorized parties.
The Encrypt Message and Decrypt Message process steps will look up the encryption key from the Neuron ESB configuration. Developers may also specify a custom initialization vector that will be used to enhance the security of the encrypted data. Using the Encrypt Message step, it is possible to either encrypt the entire XML message, or to encrypt a fragment of the message specifying using an XPath expression.
New Sign/Verify Message Process StepsThe Sign Message process step uses the RSA algorithm to attach a cryptographic signature to an XML message. The Verify Message process step will use the same RSA algorithm to verify that a signed message is valid. Both the Sign Message and Verify Message process steps use X.509v3 certificates stored in the Windows certificate store and configured in the ESB configuration to sign or verify the XML message.
The Sign Message process step requires the presence of a private key attached to the certificate in the certificate store. Using the private key, the Sign Message process step will use the XML Signature standard to calculate the cryptographically-secure signature for the message and will add the signature to the XML body of the message.
The Verify Message process step will use the public key associated with a configured X.509v3 certificate to verify that the signature attached to an XML message is valid and was signed by the private key associated with the public key that is used to verify the message’s signature.
Connectivity
Topic Transports
RabbitMQ Clustering for TopicsIn Neuron ESB, Topics can be configured to use any number of transports including TCP, Peer, Named Pipes, MSMQ and RabbitMQ. MSMQ or RabbitMQ would typically be used if durable/persisted or transacted messaging was required end to end.
In Neuron ESB 3.1, RabbitMQ support has been substantially upgraded to support Clustered/Mirrored RabbitMQ environments.

In clustered RabbitMQ environments, mirroring of all Neuron ESB infrastructure queues should be configured through the RabbitMQ administration portal. Once this is done, each member of the cluster should be entered in the RabbitMQ tab of the Neuron ESB Explorer’s Deployment Groups section as displayed in the image above.
New property options on the Topic’s transport network property page determine the behavior as well as level of reliability that will be provided if either a member of the cluster or all members of a cluster fail. These property options can also guarantee once only delivery of the message.

The RabbitMQ transport for a Topic can be configured to run either in PublishConfirm (asynchronous type of transaction support based on acks/nacks), Transactional or no Transaction mode. It can also be configured to detect and discard any duplicate messages as well as resubmit all unacknowledged messages once connectivity is restored to the cluster if one or all machines in the Rabbit MQ cluster fail.
For example, consider the case where there are 2 RabbitMQ nodes configured in a mirrored cluster. If messages were being published and received through Neuron ESB while one of the nodes went down, the underlying Neuron ESB Runtime would automatically catch the failure condition, report it, and seamlessly roll over and send/receive messages to the remaining node in the RabbitMQ cluster. The original failed message would be resent to the surviving node and (if using PublishConfirms), any unacknowledged messages will be republished to the surviving node as well to ensure no message loss. Any messages that fail to be redelivered would be written to the Neuron ESB Audit database where they can later be resubmitted.
If both nodes go down, once the primary node is restored, all unacknowledged messages (if using PublishConfirms), will be resent to the primary node. Any failures will be written to the Neuron ESB Audit database where they can later be resubmitted.
MiscellaneousRabbitMQ Dead Letter Monitoring – Neuron ESB automatically monitors a dead letter queue for all of its infrastructure queues. If the Neuron ESB dead letter processor fails on startup, any endpoint that successfully starts up after the fact will restart the dead letter processor.
RabbitMQ Endpoint Health statistics - The endpoint health statistics (errors and warnings) were never in sync with the statistics in the base child class, hence even if restarted and the statistics were cleared, they would be repopulated by the old number and always show red errors. This would be intermittent. This has been fixed.
Additionally, if a RabbitMQ based topic failed to start up when the Neuron ESB runtime was started, the timer would never be initialized so there was nothing watching to try to refresh the statistics reported in Endpoint Health within the Neuron ESB Explorer in case where the RabbitMQ topic would later be restarted.
Adapters
Microsoft Dynamics CRM 2013 AdapterThis is a new adapter included in the 3.1 release. This adapter supports both one way subscribe as two-way, solicit response mode. Users can either send updates or inserts into Dynamics CRM 2013, or make FetchXml Query requests against Dynamics CRM 2013. This adapter also supports meta-data harvesting. Users can browse the operations exposed by Dynamics CRM2013 and elect to generate Xml Schemas and sample Xml Messages for the various operations.
This adapter supports multiple security options, standard Windows credentials, Live Id credentials and Federated.

The Meta data generation wizard can be accessed through the “Retrieve Metadata” property of the adapter endpoint.
Operations can be selected by clicking the Add button. After operations are selected, the Import button will display the selected operations, allowing users to edit their properties and to optionally choose to generate sample Xml messages. The Finish button will store all the generated Xml Schemas and

messages into the Neuron Explorer’s Repository.
Neuron ESB 3.1 ships a sample demonstrating how to use the new adapter. This can be found in the Neuron Explorer’s Sample Browser.
SalesForce.com AdapterThis is a new adapter included in the 3.1 release. This adapter supports the publishing of outbound notifications directly from SalesForce.com to Neuron ESB as well as two-way, solicit response mode. Users can either send updates or inserts into SalesForce.com, or make Query requests against SalesForce.com. This adapter also supports meta-data harvesting. Users can browse the operations exposed by SalesForce.com and elect to generate Xml Schemas and sample Xml Messages for the various operations.
When using the SalesForce.com adapter in Publish mode, the user must supply a URL that Neuron will host. All outbound notifications that are received can then be mapped to specific topics using the “Message Routing Table” property of the adapter endpoint.

The Meta data generation wizard can be accessed through the “Retrieve Metadata” property of the adapter endpoint.
Operations can be selected by clicking the Add button. After operations are selected, the Import button will display the selected operations, allowing users to edit their properties and to optionally choose to generate sample Xml messages. The Finish button will store all the generated Xml Schemas and messages into the Neuron Explorer’s Repository.
Extended Apache Active MQ AdapterSeveral modifications were made to this adapter to achieve higher throughput in environments with limited IO capabilities. We added support for a configurable number of ActiveMQ Consumers to publish messages to Neuron ESB and a configurable number of producers to send messages to ActiveMQ from Neuron ESB. Support was also added for different acknowledgement types when reading messages from ActiveMQ – Individual Acknowledge, client acknowledge, transactional, auto acknowledge. For

sending messages to ActiveMQ, we added support for both synchronous and asynchronous sends. Additionally, the client libraries were upgraded. We now use:
Apache.NMS.ActiveMQ – 1.6.2 Apache.NMS – 1.6.0
Updated Neuron ESB Adapter FrameworkThis has been updated and is now included in the Neuron Explorer’s Sample Browser. This is a sample project template that demonstrates how to build Neuron ESB Adapters using any message pattern such as request/response, solicit/response, one way publish, one way subscribe. Many helper functions have been pushed into main Neuron ESB assemblies making adapters much easier to develop.
MiscellaneousPOP3, Microsoft Exchange, Azure Service Bus, and FTP/SFTP/FTPS Adapters – At runtime, these adapters may use the Neuron ESB Audit Database for specific functions, if enabled. We found that under certain conditions the adapters would erroneously detect that there was no Neuron ESB Audit database configured for the environment. Hence those specific features, if enabled, would remain effectively disabled. This has been corrected.
Microsoft Exchange Adapter - System.ArgumentException i.e. "The value must be greater than 0" would be thrown if a slash wasn't used with the folder name.
Service Endpoints
MiscellaneousNEW – Client Credentials, Service Credentials and Access Controls Lists are all populated by the Credentials created and maintained in the Security section of the Neuron ESB Explorer. If these were set in previous versions of Neuron ESB, they will have to be reconfigured to use the Credential store.
NEW - Windows authentication is now supported when using the REST binding with the Transport:Windows security setting.
In Neuron ESB 3.1 we have fixed service endpoints so when policy retries are defined, they show up as warnings similar to adapter endpoint retries when policies are used. Additionally, warnings and errors are incremented for the WMI performance counters for adapter endpoints.
Performance
Neuron Runtime
Asynchronous Startup and ShutdownIn previous releases, on start up the Neuron ESB runtime would start up each Service and Adapter endpoint, one at a time. This could result in both significant startup and shutdown times if there were many endpoints defined in a solution. This has been changed in Neuron ESB 3.1 so that all endpoints are started up and shutdown asynchronously.

Neuron Installer
Neuron ESB WMI Performance CountersThe creation of these has now been moved to the Setup.exe installer. Previously, these were created each time the Neuron ESB Runtime was started. This feature is represented on the Feature Install page of the installation wizard by the “ESB Service Management Objects” and is disabled (unchecked) by default.