NEF6LM Cordless Flaring Tool User Manual - NAVAC
5
SAVE THIS MANUAL FOR FUTURE REFERENCE NEF6LM NAVACInc. www.NavacGlobal.com User Manual Cordless Power Flaring Tool MADE IN CHINA Tel/Fax: +1 877 MY-NAVAC 877 696 2822
Transcript of NEF6LM Cordless Flaring Tool User Manual - NAVAC

SAVE THIS MANUAL FOR FUTURE REFERENCE
NEF6LM
NAVAC�Inc.www.NavacGlobal.com
User Manual
Cordless Power Flaring Tool
MADE IN CHINA
Tel/Fax: +1 877 MY-NAVAC 8 77 696 2822
Safety Guide
Contents
Structure and Technical Parameters
Operation Instruction
Troubleshooting
Exploded View and Parts List
01
03
05
06
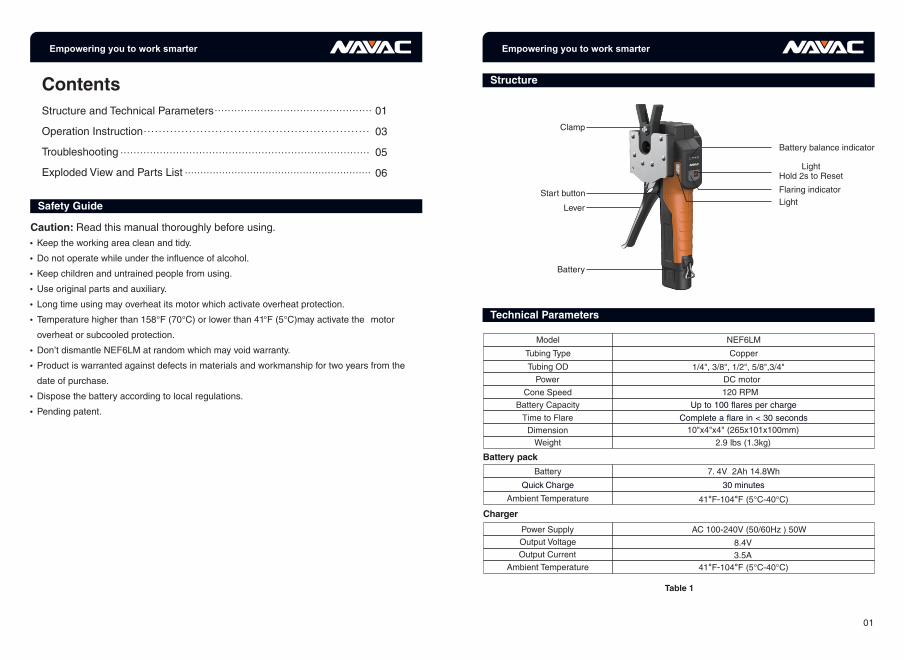
Structure
Technical Parameters
Start button
Clamp
Lever
Battery
LightHold 2s to Reset
Battery balance indicator
Flaring indicator
Light
NEF6LM
Tubing Type
Tubing OD
Power
Cone Speed
Battery Capacity
Time to Flare
1/4", 3/8", 1/2", 5/8",3/4"
DC motor
Copper
120 RPM
Up to 100 flares per charge
Complete a flare in < 30 seconds
Quick�Charge 30�minutes
Dimension 10"x4"x4" (265x101x100mm)
Battery pack
Battery 7.4V 2Ah 14.8Wh
Power Supply
Output Voltage
Output Current
AC 100-240V (50/60Hz ) 50W
8.4V
3.5A
Ambient Temperature 41°F-104°F (5°C-40°C)
Charger
Ambient Temperature
01
Caution: Read this manual thoroughly before using.
............................................................
Ÿ Keep the working area clean and tidy.
Ÿ Do not operate while under the influence of alcohol.
Ÿ Keep children and untrained people from using.
Ÿ Use original parts and auxiliary.
Ÿ Long time using may overheat its motor which activate overheat protection.
Ÿ Temperature higher than 158°F (70°C) or lower than 4 1 °F (5°C)may activate the motor
overheat or subcooled protection.
Ÿ Don’t dismantle NEF6LM at random which may void warranty.
Ÿ Product is warranted against defects in materials and workmanship for two years from the
date of purchase.
Ÿ Dispose the battery according to local regulations.
Ÿ Pending patent.
Model
................................................
Table 1
Weight 2.9 lbs (1.3kg)
41°F-104°F (5°C-40°C)
............................................................................

Operation Instruction
0302
2. Get the clamp placed.Ÿ Keep the lever open and put in the clamp. A locked lever resists the clamp being placed.Ÿ Push the lever inward to lock the clamp.
3. Press the START button to flare.
Copper
Limit baffle
Clamp�legs
Figure 1
Figure 2
Clamp
Lever
Locking the clamp
Figure 3
Caution:Make sure hash marks lineup. Otherwise it may cause a defective flare and damage the clamp.
Caution:Ÿ Don’t open the lever during flaring, otherwise the automatic flaring stops.Ÿ If it happens, press the reset button 2 seconds to draw back the cone.Ÿ Make sure the clamp is still horizontally placed.Ÿ Press inward the lever to lock the clamp again.Ÿ Press the start button to reflare.
LightFlaring
Hold 2s to Reset
0504
Troubleshooting
Problem Possible cause Solution
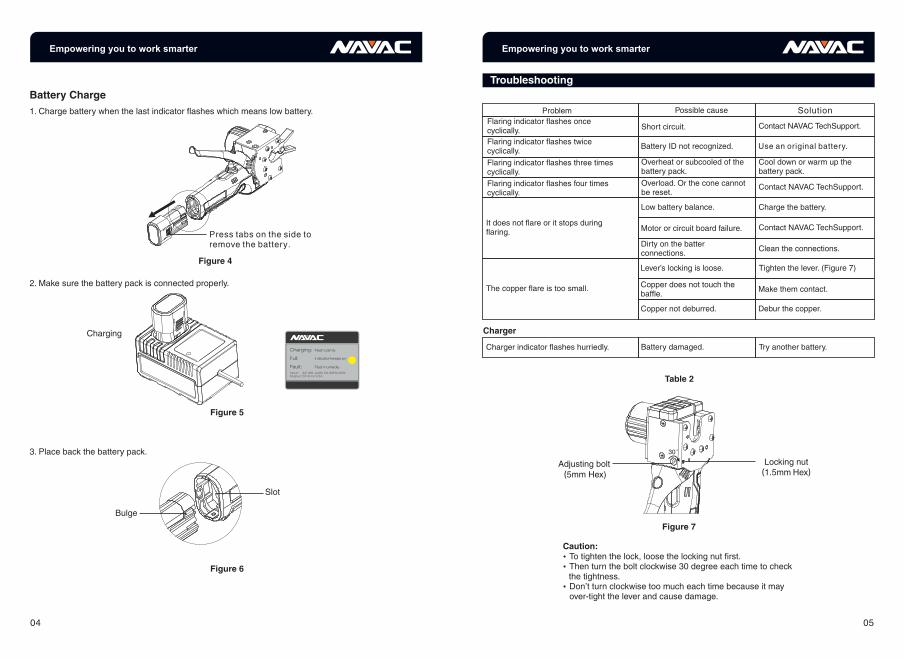
Adjusting bolt�(5mm Hex)
Locking nut(1.5mm�Hex)�
30°
Charger indicator flashes hurriedly.
Short circuit.
Battery ID not recognized.
Overheat or subcooled of thebattery pack.
Contact NAVAC TechSupport.
Cool down or warm up thebattery pack.
Use an original battery.
Flaring indicator flashes oncecyclically.
Flaring indicator flashes twicecyclically.
Flaring indicator flashes three timescyclically.
Figure 7
It does not flare or it stops duringflaring.
Low battery balance.
Motor or circuit board failure.
Lever’s locking is loose.
Copper does not touch thebaffle.
The copper flare is too small.
Tighten the lever. (Figure 7)
Make them contact.
Copper not deburred. Debur the copper.
Battery Charge
2. Make sure the battery pack is connected properly.
Charging
Bulge
Figure 4
Figure 5
Slot
Figure 6
Table 2
Flaring indicator flashes four timescyclically.
Overload. Or the cone cannotbe reset.
Battery damaged. Try another battery.
Charge the battery.
Dirty on the batterconnections.
Clean the connections.
Contact NAVAC TechSupport.
Contact NAVAC TechSupport.
Caution: Ÿ To tighten the lock, loose the locking nut first.Ÿ Then turn the bolt clockwise 30 degree each time to check
the tightness.Ÿ Don’t turn clockwise too much each time because it may
over-tight the lever and cause damage.
1. Charge battery when the last indicator flashes which means low battery.
3. Place back the battery pack.
Charging:
Full:
Fault: Flash hurriedly
Flash calmly
Indicator keeps on
Input: AC 100~240V 50-60Hz 50WOutput: DC 8.4V 3.5A
Charger

Part No. ItemRef No.
Spare Parts List
Figure 8
Exploded View
Table 3
0706
1
2
3
4
5
6
7
8
9
10
11
12
13
14
15
16
17
18
19
20
21
22
23
24
25
26
27
28
29
30
31
32
33
34
35
36
37
38
39
40
PNEF1
PNEF2
PNEF3
PNEF4
PNEF5
PNEF6
PNEF7
PNEF8
PNEF9
PNEF10
PNEF11
PNEF12
PNEF13
PNEF14
PNEF15
PNEF16
PNEF17
PNEF18
PNEF19
PNEF20
PNEF21
PNEF22
PNEF23
PNEF24
PNEF25
PNEF26
PNEF27
PNEF28
PNEF29
PNEF30
PNEF31
PNEF32
PNEF33
PNEF34
PNEF35
PNEF36
PNEF37
PNEF38
PNEF39
PNEF40