NASAL PILLOWS SYSTEM - eu-pap.co.uk · Ajuste as correias superiores ... The nasal pillows system...
14
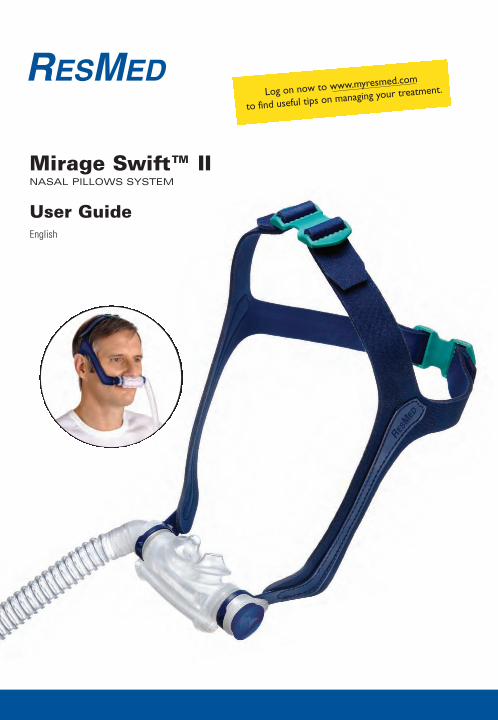
Mirage Swift™ II NASAL PILLOWS SYSTEM User Guide English Log on now to www.myresmed.com to find useful tips on managing your treatment.
Transcript of NASAL PILLOWS SYSTEM - eu-pap.co.uk · Ajuste as correias superiores ... The nasal pillows system...
Global leaders in sleep and respiratory medicine www.myresmed.com
Mirage Swift™ II NASAL PILLOWS SYSTEM
User GuideEnglish
60893/2 08 09
Mirage Swift II
User
AMER ML
Log on now to www.myresmed.com
to find useful tips on managing your treatment.
6 0 8 9 3
USA Swift II Multi cover.qxp 18/09/2008 2:19 PM Page 1

ResMed Ltd (Manufacturer) 1 Elizabeth Macarthur Drive Bella Vista NSW 2153 Australia ResMed Corp (US Designated Agent) 14040 Danielson Street Poway CA 92064-6857 USA ResMed (UK) Ltd (EU Authorized Representative) 96 Milton Park Abingdon Oxfordshire OX14 4RY UK ResMed Offices Australia, Austria, Belgium, Brazil, China, Finland, France, Germany, Greece, Hong Kong, India,Ireland, Italy, Japan, Malaysia, Mexico, Netherlands, New Zealand, Norway, Portugal, Singapore, South Africa,Spain, Sweden, Switzerland, UK, USA (see www.resmed.com for contact details).
Mirage Swift II Nasal Pillows System
Protected by patents: AU 785376, DE 20321468.4, DE 20321469.2, DE 20321470.6, DE 20321471.4, DE 20321472.2,EP 1314445, NZ 562417, NZ 562418, NZ 562419, NZ 553756, NZ 553757, NZ 553822, NZ 553824, NZ 553825, US6581594, US 6823865, US 7159587, US 7318437. Other patents pending. Protected by design registrations: AU 301936, AU 301937, AU 301938, AU 301939, AU 301940, AU 301941, AU301942, AU 301943, AU 302271, AU 302804, AU 311482, AU 311483, AU 311484, AU 311485, CN 200430102460.2,CN 200430102461.7, CN 200430102462.1, CN 200430102463.6, CN 200430102464.0, CN 200430102465.5, CN200430102466.X, CN 200430102467.4, CN 200430102468.9, CN 200630138503.1, CN 200630138504.6, CN200730158310.7, EP 259056, EU 604632, HK 0412683.5, JP 1243021, JP 1243024, JP 1243272, JP 1243273, JP1243274, JP 1243027, JP 1243025, JP 1242455, JP 1242456, JP 1243026, JP 1243475, JP 1303347, JP 1303348, JP1312331, JP 1312517, JP 1312518, NZ 405576, NZ 407158, NZ 407159, NZ 407143, NZ 407144, NZ 407145, NZ407155, NZ 407160, NZ 407161, NZ 407162, NZ 407163, NZ 407164, NZ 408220, NZ 408221, NZ 408222, USD542912, US D545961, US D546441, US D549323, US D556899, US D556900, US D557409, US D557410, USD557800, US D561893, US D562729, US D562976. Other designs pending.
Mirage, Mirage Swift, AutoSet CS 2 and VPAP Adapt SV are trademarks of ResMed Ltd and Mirage, Swift, AutoSet CS and VPAP are registered in U.S. Patent and Trademark Office.
Dove is a trademark of Unilever.
© 2008 ResMed Ltd. 60893-Eng/2 08 09
USA Swift II Multi cover.qxp 18/09/2008 2:19 PM Page 2

Tube retainer / Bague de fixation du tuyau / Retenedor del tubo / Retentor do tubo
1
5
5
432b 2a1
3 4b
2b 4 5 6
2
3
4a 1
B Fitting the Mirage Swift II / Mise en place du masque narinaire Mirage Swift II / Colocación del sistema Mirage Swift II / Colocação da Mirage Swift II
D Reassembling the Mirage Swift II / Remontage du masque narinaire Mirage Swift II / Montaje del sistema Mirage Swift II / Como voltar a montar a Mirage Swift II
C Disassembling for Cleaning / Démontage pour le nettoyage / Desmontaje para la limpieza / Desmontagem para limpeza
Headgear / Harnais / Arnés para la cabeza / Arnês
A Parts of the Mirage Swift™ II / Composants du Mirage Swift™ II / Partes del Mirage Swift™ II / Componentes do Mirage Swift™ II
Pillow sleeve assembly (pillow sleeve, frame and clip) / Corps du masque (coussin, support et barrette) / Conjunto del manguito de la almohadilla (manguito, armazón y broche) / Conjunto de manga da almofada (manga da almofada, armação e clipe)
Short tube assembly (elbow, short tube and swivel) / Ensemble tuyau court (coude, tuyau court et pièce pivotante) / Conjunto del tubo corto (codo, tubo corto y pieza giratoria) / Conjunto de tubo curto (cotovelo, tubo curto e peça giratória)
Short tube / Tuyau court / Tubo corto / Tubo curto
Elbow / Coude / Codo / Cotovelo
Vent holes / Orifices de ventilation / Orificios de ventilación / Respiradouros
Top buckle / Boucle supérieure / Presilla superior / Fivela superior
Top strap / Sangle supérieure / Correa superior / Correia superior
Panel / Partie latérale / Panel / Painel
Back strap / Sangle arrière / Correa posterior / Correia traseira
Back buckle / Boucle arrière / Presilla posterior / Fivela traseira
Seal ring (x2) / Bague d'étanchéité (x2) / Junta (x2) / Anel de vedação (x2)
Headgear ring / Anneau du harnais / Anillo del arnés / Anel do arnês
ResMed logo faces outward / Logo ResMed tourné vers l'extérieur / El logotipo de ResMed se dirige hacia afuera / O logotipo da ResMed está virado para fora
Adjust back straps / Ajustez les sangles arrières / Ajuste las correas posteriores / Ajuste as correias traseiras
Adjust top straps / Ajustez les sangles supérieures / Ajuste las correas superiores / Ajuste as correias superiores
Rotate pillow sleeve assembly for comfort and seal / Faites pivoter le corps du masque pour obtenir un ajustement confortable et une étanchéité efficace / Rote el conjunto del manguito de la almohadilla para un ajuste cómodo y sin fugas / Gire o conjunto de manga da almofada para uma melhor vedação e maior conforto
Tube retainer (optional) / Bague de fixation du tuyau (facultative) / Retenedor del tubo (opcional) / Retentor do tubo (opcional)
Optional tube positions / Positions possibles pour le tuyau / Posiciones posibles del tubo / Posições opcionais do tubo
Elbow / Coude / Codo / Cotovelo Cap / Bouchon / Tapa / TampaHeadgear ring / Anneau du harnais / Anillo del arnés / Anel do arnês
Slide clip / Faites glisser la barrette / Deslice el broche / Deslize o clipe
Pillow sleeve / Coussin / Manguito de la almohadilla / Manga da almofada
Note: The seal rings do not need to be removed for cleaning. / Remarque : vous n'avez pas besoin de retirer les bagues d'étanchéité du harnais pour le nettoyage. / Nota: Para la limpieza no es necesario retirar las juntas. / Nota: Os anéis de vedação não necessitam de ser removidos para limpeza.
Seal rings / Bagues d'étanchéité / Juntas / Anéis de vedação
Seal rings / Bagues d'étanchéité / Juntas / Anéis de vedação
2a
Pillow sleeve / Coussin / Manguito de la almohadilla / Manga da almofada
Slide clip / Faites glisser la barrette / Deslice el broche / Deslize o clipe
Elbow / Coude / Codo / Cotovelo
Cap / Bouchon / Tapa / Tampa
Pillow sleeve / Coussin / Manguito de la almohadilla / Manga da almofada
Frame / Support / Armazón / Armação
Cap / Bouchon / Tapa / Tampa
Nasal pillows / Masque narinaire / Almohadillas nasales / Almofadas nasais
Clip / Barrette / Broche / Clipe
Swivel / Pièce pivotante / Pieza giratoria / Peça giratória
© 2008 R
esMed Ltd.
© 2008 R
esMed Ltd.
© 2008 R
esMed Ltd.
© 2008 R
esMed Ltd.
Headgear ring / Anneau du harnais / Anillo del arnés / Anel do arnês
ResMed logo faces away from headgear / Logo ResMed tourné dans la direction opposée au harnais / El logotipo de ResMed queda en sentido contrario al arnés / O logotipo da ResMed está virado para fora do arnés
Swift II Illo sheets.qxp 16/09/2008 11:44 AM Page 1

2b2a1
A B
C
D
3b3a © 2008 R
esMed Ltd.
Note: The headgear does not need to be taken apart for cleaning. Headgear reassembly instructions are provided here as additional information. / Remarque : il n'est pas nécessaire de démonter le harnais pour le nettoyage. Les instructions de remontage sont fournies à titre indicatif. / Nota: El arnés no necesita ser desmontado para su limpieza. Las instrucciones para el montaje del arnés se proporcionan únicamente como información adicional. / Nota: Não necessita de desmontar o arnês antes de proceder à limpeza. As instruções de montagem do arnês são oferecidas como informações adicionais.
Back straps / Sangles arrières / Correas posteriores / Correias traseiras
Top straps / Sangles supérieures / Correas superiores / Correias superiores
Back buckle / Boucle arrière / Presilla posterior / Fivela traseira
Back straps / Sangles arrières / Correas posteriores / Correias traseiras
Top buckle / Boucle supérieure / Presilla superior / Fivela superior
Top straps / Sangles supérieures / Correas superiores / Correias superiores
Note: For complete instructions, read the text section in conjunction with the illustrations on this sheet.Remarque : pour les instructions complètes, veuillez lire le texte du guide avec cette fiche d'illustrations.Nota: Para tener instrucciones completas, lea el texto en conjunto con las figuras de esta hoja.Nota: Para obter as instruções completas, leia a secção de texto em conjunção com as ilustrações deste folheto.
Illustrations Sheet / Fiche d'illustrations / Hoja de Figuras / Folheto de Ilustrações
Mirage SwiftTM II NASAL PILLOWS SYSTEM
Component of: 60893/2
E Reassembling the Headgear / Remontage du harnais / Montaje del arnés / Como voltar a montar o arnês
Swift II Illo sheets.qxp 16/09/2008 11:44 AM Page 2

English
1
Mirage Swift™ II NASAL PILLOWS SYSTEM
Thank you for choosing ResMed’s Mirage Swift II Nasal Pillows System.The nasal pillows system is light, flexible and quiet. It is designed to minimize contact with your face, thus ensuring that you feel comfortable during therapy.This user guide provides you with the information you need for the correct use of your system.
Intended Use
The Mirage Swift II is intended for multipatient use by adult patients (>66 lb/30 kg) prescribed continuous positive airway pressure or bilevel therapy for use in home, hospitals or clinics.Note: The Mirage Swift II is not compatible for use with ResMed AutoSet CS™ 2 and VPAP™ Adapt SV devices.
CAUTIONIn the USA, federal law restricts this device to sale by, or on the order of, a physician.
Medical Information
Note: The Mirage Swift II does not contain latex, PVC, or DEHP materials. If you have ANY reaction to any part of the system, discontinue use and consult your sleep therapist.
. WARNINGS AND CAUTIONS• This system should be used only with flow generators (CPAP or bilevel)
recommended by your physician or respiratory therapist. It should not be used unless the flow generator is turned on and operating properly. The vent holes should never be blocked. Explanation of the Warning: Flow generators are intended to be used with special interfaces with connectors which have vent holes (vent holes are
60893 Eng.fm Page 1 Monday, September 22, 2008 8:56 AM

2
located on the frame—see section A on the illustrations sheet) or separate exhalation devices to allow continuous flow of air out of the interface. When the flow generator is turned on and functioning properly, new air from the flow generator flushes the exhaled air out through the attached exhalation port. However, when the flow generator is not operating (eg, power failure), not enough fresh air will be provided through the system, and exhaled air may be rebreathed. In this situation, remove the Mirage Swift II immediately.
• The exhaust vent flow is lower at lower system pressures (see section “Technical Specifications” for Pressure-Flow Curve details). If the system pressure during expiration is too low, there may not be enough exhaust vent flow to completely flush the air delivery hose of exhaled air before the start of the next inspiration.
• Discontinue using the Mirage Swift II if you frequently experience nasal irritation, and consult your physician.
• The Mirage Swift II must be cleaned and disinfected/sterilized if it is used between patients. See section “Reprocessing the Mirage Swift II between Patients” for details.
• Do not modify the components of this system. Intentional modification of any of the components may cause injury or reduce therapy.
• If oxygen is used with the flow generator, the oxygen flow must be turned off when the flow generator is not operating. Explanation of the Warning: When the flow generator is not in operation, and the oxygen flow is left on, oxygen delivered into the ventilator tubing may accumulate within the flow generator enclosure. Oxygen accumulated in the flow generator enclosure will create a risk of fire. This warning applies to most types of flow generators.
• Please refrain from smoking while oxygen is in use.Note: At a fixed flow rate of supplemental oxygen flow, the inhaled oxygen concentration will vary, depending on the pressure settings, patient breathing pattern, interface selection and the leak rate.
Parts of the Mirage Swift II
See section A on the illustrations sheet.
Fitting the Mirage Swift II
Note: Refer to your flow generator manual for details on settings and operational information.See section B on the illustrations sheet.
60893 Eng.fm Page 2 Monday, September 22, 2008 8:56 AM

3
English
1 Put the headgear on your head and place the nasal pillows below your nose. Make sure the top strap passes over the top of your head. Make sure the
ResMed logo on the pillow sleeve faces outward; away from your face
(B-1).
2 Insert the nasal pillows into your nostrils. Gently tighten the headgear straps; first the back straps (B-2a) and then the top straps (B-2b). Alternate the adjustment of each set of straps, so that the headgear panels rest between the eye and the ear. The pillow sleeve should rest comfortably above your upper lip.
3 Adjust the angle of the nasal pillows. To do this, rotate the pillow sleeve assembly forward or backward so that the nasal pillows sit comfortably inside your nostrils (B-3).
4 Tube Retainer (optional). Use the tube retainer if you prefer to have the short tube assembly secured to the headgear in the up position (B-4).
5 The short tube assembly can be attached in four different ways (B-5). Note: The short tube assembly and cap can be connected to either side of the pillow sleeve. See “Disassembling for Cleaning” and “Reassembling the Mirage Swift II” for instructions on how to remove and attach the short tube assembly and cap.
6 Connect one end of the main air tubing to your flow generator and the other end to the swivel. Turn your flow generator on.Notes: • Flow generator mask setting: If available, select “Swift”; otherwise
select “Mirage” as the mask option when using the Mirage Swift II with ResMed flow generators that have mask setting options.
• SmartStop feature: This feature may not operate effectively when using the Mirage Swift II with some ResMed flow generators that have the SmartStop feature. This is particularly relevant when using the small size pillow sleeve.
If you feel air leaks, readjust the angle of the nasal pillows to get a better seal. You may need to readjust the headgear straps. Do not overtighten the headgear straps. If you are unable to resolve any leaks you may need an alternative pillow sleeve size.
7 Take time to adjust the following to achieve a secure and comfortable fit:• headgear straps• angle of the pillow sleeve assembly• position of the short tube assembly.
60893 Eng.fm Page 3 Monday, September 22, 2008 8:56 AM

4
Removing the Mirage Swift II
To remove the Mirage Swift II, pull the pillow sleeve assembly away from your nose and lift the headgear off your head. You do not need to loosen the headgear straps.
Disassembling for Cleaning
See section C on the illustrations sheet. Before disassembling the Mirage Swift II, disconnect the flow generator tubing. To do this, hold the swivel and pull it away from the flow generator tubing.
CAUTIONDo not pull on the short tube or the flow generator tubing as they may get
damaged.
• To disassemble the Mirage Swift II for daily cleaning, follow steps 1–3.• To disassemble the Mirage Swift II for weekly cleaning, follow steps 1–5.
1 Detach the short tube assembly. To do this, hold the elbow and pull it away from the seal ring (C-1).Note: The short tube assembly cannot be taken apart.
2 Remove the cap by pulling it away from the seal ring (C-2).3 Detach the headgear ring from the pillow sleeve assembly. Simply pull the
headgear rings from the ends of the frame (C-3).4 Disassemble the pillow sleeve assembly. To do this, slide off the clip (C-4a)
and then peel the pillow sleeve off the frame (C-4b). Note: When sliding the clip, hold it at one end, not in the middle.
5 The seal rings do not need to be removed from the headgear (C-5).
Cleaning the Mirage Swift II in the Home
Notes:• Wash your hands before cleaning the mask.• Wash the headgear before first time use, as the dye may run. It is important
to always handwash the headgear.• The headgear may be washed without being disassembled.
Daily
Handwash the pillow sleeve assembly, short tube assembly and cap in warm (approx. 86°F/30°C) water using mild soap or detergent. Rinse the components well and allow them to air dry out of direct sunlight and heat. The system components have been tested using Dove™ Unscented beauty bar.
60893 Eng.fm Page 4 Monday, September 22, 2008 8:56 AM

5
English
Note: Ensure that the vent holes are not blocked. Use a soft bristle brush to clean the vent.
Weekly
Handwash the headgear, tube retainer and all components in warm, (approx. 86°F/30°C) water using mild soap or detergent. Rinse the components well and allow them to air dry out of direct sunlight and heat.
. CAUTION• Do not use solutions containing bleach, chlorine, alcohol, aromatics,
moisturizers, antibacterial agents, or scented oils to clean any part of
the system or air tubing. These solutions may cause damage and
reduce the life of the product.
• Exposing any part of the system or tubing to direct sunlight or heat
may cause deterioration.
• If any change in performance or visible deterioration of a component is
apparent (cracking, crazing, tears etc), the component should be
discarded and replaced.
Reprocessing the Mirage Swift II between
Patients
The Nasal Pillows System should be reprocessed when used between patients. Cleaning, disinfection and sterilization instructions are available from the ResMed website, www.resmed.com/masks/sterilization/americas.
If you do not have Internet access, please contact your ResMed representative.
Reassembling the Mirage Swift II
CAUTIONComponents of the Mirage Swift II pillow sleeve assembly (pillow sleeve,
frame and clip—see section A on the illustration sheet) are not compatible
for use with Mirage Swift components. Combining these components
from the two systems may result in rebreathing of exhaled air.
See section D on the illustrations sheet. 1 Make sure both seal rings are properly fitted to the headgear rings (D-1).
60893 Eng.fm Page 5 Wednesday, September 24, 2008 10:41 AM

6
2 Assemble the pillow sleeve assembly. To do this:a Wrap the pillow sleeve around the frame. Then insert the pillow sleeve
edges into the groove of the frame (D-2a).b Hold the clip at one end and then slide it onto the frame to secure the
pillow sleeve in place (D-2b).Note: If the clip does not slide easily, check that the pillow sleeve edge is fitted flush to the groove of the frame.
3 Attach the headgear ring to the pillow sleeve assembly. To do this, firmly push the headgear rings onto the ends of the frame (D-3). When attaching the pillow sleeve assembly make sure:• the headgear panels are facing out• the nasal pillows are pointing upwards• the ResMed logo faces out—away from the headgear.Make sure the pillow sleeve assembly is properly fitted to the headgear before going on to the next step.
4 Attach the short tube assembly to your preferred side of the pillow sleeve assembly. To do this, push the elbow into the seal ring until it clicks into place (D-4).
5 Insert the cap into the other seal ring until it clicks into place (D-5).6 The assembled system should look like this (D-6). Make sure the ResMed
logo on the pillow sleeve faces out—away from the headgear.
Additional Information
Reassembling the Headgear
See section E on the illustrations sheet. If taken apart, the headgear has four parts:A: Left strap; B: Right strap; C: Back buckle; D: Top buckle.1 Lay out the four parts of the headgear as shown in (E-1). The panels must
face up.Note: Before threading the straps, make sure that the buckles are positioned as shown in (E-2) and (E-3).2 Thread the back straps through the back buckle (part C) as shown in
(E-2a) and (E-2b).3 Thread the top straps through the top buckle (part D) as shown in
(E-3a) and (E-3b).
Disposal
The Mirage Swift II Nasal Pillows System does not contain any hazardous substances and may be disposed of with your normal household refuse.
60893 Eng.fm Page 6 Monday, September 22, 2008 8:56 AM

7
English
Technical Specifications
Pressure–Flow Curve
Note: As a result of manufacturing variations, the vent flow may vary from the values listed in the table.
Dead Space Information
Dead space is the empty volume of the pillow sleeve and short tube assemblyup to the swivel.The dead space of the Mirage Swift II for all pillow sleeve sizes is 91 mL.
Standards
CE designation in accordance with EC directive 93/42/EEC, class IIa.EN ISO 14971, ISO 5356-1, ISO 10993-1 and EN ISO 17510-2.
Therapy Pressure
4 to 20 cm H2O
Resistance
Drop in measured pressure between the swivel and pillow sleeve (average for three pillow sleeve sizes):at 50 L/min: 0.4 cm H2O at 100 L/min: 1.6 cm H2O
0
10
20
30
40
50
60
4 6 8 10 12 14 16 18 20
Mask Pressure (cm H2O)
Ven
t F
low
Rate
(L
/min
)
Pressure(cm H2O)
Flow(L/min)
4 20
8 29
12 37
16 43
20 49
60893 Eng.fm Page 7 Friday, October 17, 2008 9:14 AM

8
Symbols
System and Packaging
User Guide
Ordering Information
Caution, consult accompanying documents
Lot number
Part number
Indicates a Warning or Caution and alerts you to a possible injury or explains special measures for the safe and effective use of the device.
Part No. Item
System
60512 Mirage Swift II Nasal Pillow System - AMER
Replacement Parts
60541 Pillow sleeve, Small (1 pk.)
60542 Pillow sleeve, Medium (1 pk.)
60543 Pillow sleeve, Large (1 pk.)
60523 Headgear buckle (4 pk.)
60524 Seal ring (10 pk.)
60525 Cap (1 pk.)
60526 Headgear (1 pk.)
60536 Frame with Clip and Cap (1 pk.)
60528 Short tube assembly (1 pk.)
60529 Short tube assembly (10 pk.)
60530 Tube retainer (3 pk.)
60537 Frame System with Pillow sleeve (excluding headgear), Small
60538 Frame System with Pillow sleeve (excluding headgear), Medium
60539 Frame System with Pillow sleeve (excluding headgear), Large
60540 Clip (1 pk.)
LOT
REF
60893 Eng.fm Page 8 Monday, September 22, 2008 8:56 AM

9
English
Limited Warranty
ResMed warrants that your ResMed system, including its components—frame, pillow sleeve, headgear, tubing and other accessories (“Product”)—shall be free from defects in material and workmanship for a period of ninety (90) days from the date of purchase by the initial consumer.For further details refer to the Warranty.
Accessories
61121 Distal pressure port (1 pk.)
61124 Distal pressure port (10 pk.)
60549 Main pressure port (1 pk.)
60550 Main pressure port (10 pk.)
Part No. Item
60893 Eng.fm Page 9 Monday, September 22, 2008 8:56 AM

10
60893 Eng.fm Page 10 Monday, September 22, 2008 8:56 AM