Musculoskeletal Injury Prevention Manual (MSIP) · where changes are most needed. You may also have...
86
Musculoskeletal Injury Prevention Manual (MSIP) April 25, 2017
Transcript of Musculoskeletal Injury Prevention Manual (MSIP) · where changes are most needed. You may also have...

Musculoskeletal Injury Prevention Manual
(MSIP)
April 25, 2017

Page 1 of 86
Table of Contents Policy ....................................................................................................................................................................... 3
Purpose ................................................................................................................................................................... 5
How to identify hazards .......................................................................................................................................... 6
Section 1 ................................................................................................................................................................ 10
Resident Handling ................................................................................................................................................. 10
“CONFIRM” ............................................................................................................................................................ 10
What is “CONFIRM”? ............................................................................................................................................. 11
How do we “CONFIRM”? ....................................................................................................................................... 11
Pre-Handling Check .................................................................................................................................. 14
Safe Work Procedures ........................................................................................................................................... 15
Prepare Your Equipment ................................................................................................................................ 16
Bed Height ................................................................................................................................................ 17
Slider Sheet Positioning ........................................................................................................................... 17
Lifting/Lowering Bed Rails ........................................................................................................................ 19
Pushing or Pulling ..................................................................................................................................... 21
Repositioning .................................................................................................................................................. 23
Sliding Closer to the Edge of the Bed ....................................................................................................... 24
One Person Assist ..................................................................................................................................... 24
Sliding Closer to the Edge of the Bed ....................................................................................................... 26
Two Person Assist .................................................................................................................................... 26
Repositioning -Turning ................................................................................................................................... 27
Turning a Resident Away From You ......................................................................................................... 28
Turning a Resident Towards You .............................................................................................................. 30
Turning a Resident – 2 Person Assist ....................................................................................................... 32
Turning a Resident – 2 Person Assist ....................................................................................................... 34
Bed Boost ........................................................................................................................................................ 36
Bed Boost – Head of Bed .......................................................................................................................... 37
Knee Method ............................................................................................................................................ 37
Bed Boost – Head of Bed .......................................................................................................................... 38
Standing Method...................................................................................................................................... 38
Bed Boost – Side of Bed Method ............................................................................................................. 39
Lie to Sit .......................................................................................................................................................... 41

Page 2 of 86
Two Person Assist .................................................................................................................................... 42
One Person Assist ..................................................................................................................................... 44
Two Person Assist .................................................................................................................................... 47
One Person Assist ..................................................................................................................................... 49
Slide Resident Back in A Wheelchair ........................................................................................................ 51
Facilitating a Seated Resident to Inch Forward/Backward ...................................................................... 52
Sit to Stand Transfer ....................................................................................................................................... 54
Sit to Stand Transfer – One Person Assist ................................................................................................ 55
Aiding Mobile Residents ................................................................................................................................. 58
Walking With a Resident .......................................................................................................................... 59
Cleaning The Bed ...................................................................................................................................... 62
Making The Bed........................................................................................................................................ 64
Section 2 ................................................................................................................................................................ 65
High Risk Actions............................................................................................................................................. 65
Fore / Aft Lift ............................................................................................................................................ 66
Blanket Lift ............................................................................................................................................... 67
Chicken Lift ............................................................................................................................................... 68
Cradle or Basket Lift ................................................................................................................................. 69
Three Person Lift ...................................................................................................................................... 70
Two person arm/towel lift ....................................................................................................................... 73
One person through arm lift .................................................................................................................... 74
Australian shoulder lift ............................................................................................................................. 75
Pivot Transfers ................................................................................................................................................ 76
Two Person Pivot Transfer ....................................................................................................................... 77
One Person Pivot Transfer ....................................................................................................................... 79
Appendix A ............................................................................................................................................................ 80
Forms and Checklists ............................................................................................................................................. 80
Pre-Handling Check .................................................................................................................................. 81
Questions to consider when evaluating patient-handling situations ................................................................... 82
Appendix B ............................................................................................................................................................ 84
References ...................................................................................................................................................... 84
Page 3 of 86
Musculoskeletal Injury Prevention (MSIP)
Policy
ProVita is committed to the development, implementation and ongoing maintenance and evaluation of a Musculoskeletal Injury Prevention Program. The MSIP Program will be implemented and actuated by the site managers; monitored and overseen by the Vice President of Operations. MSI’s are defined as "injuries or disorders of the muscles, tendons, ligaments, joints, nerves, blood vessels or related soft tissues including sprains, strains and inflammation." MSI's compromise the health of our employees and affect their work and leisure activities. However, if all Pro Vita staff work together to create a safe environment, these injuries are often preventable.
The Program will focus on the identification, assessment and control of risk factors associated with the physical performance of job related duties at Pro Vita sites. The MSI Prevention Program will have a strong focus on communication and training to ensure that all staff are comfortable and confident with performing their job tasks safely. Pro Vita management and employees will work together to create:
• Hazard identification systems • Job Safety Analysis’ (JSA) • Safe work procedures • Effective training programs • Procedures for program maintenance • Procedures for equipment maintenance
Responsibilities of Senior Management and Executives
Senior Management and Executives must: • Maintain the overall control of the MSIP • Ensure that all established MSIP policies and procedures are administered and enforced • Provide information, instruction, assistance and support in all safety initiatives • Provide all management, supervisors and employees with the proper tools and equipment to do
their job safely • Work with managers, supervisors and employees to revise the MSIP program annually or more
often if business demands
Responsibilities of Management and Supervisors Management and Supervisors must: • Act as an example for others by always utilizing appropriate musculoskeletal injury prevention
principles and promote good employee attitudes towards musculoskeletal injury prevention and safety in general
• Ensure all aspects of the MSIP program are carried out within their respective areas • Identify workplace hazards and ergonomic issues including issues pertaining to repetitive
and/or strenuous lifting and transferring practices • Participate with site employee health and safety committee in developing and implementing
steps to prevent or eliminate hazards • Ensure that all staff are adequately trained in safe and effective methods of lifting and
transferring students and/or materials handling • Monitor and document employee performance and enforce safe work practices and procedures
Page 4 of 86
• Coordinate and conduct site/service specific orientation to ensure that all staff are aware of MSI
hazards. • Perform regular audits of ergonomics and musculoskeletal injury prevention strategies,
procedures and guidelines • Assess the requirements for, and promote the acquisition of, lifting and transferring devices and
ensure these devices are available and are used • Ensure that incident/ accident investigations are conducted for all work-related accidents, and
that appropriate recommendations and corrective actions are taken to reduce the risk of repeat incident or injury
• Ensure that all accident/incident records are prepared correctly and promptly, and communicated to all applicable parties
• Share CQI initiatives with other pro vita personnel as they relate to MSI’s
Responsibility of Employees All employees must: • Always utilize appropriate musculoskeletal injury prevention principles • Participate in creating and maintaining a safe work environment by knowing and following safe
work practices, policies and procedures • Report unsafe acts and conditions to his/her supervisor • Establish and maintain competency in the application of musculoskeletal injury prevention
strategies as well as resident lifts and transfers and materials handling techniques • Actively participate in investigations, inspections, and committees when required by
management • Report any accidents, incidents, near misses or illnesses to management immediately • Use the correct tools and equipment for the job, keep the tools in good condition and report any
defects • Develop personal responsibility for their health and safety
Art Forster Date President and CEO

Page 5 of 86
Purpose
At ProVita Care Management we support a proactive approach to injury prevention. Education, communication, supervision and training must work together to prevent workplace injuries, and it is vital that everyone is 100% committed to staff health and safety.
Education and Training
• Provide knowledge to all employees of the hazards of their job tasks • All staff demonstrate their understanding of safe work procedures • All staff are provided on-the-job training to ensure that they have demonstrated that they
know and are physically capable of completing their tasks safely • All staff are taught how to make correct assessments of the resident, including: mobility,
space and task • All staff are instructed on choosing the appropriate handling equipment to minimize risk of
injury to themselves or the resident • All staff have demonstrated their understanding of risk minimization, to themselves and the
residents
Communication • All staff will be made aware and have easy access to safe work procedures, training and
education • All staff will be made aware ProVita strongly urges all employees to speak to their
manager regarding any questions or concerns they have regarding safe work procedures • All safe work procedures will be communicated and demonstrated (where appropriate) to
ensure there is full comprehension
Supervision • Staff will be observed on a regular basis to ensure that they are utilizing their safe work
procedures • Staff will be corrected/coached when they make ergonomic errors • All staff will be disciplined if they deliberately ignore the safe work procedures, and
jeopardize the health and safety of (staff, resident, visitor, volunteer etc.)
It is the responsibility of all managers and staff within the facilities to prevent injuries.

Page 6 of 86
How to identify hazards Staff can help in the process of identifying risk factors. Staff often have the best insights into the demands of their job and are in a good position to help identify risks and prevent MSI. Staff must report any work-related injuries and signs or symptoms of MSI without delay. If someone reports an injury requiring medical attention or an unsafe condition that could lead to injury, the employer must investigate. An investigation will help to identify risk factors that contributed to the injury or condition and lead to implementing controls to eliminate or minimize the risk factors.
Physical Risk Factors
Force Repetition Work Posture
Local Contact Stress
Definition
Muscle and tendons can be overloaded when you apply a strong force against an object
Involves doing a task that uses the same muscles over and over with little chance for rest or recovery
Awkward posture occurs when any joint of your body bends or twists outside of a comfortable range of motion
When a hard or sharp object comes in contact with the skin. The nerves and the tissues beneath the skin can be injured by the pressure
Examples
Moving linen carts, lifting or lowering or carrying heavy items, gripping small items, moving beds with brakes on, manual lifts
Repeatedly using a pill crusher, lifting items, blister packs, disinfecting tubs
Bending at the waist, leaning sideways, reaching. For example: putting on socks when not at foot level, reaching into tight spaces, when bed is against the wall, and reaching across to complete a task.
Kneeling, gripping small objects, pill crushing
Minimization or Prevention
Mechanical lifting devices, higher or lower storage, lighter carts
Adequate breaks to allow muscle recovery, alternating jobs
Adjustable work station heights, different tools, adequate breaks
padding, micro-breaks, alternating jobs, tools with springs

Page 7 of 86
Understanding the Risks of Musculoskeletal Injury (MSI) Think about your job and all the different duties. For each duty, try to identify which, if any, of the four physical risk factors (force, repetition, work posture, local contact stress) are present. Particularly think about whether these affect the same body part. Then consider these questions: • Does the total time (duration) you spend doing a particular duty increase the physical
demands on your body? • Do any of the following increase the physical demands on your body:
o Layout of your workplace or workstation (such as work surfaces that are too high or too low or that result in excessive reaching or bending distances)
o Characteristics of the objects you handle (such as objects that are too large to handle or that have their weight unevenly distributed)
o Environmental conditions (such as an atmosphere or objects cold enough to make the hands cold while the staff handles objects)
o Organization of your work duties (such as a lack of variety of tasks therefore continuous repetitive motion of the same muscles, with the result that your muscles do not have a chance to rest and recover)
• When you bend, are you bending with your knees? Keeping your back straight and not arched? Can you get your body closer to an object you are reaching for rather than over-reaching? Are you able to push the item rather than pulling? Etc.
After you answer these questions, you will have a fairly good idea of what risk factors you are exposed to in your work. You can probably see which duties place you at the most risk of MSI and where changes are most needed. You may also have some suggestions for practical solutions to reduce or eliminate some of these risk factors. Discuss your answers and suggestions with your supervisor. You might also talk to members of the joint committee or your staff health and safety representative about the risks of MSI. Key questions If you may be exposed to a risk of MSI in your job, you must be educated in risk identification related to your work. This includes recognizing the early signs and symptoms of MSI and their potential health effects. Based on the information in this guide, you should be able to answer the following questions:
• What are some early signs and symptoms of MSI? • What person would you report these signs and symptoms to? • What can happen if you ignore early signs and symptoms of MSI? • What are the risk factors in your job that could lead to MSI?
What comes next? Risk factor identification is just one step in eliminating or minimizing the risk of MSI to staff. Once risk factors have been identified, your manager must do a job safety analysis to find out how great the risk is. Not all risk factors are necessarily severe enough or occur for a long enough time to cause or contribute to an injury. Job safety analyses should be carried out by people who understand the work process, the MSI risk factors, and the principles of job safety analysis and control. When doing a job safety analysis, your manager will consult with staff that have signs or symptoms of MSI and with a representative sample of staff that carry out the work being assessed. The sample should include staff that represent a range of characteristics such as gender, age, and height.

Page 8 of 86
The job safety analysis may determine that control measures are needed to eliminate or minimize the risk. Some examples of control measures are mechanical lifting devices, adequate recovery time from repetitive tasks, adjustable workstation heights, and padding on sharp edges of work surfaces. Staff may also need to be trained in safe work procedures for some tasks, such as adjusting their workstation to fit the task correctly. If the site provides any mechanical aids (such as a lifting device) or any personal protective equipment (such as knee pads), staff must be trained to use them. Staff have a responsibility to follow safe work procedures and use equipment they have been trained to use.
MSI Prevention – Getting Started
For on-going success in preventing musculoskeletal injuries, work places need to take a program approach. The Hazard Prevention Program Regulations (HPPR) provide the framework for such a program.
Section 19.1 of the Regulations The employer shall, in consultation with and with the participation of the policy committee, or, if there is no policy committee, the work place committee or the health and safety representative, develop, implement and monitor a program for the prevention of hazards, including ergonomics-related hazards, in the work place that is appropriate to the size of the work place and the nature of the hazards and that includes the following components: • an implementation plan; • a hazard identification and assessment methodology; • hazard identification and assessment; • preventive measures; • employee education; and • a program evaluation
Subsection (1) applies in respect of every work place controlled by the employer and, in respect of every work activity carried out by an employee in a work place that is not controlled by the employer, to the extent that the employer controls the activity.
Under the Regulations, the program must be developed, implemented and monitored “in consultation with and with the participation of” the policy committee. (If there is no policy committee, the employer shall call upon the work place committee or the health and safety representative.) In addition, the program must include a number of parts: • An implementation plan • Hazard identification and assessment methodology • Hazard identification and assessment • Preventive measures • Employee education • Program evaluation
The first step is to establish an implementation plan that includes all these parts, in a logical order that will make the process easier.

Page 9 of 86
Section 19.3(1) of the Regulations requires several sources of information to be taken into account in developing the methodology. To ensure that information from these sources is useful and will make the program more effective, employee education should take place early in the implementation process. Employee education includes training for those who conduct work place inspections, such as health and safety committee members.
Implementation Plan Section 19.2 of the Regulations The employer shall: • develop an implementation plan that specifies the time frame for each phase of the development
and implementation of the prevention program; • monitor the progress of the implementation of the preventive measures; and • review the time frame of the implementation plan regularly and, as necessary, revise it
In implementing the prevention program, the employer shall ensure that ergonomics-related hazards are identified and assessed and that they are eliminated or reduced, as required by subsection 19.5(1), as much as reasonably possible and that any person assigned to identify and assess ergonomics-related hazards has the necessary instruction and training. The implementation plan for the MSI prevention program must include the following components, in this recommended order: Step 1: Process for consultation with and participation of the policy committee (or the work place
committee or the health and safety representative) during each step of the program. Step 2: Education of employees and health and safety committee members. Step 3: Methodology for hazard identification and assessment. Step 4: Hazard identification and assessment. Step 5: Preventive measures. Step 6: Program evaluation.
The implementation plan must establish time frames for each phase in the development and implementation of the program. Be realistic in establishing the schedule. If the hazard prevention program at the work place has never included MSI prevention, it may take a few years to address all the ergonomics-related hazards.
The size and complexity of the work place, as well as other health and safety priorities, will be factors in the time required. If most employees in the work place perform roughly the same tasks, it may not take as long to implement the program and address the ergonomics-related hazards.
The implementation plan must be monitored periodically to ensure that the process is on schedule. If for some unforeseen reason the time frames in the implementation plan cannot be met, they may need to be revised.

Section 1
Resident Handling
“CONFIRM”

Page 11 of 86
What is “CONFIRM”?
Quite often in healthcare, employees execute tasks before evaluating the task. Not properly preparing yourself or your resident for the task to be performed can lead to injuries, to everyone involved. To help reduce the risk of injury and ensure that all parties involved remain safe, all staff need to take the time to “CONFIRM” that the task can be performed safely.
C Communicate
O Orient Equipment and Resident
N Neutral Spine
F Foundation
I Arms IN
R Re-evaluate positions before moving
M Move your legs by shifting weight

Page 12 of 86
How do we “CONFIRM”?
Communicate
Communicate with the resident, and any partner you may be working with. • Ensure that all of the people involved in the task have a clear understanding of what
is happening. • Identify the task that will be performed, and how best perform it. • Identify any concerns or hazards that may occur when performing the task • When working with a partner:
• Decide on the safest method • Discuss the procedures and steps • Identify a leader • Decide on counting method
Orient Equipment and Resident Prepare the resident, the equipment and your environment.
• Have all the equipment and supplies for resident care close at hand • Setup your equipment and remove any obstacles, furniture, equipment, and items on
the floor that might be in your way • Ensure that brakes are secured or released (as appropriate) • Ensure that the slider sheet is positioned properly (as appropriate) • Check that all equipment is functioning properly
Neutral Spine Maintain the natural curve of your spine, and remain in body neutral.
• When your body shifts, your torso should not twist. • Your body should move at the joints, not at your spine. • “chest up, eyes forward, bum out”
Foundation Keep your lower body stabilized.
• Keep your feet shoulder width apart, and one foot a half step forward. • Knees should be slightly bent, and never locked
Arms IN Keep your arms close to your body
Page 13 of 86
• Over-reaching and stretching your arms will pull your spine out of body neutral • Your elbows should be in, and should point down
Re-evaluate positions before moving Look at your load, environment and your own abilities
The Resident: • How heavy ishe/she? • How far are you moving him/her? • May he/she move unpredictably while you are moving him/her?
The Environment: • How much space do you have? • Is there anything in your way? • Is the floor wet or dry? • Is the route you are taking clear?
Yourself: • Are you injured, tired, distracted? • Have you fully assessed the situation and all of the players and hazards? • Is your body positioned in the safest manner? • Are you ready?
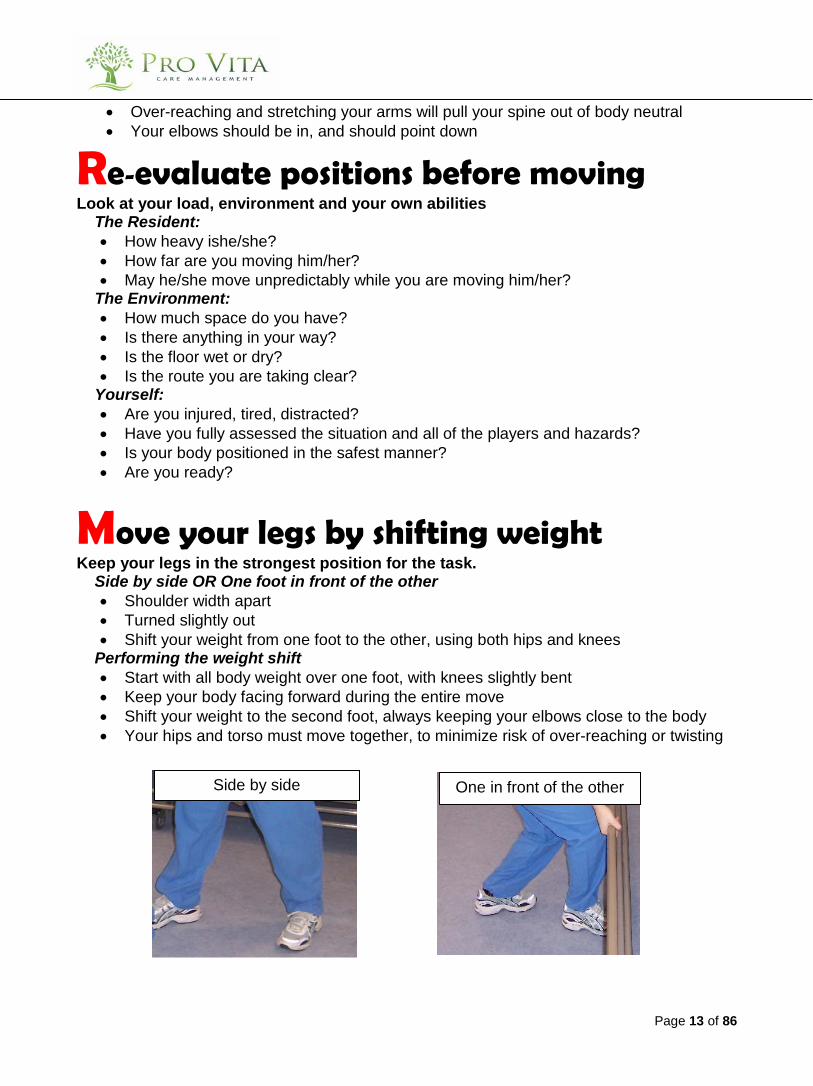
Move your legs by shifting weight Keep your legs in the strongest position for the task.
Side by side OR One foot in front of the other • Shoulder width apart • Turned slightly out • Shift your weight from one foot to the other, using both hips and knees
Performing the weight shift • Start with all body weight over one foot, with knees slightly bent • Keep your body facing forward during the entire move • Shift your weight to the second foot, always keeping your elbows close to the body • Your hips and torso must move together, to minimize risk of over-reaching or twisting
Side by side One in front of the other

Page 14 of 86
Pre-Handling Check Ask these questions before every manual transfer
Strength: Can the person…
If no to any of these, you and/or the resident are at risk of injury. Use an overhead/mechanical lift.
In bed: with knees bent, lift their hips off the bed and hold for 5 seconds?
Sitting: hold up each foot, straight knee and hold for 5 seconds?
Balance: Can the person…
Sit upright on the side of the bed without help?
Sit or lean forward in a chair with minimal help?
Cognitive: Can the person… Understand and follow instructions appropriately and cooperatively?
Is their cognitive status “normal”, compared to usual?

Safe Work Procedures
Applying the principles of CONFIRM to Healthcare

Page 16 of 86
Resident Handling
Safe Work Procedures
Prepare Your Equipment
CONFIRM the safety of both you and your residents.

Page 17 of 86
Bed Height
• Remember to CONFIRM when adjusting the bed height. Do not reach, twist or lean over the bed to adjust the height.
• Your partner and the environment are factors that will impact the appropriate bed height for the task.
Both feet on the floor method
• Adjust the bed height so that it is between knuckle and hip height. If you are conducting a bed boost, it may be easier to have the bed positioned higher, closer to the height of your hips.
One knee on the bed method
• If one knee is placed on the bed, the bed height should be positioned about 2 inches above the knee of the smallest person.
• If you are working with a partner, adjust the height of the bed to accommodate the smallest person. The taller person will need to bend their legs to maintain the spinal curves.
• If the height difference between partners is large the taller person can work with a knee on the bed and the shorter person with both feet on the floor.
Slider Sheet Positioning • Slider sheets will greatly reduce the friction between the resident and the bed, when
repositioning or transferring the resident. In an emergency situation, a garbage bag would work in place of a sliding sheet. Soaker pads and regular sheets cannot be used in place of a sliding sheet as they do not slide.
• Remember to CONFIRM when positioning a sliding sheet. Refrain from reaching, twisting and leaning over the bed.

Page 18 of 86
• Position the residents entire torso on the sliding sheet to reduce as much friction as possible.
• When making a bed with a slider sheet, the long portion of the sheet should be draped across the width of the bed. Position the slippery side down or closest to the bed surface.
• When not using the slider sheet, for safety and esthetic reasons, tuck the long ends of the slider under the mattress. When doing so, use a palms up posture to reduce friction.
Hand Positions When gripping the slider sheet use a straight wrist, close to the resident’s hip and shoulder areas. Palms up, elbows in

Page 19 of 86
Lifting/Lowering Bed Rails
CONFIRM the safety of both you and your residents.
1. Communicate with the resident
• Make resident aware of task and check their position on the bed surface
2. Orient Equipment and Resident • Remove any obstacles that will interfere with your weight shift or the motions of
the bed rails. • Ensure that all resident limbs will not interfere with the movement of the rails,
thus causing injury
3. Neutral Spine • As you move the bedrails up or down, ensure that your back stays straight, and
that it is your knees that bed. • Do not bend at the waist when raising or lowering the bed rail
4. Foundation
• Set up your feet to weight shift in the same direction as the bed rail. If the bed rails move to the side as they go down, use a side weight shift.
• Ensure your feet are planted shoulder width apart
5. Arms In • Keep your elbows bent, and your shoulders over your hips • Hold the rail palms facing up
6. Re-evaluate positions before moving
• Is there anything blocking the movement of the rails, or your weight shift? • Is the resident aware of the task being performed? • Is your body in the appropriate position?
7. Move your legs by shifting weight
Lifting bed rail • Weight shift forward and up, from back to front foot. • If bed rail is not completely raised after the weight shift, finish the lift by bending
at the elbows and bringing your hands towards your chest.

Page 20 of 86
Lowering bed rail
• Weight shift backward and down from front to back foot. • When lowering the bed rail, get as close as you can to the latch without twisting
or reaching.
Page 21 of 86
Pushing or Pulling Equipment/Beds/Carts/Stretchers
CONFIRM the safety of both you and your residents.
1. Communicate with the resident
2. Orient Equipment and Resident • Before using equipment make sure that it is set up properly and operating
appropriately. For example wheels roll freely and steer easily. • Release the brakes prior to moving.
3. Neutral Spine
4. Foundation
• Use a staggered stance with a good base of support.
5. Arms In • Place both hands at or slightly above waist level and keep elbows slightly in front of
the body. Have elbows bent and pointing at the ground. • Use both hands to push and pull objects. This will eliminate strain on wrists and back
muscles.
6. Re-evaluate positions before moving The Load
• How heavy is it? • How far are you moving it? • May it move unpredictably while you are moving it?
The Environment • Is there anything in the way? • Is the floor wet or dry? • Is the route you’re taking clear?
Yourself • Are you injured, tired or distracted? • Have you fully assessed the situation and all of the players and hazards? • Is your body positioned in the safest manner? • Are you ready?
7. Move your legs by shifting weight
Pushing • Weight shift through the hips from your back to front leg.
Pulling • Weight shift through the hips from your front leg to your back leg

Page 22 of 86
Stopping
• Have a good grip on the bed and a staggered foot stance. • Drop your hips as if you were about to sit down.
Turning Corners
• Keep stepping, with smaller steps, through the corner. • Keep your elbows in close to your body.
2 Person Bed/Stretcher push/pull
• Face each other, one at the foot the other at the head of the bed. To ensure good body mechanics the person at the foot end of the bed will be walking backwards.
• The person pushing at the head of the bed end has the lead ensuring safety for the person walking backwards. TAKE YOUR TIME!
Stopping
Pulling
Start
Page 23 of 86
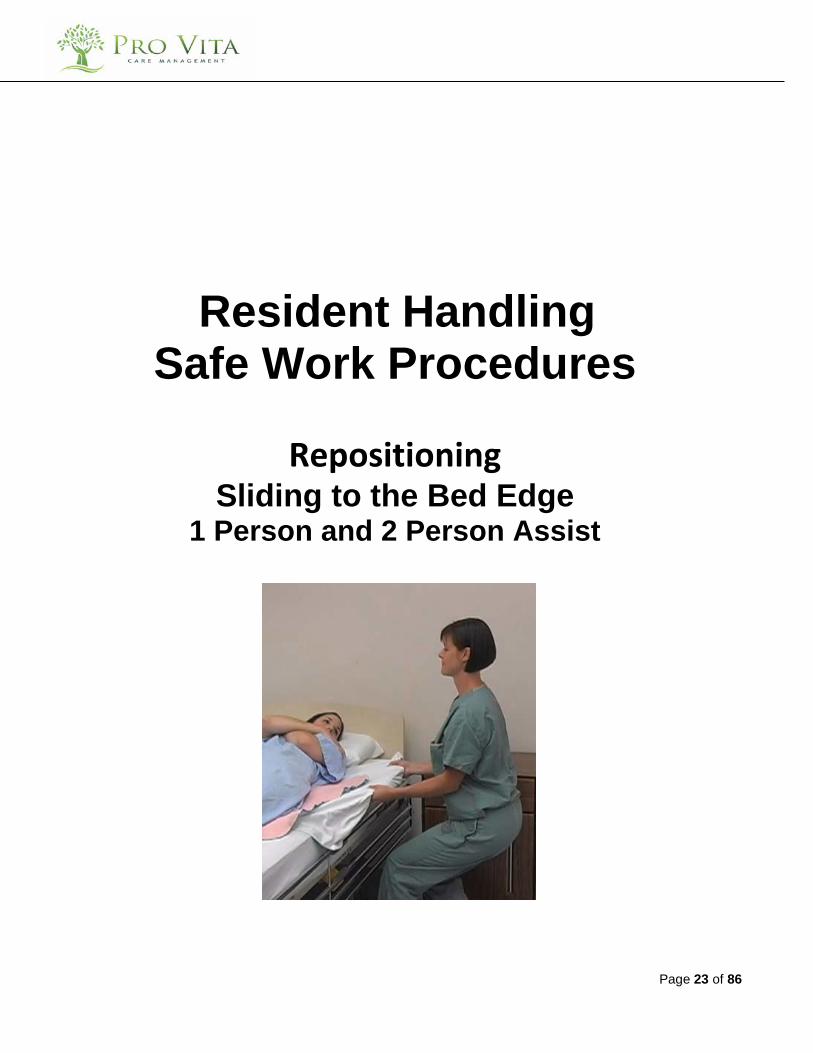
Resident Handling Safe Work Procedures
Repositioning
Sliding to the Bed Edge 1 Person and 2 Person Assist

Page 24 of 86
CONFIRM the safety of both you and your residents.
Sliding Closer to the Edge of the Bed
One Person Assist
Task requirements: • Use 2 caregivers whenever possible. • Use a slider sheet. • If the resident is large or fragile move resident in two or more moves.
CONFIRM the safety of both you and your residents.
1. Communicate with the resident
2. Orient Equipment and Resident • For heavy residents, use an additional slider sheet under the resident’s legs and feet. • Slide the resident’s feet to the side of the bed (if resident has discomfort bend their
knees) • Ask resident to assist as much as possible: • Cross arms over their chest • Lifting the head. If resident is unable to lift their head, grasp the pillow together with the
top corner of the slider sheet.
3. Neutral Spine
4. Foundation • Set one foot forward and the other foot back. • Have all of your weight over your front leg. Do not lock your knees.
5. Arms In • Grasp the slider sheet at the resident’s shoulder and hip, palms up, and elbows in close.
Keep wrists straight.
6. Re-evaluate positions before moving The Resident • Do you need an extra sliding sheet for this resident? • Can the resident help? • Are they ready?
The Environment • Do you have the supplies that you need?
Yourself • Are you ready?

Page 25 of 86
7. Move your legs by shifting weight
• Weight shift from front leg to back leg • Shift your weight onto your back leg keeping your elbows at your sides, like sitting back
on an invisible chair.
Start Finish
Start Finish

Page 26 of 86
Sliding Closer to the Edge of the Bed
Two Person Assist
Task requirements: • Use an overhead lift, if available. • Use a slider sheet.
CONFIRM the safety of both you and your residents.
1. Communicate with the resident and your partner • Appoint a leader and discuss any potential problems or concerns that might arise before,
during and after the slide.
2. Orient Equipment and Resident • For heavy residents, use an additional slider sheet under the resident’s feet and legs. • Slide the resident’s feet to the side of the bed. • Ask resident to assist as much as possible:
• Cross arms over their chest and lifting their head
3. Neutral Spine • Do not bend or pull with your waist • Bend at the knees
4. Foundation
• Maintain your feet in a side by side position, shoulder width apart
5. Arms In
• Position one person at resident’s shoulders and other at resident’s hips.
6. Re-evaluate positions before moving
• Do you need an extra sliding sheet for this resident?
• Can the resident help? • Are they ready? The Environment • Do you have the supplies that you need? Yourself • Are you ready?
7. Move your legs by shifting weight • Shift your weight from your front to back leg
keeping your elbows at your sides.
Start
Finish

Page 27 of 86
Resident Handling
Safe Work Procedures Repositioning -Turning
1 & 2 Person Assist
Turning the resident away from you Turning the resident towards you

Page 28 of 86
CONFIRM the safety of both you and your residents.
Turning a Resident Away From You
Task requirements: • Sliding sheet is mandatory
CONFIRM the safety of both you and your residents.
1. Communicate with the resident • Communicate with your resident throughout the task. • Ask resident to assist as much as possible i.e. help turn by pulling on the mattress/ bedrail.
2. Orient Equipment and Resident • Lower bedrail on near side and raise on far side. • Place supplies within easy reach. • Place pillow between resident and railing to improve resident comfort and reduce anxiety. • Bend one knee (knee closest to you) or cross the residents ankles. • Cross arms over their chest. • Have resident look in the direction of the turn
3. Neutral Spine
4. Foundation • Have one foot forward, one foot back so you can weight shift in the direction of the turn.
5. Arms In • Grasp the slider sheet at the resident’s shoulder and hip, palms up, and elbows in close. • Keep wrists straight
6. Re-evaluate positions before moving The Resident • Do you need an extra sliding sheet for this resident? • Can the resident help? • Are they ready?
The Environment • Do you have the supplies that you need?
Yourself • Are you ready?
Page 29 of 86
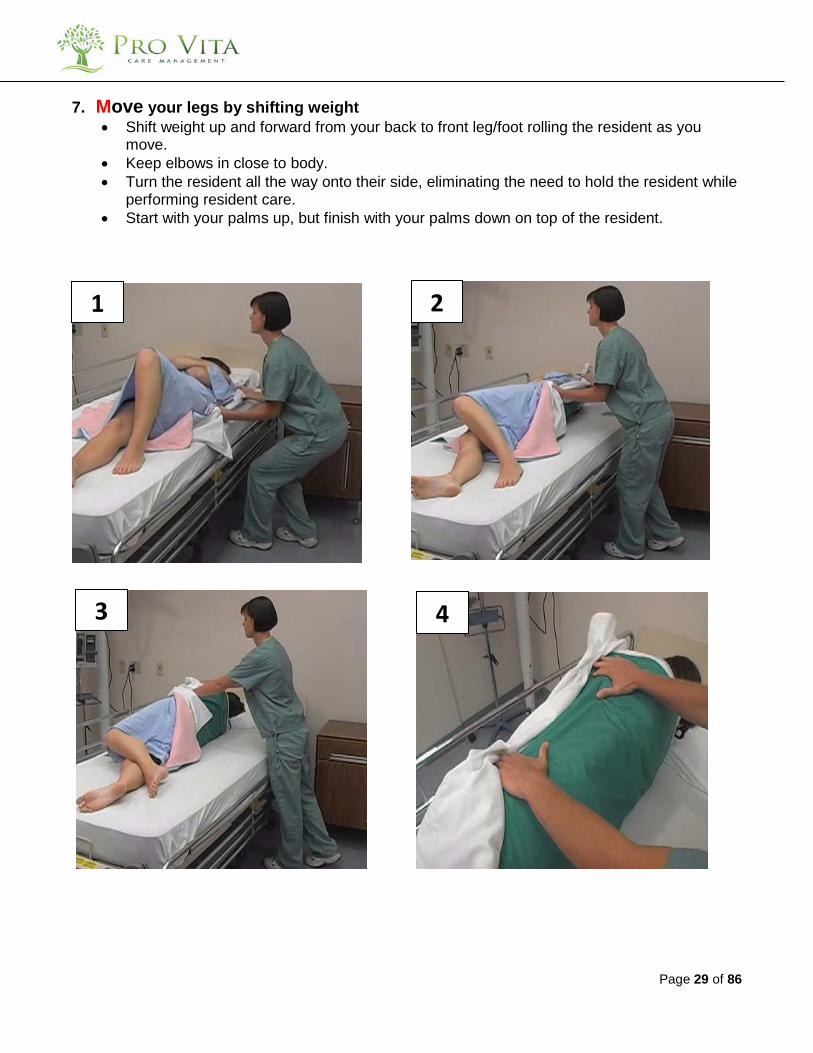
7. Move your legs by shifting weight • Shift weight up and forward from your back to front leg/foot rolling the resident as you
move. • Keep elbows in close to body. • Turn the resident all the way onto their side, eliminating the need to hold the resident while
performing resident care. • Start with your palms up, but finish with your palms down on top of the resident.
1 2
3 4
Page 30 of 86
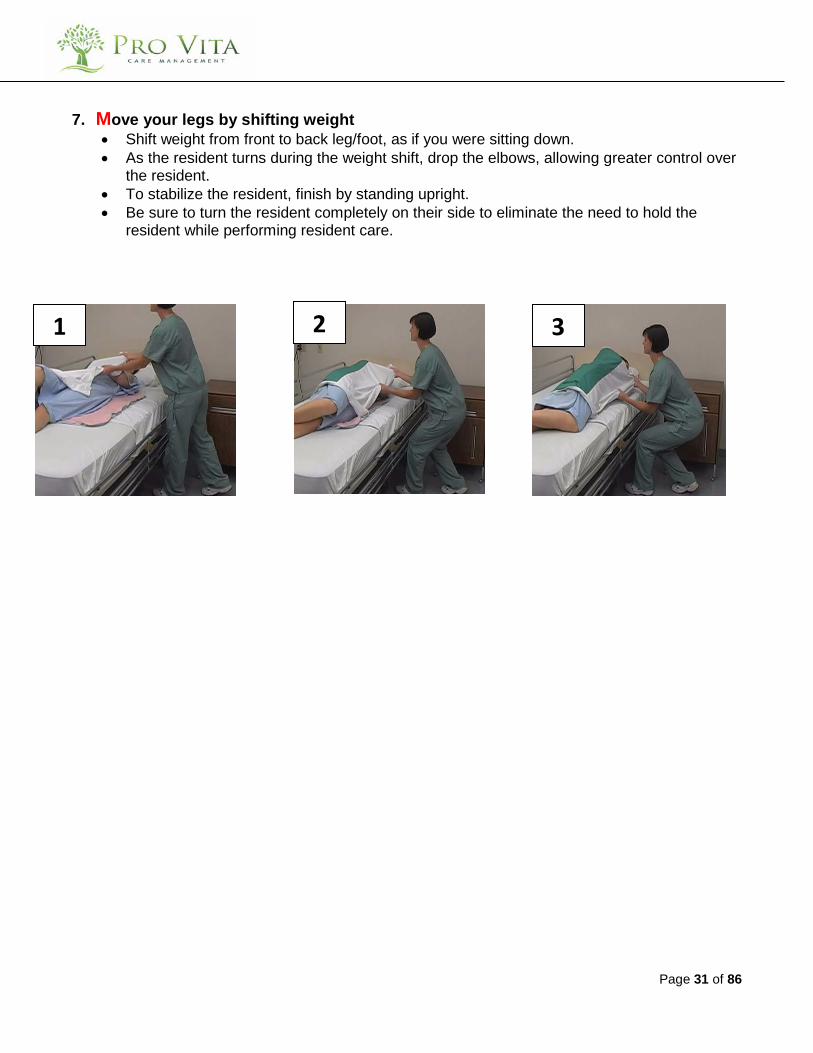
Turning a Resident Towards You
Task requirements:
• It is preferable to turn a resident away from you (particularly in aggressive circumstances). • Place a pillow on top of resident’s crossed arms in situations where you are dealing with
aggression. • Set-up and weight shift similar to turning away except where noted
CONFIRM the safety of both you and your residents.
1. Communicate with the resident and your partner • Slide resident to side of the bed if necessary (refer to Siding Closer to the Edge technique). • Bend knee of leg farthest away from you.
2. Orient Equipment and Resident • Lower bedrail on near side and raise on far side. • Place supplies within easy reach. • Place pillow between resident and railing to improve resident comfort and reduce anxiety. • Bend one knee (knee closest to you) or cross the residents ankles. • Cross arms over their chest. • Have resident look in the direction of the turn
3. Neutral Spine
4. Foundation • Assume a staggered stance with feet hip width apart (or use knee on bed technique).
5. Arms In • Grasp the slider sheet at the resident’s shoulder and hip, palms down, and elbows pointing
down. Keep wrists straight.
6. Re-evaluate positions before moving The Resident • Do you need an extra sliding sheet for this resident? • Can the resident help? • Are they ready?
The Environment • Do you have the supplies that you need?
Yourself • Are you ready?
Page 31 of 86
7. Move your legs by shifting weight • Shift weight from front to back leg/foot, as if you were sitting down. • As the resident turns during the weight shift, drop the elbows, allowing greater control over
the resident. • To stabilize the resident, finish by standing upright. • Be sure to turn the resident completely on their side to eliminate the need to hold the
resident while performing resident care.
1 2 3
Page 32 of 86
Turning a Resident – 2 Person Assist Staff Facing Each Other
Task requirements:
• Use an overhead lift, if available. • To reduce reaching and forward bending: one caregiver will initiate the turn using the turn away
technique. When the resident is at the mid-point of the turn, the other caregiver will complete the turn using the turn towards technique. Second person is there as assistance.
CONFIRM the safety of both you and your residents.
1. Communicate with the resident and your partner • Position yourselves one on each side of the bed. • Ask resident to assist as much as possible i.e. help turn by pulling on the mattress/ bedrail. • Identify leader and discus any potential problems or concerns that might arise before,
during and after the turn.
2. Orient Equipment and Resident • Lower bedrails on both sides of the bed. • Bend one knee (knee closest to you) or cross the residents ankles. • Cross arms over their chest. • Have resident look in the direction of the turn.
3. Neutral Spine
4. Foundation
• Have one foot forward, one foot back so you can weight shift in the direction of the turn.
5. Arms In Turn away from caregiver • Grasp the slider sheet at the resident’s shoulder and hip, palms up, and elbows in close.
Keep wrists straight. Turn towards caregiver • Keep elbows in close and wrist straight in anticipation of receiving the resident during the
turn.
6. Re-evaluate positions before moving The Resident • Do you need an extra sliding sheet for this resident? • Can the resident help? • Are they ready?
The Environment • Do you have the supplies that you need?
Yourself • Are you ready?

Page 33 of 86
7. Move your legs by shifting weight Turn away from caregiver • Shift weight up and forward from your back to front leg/foot rolling the resident away from
you as you move. Turn towards caregiver • Once the resident has reached the top of the turn, shift weight back and down from your
front to back leg/foot rolling the resident towards you as you move. • Keep elbows in close to body. • Turn the resident all the way onto their side, eliminating the need to hold the resident while
performing resident care.
*Note: If the resident rolls back, grasp the slider sheet at the resident’s hips and slide the resident slightly towards you.
1 2
3 Leg Positioning

Page 34 of 86
Turning a Resident – 2 Person Assist Staff Beside Each Other
Task requirements:
• Use an overhead lift, if available. • Only use this procedure when:
o An overhead lift is unavailable, o The resident is bariatric, or o Space is restricted and staff cannot be positioned across from each other.
• It is preferable to turn a resident away from you (particularly in aggressive circumstances). • Place a pillow on top of resident’s crossed arms in situations where you are dealing with
aggression. CONFIRM the safety of both you and your residents.
1. Communicate with the resident and your partner • Ask resident to assist as much as possible i.e. help turn by pulling on the mattress/ bedrail. • Identify leader and discus any potential problems or concerns that might arise before,
during and after the turn.
2. Orient Equipment and Resident • Position yourselves both on one side of the bed. • Lower bedrail on near side and raise on far side. • Place pillow between resident and railing to improve resident comfort and reduce anxiety. • Bend one knee (knee closest to you) or cross the resident’s ankles. • Cross arms over their chest. • Have resident look in the direction of the turn.
3. Neutral Spine
4. Foundation • Have one foot forward, one foot back so you can weight shift in the direction of the turn.
5. Arms In • Position one person at resident’s shoulders and other at resident’s hips. • Grasp the slider sheet at the resident’s shoulder and hip, palms up, and elbows in close. • Keep wrists straight.
6. Re-evaluate positions before moving The Resident • Do you need an extra sliding sheet for this resident? • Can the resident help? • Are they ready?
The Environment • Do you have the supplies that you need?
Yourself • Are you ready?

Page 35 of 86
7. Move your legs by shifting weight • Shift weight up and forward from your back to front leg/foot rolling the resident as you
move. • Keep elbows in close to body. • Turn the resident all the way onto their side, eliminating the need to hold the resident while
performing resident care. • Start with your palms up, but finish with your palms down on top of the resident.
*Note: If the resident rolls back, grasp the slider sheet at the resident’s hips and slide the resident slightly towards you.
MID
1 2
3
Page 36 of 86
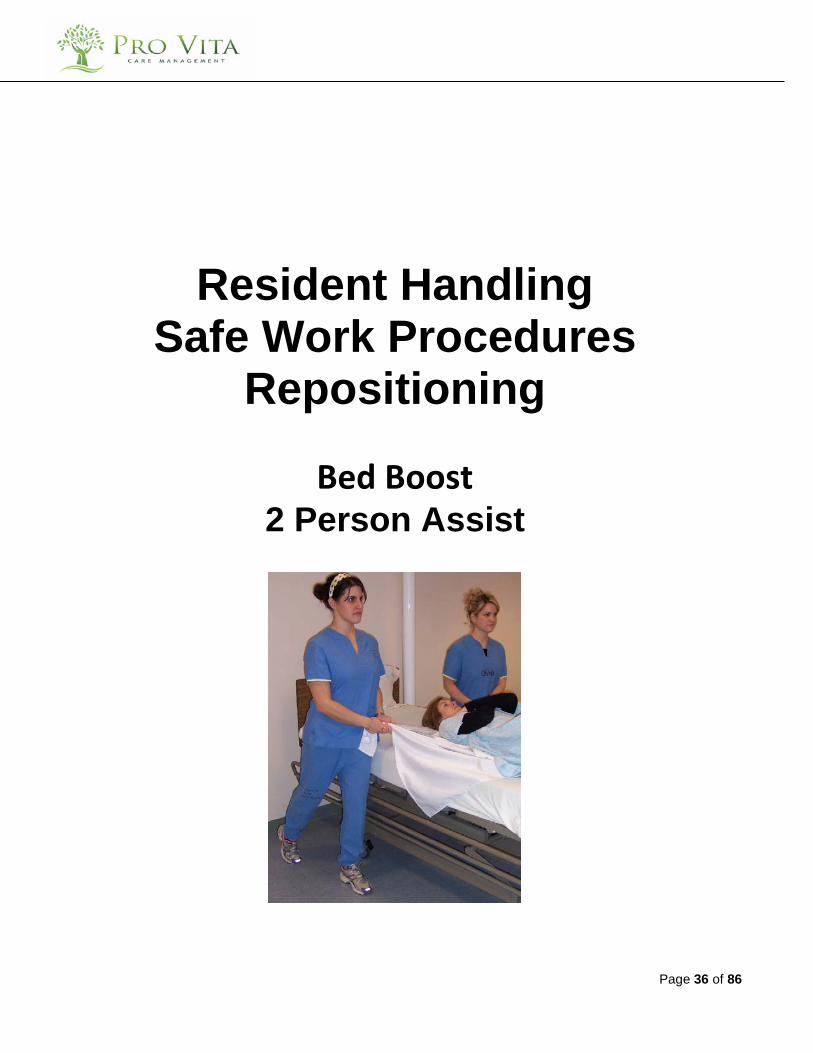
Resident Handling
Safe Work Procedures Repositioning
Bed Boost
2 Person Assist
Page 37 of 86
CONFIRM the safety of both you and your residents.
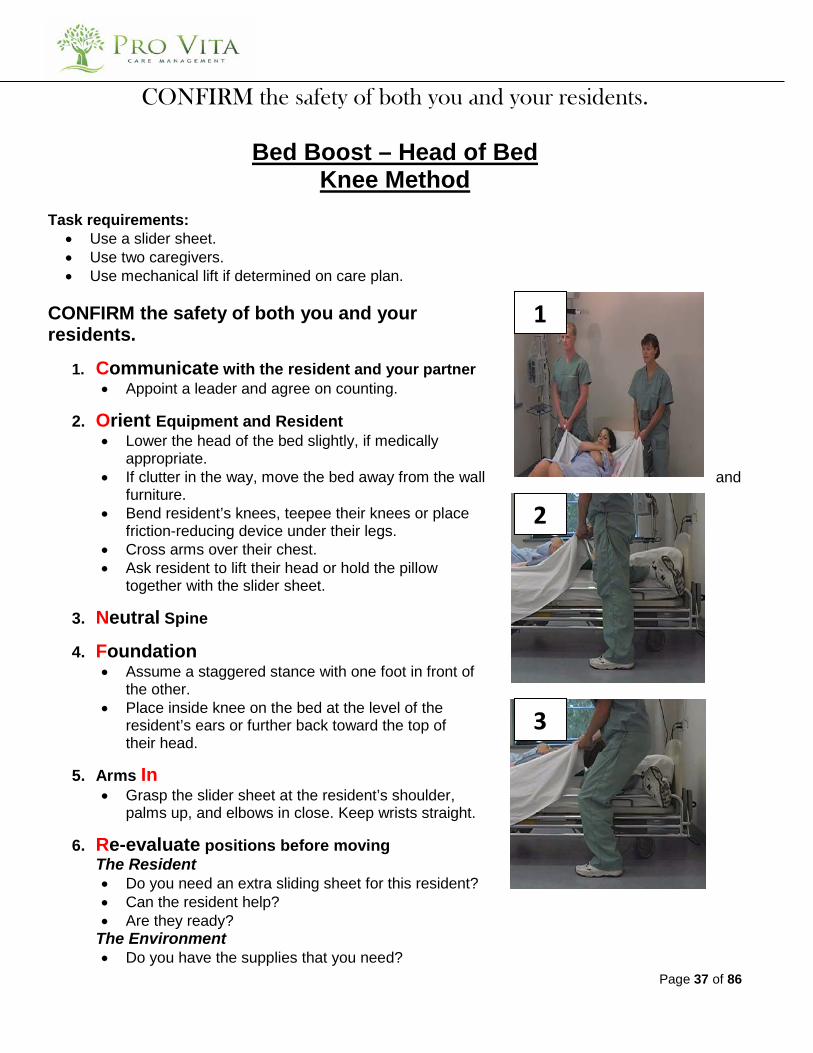
Bed Boost – Head of Bed Knee Method
Task requirements:
• Use a slider sheet. • Use two caregivers. • Use mechanical lift if determined on care plan.
CONFIRM the safety of both you and your residents.
1. Communicate with the resident and your partner • Appoint a leader and agree on counting.
2. Orient Equipment and Resident • Lower the head of the bed slightly, if medically
appropriate. • If clutter in the way, move the bed away from the wall and
furniture. • Bend resident’s knees, teepee their knees or place
friction-reducing device under their legs. • Cross arms over their chest. • Ask resident to lift their head or hold the pillow
together with the slider sheet.
3. Neutral Spine
4. Foundation • Assume a staggered stance with one foot in front of
the other. • Place inside knee on the bed at the level of the
resident’s ears or further back toward the top of their head.
5. Arms In • Grasp the slider sheet at the resident’s shoulder,
palms up, and elbows in close. Keep wrists straight.
6. Re-evaluate positions before moving The Resident • Do you need an extra sliding sheet for this resident? • Can the resident help? • Are they ready?
The Environment • Do you have the supplies that you need?
1
2
3
Page 38 of 86
Yourself • Are you ready?
7. Move your legs by shifting weight • Weight shift your hips back while sitting down on
your leg, keeping your arms beside your torso.
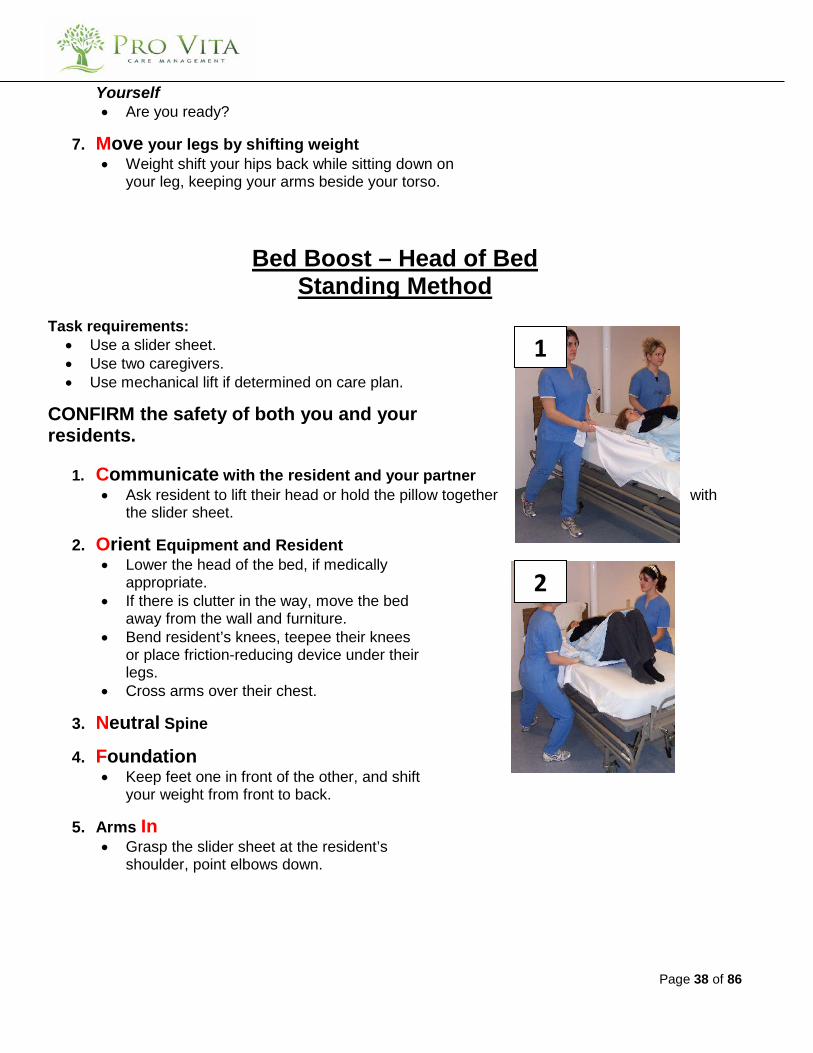
Bed Boost – Head of Bed Standing Method
Task requirements:
• Use a slider sheet. • Use two caregivers. • Use mechanical lift if determined on care plan.
CONFIRM the safety of both you and your residents.
1. Communicate with the resident and your partner • Ask resident to lift their head or hold the pillow together with
the slider sheet.
2. Orient Equipment and Resident • Lower the head of the bed, if medically
appropriate. • If there is clutter in the way, move the bed
away from the wall and furniture. • Bend resident’s knees, teepee their knees
or place friction-reducing device under their legs.
• Cross arms over their chest.
3. Neutral Spine
4. Foundation • Keep feet one in front of the other, and shift
your weight from front to back.
5. Arms In • Grasp the slider sheet at the resident’s
shoulder, point elbows down.
1
2

Page 39 of 86
6. Re-evaluate positions before moving The Resident • Do you need an extra sliding sheet for this
resident? • Can the resident help? • Are they ready?
The Environment • Do you have the supplies that you need?
Yourself • Are you ready?
7. Move your legs by shifting weight • Weight shift from your front to back leg/foot
keeping your arms beside your torso.
Bed Boost – Side of Bed Method Task requirements:
• Use a slider sheet. • Use two caregivers. • Use mechanical lift if determined on care plan.
CONFIRM the safety of both you and your residents.
1. Communicate with the resident and your partner • Appoint a leader and agree on counting.
2. Orient Equipment and Resident
• Lower the head of the bed, if medically appropriate.
• Bend resident’s knees, teepee their knees or place friction-reducing device under their legs.
• Cross arms over their chest. • Ask resident to lift their head or hold the
pillow together with the slider sheet.
3. Neutral Spine
4. Foundation • Assume a side-by-side stance with feet
shoulder width apart and feet pointing out at a 45° angle.
1
3
2

Page 40 of 86
5. Arms In
• Grasp the slider sheet at the resident’s shoulder and hips, palms up.
6. Re-evaluate positions before moving
The Resident • Do you need an extra sliding sheet for this
resident? • Can the resident help? • Are they ready?
The Environment • Do you have the supplies that you need?
Yourself • Are you ready?
7. Move your legs by shifting weight
• Weight shift from your “footboard” foot to your “headboard” foot, keeping your arms close to your torso.
3
Page 41 of 86
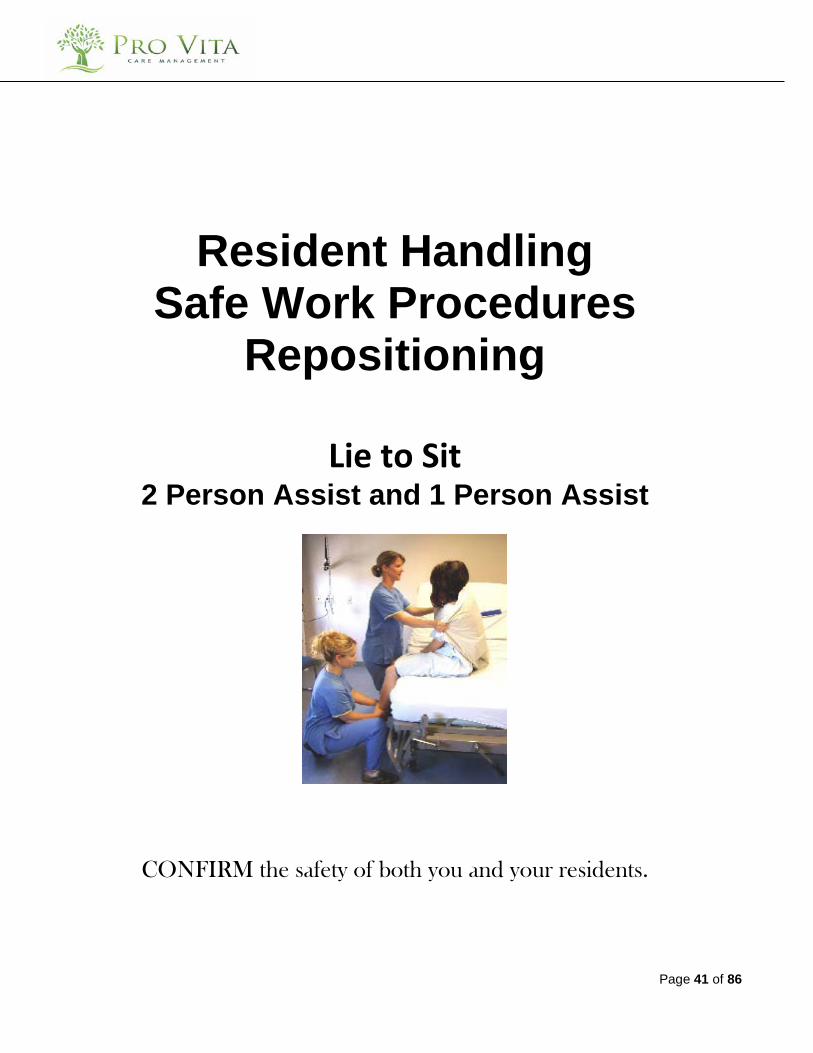
Resident Handling Safe Work Procedures
Repositioning
Lie to Sit 2 Person Assist and 1 Person Assist
CONFIRM the safety of both you and your residents.

Page 42 of 86
Two Person Assist CONFIRM the safety of both you and your residents.
1. Communicate with the resident and your partner • Before beginning, discuss any potential problems or concerns that might arise before,
during and after the reposition. • Instruct resident to assist by pushing off the bed with their hand.
2. Orient Equipment and Resident • Raise the head of the bed up as much as the resident will tolerate. • If slider sheet on the bed, tuck under mattress for safety. • Using turning technique assist the resident to roll onto their side. • Once on their side, ensure their hips are about a hand length (approximately 1 foot) from
the edge of the bed. • Slide the resident’s feet over the edge of the bed using a weight shift.
3. Neutral Spine
4. Foundation • First person uses a staggered stance, with one foot in front and the other back, • Second person uses a side-by-side foot stance, feet slightly turned out at 45°
5. Arms In • First person grasp resident’s calves • Second person grasps resident’s shoulders or place one hand on residents hip and the
other under their shoulder
6. Re-evaluate positions before moving The Resident • Is the resident able to help him/herself? • Does the resident understand the task, and are they ready? • Can the resident be manually lifted?
The Environment • Is the floor wet or dry? • Do you have the appropriate supplies/equipment? • Are there any obstacles?
Yourself • Are you ready? • Are you in a safe position?
Page 43 of 86
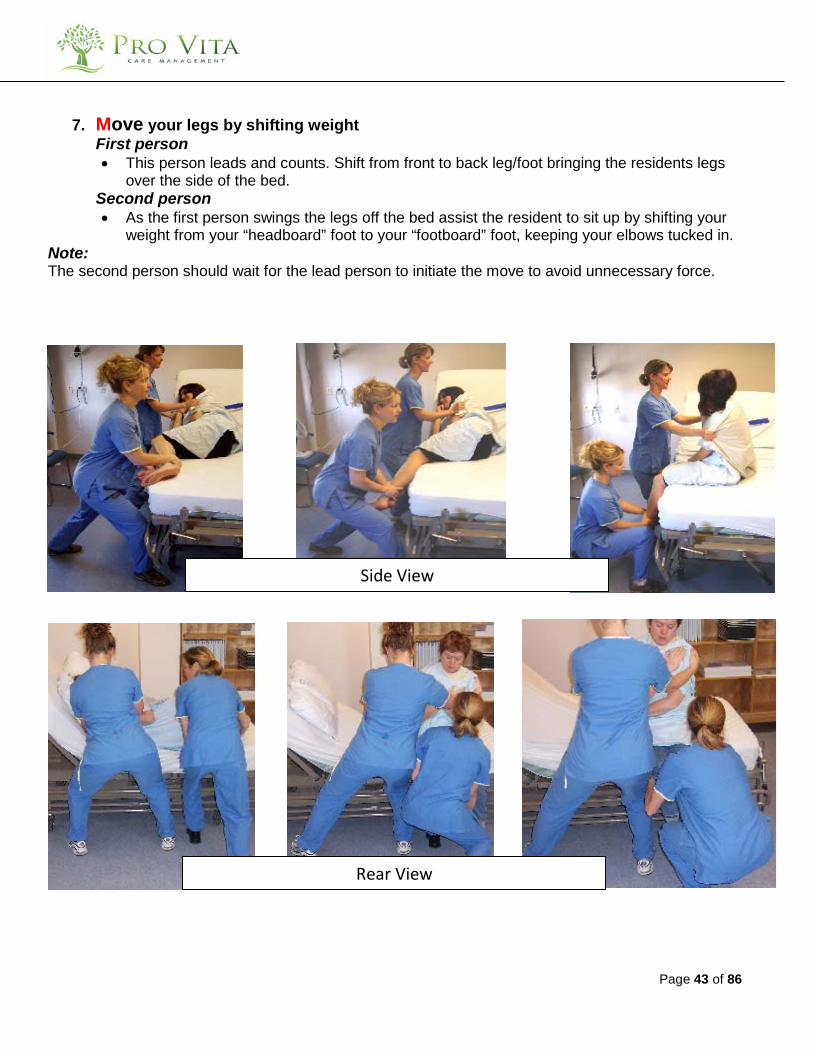
7. Move your legs by shifting weight First person • This person leads and counts. Shift from front to back leg/foot bringing the residents legs
over the side of the bed. Second person • As the first person swings the legs off the bed assist the resident to sit up by shifting your
weight from your “headboard” foot to your “footboard” foot, keeping your elbows tucked in. Note: The second person should wait for the lead person to initiate the move to avoid unnecessary force.
Side View
Rear View
Page 44 of 86
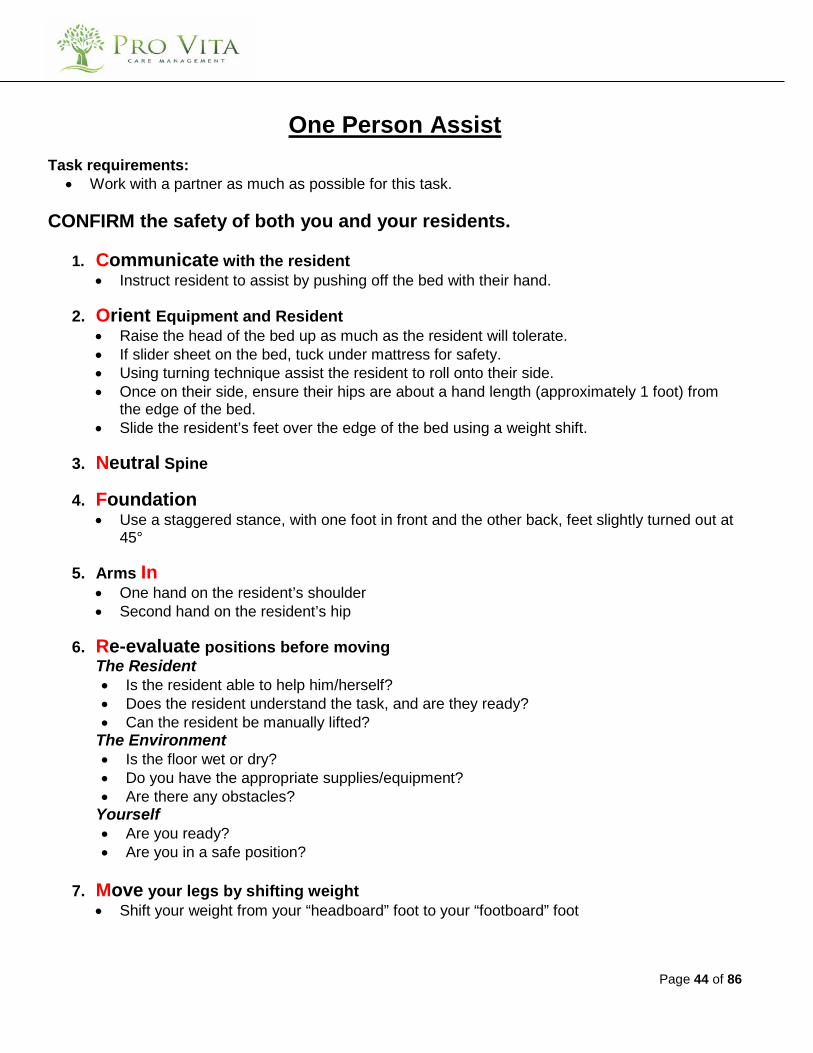
One Person Assist
Task requirements:
• Work with a partner as much as possible for this task. CONFIRM the safety of both you and your residents.
1. Communicate with the resident • Instruct resident to assist by pushing off the bed with their hand.
2. Orient Equipment and Resident • Raise the head of the bed up as much as the resident will tolerate. • If slider sheet on the bed, tuck under mattress for safety. • Using turning technique assist the resident to roll onto their side. • Once on their side, ensure their hips are about a hand length (approximately 1 foot) from
the edge of the bed. • Slide the resident’s feet over the edge of the bed using a weight shift.
3. Neutral Spine
4. Foundation • Use a staggered stance, with one foot in front and the other back, feet slightly turned out at
45°
5. Arms In • One hand on the resident’s shoulder • Second hand on the resident’s hip
6. Re-evaluate positions before moving The Resident • Is the resident able to help him/herself? • Does the resident understand the task, and are they ready? • Can the resident be manually lifted?
The Environment • Is the floor wet or dry? • Do you have the appropriate supplies/equipment? • Are there any obstacles?
Yourself • Are you ready? • Are you in a safe position?
7. Move your legs by shifting weight
• Shift your weight from your “headboard” foot to your “footboard” foot

Page 45 of 86
Side View Rear View
Page 46 of 86
Resident Handling Safe Work Procedures
Repositioning
Sit to Lie 2 Person Assist and 1 Person Assist
Page 47 of 86
CONFIRM the safety of both you and your residents.
Two Person Assist
CONFIRM the safety of both you and your residents.
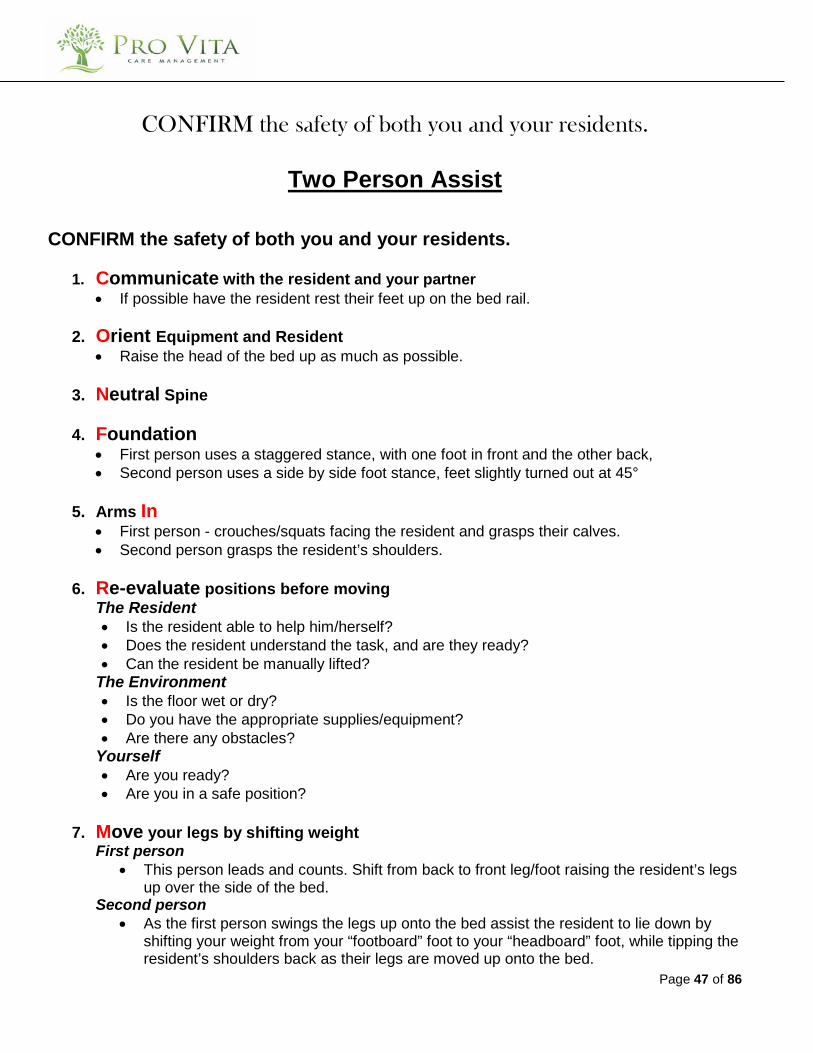
1. Communicate with the resident and your partner • If possible have the resident rest their feet up on the bed rail.
2. Orient Equipment and Resident • Raise the head of the bed up as much as possible.
3. Neutral Spine
4. Foundation • First person uses a staggered stance, with one foot in front and the other back, • Second person uses a side by side foot stance, feet slightly turned out at 45°
5. Arms In
• First person - crouches/squats facing the resident and grasps their calves. • Second person grasps the resident’s shoulders.
6. Re-evaluate positions before moving
The Resident • Is the resident able to help him/herself? • Does the resident understand the task, and are they ready? • Can the resident be manually lifted?
The Environment • Is the floor wet or dry? • Do you have the appropriate supplies/equipment? • Are there any obstacles?
Yourself • Are you ready? • Are you in a safe position?
7. Move your legs by shifting weight
First person • This person leads and counts. Shift from back to front leg/foot raising the resident’s legs
up over the side of the bed. Second person
• As the first person swings the legs up onto the bed assist the resident to lie down by shifting your weight from your “footboard” foot to your “headboard” foot, while tipping the resident’s shoulders back as their legs are moved up onto the bed.
Page 48 of 86
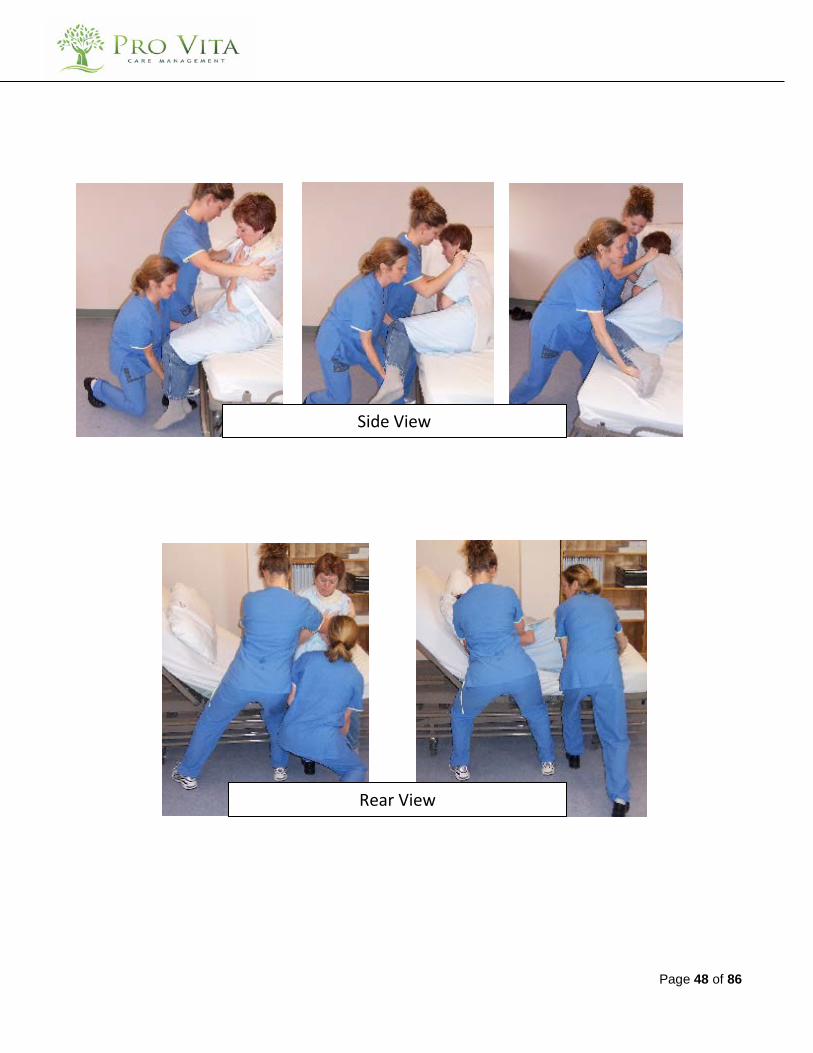
Side View
Rear View

Page 49 of 86
One Person Assist
Task requirements:
• Work with a partner as much as possible.
1. Communicate with the resident • If possible have the resident rest their feet up on the bed rail. • Encourage the resident to lower themselves to the bed and bring their feet up onto the bed.
2. Orient Equipment and Resident
• Raise the head of the bed up as much as possible.
3. Neutral Spine
4. Foundation • Use a side-by-side foot stance with feet slightly turned out at 45°.
5. Arms In
• Grasp the resident’s shoulders.
6. Re-evaluate positions before moving The Resident • Is the resident able to help him/herself? • Does the resident understand the task, and are they ready? • Can the resident be manually lifted?
The Environment • Is the floor wet or dry? • Do you have the appropriate supplies/equipment? • Are there any obstacles?
Yourself • Are you ready? • Are you in a safe position?
7. Move your legs by shifting weight
• Weigh shift from your “footboard” foot to your “headboard” foot while tipping the resident’s shoulders toward the bed.
• If their legs remain off the bed, reposition yourself at the resident’s feet. • With a staggered stance weight shift from the back leg/foot to the front while moving their
legs up onto the bed.

Page 50 of 86
Resident Handling Safe Work Procedures
Repositioning
Repositioning Wheelchair Resident
Page 51 of 86
CONFIRM the safety of both you and your residents.
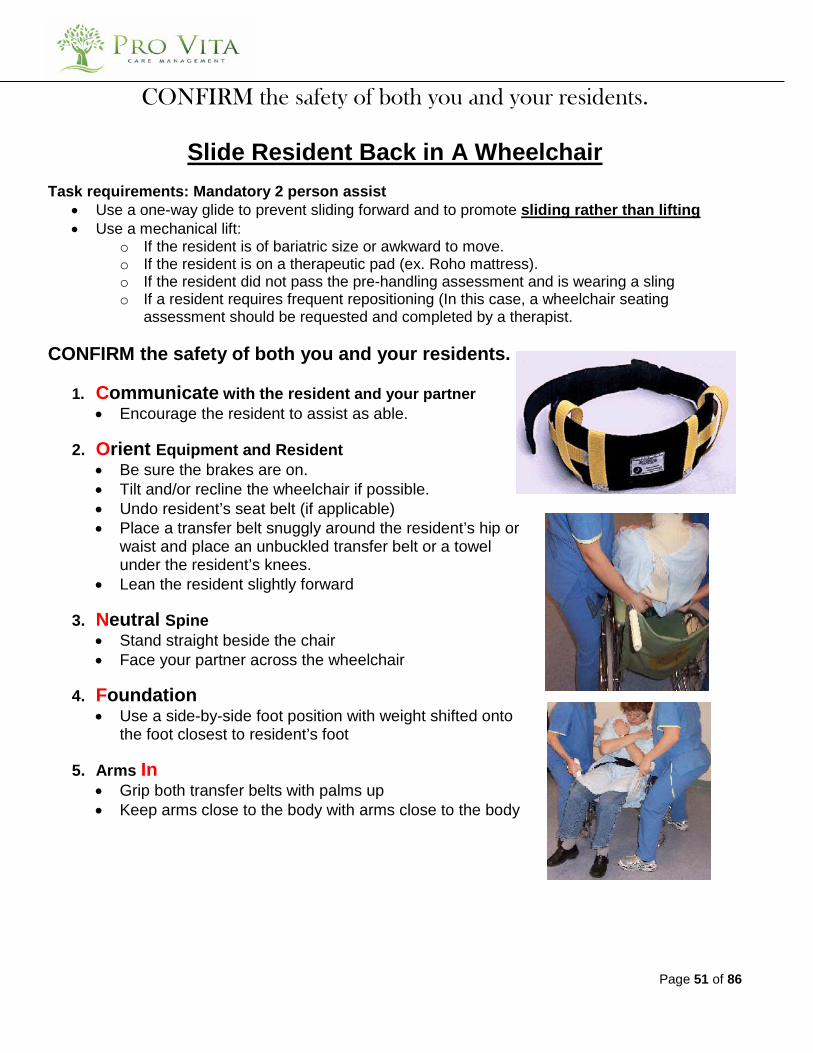
Slide Resident Back in A Wheelchair
Task requirements: Mandatory 2 person assist • Use a one-way glide to prevent sliding forward and to promote sliding rather than lifting • Use a mechanical lift:
o If the resident is of bariatric size or awkward to move. o If the resident is on a therapeutic pad (ex. Roho mattress). o If the resident did not pass the pre-handling assessment and is wearing a sling o If a resident requires frequent repositioning (In this case, a wheelchair seating
assessment should be requested and completed by a therapist. CONFIRM the safety of both you and your residents.
1. Communicate with the resident and your partner • Encourage the resident to assist as able.
2. Orient Equipment and Resident
• Be sure the brakes are on. • Tilt and/or recline the wheelchair if possible. • Undo resident’s seat belt (if applicable) • Place a transfer belt snuggly around the resident’s hip or
waist and place an unbuckled transfer belt or a towel under the resident’s knees.
• Lean the resident slightly forward
3. Neutral Spine • Stand straight beside the chair • Face your partner across the wheelchair
4. Foundation
• Use a side-by-side foot position with weight shifted onto the foot closest to resident’s foot
5. Arms In
• Grip both transfer belts with palms up • Keep arms close to the body with arms close to the body

Page 52 of 86
6. Re-evaluate positions before moving • Before beginning, discuss any potential problems or
concerns that might arise before, during and after the reposition.
• Remind resident of the task you are performing, and their role
7. Move your legs by shifting weight
• First, straighten your knees slightly while keeping your elbows tucked in. This will elevate their legs off the chair.
• Next, weight shift onto the foot closest to the resident’s head.
Facilitating a Seated Resident to Inch Forward/Backward
Task requirements: • Two should perform the task, second person stands behind the resident to assist with lean.
CONFIRM the safety of both you and your residents.
1. Communicate with the resident and your partner • Encourage resident to assist, as appropriate.
2. Orient Equipment and Resident
• Have resident lean to one side. • Ensure that equipment brakes are on. • If resident on a bed, adjust bed height to allow residents
feet to touch the floor. • Undo seat belt.
3. Neutral Spine • Sit close enough to resident to avoid over-reaching, and
bending
4. Foundation • Kneel in front of resident, keeping knees shoulder width apart.
5. Arms In
• One hand behind the knee of the resident’s raised hip, other hand behind the resident’s pelvis
6. Re-evaluate positions before moving
Environment: • Is the floor wet or dry? • Is there anything in the way, and do you have enough room?

Page 53 of 86
The Resident: • How heavy is the resident? • Might they move unpredictably? Yourself: • Have you fully assessed the situation, the players and the hazards? • Is your body positioned in the safest manner?
7. Move your legs by shifting weight
Moving resident forward • Weight shift from front to back leg while slightly pulling forward on the resident’s leg.
Repeat with other leg.
Moving resident backward • Weight shift from back to front leg while slightly pushing on the front of the resident’s
knee. Repeat with other leg.
Repeat entire process as needed, until desired position is reached.

Page 54 of 86
Resident Handling Safe Work Procedures
Transfers
Sit to Stand Transfer 1 Person Assist
CONFIRM the safety of both you and your residents.

Page 55 of 86
Sit to Stand Transfer – One Person Assist
Task requirements: • Mandatory transfer belt use. • Conduct a pre-handling check before standing resident. • Use a mechanical lift if the resident cannot pass pre-handling check. (see page 14 of this
handbook) CONFIRM the safety of both you and your residents.
1. Communicate with the resident • Discuss the task to be performed with the resident
2. Orient Equipment and Resident
The Environment • Bed height should be lowered to allow residents feet to touch the floor. • Bring seat close to you and the resident. • If a walker is required, place the walker within easy reach to allow positioning in front of the
resident once they are standing. The Resident • Ensure appropriate footwear. • Ensure resident’s hands are NOT holding a walker. • Transfer belt snuggly around the resident’s hips. • Facilitate standing by positioning the resident: • Ankles under their knees, with one foot slightly back. • Sitting close to the edge of the bed.
3. Neutral Spine • Prevent twisting in the torso. Remember to point your toes in the direction your hands are
going.
4. Foundation • Place your knees around the outside of both of the resident’s legs. • Stagger your feet with the foot closest to the transfer location to the back. • Start with weight shifted on forward foot.
5. Arms In • Place your arms around the outside of the resident’s arms. • Grip the transfer belt with both hands. • Put the resident’s hands on your hips, if possible. Do not let the resident put their hands
around your neck/shoulders.
Page 56 of 86
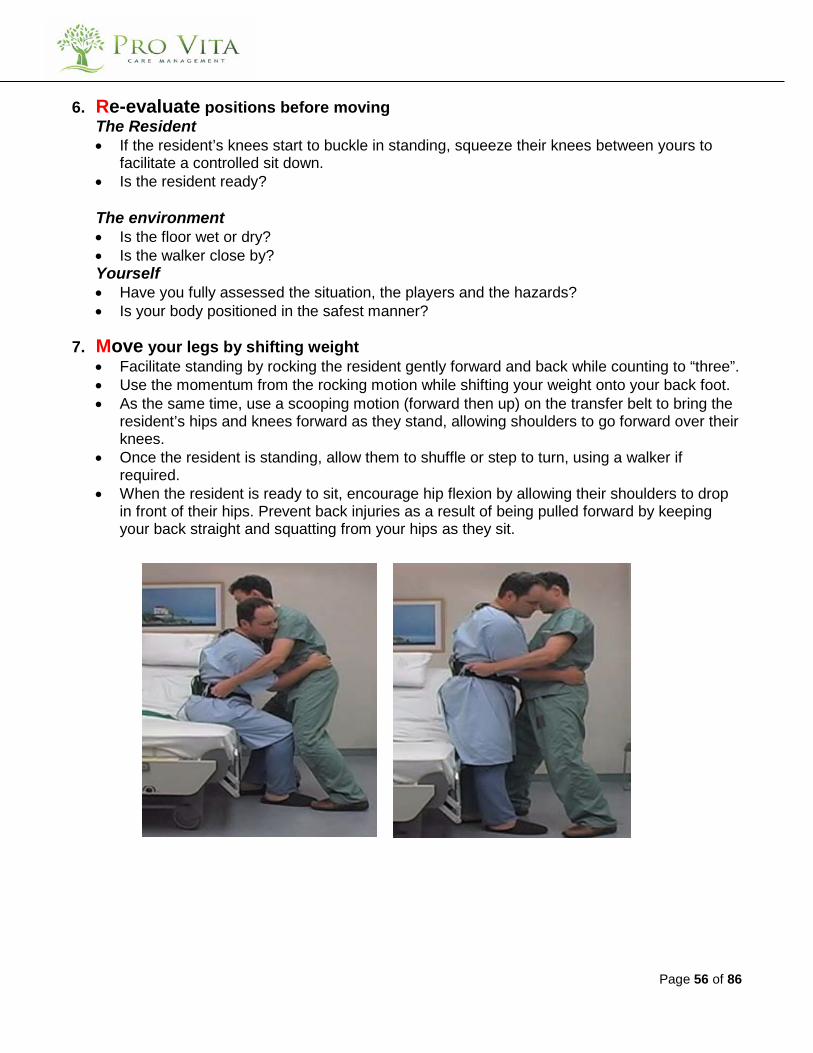
6. Re-evaluate positions before moving The Resident • If the resident’s knees start to buckle in standing, squeeze their knees between yours to
facilitate a controlled sit down. • Is the resident ready? The environment • Is the floor wet or dry? • Is the walker close by? Yourself • Have you fully assessed the situation, the players and the hazards? • Is your body positioned in the safest manner?
7. Move your legs by shifting weight • Facilitate standing by rocking the resident gently forward and back while counting to “three”. • Use the momentum from the rocking motion while shifting your weight onto your back foot. • As the same time, use a scooping motion (forward then up) on the transfer belt to bring the
resident’s hips and knees forward as they stand, allowing shoulders to go forward over their knees.
• Once the resident is standing, allow them to shuffle or step to turn, using a walker if required.
• When the resident is ready to sit, encourage hip flexion by allowing their shoulders to drop in front of their hips. Prevent back injuries as a result of being pulled forward by keeping your back straight and squatting from your hips as they sit.

Page 57 of 86

Page 58 of 86
RESIDENT HANDLING SAFE WORK PROCEDURES
AMBULATORY RESIDENTS
Aiding Mobile Residents

Page 59 of 86
CONFIRM the safety of both you and your residents.
1 Person Assist Walking With a Resident
Task requirements:
• Mandatory transfer belt use for this technique. • Conduct a pre-handling check before standing resident. Use a mechanical lift if the resident
cannot pass weight-bearing tests.
CONFIRM the safety of both you and your residents.
1. Communicate with the resident and your partner 2. Orient Equipment and Resident 3. Neutral Spine 4. Foundation 5. Arms In 6. Re-evaluate positions before moving 7. Move your legs by shifting weight
1. Communicate with the resident
• Communicate with resident throughout ambulation.
2. Orient the Equipment and the Resident • Walker, cane etc. needed as indicated on the care plan • Explain to the resident what you are doing, and how you plan to do it
3. Neutral Spine • Avoid torso twisting
4. Foundation • Keeping your legs shoulder width apart, bend with your knees to attain the height required
to attach transfer belt
5. Arms In • Grasp the far side of the transfer belt, allowing your forearm to cross the resident’s low
back. • Your other hand can grasp the close side of the transfer belt, support the resident’s
hand/forearm or help to guide the walker.
6. Re-evaluate positions before moving

Page 60 of 86
• Expect the unexpected o Is the resident comfortable, and ready for becoming ambulatory? o Are you in the best position for helping the resident?
7. Move your legs by shifting weight • Use your knees to stand up • The strength of your legs will help the resident stand
Page 61 of 86
BED MAKING AND CLEANING IN HEALTHCARE FACILITIES
Page 62 of 86
CONFIRM the safety of both you and your residents.
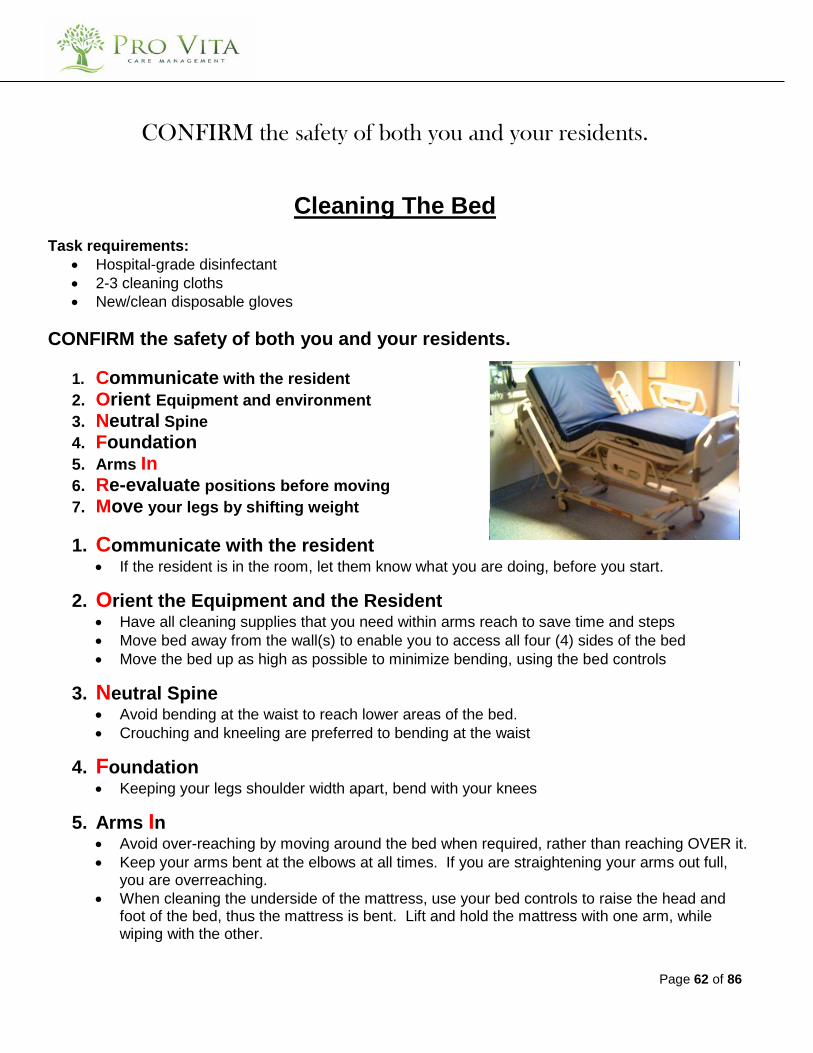
Cleaning The Bed
Task requirements:
• Hospital-grade disinfectant • 2-3 cleaning cloths • New/clean disposable gloves
CONFIRM the safety of both you and your residents.
1. Communicate with the resident 2. Orient Equipment and environment 3. Neutral Spine 4. Foundation 5. Arms In 6. Re-evaluate positions before moving 7. Move your legs by shifting weight
1. Communicate with the resident
• If the resident is in the room, let them know what you are doing, before you start.
2. Orient the Equipment and the Resident • Have all cleaning supplies that you need within arms reach to save time and steps • Move bed away from the wall(s) to enable you to access all four (4) sides of the bed • Move the bed up as high as possible to minimize bending, using the bed controls
3. Neutral Spine • Avoid bending at the waist to reach lower areas of the bed. • Crouching and kneeling are preferred to bending at the waist
4. Foundation • Keeping your legs shoulder width apart, bend with your knees
5. Arms In • Avoid over-reaching by moving around the bed when required, rather than reaching OVER it. • Keep your arms bent at the elbows at all times. If you are straightening your arms out full,
you are overreaching. • When cleaning the underside of the mattress, use your bed controls to raise the head and
foot of the bed, thus the mattress is bent. Lift and hold the mattress with one arm, while wiping with the other.

Page 63 of 86
• If flipping the mattress over, pull it in close to the body, then flip it over, leaving the cleaned side of the mattress supported by the bed rails.
6. Re-evaluate position • Are you over-reaching? • Is there enough room for you to walk all the way around the bed?
7. Move your legs by shifting weight

Page 64 of 86
Making The Bed
Task requirements:
• Clean/new sheets, blankets, pillow cases, etc…
CONFIRM the safety of both you and your residents.
1. Communicate with the resident 2. Orient Equipment and environment 3. Neutral Spine 4. Foundation 5. Arms In 6. Re-evaluate positions before moving 7. Move your legs by shifting weight
1. Communicate with the resident
• If the resident is in the room, let them know what you are doing, before you start.
2. Orient the Equipment and the Resident • Have all clean/new bedding supplies in the room with you to save time and steps
3. Neutral Spine • Avoid bending at the waist to reach across the bed • Avoid twisting your torso when tucking in sheets/blankets
4. Foundation • Keeping your legs shoulder width apart, bend with your knees
5. Arms In • Avoid over-reaching by moving around the bed when required, rather than reaching OVER it. • Keep your arms bent at the elbows at all times. If you are straightening your arms out full,
you are overreaching. • Do one half of the bed at a time
6. Re-evaluate position • Are you over-reaching? • Is there enough room for you to walk all the way around the bed?
7. Move your legs by shifting weight
Section 2
Transfer and Repositioning of
Residents
High Risk Actions
DO NOT PERFORM THE FOLLOWING TYPES OF
LIFT/TRANSFERS
Except in the event of an emergency such as
an evacuation.
Page 66 of 86
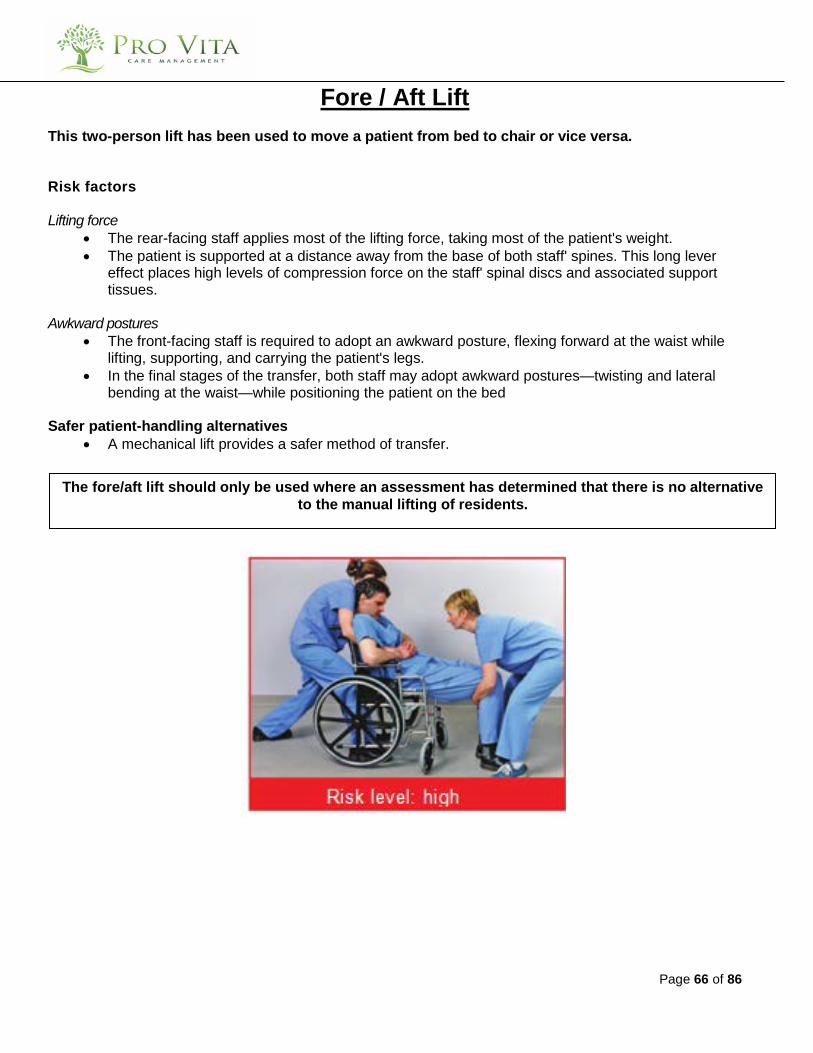
Fore / Aft Lift This two-person lift has been used to move a patient from bed to chair or vice versa.
Risk factors
Lifting force • The rear-facing staff applies most of the lifting force, taking most of the patient's weight. • The patient is supported at a distance away from the base of both staff' spines. This long lever
effect places high levels of compression force on the staff' spinal discs and associated support tissues.
Awkward postures
• The front-facing staff is required to adopt an awkward posture, flexing forward at the waist while lifting, supporting, and carrying the patient's legs.
• In the final stages of the transfer, both staff may adopt awkward postures—twisting and lateral bending at the waist—while positioning the patient on the bed
Safer patient-handling alternatives
• A mechanical lift provides a safer method of transfer.
The fore/aft lift should only be used where an assessment has determined that there is no alternative to the manual lifting of residents.
Page 67 of 86
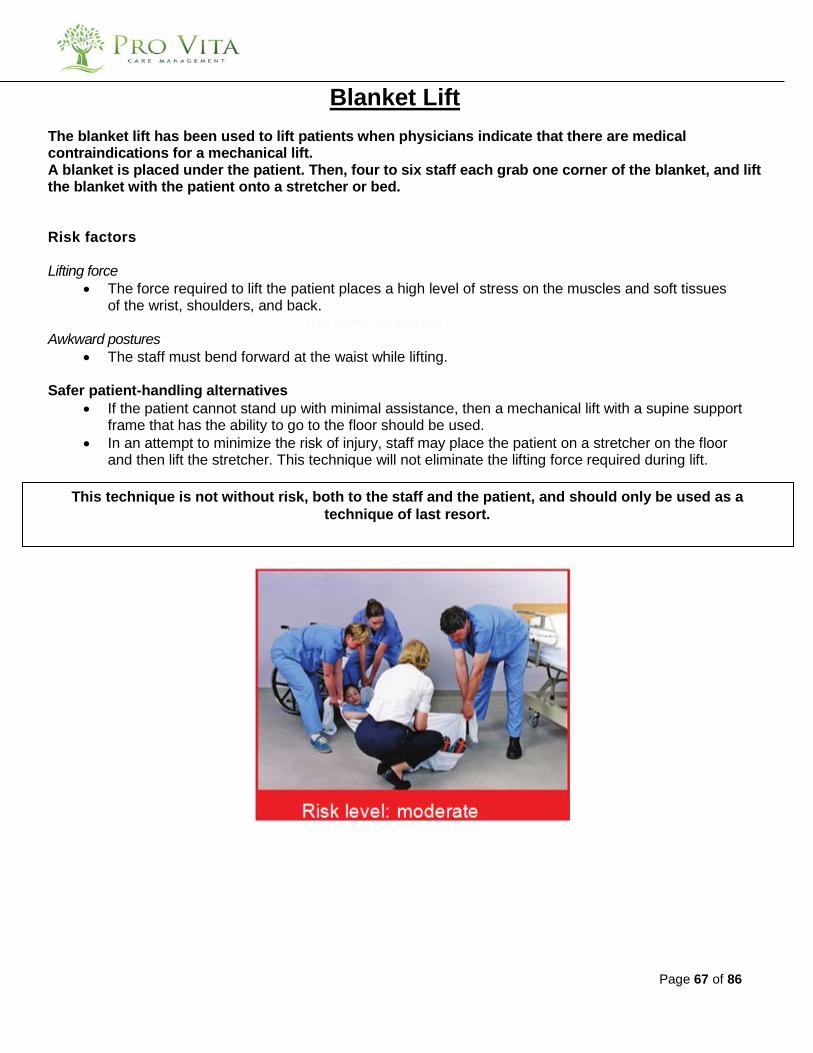
Blanket Lift The blanket lift has been used to lift patients when physicians indicate that there are medical contraindications for a mechanical lift. A blanket is placed under the patient. Then, four to six staff each grab one corner of the blanket, and lift the blanket with the patient onto a stretcher or bed.
Risk factors
Lifting force • The force required to lift the patient places a high level of stress on the muscles and soft tissues
of the wrist, shoulders, and back. Risk level: moderate
Awkward postures • The staff must bend forward at the waist while lifting.
Safer patient-handling alternatives
• If the patient cannot stand up with minimal assistance, then a mechanical lift with a supine support frame that has the ability to go to the floor should be used.
• In an attempt to minimize the risk of injury, staff may place the patient on a stretcher on the floor and then lift the stretcher. This technique will not eliminate the lifting force required during lift.
This technique is not without risk, both to the staff and the patient, and should only be used as a technique of last resort.
Page 68 of 86
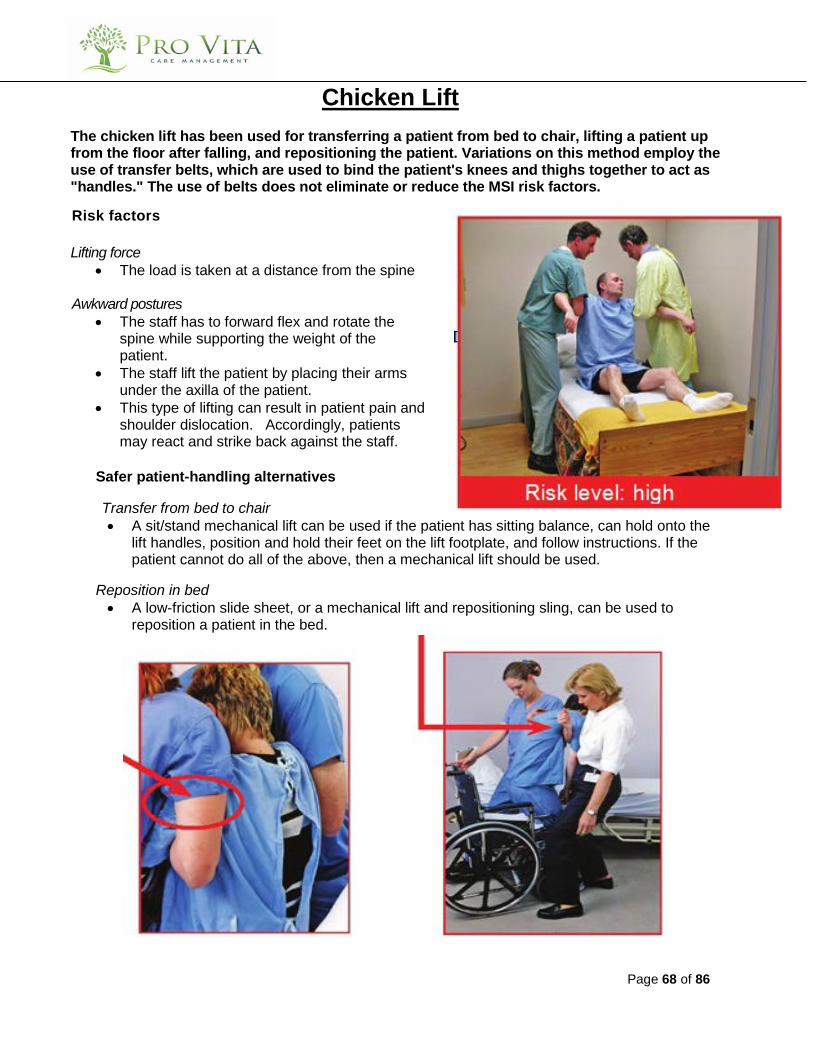
Chicken Lift The chicken lift has been used for transferring a patient from bed to chair, lifting a patient up from the floor after falling, and repositioning the patient. Variations on this method employ the use of transfer belts, which are used to bind the patient's knees and thighs together to act as "handles." The use of belts does not eliminate or reduce the MSI risk factors. Risk factors Lifting force
• The load is taken at a distance from the spine
Awkward postures • The staff has to forward flex and rotate the
spine while supporting the weight of the patient.
• The staff lift the patient by placing their arms under the axilla of the patient.
• This type of lifting can result in patient pain and shoulder dislocation. Accordingly, patients may react and strike back against the staff.
Safer patient-handling alternatives
Transfer from bed to chair • A sit/stand mechanical lift can be used if the patient has sitting balance, can hold onto the
lift handles, position and hold their feet on the lift footplate, and follow instructions. If the patient cannot do all of the above, then a mechanical lift should be used.
Reposition in bed • A low-friction slide sheet, or a mechanical lift and repositioning sling, can be used to
reposition a patient in the bed.
Page 69 of 86
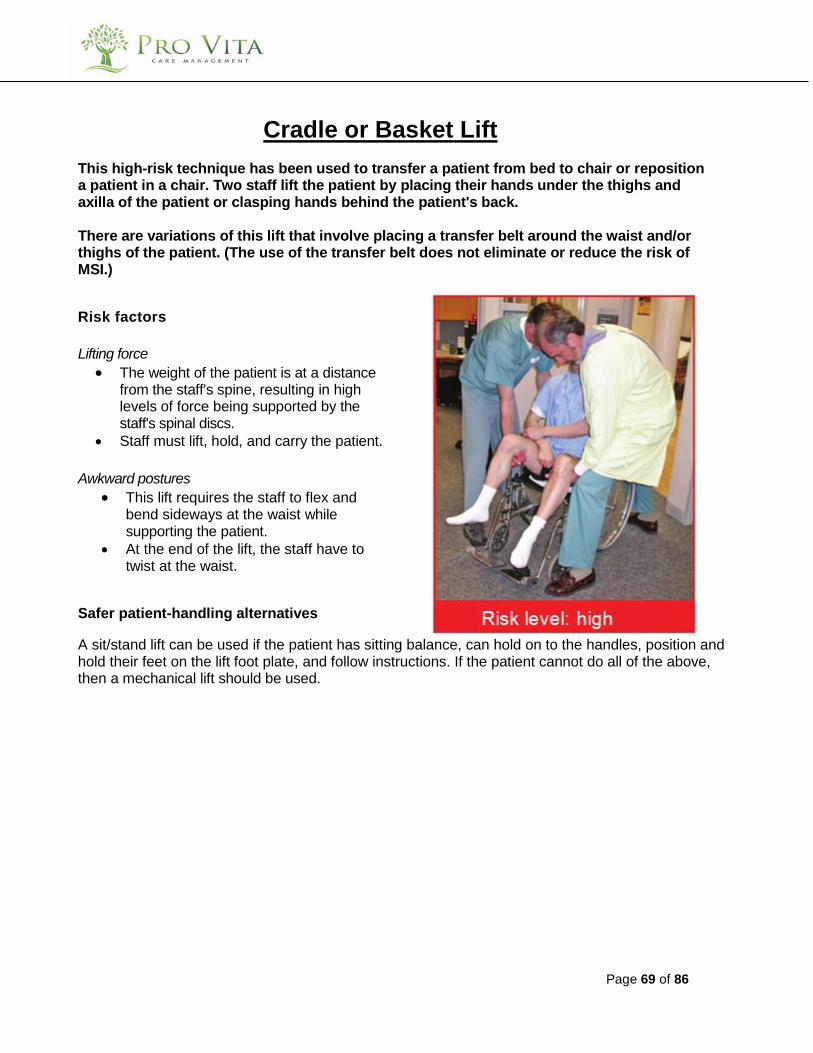
Cradle or Basket Lift
This high-risk technique has been used to transfer a patient from bed to chair or reposition a patient in a chair. Two staff lift the patient by placing their hands under the thighs and axilla of the patient or clasping hands behind the patient's back. There are variations of this lift that involve placing a transfer belt around the waist and/or thighs of the patient. (The use of the transfer belt does not eliminate or reduce the risk of MSI.) Risk factors Lifting force
• The weight of the patient is at a distance from the staff's spine, resulting in high levels of force being supported by the staff's spinal discs.
• Staff must lift, hold, and carry the patient. Awkward postures
• This lift requires the staff to flex and bend sideways at the waist while supporting the patient.
• At the end of the lift, the staff have to twist at the waist.
Safer patient-handling alternatives A sit/stand lift can be used if the patient has sitting balance, can hold on to the handles, position and hold their feet on the lift foot plate, and follow instructions. If the patient cannot do all of the above, then a mechanical lift should be used.
Page 70 of 86
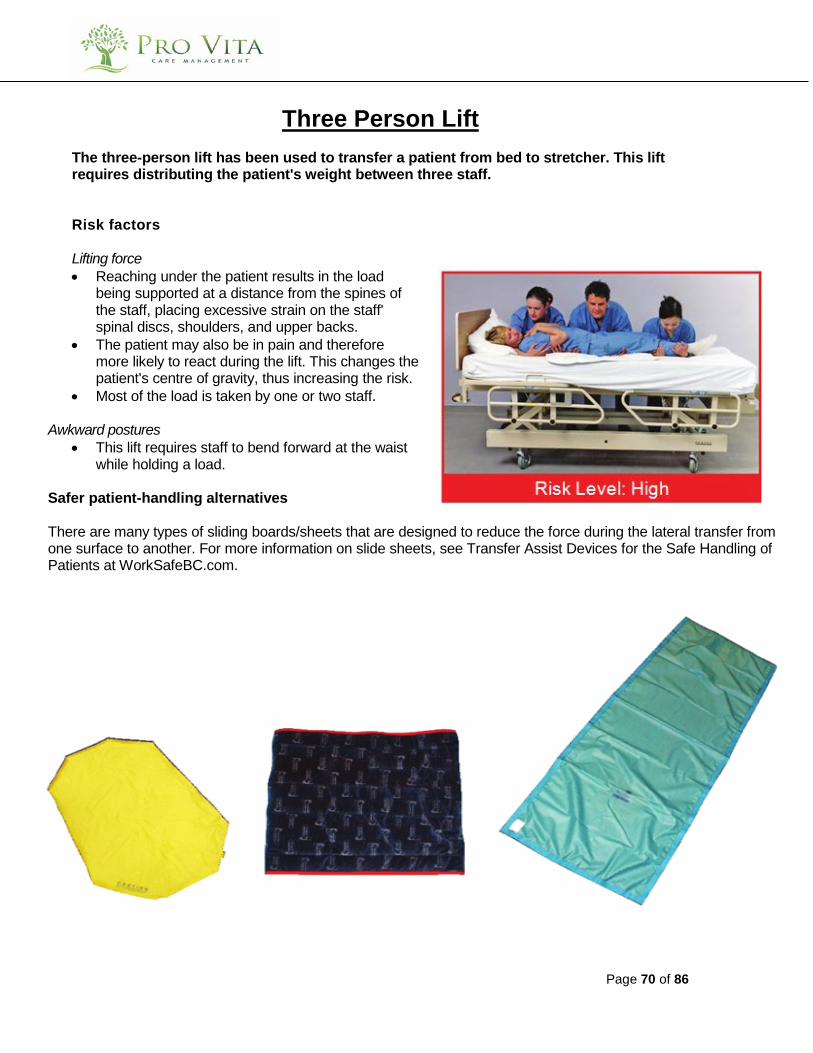
Three Person Lift
The three-person lift has been used to transfer a patient from bed to stretcher. This lift requires distributing the patient's weight between three staff. Risk factors Lifting force • Reaching under the patient results in the load
being supported at a distance from the spines of the staff, placing excessive strain on the staff' spinal discs, shoulders, and upper backs.
• The patient may also be in pain and therefore more likely to react during the lift. This changes the patient's centre of gravity, thus increasing the risk.
• Most of the load is taken by one or two staff. Awkward postures
• This lift requires staff to bend forward at the waist while holding a load.
Safer patient-handling alternatives There are many types of sliding boards/sheets that are designed to reduce the force during the lateral transfer from one surface to another. For more information on slide sheets, see Transfer Assist Devices for the Safe Handling of Patients at WorkSafeBC.com.

Page 71 of 86
Belt Lift (Lifting a fallen resident off the floor) The transfer belt lift is a two-person lift used for raising a fallen patient from the floor. The lift involves the use of interlocking transfer belts. One belt is put around the patient, and the other is attached to the belt around the patient to act as a long lever arm for the staff to pull on. When a patient falls to the floor, staff should not feel compelled to move a patient quickly, unless there is a life- threatening situation. Staff should make the patient comfortable and call for medical assistance. Risk factors - Standing staff Lifting force h
• The staff has to apply force primarily by pulling on the transfer belt.
• The staff has a degree of lateral (sideways) bending at the waist.
Awkward postures
• Pulling on the transfer belt results in the staff's shoulder adopting an awkward abducted posture.
• Lateral bending increases in the course of pulling the patient to an upright posture. This twisting under load increases the risk of injury to the staff's lower back.
Risk factors - Squatting staff Lifting force
• The staff is required to support the patient during the raising process.
• The staff should act as a guide, though there is a temptation to assist by trying to lift the patient.
Safer patient-handling alternatives If the patient can assist enough to get into a four-point kneeling position, then a chair can be used to provide a support for the patient as they assist themselves to their feet or to a sitting position. This should require minimal assistance from the staff. Care staff can be trained in methods of assisting patients to a sitting or standing posture using a chair as a support device for the patient. This, however, requires specific training in this technique. This technique may be an alternative in a domestic environment. If the patient cannot or will not assist, then a mechanical lift should be used.
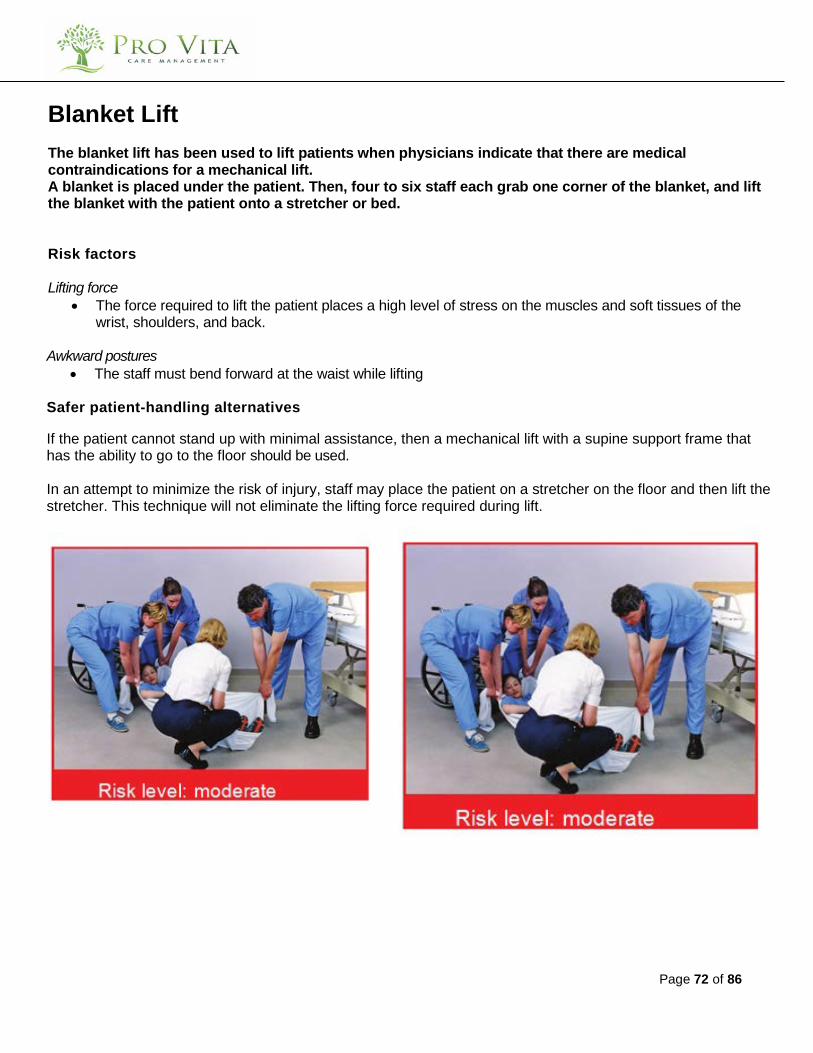
Page 72 of 86
Blanket Lift The blanket lift has been used to lift patients when physicians indicate that there are medical contraindications for a mechanical lift. A blanket is placed under the patient. Then, four to six staff each grab one corner of the blanket, and lift the blanket with the patient onto a stretcher or bed. Risk factors Lifting force
• The force required to lift the patient places a high level of stress on the muscles and soft tissues of the wrist, shoulders, and back.
Awkward postures • The staff must bend forward at the waist while lifting
Safer patient-handling alternatives
If the patient cannot stand up with minimal assistance, then a mechanical lift with a supine support frame that has the ability to go to the floor should be used. In an attempt to minimize the risk of injury, staff may place the patient on a stretcher on the floor and then lift the stretcher. This technique will not eliminate the lifting force required during lift.

Page 73 of 86
Two person arm/towel lift
This technique has been used to reposition the patient in bed or lift the patient from one surface to another. It involves placing a towel under the thighs of the patient to act as a sling support. Transfer belts are sometimes used as an additional handle, even though they should not be used this way. Risk factors Lifting force
• The staff lift the patient manually by applying force through the patient's arms, shoulders, and under the thighs.
Awkward postures
• The staff lifts with an extended reach, with lower back flexed at the waist.
Safer patient-handling alternatives Patient able to assist If able, the patient should be encouraged to assist in turning and moving in bed. Transfer assist devices (such as, slider [repositioning] sheets, bed handles, bed ladders) can be used to assist such patients. Patient not able to assist (dependant) In order to minimize the risk of injury when repositioning, dependent patients require a transfer assist device, such as a low-friction slide sheet, mechanical lift, or roller board.
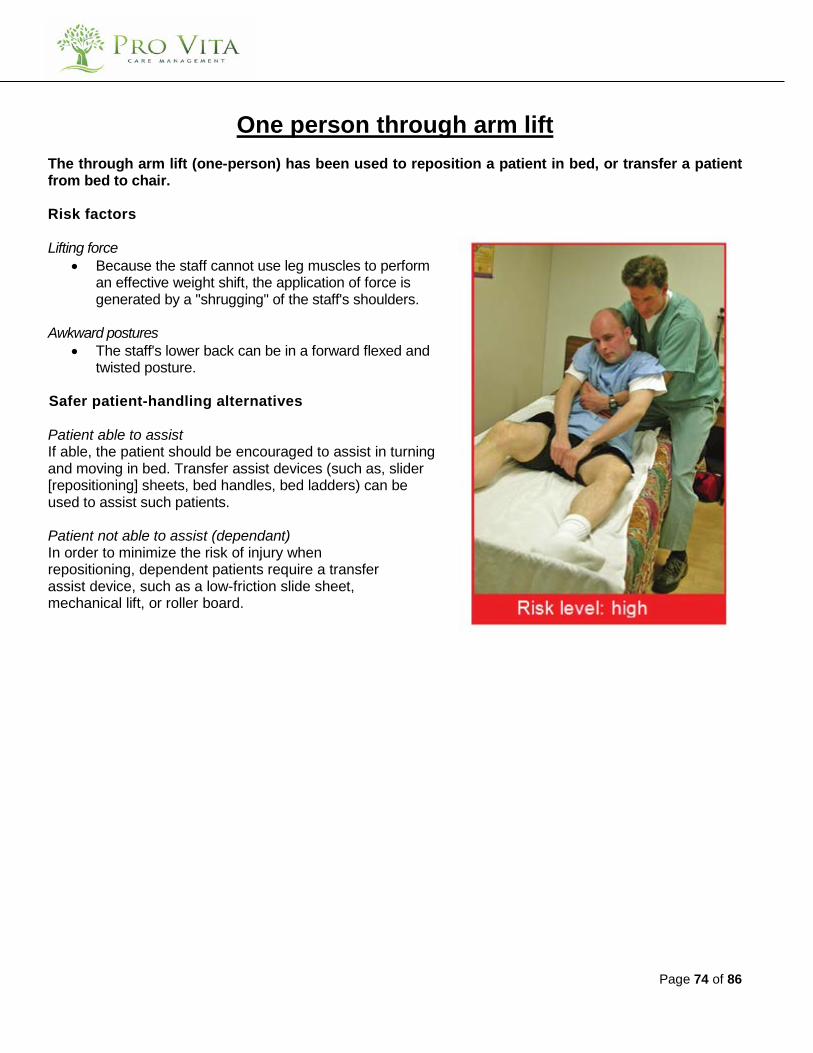
Page 74 of 86
One person through arm lift
The through arm lift (one-person) has been used to reposition a patient in bed, or transfer a patient from bed to chair. Risk factors Lifting force
• Because the staff cannot use leg muscles to perform an effective weight shift, the application of force is generated by a "shrugging" of the staff's shoulders.
Awkward postures
• The staff's lower back can be in a forward flexed and twisted posture.
Safer patient-handling alternatives Patient able to assist If able, the patient should be encouraged to assist in turning and moving in bed. Transfer assist devices (such as, slider [repositioning] sheets, bed handles, bed ladders) can be used to assist such patients. Patient not able to assist (dependant) In order to minimize the risk of injury when repositioning, dependent patients require a transfer assist device, such as a low-friction slide sheet, mechanical lift, or roller board.

Page 75 of 86
Australian shoulder lift
(repositioning a resident in bed) The shoulder lift has been used to reposition a patient in bed or to transfer a patient from bed to chair. Staff link one arm around the waist or under the thighs of the patient and support the patient's torso by placing their shoulder under the patient's axilla. The staff's free arm is placed on the bed for support. Risk factors Lifting force
• Each of two staff must lift the patient by using one shoulder as the support for the load. This puts a high level of force through the shoulder of the patient and the lower backs of the staff.
• Elbows and wrists are also exposed to high levels of lifting force. • The load is supported at a distance from the base of the staff' spines.
Awkward postures
• The staff must adopt a forward flexed position at the beginning and end of the lift. • The staff can twist their lower backs while supporting the load of the patient. • The arm that supports the unloaded shoulder/arm of the staff (the strut arm) twists as the patient is
moved up in bed. • The staff are supporting and carrying an unbalanced load on one side of their torso.
Safer patient-handling alternatives Patient able to assist If able, the patient should be encouraged to assist in turning and moving in bed. Transfer assist devices (such as, slider [repositioning] sheets, bed handles, bed ladders) can be used to assist such patients.
Patient not able to assist (dependant) In order to minimize the risk of injury when repositioning, dependent patients require a transfer assist device, such as a low-friction slide sheet, mechanical lift, or roller board.
Page 76 of 86
Pivot Transfers Some transfers require a greater level of skill to perform than others. What may be a straightforward activity for an occupational or physical therapist may not be for a care aide. This is because some transfer techniques, like the pivot transfers, place greater reliance on the patient to understand what they have to do—achieve and maintain a weight- bearing stance and cooperate with the care staff at critical moments during the transfer. Failure to assess the patient's ability to do both of these tasks significantly increases the risk of injury to the staff. There are two standard methods used to accomplish pivot transfers:
• Two-person pivot
• One-person pivot
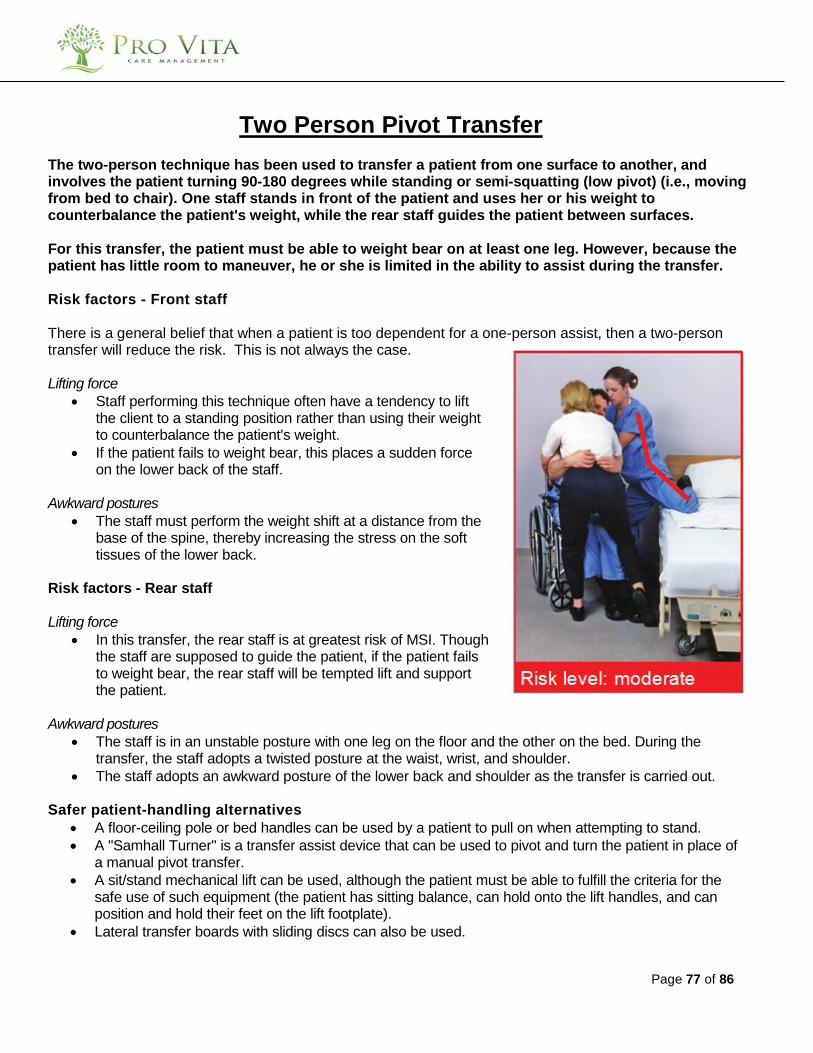
Page 77 of 86
Two Person Pivot Transfer
The two-person technique has been used to transfer a patient from one surface to another, and involves the patient turning 90-180 degrees while standing or semi-squatting (low pivot) (i.e., moving from bed to chair). One staff stands in front of the patient and uses her or his weight to counterbalance the patient's weight, while the rear staff guides the patient between surfaces. For this transfer, the patient must be able to weight bear on at least one leg. However, because the patient has little room to maneuver, he or she is limited in the ability to assist during the transfer. Risk factors - Front staff There is a general belief that when a patient is too dependent for a one-person assist, then a two-person transfer will reduce the risk. This is not always the case. Lifting force
• Staff performing this technique often have a tendency to lift the client to a standing position rather than using their weight to counterbalance the patient's weight.
• If the patient fails to weight bear, this places a sudden force on the lower back of the staff.
Awkward postures
• The staff must perform the weight shift at a distance from the base of the spine, thereby increasing the stress on the soft tissues of the lower back.
Risk factors - Rear staff Lifting force
• In this transfer, the rear staff is at greatest risk of MSI. Though the staff are supposed to guide the patient, if the patient fails to weight bear, the rear staff will be tempted lift and support the patient.
Awkward postures
• The staff is in an unstable posture with one leg on the floor and the other on the bed. During the transfer, the staff adopts a twisted posture at the waist, wrist, and shoulder.
• The staff adopts an awkward posture of the lower back and shoulder as the transfer is carried out.
Safer patient-handling alternatives • A floor-ceiling pole or bed handles can be used by a patient to pull on when attempting to stand. • A "Samhall Turner" is a transfer assist device that can be used to pivot and turn the patient in place of
a manual pivot transfer. • A sit/stand mechanical lift can be used, although the patient must be able to fulfill the criteria for the
safe use of such equipment (the patient has sitting balance, can hold onto the lift handles, and can position and hold their feet on the lift footplate).
• Lateral transfer boards with sliding discs can also be used.

Page 78 of 86
One Person Pivot Transfer (hands around neck)
This transfer, a variation of the one-person pivot transfer, involves the placement of the patient's arms around the staff's neck. This poses a high risk of injury to the staff's neck and upper back if the patient fails to weight bear. The patient should also never be permitted to place their hands on the staff's shoulders during a pivot transfer because the patient can quickly move their hand position to the staff's neck. If unable to reach around to the transfer belt, the staff should reassess his or her ability to perform the transfer safely. Risk factors Lifting force
• Staff performing this technique can have a tendency to lift the patient rather than performing a weight transfer.
• If the patient fails to weight bear, this places a sudden force on the lower back of the staff.
• Staff are often taught to block the flexion of the patient's knees, to prevent the patient from collapsing. This gives the staff a very narrow base of support for the weight transfer. If the patient fails to weight bear, the patient can collapse onto the unbalanced staff.
Awkward postures
• The staff must perform the weight shift at a distance from the base of the spine, thereby increasing the stress on the soft tissues of the lower back. A transfer belt reduces the reach distance, but does not reduce the weight of the load.
Safer patient-handling alternatives
• A floor-ceiling pole or bed handles can be used by a patient to pull on when attempting to stand. • A "Samhall Turner" is a transfer assist device that can be used to pivot and turn the patient in place of
a manual pivot transfer. • A sit/stand mechanical lift can be used, although the patient must be able to fulfill the criteria for the
safe use of such equipment (the patient has sitting balance, can hold onto the lift handles, and can position and hold their feet on the lift footplate).
• Lateral transfer boards with sliding discs can also be used.

Page 79 of 86
One Person Pivot Transfer (hands around waist)
This transfer has been used to move weight-bearing patients from one sitting position to another. It is critical for the safe conclusion of this transfer that the patient is able to weight bear and move to a full standing position. The technique enables the patient to be transferred in a semi- squatted position. In theory, the staff uses the counterbalancing force of his or her own body to counter the weight of the patient. However, because the transfer happens quickly, even if the patient can assist, there is no time or opportunity for them to assist. Though pivot transfers are classified as moderate risk, this technique can quickly transition to a high-risk activity if the patient fails to weight bear or it is done incorrectly by the staff. Even though staff receive training in this technique, they still may be tempted to lift the patient. Risk factors
Lifting force • Staff performing this technique can have a tendency to lift the
patient rather than performing a weight transfer. • If the patient fails to weight bear, this places a sudden force on
the lower back of the staff. • Staff are often taught to block the flexion of the patient's knees,
to prevent the patient from collapsing. This gives the staff a very narrow base of support for the weight transfer. If the patient fails to weight bear, the patient can collapse onto the unbalanced staff.
Awkward postures
• The staff must perform the weight shift at a distance from the base of the spine, thereby increasing the stress on the soft tissues of the lower back. A transfer belt reduces the reach distance, but does not reduce the weight of the load.
Safer patient-handling alternatives
• A floor-ceiling pole or bed handles can be used by a patient to pull on when attempting to stand.
• A "Samhall Turner" is a transfer assist device that can be used to pivot and turn the patient in place of a manual pivot transfer.
• A sit/stand mechanical lift can be used, although the patient must be able to fulfill the criteria for the safe use of such equipment (the patient has sitting balance, can hold onto the lift handles, and can position and hold their feet on the lift footplate).
• Lateral transfer boards with sliding discs can also be used.
Page 80 of 86
Appendix A
Forms and Checklists
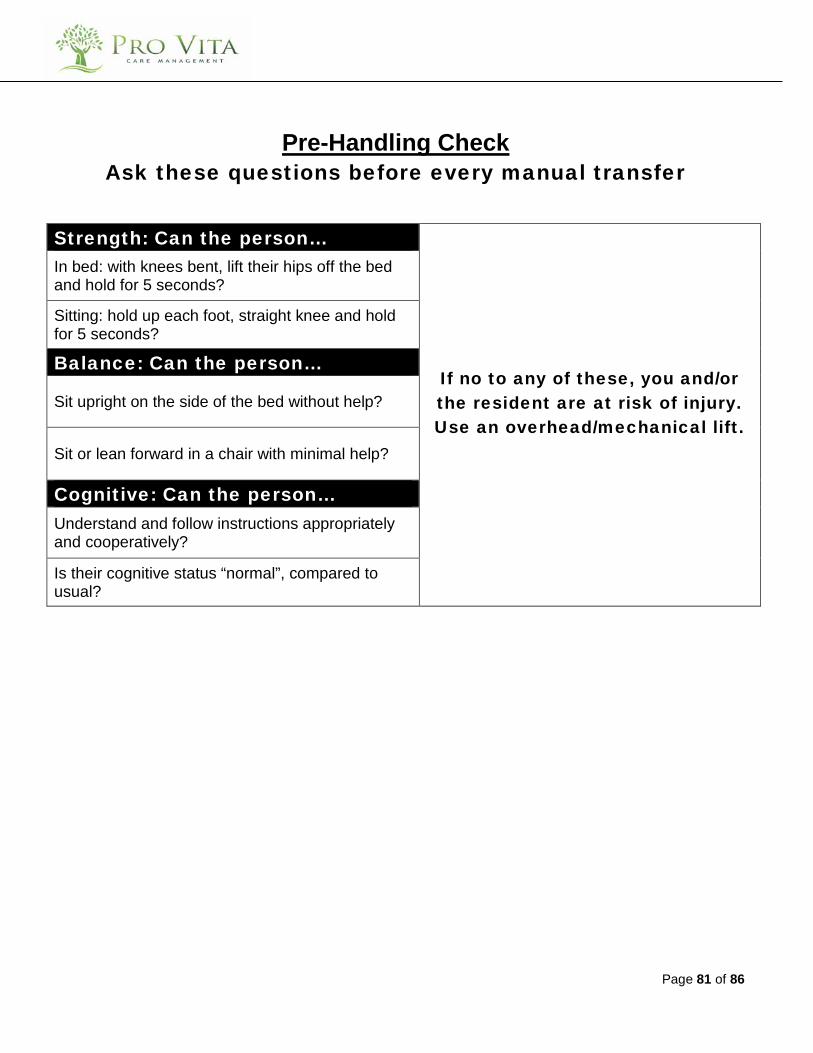
Page 81 of 86
Pre-Handling Check
Ask these questions before every manual transfer
Strength: Can the person…
If no to any of these, you and/or the resident are at risk of injury. Use an overhead/mechanical lift.
In bed: with knees bent, lift their hips off the bed and hold for 5 seconds?
Sitting: hold up each foot, straight knee and hold for 5 seconds?
Balance: Can the person…
Sit upright on the side of the bed without help?
Sit or lean forward in a chair with minimal help?
Cognitive: Can the person… Understand and follow instructions appropriately and cooperatively?
Is their cognitive status “normal”, compared to usual?

Page 82 of 86
Questions to consider when evaluating patient-handling situations
Patient Assessment ❑ Has a job safety analysis been completed for each of the handling activities?
❑ If a job safety analysis was completed, did it address MSI risk factors required by the Occupational Health and Safety Regulation?
Equipment ❑ Has appropriate equipment been provided to lift dependent patients? ❑ Is the equipment easily accessible? ❑ Do staff use the equipment? If so, to what extent?
❑ Is the equipment being used correctly? (For example, transfer belts are designed to enable the staff to get closer to the patient while ambulating or as an assist to help the patient to stand. They should not be used as handles to lift or drag the patient.)
Training ❑ Does staff training include high-risk, patient-handling practices such as manual lifting?
❑ Do staff know what types of techniques have been approved by the physiotherapist, occupational therapist, or patient-handling assessor?
❑ Do staff know what types of handling procedures are prohibited? ❑ Does training cover the use of mechanical lifts or transfer assist devices?
❑ Have staff received sufficient training in the identification of MSI risk factors in their handling practices? ❑ Are staff ignoring safer work procedures in preference for high- risk techniques? ❑ Do supervisors require additional training?

Page 83 of 86
Some Pushing Pointers • Keep upper arms and elbows to side of body • Hands at waist level • Stagger stance (with one foot forward, one foot back) • Feet and shoulder width apart • Keep back straight • Bend your knees. • Move load by shifting weight from back leg to front leg • Avoid twisting • Keep both hands on the load

Page 84 of 86
Appendix B
References

Page 85 of 86
References:
The “Take 5” Method is one that is utilized by the Vancouver Island Health Authority and is an excellent ergonomical tool. http://www.viha.ca/wellness_and_safety/safety_prevention/programs/msip/safe_patient_handling.htm All of the high risk procedures can be referenced through the following website: http://www.worksafebc.com/publications/high_resolution_publications/assets/pdf/bk97.pdf