
Instructors solution manual to electronic devices and circuit theory

Quick Heal Technologies Ltd. www.quickheal.com
Multi device
User Guide
Version 1.03

Fonetastic-Multi device–User guide Version 1.03
i
Copyright & License Information
Copyright © 2017 Quick Heal Technologies Ltd. All Rights Reserved.
No part of this publication may be reproduced, duplicated, or modified in any form or incorporated into any information retrieval system, electronic or any other media or transmitted in any form without prior permission of Quick Heal Technologies Limited, Reg. Office: Marvel Edge, Office No. 7010 C & D, 7th Floor, Viman Nagar, Pune 411014.
Marketing, distribution or use by anyone barring the people authorized by Quick Heal Technologies Ltd. is liable to legal prosecution.
License Terms
Installation and usage of Quick Heal Antivirus Security is subject to user’s unconditional acceptance of the Quick Heal end-user license terms and conditions.
To read the license terms, visit www.quickheal.com/eula and check the End-User License Agreement for your product.

Fonetastic-Multi device–User guide Version 1.03
ii
About This Document
This user guide covers all the information required to install and Fonetastic. The following table lists the conventions that we followed to prepare this guide:
Convention Meaning
Bold Font Anything highlighted in bold indicates that it is a menu title, window title, check box, drop-down menu, dialog, button names, hyperlinks, and so on.
This is a symbol used for a note. Note supplements important points or highlights information related to the topic being discussed.
This is a symbol used for a tip. Tip helps users to apply the techniques and procedures to achieve a task in an easy way.
This is a symbol used for warning or caution. This is an advice either to avoid loss of data or damage to hardware.
<Step 1>
<Step 2>
The instruction mentioned in the numbered list indicates actions that you need to perform.

Fonetastic-Multi device–User guide Version 1.03
iii
Document History
Release No Change Date Change Summary
1.03 April 2017 NA

Fonetastic-Multi device–User guide Version 1.03
iv
Contents
1. Getting started .................................................................................................. 1
Prerequisites ............................................................................................................................. 2
System requirements ................................................................................................................ 2
Installation of Fonetastic .......................................................................................................... 2
Downloading Fonetastic installer ....................................................................................... 2
Installing Fonetastic ............................................................................................................ 3
2. Registration, reactivation, and renewal ............................................................ 4
Registering Fonetastic ............................................................................................................... 4
Registering licensed version ............................................................................................... 4
Share registration logs ........................................................................................................ 5
About Quick Heal RDM ............................................................................................................. 5
Creating an account with Quick Heal RDM ......................................................................... 8
Creating and activating the RDM account via Dashboard card .................................... 8
Creating and activating the RDM account via App Settings .......................................... 8
Signing up with Quick Heal RDM ........................................................................................ 9
Signing up with Quick Heal RDM using a Google account ................................................ 10
Adding a device to Quick Heal RDM ................................................................................. 10
Deactivating the product from your device through RDM ............................................... 11
License Summary .................................................................................................................... 11
Reactivating Fonetastic ........................................................................................................... 12
Reactivating licensed version ............................................................................................ 12
Renewal of Fonetastic ............................................................................................................. 13
Renewing licensed version................................................................................................ 13
Renewal through website ............................................................................................ 13
Call Us ........................................................................................................................... 14
3. Dashboard ...................................................................................................... 15
Optimize .................................................................................................................................. 15
Privacy ..................................................................................................................................... 15
Secure...................................................................................................................................... 16
Settings .................................................................................................................................... 16
Dashboard cards ..................................................................................................................... 16
4. Features .......................................................................................................... 18

Contents
v
Optimize .................................................................................................................................. 18
Speed ................................................................................................................................ 19
Optimize now ............................................................................................................... 19
Summary ...................................................................................................................... 20
Auto optimize ............................................................................................................... 20
RAM used by installed apps ......................................................................................... 20
List of uninstalled apps ................................................................................................. 20
Format phone ............................................................................................................... 21
Responsive Dashboard cards........................................................................................ 21
Battery ............................................................................................................................... 22
Safe Charging ............................................................................................................... 22
Battery Saver ................................................................................................................ 23
Boost Now .................................................................................................................... 23
Configure Battery Saving Mode ................................................................................... 24
Auto Saving Mode ........................................................................................................ 24
Responsive Dashboard cards........................................................................................ 25
Storage .............................................................................................................................. 25
Summary ...................................................................................................................... 26
Auto Cleaning ............................................................................................................... 26
Clear Browser history ................................................................................................... 26
Move data from Internal storage to SD card ............................................................... 27
Move data from SD card to Internal Storage ............................................................... 27
Delete Personal Data from Phone ................................................................................ 28
Responsive Dashboard cards........................................................................................ 28
Data Usage ........................................................................................................................ 29
Tracker .......................................................................................................................... 30
Summary ...................................................................................................................... 30
Set Data Plan ................................................................................................................ 30
Responsive Dashboard card ......................................................................................... 33
Privacy ..................................................................................................................................... 33
App Access ........................................................................................................................ 33
Access App Access through Fingerprint ....................................................................... 34
Show prompt to lock newly installed apps ................................................................... 34
Scramble Keyboard ...................................................................................................... 35
Intruders ....................................................................................................................... 35
Responsive Dashboard cards........................................................................................ 36
Vault .................................................................................................................................. 36
Access Vault through Fingerprint ................................................................................. 37
Contacts Vault .............................................................................................................. 37
Document Vault ........................................................................................................... 39
Gallery Vault ................................................................................................................. 40
Contents
vi
Add Images & Videos to Vault ..................................................................................... 41
Intruders ....................................................................................................................... 41
Create Vault shortcut ................................................................................................... 41
Create Secure Camera Shortcut ................................................................................... 42
Responsive Dashboard cards........................................................................................ 42
Block Numbers .................................................................................................................. 42
Blocked List ................................................................................................................... 43
Block a Custom Series ................................................................................................... 44
Block SMS with Keywords ............................................................................................ 44
Block Unknown International Calls .............................................................................. 44
Alert on Call Rejection .................................................................................................. 44
Block WAP/PUSH SMS .................................................................................................. 45
Register with DND ........................................................................................................ 45
Responsive Dashboard cards........................................................................................ 46
Privacy Advisor .................................................................................................................. 46
Responsive Dashboard cards........................................................................................ 48
Secure...................................................................................................................................... 48
Antivirus ............................................................................................................................ 48
Scan now ...................................................................................................................... 49
List of Threats ............................................................................................................... 49
Schedule Scan ............................................................................................................... 51
Background Scan .......................................................................................................... 51
On Install App Scan ...................................................................................................... 51
Scan from Cloud ........................................................................................................... 52
Vulnerability Scan ......................................................................................................... 52
Browsing & Phishing Protection ................................................................................... 52
Responsive Dashboard cards........................................................................................ 52
Anti-Theft .......................................................................................................................... 53
Access Anti-Theft through Fingerprint ......................................................................... 53
Anti-Theft ..................................................................................................................... 54
Phone Tracker............................................................................................................... 54
Log on to RDM account to access your phone remotely .............................................. 54
Intruders ....................................................................................................................... 54
Block phone when the airplane mode is turned ON..................................................... 55
Block phone if a new SIM is inserted, to avoid intrusion ............................................. 55
Notify on SIM change ................................................................................................... 55
Customize your Block Screen ........................................................................................ 55
Recovery Contacts ........................................................................................................ 55
List of Trusted SIMs ...................................................................................................... 55
Remote Actions ............................................................................................................ 56
How to unblock your Anti-theft block screen? ............................................................. 57
Responsive Dashboard cards........................................................................................ 58
Contents
vii
Block Websites .................................................................................................................. 58
Access Block Websites through Fingerprint ................................................................. 59
Block Websites ............................................................................................................. 59
Select categories to block ............................................................................................. 59
List of Excluded Websites ............................................................................................. 60
Reset ............................................................................................................................. 60
Responsive Dashboard card ......................................................................................... 60
Security Advisor ................................................................................................................ 61
Risk Settings ................................................................................................................. 61
Secure Settings ............................................................................................................. 61
5. Settings ........................................................................................................... 64
Account Settings ..................................................................................................................... 64
Set PIN ............................................................................................................................... 64
Responsive Dashboard card ......................................................................................... 65
User Details ....................................................................................................................... 65
Responsive Dashboard card ......................................................................................... 65
App Settings ............................................................................................................................ 65
Set Notifications ................................................................................................................ 66
Uninstall Protection .......................................................................................................... 66
Intruder Image Capture .................................................................................................... 67
Intruder Gallery ................................................................................................................. 67
Quick Setting on Status Bar .............................................................................................. 67
Clean Cache ....................................................................................................................... 68
Floating Window ............................................................................................................... 68
One Tap Boost ................................................................................................................... 69
Application Statistics ......................................................................................................... 69
Manage Through Web ...................................................................................................... 69
Create Web Account ......................................................................................................... 70
News.................................................................................................................................. 70
Help Center ............................................................................................................................. 70
Help ................................................................................................................................... 70
FAQs .................................................................................................................................. 70
Contact Us ......................................................................................................................... 70
About ....................................................................................................................................... 71
About Product ................................................................................................................... 72
Uninstall Fonetastic App ................................................................................................... 72
How to use? ...................................................................................................................... 72

Contents
viii
6. Index ............................................................................................................... 73
Fonetastic-Multi device–User guide Version 1.03
1
Getting started
Fonetastic! The real-time security solution for Android devices.
Fonetastic is a one-stop security solution specifically designed for mobile devices. It protects your smartphone from viruses and malware. This application is very simple to install and easy to use.
With Fonetastic on your smartphone, you can:
Make your device perform faster.
Monitor the device battery.
Limit your mobile data usage.
Lock the applications so that no one can snoop your data.
Private your contacts, media, and documents by using Vault.
Track and locate the mobile device when lost or stolen.
Manage all applications on the device.
Block calls and SMS from an unwanted number and receive notification when the SIM card is changed.
Floating Window on the Home screen.
Remotely access the device through the RDM portal.
During installation, read each installation screen carefully and follow the given instructions.
To install Fonetastic, ensure that you comply with the following requirements:
Prerequisites
System requirements
Installation of Fonetastic
Chapter
1

Getting started
2
Prerequisites Guidelines for installing Fonetastic on the device:
A device with multiple antivirus software applications installed may result in the device malfunction. Before installing Fonetastic, remove other antivirus programs to avoid any issues.
Close all open applications before installing Fonetastic.
System requirements To install Fonetastic, the device must meet the following criteria:
You can install Fonetastic on any Android mobile devices.
Supported Android versions and screen resolutions are as follows:
Supported Android Versions
Fonetastic is compatible with the following versions: 4.0 and later.
The following screen resolutions are supported:
All resolutions ranging from 240 x 320 to 1080 x 1920.
Installation of Fonetastic You can install Fonetastic on the device using two methods.
To install Fonetastic, follow one of the following methods:
Downloading Fonetastic installer.
Installing Fonetastic.
Downloading Fonetastic installer
Download the Fonetastic installer from the following website: http://www.quickheal.com/installer.
To download the installer, you require a 20-digit valid product key of Fonetastic.
You will receive the product key on the registered email ID if you have purchased it online.

Getting started
3
Installing Fonetastic
To install Fonetastic, follow these steps:
Download the installer file.
If you have downloaded the installer file from the website directly to the device, tap the installer file (. apk).
If you have downloaded the installer file to the computer (PC), copy the installer file to the device. On the device, tap the installer file (. apk).
A screen appears requesting for your consent to proceed with the installation.
Tap Install to start the installation process.
After successful installation of Fonetastic, two buttons Open and Done appear.
Tap Done to finish the installation process.
The Fonetastic app is added to the Apps list on the device.
To open the app, go to the Apps list and tap the Fonetastic icon. The License Agreement screen appears.
To know how to register the license, see Registering Fonetastic.

Fonetastic-Multi device–User guide Version 1.03
4
Registration, reactivation, and renewal
After installation, you must register Fonetastic to avail of all the features and get technical support facility. Fonetastic-Multi device allows activation on three devices with the same product key. You can activate and reactivate Fonetastic on any Android-supported mobile devices.
In case you change the mobile device, ensure that you have deactivated the application from the RDM portal and uninstall the product from the mobile device.
This chapter includes the following sections:
Registering Fonetastic
About Quick Heal RDM
Reactivating Fonetastic
Renewal of Fonetastic
Registering Fonetastic You can register Fonetastic in the following way:
Registering licensed version
To register a copy of the product, follow these steps:
Go to the Apps list on the device, and then tap the Fonetastic icon. The License Agreement screen is displayed.
The I Agree to all Terms & Conditions of EULA check box is selected by default. If you clear this option, you cannot proceed further for registration. To read the full license terms and conditions, tap EULA.
The Receive SMS/Email Alerts check box is selected by default. This option helps you to receive the alerts and Fonetastic updates. If you do not want to receive the SMS alerts, clear this option.
Tap Agree. You are redirected to the License Activation screen.
Chapter
2

Registration, reactivation, and renewal
5
Note:
To activate the product on the devices with Android OS 6.0 and later versions, you must grant the required phone permissions. Tap Grant Access to proceed further.
Enter the 20-digit product key. If you have purchased the product online, your product key will be sent to your registered email ID.
Note:
If you have not purchased a license, you can buy it by visiting our website. Tap Buy Now on the License Activation screen, which navigates you to the Quick Heal website.
Tap Next. After successful activation, a message with the expiry date of the product and the remaining count of licenses is displayed.
Note:
The expiry date is same for all the products activated with same product key.
As soon as the application is activated, a brief demo is displayed. To view the demo, tap Next. Else, tap Skip if you do not want to see the demo.
On the Demo screen, the Allow to collect app Statistics check box is selected by default. This option helps you to send the analytics data of Fonetastic for research purpose to the server. If you do not want to send the analytics data, clear this option.
After the device is registered with the application, dashboard cards are displayed to take the required action. Tap dashboard card to take the immediate action, else tap the arrow given at the bottom of the Home screen to go to the application.
Share registration logs
In case of any issue during the registration of the Fonetastic application, you can share the logs through the available options.
To share the logs, follow these steps:
Go to the Registration screen.
On the top right of the Registration screen, touch and hold the ? symbol. The Share Logs screen is displayed.
Tap Share Logs.
About Quick Heal RDM Quick Heal Remote Device Management (Quick Heal RDM) portal helps you to control and manage the devices remotely. Quick Heal RDM allows you to access various features of

Registration, reactivation, and renewal
6
Fonetastic on the device when the device is not physically accessible or you are unable to locate it, or lost or stolen.
You can manage the following Fonetastic features through the RDM portal:
Features Description
Locate
Trace the device - To track the device location when the device is
lost or stolen. The current location of the lost device will be
updated on the RDM portal.
Ring - To play the ringtone on the device so that you can trace it
if it is located nearby.
Lock
To lock the device to prevent misuse of the data when it is lost
or stolen. When the device is locked through the RDM portal,
the image of the surrounding area of the device and location is
also captured and sent to registered email address. This image
might help you trace your device.
Unlock To unlock the device remotely if you get back the lost device or if
you have blocked the device by mistake.
Wipe To wipe the device data when it is lost or stolen. The data from
both the internal and external memories will be wiped in this
case.
Auto Dial/Receive To dial a call from the lost device silently to another device. Also,
you can pick up a call on the lost or stolen device silently.
Auto Capture Image To capture images of the surrounding area of the lost device
secretly. The images are sent to registered email ID.
Auto Record Audio To record an audio of one minute on the device silently. The
recorded audio is sent to registered email ID.
Auto Record Video To record video of one minute on the device silently. The video
is sent to registered email ID.
Scan Device To run a full scan on the device remotely if required.
Block Websites To block the websites on the device remotely.

Registration, reactivation, and renewal
7
Features Description
Anti-Theft To enable the option remotely to secure the phone in case the
phone is lost or stolen.
Update virus
database
To update the virus database for Fonetastic on the device
remotely.
Change PIN To set the PIN and change it remotely if required.
Background Scan To run a background scan on the device remotely if required.
On Install App Scan To run scanning of newly installed application on the device
remotely if required.
Forward all calls To set a number to forward all the incoming calls. You can also
enable or disable the Call Forwarding option through remote
SMS commands.
The command should be in the following format:
START_FORWARD <PIN> <number to which calls are to be
forwarded>
However, you can stop call forward whenever you want.
To stop call forward, send the following command:
STOP_FORWARD <PIN>
Privacy Advisor To turn ON the Privacy Advisor settings remotely on the device.
Security Advisor To turn ON the Security Advisor settings remotely on the device.
Browsing & Phishing
protection
To turn ON the browsing and phishing protection remotely on
the device.
You can access and manage Quick Heal RDM account with the following methods:
Creating an account with Quick Heal RDM
Signing up with Quick Heal RDM
Signing up with Quick Heal RDM using a Google account
Adding a device to Quick Heal RDM

Registration, reactivation, and renewal
8
Deactivating the product from your device through RDM
Creating an account with Quick Heal RDM
Before you create an account with the Quick Heal RDM portal, you must activate the Fonetastic application on the mobile device. To know how to register the Fonetastic application, see Registering licensed version.
You can activate Quick Heal RDM account using the following methods:
Creating and activating the RDM account via Dashboard card
Creating and activating RDM via App Settings
Creating and activating the RDM account via Dashboard card
To create and activate the RDM account via Dashboard card, follow these steps:
After your device is successfully registered with the app, a card to activate the RDM account is displayed after the registration. If you skip activating your RDM account at this stage, this card is displayed again after one week.
Tap Sign Up to create your RDM account. You will be navigated to the RDM portal to create
your account.
Note:
You must turn ON the Manage Through Web option in Settings to create and log on to your RDM account.
If you already have RDM account, you need to sign in to the RDM account. Else tap Sign Up on the top left of the RDM portal to create your account.
Fill the required details and create your RDM account.
After your RDM account is created, an email to activate the account is sent to the registered email id.
Open the registered email, and then click the Activate button or copy the given link in the browser address bar.
You are redirected to the Set Password page of the Quick Heal RDM portal.
Set your password, and then click Save.
You have successfully created an account with the Quick Heal RDM portal. Now, you can manage the device through the Quick Heal RDM portal.
Creating and activating the RDM account via App Settings
To create and activate the RDM account via Settings, follow these steps:
Open Fonetastic.
Registration, reactivation, and renewal
9
Tap the arrow given at the bottom of the Home screen. Dashboard is displayed.
Tap Settings, and then go to App settings.
The Manage Through Web option is enabled by default. Tap Create Web Account to create the RDM account. You will be navigated to the RDM portal to create your account.
Note:
The Manage Through Web option must be turned ON to create or log on to your RDM account.
If you already have RDM account, you need to sign in to the RDM account. Else tap Sign Up on the top left of the RDM portal to create your account.
Fill the required details and create your RDM account.
After your RDM account is created, an email to activate the account is sent to the registered email id.
Open the registered email, and then click the Activate button or copy the given link in the browser address bar.
You are redirected to the Set Password page of the Quick Heal RDM portal.
Set your password, and then click Save.
You have successfully created an account with the Quick Heal RDM portal. Now, you can manage the device through the Quick Heal RDM portal.
Signing up with Quick Heal RDM
You can create an account with the Quick Heal RDM portal manually in the following way:
Visit Quick Heal RDM at https://mydevice.quickheal.com.
The RDM portal is displayed.
In the top right of the displayed page, click the Sign up button.
Enter the Username or Email ID, valid Mobile Number, and Fonetastic Product Key.
Enter the correct verification code.
Read the license agreement and privacy policy documents carefully.
Select the I agree to the Quick Heal License Agreement and Privacy Policy option.
Click Sign up.
An email to activate the Quick Heal RDM account is sent to your email ID.
Open the email in your registered email account, and then click the Activate button or copy the link in the browser address bar.
You are redirected to the Set Password page of the Quick Heal RDM portal.
Registration, reactivation, and renewal
10
Set your password, and then click Save.
The account with the Quick Heal RDM portal is created successfully. Now, you can manage the device through the Quick Heal RDM portal.
Signing up with Quick Heal RDM using a Google account
You can also create an account with the Quick Heal RDM portal with your existing Google account.
To sign up with the Google account, follow these steps:
On the RDM portal, click the Sign in with Google button.
Enter Username and Password of the existing Google account.
Read the service agreement and privacy policies carefully.
Click Sign in.
On the Create New Account page, enter the valid Mobile Number and Product Key.
Enter the correct verification code.
Read the license agreement and privacy policy documents carefully.
Select the I agree to the Quick Heal License Agreement and Privacy Policy option.
Click Sign up.
You have successfully created an account with the Quick Heal RDM portal. Now, you can log on to the Quick Heal RDM account using the existing Google account and manage the device.
When you first log on to the Quick Heal RDM portal, configure the Add Device page. To know how to add a device, see Adding a device to Quick Heal RDM.
Adding a device to Quick Heal RDM
When you first log on to the Quick Heal RDM portal, configure the Add Device page that appears. To manage the device remotely, you must add the devices in the Quick Heal RDM portal.
To add a device, follow these steps:
Visit Quick Heal RDM portal at https://mydevice.quickheal.com.
Log on to the Quick Heal RDM portal. The Add Device page is displayed.
In the Name text box, write a name to the device.
In the Product Key text box, enter the valid product key. The count of the devices activated with same product key is displayed. All the activated devices are displayed.
Select the device that needs to be added to the RDM portal and then click Add.A One Time Password (OTP) is sent to the device. The One Time Password text box, Submit, and Resend OTP buttons are available on the Quick Heal RDM portal.
Registration, reactivation, and renewal
11
Enter OTP, and then click Submit.
The device is successfully added to the RDM portal.
Note:
In case you do not receive OTP, you can send OTP again by clicking the Resend OTP button.
Deactivating the product from your device through RDM
The Deactivate option helps to deactivate the Fonetastic application from your device.
To deactivate, follow these steps:
Visit Quick Heal RDM portal at https://mydevice.quickheal.com.
Log on to the Quick Heal RDM portal. Dashboard is displayed.
Note:
To deactivate your device from the RDM portal, a device must be already added to the RDM account.
Click Device Details on the top left of Dashboard. The Device Details screen is displayed.
Click the Deactivate option to deactivate the application from the device.
License Summary To view the details of license of the application. You can view validity and expiry date of the product. You can view the count of the activated devices. You can renew and remove the product.
To view the license summary, follow these steps:
Visit Quick Heal RDM portal at https://mydevice.quickheal.com.
Log on to the Quick Heal RDM portal. Dashboard is displayed.
Roll the mouse over the Welcome option on the top right of Dashboard, and then click the License Summary option. The License Summary page is displayed.
Click Product key to know the license summary. The license Summary includes Product Key, Activation date, expiry date, total activated device count, and other details.
If you want to renew the product, click Renew Now. You will be redirected to the Quick Heal website where you can renew the product.
If you want to remove the product from the RDM portal, click Remove Product.

Registration, reactivation, and renewal
12
Reactivating Fonetastic Reactivation of Fonetastic enables you to use the product until the end of the liable license period. You may need to reactivate the product if you have removed Fonetastic from the device, or in case you format the device, or you change the mobile device.
In case you change the mobile device, ensure that you have deactivated the application from the RDM portal and uninstall the application from the mobile device.
Reactivating licensed version
To reactivate the copy of Fonetastic licensed version, follow these steps:
Go to the Apps list on the device and tap the Fonetastic icon. The License Agreement screen is displayed.
The I Agree to all Terms & Conditions of EULA check box is selected by default. If you clear this option, you will not be able to proceed further for registration. To read the full license terms and conditions, tap EULA.
The Receive SMS/Email Alerts check box is selected by default. This option helps you to receive the alerts and Fonetastic updates. If you do not want to receive the SMS alerts, clear this option.
Tap Agree. You are redirected to the License Activation screen.
Note:
To activate the product on the devices with Android OS 6.0 and later versions, you must grant the required phone permissions.
Enter the 20-digit product key. If you have purchased the product online, you can find the product key in the email sent to your registered email ID.
Tap Next. After successful activation, a message with the expiry date of the product and the remaining count of licenses is displayed.
Note:
The expiry date is same for all the products activated with same product key.
As soon as the application is activated, a brief demo is displayed. To view the demo, tap Next. Else, tap Skip if you do not want to see the demo.
On the Demo screen, the Allow to collect app Statistics check box is selected by default. This option helps you to send the analytics data of Fonetastic for research purpose to the server. If you do not want to send the analytics data, clear this option.

Registration, reactivation, and renewal
13
Renewal of Fonetastic You can renew the Fonetastic application in the following ways:
Renewing licensed version
If the product license is expired, you cannot use important features of Fonetastic. Therefore, the mobile device gets exposed to different types of threats. To avoid the threats, we strongly recommend you to renew the license before it expires.
To renew the licensed copy of Fonetastic, follow these steps:
Open Fonetastic.
Tap the arrow given at the bottom of the Home screen. Dashboard is displayed.
Tap the Settings icon, and then tap About Product.
Tap Renew.
On the Renew License screen, enter the 20-digit renewal key, and then tap Next. The license is successfully renewed.
Note:
The expiry date of all the products is same for the devices activated with same product key. If you renew one license, all the other product licenses will be renewed at the same time.
If you do not have a renewal key, you can purchase it by visiting our website or by calling the renewal team. Tap Buy Now on the Renew License screen to buy the renewal key by using one of the following ways:
Renewal through website
Call us
Renewal through website
You can buy a renewal key and renew the license online. To renew the license through our website, follow these steps:
Open Fonetastic.
Tap the arrow given at the bottom of the Home screen. Dashboard is displayed.
Tap the Settings icon, and then tap About Product.
In the License Information section, tap Renew.
Tap Buy Now of Renew using the website to buy the renewal license through the website. You will be redirected to the Buy License screen.
Enter the 20-digit product key. You can find the product key in the email sent to your registered email ID, and then tap Submit.
Registration, reactivation, and renewal
14
After renewing the license successfully, you need to update the license information on the device by going to Fonetastic Dashboard > Settings > About Product > Update.
Call Us
You can call our Renewal team to assist you in buying a renewal key and renewing the license.

Fonetastic-Multi device–User guide Version 1.03
15
Dashboard
Dashboard is the default screen, which appears on the mobile device screen when you open the application. Dashboard is unique and helps to navigate easily to all the components of the application. All the associated features and status are displayed on the screen. All the features of the Fonetastic application are accessible from Dashboard.
Fonetastic Dashboard includes Optimize, Privacy, Secure, and Settings. Tap the required option to navigate to the selected option.
You can find the following options on Dashboard:
Optimize
Privacy
Secure
Settings
Dashboard cards
Optimize The Optimize option helps you to check the device performance, boost the device speed , monitor battery usage, and manage data plan. Tap the Optimize option to navigate to the features of Optimize. Optimize on Fonetastic includes the following features: Speed, Battery, Storage, and Data Usage. To know about various features of Optimize, see Optimize.
Privacy The Privacy option helps you to secure the device from unauthorized users. You can restrict unauthorized users from viewing the photos, contacts, documents, and applications without your consent. You can lock applications, make contacts, documents, and gallery to private, block unwanted numbers, and know the applications that access the device permissions. Tap the Privacy option to navigate to the features of Privacy. Privacy on Fonetastic includes the following features: App Access, Vault, Block Numbers, and Privacy Advisor. To know about various features of Privacy, see Privacy.
Chapter
3

Dashboard
16
Secure The Secure option helps to boost the security of the device. The Secure option scans for potential threats present on the device. You can enhance the security settings to stop attempts to exploit vulnerabilities. You can scan the device, track the device location, block websites, and secure settings. Tap the Secure option to navigate to the features of Secure. Secure on Fonetastic includes the following features: Antivirus, Anti-Theft, Block Websites, and Security Advisor. To know about various features of Secure, see Secure.
Settings The Settings option helps you to configure user details, floating window, provides uninstall protection, set notifications, and secure the device from unauthorized users.
Tap the Settings icon to navigate to the settings.
Settings on Fonetastic include the following: Account settings, App settings, Help Center, and About.
To know more about settings, see Settings.
Dashboard cards After the Fonetastic application is registered on the device, few dashboard cards to grant permissions are displayed on the devices with Android OS 6.0 and later versions.
The following cards are displayed:
Accessibility permission: This permission is required to provide real-time protection for your device. Grant this permission to make Fonetastic protect your phone from security risks and vulnerabilities.
App with usage access permission: This permission is required to make Fonetastic track what other applications you are using and how often. Grant this permission to know about other applications usage and other details.
SD card permission: This permission is required to get access to your device SD card. Grant this permission to ensure the protection of your SD card during, scanning and moving data to & fro to SD card.
Overlay permission: This permission is required to keep your personal info private & prevent unauthorized access by displaying Fonetastic on top of your phone. Grant this permission to safely lock your apps & secure your block screen by displaying on the top of the device interface.

Dashboard
17
Missing permissions: These permissions are required to gain access to all the features. Grant this permission to enable the Fonetastic features. Most of the features cannot work without these permissions.
Data Saver permission: This permission is required to keep your app updated. Grant this permission to make Fonetastic run in data saver mode and to keep your device updated.
Registration grant permission: This permission is required to activate the Fonetastic application on your device. Grant this permission to manage your system settings such as brightness, display, etc.

Fonetastic-Multi device–User guide Version 1.03
18
Features
This section is to familiarize you with the features of Fonetastic. Use various features of Fonetastic to secure the device and its crucial data. They are as follows:
Optimize
Privacy
Secure
Optimize
The Optimize option includes four features: Speed, Battery, Storage, and Data Usage. This option helps you to check the device performance and improve the device speed. You can save the battery power and check the battery status. You can also increase the storage space and set the data plans. You can optimize the device effectively by ending unnecessary processes, and browsing history. The Optimize option helps to clear the cached files accumulated by the various applications and clean up the memory.
To configure the features of the Optimize option, follow these steps:
Open Fonetastic.
Tap the arrow given at the bottom of the Home screen. Dashboard is displayed.
Tap Optimize. The features of Optimize are displayed.
The following are the features of the Optimize option:
Speed
Battery
Storage
Data Usage
Chapter
4

Features
19
Speed
The Speed option enhances the device performance. It displays the status of the device performance and the RAM available on the device. There are three types of the speed statuses: Low, Ok, and Good. Each status is represented by a color code.
Status and color codes are as follows:
Speed Level % Status Color code
Less than 30% Low Red
Greater than 30% and less than 50% OK Orange
Greater than 50% Good Green
To configure the options of Speed, follow these steps:
Open Fonetastic.
Tap the arrow given at the bottom of the Home screen. Dashboard is displayed.
Tap Optimize, and then tap Speed. The status of the device performance, the percentage of unutilized RAM and the other options are displayed.
The following are the options of Speed:
Optimize Now
Summary
Auto Optimize
RAM used by Installed apps
List of uninstalled apps
Format phone
Optimize now
Optimizes and improves the device performance manually. The Optimize now option will initiate optimizing the device and improves the device performance. It kills all the running applications and then displays the speed status and percentage of the RAM available.
To optimize the device manually, follow these steps:
i. Open Fonetastic.
ii. Tap the arrow given at the bottom of the Home screen. Dashboard is displayed.
iii. Tap Optimize, and then tap Speed. The Speed screen is displayed.
iv. Tap Optimize now to manually start the device optimization process.
v. Tap the Stop option to end the optimization process. Else, wait till the optimization process is completed, and then tap Done.

Features
20
Summary
Displays the overall usage of the device RAM. You can view the overall RAM consumption and available RAM on the device.
To view the summary, follow these steps:
i. Open Fonetastic.
ii. Tap the arrow given at the bottom of the Home screen. Dashboard is displayed.
iii. Tap Optimize, and then tap Speed. The Speed screen is displayed.
iv. Tap Summary to view the overall usage of the device RAM.
Auto optimize
To improve the device performance automatically. Enable the Auto optimize option to optimize the device automatically at regular intervals up to four times in a day whenever the device speed is low.
To optimize the device automatically, follow these steps:
i. Open Fonetastic.
ii. Tap the arrow given at the bottom of the Home screen. Dashboard is displayed.
iii. Tap Optimize, and then tap Speed. The Speed screen is displayed.
iv. Enable Auto optimize to optimize the device automatically.
Note:
By default, this option is turned OFF.
RAM used by installed apps
Displays the list of all installed applications and the corresponding usage of the RAM.
To view the RAM used by installed apps, follow these steps:
i. Open Fonetastic.
ii. Tap the arrow given at the bottom of the Home screen. Dashboard is displayed.
iii. Tap Optimize, and then tap Speed. The Speed screen is displayed.
iv. Tap RAM used by installed apps to view the usage of RAM.
If you want to uninstall the application that consumes more RAM, select the application, and then tap Uninstall to remove the particular application. You can also sort the applications by RAM used, Name of App, and Rarely used.
List of uninstalled apps
Displays the list of all the applications that are uninstalled through the Fonetastic application.
Tap the application to navigate to Google Play to install it again if required. Tap Clear List to clear the uninstalled applications list.

Features
21
Format phone
Erases the complete data on the device.
Note:
Formatting the device will permanently erase the data stored on the device.
To format the device, follow these steps:
i. Open Fonetastic.
ii. Tap the arrow given at the bottom of the Home screen. Dashboard is displayed.
iii. Tap Optimize, and then tap Speed. The Speed screen is displayed.
iv. Tap Format phone. You are redirected to the Device Settings screen.
v. Tap Factory data reset, and then tap Reset phone.
Responsive Dashboard cards
The following are Dashboard responsive cards of the Speed option:
Dashboard responsive card is displayed to improve the device performance after installing the Fonetastic application.
Dashboard responsive card is displayed everyday to optimize the device at 10 AM, 1 PM, 4 PM, and 7 PM when available RAM is low.
Dashboard responsive card is displayed if you have already configured auto optimization. The card displays the status of RAM.
The Device set to Awesome card is displayed at 7 AM every day if the Auto Optimize option is turned ON.
An Auto optimize promotional card is displayed when you tap the Optimize now option manually up to five times after activating the application. This is to configure the Auto Optimize option.
Dashboard responsive card is displayed to inform the apps, which are respawning on every seventh day after installing the application.
An Uninstall Heavy apps card is displayed after one month of installing the application. You can uninstall the applications that consume more RAM if required.

Features
22
Battery
The Battery option helps you to monitor the battery usage of the device. You can kill all the applications that drain the device power. The battery status and the remaining hours for the battery to get drained is displayed. There are five types of the battery statuses: Critical, Low, Ok, Good, and Full. Each status is represented by a color code. Status and color codes are as follows:
Battery Level % Status Color code
Less than or equal to 10% Critical Red
11-30% Low Red
31-60% OK Orange
Greater than 60% Good Green
100% Full Green
The device plays an alarm when the battery of the device reaches the critical level or when the device is fully charged.
Note:
The alarm will not be played when the device is in the vibrate or silent mode.
To monitor and configure the Battery options, follow these steps:
Open Fonetastic.
Tap the arrow given at the bottom of the Home screen. Dashboard is displayed.
Tap Optimize, and then tap Battery. The Battery screen is displayed.
The following options are available:
Safe Charging
Battery Saver
Boost Now
Configure Battery Saving Mode
Auto Saving Mode
Safe Charging
Displays the charging screen on the device. After the Safe Charging option is enabled, the charging screen appears whenever the device is connected to the charger and when the device is locked.
Features
23
Note:
To display the charging screen on the devices with OS 6.0 and later versions, you must grant permissions.
To display the charging screen, follow these steps:
i. Open Fonetastic.
ii. Tap the arrow given at the bottom of the Home screen. Dashboard is displayed.
iii. Tap Optimize, and then tap Battery. The Battery screen is displayed.
iv. Tap Safe Charging to enable the option.
Battery Saver
To avail of all the options of Battery, you must enable Battery Saver. The options of Battery Saver include Boost Now, Configure Battery Saving Mode, and Auto Saving Mode.
Note:
To avail of all the battery features on the devices with OS 6.0 and later versions, you must grant permissions.
To enable Battery Saver, follow these steps:
i. Open Fonetastic.
ii. Tap the arrow given at the bottom of the Home screen. Dashboard is displayed.
iii. Tap Optimize, and then tap Battery. The Battery screen is displayed.
iv. Tap Battery Saver. The following options are enabled:
Boost Now
Configure Battery Saving Mode
Auto Saving Mode
Boost Now
Saves the power of the device manually. It helps to extend the battery life. It disables all the settings that consumes power and kills all the downloaded and system applications.
Note:
The Battery Saver option must be enabled to boost the battery life of the device.
To boost the battery life, follow these steps:
i. Open Fonetastic.
ii. Tap the arrow given at the bottom of the Home screen. Dashboard is displayed.
iii. Tap Optimize, and then tap Battery. The Battery screen is displayed.
iv. Tap Boost Now. The Save More Power screen is displayed.

Features
24
v. Tap Save Now to activate the configured save mode options.
Configure Battery Saving Mode
Customizes the battery saving mode settings. The options, which are turned ON will be ignored during the power saving mode.
Note:
In case you have not configured the power mode, default settings are configured.
The Battery Saver option must be enabled to configure the battery saving mode options.
To customize the battery saving mode settings, follow these steps:
i. Open Fonetastic.
ii. Tap the arrow given at the bottom of the Home screen. Dashboard is displayed.
iii. Tap Optimize, and then tap Battery. The Battery screen is displayed.
iv. Tap Configure Battery Saving Mode. The Configure Battery Saving Mode screen is displayed.
v. Configure the given settings: Brightness level, Wi-Fi, Sync, Bluetooth, Mobile Data, and Screen timeout as required. The options, which are turned ON will be ignored during power saving mode.
In case of the Screen timeout option, select the time from the drop-down options.
Auto Saving Mode
Saves the power of the device automatically. With this option, you can set the power saving mode automatically when the battery level reaches 30%, 20%, 10%, and Not Set. A notification is displayed when the power saving mode is turned ON.
To enable auto saving mode, follow these steps:
i. Open Fonetastic.
ii. Tap the arrow given at the bottom of the Home screen. Dashboard is displayed.
iii. Tap Optimize, and then tap Battery. The Battery screen is displayed.
iv. Tap Auto Saving Mode to enable it and select the drop down values to activate auto battery saving mode at the selected battery level percentage. If you do not want to save the battery automatically, select Not Set from the drop down values.
After activating Auto Saving Mode, a notification about activation of the auto saving power mode is displayed.
Note:
When you set a power saving mode to be turned ON at 30%, a notification is displayed when the percentage of battery remaining reaches 32%.
The Battery Saver option must be enabled to configure Auto Saving Mode.

Features
25
Responsive Dashboard cards
The following are Dashboard responsive cards of the Battery option:
Good: A green color card along with a tip is displayed when the status is good.
OK: An orange color card along with a tip is displayed when the status is OK.
Low: A red color card is displayed with the Save Power option when the battery level is low.
Low: A red color card is displayed when the battery level is low and Auto Battery Saving Mode is turned ON.
Critical: A red color card is displayed with the Save Power option when the battery level is critical. In addition, a card is displayed to set the dark color wallpaper to save the battery.
An Auto Saving Mode promotional card is displayed when you tap the Save Power option five times manually and if the Auto Power Saving Mode option is disabled. This is to configure the Auto Saving Mode option.
Storage
The Storage option helps you to clean cache, clear the history of the device browser and chrome, move data from SD card to internal memory and vice-versa. You can also delete personal data from the device. There are three types of the storage statuses: Low, Ok, and Good. Each status is represented by a color code. Status and color codes are as follows:
Storage % Status Color code
0-15% Low Red
16-50% OK Orange
Greater than 50% Good Green
To configure the Storage options, follow these steps:
Open Fonetastic.
Tap the arrow given at the bottom of the Home screen. Dashboard is displayed.
Tap Optimize, and then tap Storage. The Internal Storage screen is displayed.
Note:
To access the features of storage on the devices with OS 6.0 and later versions, you must grant permissions.
The following options are available:
Summary
Auto Cleaning

Features
26
Clear Browser History
Move Data from Internal Storage to SD Card
Move data from SD card to Internal Storage
Delete Personal Data from Phone
Summary
Displays the total, internal, and external storage space available. You can also view the total storage occupied by the device data and remaining available space.
To view the summary of the storage, follow these steps:
i. Open Fonetastic.
ii. Tap the arrow given at the bottom of the Home screen. Dashboard is displayed.
iii. Tap Optimize, and then tap Storage. The Internal Storage screen is displayed.
iv. Tap Summary. You can view the storage summary.
Auto Cleaning
To clean the cache automatically.
Tap the Auto Cleaning option to clean the device automatically.
Note:
This option is available only the devices with OS 5.0 and earlier versions.
Clear Browser history
To clear the device browser history. To clear the device browsing history, turn ON the Clear Browser history option. The device browsing history will be cleared whenever cleaning of cache is initiated on the device. You can clear the browsing history automatically when auto cleaning is configured on the device.
Note:
By default, this option is turned OFF.
Clear Browsing History clears the history of the Chrome and the default browser of the device.
This option is not available on the devices with OS 6.0 version and later versions.

Features
27
Move data from Internal storage to SD card
To move the data from internal storage to SD card in case the internal memory storage is full. You can move the images, videos, music, and downloads as required.
Note:
This option is not available on the devices with OS 4.4 version.
To move the data from internal storage to SD card on the devices with Android OS 6.0 and later versions, you must grant permissions.
To move the data from internal storage to SD card, follow these steps:
i. Open Fonetastic.
ii. Tap the arrow given at the bottom of the Home screen. Dashboard is displayed.
iii. Tap Optimize, and then tap Storage. The Internal + SD Storage screen is displayed.
iv. Tap Move data from Internal Storage to SD card. The Move Data screen is displayed. The remaining space in the internal storage is displayed.
v. Select the data that you want to move from internal storage to SD card. The data includes images, videos, music, and downloaded files.
vi. Tap Move to SD Card. After the data is moved successfully, tap Done. You will be navigated to the Storage screen.
Move data from SD card to Internal Storage
To move the data from SD card to internal storage in case the SD card is full. You can move the images, videos, music, and downloads as per the requirement.
Note:
This option is not available on the devices with OS 4.4 version.
To move the data from SD card to internal storage on the devices with Android OS 6.0 and later versions, you must grant permissions.
To move the data from SD card to internal storage, follow these steps:
i. Open Fonetastic.
ii. Tap the arrow given at the bottom of the Home screen. Dashboard is displayed.
iii. Tap Optimize, and then tap Storage. The Internal Storage screen is displayed.
iv. Tap Move Data from SD Card to Internal Storage. The Move Data screen is displayed. The remaining memory in external storage is displayed.
v. Select the data that you want to move from SD card to internal storage. The data includes images, videos, music, and downloads.
vi. Tap Move to Internal Storage. After the data is moved successfully, tap Done. You will be navigated to the Storage screen.

Features
28
Delete Personal Data from Phone
To delete the personal data from the device. You can delete contacts, calendar events, messages, SD card (internal and external), and SIM data (contacts and messages). In this case, before deleting the data permanently, it is recommended to ensure that you do not require the data. The process will be continued in the background. While deleting the personal data, you can go back and continue working with the other features of Fonetastic.
Note:
You cannot delete personal data on the external SD card on the devices with OS 4.4 version.
To delete the personal data on the devices with OS 6.0 and later versions, you must grant permissions.
To delete the data, follow these steps:
i. Open Fonetastic.
ii. Tap the arrow given at the bottom of the Home screen. Dashboard is displayed.
iii. Tap Optimize, and then tap Storage. The Internal Storage screen is displayed.
iv. Tap Delete Personal Data from Phone. The Delete Personal Data from Phone screen is displayed.
v. Select the items that you want to delete. The items include contacts (phone contacts), calendar events, messages (phone messages), SD card (Internal and External), and SIM data (contacts and messages).
vi. Tap Delete, enter PIN, and then tap OK.
Note:
If SIM is not present in the phone, then the SIM Data option will be disabled.
If Wipe command execution is in progress, then you cannot delete the personal data and vice versa.
Responsive Dashboard cards
The following are Dashboard responsive cards of the Storage option:
The Clean Cache card is displayed after installing the application to clean the cache.
The Clean Cache card is also displayed once in a week if the Auto Clean cache option is turned OFF and if the data size in the cache memory reaches more than 100 MB.
Auto cleaning of Cache card is also displayed to configure the cleaning of cache automatically.

Features
29
Move Photos to SD card is displayed when internal storage space is occupied by 35% of the photos.
Note:
To move photos to SD card on the devices with OS 6.0 and later versions, you must grant permissions.
Move applications to the SD card is displayed when the storage capacity left in the internal storage is less than 35%. You can move the applications from the internal storage to the SD card.
Note:
To move applications to the SD card on the devices with OS 6.0 and later versions, you must grant permissions.
A Dashboard responsive card is displayed on the fifth day of activating the Fonetastic application to grant permissions if you have not granted the permissions yet.
Data Usage
The Data Usage option lets you track and monitor data usage limit. You can set, monitor, and control the data plan as per your requirement. After you set the plan, you can view the available days left for your data plan to complete and mobile data left. There are four types of statuses: Over Consumed, Ok, Good, and Under Consumed.
Each status is represented by a color code. Status and color codes are as follows:
Data usage % Status Color code
0-40% Under Consumed Green
41-80% OK Orange
81 -100% Good Green
Greater than 100% Over Consumed Red
0-40% Under Consumed Green
To configure Data usage features, follow these steps:
Open Fonetastic.
Tap the arrow given at the bottom of the Home screen. Dashboard is displayed.
Tap Optimize, and then tap Data Usage. The Data Usage screen is displayed.
Note:
The Data Usage tracker is turned ON by default.

Features
30
The following options are available:
Tracker
Summary
Set Data Plan
Tracker
To track and control the usage of mobile data and Wi-Fi. You can view and set data plan to control of mobile data usage.
To enable tracker, follow these steps:
i. Open Fonetastic.
ii. Tap the arrow given at the bottom of the Home screen. Dashboard is displayed.
iii. Tap Optimize, and then tap Data Usage. The Data Usage screen is displayed.
iv. Tap Tracker to enable the Tracker option.
Summary
You can view your daily average data usage and data used in last seven days. You can also view Day-wise and App-wise data usage breakup.
Set Data Plan
To set the data plan. The Set Data Plan option helps you configure the data usage plan to monitor and track the usage. The data plans of the Fonetastic application include: Monthly Plan and Custom Plan.
Monthly Plan
To set the Monthly Data Plan, follow these steps:
i. Open Fonetastic.
ii. Tap the arrow given at the bottom of the Home screen. Dashboard is displayed.
iii. Tap Optimize, and then tap Data Usage. The Data Usage screen is displayed.
Note:
The Data Usage tracker is turned ON by default.
If the Tracker option is disabled, then you will not be able to view the summary of data usage and you cannot set data plan.
Note:
If no mobile data is used after the tracker is turned ON, then no entries will be listed in Day-wise data breakup chart.

Features
31
iv. Tap Set Data Plan. The Set Data Plan screen is displayed.
v. Tap the Data Plan drop-down list. The list includes Monthly plan, and Custom Plan.
vi. Select Monthly Plan from the drop-down list. The Monthly plan screen is displayed.
vii. Enter the value of your data plan. Enter the value in MB or GB.
You can enter up to four digits following with two decimals. For example: xxxx. xx.
viii. Select Start Date of every month to track the data usage from the specified date. Select the value from the drop-down list given next to the Start Date.
ix. Enter the data value in the Data used till date option if you have used any data before setting the data plan.
x. Select Notify me when the plan is over to notify you when the data plan is over.
xi. Select Notify me when Daily limit is reached to get a notification when the daily limit is reached.
xii. Tap Save. After saving the data plan, a card is displayed, which shows the daily limit of the data usage.
xiii. In case, you want to edit the monthly plan, tap Edit to modify the data plan.
Note:
This option will be pre-filled with the value if you have already used mobile data before setting data plan.
Note:
The option, Notify me when the plan is over, is enabled by default.
Note:
The option, Notify me when Daily limit is reached, is enabled by default.
Note:
If the daily limit of the data usage is reached, a prompt is displayed to continue the data usage or to discontinue. If you tap Continue, then that message disappears. If you tap Disconnect, Mobile Data will be turned OFF. However, if you turn it ON again, the prompt is displayed to continue the data usage or to disconnect until you tap Continue.
If the Data plan is over, a prompt is displayed to continue or to discontinue the data usage. If you tap Continue, the message disappears. If you tap Disconnect, Mobile Data will be turned OFF. However, if you turn it ON again, the prompt is displayed to continue or to disconnect the data usage until you tap Continue.

Features
32
Custom Plan
To set the customized data plan, follow these steps:
i. Open Fonetastic.
ii. Tap the arrow given at the bottom of the Home screen. Dashboard is displayed.
iii. Tap Optimize, and then tap Data Usage. The Data Usage screen is displayed
iv. Tap Set Data Plan. The Set Data Plan screen is displayed.
v. Tap the Data Plan drop-down list. The list includes Monthly plan and Custom Plan.
vi. Select Custom Plan from the Data plan drop-down list. The Custom Plan screen is displayed.
vii. Enter the value of your data plan. You can select the value in MB or GB.
viii. Enter the Start date and End date from the values given in the list.
ix. Enter the Data value in Data used till Date if you have used any data before setting the data plan. This field will be pre-filled with the value if you have already used mobile data before setting data plan.
x. Select Notify me when the plan is over to notify you when the data plan gets completed.
xi. Select Notify me when Daily limit is reached to get a notification when the daily limit is reached.
xii. Tap Save. After setting up the data plan, a card is displayed, which shows the daily limit of the data usage.
xiii. In case, you want to edit the custom plan, tap Edit to modify the data plan.
Please note that you will not be able to disconnect the data usage of the devices with OS 4.4 and later versions through Fonetastic. Hence, these users will be navigated to the Device Settings page to disable data usage manually.
Note:
This option will be pre-filled with the value if you have already used mobile data before setting data plan.
Note:
The option, Notify me when Daily limit is reached, is enabled by default.
Note:
If the daily limit of the data usage is reached, a prompt is displayed to continue the data usage or to discontinue. If you tap Continue, then that message disappears. If you tap Disconnect, Mobile Data will be turned OFF. However, if

Features
33
Responsive Dashboard card
If a Data plan is not set even after 10 days of installation of the Fonetastic application, then a Dashboard promotional card is displayed to let you know about the Data Usage option and to set your data plan.
Privacy The Privacy option includes four features: App Access, Vault, Block Numbers, and Privacy Advisor. This option helps you to secure the device from unauthorized users. You can restrict unauthorized users from viewing the photos, contacts, documents, and applications without your consent. You can lock applications, make contacts, documents, and gallery to private, block unwanted numbers, and know the applications that access the device permissions.
To configure the Privacy features, follow these steps:
Open Fonetastic.
Tap the arrow given at the bottom of the Home screen. Dashboard is displayed.
Tap Privacy. The privacy features are displayed.
The following are the features of the Privacy option:
App Access
Vault
Block Numbers
Privacy Advisor
App Access
The App Access option helps to lock the applications installed on the phone. With App Access, you can lock all the personal data that you want to remain it private. The applications include both system and downloaded apps. You can protect the data from any kind of misuse. In addition, you can use scramble keyboard to avoid predicting the PIN while entering on a keypad. You can lock the applications which contain the videos, audio, chats, confidential data, images, etc.
you turn it ON again, the prompt is displayed to continue the data usage or to disconnect until you tap Continue.
If the Data plan is over, a prompt is displayed to continue or to discontinue the data usage. If you tap Continue, the message disappears. If you tap Disconnect, Mobile Data will be turned OFF. However, if you turn it ON again, the prompt is displayed to continue or to disconnect the data usage until you tap Continue.
Please note that you will not be able to disconnect the data usage of the devices with OS 4.4 and later versions through Fonetastic. Hence, these users will be navigated to the Device Settings page to disable data usage manually.

Features
34
To lock an application through App Access, follow these steps:
1. Open Fonetastic.
2. Tap the arrow given at the bottom of the Home screen. Dashboard is displayed.
Tap Privacy, and then tap App Access.The Set PIN screen is displayed.
3. Enter New PIN, Re-enter New PIN and then tap Save. If you have already set the PIN through the other options, enter PIN, and then tap Submit.
4. Grant the permissions required, and then tap Continue.
The Lock Apps screen, which includes the list of applications is displayed.
5. Tap the application that you want to lock. After locking the apps, the total count of locked applications is displayed in the parenthesis of the Lock apps screen. You can also search apps by typing the name of the app in the given Search field.
Access App Access through Fingerprint
If your device has Fingerprint sensor, you can use your fingerprint to access the App Access feature. To access this feature through Fingerprint, at least one fingerprint must be configured. After five unsuccessful fingerprint scans, the Fonetastic application asks you to enter the PIN that you have configured.
To configure the settings of App Access, tap the Settings icon on the top right of the Lock apps screen.
The following settings are available:
Show prompt to lock newly installed apps
Scramble keyword
Intruders
Show prompt to lock newly installed apps
Displays a prompt to lock a newly installed application on the device. If this option is enabled, then a prompt is displayed whenever you install a new application on the device. This helps to secure the application from the moment it is installed on the device.
To display the prompt to lock the newly installed application, follow these steps:
i. Open Fonetastic.
ii. Tap the arrow given at the bottom of the Home screen. Dashboard is displayed.
iii. Tap Privacy, and then tap App Access.
iv. Enter PIN of the device..
Note:
The Fingerprint option is supported only on the devices with Fingerprint sensor.
Features
35
The Lock apps screen is displayed.
v. Tap the Settings icon on the top right of the Lock apps screen.
vi. Tap Show prompt to lock newly installed apps to enable the option and to display the prompt when a new application is installed on the device.
Scramble Keyboard
The purpose of this setting is to show random key ordering on the App Access lock screen. This is to prevent detection of PIN from unauthorized users when you enter a PIN on the keyboard. The position of the numbers changes every time the keypad is activated so that only the actual user can see the scrambled digits. By default, Scramble Keyboard is turned OFF.
To enable Scramble Keyboard, follow these steps:
i. Open Fonetastic.
ii. Tap the arrow given at the bottom of the Home screen. Dashboard is displayed.
iii. Tap Privacy, and then tap App Access.
iv. Enter PIN of the device. The Lock apps screen is displayed.
v. Tap the Settings icon on the top right of the Lock apps screen.
vi. Tap Scramble Keyboard to enable the random keypad.
Intruders
This option helps to view all the captured intruder images. The images are captured when an unauthorized person tries to access the locked applications in your absence. In this gallery, you can store up to ten images. If there are more images, then the old images will be replaced with the new images.
To view intruder images, follow these steps:
i. Open Fonetastic.
ii. Tap the arrow given at the bottom of the Home screen. Dashboard is displayed.
iii. Tap Privacy, and then tap App Access.
iv. Enter PIN of the device. The Lock apps screen is displayed.
v. Tap the Settings icon on the upper right of the Lock apps screen.
Note:
You must set PIN to access this feature. If you have already set the PIN through the other options, enter PIN, and then tap Submit.
To show a prompt to lock the new app installed on the devices with OS 6.0 and later versions, you must grant permissions.
Note:
In case the locked application is uninstalled and reinstalled on the device, then the application is locked automatically.
Features
36
vi. Tap Intruders to view the intruder images gallery.
Responsive Dashboard cards
The following are Dashboard responsive cards of the App Access option:
After registration is completed, a Dashboard card is displayed that lets the user know about the App Access feature.
When an unauthorized user tries to unlock any one of the locked applications by entering incorrect PIN or incorrect fingerprint for two times, an image of that user will be captured from the front camera of the device. The captured images are displayed on the responsive cards of the application. Maximum five images are displayed and if a new image is captured, then the old image will be replaced with the new image.
Vault
The Vault option helps to maintain a private contacts list, documents, and gallery. Fonetastic Vault provides three types of Vault: Contacts Vault, Document Vault, and Gallery Vault. You can make contacts, call logs, SMS logs, images, and videos to be private or non-private. Document Vault allows you to secure all the important documents. Contact Vault allows you to secure important call logs and messages, which are received from the private contacts. Gallery Vault allows you to secure the private photos and videos. You can view and share private photos, videos, and documents. Vault capture intruder images when an unauthorized user tries to access your contacts, documents, and gallery.
To access Vault directly from your Home screen, a shortcut is readily available on the Home screen else, you can create a shortcut for Vault on the device Home screen.
To configure Vault, follow these steps:
Open Fonetastic.
Tap the arrow given at the bottom of the Home screen. Dashboard is displayed.
Tap Privacy, and then tap Vault. The Set PIN screen is displayed.
Enter New PIN, Re-enter New PIN and then tap Save. If you have already set the PIN through the other options, enter PIN.
The Vault screen is displayed.
Note:
To capture and store intruder images on the devices with OS 6.0 and later versions, you must grant permissions.

Features
37
Access Vault through Fingerprint
If your device has Fingerprint sensor, you can use your fingerprint to access the Vault feature. To access this feature through Fingerprint, at least one fingerprint must be configured. After five unsuccessful fingerprint scans, the Fonetastic application asks you to enter the PIN that you have configured.
You can use Fingerprint to access the Vault shortcut on the Home screen.
The following options are available:
Contacts Vault
Document Vault
Gallery Vault
Add Images & Vault
Intruders
Create Vault Shortcut
Create Secure Camera Shortcut
Contacts Vault
To add contacts to Vault that you want to make private and view the list. This list includes the contacts added from call logs, contacts, and numbers added manually.
To add and view contacts to Contacts Vault, follow these steps:
i. Open Fonetastic.
ii. Tap the arrow given at the bottom of the Home screen. Dashboard is displayed.
iii. Tap Privacy, and then tap Vault.
Note:
In case you have forgotten your PIN, tap Forgot PIN. The Forgot PIN screen is displayed. A temporary PIN will be sent to your recovery contact, or you can reset your PIN by logging on to the RDM account.
Note:
The Fingerprint option is supported only on the devices with Fingerprint sensor.
Note:
You will not be able to view the private contacts and messages in the normal contacts or messages folder.
To add contacts and access the features of Vault on the devices with OS 6.0 and later versions, you must grant permissions.

Features
38
iv. Enter PIN. The Vault screen is displayed.
v. Tap Contacts Vault. There are three ways to add contacts to Vault. The ways include: From Call Logs, From Contacts, and Enter Number. You can also add new
numbers to the existing list by tapping the plus sign (+) on the top right of the
Contacts Vault screen.
You can make a new contact as private in the following ways:
o From Call Logs: To add a number to Vault from call logs. Select and add the call logs that you want to add to Vault. After adding a number to Vault, both the past and future call logs and SMS from that number will be made private.
To add the number from call logs to Vault, follow these steps:
i. Open Fonetastic.
ii. Tap the arrow given at the bottom of the Home screen. Dashboard is displayed.
iii. Tap Privacy, and then tap Vault.
iv. Enter PIN. The Vault screen is displayed.
v. Tap Contacts Vault. The Add Contacts to Vault screen is displayed.
vi. Tap From Call Logs. List of call logs is displayed on the From Call Logs screen.
vii. Select the particular number from call log that you want to add to Vault, and then tap Add.
o From Contacts: To add a number to Vault from the device contacts list. Select the contacts that you want to add to Vault. After adding to Vault, the contact will be saved exclusively in the private contact list.
To add contacts to Vault, follow these steps:
i. Open Fonetastic.
ii. Tap the arrow given at the bottom of the Home screen. Dashboard is displayed.
iii. Tap Privacy, and then tap Vault.
iv. Enter PIN. The Vault screen is displayed.
v. Tap Contacts Vault. The Add Contacts to Vault screen is displayed.
vi. Tap From Contacts. List of device contacts is displayed on the From Contacts screen.
vii. Select the contact that you want to add to Vault, and tap Add.
o Enter Number: To enter a mobile number manually and add to Vault. You can enter any mobile number manually to make them private.
Features
39
To enter a number manually and add to Vault, follow these steps:
i. Open Fonetastic.
ii. Tap the arrow given at the bottom of the Home screen. Dashboard is displayed.
iii. Tap Privacy, and then tap Vault.
iv. Enter PIN. The Vault screen is displayed.
v. Tap Contacts Vault. The Add Contacts to Vault screen is displayed.
vi. Tap Enter Number to manually add a number to the private contact list.
vii. The Add Number pop-up to enter the mobile number is displayed.
viii. Enter the mobile number that you want to make private, and then tap Add.
Document Vault
This option helps to add the files to document vault. The files stored in this vault are made private and will not be visible in the document editor and the file browser application. With this option, you can also view the files added to Document Vault.
To add files to Document Vault, follow these steps:
i. Open Fonetastic.
ii. Tap the arrow given at the bottom of the Home screen. Dashboard is displayed.
iii. Tap Privacy, and then tap Vault.
iv. Enter PIN. The Vault screen is displayed.
Note:
You will not be able to make messages to private on the devices with OS 4.4 and later versions.
If you want to restore the private contacts and their data to the device contacts, then give a long tap for a few seconds on the private contact and tap the Restore icon.
Deleting the private contacts will permanently remove the contact details along with the private data such as call and SMS logs.
Note:
To add documents to Vault on the devices with OS 6.0 and later versions, you must grant permissions.

Features
40
v. Tap Document Vault. The Document Vault screen is displayed. List of files and folders is displayed. You can also add new documents to the existing list by tapping the plus sign (+) on the top right of the Document Vault screen.
vi. Select the document that you want to make private and tap the check mark () on the upper right of Document Vault.
To restore, delete, and share the files, follow these steps
i. Open Fonetastic.
ii. Tap the arrow given at the bottom of the Home screen. Dashboard is displayed.
iii. Tap Privacy, and then tap Vault.
iv. Enter PIN. The Vault screen is displayed.
v. Tap Document Vault. List of private files is displayed.
vi. Tap the file to restore, delete, and share as required.
Gallery Vault
To add all the images and videos to Gallery Vault to make them private. With this option, you can also view the images and videos added to Gallery Vault.
To add images and videos to Gallery Vault, follow these steps:
i. Open Fonetastic.
ii. Tap the arrow given at the bottom of the Home screen. Dashboard is displayed.
iii. Tap Privacy, and then tap Vault.
iv. Enter PIN. The Vault screen is displayed.
v. Tap Gallery Vault. List of private images and videos is displayed. To add images or
videos to Gallery Vault, tap the plus sign (+) on the top right of Gallery Vault. This
option will navigate you to the device gallery. Select the items and then tap the check
mark () to add them to Gallery Vault. If you want to add new images using the
Camera option, tap the Camera icon on the top right of Gallery Vault.
Note:
To add and view images and videos to Vault on the devices with OS 6.0 and later versions, you must grant permissions.
Note:
If you want to restore, delete, and share images in Gallery Vault, give a long tap on an image to display three options: Restore, Delete, and Share. If you tap on multiple images, only two options are displayed: Restore and Delete. In case you want to restore and delete the videos in Gallery Vault, give a long tap on a video to display two options: Restore and Delete.

Features
41
Add Images & Videos to Vault
To add images and videos to Gallery Vault. All the images and videos, which are made private, will be stored in Gallery Vault. You can add images and videos to Gallery Vault from the third party applications. Select the item that you want to make private and tap the Share option to add to Gallery Vault. Select Gallery Vault from the share options displayed and then the item will be added to Gallery Vault. After adding images or videos to Vault, a hidden folder named .QH Vault is created in the device storage. Vault consists of all the private images and videos in the encrypted form.
To add images or videos to Gallery Vault, follow these steps:
i. Open Fonetastic.
ii. Tap the arrow given at the bottom of the Home screen. Dashboard is displayed.
iii. Tap Privacy, and then tap Vault.
iv. Enter PIN. The Vault screen is displayed.
v. Tap Add Images & Videos to Vault. The device gallery, which contains images and videos appears.
vi. Select the image, and then tap the check mark () to add images or videos from the device gallery to Gallery Vault.
Intruders
This option helps to view all the intruder images. The images are captured when an unauthorized person tries to access Vault in your absence. In this gallery, you can store up to ten images. If there are more images, the old images will be replaced with the new images.
Create Vault shortcut
To view and access Vault directly on the device Home screen. Tap Create Vault shortcut to create a vault shortcut on the device Home screen.
Note:
If you delete .QH vault, then the images and videos stored in Gallery Vault will be deleted. Ensure to check before you delete .QH vault.
The images and videos present in an external SD card cannot be made private the devices with OS 4.4 version.
To add and view images and videos to Vault on the devices with OS 6.0 and later versions, you must grant permissions.
Note:
To view and capture intruder images to Vault on the devices with OS 6.0 and later versions, you must grant permissions.

Features
42
Create Secure Camera Shortcut
To use the secure camera, you can create a Secure Camera Shortcut on the device Home screen. This option helps you to click photos securely. The photo captured through this option will be directly added to Gallery Vault. Tap Create Secure Camera Shortcut to create a secure camera shortcut on the device Home screen.
Responsive Dashboard cards
The following are Dashboard responsive cards of the Vault option
Dashboard responsive card is displayed only when an intruder image is captured. This card displays five latest intruder images that were captured.
A Vault promotional card is displayed after 8 days of registration to know about Vault and how to configure it.
Block Numbers
The Block Numbers option helps you to block unwanted calls and messages. With this option, you can easily block unwanted calls from both local and all unknown international numbers. You can also block messages from unwanted local numbers. This option blocks all commercial calls and messages if required. You can also block a number of a particular series or messages by adding keywords.
To configure the options of Block Numbers, follow these steps:
Open Fonetastic.
Tap the arrow given at the bottom of the Home screen. Dashboard is displayed.
Tap Privacy, and then tap Block Numbers. The Block Numbers screen is displayed.
Enable Block Numbers to configure other options.
The following options are available:
Blocked List
Block a Custom Series
Note:
SMS blocking is not supported on the devices with OS 4.4 and later versions.
Block Numbers is turned OFF by default on the devices with OS 6.0 and later versions. To access all the features of Block Numbers on the devices with OS 6.0 and later versions, you must grant permissions.
Note:
It is mandatory to enable the Block Numbers option to configure the options.

Features
43
Block SMS with Keywords
Block Unknown International Calls
Alert on Call Rejection
Block WAP/ PUSH SMS
Register with DND
Blocked List
This option helps to add the numbers to the block list to block all the calls and messages from a new number if required. You can also view the list of the numbers that you have blocked.
To add and view the blocked list, follow these steps:
i. Open Fonetastic.
ii. Tap the arrow given at the bottom of the Home screen. Dashboard is displayed.
iii. Tap Privacy, and then tap Block Numbers. The Block Numbers screen is displayed.
iv. Enable Block Numbers, and then tap Blocked List to add and view the blocked numbers. There are three ways to add new numbers to the blocked list. The ways include: From Phone Logs, From Contacts, and Enter a Number to Block. You can also view the blocked numbers list and add new numbers to the blocked list by tapping the
plus sign (+).
You can block a new number using the following ways:
o From Phone Logs: You can block a number from phone logs. Select the check box against a call log, and then tap Add.
o From Contacts: You can block a number from the device contact list. Select the check box against a contact, and then tap Add.
o Enter a Number to Block: To block a number by entering manually. Enter the number, and then select block calls from this number, or block SMS from this number or both, and then tap Add.
You can view the call and message history of the blocked numbers by tapping the number. An SMS from the blocked number can be forwarded, copied, deleted, and you can move the SMS to the Inbox if required. Select the SMS and perform the action as per your requirement.
Note:
Before you remove an unknown number from the blocked list, you can save the unknown number to your contact list. To add the unknown number to the contact list, tap the cross sign (×) to remove the number and then select the Add Contact to Phonebook check box to add the number to the device contacts list.

Features
44
Block a Custom Series
Blocks all the calls and messages from a series of numbers. You can add a number that starts with and ends with the particular series.
To add a new series, follow these steps:
i. Open Fonetastic.
ii. Tap the arrow given at the bottom of the Home screen. Dashboard is displayed.
iii. Tap Privacy, and then tap Block Numbers. The Block Numbers screen is displayed. Enable Block Numbers, and then tap the Block a Custom Series option. The Block a Custom Series screen is displayed.
iv. Select Start with or End with as required, and then enter the digits.
v. Select the Block calls from this Number option or Block SMS from this Number option or both as required.
vi. Tap Add. After adding a series, you can add new series by tapping the plus sign (+) on
the top right of the Block a Custom Series screen.
Block SMS with Keywords
To block messages related to a particular keyword. Tap Block SMS with Keywords, enter the keyword, and then tap Add. All the message, which includes such keywords, will be blocked. This is helpful in blocking spams and other harmful messages. To remove the keyword, tap the cross
sign (×), which is available next to the keyword. To add new keywords, tap the plus sign (+) on
the top right of the Block SMS with Keywords screen.
Block Unknown International Calls
To block all unknown international calls. Enable this option to block incoming calls from an International number that is not saved in the phonebook. Enable Block Unknown International Calls to block unknown international calls. To view the blocked international calls, go to the Blocked List option.
Alert on Call Rejection
Enable this option to get an alert when you reject a call thrice. If you reject an unknown call for three times, an alert is displayed for 20 seconds to add the rejected call to the blocked list.
Note:
You cannot block Non-numeric senders.
You must enter at least three digits to block the custom series.
Note:
Block SMS with Keywords is not supported on the devices with OS 4.4 and later versions

Features
45
Block WAP/PUSH SMS
Enable this option to block WAP/PUSH messages.
Register with DND
To register the number with the National Do Not Call Directory (TRAI) to block commercial or telemarketing calls.
To register with DND, follow these steps:
i. Open Fonetastic.
ii. Tap the arrow given at the bottom of the Home screen. Dashboard is displayed.
iii. Tap Privacy, and then tap Block Numbers. The Block Numbers screen is displayed.
iv. Enable Block Numbers, and then tap Register with DND. The Register with DND screen is displayed.
Register with DND provides following ways to block the telemarketing calls and SMS:
o Call to TRAI: To dial a call to TRAI. Tap Call to TRAI to register a complaint to TRAI through a phone call.
o SMS to TRAI: Lets you send a message to TRAI to block or allow the telemarketing calls and SMS. The following are the options to send SMS to TRAI:
Block Telemarketing Calls & SMS: To block all commercial calls and messages.
Allow Telemarketing Calls & SMS: To unblock all the calls and SMS that are previously blocked. Your device will start receiving all the telemarketing calls and SMS.
Block Selective SMS & All Calls: Lets you block all the calls, but in case of SMS, you can select categories to stop receiving SMS whenever required. Select the category, tap Block, and then tap Report.
Complaint To TRAI: Allows you to report a number from which you receive
unwanted calls or SMS even after registering the number with DND. You
should report within three days span of receiving a call or message from that
number.
Note:
Block WAP/PUSH SMS is not supported on the devices with OS 4.4 and later versions.
Note:
In case you want to unblock any category, you must allow all the categories through the Allow Telemarketing Calls & SMS option.

Features
46
Responsive Dashboard cards
The following are Dashboard responsive cards of the Vault option:
Dashboard responsive card is displayed at 9 AM for every 7 days if the Spam SMS count reaches 10 or more. This card helps you to view and delete the Spam messages.
A promotional responsive card is displayed after deleting the Spam messages, which shows the result of deletion of Spam messages and promotes the Block SMS with keywords feature.
The Activate Call Block Dashboard responsive card is displayed on the devices with OS 6.0 and later versions to enable the Block Numbers option. This card is displayed after the registration of the Fonetastic application and after a week if the Block Numbers option is not enabled yet.
Privacy Advisor
The Privacy Advisor option helps you to detect the applications that collect your personal information such as user credentials, contacts, social security number, and passwords. You can monitor applications with various permissions such as Cost You Money, Access Your Personal Data, Access to Accounts, Capture Media, Track Your Location, Use Your Networks, Access Your Identity Info, and Request Device Admin. You can also add the applications to the trusted list as per your requirement.
To know about the applications that access the data, follow these steps:
Open Fonetastic.
Tap the arrow given at the bottom of the Home screen. Dashboard is displayed.
Tap Privacy, and then tap Privacy Advisor. The Privacy Advisor screen is displayed.
Enable the Privacy Advisor option to know the apps that access the personal information.
The following types of access permissions are available for applications:
Cost You Money: Applications with this permission can make calls and send messages without your consent. Extra charges can be applied for making calls and sending SMS.
Note:
Track the DND service status on the number by entering this link on the address bar of the browser: http://www.nccptrai.gov.in/nccpregistry/search.misc
You can deregister your number later from the DND list if required.
This option is not available outside India.
Note:
If the Privacy Advisor option is disabled, all the permissions will also be disabled.

Features
47
Access Your Personal Data: Applications with this permission may access the Call logs, Contacts, SMS logs, Calendar events, and the Profile. Malicious Applications might read the confidential messages or delete them before you even receive them.
Access to Accounts: Applications with this permission may request authentication credentials of your accounts. Such applications may add or remove accounts and delete your passwords.
Capture Media: Applications with this permission may read, edit, share, and delete the pictures, audio, and video files.
Track Your Location: Applications with this permission can track and update the device location to their servers, which may be harmful.
Use Your Networks: Applications with this permission allow network usage in the background.
Access Your Identity Info: Applications with this permission can share your phone’s IMEI number, Phone number, Calendar, and Serial number of the phone to their server without your consent.
Request Device Admin: Applications with this permission may get device admin privileges and manage the device. Such applications might be difficult to uninstall.
To view the permissions and related applications, follow these steps:
i. Open Fonetastic.
ii. Tap the arrow given at the bottom of the Home screen. Dashboard is displayed.
iii. Tap Privacy, and then tap Privacy Advisor. The Privacy Advisor screen is displayed.
iv. Enable the Privacy Advisor option to know the permissions that are accessed by the applications on the device.
v. Tap the permission that you want to view. The applications that have the particular permission(s) are displayed.
vi. Tap the application to view the other permissions it can access. All the permissions that application may access are displayed. You can view the other permissions that the application might access by tapping Other Permissions.
vii. Tap the Trust option to add the application to the trusted apps list else tap Uninstall option to remove the application from the device if required.
To view the apps added to the trusted list, follow these steps:
i. Tap the Shield icon on the top right of the Privacy Advisor screen. You can view the apps added to the trusted apps list.
ii. Tap the application to view the other permissions it can access. All the permissions that the application may access are displayed.

Features
48
iii. Tap the Don’t trust option to remove the application from the trusted apps list else tap the Uninstall option to remove the application from the device if required.
Responsive Dashboard cards
The following are Dashboard responsive cards of the Privacy Advisor option:
Dashboard responsive card is displayed to turn ON the Privacy Advisor option if it is turned OFF for 15 days.
Dashboard responsive card is displayed when you turn ON the Privacy Advisor option or when you install or update high risky apps on the device.
Secure The Secure option includes four features: Antivirus, Anti-Theft, Block Websites, and Security Advisor. This option helps to check the possible threats present on the device. You can enhance the security settings to stop attempts to exploit vulnerabilities. You can track the device location when it is lost or theft. You can block harmful websites if required. You may also get notifications if insecure settings are turned ON.
To configure the Secure features, follow these steps:
Open Fonetastic.
Tap the arrow given at the bottom of the Home screen. Dashboard is displayed.
Tap Secure. The Secure features are displayed.
The following are the features of the Secure option:
Antivirus
Anti-Theft
Block Websites
Security Advisor
Antivirus
The Antivirus option helps to scan the device and set security measures against possible vulnerabilities and privacy violation. Scanning of the device gives a clear idea about the security of the device. You can take appropriate actions to enhance the device security. You can view the list of threats detected during the scan. You can also view the application and file threats detected under separate categories.
To secure the device, follow these steps:
Open Fonetastic.
Tap the arrow given at the bottom of the Home screen. Dashboard is displayed.
Tap Secure, and then tap Antivirus. The Antivirus screen is displayed.

Features
49
The following options are available:
Scan now
List of Threats
Schedule Scan
Background Scan
On Install App Scan
Scan from Cloud
Vulnerability Scan
Browsing & Phishing Protection
Scan now
Let’s you run a scan on the device. All the downloaded applications are scanned in this scan. You can uninstall or ignore the applications that are virus affected. All the downloaded applications are scanned in this scan.
To scan the device, follow these steps:
i. Open Fonetastic.
ii. Tap the arrow given at the bottom of the Home screen. Dashboard is displayed.
iii. Tap Secure, and then tap Antivirus. The Antivirus screen is displayed.
iv. Tap Scan now and the scanning will be initiated. The threats will be detected after the scan.
List of Threats
Displays the threats that were detected during the scan. List of Threats is categorized into four types: Unresolved, Resolved, Quarantined, and Vulnerabilities. The following are the list of threats:
Unresolved
Resolved
Quarantined
Vulnerabilities
Unresolved
Displays the list of unresolved harmful application threats detected during the scan. You can view the count of unresolved threats. You have to take an action to resolve the threats.
Note:
If Background Scan is turned OFF, then the Scan now option will run a full scan on the device.
It is recommended to uninstall the threats detected after the scan.

Features
50
To resolve the threats, follow these steps:
i. Open Fonetastic.
ii. Tap the arrow given at the bottom of the Home screen. Dashboard is displayed.
iii. Tap Secure, and then tap Antivirus. The Antivirus screen is displayed.
iv. Tap List of Threats, and then tap Unresolved. The list of unresolved threats is displayed.
v. Tap Uninstall to remove the application from the device, and then tap Ok.
Resolved
Displays the list of resolved applications. After you resolve the threats from Unresolved type list, the threats are displayed in the Resolved type list. You can clear the list by tapping the Clear option.
Quarantined
Displays the list of repaired files. You can restore and delete the files. This option also helps to delete the quarantined files automatically after selected number of days.
To restore the files, follow these steps:
i. Open Fonetastic.
ii. Tap the arrow given at the bottom of the Home screen. Dashboard is displayed.
iii. Tap Secure, and then tap Antivirus. The Antivirus screen is displayed.
iv. Tap List of Threats, and then tap Quarantined. The list of repaired files is displayed.
v. Select the check box next to the files, and then tap Restore. To delete the files, tap Delete. Select to delete the Quarantined files after 7 days, 30 days, and 45 days.
Vulnerabilities
Displays the list of vulnerable apps and files detected during the scan. The app or file that has the highest vulnerability percentage will be listed at the top. You can trust and uninstall the vulnerable apps. In case of vulnerable files, you can trust and delete. After you trust any particular app or file, it will be moved to the bottom of the list.
All the apps and files that detected during the scan are displayed as per the vulnerability severity. Depending on the issue severity, the application provides you with recommendations to take necessary action on it.
To perform actions on vulnerable apps and files, follow these steps:
i. Open Fonetastic.
ii. Tap the arrow given at the bottom of the Home screen. Dashboard is displayed.
iii. Tap Secure, and then tap Antivirus. The Antivirus screen is displayed.
iv. Tap List of Threats, and then tap Vulnerabilities. The list of vulnerable threats is displayed.

Features
51
v. Tap the Trust option to make the vulnerable app or file as trusted entity. If you want to uninstall any application, tap Uninstall. In case you want to remove files, tap Delete to remove the files from the device.
Schedule Scan
Schedule Scan helps you to plan a scan at a scheduled time and frequency. This helps you to scan the device at the defined schedule automatically.
To schedule a scan, follow these steps:
i. Open Fonetastic.
ii. Tap the arrow given at the bottom of the Home screen. Dashboard is displayed.
iii. Tap Secure, and then tap Antivirus. The Antivirus screen is displayed.
iv. Tap Schedule Scan. You can view all the planned scans if you have created any.
v. To schedule a new scan, tap Schedule New Scan.
vi. In the Set Schedule Scan section, set the time and frequency to start the scan automatically. Schedule Scan has four options to set the time and frequency: Scan while charging, Once a day, Once a week, and Once a month.
o If you select Scan while charging, the device will be scanned once in 24 hours while the device is connected to the charger or charging for the first time in a day with the battery level at least 50% or more.
o If you select Once a day, specify the time.
o If you select Once a week, specify day and time. If you select Once a month, specify date and time.
Background Scan
To run a real-time scan on the device. This option is enabled by default to perform the background scan automatically on the device, whenever an application is downloaded or updated.
On Install App Scan
To run scanning of newly installed application on the device. The On Install App Scan option helps to run a scan, whenever a new application is installed on the device.
Note:
To run background scan on the devices with Android OS 6.0 and later versions, you must grant permission when you enable the Background Scan option.

Features
52
Scan from Cloud
To run a cloud scan. This option helps you to scan through Cloud. Cloud scanning allows scanning of all the installed applications and .apk files available on the device storage. Enable this option to perform cloud scanning.
Vulnerability Scan
To run a vulnerability scan on the device. Enable this option to perform the vulnerability scan on the device, whenever a scan is performed on the device.
Browsing & Phishing Protection
To block access to malicious and fraudulent websites. Enable this feature to activate the Browsing & Phishing Protection option. This option is supported on all the major browsers such as Chrome, Opera, Firefox, Apus, CM Security browser, etc. The Browsing & Phishing protection option is also supported on incognito or private modes of the browsers.
Responsive Dashboard cards
The following are Dashboard responsive cards of the Antivirus option:
Dashboard responsive card is displayed to remind you to scan the device if Background Scan is disabled.
Dashboard responsive card is displayed to remind you to turn ON the Browsing & Phishing Protection option if it is turned OFF.
Dashboard responsive card is displayed to inform you that the threats detected during background scan are quarantined.
Dashboard responsive card is displayed if no action is taken on the detected application threats.
Dashboard responsive card is displayed to inform you to enable Accessibility service for Fonetastic. Dashboard responsive card is displayed to show the result of the vulnerability scan.
Dashboard responsive card is displayed to run your first scan on the device after activating the Fonetastic application.
Note:
Ensure to check your Internet connectivity before performing cloud scanning.
Note:
To avail of the Browsing & Phishing Protection option on multiple browsers for the devices with OS 4.0 and later versions, you must enable Accessibility Service for Fonetastic on the device.

Features
53
Anti-Theft
The Anti-Theft option helps you to secure the phone in case the phone is lost or stolen. This feature lets you block the phone when the trusted SIM is changed or whenever the airplane mode is turned ON. An SMS will be sent to the recovery contacts when the SIM is changed. This option helps you to unblock the device if you forget the PIN. You can also capture intruder images when an unauthorized user attempts to enter an incorrect PIN to unblock the anti-theft block screen.
To configure the Anti-Theft settings, follow these steps:
Open Fonetastic.
Tap the arrow given at the bottom of the Home screen. Dashboard is displayed.
Tap Secure, and then tap Anti-Theft. The Anti-Theft screen is displayed.
Access Anti-Theft through Fingerprint
If your device has Fingerprint sensor, you can use your fingerprint to access the Anti-theft feature. To access this feature through Fingerprint, at least one fingerprint must be configured. After five unsuccessful fingerprint scans, the Fonetastic application asks you to enter the PIN that you have configured.
You can also use the Fingerprint access to unblock the Antitheft Block screen.
The following options are available:
Anti-Theft
Phone Tracker
Log on to RDM account to access your phone remotely
Intruders
Block phone when the airplane mode is turned ON
Block phone if a new SIM is inserted, to avoid intrusion
Notify on SIM change
Customize your Block Screen
Recovery Contacts
List of Trusted SIMs
Remote Actions
Note:
The Fingerprint option is supported only on the devices with Fingerprint sensor.
In case of the Anti-Theft block screen, intruder images are captured after two unsuccessful Fingerprint attempts.
Features
54
Anti-Theft
Enable the Anti-Theft option to configure the settings. If this feature is disabled, you cannot configure the settings.
To enable the Anti-Theft option, follow these steps:
i. Open Fonetastic.
ii. Tap the arrow given at the bottom of the Home screen. Dashboard is displayed.
iii. Tap Secure, and then tap Anti-Theft. The Anti-Theft screen is displayed.
iv. Tap the Anti-Theft option to enable it. The Set PIN screen is displayed.
v. Enter New PIN, Re-enter New PIN and then tap Save. If you have already set the PIN through the other options, the Recovery Contacts screen is displayed.
vi. Tap Add from Contacts to add recovery contacts. You can set up to two recovery contacts. Select the contact from the device contacts or phonebook, and then tap Add.
vii. Tap Next, and then tap Done. The Anti-Theft option is enabled.
Phone Tracker
To locate your phone if lost or stolen. This option simplifies the device tracking. Tapping the Phone Tracker option will navigate you to location settings, where you can enable the location settings and the Phone Tracker option. Disabling location settings will disable the Phone Tracker option also.
Log on to RDM account to access your phone remotely
You can log on to the RDM account with the provided link and access the device remotely. Tapping https://mydevice.quickheal.com will navigate you to the RDM portal in the browser.
Intruders
This option helps to view all the captured intruder images. The images are captured when an unauthorized person tries to access the device in your absence. You can store up to ten images. If there are more images, the old images will be replaced with the new images.
Note:
The Anti-Theft option is turned OFF by default.
Note:
After adding the recovery contacts on the devices with OS 6.0 and later versions, you must grant all the permissions to enable the Anti-Theft option.
Features
55
Block phone when the airplane mode is turned ON
Enable this feature to block the device as soon as the airplane mode of the device is turned ON. This ensures the security of the device if it is lost or stolen.
Block phone if a new SIM is inserted, to avoid intrusion
Enable this option to block the device as soon as the SIM is changed. This helps you to secure the device as it can be unblocked by an authentic PIN only.
Notify on SIM change
Enable this option to get a notification to the recovery contact numbers on SIM change. This helps you know the reason why the SIM has been changed and what action you need to take.
Customize your Block Screen
To customize the message that appears on the block screen. When the device is blocked, a message and the recovery contact numbers appear on the blocked device screen. A default message is already present on the block screen; however, you can edit the message if required.
Recovery Contacts
You can add up to two recovery contacts with two numbers to each contact, which are displayed on the block screen. These contact numbers will receive messages whenever an SIM is changed or you forgot the PIN.
List of Trusted SIMs
You can create a list of trusted SIM cards. If you use multiple SIM cards and you frequently change the cards, you can enlist all the SIM cards. In this way, the device will not be blocked whenever you change an SIM card.
You may use multiple SIM cards because of network or business reasons. For example, if you travel to different states or geographical locations and you need to use local SIM cards for communication, you may use multiple SIM cards.
To add SIMs to the Trusted SIMs list, restart the phone with a new SIM and add the SIM to the Trusted SIMs list when prompted.
Note:
Ensure that you have active recovery contact numbers so that you can track all the activities carried out on the device.
Note:
Ensure that you have saved the active recovery contact numbers

Features
56
Remote Actions
To perform actions on the device remotely by sending commands. This helps you locate, trace, and control the device when it is lost or stolen. This might help you to get back the lost device. You can also block the device and wipe your personal data to secure the device.
You can perform following remote actions with this option:
Trace phone remotely: To trace the geographical location of the lost device. To get the device location, send this command:
TRACE PIN (For example – TRACE XXXX)
Block phone remotely: To block the device remotely if it is lost or stolen. It sends you the location of the device and captured images. To block the device, send this command:
BLOCK PIN (For example – BLOCK XXXX)
Unblock phone remotely: To unblock the device in case the device is blocked by mistake or you got back your lost or stolen device and want to unblock it, send this command:
UNBLOCK PIN (For example – UNBLOCK XXXX)
Wipe data remotely: To wipe the data from the lost device remotely. To wipe data, send this command:
WIPE PIN (For example – WIPE XXXX)
Ring phone remotely: To locate the device by playing a ringtone on it if you think it is in the nearby surroundings. To ring the device, send this command:
RING PIN (For example – RING XXXX)
Dial call remotely: To dial a call from the lost device silently to another mobile device. This helps you to listen to the possible conversation going near the lost device. To dial a call, send this command:
CALL PIN (For example – CALL XXXX)
Pickup call remotely: To pick up a call on the lost or stolen device silently. This helps you listen to the possible conversation going near the lost device. To pick up a call, send this command:
PICKUP PIN (For example – PICKUP XXXX)
Capture image remotely: To capture images of the surrounding area near the lost device secretly and send them to your email ID. To capture images, send this command:
PHOTO PIN (For example – PHOTO XXXX)
Record video remotely: To record video of one minute on the device silently and send it to your email ID. This helps in recording video of possible conversation going near the lost device. To record video, send this command:
Note:
Pickup call remotely is not supported on devices with OS 5.0 and later versions.

Features
57
VIDEO PIN (For example – VIDEO XXXX)
Record audio remotely: To record audio of one minute on the device silently and send it to your email ID. This helps in recording possible conversation going near the lost device. To record audio, send this command:
AUDIO PIN (For example – AUDIO XXXX)
How to unblock your Anti-theft block screen?
The Anti-Theft option helps you to secure the phone in case the phone is lost or stolen. In this framework, the device may get blocked due to the various security reasons. Whenever the device gets blocked, you can unblock your screen with the PIN that you had set. In case you forgot the PIN, Fonetastic provides three options to unblock your phone; Get Temporary PIN, Gmail Authentication, and Remote Device Management.
Get Temporary PIN: This option helps you to send a temporary PIN to the recovery contacts to reset your PIN.
To get a temporary PIN, follow these steps:
i. Tap the Unblock phone option on the block screen. The Enter PIN screen is displayed.
ii. Tap Forgot PIN? incase you forgot the PIN. The Forgot PIN screen is displayed.
iii. Tap Get Temporary PIN. The Get Temporary PIN screen is displayed.
iv. Tap Send. A temporary PIN is sent to the recovery contact numbers that you have given during the registration.
Google Authentication: This option helps you to unblock your screen by validating your Gmail account.
To validate your Gmail account, follow these steps:
i. Tap the Unblock phone option on the block screen. The Enter PIN screen is displayed.
ii. Tap Forgot PIN? incase you forgot the PIN. The Forgot PIN screen is displayed. The three options to unblock your phone are displayed.
iii. Tap Google Authentication. The Google Authentication screen is displayed. Incase of no Internet connectivity, the Configure Internet screen is displayed.
To configure the internet, follow these steps:
i. On the Configure Internet screen, enable Mobile to turn ON mobile date, else, enable Wi-Fi to turn ON Wi-Fi.
ii. If you want to configure the Wi-Fi settings, tap the Wi-Fi option. The Configure Wi-Fi screen is displayed.
Note:
Please be notified that carrier charges may apply to send a message.
Features
58
iii. Enter Network SSID, select Security and then tap Connect. The Security options include Open, WEP, and WPA_WPA2_PSK. If you select WEP, and WPA_WPA2_PSK security options, then you must enter the password to connect to the Wi-Fi.
iv. After the internet is connected, check your email address, enter the password of your Gmail account and then tap Login.
Remote Device Management: This option informs that you can reset your PIN through the RDM portal.
To reset your PIN through the RDM portal, follow these steps:
i. Tap the Unblock phone option on the block screen. The Enter PIN screen is displayed.
ii. Tap Forgot PIN? incase you forgot the PIN. The Forgot PIN screen is displayed. The three options to unblock your phone are displayed.
iii. Tap Remote Device Management. The Remote Device Management screen is
displayed. Log on to the RDM portal using the URL provided on the screen.
Responsive Dashboard cards
The following are Dashboard responsive cards of Anti-Theft option:
Dashboard responsive card is displayed after eight days of registration if the location settings of the device are turned OFF.
Dashboard responsive card is displayed to turn ON the Anti-Theft option if turned OFF.
Block Websites
The Block Websites option helps you to make safe and secure browsing. It blocks infected and fraudulent websites. This prevents you from accessing unwanted websites that may harm your device or may steal the confidential information. You can also control the online activities of the children or other users of the mobile device.
To configure the Block Websites settings, follow these steps:
Open Fonetastic.
Tap the arrow given at the bottom of the Home screen. Dashboard is displayed.
Tap Secure, and then tap Block Websites.
Enter New PIN, Re-enter New PIN and then tap Save. If you have already set the PIN through the other options, enter PIN, and then tap Submit. The Block Websites screen is displayed.
Note:
In case of no Internet connectivity, you must the configure internet to access the RDM portal. To know how to configure your internet, see Configuring Internet

Features
59
Access Block Websites through Fingerprint
If your device has Fingerprint sensor, you can use your fingerprint to access the Block Websites feature. To access this feature through Fingerprint, at least one fingerprint must be configured. After five unsuccessful fingerprint scans, the Fonetastic application asks you to enter the PIN that you have configured.
The following options are available:
Block Websites
Select Categories to Block
List of Excluded Websites
Reset
Block Websites
To block websites based on the selected categories. You can also exclude some of the websites by adding the particular URLs to the list of excluded websites.
Tap to enable Block Websites for safe and secure browsing. This option is supported on all the major browsers such as Chrome, Opera, Firefox, Apus, CM Security browser, etc. The Block Websites option is also supported on incognito or private modes of the browsers. However, you must enable Accessibility Service for Fonetastic on your device.
Select categories to block
To block the websites of selected category.
To select the categories, follow these steps:
i. Open Fonetastic.
ii. Tap the arrow given at the bottom of the Home screen. Dashboard is displayed.
Note:
You must set PIN to access this feature. If you have already set the PIN through the other options, enter PIN, and then tap Submit.
To do safe browsing on the devices with OS 6.0 and later versions, you must grant permissions.
Note:
The Fingerprint option is supported only on the devices with Fingerprint sensor.
Note:
To avail the Block Websites option on multiple browsers for the devices with OS 4.0 and later versions, you must enable Accessibility Service for Fonetastic on the device.

Features
60
iii. Tap Secure, and then tap Block Websites.
iv. Enter PIN. The Block Websites screen is displayed.
v. Tap Select categories to block. It will display all the categories.
vi. Select to block a website of the particular category.
vii. Tap Restore Default to block default website categories.
List of Excluded Websites
To exclude a particular website from the blocked list. You can add the URL of the particular website that has to be excluded from the blocked category list. The excluded websites will be ignored during blocking.
To exclude websites, follow these steps:
i. Open Fonetastic.
ii. Tap the arrow given at the bottom of the Home screen. Dashboard is displayed.
iii. Tap Secure, and then tap Block Websites.
iv. Enter PIN. The Block Websites screen is displayed. Tap List of Excluded Websites to add a URL to the list.
v. Tap the plus sign (+) given at the upper right of the List of the Excluded Websites screen. The Exclude Website pop-up is displayed.
vi. Type the URL that you want to exclude from blocking, and then tap Add. To remove
the URL from the excluded websites, tap the cross sign (×), and then tap Remove.
Reset
To clean the web Security related local cache stored on the device. This option clears the web security cache containing details of categorization of URLs visited on the device.
To reset URL Cache, follow these steps:
i. Open Fonetastic.
ii. Tap the arrow given at the bottom of the Home screen. Dashboard is displayed.
iii. Tap Secure, and then tap Block Websites.
iv. Enter PIN. The Block Websites screen is displayed.
v. Tap Reset to clean URL Cache.
Responsive Dashboard card
Dashboard responsive card is displayed after registering the Fonetastic app to inform you to enable Accessibility service for Fonetastic and to enable the Block Websites feature from Dashboard.
Note:
These two options can be configured only when the Block Websites option is enabled.

Features
61
Security Advisor
The Security Advisor option helps to enhance the mobile security. Enable Security Advisor to get an alert if the security settings on your device are low. You can check the possible vulnerabilities present on the device. You can enhance the security settings to stop attempts to exploit vulnerabilities. The Security Advisor option helps to connect to the secured Wi-Fi networks only. A notification will be sent to the device in case the device is connected to an open Wi-Fi network. Turn OFF the Wi-Fi option by tapping the notification.
Security Advisor settings are of two types: Risk Settings and Security Settings. Tap the Security Advisor option to enable it.
The following settings are available:
Risk Settings
Secure Settings
Risk Settings
The settings that are enabled for a long time and if there might be a chance of a possibility of vulnerabilities, then these insecure settings will be listed under Risk Settings.
Risk Settings include the Secure Now option available next to listed insecure settings. Turn the settings to OFF by tapping the Secure Now option. When you tap the Secure Now option, you will be redirected to the respective security features where you can configure them.
Secure Settings
The risk settings that are turned OFF will be listed under Secure Settings.
You can configure the following settings on your phone to enhance the security:
Settings Description
Accounts & Sync The device receives data from synced accounts or sites that
increases the risk of hacking and account misuse. It is advisable to
turn this option to OFF when not required.
Note:
To enable the Fonetastic Anti-Theft setting, which is listed under Risk Settings on the devices with OS 6.0 and later versions, you must grant all the required permissions.
To enable the Fonetastic Background Scan setting, which is listed under Risk Settings on the devices with OS 6.0 and later versions, you must grant all the required permissions.
Note:
These two options can be configured only when the Security Advisor option is enabled.

Features
62
Settings Description
Bluetooth Data transfer through Bluetooth might put the device and its data
at risk. It is advisable to turn this option to OFF when not required.
Phone memory
encryption
You can encrypt the data on the device. This ensures security by preventing unauthorized access to the data. It is advisable to turn this option to ON to secure your data from unauthorized access.
Note:
The Device Memory Encryption setting is available only on supported OS.
Hotspot & Tethering Data shared through Wi-Fi Hotspot, USB and Bluetooth Tethering is at risk to be hacked. To prevent data hacking, turn this option to OFF if not required.
Note:
The Hotspot and Tethering setting are available only on supported OS and vendors.
Fonetastic Anti-
Theft
Protects the device and its data. With this feature, you can trace,
block, wipe data, dial a call, receive a call, capture image, record
audio and video if the device is lost. Turn this option to ON to
protect from Theft.
Fonetastic
Background Scan
Shields the device against various types of threats. Keep this option
enabled for security. Turn this option to ON for security.
Screen Lock If this option is disabled, the personal data may be at risk of misuse.
Ensure that one of the screen lock options is set to safeguard the
device data. Turn this option to ON to avoid misuse of data.
Unknown App
Sources
If any application is installed from a source other than Google Play,
then that application might pose a threat to your device. Therefore,
it is advisable to turn this option to OFF.
USB Debugging If USB debugging is enabled, the device is at risk of being hacked
and the data can be misused. Turn this option to OFF for security.

Features
63
Settings Description
Wi-Fi Communicating through an open or unsecured Wi-Fi network can
put the data at risk. It is advisable to connect Wi-Fi only on a secure
network. Turn this option to OFF for security.
Fonetastic-Multi device–User guide Version 1.03
64
Settings
The Settings section helps you configure the various settings of Fonetastic and secures the device from unauthorized users. You can configure various settings as follows:
Account Settings
App Settings
Help Center
About
Account Settings Account Settings help you to configure the settings related to the user account. Account settings include following settings:
Set PIN
User Details
Set PIN
The Set PIN option helps you to set the PIN. You must enter the correct PIN to access features of Fonetastic. After the PIN is set on your device, the name of option changes to Change PIN. The Change PIN option helps to change the PIN.
To set the PIN, follow these steps:
Open Fonetastic.
Tap the arrow given at the bottom of the Home screen. Dashboard is displayed.
Tap the Settings icon, and then go to Account Settings.
Tap Set PIN.
Enter New PIN, Re-Enter new PIN, and then tap Save. You have set PIN.
To change the PIN, follow these steps:
Open Fonetastic.
Chapter
5

Settings
65
Tap the arrow given at the bottom of the Home screen. Dashboard is displayed.
Tap the Settings icon, and then go to Account Settings.
Tap Change PIN.
Enter Old PIN, New PIN, and Re-Enter New PIN.
Tap Save.
Responsive Dashboard card
The Set PIN Dashboard card is displayed after activating the Fonetastic application to configure new PIN. This PIN has to set to access the App Access, Vault, and Anti-Theft features.
User Details
The User Details option lets you edit the profile details. You can edit Username, Email ID, Country, and Mobile Number.
To edit user details, follow these steps:
Open Fonetastic.
Tap the arrow given at the bottom of the Home screen. Dashboard is displayed.
Tap the Settings icon, and then go to Account Settings. Tap User Details.
Edit Username, Email ID, Country, and Mobile Number.
Tap Save.
Responsive Dashboard card
Dashboard responsive card is displayed on the fifth day of registration to update the user details such as Username, Email id, and contact number.
App Settings App Settings allow you to configure the settings related to the application. App Settings include the following settings:
Set Notifications
Uninstall Protection
Intruder image Capture
Intruder Gallery
Note:
You can edit Username only once.

Settings
66
Quick Settings on Status Bar
Floating Window
One Tap Boost
Application Statistics
Manage through Web
Create Web Account
News
Set Notifications
The Set Notifications option helps to display notifications of the status of the selected feature. The notifications are displayed in the device notification area.
To set notifications, follow these steps:
Open Fonetastic.
Tap the arrow given at the bottom of the Home screen. Dashboard is displayed.
Tap the Settings icon, and then go to App Settings.
Tap Set Notifications.
Tap Turn ON/OFF all Notifications, and then select the feature to get the notifications of the selected feature.
Uninstall Protection
The Uninstall Protection option secures the Fonetastic application from being removed by any unauthorized user. It is recommended that you always keep this option enabled. In case the device is lost or stolen, no one can remove the application from the device. This will help you to connect with the device to communicate and track the device.
To enable Uninstall Protection, follow these steps:
Open Fonetastic.
Tap the arrow given at the bottom of the Home screen. Dashboard is displayed.
Tap the Settings icon, and then go to App Settings.
Tap Uninstall Protection option to enable it.
You are redirected to the Activate device administrator (ADA) screen. Read the terms and conditions on the ADA screen.
Note:
You must set PIN to access this feature. If you have already set the PIN through the other options, enter PIN, and then tap Submit.

Settings
67
To proceed further, tap Activate.
Intruder Image Capture
The Intruder Image Capture option helps to detect if any unauthorized person has accessed your application, locked applications, Vault or tries to unblock the block screen by entering the incorrect PIN. If an incorrect PIN is entered two times to open your application, locked applications or Vault, an image of that user will be captured from the front camera of the device. However, if the device does not have a front camera, no image will be captured.
To enable the Intruder Image Capture option, follow these steps:
Open Fonetastic.
Tap the arrow given at the bottom of the Home screen. Dashboard is displayed.
Tap the Settings icon, and then go to App settings.
Tap Intruder Image Capture to capture the intruder images.
Intruder Gallery
The Intruder Gallery option lets you view the intruder images. Intruder images are captured when any unauthorized user tries to access the device. If an incorrect PIN is entered two times to unlock the applications or unlock the device, an image of that user will be captured from the front camera of the device. Gallery consists of the intruder images.
To view Intruder Gallery, follow these steps:
Open Fonetastic.
Tap the arrow given at the bottom of the Home screen. Dashboard is displayed.
Tap the Settings icon, and then go to App settings.
Enter PIN. All the intruder images are displayed.
Quick Setting on Status Bar
Enable the Quick Settings on Status Bar option to have a quick access to device settings options. This option includes the following: Fonetastic app, Optimize, Clean Cache, and Scan.
To enable Quick Settings on Status Bar, follow these steps:
Open Fonetastic.
Tap the arrow given at the bottom of the Home screen. Dashboard is displayed.
Tap the Settings icon, and then go to App settings.
Note:
If your device has Fingerprint sensor, you can use your fingerprint access to view the intruder images.
Intruder Gallery can store up to ten images.

Settings
68
Tap to enable the Quick Settings on Status Bar option.
Clean Cache
To clean the cache manually. Clean Cache helps to remove the application cache, system cache, and browsing history.
To clean the device cache, follow these steps:
Open the Fonetastic quick setting notification.
Tap the Clean Cache icon on the notification. The Clean Cache screen is displayed and cleaning of cache memory will be initiated.
Note:
To clean the cache on the devices with OS 6.0, the user will be redirected to the device Settings screen to clean the cache manually.
Floating Window
The Floating Window option lets you quickly free up the memory. The Floating Window can be viewed on the Home and the Apps list screen. Tapping the Floating icon launches the floating window, which displays Switch ring and App ring along with the Status button.
Status button: Displays the percentage of currently available RAM and tapping it will free up the RAM used by the apps. The color of the ring depends on the status of the device. There are three types of the speed statuses: Low, Ok, and Good.
If the RAM is low, then status ring color changes to red.
If the RAM is OK , then status ring color changes to orange.
If the RAM is good, then status ring color changes to green.
Switch ring: Lets you toggle options such as Wi-Fi, Bluetooth, Torch Light, Brightness, Sound, Battery, and Clean cache. Touch and hold the setting to redirect you to the particular the Settings screen on your device.
App ring: Displays the running apps, and then tapping the application kills the selected application and boosts the speed of your device.
To enable Floating Window, follow these steps:
Open Fonetastic.
Tap the arrow given at the bottom of the Home screen. Dashboard is displayed.
Tap Settings, and then go to App settings.
Note:
Enable the Accessibility Service option for Fonetastic to make Floating window work more effectively. Enabling the Floating window option will force stop the running downloaded applications to free up the memory and to improve the performance of the device.
Settings
69
Tap Floating Window to enable it.
One Tap Boost
To create the Optimize shortcut on the device Home screen. This option helps you to boost the device performance with one tap. Tap One Tap Boost to create an Optimize shortcut on the device Home screen.
To enable One Tap Boost, follow these steps:
Open Fonetastic.
Tap the arrow given at the bottom of the Home screen. Dashboard is displayed.
Tap the Settings icon, and then go to App settings.
Tap One Tap Boost to enable it.
Application Statistics
Fonetastic is installed and used on a vast range of mobile devices. We strive to make our application more and more compatible with all the latest devices. To make our application more competent, we continuously carry out research on our features and applications. Hence, we collect statistics from various sources and one of the sources is the user community itself.
By enabling this option, you allow the app statistics to be shared with our server. However, clear this option if you do not want to share the phone statistics.
To enable Application Statistics, follow these steps:
Open Fonetastic.
Tap the arrow given at the bottom of the Home screen. Dashboard is displayed.
Tap the Settings icon and then go to App settings.
Tap to enable the Application Statistics option.
Manage Through Web
To manage Fonetastic on the device through the Quick Heal RDM portal, it is important that you always enable the Manage Through Web option. This option is turned ON by default. You can disable this option if you do not want to control the device through the RDM portal or the device. To enable Manage Through Web, follow these steps:
Open Fonetastic.
Tap the arrow given at the bottom of the Home screen. Dashboard is displayed.
Tap the Settings icon,and then go to App settings.
Note:
This option is turned OFF by default.

Settings
70
Tap the Manage Through Web option.
Create Web Account
To create the account on the Quick Heal RDM portal. This option is enabled only if the Manage Through Web option is enabled.
To create web account, follow these steps:
Open Fonetastic.
Tap the arrow given at the bottom of the Home screen. Dashboard is displayed.
Tap the Settings icon,and then go to App settings.
Enable Manage Through Web, and then tap Create Web Account. You will be navigated to the Quick Heal RDM portal.
News
The News option shows the news related to virus threats, new malware, or any warnings related to digital security. Fonetastic sends the news to you regularly. Latest ten messages are displayed in this section.
Help Center Fonetastic provides various methods to help you in using the app and resolve the issues. You can view Online Help, read FAQs, and check our contact numbers. Help Center includes the following options:
Help
FAQs
Contact us
Help
The online help of Fonetastic is available on the device after you install Fonetastic. To know about the features and to configure them, you can access the Help. Tap Help, you will be able to view the Help file.
FAQs
The FAQs option includes answers to the frequently asked questions (FAQ) related to Fonetastic. To see FAQs, tap FAQs and you will be redirected to our website.
Contact Us
You can contact us in the following ways:
Live chat
Submit query
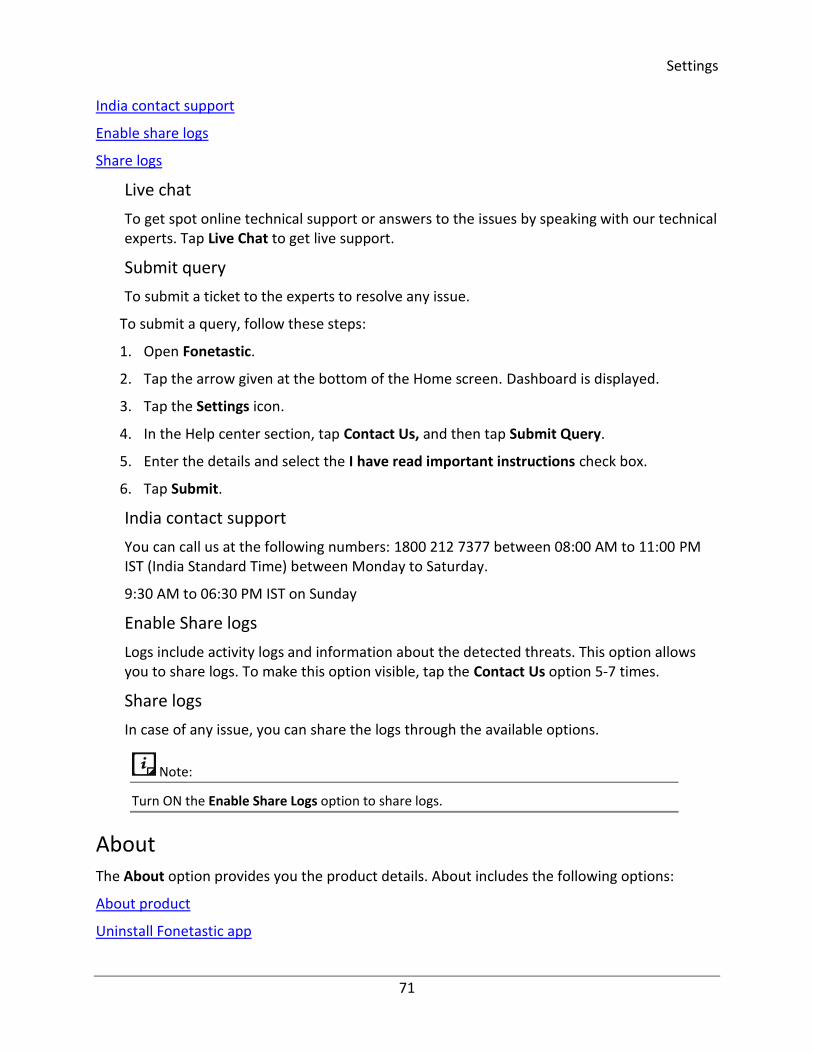
Settings
71
India contact support
Enable share logs
Share logs
Live chat
To get spot online technical support or answers to the issues by speaking with our technical experts. Tap Live Chat to get live support.
Submit query
To submit a ticket to the experts to resolve any issue.
To submit a query, follow these steps:
1. Open Fonetastic.
2. Tap the arrow given at the bottom of the Home screen. Dashboard is displayed.
3. Tap the Settings icon.
4. In the Help center section, tap Contact Us, and then tap Submit Query.
5. Enter the details and select the I have read important instructions check box.
6. Tap Submit.
India contact support
You can call us at the following numbers: 1800 212 7377 between 08:00 AM to 11:00 PM IST (India Standard Time) between Monday to Saturday.
9:30 AM to 06:30 PM IST on Sunday
Enable Share logs
Logs include activity logs and information about the detected threats. This option allows you to share logs. To make this option visible, tap the Contact Us option 5-7 times.
Share logs
In case of any issue, you can share the logs through the available options.
About The About option provides you the product details. About includes the following options:
About product
Uninstall Fonetastic app
Note:
Turn ON the Enable Share Logs option to share logs.

Settings
72
How to use?
About Product
This section provides information on license details, product details, and other information.
To get product details, follow these steps:
Open Fonetastic.
Tap the arrow given at the bottom of the Home screen. Dashboard is displayed.
Tap the Settings icon.
In the About section, tap About Product. The Virus Database, Build Version, License Information, and Liable Validity period are displayed.
To update the Virus database, tap Update.
Tap Renew to renew the license. The Renew License screen is displayed.
Uninstall Fonetastic App
Removing Fonetastic from the device leaves the device insecure to virus threats. However, in case you change the device or you need to format the device, you may need to uninstall Fonetastic.
To uninstall Fonetastic, follow these steps:
Open Fonetastic.
Tap the arrow given at the bottom of the Home screen. Dashboard is displayed.
Tap the Settings icon.
In the About section, tap Uninstall Fonetastic App. A confirmation screen appears.
Tap Continue.
Type PIN for authentication, if PIN is not set, the app will directly start the license uninstallation process.
How to use?
This section gives you a brief demo on how to use the Fonetastic application.
We have covered the basics in this section for better understanding of the application.
Note:
It is recommended to deactivate the product from the RDM portal before uninstalling it from the device.
Index
73
Index
About ................................................................................ 71
About Product ................................................................... 72
product key, license expiry date .................................. 72
Access Anti-Theft through Fingerprint .............................. 53
Access to Accounts ........................................................... 47
Account Settings ............................................................... 64
Activating Quick Heal RDM ................................................. 5
Add Images & Videos to Vault .......................................... 41
Adding a device to Quick Heal RDM ............................. 7, 10
Alert on Call Rejection ...................................................... 44
Android screen resolutions ................................................. 2
Android Versions ................................................................ 2
Anti-Theft .................................................................... 53, 54
Antivirus ............................................................................ 48
App Access ........................................................................ 33
App Settings ...................................................................... 65
Application Statistics ......................................................... 69
Auto Battery Saving Mode ................................................ 24
Auto Cleaning.................................................................... 26
Auto Optimize ................................................................... 20
Background Scan ............................................................... 51
Battery .............................................................................. 22
Block a Custom Series ....................................................... 44
Block all International calls ............................................... 44
Block Message from keywords ......................................... 44
Block Number ................................................................... 42
Block phone if a new SIM is inserted, to avoid intrusion .. 55
Block Phone when Airplane mode is turned on ................ 55
Block WAP/PUSH SMS ...................................................... 45
Block Websites .................................................................. 58
Blocked List ....................................................................... 43
Browsing and Phishing ...................................................... 52
Call to TRAI ........................................................................ 45
Capture Image Remotely .................................................. 56
Capture Media .................................................................. 47
Change PIN........................................................................ 64
Clean Cache ...................................................................... 68
Clear Browser history........................................................ 26
Configure Battery Saving Mode ........................................ 24
Contact US ........................................................................ 70
Contacts Vault ................................................................... 37
Cost you Money ................................................................ 46
Create Secure Camera Shortcut ....................................... 42
Create Vault shortcut ....................................................... 41
Custom Plan ..................................................................... 32
Customize the block screen .............................................. 55
Data Usage ....................................................................... 29
Delete Personal Data ........................................................ 28
Dial Call Remotely ............................................................ 56
Document Vault ............................................................... 39
Downloading Fonetastic ..................................................... 2
Enable Share Logs............................................................. 71
Enter a number to block ................................................... 43
Enter Number ................................................................... 38
FAQs ................................................................................. 70
Floating Window .............................................................. 68
Fonetastic ........................................................................... 1
Format phone ................................................................... 21
From Call Logs .................................................................. 38
From Contacts .................................................................. 38
Gallery Vault ..................................................................... 40
Help .................................................................................. 70
Help Center ...................................................................... 70
How to unblock your Anti-theft block screen? ................. 57
How to use ....................................................................... 72
India Contact Support ...................................................... 71
Installing Fonetastic ........................................................... 3
Intruder gallery ................................................................. 67
Intruder Image Capture .................................................... 67
List of Excluded Websites ................................................. 60
List of Threats ................................................................... 49
List of trusted SIMs ........................................................... 55
List of Uninstalled Apps .................................................... 20
Live Chat ........................................................................... 71
Lock Phone Remotely ....................................................... 56
Manage Through Web
Monthly Plan .................................................................... 30
Move Data from Internal Storage to SD card ................... 27
Move Data from SD Card to Internal Storage ................... 27
News................................................................................. 70
Notify on SIM change ....................................................... 55
One Tap Boost .................................................................. 69
Optimize ........................................................................... 18
Optimize Device

Settings
74
save power, speed up device, manage network connections ...................................................... 18, 33
Optimize Now ................................................................... 19
Personal Data .................................................................... 47
Phone Tracker ................................................................... 54
Pickup Call Remotely ........................................................ 56
Prerequisites ....................................................................... 2
Privacy .............................................................................. 33
Privacy Advisor .................................................................. 46
Product Key
inside box, email id ........................................................ 2
Quarantined ...................................................................... 50
Quick Heal RDM
creating account, adding device .................................... 8
Quick Setting on Status Bar .............................................. 67
RAM used by installed Apps ............................................. 20
Reactivating Fonetastic ..................................................... 12
Record Audio Remotely .................................................... 57
Record Video Remotely .................................................... 56
Register Product
through Internet and SMS ............................................. 4
Register with DND ............................................................. 45
Registering
licensed version, free trial ............................................. 4
Registering Fonetastic......................................................... 4
Registering licensed version ............................................... 4
Remote Actions................................................................. 56
Renewal of Fonetastic....................................................... 13
Request Device Admin ...................................................... 47
Resolved ........................................................................... 50
Responsive Dashboard card .............................................. 33
Ring Phone Remotely ........................................................ 56
Risk Settings ...................................................................... 61
Scan from Cloud ................................................................ 52
Scan Now .......................................................................... 49
Schedule Scan ................................................................... 51
Scramble Keyboard ........................................................... 35
Secure ............................................................................... 48
Secure Settings ................................................................. 61
Security Advisor ................................................................ 61
Select categories to Block................................................. 59
Set Data Plan .................................................................... 30
Set Notifications ............................................................... 66
Settings ............................................................................. 64
Share Logs ........................................................................ 71
Show Charging Screen ...................................................... 22
Show prompt to lock newly installed apps ....................... 34
Signing up with Quick Heal RDM ........................................ 9
Signing up with Quick Heal RDM using Google account7, 10
SMS to TRAI ...................................................................... 45
Spam messages ................................................................ 46
Speed................................................................................ 19
Storage ............................................................................. 25
Submit Query ................................................................... 71
Summary .............................................................. 20, 26, 30
Supported Android
versions, screen resolutions .......................................... 2
System requirements ......................................................... 2
Trace phone remotely ...................................................... 56
Track your Location .......................................................... 47
Uninstall Fonetastic .......................................................... 72
Uninstall Protection.......................................................... 66
Uninstallation Protection
Activate device administrator ..................................... 66
Unresolved ....................................................................... 49
Use your Networks ........................................................... 47
User Details ...................................................................... 65
Vault ................................................................................. 36
View Intruder images ....................................................... 54
View Intruder Images ................................................. 35, 41
Vulnerability Scan ............................................................. 52
Wipe Data Remotely ........................................................ 56


![Solution Manual for Semiconductor Devices--Physics and Technology [Sze, S. M] Solution](https://static.fdocuments.in/doc/165x107/552a98914a79598a6d8b463c/solution-manual-for-semiconductor-devices-physics-and-technology-sze-s-m-solution.jpg)