MS 10325A Microsoft Automating Administration With Windows PowerShell 2.0 LabManual-LMS - 2010
370
OFFICIAL MICROSOFT LEARNING PRODUCT 10325A Lab Instructions and Answer Key: Automating Administration with Windows PowerShell® 2.0
description
MS 10325A Microsoft Automating Administration With Windows PowerShell 2.0 LabManual-LMS - 2010
Transcript of MS 10325A Microsoft Automating Administration With Windows PowerShell 2.0 LabManual-LMS - 2010

O F F I C I A L M I C R O S O F T L E A R N I N G P R O D U C T
10325A Lab Instructions and Answer Key: Automating Administration with Windows PowerShell® 2.0
Information in this document, including URL and other Internet Web site references, is subject to change without notice. Unless otherwise noted, the example companies, organizations, products, domain names, e-mail addresses, logos, people, places, and events depicted herein are fictitious, and no association with any real company, organization, product, domain name, e-mail address, logo, person, place, or event is intended or should be inferred. Complying with all applicable copyright laws is the responsibility of the user. Without limiting the rights under copyright, no part of this document may be reproduced, stored in or introduced into a retrieval system, or transmitted in any form or by any means (electronic, mechanical, photocopying, recording, or otherwise), or for any purpose, without the express written permission of Microsoft Corporation.
Microsoft may have patents, patent applications, trademarks, copyrights, or other intellectual property rights covering subject matter in this document. Except as expressly provided in any written license agreement from Microsoft, the furnishing of this document does not give you any license to these patents, trademarks, copyrights, or other intellectual property.
The names of manufacturers, products, or URLs are provided for informational purposes only and Microsoft makes no representations and warranties, either expressed, implied, or statutory, regarding these manufacturers or the use of the products with any Microsoft technologies. The inclusion of a manufacturer or product does not imply endorsement of Microsoft of the manufacturer or product. Links may be provided to third party sites. Such sites are not under the control of Microsoft and Microsoft is not responsible for the contents of any linked site or any link contained in a linked site, or any changes or updates to such sites. Microsoft is not responsible for webcasting or any other form of transmission received from any linked site. Microsoft is providing these links to you only as a convenience, and the inclusion of any link does not imply endorsement of Microsoft of the site or the products contained therein.
© 2010 Microsoft Corporation. All rights reserved.
Microsoft and the trademarks listed at http://www.microsoft.com/about/legal/en/us /IntellectualProperty/Trademarks/EN-US.aspx are trademarks of the Microsoft group of companies. All other marks are property of their respective owners.
Product Number: 10325A
Part Number:
Released: 09/2010

Lab Instructions: Fundamentals for Using Microsoft® Windows PowerShell® v2 1
Module 1 Lab Instructions: Fundamentals for Using Microsoft® Windows PowerShell® v2
Contents: Lab A: Using Windows PowerShell As an Interactive Command-Line Shell
Exercise 1: Searching for Text Files 4
Exercise 2: Browsing the Registry 7
Exercise 3: Discovering Additional Commands and Viewing Help 9
Exercise 4: Adding Additional Commands to Your Session 11
Exercise 5: Learning How to Format Output 13
Lab B: Using the Windows PowerShell Pipeline
Exercise 1: Stopping and Restarting a Windows Service 17
Exercise 2: Exploring Objects Returned by PowerShell Commands 19
Exercise 3: Processing PowerShell Output 21

2 Lab Instructions: Fundamentals for Using Microsoft® Windows PowerShell® v2
Lab A: Using Windows PowerShell As an Interactive Command-Line Shell
Estimated time: 50 minutes
You work as a systems administrator. You have installed Windows Server 2008 R2 and need to learn how to automate some tasks. You heard that PowerShell was great for this sort of thing and need to start learning how to use it. You have used command-line utilities in the past and want to get started working with PowerShell as quickly as possible. You’re also looking for tips on how you can discover things in PowerShell on your own.

Lab Instructions: Fundamentals for Using Microsoft® Windows PowerShell® v2 3
Lab Setup For this lab, you will be browsing the file system and Registry and learning how to use PowerShell on a domain controller using a domain administrator credential. Before you begin the lab you must:
1. Start the LON-DC1 virtual machine, and then log on by using the following credentials:
• Username: CONTOSO\administrator
• Password: Pa$$w0rd
2. Open a Windows PowerShell session as Administrator.
3. Open Windows PowerShell and execute the following command:
“These are my notes” | Out-File C:\users\Administrator\Documents\notes.txt
4 Lab Instructions: Fundamentals for Using Microsoft® Windows PowerShell® v2
Exercise 1: Searching for Text Files
Scenario You are working with another administrator on a Windows Server 2008 R2 domain controller. The other administrator had been documenting his work in a text file in a user profile, but you’re not sure which profile has the file. You are taking a colleague’s advice and starting to use PowerShell to perform tasks you would previously have done with cmd.exe to find the file.
The main tasks for this exercise are as follows:
1. Browse the local file system using familiar command prompt and/or UNIX commands.
2. View the entire contents of one user’s profile folder.
3. View a list of all text files in all users’ document folders.
Task 1: Browse the local file system using familiar command prompt and/or UNIX commands • Open Windows PowerShell and set the current location to C:\.
• Show the contents of the C:\users folder from your current location.
Hint: What command would you use to see a directory listing? Read the help for that command and see if it has a parameter that lets you specify the path of the folder that you want to see a directory listing for.
• Show the contents of the C:\users folder from within that folder.
Hint: What command would you use to change directories? Use that command to change to the C:\Users folder.

Lab Instructions: Fundamentals for Using Microsoft® Windows PowerShell® v2 5
• Create a folder called Test at the root of the C drive.
Hint: What command would you use to make a directory? Use that command to create the new folder.
• Remove the C:\Test folder.
Task 2: View the entire contents of a folder • Get the entire list of all files in all folders and subfolders of the user profile
folder for the Administrator account.
Hint: What command would you use to see a directory listing? Does that command have a parameter that would enable to you specify the path of the directory you want to see a listing for? Is there a parameter that would recurse subdirectories?
• Repeat the last activity using the shortest parameter names possible.
Hint: You only need to type enough of a parameter name so that Windows PowerShell can uniquely identify the parameter you are referring to. “-comp” is often easier to type than “-computername,” for example.

6 Lab Instructions: Fundamentals for Using Microsoft® Windows PowerShell® v2
Task 3: View a list of all text files in all users’ document folders • Get the list of all text files in all subfolders of all user profile folders.
Hint: You know the command that will list files and folders. Does that command support a parameter that would enable you to include only certain types of files, such as *.txt?
• Open the notes.txt file in the Administrator account’s documents folder in Notepad.
Results: After this exercise, you should have successfully navigated the file system, discovered the notes.txt file in the Administrator’s user profile folder, and viewed the contents of that file in notepad.

Lab Instructions: Fundamentals for Using Microsoft® Windows PowerShell® v2 7
Exercise 2: Browsing the Registry
Scenario You are working on a shared computer and want to identify differences in startup programs between different accounts. You must show the different startup programs for the current user profile and built-in accounts on screen, but you don’t have to actually do the comparison.
The main tasks for this exercise are as follows:
1. View cmdlet help.
2. Navigate the Registry.
3. Create a new PSDrive.
Task 1: View cmdlet help • View basic help information for the Get-PSDrive cmdlet using Get-Help.
• View full help information for the Get-PSDrive cmdlet using Get-Help with the -Full parameter.
Task 2: Navigate the registry • Show a list of all available PSDrives using the Get-PSDrive cmdlet.
• Change the current location to HKLM:\Software\Microsoft.
• Show a list of all available PSDrives for the Registry provider.
• Change the current location to the HKEY_CURRENT_USER registry hive and list the contents at the root of that drive.

8 Lab Instructions: Fundamentals for Using Microsoft® Windows PowerShell® v2
Task 3: Create a new PSDrive • Create a new PSDrive using the New-PSDrive cmdlet. This drive should be
named “HKU” and it should have the HKEY_USERS Registry hive as the root.
Hint: Read the help to discover the three pieces of information that the New-PSDrive cmdlet needs in order to create a new drive. The PSProvider for the Registry is called “Registry.”
• View a list of all Registry PSDrives including the HKU drive you just added using the Get-PSDrive cmdlet.
Lab Instructions: Fundamentals for Using Microsoft® Windows PowerShell® v2 9
Exercise 3: Discovering Additional Commands and Viewing Help
Scenario To properly use PowerShell, you need to know how to identify commands, discover new commands, and get help information to learn how to use commands.
The main tasks for this exercise are as follows:
1. Discover commands using aliases and aliases using commands.
2. Learn how to use the help system using Get-Help.
3. Discover new commands with Get-Command.
4. Get current, online help for a command.
Task 1: Discover commands using aliases and aliases using commands • Find the command associated with the alias “dir” using Get-Alias.
• Find other aliases for the same command using Get-Alias with the Definition parameter.
Task 2: Learn how to use the help system using Get-Help • View basic help information for the Get-Help cmdlet using that cmdlet itself.
• View the examples for Get-Help using the help proxy command.
• Show the full help for Get-Help using the help proxy command.

10 Lab Instructions: Fundamentals for Using Microsoft® Windows PowerShell® v2
Task 3: Discover new commands with Get-Command • Find all commands with “Service” in their name using Get-Command and
wildcards.
• View basic help information for Get-Command using the help command.
• Find all commands of type cmdlet with “Service” in their name using Get-Command, wildcards and the CommandType parameter.
• Find all commands with the “Service” noun using Get-Command with the Noun parameter.
Task 4: Get current, online help for a command • Get the current, online help for the Get-Service cmdlet using the Get-Help
cmdlet.
Results: After this exercise, you should know how to discover commands using aliases or wildcards, how to look up different parts of help information for a command, how to use help information to learn how to use a command, and how to get current help online.

Lab Instructions: Fundamentals for Using Microsoft® Windows PowerShell® v2 11
Exercise 4: Adding Additional Commands to Your Session
Scenario When working with some Windows components and server products, you must load modules or snap-ins to be able to access the commands they provide.
The main tasks for this exercise are as follows:
1. Find all “Module” commands.
2. List all modules that are available.
3. Load the ServerManager module into the current session.
4. View all commands included in the ServerManager module.
Task 1: Find all “Module” commands • Show all “Module” commands using Get-Command so you know what is
used to manage modules.
Task 2: List all modules that are available • List all modules that are available on the current system using Get-Module.
Hint: You can also get a directory listing of the $pshome/modules folder.
Task 3: Load the ServerManager module into the current session • View basic help documentation and examples for Import-Module so that you
know what modules are and how to load them.
• Load the ServerManager module into the current session.
12 Lab Instructions: Fundamentals for Using Microsoft® Windows PowerShell® v2
Task 4: View all commands included in the ServerManager module • Show a list of all commands that are part of the ServerManager module using
Get-Command.
• Get a list of the Windows roles and features that are installed or available on the current system using Get-WindowsFeature.
Results: After this exercise, you should be able to view and load modules into PowerShell and show what commands they contain.

Lab Instructions: Fundamentals for Using Microsoft® Windows PowerShell® v2 13
Exercise 5: Learning How to Format Output
Scenario When viewing data in PowerShell, you can format the output to get the results you need.
The main tasks for this exercise are as follows:
1. View the default table format for a command.
2. View the default list and wide formats for a command.
Task 1: View the default table format for a command • View a list of all processes whose names start with “w” using the Get-Process
command.
• Show the default table view for process objects using the same command but passing the results to Format-Table.
Task 2: View the default list and wide formats for a command • Using the same Get-Process command, show the default list view for process
objects by passing the results to Format-List.
• Using the same Get-Process command, show the default wide view for process objects by passing the results to Format-Wide.
Results: After this exercise, you should be able to show PowerShell output in table, list and wide formats using default views.

Lab Instructions: Fundamentals for Using Microsoft® Windows PowerShell® v2 15
Lab B: Using the Windows PowerShell Pipeline
Estimated time: 30 minutes
You are the server administrator in an enterprise. You have a computer on which you want to make administrative changes, such as working with Services. Working with those services using the GUI adds administrative overhead, so you wish to use Windows PowerShell to accomplish the necessary tasks. To better understand how Windows PowerShell interacts with those services, you also need to explore the members, properties, and output options for the necessary commands.

16 Lab Instructions: Fundamentals for Using Microsoft® Windows PowerShell® v2
Lab Setup For this lab, you will be browsing the stopping and restarting services and viewing event log entries on a domain controller using a domain administrator credential. Before you begin the lab, you must:
1. Start the LON-DC1 virtual machine. You do not need to log on, but wait until the boot process is complete.
2. Start the LON-CLI1 virtual machine, and then log on by using the following credentials:
• Username: CONTOSO\administrator
• Password: Pa$$w0rd
3. Open a Windows PowerShell session as Administrator.

Lab Instructions: Fundamentals for Using Microsoft® Windows PowerShell® v2 17
Exercise 1: Stopping and Restarting a Windows Service
Scenario You have used PowerShell to view processes and services on various computers and now you want to perform some tasks to change the configuration on a computer.
The main tasks for this exercise are as follows:
1. View the Windows Update service details.
2. Determine what would happen if you stopped the Windows Update service.
3. Stop the Windows Update service with confirmation.
4. Restart the Windows Update service.
Task 1: View the Windows Update service • Open Windows PowerShell.
• Use the Get-Service cmdlet to view the Windows Update service.
Hint: Do not run Get-Service by itself. Rather, include a parameter so that only the Windows Update service is returned.
Task 2: Determine what would happen if you stopped the service • Use a pipeline to pass the results of your last Get-Service call to the Stop-
Service cmdlet with the WhatIf parameter to see what would happen.
Task 3: Stop the Windows Update service with confirmation • Use a pipeline to pass the results of your last Get-Service call to the Stop-
Service cmdlet with the Confirm parameter. When you are prompted press Y to stop the service.

18 Lab Instructions: Fundamentals for Using Microsoft® Windows PowerShell® v2
Task 4: Restart the Windows Update service • Use a pipeline to pass the results of your last Get-Service call to the Start-
Service cmdlet to restart the service.
Results: After this exercise, you should have successfully stopped and restarted the Windows Update service and learned about how the WhatIf and Confirm common parameters can prevent accidental changes.

Lab Instructions: Fundamentals for Using Microsoft® Windows PowerShell® v2 19
Exercise 2: Exploring Objects Returned by PowerShell Commands
Scenario You are using PowerShell to manage files and services and you know that everything returned by the commands you use are objects. You want to learn more about the properties and methods on those objects so that you can use them directly in your work to generate the reports you need.
The main tasks for this exercise are as follows:
1. View cmdlet help.
2. Get visible members for Service objects.
3. Get properties for Service objects.
4. Get all members for Service objects.
5. Get base and adapted or extended members for Service objects.
6. Find properties by wildcard search and show them in a table.
Task 1: View cmdlet help • View full help information for the Get-Member cmdlet.
Task 2: Get visible members for Service objects • Use Get-Member in a pipeline to show all visible members for Service objects.
Task 3: Get properties for Service objects • Use Get-Member in a pipeline to show all properties that are available for
Service objects.

20 Lab Instructions: Fundamentals for Using Microsoft® Windows PowerShell® v2
Task 4: Get all members for Service objects • Use Get-Member in a pipeline to show all members that are available for
Service objects.
Task 5: Get base and extended or adapted members for Service objects • Use Get-Member in a pipeline to show a view containing all of the original
(without extension or adaptation) members that are available in Service objects.
• Use Get-Member in a pipeline to show a view containing all of the extended and adapted members that are available in Service objects.
Task 6: Find properties by wildcard search and show them in a table • Get a list of all files and folders (hidden and visible) at the root of the C: drive.
• Show all properties on files and folders that contain the string “Time”.
• Generate a table showing all files and folders at the root of the C: drive with their name, creation time, last access time and last write time.
Hint: The Get-Member cmdlet supports several parameters that let you customize the information it provides.
Results: After this exercise, you should be able to use Get-Member to discover properties and methods on data returned from PowerShell cmdlets and use that information to format tables with specific columns.

Lab Instructions: Fundamentals for Using Microsoft® Windows PowerShell® v2 21
Exercise 3: Processing PowerShell Output
Scenario You have used PowerShell to generate output in the PowerShell console, and now you would like to save the output to a file or work with the output in a Windows dialog so that you can sort and filter the output to get the results you need.
The main tasks for this exercise are as follows:
1. List all commands that are designed to process output.
2. Show the default output for a command.
3. Send command output to a file.
4. Send command output to a grid and sort and filter the results.
Task 1: List all commands that are designed to process output • Show all commands with the verb “Out” in their name.
Hint: The Get-Command cmdlet supports parameters that let you customize its behavior. For example, one parameter enables you to only retrieve the cmdlets that have a particular verb.
Task 2: Show the default output for a command • Review the help information for the Get-EventLog cmdlet including the
parameters and the examples so that you understand how it works.
• Show the 100 most recent events from the System event log of type warning or error in the default output.
Note: The Get-EventLog cmdlet includes several parameters that can help filter the type of information that the cmdlet returns.

22 Lab Instructions: Fundamentals for Using Microsoft® Windows PowerShell® v2
Task 3: Send command output to a file • Pipe the results of the same command you used to get the 100 most recent
events from the System event log of type warning or error to a file using the appropriate “Out” command.
Task 4: Send command output to a grid and sort and filter the results • Pipe the results of the same command you just used to get event log data to
the “Out” command that displays a grid view.
• Sort the results in the grid by InstanceId in descending order.
• Filter the results in the grid to show only one InstanceId.
Results: After this exercise, you should know how to use PowerShell commands to redirect output to files or a grid view, and how to sort and filter data in the grid view.

Lab Instructions: Understanding and Using the Formatting System 1
Module 2 Lab Instructions: Understanding and Using the Formatting System
Contents: Lab: Using the Formatting Subsystem
Exercise 1: Displaying Calculated Properties 4
Exercise 2: Displaying a Limited Number of Columns 6
Exercise 3: Displaying All Properties and Values of Objects 7
Exercise 4: Viewing Objects via HTML 8
Exercise 5: Displaying a Limited Number of Properties 9
Exercise 6: Displaying Objects Using Different Formatting 10
Exercise 7: Displaying a Sorted List of Objects 11

2 Lab Instructions: Understanding and Using the Formatting System
Lab: Using the Formatting Subsystem
Estimated time: 20 minutes You are a system administrator for a company and work with a team of developers. Recently, some users have complained about an in-house developed application. The developers have asked you to monitor the processes associated with the troubled application and let them have easy access to the data. You have decided to provide them with that information via an HTML-based page so they can easily view the information in a Web browser. You also want to customize your view of this information as you view it in the PowerShell console.

Lab Instructions: Understanding and Using the Formatting System 3
Lab Setup For this lab, you will use the available virtual machine environment. Before you begin the lab, you must:
1. Start the LON-DC1 virtual machine. You don’t need to log on but wait until the boot process is complete.
2. Start the LON-SVR1 virtual machine, and then log on by using the following credentials:
• Username: CONTOSO\administrator
• Password: Pa$$w0rd
3. Open a Windows PowerShell session as Administrator.

4 Lab Instructions: Understanding and Using the Formatting System
Exercise 1: Displaying Calculated Properties
Scenario You need to check the status of processes on your server, and you want to display their status and also show custom properties in a table format.The main tasks for this exercise are as follows:
1. Retrieve a list of processes.
2. Display a table of objects.
3. Select the properties to display.
4. Use calculated properties to show a custom property.
Task 1: Retrieve a list of processes • Open Windows PowerShell and retrieve a list of running processes.
Task 2: Display a table of objects • Show the list of running processes formatted as a table.
Task 3: Select the properties to display • Show the list of running processes formatted as a table showing only the CPU,
Id, and ProcessName values.

Lab Instructions: Understanding and Using the Formatting System 5
Task 4: Use calculated properties to show a custom property • Show the list of running processes formatted as a table showing the CPU, Id,
ProcessName values, and a custom property named TotalMemory, which is the sum of the physical and virtual memory used for each process.
Hint: Just add the values together—don’t be concerned if one is displayed in KB and the other in MB.
Results: After this exercise, you will have displayed the CPU, ID and ProcessName values of all the running processes. You also will have created a custom property adding the physical and virtual memory using calculated properties.

6 Lab Instructions: Understanding and Using the Formatting System
Exercise 2: Displaying a Limited Number of Columns
Scenario You need to display a list of services on your systems. You need to filter out some of the columns that you don’t need when reviewing the status of the services.The main tasks for this exercise are as follows:
1. Retrieve a list of services.
2. Display a specific number of columns from a collection of objects.
Task 1: Retrieve a list of services • Retrieve a list of services.
Task 2: Display a specific number of columns from a collection of objects • Retrieve a list of services and display only the Status and Name properties.
Results: After this exercise, you will have displayed a specific number of columns from all the installed services instead of displaying all their default properties.

Lab Instructions: Understanding and Using the Formatting System 7
Exercise 3: Displaying All Properties and Values of Objects
Scenario You often retrieve a list of processes from your systems and need to display all the properties and values of the services and not just the default values normally display.The main tasks for this exercise are as follows:
1. Retrieve a list of processes.
2. Display every property and value for all the objects.
Task 1: Retrieve a list of processes • Retrieve a list of processes.
Task 2: Display every property and value for all the objects • Retrieve a list of processes and display all their properties and values.
Results: After this exercise, you will have displayed all of the properties of all of the running processes instead of displaying only their default properties.

8 Lab Instructions: Understanding and Using the Formatting System
Exercise 4: Viewing Objects via HTML
Scenario You have been asked by the development team to post a log of entries from one server’s application event log. You have decided to automate the gathering of the information and are posting it on an internal Web site for the developers to review.The main tasks for this exercise are as follows:
1. Retrieve a list of event log entries.
2. Convert a list of event log entries to HTML.
3. Use a custom title for an HTML page.
4. View an HTML page in the default Web browser.
Task 1: Retrieve a list of event log entries • Retrieve the newest 25 events from the Windows Application event log.
Task 2: Convert a list of event log entries to HTML • Retrieve the newest 25 events from the Windows Application event log and
convert the events as HTML and save the results to a file.
Task 3: Use a custom title for an HTML page • Retrieve the newest 25 events from the Windows Application event log and
convert the events as HTML file while changing its title to Last 25 events and save the results to a file.
Task 4: View an HTML page in the default Web browser • View the resulting file from the previous task in the default Web browser
(Hint: use Invoke-Item).
Results: After this exercise, you will have displayed a customized HTML page that contains a listing of the 25 newest events from the Windows Application event log.

Lab Instructions: Understanding and Using the Formatting System 9
Exercise 5: Displaying a Limited Number of Properties
Scenario You need to review the length of certain files in a particular directory and want to use PowerShell to accomplish this task.The main tasks for this exercise are as follows:
1. Display a list of files from a selected folder.
2. Display a table with several different file properties.
Task 1: Display a list of files from a selected folder • Retrieve a list of all the files that start with au and end with .dll from the
C:\Windows\System32 directory.
Task 2: Display a table with several different file properties • Retrieve a list of all the files of that start with au and end with .dll from the
C:\Windows\System32 directory and display the Name, Length and Extension properties using a table.
Results: After this exercise, you will have displayed a table containing the Name, Length and Extension properties of all the files in C:\Windows\System32 that start with au and have the extension .dll.

10 Lab Instructions: Understanding and Using the Formatting System
Exercise 6: Displaying Objects Using Different Formatting
Scenario You often use PowerShell to verify the status of processes and services and want to know how to change the way that the information is displayed in the console.The main tasks for this exercise are as follows:
1. Retrieve a list of services.
2. Display a table showing only a few specific properties.
3. Display a table by eliminating any empty spaces between columns.
Task 1: Retrieve a list of services • Retrieve a list of services.
Task 2: Display a table showing only a few specific properties • Retrieve a list of services and display only the DisplayName, Status and
DependentServices properties using a table.
Task 3: Display a table by eliminating any empty spaces between columns • Retrieve a list of services and display only the DisplayName, Status and
DependentServices properties using a table and eliminating any empty spaces between columns.
Results: After this exercise, you will have displayed a table of all the installed services by displaying only the DisplayName, Status, and DependentServices properties. You have also removed any empty spaces between each column.

Lab Instructions: Understanding and Using the Formatting System 11
Exercise 7: Displaying a Sorted List of Objects
Scenario You use PowerShell to view the status of processes and services and want to modify how some of the columns display data and even possibly create new customized columns.The main tasks for this exercise are as follows:
1. Retrieve a list of services.
2. Display a table while sorting a specific property.
Task 1: Retrieve a list of services • Retrieve a list of services.
Task 2: Display a table while sorting a specific property • Retrieve a list of services and display a table showing the services by sorting on
the Status property.
Results: After this exercise, you will have displayed a table of the installed services sorted by their Status property.

Lab Instructions: Core Windows PowerShell® Cmdlets 1
Module 3 Lab Instructions: Core Windows PowerShell® Cmdlets
Contents: Lab A: Using the Core Cmdlets
Exercise 1: Sorting and Selecting Objects 4
Exercise 2: Retrieving a Number of Objects and Saving to a File 5
Exercise 3: Comparing Objects Using XML 6
Exercise 4: Saving Objects to a CSV File 8
Exercise 5: Measuring a Collection of Objects 9
Lab B: Filtering and Enumerating Objects in the Pipeline
Exercise 1: Comparing Numbers (Integer Objects) 13
Exercise 2: Comparing String Objects 14
Exercise 3: Retrieving Processes from a Computer 15
Exercise 4: Retrieving Services from a Computer 16
Exercise 5: Iterating Through a List of Objects 17
Lab C: Using Pipeline Parameter Binding
Exercise 1: Using Advanced Pipeline Features 22
Exercise 2: Working with Multiple Computers 23
Exercise 3: Stopping a List of Processes 25
Exercise 4: Binding Properties to Parameters 27

2 Lab Instructions: Core Windows PowerShell® Cmdlets
Lab A: Using the Core Cmdlets
Estimated time: 30 minutes
You work as a system administrator in a small company. The company you work with has not invested in an enterprise-class monitoring solution. As a result, you have to do a lot of performance monitoring and capacity management/trending. One of your duties is to log in to servers and gather some basic statistics, which you do on an almost daily basis. You would like to keep a record of their current status by saving a file locally on the server as a future reference.

Lab Instructions: Core Windows PowerShell® Cmdlets 3
Lab Setup For this lab, you will use the available virtual machine environment. Before you begin the lab, you must:
1. Start the LON-DC1, LON-SVR1, and LON-SVR2 virtual machines, and then log on by using the following credentials:
• Username: CONTOSO\administrator
• Password: Pa$$w0rd
2. Disable the Windows Firewall on LON-DC1, LON-SVR1, and LON-SVR2. You can do this from Start | Control Panel | Windows Firewall. There, click the link to Turn Windows Firewall on or off, and Turn off the Windows Firewall for all network locations.
Note: This is not security best practice and under no circumstances should this be done in a production environment. Using Windows PowerShell doesn’t necessarily require the Windows Firewall to be completely disabled. However, purely for the learning purposes of this class, we will disable the firewall on all machines for all labs in order to focus our attentions on PowerShell as opposed to firewall configurations to get a better understanding of the powershell concepts involved.

4 Lab Instructions: Core Windows PowerShell® Cmdlets
Exercise 1: Sorting and Selecting Objects
Scenario You often check the status of processes on your server and would like to sort the processes so you can easily view their status.
The main tasks for this exercise are carried out on LON-SVR1 and are as follows
1. Retrieve a list of processes.
2. Sort a list of processes.
3. Select a certain number of processes.
Task 1: Retrieve a list of processes • Open Windows PowerShell and retrieve a list of running processes.
Task 2: Sort a list of processes • Retrieve a list of running processes and sort them.
Task 3: Select a certain number of processes • Retrieve a list of running processes, sort them, and select only the first five.
Results: After this exercise, you will have retrieved a list of first 5 services sorted alphabetically by their service name.

Lab Instructions: Core Windows PowerShell® Cmdlets 5
Exercise 2: Retrieving a Number of Objects and Saving to a File
Scenario You are currently having problems with an application, and want to check for the last five events in the Windows Application event log.
The main tasks for this exercise are carried out on LON-SVR1 and are as follows
1. Retrieve a list of event logs.
2. Retrieve a certain number of events.
3. Export a certain number of events to a file.
Task 1: Retrieve a list of event logs • Retrieve a list of the Windows event logs.
Task 2: Retrieve a certain number of events • Retrieve a list of the five newest/most recent events in the Windows
Application event log.
Task 3: Export a certain number of events to a file • Retrieve a list of the five newest/most recent events in the Windows
Application event log and export the events to a CSV formatted file.
Results: After this exercise, you will have exported the five most recent events from the Windows Application event log to a CSV file.

6 Lab Instructions: Core Windows PowerShell® Cmdlets
Exercise 3: Comparing Objects Using XML
Scenario You suspect that the status of a service is changing, and want to monitor that status of the service so you can determine if its status has changed.
The main tasks for this exercise are carried out on LON-SVR1 and are as follows:
1. Retrieve a list of services.
2. Save a list of services to a XML formatted file.
3. Stop a service.
4. Compare services with different statuses.
5. Restart a service.
Task 1: Retrieve a list of services • Retrieve a list of services.
Task 2: Save a list of services to an XML formatted file • Retrieve a list of services and save the listing to an XML formatted file.
Task 3: Stop a service • Stop and thus change the status of the Windows Time service (“w32time”).

Lab Instructions: Core Windows PowerShell® Cmdlets 7
Task 4: Compare services with different statuses • Retrieve a new list of services and save the listing to an XML formatted file.
(Use a different file name than what was used in Task 2.)
• Using the data from the XML formatted files, compare the old and new list of services by comparing the Status property.
Hint: When you specify a comparison property for the Compare-Object cmdlet, you can include more than one property. To do so, provide list of properties for the cmdlet’s -property parameter, inserting a comma between each property. For example, if you tell it only to compare the Status property, you will not be able to see the name of the service. If you include both the State and Name properties, then you will see the name of the service.
Task 5: Restart a service • Change the status of the Windows Time service back to its original state.
Results: After this exercise, you will have determined that the Status property of two service objects has changed after the Windows time service was modified.

8 Lab Instructions: Core Windows PowerShell® Cmdlets
Exercise 4: Saving Objects to a CSV File
Scenario You want to get a list of processes in a format that could be readable by Microsoft Excel to produce management reports and metrics.
The main tasks for this exercise are carried out on LON-SVR1 and are as follows
1. Retrieve a list of processes.
2. Export a list of processes to a file.
3. Use a non-default separator.
Task 1: Retrieve a list of processes • Retrieve a list of running processes.
Task 2: Export a list of processes to a file • Retrieve a list of running processes and export them to a CSV formatted file.
Task 3: Use a non-default separator • Retrieve a list of running processes and export them to a CSV formatted file,
but use a semi-colon “;” as the delimiter.
Results: After this exercise, you will have exported a list of processes to a CSV file using the default separator “,”, and the non-default separator “;”.

Lab Instructions: Core Windows PowerShell® Cmdlets 9
Exercise 5: Measuring a Collection of Objects
Scenario You are getting reports that there seem to be problems with one of the servers you are monitoring, and want to get a quick report of the CPU time used by processes on the server.
The main tasks for this exercise are carried out on LON-SVR1 and are as follows
1. Retrieve a list of processes.
2. Measure the average, maximum, minimum, and average of a collection.
Task 1: Retrieve a list of processes • Retrieve a list of the running processes.
Task 2: Measure the average, maximum and minimum of a collection • Retrieve a list of the running processes and measure the average, maximum,
and minimum of the CPU property of the entire collection.
Results: After this exercise, you will have measured the average, minimum and maximum values of the CPU property of all the running processes.

Lab Instructions: Core Windows PowerShell® Cmdlets 11
Lab B: Filtering and Enumerating Objects in the Pipeline
Estimated time: 30 minutes You are a system administrator. One of your tasks in the morning as your shift is starting is to check the status of the processes and services for the servers you are responsible for. Lately, you have a particular service installed on several computers that have been having issues. Your corporate monitoring solution has not always been alerting that the service has stopped running.

12 Lab Instructions: Core Windows PowerShell® Cmdlets
Lab Setup For this lab, you will use the available virtual machine environment. Before you begin the lab, you must:
1. Start the LON-DC1 virtual machine. You do not need to log on, but wait until the boot process is complete.
2. Start the LON-SVR1 virtual machine, and then log on by using the following credentials:
• Username: CONTOSO\administrator
• Password: Pa$$w0rd
3. Start the LON-SVR2 virtual machine. You do not need to log on at this time.
4. Open a Windows PowerShell session as Administrator.

Lab Instructions: Core Windows PowerShell® Cmdlets 13
Exercise 1: Comparing Numbers (Integer Objects)
Scenario You need to check the status of processes and services on your server; however, before you begin, verify that PowerShell’s comparison capabilities can indeed compare simple and complex expressions.
Note: An integer object is any whole number, such as 4 or 5. Numbers that have a fraction, such as 2.3, are not integers. Windows PowerShell can sometimes interpret a string as a number, when the number is enclosed in quotation marks, such as “7.” However, integers are not normally enclosed in quotation marks.
The main tasks for this exercise are carried out on LON-SVR1 and are as follows:
1. Compare using a simple expression.
2. Compare more complex expressions.
Task 1: Compare using a simple expression • Open Windows PowerShell and create an expression that determines
whether 3 is greater than 5.
Task 2: Compare using a more complex expression • Create a complex expression that determines whether 3 is smaller than 4 and
5 is equal to 5.
Results: After this exercise, you will have determined that 3 is smaller than 5 by having True returned, and also that the complex expression that compares whether 3 is smaller than 4 and 5 is equal to 5 resolves to True because both sides of the complex expression alone resolve to True.

14 Lab Instructions: Core Windows PowerShell® Cmdlets
Exercise 2: Comparing String Objects
Scenario Continuing with the previous exercise, you want to expand the comparison to see how string objects compare in PowerShell. In this exercise, look at both simple as well as complex expressions.
Note: A string object is any sequence of characters that is enclosed within single or double quotation marks, such as “powershell” or ‘windows.’
The main tasks for this exercise are carried out on LON-SVR1 and are as follows:
1. Compare using a simple expression.
2. Compare using a more complex expression.
Task 1: Compare using a simple expression • Create an expression that determines whether the string PowerShell is equal to
powershell.
Task 2: Compare using a more complex expression • Create a complex expression that determines whether the string logfile is equal
to logfiles and host is equal to HOST. In the latter string, use a case-sensitive expression.
Results: After this exercise, you will have determined that PowerShell is considered equal to powershell using the default comparison operators, and that the complex expression comparing logfile to logfiles and host to HOST resolves to False because one side of the complex expression alone resolves to False.
Lab Instructions: Core Windows PowerShell® Cmdlets 15
Exercise 3: Retrieving Processes from a Computer
Scenario With the previous exercises complete, you’re ready to try out PowerShell with a few administrative activities. You manage a large number of servers and would like to use PowerShell to easily query other servers to retrieve a list of the running processes.
The main tasks for this exercise are carried out on LON-SVR1 and are as follows:
1. Retrieve a list of processes.
2. Retrieve objects from a remote computer.
Task 1: Retrieve a list of processes • Retrieve a list of running processes.
Task 2: Retrieve objects from a remote computer • From LON-SVR1, retrieve a list of running processes on LON-DC1.
Results: After this exercise, you will have retrieved the list of processes running remotely on LON-DC1 from LON-SVR1.

16 Lab Instructions: Core Windows PowerShell® Cmdlets
Exercise 4: Retrieving Services from a Computer
Scenario You would like to use PowerShell to easily query other servers to retrieve a list of the services installed.
The main tasks for this exercise are carried out on LON-SVR1 and are as follows:
1. Retrieve a list of services.
2. Retrieve objects from a remote computer.
3. Filter a collection of objects.
Task 1: Retrieve a list of services • Retrieve a list of services.
Task 2: Retrieve objects from a remote computer • From LON-SVR1, retrieve a list of services from LON-DC1.
Task 3: Filter a collection of objects • From LON-SVR1, retrieve a list of services from LON-DC1 that have a name
that starts with the letter “w.”
Results: After this exercise, you will have retrieved a list of all the installed services that start with the letter w on LON-DC1 from LON-SVR1.

Lab Instructions: Core Windows PowerShell® Cmdlets 17
Exercise 5: Iterating Through a List of Objects
Scenario You have a long list of systems that you administer that includes desktops, application servers, and Active Directory servers. Often, you have to perform actions only on the application servers so you need a method to be able to filter those out from the system list.
The main tasks for this exercise are carried out on LON-SVR1 and are as follows:
1. Create a file.
2. Import the contents of a file.
3. Iterate through a list of objects.
4. Filter a list of objects.
Task 1: Create a file • Create a txt file C:\Systems.txt with the below entries. You can do this from
the powershell command line if you are able or you can open Notepad and just enter the below data, each on a single line if you need.
• LON-SVR1.contoso.com
• LON-SVR2.contoso.com
• LON-DC1.contoso.com
• LON-CLI1.contoso.com
Task 2: Import the contents of a file • Retrieve the contents of the file created.

18 Lab Instructions: Core Windows PowerShell® Cmdlets
Task 3: Iterate through a list of objects • Retrieve the contents of the created file and display all the entries in lowercase.
• Start by running the command Get-Content –Path “C:\Systems.txt” | Get-Member. Notice that the String objects each have several methods. To execute one of those methods, you will reference the String object (in a ForEach-Object script block—do so by using the $_ placeholder), type a period, then type the method name, followed by parentheses. For example, $_.ToUpper().
Task 4: Filter a list of objects • Retrieve the contents of the file created and display only the entries where the
name includes SVR.
Results: After this exercise, you will have retrieved a list of entries from a file, have changed all the characters to lowercase, and have also filtered the list of entries to return only the ones with the string SVR in the entry name.

20 Lab Instructions: Core Windows PowerShell® Cmdlets
Lab C: Using Pipeline Parameter Binding
Estimated time: 30 minutes
You are a system administrator for a company with about 100 users and desktop computers. You want to perform a set of tasks against those users and computers using Windows PowerShell. You want to accomplish those tasks using data from external files. You need to add a set of users to Active Directory, using properly-formatted and improperly-formatted CSV files. You also need to regularly reboot a set of computers based on the contents of a CSV file. Finally, you also need to stop a list of processes on computers, based on the contents of a CSV file.

Lab Instructions: Core Windows PowerShell® Cmdlets 21
Lab Setup For this lab, you will use the available virtual machine environment. Before you begin the lab, you must:
1. Start the LON-DC1 virtual machine, and then logon by using the following credentials:
• Username: CONTOSO\administrator
• Password: Pa$$w0rd
2. Start the LON-SVR1 virtual machine. You do not need to log on.
3. Start the LON-SVR2 virtual machine. You do not need to log on.
4. On LON-DC1, open a Windows PowerShell session as Administrator.

22 Lab Instructions: Core Windows PowerShell® Cmdlets
Exercise 1: Using Advanced Pipeline Features
Scenario You have created a properly-formatted CSV formatted file of new users that need to be added to your Active Directory installation. You want to use PowerShell to automate the process.
The main tasks for this exercise are as follows:
1. Import the Active Directory module.
2. Import a CSV file.
3. Create users in Active Directory using advanced pipeline features.
Task 1: Import the Active Directory module • On LON-DC1, import the Active Directory module.
Task 2: Import a CSV file • Import the CSV file E:\Mod03\Labfiles\Module3_LabC_Exercise1.csv.
Task 3: Create users in Active Directory • Using advanced pipeline features, import the CSV file
E:\Mod03\Labfiles\Module3_LabC_Exercise1.csv, and create new Active Directory users.
Results: After this exercise, you will have automated the creation of users in the contoso.com domain.

Lab Instructions: Core Windows PowerShell® Cmdlets 23
Exercise 2: Working with Multiple Computers
This is an optional exercise to complete if you have extra time, or if you want to explore on your own.
Scenario You manage several types of systems from clients, to servers, and domain controllers. You are allowed to update and reboot servers before 8AM. You have a list in a CSV file of all the systems in your company and only want to reboot the ones that are servers.
The main tasks for this exercise are carried out on LON-DC1 and are as follows:
1. Create a CSV file.
2. Import a CSV file and filter the results.
3. Restart a group of computers.
Task 1: Create a CSV file • On LON-DC1, create a CSV file C:\Inventory.csv with the below contents.
Again, you can do this from the powershell command line if you are able or you can open Notepad and just enter the below data, each on a single line if you need.
• Type,Name
• AD,LON-DC1
• Server,LON-SVR1
• Server,LON-SVR2
• Client,LON-CLI1
Task 2: Import a CSV file and filter the results • Import the CSV file created, and list only the systems where the Type is Server.

24 Lab Instructions: Core Windows PowerShell® Cmdlets
Task 3: Restart a group of computers • Import the CSV file created, and restart the systems where the Type is Server.
Note: If someone is logged in to LON-SVR1 and LON-SVR2 you may receive an error message. To overcome the error message and achieve a successful re-start the virtual machines, log off from them and then re-run the script.
Results: After this exercise, you will have restarted a filtered group of servers.

Lab Instructions: Core Windows PowerShell® Cmdlets 25
Exercise 3: Stopping a List of Processes Scenario
There are a set of inappropriate processes that are currently running on systems within your network. You have been given a CSV file that contains the list of computers and associated processes that must be stopped on each computer.
The main tasks for this exercise are as follows:
1. Start 2 applications.
2. Create a CSV file.
3. Import a CSV file and iterate through a collection of objects.
4. Stop a list of processes.
Task 1: Start two applications • On LON-DC1, open one session of Notepad and Wordpad.
Task 2: Create a CSV file • Open Windows PowerShell and create a CSV file named C:\Process.csv with
the following entries.
• Computer,ProcName
• LON-DC1,Notepad
• LON-DC1,Wordpad
Task 3: Import a CSV file and iterate through a collection of objects • Import the CSV file created in the previous task, C:\Process.csv, and select the
ProcName property to display.

26 Lab Instructions: Core Windows PowerShell® Cmdlets
Task 4: Stop a list of processes • Import the CSV file created in Task 2, C:\Process.csv, and stop each of the
processes listed.
Results: After this exercise, you will have stopped a list of processes based on values imported from a CSV file.

Lab Instructions: Core Windows PowerShell® Cmdlets 27
Exercise 4: Binding Properties to Parameters
Note: Complete this exercise only if you have finished the previous exercises and still have time remaining. If you do not have time, you can complete this exercise on your own.
Scenario You were provided a CSV formatted file with improper formatting. That file includes a second set of new users that need to be added to your Active Directory installation. You want to use PowerShell to automate the process.
The main tasks for this exercise are as follows:
1. Import a CSV file.
2. Create users in Active Directory.
Task 1: Import a CSV file • On LON-DC1, import the CSV file
E:\Mod03\Labfiles\Module3_LabC_Exercise4.csv.
Task 2: Create users in Active Directory • Import the CSV file E:\Mod03\Labfiles\Module3_LabC_Exercise4.csv and
create new Active Directory users by specifically binding properties to parameters. From the CSV file, map the properties according to the following table:
CSV file property New-ADUser parameter
EmployeeName Name and SamAccountName
Town City
Unit Department
Id EmployeeNumber

28 Lab Instructions: Core Windows PowerShell® Cmdlets
• Also, hard code the value for the Company parameter as Contoso.
Hint: You have already seen the syntax used to rename a property. You will have to repeat this syntax once for each property than you want to rename. To save typing, you may wish to complete this task in the Windows PowerShell ISE. That will allow you to type the syntax once, and then copy and paste it (and modify the values of each pasted copy) to help reduce the amount of typing.
Results: After this exercise, you will have automated the creation of 20 users in the contoso.com domain.

Lab Instructions: Windows® Management Instrumentation 1
Module 4 Lab Instructions: Windows® Management Instrumentation
Contents: Lab: Using Windows Management Instrumentation in Windows PowerShell
Exercise 1: Building Computer Inventory 4
Exercise 2: Discovering WMI Classes and Namespaces 7
Exercise 3: Generating a Logical Disk Report for All Computers 9
Exercise 4: Listing Local Users and Groups 12

2 Lab Instructions: Windows® Management Instrumentation
Lab: Using Windows Management Instrumentation in Windows PowerShell
Estimated time: 45 minutes
You work as a systems administrator, and you need to perform certain tasks against the computers, users, and groups that you manage. You need to check inventory of your computers, including the operating system versions, service pack versions, and asset tags. Your organization uses the BIOS serial number as an asset tag tracking system. You need to monitor logical drive space on multiple remote computers. You also need to generate reports showing local users and groups on those machines for audit purposes.

Lab Instructions: Windows® Management Instrumentation 3
Lab Setup For this lab, you will use the available virtual machine environment. Before you begin the lab, you must:
1. Start the LON-DC1, LON-SVR1, LON-SVR2, and LON-CLI1 virtual machines, and then log on by using the following credentials:
• Username: CONTOSO\administrator
• Password: Pa$$w0rd
2. Disable the Windows Firewall on LON-DC1, LON-SVR1, and LON-SVR2 and remain logged on to the virtual machines.
3. Disable the Windows Firewall on LON-CLI1 and also remain logged onto this virtual machine.
4. On LON-CLI1, open the Windows PowerShell console. All PowerShell commands will be run within the Windows PowerShell console.
5. On virtual machine LON-CLI1, create a text file containing the names of all computers in the domain, one on each line, and save it as C:\users \administrator\documents\computers.txt. You can either do this in the PowerShell command line if you are able or manually. Its contents should look as follows:
• LON-DC1.contoso.com
• LON-SVR1.contoso.com
• LON-SVR2.contoso.com
• LON-CLI1.contoso.com

4 Lab Instructions: Windows® Management Instrumentation
Exercise 1: Building Computer Inventory
Scenario You work as a system administrator. Periodically you need to inventory your domain computers. The inventory information you require includes the operating system version, the service pack version, and the asset tag. Your organization uses the BIOS serial number as the asset tag for all computer systems.
The main tasks for this exercise are carried out on LON-CLI1 and are as follows:
1. Retrieve the operating system information for the local computer.
2. Extract specific version information from the operating system object.
3. Retrieve operating system version numbers from the local computer “remotely”.
4. Retrieve operating system version numbers from multiple computers in one command.
5. Export operating system version numbers (both the operating system version and the service pack version) for multiple computers to a .csv file.
6. Retrieve BIOS serial numbers from multiple computers.
7. Create a custom object for each computer containing all inventory information.
8. Export the results of the last command to a file.
Task 1: Retrieve the operating system information 1. Get the operating system information from the local computer using
Get-WmiObject with the Win32_OperatingSystem class.
2. Show all properties of the Win32_OperatingSystem object you just retrieved.

Lab Instructions: Windows® Management Instrumentation 5
Task 2: Extract version information from the operating system object 1. Show all properties of the Win32_OperatingSystem object with version in their
name.
2. Generate a table showing the __SERVER, Version, ServicePackMajorVersion, and ServicePackMinorVersion properties of the Win32_OperatingSystem object.
Hint: The __SERVER property starts with two underscore characters.
Task 3: Retrieve the local operating system information “remotely” 1. Repeat the last command, passing the LON-CLI1 computer name to the
ComputerName parameter of the Get-WmiObject cmdlet.
2. Show the help information for the ComputerName parameter of the Get-WmiObject cmdlet. Note that ComputerName accepts an array of strings.
Task 4: Retrieve the operating system information for all computers 1. Read the list of domain computer names from the computers.txt file in your
documents folder.
2. Modify the last command you ran to retrieve operating system information so that it shows the information for all computers in the domain.
Task 5: Export the operating system information for all computers 1. Read the help information for the Select-Object cmdlet.
2. Replace the call to Format-Table in the last Get-WmiObject command pipeline with Select-Object, maintaining the list of properties that are required.
3. Export the operating system information to a .csv file called Inventory.csv.

6 Lab Instructions: Windows® Management Instrumentation
Task 6: Retrieve the BIOS information for all computers • Retrieve the BIOS information for all computers using the Win32_BIOS class.
Task 7: Create a custom object for each computer containing all inventory information 1. Read the help information and examples for the Select-Object cmdlet so that
you understand what it is used for and how it works.
2. Combine the operating system version information and BIOS serial numbers into one set of results using Select-Object.
Hint: This is a complex command. You need to execute Get-WmiObject and use Select-Object to create a custom column. The expression for that custom column is another call to Get-WmiObject. Refer to the course material for an example of this complex technique.
Task 8: Export the inventory report • Export the results of the last command to a .csv file called Inventory.csv.
Results: After this exercise, you should have successfully retrieved operating system and BIOS information from all computers in your domain, built custom objects using Select-Object, and generated an inventory report in a .csv file.

Lab Instructions: Windows® Management Instrumentation 7
Exercise 2: Discovering WMI Classes and Namespaces
Scenario You are retrieving computer information remotely using WMI. You need to be able to discover classes and namespaces on a remote computer so that you can get the data you need.
The main tasks for this exercise are carried out on LON-DC1 and are as follows:
1. View WMI classes in the default namespace on LON-DC1.
2. Find WMI classes using wildcards on LON-DC1.
3. Enumerate the list of top-level WMI namespaces on the LON-DC1 computer.
Task 1: View WMI classes in the default namespace 1. On LON-DC1, read help information for the List parameter in the
Get-WmiObject cmdlet.
2. Get a list of all WMI classes in the default namespace on the LON-DC1 computer.
Task 2: Find WMI classes using wildcards 1. Find all WMI classes in the default namespace on LON-DC1 that contain
Printer in their class name.
2. Find all WMI classes in all namespaces on LON-DC1 that contain Printer in their class name.

8 Lab Instructions: Windows® Management Instrumentation
Task 3: Enumerate top-level WMI namespaces 1. Enumerate the top-level WMI namespaces by retrieving WMI objects of class
__NAMESPACE in the root namespace on LON-DC1.
Hint: The __NAMESPACE class name begins with two underscore characters.
2. Generate a list of only the top-level WMI namespace names by using Get-WmiObject with Select-Object.
Hint: Sometimes, a property is a collection of other objects. Select-Object can expand that property into a list of those objects by using the -ExpandProperty parameter. For example, -ExpandProperty Name expands the Name property.
Results: After this exercise, you should be able to find WMI classes in a specific namespace, find WMI classes using a wildcard search, and find WMI namespaces on local or remote computers.

Lab Instructions: Windows® Management Instrumentation 9
Exercise 3: Generating a Logical Disk Report for All Computers
Scenario To monitor disk-space usage for computers in your organization, you want to use PowerShell to retrieve and process WMI information.
The main tasks for this exercise are carried out on LON-CLI1 and are as follows:
1. Learn how to discover the WMI class used to retrieve logical disk information.
2. Retrieve logical disk information from the local machine.
3. Apply a server-side filter to filter the logical disks to include only hard disks and gather disk information for all computers in your domain.
4. Add a calculated value to your report showing percent-free information for hard disks for all computers in your domain.
5. Learn how to discover information related to WMI classes.
Task 1: Discover the WMI class used to retrieve logical disk information • Find all WMI classes in the default namespace on the local machine that
contain LogicalDisk in the class name.
Hint: If you examine the help for Get-WmiObject, you see that the -class parameter is positional and is in position 2. That means you do not have to type the -class parameter name; you can simply provide a value, if you place it in the correct position.
Task 2: Retrieve logical disk information from the local machine • Get all logical disk drives for the local machine using the Get-WmiObject
cmdlet.

10 Lab Instructions: Windows® Management Instrumentation
Task 3: Retrieve logical disk information for hard disks in all computers in your domain 1. Read help information for the Filter parameter of the Get-WmiObject cmdlet.
2. Read the list of computer names in your domain from the computers.txt file in your documents folder.
3. Get all hard disks for all computers in your domain using the Get-WmiObject cmdlet. The DriveType property value for hard disks is 3. Show the results in a table with the computer name, device id, and free-space information.
Task 4: Add a calculated PercentFree value to your report • Add a calculated parameter to your hard disk table that has the following
properties:
• Label: ‘PercentFree’
• Expression: {$_.FreeSpace / $_.Size}
• FormatString: ‘{0:#0.00%}’
Hint: You have already seen examples of the structure necessary to create a custom or calculated column. In this task, you are doing the same thing. However, in addition to the Label and Expression elements that you have seen before, you are adding a FormatString element.
Task 5: Discover WMI information related to the logical drives 1. Show only the first hard drive found in your report.
2. Invoke the GetRelated() method on the first drive, and show the results in a table containing __CLASS and __RELPATH.
Hint: __CLASS and __RELPATH both begin with two underscore characters. These are properties of the WMI objects, just like any other properties. The underscore characters indicate that they are system properties, added by WMI and contain information that helps WMI locate and manage the objects.

Lab Instructions: Windows® Management Instrumentation 11
Hint: Remember that Get-WmiObject returns objects and that some objects have methods that perform actions. GetRelated() is one such method. For example, you could enclose an entire WMI command in parentheses to execute the GetRelated() method of the object(s) returned by that command: (Get-WmiObject your parameters go here | Select -First
1).GetRelated()
That Select-Object command ensures that only the first returned object is used.
Results: After this exercise, you should know how to check logical disk free-space information using WMI, how to add calculated properties to a report, and how to find related WMI information from your WMI data.

12 Lab Instructions: Windows® Management Instrumentation
Exercise 4: Listing Local Users and Groups
Scenario Corporate regulations require that you maintain an inventory of local users and groups on computers in your domain for audit purposes.
The main tasks for this exercise are carried out on LON-CLI1 and are as follows:
1. Find the WMI classes used to retrieve local users and groups.
2. Generate a report showing all local user accounts and groups from all computers in your domain. This report should contain the WMI object class to identify the object type as well as the computer name, user or group name, and SID.
Task 1: Find the WMI classes used to retrieve local users and groups 1. Search for WMI classes representing local users in the default namespace
using Get-WmiObject.
2. Search for WMI classes representing local groups in the default namespace using Get-WmiObject.

Lab Instructions: Windows® Management Instrumentation 13
Task 2: Generate a local users and groups report 1. Retrieve a list of all local user accounts on the local computer and identify the
properties containing the WMI object class name, the computer name, the user name, and the SID.
2. Retrieve a list of all local groups on the local computer and identify the properties containing the WMI object class name, the computer name, the user name, and the SID.
3. Read the basic help information for the ForEach-Object cmdlet. Note that ForEach-Object allows you to process a collection of objects one at a time.
4. Generate a single table showing all local users and groups from all computers in the computers.txt file that is in your documents folder. Format the table output so that it contains only the object type, the computer name, the user or group name, and the SID.
Hint: If you want to include two (or more) independent shell commands into a single {script block}, separate the commands by using a semicolon.
Results: After this exercise, you should be able to retrieve local user and group account information from local and remote computers and generate a report combining this information into a single table.

Lab Instructions: Automating Active Directory® Administration 1
Module 5 Lab Instructions: Automating Active Directory® Administration
Contents: Lab A: Managing Users and Groups
Exercise 1: Retrieving a Filtered List of Users from Active Directory 4
Exercise 2: Resetting User Passwords and Address Information 6
Exercise 3: Disabling Users That Belong to a Specific Group 8
Lab B: Managing Computers and Other Directory Objects
Exercise 1: Listing All Computers That Appear to Be Running a Specific Operating System According to Active Directory Information 13
Exercise 2: Creating a Report Showing All Windows Server 2008 R2 Servers 15
Exercise 3: Discovering Any Organizational Units That Aren’t Protected Against Accidental Deletion 17

2 Lab Instructions: Automating Active Directory® Administration
Lab A: Managing Users and Groups
Estimated time: 30 minutes
You are an Active Directory administrator and want to manage your users and groups via PowerShell. You recently upgraded your domain controller to Windows Server 2008 R2 and want to try the new PowerShell Active Directory cmdlets that came with it. In order to handle internal tasks more quickly and be prepared to automate them, you want to learn how to find information in Active Directory as well as how to accomplish basic tasks such as resetting users' passwords, disabling users, and moving objects in Active Directory.

Lab Instructions: Automating Active Directory® Administration 3
Lab Setup Before you begin the lab you must:
1. Start the LON-DC1 virtual machine and log on with the following credentials:
• Username: CONTOSO\administrator
• Password: Pa$$w0rd
2. Open the Windows PowerShell console. All commands will be run within the Windows PowerShell console.
3. In the Windows PowerShell console, execute the following command:
• Set-ExecutionPolicy RemoteSigned

4 Lab Instructions: Automating Active Directory® Administration
Exercise 1: Retrieving a Filtered List of Users from Active Directory
Scenario You want to manage your users and groups via PowerShell. To begin, you want to use Windows PowerShell to retrieve a filtered list of users from Active Directory.
The main tasks for this exercise are as follows:
1. List all modules installed on the local system.
2. Import the Active Directory module and populate the Active Directory Environment.
3. List all commands in the Active Directory module.
4. Retrieve all users matching a specific city and title by using server-side filtering.
Task 1: List all modules installed on the local system 1. Read the help documentation and examples for the Get-Module command to
familiarize yourself with how it works.
2. Show a list of all modules installed on the LON-DC1 computer by using Get-Module with the ListAvailable parameter.
Task 2: Import the Active Directory module and populate the Active Directory environment 1. Read the help documentation and examples for the Import-Module command
so that you understand how it works.
2. Use the Import-Module command to import the Active Directory module into your current PowerShell session.
3. In the Windows PowerShell console execute the following command: E:\Mod05\Labfiles\Lab_05_setup.ps1.
Task 3: List all commands in the Active Directory module • Use Get-Command to retrieve a list of all commands that were loaded when
you imported the Active Directory module.

Lab Instructions: Automating Active Directory® Administration 5
Task 4: Retrieve all users matching a specific city and title by using server-side filtering 1. Read the help documentation and examples for the Get-ADUser command to
learn how you can use it to retrieve Active Directory users. Pay extra attention to the -filter parameter.
2. Invoke Get-ADUser with no parameters to see which parameters are required and learn how to use them.
3. Retrieve a list of all Active Directory users whose office attribute has a value of “Bellevue.”
4. Retrieve a list of all Active Directory users whose office attribute has a value of “Bellevue” and whose title attribute has a value of “PowerShell Scripter.”
Results: After this exercise you should have successfully imported the Active Directory module into PowerShell and used it to retrieve a filtered list of users from Active Directory.

6 Lab Instructions: Automating Active Directory® Administration
Exercise 2: Resetting User Passwords and Address Information
Scenario You are working in Bellevue, Washington, and you are automating some Active Directory tasks using PowerShell. You need to reset user passwords and change address information for some remote users.
The main tasks for this exercise are as follows:
1. Retrieve a list of remote users.
2. Reset remote user passwords to a specific password.
3. Change remote user address information to your local Bellevue, Washington office.
Task 1: Retrieve a list of remote users • Use Get-ADUser with the -filter parameter to retrieve a list of users whose
office attribute is not set to “Bellevue.”
Task 2: Reset remote user passwords to a specific password 1. Review the documentation and examples for the Read-Host and Set-
ADAccountPassword commands. Pay close attention to the AsSecureString parameter for Read-Host and the Reset and NewPassword parameters for Set-ADAccountPassword.
2. Pass the list of users whose office is not “Bellevue” to the Set-ADAccountPassword command and use it with Read-Host to set their passwords to a password of Pa$$w0rd that you are prompted to enter in PowerShell.

Lab Instructions: Automating Active Directory® Administration 7
Task 3: Change remote user address information to your local Bellevue, Washington office 1. Look up the help documentation for the Properties parameter of Get-ADUser.
2. Retrieve a list of users whose office is not “Bellevue.” When retrieving the users, use the Properties parameter to retrieve the Office, StreetAddress, City, State, Country/Region, and PostalCode attributes. Show the results in a table containing SamAccountName along with the other attributes you specified in the Properties parameter.
3. Read the help documentation and examples for the Set-ADUser cmdlet.
4. Pass the results of the Get-ADUser command you just used to the Set-ADUser command, and set the following values:
Office: Bellevue StreetAddress: 2345 Main St. City: Bellevue State: WA Country: US PostalCode: 95102
Results: After this exercise, you should be able to reset passwords and modify attributes for a filtered list of Active Directory users.

8 Lab Instructions: Automating Active Directory® Administration
Exercise 3: Disabling Users That Belong to a Specific Group
Scenario Your organization has recently terminated a project at work called “CleanUp” and you need to disable all users that belong to the Active Directory group corresponding to the project.
The main tasks for this exercise are as follows:
1. Retrieve a list of all Active Directory groups.
2. Retrieve a specific Active Directory group named “CleanUp.”
3. Retrieve a list of members in the Active Directory group named “CleanUp.”
4. Disable the members of the Active Directory group named “CleanUp.”
Task 1: Retrieve a list of all Active Directory groups 1. Read the documentation and examples for the Get-ADGroup cmdlet.
2. Retrieve a list of all Active Directory groups by using the Get-ADGroup cmdlet.
Task 2: Retrieve a specific Active Directory group named “CleanUp” • Retrieve the Active Directory group named “CleanUp” by using the Get-
ADGroup cmdlet.
Task 3: Retrieve a list of members in the Active Directory group named “CleanUp” 1. Read the help documentation and examples for the Get-ADGroupMember
cmdlet.
2. Use the Get-ADGroup and Get-ADGroupMember cmdlets to retrieve a list of the members in the Active Directory group named “CleanUp.”

Lab Instructions: Automating Active Directory® Administration 9
Task 4: Disable the members of the Active Directory group named “CleanUp” 1. Read the help documentation and examples for the Disable-ADAccount
cmdlet.
2. Use the Disable-ADAccount cmdlet with the WhatIf parameter and the list of members of the Active Directory group named “CleanUp” to see what would happen if you were to disable the members in that group.
3. Repeat the last command without the WhatIf parameter to actually disable the group members.
Results: After this exercise, you should know how to retrieve groups from Active Directory, view their membership, and disable user accounts.

Lab Instructions: Automating Active Directory® Administration 11
Lab B: Managing Computers and Other Directory Objects
Estimated time: 20 minutes
As an Active Directory administrator, in addition to managing users and groups, you need to monitor the servers in your organization. Active Directory contains details identifying servers, and you want to use those details to discover servers and generate reports. To meet new security policies, your company has decided to put more stringent password policies in place. You need to create fine-grained password policies for your organization and heard that PowerShell was the only way to do so. Also, as a senior IT administrator responsible for a team, you want to make sure that your team members don’t accidentally delete important information in Active Directory. You want to use a new feature for organizational units OUs that prevents them from accidental deletion.

12 Lab Instructions: Automating Active Directory® Administration
Lab Setup Before you begin the lab you must:
1. Start the LON-DC1 virtual machine and log on with the following credentials:
• Username: CONTOSO\administrator
• Password: Pa$$w0rd
2. Open Windows PowerShell. All PowerShell commands will be run within the Windows PowerShell console.

Lab Instructions: Automating Active Directory® Administration 13
Exercise 1: Listing All Computers That Appear to Be Running a Specific Operating System According to Active Directory Information
Scenario As an Active Directory administrator, in addition to managing users and groups you also need to monitor the servers in your organization. Active Directory contains details identifying servers, and you want to use those details to discover servers.
The main tasks for this exercise are as follows:
1. Import the Active Directory module.
2. List all of the properties for one AD computer object.
3. Find any properties containing operating system information on an AD computer.
4. Retrieve all computers running a specific operating system.
Task 1: Import the Active Directory module • Import the Active Directory module into your current PowerShell session.
Task 2: List all of the properties for one AD computer object 1. Read the help documentation and examples for the Get-ADComputer cmdlet.
2. Show all properties for one computer from Active Directory using the Get-ADComputer cmdlet with the -filter, Properties, and ResultSetSize parameters.
Task 3: Find any properties containing operating system information on an AD computer • Get one computer from Active Directory and show all properties containing
operating system information.

14 Lab Instructions: Automating Active Directory® Administration
Task 4: Retrieve all computers running a specific operating system 1. Get a list of all computers running “Windows Server 2008 R2” using Get-
ADComputer with the -filter parameter.
2. Repeat the last command but include the OperatingSystem property in the objects that are returned.
Results: After this exercise you should be able to retrieve AD computers that match specific criteria and indicate which properties you want to retrieve for those computers.

Lab Instructions: Automating Active Directory® Administration 15
Exercise 2: Creating a Report Showing All Windows Server 2008 R2 Servers
Scenario Now that you can discover servers in your organization using Active Directory, your manager would like you to generate a report showing all Windows Server 2008 R2 servers in your organization.
The main tasks for this exercise are as follows:
1. Retrieve all computers running Windows Server 2008 R2.
2. Generate an HTML report showing only the computer name, SID, and operating system details.
3. Generate a CSV file showing only the computer name, SID, and operating system details.
Task 1: Retrieve all computers running Windows Server 2008 R2 • Retrieve all AD computers running the Windows Server 2008 R2 operating
system. Include the OperatingSystem, OperatingSystemHotfix, OperatingSystemServicePack, and OperatingSystemVersion properties in the computer objects that you retrieve.
Task 2: Generate an HTML report showing only the computer name, SID, and operating system details 1. Read the help documentation and examples for the ConvertTo-Html and Out-
File cmdlets so that you understand how they work.
2. Rerun the command from Task 1 to retrieve Windows Server 2008 R2 servers. Generate an HTML table fragment by passing the results to the ConvertTo-Html cmdlet. Don’t forget to use the Fragment parameter.
3. Rerun the command from Task 1 to retrieve Windows Server 2008 R2 servers. Generate an HTML file by passing the results to the ConvertTo-Html and Out-File cmdlets. Name the resulting file C:\OSList.htm.
4. Use PowerShell to open the C:\OSList.htm file in Internet Explorer.

16 Lab Instructions: Automating Active Directory® Administration
Task 3: Generate a CSV file showing only the computer name, SID, and operating system details 1. Read the help documentation and examples for the Export-Csv cmdlet so that
you understand how it works.
2. Rerun the command from Task 1 to retrieve Windows Server 2008 R2 servers. Use Select-Object to select only the Name, SID, and OperatingSystem* attributes.
3. Pass the results of the last command to Export-Csv to create a CSV file containing the results. Name the resulting file C:\OSList.csv.
4. Use PowerShell to open the C:\OSList.csv file in Notepad.
Results: After this exercise, you should be able to generate HTML and CSV documents containing information you retrieved using PowerShell commands.

Lab Instructions: Automating Active Directory® Administration 17
Exercise 3: Discovering Any Organizational Units That Aren’t Protected Against Accidental Deletion
Scenario As a senior IT administrator responsible for a team, you want to make sure that your team members don’t accidentally delete important information in Active Directory. You know about the new feature for OUs that prevents them from accidental deletion and you want to monitor the OUs in your environment to ensure that they are appropriately protected.
The main tasks for this exercise are as follows:
1. Retrieve all organizational units.
2. Retrieve organizational units that are not protected against accidental deletion.
Task 1: Retrieve all organizational units 1. Read the help documentation and examples for the
Get-ADOrganizationalUnit cmdlet to learn how it works.
2. Get a list of all organizational units in AD. Include the ProtectedFromAccidentalDeletion property in the results.
Task 2: Retrieve organizational units that are not protected against accidental deletion • Use the Get-ADOrganizationalUnit cmdlet to get a list of all organizational
units whose ProtectedFromAccidentalDeletion property is set to false.
Results: After this exercise, you should be able to use the Active Directory cmdlets to retrieve organizational units from Active Directory.

Lab Instructions: Windows PowerShell® Scripts 1
Module 6 Lab Instructions: Windows PowerShell® Scripts
Contents: Lab: Writing Windows PowerShell Scripts
Exercise 1: Executing Scripts 4
Exercise 2: Using Positional Script Parameters 5
Exercise 3: Using Named Script Parameters 7

2 Lab Instructions: Windows PowerShell® Scripts
Lab: Writing Windows PowerShell Scripts
Estimated time: 30 minutes You are a system administrator, and have commands that you run regularly at work. To save time and also to be able to more easily pass around your commonly used commands to others, you have decided to copy your commands into a script. To make it easier for more junior administrators or even desktop users to use your script, you’ve added simple command-line arguments that can be passed dynamically to your script when run.

Lab Instructions: Windows PowerShell® Scripts 3
Lab Setup For this lab, you will use the available virtual machine environment. Before you begin the lab, you must:
1. Start the LON-DC1 virtual machine. You do not need to log on but wait until the boot process is complete.
2. Start the LON-SVR1 virtual machine, and then log on by using the following credentials:
• Username: CONTOSO\administrator
• Password: Pa$$w0rd
4. Open a Windows PowerShell session as Administrator.

4 Lab Instructions: Windows PowerShell® Scripts
Exercise 1: Executing Scripts
Scenario To administer your systems, you like to copy commonly used commands into a script so you can easily invoke them later.The main tasks for this exercise are carried out on LON-SVR1 and are as follows:
1. Check the execution policy setting.
2. Create a script.
3. Execute a script from the shell.
Task 1: Check the execution policy setting • Check the execution policy to make sure scripts can be executed without
needing to be signed.
Task 2: Create a script • Create a PowerShell script C:\Script.ps1 that contains a command will get all
the running powershell processes. You can use Notepad to do this then replace the file extension from .txt to .ps1 once you are finished.
Task 3: Execute a script from the shell • Run the script from the PowerShell console calling the script name
C:\Script.ps1.
Results: After this exercise, you will have created and run a simple script that lists all the “powershell” processes.

Lab Instructions: Windows PowerShell® Scripts 5
Exercise 2: Using Positional Script Parameters
Scenario With basic scripting firmly understood, you now want to expand a few scripts to make them easier to use. You want to be able to easily pass parameters to your script so that they can be more generalized.
The main tasks for this exercise are carried out on LON-SVR1 and are as follows:
1. Copy commands into a script.
2. Use commands with hard-coded values as parameter values.
3. Identify variable portions of a command.
4. Create positional script parameters.
5. Execute a script from the shell.
Task 1: Copy commands into a script • Create a script named C:\Script2.ps1 containing the following command:
Get-EventLog –LogName Application –Newest 100|Group-Object -Property InstanceId|Sort-Object –Descending -Property Count|Select-Object –Property Name,Count -First 5|Format-Table –AutoSize
Task 2: Use commands with hard-coded values as parameter values • Run the script just created.
Task 3: Identify variable portions of a command • Review the script and determine what parts of the command could be
considered variable values.

6 Lab Instructions: Windows PowerShell® Scripts
Task 4: Create positional script parameters • Create a new script C:\Script3.ps1 that accepts positional script parameters
for the four values underlined below.
Hint: Create a script that accepts four parameters, such as $log, $new, $group, and $first. In addition to defining those parameters in a Param() block, use those parameters in place of the hard-coded values in the command.
Get-EventLog –LogName Application –Newest 100|Group-Object -Property InstanceId|Sort-Object –Descending -Property Count|Select-Object –Property Name,Count -First 5|Format-Table –AutoSize
Task 5: Execute a script from the shell • Run the script just created by passing back the same values that were replaced
by the parameters (in the same order).
Hint: To run the script, provide the four parameterized values, - such as “Application,” 100, “InstanceId,” and 5, in the order in which they are defined in the Param() block.
Results: After this exercise, you will have created and run a script that uses positional parameters instead of hard-coded values.

Lab Instructions: Windows PowerShell® Scripts 7
Exercise 3: Using Named Script Parameters
Scenario You want to be able to easily pass parameters to your script so that they can be more generalized. This time, however, you wish to use named parameters as opposed to positional parameters in your script.
The main tasks for this exercise are carried out on LON-SVR1 and are as follows:
1. Copy commands into a script.
2. Use commands with hard-coded values as parameter values.
3. Identify variable portions of a command.
4. Create named script parameters.
5. Execute a script from the shell.
Task 1: Copy commands into a script • Create a script C:\Script4.ps1 that contains the following command:
Get-Counter -Counter "\Processor(_Total)\% Processor Time" -SampleInterval 2 -MaxSamples 3
Task 2: Use commands with hard-coded values as parameter values • Run the script just created.
Task 3: Identify variable portions of a command • Review the script and determine what parts of the command could be
considered variable values.
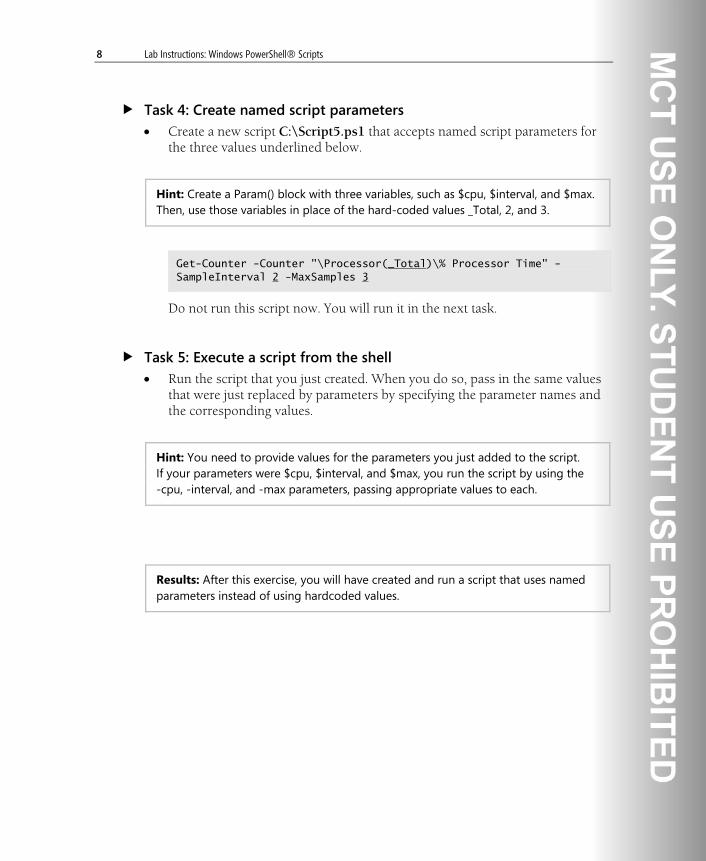
8 Lab Instructions: Windows PowerShell® Scripts
Task 4: Create named script parameters • Create a new script C:\Script5.ps1 that accepts named script parameters for
the three values underlined below.
Hint: Create a Param() block with three variables, such as $cpu, $interval, and $max. Then, use those variables in place of the hard-coded values _Total, 2, and 3.
Get-Counter -Counter "\Processor(_Total)\% Processor Time" -SampleInterval 2 -MaxSamples 3
Do not run this script now. You will run it in the next task.
Task 5: Execute a script from the shell • Run the script that you just created. When you do so, pass in the same values
that were just replaced by parameters by specifying the parameter names and the corresponding values.
Hint: You need to provide values for the parameters you just added to the script. If your parameters were $cpu, $interval, and $max, you run the script by using the -cpu, -interval, and -max parameters, passing appropriate values to each.
Results: After this exercise, you will have created and run a script that uses named parameters instead of using hardcoded values.

Lab Instructions: Background Jobs and Remote Administration 1
Module 7 Lab Instructions: Background Jobs and Remote Administration Contents: Lab A: Working with Background Jobs
Exercise 1: Using Background Jobs with WMI 4
Exercise 2: Using Background Jobs for Local Computers 5
Exercise 3: Receiving the Results from a Completed Job 6
Exercise 4: Removing a Completed Job 7
Exercise 5: Waiting for a Background Job to Complete 8
Exercise 6: Stopping a Background Job Before It Completes 9
Exercise 7: Working with the Properties of a Job 10
Lab B: Using Windows PowerShell Remoting
Exercise 1: Interactive Remoting 14
Exercise 2: Fan-Out Remoting 15
Exercise 3: Fan-Out Remoting Using Background Jobs 16
Exercise 4: Saving Information from Background Jobs 18

2 Lab Instructions: Background Jobs and Remote Administration
Lab A: Working with Background Jobs
Estimated time: 30 minutes
You are a system administrator who has several scripts already developed. Some of the scripts can take anywhere from a few seconds to several minutes to complete. You would waste a lot of productive time if you ran the scripts one-by-one and waited for each to finish. To save time, you are going to use background jobs to run all the scripts synchronously, and be able to control everything from one PowerShell console.
Lab Instructions: Background Jobs and Remote Administration 3
Lab Setup For this lab, you will use the available virtual machine environment. Before you begin the lab, you must:
1. Start the LON-DC1 virtual machine. You do not need to log on, but wait until the boot process is complete.
2. Start the LON-SVR1 virtual machine and then log on by using the following credentials:
• Username: CONTOSO\administrator
• Password: Pa$$w0rd
3. Open a Windows PowerShell session as Administrator.

4 Lab Instructions: Background Jobs and Remote Administration
Exercise 1: Using Background Jobs with WMI
Scenario You use WMI to gather a lot of information from servers and would like to use background jobs so you can continue using the console while they are running. The main tasks for this exercise are as follows:
1. Start a background job.
2. Check the status of a background job.
3. Use Windows Management Instrumentation.
4. Retrieve information from remote computers.
Perform these tasks on the LON-SVR1 virtual machine.
Task 1: Start a background job • Open Windows PowerShell and run a background job that simply runs
Get-Process –Name PowerShell.
Task 2: Check the status of a background job • Check the status of the background job just started.
Task 3: Use Windows Management Instrumentation • Use WMI to retrieve the local computer name (use the
Win32_ComputerSystem class).
Task 4: Retrieve information from remote computers • Using a background job, run the previous WMI command against LON-DC1
and view the results.
Results: After this exercise, you will have used a background job that uses WMI to retrieve the Win32_ComputerSystem class from LON-DC1 remotely.

Lab Instructions: Background Jobs and Remote Administration 5
Exercise 2: Using Background Jobs for Local Computers
Scenario You often run commands that take a long time and would like to use background jobs so you can continue using the console while they are running.
The main tasks for this exercise are as follows:
1. Start a background job.
2. Check the status of a background job.
3. Retrieve information from local commands.
Task 1: Start a background job • Start a background job that retrieves all of the services on the local machine.
Task 2: Check the status of a background job • Check the status of the background job.
Task 3: Retrieve information from local commands • Retrieve the results from the background job.
Results: After this exercise, you will have used a background job to retrieve a listing of all the installed services on LON-SVR1.

6 Lab Instructions: Background Jobs and Remote Administration
Exercise 3: Receiving the Results from a Completed Job
Scenario You often use background jobs to run commands and now would like to view the results of the jobs you have started and are completed.The main tasks for this exercise are as follows:
1. Run a background job.
2. Check the status of a background job.
3. Receive results from a background job and keep the results in memory.
4. Remove the results of a background job from memory.
Perform these tasks on the LON-SVR1 virtual machine.
Task 1: Run a background job • Start a background job that will retrieve the most recent 100 events from the
Windows Application event log.
Task 2: Check the status of a background job • Check the status of the background job just started.
Task 3: Receive the results of a background job and keep the results in memory • Receive the results of the background job just started and keep the results in
memory.
Task 4: Remove the results of a background job from memory • Receive the results of the background job just started and remove the results
from memory.
Results: After this exercise, you will have used a background job to retrieve a listing of the most recent 100 events in the Windows Application event log. You also will have seen how to save and remove the results from memory.

Lab Instructions: Background Jobs and Remote Administration 7
Exercise 4: Removing a Completed Job
Scenario You often use background jobs to run commands and now would like to remove some of the jobs from memory so the listing of any previously completed jobs is cleared up.The main tasks for this exercise are as follows:
1. Run a background job.
2. Check the status of a background job.
3. Remove a completed job.
Perform these tasks on the LON-SVR1 virtual machine.
Task 1: Run a background job • Start a background job that will run the Get-HotFix cmdlet.
Task 2: Check the status of a background job • Check the status of the background job just started.
Task 3: Remove a completed job • Once completed, remove the completed job from memory.
Results: After this exercise, you will have run Get-HotFix as a background job, checked its status, and once completed, will have removed the entire job from memory.

8 Lab Instructions: Background Jobs and Remote Administration
Exercise 5: Waiting for a Background Job to Complete
Scenario You often use background jobs to run commands and now would like to save some of the results to a text file for future reference. The main tasks for this exercise are as follows:
1. Start a background job.
2. Check the status of a background job.
3. Wait for background job to complete.
4. Copy the results of a background job to a file.
Perform these tasks on the LON-SVR1 virtual machine.
Task 1: Start a background job • Start a background job that simply runs the Start-Sleep cmdlet with a
parameter value of 15 seconds.
Task 2: Check the status of a background job • Check the status of the background job just started.
Task 3: Wait for a background job to complete • Run a command that will wait until the background job is completed.
Task 4: Copy the results of a background job to a file • Copy the results of the background job to a local text file.
Results: After this exercise, you will have run Start-Sleep for 15 seconds, checked its status, and will have run the Wait-Job cmdlet to ensure the job was completed. You will also have copied the results of the background job to a local file.

Lab Instructions: Background Jobs and Remote Administration 9
Exercise 6: Stopping a Background Job Before It Completes
Scenario You often use background jobs to run commands and have noticed that one of your jobs appears to be hung. You would like to stop it to make sure it isn’t using any server resources.
The main tasks for this exercise are as follows:
1. Start a background job.
2. Check the status of the background job.
3. Stop a background job that has not yet completed.
Perform these tasks on the LON-SVR1 virtual machine.
Task 1: Start a background job • Start a background job that runs as an infinite loop.
Hint: The script block for this job will be something like this: { while ($true) { Start-Sleep -seconds 1 } }
Task 2: Check the status of the background job • Check the status of the background job just created.
Task 3: Stop a background job that has not yet completed • Stop the background job even though it is still running.
Results: After this exercise, you will have run a simple endless command as a background job, checked its status, and will have stopped the background job before it returned a completed status.

10 Lab Instructions: Background Jobs and Remote Administration
Exercise 7: Working with the Properties of a Job
Scenario You often use background jobs to run commands and would like to display some of the properties of those jobs.
The main tasks for this exercise are as follows:
1. Start a background job.
2. Display a list of background jobs.
3. Use Get-Member to look at the properties of a job.
Perform these tasks on the LON-SVR1 virtual machine.
Task 1: Start a background job • Start a background job that gets a listing of all the directories and files in
C:\Windows\System32.
Task 2: Display a list of background jobs • Display a list of all the background jobs on the system.
Task 3: Use Get-Member to look at the properties of a job • Use Get-Member to look at the properties of the background job just created.
Results: After this exercise, you will have started a background job that retrieves a listing of all the contents of C:\Windows\System32, used Get-Member to view the methods and properties of a background job, and you will have displayed the ChildJobs property of the background job.

12 Lab Instructions: Background Jobs and Remote Administration
Lab B: Using Windows PowerShell Remoting
Estimated time: 45 minutes
You are a system administrator and often need to run commands on remote computers. You could ask each user to run the commands themselves, but you prefer to have control to run the commands yourself. You have heard about being able to run remote commands using WMI, and know that your company also has a desktop management system that may be able to run these commands, but you would rather be in complete control of the commands yourself. Furthermore, your company uses host firewalls and you know that they can cause issues with using WMI. So you’ve decided to implement PowerShell remoting throughout your organization.

Lab Instructions: Background Jobs and Remote Administration 13
Lab Setup For this lab, you will use the available virtual machine environment. Before you begin the lab, you must:
1. Start the LON-DC1, LON-SVR1, and LON-SVR2 virtual machines, and then log on by using the following credentials:
• Username: CONTOSO\administrator
• Password: Pa$$w0rd
2. Open a Windows PowerShell session as Administrator on all three virtual machines.
3. Run the following command on all three virtual machines:
• Enable-PSRemoting –Force

14 Lab Instructions: Background Jobs and Remote Administration
Exercise 1: Interactive Remoting
Scenario You often have to work with remote computers and want to open up an interactive remoting session to run commands interactively on other computers.The main tasks for this exercise are carried out on LON-SVR1 and are as follows:
1. Initiate a 1:1 remoting session to a remote computer.
2. Run remote commands interactively.
Task 1: Initiate a 1:1 remoting session to a remote computer • On LON-SVR1, initiate an interactive remoting session to LON-DC1.
Task 2: Run remote commands interactively • On LON-SVR1, using the interactive remoting session to LON-DC1, issue the
command Get-HotFix.
Results: After this exercise, you will have initiated a 1:1 remoting session with LON-DC1 from LON-SVR1 and will have issued Get-HotFix remotely.

Lab Instructions: Background Jobs and Remote Administration 15
Exercise 2: Fan-Out Remoting
Scenario You often have to check the event logs of remote servers to check for certain events and would like to use PowerShell remoting to ease the process of connecting to remote computers.The main tasks for this exercise are as follows:
1. Invoke a command on multiple computers.
2. Sort and filter objects in the pipeline.
Task 1: Invoke a command on multiple computers • From LON-SVR1, invoke the command Get-EventLog –LogName Application
–Newest 100 on LON-SVR2 and LON-DC1.
Task 2: Sort and filter objects in the pipeline • Run the same command again and group the results by the EventId property,
sort them in descending order by the resulting Count property, then select only the first five to display.
Results: After this exercise, you will have invoked a command on LON-DC1 and LON-SVR2 from LON-SVR1 to retrieve a listing of the 100 newest events from the Windows Application event log, and will have grouped and sorted the results to display the top five EventId values that have occurred the most.

16 Lab Instructions: Background Jobs and Remote Administration
Exercise 3: Fan-Out Remoting Using Background Jobs
Scenario You have an upcoming corporate audit and have to check the system drive of remote servers to check for certain permissions. You would like to use PowerShell remoting to ease the process of connecting to these remote computers. By experience, the auditing process can take a long time per server, so you will also want to start this as a background job so you can continue using your PowerShell console while the job is running. The main tasks for this exercise are as follows:
1. Invoke a command on multiple computers as a background job.
2. Wait for the parent job to complete.
3. Get the ID of all child jobs.
4. Sort and filter objects in the pipeline.
Task 1: Invoke a command on multiple computers as a background job • From LON-SVR1, invoke the command “Get-Acl –Path C:\Windows\
System32\* –Filter *.dll” on LON-SVR2 and LON-DC1 as a background job.
Task 2: Wait for the parent job to complete • From LON-SVR1, invoke the cmdlet to wait until the previous background job
completes.
Task 3: Get the ID of all child jobs • From LON-SVR1, get a listing of all the IDs of the child jobs from the previous
background job.

Lab Instructions: Background Jobs and Remote Administration 17
Task 4: Sort and filter objects in the pipeline • Once the job is completed, retrieve the results and filter the output to only
display files where the owner name contains Administrator.
Hint: Remember, you can use the -like operator and a comparison value such as *Administrator* to search for owner names that contain Administrator.
Results: After this exercise, you will have invoked a command on LON-DC1 and LON-SVR2 as a background job from LON-SVR1 to retrieve the ACLs on all the files in C:\Windows\System32 with the extension *.dll, and will have filtered to display only the files with the owner being the BUILTIN\Administrators.

18 Lab Instructions: Background Jobs and Remote Administration
Exercise 4: Saving Information from Background Jobs
Scenario For that same corporate audit, you need to verify information about % Processor Time PerfMon counters for multiple machines. You need to save information about one computer to a text file. The main tasks for this exercise are as follows:
1. Invoke a command on multiple computers as a background job.
2. Wait for the parent job to complete.
3. Receive the results only from a single child job.
4. Export the results to a file.
Task 1: Invoke a command on multiple computers as a background job • From LON-SVR1, invoke the command Get-Counter -Counter
"\Processor(_Total)\% Processor Time" -SampleInterval 2 -MaxSamples 3 on LON-SVR2 and LON-DC1 as a background job.
Task 2: Wait for the parent job to complete • From LON-SVR1, invoke the cmdlet to wait until the previous background job
completes.
Task 3: Receive the results only from a single child job • From LON-SVR1, get the results of the child job that retrieved the results from
LON-DC1.

Lab Instructions: Background Jobs and Remote Administration 19
Task 4: Export the results to a file • From LON-SVR1, use the previous results of the child job that retrieved the
results from LON-DC1 and save them to a file.
Results: After this exercise, you will have invoked a command on LON-DC1 and LON-SVR2 as a background job from LON-SVR1 to retrieve the total %Processor Time value, waited for the parent job to complete, and will have retrieved the results of the child job that was used for LON-DC1 only by saving the results to a file.

Lab Instructions: Advanced Windows PowerShell® Tips and Tricks 1
Module 8 Lab Instructions: Advanced Windows PowerShell® Tips and Tricks
Contents: Lab: Advanced PowerShell Tips and Tricks
Exercise 1: Writing a Profile Script 4
Exercise 2: Creating a Script Module 5
Exercise 3: Adding Help Information to a Function 7
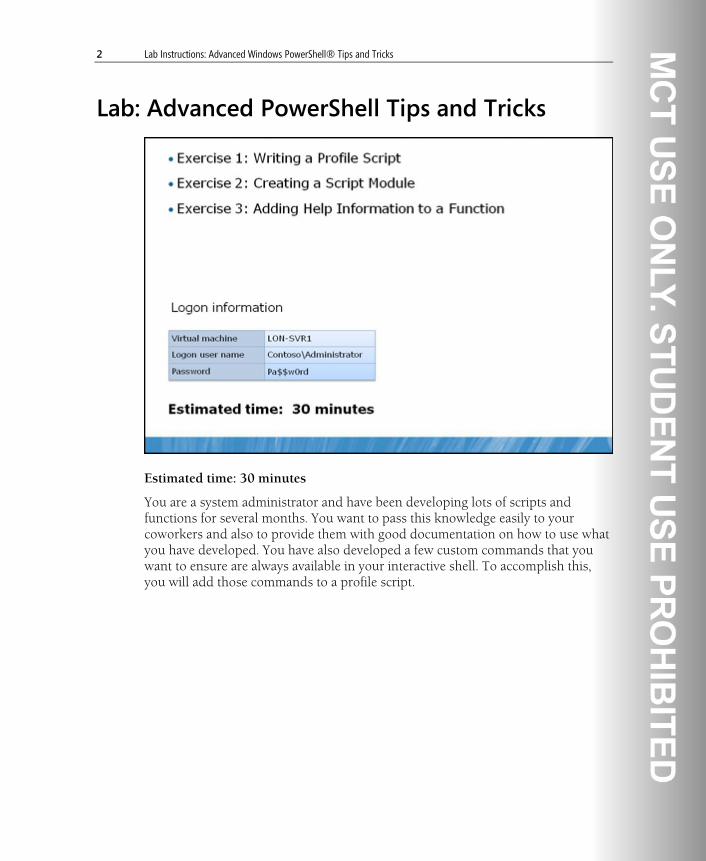
2 Lab Instructions: Advanced Windows PowerShell® Tips and Tricks
Lab: Advanced PowerShell Tips and Tricks
Estimated time: 30 minutes
You are a system administrator and have been developing lots of scripts and functions for several months. You want to pass this knowledge easily to your coworkers and also to provide them with good documentation on how to use what you have developed. You have also developed a few custom commands that you want to ensure are always available in your interactive shell. To accomplish this, you will add those commands to a profile script.

Lab Instructions: Advanced Windows PowerShell® Tips and Tricks 3
Lab Setup For this lab, you will use the available virtual machine environment. Before you begin the lab, you must:
1. Start the LON-SVR1 virtual machine, and then log on by using the following credentials:
• Username: CONTOSO\administrator
• Password: Pa$$w0rd
2. Open a Windows PowerShell session as Administrator.

4 Lab Instructions: Advanced Windows PowerShell® Tips and Tricks
Exercise 1: Writing a Profile Script
Scenario You have a series of commands you want to run every time you start a new PowerShell console to save time.
The main tasks for this exercise are as follows:
1. Write a profile script.
2. Test a profile script.
Task 1: Write a profile script • Write a profile script that does the following things:
a. Sets the current directory to C:.
b. Loads the Server Manager PowerShell module.
c. Prompts the user to enter alternate credentials and saves them to a variable.
Task 2: Test a profile script • Load the previously written profile script into the current session.
Results: After this exercise, you will have written and tested a profile script that sets the current directory, loads the Server Manager module, and creates a variable containing a credential object.

Lab Instructions: Advanced Windows PowerShell® Tips and Tricks 5
Exercise 2: Creating a Script Module
Scenario You have some long, one-line commands you often type to get status information on your servers and services. You want to add these often-typed commands into a module so that you can easily transfer them to other computers and easily share them with others. The main tasks for this exercise are as follows:
1. Package a function as a script module.
2. Load a script module.
3. Test the script module.
Task 1: Package a function as a script module • Create the function Get-AppEvents and save it as a module script file name
MyAppEvents.psm1. The function Get-AppEvents has the following code.
Funnction Get-AppEvents { Get-EventLog –LogName Application –Newest 100 | Group-Object -Property InstanceId | Sort-Object –Descending -Property Count | Select-Object –Property Name,Count -First 5 | Format-Table –AutoSize }
Hint: Simply type the preceding code into a new script in the Windows PowerShell ISE. Then save the file as MyAppEvents.psm1. Be sure to save the file in the correct location for modules, in a module folder named MyAppEvents. For example: \Documents\WindowsPowerShell\Modules\MyAppEvents\MyAppEvents.psm1.

6 Lab Instructions: Advanced Windows PowerShell® Tips and Tricks
Task 2: Load a script module • Load the script module just created named MyAppEvents.
Task 3: Test the script module • Invoke the function Get-AppEvents.
Results: After this exercise, you will have written and tested a script module that runs a long command line that retrieves the five EventId values that have occurred the most often in the latest 100 events in the Windows Application event log.

Lab Instructions: Advanced Windows PowerShell® Tips and Tricks 7
Exercise 3: Adding Help Information to a Function
Scenario You have some long, one-line commands that you have added to functions. You want to be able to use the Get-Help cmdlet to get help information from the functions you created to serve as a reminder on how to use them and what information they provide. The main tasks for this exercise are as follows:
1. Add comment-based help to a function.
2. Test comment-based help.
3. Reload a module.
Task 1: Add comment-based help to a function • Edit the function Get-AppEvents in the MyAppEvents module created in
Exercise 1 Task1 to add the following to the function, which will add a DESCRIPTION and EXAMPLE to the help information. For example, add the following:
<# .SYNOPSIS Get-AppEvents retrieves the newest 100 events from the Application event log, groups and sorts them by InstanceID and then displays only top 5 events that have occurred the most. .DESCRIPTION See the synopsis section. .EXAMPLE To run the function, simply invoke it: PS> Get-AppEvents #>
Task 2: Test comment-based help • Test the comment-based help for the Get-AppEvents function with no
parameters passed and also with the –Examples switch passed.
Hint: If no help is displayed, or if an error message is displayed, proceed to the next Task.
8 Lab Instructions: Advanced Windows PowerShell® Tips and Tricks
Task 3: Reload a module • If the comment-based help is not working, remove and reimport the
MyAppEvents module. Then test the comment-based help for the Get-AppEvents function again.
Results: After this exercise, you will have added and tested comment-based help in the function that retrieves the five EventId values that have occurred the most in the latest 100 events in the Windows Application event log.

Lab Instructions: Automating Windows Server® 2008 Administration 1
Module 9 Lab Instructions: Automating Windows Server® 2008 Administration
Contents: Lab A: Using the Server Manager Cmdlets
Exercise 1: Listing All Currently Installed Features 5
Exercise 2: Comparing Objects 7
Exercise 3: Installing a New Server Feature 8
Exercise 4: Exporting Current Configuration to XML 9
Lab B: Using the Group Policy Cmdlets
Exercise 1: Listing All Group Policy Objects in the Domain 13
Exercise 2: Creating a Text-Based Report 14
Exercise 3: Creating HTML Reports 15
Exercise 4: Backing Up All Group Policy Objects 16
Lab C: Using the Troubleshooting Pack Cmdlets
Exercise 1: Importing the Troubleshooting Pack Module 20
Exercise 2: Solving an End-User Problem Interactively 21
Exercise 3: Solving a Problem Using Answer Files 22
Lab D: Using the Best Practices Analyzer Cmdlets
Exercise 1: Importing the Best Practices Module 26
Exercise 2: Viewing Existing Models 27
Exercise 3: Running a Best Practices Scan 28

2 Lab Instructions: Automating Windows Server® 2008 Administration
Lab E: Using the IIS Cmdlets
Exercise 1: Importing the IIS Module 32
Exercise 2: Creating a New Web Site 33
Exercise 3: Backing Up IIS 34
Exercise 4: Modifying Web Site Bindings 35
Exercise 5: Using the IIS PSDrive 36
Exercise 6: Restoring an IIS Configuration 38
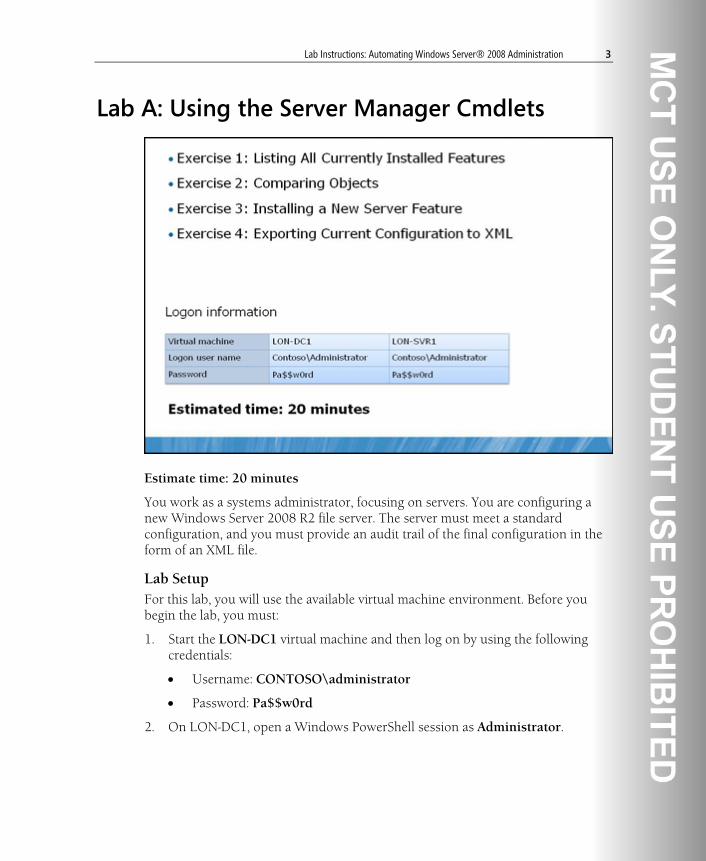
Lab Instructions: Automating Windows Server® 2008 Administration 3
Lab A: Using the Server Manager Cmdlets
Estimate time: 20 minutes
You work as a systems administrator, focusing on servers. You are configuring a new Windows Server 2008 R2 file server. The server must meet a standard configuration, and you must provide an audit trail of the final configuration in the form of an XML file.
Lab Setup For this lab, you will use the available virtual machine environment. Before you begin the lab, you must:
1. Start the LON-DC1 virtual machine and then log on by using the following credentials:
• Username: CONTOSO\administrator
• Password: Pa$$w0rd
2. On LON-DC1, open a Windows PowerShell session as Administrator.

4 Lab Instructions: Automating Windows Server® 2008 Administration
3. On LON-DC1, open the Start menu. Under the Administrative Tools folder, open the Group Policy Management Console.
4. In the left pane of the Group Policy Management Console, expand the forest and domain until you see the Starter GPO folder. Select the Starter GPO folder by clicking on it.
5. In the right pane, click the Create Starter GPOs button to create the Starter GPOs.
6. Ensure that Windows PowerShell remoting is enabled on LON-SVR1 and LON-SVR2. If you completed the previous labs in this course and have not shut down and discarded the changes in the virtual machines, remoting will be enabled. If not, open a Windows PowerShell session on those two virtual machines and run Enable-PSRemoting on each.
7. In Windows PowerShell, execute the following two commands:
• Set-ExecutionPolicy RemoteSigned
• E:\Mod09\Labfiles\Lab_09_Setup.ps1
Note: Some of the Group Policy Objects and DNS entries that this script will modify may already exist in the virtual machine and you may receive and error saying so if you have used the virtual machine during earlier modules and have not discarded those changes.
8. Ensure that the Windows Firewall is disabled on LON-SVR1, LON-DC1, and LON-SVR2.
9. Start the LON-SVR1 virtual machine, and then log on by using the following credentials:
• Username: CONTOSO\administrator
• Password: Pa$$w0rd
10. Open a Windows PowerShell session as Administrator.

Lab Instructions: Automating Windows Server® 2008 Administration 5
Exercise 1: Listing All Currently Installed Features
Scenario You are configuring a new Windows Server 2008 R2 file server. Other administrators have been using it for testing, so you don’t know what state it is in. You want to use the Server Manager cmdlets in Windows PowerShell to discover how the server is currently configured.
The main tasks for this exercise are carried out on LON-SVR1 and are as follows:
1. Import the Windows Server Manager PowerShell module.
2. View the module contents.
3. View all installed server features using Windows PowerShell.
Task 1: Import the Windows Server Manager PowerShell module 1. On LON-SVR1, in Windows PowerShell, view the list of all available modules.
2. Import the Server Manager module into your PowerShell session.
Task 2: View the module contents • View the contents of the ServerManager module.
6 Lab Instructions: Automating Windows Server® 2008 Administration
Task 3: View all installed server features 1. Display the available and installed server features using Windows PowerShell
and the Server Manager cmdlets.
2. Display only the server features that have been installed using Windows PowerShell and the Server Manager cmdlets.
Note: The Windows Feature object has a Boolean property called Installed that indicates whether it is installed or not.
Results: After this exercise, you should have successfully loaded the ServerManager PowerShell module, displayed the module contents, and viewed installed and available server features.

Lab Instructions: Automating Windows Server® 2008 Administration 7
Exercise 2: Comparing Objects
Scenario You need to compare the current configuration against your corporate standard. The standard configuration has been documented using the Export-Clixml cmdlet. You must compare the feature configuration information in this file against the current configuration.
The main tasks for this exercise are carried out on LON-SVR1 and as follows:
1. Import an XML file with standard configuration information.
2. Compare the standard configuration to the current configuration using the Compare-Object cmdlet.
Task 1: Import the XML file 1. Import the TargetFeatures.xml file from the E:\Mod09\Labfiles folder,
which was created with Export-Clixml cmdlet, as the variable $target.
2. Create a variable that contains the current server feature configuration.
Task 2: Compare the imported features with the current features • Compare the installed property of the $target and $current objects using the
Compare-Object cmdlet. The $target variable is the reference object and $current is the difference object.
Note: The installed property should be the only thing that is different, but you can include other property names to make the result more meaningful.
Results: After this exercise, you should be able to identify which server features need to be installed and which need to be removed to bring the configuration into compliance.

8 Lab Instructions: Automating Windows Server® 2008 Administration
Exercise 3: Installing a New Server Feature
Scenario To bring the server configuration into compliance, you need to install the missing server features.
The main task for this exercise is carried out on LON-SVR1 and is as follows:
1. Install the missing Windows Server features.
Task 1: View cmdlet help • View help and examples for the Add-WindowsFeature cmdlet.
Task 2: Install missing features • To install the missing features based on the comparison you did in Exercise 2,
you could simply make a written note of features installed in $target, but not installed in $current, and manually use Add-WindowsFeature to install each one. You can also accomplish this task using Windows PowerShell. Write a pipelined expression to install features that should be installed but are not.
Note: Remember, you can use the –WhatIf common parameter with Add-WindowsFeature so you can preview what the cmdlet would do without actually making any changes.
Results: After this exercise, you should have installed the server features that were installed in the imported configuration but not in the current configuration.

Lab Instructions: Automating Windows Server® 2008 Administration 9
Exercise 4: Exporting Current Configuration to XML
Scenario To provide an audit trail, you must export the current configuration to an XML file.
The main tasks for this exercise are carried out on LON-SVR1 and are as follows:
1. Verify the current configuration of installed features.
2. Create an XML file with information about the current feature configuration.
Task 1: Verify the current configuration • Using Windows PowerShell, display only the currently installed features,
and make sure only the following features are installed: File-Services, FS-FileServer, Windows-Internal-DB, Backup-Features, Backup, Backup-Tools, and WSRM.
Task 2: Export configuration to XML • Get all server features and export to a PowerShell XML file called
LON-SVR1-Features.xml. Store the file in your documents folder.
Results: After this exercise, you should have created an XML file that contains the current and now standardized, feature configuration.

Lab Instructions: Automating Windows Server® 2008 Administration 11
Lab B: Using the Group Policy Cmdlets
Estimated time: 20 minutes
You are a Windows administrator responsible for managing Group Policy objects in your domain. Your manager has asked for a report of all your Group Policy Objects. You manager also wants to make sure that all Group Policy Objects are being backed up.

12 Lab Instructions: Automating Windows Server® 2008 Administration
Lab Setup For this lab, you will use the available virtual machine environment. Before you begin the lab, you must:
1. Start the LON-SVR1 virtual machine. You do not need to log on, but wait until the boot process is complete.
2. Start the LON-DC1 virtual machine, and then log on by using the following credentials:
• Username: CONTOSO\administrator
• Password: Pa$$w0rd
3. Open a Windows PowerShell session.

Lab Instructions: Automating Windows Server® 2008 Administration 13
Exercise 1: Listing All Group Policy Objects in the Domain
Scenario Your manager has asked for a report of all your Group Policy Objects. You will start this process by gathering a list of all the Group Policy Objects in the domain.
The main tasks for this exercise are carried out on LON-DC1 and are as follows:
1. Import the Group Policy PowerShell module.
2. View the module contents.
3. View all Group Policy objects using Windows PowerShell.
Task 1: Import the Group Policy PowerShell module 1. Open Windows PowerShell and view the list of available modules.
2. Import the Group Policy module into your PowerShell session.
Task 2: View the module contents • View the contents of the Group Policy module.
Task 3: View Group Policy objects • Display all Group Policy objects in the domain using Windows PowerShell.
Results: After this exercise, you should have successfully loaded the GroupPolicy PowerShell module, displayed the module contents, and viewed all Group Policy objects in the domain.

14 Lab Instructions: Automating Windows Server® 2008 Administration
Exercise 2: Creating a Text-Based Report
Scenario Your manager has asked for some brief, summary reports of the Group Policy objects in your domain in a text file format.
The main tasks for this exercise are as follows:
1. Get selected information from all Group Policy objects in the domain.
2. Create a text file with this information.
Task 1: Get selected Group Policy object properties • Using Windows PowerShell, get all Group Policy objects for the domain
displaying the GPO name, when it was created, and when it was last modified. The output should be sorted by the time the GPO was last modified.
Note: Group Policy objects in PowerShell are like any other object in that they have properties. Use Get-Member to discover property names.
Task 2: Create a text file report • Collect the same information specified in the previous task and save the results
to a text file called GPOSummary.txt in \\LON-SVR1\E$\Mod09\Labfiles.
Results: After this exercise, you should have a text file that displays selected properties about all Group Policy objects in your domain.

Lab Instructions: Automating Windows Server® 2008 Administration 15
Exercise 3: Creating HTML Reports
Scenario You need to document Group Policy objects for historical and audit purposes. Your manager has also asked for a HTML-formatted report on the default domain policy.
The main tasks for this exercise are as follows:
1. Create an HTML report for the Default Domain policy.
2. Create an individual HTML report for each group policy object.
Task 1: Create a default Domain Policy report • Using Windows PowerShell, create an HTML report for the default domain
policy called DefaultDomainPolicy.htm and save it in your documents folder.
Task 2: Create individual GPO reports • Using a PowerShell expression, create individual HTML reports for each
Group Policy object and save them to \\LON-SVR1\E$\Mod09\Labfiles. The filename should be in the format GPO display name.htm.
Hint: You need to retrieve the GPOs, and then enumerate them by using ForEach-Object. Within the ForEach-Object script block, use a GPO cmdlet that generates a GPO report. That cmdlet identifies the GPOs by using an -id parameter; using $_.id for that parameter value will identify each GPO that you enumerate.
Results: After this exercise, you should have html reports for every Group Policy object in the domain.

16 Lab Instructions: Automating Windows Server® 2008 Administration
Exercise 4: Backing Up All Group Policy Objects
Scenario For business continuity purposes it is critical that Group Policy objects are properly backed up on a weekly basis. Your manager has asked you to develop a PowerShell solution you can run on a weekly basis to back up all Group Policy objects.
The main task for this exercise is:
1. Back up a Group Policy Object individually and collectively.
Task 1: Back up the Default Domain policy • Using Windows PowerShell, create a local backup of the Default Domain
policy to your documents folder.
Task 2: Back up all Group Policy objects • Using Windows PowerShell, back up all group policy objects in the domain to
\\LON-SVR1\E$\Mod09\Labfiles. Add the comment Weekly Backup to each backup.
Results: After this exercise, you should have backups of every Group Policy object in the domain.

18 Lab Instructions: Automating Windows Server® 2008 Administration
Lab C: Using the Troubleshooting Pack Cmdlets
Estimated time: 20 minutes
You work as a systems technician, troubleshooting problems with individual desktops. The help desk manager has asked for your assistance in troubleshooting a desktop problem. She has heard you can solve problems with Windows PowerShell and has asked for your assistance in learning more.

Lab Instructions: Automating Windows Server® 2008 Administration 19
Lab Setup For this lab, you will use the available virtual machine environment. Before you begin the lab, you must:
1. Start the LON-DC1 and LON-SVR1 virtual machines. You do not need to log on, but wait until the boot process is complete.
2. Start the LON-CLI1 virtual machine, and then logon by using the following credentials:
• Username: CONTOSO\administrator
• Password: Pa$$w0rd
3. Open a Windows PowerShell session on LON-CLI1.

20 Lab Instructions: Automating Windows Server® 2008 Administration
Exercise 1: Importing the Troubleshooting Pack Module
Scenario Your company has standardized on Windows 7 as the client operating system which includes PowerShell. You need to become familiar with PowerShell-based tools that you can use to troubleshoot and resolve problems.
The main tasks for this exercise are carried out on LON-CLI1 and are as follows:
1. Import the Troubleshooting Pack PowerShell module.
2. View the module contents.
Task 1: Import the Troubleshooting Pack PowerShell module • On LON-CLI1, import the Troubleshooting Pack module into your
PowerShell session.
Task 2: View the module contents • View the contents of the Troubleshooting Pack module.
Results: After this exercise, you will have successfully loaded the Troubleshooting Pack module and know what cmdlets it offers.

Lab Instructions: Automating Windows Server® 2008 Administration 21
Exercise 2: Solving an End-User Problem Interactively
Scenario Since you have to support Windows 7 clients, you plan to use Windows PowerShell to resolve problems faster and more efficiently. There is an ongoing problem with the Windows Search service. Using the Troubleshooting Pack cmdlets, your job is to find a way to identify this problem and resolve it.
The main tasks for this exercise are:
1. Stop Windows search.
2. Run an interactive troubleshooting session.
3. View the report.
Task 1: Stop Windows search • To simulate the problem, use Windows PowerShell to stop the Windows
Search service if it is running.
Task 2: Run an interactive troubleshooting session 1. Using the Search troubleshooting pack, run a troubleshooting session and
save the results to the current directory. When prompted, indicate that Files don’t appear in search results.
2. When prompted, allow the troubleshooter to fix the problem.
Task 3: View the report • Using Internet Explorer, view the contents of ResultReport.xml.
Results: After this exercise, you should have successfully run an interactive troubleshooting session in Windows PowerShell and generated a report file.

22 Lab Instructions: Automating Windows Server® 2008 Administration
Exercise 3: Solving a Problem Using Answer Files
Scenario You have a recurring problem that is relatively easy to resolve once it has been identified. You want to develop an answer file for this problem so that if the suspected problem exists, you can run the file so, the problem can be resolved quickly with minimal intervention on your part.
The main tasks for this exercise are as follows:
1. Create a troubleshooting pack answer file.
2. Use the answer file to resolve a problem.
3. Run a troubleshooting session unattended.
Task 1: Create an answer file • Create an answer file called SearchAnswer.xml in your documents folder for
the Search troubleshooting pack. When prompted, answer that Files Don’t Appear in Search Results. Leave any other questions blank.
Task 2: Invoke troubleshooting using the answer file 1. Using Windows PowerShell, stop the Windows Search service if it is running.
This will simulate the problem.
2. Use the answer file you created in Task 1 and invoke the Search troubleshooting pack. Do not fix any problems when prompted.
Task 3: Invoke troubleshooting unattended • Using the answer file you created in Task 1, invoke the Search troubleshooting
pack in unattended mode.

Lab Instructions: Automating Windows Server® 2008 Administration 23
Task 4: Verify the solution • Using Windows PowerShell, check the status of the Windows Search service
and verify that it is now running.
Results: After this exercise, you should have a troubleshooting answer file which you have used interactively and unattended to troubleshoot and solve a problem.
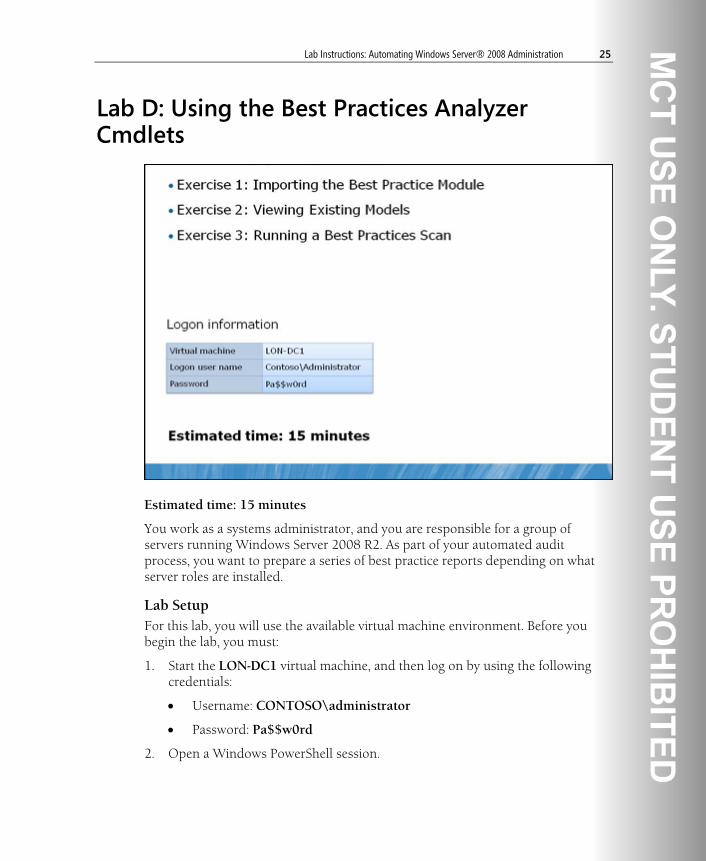
Lab Instructions: Automating Windows Server® 2008 Administration 25
Lab D: Using the Best Practices Analyzer Cmdlets
Estimated time: 15 minutes
You work as a systems administrator, and you are responsible for a group of servers running Windows Server 2008 R2. As part of your automated audit process, you want to prepare a series of best practice reports depending on what server roles are installed.
Lab Setup For this lab, you will use the available virtual machine environment. Before you begin the lab, you must:
1. Start the LON-DC1 virtual machine, and then log on by using the following credentials:
• Username: CONTOSO\administrator
• Password: Pa$$w0rd
2. Open a Windows PowerShell session.

26 Lab Instructions: Automating Windows Server® 2008 Administration
Exercise 1: Importing the Best Practices Module
Scenario As a Windows administrator, it is very important that your systems operate at peak efficiency while remaining secure. As a company policy you closely follow Microsoft recommended best practices. Windows PowerShell has a solution for analyzing your computers and network to see if they meet their recommended best practices. You want to learn more about this.
The main tasks for this exercise are as follows:
1. Import the Best Practices PowerShell module.
2. View the module contents.
Task 1: Import the Best Practices PowerShell module 1. Open Windows PowerShell and view the list of available modules.
2. Import the Best Practices module into your PowerShell session.
Task 2: View the module contents • View the contents of the Best Practices module.
Results: After this exercise, you should have successfully loaded the Best Practices PowerShell module and displayed the module contents.

Lab Instructions: Automating Windows Server® 2008 Administration 27
Exercise 2: Viewing Existing Models
Scenario In continuing your investigation of how PowerShell can help with analyzing best practices, you need to discover what areas it can scan.
The main task for this exercise is:
1. Display all available best practice models.
Task 1: Display all available best practice models • In Windows PowerShell, display all the best practice models you can use.
Results: After this exercise, you should be able to identify which areas can be scanned for best practices.

28 Lab Instructions: Automating Windows Server® 2008 Administration
Exercise 3: Running a Best Practices Scan
Scenario Now that you know what areas you can scan, you decide to discover how well your systems match up to the best practice model.
The main tasks for this exercise are as follows:
1. Run a best practices scan.
2. View the results.
3. Create a best practices scan report.
Task 1: Run a best practices scan • Using Windows PowerShell, run a best practices scan for Active Directory.
Task 2: View the scan results • Save the results of the Active Directory scan to a variable called $results and
view the results.
Task 3: View selected results • Each item in a scan result has a Severity property. Using Windows PowerShell,
display only scan results from your last Active Directory scan that are of the Error type.

Lab Instructions: Automating Windows Server® 2008 Administration 29
Task 4: Create a best practices report 1. Using Windows PowerShell, run a best practices scan for Active Directory and
generate an HTML report capturing these properties: ResultID, Severity, Category, Title, Problem, Impact, Resolution, and Compliance. The report should be sorted by Severity. Save the file to your documents folder. Use the CSS file found in your lab folder to provide formatting.
2. Open Windows Internet Explorer® to view the file.
Results: After this exercise, you should have an HTML report that compares your current Active Directory configuration to the Best Practices model.

Lab Instructions: Automating Windows Server® 2008 Administration 31
Lab E: Using the IIS Cmdlets
Estimated time: 30 minutes
You are a Windows Administrator tasked with managing a small Web server used for internal purposes. Your job includes creating and managing Web sites. Because your company charges for internal IT services, you need to automate Web site management so that it can be done in the most efficient manner possible.
Lab Setup For this lab, you will use the available virtual machine environment. Before you begin the lab, you must:
1. Start the LON-DC1 virtual machine, and then log on by using the following credentials:
• Username: CONTOSO\administrator
• Password: Pa$$w0rd
2. Open a Windows PowerShell session.

32 Lab Instructions: Automating Windows Server® 2008 Administration
Exercise 1: Importing the IIS Module
Scenario Your job includes creating and managing Web sites. Because your company charges back for IT services, you need to automate Web site management so that it can be done in the most efficient manner possible. You have heard that you can manage IIS from Windows PowerShell and want to learn more.
The main tasks for this exercise are as follows:
1. Import the IIS PowerShell module.
2. View the module contents.
Task 1: Import the IIS PowerShell module 1. Open Windows PowerShell and view the list of available modules.
2. Import the IIS management module into your PowerShell session.
Task 2: View the module contents • View the contents of the IIS module.
Results: After this exercise, you should have successfully loaded the IIS PowerShell module and displayed the module contents.

Lab Instructions: Automating Windows Server® 2008 Administration 33
Exercise 2: Creating a New Web Site
Scenario You want to test the IIS cmdlets by creating a simple Web site.
The main tasks for this exercise are as follows:
1. Create a simple Web site using the IIS cmdlets.
2. View all web sites.
3. Verify the Web site.
Task 1: Create a new Web site 1. Using the IIS cmdlets, create a new Web site using these settings:
a. Name: PowerShellDemo
b. Port: 80
c. Physical Path: %SystemDrive%\Inetpub\PowerShellDemo
2. Copy underconstruction.htm from the lab folder to the root of the new site as default.htm.
Task 2: View all Web sites • Using Windows PowerShell and the IIS cmdlets, view all Web sites running on
LON-DC1.
Task 3: Verify the Web site 1. Using Windows PowerShell, stop the Default Web site if it is running.
2. Using Windows PowerShell, start the new PowerShellDemo site.
3. Open the LON-DC1 Web server in Internet Explorer and verify you have reached the new site.
Results: After this exercise, you should be able to open the new Web site in Internet explorer and view the default document.

34 Lab Instructions: Automating Windows Server® 2008 Administration
Exercise 3: Backing Up IIS
Scenario Before making changes to IIS or Web site configurations, you need to have a backup. You want to use the IIS cmdlets to back up your IIS configuration.
The main tasks for this exercise are as follows:
1. Back up your IIS configuration.
2. Verify the backup.
Task 1: Back up IIS • Using the IIS cmdlets, back up your IIS configuration with a name of Backup1.
Task 2: Verify the backup • Using the IIS cmdlets, verify the Backup1 backup you just created.
Results: After this exercise, you should have a verified backup of IIS.

Lab Instructions: Automating Windows Server® 2008 Administration 35
Exercise 4: Modifying Web Site Bindings
Scenario To provide additional security for your internal Web server, you want to change the binding from the default port to a new port.
The main tasks for this exercise are as follows:
1. Display the current binding information for all Web sites.
2. Change the binding information for all sites to a new port.
3. Verify the site bindings have been changed.
Task 1: Display current binding information for all Web sites • Using the IIS cmdlets, display current binding settings for all Web sites on
LON-DC1.
Task 2: Change port binding • Using Windows PowerShell, change the port binding for all Web sites on
LON-DC1 from port 80 to port 8001. This includes the site using a host header.
Task 3: Verify the new bindings 1. Using Windows PowerShell and the IIS cmdlets, view the new binding
information.
2. Using Internet Explorer, connect to the PowerShell Demo site on LON-DC1 using the new binding information.
Results: After this exercise, you should have changed the default binding on all sites to 8001 and verified the change.

36 Lab Instructions: Automating Windows Server® 2008 Administration
Exercise 5: Using the IIS PSDrive
Scenario Because your Web server includes several sites, you do not want the default site to start automatically. Using the IIS PSDrive, you need to reconfigure the site so that it does not start automatically.
The main tasks for this exercise are as follows:
1. Use the IIS PSDrive to navigate through the site folder.
2. Display current properties for the default site.
3. Modify the default site so that it is not automatically started by the server.
Task 1: Connect to the IIS PSDrive 1. Display all available PSDrives in your PowerShell session.
2. Change your PowerShell location to the root of your IIS PSDrive.
Task 2: Navigate to the default site • Within the IIS PS Drive, navigate to the folder that represents the Default Site.
Task 3: Display all properties for the default site • Using Windows PowerShell and the IIS PSDrive, display a list of all properties
for the default site.
Tip: Not all properties may be displayed by default.

Lab Instructions: Automating Windows Server® 2008 Administration 37
Task 4: Modify the default site 1. Using Windows PowerShell and the IIS PSDrive, modify the default site so that
the site does not start automatically.
2. Change your PowerShell location back to C:\.
Results: After this exercise, you should have navigated through the IIS PSDrive and modified the Default Web site so that it does not start automatically.

38 Lab Instructions: Automating Windows Server® 2008 Administration
Exercise 6: Restoring an IIS Configuration
Scenario You realize you don’t want to keep the changes you’ve made so you wish to restore IIS to its previous configuration.
The main tasks for this exercise are:
1. View all available IIS configuration backups.
2. Restore the most current IIS backup.
Task 1: View existing backups • Using Windows PowerShell and the IIS cmdlets, display all available IIS
configuration backups.
Task 2: Restore the most recent configuration • Using Windows PowerShell and the IIS cmdlets, restore the most recent IIS
configuration.
Results: After this exercise, you should have restored IIS back to an earlier configuration with all sites back on port 80. You can ignore any errors about denied access to c:\windows\system32\inetserv\config\scheman\wsmanconfig_schema.xml.

Lab Instructions: Writing Your Own Windows PowerShell® Scripts 1
Module 11 Lab Instructions: Writing Your Own Windows PowerShell® Scripts
Contents: Lab A: Using Variables and Arrays
Exercise 1: Creating Variables and Interacting with Them 5
Exercise 2: Understanding Arrays and Hashtables 7
Exercise 3: Using Single-Quoted and Double-Quoted Strings and the Backtick 11
Exercise 4: Using Arrays and Array Lists 13
Exercise 5: Using Contains, Like and Equals Operators 14
Lab B: Using Scripting Constructs
Exercise 1: Processing and Validating Input 19
Exercise 2: Working with For, While, Foreach, and Switch 21
Exercise 3: Using the Power of the One-Liner 24
Lab C: Error Trapping and Handling
Exercise 1: Retrieving Error Information 28
Exercise 2: Handling Errors 31
Exercise 3: Integrating Error Handling 34
Lab D: Debugging a Script
Exercise 1: Debugging from the Windows PowerShell Console 40
Exercise 2: Debugging Using the Windows PowerShell Integrated Scripting Environment (ISE) 43

2 Lab Instructions: Writing Your Own Windows PowerShell® Scripts
Lab E: Modularization
Exercise 1: Generating an Inventory Audit Report 48

Lab Instructions: Writing Your Own Windows PowerShell® Scripts 3
Lab A: Using Variables and Arrays
Estimated time: 30 minutes
You’ve been using PowerShell interactively for long enough that you’re comfortable with the cmdlets you use. Now you want to start automating your environment and you need to create scripts that work on a larger scale. Your developer friend told you about variables, arrays, and hashtables. He also suggested that you need to learn the key looping constructs like for, while, do, etc., so that you can take advantage of them in your automation scripts.

4 Lab Instructions: Writing Your Own Windows PowerShell® Scripts
Lab Setup Before you begin the lab you must:
1. Start the LON-DC1 and LON-SVR1 virtual machines and log on with the following credentials:
• Username: CONTOSO\administrator
• Password: Pa$$w0rd
2. On LON-SVR1, open the Windows PowerShell ISE. All PowerShell commands are run within the Windows PowerShell ISE program.

Lab Instructions: Writing Your Own Windows PowerShell® Scripts 5
Exercise 1: Creating Variables and Interacting with Them
Scenario You’ve been using PowerShell interactively for long enough that you’re comfortable with the cmdlets you use. You have noticed that you often repeat the same command when working interactively and would like to learn how to avoid unnecessary repetition. A colleague told you that you can store results in variables so you need to experiment with variables and learn how they work.
The main tasks for this exercise are carried out on LON-SVR1 and are as follows:
1. Create strongly- and weakly-typed variables.
2. View all variables and their values.
3. Assign values to variables from a child scope and learn how scopes affect variables.
4. Remove a variable.
Task 1: Create and work with variables and variable types 1. Create a variable called myValue and assign the value of 1 to it.
2. Assign “Hello” to the value of myValue. Notice that the variable changed from an integer to a string.
3. Read help documentation and examples for the Get-Variable cmdlet.
4. Show all properties for the myValue variable using Get-Variable.
5. Show the contents of the myValue variable using Get-Variable with the ValueOnly parameter.
6. Redefine the variable myValue assigning it as an [int] (integer). Assign the value of 1 to it.
7. Try to assign the value of “Hello” to the myValue variable. Notice that an error was raised in PowerShell because the variable myValue has been typed as an [int].

6 Lab Instructions: Writing Your Own Windows PowerShell® Scripts
Task 2: View all variables and their values • Get a list of all variables and their current values in the current scope by using
the Get-Variable cmdlet.
Task 3: Remove a variable 1. Read the help documentation and examples for the Remove-Variable cmdlet
to learn how you can use it to remove variables.
2. Remove the myValue variable you created earlier using the Remove-Variable cmdlet.
Results: After this exercise, you should be able to create new variables, view variable values and remove variables.

Lab Instructions: Writing Your Own Windows PowerShell® Scripts 7
Exercise 2: Understanding Arrays and Hashtables
Scenario When you are automating tasks in your environment, there are times when you would like to store a collection of objects in a variable and work with that collection. You want to explore how to do this using arrays and hashtables.
The main tasks for this exercise are as follows:
1. Create an array of services.
2. Access individual items and groups of items in an array.
3. Retrieve the count of objects in an array.
4. Create a hashtable of services.
5. Access individual items in a hashtable.
6. Enumerate key and value collections of a hashtable.
7. Remove a value from a hashtable.
Task 1: Create an array of services 1. Read the documentation in about_Arrays to understand how arrays work in
PowerShell.
2. Create a variable called services and assign it to a list of all Windows services.
3. Show the contents of the services variable.
4. Show the type of the services variable.
Task 2: Access individual items and groups of items in an array 1. Show the first item in the services array.
2. Show the second item in the services array.
3. Show the last item in the services array.
4. Show the first ten items in the services array.

8 Lab Instructions: Writing Your Own Windows PowerShell® Scripts
Task 3: Retrieve the count of objects in an array • Determine how many items are in an array by using the Count property.
Task 4: Create a hashtable of services 1. Read the documentation in about_Hash_Tables to understand how
hashtables work in PowerShell.
2. Create a new, empty hashtable called serviceTable.
3. Use the services array to populate the serviceTable hashtable using the service name as the key and the service as the value.
Hint: One way to do this is to use the ForEach scripting construct, which you will learn about next. This is different from the ForEach-Object cmdlet. For example, if $services contains your services, and $serviceTable is your empty hashtable: ForEach ($service in $services) { $serviceTable[$service.Name] = $service } This creates a hashtable $serviceTable, where the keys are service names, and the values are the actual service objects. You can access a service by its name.
4. Show the serviceTable hashtable contents.

Lab Instructions: Writing Your Own Windows PowerShell® Scripts 9
Task 5: Access individual items in a hashtable 1. Show the BITS entry in the serviceTable hashtable.
Hint: If $serviceTable is your hashtable, $serviceTable['service_name'] accesses the service namedservice_name.
2. Show the wuauserv entry in the serviceTable hashtable.
3. Use Get-Member to show all properties and methods on the serviceTable hashtable.
4. Determine how many items are in the serviceTable hashtable.
Hint: Hashtables are objects, and one of their properties is Count. If you start with the variable that contains your hashtable, follow it with a period, and follow that with the Count property, you can retrieve the contents of the Count property.
Task 6: Enumerate key and value collections of a hashtable
Hint: Hashtables are objects, and expose properties such as Keys and Values. These properties are collections, meaning they contain other objects - such as all the keys in the hastable, or all the values in the hashtable, respectively. Use the Keys and Values properties in the same way you used the Count property earlier.
1. Show all keys in the serviceTable hashtable.
2. Show all values in the serviceTable hashtable.

10 Lab Instructions: Writing Your Own Windows PowerShell® Scripts
Task 7: Remove a value from a hashtable 1. Remove the BITS entry from the serviceTable hashtable using the appropriate
method.
Hint: Hashtables have a Remove() method that can remove items identified by their key. For example, $hash.Remove('Hello') would remove the element having the key "Hllo"from the hashtable in $hash.
2. Show the BITS entry in the serviceTable hashtable to verify that it was properly removed.
Results: After this exercise, you should be able to create arrays and hashtables, access individual items in arrays and hashtables, and remove items from hashtables.

Lab Instructions: Writing Your Own Windows PowerShell® Scripts 11
Exercise 3: Using Single-Quoted and Double-Quoted Strings and the Backtick
Scenario While automating tasks, you would like to format some of the output using strings. You need to understand how different strings work in PowerShell so that you can create compound strings that contain variable values. Also, while using PowerShell interactively you noticed that there are times when you would like to split a command across multiple lines.
The main tasks for this exercise are as follows:
1. Learn the differences between single-quoted and double-quoted strings.
2. Use a backtick (`) to escape characters in a string.
3. Use a backtick (`) as a line continuance character in a command.
Task 1: Learn the differences between single-quoted and double-quoted strings 1. Create a variable called myValue and assign it a value of ‘Hello’.
2. Show the value of the following string by entering it into PowerShell: “The value is $myValue”. Note how the string variable was expanded in the double-quoted string.
3. Show the value of the following string by entering it into PowerShell: ‘The value is not $myValue’. Note how the string variable was not expanded in the single-quoted string.
Task 2: Use a backtick (') to escape characters in a string 1. Show the value of the following string by entering it into PowerShell: “The
value is not `$myValue”. Make sure you enter the backtick before $myValue and note how the string variable was not expanded in the double-quoted string when the $ was escaped with a backtick.
2. List the contents of the C:\Program Files directory.
3. Repeat the last command without using quotation marks by using a backtick to escape the space between Program and Files.

12 Lab Instructions: Writing Your Own Windows PowerShell® Scripts
Task 3: Use a backtick (`) as a line continuance character in a command • Retrieve the Windows Update service object using Get-Service. Place the
Name parameter on the second line of the command and use a backtick at the end of the first line to indicate that the command spans two lines.
Results: After this exercise, you should be able to create simple and compound strings and use a backtick to split a single command across multiple lines.

Lab Instructions: Writing Your Own Windows PowerShell® Scripts 13
Exercise 4: Using Arrays and Array Lists
Scenario While working with arrays, you noticed that you were not able to easily find items in the array or remove items from the array. You need to learn about Array Lists so that you can manipulate the contents of the collection more easily.
The main tasks for this exercise are as follows:
1. Learn how to extract items from an array.
2. Discover the properties and methods for an array.
Task 1: Learn how to extract items from an array 1. Create a variable called days and assign an array of the seven days of the week
to that variable, starting with Sunday.
2. Show the third item in the days array.
Task 2: Discover the properties and methods for an array 1. Pass the days array to Get-Member to see the properties and methods. Note
that the properties and methods that appear are for the items in the days array and not for the days array itself.
2. Use Get-Member with the InputObject parameter to show the properties and methods for the days array. This technique also shows the properties and methods for the days array itself.
Results: After this exercise, you should be able to extract specific items from arrays by index or from array lists by name. You should also be able to discover the properties and methods for an array or array list.

14 Lab Instructions: Writing Your Own Windows PowerShell® Scripts
Exercise 5: Using Contains, Like and Equals Operators
Scenario Sometimes when you are working with your scripts, you find yourself working with collections of items. You need to explore how to find items in those collections that match or partially match a string.
The main tasks for this exercise are as follows:
1. Use contains, like and equals operators to find elements in arrays.
2. Understand the difference when using those operators with strings.
Task 1: Use contains, like and equals operators to find elements in arrays 1. Read the about_Comparison_Operators documentation that describes the
contains, like, and equals operators to understand how they are used in PowerShell.
2. Create a new variable called colors and assign an array to it containing the following values: Red, Orange, Yellow, Green, Black, Blue, Gray, Purple, Brown, and Blue.
3. Use the like operator to show all colors in the colors array that end with e.
4. Use the like operator to show all colors in the colors array that start with b.
5. Use the like operator to show all colors in the colors array that contain a.
6. Use the contains operator to determine if the colors array contains the value White.
7. Use the contains operator to determine if the colors array contains the value Green.
8. Use the equals operator to find all values in the colors array that are equal to the value Blue.

Lab Instructions: Writing Your Own Windows PowerShell® Scripts 15
Task 2: Understand the difference when using those operators with strings 1. Create a new variable called favoriteColor and assign the value of Green to it.
2. Use the like operator to determine whether the value in favoriteColor contains e.
3. Use the contains operator to determine whether the value in favoriteColor contains e. Note that this returns false because it treats the favoriteColor variable like an array of strings.
Results: After this exercise, you should be able use the contains, like, and equal operators to show partial contents of a collection. You should also understand how these operators function differently, depending on the type of object they are being used with.

Lab Instructions: Writing Your Own Windows PowerShell® Scripts 17
Lab B: Using Scripting Constructs
Estimated time: 30 minutes
Some of your junior IT staff could benefit from PowerShell scripts but they don’t have the skills yet to write them themselves. You want to create some command-line utilities that allow those staff members to do specific tasks based on their input. As an Active Directory administrator, you need to be able to provision new accounts and make large scale changes very easily. PowerShell looping constructs have become required knowledge for you to get this work done in an efficient manner. You want to be careful with your scripts so that they don’t take too long to run in your enterprise and so that they don’t use too many system resources.

18 Lab Instructions: Writing Your Own Windows PowerShell® Scripts
Before you begin the lab you must:
1. Start the LON-DC1, LON-SVR1, LON-SVR2, and LON-CLI1 virtual machines. Wait until the boot process is complete.
2. Log on to LON-DC1 with the following credentials:
• Username: CONTOSO\administrator
• Password: Pa$$w0rd
3. Open the Windows PowerShell ISE on LON-DC1. All PowerShell commands are run within the Windows PowerShell ISE program.
4. Disable the firewall on the LON-DC1, LON-SVR1, LON-SVR2, and LON-CLI1 virtual machines.
This is not a security best practice and under no circumstances should this be done in a production environment. This is done in this instance purely to allow us to focus on the learning task at hand and concentrate on PowerShell concepts.
Note: You may choose to complete these exercises in the Windows PowerShell ISE or in the Windows PowerShell console. In the console, you can open a construct using a left brace {, and the shell allows you to press Enter to continue a new line. When you do so, the shell prompt changes to >>, indicating that you are still inside a construct. Continue typing, and when you are done, close the construct with a right brace } and press Enter. You must press Enter one last time on a >> line to tell the shell that you are finished. Alternately, complete the exercises in the Windows PowerShell ISE, which is better-designed for multiline commands and scripts.

Lab Instructions: Writing Your Own Windows PowerShell® Scripts 19
Exercise 1: Processing and Validating Input
Scenario Some of your junior IT staff could benefit from PowerShell scripts but they don’t have the skills yet to write them themselves. You want to create some command-line utilities that allow those staff members to do specific tasks based on their input.
The main tasks for this exercise are as follows:
1. Read input from the end user.
2. Validate input received from the end user.
3. Create a script that prompts for specific input and exits only when the right input is found or when no input is provided.
Task 1: Read input from the end user 1. Read the help documentation and examples for the Read-Host cmdlet so that
you understand how it is used.
2. Use Read-Host to prompt for input, setting the prompt text to Enter anything you like and press <ENTER> when done.
3. Create a new variable called serverName and assign a value entered at the prompt through Read-Host. Use Server Name for the prompt text.
Task 2: Validate input received from the end user 1. Read the documentation in about_if to understand how if statements work.
2. Create an if statement that outputs Server name '$serverName' is REJECTED if the value of the serverName variable does not start with SERVER or Server name '$serverName' is OK! if the value of the serverName variable does start with SERVER.

20 Lab Instructions: Writing Your Own Windows PowerShell® Scripts
Task 3: Create a script that prompts for specific input and exits only when the right input is found or when no input is provided 1. Read the documentation in about_do to understand how the do…while
statement works.
2. Create a do…while statement that clears the screen and then prompts the user for a server name. The prompt text should be 'Server Name (this must start with "SERVER")'. The loop should terminate when the user either provides a server name that starts with SERVER or doesn’t provide any input at all and just presses <ENTER>.
3. Output the value of the serverName variable in the console.
4. Combine the results of steps 2 and 3 into a script and run it.
Results: After this exercise, you should be able to read and process user input in a PowerShell script.

Lab Instructions: Writing Your Own Windows PowerShell® Scripts 21
Exercise 2: Working with For, While, Foreach, and Switch
Scenario As an Active Directory administrator, you need to be able to provision new accounts and make large-scale changes very easily. PowerShell looping constructs have become required knowledge for you to get this work done in an efficient manner. You'll start with some basic for a while loops, and then move on to using what you've learned for your Active Directory tasks.
The main tasks for this exercise are as follows:
1. Create a basic for loop.
2. Create a basic while loop.
3. Use the for statement to create users in Active Directory.
4. Use foreach to iterate through a collection of objects.
5. Use switch to test a value and translate it to a human-readable string.
Task 1: Create a basic for loop 1. Create a new variable called i and assign a value of 100 to that variable.
2. Read the documentation in about_For so that you understand how for loops work.
3. Create a for loop with the following values:
init: $i condition: $i -lt 100 repeat: $i++
Inside the for loop write the value of $i out to the current host using Write-Host. Note that the loop does not run and no output is produced.
4. Repeat the last task using an init value of $i = 0. Note that the numbers 0 through 99 are output to the host.

22 Lab Instructions: Writing Your Own Windows PowerShell® Scripts
Task 2: Create a basic while loop 1. Assign a value of 0 to the i variable.
2. Read the documentation in about_While so that you understand how while loops work.
3. Create a while loop with the following condition: $i -lt 100. Inside the while loop write the value of $i out to the current host using Write-Host and increment the value of $i. Note that this loop produces the exact same output as the for loop you just ran.
Task 3: Use the for statement to create users in Active Directory 1. Import the Active Directory module into the current session.
2. Read the help documentation and examples for the New-ADUser cmdlet so that you understand how it works.
3. Create a new user named Module11BTest1 in the CN=Users,DC=contoso,DC=com container with a SAM account name of Module11BTest1. Use the PassThru parameter to show the user once they are created.
4. Create a new variable called numUsers and assign the value of 10 to that variable.
5. Create a for loop to generate 9 more users. The for loop counter ($i) should be initialized to 2 and the for loop should terminate when the counter is equal to the value of the numUsers variable. All users should have a name and SAM account name of Module11BTest$i and they should be created in the CN=Users,DC=contoso,DC=com container. Use the PassThru parameter to show the users once they are created.
6. Remove the test users by retrieving all users whose name starts with Module11BTest using Get-ADUser and piping them to Remove-ADUser.

Lab Instructions: Writing Your Own Windows PowerShell® Scripts 23
Task 4: Use foreach to iterate through a collection of objects 1. Read the documentation in about_foreach so that you understand how the
foreach statement works.
2. Retrieve a list of logical disks using Get-WmiObject with the Win32_LogicalDisk class. Store the results in a new variable called disks.
3. Use the foreach operator to iterate through the disks array. The current item should be stored in a variable called disk. Inside the loop use Select-Object to output the DeviceId and DriveType properties for each disk.
Task 5: Use switch to test a value and translate it to a human-readable string 1. Read the documentation in about_switch so that you understand how the
switch statement works.
2. Using the same foreach loop you just created, add a switch statement to lookup a display name for the DriveType property integer value. Store the display name in a variable called driveTypeValue. Update the Select-Object statement to output the driveTypeValue value as a calculated value called DriveType instead of the DriveType property. The DriveType values and their corresponding display names are:
0: Unknown 1: No Root Directory 2: Removable Disk 3: Local Disk 4: Network Drive 5: Compact Disk 6: RAM Disk
Results: After this exercise, you should be able to use the for, foreach, and switch statements in your PowerShell scripts.

24 Lab Instructions: Writing Your Own Windows PowerShell® Scripts
Exercise 3: Using the Power of the One-Liner
Scenario Now that you can perform large scale optimizations against Active Directory, you want to be careful with your scripts so that they don’t take too long to run in your enterprise and so that they don’t use too many system resources. At the same time, you also want to prove to yourself how scripting and one-liner commands can be interchangeable.
The main tasks for this exercise are as follows:
1. Create scripts to retrieve and process data.
2. Create one-liners for those scripts that are much more efficient.
Task 1: Create scripts to retrieve and process data 1. Use the foreach statement to iterate through a list of the names of all
computers in your domain (LON-DC1, LON-SVR1, LON-SVR2 and LON-CLI1). For each computer, get the Windows Update service using Get-Service.
2. Use the foreach statement to iterate through all Active Directory users. For each user, include the Office attribute in the results and show only users that have an Office attribute value of Bellevue.
Task 2: Create one-liners for those scripts that are much more efficient 1. Use Get-Service to retrieve the Windows Update service from all computers in
the domain. Pass an array of computer names directly into the ComputerNames parameter.
2. Use Get-ADUser to retrieve all Active Directory users whose Office attribute has a value of Bellevue.
Results: After this exercise, you should understand that many short scripts can be converted into simple one-liner commands that are efficient and require less memory.

26 Lab Instructions: Writing Your Own Windows PowerShell® Scripts
Lab C: Error Trapping and Handling
Estimated time: 30 minutes
You are assigned to update a Windows PowerShell script that gathers audit information from machines on your network. All errors must be logged to the Windows Event Log under the Windows PowerShell event log according to company policy. This script is designed to run from the task scheduler, so the event log is the only way that you are notified if the script is not completing its audit as necessary.

Lab Instructions: Writing Your Own Windows PowerShell® Scripts 27
Lab Setup Before you begin the lab you must:
1. Start the LON-DC1 virtual machines Wait until the boot process is complete.
2. Start the LON-SVR1 virtual machine and log on with the following credentials:
• Username: CONTOSO\administrator
• Password: Pa$$w0rd
3. On LON-SVR1, open the Windows PowerShell ISE. All PowerShell commands are run within the Windows PowerShell ISE program.
4. In the PowerShell window, type the following command and press ENTER:
Set-ExecutionPolicy RemoteSigned –Scope CurrentUser.
5. In the PowerShell window, type the following command and press ENTER:
Set-Location E:\Mod11\Labfiles

28 Lab Instructions: Writing Your Own Windows PowerShell® Scripts
Exercise 1: Retrieving Error Information
Scenario Since your audit scripts need to run unattended, you would like to understand how Windows PowerShell commands respond when they encounter a problem. After seeing how Windows PowerShell acts on encountering an error, you need to find out how to control those errors and identify what problems were encountered. Finally, you want to be able to create your own errors, so you can provide meaningful messages for your environment.
1. Identify the Error Action Preference settings.
2. Control error action in scope.
3. Control error action per command.
4. Review errors globally.
5. Review errors by command.
Task 1: Identify the Error Action Preference settings 1. Examine the $ErrorActionPreference variable.
2. Review the help for the preference variables and common parameters.
Task 2: Control nonterminating error action in scope 1. Confirm that $ErrorActionPreference is set to Continue.
2. Run ErrorActionPreference.ps1 and set the FilePath parameter to Servers.txt (the script and the text file are in the E:\Mod11\Labfiles folder).
3. Rerun the ErrorActionPreference.ps1 script and set the FilePath parameter to DoesNotExist.txt.
4. Set $ErrorActionPreference to its other values and run the script with a FilePath of DoesNotExist.txt for each value. Note the difference in how the error condition is handled.
5. Close Windows PowerShell.

Lab Instructions: Writing Your Own Windows PowerShell® Scripts 29
Task 3: Control error action per command 1. Open ErrorActionPreference.ps1 (from the E:\Mod11\Labfiles folder) in the
Windows PowerShell ISE.
2. Confirm that $ErrorActionPreference is set to Continue.
3. Use the -ErrorAction parameter for Get-Content (line 6) to control the error action at the cmdlet. Run the script once with a FilePath of DoesNotExist.txt for each error action setting.
4. Remove the -ErrorAction parameter from line 6 and save the file.
Task 4: Review errors globally 1. Open Windows PowerShell.
2. Confirm that $ErrorActionPreference is set to Continue.
3. Run ErrorActionPreference.ps1 and set the FilePath parameter to 'ServersWithErrors.txt' (the text file is in the E:\Mod11\Labfiles folder).
4. Examine the $error automatic variable.
Task 5: Review errors by command 1. In the script pane of Windows PowerShell ISE, edit line 12 of the
ErrorActionPreference.ps1 script to include the -ErrorVariable global:ComputerSystemError.
2. Run ErrorActionPreference.ps1 and set the FilePath parameter to ServersWithErrors.txt.
3. Examine the ComputerSystemError variable.
4. Remove the ComputerSystemError variable from the global scope.
5. In the script pane of Windows PowerShell ISE, edit line 12 of the ErrorActionPreference.ps1 script to include the -ErrorVariable +global:ComputerSystemError.

30 Lab Instructions: Writing Your Own Windows PowerShell® Scripts
6. Run ErrorActionPreference.ps1 and set the FilePath parameter to ServersWithErrors.txt.
7. Examine the ComputerSystemError variable.
8. Remove the -ErrorVariable +global:ComputerSystemError from line 12 and save the script.
Results: After this exercise, you should have identified terminating and nonterminating errors, controlled the Windows PowerShell runtime's Error Action Preference both in scope and by command, examined where error information is available.

Lab Instructions: Writing Your Own Windows PowerShell® Scripts 31
Exercise 2: Handling Errors Now that you have a feel for how errors occur and how to control their output, you need to identify the trouble spots and add some error handling to your scripts. In your experimentation, you notice that there are specific types of errors thrown and you need to identify how to deal with different types of errors.
The main tasks for this exercise are as follows:
1. Handle scoped errors.
2. Handle error prone sections of code.
3. Clean up errors in code.
4. Catch specific types of errors.
Task 1: Handle scoped errors 1. Open the Windows PowerShell ISE and open UsingTrap.ps1 (from the
E:\Mod11\Labfiles folder).
2. Run UsingTrap.ps1and set the FilePath parameter to ServersWithErrors.txt (from the E:\Mod11\Labfiles folder).
3. Modify the trap statement to display other information from the various errors.
4. Move the trap statement to different spots in the scope of the script (into the function InventoryServer, just under the first if statement) and see how that impacts the continuation after the error.
5. Remove the -ErrorAction parameters from the Get-WmiObject commands and run the script. Notice the change in behavior when the errors change from terminating errors to nonterminating errors.

32 Lab Instructions: Writing Your Own Windows PowerShell® Scripts
Task 2: Handle error prone sections of code 1. Open AddingTryCatch.ps1 (from the E:\Mod11\Labfiles folder) in the
Windows PowerShell ISE.
2. Change the if statement on lines 42 to 45 to be:
try { if ( $ping.Send("$server").Status -eq 'Success' ) { InventoryServer($server) } } catch { Write-Error "Unable to ping $server" Write-Host "The error is located on line number: ($_.InvocationInfo.ScriptLineNumber)" Write-Host "$($_.InvocationInfo.Line.Trim())" }
3. Run the AddingTryCatch.ps1 and set the FilePath parameter to ServersWithErrors.txt (from the E:\Mod11\Labfiles folder).
Task 3: Clean up after error prone code • In the Windows PowerShell ISE, in the AddingTry.ps1 file, after the closing
brace in the catch add:
finally { Write-Host "Finished with $server" }
Question: What type of scenarios would a finally block be useful for?
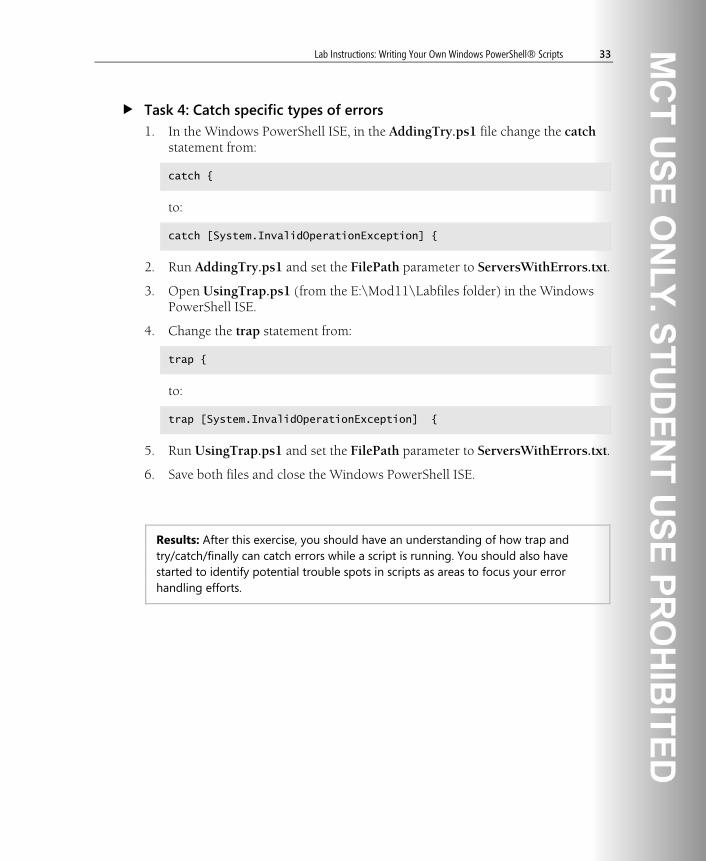
Lab Instructions: Writing Your Own Windows PowerShell® Scripts 33
Task 4: Catch specific types of errors 1. In the Windows PowerShell ISE, in the AddingTry.ps1 file change the catch
statement from:
catch {
to:
catch [System.InvalidOperationException] {
2. Run AddingTry.ps1 and set the FilePath parameter to ServersWithErrors.txt.
3. Open UsingTrap.ps1 (from the E:\Mod11\Labfiles folder) in the Windows PowerShell ISE.
4. Change the trap statement from:
trap {
to:
trap [System.InvalidOperationException] {
5. Run UsingTrap.ps1 and set the FilePath parameter to ServersWithErrors.txt.
6. Save both files and close the Windows PowerShell ISE.
Results: After this exercise, you should have an understanding of how trap and try/catch/finally can catch errors while a script is running. You should also have started to identify potential trouble spots in scripts as areas to focus your error handling efforts.

34 Lab Instructions: Writing Your Own Windows PowerShell® Scripts
Exercise 3: Integrating Error Handling Having gotten comfortable with the error handling mechanisms in PowerShell, you need to incorporate that into your existing scripts. Because company policy dictates that errors are to be logged to the event log, you also need to determine how to write error log entries.
The main tasks for this exercise are as follows:
1. Set up the shell environment.
2. Create new Event Source for the Windows PowerShell Event Log.
3. Write error messages to the Windows PowerShell Event Log.
4. Add a top level Trap function to catch unexpected errors and log them to the event log.
5. Add localized Try/Catch/Finally error handling to potential trouble spots, and log the errors to the event log.
Task 1: Set up the shell environment 1. On the Start menu click All Programs, click Accessories, click Windows
PowerShell, right-click Windows PowerShell and choose Run As Administrator.
2. In the PowerShell window, type the following command and press ENTER:
Set-ExecutionPolicy ‘RemoteSigned’ –Scope CurrentUser
3. In the PowerShell window, type the following command and press ENTER:
Set-Location E:\Mod11\Labfiles
Task 2: Create new Event Source for the Windows PowerShell Event Log 1. Start Windows PowerShell as an administrator.
2. Use New-EventLog to create an event source called AuditScript in the Windows PowerShell event log.

Lab Instructions: Writing Your Own Windows PowerShell® Scripts 35
Task 3: Write error messages to the Windows PowerShell Event Log 1. Use Write-EventLog to write a new event to the Windows PowerShell event
log.
2. Open the event viewer and verify that the event was written to the event log.
3. Close Windows PowerShell.
Task 4: Add a top level Trap function to catch unexpected errors and log them to the event log 1. Open the Windows PowerShell ISE and open AuditScript.ps1.
2. Create a trap function in the primary scope of the application to catch any unhandled errors and log them to the event log. The script name, type of error, the command generating the error, and the line number where the error occurred should all be logged to the event log.
Task 5: Add localized Try...Catch error handling to potential trouble spots and log the errors to the event log 1. Review the AuditScript.ps1 file and look for potential trouble spots. Wrap
those spots in a try/catch or try/catch/finally block. Add other PowerShell statements as necessary to make the script hardened to dealing with errors.
2. Run AuditScript.ps1 with the FilePath parameter to AuditTest0.txt, then AuditTest1.txt, and finally AuditTest2.txt.

36 Lab Instructions: Writing Your Own Windows PowerShell® Scripts
3. Check the event log for and verify that any errors were logged. Also, compare the output files to verify that the outputs are all the same by using the commands that follow:
Compare-Object –ReferenceObject (Import-CliXML AuditLog-AuditTest0.txt.xml) –DifferenceObject (Import-CliXML AuditLog-AuditTest1.txt.xml) Compare-Object –ReferenceObject (Import-CliXML AuditLog-AuditTest1.txt.xml) –DifferenceObject (Import-CliXML AuditLog-AuditTest2.txt.xml) Compare-Object –ReferenceObject (Import-CliXML AuditLog-AuditTest0.txt.xml) –DifferenceObject (Import-CliXML AuditLog-AuditTest2.txt.xml)
4. Close the Windows PowerShell ISE.
Results: After this exercise, you should have created an event source in the Windows PowerShell event log, created a top-level trap to catch unexpected errors and log them, and wrapped potentially error-prone sections of script in a try/catch block.

38 Lab Instructions: Writing Your Own Windows PowerShell® Scripts
Lab D: Debugging a Script
Estimated time: 30 minutes
Your manager has provided you with several Windows PowerShell scripts that are not functioning as expected. The first script is EvaluatePingTimes, which loads a log of ping tests run against various machines on your WAN. It categorizes the results based on the expected network latency. However, there is a problem with the totals not matching the number of ping tests performed. The second script is CalculatePerfMonStats, which imports some PerfMon data relating to memory usage on a server and calculates some statistics. For some of the counters, there seems to be a problem with how the numbers are read in, as some math errors are generated.

Lab Instructions: Writing Your Own Windows PowerShell® Scripts 39
Lab Setup For this lab, you use the available virtual machine environment. Before you being the lab, you must:
1. Start the LON-DC1 virtual machine and then log on by using the following credentials:
• Username: CONTOSO\administrator
• Password: Pa$$w0rd
2. Open a Windows PowerShell session.

40 Lab Instructions: Writing Your Own Windows PowerShell® Scripts
Exercise 1: Debugging from the Windows PowerShell Console
Scenario Since you are responsible for fixing several error prone scripts, you need to experiment with some of the debugging facilities in PowerShell. First, you explore how debugging statements can be written to the console. After that, you can explore how PowerShell allows you to step through the script and interactively explore the current state of variables. Finally, after finding some of your problem areas, you can use the breakpoint features to stop a script at the trouble spots for further investigation.
The main tasks for this exercise are as follows:
1. Use $DebugPreference to enable debugging statements.
2. Use Write-Debug to provide information as the script progresses.
3. Use Set-PSDebug to trace the progress through the script.
4. Use Set-PSBreakpoint to break into a script’s progress at specified points.
5. Use Get-PSBreakpoint and Remove-PSBreakpoint to manage breakpoints.
6. Use Set-PSBreakpoint to break into a script if certain conditions are met.
Task 1: Use $DebugPreference to enable debugging statements 1. Run the EvaluatePingTimes.ps1 script and pass the PingTestResults.xml file
as the –Path parameter and use the –FirstRun switch (the script and the xml file are in the E:\Mod11\Labfiles folder).
2. Set the $DebugPreference variable to Continue.
3. Re-run the EvaluatePingTimes.ps1 script with the same parameters.
Task 2: Use Write-Debug to provide information as the script progresses 1. Open CalculatePerfMonStats.ps1 (the script is in the E:\Mod11\Labfiles
folder) in Notepad.
2. Add Write-Debug statements inside functions, inside loops, and in other areas where variables change or are assigned.
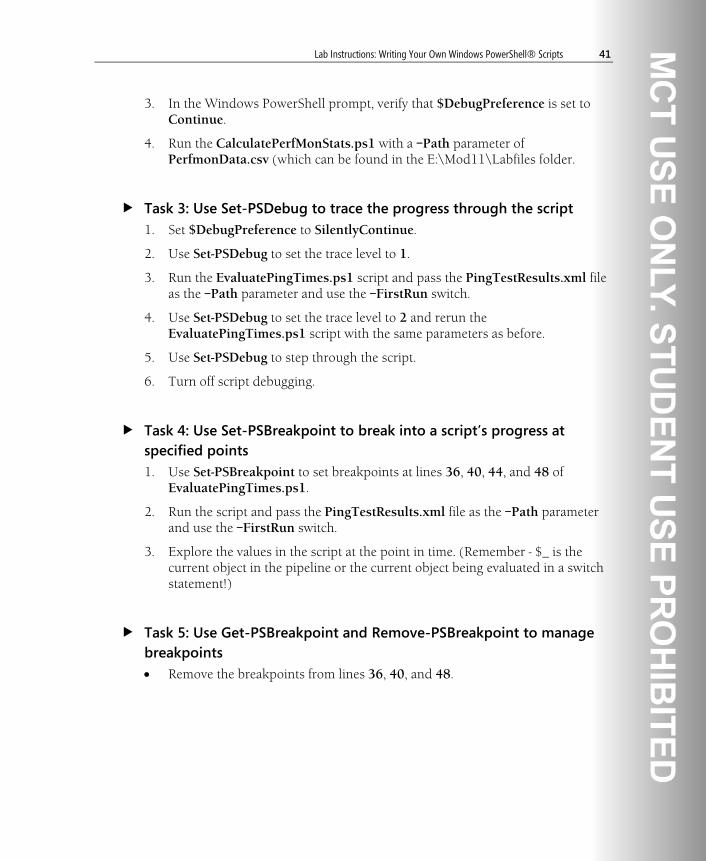
Lab Instructions: Writing Your Own Windows PowerShell® Scripts 41
3. In the Windows PowerShell prompt, verify that $DebugPreference is set to Continue.
4. Run the CalculatePerfMonStats.ps1 with a –Path parameter of PerfmonData.csv (which can be found in the E:\Mod11\Labfiles folder.
Task 3: Use Set-PSDebug to trace the progress through the script 1. Set $DebugPreference to SilentlyContinue.
2. Use Set-PSDebug to set the trace level to 1.
3. Run the EvaluatePingTimes.ps1 script and pass the PingTestResults.xml file as the –Path parameter and use the –FirstRun switch.
4. Use Set-PSDebug to set the trace level to 2 and rerun the EvaluatePingTimes.ps1 script with the same parameters as before.
5. Use Set-PSDebug to step through the script.
6. Turn off script debugging.
Task 4: Use Set-PSBreakpoint to break into a script’s progress at specified points 1. Use Set-PSBreakpoint to set breakpoints at lines 36, 40, 44, and 48 of
EvaluatePingTimes.ps1.
2. Run the script and pass the PingTestResults.xml file as the –Path parameter and use the –FirstRun switch.
3. Explore the values in the script at the point in time. (Remember - $_ is the current object in the pipeline or the current object being evaluated in a switch statement!)
Task 5: Use Get-PSBreakpoint and Remove-PSBreakpoint to manage breakpoints • Remove the breakpoints from lines 36, 40, and 48.

42 Lab Instructions: Writing Your Own Windows PowerShell® Scripts
Task 6: Use Set-PSBreakpoint to break into a script if certain conditions are met 1. Remove all the existing breakpoints.
2. Create a breakpoint on line 44 of EvaluatePingTimes.ps1 and use the –Action parameter to check if the RoundtripTime property is equal to 35. If it is, have the script break into a nested prompt. If not, let the script continue.
3. Run the script and pass the PingTestResults.xml file as the –Path parameter and use the –FirstRun switch.
4. Close the Windows PowerShell prompt.
Results: After this exercise, you should have an understanding of how the DebugPreference automatic variable controls debugging messages, know how to step through troublesome scripts and track how things are changing, and set breakpoints in a script to further troubleshoot script performance.

Lab Instructions: Writing Your Own Windows PowerShell® Scripts 43
Exercise 2: Debugging Using the Windows PowerShell Integrated Scripting Environment (ISE)
Scenario Having just finished using the debugging tools from the console, you want to take advantage of the graphical script editor the Windows PowerShell ISE provides. You will use the debugging skills developed in the previous exercise to step through and work with another problem script.
The main tasks for this exercise are as follows:
1. Set breakpoints directly in the script editor.
2. Step through a script using the menu shortcuts or the keyboard.
Task 1: Set a breakpoint 1. In the script editor, set your cursor on line 33. Use the Toggle Breakpoint
function from the Debug menu to set a breakpoint.
2. Right click on line 25 and choose Toggle Breakpoint.
3. Set your cursor on line 44 and use F9 to set a breakpoint.
4. In the command window, use Get-PSBreakpoint to examine breakpoints you have set.
5. Remove those breakpoints.
Task 2: Step through the script 1. Set a breakpoint on the first statement of the foreach loop where
CreateStatistics is called and which breaks in only if $CounterValue is Memory\Pages/sec.
Hint: Check the help on Set-PSBreakpoint for how to set a breakpoint on a command.
2. From the command window, run the script with the –Path parameter set to the PerfmonData.csv file (in the E:\Mod11\Labfiles folder).

44 Lab Instructions: Writing Your Own Windows PowerShell® Scripts
3. When the script breaks, use F11 or the Step Into option off of the Debug menu to step into the CreateStatistics function. Step into the function one more time.
4. Step over (using the keyboard or the Debug menu) the first line in the CalculateMedian function.
5. Step out of the CalculateMedian function.
6. Move into the command window and examine the $Stats variable.
7. Continue running the script.
8. Close the Windows PowerShell ISE.
Results: After this exercise, you should have used the tooling built in to the Windows PowerShell ISE to debug a script.

46 Lab Instructions: Writing Your Own Windows PowerShell® Scripts
Lab E: Modularization
Estimated time: 45 minutes
You now have the knowledge and experience you need to begin crafting some very capable scripts to automate administrative activities. You will use those skills to create two scripts, one for generating an inventory report and anther for testing network performance.

Lab Instructions: Writing Your Own Windows PowerShell® Scripts 47
Lab Setup Before you begin the lab you must:
1. Start the LON-DC1, LON-SVR1, LON-SVR2, and LON-CLI1 virtual machines. Wait until the boot process is complete.
2. Log on to the LON-CLI1 virtual machine with the following credentials:
• Username: CONTOSO\administrator
• Password: Pa$$w0rd
3. Open the Windows PowerShell ISE. All PowerShell commands run within the Windows PowerShell ISE program.
4. Create a text file containing the names of all computers in the domain, one on each line, and save it as C:\users\Administrator\documents\computers.txt.

48 Lab Instructions: Writing Your Own Windows PowerShell® Scripts
Exercise 1: Generating an Inventory Audit Report
Scenario Your business is conducting an inventory audit and needs to generate a list of configuration information for several servers. This list must include the server’s name, BIOS serial number, operating system version, service pack version, and total number of processor cores. This list must be in table format for management, in a CSV file for importation into a configuration database, and in an XML file for archival purposes.
The main tasks for this exercise are as follows:
1. Create a function called Get-Inventory that accepts computer names as pipeline input. This function must loop through each of the computers and use WMI to retrieve the BIOS serial number, operating system version, service pack version, and total number of processor cores. It returns a single object for each computer containing the server name and the properties retrieved from WMI.
2. Pass a list of all server names in your domain to the function and export the results of the function in three formats: .txt, .csv and .xml.
Task 1: Create an inventory gathering function 1. Read the help documentation and examples for the New-Object cmdlet so that
you understand how it can be used to generate new custom objects.
2. Read the help documentation in about_function and the help options listed in here to learn more about functions and how they work.
3. Create a function called Get-Inventory. The Get-Inventory function should accept computer names from the pipeline. You do not need to declare a parameter for this.
4. In the body of the function create a PROCESS script block that iterates through the values piped into the function. Within that script block, retrieve BIOS, operating system and processor information using Get-WmiObject. It must then return a new object that contains the computer name, BIOS serial number, operating system version, service pack version and the number of processor cores.
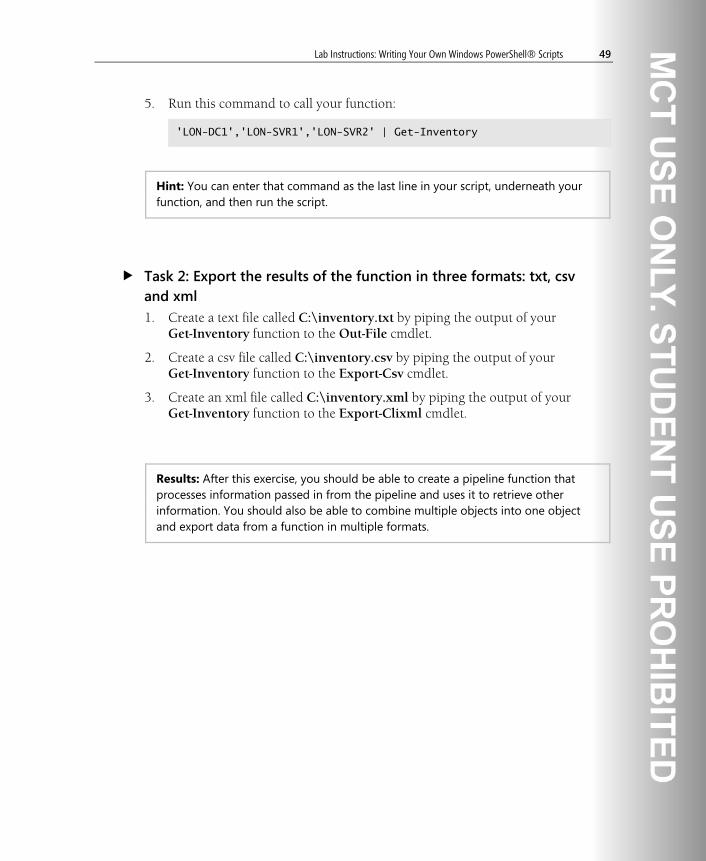
Lab Instructions: Writing Your Own Windows PowerShell® Scripts 49
5. Run this command to call your function:
'LON-DC1','LON-SVR1','LON-SVR2' | Get-Inventory
Hint: You can enter that command as the last line in your script, underneath your function, and then run the script.
Task 2: Export the results of the function in three formats: txt, csv and xml 1. Create a text file called C:\inventory.txt by piping the output of your
Get-Inventory function to the Out-File cmdlet.
2. Create a csv file called C:\inventory.csv by piping the output of your Get-Inventory function to the Export-Csv cmdlet.
3. Create an xml file called C:\inventory.xml by piping the output of your Get-Inventory function to the Export-Clixml cmdlet.
Results: After this exercise, you should be able to create a pipeline function that processes information passed in from the pipeline and uses it to retrieve other information. You should also be able to combine multiple objects into one object and export data from a function in multiple formats.

Lab Answer Key: Fundamentals for Using Microsoft® Windows PowerShell® v2 1
Module 1 Lab Answer Key: Fundamentals for Using Microsoft® Windows PowerShell® v2
Contents: Lab A: Using Windows PowerShell As an Interactive Command-Line Shell
Exercise 1: Searching for Text Files 3
Exercise 2: Browsing the Registry 5
Exercise 3: Discovering Additional Commands and Viewing Help 7
Exercise 4: Adding Additional Commands to Your Session 9
Exercise 5: Learning How to Format Output 10
Lab B: Using the Windows PowerShell Pipeline
Exercise 1: Stopping and Restarting a Windows Service 13
Exercise 2: Exploring Objects Returned by PowerShell Commands 14
Exercise 3: Processing PowerShell Output 16

2 Lab Answer Key: Fundamentals for Using Microsoft® Windows PowerShell® v2
Lab A: Using Windows PowerShell As an Interactive Command-Line Shell Before You Begin 1. Start the LON-DC1 virtual machine.
2. Log on to LON-DC1 as Contoso\Administrator with a password of Pa$$w0rd.
3. Open a Windows PowerShell session as Administrator. by doing the following:
a. Go to Start > All Programs > Accessories > Windows PowerShell.
b. Right click Windows PowerShell and click Run as administrator.
4. In the Windows PowerShell windows execute the following command:
“These are my notes” | Out-File C:\users\Administrator \Documents\notes.txt

Lab Answer Key: Fundamentals for Using Microsoft® Windows PowerShell® v2 3
Exercise 1: Searching for Text Files
Task 1: Browse the local file system using familiar command prompt and/or UNIX commands 1. In the PowerShell window, type the following command and press ENTER:
cd C:\
2. In the PowerShell window, type the following command and press ENTER:
dir C:\users
3. In the PowerShell window, type the following command and press ENTER:
cd users dir
4. In the PowerShell window, type the following command and press ENTER:
cd C:\
5. In the PowerShell window, type the following command and press ENTER:
chdir users ls
6. In the PowerShell window, type the following command and press ENTER:
cd \ md test
7. In the PowerShell window type the following command and press ENTER:
rm test

4 Lab Answer Key: Fundamentals for Using Microsoft® Windows PowerShell® v2
Task 2: View the entire contents of a folder 1. In the PowerShell window, type the following command and press ENTER:
dir C:\users\administrator -recurse
2. In the PowerShell window, type the following command and press ENTER:
dir C:\users\administrator –r
Task 3: View a list of all text files in all users’ document folders 1. In the PowerShell window, type the following command and press ENTER:
dir C:\users\*\documents –recurse –include *.txt
2. In the PowerShell window, type the following command and press ENTER:
notepad C:\users\administrator\documents\notes.txt
Results: After this exercise, you should have successfully navigated the file system, discovered the notes.txt file in the Administrator’s user profile folder, and viewed the contents of that file in notepad.

Lab Answer Key: Fundamentals for Using Microsoft® Windows PowerShell® v2 5
Exercise 2: Browsing the Registry
Task 1: View cmdlet help
1. In the PowerShell window, type the following command and press ENTER:
Get-Help Get-PSDrive
2. In the PowerShell window, type the following command and press ENTER:
Get-Help Get-PSDrive –Full | more
Task 2: Navigate the registry
1. In the PowerShell window, type the following command and press ENTER:
Get-PSDrive
2. In the PowerShell window ,type the following command and press ENTER:
cd HKLM: cd Software cd Microsoft
3. In the PowerShell window, type the following command and press ENTER:
Get-PSDrive –PSProvider Registry
4. In the PowerShell window, type the following command and press ENTER:
cd HKCU: dir

6 Lab Answer Key: Fundamentals for Using Microsoft® Windows PowerShell® v2
Task 3: Create a new PSDrive
1. In the PowerShell window, type the following command and press ENTER:
New-PSDrive –Name HKU –PSProvider Registry –Root Registry::HKEY_USERS
2. In the PowerShell window, type the following command and press ENTER:
Get-PSDrive –PSProvider Registry

Lab Answer Key: Fundamentals for Using Microsoft® Windows PowerShell® v2 7
Exercise 3: Discovering Additional Commands and Viewing Help
Task 1: Discover commands using aliases and aliases using commands
1. In the PowerShell window, type the following command and press ENTER:
Get-Alias dir
2. In the PowerShell window, type the following command and press ENTER:
Get-Alias –Definition Get-ChildItem
Task 2: Learn how to use the help system using Get-Help
1. In the PowerShell window, type the following command and press ENTER:
Get-Help Get-Help
2. In the PowerShell window, type the following command and press ENTER:
help Get-Help -Examples
3. In the PowerShell window, type the following command and press ENTER:
help Get-Help –Full
Task 3: Discover new commands with Get-Command
1. In the PowerShell window, type the following command and press ENTER:
Get-Command *Service*
2. In the PowerShell window, type the following command and press ENTER:
Get-Help Get-Command

8 Lab Answer Key: Fundamentals for Using Microsoft® Windows PowerShell® v2
3. In the PowerShell window, type the following command and press ENTER:
Get-Command *Service* -CommandType cmdlet
4. In the PowerShell window, type the following command and press ENTER:
Get-Command –Noun Service
Task 4: Get current, online help for a command • In the PowerShell window, type the following command and press ENTER:
Note: If you receive a blocking message saying this site has been blocked by Internet Explorer Enhanced Security Configuration, you should add the site to your trusted sites in the Secuity tab of Internet Options or just click Add on the blocking dialogue that you receieved.
Get-Help Get-Service –Online
Results: After this exercise, you should know how to discover commands using aliases or wildcards, how to look up different parts of help information for a command, how to use help information to learn how to use a command, and how to get current help online.

Lab Answer Key: Fundamentals for Using Microsoft® Windows PowerShell® v2 9
Exercise 4: Adding Additional Commands to Your Session
Task 1: Find all “Module” commands • In the PowerShell window, type the following command and press ENTER:
Get-Command –Noun Module
Task 2: List all modules that are available • In the PowerShell window, type the following command and press ENTER:
Get-Module –ListAvailable
Task 3: Load the ServerManager module into the current session
1. In the PowerShell window, type the following command and press ENTER:
Get-Help Import-Module
2. In the PowerShell window, type the following command and press ENTER:
Import-Module ServerManager
Task 4: View all commands included in the ServerManager module
1. In the PowerShell window, type the following command and press ENTER:
Get-Command –Module ServerManager
2. In the PowerShell window, type the following command and press ENTER:
Get-WindowsFeature
Results: After this exercise, you should be able to view and load modules into PowerShell and show what commands they contain.

10 Lab Answer Key: Fundamentals for Using Microsoft® Windows PowerShell® v2
Exercise 5: Learning How to Format Output
Task 1: View the default table format for a command
1. In the PowerShell window, type the following command and press ENTER:
Get-Process w*
2. In the PowerShell window, type the following command and press ENTER:
Get-Process w* | Format-Table
Task 2: View the default list and wide formats for a command
1. In the PowerShell window, type the following command and press ENTER:
gps w* | Format-List
2. In the PowerShell window, type the following command and press ENTER:
gps w* | Format-Wide
Results: After this exercise, you should be able to show PowerShell output in table, list and wide formats using default views.

12 Lab Answer Key: Fundamentals for Using Microsoft® Windows PowerShell® v2
Lab B: Using the Windows PowerShell Pipeline Before You Begin 1. Start the LON-DC1 virtual machine. You do not need to log on, but wait until
the boot process is complete.
2. Start the LON-CLI1 virtual machine, and then log on by using the following credentials:
• Username: CONTOSO\administrator
• Password: Pa$$w0rd
3. Open a Windows PowerShell session as Administrator. by doing the following:
a. Go to Start > All Programs > Accessories > Windows PowerShell.
b. Right click Windows PowerShell and click on Run as administrator.

Lab Answer Key: Fundamentals for Using Microsoft® Windows PowerShell® v2 13
Exercise 1: Stopping and Restarting a Windows Service
Task 1: View the Windows Update service • In the PowerShell window, type the following command and press ENTER:
Get-Service “Windows Update”
Task 2: Determine what would happen if you stopped the service • In the PowerShell window, type the following command and press ENTER:
Get-Service wuauserv | Stop-Service –whatif
Task 3: Stop the Windows Update service with confirmation • In the PowerShell window, type the following command and press ENTER:
Get-Service wuauserv | Stop-Service –confirm
Task 4: Restart the Windows Update service • In the PowerShell window, type the following command and press ENTER:
gsv wuauserv | Start-Service
Results: After this exercise, you should have successfully stopped and restarted the Windows Update service and learned about how the WhatIf and Confirm common parameters can prevent accidental changes.

14 Lab Answer Key: Fundamentals for Using Microsoft® Windows PowerShell® v2
Exercise 2: Exploring Objects Returned by PowerShell Commands
Task 1: View cmdlet help • In the PowerShell window, type the following command and press ENTER:
help Get-Member –Full
Task 2: Get visible members for Service objects • In the PowerShell window, type the following command and press ENTER:
Get-Service | Get-Member
Task 3: Get properties for Service objects • In the PowerShell window, type the following command and press ENTER:
Get-Service | Get-Member –MemberType Property
Task 4: Get all members for Service objects • In the PowerShell window, type the following command and press ENTER:
Get-Service | Get-Member –Force
Task 5: Get base and extended or adapted members for Service objects 1. In the PowerShell window, type the following command and press ENTER:
Get-Service | Get-Member –View Base
2. In the PowerShell window, type the following command and press ENTER:
Get-Service | Get-Member –View Adapted,Extended

Lab Answer Key: Fundamentals for Using Microsoft® Windows PowerShell® v2 15
Task 6: Find properties by wildcard search and show them in a table 1. In the PowerShell window, type the following command and press ENTER:
dir C:\ -Force
2. In the PowerShell window ,type the following command and press ENTER:
dir C:\ -Force | Get-Member *Time* -MemberType Property
3. In the PowerShell window, type the following command and press ENTER:
dir C:\ -Force | Format-Table Name,*Time
Results: After this exercise, you should be able to use Get-Member to discover properties and methods on data returned from PowerShell cmdlets and use that information to format tables with specific columns.

16 Lab Answer Key: Fundamentals for Using Microsoft® Windows PowerShell® v2
Exercise 3: Processing PowerShell Output
Task 1: List all commands that are designed to process output • In the PowerShell window, type the following command and press ENTER:
Get-Command –verb Out
Task 2: Show the default output for a command 1. In the PowerShell window, type the following command and press ENTER:
help Get-EventLog -Full
2. In the PowerShell window, type the following command and press ENTER:
Get-EventLog System –Newest 100 –EntryType Warning,Error | Out-Default
Task 3: Send command output to a file • In the PowerShell window, type the following command and press ENTER:
Get-EventLog System -Newest 100 -EntryType Warning,Error | Out-File C:\users\Administrator\Documents\RecentIssues.txt
Task 4: Send command output to a grid and sort and filter the results 1. In the PowerShell window, type the following command and press ENTER:
Get-EventLog System -Newest 100 -EntryType Warning,Error | Out-GridView
2. Click on the InstanceID column header twice; once to sort in ascending order, then a second time to sort in descending order.

Lab Answer Key: Fundamentals for Using Microsoft® Windows PowerShell® v2 17
3. Filter the results in the grid to show only one InstanceId.
a. Click on the Add criteria button.
b. Select the check box beside InstanceID.
c. Click on the Add button.
d. Click on the hyperlink is less than or equal to operator and change operator to equals.
e. Enter any event ID that you have in your result set in the <Empty> text box.
f. Click on the X in the top right corner of the grid view window to close it.
Results: After this exercise, you should know how to use PowerShell commands to redirect output to files or a grid view, and how to sort and filter data in the grid view.

Lab Answer Key: Understanding and Using the Formatting System 1
Module 2 Lab Answer Key: Understanding and Using the Formatting System
Contents: Lab: Using the Formatting Subsystem
Exercise 1: Displaying Calculated Properties 3
Exercise 2: Displaying a Limited Number of Columns 4
Exercise 3: Displaying All Properties and Values of Objects 5
Exercise 4: Viewing Objects via HTML 6
Exercise 5: Displaying a Limited Number of Properties 7
Exercise 6: Displaying Objects Using Different Formatting 8
Exercise 7: Displaying a Sorted List of Objects 9

2 Lab Answer Key: Understanding and Using the Formatting System
Lab: Using the Formatting Subsystem Before You Begin 1. Start the LON-DC1 virtual machine.
2. Start the LON-SVR1 virtual machine.
3. Log on to LON-SVR1 as Contoso\Administrator with a password of Pa$$w0rd.
4. On the Start menu of LON-SVR1, click All Programs , click Accessories, click Windows PowerShell, and then click Windows PowerShell.

Lab Answer Key: Understanding and Using the Formatting System 3
Exercise 1: Displaying Calculated Properties
Task 1: Retrieve a list of processes • In the Windows PowerShell® window, type the following command and press
ENTER:
Get-Process
Task 2: Display a table of objects • In the PowerShell window, type the following command and press ENTER:
Get-Process|Format-Table
Task 3: Select the properties to display • In the PowerShell window, type the following command and press ENTER:
Get-Process|Format-Table –Property CPU,Id,ProcessName
Task 4: Use calculated properties to show a custom property • In the PowerShell window, type the following command and press ENTER:
Get-Process|Format-Table –Property CPU, ID,ProcessName,@{Label="TotalMemory";Expression={$_.WS+$_.VM}}
Results: After this exercise, you will have displayed the CPU, ID and ProcessName values of all the running processes and have created a custom property adding the physical and virtual memory using calculated properties.

4 Lab Answer Key: Understanding and Using the Formatting System
Exercise 2: Displaying a Limited Number of Columns
Task 1: Retrieve a list of services • In the PowerShell window, type the following command and press ENTER:
Get-Service
Task 2: Display a specific number of columns from a collection of objects • In the PowerShell window, type the following command and press ENTER:
Get-Service|Format-Table –Property Status,Name
Results: After this exercise, you will have displayed a specific number of columns from all the installed services instead of displaying all their default properties.

Lab Answer Key: Understanding and Using the Formatting System 5
Exercise 3: Displaying All Properties and Values of Objects
Task 1: Retrieve a list of processes • In the PowerShell window, type the following command and press ENTER:
Get-Process
Task 2: Display every property and value for all the objects • In the PowerShell window, type the following command and press ENTER:
Get-Process|Format-List –Property *
Results: After this exercise, you will have displayed all of the properties of all of the running processes instead of displaying only their default properties.
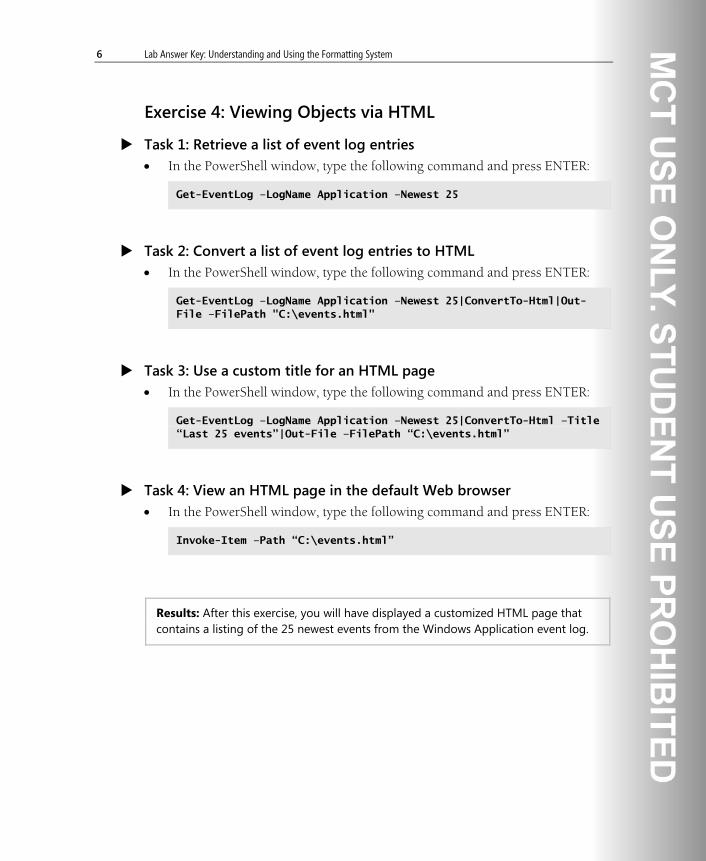
6 Lab Answer Key: Understanding and Using the Formatting System
Exercise 4: Viewing Objects via HTML
Task 1: Retrieve a list of event log entries • In the PowerShell window, type the following command and press ENTER:
Get-EventLog –LogName Application –Newest 25
Task 2: Convert a list of event log entries to HTML • In the PowerShell window, type the following command and press ENTER:
Get-EventLog –LogName Application –Newest 25|ConvertTo-Html|Out-File –FilePath "C:\events.html"
Task 3: Use a custom title for an HTML page • In the PowerShell window, type the following command and press ENTER:
Get-EventLog –LogName Application –Newest 25|ConvertTo-Html –Title “Last 25 events”|Out-File –FilePath “C:\events.html”
Task 4: View an HTML page in the default Web browser • In the PowerShell window, type the following command and press ENTER:
Invoke-Item –Path “C:\events.html”
Results: After this exercise, you will have displayed a customized HTML page that contains a listing of the 25 newest events from the Windows Application event log.

Lab Answer Key: Understanding and Using the Formatting System 7
Exercise 5: Displaying a Limited Number of Properties
Task 1: Display a list of files from a selected folder • In the PowerShell window, type the following command and press ENTER:
Get-ChildItem –Path “C:\Windows\System32” –Filter “au*.dll”
Task 2: Display a table with several different file properties • In the PowerShell window, type the following command and press ENTER:
Get-ChildItem –Path “C:\Windows\System32” –Filter “au*.dll”|Format-Table –Property Name,Length,Extension
Results: After this exercise, you will have displayed a table containing the Name, Length and Extension properties of all the files in C:\Windows\System32 that start with “au” and have the extension “.dll”.

8 Lab Answer Key: Understanding and Using the Formatting System
Exercise 6: Displaying Objects Using Different Formatting
Task 1: Retrieve a list of services • In the PowerShell window, type the following command and press ENTER:
Get-Service
Task 2: Display a table showing only a few specific properties • In the PowerShell window, type the following command and press ENTER:
Get-Service|Format-Table –Property DisplayName,Status,DependantServices
Task 3: Display a table by eliminating any empty spaces between columns • In the PowerShell window, type the following command and press ENTER:
Get-Service|Format-Table –AutoSize –Property DisplayName,Status,DependantServices
Results: After this exercise, you will have displayed a table of all the installed services by displaying only the DisplayName, Status, and DependentServices properties, and you will have also removed any empty spaces between each column.

Lab Answer Key: Understanding and Using the Formatting System 9
Exercise 7: Displaying a Sorted List of Objects
Task 1: Retrieve a list of services • In the PowerShell window, type the following command and press ENTER:
Get-Service
Task 2: Display a table while sorting a specific property • In the PowerShell window, type the following command and press ENTER:
Get-Service|Sort-Object –Property Status|Format-Table
Results: After this exercise, you will have displayed a table of the installed services sorted by their Status property.

Lab Answer Key: Core Windows PowerShell® Cmdlets 1
Module 3 Lab Answer Key: Core Windows PowerShell® Cmdlets
Contents: Lab A: Using the Core Cmdlets
Exercise 1: Sorting and Selecting Objects 3
Exercise 2: Retrieving a Number of Objects and Saving to a File 4
Exercise 3: Comparing Objects Using XML 5
Exercise 4: Saving Objects to a CSV File 7
Exercise 5: Measuring a Collection of Objects 8
Lab B: Filtering and Enumerating Objects in the Pipeline
Exercise 1: Comparing Numbers (Integer Objects) 10
Exercise 2: Comparing String Objects 11
Exercise 3: Retrieving Processes from a Computer 12
Exercise 4: Retrieving Services from a Computer 13
Exercise 5: Iterating Through a List of Objects 14
Lab C: Using Pipeline Parameter Binding
Exercise 1: Using Advanced Pipeline Features 16
Exercise 2: Working with Multiple Computers 18
Exercise 3: Stopping a List of Processes 19
Exercise 4: Binding Properties to Parameters 20

2 Lab Answer Key: Core Windows PowerShell® Cmdlets
Lab A: Using the Core Cmdlets Before You Begin 1. Start the LON-DC1, LON-SVR1, and LON-SVR2 virtual machines.
2. Log on to LON-DC1, LON-SVR1, and LON-SVR2 as Contoso\Administrator with a password of Pa$$w0rd.
3. Disable the Windows® Firewall for LON-DC1 by carrying out the following steps
a. Go to Start > Control Panel > System and Security > Windows Firewall.
b. Click Turn Windows Firewall on or off.
c. In the Domain network location settings section, click the radio button Turn off Windows Firewall (not recommended).
d. In the Home or work (private) network location settings, click the radio button Turn off Windows Firewall (not recommended).
e. In the Public network location settings, click the radio button Turn off Windows Firewall (not recommended).
f. Click OK.
g. Repeat steps a to e for virtual mahcines LON-SVR1 and LON-SVR2.
Note: This is not security best practice and under no circumstances should this be done in a production environment. This is done in this instance purely to allow us to focus on the learning task at hand and concentrate on powershell concepts.
4. On the Start menu of LON-SVR1 click All Programs, click Accessories, click Windows PowerShell, click Windows PowerShell.

Lab Answer Key: Core Windows PowerShell® Cmdlets 3
Exercise 1: Sorting and Selecting Objects
Task 1: Retrieve a list of processes • On LON-SVR1, in the Windows PowerShell® window, type the following
command and press ENTER:
Get-Process
Task 2: Sort a list of processes • In the PowerShell window, type the following command and press ENTER:
Get-Process | Sort-Object
Task 3: Select a certain number of processes • In the PowerShell window, type the following command and press ENTER:
Get-Process | Sort-Object | Select-Object –First 5
Results: After this exercise, you will have retrieved a list of first five services sorted alphabetically by their service name.

4 Lab Answer Key: Core Windows PowerShell® Cmdlets
Exercise 2: Retrieving a Number of Objects and Saving to a File
Task 1: Retrieve a list of event logs • In the PowerShell window, type the following command and press ENTER:
Get-EventLog –List
Task 2: Retrieve a certain number of events • In the PowerShell window, type the following command and press ENTER:
Get-EventLog –LogName Application –Newest 5
Task 3: Export a certain number of events to a file • In the PowerShell window, type the following command and press ENTER:
Get-EventLog –LogName Application –Newest 5 | Export-Csv –Path "C:\Export.csv"
Results: After this exercise, you will have exported the five most recent events from the Windows Application event log to a CSV file.

Lab Answer Key: Core Windows PowerShell® Cmdlets 5
Exercise 3: Comparing Objects Using XML
Task 1: Retrieve a list of services • In the PowerShell window, type the following command and press ENTER:
Get-Service
Task 2: Save a list of services to an XML formatted file • In the PowerShell window, type the following command and press ENTER:
Get-Service | Export-Clixml –Path "C:\Export.xml"
Task 3: Stop a service • In the PowerShell window, type the following command and press ENTER:
Stop-Service –Name "w32time"
Task 4: Compare services with different statuses 1. In the PowerShell window, type the following command and press ENTER:
Get-Service | Export-Clixml –Path "C:\Export2.xml"
2. In the PowerShell window, type the following command and press ENTER:
Compare-Object –ReferenceObject (Import-Clixml –Path "C:\Export.xml") –DifferenceObject (Import-Clixml –Path "C:\Export2.xml") –Property Name,Status

6 Lab Answer Key: Core Windows PowerShell® Cmdlets
Task 5: Restart a service • In the PowerShell window, type the following command and press ENTER:
Start-Service –Name "w32time"
Results: After this exercise, you will have determined that the Status property of two service comparison objects had changed after the Windows time service was modified.The difference between the files is the status of the W32Time service changing from running to stopped.

Lab Answer Key: Core Windows PowerShell® Cmdlets 7
Exercise 4: Saving Objects to a CSV file
Task 1: Retrieve a list of processes • In the PowerShell window, type the following command and press ENTER:
Get-Process
Task 2: Export a list of processes to a file • In the PowerShell window, type the following command and press ENTER:
Get-Process | Export-Csv –Path "C:\Export2.csv"
Task 3: Use a non-default separator • In the PowerShell window, type the following command and press ENTER:
Get-Process | Export-Csv –Path "C:\Export3.csv" –Delimiter ";"
Results: After this exercise, you will have exported a list of processes to a CSV file using the default separator “,”, and the non-default separator “;”.

8 Lab Answer Key: Core Windows PowerShell® Cmdlets
Exercise 5: Measuring a Collection of Objects
Task 1: Retrieve a list of processes • In the PowerShell window, type the following command and press ENTER:
Get-Process
Task 2: Measure the average, maximum and minimum of a collection • In the PowerShell window, type the following command and press ENTER:
Get-Process | Measure-Object –Property CPU –Average –Maximum -Minimum
Results: After this exercise, you will have measured the average, minimum and maximum values of the CPU property of all the running processes.

10 Lab Answer Key: Core Windows PowerShell® Cmdlets
Lab B: Filtering and Enumerating Objects in the Pipeline Before You Begin 1. Start the LON-DC1 virtual machine.
2. Start the LON-SVR1 virtual machine.
3. Start the LON-SVR2 virtual machine.
4. Log on to LON-SVR1 as Contoso\Administrator with a password of Pa$$w0rd.
5. On the Start menu of LON-SVR1 click All Programs, click Accessories, click Windows PowerShell, click Windows PowerShell.
Exercise 1: Comparing Numbers (Integer Objects)
Task 1: Compare using a simple expression • On LON-SVR1, in the PowerShell window, type the following command and
press ENTER:
3 –gt 5
Task 2: Compare using a more complex expression • In the PowerShell window, type the following command and press ENTER:
(3 –lt 4) –and (5 –eq 5)
Results: After this exercise, you will have determined that 3 is smaller than 5 by having True returned, and also that the complex expression that compares whether 3 is smaller than 4 and 5 is equal to 5 resolves to True because both sides of the complex expression alone resolve to True.

Lab Answer Key: Core Windows PowerShell® Cmdlets 11
Exercise 2: Comparing String Objects
Task 1: Compare using a simple expression • In the PowerShell window, type the following command and press ENTER:
"PowerShell" –eq "powershell"
Task 2: Compare using a more complex expression • In the PowerShell window, type the following command and press ENTER:
("logfile" –eq "logfiles") –and ("host" –ceq "HOST")
Results: After this exercise, you will have determined that PowerShell is considered equal to powershell using the default comparison operators, and that the complex expression comparing logfile to logfiles and host to HOST resolves to False because one side of the complex expression alone resolves to False.

12 Lab Answer Key: Core Windows PowerShell® Cmdlets
Exercise 3: Retrieving Processes from a Computer
Task 1: Retrieve a list of processes • In the PowerShell window, type the following command and press ENTER:
Get-Process
Task 2: Retrieve objects from a remote computer • In the PowerShell window, type the following command and press ENTER:
Get-Process –ComputerName "LON-DC1"
Results: After this exercise, you will have retrieved the list of processes running remotely on LON-DC1 from LON-SVR1.

Lab Answer Key: Core Windows PowerShell® Cmdlets 13
Exercise 4: Retrieving Services from a Computer
Task 1: Retrieve a list of services • In the PowerShell window, type the following command and press ENTER:
Get-Service
Task 2: Retrieve objects from a remote computer • In the PowerShell window, type the following command and press ENTER:
Get-Service –ComputerName "LON-DC1"
Task 3: Filter a collection of objects • In the PowerShell window, type the following command and press ENTER:
Get-Service –ComputerName "LON-DC1" –Name "w*"
Results: After this exercise, you will have retrieved a list of all the installed services that start with the letter “w” on LON-DC1 from LON-SVR1.

14 Lab Answer Key: Core Windows PowerShell® Cmdlets
Exercise 5: Iterating Through a List of Objects
Task 1: Create a file • Create a txt file named C:\Systems.txt that contains the following text: You
can do this from the powershell command line if you are able or you can open Notepad and just enter the below data, each on a single line if you need.
• LON-SVR1.contoso.com
• LON-SVR2.contoso.com
• LON-DC1.contoso.com
• LON-CLI1.contoso.com
Task 2: Import the contents of a file • In the PowerShell window, type the following command and press ENTER:
Get-Content –Path "C:\Systems.txt"
Task 3: Iterate through a list of objects • In the PowerShell window, type the following command and press ENTER:
Get-Content –Path "C:\Systems.txt" | ForEach-Object –Process {$_.ToLower()}
Task 4: Filter a list of objects • In the PowerShell window, type the following command and press ENTER:
Get-Content –Path "C:\Systems.txt" | Where-Object –FilterScript {$_ -like "*SVR*"}
Results: After this exercise, you will have retrieved a list of entries from a file, have changed all the characters to lowercase, and also have filtered the list of entries to return only the ones with the string SVR in the entry name.

16 Lab Answer Key: Core Windows PowerShell® Cmdlets
Lab C: Using Pipeline Parameter Bindingsvr Before You Begin 1. Start the LON-DC1 virtual machine.
2. Start the LON-SVR1 virtual machine. You do not need to logon.
3. Start the LON-SVR2 virtual machine. You do not need to logon.
4. Log on to LON-DC1 as Contoso\Administrator with a password of Pa$$w0rd.
5. On the Start menu of LON-DC1 click All Programs, click Accessories, click Windows PowerShell, click Windows PowerShell.
Exercise 1: Using Advanced Pipeline Features
Task 1: Import the Active Directory module • On LON-DC1, in the PowerShell window, type the following command and
press ENTER:
Import-Module –Name ActiveDirectory
Task 2: Import a CSV file • In the PowerShell window, type the following command and press ENTER:
Import-Csv –Path "E:\Mod03\Labfiles\Module3_LabC_Exercise1.csv"

Lab Answer Key: Core Windows PowerShell® Cmdlets 17
Task 3: Create users in Active Directory • In the PowerShell window, type the following command and press ENTER:
Import-Csv –Path "E:\Mod03\Labfiles\Module3_LabC_Exercise1.csv" | New-ADUser
Results: After this exercise, you will have automated the creation of 50 users in the contoso.com domain.

18 Lab Answer Key: Core Windows PowerShell® Cmdlets
Exercise 2: Working with Multiple Computers
Task 1: Create a CSV file • On LON-DC1, at the command prompt of the Windows PowerShell window,
create a CSV file named “C:\Inventory.csv” that contains the following text:
• Type,Name
• AD,LON-DC1
• Server,LON-SVR1
• Server,LON-SVR2
• Client,LON-CLI1
Task 2: Import a CSV file and filter the results • In the PowerShell window, type the following command and press ENTER:
Import-Csv –Path "C:\Inventory.csv" | Where-Object –FilterScript {$_.Type –eq "Server"}
Task 3: Restart a group of computers • In the PowerShell window, type the following command and press ENTER:
Import-Csv –Path "C:\Inventory.csv "|Where-Object –FilterScript {$_.Type –eq "Server"} | ForEach-Object -Process {Restart-Computer –ComputerName $_.Name}
Note: If someone is logged in to LON-SVR1 and LON-SVR2 you may receive an error message. To overcome the error message successful re-start the virtual machines, log off from them and then re-run the script.
Results: After this exercise, you will have restarted a filtered group of servers.

Lab Answer Key: Core Windows PowerShell® Cmdlets 19
Exercise 3: Stopping a List of Processes
Task 1: Start two applications • On LON-DC1, start the Notepad.exe and Wordpad.exe applications.
Task 2: Create a CSV file • At the command prompt of the Windows PowerShell window, create a CSV
file named C:\Process.csv that contains the following text:
• Computer,ProcName
• LON-DC1,Notepad
• LON-DC1,Wordpad
Task 3: Import a CSV file and iterate through a collection of objects • In the PowerShell window, type the following command and press ENTER:
Import-Csv –Path "C:\Process.csv" | Select-Object –Property "ProcName"
Task 4: Stop a list of processes • In the PowerShell window, type the following command and press ENTER:
Import-Csv –Path "C:\Process.csv" | Select-Object –Property "ProcName" | ForEach-Object –Process {Stop-Process –Name $_.ProcName}
Results: After this exercise, you will have stopped a list of processes based on values imported from a CSV file.

20 Lab Answer Key: Core Windows PowerShell® Cmdlets
Exercise 4: Binding Properties to Parameters
Task 1: Import a CSV file • In the PowerShell window, type the following command and press ENTER:
Import-Csv –Path "E:\Mod03\Labfiles\Module3_LabC_Exercise4.csv"
Task 2: Create users in Active Directory • In the PowerShell window, type the following command and press ENTER:
Import-Csv –Path "E:\Mod03\Labfiles\Module3_LabC_Exercise4.csv"|Select-Object –Property @{Name="Name";Expression={$_.EmployeeName}},@{ Name="SamAccountName";Expression={$_.EmployeeName}},@{Name=" City";Expression={$_.Town}},@{ Name="Department";Expression={$_.Unit}},@{Name=" EmployeeNumber";Expression={$_.Id }}|New-ADUser –Company "Contoso"
Results: After this exercise, you will have automated the creation of 20 users in the contoso.com domain.

Lab Answer Key: Windows® Management Instrumentation 1
Module 4 Lab Answer Key: Windows® Management Instrumentation
Contents: Lab: Using Windows Management Instrumentation in Windows PowerShell
Exercise 1: Building Computer Inventory 4
Exercise 2: Discovering WMI Classes and Namespaces 7
Exercise 3: Generating a Logical Disk Report for All Computers 9
Exercise 4: Listing Local Users and Groups 11

2 Lab Answer Key: Windows® Management Instrumentation
Lab: Using Windows Management Instrumentation in Windows PowerShell Before You Begin 1. Start the LON-DC1, LON-SVR1, LON-SVR2, and LON-CLI1 virtual machines.
2. Ensure that the Windows® Firewall on LON-DC1, LON-SVR1, LON-SVR2, and LON-CLI1 machines has been disabled by completing the following steps:
a. On LON –DC1 go to Start > Control Panel > System and Security > Windows Firewall.
b. Click on Turn Windows Firewall on or off.
c. In the Domain network location settings section, click the radio button Turn off Windows Firewall (not recommended).
d. In the Home or work (private) network location settings, click the radio button Turn off Windows Firewall (not recommended).
e. In the Public network location settings, click the radio button Turn off Windows Firewall(not recommended).
f. Remain logged on to the virtual machine.
g. Repeat steps a to e for virtual mahcines LON-SVR1, LON-SVR2 and LON-CLI1.
Note: This is not security best practice and under no circumstances should this be done in a production environment. This is done in this instance purely to allow us to focus on the learning task at hand and concentrate on powershell concepts.

Lab Answer Key: Windows® Management Instrumentation 3
3. Log on to both LON-CLI1 and LON-DC1 as Contoso\Administrator with a password of Pa$$w0rd.
4. On the Start menu of LON-CLI1 and LON-DC1 click All Programs, click Accessories, click Windows PowerShell, click Windows PowerShell again.
5. On virtual machine LON-CLI1, create a text file containing the names of all computers in the domain, one on each line, and save it as C:\users\administrator\documents\computers.txt. You can either do this in the PowerShell command line if you are able or manually. Its contents should look as follows:
LON-DC1.contoso.com
LON-SVR1.contoso.com
LON-SVR2.contoso.com
LON-CLI1.contoso.com

4 Lab Answer Key: Windows® Management Instrumentation
Exercise 1: Building Computer Inventory
Task 1: Retrieve the operating system information
1. On LON-CLI1, in the Windows PowerShell® window, type the following command and press ENTER:
Get-WmiObject –Class Win32_OperatingSystem
2. In the PowerShell window, type the following command and press ENTER:
gwmi Win32_OperatingSystem | Format-List *
Task 2: Extract version information from the operating system object
1. In the PowerShell window, type the following command and press ENTER:
gwmi Win32_OperatingSystem | fl *version*
2. In the PowerShell window, type the following command and press ENTER:
gwmi Win32_OperatingSystem | Format-Table __SERVER,Version,ServicePackMajorVersion,ServicePackMinorVersion
Note: There are two underscores as a prefix to class SERVER.
Task 3: Retrieve the local operating system information “remotely”
1. In the PowerShell window, type the following command and press ENTER:
gwmi Win32_OperatingSystem -ComputerName LON-CLI1 | Format-Table __SERVER,Version,ServicePackMajorVersion,ServicePackMinorVersion
2. In the PowerShell window, type the following command and press ENTER:
get-help gwmi –parameter ComputerName

Lab Answer Key: Windows® Management Instrumentation 5
Task 4: Retrieve the operating system information for all computers
1. In the PowerShell window, type the following command and press ENTER:
Get-Content C:\users\administrator\documents\computers.txt
2. In the PowerShell window, type the following command and press ENTER:
gwmi Win32_OperatingSystem -ComputerName (gc C:\users\Administrator\documents\computers.txt) | Format-Table __SERVER,Version,ServicePackMajorVersion,ServicePackMinorVersion
Task 5: Export the operating system information for all computers
1. In the PowerShell window, type the following command and press ENTER:
get-help select-object -full
2. In the PowerShell window, type the following command and press ENTER:
gwmi Win32_OperatingSystem -ComputerName (gc C:\users\Administrator\documents\computers.txt) | Select-Object __SERVER,Version,ServicePackMajorVersion,ServicePackMinorVersion
3. In the PowerShell window, type the following command and press ENTER:
gwmi Win32_OperatingSystem -ComputerName (gc C:\users\Administrator\documents\computers.txt) | Select-Object __SERVER,Version,ServicePackMajorVersion,ServicePackMinorVersion | Export-Csv C:\Inventory.csv
Task 6: Retrieve the BIOS information for all computers • In the PowerShell window, type the following command and press ENTER:
gwmi Win32_BIOS -ComputerName (gc C:\users\Administrator\documents\computers.txt)

6 Lab Answer Key: Windows® Management Instrumentation
Task 7: Create a custom object for each computer containing all inventory information
1. In the PowerShell window, type the following command and press ENTER:
get-help select-object -full
2. In the PowerShell window, type the following command and press ENTER:
gwmi Win32_OperatingSystem -ComputerName (gc C:\users\Administrator\documents\computers.txt) | Select-Object __SERVER,Version,ServicePackMajorVersion,ServicePackMinorVersion,@{name='AssetTag';expression={(gwmi Win32_BIOS -ComputerName $_.__SERVER).SerialNumber}}
Task 8: Export the inventory report • In the PowerShell window, type the following command and press ENTER:
gwmi Win32_OperatingSystem -ComputerName (gc C:\users\Administrator\documents\computers.txt) | Select-Object __SERVER,Version,ServicePackMajorVersion,ServicePackMinorVersion,@{name='AssetTag';expression={(gwmi Win32_BIOS -ComputerName $_.__SERVER).SerialNumber}} | Export-Csv C:\Inventory.csv
Results: After this exercise, you should have successfully retrieved operating system and BIOS information from all computers in your domain, built custom objects using Select-Object, and generated an inventory report in a .csv file.
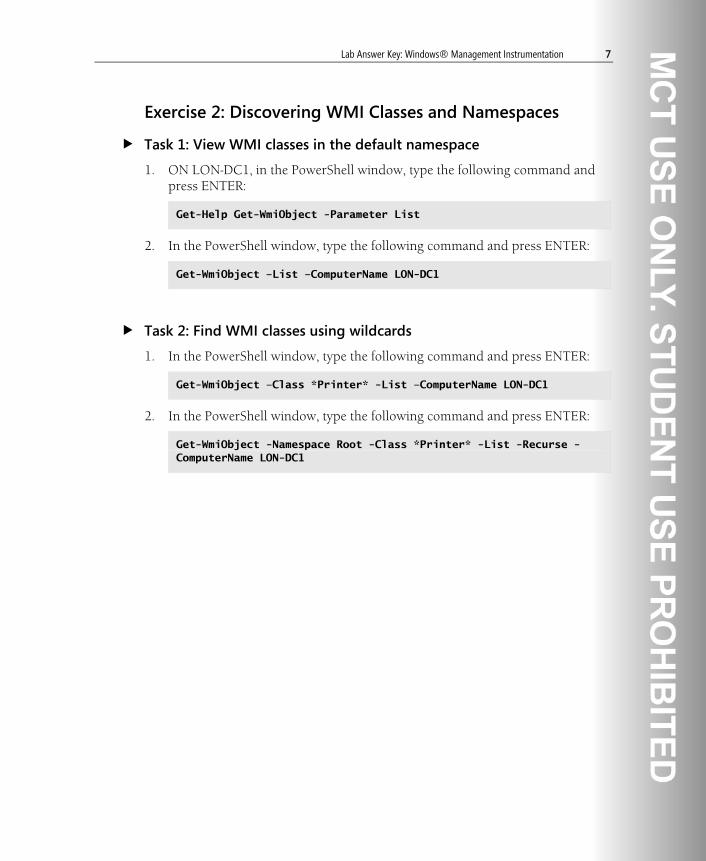
Lab Answer Key: Windows® Management Instrumentation 7
Exercise 2: Discovering WMI Classes and Namespaces
Task 1: View WMI classes in the default namespace
1. ON LON-DC1, in the PowerShell window, type the following command and press ENTER:
Get-Help Get-WmiObject -Parameter List
2. In the PowerShell window, type the following command and press ENTER:
Get-WmiObject –List –ComputerName LON-DC1
Task 2: Find WMI classes using wildcards
1. In the PowerShell window, type the following command and press ENTER:
Get-WmiObject –Class *Printer* -List –ComputerName LON-DC1
2. In the PowerShell window, type the following command and press ENTER:
Get-WmiObject -Namespace Root -Class *Printer* -List -Recurse -ComputerName LON-DC1

8 Lab Answer Key: Windows® Management Instrumentation
Task 3: Enumerate top-level WMI namespaces
1. In the PowerShell window, type the following command and press ENTER:
Get-WmiObject –Namespace Root –Class __NAMESPACE –ComputerName LON-DC1
Note: There are two underscores as a prefix to class NAMESPACE.
2. In the PowerShell window, type the following command and press ENTER:
Get-WmiObject -Namespace Root -Class __NAMESPACE -ComputerName LON-DC1 | Select-Object -ExpandProperty Name
Results: After this exercise, you should be able to find WMI classes in a specific namespace, find WMI classes using a wildcard search, and find WMI namespaces on local or remote computers.

Lab Answer Key: Windows® Management Instrumentation 9
Exercise 3: Generating a Logical Disk Report for all Computers
Task 1: Discover the WMI class used to retrieve logical disk information • On LON-CLI1, in the PowerShell window, type the following command and
press ENTER:
Get-WmiObject –class *disk* -list
Task 2: Retrieve logical disk information from the local machine • In the PowerShell window, type the following command and press ENTER:
Get-WmiObject Win32_LogicalDisk
Task 3: Retrieve logical disk information for hard disks in all computers in your domain
1. In the PowerShell window, type the following command and press ENTER:
Get-Help Get-WmiObject –Parameter Filter
2. In the PowerShell window, type the following command and press ENTER:
Get-WmiObject Win32_LogicalDisk -Filter 'DriveType=3' -ComputerName (gc C:\Users\Administrator\documents\computers.txt)
3. In the PowerShell window, type the following command and press ENTER:
Get-WmiObject Win32_LogicalDisk -Filter 'DriveType=3' -ComputerName (gc C:\Users\Administrator\documents\computers.txt) | Format-Table __SERVER,DeviceID,FreeSpace
Note: You may need to change the path and filename of the computers.txt file to correspond with the path and filename used on your computer.

10 Lab Answer Key: Windows® Management Instrumentation
Task 4: Add a calculated PercentFree value to your report • In the PowerShell window, type the following command and press ENTER:
Get-WmiObject Win32_LogicalDisk -Filter 'DriveType=3' -ComputerName (gc C:\Users\Administrator\documents\computers.txt) | Format-Table __SERVER,DeviceID,FreeSpace,@{Label='PercentFree';Expression={$_.FreeSpace / $_.Size};FormatString='{0:#0.00%}'}
Note: For more information on the FormatString element and the formatting commands it accepts, see http://go.microsoft.com/fwlink/?LinkId=193576.
Task 5: Discover WMI information related to the logical drives
1. In the PowerShell window, type the following command and press ENTER:
Get-WmiObject Win32_LogicalDisk –Filter 'DriveType=3' –ComputerName (gc C:\Users\Administrator\documents\computers.txt) | Select-Object –First 1
2. In the PowerShell window, type the following command and press ENTER:
(Get-WmiObject Win32_LogicalDisk –Filter 'DriveType=3' –ComputerName (gc C:\Users\Administrator\documents\computers.txt) | Select-Object –First 1).GetRelated() | Format-Table __CLASS,__RELPATH
Results: After this exercise, you should know how to check logical disk free-space information using WMI, how to add calculated properties to a report, and how to find related WMI information from your WMI data.
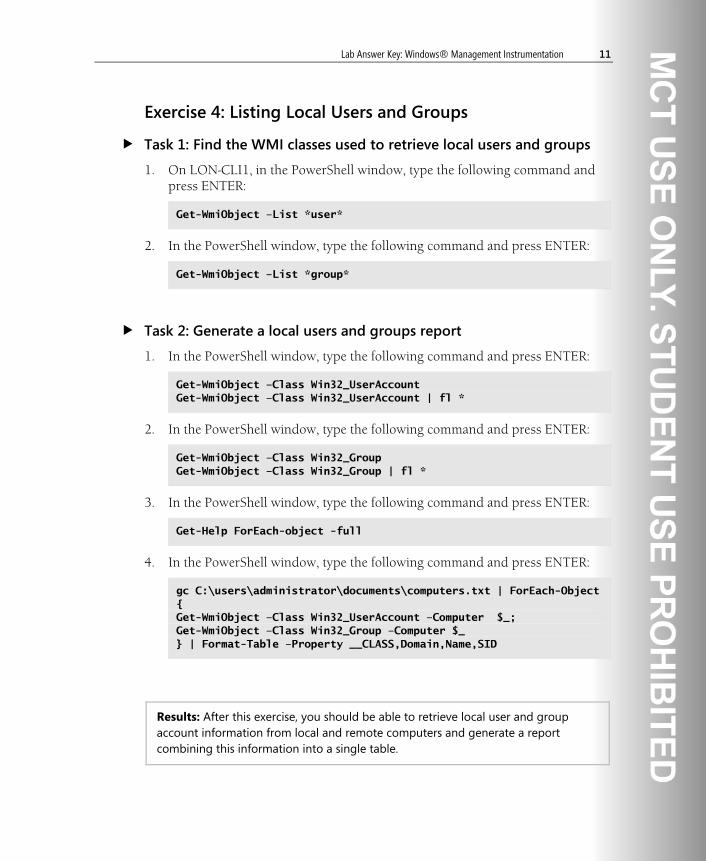
Lab Answer Key: Windows® Management Instrumentation 11
Exercise 4: Listing Local Users and Groups
Task 1: Find the WMI classes used to retrieve local users and groups
1. On LON-CLI1, in the PowerShell window, type the following command and press ENTER:
Get-WmiObject –List *user*
2. In the PowerShell window, type the following command and press ENTER:
Get-WmiObject –List *group*
Task 2: Generate a local users and groups report
1. In the PowerShell window, type the following command and press ENTER:
Get-WmiObject –Class Win32_UserAccount Get-WmiObject –Class Win32_UserAccount | fl *
2. In the PowerShell window, type the following command and press ENTER:
Get-WmiObject –Class Win32_Group Get-WmiObject –Class Win32_Group | fl *
3. In the PowerShell window, type the following command and press ENTER:
Get-Help ForEach-object -full
4. In the PowerShell window, type the following command and press ENTER:
gc C:\users\administrator\documents\computers.txt | ForEach-Object { Get-WmiObject –Class Win32_UserAccount –Computer $_; Get-WmiObject –Class Win32_Group –Computer $_ } | Format-Table –Property __CLASS,Domain,Name,SID
Results: After this exercise, you should be able to retrieve local user and group account information from local and remote computers and generate a report combining this information into a single table.

Lab Answer Key: Automating Active Directory® Administration 1
Module 5 Lab Answer Key: Automating Active Directory® Administration
Contents: Lab A: Managing Users and Groups
Exercise 1: Retrieving a Filtered List of Users from Active Directory 3
Exercise 2: Resetting User Passwords and Address Information 5
Exercise 3: Disabling Users That Belong to a Specific Group 7
Lab B: Managing Computers and Other Directory Objects
Exercise 1: Listing All Computers That Appear to Be Running a Specific Operating System According to Active Directory Information 10
Exercise 2: Creating a Report Showing All Windows Server 2008 R2 Servers 12
Exercise 3: Discovering Any Organizational Units That Aren’t Protected Against Accidental Deletion 14

2 Lab Answer Key: Automating Active Directory® Administration
Lab A: Managing Users and Groups Before You Begin 1. Start the LON-DC1 virtual machine.
2. Log on to LON-DC1 as Contoso\Administrator with a password of Pa$$w0rd.
3. Disable the Windows® Firewall for LON-DC1 by carrying out the following steps
a. Go to Start > Control Panel > System and Security > Windows Firewall.
b. Click on Turn Windows Firewall on or off.
c. In the Domain network location settings section, click the radio button Turn off Windows Firewall (not recommended).
d. In the Home or work (private) network location settings, click the radio button Turn off Windows Firewall (not recommended).
e. In the Public network location settings, click the radio button Turn off Windows Firewall (not recommended).
Note: This is not security best practice and under no circumstances should this be done in a production environment. This is done in this instance purely to allow us to focus on the learning task at hand and concentrate on powershell concepts. You can close the Windows Firewall dialogue when finished.
4. On the Start menu of LON-DC1, click All Programs, click Accessories, click Windows PowerShell, and then click Windows PowerShell. All commands will be run within the Windows PowerShell console.
5. In Windows PowerShell®, execute the following command:
Set-ExecutionPolicy RemoteSigned

Lab Answer Key: Automating Active Directory® Administration 3
Exercise 1: Retrieving a Filtered List of Users from Active Directory The main tasks for this exercise are:
1. List all modules installed on the local system.
2. Import the Active Directory module.
3. List all commands in the Active Directory module.
4. Retrieve all users matching a specific city and title by using server-side filtering.
Task 1: List all modules installed on the local system 1. In the PowerShell window, type the following command and press ENTER:
Get-Help Get-Module -Full
2. In the PowerShell window, type the following command and press ENTER:
Get-Module –ListAvailable
Task 2: Import the Active Directory module and populate the Active Directory environment 1. In the PowerShell window, type the following command and press ENTER:
Get-Help Import-Module -Full
2. In the PowerShell window, type the following command and press ENTER:
Import-Module ActiveDirectory
3. In the PowerShell window, type the following command and press ENTER:
E:\Mod05\Labfiles\Lab_05_Setup.ps1

4 Lab Answer Key: Automating Active Directory® Administration
Task 3: List all commands in the Active Directory module • In the PowerShell window, type the following command and press ENTER:
Get-Command -Module ActiveDirectory
Task 4: Retrieve all users matching a specific city and title by using server-side filtering 1. In the PowerShell window, type the following command and press ENTER:
Get-Help Get-ADUser -Full
2. In the PowerShell window, type the following command and press ENTER:
Get-ADUser
3. When you are prompted to enter a value for the Filter parameter, type the following and click OK:
!?
4. After reviewing the help documentation for the Filter parameter, type the following and press ENTER:
office -eq "Bellevue"
5. In the PowerShell window, type the following command and press ENTER:
Get-ADUser -Filter 'office -eq "Bellevue"'
6. In the PowerShell window, type the following command and press ENTER:
Get-ADUser -Filter '(office -eq "Bellevue") -and (title -eq "PowerShell Scripter")'
Results: After this exercise you should have successfully imported the Active Directory module into PowerShell and used it to retrieve a filtered list of users from Active Directory.

Lab Answer Key: Automating Active Directory® Administration 5
Exercise 2: Resetting User Passwords and Address Information
Task 1: Retrieve a list of remote users • In the PowerShell window, type the following command and press ENTER:
Get-ADUser -Filter 'office -ne "Bellevue"'
Task 2: Reset remote user passwords to a specific password 1. In the PowerShell window, type the following command and press ENTER
after each line:
Get-Help Read-Host -Full Get-Help Set-ADAccountPassword -Full
2. In the PowerShell window, type the following command and press ENTER:
Get-ADUser -Filter 'office -ne "Bellevue"' | Set-ADAccountPassword -Reset -NewPassword (Read-Host -AsSecureString 'New password')
3. When prompted enter the password Pa$$w0rd and press ENTER:
Pa$$w0rd

6 Lab Answer Key: Automating Active Directory® Administration
Task 3: Change remote user address information to your local Bellevue, Washington office 1. In the PowerShell window, type the following command and press ENTER:
Get-Help Get-ADUser -Parameter Properties
2. In the PowerShell window type the following command and press ENTER:
Get-ADUser -Filter 'office -ne "Bellevue"' -Properties Office,StreetAddress,City,State,Country,PostalCode | Format-Table SamAccountName,Office,StreetAddress,City,State,Country,PostalCode
3. In the PowerShell window, type the following command and press ENTER:
Get-Help Set-ADUser -Full
4. In the PowerShell window, type the following command and press ENTER:
Get-ADUser -Filter 'office -ne "Bellevue"' -Properties Office,StreetAddress,City,State,Country,PostalCode | Set-ADUser -Office Bellevue -StreetAddress '2345 Main St.' -City Bellevue -State WA -Country US -PostalCode '95102'
Results: After this exercise, you should be able to reset passwords and modify attributes for a filtered list of Active Directory users.

Lab Answer Key: Automating Active Directory® Administration 7
Exercise 3: Disabling Users That Belong to a Specific Group
Task 1: Retrieve a list of all Active Directory groups 1. In the PowerShell window, type the following command and press ENTER:
Get-Help Get-ADGroup -Full
2. In the PowerShell window, type the following command and press ENTER:
Get-ADGroup -Filter *
Task 2: Retrieve a specific Active Directory group named “CleanUp” • In the PowerShell window, type the following command and press ENTER:
Get-ADGroup -Identity CleanUp
Task 3: Retrieve a list of members in the Active Directory group named “CleanUp” 1. In the PowerShell window, type the following command and press ENTER:
Get-Help Get-ADGroupMember -Full
2. In the PowerShell window, type the following command and press ENTER:
Get-ADGroup -Identity CleanUp | Get-ADGroupMember

8 Lab Answer Key: Automating Active Directory® Administration
Task 4: Disable the members of the Active Directory group named “CleanUp” 1. In the PowerShell window, type the following command and press ENTER:
Get-Help Disable-ADAccount -Full
2. In the PowerShell window, type the following command and press ENTER:
Get-ADGroup -Identity CleanUp | Get-ADGroupMember | Disable-ADAccount -WhatIf
3. In the PowerShell window, type the following command and press ENTER:
Get-ADGroup -Identity CleanUp | Get-ADGroupMember | Disable-ADAccount
Results: After this exercise, you should know how to retrieve groups from Active Directory, view their membership, and disable user accounts.

10 Lab Answer Key: Automating Active Directory® Administration
Lab B: Managing Computers and Other Directory Objects Before You Begin 1. Start the LON-DC1 virtual machine.
2. Ensure that the Windows Firewall on LON-DC1 has been disabled.
3. Log on to LON-DC1 as Contoso\Administrator with a password of Pa$$w0rd.
4. On the Start menu of LON-DC1, click All Programs, click Accessories, click Windows PowerShell, and then click Windows PowerShell. All commands will be run within the Windows PowerShell console.
Exercise 1: Listing All Computers That Appear to Be Running a Specific Operating System According to Active Directory Information
Task 1: Import the Active Directory module • In the PowerShell window, type the following command and press ENTER:
import-Module ActiveDirectory
Task 2: List all of the properties for one AD computer object 1. In the PowerShell window, type the following command and press ENTER:
Get-Help Get-ADComputer -Full
2. In the PowerShell window, type the following command and press ENTER:
Get-ADComputer -Filter * -Properties * -ResultSetSize 1 | fl *

Lab Answer Key: Automating Active Directory® Administration 11
Task 3: Find any properties containing operating system information on an AD computer • In the PowerShell window, type the following command and press ENTER:
Get-ADComputer -Filter * -Properties * -ResultSetSize 1 | fl *operatingsystem*
Task 4: Retrieve all computers running a specific operating system 1. In the PowerShell window, type the following command and press ENTER:
Get-ADComputer -Filter 'OperatingSystem -like "Windows Server 2008 R2*"'
Note: In some installations, the previous solution might not work, and might result in an error message regarding extended attributes. If that occurs, use the alternate solution provided next.
2. In the PowerShell window, type the following command and press ENTER:
Get-ADComputer -Filter 'OperatingSystem -like "Windows Server 2008 R2*"' -Properties OperatingSystem
Results: After this exercise you should be able to retrieve AD computers that match specific criteria and indicate which properties you want to retrieve for those computers.

12 Lab Answer Key: Automating Active Directory® Administration
Exercise 2: Creating a Report Showing All Windows Server 2008 R2 Servers
Task 1: Retrieve all computers running Windows Server 2008 R2 • In the PowerShell window, type the following command and press ENTER:
Get-ADComputer -Filter 'OperatingSystem -like "Windows Server 2008 R2*"' -Properties OperatingSystem,OperatingSystemHotfix,OperatingSystemServicePack,OperatingSystemVersion
Task 2: Generate an HTML report showing only the computer name, SID, and operating system details 1. In the PowerShell window, type the following commands and press ENTER at
the end of each line:
Get-Help ConvertTo-Html –Full Get-Help Out-File -Full
2. In the PowerShell window, type the following command and press ENTER:
Get-ADComputer -Filter 'OperatingSystem -like "Windows Server 2008 R2*"' -Properties OperatingSystem,OperatingSystemHotfix,OperatingSystemServicePack,OperatingSystemVersion | ConvertTo-Html -Property Name,SID,OperatingSystem* -Fragment
3. In the PowerShell window, type the following command and press ENTER:
Get-ADComputer -Filter 'OperatingSystem -like "Windows Server 2008 R2*"' -Properties OperatingSystem,OperatingSystemHotfix,OperatingSystemServicePack,OperatingSystemVersion | ConvertTo-Html -Property Name,SID,OperatingSystem* | Out-File C:\OSList.htm
4. In the PowerShell window, type the following command and press ENTER:
C:\OSlist.htm

Lab Answer Key: Automating Active Directory® Administration 13
Task 3: Generate a CSV file showing only the computer name, SID, and operating system details 1. In the PowerShell window, type the following command and press ENTER:
Get-Help Export-Csv -Full
2. In the PowerShell window, type the following command and press ENTER:
Get-ADComputer -Filter 'OperatingSystem -like "Windows Server 2008 R2*"' -Properties OperatingSystem,OperatingSystemHotfix,OperatingSystemServicePack,OperatingSystemVersion | Select-Object Name,SID,OperatingSystem*
3. In the PowerShell window, type the following command and press ENTER:
Get-ADComputer -Filter 'OperatingSystem -like "Windows Server 2008 R2*"' -Properties OperatingSystem,OperatingSystemHotfix,OperatingSystemServicePack,OperatingSystemVersion | Select-Object Name,SID,OperatingSystem* | Export-Csv C:\OSList.csv
4. In the PowerShell window, type the following command and press ENTER:
notepad C:\OSList.csv
Results: After this exercise, you should be able to generate HTML and CSV documents containing information that you retrieved by using PowerShell commands.

14 Lab Answer Key: Automating Active Directory® Administration
Exercise 3: Discovering Any Organizational Units That Aren’t Protected Against Accidental Deletion
Task 1: Retrieve all organizational units 1. In the PowerShell window, type the following command and press ENTER:
Get-Help Get-ADOrganizationalUnit -Full
2. In the PowerShell window, type the following command and press ENTER:
Get-ADOrganizationalUnit -Filter * -Properties ProtectedFromAccidentalDeletion
Task 2: Retrieve organizational units that are not protected against accidental deletion • In the PowerShell window, type the following command and press ENTER:
Get-ADOrganizationalUnit -Filter * -Properties ProtectedFromAccidentalDeletion | Where-Object {-not $_.ProtectedFromAccidentalDeletion}
Results: After this exercise, you should be able to use the Active Directory cmdlets to retrieve organizational units from Active Directory.

Lab Answer Key: Windows PowerShell® Scripts 1
Module 6 Lab Answer Key: Windows PowerShell® Scripts
Contents: Lab: Writing Windows PowerShell Scripts
Exercise 1: Executing Scripts 2
Exercise 2: Using Positional Script Parameters 4
Exercise 3: Using Named Script Parameters 6

2 Lab Answer Key: Windows PowerShell® Scripts
Lab: Writing Windows PowerShell Scripts Before You Begin 1. Start the LON-DC1 virtual machine.
2. Start the LON-SVR1 virtual machine.
3. Log on to LON-SVR1 as Contoso\Administrator with a password of Pa$$w0rd.
4. On the Start menu of LON-SVR1 click All Programs, click Accessories, click Windows PowerShell, click Windows PowerShell.
Exercise 1: Executing Scripts
Task 1: Check the execution policy setting 1. In the Windows PowerShell® window, type the following command and press
ENTER:
Get-ExecutionPolicy
2. If the results from the previous command is “Restricted”, in the PowerShell window, type the following command and press ENTER:
Set-ExecutionPolicy –ExecutionPolicy "RemoteSigned"
3. In the Execution Policy Change prompt type Y to indicate confirmation of your
decision to change the policy:

Lab Answer Key: Windows PowerShell® Scripts 3
Task 2: Create a script • Start the Notepad application. Create a new file named C:\Script.ps1 and
enter the following text into the file. Save the file.
Get-Process –Name powershell
Task 3: Execute a script from the shell • In the PowerShell window, type the following command and press ENTER
after each line:
Set-Location –Path "C:\" ./Script.ps1
Results: After this exercise, you will have created and run a simple script that lists all the powershell processes.

4 Lab Answer Key: Windows PowerShell® Scripts
Exercise 2: Using Positional Script Parameters
Task 1: Copy commands into a script • Start the Notepad application. Create a new file named C:\Script2.ps1 and
enter the following text into the file. Save the file.
Get-EventLog –LogName Application –Newest 100|Group-Object -Property InstanceId|Sort-Object –Descending -Property Count|Select-Object –Property Name,Count -First 5|Format-Table –AutoSize
Task 2: Use commands with hardcoded values as parameter values • In the PowerShell window, type the following command and press ENTER:
Set-Location –Path "C:\" ./Script2.ps1
Task 3: Identify variable portions of a command • The following underlined values are considered as variable names:
Get-EventLog –LogName Application –Newest 100|Group-Object -Property InstanceId|Sort-Object –Descending -Property Count|Select-Object –Property Name,Count -First 5|Format-Table –AutoSize

Lab Answer Key: Windows PowerShell® Scripts 5
Task 4: Create positional script parameters • Start the Notepad application. Create a new file named C:\Script3.ps1 and
enter the following text into the file. Save the file.
Param($log,$new,$group,$first) Get-EventLog –LogName $log –Newest $new|Group-Object -Property $group|Sort-Object –Descending -Property Count|Select-Object -Property Name,Count -First $first|Format-Table –AutoSize
Task 5: Execute a script from the shell • At the command prompt of the Windows PowerShell window, run the script
just created and pass it four arguments.
Set-Location –Path "C:\" ./Script3.ps1 "Application" 100 "InstanceId" 5
Results: After this exercise, you will have created and run a script that uses positional parameters instead of using hardcoded values.

6 Lab Answer Key: Windows PowerShell® Scripts
Exercise 3: Using Named Script Parameters
Task 1: Copy commands into a script • Start the Notepad application. Create a new file named C:\Script4.ps1 and
enter the following text into the file. Save the file.
Get-Counter -Counter "\Processor(_Total)\% Processor Time" -SampleInterval 2 -MaxSamples 3
Task 2: Use commands with hardcoded values as parameter values • In the PowerShell window, type the following command and press ENTER:
Set-Location –Path "C:\" ./Script4.ps1
Task 3: Identify variable portions of a command • The following underlined values are considered variable names:
Get-Counter -Counter "\Processor(_Total)\% Processor Time" -SampleInterval 2 -MaxSamples 3
Task 4: Create named script parameters • Start the Notepad application. Create a new file named C:\Script5.ps1 and
enter the following text into the file. Save the file.
Param($cpu,$interval,$max) Get-Counter -Counter "\Processor($cpu)\% Processor Time" -SampleInterval $interval -MaxSamples $max

Lab Answer Key: Windows PowerShell® Scripts 7
Task 5: Execute a script from the shell • At the command prompt of the Windows PowerShell window, run the script
just created by specifying all the parameter names and changing their order.
Set-Location –Path "C:\" ./Script5.ps1 –interval 2 –max 3 –cpu "_Total"
Results: After this exercise, you will have created and run a script that uses named parameters instead of using hard-coded values.

Lab Answer Key: Background Jobs and Remote Administration 1
Module 7 Lab Answer Key: Background Jobs and Remote Administration Contents: Lab A: Working with Background Jobs
Exercise 1: Using Background Jobs with WMI 2
Exercise 2: Using Background Jobs for Local Computers 4
Exercise 3: Receiving the Results from a Completed Job 5
Exercise 4: Removing a Completed Job 7
Exercise 5: Waiting for a Background Job to Complete 8
Exercise 6: Stopping a Background Job Before It Completes 10
Exercise 7: Working with the Properties of a Job 11
Lab B: Using Windows PowerShell Remoting
Exercise 1: Interactive Remoting 13
Exercise 2: Fan-Out Remoting 14
Exercise 3: Fan-Out Remoting Using Background Jobs 15
Exercise 4: Saving Information from Background Jobs 17

2 Lab Answer Key: Background Jobs and Remote Administration
Lab A: Working with Background Jobs Before You Begin 1. Start the LON-DC1 and LON-SVR1 virtual machines.
2. Log on to LON-SVR1 as Contoso\Administrator with a password of Pa$$w0rd.
3. On the Start menu of LON-SVR1 click All Programs, click Accessories, click Windows PowerShell, click Windows PowerShell.
Exercise 1: Using Background Jobs with WMI
Task 1: Start a background job • On LON-SVR1, in the PowerShell window, type the following command and
press ENTER:
Start-Job -ScriptBlock {Get-Process -Name PowerShell}
Task 2: Check the status of a background job • On LON-SVR1, in the PowerShell window, type the following command and
press ENTER:
Get-Job -Id 1
Note: The job ID 1 might be different on your computer. Run Get-Job with no parameters to see a list of jobs and their ID numbers.

Lab Answer Key: Background Jobs and Remote Administration 3
Task 3: Use Windows Management Instrumentation • On LON-SVR1, in the PowerShell window, type the following command and
press ENTER:
Get-WmiObject -Class Win32_ComputerSystem
Task 4: Retrieve information from remote computers 1. On LON-SVR1, in the PowerShell window, type the following command and
press ENTER:
Start-Job -ScriptBlock {Get-WmiObject -ComputerName LON-DC1 -Class Win32_ComputerSystem}
2. In the PowerShell window, type the following command and press ENTER:
Get-Job -Id 3
Note: The job ID number might be different on your computer. Run Get-Job with no parameters to see a list of jobs and their ID numbers.
3. In the PowerShell window, type the following command and press ENTER:
Get-Job -Id 3|Receive-Job
Results: After this exercise, you will have used a background job to use WMI to retrieve the Win32_ComputerSystem class from LON-DC1 remotely.

4 Lab Answer Key: Background Jobs and Remote Administration
Exercise 2: Using Background Jobs for Local Computers
Task 1: Start a background job • On LON-SVR1, in the PowerShell window, type the following command and
press ENTER:
Start-Job -ScriptBlock {Get-Service}
Task 2: Check the status of a background job • On LON-SVR1, in the PowerShell window, type the following command and
press ENTER:
Get-Job -Id 5
Note: The job ID number might be different on your computer. Run Get-Job with no parameters to see a list of jobs and their ID numbers.
Task 3: Retrieve information from local commands • On LON-SVR1, in the PowerShell window, type the following command and
press ENTER:
Get-Job -Id 5|Receive-Job
Results: After this exercise, you will have used a background job to retrieve a listing of all the installed services on LON-SVR1.

Lab Answer Key: Background Jobs and Remote Administration 5
Exercise 3: Receiving the Results from a Completed Job
Task 1: Run a background job • On LON-SVR1, in the PowerShell window, type the following command and
press ENTER:
Start-Job -ScriptBlock {Get-EventLog -LogName Application –Newest 100}
Task 2: Check the status of a background job • On LON-SVR1, in the PowerShell window, type the following command and
press ENTER:
Get-Job -Id 7
Note: The job ID number might be different on your computer. Run Get-Job with no parameters to see a list of jobs and their ID numbers.
Task 3: Receive the results of a background job and keep the results in memory • On LON-SVR1, in the PowerShell window, type the following command and
press ENTER:
Get-Job -Id 7|Receive-Job -Keep

6 Lab Answer Key: Background Jobs and Remote Administration
Task 4: Remove the results of a background job from memory • On LON-SVR1, in the PowerShell window, type the following command and
press ENTER:
Get-Job -Id 7|Receive-Job
Results: After this exercise, you will have used a background job to retrieve a listing of the latest 100 events in the Windows Application event log. You also will have seen how to save and remove the results from memory.

Lab Answer Key: Background Jobs and Remote Administration 7
Exercise 4: Removing a Completed Job
Task 1: Run a background job • On LON-SVR1, in the PowerShell window, type the following command and
press ENTER:
Start-Job -ScriptBlock {Get-HotFix}
Task 2: Check the status of a background job • On LON-SVR1, in the PowerShell window, type the following command and
press ENTER:
Get-Job -Id 9
Note: The job ID number might be different on your computer. Run Get-Job with no parameters to see a list of jobs and their ID numbers.
Task 3: Remove a completed job 1. On LON-SVR1, in the PowerShell window, type the following command and
press ENTER:
Wait-Job -Id 9
2. On LON-SVR1, in the PowerShell window, type the following command and press ENTER:
Remove-Job -Id 9
Results: After this exercise, you will have run Get-HotFix as a background job, checked its status, and once completed, you will have removed the entire job from memory.

8 Lab Answer Key: Background Jobs and Remote Administration
Exercise 5: Waiting for a Background Job to Complete
Task 1: Start a background job • On LON-SVR1, in the PowerShell window, type the following command and
press ENTER:
Start-Job -ScriptBlock {Start-Sleep -Seconds 15}
Task 2: Check the status of a background job • On LON-SVR1, in the PowerShell window, type the following command and
press ENTER:
Get-Job -Id 11
Note: The job ID number might be different on your computer. Run Get-Job with no parameters to see a list of jobs and their ID numbers.
Task 3: Wait for a background job to complete • On LON-SVR1, in the PowerShell window, type the following command and
press ENTER:
Wait-Job -Id 11

Lab Answer Key: Background Jobs and Remote Administration 9
Task 4: Copy the results of a background job to a file • On LON-SVR1, in the PowerShell window, type the following command and
press ENTER:
Receive-Job -Id 11|Out-File -FilePath "C:\jobs.txt"
Results: After this exercise, you will have run Start-Sleep for 15 seconds, checked its status, and will have run the Wait-Job cmdlet to ensure the job was completed. You also will have copied the results of the background job to a local file.

10 Lab Answer Key: Background Jobs and Remote Administration
Exercise 6: Stopping a Background Job Before It Completes
Task 1: Start a background job • On LON-SVR1, in the PowerShell window, type the following command and
press ENTER:
Start-Job -ScriptBlock {while($true){Start-Sleep -Seconds 1}}
Task 2: Check the status of the background job • On LON-SVR1, in the PowerShell window, type the following command and
press ENTER:
Get-Job -Id 13
Note: The job ID number might be different on your computer. Run Get-Job with no parameters to see a list of jobs and their ID numbers.
Task 3: Stop a background job that has not completed yet • On LON-SVR1, in the PowerShell window, type the following command and
press ENTER:
Stop-Job -Id 13
Results: After this exercise, you will have run a simple endless command as a background job, checked its status, and will have stopped the background job before it returned a completed status.

Lab Answer Key: Background Jobs and Remote Administration 11
Exercise 7: Working with the Properties of a Job
Task 1: Start a background job • On LON-SVR1, in the PowerShell window, type the following command and
press ENTER:
Start-Job -ScriptBlock {Get-Childitem -Path "C:\Windows\System32"}
Task 2: Display a list of background jobs • On LON-SVR1, in the PowerShell window, type the following command and
press ENTER:
Get-Job
Task 3: Use Get-Member to look at the properties of a job • On LON-SVR1, in the PowerShell window, type the following command and
press ENTER:
Get-Job -Id 15|Get-Member
Note: The job ID number might be different on your computer. Run Get-Job with no parameters to see a list of jobs and their ID numbers.
Results: After this exercise, you will have started a background job that retrieves a listing of all the contents of C:\Windows\System32, used Get-Member to view the methods and properties of a background job, and will have displayed the ChildJobs property of the background job.

Lab Answer Key: Background Jobs and Remote Administration 13
Lab B: Using Windows PowerShell Remoting Before You Begin 1. Start the LON-DC1, LON-SVR1, and LON-SVR2 virtual machines.
2. Log on to LON-DC1, LON-SVR1, and LON-SVR2 as Contoso\Administrator with a password of Pa$$w0rd.
3. On the Start menu of LON-DC1, LON-SVR1, and LON-SVR2 click All Programs, click Accessories, click Windows PowerShell, and then click Windows PowerShell.
4. In the Windows PowerShell window of LON-DC1, LON-SVR1, and LON-SVR2, run the command Enable-PSRemoting –Force.
Exercise 1: Interactive Remoting
Task 1: Initiate a 1:1 remoting session to a remote computer • On LON-SVR1, in the PowerShell window, type the following command and
press ENTER:
Enter-PSSession –ComputerName LON-DC1
Task 2: Run remote commands interactively • In the PowerShell window, type the following command and press ENTER:
Get-HotFix
Results: After this exercise, you will have initiated a 1:1 remoting session with LON-DC1 from LON-SVR1 and will have issued Get-HotFix remotely.

14 Lab Answer Key: Background Jobs and Remote Administration
Exercise 2: Fan-Out Remoting
Task 1: Invoke a command on multiple computers • On LON-SVR1, in the PowerShell window, type the following command and
press ENTER:
Note: If you are still in the remote session with LON-DC1 you can exit now by typing “Exit-pssession”.
Invoke-Command –ScriptBlock {Get-EventLog –LogName Application –Newest 100} –ComputerName LON-DC1,LON-SVR2
Task 2: Sort and filter objects in the pipeline • In the PowerShell window, type the following command and press ENTER:
Invoke-Command –ScriptBlock {Get-EventLog –LogName Application –Newest 100} –ComputerName LON-DC1,LON-SVR2|Group-Object –Property EventId|Sort-Object –Descending –Property Count|Select-Object –First 5
Results: After this exercise, you will have invoked a command on LON-DC1 and LON-SVR2 from LON-SVR1 to retrieve a listing of the 100 newest events from the Windows Application event log, and will have grouped and sorted the results to display the top five EventId values that have occurred the most.

Lab Answer Key: Background Jobs and Remote Administration 15
Exercise 3: Fan-Out Remoting Using Background Jobs
Task 1: Invoke a command on multiple computers as a background job • On LON-SVR1, in the PowerShell window, type the following command and
press ENTER:
Invoke-Command –AsJob –ScriptBlock {Get-Acl –Path "C:\Windows\System32\*" –Filter "*.dll"} –ComputerName LON-DC1,LON-SVR2
Task 2: Wait for the parent job to complete • In the PowerShell window, type the following command and press ENTER:
Wait-Job –Id 1
Note: The job ID 1 might be different on your computer. Run Get-Job with no parameters to see a list of jobs and their ID numbers.
Task 3: Get the ID of all child jobs • In the PowerShell window, type the following command and press ENTER:
Get-Job –Id 1 | Select-Object –Property ChildJobs

16 Lab Answer Key: Background Jobs and Remote Administration
Task 4: Sort and filter objects in the pipeline • In the PowerShell window, type the following command and press ENTER:
Receive-Job –Id 2,3 –Keep|Where-Object –FilterScript {$_.Owner –like "*Administrator*"}
Results: After this exercise, you will have invoked a command on LON-DC1 and LON-SVR2 as a background job from LON-SVR1 to retrieve the ACLs on all the files in C:\Windows\System32 with the extension “*.dll”, and will have filtered to display only the files with the owner being the Administrators.

Lab Answer Key: Background Jobs and Remote Administration 17
Exercise 4: Saving Information from Background Jobs
Task 1: Invoke a command on multiple computers as a background job • On LON-SVR1, in the PowerShell window, type the following command and
press ENTER:
Invoke-Command –AsJob –ScriptBlock {Get-Counter –Counter "\Processor(_Total)\% Processor Time" -SampleInterval 2 -MaxSamples 3} –ComputerName LON-DC1,LON-SVR2
Task 2: Wait for the parent job to complete • In the PowerShell window, type the following command and press ENTER:
Wait-Job –Id 4
Note: The job ID number might be different on your computer. Run Get-Job with no parameters to see a list of jobs and their ID numbers.
Task 3: Receive the results only from a single child job • In the PowerShell window, type the following command and press ENTER:
Receive-Job –Id 5,6 –Keep|Where-Object –FilterScript {$_.PSComputerName –eq "LON-DC1"}
Note: The ID numbers of the items you want to use in the above command are the next two sequential numbers from the original job in task 1. If you wish to see these listed you can type o determine the ID numbers by typing get-job –ID X| select-object –property childjobs where X is the ID number from Task 1 above.

18 Lab Answer Key: Background Jobs and Remote Administration
Task 4: Export the results to a file • In the PowerShell window, type the following command and press ENTER:
Receive-Job –Id 5,6 –Keep|Where-Object –FilterScript {$_.PSComputerName –eq "LON-DC1"}|Out-File –FilePath "C:\counter.txt"
Results: After this exercise, you will have invoked a command on LON-DC1 and LON-SVR2 as a background job from LON-SVR1 to retrieve the total %Processor Time value, waited for the parent job to complete, and will have retrieved the results of the child job that was used for LON-DC1 only by saving the results to a file.

Lab Answer Key: Advanced Windows PowerShell® Tips and Tricks 1
Module 8 Lab Answer Key: Advanced Windows PowerShell® Tips and Tricks
Contents: Lab: Advanced PowerShell Tips and Tricks
Exercise 1: Writing a Profile Script 2
Exercise 2: Creating a Script Module 4
Exercise 3: Adding Help Information to a Function 6

2 Lab Answer Key: Advanced Windows PowerShell® Tips and Tricks
Lab: Advanced PowerShell Tips and Tricks Before You Begin 1. Start the LON-SVR1 virtual machine, and then log on by using the following
credentials:
• Username: CONTOSO\administrator
• Password: Pa$$w0rd
2. On the Start menu of LON-SVR1 click All Programs, click Accessories, click Windows PowerShell, then right-click Windows PowerShell and click Run As Administrator.
Exercise 1: Writing a Profile Script
Task 1: Write a profile script 1. In the Windows PowerShell® window, type the following command and press
ENTER:
New-Item –Type File –Path $profile -Force
Note: You may need to run Set-executionpolicy remotesigned if that setting is not already defined.
2. In the PowerShell window, type the following command and press ENTER:
Notepad $profile
If you get prompted to provide credentials you can use username Contoso\Administrator and password Pa$$w0rd.

Lab Answer Key: Advanced Windows PowerShell® Tips and Tricks 3
3. In the Notepad window, type the following, and then click Save and Exit.
Set-Location –Path "C:\" Import-Module –Name ServerManager $cred=Get-Credential
Task 2: Test a profile script • In the PowerShell window, type the following command and press ENTER:
. $profile
Note: As outlined earlier in Task 1 you may need to run Set-executionpolicy remotesigned if that setting is not already defined. Also, again If you get prompted to provide credentials you can use username Contoso\Administrator and password Pa$$w0rd.
Hint: That command is a period (or dot), a space, and then $profile.
Results: After this exercise, you should have a better understanding on how to write and use a profile script.

4 Lab Answer Key: Advanced Windows PowerShell® Tips and Tricks
Exercise 2: Creating a Script Module
Task 1: Package a function as a script module 1. Use Windows® Explorer to open your Documents (or My Documents) folder.
2. Double-click the Windows PowerShell folder. (If the folder does not exist, create it.)
3. Create a new subfolder named Modules. Double-click the new folder.
4. Create a new subfolder named MyAppEvents. Double-click the new folder.
5. Click All Programs, click Accessories, click Windows PowerShell, right-click Windows PowerShell ISE and click Run As Administrator
6. In the Windows PowerShell ISE open a new script file by pressing CTRL+N.
7. In the new script, type the following. Then save the file in the MyAppEvents folder that you created previously. Name the file MyAppEvents.psm1.
Function Get-AppEvents { Get-EventLog –LogName Application –Newest 100 | Group-Object -Property InstanceId | Sort-Object –Descending -Property Count | Select-Object –Property Name,Count -First 5 | Format-Table –AutoSize }
Task 2: Load a script module • In the PowerShell window, type the following command and press ENTER:
Note: You may need to enter the full path to the file if you receive an error. You may also want to use the SPSHome directory location.
Import-Module –Name MyAppEvents

Lab Answer Key: Advanced Windows PowerShell® Tips and Tricks 5
Task 3: Test the script module • In the PowerShell window, type the following command and press ENTER:
Get-AppEvents
Results: After this exercise, you should have a better understanding of how to create and import script modules.

6 Lab Answer Key: Advanced Windows PowerShell® Tips and Tricks
Exercise 3: Adding Help Information to a Function
Task 1: Add comment based help to a function 1. In the Windows PowerShell ISE window, open the MyAppEvent.psm1 file
that you created in the previous exercise.
2. In the script, type the following, and then click Save and Exit. You may need to add only the boldfaced portion.
function Get-AppEvents { <# .SYNOPSIS Get-AppEvents retrieves the newest 100 events from the Application event log, groups and sorts them by InstanceID and then displays only top 5 events that have occured the most. .DESCRIPTION See the synopsis section. .EXAMPLE To run the function, simply invoke it: PS> Get-AppEvents #> Get-EventLog –LogName Application –Newest 100|Group-Object -Property InstanceId|Sort-Object –Descending -Property Count|Select-Object –Property Name,Count -First 5|Format-Table –AutoSize }
Task 2: Test comment-based help 1. In the PowerShell window, type the following command and press ENTER:
Get-Help Get-AppEvents
2. In the PowerShell window, type the following command and press ENTER:
Get-Help Get-AppEvents –Examples

Lab Answer Key: Advanced Windows PowerShell® Tips and Tricks 7
Task 3: Reload a module 1. In the PowerShell window, type the following command and press ENTER:
Remove-Module –Name MyAppEvents
2. In the PowerShell window, type the following command and press ENTER:
Import-Module –Name MyAppEvents
3. In the PowerShell window, type the following command and press ENTER:
Get-Help Get-AppEvents
Results: After this exercise, you should have a better understanding of how to add comment-based help to a function.

Lab Answer Key: Automating Windows Server® 2008 Administration 1
Module 9 Lab Answer Key: Automating Windows Server® 2008 Administration
Contents: Lab A: Using the Server Manager Cmdlets
Exercise 1: Listing All Currently Installed Features 5
Exercise 2: Comparing Objects 6
Exercise 3: Installing a New Server Feature 7
Exercise 4: Exporting Current Configuration to XML 8
Lab B: Using the Group Policy Cmdlets
Exercise 1: Listing All Group Policy Objects in the Domain 10
Exercise 2: Creating a Text-Based Report 12
Exercise 3: Creating HTML Reports 13
Exercise 4: Backing Up All Group Policy Objects 14
Lab C: Using the Troubleshooting Pack Cmdlets
Exercise 1: Importing the Troubleshooting Pack Module 16
Exercise 2: Solving an End-User Problem Interactively 17
Exercise 3: Solving a Problem Using Answer Files 18
Lab D: Using the Best Practices Analyzer Cmdlets
Exercise 1: Importing the Best Practices Module 21
Exercise 2: Viewing Existing Models 22
Exercise 3: Running a Best Practices Scan 22

2 Lab Answer Key: Automating Windows Server® 2008 Administration
Lab E: Using the IIS Cmdlets
Exercise 1: Importing the IIS Module 25
Exercise 2: Creating a New Web Site 26
Exercise 3: Backing Up IIS 28
Exercise 4: Modifying Web Site Bindings 29
Exercise 5: Using the IIS PSDrive 30
Exercise 6: Restoring an IIS Configuration 31

Lab Answer Key: Automating Windows Server® 2008 Administration 3
Lab A: Using the Server Manager Cmdlets Before You Begin 1. Start the LON-DC1, LON-SVR1 and LON-SVR2 virtual machines.
2. Log on to LON-DC1 as Contoso\Administrator with a password of Pa$$w0rd.
3. On the Start menu of LON-DC1 click All Programs, click Accessories, click Windows PowerShell, right-click Windows PowerShell and click Run As Administrator.
4. On LON-DC1, open a Windows PowerShell® session as Administrator.
5. On LON-DC1, open the Start menu. Under the Administrative Tools folder, open the Group Policy Management Console.
6. In the left pane of the Group Policy Management console, expand the forest and domain until you see the Starter GPOs folder. Select the Starter GPOs folder by clicking on it.
7. In the right pane, click the Create Starter GPOs Folder button to create the Starter GPOs.
8. Ensure that Windows PowerShell remoting is enabled on LON-SVR1 and LON-SVR2. If you completed the previous labs in this course and have not shut down and discarded the changes in the virtual machines, remoting will be enabled. If not, open a Windows PowerShell session on those two virtual machines and run Enable-PSRemoting on each.

4 Lab Answer Key: Automating Windows Server® 2008 Administration
9. In Windows PowerShell, execute the following two commands:
a. Set-ExecutionPolicy RemoteSigned
b. E:\Mod09\Labfiles\Lab_09_Setup.ps1
Note: Some of the Group Policy Objects and DNS entries that this script will modify may already exist in the virtual machine and you may receive and error saying so if you have used the virtual machine during earlier modules and have not discarded those changes.
10. Log on to LON-SVR1 as Contoso\Administrator with a password of Pa$$w0rd.
11. On the Start menu of LON-SVR1 click All Programs, click Accessories, click Windows PowerShell, right-click Windows PowerShell and click Run As Administrator.
12. Disable the Windows® Firewall for LON-SVR1 by carrying out the following steps
a. Go to Start > Control Panel > System and Security > Windows Firewall.
b. Click on Turn Windows Firewall on or off.
c. In the Domain network location settings section, click the radio button Turn off Windows Firewall (not recommended).
d. In the Home or work (private) network location settings, click the radio button Turn off Windows Firewall (not recommended).
e. In the Public network location settings, click the radio button Turn off Windows Firewall (not recommended).
f. Repeat steps a to e for virtual machines LON-DC1 and LON-SVR2.
Note: This is not security best practice and under no circumstances should this be done in a production environment. This is done in this instance purely to allow us to focus on the learning task at hand and concentrate on powershell concepts.

Lab Answer Key: Automating Windows Server® 2008 Administration 5
Exercise 1: Listing All Currently Installed Features
Task 1: Import the Windows Server Manager PowerShell module 1. On LON-SVR1, in the Windows PowerShell window, type the following
command and press ENTER:
Get-Module -ListAvailable
2. In the Windows PowerShell window, type the following command and press ENTER:
Import-Module ServerManager
Task 2: View the module contents • In the Windows PowerShell window, type the following command and press
ENTER:
Get-Command –module ServerManager
Task 3: View all installed server features 1. In the Windows PowerShell window, type the following command and press
ENTER:
Get-WindowsFeature
2. In the Windows PowerShell window, type the following command and press ENTER:
Get-WindowsFeature | Where {$_.installed}

6 Lab Answer Key: Automating Windows Server® 2008 Administration
Exercise 2: Comparing Objects
Task 1: Import the XML file 1. On LON-SVR1, in the Windows PowerShell window, type the following
command and press ENTER:
$target=Import-Clixml –path E:\Mod09\Labfiles\TargetFeatures.xml
2. In the Windows PowerShell window, type the following command and press ENTER:
$current=Get-WindowsFeature
Task 2: Compare the imported features with the current features • In the Windows PowerShell window, type the following command and press
ENTER:
Compare-Object $target $current –property installed,Name

Lab Answer Key: Automating Windows Server® 2008 Administration 7
Exercise 3: Installing a New Server Feature
Task 1: View cmdlet help • On LON-SVR1, in the Windows PowerShell window, type the following
command and press ENTER:
help Add-WindowsFeature –full
Task 2: Install missing features • In the Windows PowerShell window, type the following command and press
ENTER:
Compare-Object $target $current –property installed,name | where {$_.sideIndicator –eq "=>" –and –not $_.installed} | foreach {Add-WindowsFeature $_.name}
Note: There are usually several ways to accomplish a task in Windows PowerShell. The solution here is but one possible choice. You may have a different solution that also works.

8 Lab Answer Key: Automating Windows Server® 2008 Administration
Exercise 4: Exporting Current Configuration to XML
Task 1: Verify the current configuration • On LON-SVR1, in the Windows PowerShell window, type the following
command and press ENTER:
Get-WindowsFeature | where {$_.installed}
Task 2: Export configuration to XML • In the Windows PowerShell window, type the following command and press
ENTER:
Get-WindowsFeature | Export-Clixml $env:userprofile\documents\LON-SVR1-Features.xml.

10 Lab Answer Key: Automating Windows Server® 2008 Administration
Lab B: Using the Group Policy Cmdlets Before You Begin 1. Start the LON-DC1 virtual machine.
2. Log on to LON-DC1 as Contoso\Administrator with a password of Pa$$w0rd.
3. Start the LON-SVR1 virtual machine. You do not need to log on.
4. On the Start menu of LON-DC1 click All Programs, click Accessories, click Windows PowerShell, click Windows PowerShell.
Exercise 1: Listing All Group Policy Objects in the Domain
Task 1: Import the Group Policy PowerShell module 1. On LON-DC1, in the Windows PowerShell window, type the following
command and press ENTER:
Get-Module -ListAvailable
2. In the Windows PowerShell window, type the following command and press ENTER:
Import-Module GroupPolicy
Task 2: View the module contents • In the Windows PowerShell window, type the following command and press
ENTER:
Get-Command –module GroupPolicy

Lab Answer Key: Automating Windows Server® 2008 Administration 11
Task 3: View Group Policy objects • In the Windows PowerShell window, type the following command and press
ENTER:
Get-GPO –all

12 Lab Answer Key: Automating Windows Server® 2008 Administration
Exercise 2: Creating a Text-Based Report
Task 1: Get selected Group Policy object properties • In the Windows PowerShell window, type the following command and press
ENTER:
Get-Gpo -all | Sort ModificationTime | Select Displayname,*time
Task 2: Create a text file report • In the Windows PowerShell window, type the following command and press
ENTER:
get-gpo -all | Sort ModificationTime | Select Displayname,*time | out-file \\LON-SVR1\E$\Mod09\Labfiles\Reports_GPOSummary.txt

Lab Answer Key: Automating Windows Server® 2008 Administration 13
Exercise 3: Creating HTML Reports
Task 1: Create a default Domain Policy report • In the Windows PowerShell window, type the following one line command
and press ENTER:
Get-GPOReport -Name "Default Domain Policy" -ReportType HTML -Path $env:userprofile\documents\DefaultDomainPolicy.htm
Task 2: Create individual GPO reports • In the Windows PowerShell window, type the following one line command
and press ENTER:
Get-Gpo -all | foreach {Get-GPOReport –id $_.id -ReportType HTML -Path \\LON-SVR1\E$\Mod09\Labfiles\$($_.Displayname).htm}

14 Lab Answer Key: Automating Windows Server® 2008 Administration
Exercise 4: Backing Up All Group Policy Objects
Task 1: Back up the Default Domain policy • In the Windows PowerShell window, type the following command and press
ENTER:
Backup-Gpo -Name "Default Domain Policy" -Path $env:userprofile\documents
Task 2: Back up all Group Policy objects • In the Windows PowerShell window, type the following command and press
ENTER:
Backup-GPO -All -Path \\LON-SVR1\E$\Mod09\Labfiles -Comment "Weekly Backup"

16 Lab Answer Key: Automating Windows Server® 2008 Administration
Lab C: Using the Troubleshooting Pack Cmdlets Before You Begin 1. Start the LON-DC1 and LON-SVR1 virtual machines. You do not need to log
on.
2. Start the LON-CLI1 virtual machine and log on as Contoso\Administrator with a password of Pa$$w0rd.
3. On the Start menu of LON-CLI1 click All Programs, click Accessories, click Windows PowerShell, click Windows PowerShell.
Exercise 1: Importing the Troubleshooting Pack Module
Task 1: Import the Troubleshooting Pack PowerShell module • On LON-CLI1, in the Windows PowerShell window, type the following
command and press ENTER:
Import-Module TroubleShootingPack
Task 2: View the module contents • In the Windows PowerShell window, type the following command and press
ENTER:
Get-Command –module TroubleShootingPack

Lab Answer Key: Automating Windows Server® 2008 Administration 17
Exercise 2: Solving an End-User Problem Interactively
Task 1: Stop Windows search • On LON-CLI1, in the Windows PowerShell window, type the following
command and press ENTER:
Stop-Service WSearch
Task 2: Run an interactive troubleshooting session 1. In the Windows PowerShell window, type the following command and press
ENTER:
$pack=Get-Troubleshootingpack $env:windir\diagnostics\system\search
2. In the PowerShell window, type the following command and press ENTER:
Invoke-TroubleshootingPack $pack -Result "c:\result.xml"
3. Type 1 and Press ENTER.
4. Type 1 and press ENTER.
5. Type x and press ENTER. (it should be lowercase x that is used)
Task 3: View the report 1. Click the Internet Explorer icon on the Taskbar.
2. In the Internet Explorer navigation field type C:\result.xml and press ENTER.
If prompted, answer yes to run scripts and allow blocked content.
3. Double-click files to review them. There will be several file sin the C:\Result.xml folder.
4. After reviewing the file, close Internet Explorer.

18 Lab Answer Key: Automating Windows Server® 2008 Administration
Exercise 3: Solving a Problem Using Answer Files
Task 1: Create an answer file 1. In the Windows PowerShell window, type the following one line command
and press ENTER:
Get-Troubleshootingpack C:\Windows\diagnostics\system\search -AnswerFile SearchAnswer.xml
2. Press ENTER.
3. Type 1 and press ENTER.
4. Press ENTER.
Task 2: Invoke troubleshooting using the answer file 1. In the Windows PowerShell window, type the following command and press
ENTER:
Stop-Service WSearch
2. In the Windows PowerShell window, type the following command and press ENTER:
Invoke-TroubleshootingPack $pack -AnswerFile SearchAnswer.xml
3. Type x and press ENTER. (It should be lowercase x that is used.)

Lab Answer Key: Automating Windows Server® 2008 Administration 19
Task 3: Invoke troubleshooting unattended • In the Windows PowerShell window, type the following command and press
ENTER:
Invoke-TroubleshootingPack $pack -AnswerFile SearchAnswer.xml –Unattended
Task 4: Verify the solution • In the Windows PowerShell window, type the following command and press
ENTER:
Get-Service WSearch

Lab Answer Key: Automating Windows Server® 2008 Administration 21
Lab D: Using the Best Practices Analyzer Cmdlets Before You Begin 1. Start the LON-DC1 virtual machine and log on as Contoso\Administrator
with a password of Pa$$w0rd.
2. On the Start menu of LON-DC1 click All Programs, click Accessories, click Windows PowerShell, and then click Windows PowerShell.
Exercise 1: Importing the Best Practices Module
Task 1: Import the Best Practices PowerShell module 1. On LON-DC1, in the Windows PowerShell window, type the following
command and press ENTER:
Get-Module –ListAvailable
2. In the Windows PowerShell window, type the following command and press ENTER:
Import-Module BestPractices
Task 2: View the module contents • In the Windows PowerShell window, type the following command and press
ENTER:
Get-Command -module BestPractices

22 Lab Answer Key: Automating Windows Server® 2008 Administration
Exercise 2: Viewing Existing Models
Task 1: Display all available best practice models • In the Windows PowerShell window, type the following command and press
ENTER:
Get-BpaModel
Exercise 3: Running a Best Practices Scan
Task 1: Run a best practices scan • In the Windows PowerShell window, type the following command and press
ENTER:
Invoke-BpaModel microsoft/windows/directoryservices
Task 2: View the scan results 1. In the Windows PowerShell window, type the following command and press
ENTER:
$results=Get-BpaResult microsoft/windows/directoryservices
2. In the Windows PowerShell window, type the following command and press ENTER:
$results| more
3. Press the SPACEBAR to advance to the next page or type Q to quit.

Lab Answer Key: Automating Windows Server® 2008 Administration 23
Task 3: View selected results • In the Windows PowerShell window, type the following command and press
ENTER:
$results | where {$_.severity –eq “Error"}
Depending on the current configuration, there may not be any errors to display.
Task 4: Create a best practices report 1. In the Windows PowerShell window, type the following command and press
ENTER:
$results | sort Severity | Select ResultID,Severity,Category,Title,Problem,Impact,Resolution,Compliance | ConvertTo-Html -Title "Active Directory Best Practice Scan" -CssUri E:\Mod09\LabFiles\bpareport.css | Out-File $env:userprofile\documents\adbpa.htm
2. Click Start, click All Programs and then click Internet Explorer.
3. In the URL navigation field type C:\Users\Administrator.NYC-DC1 \Documents\adbpa.htm.
4. Close Internet Explorer after viewing the file.

Lab Answer Key: Automating Windows Server® 2008 Administration 25
Lab E: Using the IIS Cmdlets Before You Begin 1. Start the LON-DC1 virtual machine and log on as Contoso\Administrator
with a password of Pa$$w0rd.
2. On the Start menu of LON-DC1 click All Programs, click Accessories, click Windows PowerShell, and then click Windows PowerShell.
Exercise 1: Importing the IIS Module
Task 1: Import the IIS PowerShell module 1. In the Windows PowerShell window, type the following command and press
ENTER:
Get-Module -ListAvailable
2. In the Windows PowerShell window, type the following command and press ENTER:
Import-Module WebAdministration
Task 2: View the module contents • In the Windows PowerShell window, type the following command and press
ENTER:
Get-Command –module WebAdministration

26 Lab Answer Key: Automating Windows Server® 2008 Administration
Exercise 2: Creating a New Web Site
Task 1: Create a new Web site 1. In the Windows PowerShell window, type the following command and press
ENTER:
mkdir $env:systemdrive\inetpub\PowerShellDemo
2. In the Windows PowerShell window, type the following one-line command and press ENTER:
Copy [path to lab folder]\UnderConstruction.html –destination $env:systemdrive\inetpub\PowerShellDemo\default.htm
3. In the Windows PowerShell window, type the following one-line command and press ENTER:
New-WebSite -Name PowerShellDemo -port 80 -PhysicalPath $env:systemdrive\inetpub\PowerShellDemo
Task 2: View all Web sites • In the Windows PowerShell window, type the following command and press
ENTER:
Get-Website

Lab Answer Key: Automating Windows Server® 2008 Administration 27
Task 3: Verify the Web site 1. In the Windows PowerShell window, type the following command and press
ENTER:
Stop-Website "Default Web Site"
2. In the Windows PowerShell window, type the following command and press ENTER:
Start-Website "PowerShellDemo"
3. On LON-DC1, click Start, click All Programs and then click Internet Explorer.
4. In the URL navigation field type:
http://lon-dc1
and press ENTER.
5. Close Internet Explorer after viewing the welcome page.

28 Lab Answer Key: Automating Windows Server® 2008 Administration
Exercise 3: Backing Up IIS
Task 1: Back up IIS • In the Windows PowerShell window, type the following command and press
ENTER:
Backup-WebConfiguration Backup1
Task 2: Verify the backup • In the Windows PowerShell window, type the following command and press
ENTER:
Get-WebConfigurationBackup Backup1

Lab Answer Key: Automating Windows Server® 2008 Administration 29
Exercise 4: Modifying Web Site Bindings
Task 1: Display current binding information for all Web sites • In the Windows PowerShell window, type the following command and press
ENTER:
Get-WebSite
Note: Because the Get-WebBinding cmdlet doesn’t include the Web site name, you might use a command like this: Get-WebSite | Foreach { $_ | add-member Noteproperty -name
BindingInformation -value ((Get-WebBinding
$_.name).bindinginformation) -passthru} | Select
Name,BindingInformation
Task 2: Change port binding • In the Windows PowerShell window, type the following one line command
and press ENTER:
Get-WebSite | Foreach { $name=$_.name ; Get-WebBinding $name | Set-WebBinding -name $name -PropertyName Port -Value 8001}
Task 3: Verify the new bindings 1. In the Windows PowerShell window, type the following command and press
ENTER:
Get-WebSite
2. On LON-DC1, click Start, click All Programs and then click Internet Explorer.
3. In the URL navigation field type:
http://lon-dc1:8001
4. Close Internet Explorer.

30 Lab Answer Key: Automating Windows Server® 2008 Administration
Exercise 5: Using the IIS PSDrive
Task 1: Connect to the IIS PSDrive 1. In the Windows PowerShell window, type the following command and press
ENTER:
Get-PSDrive
2. In the Windows PowerShell window, type the following command and press ENTER:
cd IIS:
Task 2: Navigate to the default site • In the Windows PowerShell window, type the following command and press
ENTER:
cd "Sites\Default Web Site"
Task 3: Display all properties for the default site • In the Windows PowerShell window, type the following command and press
ENTER:
Get-Item . | select *
Task 4: Modify the default site 1. In the Windows PowerShell window, type the following command and press
ENTER:
Set-ItemProperty . -Name serverAutoStart -Value $False
2. In the Windows PowerShell window, type the following command and press ENTER:
cd C:

Lab Answer Key: Automating Windows Server® 2008 Administration 31
Exercise 6: Restoring an IIS Configuration
Task 1: View existing backups • In the Windows PowerShell window, type the following command and press
ENTER:
Get-WebConfigurationBackup
Task 2: Restore the most recent configuration 1. In the Windows PowerShell window, type the following command and press
ENTER:
Restore-WebConfiguration –name Backup1
2. In the Windows PowerShell window, type the following command and press ENTER:
Get-WebSite
Note: You can ignore any errors about denied access to c:\windows\system32\inetserv\config\scheman\wsmanconfig_schema.xml.or c:\windows\system32\inetserv\mbschema.xml.

Lab Answer Key: Writing Your Own Windows PowerShell® Scripts 1
Module 11 Lab Answer Key: Writing Your Own Windows PowerShell® Scripts
Contents: Lab A: Using Variables and Arrays
Exercise 1: Creating Variables and Interacting with Them 3
Exercise 2: Understanding Arrays and Hashtables 5
Exercise 3: Using Single-Quoted and Double-Quoted Strings and the Backtick 8
Exercise 4: Using Arrays and Array Lists 10
Exercise 5: Using Contains, Like and Equals Operators 11
Lab B: Using Scripting Constructs
Exercise 1: Processing and Validating Input 15
Exercise 2: Working with For, While, Foreach, and Switch 17
Exercise 3: Using the Power of the One-Liner 22
Lab C: Error Trapping and Handling
Exercise 1: Retrieving Error Information 25
Exercise 2: Handling Errors 30
Exercise 3: Integrating Error Handling 33
Lab D: Debugging a Script
Exercise 1: Debugging from the Windows PowerShell Console 37
Exercise 2: Debugging Using the Windows PowerShell Integrated Scripting Environment (ISE) 42

2 Lab Answer Key: Writing Your Own Windows PowerShell® Scripts
Lab E: Modularization
Exercise 1: Generating an Inventory Audit Report 45
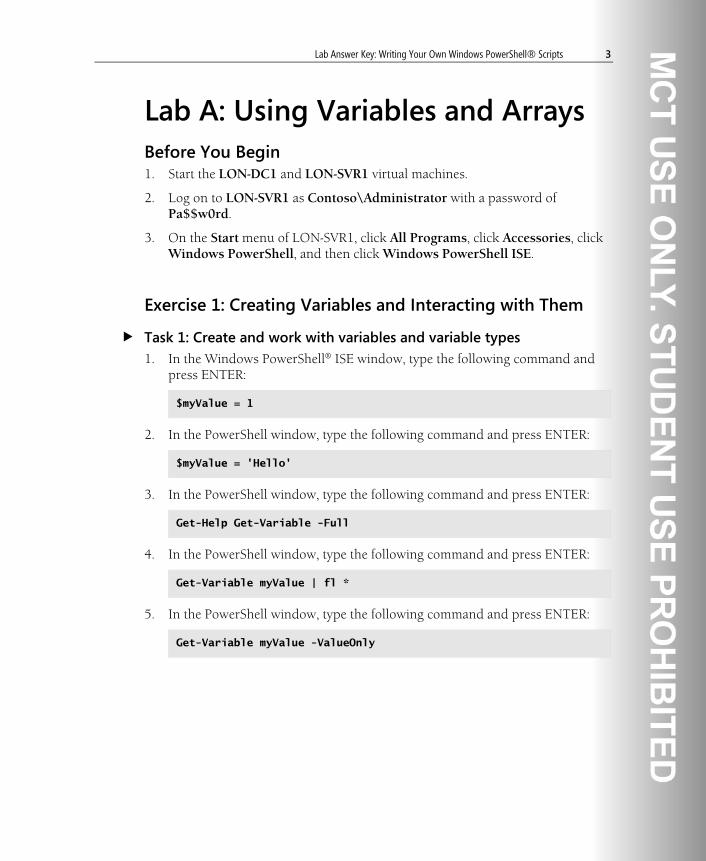
Lab Answer Key: Writing Your Own Windows PowerShell® Scripts 3
Lab A: Using Variables and Arrays Before You Begin 1. Start the LON-DC1 and LON-SVR1 virtual machines.
2. Log on to LON-SVR1 as Contoso\Administrator with a password of Pa$$w0rd.
3. On the Start menu of LON-SVR1, click All Programs, click Accessories, click Windows PowerShell, and then click Windows PowerShell ISE.
Exercise 1: Creating Variables and Interacting with Them
Task 1: Create and work with variables and variable types 1. In the Windows PowerShell® ISE window, type the following command and
press ENTER:
$myValue = 1
2. In the PowerShell window, type the following command and press ENTER:
$myValue = 'Hello'
3. In the PowerShell window, type the following command and press ENTER:
Get-Help Get-Variable -Full
4. In the PowerShell window, type the following command and press ENTER:
Get-Variable myValue | fl *
5. In the PowerShell window, type the following command and press ENTER:
Get-Variable myValue -ValueOnly

4 Lab Answer Key: Writing Your Own Windows PowerShell® Scripts
6. In the PowerShell window, type the following command and press ENTER:
[int]$myValue = 1
7. In the PowerShell window, type the following command and press ENTER:
$myValue = 'Hello'
Task 2: View all variables and their values • In the PowerShell window, type the following command and press ENTER:
Get-Variable
Task 3: Remove a variable 1. In the PowerShell window, type the following command and press ENTER:
Get-Help Remove-Variable -Full
2. In the PowerShell window, type the following command and press ENTER:
Remove-Variable myValue
Results: After this exercise, you should be able to create new variables, view variable values, and remove variables.

Lab Answer Key: Writing Your Own Windows PowerShell® Scripts 5
Exercise 2: Understanding Arrays and Hashtables
Task 1: Create an array of services 1. In the PowerShell window, type the following command and press ENTER:
get-help about_arrays
2. In the PowerShell window, type the following command and press ENTER:
$services = Get-Service
3. In the PowerShell window, type the following command and press ENTER:
$services
4. In the PowerShell window, type the following command and press ENTER:
$services.GetType().FullName
Task 2: Access individual items and groups of items in an array 1. In the PowerShell window, type the following command and press ENTER:
$services[0]
2. In the PowerShell window, type the following command and press ENTER:
$services[1]
3. In the PowerShell window, type the following command and press ENTER:
$services[-1]
4. In the PowerShell window, type the following command and press ENTER:
$services[0..9]

6 Lab Answer Key: Writing Your Own Windows PowerShell® Scripts
Task 3: Retrieve the count of objects in an array • In the PowerShell window, type the following command and press ENTER:
$services.Count
Task 4: Create a hashtable of services 1. In the PowerShell window, type the following command and press ENTER:
get-help about_hash_tables
2. In the PowerShell window, type the following command and press ENTER:
$serviceTable = @{}
3. In the PowerShell window, type the following command and press ENTER:
foreach ($service in $services) { $serviceTable[$service.Name] = $service }
4. In the PowerShell window, type the following command and press ENTER:
$serviceTable
Task 5: Access individual items in a hashtable 1. In the PowerShell window, type the following command and press ENTER:
$serviceTable['BITS']
2. In the PowerShell window, type the following command and press ENTER:
$serviceTable['wuauserv']

Lab Answer Key: Writing Your Own Windows PowerShell® Scripts 7
3. In the PowerShell window, type the following command and press ENTER:
$serviceTable | gm
4. In the PowerShell window, type the following command and press ENTER:
$serviceTable.Count
Task 6: Enumerate key and value collections of a hashtable 1. In the PowerShell window, type the following command and press ENTER:
$serviceTable.Keys
2. In the PowerShell window, type the following command and press ENTER:
$serviceTable.Values
Task 7: Remove a value from a hashtable 1. In the PowerShell window, type the following command and press ENTER:
$serviceTable.Remove('BITS')
2. In the PowerShell window, type the following command and press ENTER:
$serviceTable['BITS']
Results: After this exercise, you should be able to create arrays and hashtables, access individual items in arrays and hashtables, and remove items from hashtables.

8 Lab Answer Key: Writing Your Own Windows PowerShell® Scripts
Exercise 3: Using Single-Quoted and Double-Quoted Strings and the Backtick
Task 1: Learn the differences between single-quoted and double-quoted strings 1. In the PowerShell window, type the following command and press ENTER:
$myValue = 'Hello'
2. In the PowerShell window, type the following command and press ENTER:
"The value is $myValue"
3. In the PowerShell window, type the following command and press ENTER:
'The value is not $myValue'
Task 2: Use a backtick (`) to escape characters in a string 1. In the PowerShell window, type the following command and press ENTER:
"Nor is the value `$myValue"
2. In the PowerShell window, type the following command and press ENTER:
dir 'C:\Program Files'
3. In the PowerShell window, type the following command and press ENTER:
dir C:\Program` Files

Lab Answer Key: Writing Your Own Windows PowerShell® Scripts 9
Task 3: Use a backtick (`) as a line continuance character in a command • In the PowerShell window, type the following command and press ENTER:
Get-Service ` -name "Windows Update"
Results: After this exercise, you should be able to create simple and compound strings and use a backtick to split a single command across multiple lines.

10 Lab Answer Key: Writing Your Own Windows PowerShell® Scripts
Exercise 4: Using Arrays and Array Lists
Task 1: Learn how to extract items from an array 1. In the PowerShell window, type the following command and press ENTER:
$days = @('Sunday','Monday','Tuesday','Wednesday','Thursday','Friday','Saturday')
2. In the PowerShell window, type the following command and press ENTER:
$days[2]
Task 2: Discover the properties and methods for an array 1. In the PowerShell window, type the following command and press ENTER:
$days | Get-Member
2. In the PowerShell window, type the following command and press ENTER:
Get-Member -InputObject $days
Results: After this exercise, you should be able to extract specific items from arrays by index or from array lists by name. You should also be able to discover the properties and methods for an array or array list.

Lab Answer Key: Writing Your Own Windows PowerShell® Scripts 11
Exercise 5: Using Contains, Like and Equals Operators
Task 1: Use contains, like and equals operators to find elements in arrays 1. In the PowerShell window, type the following command and press ENTER:
get-help about_comparison_operators
2. In the PowerShell window, type the following command and press ENTER:
$colors = @('Red','Orange','Yellow','Green','Black','Blue','Gray','Purple','Brown','Blue')
3. In the PowerShell window, type the following command and press ENTER:
$colors -like '*e'
4. In the PowerShell window, type the following command and press ENTER:
$colors -like 'b*'
5. In the PowerShell window, type the following command and press ENTER:
$colors -like '*a*'
6. In the PowerShell window, type the following command and press ENTER:
$colors -contains 'White'
7. In the PowerShell window, type the following command and press ENTER:
$colors -contains 'Green'
8. In the PowerShell window, type the following command and press ENTER:
$colors -eq 'Blue'

12 Lab Answer Key: Writing Your Own Windows PowerShell® Scripts
Task 2: Understand the difference when using those operators with strings 1. In the PowerShell window, type the following command and press ENTER:
$favoriteColor = 'Green'
2. In the PowerShell window, type the following command and press ENTER:
$favoriteColor -like '*e*'
3. In the PowerShell window, type the following command and press ENTER:
$favoriteColor -contains 'e'
Results: After this exercise, you should be able use the contains, like, and equal operators to show partial contents of a collection. You should also understand how these operators function differently, depending on the type of object they are being used with.

14 Lab Answer Key: Writing Your Own Windows PowerShell® Scripts
Lab B: Using Scripting Constructs Before You Begin 1. Start the LON-DC1, LON-SVR1, LON-SVR2, and LON-CLI1 virtual machines.
2. Log on to LON-DC1 as Contoso\Administrator with a password of Pa$$w0rd.
3. On the Start menu of LON-DC1 click All Programs, click Accessories, click Windows PowerShell, and click Windows PowerShell ISE.
4. On LON-CLI1, disable Windows Firewall by carrying out the following steps:
a. Go to Start> Control Panel>System and Security> Windows Firewall.
b. Click Turn Windows Firewall on or off.
c. In the Domain network location settings section, click Turn off Windows Firewall (not recommended).
d. In the Home or work (private) network location settings, click Turn off Windows Firewall (not recommended).
e. In the Public network location settings, click Turn off Windows Firewall (not recommended).
f. Repeat steps a through e for virtual machines LON-DC1, LON-SVR1, and LON-SVR2.
Note: Disabling the firewall is not a security best practice and under no circumstances should this be done in a production environment. This is done in this instance purely to allow us to focus on the learning task at hand and concentrate on PowerShell concepts.

Lab Answer Key: Writing Your Own Windows PowerShell® Scripts 15
Exercise 1: Processing and Validating Input
Task 1: Read input from the end user 1. In the PowerShell ISE window, type the following command and press
ENTER:
Get-Help Read-Host -Full
2. In the PowerShell window, type the following command and press ENTER:
Read-Host -Prompt 'Enter anything you like and press <ENTER> when done'
You will receive the Windows PowerShell ISE – Input dialogue bearing the text you outlined above in Step 2. Enter any text you like and click OK.
3. In the PowerShell window, type the following command and press ENTER:
$serverName = Read-Host -Prompt 'Server Name'
Again you will receive the Windows PowerShell ISE – Input dialogue bearing the text you outlined above in Step 3. Enter any text you like and click OK.
Task 2: Validate input received from the end user 1. In the PowerShell window, type the following command and press ENTER:
get-help about_if
2. In the PowerShell window, type the following command and press ENTER
if ($serverName -notlike 'SERVER*') { "Server name '$serverName' is REJECTED" } else {"Server name '$serverName' is OK!" }
3. Run the command if it has not already run by pressing Enter in the last step. You can run the commands by highlighting the code you wish to run, right clicking and going to “Run Selection” or by pressing F5. In the resultant diaogue type any text and click OK.

16 Lab Answer Key: Writing Your Own Windows PowerShell® Scripts
Task 3: Create a script that prompts for specific input and exits only when the right input is found or when no input is provided 1. In the PowerShell window, type the following command and press ENTER:
get-help about_do
2. In the PowerShell window, type the following command and press ENTER:
do { cls $serverName = Read-Host -Prompt 'Server Name (this must start with "SERVER")' } until ((-not $serverName) -or ($serverName -like 'SERVER*'))
3. In the PowerShell window, type the following command and press ENTER:
$serverName
4. In the PowerShell window, type the following command and press ENTER:
do { cls $serverName = Read-Host -Prompt 'Server Name (this must start with "SERVER")' } until ((-not $serverName) -or ($serverName -like 'SERVER*')) $serverName
5. Again run the command if it has not already run by pressing Enter in the last step. You can run the commands by highlighting the code you wish to run, right clicking and going to “Run Selection" or by pressing F5. In the resultant diaogue type any text and click OK.
Results: After this exercise, you should be able to read and process user input in a PowerShell script.

Lab Answer Key: Writing Your Own Windows PowerShell® Scripts 17
Exercise 2: Working with For, While, Foreach, and Switch
Task 1: Create a basic for loop 1. In the PowerShell window, type the following command and press ENTER:
$i = 100
2. In the PowerShell window, type the following command and press ENTER:
Get-Help about_For
3. In the PowerShell window, type the following command and press ENTER:
for ($i; $i -lt 100; $i++) { Write-Host $i }
4. In the PowerShell window, type the following command and press ENTER:
for ($i = 0; $i -lt 100; $i++) { Write-Host $i }
Task 2: Create a basic while loop 1. In the PowerShell window, type the following command and press ENTER:
$i = 0
2. In the PowerShell window, type the following command and press ENTER:
Get-Help about_While
3. In the PowerShell window, type the following command and press ENTER:
while ($i -lt 100) { write $i; $i++ }
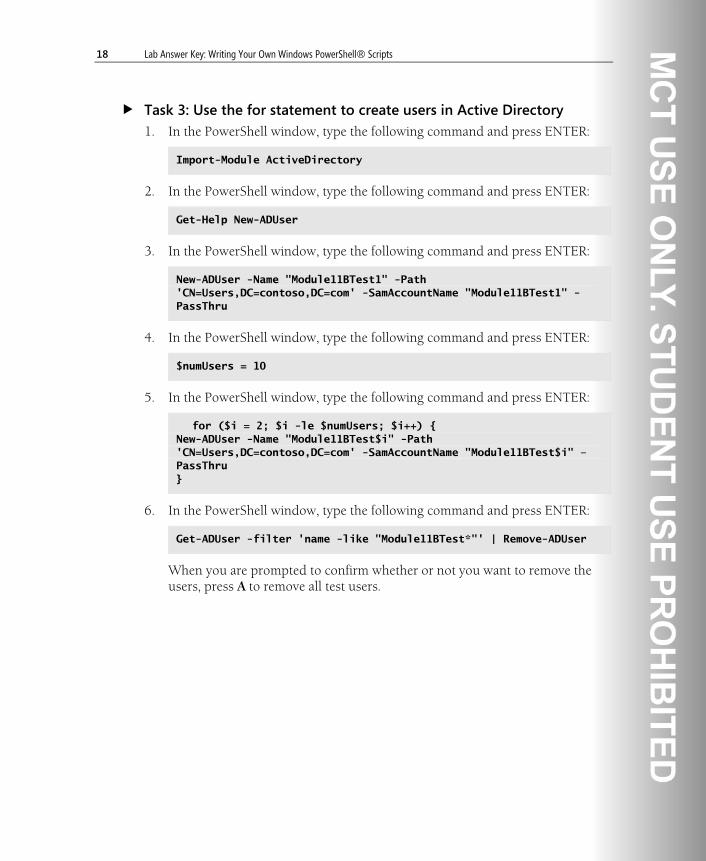
18 Lab Answer Key: Writing Your Own Windows PowerShell® Scripts
Task 3: Use the for statement to create users in Active Directory 1. In the PowerShell window, type the following command and press ENTER:
Import-Module ActiveDirectory
2. In the PowerShell window, type the following command and press ENTER:
Get-Help New-ADUser
3. In the PowerShell window, type the following command and press ENTER:
New-ADUser -Name "Module11BTest1" -Path 'CN=Users,DC=contoso,DC=com' -SamAccountName "Module11BTest1" -PassThru
4. In the PowerShell window, type the following command and press ENTER:
$numUsers = 10
5. In the PowerShell window, type the following command and press ENTER:
for ($i = 2; $i -le $numUsers; $i++) { New-ADUser -Name "Module11BTest$i" -Path 'CN=Users,DC=contoso,DC=com' -SamAccountName "Module11BTest$i" –PassThru }
6. In the PowerShell window, type the following command and press ENTER:
Get-ADUser -filter 'name -like "Module11BTest*"' | Remove-ADUser
When you are prompted to confirm whether or not you want to remove the users, press A to remove all test users.

Lab Answer Key: Writing Your Own Windows PowerShell® Scripts 19
Task 4: Use foreach to iterate through a collection of objects 1. In the PowerShell window, type the following command and press ENTER:
get-help about_foreach
2. In the PowerShell window, type the following command and press ENTER:
$disks = Get-WmiObject Win32_LogicalDisk
3. In the PowerShell window, type the following command and press ENTER:
foreach ($disk in $disks) { $disk | Select-Object DeviceID,DriveType }

20 Lab Answer Key: Writing Your Own Windows PowerShell® Scripts
Task 5: Use switch to test a value and translate it to a human-readable string 1. In the PowerShell window, type the following command and press ENTER:
get-help about_switch
2. In the PowerShell window, type the following command and press ENTER:
foreach ($disk in $disks) { $driveTypeValue = switch ($disk.DriveType) { 0 { 'Unknown' break } 1 { 'No Root Directory' break } 2 { 'Removable Disk' break } 3 { 'Local Disk' break } 4 { 'Network Drive' break } 5 { 'Compact Disk' break } 6 { 'RAM Disk' break } } $disk | Select-Object -Property DeviceID, @{name='DriveType';expression={$driveTypeValue}} }

Lab Answer Key: Writing Your Own Windows PowerShell® Scripts 21
Note: Be aware of the formatting if you receive errors. This will execute if typed exactly as above. You should enter this into the PowerShell ISE or you can type it all on one line and use semi-colon ; before the break command. i.e …..6 {‘RAM Disk’; break }…..
3. Run the commands if it has not already run by pressing Enter in the last step. You can run the commands by highlighting the code you wish to run, right clicking and going to “Run Selection” or by pressing F5. In the resultant diaogue type any text and click OK.
Results: After this exercise, you should be able to use the for, foreach, and switch statements in your PowerShell scripts.

22 Lab Answer Key: Writing Your Own Windows PowerShell® Scripts
Exercise 3: Using the Power of the One-Liner
Task 1: Create scripts to retrieve and process data 1. In the PowerShell window, type the following command and press ENTER:
foreach ($computer in @('LON-DC1','LON-SVR1','LON-SVR2','LON-CLI1')) { Get-Service -Name wuauserv -ComputerName $computer }
2. In the PowerShell window, type the following command and press ENTER:
foreach ($user in Get-ADUser -Filter * -Properties Office) { if ($user.Office -eq 'Bellevue') { $user } }
Task 2: Create one-liners for those scripts that are much more efficient 1. In the PowerShell window, type the following command and press ENTER:
Get-Service -Name w* -ComputerName @('LON-DC1','LON-SVR1','LON-SVR2','LON-CLI1')
Note: Remember that the @ and parentheses are optional; the shell treats this comma-separated list as an array with or without them.
2. In the PowerShell window, type the following command and press ENTER:
Get-ADUser -Filter 'Office -eq "Bellevue"' -Properties Office
Results: After this exercise, you should understand that many short scripts can be converted into simple one-liner commands that are efficient and require less memory.

24 Lab Answer Key: Writing Your Own Windows PowerShell® Scripts
Lab C: Error Trapping and Handling Before You Begin 1. Start the LON-DC1 virtual machines Wait until the boot process is complete.
2. Start the LON-SVR1 virtual machine and log on with the following credentials:
• Username: CONTOSO\administrator
• Password: Pa$$w0rd
3. On LON-SVR1, open the Windows PowerShell ISE. All PowerShell commands will be run within the Windows PowerShell ISE program.
4. In the PowerShell window, type the following command and press ENTER:
Set-ExecutionPolicy RemoteSigned –Scope CurrentUser
• If you receive a prompt to confirm execution policy change, click Yes.
5. In the PowerShell window, type the following command and press ENTER:
Set-Location E:\Mod11\Labfiles

Lab Answer Key: Writing Your Own Windows PowerShell® Scripts 25
Exercise 1: Retrieving Error Information
Task 1: Identify the Error Action Preference settings 1. In the PowerShell window, type the following command and press ENTER:
$ErrorActionPreference
2. In the PowerShell window, type the following command and press ENTER:
Get-Help about_preference_variables
3. In the PowerShell window, type the following command and press ENTER:
Get-Help about_CommonParameters
Task 2: Control nonterminating error action in scope 1. In the PowerShell window, type the following command and press ENTER:
Set-Location E:\Mod11\Labfiles
2. In the PowerShell window, type the following command and press ENTER:
$ErrorActionPreference = 'Continue'
3. In the PowerShell window, type the following command and press ENTER:
./ErrorActionPreference.ps1 –FilePath Servers.txt
4. In the PowerShell window, type the following command and press ENTER:
./ErrorActionPreference.ps1 –FilePath DoesNotExist.txt
5. In the PowerShell window, type the following command and press ENTER:
$ErrorActionPreference = 'SilentlyContinue'
6. In the PowerShell window, type the following command and press ENTER:
./ErrorActionPreference.ps1 –FilePath DoesNotExist.txt

26 Lab Answer Key: Writing Your Own Windows PowerShell® Scripts
7. In the PowerShell window, type the following command and press ENTER:
$ErrorActionPreference = 'Inquire'
8. In the PowerShell window, type the following command and press ENTER:
./ErrorActionPreference.ps1 –FilePath DoesNotExist.txt
9. In the PowerShell window, type the following command and press ENTER:
$ErrorActionPreference = 'Stop'
10. In the PowerShell window, type the following command and press ENTER:
./ErrorActionPreference.ps1 –FilePath DoesNotExist.txt
11. Close the Windows PowerShell window.
Task 3: Control error action per command 1. Open the Windows PowerShell ISE again and click the File menu, click on the
Open menu item, and navigate to and select E:\Mod11\Labfiles \ErrorActionPreference.ps1.
2. In the PowerShell window, type the following command and press ENTER:
$ErrorActionPreference = 'Continue'
3. Edit line 6 of ErrorActionPreference.ps1 to be the following and save the file:
[string[]]$servers = Get-Content $FilePath –ErrorAction 'SilentlyContinue'
4. In the PowerShell window, type the following command and press ENTER:
.\ErrorActionPreference.ps1 –FilePath DoesNotExist.txt
5. Edit line 6 of ErrorActionPreference.ps1 to be the following and save the file:
[string[]]$servers = Get-Content $FilePath –ErrorAction 'Inquire'

Lab Answer Key: Writing Your Own Windows PowerShell® Scripts 27
6. In the PowerShell window, type the following command and press ENTER:
.\ErrorActionPreference.ps1 –FilePath DoesNotExist.txt
7. Edit line 6 of ErrorActionPreference.ps1 to be the following and save the file:
[string[]]$servers = Get-Content $FilePath –ErrorAction 'Stop'
8. In the PowerShell window, type the following command and press ENTER
.\ErrorActionPreference.ps1 –FilePath DoesNotExist.txt
9. Edit line 6 of ErrorActionPreference.ps1 to be the following and save the file:
[string[]]$servers = Get-Content $FilePath$err
10. Do not close the file in the script editor.
Task 4: Review errors globally 1. In the PowerShell window, type the following command and press ENTER:
Set-Location E:\Mod11\Labfiles
2. In the PowerShell window, type the following command and press ENTER:
$ErrorActionPreference = 'Continue'
3. In the PowerShell window, type the following command and press ENTER:
./ErrorActionPreference.ps1 –FilePath ServersWithErrors.txt
4. In the PowerShell window, type the following command and press ENTER:
$Error
5. In the PowerShell window, type the following command and press ENTER:
$Error[0] | get-member
6. Close the Windows PowerShell window.

28 Lab Answer Key: Writing Your Own Windows PowerShell® Scripts
Task 5: Review errors by command 1. Open the Windows PowerShell ISE and in the script pane edit line 12 of
ErrorActionPreference.ps1 to be the following and save the file:
$ComputerSystem = Get-WmiObject -Class Win32_ComputerSystem -Computername $server –ErrorVariable global:ComputerSystemError
2. In the PowerShell window, type the following command and press ENTER:
.\ErrorActionPreference.ps1 –FilePath ServersWithErrors.txt
3. In the PowerShell window, type the following command and press ENTER:
$ComputerSystemError | Format-List *
4. In the PowerShell window, type the following command and press ENTER:
$ComputerSystemError | Get-Member
5. In the PowerShell window, type the following command and press ENTER:
Remove-Variable ComputerSystemError
6. In the script pane, edit line 12 of ErrorActionPreference.ps1 to be the following and save the file:
$ComputerSystem = Get-WmiObject -Class Win32_ComputerSystem -Computername $server –ErrorVariable +global:ComputerSystemError
7. In the PowerShell window, type the following command and press ENTER:
.\ErrorActionPreference.ps1 –FilePath ServersWithErrors.txt.
8. In the PowerShell window, type the following command and press ENTER:
$ComputerSystemError | Format-List *

Lab Answer Key: Writing Your Own Windows PowerShell® Scripts 29
9. In the PowerShell window, type the following command and press ENTER:
$ComputerSystemError | Get-Member
10. In the script pane, edit line 12 of ErrorActionPreference.ps1 to be the following and save the file:
$ComputerSystem = Get-WmiObject -Class Win32_ComputerSystem -Computername $server.
Results: After this exercise, you should have identified terminating and nonterminating errors, controlled the Windows PowerShell runtime's Error Action Preference both in scope and by command, and examined where error information is available.

30 Lab Answer Key: Writing Your Own Windows PowerShell® Scripts
Exercise 2: Handling Errors
Task 1: Handle scoped errors 1. In the Windows PowerShell ISE, click the File menu, click on the Open menu
item, and navigate to and select E:\Mod11\Labfiles\UsingTrap.ps1.
2. In the PowerShell window, type the following command and press ENTER:
./UsingTrap.ps1 –FilePath ServersWithErrors.txt
3. In the script pane, edit the trap statement to include $_ | get-member to find additional information that can be used to enhance an error message.
4. Moving the trap statement above the foreach statement on line 38 stops the foreach loop at the first error. Moving the trap statement under the if statement at line 49 does not catch any ping errors but catches errors from within the InventoryServer function.
Task 2: Handle error prone sections of code 1. In the Windows PowerShell ISE, click the File menu, click on the Open menu
item, and navigate to and select E:\Mod11\Labfiles\AddingTryCatch.ps1.
2. In the script pane, edit the if statement on lines 42 to 45 to be the following and save the file:
try{ if ( $ping.Send("$server").Status –eq 'Success') { InventoryServer($server) } } Catch { Write-Error "Unable to ping $server" Write-Error "The error is located on line number: $ ($_.InvocationInfo.ScriptLineNumber)" Write-Error "$($_.InvocationInfo.Line.Trim())" }
3. From the command pane, enter the following and press ENTER:
./AddingTryCatch.ps1 –FilePath ServersWithErrors.txt

Lab Answer Key: Writing Your Own Windows PowerShell® Scripts 31
Task 3: Clean up after error prone code • In the script pane, after the closing brace in the catch statement, add the
following and save the file:
finally { Write-Host "Finished with $server" }
Question: What type of scenarios would a finally block be useful for?
Answer: The finally block is useful for closing out database connections, disposing of COM objects, unregistering events tied to unmanaged code (via the Win32 API), and cleaning up after any long-running process with potential errors.
Task 4: Catch specific types of errors 1. In the script pane, change the first line of the catch statement from:
catch {
to:
catch [System.InvalidOperationException] {
and save the script.
2. In the command pane, enter the following command and press ENTER:
./AddingTryCatch.ps1 –FilePath ServersWithErrors.txt.
3. Click the File menu, click on the open item, and navigate to and select E:\Mod11\Labfiles\UsingTrap.ps1.
4. In the script pane, edit the trap statement from:
trap {
to:
trap [System.InvalidOperationException] {
and save the file.

32 Lab Answer Key: Writing Your Own Windows PowerShell® Scripts
5. In the command pane, enter the following command and press ENTER:
./UsingTrap.ps1 –FilePath ServersWithErrors.txt.
6. Save both files and close the Windows PowerShell ISE.
Results: After this exercise, you should have an understanding of how the Trap and Try…Catch…Finally constructs can catch errors while a script is running. You should also have started to identify potential trouble spots in scripts as areas to focus your error handling efforts.

Lab Answer Key: Writing Your Own Windows PowerShell® Scripts 33
Exercise 3: Integrating Error Handling
Task 1: Set up the shell environment 1. On the Start menu click All Programs, click Accessories, click Windows
PowerShell, right-click Windows PowerShell, and choose Run as Administrator.
2. In the PowerShell window, type the following command and press ENTER:
Set-ExecutionPolicy 'RemoteSigned' –Scope CurrentUser
Click Yes in the Execution Policy Change dialogue when prompted to confirm the change.
3. In the PowerShell window, type the following command and press ENTER:
Set-Location E:\Mod11\Labfiles
Task 2: Create new Event Source for the Windows PowerShell Event Log • In the PowerShell window, type the following command and press ENTER:
New-EventLog –Source AuditScript –LogName 'Windows PowerShell'
Task 3: Write error messages to the Windows PowerShell Event Log 1. In the PowerShell window, type the following command and press ENTER:
Write-EventLog -LogName 'Windows PowerShell' -Source 'AuditScript' -Message 'This is a test' –EventID 3030
2. In the PowerShell window, type the following command and press ENTER:
Show-EventLog
3. In the event viewer, verify that your log entry was written to the Windows PowerShell event log under Event Viewer > Applications and Service Logs > Microsoft > Windows PowerShell.
4. Close Windows PowerShell.

34 Lab Answer Key: Writing Your Own Windows PowerShell® Scripts
Task 4: Add a top level Trap function to catch unexpected errors and log them to the event log 1. On the Start menu click All Programs, click Accessories, click Windows
PowerShell, and click Windows PowerShell ISE.
2. In the Windows PowerShell ISE, click the File menu, click on the Open menu item, and navigate to and select E:\Mod11\Labfiles\AuditScript.ps1.
3. In the script pane, between the param block and the first function, enter the following and save the script:
trap { $message = @" Unhandled error in the script. from $($_.InvocationInfo.ScriptName) at line :$($_.InvocationInfo.ScriptLineNumber) by: $($_.InvocationInfo.InvocationName) Message: $($_.exception.message) "@ Write-EventLog -LogName "Windows PowerShell" -Source "AuditScript" -EventID 3030 -EntryType Error -Message $message }
Task 5: Add localized Try…Catch error handling to potential trouble spots, and log the errors to the event log 1. In the script pane, edit the script to match AuditScriptFinal.ps1.
2. In the command pane, type the following and press ENTER:
./AuditScript.ps1 –FilePath AuditTest0.txt
3. In the command pane, type the following and press ENTER:
./AuditScript.ps1 –FilePath AuditTest1.txt
4. In the command pane, type the following and press ENTER:
./AuditScript.ps1 –FilePath AuditTest2.txt
5. In the command pane, type the following and press ENTER:
Show-EventLog
6. Verify that errors were written to the event log from the script.

Lab Answer Key: Writing Your Own Windows PowerShell® Scripts 35
7. In the command pane, type the following and press ENTER:
Compare-Object –ReferenceObject (Import-CliXML AuditLog-AuditTest0.txt.xml) –DifferenceObject (Import-CliXML AuditLog-AuditTest1.txt.xml)
8. In the command pane, type the following and press ENTER:
Compare-Object –ReferenceObject (Import-CliXML AuditLog-AuditTest1.txt.xml) –DifferenceObject (Import-CliXML AuditLog-AuditTest2.txt.xml)
9. In the command pane, type the following and press ENTER:
Compare-Object –ReferenceObject (Import-CliXML AuditLog-AuditTest0.txt.xml) –DifferenceObject (Import-CliXML AuditLog-AuditTest2.txt.xml)
10. Close the Windows PowerShell ISE.
Results: After this exercise, you should have created an event source in the Windows PowerShell event log, created a top-level trap to catch unexpected errors and log them, and wrapped potentially error prone sections of script in a Try…Catch construct.

Lab Answer Key: Writing Your Own Windows PowerShell® Scripts 37
Lab D: Debugging a Script Before You Begin 1. Start the LON-DC1 virtual machine, and then log on by using the following
credentials:
• Username: CONTOSO\administrator
• Password: Pa$$w0rd
2. Open a Windows PowerShell session.
Exercise 1: Debugging from the Windows PowerShell Console
Task 1: Use $DebugPreference to enable debugging statements 1. In the Windows PowerShell window, type the following command and press
ENTER:
Set-Location E:\Mod11\Labfiles
2. In the Windows PowerShell window, type the following command and press ENTER:
.\EvaluatePingTimes.ps1 –Path .\PingTestResults.xml -FirstRun
3. In the Windows PowerShell window, type the following command and press ENTER:
$DebugPreference = 'Continue'
4. In the Windows PowerShell window, type the following command and press ENTER:
.\EvaluatePingTimes.ps1 –Path .\PingTestResults.xml -FirstRun

38 Lab Answer Key: Writing Your Own Windows PowerShell® Scripts
Task 2: Use Write-Debug to provide information as the script progresses 1. In the Windows PowerShell window, type the following command and press
ENTER:
Notepad ./CalculatePerfMonStats.ps1
2. Add Write-Debug statements inside functions, inside loops, and in other areas where variables change or are assigned, such as on line 20:
Write-Debug $SortedValues[$MiddleOfResults]
3. Save CalculatePerfMonStats.ps1.
4. In the Windows PowerShell window, type the following command and press ENTER:
.\CalculatePerfMonStats.ps1 –Path .\PerfmonData.csv
Task 3: Use Set-PSDebug to trace the progress through the script 1. In the Windows PowerShell window, type the following command and press
ENTER:
$DebugPreference = 'SilentlyContinue'
2. In the Windows PowerShell window, type the following command and press ENTER:
Set-PSDebug –Trace 1
3. In the Windows PowerShell window, type the following command and press ENTER:
./EvaluatePingTimes.ps1 –Path PingTestResults.xml -FirstRun

Lab Answer Key: Writing Your Own Windows PowerShell® Scripts 39
4. In the Windows PowerShell window, type the following command and press ENTER:
Set-PSDebug –Trace 2
5. In the Windows PowerShell window, type the following command and press ENTER:
.\EvaluatePingTimes.ps1 –Path .\PingTestResults.xml –FirstRun
6. In the Windows PowerShell window, type the following command and press ENTER:
Set-PSDebug –Off
Task 4: Use Set-PSBreakpoint to break into a script’s progress at specified points 1. In the Windows PowerShell window, type the following command and press
ENTER:
Set-PSBreakpoint –Line 36, 40, 44, 48 –Script EvaluatePingTimes.ps1
2. In the Windows PowerShell window, type the following command and press ENTER:
.\EvaluatePingTimes.ps1 –Path .\PingTestResults.xml -FirstRun
3. In the Windows PowerShell window, type the following command at the nested prompt and press ENTER:
$_ | Format-List

40 Lab Answer Key: Writing Your Own Windows PowerShell® Scripts
Task 5: Use Get-PSBreakpoint and Remove-PSBreakpoint to manage breakpoints 1. In the Windows PowerShell window, type the following command and press
ENTER:
Get-PSBreakpoint
2. Note the ID of one of the breakpoints for the next command
3. In the Windows PowerShell window, type the following command and press ENTER:
Remove-PSBreakpoint -ID <ID of one of the existing breakpoints>
4. In the Windows PowerShell window, type the following command and press ENTER:
Get-PSBreakpoint
5. In the Windows PowerShell window, type the following command and press ENTER:
Get-PSBreakpoint | Remove-PSBreakpoint
Task 6: Use Set-PSBreakpoint to break into a script if certain conditions are met 1. In the Windows PowerShell window, type the following command and press
ENTER:
Set-PSBreakpoint –Line 44 –Script .\EvaluatePingTimes.ps1 –Action { if ($_.RoundtripTime –eq 35) {break} else {continue}}
2. In the Windows PowerShell window, type the following command and press ENTER:
.\EvaluatePingTimes.ps1 –Path .\PingTestResults.xml -FirstRun

Lab Answer Key: Writing Your Own Windows PowerShell® Scripts 41
3. In the Windows PowerShell window, type the following command at the nested prompt and press ENTER:
$_.RoundtripTime
4. In the Windows PowerShell window, type the following command at the nested prompt and press ENTER:
exit
5. Close the Windows PowerShell Prompt.
Results: After this exercise, you should have an understanding of how the $DebugPreference automatic variable controls debugging messages, know how to step through troublesome scripts and track how things are changing, and set breakpoints in a script to further troubleshoot script performance.

42 Lab Answer Key: Writing Your Own Windows PowerShell® Scripts
Exercise 2: Debugging Using the Windows PowerShell Integrated Scripting Environment (ISE)
Task 1: Set a breakpoint 1. In the Windows PowerShell ISE script pane with the file E:\Mod11\Labfiles
\CalculatePerfMonStats.ps1 open and loaded into the ISE, set the cursor on line 33. Select Toggle Breakpoint from the Debug menu.
2. Right-click on line 25 in the script pane. Choose Toggle Breakpoint.
3. Set the cursor on line 44 in the script pane. Press F9.
4. In the Windows PowerShell command window, type the following command and press ENTER: (Ensure the set-location value is still E:\Mod11\Labfiles.)
Get-PSBreakpoint
5. In the command window, type the following command and press ENTER:
Get-PSBreakpoint | Remove-PSBreakpoint
Task 2: Step through the script 1. In the Windows PowerShell command window, type the following command
and press ENTER:
Set-PSBreakpoint –Command CreateStatistics –Script CalculatePerfMonStats.ps1 –Action {if ($CounterValue –like 'Memory\Pages/sec') {break;} else {continue}}
2. In the command window, type the following command and press ENTER:
./CalculatePerfMonStats.ps1 –Path PerfmonData.csv
3. When the script breaks, press F11. Press F11 again to step into the CalculateMedian function.
4. Press F10 to step over the first line of the CalculateMedian function.
5. Press SHIFT+F11 to step out of the CalculateMedian function.

Lab Answer Key: Writing Your Own Windows PowerShell® Scripts 43
6. When the script breaks, in the command pane, type the following command and press ENTER:
$Stats | Format-List
7. When the script breaks, in the command pane, type the following command and press ENTER:
exit
8. Close the Windows PowerShell ISE.
Results: After this exercise, you should have used the integrated debugging features in the Windows PowerShell ISE to debug a script by setting breakpoints and stepping through the script.

Lab Answer Key: Writing Your Own Windows PowerShell® Scripts 45
Lab E: Modularization Before You Begin 1. Start the LON-DC1, LON-SVR1, LON-SVR2, and LON-CLI1 virtual machines.
Wait until the boot process is complete.
2. Log on to the LON-CLI1 virtual machine with the following credentials:
a. Username: CONTOSO\administrator
b. Password: Pa$$w0rd
3. Open the Windows PowerShell ISE. All PowerShell commands are run within the Windows PowerShell ISE program.
4. Create a text file containing the names of all computers in the domain, one on each line, and save it as C:\users\Administrator\documents\computers.txt.
Exercise 1: Generating an Inventory Audit Report
Task 1: Create an inventory gathering function 1. In the PowerShell ISE window, type the following command into the
command pane and press ENTER:
Get-Help New-Object -Full
2. In the PowerShell ISE window, type the following command into the command pane and press ENTER:
Get-Help about_functions

46 Lab Answer Key: Writing Your Own Windows PowerShell® Scripts
3. In the PowerShell ISE window, type the following into the script pane, pressing ENTER at the end of every line:
Function Get-Inventory { PROCESS { $bios = Get-WmiObject -Class Win32_BIOS -ComputerName $_ $os = Get-WmiObject -Class Win32_OperatingSystem -ComputerName $_ $processor = Get-WmiObject -Class Win32_Processor -ComputerName $_ $obj = New-Object -TypeName PSObject $obj | Add-Member NoteProperty ComputerName $_ $obj | Add-Member NoteProperty BiosSerialNumber ($bios.serialnumber) $obj | Add-Member NoteProperty OSVersion ($os.caption) $obj | Add-Member NoteProperty SPVersion ($os.servicepackmajorversion) $obj | Add-Member NoteProperty NumProcessorCores ($processor.numberofcores) write-output $obj } } 'LON-DC1','LON-SVR1','LON-SVR2' | Get-Inventory
4. Run the commands if it has not already run by pressing Enter in the last step. You can run the commands by highlighting the code you wish to run, right clicking and going to “Run Selection” or by pressing F5. In the resultant diaogue type any text and click OK.
Note: If you are receiving error messages when running it double check that your formatting is correct as well as the syntax. You could also save this as a script and then run that script by calling it from the Windows PowerShell command line.

Lab Answer Key: Writing Your Own Windows PowerShell® Scripts 47
Task 2: Export the results of the function in three formats: .txt, .csv, and .xml 1. In the PowerShell ISE window, modify this line:
'LON-DC1','LON-SVR1','LON-SVR2' | Get-Inventory
to read:
'LON-DC1','LON-SVR1','LON-SVR2' | Get-Inventory | Out-File inventory.txt
2. In the PowerShell ISE window, modify this line:
'LON-DC1','LON-SVR1','LON-SVR2' | Get-Inventory | Out-File inventory.txt
to read:
'LON-DC1','LON-SVR1','LON-SVR2' | Get-Inventory | Export-CSV inventory.csv
3. In the PowerShell ISE window, modify this line:
'LON-DC1','LON-SVR1','LON-SVR2' | Get-Inventory | Export-CSV inventory.csv
to read:
'LON-DC1','LON-SVR1','LON-SVR2' | Get-Inventory | Export-CliXML inventory.xml
Results: After this exercise, you should be able to create a pipeline function (also known as a filter) that processes information passed in from the pipeline and uses it to retrieve other information. You should also be able to combine multiple objects into one object and export data from a function in multiple formats.