MPLAB® C18 C Compiler - Wayne State...
46
MPLAB® C18 C Compiler
Transcript of MPLAB® C18 C Compiler - Wayne State...

MPLAB® C18 C Compiler

MPLAB® C18 C Compiler
• The layout of this document:
– Installing MPLAB C18: • A step-by-step guide through the installation
process of MPLAB C18 Compiler.
– Configuring MPLAB IDE: • MPLAB IDE setup for use with MPLAB C18.
• Basics of MPLAB IDE configuration to run your Program.
• Verifying Installation, building and testing programs.
• Debugging using MPLAB SIM simulator.
• Configuration Bits.

MPLAB® C18 C Compiler
• Before Installing MPLAB C18 C Compiler – MPLAB IDE should be installed on the PC prior to
installing MPLAB C18. • You can download the MPLAB IDE v8.x from the microchip
website: http://www.microchip.com
– Run the program and follow the series of dialogs

MPLAB® C18 C Compiler
• Welcome Screen

MPLAB® C18 C Compiler
• The license agreement, select I Accept

MPLAB® C18 C Compiler • Select Installation Directory, the default installation
directory is c:\mcc18 as shown below
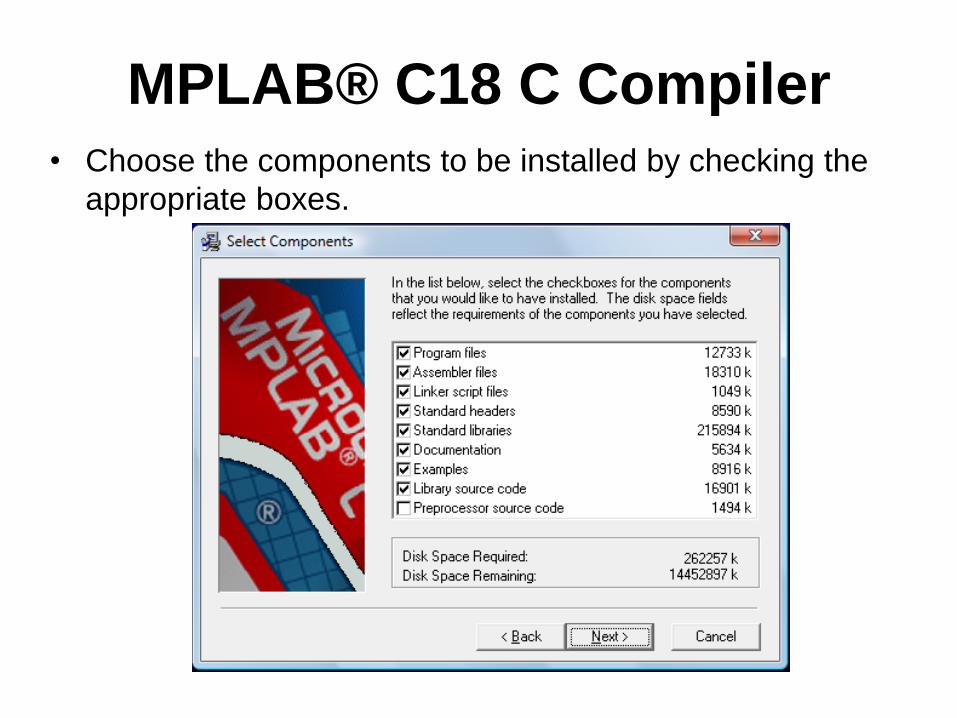
MPLAB® C18 C Compiler • Choose the components to be installed by checking the
appropriate boxes.

MPLAB® C18 C Compiler • Environment variable configuration Options: select the
desired options to configure MPLAB C18 C compiler.

MPLAB® C18 C Compiler • MPLAB IDE configuration Options: select the desired
options to configure MPLAB C18 C compiler.

MPLAB® C18 C Compiler • Start Installation, You are ready to install MPLAB C18 C
compiler. At the Installation Complete screen, click Finish. MPLAB C18 has been successfully installed.
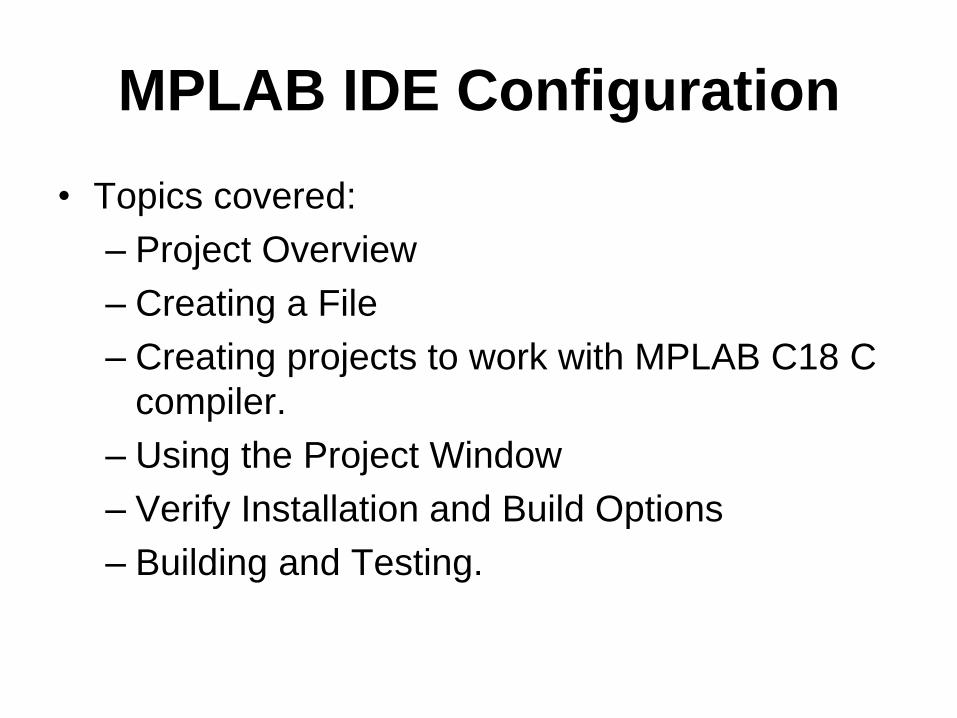
MPLAB IDE Configuration
• Topics covered:
– Project Overview
– Creating a File
– Creating projects to work with MPLAB C18 C
compiler.
– Using the Project Window
– Verify Installation and Build Options
– Building and Testing.

Project Overview
• Projects are groups of files associated with language tools.
• A project consists of source files, header files, object files, library files and a linker script.
• At least one header file is required to identify the register names of the target microcontroller.
• The project’s output files consist of executable code to be loaded into the target microcontroller.

CREATING A FILE
• Start MPLAB IDE and
select File ->New to
bring up a new empty
source file.

CREATING A FILE
• Type the source text
into this new file.
• File ->Save As to
save this file. Browse
to or create a new
folder location to store
projects.
• Click Save.

CREATING PROJECTS
• Select Project ->
Project Wizard to
create a new project

CREATING PROJECTS
• Select a device, use the pull-down menu to select the device.

CREATING PROJECTS
• Select the language toolsuite. If you use the MPLAB C
18 Compiler, then select “Microchip C18 Toolsuite” as
the “Active Toolsuite”. See the figure below.

CREATING PROJECTS
• Click on each language tool in the toolsuite (under “Toolsuite
Contents”) and check or set up its associated executable location.

CREATING PROJECTS
• MPASM Assembler should point to the assembler executable,
MPASMWIN.exe, under “Location”. If it does not, enter or browse to
the executable location, which is by default:
C:\mcc18\mpasm\MPASMWIN.exe. See figure below
Verify location

CREATING PROJECTS
• MPLINK Object Linker (MPLink.exe) should point to the linker
executable, MPLink.exe, under “Location”. If it does not, enter or
browse to the executable location, which is by default:
C:\mcc18\bin\MPLink.exe
Verify location

CREATING PROJECTS
• MPLAB C18 C Compiler (mcc18.exe) should point to the compiler
executable, mcc18.exe, under “Location”. If it does not, enter or
browse to the executable location, which is by default:
C:\mcc18\bin\mcc18.exe
Verify location

CREATING PROJECTS
• MPLIB Librarian (MPLib.exe) should point to the library executable,
MPLib.exe, under “Location”. If it does not, enter or browse to the
executable location, which is by default: C:\mcc18\bin\MPLib.exe
Verify location
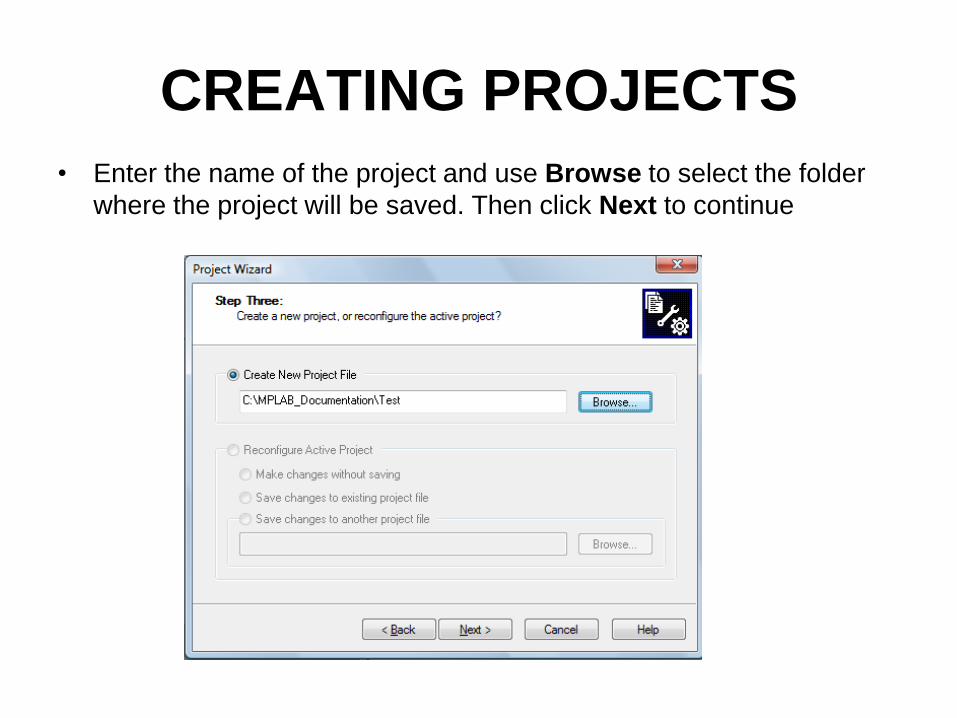
CREATING PROJECTS
• Enter the name of the project and use Browse to select the folder
where the project will be saved. Then click Next to continue

CREATING PROJECTS
• Select the source file created earlier (See figure below). If source
files have not yet been created, they can be added later. Click Add
to add it to the list of files to be used for this project (on the right).
Add test.c file to the project

CREATING PROJECTS
• A summary appears, click ‘Finish

CREATING PROJECTS
• After clicking ‘Finish’, the figure on the
right window appears.
• A library files and Linker scripts must be
added.

Adding Library Files to the Project
• To add Library Files to the
project, Right click on the
Library Files in the tree.
• Click Add files.

Adding Library Files to the Project
• Browse to the location c:\mcc18\lib\. Then select “p18f458.lib” and
click open.

Adding Library Files to the Project
• You will get the figure bellow.
The new added lib file

Adding Linker Script to the Project
• To add linker script to the
project, Right click on the
Linker Script in the tree.
• Click Add files.

Adding Linker Script to the Project
• Browse to the location c:\mcc18\lkr\ Then select “18f458.lkr” and
click open.

Adding Linker Script to the Project
• You will get the figure bellow.
The new added lkr file
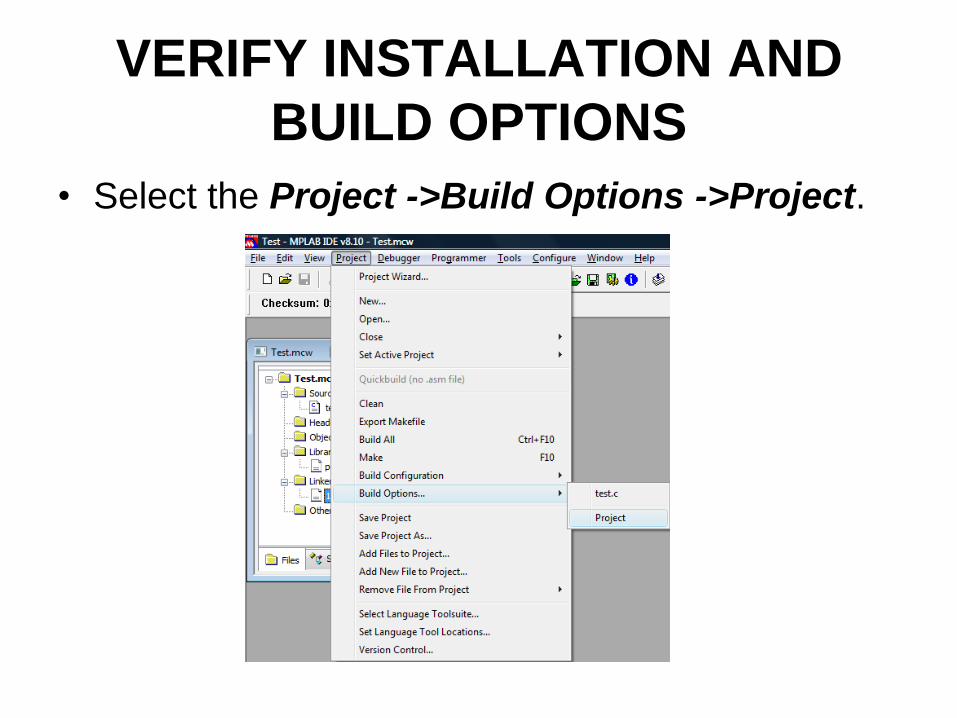
VERIFY INSTALLATION AND
BUILD OPTIONS
• Select the Project ->Build Options ->Project.

VERIFY INSTALLATION AND
BUILD OPTIONS
• Under Directories, select
the dropdown box and
locate Include Search
Path and Library Search
Path.

VERIFY INSTALLATION AND
BUILD OPTIONS
• If the Include Search
Path is not set as shown
in the next Figure, use the
New button to locate this
folder in the MPLAB C18
installation folder

VERIFY INSTALLATION AND
BUILD OPTIONS
• If the Library Search Path
is not set as shown in the
next Figure, use the New
button to locate the folder
in the MPLAB C18
installation folder
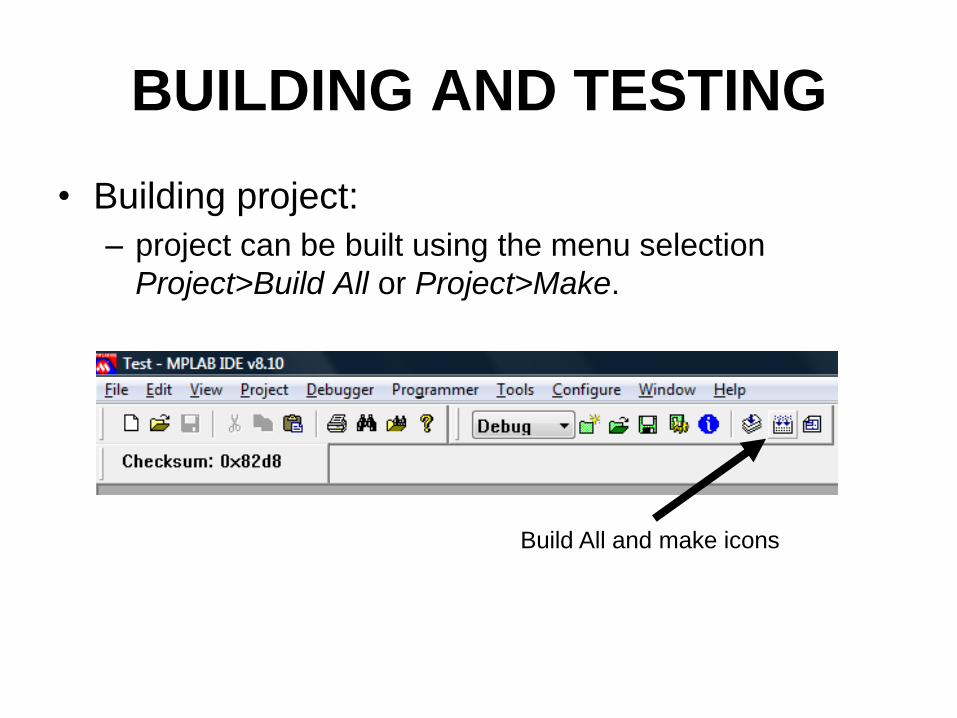
BUILDING AND TESTING
• Building project:
– project can be built using the menu selection
Project>Build All or Project>Make.
Build All and make icons

BUILDING AND TESTING
• Output Window after successful Build

DEBUGGING WITH MPLAB SIM
• To test your programs in MPLAB IDE, use the built-in simulator, MPLAB SIM
• To enable the simulator, select Debugger, Select Tool, then select MPLAB SIM.

DEBUGGING WITH MPLAB SIM
• After the simulator is selected, the Debug Toolbar
appears under the MPLAB menus.
Run
Halt
Animate Step
Into Step
Over
Step
Out Reset
Break
Point

DEBUGGING WITH MPLAB SIM
• Run: Run program
• Halt: Halt program execution
• Animate: Continually step into instructions.
• Step Into: Step into the next instruction.
• Step Over: Step over the next instruction.
• Step Out: Step out of the subroutine.
• Reset: Perform a MCLR Reset.
• Break Point: Insert a break point.

CONFIGURATION BITS
• The configuration bits are useful to make
your chip working properly, e.g., turn OFF
the WatchDogTimer, select an external
Oscillator, etc.
• The configuration bits can be set directly in
your code or using the configuration bit
menu.

CONFIGURATION BITS
• To set the Configuration Bits using the menu.
Select Configure ~> Configuration Bits

CONFIGURATION BITS
• To enable setting the Configuration Bits, uncheck
“Configuration Bits set in Code”.

CONFIGURATION BITS
• To enable the external Oscillator.
Click here and select XT

CONFIGURATION BITS
• To turn the Watchdog Timer OFF.
Click here and select
Disabled-controlled
by SWDTEN bit