MODULE 3: GENERAL JOURNALS Module Overvie Microsoft Dynamics® NAV 2013, general journals are used...
38
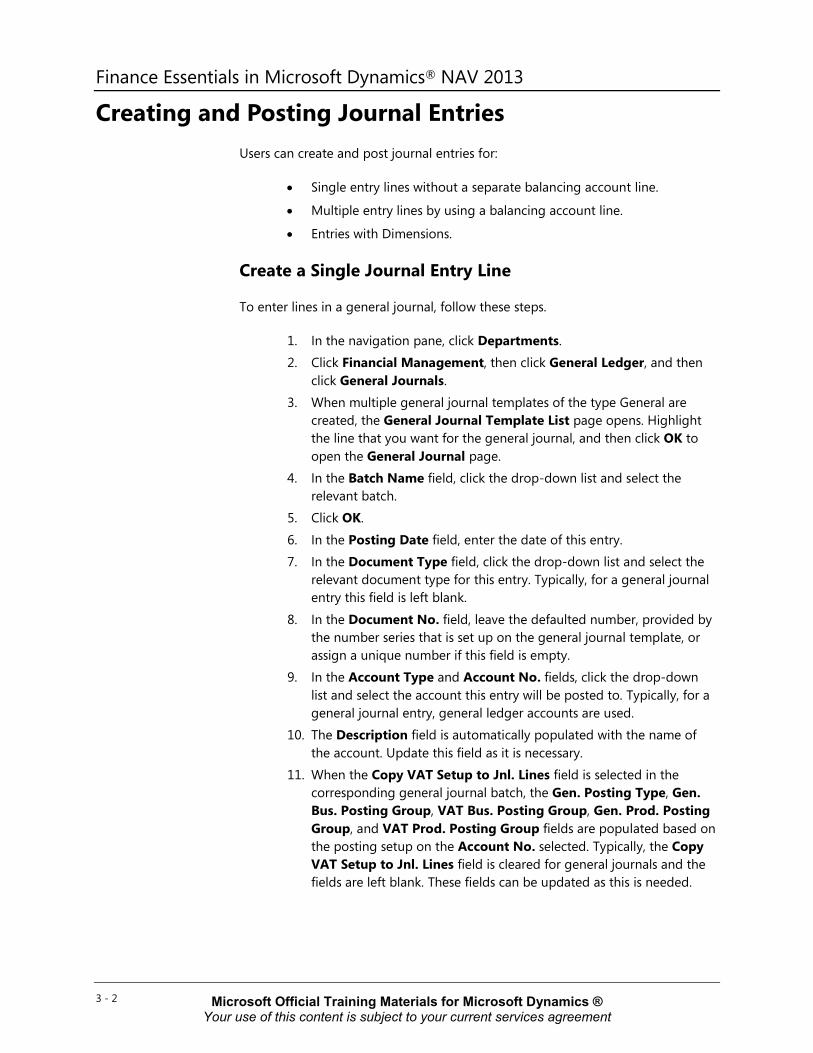
3 - 1 MODULE 3: GENERAL JOURNALS Module Overview In Microsoft Dynamics ® NAV 2013, general journals are used to post information into the general ledger and other accounts. The general journal is also used to post cost allocations and other adjustments to the accounts and then users can reverse and correct incorrect entries, when you have to. When users frequently have to enter the same journal postings, Microsoft Dynamics NAV 2013 provides two helpful tools, standard journal and recurring journals. Standard journals can be created and used to enter journal lines automatically. Recurring journals can be created and when they are opened they already contain journal lines that can be reviewed, adjusted and posted on a recurring basis. Additionally, when you use recurring journals that you can post cost allocations by using allocation keys based on amounts or percentages. Note: How to set up journal templates and batches is covered in the course Application Setup in Microsoft Dynamics NAV 2013. Objectives The objectives are: • Explain the general journal entry and posting system. • Create and post general journal entries. • Describe standard general journals. • Describe recurring general journals and include the fields and allocations. • Show how to use recurring journals with allocations and how to record accruals. • Explain how to reverse and correct journal entries. Microsoft Official Training Materials for Microsoft Dynamics ® Your use of this content is subject to your current services agreement
Transcript of MODULE 3: GENERAL JOURNALS Module Overvie Microsoft Dynamics® NAV 2013, general journals are used...
3 - 1
MODULE 3: GENERAL JOURNALS
Module Overview In Microsoft Dynamics® NAV 2013, general journals are used to post information into the general ledger and other accounts. The general journal is also used to post cost allocations and other adjustments to the accounts and then users can reverse and correct incorrect entries, when you have to.
When users frequently have to enter the same journal postings, Microsoft Dynamics NAV 2013 provides two helpful tools, standard journal and recurring journals. Standard journals can be created and used to enter journal lines automatically. Recurring journals can be created and when they are opened they already contain journal lines that can be reviewed, adjusted and posted on a recurring basis. Additionally, when you use recurring journals that you can post cost allocations by using allocation keys based on amounts or percentages.
Note: How to set up journal templates and batches is covered in the course Application Setup in Microsoft Dynamics NAV 2013.
Objectives
The objectives are:
• Explain the general journal entry and posting system.
• Create and post general journal entries.
• Describe standard general journals.
• Describe recurring general journals and include the fields and allocations.
• Show how to use recurring journals with allocations and how to record accruals.
• Explain how to reverse and correct journal entries.
Microsoft Official Training Materials for Microsoft Dynamics ® Your use of this content is subject to your current services agreement
Finance Essentials in Microsoft Dynamics® NAV 2013
3 - 2
Creating and Posting Journal Entries Users can create and post journal entries for:
• Single entry lines without a separate balancing account line.
• Multiple entry lines by using a balancing account line.
• Entries with Dimensions.
Create a Single Journal Entry Line
To enter lines in a general journal, follow these steps.
1. In the navigation pane, click Departments. 2. Click Financial Management, then click General Ledger, and then
click General Journals. 3. When multiple general journal templates of the type General are
created, the General Journal Template List page opens. Highlight the line that you want for the general journal, and then click OK to open the General Journal page.
4. In the Batch Name field, click the drop-down list and select the relevant batch.
5. Click OK.
6. In the Posting Date field, enter the date of this entry. 7. In the Document Type field, click the drop-down list and select the
relevant document type for this entry. Typically, for a general journal entry this field is left blank.
8. In the Document No. field, leave the defaulted number, provided by the number series that is set up on the general journal template, or assign a unique number if this field is empty.
9. In the Account Type and Account No. fields, click the drop-down list and select the account this entry will be posted to. Typically, for a general journal entry, general ledger accounts are used.
10. The Description field is automatically populated with the name of the account. Update this field as it is necessary.
11. When the Copy VAT Setup to Jnl. Lines field is selected in the corresponding general journal batch, the Gen. Posting Type, Gen. Bus. Posting Group, VAT Bus. Posting Group, Gen. Prod. Posting Group, and VAT Prod. Posting Group fields are populated based on the posting setup on the Account No. selected. Typically, the Copy VAT Setup to Jnl. Lines field is cleared for general journals and the fields are left blank. These fields can be updated as this is needed.
Microsoft Official Training Materials for Microsoft Dynamics ® Your use of this content is subject to your current services agreement

Module 3: General Journals
3 - 3
Note: Through the Choose Columns function, the VAT Bus. Posting Group and VAT Prod. Posting Group fields can be made available on the General Journal page.
12. In the Amount field, enter the amount for the entry. Positive and negative amounts in general journals are posted to the account specified in the Account No. field as follows:
o A positive amount represents a debit to the account.
o A negative amount represents a credit to the account.
Note: Through the Choose Columns function, the Debit Amount and Credit Amount fields can be made available on the General Journal page. When you enter an amount in these fields, the Amount field will be automatically filled in.
• Entering a positive amount in the Debit Amount field will result in a positive amount in the Amount field.
• Entering a negative amount in the Debit Amount field will result in a negative amount in the Amount field.
• Entering a positive amount in the Credit Amount field will result in a negative amount in the Amount field.
• Entering a negative amount in the Credit Amount field will result in a positive amount in the Amount field.
• Entering a positive amount in the Amount field will result in a positive amount in the Debit Amount field.
• Entering a negative amount in the Amount field will result in a positive amount in the Credit Amount field.
Note: When the posting group fields are filled in, the amount in the Amount field is considered eligible for the value-added tax (VAT). After posting, the amount will be split in the amount excluding VAT. This amount will then be posted on the account filled in on the journal line, and the VAT amount, that will be posted on the VAT account, according to the VAT setup of the specified VAT posting groups on the journal line.
13. In the Bal. Account Type and Bal. Account No. fields, click the drop-down list to select the balancing account for this entry. These fields are automatically populated when the controlling general journal batch is set up with a default balancing account type and number.
Microsoft Official Training Materials for Microsoft Dynamics ® Your use of this content is subject to your current services agreement

Finance Essentials in Microsoft Dynamics® NAV 2013
3 - 4
14. After the Copy VAT Setup to Jnl. Lines field is selected in the corresponding general journal batch, the Bal. Gen. Posting Type, Bal. Gen. Bus. Posting Group, Bal. VAT Bus. Posting Group, Bal. Gen. Prod. Posting Group, and Bal. VAT Prod. Posting Group fields are populated based on the posting setup on the Account No. selected. Typically, the Copy VAT Setup to Jnl. Lines field is cleared for general journals and the fields are left blank. These fields can be updated as this is needed.
Note: Through the Choose Columns function, the Bal. VAT Bus. Posting Group and Bal. VAT Prod. Posting Group fields can be made available on the General Journal page.
Notice that the Balance and Total Balance fields at the bottom of the window are equal to zero.
Create Journal Entries with a Balancing Line
When a journal contains multiple entries that are all applied to the same balancing account, users can enter one final balancing line so that only one complete line is posted to the balancing account. This is helpful, for example, when you are reallocating costs.
To create journal entries with a separate balancing line, follow these steps.
1. Repeat steps 1 through 12 from the previous lesson “Create a Single Journal Entry Line”.
2. Move to the next general journal line by pressing the DOWN ARROW key. Notice that many of the fields on the new line are identical as to those on the first line.
Note: The Document No. field contains the same number as the previous line when the previous lines combined are not in balance. When the previous lines are in balance the Document No. field will be given the next sequential number, according to the number series that is set up in the No. Series field on the corresponding general journal batch.
3. Repeat steps 6 through 12 from the previous lesson “Create a Single Journal Entry Line.”
4. Create as many journal lines (with debit and credit amounts) as is necessary for the Total Balance field to be equal to zero.
Microsoft Official Training Materials for Microsoft Dynamics ® Your use of this content is subject to your current services agreement

Module 3: General Journals
3 - 5
Preview a Test Report
To view the effect that the journal will have on the accounts set up as reconciling accounts, you can print a test report before posting. To preview the test report from a general journal, follow these steps.
1. On the Actions tab, click Test Report. 2. Select the Show Dimensions check box, if you want to view the
dimensions and the dimension values that are assigned to the journal lines.
3. Click Preview. 4. Review the report. If the journal lines are out of balance a warning will
be given on the report.
5. Close the Print Preview page.
Post a General Journal
You can only post a general journal, when you meet the following conditions:
• The Total Balance field at the bottom of the General Journal page is equal to zero.
• The general journal lines are balanced by date, based on Posting Date.
• If the Force Doc. Balance field is selected in the controlling general journal template, the general journal lines must also balance by document number and document type.
Note: When the Force Doc. Balance field is clear, you can post transactions that do not balance by document number. However, you cannot reverse the resulting entries, because you cannot automatically reverse transactions that do not balance by document number.
To post the general journal, follow these steps.
1. On the Actions tab, click Post. 2. Click Yes to post the journal lines.
Note: Only visible journal lines, or, in other words, lines that are within the filter, and are in balance, are posted. The entries that are hidden because the filter is applied are not posted, even if they balance.
3. Click OK. 4. Click OK to close the General Journal page.
Microsoft Official Training Materials for Microsoft Dynamics ® Your use of this content is subject to your current services agreement
Finance Essentials in Microsoft Dynamics® NAV 2013
3 - 6
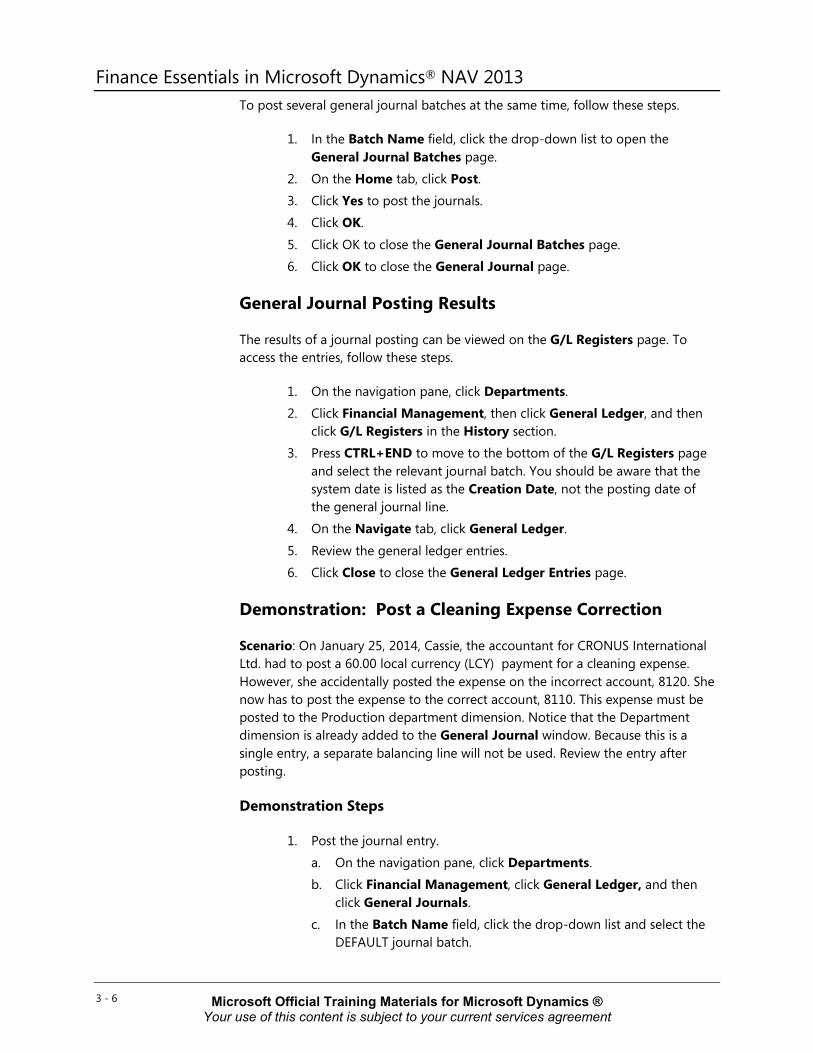
To post several general journal batches at the same time, follow these steps.
1. In the Batch Name field, click the drop-down list to open the General Journal Batches page.
2. On the Home tab, click Post. 3. Click Yes to post the journals. 4. Click OK.
5. Click OK to close the General Journal Batches page. 6. Click OK to close the General Journal page.
General Journal Posting Results
The results of a journal posting can be viewed on the G/L Registers page. To access the entries, follow these steps.
1. On the navigation pane, click Departments. 2. Click Financial Management, then click General Ledger, and then
click G/L Registers in the History section. 3. Press CTRL+END to move to the bottom of the G/L Registers page
and select the relevant journal batch. You should be aware that the system date is listed as the Creation Date, not the posting date of the general journal line.
4. On the Navigate tab, click General Ledger. 5. Review the general ledger entries. 6. Click Close to close the General Ledger Entries page.
Demonstration: Post a Cleaning Expense Correction
Scenario: On January 25, 2014, Cassie, the accountant for CRONUS International Ltd. had to post a 60.00 local currency (LCY) payment for a cleaning expense. However, she accidentally posted the expense on the incorrect account, 8120. She now has to post the expense to the correct account, 8110. This expense must be posted to the Production department dimension. Notice that the Department dimension is already added to the General Journal window. Because this is a single entry, a separate balancing line will not be used. Review the entry after posting.
Demonstration Steps
1. Post the journal entry. a. On the navigation pane, click Departments. b. Click Financial Management, click General Ledger, and then
click General Journals. c. In the Batch Name field, click the drop-down list and select the
DEFAULT journal batch.
Microsoft Official Training Materials for Microsoft Dynamics ® Your use of this content is subject to your current services agreement

Module 3: General Journals
3 - 7
d. Click OK. e. Delete existing lines, if there are any.
f. In the Posting Date field, enter 01/25/14. g. Do not change the Document No. field. h. Leave the Document Type field blank. i. In the Account Type field, click the drop-down list and select G/L
Account. j. In the Account No. field, enter 8110. k. In the Description field, enter ‘Correction cleaning expense
January 2014.’
l. Remove the values from the Gen. Posting Type, Gen. Bus. Posting Group, VAT Bus. Posting Group, Gen. Prod. Posting Group, and VAT Prod. Posting Group fields. This will ensure that VAT is not calculated on any amounts.
m. In the Amount field, enter 60.00. n. In the Bal. Account No. field, enter 8120. o Remove the values from the Bal. Gen. Posting Type, Bal. Gen.
Bus. Posting Group, Bal. VAT Bus. Posting Group, Bal. Gen. Prod. Posting Group, and Bal. VAT Prod. Posting Group fields.
o. On the Home tab, click Dimensions.
p. In the Dimension Code field, enter DEPARTMENT. q. In the Dimension Value Code field, enter PROD.
FIGURE 3.1: GENERAL JOURNAL – DIMENSION SET ENTRIES
Microsoft Official Training Materials for Microsoft Dynamics ® Your use of this content is subject to your current services agreement

Finance Essentials in Microsoft Dynamics® NAV 2013
3 - 8
r. Click OK to close the Edit Dimension Set Entries page. s. Verify that the Total Balance is zero.
t. On the Home tab, click Post. u. Click Yes to post the journal lines. v. Click OK. w. Click OK to close the General Journal page.
2. Review the entry after posting.
a. On the navigation pane, click Departments. b. Click Financial Management, then click General Ledger, and
then click G/L Registers in the History section. c. Press CTRL+END to move to the bottom of the G/L Registers
page and select the relevant journal batch. d. On the Navigate tab, click General Ledger. e. Review the general ledger entries.
FIGURE 3.2: G/L REGISTERS – GENERAL LEDGER ENTRIES
f. Click Close to close the General Ledger Entries page.
Microsoft Official Training Materials for Microsoft Dynamics ® Your use of this content is subject to your current services agreement

Module 3: General Journals
3 - 9
Lab 3.1: Create a Journal Entry Scenario
As the accounting manager at CRONUS International Ltd., you have to create and post a debit journal entry that is divided between the Sales and Administration Departments. But the credit entry must not be separated by department. Use the following criteria to complete this journal entry:
• DEFAULT general journal batch
• Posting date January 1, 2014
• Debit to G/L account 8110
o 100.00 LCY to the Sales Department
o 60.00 LYC to the Administration Department
• Credit to G/L account 2910
After you post the entries, review them in the G/L Register and then close all open windows.
Exercise 1: Create a Journal Entry
Task 1: Create a Journal Entry
High Level Steps 1. Enter the necessary lines in the general journal.
2. Post the general journal. 3. Review the entries in the G/L Register.
Detailed Steps 1. Enter the necessary lines in the general journal.
a. On the navigation pane, click Departments. b. Click Financial Management, click General Ledger, and then
click General Journals.
c. In the Batch Name field, click the drop-down list and select the DEFAULT journal batch.
d. Delete existing lines, if there are any. e. In the Posting Date field, enter 01/01/14.
f. Do not change the Document No. field. g. In the Account Type field, click the drop-down list and select G/L
Account.
h. In the Account No. field, enter 8110.
Microsoft Official Training Materials for Microsoft Dynamics ® Your use of this content is subject to your current services agreement

Finance Essentials in Microsoft Dynamics® NAV 2013
3 - 10
i. Remove the values from the Gen. Posting Type, Gen. Bus. Posting Group, VAT Bus. Posting Group, Gen. Prod. Posting Group, and VAT Prod. Posting Group fields.
j. In the Amount field, enter 100.00. k. On the Home tab, click Dimensions. l. In the Dimension Code field, enter DEPARTMENT.
m. In the Dimension Value Code field, enter SALES. n. Click OK. o Move to the next general journal line by pressing the DOWN
ARROW key.
o. In the Posting Date field, enter 01/01/14. p. Do not change the Document No. field.
q. In the Account Type field, click the drop-down list and select G/L Account.
r. In the Account No. field, enter 8110. s. Remove the values from the Gen. Posting Type, Gen. Bus.
Posting Group, VAT Bus. Posting Group, Gen. Prod. Posting Group, and VAT Prod. Posting Group fields.
t. In the Amount field, enter 60.00. u. On the Home tab, click Dimensions.
v. In the Dimension Code field, enter DEPARTMENT. w. In the Dimension Value Code field, enter ADM. x. Click OK. y. Move to the next general journal line by pressing the DOWN
ARROW key. z. In the Posting Date field, enter 01/01/14. aa. Do not change the Document No. field. bb. In the Account Type field, click the drop-down list and select G/L
Account. cc. In the Account No. field, enter 2910. dd. Remove the values from the Gen. Posting Type, Gen. Bus.
Posting Group, VAT Bus. Posting Group, Gen. Prod. Posting Group, and VAT Prod. Posting Group fields.
ee. In the Amount field, enter -160.00.
2. Post the general journal. a. Verify that the Total Balance is zero. b. On the Actions tab, click Post. c. Click Yes to post the journal lines.
d. Click OK. e. Click OK to close the General Journal.
Microsoft Official Training Materials for Microsoft Dynamics ® Your use of this content is subject to your current services agreement

Module 3: General Journals
3 - 11
3. Review the entries in the G/L Register. a. On the navigation pane, click Departments.
b. Click Financial Management, then click General Ledger, and then click G/L Registers in the History section.
c. Press CTRL+END to move to the bottom of the G/L Registers page and select the relevant line.
d. On the Navigate tab, click General Ledger. e. Review the general ledger entries. f. Click Close to close the General Ledger Entries page.
Standard Journals Standard journals are useful for transactions that are posted frequently with few or no changes, but do not have a fixed recurrence between two posts. A standard general journal is a general journal that is saved as a default set of lines. It can be accessed at a later stage to automatically fill in general journal lines.
A standard journal is created from a journal, and it can be:
• Created only for journals of the type General.
• Used only within the same journal template.
• Used for the different journal batches from the same journal template.
Demonstration: Create a Standard Journal
Scenario: Phyllis, the Accounting Manager at CRONUS, processes payroll payments every month. Although the amounts are different every time, the G/L accounts are always the same. She decides to create a standard journal for this transaction, with the following criteria:
• GENERAL journal template, CASH journal batch
• Debit to G/L accounts:
o 8710
o 8720
o 8730
o 8750
o 5830
o 8740
• A single credit journal line to Bank Account WWB-OPERATING
Microsoft Official Training Materials for Microsoft Dynamics ® Your use of this content is subject to your current services agreement

Finance Essentials in Microsoft Dynamics® NAV 2013
3 - 12
Demonstration Steps
1. Create the general journal lines.
a. On the navigation pane, click Departments. b. Click Financial Management, then click General Ledger, and
then click General Journals.
c. In the Batch Name field, click the drop-down list and select CASH.
d. Click OK. e. In the Posting Date field, leave the defaulted date.
f. In the Document Type field, click the drop-down list and select Payment.
g. In the Document No. field, leave the defaulted number that is provided by the number series that is set up on the journal template, or assign a unique number if this field is empty.
h. In the Account Type, click the drop-down list and select G/L Account.
i. In the Account No. field, enter 8710.
j. The Description field is automatically populated with the name of the account. Update this field as necessary.
k. Leave the Gen. Posting Type, Gen. Bus. Posting Group, VAT Bus. Posting Group, Gen. Prod. Posting Group, and VAT Prod. Posting Group fields blank.
l. Repeat steps e-k for G/L accounts 8720, 8730, 8750, 5830, and 8740.
m. Move to the next general journal line by pressing the DOWN ARROW key.
n. In the Posting Date field, leave the defaulted date. o In the Document Type field, click the drop-down list and select
Payment.
o. In the Document No. field, leave the defaulted number that is provided by the number series that is set up on the journal template, or assign a unique number if this field is empty.
p. In the Account Type, click the drop-down list and select Bank Account.
q. In the Account No. field, enter WWB-OPERATING. r. The Description field is automatically populated with the name
of the account. Update this field as necessary. s. Leave the Gen. Posting Type, Gen. Bus. Posting Group, VAT
Bus. Posting Group, Gen. Prod. Posting Group, and VAT Prod. Posting Group fields blank.
Microsoft Official Training Materials for Microsoft Dynamics ® Your use of this content is subject to your current services agreement

Module 3: General Journals
3 - 13
2. Create a standard journal. a. On the Actions tab, click Save as Standard Journal. b. In the Code field, type PAY. c. In the Description field, enter Payroll journal. d. Clear the Save Amount field. Standard Journals can also save the
Amounts you have recorded in the journal. Check this field if you want to keep the amounts.
FIGURE 3.3: GENERAL JOURNAL – SAVE AS A STANDARD JOURNAL
e. Click OK to save the standard journal. f. Click OK when you receive the message. g. Delete the journal lines. h. Click OK to close the General Journal page.
Demonstration: Use a Standard Journal
Scenario: On January 31, 2014 Phyllis has to process the payroll payments by using the standard journal, with the following criteria.
1. Debit to G/L accounts: o 8710 – 100,000.00 LCY
o 8720 – 30,000.00 LCY
o 8730 – 1,000.00 LCY
Microsoft Official Training Materials for Microsoft Dynamics ® Your use of this content is subject to your current services agreement

Finance Essentials in Microsoft Dynamics® NAV 2013
3 - 14
o 8750 – 8,000.00 LCY
o 8740 – 25,000.00 LCY
2. Credit to: o G/L account 5830 – 8,000.000 LCY
o Bank account WWB-OPERATING – 156,000.00 LCY
Demonstration Steps
1. Use a standard journal. a. On the navigation pane, click Departments. b. Click Financial Management, then click General Ledger, and
then click General Journals. c. In the Batch Name field, click the drop-down list and select
CASH. d. Click OK.
e. In the Posting Date field, enter 01/31/14. f. On the Actions tab, click Get Standard Journals. g. Select the standard journal with the code PAY. h. Click OK.
i. Click OK to the message that states the journal lines are successfully inserted.
FIGURE 3.4: GENERAL JOURNAL WINDOW
j. The Posting Date field on all the journal lines is 01/31/14.
k. The Document No. is different for each journal line. Because there are no amounts filled in on the standard journal, each line is
Microsoft Official Training Materials for Microsoft Dynamics ® Your use of this content is subject to your current services agreement

Module 3: General Journals
3 - 15
in balance. Therefore, the next line is assigned the sequential number according to the number series that is set up on the journal batch. You can always adjust the document number if this is necessary.
Note: If the Force Doc. Balance check box is selected on the controlling journal template, then you will be obligated to change the document number. All journal lines must then have the same document number otherwise you cannot post the general journal.
l. Fill in the Amount field on each journal line, according to the scenario.
m. Verify that the Total Balance field is equal to zero.
n. On the Home tab, click Post. o Click Yes to post the journal lines.
o. Click OK.
p. Click OK to close the General Journal page.
Recurring Journals Recurring journals are useful for transactions that are posted frequently with few or no changes. Some criteria for a recurring journal includes the following:
• Contains special fields for managing recurring transactions.
• You can use it to allocate single entries to multiple general ledger accounts.
• You can create it for:
o Each general journal type (general, assets, cash receipts, payments, intercompany, jobs, sales, and purchase).
o Fixed asset journals.
o Item journals.
o Resource journals.
• Balancing fields will not be available on the journal lines.
• The journal lines are preserved after posting.
Additional information about accessing recurring journals includes the following:
• The Recurring General Journals page contains recurring journals of all general journal types, and can be accessed as follows:
o Departments > Financial Management > Fixed Assets.
o Departments > Financial Management > Period Activities > General Ledger.
Microsoft Official Training Materials for Microsoft Dynamics ® Your use of this content is subject to your current services agreement

Finance Essentials in Microsoft Dynamics® NAV 2013
3 - 16
o Departments > Financial Management > Period Activities > Receivables.
o Departments > Financial Management > Period Activities > Payables.
• The Recurring Fixed Assets Journals page contains recurring fixed asset journals and it can be accessed as follows: Departments > Financial Management > Fixed Assets.
• The Recurring Item Journals page contains recurring item journals and it can be accessed as follows: Departments > Purchase > Inventory & Costing.
• The Recurring Job Journals page contains recurring job journals and it can be accessed as follows: Departments > Jobs.
• The Recurring Resource Journals page contains recurring resource journals and it can be accessed as follows: Departments > Resource Planning.
FIGURE 3.5: RECURRING GENERAL JOURNAL
Note: Only the recurring general journals post to general ledger accounts and they will be discussed later in this lesson.
Microsoft Official Training Materials for Microsoft Dynamics ® Your use of this content is subject to your current services agreement

Module 3: General Journals
3 - 17
Recurring Methods
The Recurring Method field determines how the amount on the journal line is treated after posting. The following table shows the various recurring methods.
Recurring Method
Description Examples
Fixed Use when the journal amount is the same each period. The amount on the journal line remains unchanged after posting.
Monthly expensing of a prepaid annual insurance premium throughout the year. Recording fixed expense invoices if purchase documents are not used (for example, cleaning on a contract basis).
Variable Use when the journal amount is different each period. The amount on the journal line is deleted after the recurring journal is posted.
Recording variable expense invoices if purchase documents are not used (for example, stationery, maintenance).
Recording regular customer sales if sales documents are not used.
Recording payroll for an itinerant/irregular workforce, where the hours change every week/fortnight/month.
Balance The balance of the account on the line is allocated among the accounts specified for the line on the Allocations page. Therefore, the balance on the account on the line is set to zero.
Remember to fill in the Allocation % field in the Allocations page.
Periodic allocation of an expense account between departments.
Periodic allocation of overheads posted to a single overhead account to several specific overhead accounts.
Intercompany expense allocations.
Reversing Fixed
The amount on the journal line remains unchanged after posting, and a reversing entry posts on the following day.
Monthly accrual of a contract cleaning invoice not received until the following month.
Microsoft Official Training Materials for Microsoft Dynamics ® Your use of this content is subject to your current services agreement

Finance Essentials in Microsoft Dynamics® NAV 2013
3 - 18
Recurring Method
Description Examples
Reversing Variable
The amount on the journal line is deleted after posting, and a reversing entry is posted the next day.
Monthly accrual of an electricity invoice is not received until the end of the first week of the following month. Monthly income accrual for the sales value of items shipped but not invoiced.
Reversing Balance
The balance of the account on the line is allocated among the accounts specified for the line on the Allocations page. The balance on the account is set to zero. A reversing entry posts on the following day.
The same examples as the Balance method but the allocations are only temporary. (For example, the allocations are temporary because they are only an estimate for periodic reporting.)
Recurring Frequency
The Recurring Frequency field contains a formula that determines how frequently the entry on the journal line will be posted. This formula can contain no more than 20 alphanumeric characters that the program recognizes as abbreviations for time specifications.
For example, if the formula 1M is entered with a Posting Date of 01/15/10, after the journal is posted, the date is changed to 02/15/10.
Use one of the following methods to post an entry on the last day of every month after the current month:
• Post the first entry on the last day of a month and enter the formula 1D+1M-1D (1 day + 1 month - 1 day). With this formula, the program calculates the date correctly regardless of how many days are in the month.
• Post the first entry on any arbitrary day of a month and then enter the formula: 1M+CM. With this formula, the program calculates one full month plus the remaining days of the current month.
Note: If you are posting monthly accruals that must be reversed the following month (Reversing Fixed, Reversing Variable, and Reversing Balance methods), post them on the last day of each month. The first entry must be posted on the last day of the current month and the recurring frequency must be either 1D+1M-1D or 1M+CM. This makes sure the reversal is always posted on the first day of the following month.
Microsoft Official Training Materials for Microsoft Dynamics ® Your use of this content is subject to your current services agreement

Module 3: General Journals
3 - 19
Document Number Formulas
Instead of using a number series to determine the value in the Document No. field, Microsoft Dynamics NAV 2013 provides the option to enter a formula to create a document number for each posted entry that is then updated automatically every time that the recurring journal is posted.
Note: Typically, the No. Series field is left blank on the Journal Templates page and the General Journal Batches page for recurring journals and corresponding journal batches.
The Posting No. Series field on the journal batch will override the manual document numbers on the recurring journal line. If you want to use the formulas as the posted number on the ledger entries, make sure that the Posting No. Series field is left blank.
Simple text can be combined with the following text codes to form a number series:
• %1 - The current day number
• %2 - The current week number
• %3 - The current month number
• %4 - The current month name
• %5 - The current accounting period name
For example, if the entry's document number is R (rent) + current month, enter R%3 in the field. The document number for January will then be R1.
Note: The Document No. field supports up to 20 alphanumeric characters. Consider this limitation when you are creating formulas.
If there is more than one line in the journal, the program will do the following:
• Automatically keep the same number on the next lines, until the balance for the journal is zero (0).
• Enter the next consecutive number on the next line.
Posting Group Fields
When the Copy VAT Setup to Jnl. Lines field is selected in the general journal batch, the following five fields are populated based on the posting setup on the selected Account No.
Microsoft Official Training Materials for Microsoft Dynamics ® Your use of this content is subject to your current services agreement

Finance Essentials in Microsoft Dynamics® NAV 2013
3 - 20
• Gen. Posting Type
• Gen. Bus. Posting Group
• Gen. Prod. Posting Group
• VAT Bus. Posting Group
• VAT Prod. Posting Group
The values in these fields can be modified or deleted as is needed.
Note: Through the Choose Columns function, the VAT Bus. Posting Group and VAT Prod. Posting Group fields can be made available on the Recurring General Journal page.
Note: When the posting group fields are filled in, the amount in the Amount field will be considered to include VAT.
Expiration Dates
Recurring journal lines can be set up with expiration dates. Use the Expiration Date field to limit the posting period by specifying the last date that an entry can be repeated.
By using this field, a line can be entered in the journal even though it will only be posted for a limited period. The line will not be posted after the date entered in the field.
The advantage of using this field is that the line will not be deleted from the journal immediately and the present expiration date can be replaced with a later one so that the line can be used additionally into the future.
If the field is blank, the line will be posted during each posting process until it is deleted from the journal.
Allocations
Allocations are used to allocate the amount on the recurring journal line to several G/L accounts and dimensions. Meaning that the allocation is in itself a balancing account line to the recurring journal line because recurring entries do not have balancing accounts.
Just as in a recurring journal, an allocation only has to be entered one time. The allocation remains in the allocation journal after posting. Therefore, you do not have to re-enter amounts and allocations every time that the recurring journal line is posted.
Microsoft Official Training Materials for Microsoft Dynamics ® Your use of this content is subject to your current services agreement

Module 3: General Journals
3 - 21
Enter allocations for a journal entry by using one of the following methods:
• Double-click the Allocated Amt. (LCY) field on the recurring journal line.
• On the ribbon, click the Navigate tab, and then click Allocations.
FIGURE 3.6: ALLOCATIONS WINDOW
Allocate the amount from the line to different accounts and dimensions by using one of the following allocation methods:
• Allocation Quantity - Allocate the amounts by quantities. An example is allocating by the number of people in each department.
• Allocation % - Allocate the amounts by percentage.
• Amount - If you use the Allocation Quantity or Allocation% field, the program calculates the allocated amount in this field. However, the field can be used to enter a manually calculated allocation amount.
After you enter the lines with the allocations, the Recurring General Journal page displays the following:
• The Allocated Amt. (LCY) field will now be filled in.
• If the recurring journal line is in LCY, the Allocated Amt. (LCY) field will match the Amount field but have the opposite sign.
Note: The posting fields can be filled in on either the recurring journal line or on the allocation line, but not on both. These fields are as follows: Gen. Posting Type, Gen. Bus. Posting Group, Gen. Prod. Posting Group, VAT Bus. Posting Group, and VAT Prod. Posting Group.
Microsoft Official Training Materials for Microsoft Dynamics ® Your use of this content is subject to your current services agreement

Finance Essentials in Microsoft Dynamics® NAV 2013
3 - 22
Allocations can be used with all Recurring Methods. However, some rules apply for using the Balance method. They include the following:
• Allocations must be used because this method cannot post to a balance account in another journal line.
• Do not enter an Amount because, as part of the posting process, the program determines the amounts to post on the line from the account balance.
• The recurring journal must be posted before the allocated amounts can be viewed. The Test Report does not show the calculated allocation amounts.
Processing Recurring Journals When you process recurring journals, you can save frequently posted journals as a recurring template for the general journal. This helps to save time when you are posting in the accounts.
The demonstrations in this lesson will show how to process recurring journals. The first demonstration uses a new recurring journal that will be set up first. It will show how to post recurring payable entries that must be paid but do not require invoice documents. Different recurring methods are used and the costs are allocated to multiple departments.
The second demonstration summarizes income and expense accruals. It will show how to post an accrual by using the Reverse Variable method.
Demonstration: Process a Recurring Journal with Allocations
Scenario: Cassie, the accountant at CRONUS International Ltd., must set up a recurring payments journal for monthly expenses. This includes the following:
• Cleaning: The amount 500.00 LCY, always due on the fifteenth of each month, and allocated between these three departments:
o Administration - 50 percent
o Production - 25 percent
o Sales - 25 percent
• Advertising Expenses: Variable, but always due on the twenty-fifth of each month and allocated only to the Sales Department.
These expenses must be available for payment selection but do not require an invoice document.
For this demonstration, a new recurring journal batch is created so that manual document numbers can be used.
Microsoft Official Training Materials for Microsoft Dynamics ® Your use of this content is subject to your current services agreement

Module 3: General Journals
3 - 23
Demonstration Steps
1. Create a recurring payables journal and batch.
a. In the navigation pane, click Departments. b. Click Administration, and then click Application Setup. c. On the Application Setup page, click Financial Management,
then click General, and then click Journal Templates. d. Click New. e. In the Name field, enter RECPAY. f. In the Description field, enter Recurring Payments Journal.
g. In the Type filed, enter Payments. h. Select the Recurring check box. i. Leave the No. Series and Posting No. Series fields blank. j. Clear the Copy VAT Setup to Journal Lines check box.
k. Click Yes to the message to update the journal lines. l. On the Navigate tab, click Batches. m. In the Name field, enter RECURRING. n. In the Description field, enter Recurring Payments Journal.
FIGURE 3.7: RECURRING GENERAL JOURNAL TEMPLATE AND BATCH
o. Click OK to close the General Journal Batches page.
p. Click OK to close the General Journal Templates page.
Microsoft Official Training Materials for Microsoft Dynamics ® Your use of this content is subject to your current services agreement
Finance Essentials in Microsoft Dynamics® NAV 2013
3 - 24
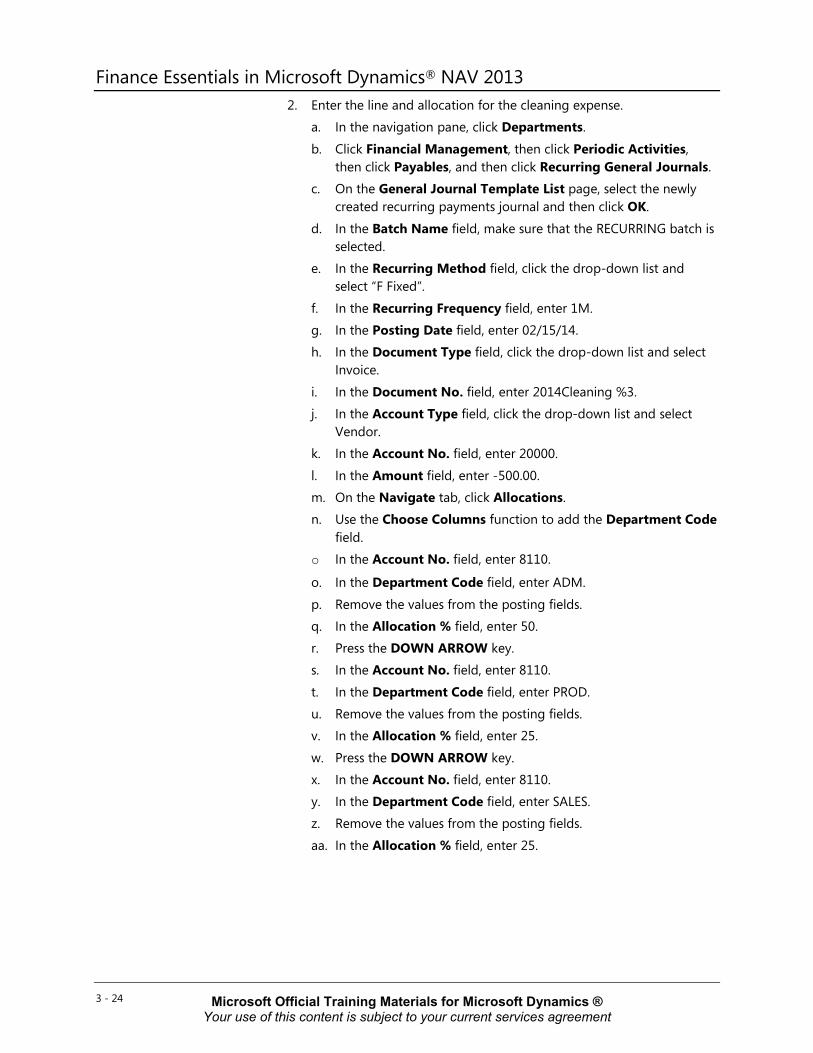
2. Enter the line and allocation for the cleaning expense. a. In the navigation pane, click Departments.
b. Click Financial Management, then click Periodic Activities, then click Payables, and then click Recurring General Journals.
c. On the General Journal Template List page, select the newly created recurring payments journal and then click OK.
d. In the Batch Name field, make sure that the RECURRING batch is selected.
e. In the Recurring Method field, click the drop-down list and select “F Fixed”.
f. In the Recurring Frequency field, enter 1M. g. In the Posting Date field, enter 02/15/14. h. In the Document Type field, click the drop-down list and select
Invoice.
i. In the Document No. field, enter 2014Cleaning %3. j. In the Account Type field, click the drop-down list and select
Vendor. k. In the Account No. field, enter 20000.
l. In the Amount field, enter -500.00. m. On the Navigate tab, click Allocations. n. Use the Choose Columns function to add the Department Code
field. o In the Account No. field, enter 8110.
o. In the Department Code field, enter ADM.
p. Remove the values from the posting fields. q. In the Allocation % field, enter 50. r. Press the DOWN ARROW key. s. In the Account No. field, enter 8110.
t. In the Department Code field, enter PROD. u. Remove the values from the posting fields. v. In the Allocation % field, enter 25.
w. Press the DOWN ARROW key. x. In the Account No. field, enter 8110. y. In the Department Code field, enter SALES. z. Remove the values from the posting fields.
aa. In the Allocation % field, enter 25.
Microsoft Official Training Materials for Microsoft Dynamics ® Your use of this content is subject to your current services agreement
Module 3: General Journals
3 - 25
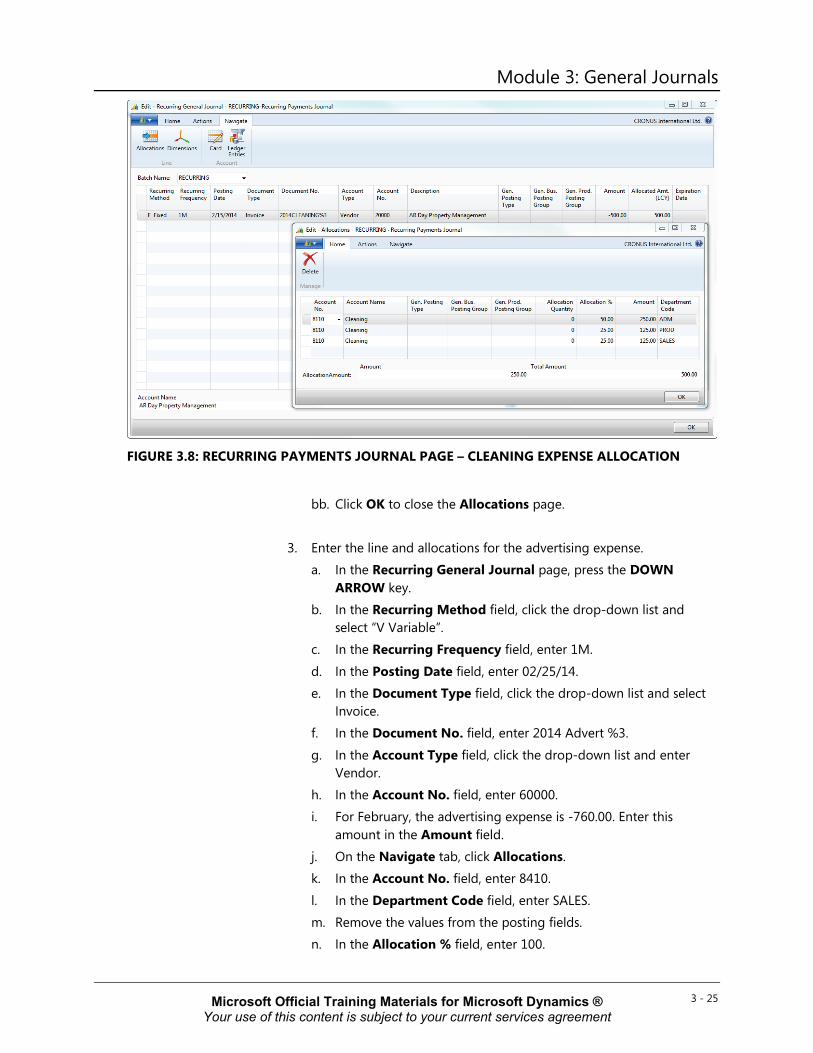
FIGURE 3.8: RECURRING PAYMENTS JOURNAL PAGE – CLEANING EXPENSE ALLOCATION
bb. Click OK to close the Allocations page.
3. Enter the line and allocations for the advertising expense. a. In the Recurring General Journal page, press the DOWN
ARROW key. b. In the Recurring Method field, click the drop-down list and
select “V Variable”. c. In the Recurring Frequency field, enter 1M.
d. In the Posting Date field, enter 02/25/14. e. In the Document Type field, click the drop-down list and select
Invoice. f. In the Document No. field, enter 2014 Advert %3.
g. In the Account Type field, click the drop-down list and enter Vendor.
h. In the Account No. field, enter 60000. i. For February, the advertising expense is -760.00. Enter this
amount in the Amount field. j. On the Navigate tab, click Allocations. k. In the Account No. field, enter 8410.
l. In the Department Code field, enter SALES. m. Remove the values from the posting fields. n. In the Allocation % field, enter 100.
Microsoft Official Training Materials for Microsoft Dynamics ® Your use of this content is subject to your current services agreement

Finance Essentials in Microsoft Dynamics® NAV 2013
3 - 26
FIGURE 3.9: RECURRING PAYMENTS JOURNAL PAGE – ADVERTISING EXPENSE ALLOCATION
o. Click OK to close the Allocations page.
4. Post the recurring journal. a. Change your work date to 02/15/14 to post the cleaning expense.
b. On the Actions tab, click Post. c. Click Yes to post the journal lines. d. Click OK.
e. Change your work date to 02/25/14 to post the advertising expense.
f. Repeat steps b through d.
Note: Recurring Journals will not post if the workdate is before the Posting Date or after the Expiration Date.
g. Review the lines remaining in the journal: The Posting Date on the first line is 03/15/14 and the
second line is 03/25/14.
The Amount field contains the following:
The first line still contains the -500.00 LCY because it is a fixed amount.
The second line is empty because the method is variable.
The Allocated Amt. (LCY) fields still display the allocation amounts.
Microsoft Official Training Materials for Microsoft Dynamics ® Your use of this content is subject to your current services agreement

Module 3: General Journals
3 - 27
FIGURE 3.10: RECURRING PAYMENTS JOURNAL PAGE AFTER POSTING
Note: To record next month’s expenses, update the amount on the second line and then post the journal. Because the Allocation % field is set to 100 for the second line, the allocation always calculates based on the value entered in the Amount field on the recurring journal line. Therefore, it does not have to be updated.
h. Click OK to close the Recurring General Journal page.
5. Review the posted recurring journal entries. a. In the navigation pane, click Departments.
b. Click Financial Management, then click General Ledger, and then click G/L Registers in the History section.
c. Move to the second last entry to review the ledger entries of the cleaning expense.
d. On the Navigate tab, click General Ledger. e. Review the entries in the register:
The Document No. field contains the results of the formula. The number 2 represents February.
The amounts are allocated to the Departments.
Microsoft Official Training Materials for Microsoft Dynamics ® Your use of this content is subject to your current services agreement

Finance Essentials in Microsoft Dynamics® NAV 2013
3 - 28
FIGURE 3.11: G/L REGISTERS – GENERAL LEDGER ENTRIES CLEANING EXPENSE
f. Click Close to close the General Ledger Entries page. g. Move to the last entry on the G/L Registers page. h. Repeat steps d through f to review the ledger entries for the
advertising expense.
Demonstration: Recording Accruals
You can use the recurring journal to record accruals. Income and expense accruals are entered at the end of an accounting period to make sure that all income and expenses for the period are included in the financial results. These accruals are reversed out of the ledger the day after the entry is posted.
Scenario: Starting in February 2014, Cassie, the accountant for CRONUS International Ltd. must set up a recurring monthly accrual for bank interest in the amount of 200.00 LCY. The interest is received the second day of the month following the month it is accrued.
The recurring journal with allocation is set up as follows:
• The interest is recorded in the month that it is earned and is posted to account 9110, Interest on Bank Balances.
• The Document No. field contains the current month name and the word Interest.
• The day after the interest is posted to 9110, the entry is reversed and the interest is posted to account 2330, Accrued Interest.
Review the entries after you have posted them.
Microsoft Official Training Materials for Microsoft Dynamics ® Your use of this content is subject to your current services agreement
Module 3: General Journals
3 - 29
Demonstration Steps
1. Enter the accrual and allocations.
a. In the navigation pane, click Departments. b. Click Financial Management, then click Periodic Activities,
then click General Ledger, and then click Recurring General Journals.
c. On the General Journal Template List page, select the Recurring Payments Journal and then click OK.
d. In the Batch Name field, make sure that the RECURRING batch is selected.
e. Delete all existing lines. f. In the Recurring Method field, click the drop-down list and
select RV Reversing Variable.
g. In the Recurring Frequency field, enter 1M+CM. h. In the Posting Date field, enter 02/28/14. i. In the Document No. field, enter %4 Interest. j. In the Account Type field, click the drop-down list and enter G/L
Account. k. In the Account No. field, enter 9110. l. In the Amount field, enter -200.00.
m. On the Navigate tab, click Allocations. n. In the Account No. field, enter 2330. o. In the Allocation % field, enter 100. p. Click OK to close the Allocations page.
q. Notice that the Allocated Amt. (LCY) field displays 200.00. r. Change your work date to 02/28/14. s. On the Home tab, click Post. t. Click Yes to post the journal lines.
u. Click OK. v. Review the lines remaining in the window:
The Posting Date is now 03/31/14.
The Amount field is empty because the method is variable.
The Allocated Amt. (LCY) field displays the allocation amount.
w. Click OK to close the Recurring General Journal page.
Microsoft Official Training Materials for Microsoft Dynamics ® Your use of this content is subject to your current services agreement

Finance Essentials in Microsoft Dynamics® NAV 2013
3 - 30
2. Review the posted accrual. a. In the navigation pane, click Departments.
b. Click Financial Management, then click General Ledger, and then click G/L Registers in the History section.
c. Press CTRL+END to move to the last entry. d. On the Navigate tab, click General Ledger. e. Review the entries in the register:
The two accrual entries posted on 02/28/14 and the two reversal entries posted on 03/01/14.
The Document No. field contains the results of the formula. November is displayed because %4 is used.
FIGURE 3.12: G/L REGISTERS – GENERAL LEDGER ENTRIES ACCRUALS
f. Click Close to close the General Ledger Entries page.
Microsoft Official Training Materials for Microsoft Dynamics ® Your use of this content is subject to your current services agreement
Module 3: General Journals
3 - 31
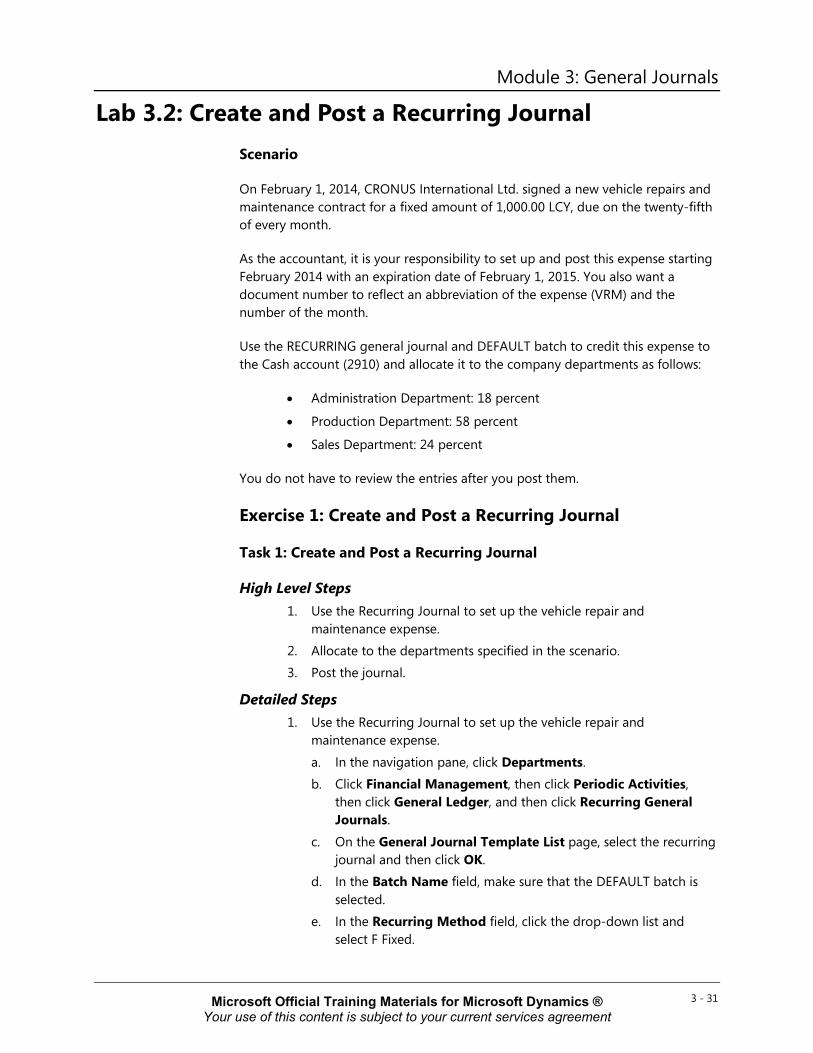
Lab 3.2: Create and Post a Recurring Journal Scenario
On February 1, 2014, CRONUS International Ltd. signed a new vehicle repairs and maintenance contract for a fixed amount of 1,000.00 LCY, due on the twenty-fifth of every month.
As the accountant, it is your responsibility to set up and post this expense starting February 2014 with an expiration date of February 1, 2015. You also want a document number to reflect an abbreviation of the expense (VRM) and the number of the month.
Use the RECURRING general journal and DEFAULT batch to credit this expense to the Cash account (2910) and allocate it to the company departments as follows:
• Administration Department: 18 percent
• Production Department: 58 percent
• Sales Department: 24 percent
You do not have to review the entries after you post them.
Exercise 1: Create and Post a Recurring Journal
Task 1: Create and Post a Recurring Journal
High Level Steps 1. Use the Recurring Journal to set up the vehicle repair and
maintenance expense. 2. Allocate to the departments specified in the scenario. 3. Post the journal.
Detailed Steps 1. Use the Recurring Journal to set up the vehicle repair and
maintenance expense.
a. In the navigation pane, click Departments. b. Click Financial Management, then click Periodic Activities,
then click General Ledger, and then click Recurring General Journals.
c. On the General Journal Template List page, select the recurring journal and then click OK.
d. In the Batch Name field, make sure that the DEFAULT batch is selected.
e. In the Recurring Method field, click the drop-down list and select F Fixed.
Microsoft Official Training Materials for Microsoft Dynamics ® Your use of this content is subject to your current services agreement

Finance Essentials in Microsoft Dynamics® NAV 2013
3 - 32
f. In the Recurring Frequency field, enter 1M. g. In the Posting Date field, enter 02/25/14.
h. In the Document No. field, enter VRM%3. i. In the Account No. field, enter 2910. j. In the Amount field, enter -1,000.00.
2. Allocate to the departments specified in the scenario. a. On the Navigate tab, click Allocations. b. In the Account No. field, enter 8530. c. In the Allocation % field, enter 18.
d. In the Department Code field, enter ADM. e. Press the DOWN ARROW key. f. In the Account No. field, enter 8530. g. In the Allocation % field, enter 58.
h. In the Department Code field, enter PROD. i. Press the DOWN ARROW key. j. In the Account No. field, enter 8530. k. In the Allocation % field, enter 24.
l. In the Department Code field, enter SALES. m. Press the DOWN ARROW key. n. Click OK to close the Allocations page.
3. Post the journal.
a. Change the work date to 02/25/14. b. On the Actions tab, click Post. c. Click Yes to post the journal lines. d. Click OK. e. Click OK to close the Recurring General Journal page.
Reversals and Corrections Occasionally, users will have to reverse or correct journal entry lines because changes or entries were booked incorrectly. Reversing journal entry lines helps users reverse entries easily and correctly.
Reversing Journal Entries
In Microsoft Dynamics NAV 2013, when an incorrect general journal is posted, the posted ledger entries can be reversed in the corresponding registers. However, to reverse an entry, the following must be true of the original entry:
Microsoft Official Training Materials for Microsoft Dynamics ® Your use of this content is subject to your current services agreement

Module 3: General Journals
3 - 33
• The Journal Batch Name field must not be blank in the G/L Register.
• Customer Ledger Entries must not be applied.
• Vendor Ledger Entries must not be applied.
• Bank Ledger Entries must not be closed by reconciliation.
• The total amount of the G/L Entries must equal zero.
• The entry must not include any Item Ledger Entries.
• The ledger entries cannot be created by a reversal.
After you reverse the entries, you can then post them in the same register.
To reverse posted ledger entries from a register, follow these steps.
1. On the navigation pane, click Departments.
2. Click Financial Management, then click General Ledger, and then click G/L Registers.
3. Locate and select the register to be reversed. 4. On the Home tab, click Reverse Register. 5. On the Reverse Register Entries page, on the Actions tab, click
Reverse. 6. Click Yes to reverse the entries. 7. Click OK to the message that the entries are reversed.
8. Move to the last entry on the G/L Registers page to review the fields on the reversing entry: o The Source Code is Reversal.
o The Creation Date is the system date.
o The Posting Date is the original posting date of the entry.
Posting Correction Entry Lines
Posted ledger entries cannot be changed or deleted in Microsoft Dynamics NAV 2013. However, you can correct the incorrect entries by posting one or more corrective entries by using the general journal.
When you are correcting entries, selecting the Correction check box affects the way entries are posted.
To use the correction functionality, the following fields must show on the General Journal page:
• Correction
• Debit Amount
• Credit Amount
Microsoft Official Training Materials for Microsoft Dynamics ® Your use of this content is subject to your current services agreement

Finance Essentials in Microsoft Dynamics® NAV 2013
3 - 34
Note: The Correction field cannot be added through the Choose Columns function. It must be added through the design environment.
If the Correction check box is selected on the journal lines:
• The Amount field on the line must have the opposite sign of the original, incorrect entry.
• Positive amounts in the Amount field are posted as a positive amount in the Debit Amount field as usual.
• Negative amounts in the Amount field are posted as a positive amount in the Credit Amount field as usual.
If the Correction check box is cleared on the journal lines:
• The Amount field on the line must have the opposite sign of the original, incorrect entry.
• Positive amounts in the Amount field are posted as a negative amount in the Credit Amount field.
• Negative amounts in the Amount field are posted as a negative amount in the Debit Amount field.
The Debit Amount and Credit Amount fields in the journal display the difference between corrections and usual postings.
After you post a correcting entry in a journal, the effect on the account that is used for posting is as follows:
• If the Correction check box is selected:
o The original entry and correcting entry are posted to the same side of the account, either as debits or credits.
o The correcting entry has a negative sign. This is helpful when you run reports such as the Cash Flow Statement.
• If the Correction check box is cleared, the original entry and correcting entry are posted to opposite sides of the account, one as a debit and the other as a credit.
Microsoft Official Training Materials for Microsoft Dynamics ® Your use of this content is subject to your current services agreement

Module 3: General Journals
3 - 35
Module Review Module Review and Takeaways
General journals are the basis of many financial functions in Microsoft Dynamics NAV 2013.
General journals can be posted with and without balancing lines and the user can set up dimensions.
Recurring journals help users to record frequently posted entries and to allocate expenses to various departments.
How to reverse and correct incorrect entries is useful in everyday work. Additionally, a full understanding of how journals are used is helpful in performing other finance related tasks, such as the reconciling accounts or for additional information.
Test Your Knowledge
Test your knowledge with the following questions.
1. What type of journal does not have a balancing account on the line?
( ) Payment Journal
( ) Recurring General Journal
( ) General Journal
( ) Sales Journal
2. What does the following Document No. formula represent in a recurring journal: %4?
( ) Current month name
( ) Current month number
( ) Current accounting period name
( ) Current day number
3. On a Recurring General Journal, which Recurring Method must use allocations?
( ) Variable
( ) Reversing Variable
Microsoft Official Training Materials for Microsoft Dynamics ® Your use of this content is subject to your current services agreement
Finance Essentials in Microsoft Dynamics® NAV 2013
3 - 36
( ) Balance
( ) Fixed
4. To reverse a posted ledger entry, which of the following condition(s) must be met?
( ) The Journal Batch Name field must be blank.
( ) Customer and Vendor ledger entries must not be applied.
( ) Bank ledger entries can be either opened or closed by reconciliation.
( ) The total of the G/L entries must be greater than zero.
5. Regardless of whether the Correction check box is selected or cleared, what must be done when you post a correcting ledger entry in the general journal?
( ) Enter positive amounts in the Debit Amount field on the line.
( ) Enter the same sign as the original, incorrect entry in the Amount field on the line.
( ) Enter the opposite sign of the original, incorrect entry in the Amount field on the line.
( ) Enter negative amounts in the Credit Amount field on the line.
6. Which of the following results from posting a correction with the Correction check box selected?
( ) The original entry and correcting entry are posted to opposite sides of the account, one as a debit and the other as a credit.
( ) The original entry and the correcting entry are posted to the same side of the account, either as debits or credits.
( ) The correcting entry has a positive sign.
( ) Click here to enter text.
Microsoft Official Training Materials for Microsoft Dynamics ® Your use of this content is subject to your current services agreement

Module 3: General Journals
3 - 37
Test Your Knowledge Solutions
Module Review and Takeaways
1. What type of journal does not have a balancing account on the line?
( ) Payment Journal
(√) Recurring General Journal
( ) General Journal
( ) Sales Journal
2. What does the following Document No. formula represent in a recurring journal: %4?
(√) Current month name
( ) Current month number
( ) Current accounting period name
( ) Current day number
3. On a Recurring General Journal, which Recurring Method must use allocations?
( ) Variable
( ) Reversing Variable
(√) Balance
( ) Fixed
4. To reverse a posted ledger entry, which of the following condition(s) must be met?
( ) The Journal Batch Name field must be blank.
(√) Customer and Vendor ledger entries must not be applied.
( ) Bank ledger entries can be either opened or closed by reconciliation.
( ) The total of the G/L entries must be greater than zero.
Microsoft Official Training Materials for Microsoft Dynamics ® Your use of this content is subject to your current services agreement
Finance Essentials in Microsoft Dynamics® NAV 2013
3 - 38
5. Regardless of whether the Correction check box is selected or cleared, what must be done when you post a correcting ledger entry in the general journal?
( ) Enter positive amounts in the Debit Amount field on the line.
( ) Enter the same sign as the original, incorrect entry in the Amount field on the line.
(√) Enter the opposite sign of the original, incorrect entry in the Amount field on the line.
( ) Enter negative amounts in the Credit Amount field on the line.
6. Which of the following results from posting a correction with the Correction check box selected?
( ) The original entry and correcting entry are posted to opposite sides of the account, one as a debit and the other as a credit.
(√) The original entry and the correcting entry are posted to the same side of the account, either as debits or credits.
( ) The correcting entry has a positive sign.
( ) Click here to enter text.
Microsoft Official Training Materials for Microsoft Dynamics ® Your use of this content is subject to your current services agreement