
Module 3- Configure Computer Systems and Networks
102
Sector: INFORMATION AND COMMUNICATION TECHNOLOGY Qualification: COMPUTER HARDWARE SEVICING NC II Unit of Competency: CONFIGURE COMPUTER SYSTEMS & NETWORKS Module Title: CONFIGURING COMPUTER SYSTEMS & NETWORKS
-
Upload
bea-may-m-belarmino -
Category
Documents
-
view
3.952 -
download
18
description
Developed by: Alain C. Gallarde
Transcript of Module 3- Configure Computer Systems and Networks

Sector:
INFORMATION AND COMMUNICATION TECHNOLOGY
Qualification:COMPUTER HARDWARE SEVICING NC II
Unit of Competency:CONFIGURE COMPUTER SYSTEMS & NETWORKS
Module Title:
CONFIGURING COMPUTER SYSTEMS & NETWORKS
Technical Education and Skills Development Authority
SOUTHERN ISABELA COLLEGE OF ARTS AND TRADESSantiago City

SICAT-TESDA QA SYSTEM.
Computer Hardware Servicing NC II
Date Developed:November 10, 2010
Document No.:
Configuring Computer Systems & Networks
Developed by: Alain C. Gallarde
Issued by: Pageii of 85Revision No.:
Republic of the PhilippinesTECHNICAL EDUCATION AND SKILLS DEVELOPMENT AUTHORITY
Region 02
SOUTHERN ISABELA COLLEGE OF ARTS AND TRADESSantiago City

SUMMARY OF COMPETENCY-BASED LEARNING MATERIALS
1. Install computer systems and networks
Installing computer systems and networks
ELC724318
2. Diagnose and troubleshoot computer systems
Diagnosing and troubleshooting computer systems
ELC724319
3. Configure computer systems and networks
Configuring computer systems and networks
ELC724320
4. Maintain computer systems and networks
Maintaining computer systems and networks
ELC724321
SICAT-TESDA QA SYSTEM.
Computer Hardware Servicing NC II
Date Developed:November 10, 2010
Document No.:
Configuring Computer Systems & Networks
Developed by: Alain C. Gallarde
Issued by: Page1 of 85Revision No.:

HOW TO USE THIS MODULE
Welcome to the Module “Configuring Computer System and Networks”. This module contains training materials and activities for you to complete.
The unit of competency “Configure Computer System and Networks” contains knowledge, skills and attitudes required for a Computer Hardware Servicing NC II course.
You are required to go through a series of learning activities in order to complete each of the learning outcomes of the module. In each learning outcome there are Information Sheets, Operation Sheets, Job Sheet and Activity Sheets. Follow these activities on your own and answer the Self-Check at the end of each learning activity.
If you have questions, don’t hesitate to ask your trainer for assistance.
Recognition of Prior Learning (RPL)
You may already have some of the knowledge and skills covered in this module because you have:
o been working for some timeo already have completed training in this area.
If you can demonstrate to your trainer that you are competent in a particular skill or skills, talk to him/her about having them formally recognized so you don’t have to do the same training again. If you have a qualification or Certificate of Competency from previous trainings show it to your trainer. If the skills you acquired are still current and relevant to this module, they may become part of the evidence you can present for RPL. If you are not sure about the currency of your skills, discuss it with your trainer.
After completing this module ask your trainer to assess your competency. Result of your assessment will be recorded in your competency profile. All the learning activities are designed for you to complete at your own pace.
Inside this module you will find the activities for you to complete followed by relevant information sheets for each learning outcome. Each learning outcome may have more than one learning activity.
SICAT-TESDA QA SYSTEM.
Computer Hardware Servicing NC II
Date Developed:November 10, 2010
Document No.:
Configuring Computer Systems & Networks
Developed by: Alain C. Gallarde
Issued by: Page2 of 85Revision No.:

MODULE CONTENT
QUALIFICATION COMPUTER HARDWARE SERVICING NC IIUNIT OF
COMPETENCY Configure Computer Systems and Networks
MODULE TITLE Configuring Computer Systems and Networks
INTRODUCTION:
This unit covers the outcomes required in configuring computers systems and networks.
LEARNING OUTCOMES:1. Plan and prepare for configuration
2. Configure computer systems and networks
3. Inspect and test configured computer systems and networks
ASSESSMENT CRITERIA:1. Configured computer systems and networks identified from the Job/Service
Order or instructions.2. Planned and prepared job requirements.3. Followed OHS policies and procedures of job requirements.4. Checked computer systems and networks configuration with specified re-
quirements.5. Checked necessary tools, equipment materials6. Appropriate Personal Protective Equipment are used and OHS policies and
procedures followed7. Normal function of systems and networks checked in accordance with man-
ufacturer’s instructions8. Fault or problem in the systems and networks diagnosed in line with the
standard operating procedures.9. Computer systems and networks configured in line with the standard oper-
ating procedures.10. Final inspections are undertaken to ensure that the configuration done on
the systems and networks conforms with the manufacture’s instruction/manual
11. Computer systems and networks are checked to ensure safe operation.12. Report is prepared and completed according to company requirements.
Prerequisite: PC Operation
SICAT-TESDA QA SYSTEM.
Computer Hardware Servicing NC II
Date Developed:November 10, 2010
Document No.:
Configuring Computer Systems & Networks
Developed by: Alain C. Gallarde
Issued by: Page3 of 85Revision No.:
TECHNICAL TERMS
Bluetooth - wireless connection use to send and received messages
Coverall - apparel suit won to protect the body
E-mail - electronic messages we received via internet
Fax - abbreviation of facsimile; the electronic transmission of copies of documents for reproduction at a remote location.
Internet - abbreviation for internetwork. A set of corrupt networks made up of a large number of smaller networks.
Intranet - set of interconnected networks using the Internet Protocol
Modems - translates between digital signals that the computer uses, and analog signals suitable for transmission over telephone lines.
Network - interconnected group of computers
PDA - abbreviation for Personal Digital Assistant; a tiny pen-based palm top computer that combines fax, e-mail and simple word processing into an easy-to-use unit that fits, into pocket.
OHS - Occupational Health & Safety
Peer-to-peer network – a network architecture in which driver files and printers on every PC can be available to every other PC on the network.
Policies - approach, code, system, guidelines, theory, line
Server - any computer that makes access to files, printing, communications, or other services available users of the network.
Software - an application program or an operating system that computer execute
Storage Media - devices use to store data from the computer.
Topology - map of a network
USB - abbreviation of Universal Serial Bus
Wide Area Network – network that connects users across large distances, and other crosses the geographical boundaries of cities or state.
SICAT-TESDA QA SYSTEM.
Computer Hardware Servicing NC II
Date Developed:November 10, 2010
Document No.:
Configuring Computer Systems & Networks
Developed by: Alain C. Gallarde
Issued by: Page4 of 85Revision No.:

LEARNING OUTCOME #1
PLAN AND PREPARE FOR THE MAINTENANCE OF COMPUTER SYSTEMS AND NETWORKS.
CONTENTS: Plan/conduct maintenance procedures according to job requirements. Safety measures are observed at all times. Identify and diagnose faulty system. Prepare tools and test equipments. Identify or obtain PC specifications and schematic diagrams. Identify or obtain Network functions and specifications
ASSESSMENT CRITERIA:1. Maintenance planned and prepared with OHS policies and procedures.2. The materials, tools, equipments and testing devices obtained and checked.3. Computer systems and networks checked, identified and maintained with
specifications and requirements to conform with manufacturersCONDITION:Students/trainees must be provided with the following:
OHS guidelines and policies. PC specifications Network designs Schematic Diagrams Books/magazines Manuals
EVALUATION METHOD:
Hands-on Direct observation Practical demonstration
LEARNING OUTCOME SUMMARY
Learning Experiences
SICAT-TESDA QA SYSTEM.
Computer Hardware Servicing NC II
Date Developed:November 10, 2010
Document No.:
Configuring Computer Systems & Networks
Developed by: Alain C. Gallarde
Issued by: Page5 of 85Revision No.:
Learning Outcome 1Plan And Prepare For The Maintenance Of Computer Systems And Networks
Learning Activities Special Instructions1. Read information sheet
3.1-1 What is a Com-puter Network?
If you have some problem on the content of the information sheets don’t hesitate to approach your facilitator.If you feel that you are now knowledgeable on the content of the information sheets, you can now answer self check provided in the module.
2. Answer self-check 3.1-1 Compare your answer to the answer key 3.1-1. If you got 100% correct answer in this self-check, you can now move to the next information sheet. If not review the information sheet and go over the self-check again.
3. Read information sheet 3.1-2 “Appropriate Materials, Tools and Testing Devices used in Configuration Task”
If you have some problem on the content of the information sheet don’t hesitate to approach your facilitator.If you feel that you are now knowledgeable on the content of the information sheet, you can now answer self check provided in the module.
4. Answer self-check 3.1-2 Compare your answer to the answer key 2.1-2. If you got 100% correct answer in this self-check, you can now move to the next Learning Outcome. If not review the information sheet and go over the self-check again.
SICAT-TESDA QA SYSTEM.
Computer Hardware Servicing NC II
Date Developed:November 10, 2010
Document No.:
Configuring Computer Systems & Networks
Developed by: Alain C. Gallarde
Issued by: Page6 of 85Revision No.:

INFORMATION SHEET 3.1-1
What is a Computer Network?Learning Objective: After reading this INFORMATION SHEET, YOU MUST be able to be familiar with Computer Network.
A computer network is an interconnected group of computers.
Computer Network
In general, the term network can refer to any interconnected group or system. More specifically, a network is any method of sharing information between two systems (human or mechanical).
BENEFITS OF SHARING INFORMATION VIA NETWORK
In addition to reducing hardware costs by sharing expensive printers and other peripherals among multiple users, networks provide additional benefits to the users.
Software and data files can be shared for access by multiple users Electronic mail (email) can be sent and received Collaboration features allow contributions by multiple users to a single document Remote-control programs can be used to troubleshoot problems or show new users how to perform a task
SICAT-TESDA QA SYSTEM.
Computer Hardware Servicing NC II
Date Developed:November 10, 2010
Document No.:
Configuring Computer Systems & Networks
Developed by: Alain C. Gallarde
Issued by: Page7 of 85Revision No.:

SHARED HARDWARE COMPONENTS
Virtually any storage or output device can be shared over a network, but the most common devices to be used over a network include:
Printers Disk drives CD-ROM and optical drives Modems Fax Tape backup units
LOCAL AREA NETWORK (LAN)
A network covering a small geographic area, like a home, office, or building. Current LANs are most likely to be based on Ethernet technology. For example, a library will have a wired or wireless LAN for users to interconnect local devices (e.g., printers and servers) and to connect to the internet. All of the PCs in the library are connected by category 5 (Cat5) cable, running the IEEE 802.3 protocol through a system of interconnection devices and eventually connect to the internet. The cables to the servers are on Cat 5e enhanced cable, which will support IEEE 802.3 at 1 GB/s.
The staff computers (bright green) can get to the color printer, checkout records, and the academic network and the Internet. All user computers can get to the Internet and the card catalog. Each workgroup can get to its local printer. Note that the printers are not accessible from outside their workgroup.
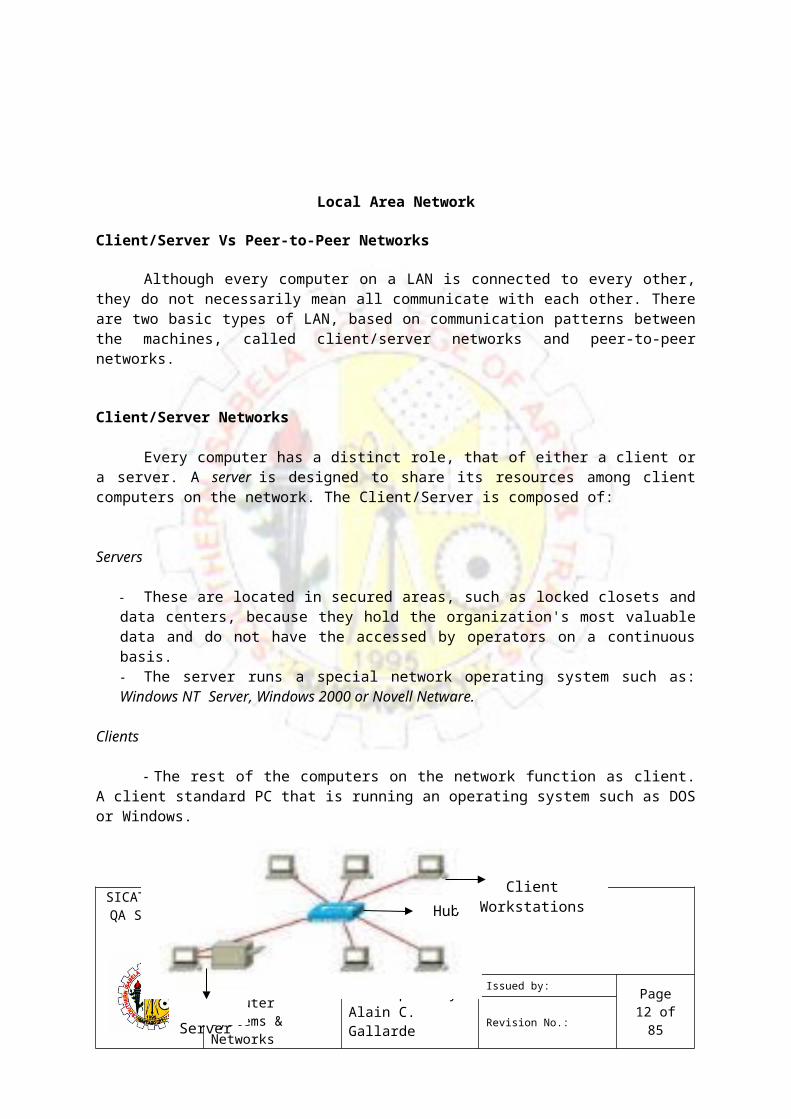
Local Area Network
Client/Server Vs Peer-to-Peer Networks
Although every computer on a LAN is connected to every other, they do not necessarily mean all communicate with each other. There are two basic
SICAT-TESDA QA SYSTEM.
Computer Hardware Servicing NC II
Date Developed:November 10, 2010
Document No.:
Configuring Computer Systems & Networks
Developed by: Alain C. Gallarde
Issued by: Page8 of 85Revision No.:
Hub
Server
Workgroup of Computers

types of LAN, based on communication patterns between the machines, called client/server networks and peer-to-peer networks.
Client/Server Networks
Every computer has a distinct role, that of either a client or a server. A server is designed to share its resources among client computers on the network. The Client/Server is composed of:
Servers
These are located in secured areas, such as locked closets and data centers, because they hold the organization's most valuable data and do not have the accessed by operators on a continuous basis. The server runs a special network operating system such as: Windows NT Server, Windows 2000 or Novell Netware.
Clients
- The rest of the computers on the network function as client. A client standard PC that is running an operating system such as DOS or Windows.
Example of Client/Server
Peer-to-Peer Network
In a peer-to-peer network, every computer is equal and can communicate with other computer on a network to which it has been granted access rights. Essentially, every computer in this network functions as both server and client. Peer-to-peer network can be as small as two computers as many as hundreds of units.
There is no theoretical limit to the size of a peer-to-peer network, performance drops significantly and security becomes a major headache on peer -based network with more than 10 computers. Also, Microsoft imposes a 10-
SICAT-TESDA QA SYSTEM.
Computer Hardware Servicing NC II
Date Developed:November 10, 2010
Document No.:
Configuring Computer Systems & Networks
Developed by: Alain C. Gallarde
Issued by: Page9 of 85Revision No.:
Hub
Server
Client Workstations

station limit on computers running Windows 2000 Professional who are sharing resources with other system. For this reason, it is better you switch to a client/server network when your network climbs to 10 stations.
INTERNETWORK
Two or more networks or network segments connected using devices that operate at layer 3 (the 'network' layer) of the OSI Basic Reference Model, such as a router. Any interconnection among or between public, private, commercial, industrial, or governmental networks may also be defined as an internetwork.
In modern practice, the interconnected networks use the Internet Protocol. There are at least three variants of internetwork, depending on who administers and who participates in them:
Intranet Extranet Internet
Intranets and extranets may or may not have connections to the Internet. If connected to the Internet, the intranet or extranet is normally protected from being accessed from the Internet without proper authorization. The Internet is not considered to be a part of the intranet or extranet, although it may serve as a portal for access to portions of an extranet.
Intranet
An intranet is a set of interconnected networks, using the Internet Protocol and uses IP-based tools such as web browsers and ftp tools, that is under the control of a single administrative entity. That administrative entity closes the intranet to the rest of the world, and allows only specific users. Most commonly, an intranet is the internal network of a company or other enterprise.
Extranet
An extranet is a network or internetwork that is limited in scope to a single organization or entity but which also has limited connections to the networks of one or more other usually, but not necessarily, trusted organizations or entities (e.g. a company's customers may be given access to some part of its intranet creating in this way an extranet, while at the same time the customers may not be considered 'trusted' from a security standpoint). Technically, an extranet may also be categorized as a CAN, MAN, WAN, or other
SICAT-TESDA QA SYSTEM.
Computer Hardware Servicing NC II
Date Developed:November 10, 2010
Document No.:
Configuring Computer Systems & Networks
Developed by: Alain C. Gallarde
Issued by: Page10 of 85Revision No.:

type of network, although, by definition, an extranet cannot consist of a single LAN; it must have at least one connection with an external network.
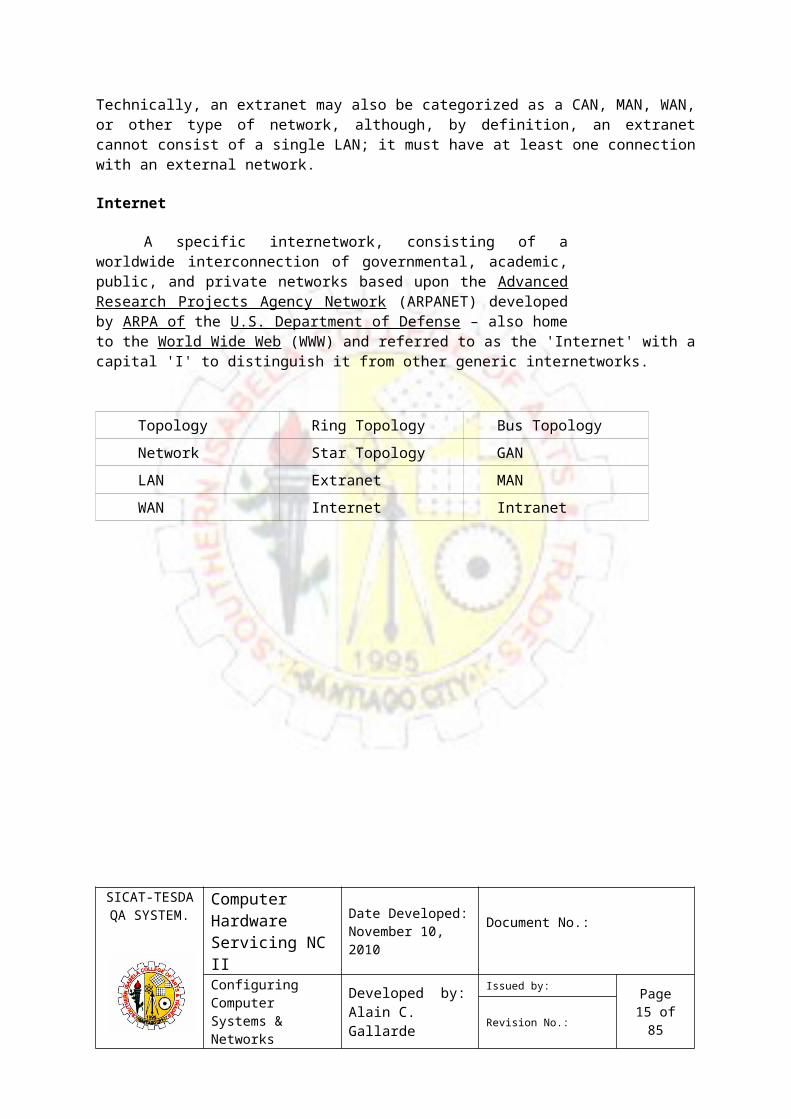
Internet
A specific internetwork, consisting of a worldwide interconnection of governmental, academic, public, and private networks based upon the Advanced Research Projects Agency Network (ARPANET) developed by ARPA of the U.S. Department of Defense – also home to the World Wide Web (WWW) and referred to as the 'Internet' with a capital 'I' to distinguish it from other generic internetworks.
Topology Ring Topology Bus Topology
Network Star Topology GAN
LAN Extranet MAN
WAN Internet Intranet
SICAT-TESDA QA SYSTEM.
Computer Hardware Servicing NC II
Date Developed:November 10, 2010
Document No.:
Configuring Computer Systems & Networks
Developed by: Alain C. Gallarde
Issued by: Page11 of 85Revision No.:
SELF-CHECK 3.1-1
I. Identify the following. Choose your answer from the grid below. Use a separate sheet of paper in answering.
______________ 1. The World Wide Web.______________ 2. The internal network of a company or other enterprise. ______________ 3. A model for supporting mobile communications across an
arbitrary number of wireless LANs.______________ 4. A data communications network that covers a relatively
broad geographic area.______________ 5. A network that connects two or more Local Area Networks
or Campus Area Networks together.______________ 6. It signifies the way in which intelligent devices in the
network see their logical relations to one another______________ 7. It is the interconnected group of computers.______________ 8. A network covering a small geographic area, like a home. ______________ 9. All the cables run from the computers to the central
location where they are all connected by hub.______________10. Each computer is connected to the next computer with the
last one connected to the first.
SICAT-TESDA QA SYSTEM.
Computer Hardware Servicing NC II
Date Developed:November 10, 2010
Document No.:
Configuring Computer Systems & Networks
Developed by: Alain C. Gallarde
Issued by: Page12 of 85Revision No.:

ANSWER KEY
Self-Check# 3.1-1
1. Internet2. Intranet3. GAN4. WAN5. MAN6. Topology7. Network8. LAN9. Star topology10. Ring topology
SICAT-TESDA QA SYSTEM.
Computer Hardware Servicing NC II
Date Developed:November 10, 2010
Document No.:
Configuring Computer Systems & Networks
Developed by: Alain C. Gallarde
Issued by: Page13 of 85Revision No.:

INFORMATION SHEET 3.1-2
Appropriate Materials, Tools and Testing Devices used in Configuration Task
Learning Objective: After reading this INFORMATION SHEET, YOU MUST be able to identify and use appropriate materials, tools and testing devices used in configuration task.
These are the following materials needed in the Configuration task:
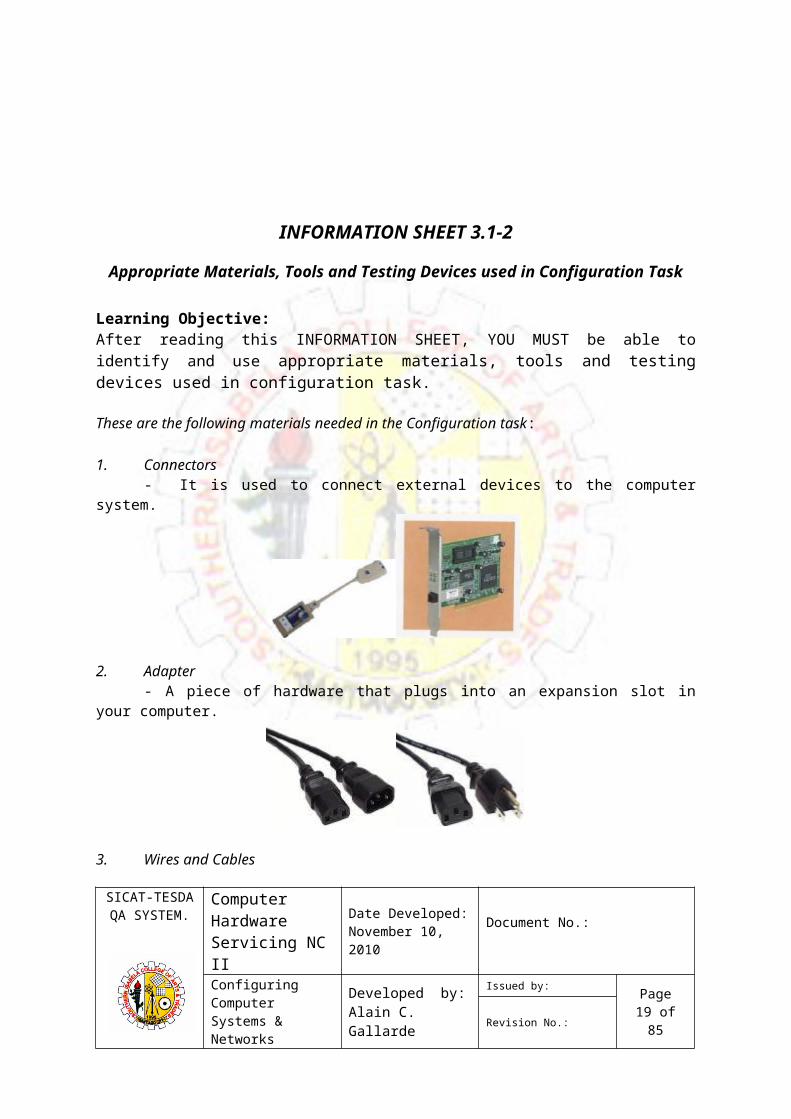
1. Connectors - It is used to connect external devices to the computer system.
2. Adapter- A piece of hardware that plugs into an expansion slot in your computer.
3. Wires and Cables- It is used to connect computers for network.
4. Appropriate software- This software packages are used to install new drivers needed in setting
up your computer.
SICAT-TESDA QA SYSTEM.
Computer Hardware Servicing NC II
Date Developed:November 10, 2010
Document No.:
Configuring Computer Systems & Networks
Developed by: Alain C. Gallarde
Issued by: Page14 of 85Revision No.:
5. Computer storage media- These help you in saving data and providing backup for your files such as
diskette, compact disc, flash drives and memory cards.
6. Reference book- These are books that will provide you topics about networking or related
books on computer.
7. Manuals- These provide you instructions for certain operation or task.
8. Cable tieSICAT-TESDA QA SYSTEM.
Computer Hardware Servicing NC II
Date Developed:November 10, 2010
Document No.:
Configuring Computer Systems & Networks
Developed by: Alain C. Gallarde
Issued by: Page15 of 85Revision No.:

- It is used to organized wires and cables used in connecting computers to avoid tangling.
These are the following tools/ testing devices needed in the configuration task:
1. Screw driversFlat screw driver is use to fasten negative slotted screws.
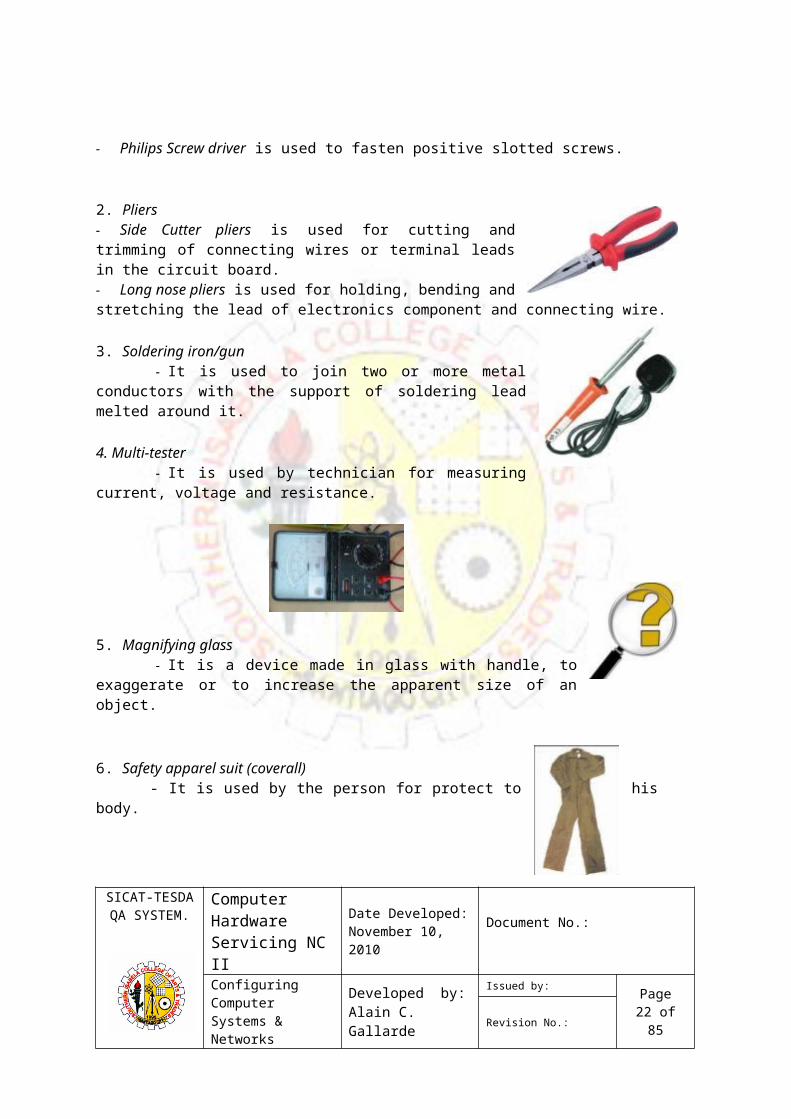
Philips Screw driver is used to fasten positive slotted screws.
2. Pliers Side Cutter pliers is used for cutting and trimming of connecting wires or terminal leads in the circuit board. Long nose pliers is used for holding, bending and stretching the lead of electronics component and connecting wire.
3. Soldering iron/gun It is used to join two or more metal conductors
with the support of soldering lead melted around it.
4. Multi-tester It is used by technician for measuring current,
voltage and resistance.
5. Magnifying glass It is a device made in glass with handle, to exaggerate
or to increase the apparent size of an object.
SICAT-TESDA QA SYSTEM.
Computer Hardware Servicing NC II
Date Developed:November 10, 2010
Document No.:
Configuring Computer Systems & Networks
Developed by: Alain C. Gallarde
Issued by: Page16 of 85Revision No.:

6. Safety apparel suit (coverall)- It is used by the person for protect to his body.
7. Anti-static wrist strap- It absorbs the static electricity of the material when
being hold by the hands.
8. Tweezers- It is used to hold the small sensitive part of the computer.
9. Mini-vacuum cleaner- It is used for cleaning sensitive parts of the computer.
Note: Apply safety precautions when handling the materials, tools and testing devices for safe keeping purposes and long lasting use.
SICAT-TESDA QA SYSTEM.
Computer Hardware Servicing NC II
Date Developed:November 10, 2010
Document No.:
Configuring Computer Systems & Networks
Developed by: Alain C. Gallarde
Issued by: Page17 of 85Revision No.:

SELF-CHECK 3.1-2
I. Identify the following. Use a separate sheet of paper in answering.
______________ 1. It is a tool used to hold the small sensitive parts of computer.
______________ 2. A device made in glass with handle, to exaggerate or to increase the apparent size of an object.
______________ 3. It is an instrument used by technician for measuring current, voltage and resistance.
______________ 4. It is a tool used for cutting and trimming of connecting wires or terminal leads in the circuit board.
______________ 5. It is a tool used to join two or more metal conductors with the support of soldering lead melted around it.
______________ 6. It is a material used to organize wires and cables used in connecting computers to avoid tangling.
______________ 7. These are the materials that are used in saving data and providing backup for your files such as diskette, compact disc, flash drives and memory cards.
______________ 8. It is a piece of hardware that plugs into an expansion slot in your computer.
______________ 9. It is a reference material that provides you instructions for certain operation or task.
______________ 10. It is a tool used for holding, bending and stretching the lead of electronics component and connecting wire.
SICAT-TESDA QA SYSTEM.
Computer Hardware Servicing NC II
Date Developed:November 10, 2010
Document No.:
Configuring Computer Systems & Networks
Developed by: Alain C. Gallarde
Issued by: Page18 of 85Revision No.:
Answer Key 3.1-2
tweezers magnifying glass multi-tester side-cutter pliers soldering iron cable tie Computer Storage device adapter manuals long nose pliers
LEARNING OUTCOME SUMMARY
SICAT-TESDA QA SYSTEM.
Computer Hardware Servicing NC II
Date Developed:November 10, 2010
Document No.:
Configuring Computer Systems & Networks
Developed by: Alain C. Gallarde
Issued by: Page19 of 85Revision No.:

LEARNING OUTCOME #2
Configure a Computer System and Networks
CONTENTS: Occupational health and safety Testing normal function of systems and networks Procedures in checking the faults or problems Procedures in configure systems and networks
ASSESSMENT CRITERIA:1. Appropriate Personal Protective Equipment are used and OHS policies and
procedures followed2. Normal function of systems and networks checked in accordance with manu-
facturer’s instructions3. Fault or problem in the systems and networks diagnosed in line with the stan-
dard operating procedures.4. Computer systems and networks configured in line with the standard operat-
ing procedures..CONDITION:Trainees must be provided with the following:
1. WORKPLACE LOCATION2. EQUIPMENT3. Tools
Server Peripherals Desktop ComputersPolicies and procedures: Procedures and guidelines Safety precautionsAnti-static wrist wrap Pliers Philips screw driverWires and Cables Appropriate Software Computer Storage Media
EVALUATION METHOD:1. Hands-on2. Direct observation3. Practical demonstration
Learning Experiences
SICAT-TESDA QA SYSTEM.
Computer Hardware Servicing NC II
Date Developed:November 10, 2010
Document No.:
Configuring Computer Systems & Networks
Developed by: Alain C. Gallarde
Issued by: Page20 of 85Revision No.:

Learning Outcome 2Configure a Computer System and Networks
Learning Activities Special Instructions1. Read
information sheet 3.2-1 ” Configuring the Computer Systems and Network “
If you have some problem on the content of the information sheet don’t hesitate to approach your facilitator.If you feel that you are now knowledgeable on the content of the information sheet, you can now answer self check provided in the module.
2. Answer self-check 3.2-1 Compare your answer to the answer key 3.2-1. If you got 100% correct answer in this self-check, you can now perform Job Sheet 3.2-1. If not review the information sheet and go over the self-check again.
3. Perform Job Sheet 3.2-1 Networking & File & Printer Sharing
Compare your task to the performance checklist. If you got 100% correct answer in this task, you can now move to the next information sheet. If not review the information sheet and go over the task again.
4. Read information sheet 3.2-2 “Common Faults and Problems of Computer”
If you have some problem on the content of the information sheet don’t hesitate to approach your facilitator.If you feel that you are now knowledgeable on the content of the information sheet, you can now answer self-check provided in the module.
5. Answer self-check 3.2-2
Compare your answer to the answer key 3.2-2. If you got 100% correct answer in this self-check, you can now perform Task Sheet 3.2-1. If not review the information sheet and go over the self-check again.
6. Do Task Sheet 3.2-1 Identifying Common Faults and Errors of Computer
Compare your work to the Performance Checklist. If you got 100% correct answer in this task, you can now move to the next information sheet. If not review the information sheet and go over the task again.
SICAT-TESDA QA SYSTEM.
Computer Hardware Servicing NC II
Date Developed:November 10, 2010
Document No.:
Configuring Computer Systems & Networks
Developed by: Alain C. Gallarde
Issued by: Page21 of 85Revision No.:
5. Read information sheet 3.2-3 “How to Configure a Peer Network in Windows”
If you have some problem on the content of the information sheet don’t hesitate to approach your facilitator.If you feel that you are now knowledgeable on the content of the information sheet, you can now answer self check provided in the module.
6. Answer self-check 3.2-3 Compare your answer to the answer key 3.2-3. If you got 100% correct answer in this self-check, you can now perform Task Sheet 3.2-2. If not review the information sheet and go over the self-check again.
7. Do Task Sheet 3.2-2 Set-ting XP Network Connection
Compare your work to the Performance Checklist. If you got 100% correct answer in this task, you can now move to the next information sheet. If not review the information sheet and go over the task again.
8. Read information sheet 3.2-4 “Accidental Event Checklist”
If you have some problem on the content of the information sheet don’t hesitate to approach your facilitator.If you feel that you are now knowledgeable on the content of the information sheet, you can now answer self check provided in the module.
9. Answer self-check 3.2-4 Compare your answer to the answer key 3.2-4. If you got 100% correct answer in this self-check, you can now perform Task Sheet 3.2-3. If not review the information sheet and go over the self-check again.
10. Do Task Sheet 3.2-3
Accident Report
Compare your work to the Performance Checklist. If you got 100% correct answer in this task, you can now move to the next Learning Outcome. If not review the information sheet and go over the task again.
SICAT-TESDA QA SYSTEM.
Computer Hardware Servicing NC II
Date Developed:November 10, 2010
Document No.:
Configuring Computer Systems & Networks
Developed by: Alain C. Gallarde
Issued by: Page22 of 85Revision No.:

INFORMATION SHEET 3.2-1
Configuring the Computer Systems and Network
Learning Objective: After reading this INFORMATION SHEET, YOU MUST be able to Configuring the Computer Systems and Network
How to Set Up a Computer from Scratch
Setting up a computer may seem like a daunting task, but it is really very simple. The brand of computer doesn't matter, as almost all computers are set up the same way. If you are setting up a new computer, odds are there is a quick start guide in the box that will have pictures and step by step details.
Instructions1. Unpack the monitor and tower and situate the monitor where you will
be most comfortable when working or surfing the Internet. Plug the monitor into the back of the tower. Unpack and connect the keyboard and mouse. Next, plug in the speakers.
2. Plug the monitor, tower and speaker electrical plugs into the surge pro-tector strip. Next, power on the monitor, the tower and then speakers, making sure the volume is turned rather low. Once the system is pow-ered up, you will begin customizing windows.
3. Customizing windows is very simple and each step is self-explanatory. You will be setting up the region and language settings, personalizing the software, entering your product key, naming the computer and as-signing an administrator password and setting the date and time.
4. The network settings will depend on whether you have a network of other computers you will need to connect to or not. If you are connect-ing to a network, use the typical settings if you are a beginner. Select custom settings if you are an advanced user and know how to manually configure the components needed for your network.
5. If you are connecting to a network you will need to enter the name of the network domain. All computers on a network need to have the same domain name to communicate. If you are not connecting to a network, accept the default and click "Next."
6. Windows will complete installation and then ask you about protec-tion and whether or not you would like to turn on automatic updates. Windows will then ask how you choose to connect to the Internet so that it can activate windows and register your copy.
SICAT-TESDA QA SYSTEM.
Computer Hardware Servicing NC II
Date Developed:November 10, 2010
Document No.:
Configuring Computer Systems & Networks
Developed by: Alain C. Gallarde
Issued by: Page23 of 85Revision No.:

7. Once Windows is up and running you should connect your printer and other peripherals. Printers do not all install the same way, so you will need to review your printer instructions before attempting setup. After you have completed installation and setup of your printer, install any other devices such as a scanner
Customize a Computer DesktopA computer desktop can be customized to an individual’s specific needs. While one person may want quick access to certain files or applications, someone else is sure to have different needs. Everyone has their own tastes in images, the number of files accessible from the desktop and practically any detail can be customized.
InstructionsThings You'll Need:
Computer How to Customize a Computer Desktop
1. Select your background. From the start menu, go to Control Panel and then click “Appearance and Themes.”
2. Click “Change the Desktop Background.”3. Choose a standard background by scrolling through the list of available
backgrounds. As you click each one, you can view how it will look on your desktop. If you’d like to use an image from your pictures file rather than a standard background, click “Browse” which will take you to your pictures folder.Choose Folders to Display on Desktop
4. Click "Customize Desktop" from the “Change Desktop Background” popup.
5. Choose which folders or applications you'd like to have shown on your desktop. You can also restore the original settings and set up automatic desktop cleanup.
6. Click on the Web tab to select any web pages you’d like to access from your desktop.
7. Move any additional folders from the My Documents folder to the Desktop folder if you’d like to have access to them from your desktop.
Change Display Settings in Windows XP
The display settings for Windows XP determine the screen resolution and color quality that is displayed on your monitors. The "Display Properties" dialog box is used to adjust these two components so you can get the look you want for Windows XP.
Difficulty: Easy
SICAT-TESDA QA SYSTEM.
Computer Hardware Servicing NC II
Date Developed:November 10, 2010
Document No.:
Configuring Computer Systems & Networks
Developed by: Alain C. Gallarde
Issued by: Page24 of 85Revision No.:

Instructions
Things You'll Need: Windows XP Operating System
1. Click the "Start" button on the bottom left of your computer to display the Start menu. Choose the "Control Panel" option from the right side of the Start menu. The "Control Panel" window will open onto your desktop.
2. Double-click the "Display" icon from the Control Panel to open the "Dis-play Properties" dialog box. You can then select the "Settings" tab from the top of the dialog box.
3. Slide the bar under the "Screen resolution" setting of the "Display Prop-erties" dialog box to decrease or increase the screen resolution. The chosen resolution will be displayed under the sliding bar.
4. Use the "Color quality" drop-down list to choose the type of quality you want your computer to use. You can choose to have the color quality be "Medium," "High" or "Highest."
5. Click the "Apply" button at the bottom of the "Display Properties" dia-log box to apply the settings. If you are not happy with the settings you can change them as instructed in the steps above.
6. Choose the "OK" button when you are happy with your display setting changes. The "Display Properties" dialog box will close and the settings will be saved
Configure a Computer's Memory Settings
I want to do ths!
The memory that is installed on a computer helps determine its performance (how fast or slow its processing speed is). Your computer's memory settings oftentimes can affect how your computer runs, so if you're experience sluggish performance, perhaps you should adjust your memory settings. Therefore, making sure your computer is equipped for maximum performance is essential for a fast-operating computer that
SICAT-TESDA QA SYSTEM.
Computer Hardware Servicing NC II
Date Developed:November 10, 2010
Document No.:
Configuring Computer Systems & Networks
Developed by: Alain C. Gallarde
Issued by: Page25 of 85Revision No.:

executes tasks quickly. Sometimes, if multiple tasks are running and consuming a lot of your computer's memory, your manufacturer pre-settings might not be very satisfactory. Not to worry, however, because you can configure a computer's memory settings to the most optimum level for your computing needs.
Instructions1. Click the "My Computer" icon located on your desktop, and then select
"Properties" from the drop-down menu that appears.2. Click the "Advanced" tab, which is located inside the "System Prop-
erties" window that appears upon clicking "Properties."3. Click "Settings," which is located in the "Performance" section of the
"Advanced" tab.4. Click "Advanced" within the "Performance Options" window that ap-
pears upon clicking "Settings."5. Click "Change," which is located within the "Virtual Memory" section of
the "Advanced" tab located in the "Performance Options" window.6. Click on "System Managed Size" to set the memory settings recom-
mended for your computer by your manufacturer, or configure your own memory settings by clicking on "Custom."
Set Up a Local Area Network
A local area network, or LAN for short, is a group of interconnected computers that can share data among one another. Almost always, LANs are set up using Ethernet cables connecting Ethernet cards installed on each computer to a hub, switch or router. This joining device must have enough ports on it so that all computers to be connected to the LAN can plug into it. A LAN may, but need not by definition, provide access to the Internet.
Instructions
Things You'll Need: Ethernet cables Ethernet hub/switch Computers with Ethernet cards
1. Shut off all computers to be networked.2. Connect all computers to a hub or switch using Ethernet cords. If you
plan on connecting the computers to the Internet through a main gate-way computer, that computer will need two Ethernet adapters in-stalled: one to receive the incoming signal from a modem and one to connect to the hub.
3. Plug in the hub or switch.4. Turn on all of the computers.
SICAT-TESDA QA SYSTEM.
Computer Hardware Servicing NC II
Date Developed:November 10, 2010
Document No.:
Configuring Computer Systems & Networks
Developed by: Alain C. Gallarde
Issued by: Page26 of 85Revision No.:

5. Run the network setup wizard on each computer. To access the wizard, go to the "Start" menu and click on "Network," or "Network Connec-tions." Depending on if you are running Windows XP or Vista, things may be labeled differently, but under Network Connections there should be buttons for sharing Internet connections or setting up a net-work that open the network setup wizard. The wizard will take you through a relatively simple process and configure the computers for networking.
6. Restart all computers on the network.
Change Workgroup and Computer Name
A Windows XP workgroup connects computers in a network in order to share files. A workgroup also connects hardware, such as printers and scanners.
Instructions
1. Set up a Windows XP workgroup on your PC. Click the "Start" menu in the lower left-hand corner of your WIndows XP screen and select "My Computer."
2. Right-click on the icon for "My Computer." Click "Properties" in the pop-up menu. A "System Properties" window will appear on the screen.
3. Click the tab for "Computer Name." Click the "Change" button at the bottom of the window.
4. Enter a name for the Windows XP workgroup and computer Name. It is important to remember this name. Click "OK."
5. Restart computer.
How to Setup a Static IP Address (Win XP)
I want to do this!
SICAT-TESDA QA SYSTEM.
Computer Hardware Servicing NC II
Date Developed:November 10, 2010
Document No.:
Configuring Computer Systems & Networks
Developed by: Alain C. Gallarde
Issued by: Page27 of 85Revision No.:
This guide will show the user how to set up a static IP address in Windows XP.
By default most broadband internet service providers automatically assign your computer a new IP address
every time it boots up. This is called a Dynamic IP address.
A static IP address assigns one permanent IP to your computer. This is useful if you want to host a
website, access your computer remotely, or run any kind of server.
Instructions
Things You'll Need:
PC with Windows XP Broadband Internet Access Pencil and paper
1. First you'll need to take down some IP information so if you don't have something to write with open up notepad.
Click on the Start Menu then select Run. A window like this one should appear. In this window type "command" and press enter.
2. A black DOS screen should appear. Type "ipconfig /all" in the DOS prompt and press enter. All your IP information should generate. This is a helpful command to know if you ever have to find your IP address or other info about your in-ternet connection.Be sure to write down your IP Address, Subnet Mask, De-fault Gateway, and both DNS servers. After your are done type "exit" and press enter to exit the DOS window.(Note: If both DNS server addresses are the same then they are just proxy num-bers used by your router and you will have to either log onto your router status page or call your ISP and ask for your DNS or Name server addresses.)
3. Now click "Start" and open up the "Control Panel." Select "Net-work Connections" and right click on the connection you use and select "Properties."
4. A window like this one should appear. Select "Internet Proto-col (TCP/IP)" and click on Properties.
5. window like the one pictured will pop up. "Obtain an IP ad-dress automatically," should be selected. If it isn't then con-gratulations, you have a static IP already. Select "Use the following IP address." En-ter the following:
IP Address -- Type in the IP address you wrote down but change the last digit to a number between 1 and 255. For example, if
SICAT-TESDA QA SYSTEM.
Computer Hardware Servicing NC II
Date Developed:November 10, 2010
Document No.:
Configuring Computer Systems & Networks
Developed by: Alain C. Gallarde
Issued by: Page28 of 85Revision No.:

your IP address is "192.168.1.1" you would enter "192.168.1.11" or "192.168.1.101"Subnet Mask / Default Gateway -- Enter these exactly as you copied them down.
6. Next click "Use the following DNS server addresses" and add the DNS servers you copied down or found in your router settings.After you've entered all the information your screen should look something like the picture to the left.
7. Now make sure you can connect to the internet and congratulations! You now have a static IP address! If you can't connect to the internet the most common problem is the DNS servers. Make sure your DNS servers are correct. If you can't find your router settings just call your ISP and they should be able to give you your DNS or Name Servers.
Share a Printer Between Desktop & Wireless Laptop
Different printer models allow you to share a printer between a desktop and a wireless laptop computer. If you have a desktop computer somewhere in the house and you want to print from a laptop in another part of the house, you can share a printer between the computers so you won't have to send files between two computers. Find out how you can share one printer between a desktop and laptop computers.
Instructions
Things You'll Need: Desktop computer Printer Printer driver Router Laptop computer
1. Load the printer driver onto both computers. This allows the com-puter to be able to read and connect to the printer. The driver is in-cluded in the printer installation CD and is automatically installed when you choose "Autorun."
2. Establish a network between two computers. If you already have an Internet connection, it is most likely that the laptop and desktop are al-ready in a network. Go to the master computer (the one directly con-nected to the printer). On the control panel, click "Printers and faxes." Select the printer you want to share, right click on it and select "Proper-ties." Click on the "Sharing" tab and share the printer. Change the "Share name" to a name you want such as "Home computer" and write this down. Click on the button that says, "Enable file and printer shar-ing."
SICAT-TESDA QA SYSTEM.
Computer Hardware Servicing NC II
Date Developed:November 10, 2010
Document No.:
Configuring Computer Systems & Networks
Developed by: Alain C. Gallarde
Issued by: Page29 of 85Revision No.:

3. On the other computer, open the control panel and click on "Printers and faxes" to change the printer settings. Add the printer by choosing "add printer." Shortly, the "Add printer" wizard will pop up and will guide you through the process, making connection between the two printers easier. If you are asked for the name of the computer you want to connect to, be sure to use the exact name that you assigned the other computer (i.e. "Home computer," or whatever name you chose).
4. Test the connection by printing a test page. If it doesn't work, the first thing to check is that you have the correct computer name on the wireless laptop.
How to install a wired network adapter
To connect to a network, your computer needs a network adapter. Fortunately, most computer manufacturers know that connecting to the Internet or other computers is important to computer users, and they include a network adapter with your computer.
If you need to add a network adapter, first choose which method you want to use to install it. Most people prefer to use a USB (Universal Serial Bus) network adapter, because it's easy to install. If you have a portable computer, you might find a CardBus (also known as PCMCIA or PC Card) or CF network adapter better meets your needs. If you have a desktop computer with the proper amount of available space, you may also have the option of adding an internal network adapter.
The instructions you follow to install a network adapter depend on how you connect it.
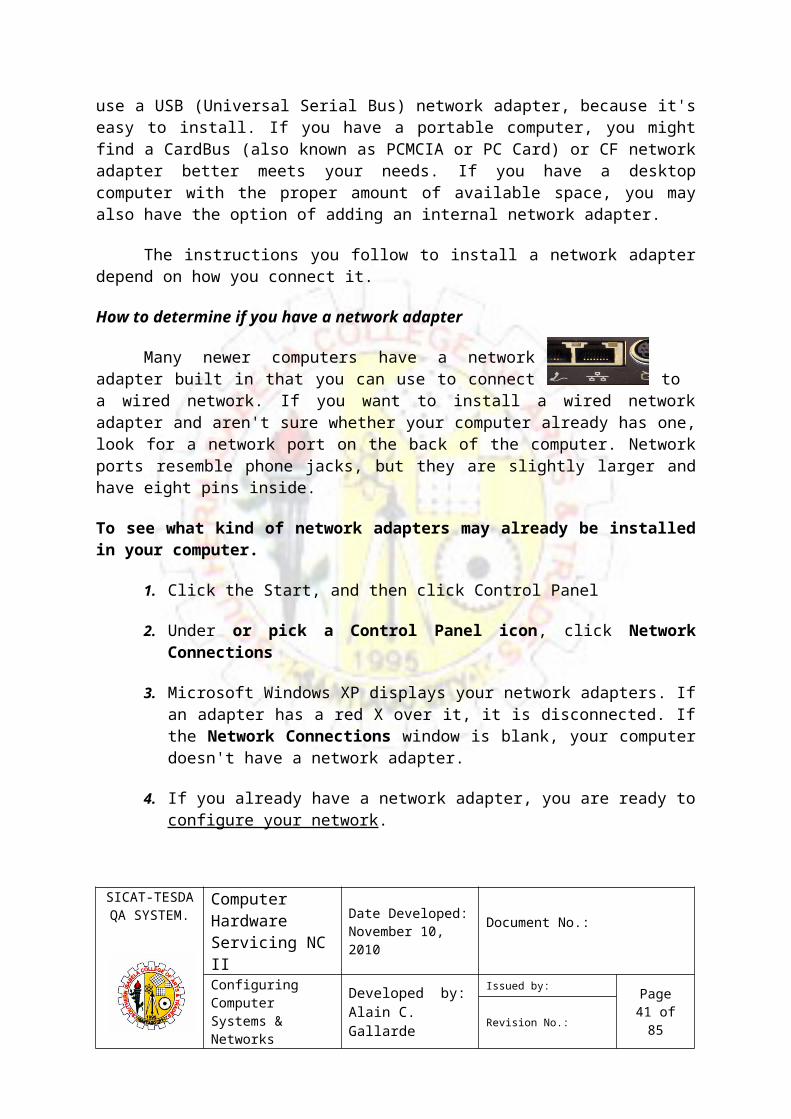
How to determine if you have a network adapter
Many newer computers have a network adapter built in that you can use to connect to a wired network. If you want to install a wired network adapter and aren't sure whether your computer already has one, look for a network port on the back of the computer. Network ports resemble phone jacks, but they are slightly larger and have eight pins inside.
To see what kind of network adapters may already be installed in your computer.
1. Click the Start, and then click Control Panel
SICAT-TESDA QA SYSTEM.
Computer Hardware Servicing NC II
Date Developed:November 10, 2010
Document No.:
Configuring Computer Systems & Networks
Developed by: Alain C. Gallarde
Issued by: Page30 of 85Revision No.:

2. Under or pick a Control Panel icon, click Network Connections
3. Microsoft Windows XP displays your network adapters. If an adapter has a red X over it, it is disconnected. If the Network Connections window is blank, your computer doesn't have a network adapter.
4. If you already have a network adapter, you are ready to configure your network.
How to install a wired USB network adapter
Once you have the adapter…
If your USB network adapter came with software, insert the CD or floppy disk into your computer, and follow the manufacturer's instructions to install the software.
Find an available USB port on your computer.
Note: If you need to move your computer to reach the USB ports, you should shut down Windows to avoid damaging your computer. If you can easily reach a USB port, you need not
shut down your computer.
If you do not have an unused USB port, connect a USB hub to add additional ports. Then connect your USB network adapter to the unused USB port.
Connect the network cable to the network adapter.
5. Connect the other end of the network cable to your networking equipment.
6. If you had to shut down your computer to get to the USB port, you can now turn on your computer. Windows detects and installs the new hardware, and then displays a notification informing you that the hardware has been successfully installed.
5
SICAT-TESDA QA SYSTEM.
Computer Hardware Servicing NC II
Date Developed:November 10, 2010
Document No.:
Configuring Computer Systems & Networks
Developed by: Alain C. Gallarde
Issued by: Page31 of 85Revision No.:

Sharing Resources and Accessing Shared Resources
1. Open My Computer, double-click the C: drive, and create a new folder on the C: drive. Name it Shared. Right-click the Shared folder and select Properties.
2. In the Shared Properties dialog box, select the Sharing tab. Notice that the. Select the Share This Folder button. Type the Share Name. Click Apply and the computer you are linked to should be able to view your Shared folder.
2. Right-click My Network Places, which should be located on your desktop. Select Properties. Right-click your connection (look for a name like Local Area Connection) and again select Properties. In your Local Area Connection Properties dialog box, select File and Print Sharing for Microsoft Networks and click OK. If you don’t see an option for File and Print Sharing, click Install and select a service and then click Add. Now select the File and Print Sharing option.
3. Open My Network Places- double-click the icon- and select the Entire Network option under Other Places at the left of the window. In the main (right-hand) pane, you should see one or more options. Double-click the
SICAT-TESDA QA SYSTEM.
Computer Hardware Servicing NC II
Date Developed:November 10, 2010
Document No.:
Configuring Computer Systems & Networks
Developed by: Alain C. Gallarde
Issued by: Page32 of 85Revision No.:

4. You’re now at the main network screen, where you should see what’s called a workgroup. A workgroup is a basic group of computers connected to the same Ethernet network. Double-click the workgroup to see all the computers connected to your Ethernet network.
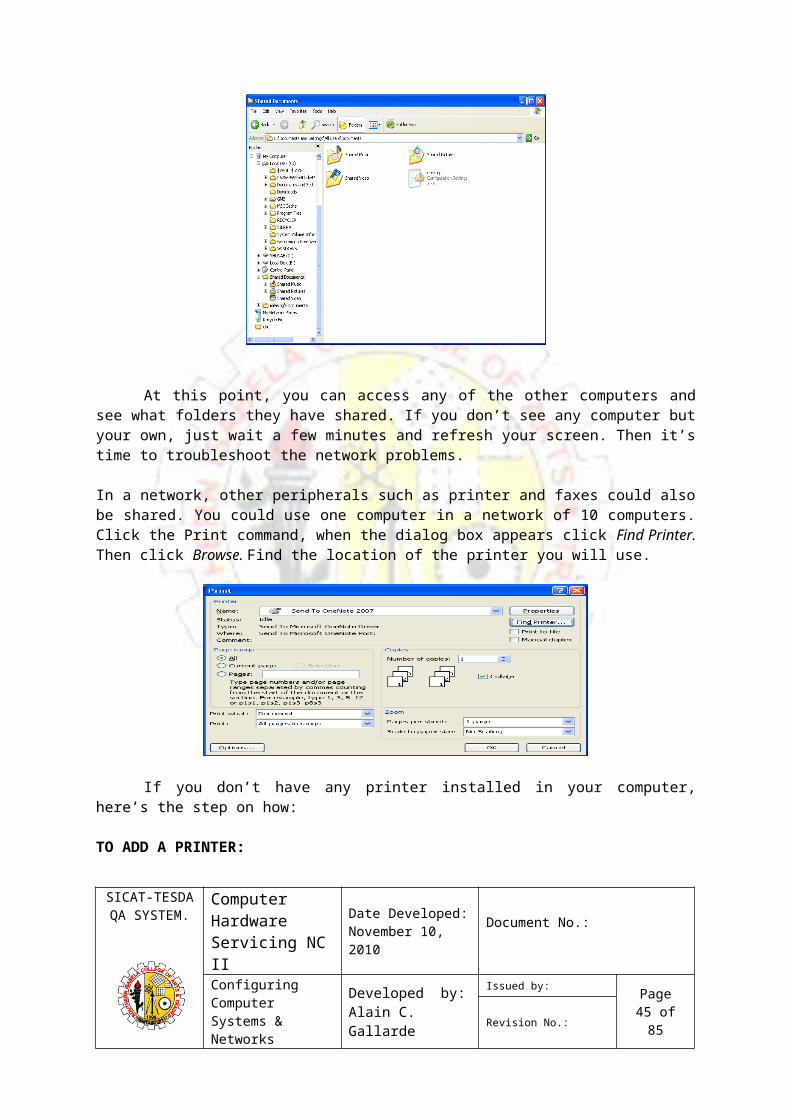
At this point, you can access any of the other computers and see what folders they have shared. If you don’t see any computer but your own, just wait a few minutes and refresh your screen. Then it’s time to troubleshoot the network problems.
In a network, other peripherals such as printer and faxes could also be shared. You could use one computer in a network of 10 computers. Click the Print command, when the dialog box appears click Find Printer. Then click Browse. Find the location of the printer you will use.
SICAT-TESDA QA SYSTEM.
Computer Hardware Servicing NC II
Date Developed:November 10, 2010
Document No.:
Configuring Computer Systems & Networks
Developed by: Alain C. Gallarde
Issued by: Page33 of 85Revision No.:
Local Disk (C:\PC 1)

If you don’t have any printer installed in your computer, here’s the step on how: TO ADD A PRINTER:
1. Click Start button, then point to Printer and Faxes.
2. A window will be displayed showing Click Add a Printer on the Taskpane (if there are printers already installed).
3. To continue, click Next.
SICAT-TESDA QA SYSTEM.
Computer Hardware Servicing NC II
Date Developed:November 10, 2010
Document No.:
Configuring Computer Systems & Networks
Developed by: Alain C. Gallarde
Issued by: Page34 of 85Revision No.:

4. Select what kind of printer you are going to connect, Local printer or Network printer.
5. Select Printer port.
6. Below Manufacturer, Click on the name of the printer's manufacturer. Man-ufacturers are listed in alphabetical order and you may have to click on the little down arrow until the manufacturer's name appears in the list.
SICAT-TESDA QA SYSTEM.
Computer Hardware Servicing NC II
Date Developed:November 10, 2010
Document No.:
Configuring Computer Systems & Networks
Developed by: Alain C. Gallarde
Issued by: Page35 of 85Revision No.:

Below Model, Click on the model of the printer you will be using. Model names are listed in alphabetical order and you may need to click on the little down arrow until the model name appears in the list.
Note: You can often find the manufacturer and model names by looking on the printer itself.
7. Click the Next button. Windows will check to see if it has the software nec-essary to communicate with the printer (the software your computer needs to communicate with devices like printers, monitors, and disk drives is known as a driver). If so, it will install the software automatically.
Note: If you receive a message saying that Windows was unable to locate the necessary files, you will need to get the necessary software before continuing. Most often, the printer manufacturer's Web site will have a section called Drivers, from which you can download the software necessary to use their products. If you are unable to locate the software on the manufacturer's Web site, inquire within your department to see if someone is in possession of a software installation disk for the printer. Once you have obtained the necessary software, click here for instructions on installing a driver.
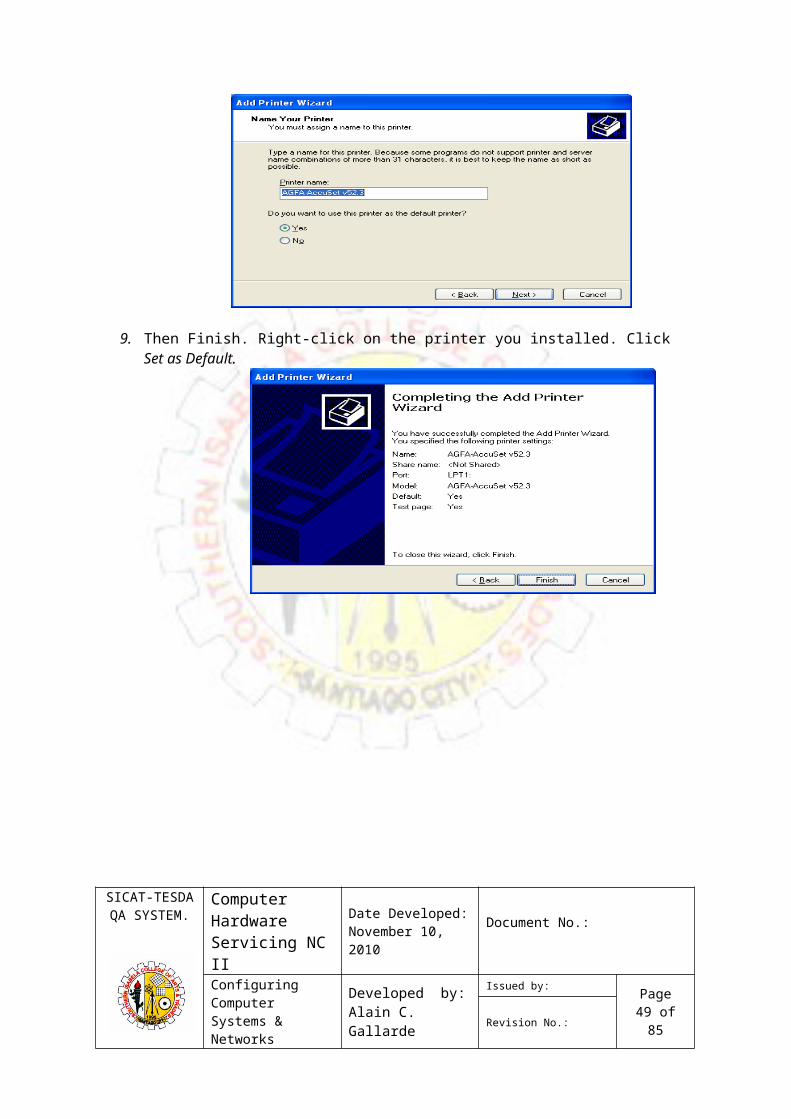
8. Assign your Printer name. Click Next. If you want to test page, click Yes. Click Next.
SICAT-TESDA QA SYSTEM.
Computer Hardware Servicing NC II
Date Developed:November 10, 2010
Document No.:
Configuring Computer Systems & Networks
Developed by: Alain C. Gallarde
Issued by: Page36 of 85Revision No.:

9. Then Finish. Right-click on the printer you installed. Click Set as Default.
SELF CHECK 3.2-1
SICAT-TESDA QA SYSTEM.
Computer Hardware Servicing NC II
Date Developed:November 10, 2010
Document No.:
Configuring Computer Systems & Networks
Developed by: Alain C. Gallarde
Issued by: Page37 of 85Revision No.:

TRUE OR FALSE: Write T if the statement is True and F if the statement is False.
____1. Setting up a computer may seem like a daunting task, but it is really very simple.
____2. A computer desktop can’t be customized to an individual’s specific needs.
____3. The display settings for Windows XP determine the screen resolution and color quality that is displayed on your monitors.
____4. Your computer's memory settings oftentimes can affect how your computer runs.
____5. A Windows XP workgroup connects computers in a network in order to hide files.
Answer Key
SICAT-TESDA QA SYSTEM.
Computer Hardware Servicing NC II
Date Developed:November 10, 2010
Document No.:
Configuring Computer Systems & Networks
Developed by: Alain C. Gallarde
Issued by: Page38 of 85Revision No.:

1. T2. F3. T4. T5. F
SICAT-TESDA QA SYSTEM.
Computer Hardware Servicing NC II
Date Developed:November 10, 2010
Document No.:
Configuring Computer Systems & Networks
Developed by: Alain C. Gallarde
Issued by: Page39 of 85Revision No.:
Job Sheet 3.2-1
Title : Networking & File & Printer SharingPerformance Objective : Given a working personal computer you are going to network using hub and then Change the computer name and workgroup, assign static IP address add printer and perform printer sharing.
Supplies, Tools & Equipment : Working PC Server LAN Cable Hub/Switch Printer
Steps/ Procedure:1. Start Computer2. Change workgroup and computer name based on the servers
Workgroup.3. Assign Static IP Address4. Check the connectivity5. Add servers printer6. Share Servers Printer7. Create document in your workstation8. Save and share the document
Print document from your computer to servers printer.
Assessment Method: Demonstration , Performance Criteria checklist
Performance Criteria Checklist 3.2-1
CRITERIA Ye No
Did you… s Started the computer properlyChanged workgroupChanged computer nameAssigned IP AddressInstalled printerMade printer sharingConnected to the serverCreated documentShared documentPrinted DocumentFollowed safety procedures
INFORMATION SHEET 3.2-2
Common Faults and Problems of Computer
Learning Objective: After reading this INFORMATION SHEET, YOU MUST be able to identify Common Faults and Problems of Computer

Today's computers have faster microprocessors, more memory and bigger hard drives. When you think about the differences between a Pentium 4 and 386, you have to conclude the improvement is astounding! But when error attacks our computer we have to do something for the computers to survive. Here are some of the common faults and problems that we may encounter:
1. Why computer becomes slow?
You need more memory.
Don't overlook the obvious. Up until recently not having enough memory wasn't a problem. With the price of RAM becoming very affordable, most people were filling their computers with more than enough memory to do the job. If your computer is slow and it has lower capacity of RAM, you need to add more memory to speed it up.
Spyware and viruses
Spyware. It is a software program that intentionally installed on the computer by the user to monitor or spy on what the other users of the same computer is doing.
you do realize for them to be effective, you have to keep up to date. By up to date, it means up to the minute.
Virus. A software program, macro or script that has been designed to infect, destroy, modify or cause other problems with computer or software program.
Background programs
When you install new software on your computer, often times you install it to run in the background every time you start up. Most times you do this without knowing it. Look at the bottom right hand side of your screen.

If you see several icons there, you have extra programs running and stealing resources. Right click on these and see if you have the option of closing them. Many times, you can open the program and choose an option to keep these programs from starting automatically.
Corrupted registry
Any changes you make to your computer effects and actually, it corrupts your registry even when you do something positive like remove spyware and you end up with a corrupted registry.
After months of corrupting your registry, it will become good. This will, in its early stages, cause your computer to slow down. In its advanced stages, it will freeze and crash and do more mysterious and troublesome things.
2. After I pressed the Power button...
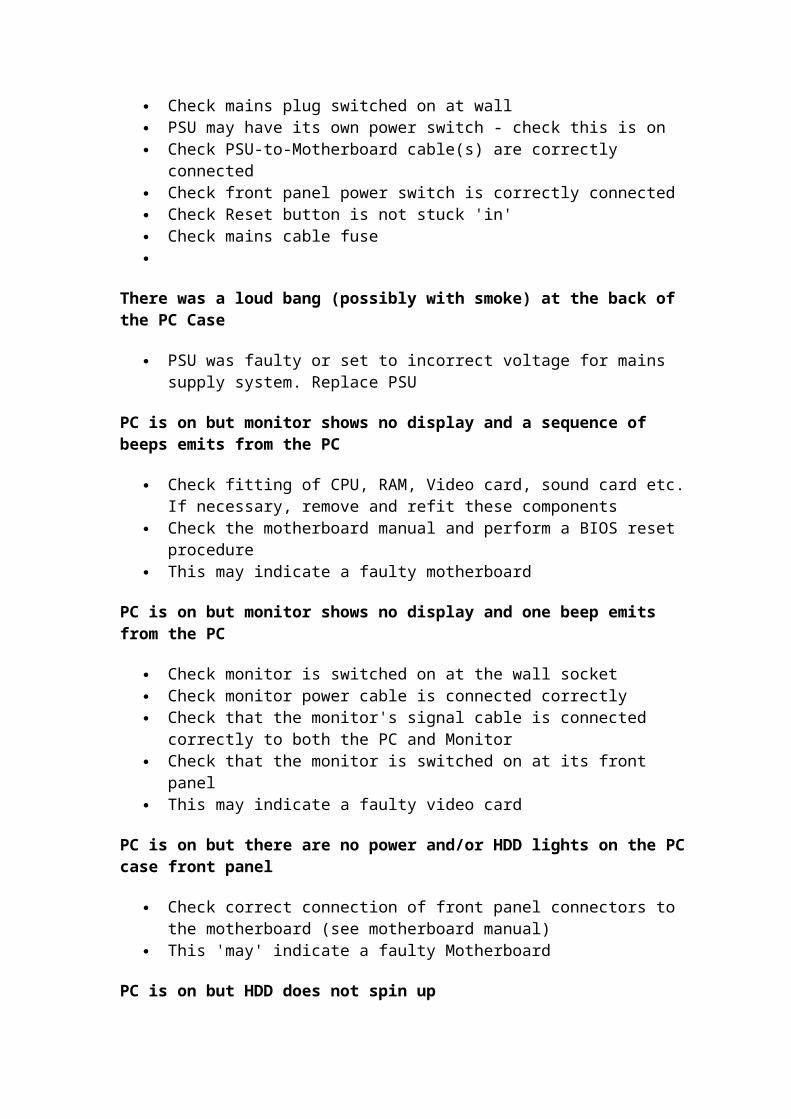
Nothing happened
Check mains plug switched on at wall PSU may have its own power switch -
check this is on Check PSU-to-Motherboard cable(s) are
correctly connected Check front panel power switch is cor-
rectly connected Check Reset button is not stuck 'in' Check mains cable fuse
There was a loud bang (possibly with smoke) at the back of the PC Case
PSU was faulty or set to incorrect voltage for mains supply sys-tem. Replace PSU
PC is on but monitor shows no display and a sequence of beeps emits from the PC
Check fitting of CPU, RAM, Video card, sound card etc. If neces-sary, remove and refit these components
Check the motherboard manual and perform a BIOS reset pro-cedure
This may indicate a faulty motherboard
PC is on but monitor shows no display and one beep emits from the PC

Check monitor is switched on at the wall socket Check monitor power cable is connected correctly Check that the monitor's signal cable is connected correctly to
both the PC and Monitor Check that the monitor is switched on at its front panel This may indicate a faulty video card
PC is on but there are no power and/or HDD lights on the PC case front panel
Check correct connection of front panel connectors to the motherboard (see motherboard manual)
This 'may' indicate a faulty Motherboard
PC is on but HDD does not spin up
Check power connector to HDD is properly connected Check IDE ribbon cable is correctly connected to both Mother-
board and HDD This may indicate a faulty Hard Drive
PC is on but CD-ROM shows no lights/will not eject tray
Check power connector to CD-ROM is properly connected Check IDE ribbon cable is correctly connected to both Mother-
board and CD-ROM This may indicate a faulty CD-ROM Drive
PC is on but the CPU fan/fans do not spin
Disconnect the power immediately to prevent damage to the CPU from overheating
Check fan power cables are correctly connected to the relevant power connector (in most cases, a motherboard FAN connector or one of the PSU power connectors)
Disconnect the power and carefully spin the fan blades with a fin-ger. If there is any resistance to this movement, this may indic-ate a faulty fan unit
On boot up, the monitor shows corrupted display
Check seating of CPU, RAM, Video card, sound card etc. If necessary, remove and refit these components
Check the motherboard manual and perform a BIOS reset procedure
This may indicate a faulty Motherboard or Video card
On boot up, display shows incorrect CPU type/speed
Check the motherboard manual for the appropriate CPU jumper settings (where applicable)
Check BIOS settings for CPU type (see Motherboard Manual) Perform a BIOS reset procedure Perform a BIOS update (with an updated BIOS, the Motherboard
may support your CPU) This may indicate a faulty/old motherboard
On boot up, display shows incorrect RAM total
Check correct seating of Memory Modules in slots In cases of two or more modules, this may indicate a faulty mod-
ule This may indicate a faulty/old motherboard
On boot up, display shows - FDD/Keyboard/Mouse not found (or similar)
Check correct connection of device described, In the case of the FDD, check its ribbon and power connections
Check that the BIOS is configured correctly for the device de-scribed
This may indicate a fault with the described device or Mother-board
The monitor shows no picture
Is the power light on? Are the cables plugged in? Check brightness and contrast settings. Swap the monitor with another one, reboot the machine and see
if it works. If the computer works the monitor has probably gone bad. If it still fails to work, something in the CPU perhaps a video card has gone bad.
Computer displays limited colors.
Check display options for the monitor usually under control panel under the display icon. Select at least 256 colors for standard display. If you had 16 color selected, this may be why your screen displays limited colors. Some programs such as FastCat require you to set display settings to 256 colors.
Signs of Video Display Troubles
If your screen is completely white or gray and you hear buzzing noises, this could indicate video card troubles. Before you panic, make

sure all cables are secured from monitor to CPU. Try using another power cord for the monitor to see if this may be the problem.
If screen appears distorted around the edges and the color does not look right, you may have incorrect display adapters. Select Start, Settings, and Control Panel. Double click on System Icon and select Device Manager. You will see a listing of devices. Double click on Display adapters to view the type. If there is a yellow exclamation point next to device, there is a conflict. To view conflicts for a certain device, click on the device, select properties, and select the general tab. There should be a description of the device and why it is not working properly.
Printer Does Not Print.
Are all cables connected and is the printer turned on? Is the printer online? Is there paper in the tray? Is the printer an Inkjet/Deskjet or a Laserjet? If it's an inkjet, is the ink cartridge out of ink. Remove cartridge,
hold up to light or gently shake it to see if it is empty.
Things to Try...
Do you have correct print drivers installed? Find print drivers under Device Manager.
Check to be sure you have correct print drivers installed. Double click on System Icon and select Device Manager. You will see a listing of devices. Double click on the Ports button to view the type. If there is a yellow exclamation point next to device, there is a conflict.

Self Check 3.2-2
Multiple Choices: Select the best answer of the given choices:
1. It is a software program that intentionally installed on the computer by the user to monitor or spy on what the other users of the same computer is doing.
A. Spyware and VirusesB. Utility SoftwareC. Application SoftwareD. All of the above
2. A software program, macro or script that has been designed to infect, destroy, modify or cause other problems with computer or software program.
A. VirusB. Utility SoftwareC. Application SoftwareD. All of the above
3. Which of the following is not the solution if the printer not responding.
A. Check if the printer is onlineB. Check if there is paper in the trayC. Check the brightness and contrast settingsD. All of the above
4. Why computer becomes slow?A. You need more memoryB. Spyware and viruses C. Corrupted registryD. All of the above

5. Which of the following is the troubleshooting procedure when PC is on but monitor shows no display and one beep emits from the PC.
A. Check monitor is switched on at the wall socket B. Check monitor power cable is connected correctly C. Check that the monitor's signal cable is connected correctly to
both the PC and Monitor D. All of the above
Answer Key
1. A2. A3. C4. D5. D
TASK SHEET 3.2-1
Title: Identifying Common Faults and Errors of ComputerPerformance Objective : Given the necessary tools, materials and equipment identify the common faults and errors of computer system.Supplies, Tools & Equipment : System UnitMonitor KeyboardMousePrinter
Steps/ Procedure:when you detached the following:
1. Prepare the necessary tools, equipment and materials2. Detached the following
Devices Port- Keyboard - PS/2- Mouse - PS/2- Hard disk - IDE cable- Floppy disk drive - IDE cable- CD-Rom drive - IDE cable- RAM chip - Memory slot
3. List the messages or errors it will prompt you.
Assessment Method: Demonstration , Performance Criteria checklist

PERFORMANCE CRITERIA CHECKLIST
CRITERIADid you…
Yes No
Observed safety precautions.
Inspected all the peripherals properly.
Strictly noted standard checking of different peripherals.
Observed Proper boot-up and shutdown of the computer.

INFORMATION SHEET 3.2-3
How to Configure a Peer Network in Windows
Learning Objective:
After reading this INFORMATION SHEET, YOU MUST be able to Config-ure a Peer Network in Windows.
To create a peer network, you must have the following components:
•A network interface or Local Area Network (LAN) adapter for each computer. The same manufacturer and model of network card is preferred.
• Cabling that is supported by the network cards.• Windows drivers for the network cards. • A common network protocol.• A unique computer name for each computer.
To create a peer network, follow these steps for each computer connected to the network: 1. Shut down the computer and install the network card and appropriate cabling for each computer.
NOTE: For information about how to configure your network adapters and physically connect your computers, consult the documentation included with your network adapters or contact the manufacturer(s) of your network adapters.
2. Start Windows and install the network drivers. Windows may detect your network card and install the drivers when you start the computer. If the network card drivers are not included with Windows, follow the manufacturer's instructions about how to install the network drivers.
.3. Choose a client and a common protocol for each computer. To do this, follow these steps:
a. Click Start, point to Settings, click Control Panel, and then double-click Network.
b. Click Add, click Client, and then click Add.c. In the Manufacturers box, click the appropriate manufacturer,

click the appropriate client in the Network Clients box, and then click OK.
d. Click Add, click Protocol, and then click Add.
e. In the Manufacturers box, click the appropriate manufacturer, click the appropriate protocol in the Network Protocol box, and then click OK.Follow the instructions to finish installing the network client and protocol.
.
4. Configure a peer server. Each computer that is configured for File and Printer Sharing can act as a server. To configure a computer for File and Printer Sharing, use the following steps:
a. Click Start, point to Settings, click Control Panel, and then double-click Network.
b. Click File and Print Sharing, click one or both options to share files and printers, click OK, and then click OK again.
c. Click Yes when you are prompted to restart your computer.
.
5. Give each computer a unique computer name. To do this, use the following steps:
a. Click Start, point to Settings, click Control Panel, and then double-click Network.
b. On the Identification tab, type a unique name in the Computer name box.
c.
Click OK, and then click Yes when you are prompted to restart your computer.
NOTE: The computer name must be unique for each computer on the network and should be no more than 15 characters in length. In small networks, the workgroup name should be the same for each computer so that all computers are visible in the same workgroup when browsing. You should not use spaces or the following characters in computer and workgroup names:/ \ * , . " @
Windows XP NetworkingAs in previous versions of Windows, Windows XP provides a
wizard for network connection setup. Wizards break down a task into individual steps and guide the user through the steps one at a time.
The Windows XP New Connection Wizard supports two basic types of Internet connections, dialup and broadband.

To access the network connection setup wizard in Windows XP, navigate through the Start menu to the Connect To and Show all connections options as shown below.
The same feature is also accessible via the Network Connections icon in Control Panel.
Choosing either of the above options causes a new window to appear on the desktop as shown below. On the right, this window displays icons for any pre-existing connections. The Create a new connection option on the left allows new connections to be set up.
Types of Windows XP Network Connection
Setup
Clicking the Create a new connection option from the Network Connections dialog activates the wizard as shown below.
Clicking Next presents the user with three main choices for Internet and private network setup as shown below.
The Connect to the Internet option supports several types of Internet connection setup. This option allows the user to choose from a list of ISPs, use a setup CD-ROM provided by their ISP, or set up a connection manually.
Connect to the network at my workplace supports client-side set up of both dialup remote access and VPN services.
The Set up an advanced connection option supports serial, parallel and infrared port networking setups. This option also allows the user to enable certain types of incoming network connections.
Setting up an Internet Connection
The Getting Ready page presents three choices as shown below:
The Choose from a list of Internet Service Providers option gives instructions for setting up an account with an ISP, then making the Internet connection through that new account.

The Set up my connection manually option sets up connections for accounts that have already been opened with an ISP (username and password are ready for use).
The Use the CD I got from an ISP option should be used when possessing an installation CD-ROM from one of the service providers.
By default the first option Get online with MSN (Microsoft Network) is selected. To set up a new connection to MSN, click Finish. To set up a new connection to various other ISPs, change the radio button selection to the second option and then click Finish.
MSN Internet Connection Setup
After choosing MSN and clicking Finish, the Windows XP network connection wizard closes and a new window opens as shown below.
This window leads to the MSN Explorer Wizard. Answering Yes to this question creates a key in the Windows Registry that allows access to MSN email from the Windows XP Start Menu. Answering No to this question skips that step. After answering either Yes or No, the MSN wizard launches automatically.
The MSN wizard sets up an MSN account and dial-up Internet connection but require a working phone line connected to a working modem.
Other ISP Internet Connection Setup
After choosing an alternate ISP and clicking Finish, the Windows XP network connection wizard closes and a new Windows Explorer window opens as shown below.
The first shortcut launches the MSN window shown above. The second shortcut launches a new Internet Connection Wizard. This wizard dials a public phone number to obtain a list of ISP referrals from Microsoft. Obviously, this wizard will provide a limited list of service providers and not necessarily the best ones for each individual's needs.
These shortcuts, installed in C:\Program Files\Online Services, can be accessed at any time from Windows Explorer. It is not necessary to navigate through the Windows XP network connection wizard to execute them.
This wizard assumes an account has been opened previously. Manual connections require the username (account name) and password from a working ISP service. Dial-up connections also require a telephone number; broadband connections do not.
The next step presents three options for creating a manual connection.
The Connect using a dial-up modem option works for phone line Internet services (either traditional dial-up or ISDN).

The Connect using a broadband connection that requires a user name and password option works for DSL or cable modem Internet services that use PPPoE.
The Connect using a broadband connection that is always on option works for true "always on" DSL or cable modem services (those that do not require a username/password) as specified in their service agreement.
Microsoft added this option for informational purposes only. Service providers normally create their setup CDs to include all of the necessary setup data for an operating system in a self-contained package. Therefore, clicking Finish has no effect other than to exit the wizard.

Self Check 3.2-3True or False: Write T if the statement is True and F if the statement is false.
____1. The Windows XP New Connection Wizard supports two basic types of Internet connections, dialup and broadband.
____2. The Connect using a dial-up modem option works for phone line Internet services
____3. The Connect to the Internet option supports several types of Internet connection setup.
____4. To access the network connection setup wizard in Windows XP, navigate through the run menu to the Connect To and Show all connections options.
____5. The Set up my connection manually option should be used when possessing an installation CD-ROM from one of the service providers.

Answer Key
1. T2. T3. T4. F5. F
TASK SHEET 3.2-2
Title : Setting XP Network Connection

Performance Objective : Given the needed materials, set-up a network connection on four computers.
Supplies, Tools & Equipment : - Network cables- 4 Computer units- 1 hub- Network Card Driver
Steps/ Procedure:1. Prepare the needed tools, supplies and materials2. Connect Network Cables to Hub and computers3. Start computers4. Configure Computer Network
Assign workgroup Assign I.P address
5. Check the connectivity of your network.6. Perform file and printer sharing
Assessment Method: Demonstration , Performance Criteria checklist
PERFORMANCE CRITERIA CHECKLIST
CRITERIADid you…
Yes No
Observed Safety Precautions.
Properly connected all the UTP cables to the

computer and hub. Assigned correct workgroup to all computers
Assigned I.P. Address properly.
Connected Computers properly and seen in the network.
Performed file and Printer sharing
Observed Proper boot-up and shutdown of the computer.
INFORMATION SHEET 3.2-4Accidental Event Checklist
Learning Objective: After reading this INFORMATION SHEET, YOU MUST be able to use and accomplish Accidental Event Checklist
Accident reports may contain the following details: Name of person injured Date and Time of accident Type of Injury First Aid given Action taken to prevent further accidents.

With this kind of report, the trainer and the trainees could see what type of accident mostly occur on their place that they could already prevent it from coming.
Sample Accident Report
ACCIDENT, DANGEROUS OCCURRENCE AND INCIDENT REPORT
Name: _______________________________ Date: ________________Year & Section: ______________________
A. Subject of Report(Please tick the box) Injury Dangerous occurrence Damage to equipment Accidents/incidents with the potential to injure or cause damage Health Condition
B. Place, Date, Time:
Exact location of event: ___________________________________Time of event: ____________________________________________Traner-in-charge at the time of event: ___________________
C. Nature of Injury:_________________________________________________________________________________________________________________________________________________________________________________
D. First Aid Treatment: _________________________________________________________________________________________________________________________________________________________________________________
Checked by: ____________________________Self Check
1. Enumerate the component of Accident reports.

Answer Key
Accident reports may contain the following details: Name of person injured Date and Time of accident Type of Injury First Aid given Action taken to prevent further accidents.
.

TASK SHEET 3.2-3Title : Accident ReportPerformance Objective : Base on the given template make an
Accident Report that you may encounter inside the computer laboratory
Supplies, Tools & Equipment : Working PC Printer Bond paper Ruler Pencil/Eraser Accident report template
Steps/ Procedure:1. Prepare the necessary tools, supplies and materials2. Use the given template to make an accident report that
you may encounter inside the computer laboratory3. Let your trainer check your work
Assessment Method: Demonstration , Performance Criteria checklist
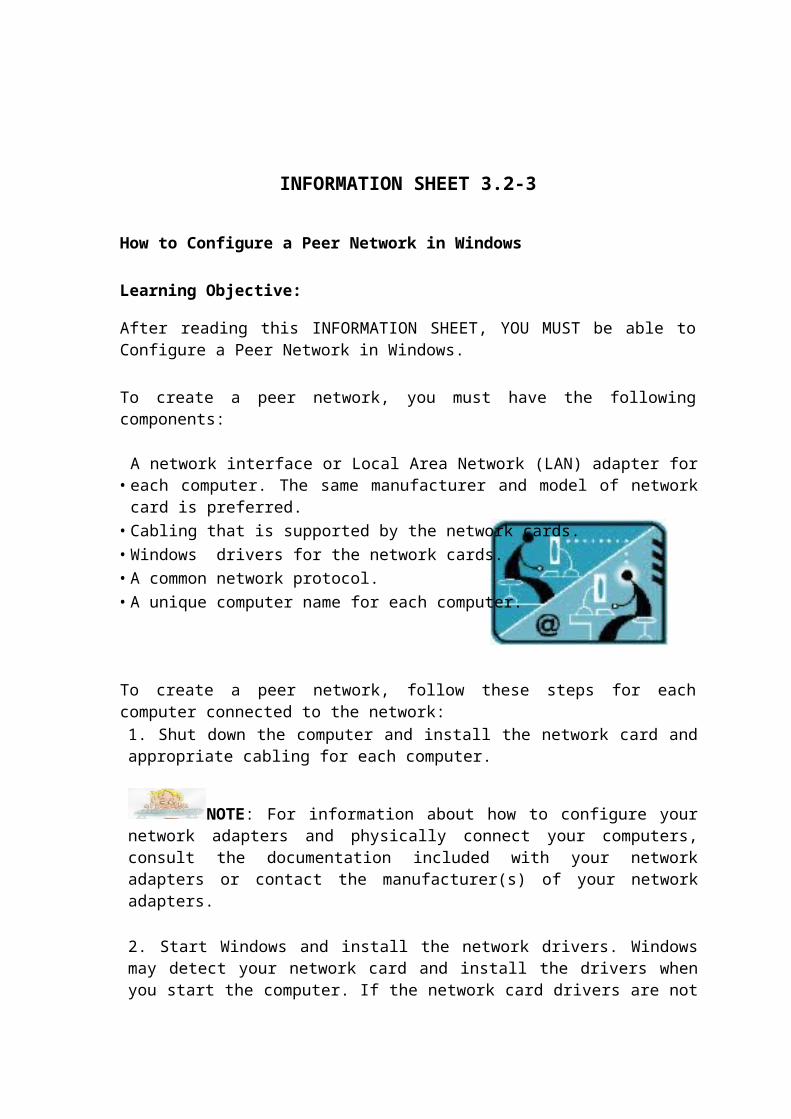
PERFORMANCE CRITERIA CHECKLIST
CRITERIADid you…
Yes No
Observed Safety Precautions.
Filled up template properly
Checked subject of report accurately.
Entered Place, Date & time.
Stated the nature of injury
Applied first aid treatment.

LEARNING OUTCOME SUMMARY
LEARNING OUTCOME #3
Inspect and test configured computer systems and networks
CONTENTS:a. Inspecting work instructions according to job requirements.b. Planning and preparing of standard operating proceduresc. Occupational health and safetyd. Configuring system and networkse. Procedures in using the tools and equipments
ASSESSMENT CRITERIA:1. Configured computer systems and networks identified from the Job/Ser-
vice Order or instructions.2. Planned and prepared job requirements.3. Followed OHS policies and procedures of job requirements.4. Checked computer systems and networks configuration with specified re-
quirements.5. Checked necessary tools, equipment materials
CONDITION:Trainees must be provided with the following:
1. WORKPLACE LOCATION2. EQUIPMENT3. Tools
Server Peripherals Desktop ComputersPolicies and procedures: Procedures and guidelines Safety precautionsAnti-static wrist wrap Pliers Philips screw driverWires and Cables Appropriate Software Computer Storage Media
EVALUATION METHOD:1. Hands-on2. Direct observation3. Practical demonstration

Learning ExperiencesLearning Outcome 3Inspect and test configured computer systems and networks
Learning Activities Special Instructions1. Read information sheet
3.3-1 “How to Config-ure a Peer Network in Windows”
If you have some problem on the content of the information sheet don’t hesitate to approach your facilitator.If you feel that you are now knowledgeable on the content of the information sheet, you can now answer self check provided in the module.
2. Answer self-check 3.3-1
Compare your answer to the answer key 3.3-1. If you got 100% correct answer in this self-check, you can now perform Job Sheet 3.3-1. If not review the information sheet and go over the self-check again.
3. Perform Job Sheet 3.3-1Inspection Checklist
Compare your work to the Performance Checklist. If you got 100% correct answer in this task, you can now move to the next information sheet. If not review the information sheet and go over the task again.
4. Read information sheet 3.3-2 “Writing an Accomplishment Report”
If you have some problem on the content of the information sheet don’t hesitate to approach your facilitator.If you feel that you are now knowledgeable on the content of the information sheet, you can now perform Operation Sheet provided in the module.
5. Answer self-check 3.3-2
Compare your answer to the answer key 3.3-2. If you got 100% correct answer in this self-check, you can now perform Task Sheet 3.3-1. If not review the information sheet and go over the self-check again.
6. Do Task Sheet 3.3-1
Accomplishment Report
Compare your work to the Performance Checklist. If you got 100% correct answer in this task, you can now move to the next information sheet. If not review the information

sheet and go over the task again.INFORMATION SHEET 3.3-1
SAMPLE EQUIPMENT INSPECTION CHECKLIST
Below is a sample Maintenance Inspection Checklist. You may note that this checklist pertains to the same equipment with the Maintenance Schedule (see sample). This checklist will confirm if the maintenance activities have been performed in order to prolong the life of this particular equipment. The Inspection items are stated in a question form as these serve as the criteria or standards of maintenance.
SAMPLE INSPECTION CHECKLIST
INSPECTION CHECKLIST
Equipment Type : Desktop ComputerProperty Code : P.C. #1Number : P.C.#1Location : Practical Work Area
YES NO N/A INSPECTED ITEMS1. Is the machine operate normally?2. Are accessories checks for damage?3. Are all device driver installed and configured prop-
erly?4. Are the display properties configured?5. Is the sound functioning?6. Is the pc connected to the server?7. Is the printer installed is shared?8. Can you add printer from the server?9. Is their internet connection?10. Is registry problem fixed?11. Is internal parts cleaned?12. Is external parts cleaned?
Self Check 3.3-1
1. Enumerate the different component of Inspection Checklist

Answer Key
1. Title2. Equipment Type3. Property Code4. Property Number5. Location

6. Inspected Items
JOB SHEET 3.3-1Title : INSPECTION CHECKLISTPerformance Objective Given a working personal computer you are
going to make an inspection of systems and network configuration. Use the given template as your guide for inspection.
Supplies, Tools & Equipment : Working PC Windows XP OS Printer Server

Inspection Checklist template Hub/switch
Steps/ Procedure:1. Used the given template and make inspection of your system and network
configuration
Assessment Method
Performance Criteria Checklist
PERFORMANCE CHECKLIST
Performance CriteriaDid you… Yes No
1. Started the computer properly
2. Checked the configuration of computer system and network
3. Filled up the template properly
4. Followed safety procedures while performing inspection
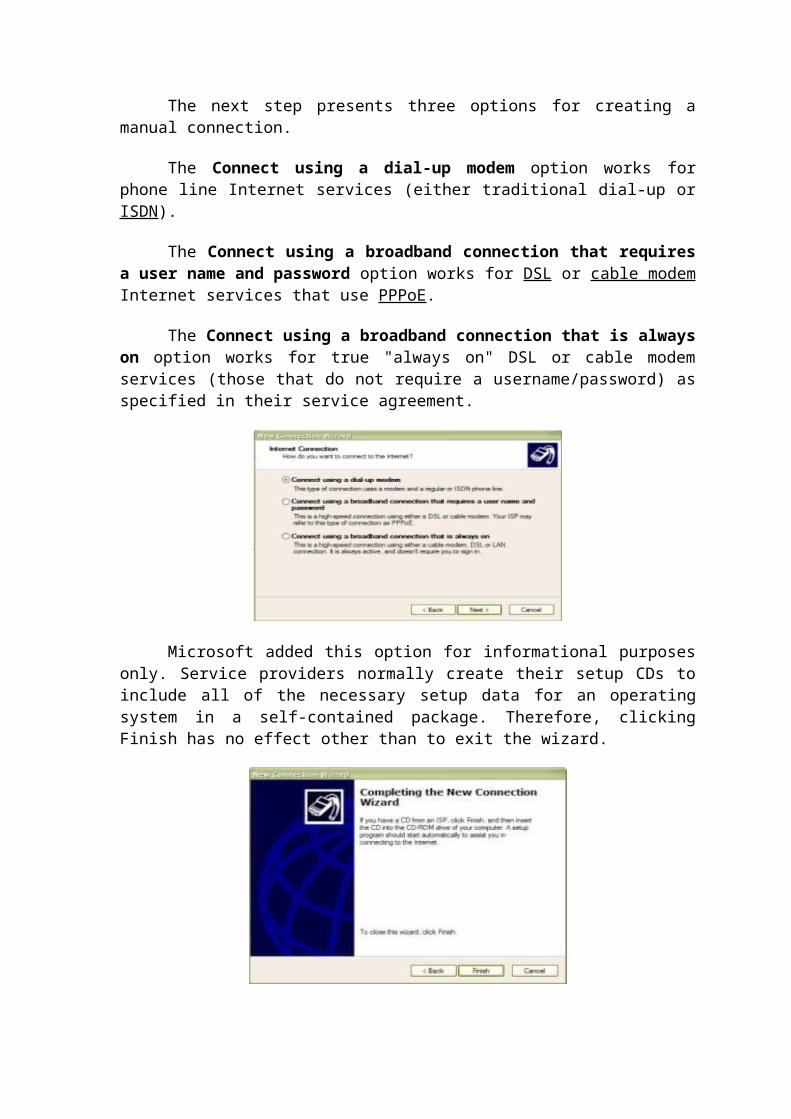
INFORMATION SHEET 3.3-2Writing an Accomplishment Report
Learning Objective:
After reading this INFORMATION SHEET, YOU MUST be able to write an Accomplishment Report
Sample of an Accomplishment Report
ACCOMPLISHMENT REPORT
Name: ___________________________ Date:_________________Assigned Task Working Properly Not Working Connected in a
NetworkPC 1 √ √PC 2 √ √PC 3 √
Printer √ √

Self Check 3.3.2.
2. What is Accomplishment Report?3. Give the component of accomplishment report.

Answer Key
1. Accomplishment Report is done when you have finished a certain job. This report may be in narrative or tabular form.
2. The components of Accomplishment report are: Name Date Assigned task Working Properly Not Working

TASK SHEET 3.3-1
Title : Accomplishment ReportPerformance Objective : Given the needed materials, supplies
& equipment, create an accomplishment report.
Supplies, Tools & Equipment : Working PC Printer Bond paper Ruler Pencil/Eraser Power Supply Diagnostic Plan template
Steps/ Procedure:1. Prepare the necessary tools, supplies and materials2. Using template, make an accomplishment report.3. Let your trainer check your work.
Assessment Method: Demonstration , Performance Criteria checklist
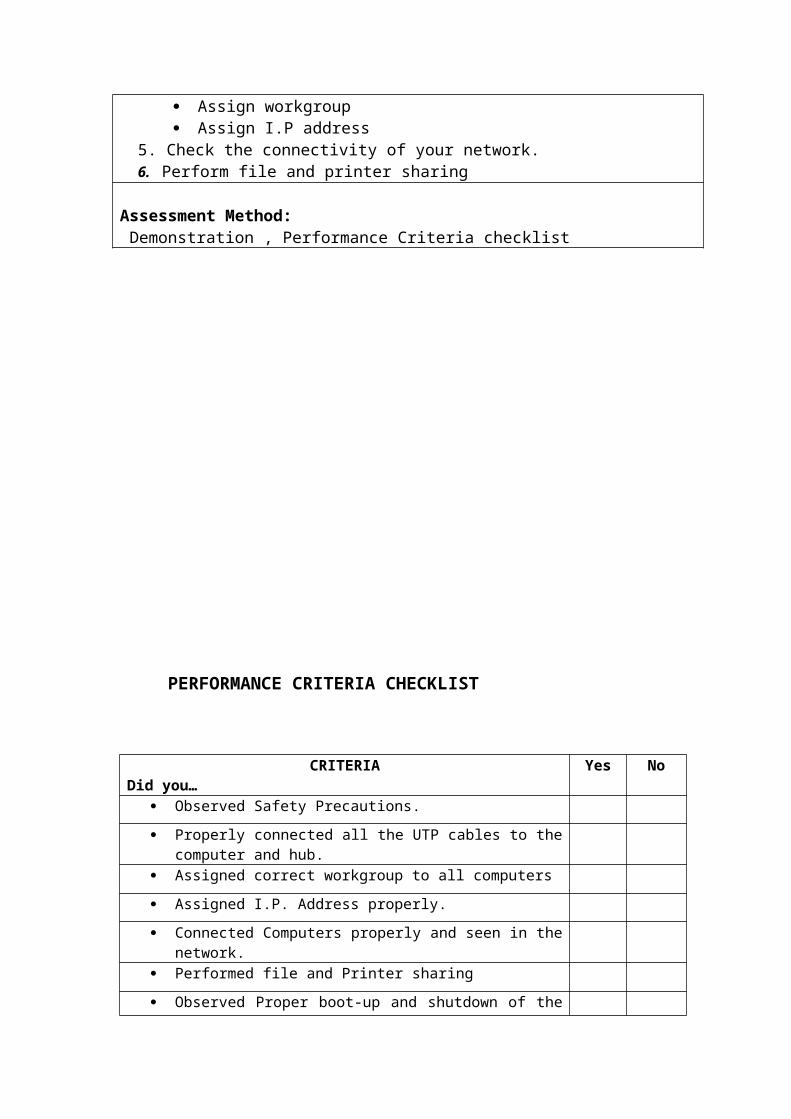
PERFORMANCE CRITERIA CHECKLIST
CRITERIADid you…
Yes No
1. Prepared tools, supplies and equipment.
2. Used the proper template
3. Filled up the template properly
4. Accomplished report accurately

INSTITUTIONAL EVALUATIONEVIDENCE PLAN
TRAINEES NAME
FACILATATORS NAME
QUALIFICATION COMPUTER HARDWARE SERVICING NC II
PROJECT-BASED ASSESSMENT
CONFIGURE COMPUTER SYSTEMS & NETWORKS
UNIT OF COMPETENCY COVERED
CONFIGURING COMPUTER SYSTEMS & NETWORKS
Ways in which evidence will be collected: [tick the column]
De
mo
ns
tra
tio
n
Wit
ten
Tes
t
Inte
rvie
w
The evidence must show that the candidate……
1. Configured computer systems and networks identified from the Job/Service Order or instructions.
X
2. Planned and prepared job requirements. X3. Followed OHS policies and procedures of job requirements. X4. Checked computer systems and networks configuration with specified
requirements.X
5. Checked necessary tools, equipment materials X6. Appropriate Personal Protective Equipment are used and OHS policies
and procedures followedX
7. Normal function of systems and networks checked in accordance with manufacturer’s instructions
X
8. Fault or problem in the systems and networks diagnosed in line with the standard operating procedures.
X
9. Computer systems and networks configured in line with the standard operating procedures.
X
10. Final inspections are undertaken to ensure that the configuration done on the systems and networks conforms with the manufacture’s instruction/manual
X
11. Computer systems and networks are checked to ensure safe operation. X12. Report is prepared and completed according to company requirements. X

NOTE: *Critical aspects of competency
DEMONSTRATION WITH QUESTIONING CHECKLIST
TRAINEE’S NAMETRAINER’S NAMEQUALIFICATION COMPUTER HARDWARE SERVICING NC IIUNIT OF COMPETENCY COVERED
1. Diagnose and Troubleshoot Computer Systems and Networks
DATE OF EVALUATIONTIME OF EVALUATIONINSTRUCTIONS FOR DEMONSTRATIONGiven the necessary materials, tools and equipment, the trainee must be able to perform the following within four (4) hours
Install Computer Systems and Networks
Materials & EquipmentObservation: / to show if evidence is
demonstratedYes No N/A
1. Configured computer systems and networks identified from the Job/Service Order or instructions.
2. Planned and prepared job requirements.3. Followed OHS policies and procedures of job
requirements.4. Checked computer systems and networks configuration
with specified requirements.5. Checked necessary tools, equipment materials6. Appropriate Personal Protective Equipment are used and
OHS policies and procedures followed7. Normal function of systems and networks checked in
accordance with manufacturer’s instructions8. Fault or problem in the systems and networks diagnosed
in line with the standard operating procedures.9. Computer systems and networks configured in line with
the standard operating procedures.10.Final inspections are undertaken to ensure that the
configuration done on the systems and networks conforms with the manufacture’s instruction/manual
11.Computer systems and networks are checked to ensure safe operation.
12.Report is prepared and completed according to company requirements.
QUALIFICATION: COMPUTER HARDWARE SERVICING NC II

UNIT OF COMPETENCY: CONFIGURE COMPUTER SYSTEMS AND NETWORK
SPECIFIC INSTRUCTIONS: ( For the candidate)
1. Given a working personal computer you are going to network using hub and then Change the computer name and workgroup, assign static IP address add printer and perform printer sharing.
Duration: 1 hour
Accomplish the following before the allotted time.
COMPETENCY EVALUATION RESULT SUMMARYTRAINEES NAMEFACILITATORS NAMEQUALIFICATION COMPUTER HARDWARE SERVICING NC IIDATE OF EVALUATIONTIME OF EVALUATIONThe Performance of the Trainee in the following assessment methods [ Please Tick appropriate box]
Satisfactory Not Satisfactory

A. Demonstration
1. Configure Computer Systems and network.
Did the trainees overall performance meet the required evidences/standards?
Recommendation
For re-evaluation ________________________________ Qualified to take the Next Competency
General comments [Strengths/Improvement Needed]
Trainee’s Signature Date:
Facilitator’s Signature: Date:


