MODUL RESPONSI PEMROGRAMAN MOBILElab.ilkom.unila.ac.id/modul/semester genap/D3... · Pemrograman...
68
MODUL RESPONSI PEMROGRAMAN MOBILE OLEH ASISTEN PEMROGRAMAN MOBILE D3 MANAJEMEN INFORMATIKA JURUSAN ILMU KOMPUTER FAKULTAS MATEMATIKA DAN ILMU PENGETAHUAN ALAM UNIVERSITAS LAMPUNG 2017
Transcript of MODUL RESPONSI PEMROGRAMAN MOBILElab.ilkom.unila.ac.id/modul/semester genap/D3... · Pemrograman...

MODUL RESPONSI PEMROGRAMAN MOBILE
OLEH
ASISTEN PEMROGRAMAN MOBILE
D3 MANAJEMEN INFORMATIKA
JURUSAN ILMU KOMPUTER
FAKULTAS MATEMATIKA DAN ILMU PENGETAHUAN ALAM
UNIVERSITAS LAMPUNG
2017

Pemrograman Mobile Semester Genap 2016-2017
PERTEMUAN KE-1 DAN 2
Layout params
This tutorial is more about creating your GUI based on layouts defined in XML file. A layout
may contain any type of widgets such as buttons, labels, textboxes, and so on. Following is a
simple example of XML file having LinearLayout −
<?xml version="1.0" encoding="utf-8"?> <LinearLayout xmlns:android="http://schemas.android.com/apk/res/android" android:layout_width="fill_parent" android:layout_height="fill_parent" android:orientation="vertical" > <TextView android:id="@+id/text" android:layout_width="wrap_content" android:layout_height="wrap_content" android:text="This is a TextView" /> <Button android:id="@+id/button" android:layout_width="wrap_content" android:layout_height="wrap_content" android:text="This is a Button" /> <!-- More GUI components go here --> </LinearLayout>
Once your layout has created, you can load the layout resource from your application code, in
your Activity.onCreate() callback implementation as shown below −
public void onCreate(Bundle savedInstanceState) { super.onCreate(savedInstanceState); setContentView(R.layout.activity_main); }
Android Layout Types
There are number of Layouts provided by Android which you will use in almost all the
Android applications to provide different view, look and feel.
Sr.No Layout & Description
1
Linear Layout
LinearLayout is a view group that aligns all children in a single direction, vertically or
horizontally.
2 Relative Layout
RelativeLayout is a view group that displays child views in relative positions.
3 Table Layout
Pemrograman Mobile Semester Genap 2016-2017
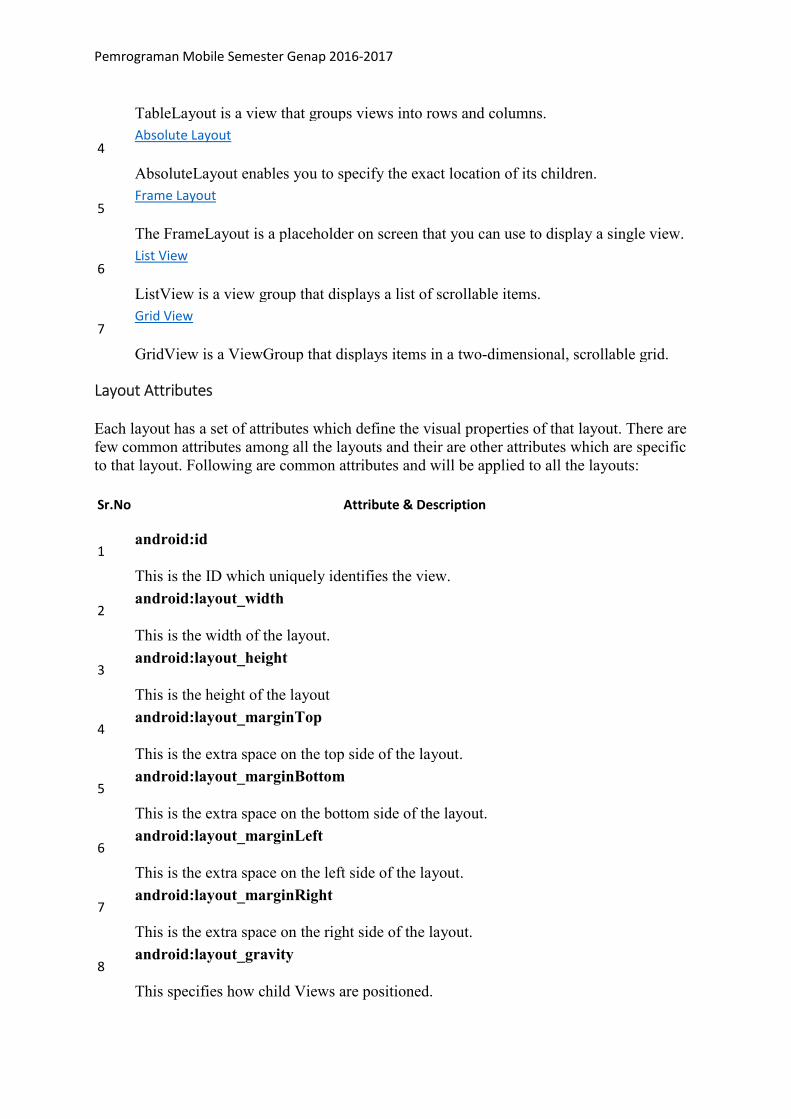
TableLayout is a view that groups views into rows and columns.
4 Absolute Layout
AbsoluteLayout enables you to specify the exact location of its children.
5 Frame Layout
The FrameLayout is a placeholder on screen that you can use to display a single view.
6 List View
ListView is a view group that displays a list of scrollable items.
7 Grid View
GridView is a ViewGroup that displays items in a two-dimensional, scrollable grid.
Layout Attributes
Each layout has a set of attributes which define the visual properties of that layout. There are
few common attributes among all the layouts and their are other attributes which are specific
to that layout. Following are common attributes and will be applied to all the layouts:
Sr.No Attribute & Description
1 android:id
This is the ID which uniquely identifies the view.
2 android:layout_width
This is the width of the layout.
3 android:layout_height
This is the height of the layout
4 android:layout_marginTop
This is the extra space on the top side of the layout.
5 android:layout_marginBottom
This is the extra space on the bottom side of the layout.
6 android:layout_marginLeft
This is the extra space on the left side of the layout.
7 android:layout_marginRight
This is the extra space on the right side of the layout.
8 android:layout_gravity
This specifies how child Views are positioned.

Pemrograman Mobile Semester Genap 2016-2017
9
android:layout_weight
This specifies how much of the extra space in the layout should be allocated to the
View.
10 android:layout_x
This specifies the x-coordinate of the layout.
11 android:layout_y
This specifies the y-coordinate of the layout.
12 android:layout_width
This is the width of the layout.
13 android:layout_width
This is the width of the layout.
14 android:paddingLeft
This is the left padding filled for the layout.
15 android:paddingRight
This is the right padding filled for the layout.
16 android:paddingTop
This is the top padding filled for the layout.
17 android:paddingBottom
This is the bottom padding filled for the layout.
Here width and height are the dimension of the layout/view which can be specified in terms of
dp (Density-independent Pixels), sp ( Scale-independent Pixels), pt ( Points which is 1/72 of
an inch), px( Pixels), mm ( Millimeters) and finally in (inches).
You can specify width and height with exact measurements but more often, you will use one
of these constants to set the width or height −
• android:layout_width=wrap_content tells your view to size itself to the dimensions
required by its content.
• android:layout_width=fill_parent tells your view to become as big as its parent
view.
Gravity attribute plays important role in positioning the view object and it can take one or
more (separated by '|') of the following constant values.
Constant Value Description
top 0x30 Push object to the top of its container, not changing its size.

Pemrograman Mobile Semester Genap 2016-2017
bottom 0x50 Push object to the bottom of its container, not changing its size.
left 0x03 Push object to the left of its container, not changing its size.
right 0x05 Push object to the right of its container, not changing its size.
center_vertical 0x10 Place object in the vertical center of its container, not changing its
size.
fill_vertical 0x70 Grow the vertical size of the object if needed so it completely fills its
container.
center_horizontal 0x01 Place object in the horizontal center of its container, not changing its
size.
fill_horizontal 0x07 Grow the horizontal size of the object if needed so it completely fills
its container.
center 0x11 Place the object in the center of its container in both the vertical and
horizontal axis, not changing its size.
fill 0x77 Grow the horizontal and vertical size of the object if needed so it
completely fills its container.
clip_vertical 0x80
Additional option that can be set to have the top and/or bottom
edges of the child clipped to its container's bounds. The clip will be
based on the vertical gravity: a top gravity will clip the bottom edge,
a bottom gravity will clip the top edge, and neither will clip both
edges.
clip_horizontal 0x08
Additional option that can be set to have the left and/or right edges
of the child clipped to its container's bounds. The clip will be based
on the horizontal gravity: a left gravity will clip the right edge, a right
gravity will clip the left edge, and neither will clip both edges.
start 0x00800003 Push object to the beginning of its container, not changing its size.
end 0x00800005 Push object to the end of its container, not changing its size.
Pemrograman Mobile Semester Genap 2016-2017
PERTEMUAN KE-3 DAN 4
UI Elements
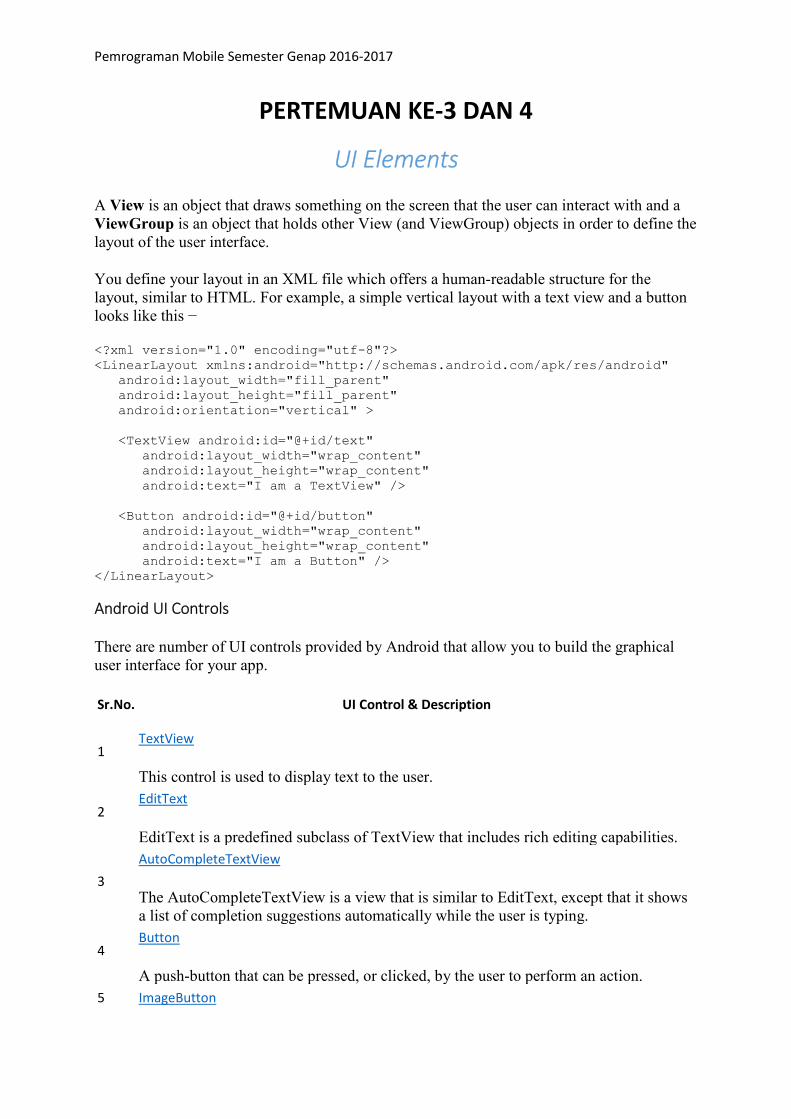
A View is an object that draws something on the screen that the user can interact with and a
ViewGroup is an object that holds other View (and ViewGroup) objects in order to define the
layout of the user interface.
You define your layout in an XML file which offers a human-readable structure for the
layout, similar to HTML. For example, a simple vertical layout with a text view and a button
looks like this −
<?xml version="1.0" encoding="utf-8"?> <LinearLayout xmlns:android="http://schemas.android.com/apk/res/android" android:layout_width="fill_parent" android:layout_height="fill_parent" android:orientation="vertical" > <TextView android:id="@+id/text" android:layout_width="wrap_content" android:layout_height="wrap_content" android:text="I am a TextView" /> <Button android:id="@+id/button" android:layout_width="wrap_content" android:layout_height="wrap_content" android:text="I am a Button" /> </LinearLayout>
Android UI Controls
There are number of UI controls provided by Android that allow you to build the graphical
user interface for your app.
Sr.No. UI Control & Description
1 TextView
This control is used to display text to the user.
2 EditText
EditText is a predefined subclass of TextView that includes rich editing capabilities.
3
AutoCompleteTextView
The AutoCompleteTextView is a view that is similar to EditText, except that it shows
a list of completion suggestions automatically while the user is typing.
4 Button
A push-button that can be pressed, or clicked, by the user to perform an action.
5 ImageButton

Pemrograman Mobile Semester Genap 2016-2017
An ImageButton is an AbsoluteLayout which enables you to specify the exact location
of its children. This shows a button with an image (instead of text) that can be pressed
or clicked by the user.
6
CheckBox
An on/off switch that can be toggled by the user. You should use check box when
presenting users with a group of selectable options that are not mutually exclusive.
7 ToggleButton
An on/off button with a light indicator.
8 RadioButton
The RadioButton has two states: either checked or unchecked.
9 RadioGroup
A RadioGroup is used to group together one or more RadioButtons.
10
ProgressBar
The ProgressBar view provides visual feedback about some ongoing tasks, such as
when you are performing a task in the background.
11 Spinner
A drop-down list that allows users to select one value from a set.
12
TimePicker
The TimePicker view enables users to select a time of the day, in either 24-hour mode
or AM/PM mode.
13 DatePicker
The DatePicker view enables users to select a date of the day.
Create UI Controls
Input controls are the interactive components in your app's user interface. Android provides a
wide variety of controls you can use in your UI, such as buttons, text fields, seek bars, check
box, zoom buttons, toggle buttons, and many more.
As explained in previous chapter, a view object may have a unique ID assigned to it which
will identify the View uniquely within the tree. The syntax for an ID, inside an XML tag is −
android:id="@+id/text_id"
To create a UI Control/View/Widget you will have to define a view/widget in the layout file
and assign it a unique ID as follows −
<?xml version="1.0" encoding="utf-8"?> <LinearLayout xmlns:android="http://schemas.android.com/apk/res/android" android:layout_width="fill_parent"

Pemrograman Mobile Semester Genap 2016-2017
android:layout_height="fill_parent" android:orientation="vertical" > <TextView android:id="@+id/text_id" android:layout_width="wrap_content" android:layout_height="wrap_content" android:text="I am a TextView" /> </LinearLayout>

Pemrograman Mobile Semester Genap 2016-2017
PERTEMUAN KE-5 DAN 6
Event Handling
There are following three concepts related to Android Event Management −
• Event Listeners − An event listener is an interface in the View class that contains a
single callback method. These methods will be called by the Android framework when
the View to which the listener has been registered is triggered by user interaction with
the item in the UI.
• Event Listeners Registration − Event Registration is the process by which an Event
Handler gets registered with an Event Listener so that the handler is called when the
Event Listener fires the event.
• Event Handlers − When an event happens and we have registered an event listener
for the event, the event listener calls the Event Handlers, which is the method that
actually handles the event.
Event Listeners & Event Handlers
Event Handler Event Listener & Description
onClick()
OnClickListener()
This is called when the user either clicks or touches or focuses upon
any widget like button, text, image etc. You will use onClick() event
handler to handle such event.
onLongClick()
OnLongClickListener()
This is called when the user either clicks or touches or focuses upon
any widget like button, text, image etc. for one or more seconds. You
will use onLongClick() event handler to handle such event.
onFocusChange()
OnFocusChangeListener()
This is called when the widget looses its focus ie. user goes away
from the view item. You will use onFocusChange() event handler to
handle such event.
onKey()
OnFocusChangeListener()
This is called when the user is focused on the item and presses or
releases a hardware key on the device. You will use onKey() event
handler to handle such event.
onTouch()
OnTouchListener()
This is called when the user presses the key, releases the key, or any
movement gesture on the screen. You will use onTouch() event
handler to handle such event.
onMenuItemClick() OnMenuItemClickListener()
Pemrograman Mobile Semester Genap 2016-2017
This is called when the user selects a menu item. You will use
onMenuItemClick() event handler to handle such event.
onCreateContextMenu()
onCreateContextMenuItemListener()
This is called when the context menu is being built(as the result of a
sustained "long click)
There are many more event listeners available as a part of View class like OnHoverListener,
OnDragListener etc which may be needed for your application. So I recommend to refer
official documentation for Android application development in case you are going to develop
a sophisticated apps.
Event Listeners Registration
Event Registration is the process by which an Event Handler gets registered with an Event
Listener so that the handler is called when the Event Listener fires the event. Though there are
several tricky ways to register your event listener for any event, but I'm going to list down
only top 3 ways, out of which you can use any of them based on the situation.
• Using an Anonymous Inner Class
• Activity class implements the Listener interface.
• Using Layout file activity_main.xml to specify event handler directly.
Below section will provide you detailed examples on all the three scenarios −
Touch Mode
Users can interact with their devices by using hardware keys or buttons or touching the
screen.Touching the screen puts the device into touch mode. The user can then interact with it
by touching the on-screen virtual buttons, images, etc.You can check if the device is in touch
mode by calling the View class’s isInTouchMode() method.
Focus
A view or widget is usually highlighted or displays a flashing cursor when it’s in focus. This
indicates that it’s ready to accept input from the user.
• isFocusable() − it returns true or false
• isFocusableInTouchMode() − checks to see if the view is focusable in touch mode.
(A view may be focusable when using a hardware key but not when the device is in
touch mode)
android:foucsUp="@=id/button_l"
onTouchEvent() public boolean onTouchEvent(motionEvent event){ switch(event.getAction()){ case TOUCH_DOWN: Toast.makeText(this,"you have clicked down Touch button",Toast.LENTH_LONG).show(); break();

Pemrograman Mobile Semester Genap 2016-2017
case TOUCH_UP: Toast.makeText(this,"you have clicked up touch button",Toast.LENTH_LONG).show(); break; case TOUCH_MOVE: Toast.makeText(this,"you have clicked move touch button"Toast.LENTH_LONG).show(); break; } return super.onTouchEvent(event) ; }
Event Handling Examples
Event Listeners Registration Using an Anonymous Inner Class
Here you will create an anonymous implementation of the listener and will be useful if each
class is applied to a single control only and you have advantage to pass arguments to event
handler. In this approach event handler methods can access private data of Activity. No
reference is needed to call to Activity.
But if you applied the handler to more than one control, you would have to cut and paste the
code for the handler and if the code for the handler is long, it makes the code harder to
maintain.
Following are the simple steps to show how we will make use of separate Listener class to
register and capture click event. Similar way you can implement your listener for any other
required event type.
Step Description
1 You will use Android studio IDE to create an Android application and name it as myapplication
under a package com.example.myapplication as explained in the Hello World Example chapter.
2 Modify src/MainActivity.java file to add click event listeners and handlers for the two buttons
defined.
3 Modify the detault content of res/layout/activity_main.xml file to include Android UI controls.
4 No need to declare default string constants.Android studio takes care default constants.
5 Run the application to launch Android emulator and verify the result of the changes done in
the aplication.
Following is the content of the modified main activity file
src/com.example.myapplication/MainActivity.java. This file can include each of the
fundamental lifecycle methods.
package com.example.myapplication; import android.app.ProgressDialog;
Pemrograman Mobile Semester Genap 2016-2017
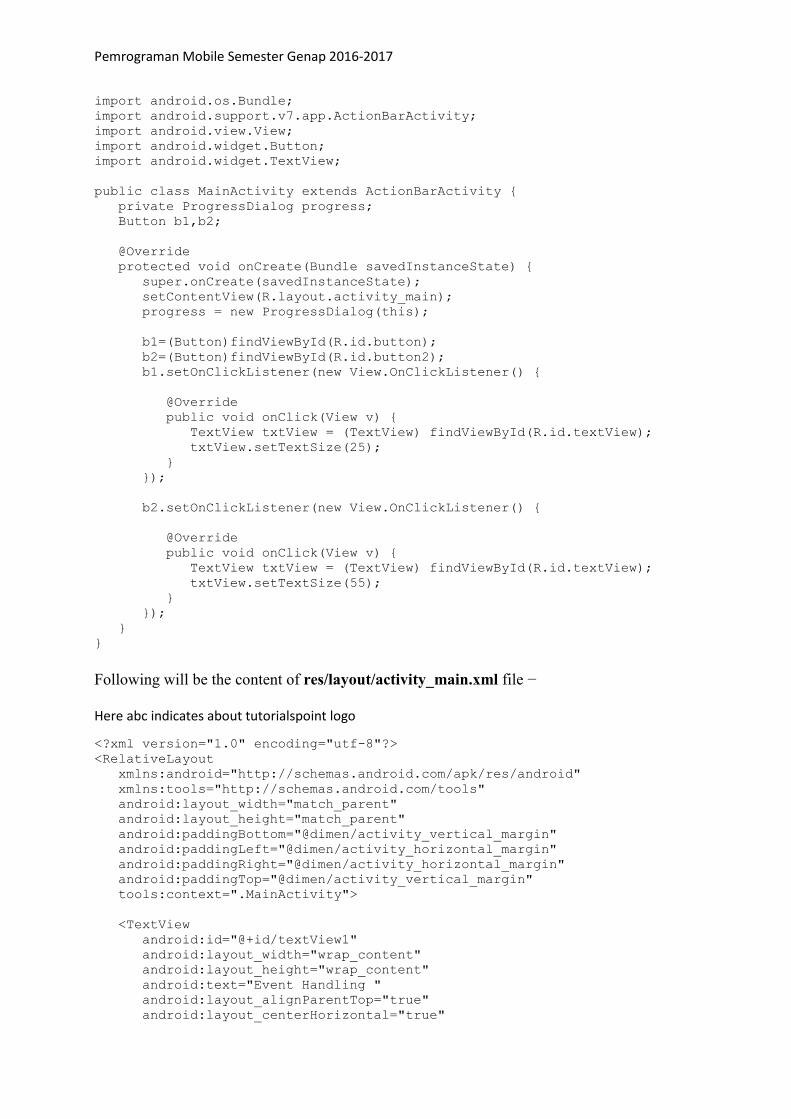
import android.os.Bundle; import android.support.v7.app.ActionBarActivity; import android.view.View; import android.widget.Button; import android.widget.TextView; public class MainActivity extends ActionBarActivity { private ProgressDialog progress; Button b1,b2; @Override protected void onCreate(Bundle savedInstanceState) { super.onCreate(savedInstanceState); setContentView(R.layout.activity_main); progress = new ProgressDialog(this); b1=(Button)findViewById(R.id.button); b2=(Button)findViewById(R.id.button2); b1.setOnClickListener(new View.OnClickListener() { @Override public void onClick(View v) { TextView txtView = (TextView) findViewById(R.id.textView); txtView.setTextSize(25); } }); b2.setOnClickListener(new View.OnClickListener() { @Override public void onClick(View v) { TextView txtView = (TextView) findViewById(R.id.textView); txtView.setTextSize(55); } }); } }
Following will be the content of res/layout/activity_main.xml file −
Here abc indicates about tutorialspoint logo
<?xml version="1.0" encoding="utf-8"?> <RelativeLayout xmlns:android="http://schemas.android.com/apk/res/android" xmlns:tools="http://schemas.android.com/tools" android:layout_width="match_parent" android:layout_height="match_parent" android:paddingBottom="@dimen/activity_vertical_margin" android:paddingLeft="@dimen/activity_horizontal_margin" android:paddingRight="@dimen/activity_horizontal_margin" android:paddingTop="@dimen/activity_vertical_margin" tools:context=".MainActivity"> <TextView android:id="@+id/textView1" android:layout_width="wrap_content" android:layout_height="wrap_content" android:text="Event Handling " android:layout_alignParentTop="true" android:layout_centerHorizontal="true"

Pemrograman Mobile Semester Genap 2016-2017
android:textSize="30dp"/> <TextView android:id="@+id/textView2" android:layout_width="wrap_content" android:layout_height="wrap_content" android:text="Tutorials point " android:textColor="#ff87ff09" android:textSize="30dp" android:layout_above="@+id/imageButton" android:layout_centerHorizontal="true" android:layout_marginBottom="40dp" /> <ImageButton android:layout_width="wrap_content" android:layout_height="wrap_content" android:id="@+id/imageButton" android:src="@drawable/abc" android:layout_centerVertical="true" android:layout_centerHorizontal="true" /> <Button android:layout_width="wrap_content" android:layout_height="wrap_content" android:text="Small font" android:id="@+id/button" android:layout_below="@+id/imageButton" android:layout_centerHorizontal="true" /> <Button android:layout_width="wrap_content" android:layout_height="wrap_content" android:text="Large Font" android:id="@+id/button2" android:layout_below="@+id/button" android:layout_alignRight="@+id/button" android:layout_alignEnd="@+id/button" /> <TextView android:layout_width="wrap_content" android:layout_height="wrap_content" android:text="Hello World!" android:id="@+id/textView" android:layout_below="@+id/button2" android:layout_centerHorizontal="true" android:textSize="25dp" /> </RelativeLayout>
Following will be the content of res/values/strings.xml to define two new constants −
<?xml version="1.0" encoding="utf-8"?> <resources> <string name="app_name">myapplication</string> </resources>
Following is the default content of AndroidManifest.xml −
<?xml version="1.0" encoding="utf-8"?> <manifest xmlns:android="http://schemas.android.com/apk/res/android"
Pemrograman Mobile Semester Genap 2016-2017
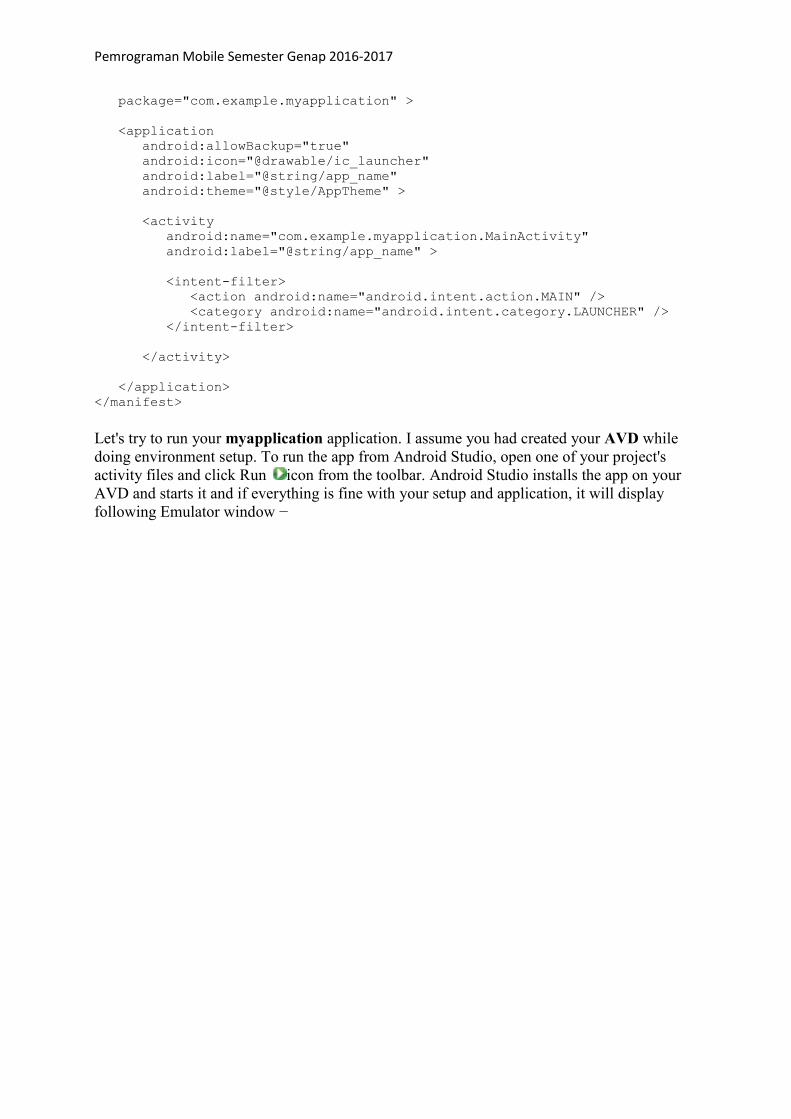
package="com.example.myapplication" > <application android:allowBackup="true" android:icon="@drawable/ic_launcher" android:label="@string/app_name" android:theme="@style/AppTheme" > <activity android:name="com.example.myapplication.MainActivity" android:label="@string/app_name" > <intent-filter> <action android:name="android.intent.action.MAIN" /> <category android:name="android.intent.category.LAUNCHER" /> </intent-filter> </activity> </application> </manifest>
Let's try to run your myapplication application. I assume you had created your AVD while
doing environment setup. To run the app from Android Studio, open one of your project's
activity files and click Run icon from the toolbar. Android Studio installs the app on your
AVD and starts it and if everything is fine with your setup and application, it will display
following Emulator window −

Pemrograman Mobile Semester Genap 2016-2017
Now you try to click on two buttons, one by one and you will see that font of the Hello
World text will change, which happens because registered click event handler method is
being called against each click event.

Pemrograman Mobile Semester Genap 2016-2017
PERTEMUAN KE-7 DAN 8
Notifications
Android Toast class provides a handy way to show users alerts but problem is that these alerts
are not persistent which means alert flashes on the screen for a few seconds and then
disappears.
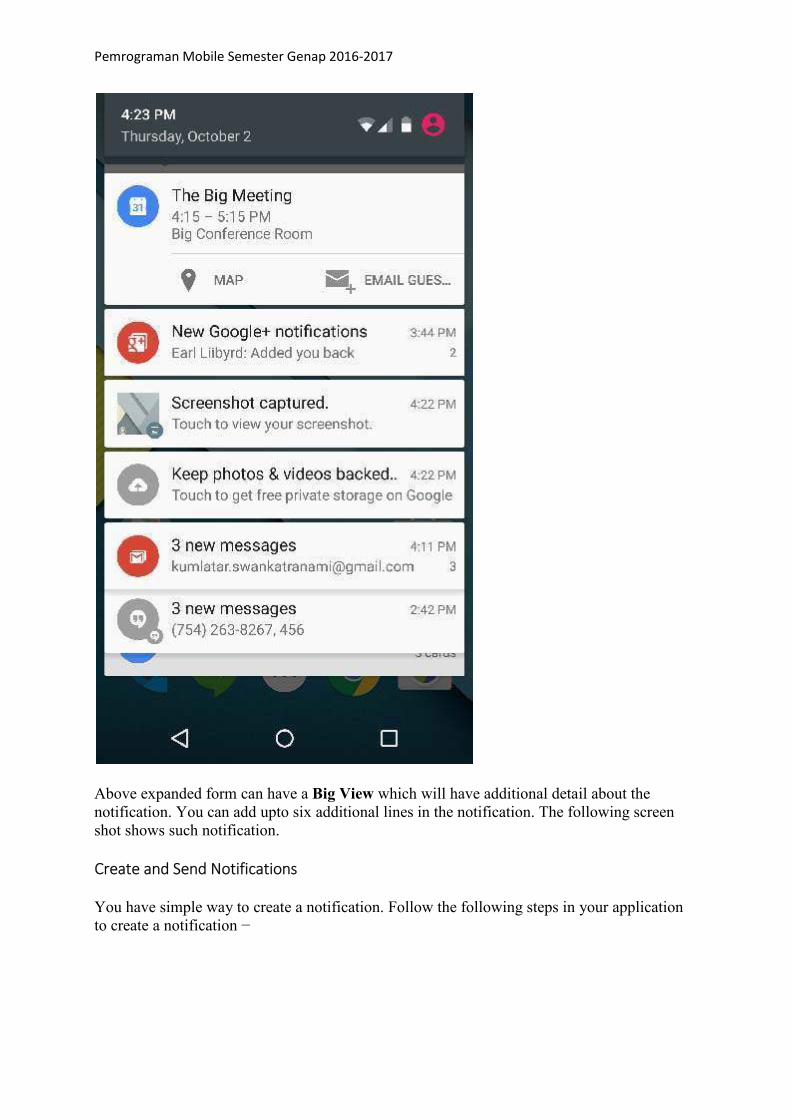
To see the details of the notification, you will have to select the icon which will display
notification drawer having detail about the notification. While working with emulator with
virtual device, you will have to click and drag down the status bar to expand it which will
give you detail as follows. This will be just 64 dp tall and called normal view.
Pemrograman Mobile Semester Genap 2016-2017
Above expanded form can have a Big View which will have additional detail about the
notification. You can add upto six additional lines in the notification. The following screen
shot shows such notification.
Create and Send Notifications
You have simple way to create a notification. Follow the following steps in your application
to create a notification −
Pemrograman Mobile Semester Genap 2016-2017
Step 1 - Create Notification Builder
As a first step is to create a notification builder using NotificationCompat.Builder.build().
You will use Notification Builder to set various Notification properties like its small and large
icons, title, priority etc.
NotificationCompat.Builder mBuilder = new NotificationCompat.Builder(this)
Step 2 - Setting Notification Properties
Once you have Builder object, you can set its Notification properties using Builder object as
per your requirement. But this is mandatory to set at least following −
• A small icon, set by setSmallIcon()
• A title, set by setContentTitle()
• Detail text, set by setContentText()
mBuilder.setSmallIcon(R.drawable.notification_icon); mBuilder.setContentTitle("Notification Alert, Click Me!"); mBuilder.setContentText("Hi, This is Android Notification Detail!");
You have plenty of optional properties which you can set for your notification. To learn more
about them, see the reference documentation for NotificationCompat.Builder.
Step 3 - Attach Actions
This is an optional part and required if you want to attach an action with the notification. An
action allows users to go directly from the notification to an Activity in your application,
where they can look at one or more events or do further work.
The action is defined by a PendingIntent containing an Intent that starts an Activity in your
application. To associate the PendingIntent with a gesture, call the appropriate method of
NotificationCompat.Builder. For example, if you want to start Activity when the user clicks
the notification text in the notification drawer, you add the PendingIntent by calling
setContentIntent().
A PendingIntent object helps you to perform an action on your applications behalf, often at a
later time, without caring of whether or not your application is running.
We take help of stack builder object which will contain an artificial back stack for the started
Activity. This ensures that navigating backward from the Activity leads out of your
application to the Home screen.
Intent resultIntent = new Intent(this, ResultActivity.class); TaskStackBuilder stackBuilder = TaskStackBuilder.create(this); stackBuilder.addParentStack(ResultActivity.class); // Adds the Intent that starts the Activity to the top of the stack stackBuilder.addNextIntent(resultIntent); PendingIntent resultPendingIntent = stackBuilder.getPendingIntent(0,PendingIntent.FLAG_UPDATE_CURRENT); mBuilder.setContentIntent(resultPendingIntent);

Pemrograman Mobile Semester Genap 2016-2017
Step 4 - Issue the notification
Finally, you pass the Notification object to the system by calling NotificationManager.notify()
to send your notification. Make sure you call NotificationCompat.Builder.build() method
on builder object before notifying it. This method combines all of the options that have been
set and return a new Notification object.
NotificationManager mNotificationManager = (NotificationManager) getSystemService(Context.NOTIFICATION_SERVICE); // notificationID allows you to update the notification later on. mNotificationManager.notify(notificationID, mBuilder.build());
The NotificationCompat.Builder Class
The NotificationCompat.Builder class allows easier control over all the flags, as well as help
constructing the typical notification layouts. Following are few important and most frequently
used methods available as a part of NotificationCompat.Builder class.
Sr.No. Constants & Description
1 Notification build()
Combine all of the options that have been set and return a new Notification object.
2
NotificationCompat.Builder setAutoCancel (boolean autoCancel)
Setting this flag will make it so the notification is automatically canceled when the
user clicks it in the panel.
3 NotificationCompat.Builder setContent (RemoteViews views)
Supply a custom RemoteViews to use instead of the standard one.
4 NotificationCompat.Builder setContentInfo (CharSequence info)
Set the large text at the right-hand side of the notification.
5 NotificationCompat.Builder setContentIntent (PendingIntent intent)
Supply a PendingIntent to send when the notification is clicked.
6 NotificationCompat.Builder setContentText (CharSequence text)
Set the text (second row) of the notification, in a standard notification.
7 NotificationCompat.Builder setContentTitle (CharSequence title)
Set the text (first row) of the notification, in a standard notification.
8 NotificationCompat.Builder setDefaults (int defaults)
Set the default notification options that will be used.
9 NotificationCompat.Builder setLargeIcon (Bitmap icon)
Set the large icon that is shown in the ticker and notification.
Pemrograman Mobile Semester Genap 2016-2017
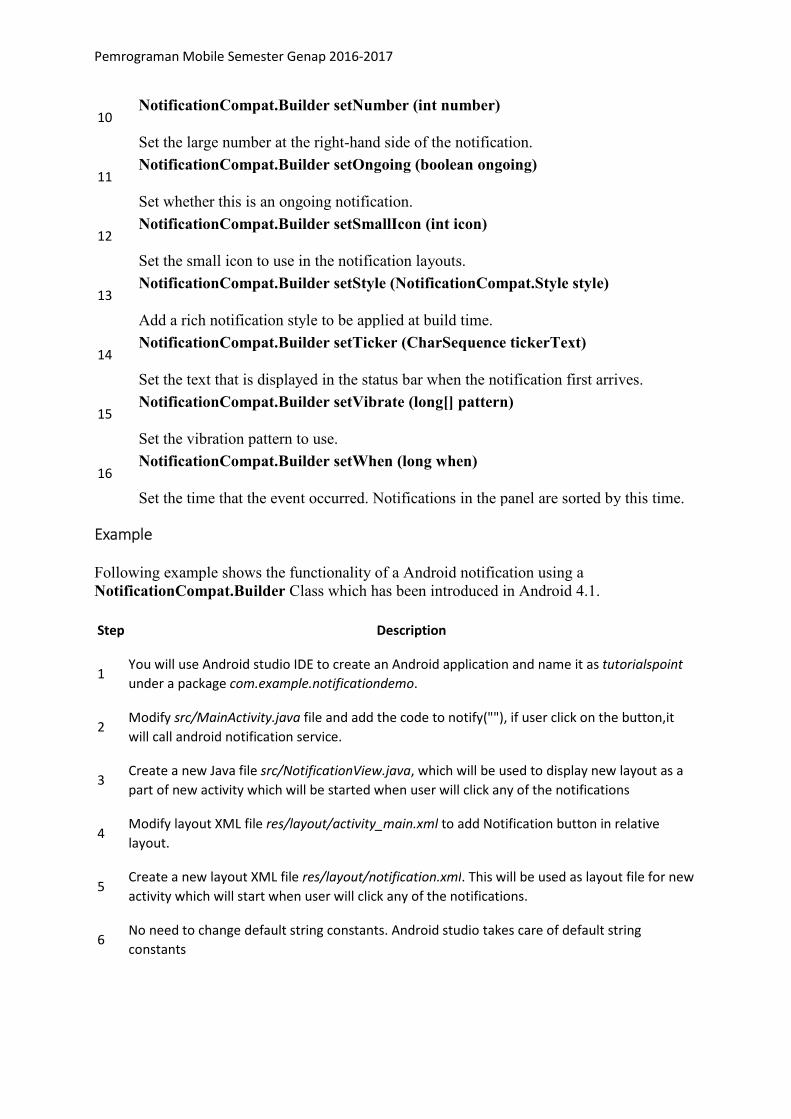
10 NotificationCompat.Builder setNumber (int number)
Set the large number at the right-hand side of the notification.
11 NotificationCompat.Builder setOngoing (boolean ongoing)
Set whether this is an ongoing notification.
12 NotificationCompat.Builder setSmallIcon (int icon)
Set the small icon to use in the notification layouts.
13 NotificationCompat.Builder setStyle (NotificationCompat.Style style)
Add a rich notification style to be applied at build time.
14 NotificationCompat.Builder setTicker (CharSequence tickerText)
Set the text that is displayed in the status bar when the notification first arrives.
15 NotificationCompat.Builder setVibrate (long[] pattern)
Set the vibration pattern to use.
16 NotificationCompat.Builder setWhen (long when)
Set the time that the event occurred. Notifications in the panel are sorted by this time.
Example
Following example shows the functionality of a Android notification using a
NotificationCompat.Builder Class which has been introduced in Android 4.1.
Step Description
1 You will use Android studio IDE to create an Android application and name it as tutorialspoint
under a package com.example.notificationdemo.
2 Modify src/MainActivity.java file and add the code to notify(""), if user click on the button,it
will call android notification service.
3 Create a new Java file src/NotificationView.java, which will be used to display new layout as a
part of new activity which will be started when user will click any of the notifications
4 Modify layout XML file res/layout/activity_main.xml to add Notification button in relative
layout.
5 Create a new layout XML file res/layout/notification.xml. This will be used as layout file for new
activity which will start when user will click any of the notifications.
6 No need to change default string constants. Android studio takes care of default string
constants

Pemrograman Mobile Semester Genap 2016-2017
7 Run the application to launch Android emulator and verify the result of the changes done in
the application.
Following is the content of the modified main activity file
src/com.example.notificationdemo/MainActivity.java. This file can include each of the
fundamental lifecycle methods.
package com.example.notificationdemo; import android.app.Activity; import android.app.NotificationManager; import android.app.PendingIntent; import android.content.Context; import android.content.Intent; import android.support.v4.app.NotificationCompat; import android.os.Bundle; import android.view.View; import android.widget.Button; public class MainActivity extends Activity { Button b1; @Override protected void onCreate(Bundle savedInstanceState) { super.onCreate(savedInstanceState); setContentView(R.layout.activity_main); b1 = (Button)findViewById(R.id.button); b1.setOnClickListener(new View.OnClickListener() { @Override public void onClick(View v) { addNotification(); } }); } private void addNotification() { NotificationCompat.Builder builder = new NotificationCompat.Builder(this) .setSmallIcon(R.drawable.abc) .setContentTitle("Notifications Example") .setContentText("This is a test notification"); Intent notificationIntent = new Intent(this, MainActivity.class); PendingIntent contentIntent = PendingIntent.getActivity(this, 0, notificationIntent, PendingIntent.FLAG_UPDATE_CURRENT); builder.setContentIntent(contentIntent); // Add as notification NotificationManager manager = (NotificationManager) getSystemService(Context.NOTIFICATION_SERVICE); manager.notify(0, builder.build()); } }
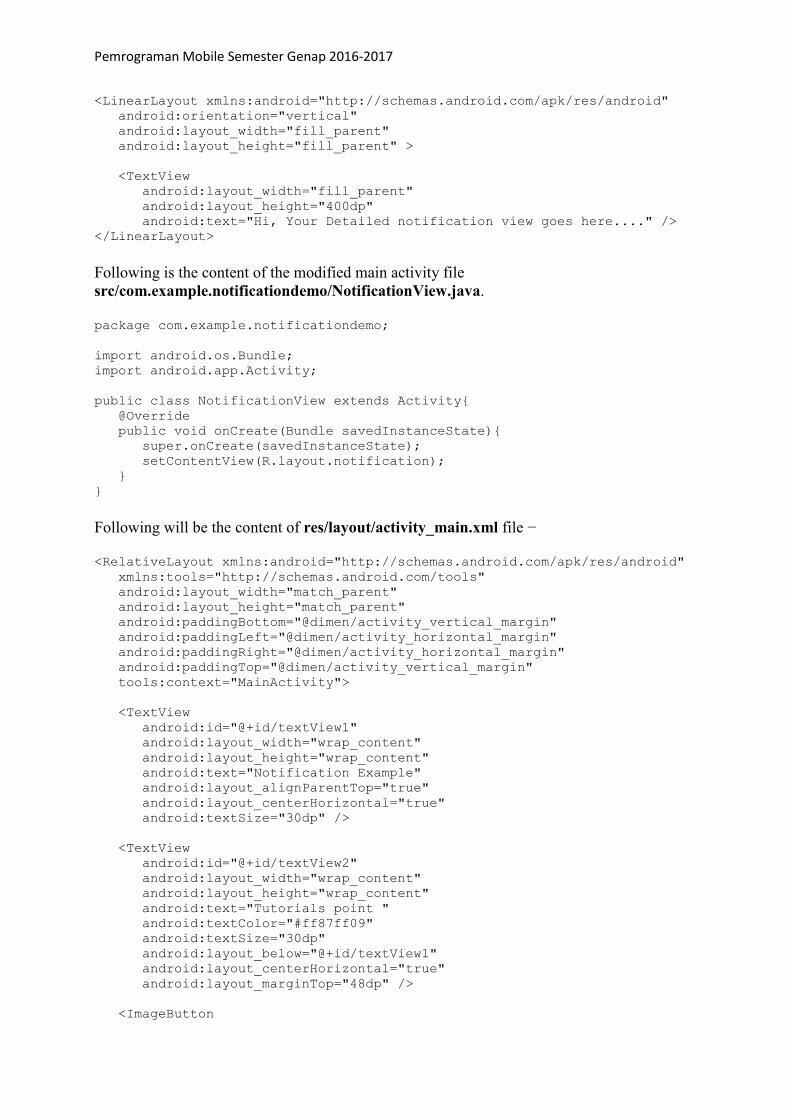
Following will be the content of res/layout/notification.xml file −
<?xml version="1.0" encoding="utf-8"?>
Pemrograman Mobile Semester Genap 2016-2017
<LinearLayout xmlns:android="http://schemas.android.com/apk/res/android" android:orientation="vertical" android:layout_width="fill_parent" android:layout_height="fill_parent" > <TextView android:layout_width="fill_parent" android:layout_height="400dp" android:text="Hi, Your Detailed notification view goes here...." /> </LinearLayout>
Following is the content of the modified main activity file
src/com.example.notificationdemo/NotificationView.java.
package com.example.notificationdemo; import android.os.Bundle; import android.app.Activity; public class NotificationView extends Activity{ @Override public void onCreate(Bundle savedInstanceState){ super.onCreate(savedInstanceState); setContentView(R.layout.notification); } }
Following will be the content of res/layout/activity_main.xml file −
<RelativeLayout xmlns:android="http://schemas.android.com/apk/res/android" xmlns:tools="http://schemas.android.com/tools" android:layout_width="match_parent" android:layout_height="match_parent" android:paddingBottom="@dimen/activity_vertical_margin" android:paddingLeft="@dimen/activity_horizontal_margin" android:paddingRight="@dimen/activity_horizontal_margin" android:paddingTop="@dimen/activity_vertical_margin" tools:context="MainActivity"> <TextView android:id="@+id/textView1" android:layout_width="wrap_content" android:layout_height="wrap_content" android:text="Notification Example" android:layout_alignParentTop="true" android:layout_centerHorizontal="true" android:textSize="30dp" /> <TextView android:id="@+id/textView2" android:layout_width="wrap_content" android:layout_height="wrap_content" android:text="Tutorials point " android:textColor="#ff87ff09" android:textSize="30dp" android:layout_below="@+id/textView1" android:layout_centerHorizontal="true" android:layout_marginTop="48dp" /> <ImageButton

Pemrograman Mobile Semester Genap 2016-2017
android:layout_width="wrap_content" android:layout_height="wrap_content" android:id="@+id/imageButton" android:src="@drawable/abc" android:layout_below="@+id/textView2" android:layout_centerHorizontal="true" android:layout_marginTop="42dp" /> <Button android:layout_width="wrap_content" android:layout_height="wrap_content" android:text="Notification" android:id="@+id/button" android:layout_marginTop="62dp" android:layout_below="@+id/imageButton" android:layout_centerHorizontal="true" /> </RelativeLayout>
Following will be the content of res/values/strings.xml to define two new constants −
<?xml version="1.0" encoding="utf-8"?> <resources> <string name="action_settings">Settings</string> <string name="app_name">tutorialspoint </string> </resources>
Following is the default content of AndroidManifest.xml −
<?xml version="1.0" encoding="utf-8"?> <manifest xmlns:android="http://schemas.android.com/apk/res/android" package="com.example.notificationdemo" > <application android:allowBackup="true" android:icon="@drawable/ic_launcher" android:label="@string/app_name" android:theme="@style/AppTheme" > <activity android:name="com.example.notificationdemo.MainActivity" android:label="@string/app_name" > <intent-filter> <action android:name="android.intent.action.MAIN" /> <category android:name="android.intent.category.LAUNCHER" /> </intent-filter> </activity> <activity android:name=".NotificationView" android:label="Details of notification" android:parentActivityName=".MainActivity"> <meta-data android:name="android.support.PARENT_ACTIVITY" android:value=".MainActivity"/> </activity> </application> </manifest>

Pemrograman Mobile Semester Genap 2016-2017
Let's try to run your tutorialspoint application. I assume you had created your AVD while
doing environment set-up. To run the APP from Android Studio, open one of your project's
activity files and click Run icon from the toolbar. Android Studio installs the app on your
AVD and starts it and if everything is fine with your setup and application, it will display
following Emulator window −
Now click button, you will see at the top a message "New Message Alert!" will display
momentarily and after that you will have following screen having a small icon at the top left
corner.
Now lets expand the view, long click on the small icon, after a second it will display date
information and this is the time when you should drag status bar down without releasing
mouse. You will see status bar will expand and you will get following screen −

Pemrograman Mobile Semester Genap 2016-2017
Big View Notification
The following code snippet demonstrates how to alter the notification created in the previous
snippet to use the Inbox big view style. I'm going to update displayNotification() modification
method to show this functionality −
protected void displayNotification() { Log.i("Start", "notification"); /* Invoking the default notification service */ NotificationCompat.Builder mBuilder = new NotificationCompat.Builder(this); mBuilder.setContentTitle("New Message"); mBuilder.setContentText("You've received new message."); mBuilder.setTicker("New Message Alert!"); mBuilder.setSmallIcon(R.drawable.woman); /* Increase notification number every time a new notification arrives */ mBuilder.setNumber(++numMessages); /* Add Big View Specific Configuration */ NotificationCompat.InboxStyle inboxStyle = new NotificationCompat.InboxStyle(); String[] events = new String[6]; events[0] = new String("This is first line...."); events[1] = new String("This is second line..."); events[2] = new String("This is third line..."); events[3] = new String("This is 4th line..."); events[4] = new String("This is 5th line..."); events[5] = new String("This is 6th line..."); // Sets a title for the Inbox style big view inboxStyle.setBigContentTitle("Big Title Details:"); // Moves events into the big view for (int i=0; i < events.length; i++) { inboxStyle.addLine(events[i]); } mBuilder.setStyle(inboxStyle);

Pemrograman Mobile Semester Genap 2016-2017
/* Creates an explicit intent for an Activity in your app */ Intent resultIntent = new Intent(this, NotificationView.class); TaskStackBuilder stackBuilder = TaskStackBuilder.create(this); stackBuilder.addParentStack(NotificationView.class); /* Adds the Intent that starts the Activity to the top of the stack */ stackBuilder.addNextIntent(resultIntent); PendingIntent resultPendingIntent =stackBuilder.getPendingIntent(0,PendingIntent.FLAG_UPDATE_CURRENT); mBuilder.setContentIntent(resultPendingIntent); mNotificationManager = (NotificationManager) getSystemService(Context.NOTIFICATION_SERVICE); /* notificationID allows you to update the notification later on. */ mNotificationManager.notify(notificationID, mBuilder.build()); }
Now if you will try to run your application then you will find following result in expanded
form of the view −

Pemrograman Mobile Semester Genap 2016-2017
PERTEMUAN KE-9 DAN 10
Location Based Services
This becomes possible with the help of Google Play services, which facilitates adding
location awareness to your app with automated location tracking, geofencing, and activity
recognition.
This tutorial shows you how to use Location Services in your APP to get the current location,
get periodic location updates, look up addresses etc.
The Location Object
The Location object represents a geographic location which can consist of a latitude,
longitude, time stamp, and other information such as bearing, altitude and velocity. There are
following important methods which you can use with Location object to get location specific
information −
Sr.No. Method & Description
1
float distanceTo(Location dest)
Returns the approximate distance in meters between this location and the given
location.
2 float getAccuracy()
Get the estimated accuracy of this location, in meters.
3 double getAltitude()
Get the altitude if available, in meters above sea level.
4 float getBearing()
Get the bearing, in degrees.
5 double getLatitude()
Get the latitude, in degrees.
6 double getLongitude()
Get the longitude, in degrees.
7 float getSpeed()
Get the speed if it is available, in meters/second over ground.
8 boolean hasAccuracy()
True if this location has an accuracy.
9 boolean hasAltitude()

Pemrograman Mobile Semester Genap 2016-2017
True if this location has an altitude.
10 boolean hasBearing()
True if this location has a bearing.
11 boolean hasSpeed()
True if this location has a speed.
12 void reset()
Clears the contents of the location.
13 void setAccuracy(float accuracy)
Set the estimated accuracy of this location, meters.
14 void setAltitude(double altitude)
Set the altitude, in meters above sea level.
15 void setBearing(float bearing)
Set the bearing, in degrees.
16 void setLatitude(double latitude)
Set the latitude, in degrees.
17 void setLongitude(double longitude)
Set the longitude, in degrees.
18 void setSpeed(float speed)
Set the speed, in meters/second over ground.
19 String toString()
Returns a string containing a concise, human-readable description of this object.
Get the Current Location
To get the current location, create a location client which is LocationClient object, connect it
to Location Services using connect() method, and then call its getLastLocation() method.
This method returns the most recent location in the form of Location object that contains
latitude and longitude coordinates and other information as explained above. To have location
based functionality in your activity, you will have to implement two interfaces −
• GooglePlayServicesClient.ConnectionCallbacks
• GooglePlayServicesClient.OnConnectionFailedListener
These interfaces provide following important callback methods, which you need to implement
in your activity class −
Sr.No. Callback Methods & Description
Pemrograman Mobile Semester Genap 2016-2017
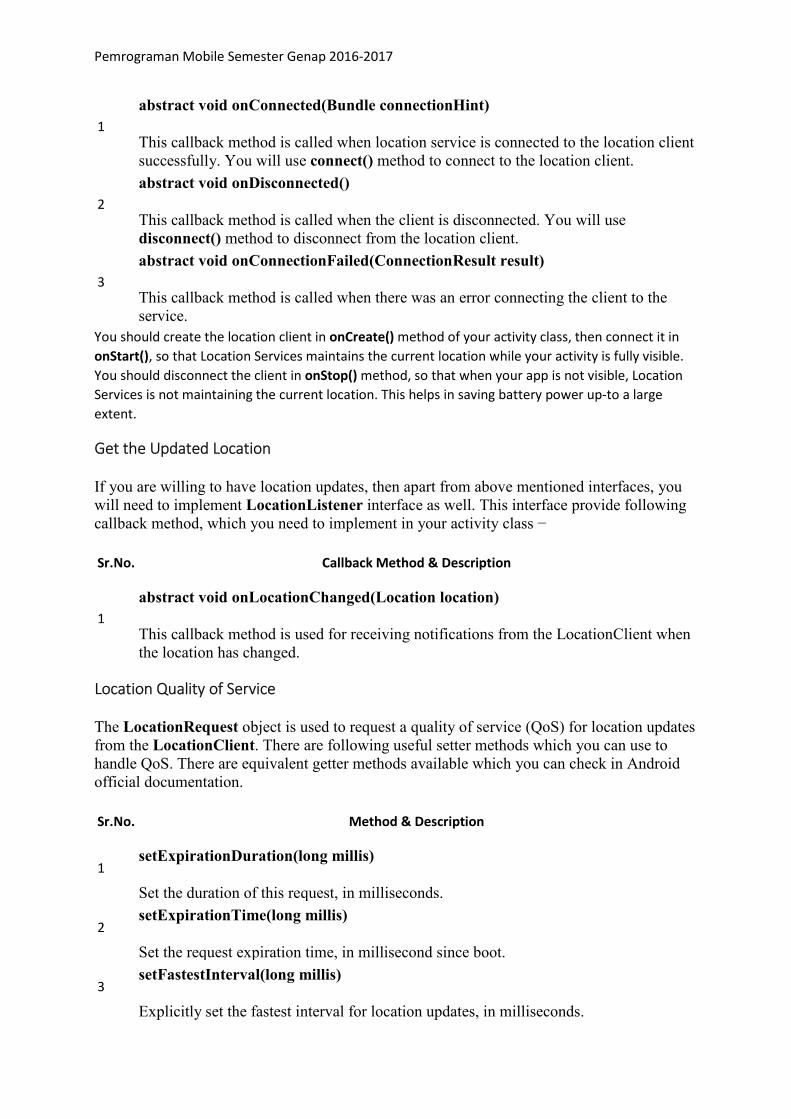
1
abstract void onConnected(Bundle connectionHint)
This callback method is called when location service is connected to the location client
successfully. You will use connect() method to connect to the location client.
2
abstract void onDisconnected()
This callback method is called when the client is disconnected. You will use
disconnect() method to disconnect from the location client.
3
abstract void onConnectionFailed(ConnectionResult result)
This callback method is called when there was an error connecting the client to the
service.
You should create the location client in onCreate() method of your activity class, then connect it in
onStart(), so that Location Services maintains the current location while your activity is fully visible.
You should disconnect the client in onStop() method, so that when your app is not visible, Location
Services is not maintaining the current location. This helps in saving battery power up-to a large
extent.
Get the Updated Location
If you are willing to have location updates, then apart from above mentioned interfaces, you
will need to implement LocationListener interface as well. This interface provide following
callback method, which you need to implement in your activity class −
Sr.No. Callback Method & Description
1
abstract void onLocationChanged(Location location)
This callback method is used for receiving notifications from the LocationClient when
the location has changed.
Location Quality of Service
The LocationRequest object is used to request a quality of service (QoS) for location updates
from the LocationClient. There are following useful setter methods which you can use to
handle QoS. There are equivalent getter methods available which you can check in Android
official documentation.
Sr.No. Method & Description
1 setExpirationDuration(long millis)
Set the duration of this request, in milliseconds.
2 setExpirationTime(long millis)
Set the request expiration time, in millisecond since boot.
3 setFastestInterval(long millis)
Explicitly set the fastest interval for location updates, in milliseconds.

Pemrograman Mobile Semester Genap 2016-2017
4 setInterval(long millis)
Set the desired interval for active location updates, in milliseconds.
5 setNumUpdates(int numUpdates)
Set the number of location updates.
6 setPriority(int priority)
Set the priority of the request.
Now for example, if your application wants high accuracy location it should create a location
request with setPriority(int) set to PRIORITY_HIGH_ACCURACY and setInterval(long)
to 5 seconds. You can also use bigger interval and/or other priorities like
PRIORITY_LOW_POWER for to request "city" level accuracy or
PRIORITY_BALANCED_POWER_ACCURACY for "block" level accuracy.
Activities should strongly consider removing all location request when entering the background (for
example at onPause()), or at least swap the request to a larger interval and lower quality to save
power consumption.
Displaying a Location Address
Once you have Location object, you can use Geocoder.getFromLocation() method to get an
address for a given latitude and longitude. This method is synchronous, and may take a long
time to do its work, so you should call the method from the doInBackground() method of an
AsyncTask class.
The AsyncTask must be subclassed to be used and the subclass will override
doInBackground(Params...) method to perform a task in the background and
onPostExecute(Result) method is invoked on the UI thread after the background
computation finishes and at the time to display the result. There is one more important method
available in AyncTask which is execute(Params... params), this method executes the task
with the specified parameters.
Example
Following example shows you in practical how to to use Location Services in your app to get
the current location and its equivalent addresses etc.
To experiment with this example, you will need actual Mobile device equipped with latest Android
OS, otherwise you will have to struggle with emulator which may not work.
Create Android Application
Step Description
1 You will use Android studio IDE to create an Android application and name it as Tutorialspoint
under a package com.example.tutorialspoint7.myapplication.
2 add src/GPSTracker.java file and add required code.

Pemrograman Mobile Semester Genap 2016-2017
3 Modify src/MainActivity.java file and add required code as shown below to take care of getting
current location and its equivalent address.
4 Modify layout XML file res/layout/activity_main.xml to add all GUI components which include
three buttons and two text views to show location/address.
5 Modify res/values/strings.xml to define required constant values
6 Modify AndroidManifest.xml as shown below
7 Run the application to launch Android emulator and verify the result of the changes done in
the application.
Following is the content of the modified main activity file MainActivity.java.
package com.example.tutorialspoint7.myapplication; import android.Manifest; import android.app.Activity; import android.os.Bundle; import android.support.v4.app.ActivityCompat; import android.test.mock.MockPackageManager; import android.view.View; import android.widget.Button; import android.widget.Toast; public class MainActivity extends Activity { Button btnShowLocation; private static final int REQUEST_CODE_PERMISSION = 2; String mPermission = Manifest.permission.ACCESS_FINE_LOCATION; // GPSTracker class GPSTracker gps; @Override public void onCreate(Bundle savedInstanceState) { super.onCreate(savedInstanceState); setContentView(R.layout.activity_main); try { if (ActivityCompat.checkSelfPermission(this, mPermission) != MockPackageManager.PERMISSION_GRANTED) { ActivityCompat.requestPermissions(this, new String[]{mPermission}, REQUEST_CODE_PERMISSION); // If any permission above not allowed by user, this condition will execute every time, else your else part will work } } catch (Exception e) { e.printStackTrace(); } btnShowLocation = (Button) findViewById(R.id.button);
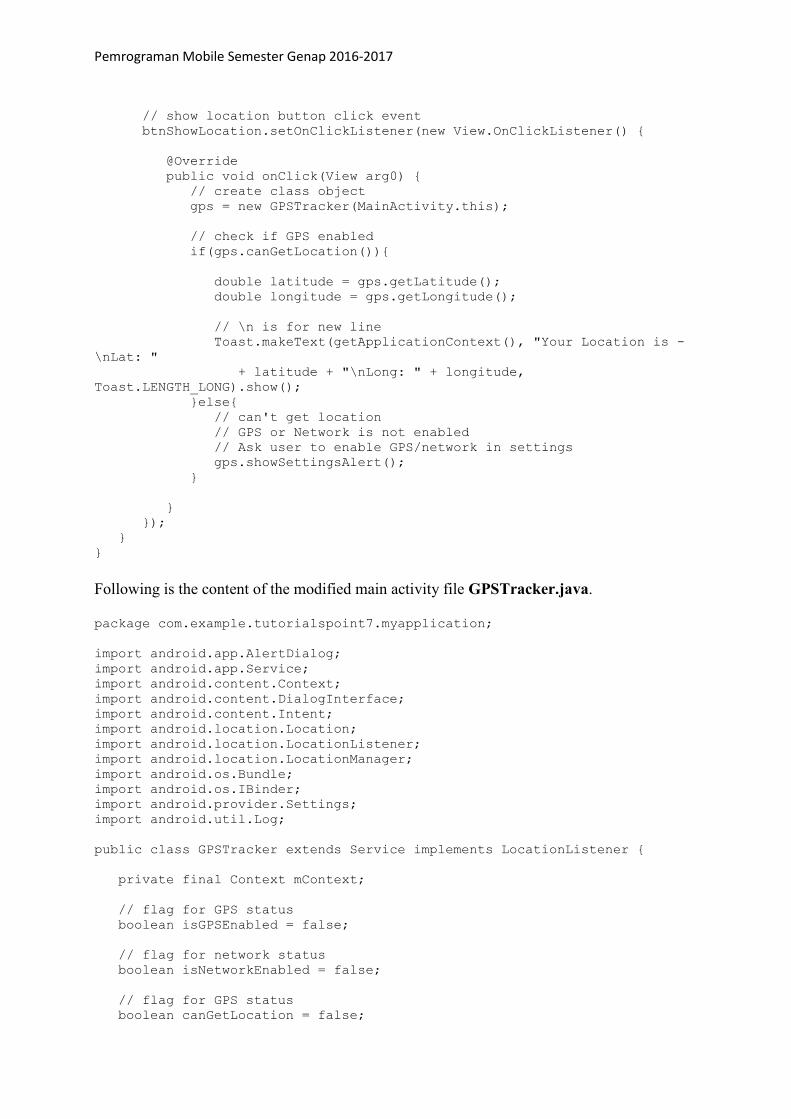
Pemrograman Mobile Semester Genap 2016-2017
// show location button click event btnShowLocation.setOnClickListener(new View.OnClickListener() { @Override public void onClick(View arg0) { // create class object gps = new GPSTracker(MainActivity.this); // check if GPS enabled if(gps.canGetLocation()){ double latitude = gps.getLatitude(); double longitude = gps.getLongitude(); // \n is for new line Toast.makeText(getApplicationContext(), "Your Location is - \nLat: " + latitude + "\nLong: " + longitude, Toast.LENGTH_LONG).show(); }else{ // can't get location // GPS or Network is not enabled // Ask user to enable GPS/network in settings gps.showSettingsAlert(); } } }); } }
Following is the content of the modified main activity file GPSTracker.java.
package com.example.tutorialspoint7.myapplication; import android.app.AlertDialog; import android.app.Service; import android.content.Context; import android.content.DialogInterface; import android.content.Intent; import android.location.Location; import android.location.LocationListener; import android.location.LocationManager; import android.os.Bundle; import android.os.IBinder; import android.provider.Settings; import android.util.Log; public class GPSTracker extends Service implements LocationListener { private final Context mContext; // flag for GPS status boolean isGPSEnabled = false; // flag for network status boolean isNetworkEnabled = false; // flag for GPS status boolean canGetLocation = false;

Pemrograman Mobile Semester Genap 2016-2017
Location location; // location double latitude; // latitude double longitude; // longitude // The minimum distance to change Updates in meters private static final long MIN_DISTANCE_CHANGE_FOR_UPDATES = 10; // 10 meters // The minimum time between updates in milliseconds private static final long MIN_TIME_BW_UPDATES = 1000 * 60 * 1; // 1 minute // Declaring a Location Manager protected LocationManager locationManager; public GPSTracker(Context context) { this.mContext = context; getLocation(); } public Location getLocation() { try { locationManager = (LocationManager) mContext.getSystemService(LOCATION_SERVICE); // getting GPS status isGPSEnabled = locationManager.isProviderEnabled(LocationManager.GPS_PROVIDER); // getting network status isNetworkEnabled = locationManager .isProviderEnabled(LocationManager.NETWORK_PROVIDER); if (!isGPSEnabled && !isNetworkEnabled) { // no network provider is enabled } else { this.canGetLocation = true; // First get location from Network Provider if (isNetworkEnabled) { locationManager.requestLocationUpdates( LocationManager.NETWORK_PROVIDER, MIN_TIME_BW_UPDATES, MIN_DISTANCE_CHANGE_FOR_UPDATES, this); Log.d("Network", "Network"); if (locationManager != null) { location = locationManager .getLastKnownLocation(LocationManager.NETWORK_PROVIDER); if (location != null) { latitude = location.getLatitude(); longitude = location.getLongitude(); } } } // if GPS Enabled get lat/long using GPS Services if (isGPSEnabled) { if (location == null) {

Pemrograman Mobile Semester Genap 2016-2017
locationManager.requestLocationUpdates( LocationManager.GPS_PROVIDER, MIN_TIME_BW_UPDATES, MIN_DISTANCE_CHANGE_FOR_UPDATES, this); Log.d("GPS Enabled", "GPS Enabled"); if (locationManager != null) { location = locationManager .getLastKnownLocation(LocationManager.GPS_PROVIDER); if (location != null) { latitude = location.getLatitude(); longitude = location.getLongitude(); } } } } } } catch (Exception e) { e.printStackTrace(); } return location; } /** * Stop using GPS listener * Calling this function will stop using GPS in your app * */ public void stopUsingGPS(){ if(locationManager != null){ locationManager.removeUpdates(GPSTracker.this); } } /** * Function to get latitude * */ public double getLatitude(){ if(location != null){ latitude = location.getLatitude(); } // return latitude return latitude; } /** * Function to get longitude * */ public double getLongitude(){ if(location != null){ longitude = location.getLongitude(); } // return longitude

Pemrograman Mobile Semester Genap 2016-2017
return longitude; } /** * Function to check GPS/wifi enabled * @return boolean * */ public boolean canGetLocation() { return this.canGetLocation; } /** * Function to show settings alert dialog * On pressing Settings button will lauch Settings Options * */ public void showSettingsAlert(){ AlertDialog.Builder alertDialog = new AlertDialog.Builder(mContext); // Setting Dialog Title alertDialog.setTitle("GPS is settings"); // Setting Dialog Message alertDialog.setMessage("GPS is not enabled. Do you want to go to settings menu?"); // On pressing Settings button alertDialog.setPositiveButton("Settings", new DialogInterface.OnClickListener() { public void onClick(DialogInterface dialog,int which) { Intent intent = new Intent(Settings.ACTION_LOCATION_SOURCE_SETTINGS); mContext.startActivity(intent); } }); // on pressing cancel button alertDialog.setNegativeButton("Cancel", new DialogInterface.OnClickListener() { public void onClick(DialogInterface dialog, int which) { dialog.cancel(); } }); // Showing Alert Message alertDialog.show(); } @Override public void onLocationChanged(Location location) { } @Override public void onProviderDisabled(String provider) { } @Override public void onProviderEnabled(String provider) { }

Pemrograman Mobile Semester Genap 2016-2017
@Override public void onStatusChanged(String provider, int status, Bundle extras) { } @Override public IBinder onBind(Intent arg0) { return null; } }
Following will be the content of res/layout/activity_main.xml file −
<?xml version = "1.0" encoding = "utf-8"?> <LinearLayout xmlns:android = "http://schemas.android.com/apk/res/android" android:layout_width = "fill_parent" android:layout_height = "fill_parent" android:orientation = "vertical" > <Button android:id = "@+id/button" android:layout_width = "fill_parent" android:layout_height = "wrap_content" android:text = "getlocation"/> </LinearLayout>
Following will be the content of res/values/strings.xml to define two new constants −
<?xml version = "1.0" encoding = "utf-8"?> <resources> <string name = "app_name">Tutorialspoint</string> </resources>
Following is the default content of AndroidManifest.xml −
<?xml version = "1.0" encoding = "utf-8"?> <manifest xmlns:android = "http://schemas.android.com/apk/res/android" package = "com.example.tutorialspoint7.myapplication"> <uses-permission android:name = "android.permission.ACCESS_FINE_LOCATION" /> <uses-permission android:name = "android.permission.INTERNET" /> <application android:allowBackup = "true" android:icon = "@mipmap/ic_launcher" android:label = "@string/app_name" android:supportsRtl = "true" android:theme = "@style/AppTheme"> <activity android:name = ".MainActivity"> <intent-filter> <action android:name = "android.intent.action.MAIN" /> <category android:name = "android.intent.category.LAUNCHER" /> </intent-filter> </activity> </application>

Pemrograman Mobile Semester Genap 2016-2017
</manifest>
Let's try to run your Tutorialspoint application. I assume that, you have connected your
actual Android Mobile device with your computer. To run the app from Android Studio, open
one of your project's activity files and click Run icon from the toolbar. Before starting your
application, Android studio installer will display following window to select an option where
you want to run your Android application.
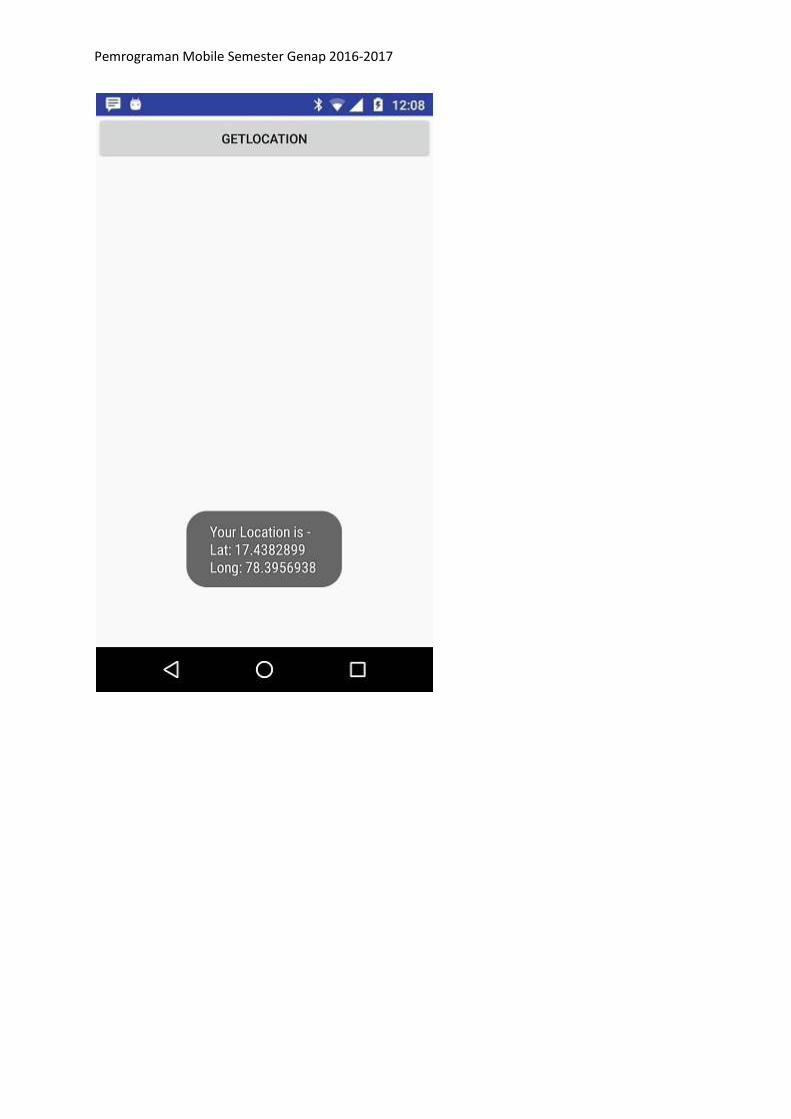
Now to see location select Get Location Button which will display location information as
follows −
Pemrograman Mobile Semester Genap 2016-2017
Pemrograman Mobile Semester Genap 2016-2017
PERTEMUAN KE-11 DAN 12
Facebook Integrations
Android allows your application to connect to facebook and share data or any kind of updates
on facebook. This chapter is about integrating facebook into your application.
There are two ways through which you can integrate facebook and share something from your
application. These ways are listed below −
• Facebook SDK
• Intent Share
Integrating Facebook SDK
This is the first way of connecting with facebook. You have to register your application and
then receive some Application Id , and then you have to download the facebook SDK and add
it to your project. The steps are listed below:
Generating application signature
You have to generate a key signature, but before you generate it, make sure you have SSL
installed, otherwise you have to download SSl. It can be downloaded here.
Now open command prompt and redirect to your java jre folder. Once you reach there, type
this command exactly. You have to replace the path in the inverted commas with your
keystore path which you can found in eclipse by selecting the window tab and selecting the
preferences tab and then selecting the build option under android from left side.
keytool -exportcert -alias androiddebugkey -keystore "your path" | openssl sha1 -binary | openssl base64
Once you enter it, you will be prompt for password. Give android as the password and then
copy the key that is given to you. It is shown in the image below −
Registering your application
Now create a new facebook application at developers.facebook.com/apps and fill all the
information. It is shown below −

Pemrograman Mobile Semester Genap 2016-2017
Now move to the native android app section and fill in your project and class name and paste
the hash that you copied in step 1. It is shown below −
If everything works fine, you will receive an application ID with the secret. Just copy the
application id and save it somewhere. It is shown in the image below −
Downloading SDK and integrating it
Download facebook sdk here. Import this into eclipse. Once imported, right click on your
facebook project and click on properties.Click on android, click on add button and select
facebook sdk as the project.Click ok.
Creating facebook login application
Once everything is complete , you can run the samples, that comes with SDK or create your
own application. In order to login, you need to call openActiveSession method and
implements its callback. Its syntax is given below −
// start Facebook Login Session.openActiveSession(this, true, new Session.StatusCallback() { // callback when session changes state public void call(Session session, SessionState state, Exception exception) { if (session.isOpened()) { // make request to;2 the /me API

Pemrograman Mobile Semester Genap 2016-2017
Request.executeMeRequestAsync(session, new Request.GraphUserCallback() { // callback after Graph API response with user object @Override public void onCompleted(GraphUser user, Response response) { if (user != null) { TextView welcome = (TextView) findViewById(R.id.welcome); welcome.setText("Hello " + user.getName() + "!"); } } }); } } }
Intent share
Intent share is used to share data between applications. In this strategy, we will not handle the
SDK stuff, but let the facebook application handles it. We will simply call the facebook
application and pass the data to share. This way, we can share something on facebook.
Android provides intent library to share data between activities and applications. In order to
use it as share intent , we have to specify the type of the share intent to ACTION_SEND. Its
syntax is given below −
Intent shareIntent = new Intent(); shareIntent.setAction(Intent.ACTION_SEND);
Next thing you need to is to define the type of data to pass , and then pass the data. Its syntax
is given below −
shareIntent.setType("text/plain"); shareIntent.putExtra(Intent.EXTRA_TEXT, "Hello, from tutorialspoint"); startActivity(Intent.createChooser(shareIntent, "Share your thoughts"));
Apart from the these methods, there are other methods available that allows intent handling.
They are listed below −
Sr.No Method & description
1 addCategory(String category)
This method add a new category to the intent.
2 createChooser(Intent target, CharSequence title)
Convenience function for creating a ACTION_CHOOSER Intent
3 getAction()
This method retrieve the general action to be performed, such as ACTION_VIEW
4 getCategories()
This method return the set of all categories in the intent and the current scaling event

Pemrograman Mobile Semester Genap 2016-2017
5 putExtra(String name, int value)
This method add extended data to the intent.
6
toString()
This method returns a string containing a concise, human-readable description of this
object
Example
Here is an example demonstrating the use of IntentShare to share data on facebook. It creates
a basic application that allows you to share some text on facebook.
To experiment with this example, you can run this on an actual device or in an emulator.
Steps Description
1 You will use Android studio to create an Android application under a package
com.example.sairamkrishna.myapplication.
2 Modify src/MainActivity.java file to add necessary code.
3 Modify the res/layout/activity_main to add respective XML components.
4 Run the application and choose a running android device and install the application on it and
verify the results.
Following is the content of the modified main activity file MainActivity.java.
package com.example.sairamkrishna.myapplication; import android.content.Intent; import android.net.Uri; import android.os.Bundle; import android.support.v7.app.AppCompatActivity; import android.view.View; import android.widget.Button; import android.widget.ImageView; import java.io.FileNotFoundException; import java.io.InputStream; public class MainActivity extends AppCompatActivity { private ImageView img; protected void onCreate(Bundle savedInstanceState) { super.onCreate(savedInstanceState); setContentView(R.layout.activity_main); img=(ImageView)findViewById(R.id.imageView); Button b1=(Button)findViewById(R.id.button); b1.setOnClickListener(new View.OnClickListener() {

Pemrograman Mobile Semester Genap 2016-2017
@Override public void onClick(View v) { Intent sharingIntent = new Intent(Intent.ACTION_SEND); Uri screenshotUri = Uri.parse("android. resource://comexample.sairamkrishna.myapplication/*"); try { InputStream stream = getContentResolver().openInputStream(screenshotUri); } catch (FileNotFoundException e) { // TODO Auto-generated catch block e.printStackTrace(); } sharingIntent.setType("image/jpeg"); sharingIntent.putExtra(Intent.EXTRA_STREAM, screenshotUri); startActivity(Intent.createChooser(sharingIntent, "Share image using")); } }); } }
Following is the modified content of the xml res/layout/activity_main.xml.
In the below code abc indicates the logo of tutorialspoint.com
<?xml version="1.0" encoding="utf-8"?> <RelativeLayout xmlns:android="http://schemas.android.com/apk/res/android" xmlns:tools="http://schemas.android.com/tools" android:layout_width="match_parent" android:layout_height="match_parent" android:paddingLeft="@dimen/activity_horizontal_margin" android:paddingRight="@dimen/activity_horizontal_margin" android:paddingTop="@dimen/activity_vertical_margin" android:paddingBottom="@dimen/activity_vertical_margin" tools:context=".MainActivity"> <TextView android:layout_width="wrap_content" android:layout_height="wrap_content" android:id="@+id/textView" android:layout_alignParentTop="true" android:layout_centerHorizontal="true" android:textSize="30dp" android:text="Facebook share " /> <TextView android:layout_width="wrap_content" android:layout_height="wrap_content" android:text="Tutorials Point" android:id="@+id/textView2" android:layout_below="@+id/textView" android:layout_centerHorizontal="true" android:textSize="35dp" android:textColor="#ff16ff01" /> <ImageView android:layout_width="wrap_content" android:layout_height="wrap_content"
Pemrograman Mobile Semester Genap 2016-2017
android:id="@+id/imageView" android:layout_below="@+id/textView2" android:layout_centerHorizontal="true" android:src="@drawable/abc"/> <Button android:layout_width="wrap_content" android:layout_height="wrap_content" android:text="Share" android:id="@+id/button" android:layout_marginTop="61dp" android:layout_below="@+id/imageView" android:layout_centerHorizontal="true" /> </RelativeLayout>
Following is the content of AndroidManifest.xml file.
<?xml version="1.0" encoding="utf-8"?> <manifest xmlns:android="http://schemas.android.com/apk/res/android" package="com.example.sairamkrishna.myapplication" > <application android:allowBackup="true" android:icon="@mipmap/ic_launcher" android:label="@string/app_name" android:theme="@style/AppTheme" > <activity android:name=".MainActivity" android:label="@string/app_name" > <intent-filter> <action android:name="android.intent.action.MAIN" /> <category android:name="android.intent.category.LAUNCHER" /> </intent-filter> </activity> </application> </manifest>
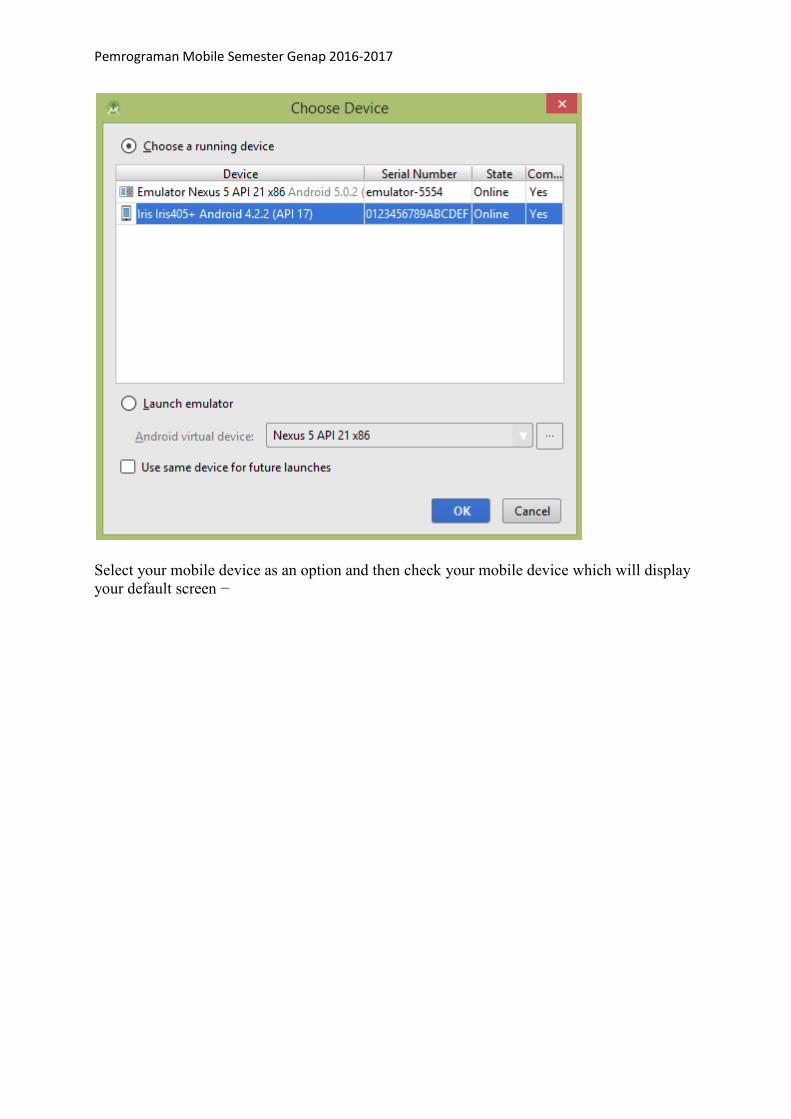
Let's try to run your Application. I assume you have connected your actual Android Mobile
device with your computer. To run the app from Android studio, open one of your project's
activity files and click Run icon from the toolbar. Before starting your application, Android
studio will display following window to select an option where you want to run your Android
application.
Pemrograman Mobile Semester Genap 2016-2017
Select your mobile device as an option and then check your mobile device which will display
your default screen −

Pemrograman Mobile Semester Genap 2016-2017
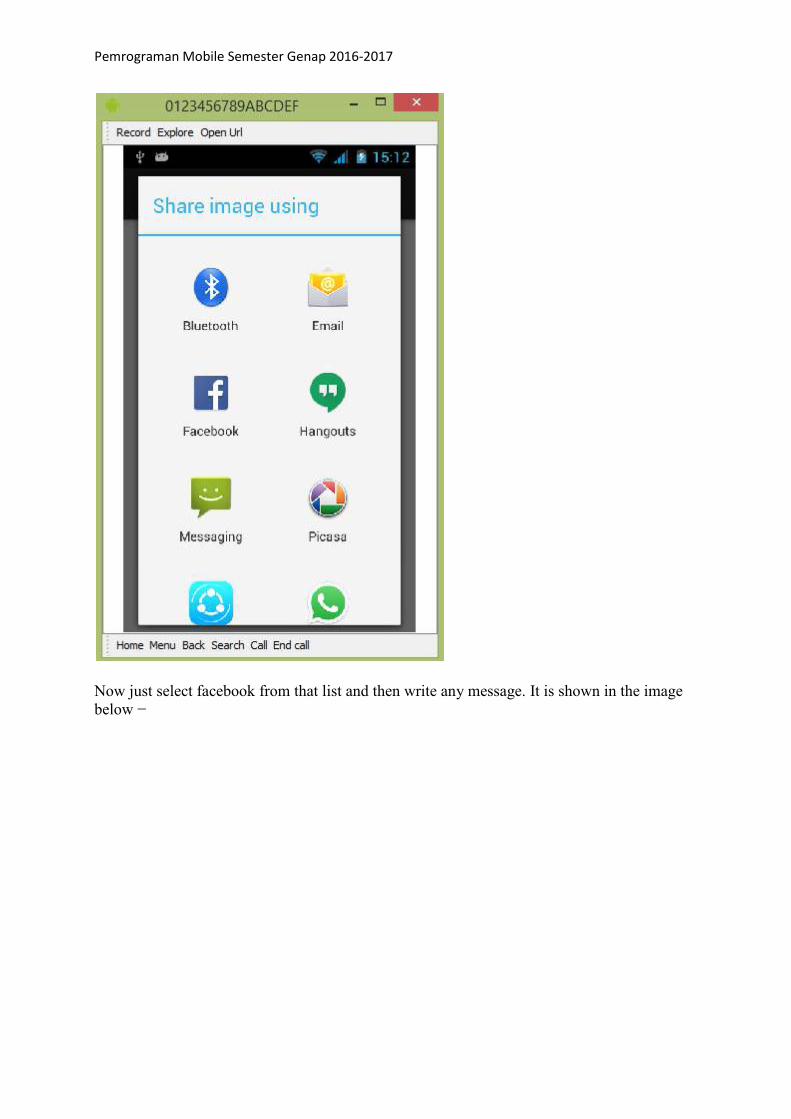
Now just tap on the button and you will see a list of share providers.
Pemrograman Mobile Semester Genap 2016-2017
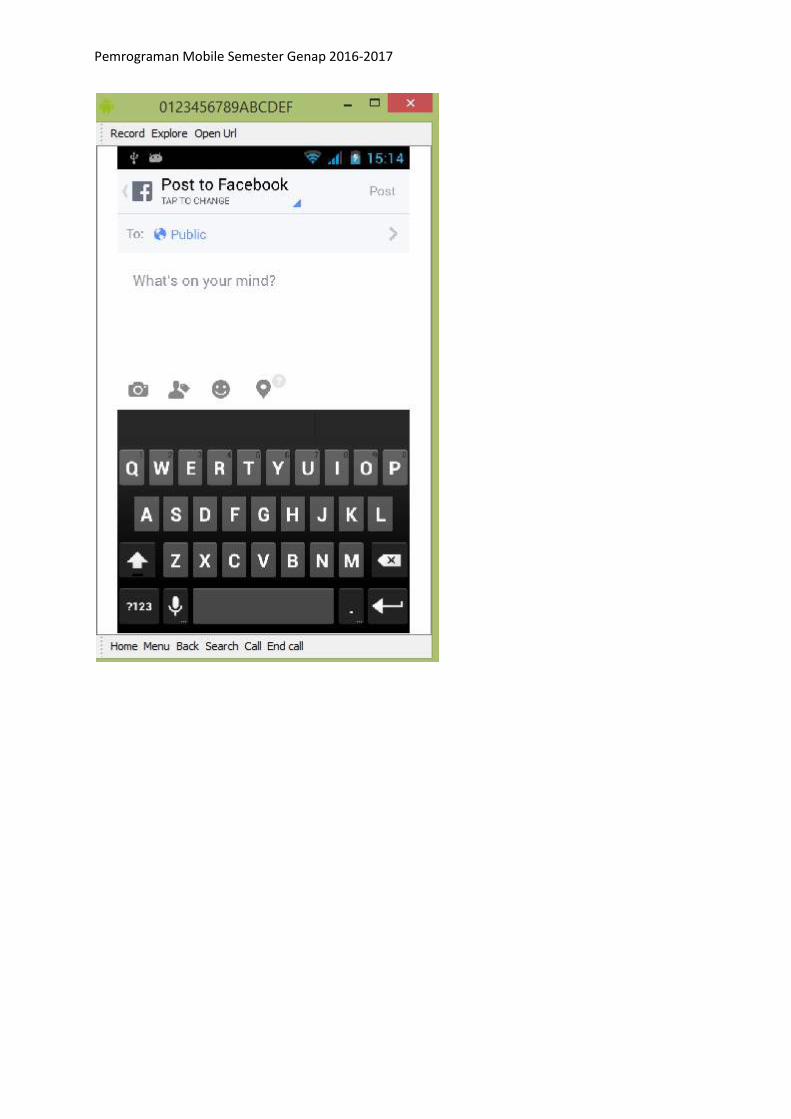
Now just select facebook from that list and then write any message. It is shown in the image
below −
Pemrograman Mobile Semester Genap 2016-2017

Pemrograman Mobile Semester Genap 2016-2017
PERTEMUAN KE-13 DAN 14
SQLite Databases
SQLite is a opensource SQL database that stores data to a text file on a device. Android
comes in with built in SQLite database implementation.
SQLite supports all the relational database features. In order to access this database, you don't
need to establish any kind of connections for it like JDBC,ODBC e.t.c
Database - Package
The main package is android.database.sqlite that contains the classes to manage your own
databases
Database - Creation
In order to create a database you just need to call this method openOrCreateDatabase with
your database name and mode as a parameter. It returns an instance of SQLite database which
you have to receive in your own object.Its syntax is given below
SQLiteDatabase mydatabase = openOrCreateDatabase("your database name",MODE_PRIVATE,null);
Apart from this , there are other functions available in the database package , that does this
job. They are listed below
Sr.No Method & Description
1
openDatabase(String path, SQLiteDatabase.CursorFactory factory, int flags,
DatabaseErrorHandler errorHandler)
This method only opens the existing database with the appropriate flag mode. The
common flags mode could be OPEN_READWRITE OPEN_READONLY
2
openDatabase(String path, SQLiteDatabase.CursorFactory factory, int flags)
It is similar to the above method as it also opens the existing database but it does not
define any handler to handle the errors of databases
3
openOrCreateDatabase(String path, SQLiteDatabase.CursorFactory factory)
It not only opens but create the database if it not exists. This method is equivalent to
openDatabase method.
4
openOrCreateDatabase(File file, SQLiteDatabase.CursorFactory factory)
This method is similar to above method but it takes the File object as a path rather then
a string. It is equivalent to file.getPath()

Pemrograman Mobile Semester Genap 2016-2017
Database - Insertion
we can create table or insert data into table using execSQL method defined in
SQLiteDatabase class. Its syntax is given below
mydatabase.execSQL("CREATE TABLE IF NOT EXISTS TutorialsPoint(Username VARCHAR,Password VARCHAR);"); mydatabase.execSQL("INSERT INTO TutorialsPoint VALUES('admin','admin');");
This will insert some values into our table in our database. Another method that also does the
same job but take some additional parameter is given below
Sr.No Method & Description
1
execSQL(String sql, Object[] bindArgs)
This method not only insert data , but also used to update or modify already existing
data in database using bind arguments
Database - Fetching
We can retrieve anything from database using an object of the Cursor class. We will call a
method of this class called rawQuery and it will return a resultset with the cursor pointing to
the table. We can move the cursor forward and retrieve the data.
Cursor resultSet = mydatbase.rawQuery("Select * from TutorialsPoint",null); resultSet.moveToFirst(); String username = resultSet.getString(0); String password = resultSet.getString(1);
There are other functions available in the Cursor class that allows us to effectively retrieve the
data. That includes
Sr.No Method & Description
1 getColumnCount()
This method return the total number of columns of the table.
2
getColumnIndex(String columnName)
This method returns the index number of a column by specifying the name of the
column
3 getColumnName(int columnIndex)
This method returns the name of the column by specifying the index of the column
4 getColumnNames()
This method returns the array of all the column names of the table.
5 getCount()

Pemrograman Mobile Semester Genap 2016-2017
This method returns the total number of rows in the cursor
6 getPosition()
This method returns the current position of the cursor in the table
7 isClosed()
This method returns true if the cursor is closed and return false otherwise
Database - Helper class
For managing all the operations related to the database , an helper class has been given and is
called SQLiteOpenHelper. It automatically manages the creation and update of the database.
Its syntax is given below
public class DBHelper extends SQLiteOpenHelper { public DBHelper(){ super(context,DATABASE_NAME,null,1); } public void onCreate(SQLiteDatabase db) {} public void onUpgrade(SQLiteDatabase database, int oldVersion, int newVersion) {} }
Example
Here is an example demonstrating the use of SQLite Database. It creates a basic contacts
applications that allows insertion, deletion and modification of contacts.
To experiment with this example, you need to run this on an actual device on which camera is
supported.
Steps Description
1 You will use Android studio to create an Android application under a package
com.example.sairamkrishna.myapplication.
2 Modify src/MainActivity.java file to get references of all the XML components and populate
the contacts on listView.
3 Create new src/DBHelper.java that will manage the database work
4 Create a new Activity as DisplayContact.java that will display the contact on the screen
5 Modify the res/layout/activity_main to add respective XML components
6 Modify the res/layout/activity_display_contact.xml to add respective XML components
7 Modify the res/values/string.xml to add necessary string components
8 Modify the res/menu/display_contact.xml to add necessary menu components

Pemrograman Mobile Semester Genap 2016-2017
9 Create a new menu as res/menu/mainmenu.xml to add the insert contact option
10 Run the application and choose a running android device and install the application on it and
verify the results.
Following is the content of the modified MainActivity.java.
package com.example.sairamkrishna.myapplication; import android.content.Context; import android.content.Intent; import android.support.v7.app.ActionBarActivity; import android.os.Bundle; import android.view.KeyEvent; import android.view.Menu; import android.view.MenuItem; import android.view.View; import android.widget.AdapterView; import android.widget.ArrayAdapter; import android.widget.AdapterView.OnItemClickListener; import android.widget.ListView; import java.util.ArrayList; import java.util.List; public class MainActivity extends ActionBarActivity { public final static String EXTRA_MESSAGE = "MESSAGE"; private ListView obj; DBHelper mydb; @Override protected void onCreate(Bundle savedInstanceState) { super.onCreate(savedInstanceState); setContentView(R.layout.activity_main); mydb = new DBHelper(this); ArrayList array_list = mydb.getAllCotacts(); ArrayAdapter arrayAdapter=new ArrayAdapter(this,android.R.layout.simple_list_item_1, array_list); obj = (ListView)findViewById(R.id.listView1); obj.setAdapter(arrayAdapter); obj.setOnItemClickListener(new OnItemClickListener(){ @Override public void onItemClick(AdapterView<?> arg0, View arg1, int arg2,long arg3) { // TODO Auto-generated method stub int id_To_Search = arg2 + 1; Bundle dataBundle = new Bundle(); dataBundle.putInt("id", id_To_Search); Intent intent = new Intent(getApplicationContext(),DisplayContact.class); intent.putExtras(dataBundle); startActivity(intent);
Pemrograman Mobile Semester Genap 2016-2017
} }); } @Override public boolean onCreateOptionsMenu(Menu menu) { // Inflate the menu; this adds items to the action bar if it is present. getMenuInflater().inflate(R.menu.menu_main, menu); return true; } @Override public boolean onOptionsItemSelected(MenuItem item){ super.onOptionsItemSelected(item); switch(item.getItemId()) { case R.id.item1:Bundle dataBundle = new Bundle(); dataBundle.putInt("id", 0); Intent intent = new Intent(getApplicationContext(),DisplayContact.class); intent.putExtras(dataBundle); startActivity(intent); return true; default: return super.onOptionsItemSelected(item); } } public boolean onKeyDown(int keycode, KeyEvent event) { if (keycode == KeyEvent.KEYCODE_BACK) { moveTaskToBack(true); } return super.onKeyDown(keycode, event); } }
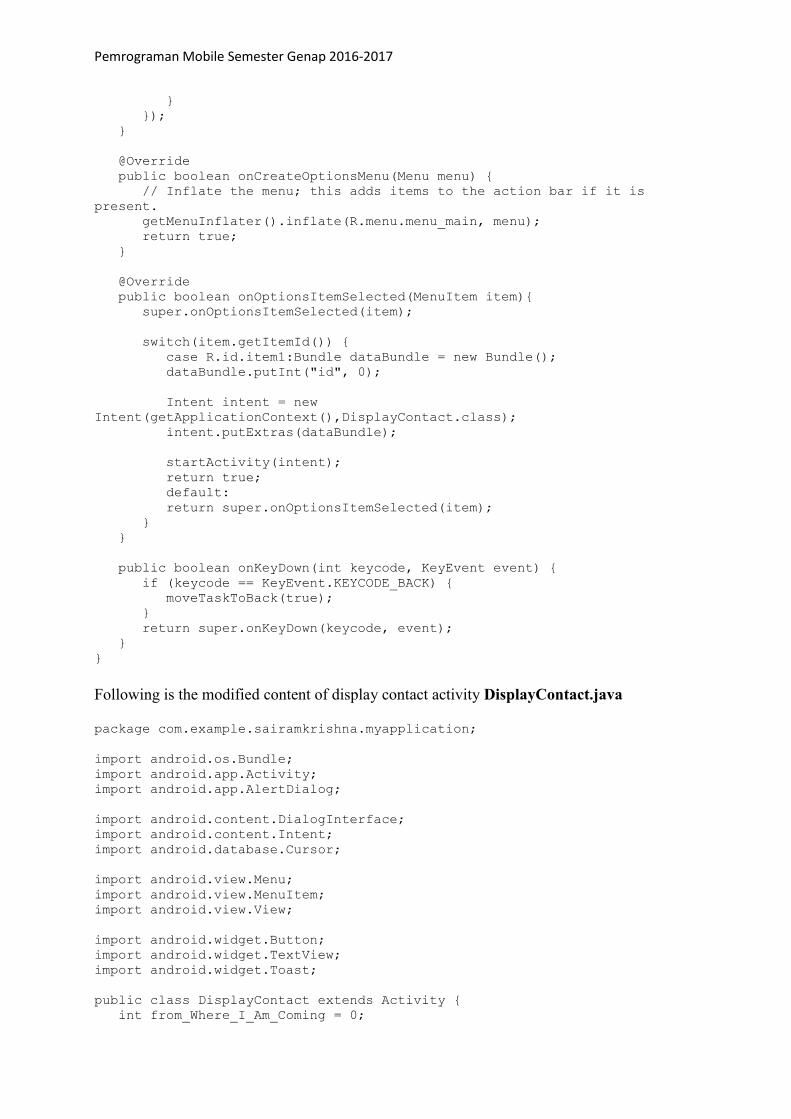
Following is the modified content of display contact activity DisplayContact.java
package com.example.sairamkrishna.myapplication; import android.os.Bundle; import android.app.Activity; import android.app.AlertDialog; import android.content.DialogInterface; import android.content.Intent; import android.database.Cursor; import android.view.Menu; import android.view.MenuItem; import android.view.View; import android.widget.Button; import android.widget.TextView; import android.widget.Toast; public class DisplayContact extends Activity { int from_Where_I_Am_Coming = 0;

Pemrograman Mobile Semester Genap 2016-2017
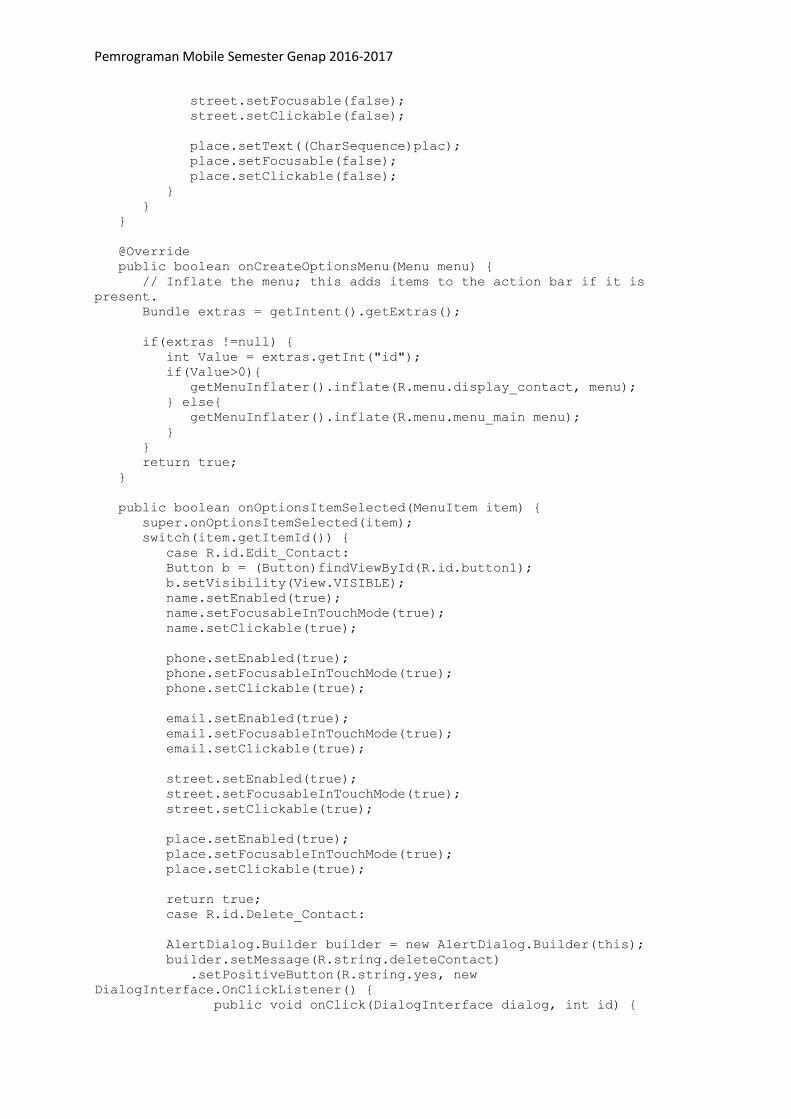
private DBHelper mydb ; TextView name ; TextView phone; TextView email; TextView street; TextView place; int id_To_Update = 0; @Override protected void onCreate(Bundle savedInstanceState) { super.onCreate(savedInstanceState); setContentView(R.layout.activity_display_contact); name = (TextView) findViewById(R.id.editTextName); phone = (TextView) findViewById(R.id.editTextPhone); email = (TextView) findViewById(R.id.editTextStreet); street = (TextView) findViewById(R.id.editTextEmail); place = (TextView) findViewById(R.id.editTextCity); mydb = new DBHelper(this); Bundle extras = getIntent().getExtras(); if(extras !=null) { int Value = extras.getInt("id"); if(Value>0){ //means this is the view part not the add contact part. Cursor rs = mydb.getData(Value); id_To_Update = Value; rs.moveToFirst(); String nam = rs.getString(rs.getColumnIndex(DBHelper.CONTACTS_COLUMN_NAME)); String phon = rs.getString(rs.getColumnIndex(DBHelper.CONTACTS_COLUMN_PHONE)); String emai = rs.getString(rs.getColumnIndex(DBHelper.CONTACTS_COLUMN_EMAIL)); String stree = rs.getString(rs.getColumnIndex(DBHelper.CONTACTS_COLUMN_STREET)); String plac = rs.getString(rs.getColumnIndex(DBHelper.CONTACTS_COLUMN_CITY)); if (!rs.isClosed()) { rs.close(); } Button b = (Button)findViewById(R.id.button1); b.setVisibility(View.INVISIBLE); name.setText((CharSequence)nam); name.setFocusable(false); name.setClickable(false); phone.setText((CharSequence)phon); phone.setFocusable(false); phone.setClickable(false); email.setText((CharSequence)emai); email.setFocusable(false); email.setClickable(false); street.setText((CharSequence)stree);
Pemrograman Mobile Semester Genap 2016-2017
street.setFocusable(false); street.setClickable(false); place.setText((CharSequence)plac); place.setFocusable(false); place.setClickable(false); } } } @Override public boolean onCreateOptionsMenu(Menu menu) { // Inflate the menu; this adds items to the action bar if it is present. Bundle extras = getIntent().getExtras(); if(extras !=null) { int Value = extras.getInt("id"); if(Value>0){ getMenuInflater().inflate(R.menu.display_contact, menu); } else{ getMenuInflater().inflate(R.menu.menu_main menu); } } return true; } public boolean onOptionsItemSelected(MenuItem item) { super.onOptionsItemSelected(item); switch(item.getItemId()) { case R.id.Edit_Contact: Button b = (Button)findViewById(R.id.button1); b.setVisibility(View.VISIBLE); name.setEnabled(true); name.setFocusableInTouchMode(true); name.setClickable(true); phone.setEnabled(true); phone.setFocusableInTouchMode(true); phone.setClickable(true); email.setEnabled(true); email.setFocusableInTouchMode(true); email.setClickable(true); street.setEnabled(true); street.setFocusableInTouchMode(true); street.setClickable(true); place.setEnabled(true); place.setFocusableInTouchMode(true); place.setClickable(true); return true; case R.id.Delete_Contact: AlertDialog.Builder builder = new AlertDialog.Builder(this); builder.setMessage(R.string.deleteContact) .setPositiveButton(R.string.yes, new DialogInterface.OnClickListener() { public void onClick(DialogInterface dialog, int id) {
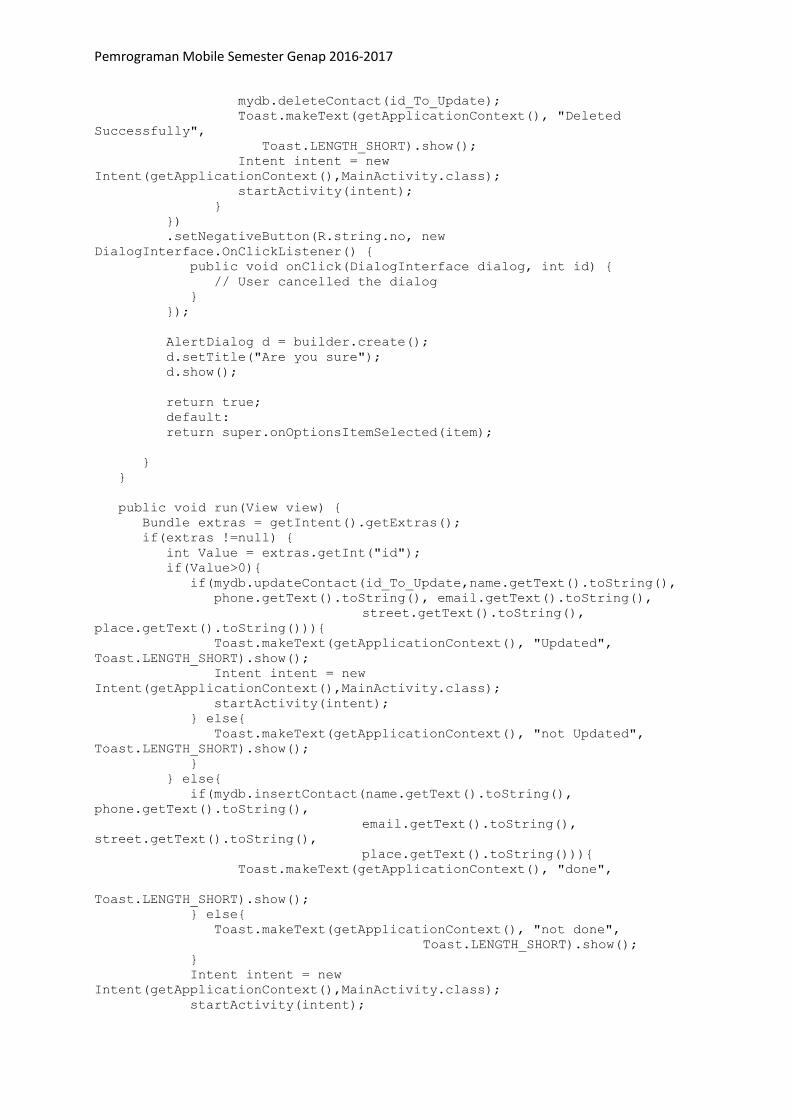
Pemrograman Mobile Semester Genap 2016-2017
mydb.deleteContact(id_To_Update); Toast.makeText(getApplicationContext(), "Deleted Successfully", Toast.LENGTH_SHORT).show(); Intent intent = new Intent(getApplicationContext(),MainActivity.class); startActivity(intent); } }) .setNegativeButton(R.string.no, new DialogInterface.OnClickListener() { public void onClick(DialogInterface dialog, int id) { // User cancelled the dialog } }); AlertDialog d = builder.create(); d.setTitle("Are you sure"); d.show(); return true; default: return super.onOptionsItemSelected(item); } } public void run(View view) { Bundle extras = getIntent().getExtras(); if(extras !=null) { int Value = extras.getInt("id"); if(Value>0){ if(mydb.updateContact(id_To_Update,name.getText().toString(), phone.getText().toString(), email.getText().toString(), street.getText().toString(), place.getText().toString())){ Toast.makeText(getApplicationContext(), "Updated", Toast.LENGTH_SHORT).show(); Intent intent = new Intent(getApplicationContext(),MainActivity.class); startActivity(intent); } else{ Toast.makeText(getApplicationContext(), "not Updated", Toast.LENGTH_SHORT).show(); } } else{ if(mydb.insertContact(name.getText().toString(), phone.getText().toString(), email.getText().toString(), street.getText().toString(), place.getText().toString())){ Toast.makeText(getApplicationContext(), "done", Toast.LENGTH_SHORT).show(); } else{ Toast.makeText(getApplicationContext(), "not done", Toast.LENGTH_SHORT).show(); } Intent intent = new Intent(getApplicationContext(),MainActivity.class); startActivity(intent);
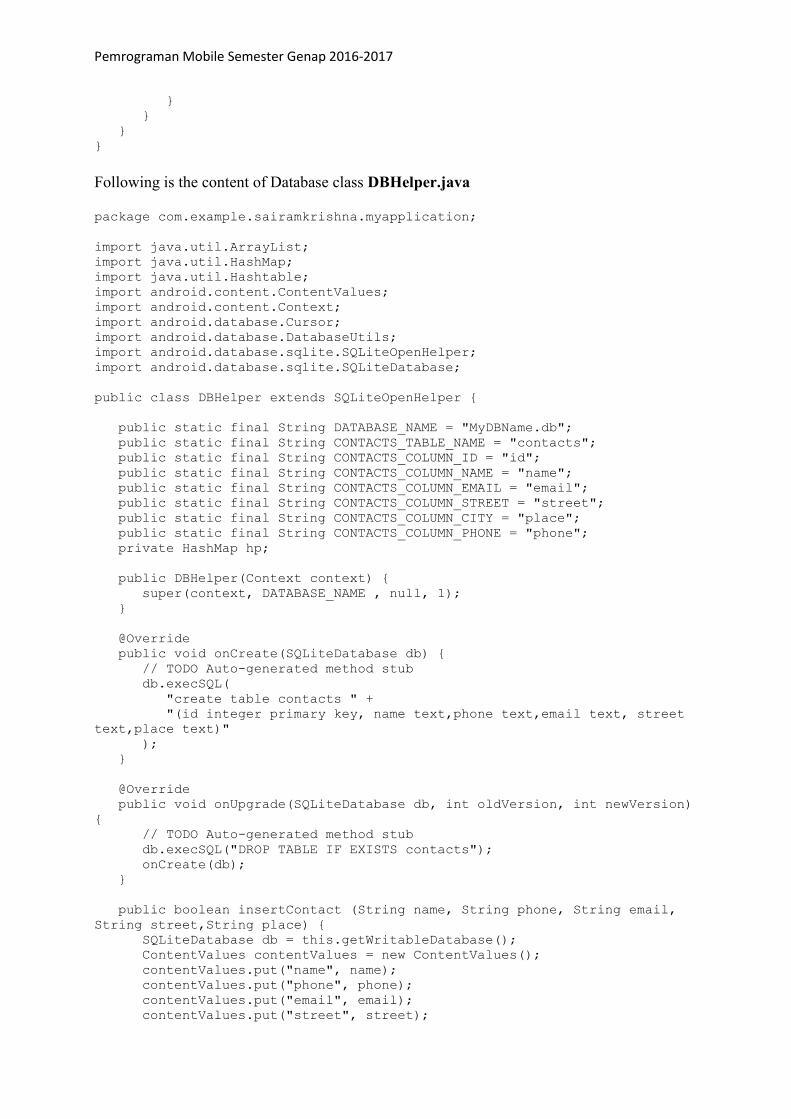
Pemrograman Mobile Semester Genap 2016-2017
} } } }
Following is the content of Database class DBHelper.java
package com.example.sairamkrishna.myapplication; import java.util.ArrayList; import java.util.HashMap; import java.util.Hashtable; import android.content.ContentValues; import android.content.Context; import android.database.Cursor; import android.database.DatabaseUtils; import android.database.sqlite.SQLiteOpenHelper; import android.database.sqlite.SQLiteDatabase; public class DBHelper extends SQLiteOpenHelper { public static final String DATABASE_NAME = "MyDBName.db"; public static final String CONTACTS_TABLE_NAME = "contacts"; public static final String CONTACTS_COLUMN_ID = "id"; public static final String CONTACTS_COLUMN_NAME = "name"; public static final String CONTACTS_COLUMN_EMAIL = "email"; public static final String CONTACTS_COLUMN_STREET = "street"; public static final String CONTACTS_COLUMN_CITY = "place"; public static final String CONTACTS_COLUMN_PHONE = "phone"; private HashMap hp; public DBHelper(Context context) { super(context, DATABASE_NAME , null, 1); } @Override public void onCreate(SQLiteDatabase db) { // TODO Auto-generated method stub db.execSQL( "create table contacts " + "(id integer primary key, name text,phone text,email text, street text,place text)" ); } @Override public void onUpgrade(SQLiteDatabase db, int oldVersion, int newVersion) { // TODO Auto-generated method stub db.execSQL("DROP TABLE IF EXISTS contacts"); onCreate(db); } public boolean insertContact (String name, String phone, String email, String street,String place) { SQLiteDatabase db = this.getWritableDatabase(); ContentValues contentValues = new ContentValues(); contentValues.put("name", name); contentValues.put("phone", phone); contentValues.put("email", email); contentValues.put("street", street);
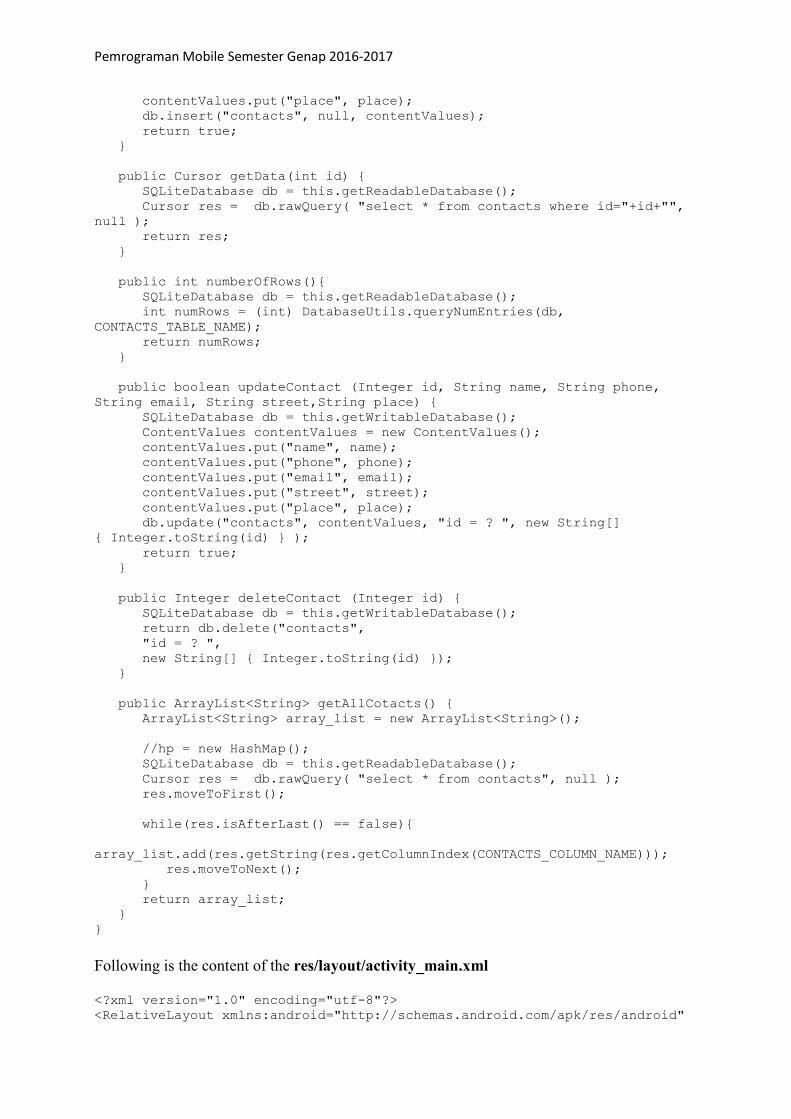
Pemrograman Mobile Semester Genap 2016-2017
contentValues.put("place", place); db.insert("contacts", null, contentValues); return true; } public Cursor getData(int id) { SQLiteDatabase db = this.getReadableDatabase(); Cursor res = db.rawQuery( "select * from contacts where id="+id+"", null ); return res; } public int numberOfRows(){ SQLiteDatabase db = this.getReadableDatabase(); int numRows = (int) DatabaseUtils.queryNumEntries(db, CONTACTS_TABLE_NAME); return numRows; } public boolean updateContact (Integer id, String name, String phone, String email, String street,String place) { SQLiteDatabase db = this.getWritableDatabase(); ContentValues contentValues = new ContentValues(); contentValues.put("name", name); contentValues.put("phone", phone); contentValues.put("email", email); contentValues.put("street", street); contentValues.put("place", place); db.update("contacts", contentValues, "id = ? ", new String[] { Integer.toString(id) } ); return true; } public Integer deleteContact (Integer id) { SQLiteDatabase db = this.getWritableDatabase(); return db.delete("contacts", "id = ? ", new String[] { Integer.toString(id) }); } public ArrayList<String> getAllCotacts() { ArrayList<String> array_list = new ArrayList<String>(); //hp = new HashMap(); SQLiteDatabase db = this.getReadableDatabase(); Cursor res = db.rawQuery( "select * from contacts", null ); res.moveToFirst(); while(res.isAfterLast() == false){ array_list.add(res.getString(res.getColumnIndex(CONTACTS_COLUMN_NAME))); res.moveToNext(); } return array_list; } }
Following is the content of the res/layout/activity_main.xml
<?xml version="1.0" encoding="utf-8"?> <RelativeLayout xmlns:android="http://schemas.android.com/apk/res/android"

Pemrograman Mobile Semester Genap 2016-2017
xmlns:tools="http://schemas.android.com/tools" android:layout_width="match_parent" android:layout_height="match_parent" android:paddingLeft="@dimen/activity_horizontal_margin" android:paddingRight="@dimen/activity_horizontal_margin" android:paddingTop="@dimen/activity_vertical_margin" android:paddingBottom="@dimen/activity_vertical_margin" tools:context=".MainActivity"> <TextView android:layout_width="wrap_content" android:layout_height="wrap_content" android:id="@+id/textView" android:layout_alignParentTop="true" android:layout_centerHorizontal="true" android:textSize="30dp" android:text="Data Base" /> <TextView android:layout_width="wrap_content" android:layout_height="wrap_content" android:text="Tutorials Point" android:id="@+id/textView2" android:layout_below="@+id/textView" android:layout_centerHorizontal="true" android:textSize="35dp" android:textColor="#ff16ff01" /> <ImageView android:layout_width="wrap_content" android:layout_height="wrap_content" android:id="@+id/imageView" android:layout_below="@+id/textView2" android:layout_centerHorizontal="true" android:src="@drawable/logo"/> <ScrollView android:layout_width="wrap_content" android:layout_height="wrap_content" android:id="@+id/scrollView" android:layout_below="@+id/imageView" android:layout_alignParentLeft="true" android:layout_alignParentStart="true" android:layout_alignParentBottom="true" android:layout_alignParentRight="true" android:layout_alignParentEnd="true"> <ListView android:id="@+id/listView1" android:layout_width="match_parent" android:layout_height="wrap_content" android:layout_centerHorizontal="true" android:layout_centerVertical="true" > </ListView> </ScrollView> </RelativeLayout>
Following is the content of the res/layout/activity_display_contact.xml
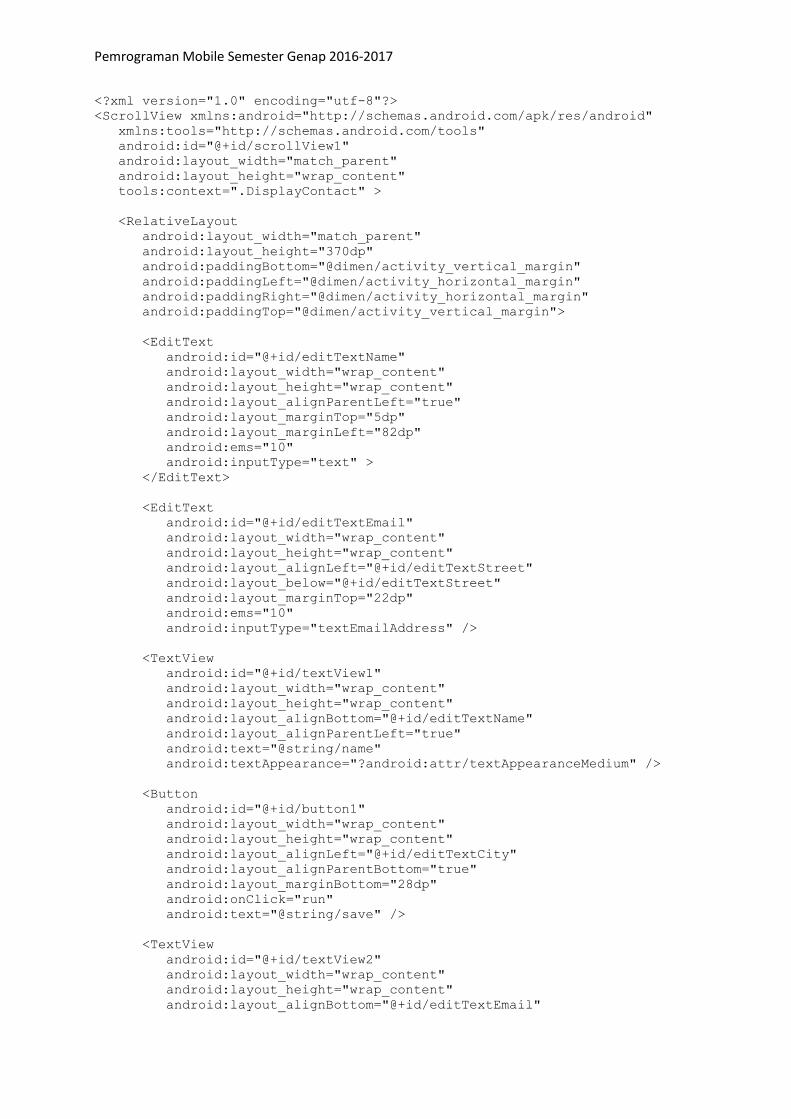
Pemrograman Mobile Semester Genap 2016-2017
<?xml version="1.0" encoding="utf-8"?> <ScrollView xmlns:android="http://schemas.android.com/apk/res/android" xmlns:tools="http://schemas.android.com/tools" android:id="@+id/scrollView1" android:layout_width="match_parent" android:layout_height="wrap_content" tools:context=".DisplayContact" > <RelativeLayout android:layout_width="match_parent" android:layout_height="370dp" android:paddingBottom="@dimen/activity_vertical_margin" android:paddingLeft="@dimen/activity_horizontal_margin" android:paddingRight="@dimen/activity_horizontal_margin" android:paddingTop="@dimen/activity_vertical_margin"> <EditText android:id="@+id/editTextName" android:layout_width="wrap_content" android:layout_height="wrap_content" android:layout_alignParentLeft="true" android:layout_marginTop="5dp" android:layout_marginLeft="82dp" android:ems="10" android:inputType="text" > </EditText> <EditText android:id="@+id/editTextEmail" android:layout_width="wrap_content" android:layout_height="wrap_content" android:layout_alignLeft="@+id/editTextStreet" android:layout_below="@+id/editTextStreet" android:layout_marginTop="22dp" android:ems="10" android:inputType="textEmailAddress" /> <TextView android:id="@+id/textView1" android:layout_width="wrap_content" android:layout_height="wrap_content" android:layout_alignBottom="@+id/editTextName" android:layout_alignParentLeft="true" android:text="@string/name" android:textAppearance="?android:attr/textAppearanceMedium" /> <Button android:id="@+id/button1" android:layout_width="wrap_content" android:layout_height="wrap_content" android:layout_alignLeft="@+id/editTextCity" android:layout_alignParentBottom="true" android:layout_marginBottom="28dp" android:onClick="run" android:text="@string/save" /> <TextView android:id="@+id/textView2" android:layout_width="wrap_content" android:layout_height="wrap_content" android:layout_alignBottom="@+id/editTextEmail"

Pemrograman Mobile Semester Genap 2016-2017
android:layout_alignLeft="@+id/textView1" android:text="@string/email" android:textAppearance="?android:attr/textAppearanceMedium" /> <TextView android:id="@+id/textView5" android:layout_width="wrap_content" android:layout_height="wrap_content" android:layout_alignBottom="@+id/editTextPhone" android:layout_alignLeft="@+id/textView1" android:text="@string/phone" android:textAppearance="?android:attr/textAppearanceMedium" /> <TextView android:id="@+id/textView4" android:layout_width="wrap_content" android:layout_height="wrap_content" android:layout_above="@+id/editTextEmail" android:layout_alignLeft="@+id/textView5" android:text="@string/street" android:textAppearance="?android:attr/textAppearanceMedium" /> <EditText android:id="@+id/editTextCity" android:layout_width="wrap_content" android:layout_height="wrap_content" android:layout_alignRight="@+id/editTextName" android:layout_below="@+id/editTextEmail" android:layout_marginTop="30dp" android:ems="10" android:inputType="text" /> <TextView android:id="@+id/textView3" android:layout_width="wrap_content" android:layout_height="wrap_content" android:layout_alignBaseline="@+id/editTextCity" android:layout_alignBottom="@+id/editTextCity" android:layout_alignParentLeft="true" android:layout_toLeftOf="@+id/editTextEmail" android:text="@string/country" android:textAppearance="?android:attr/textAppearanceMedium" /> <EditText android:id="@+id/editTextStreet" android:layout_width="wrap_content" android:layout_height="wrap_content" android:layout_alignLeft="@+id/editTextName" android:layout_below="@+id/editTextPhone" android:ems="10" android:inputType="text" > <requestFocus /> </EditText> <EditText android:id="@+id/editTextPhone" android:layout_width="wrap_content" android:layout_height="wrap_content" android:layout_alignLeft="@+id/editTextStreet" android:layout_below="@+id/editTextName"

Pemrograman Mobile Semester Genap 2016-2017
android:ems="10" android:inputType="phone|text" /> </RelativeLayout> </ScrollView>
Following is the content of the res/value/string.xml
<?xml version="1.0" encoding="utf-8"?> <resources> <string name="app_name">Address Book</string> <string name="action_settings">Settings</string> <string name="hello_world">Hello world!</string> <string name="Add_New">Add New</string> <string name="edit">Edit Contact</string> <string name="delete">Delete Contact</string> <string name="title_activity_display_contact">DisplayContact</string> <string name="name">Name</string> <string name="phone">Phone</string> <string name="email">Email</string> <string name="street">Street</string> <string name="country">City/State/Zip</string> <string name="save">Save Contact</string> <string name="deleteContact">Are you sure, you want to delete it.</string> <string name="yes">Yes</string> <string name="no">No</string> </resources>
Following is the content of the res/menu/main_menu.xml
<?xml version="1.0" encoding="utf-8"?> <menu xmlns:android="http://schemas.android.com/apk/res/android" > <item android:id="@+id/item1" android:icon="@drawable/add" android:title="@string/Add_New" > </item> </menu>
Following is the content of the res/menu/display_contact.xml
<?xml version="1.0" encoding="utf-8"?> <menu xmlns:android="http://schemas.android.com/apk/res/android" > <item android:id="@+id/Edit_Contact" android:orderInCategory="100" android:title="@string/edit"/> <item android:id="@+id/Delete_Contact" android:orderInCategory="100" android:title="@string/delete"/> </menu>
This is the defualt AndroidManifest.xml of this project

Pemrograman Mobile Semester Genap 2016-2017
<?xml version="1.0" encoding="utf-8"?> <manifest xmlns:android="http://schemas.android.com/apk/res/android" package="com.example.sairamkrishna.myapplication" > <application android:allowBackup="true" android:icon="@mipmap/ic_launcher" android:label="@string/app_name" android:theme="@style/AppTheme" > <activity android:name=".MainActivity" android:label="@string/app_name" > <intent-filter> <action android:name="android.intent.action.MAIN" /> <category android:name="android.intent.category.LAUNCHER" /> </intent-filter> </activity> <activity android:name=".DisplayContact"/> </application> </manifest>
Let's try to run your application. I assume you have connected your actual Android Mobile
device with your computer. To run the app from Android studio , open one of your project's
activity files and click Run icon from the tool bar. Before starting your application,Android
studio will display following window to select an option where you want to run your Android
application.
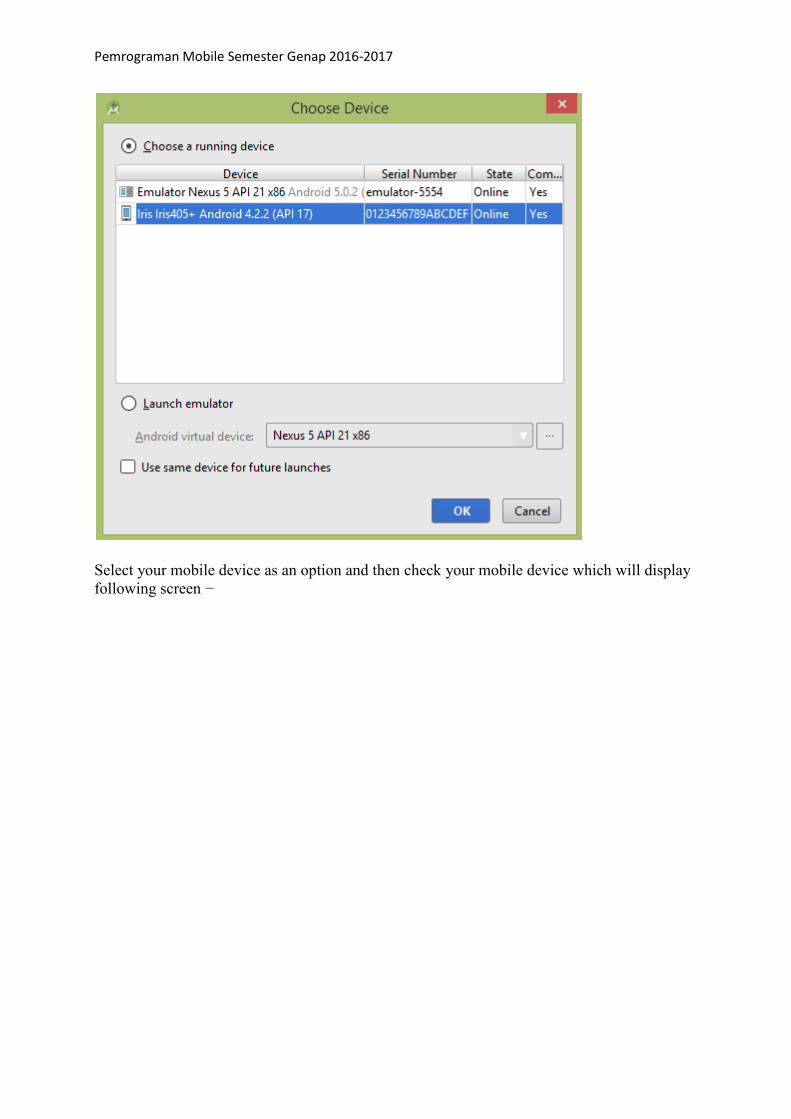
Pemrograman Mobile Semester Genap 2016-2017
Select your mobile device as an option and then check your mobile device which will display
following screen −

Pemrograman Mobile Semester Genap 2016-2017
Now open your optional menu, it will show as below image: Optional menu appears
different places on different versions
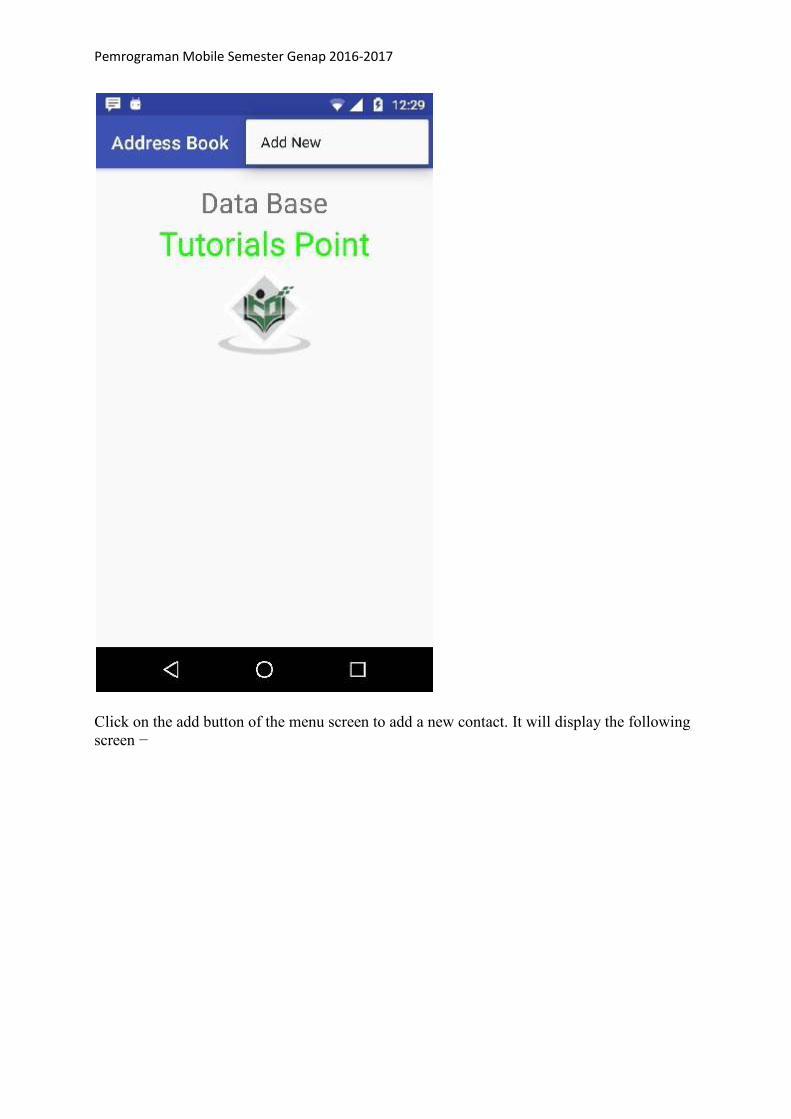
Pemrograman Mobile Semester Genap 2016-2017
Click on the add button of the menu screen to add a new contact. It will display the following
screen −
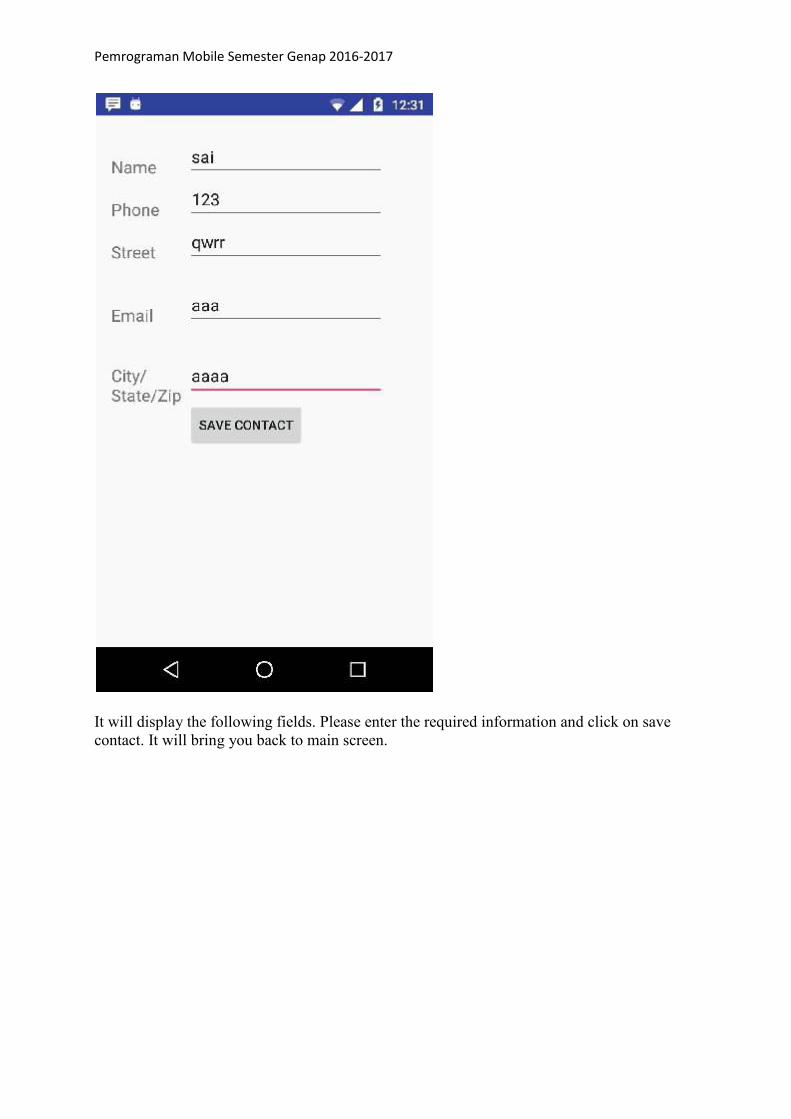
Pemrograman Mobile Semester Genap 2016-2017
It will display the following fields. Please enter the required information and click on save
contact. It will bring you back to main screen.

Pemrograman Mobile Semester Genap 2016-2017
Now our contact sai has been added.In order to see that where is your database is created.
Open your android studio, connect your mobile. Go tools/android/android device monitor.
Now browse the file explorer tab. Now browse this folder
/data/data/<your.package.name>/databases<database-name>.