Mobius – Huawei E5330 Training Guide · Mobius – Huawei E5330 Training Guide Chapter 1...
54
Mobius – Huawei E5330 Training Guide
Transcript of Mobius – Huawei E5330 Training Guide · Mobius – Huawei E5330 Training Guide Chapter 1...

Mobius – Huawei E5330 Training Guide

Mobius – Huawei E5330 Training Guide
Chapter 1 Introduction Page 3 - 13
Chapter 2 Basic Settings Page 14 - 21
Chapter 3 SMS Page 22 - 23
Chapter 4 Advance Settings Page 24 - 47
Chapter 5 FAQ Page 48 - 53

INTRODUCTION

Chapter 1 Introduction

Chapter 1 Introduction
Appearance

Chapter 1 Introduction
Connect to all Wi-Fi devices

Chapter 1 Introduction
HUAWEI E5330Bs-6 Mobile WiFi (hereinafter referred to as the E5330Bs-6) is a high-speed packet access mobile hotspot.
• The E5330Bs-6 supports the following standards: • High Speed Packet Access Plus (HSPA+) • High Speed Uplink Packet Access (HSUPA) • High Speed Downlink Packet Access (HSDPA) • Universal Mobile Telecommunications System (UMTS) • Enhanced Data rates for Global Evolution (EDGE) • General Packet Radio Service (GPRS) • Global System for Mobile communications (GSM)
• The E5330Bs-6 provides the following services: • HSPA+ packet data service of up to 21.6 Mbit/s • HSPA (HSUPA/HSDPA)/UMTS packet data service of up to 14.4 Mbit/s • EDGE/GPRS packet data service of up to 236.8 kbit/s • UMTS/GSM Short Message Service (SMS)

Chapter 1 IntroductionChapter 1 Introduction
• The E5330Bs-6 mainly supports the following features: • HSPA+ (DL) data service of up to 21.6 Mbit/s • HSDPA (DL) data service of up to 14.4 Mbit/s • HSUPA (UL) data service of up to 5.76 Mbit/s • UMTS data service of up to 384 kbit/s • EDGE data service of up to 236.8 kbit/s • GPRS data service of up to 85.6 kbit/s • PS domain data service based on UMTS and GSM • SMS based on CS/PS domain of GSM and UMTS • Wi-Fi • Five-second fast boot • Support for HUAWEI Mobile WiFi App • Press and Play • 3G/Wi-Fi auto offl oad • IPv6 /IPv4 dual stack (optional) • Built-in DHCP Server, DNS RELAY and NAT • Online software upgrade

Chapter 1 IntroductionChapter 1 Introduction
• The E5330Bs-6 mainly supports the following features: • Traffi c statistic • Standard Micro USB interface • HiLink features (Driverless, Zero installation) • LED indicators • Built-in UMTS and WLAN high gain antenna • Windows XP SP3, Windows Vista SP1/SP2, Windows 7, Windows 8 (does not • support Windows RT), MAC OS X 10.6, 10.7 and 10.8 with latest upgrades

Chapter 1 IntroductionChapter 1 Introduction
• Hardware Technical Specifi cations
Item Specifi cations
Technical standard WAN: HSPA+/HSPA/UMTS/EDGE/GPRS/GSM
Operating frequency WLAN: IEEE 802.11b/g/n
HSPA+/HSPA/UMTS: 2100/1900/850 MHz
EDGE/GPRS/GSM: 1900/1800/900/850 MHz
WLAN: 2400MHz 2483.5MHz
Internal memory 128 MB Flash, 64 MB Memory
Maximum transmitter power EDGE/GPRS/GSM: 1900/1800/900/850 MHz
WLAN
802.11b: 14 (+/-3) dBm
802.11g: 11 (+/-3) dBm
802.11n: 9 (+/-3) dBm
Receiver sensitivity UMTS: Confi rm to 3GPP Requirements

Chapter 1 IntroductionChapter 1 Introduction
• Hardware Technical Specifi cations
Item Specifi cations
Receiver sensitivity
WLAN
802.11b: -76 dBm@11 Mbit/s
802.11g: -82 dBm@1 Mbit/s
802.11g: -65 dBm@54 Mbit/s
802.11n: -64 dBm@65 Mbit/s
Operating frequency 802.11b: Up to 11 Mbit/s
802.11g: Up to 54 Mbit/s
802.11n: Support MCS0–MCS7; Up to 72.2 Mbit/s.
Maximum power consumption 3.5 W
Power supplyAC: 100–240 V
DC: 5 V, 1 A
Battery Type: Li (rechargeable)
Capacity: 3.7 V, 1500 mAh

Chapter 1 IntroductionChapter 1 Introduction
• Hardware Technical Specifi cations
Item Specifi cations
BatteryMaximum working time: 5–6 hours (depending on the network)
Maximum standby time: 300 hours (depending on the network)
External interfacesUSB interface: Micro USB
SIM card interface: standard 6-pin SIM card interface
Indicators
Signal
Green: Strong signal
Orange: Weak signal
Red: No signal
SignalGreen: Wi-Fi turned on
Blue: Connected to WLAN.
Signal
Green: Suffi cient battery
Blinking green: Charging the battery
Red: Low battery

Chapter 1 IntroductionChapter 1 Introduction
• Hardware Technical Specifi cations
Item Specifi cations
SMSGreen: New message
Blinking green: Inbox full
Power Blinks slowly: The Mobile WiFi enters the standby mode
Key-press Power switch, Reset switch
Antenna
Built-in GSM/UMTS main diversity antenna
Built-in UMTS diversity antenna
Built-in WLAN antenna
Dimensions (W × D × H) 92.8 mm×60.0 mm×14.0 mm
Weight about 74 g (including the battery)
TemperatureOperating: 0ºC to +35ºC
Storage: -20ºC to +60ºC
Humidity 5% to 95% (non-condensing)

BASIC SETTINGS

Chapter 2 Basic Settings
Press and hold the button until the indicator lights up, indicating that the Mobile WiFi is turned on.
Note: Press and hold the button to turn off the Mobile WiFi.
Press and hold the button until the
Press and hold the button to turn off
• Power on
Chapter 2 Basic Settings
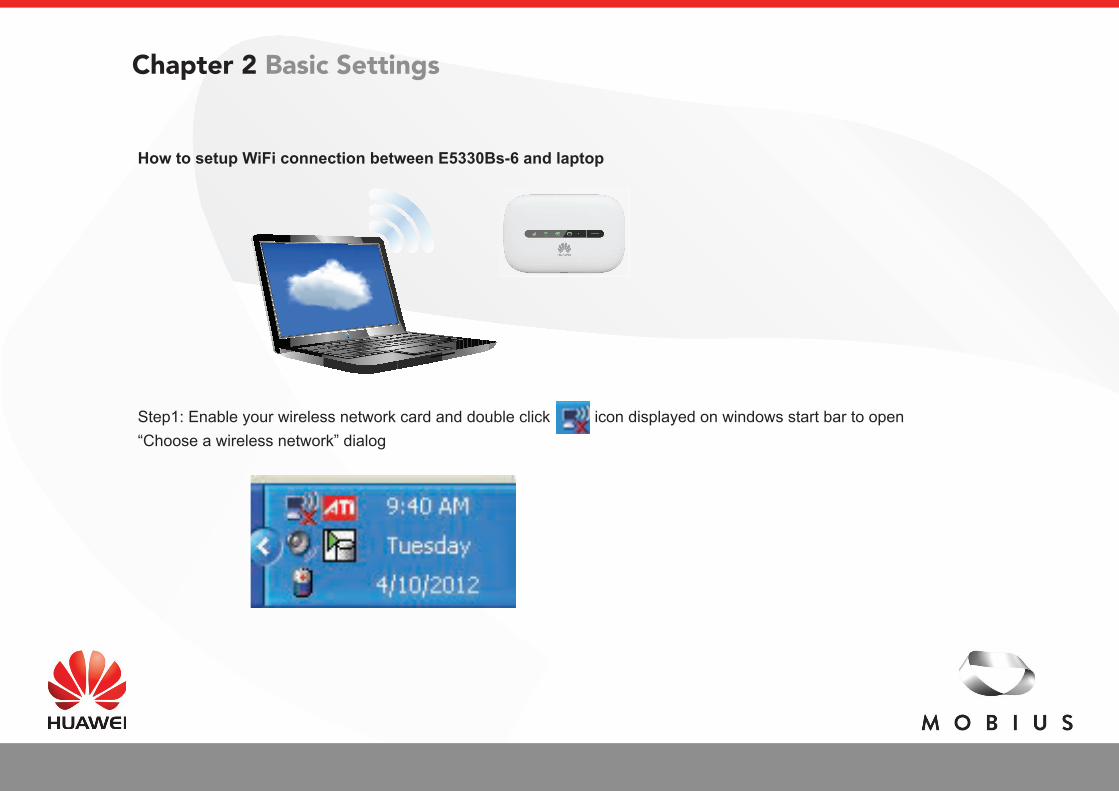
How to setup WiFi connection between E5330Bs-6 and laptop
Step1: Enable your wireless network card and double click icon displayed on windows start bar to open “Choose a wireless network” dialogStep1: Enable your wireless network card and double click icon displayed on windows start bar to open

Chapter 2 Basic Settings
How to setup WiFi connection between E5330Bs-6 and laptop
Step2: Select SSID of E5330Bs-6 in the local wireless device list (The default SSID and encryption key are printed on the Mobile WiFi label.), click to connect.on the Mobile WiFi label.), click to connect.

Chapter 2 Basic Settings
How to setup WiFi connection between E5330Bs-6 and laptop
Step3: Input WiFi Key in the dialog of password input then click to establish connectionStep3: Input WiFi Key in the dialog of password input then click to establish connection

Chapter 2 Basic Settings
How to setup WiFi connection between E5330Bs-6 and laptop
Step4: After the icon of wireless network card turned from (status of acquiring IP address ) into ,your PC
has established WiFi connection with E5330Bs-6 successfully, enter http://192.168.8.1 in web browser (ex. IE) to visit Web UI
Step4: After the icon of wireless network card turned from (status of acquiring IP address ) into ,your PC Step4: After the icon of wireless network card turned from (status of acquiring IP address ) into ,your PC

Chapter 2 Basic Settings
• Login Web UI • The device will be set up automatically based on the settings in your SIM Card, but if you need to modify a setting for your specifi c circumstances, then all changes are available from the device management page which can be accessed when PC have connected to E5 over Wi-Fi or USB cable by typing http://192.168.8.1 into your browser. User Name: admin Password: admin.
• You may view the Current connection,WLAN status of E5330Bs-6’s in following picture.
1. 2.

Chapter 2 Basic Settings
• Check the Connecting Status The traffi c statistics function records the network traffi c and duration of the current connection as well as that since you last restored the Mobile WiFi to its default settings.

SMS
Chapter 3 SMS
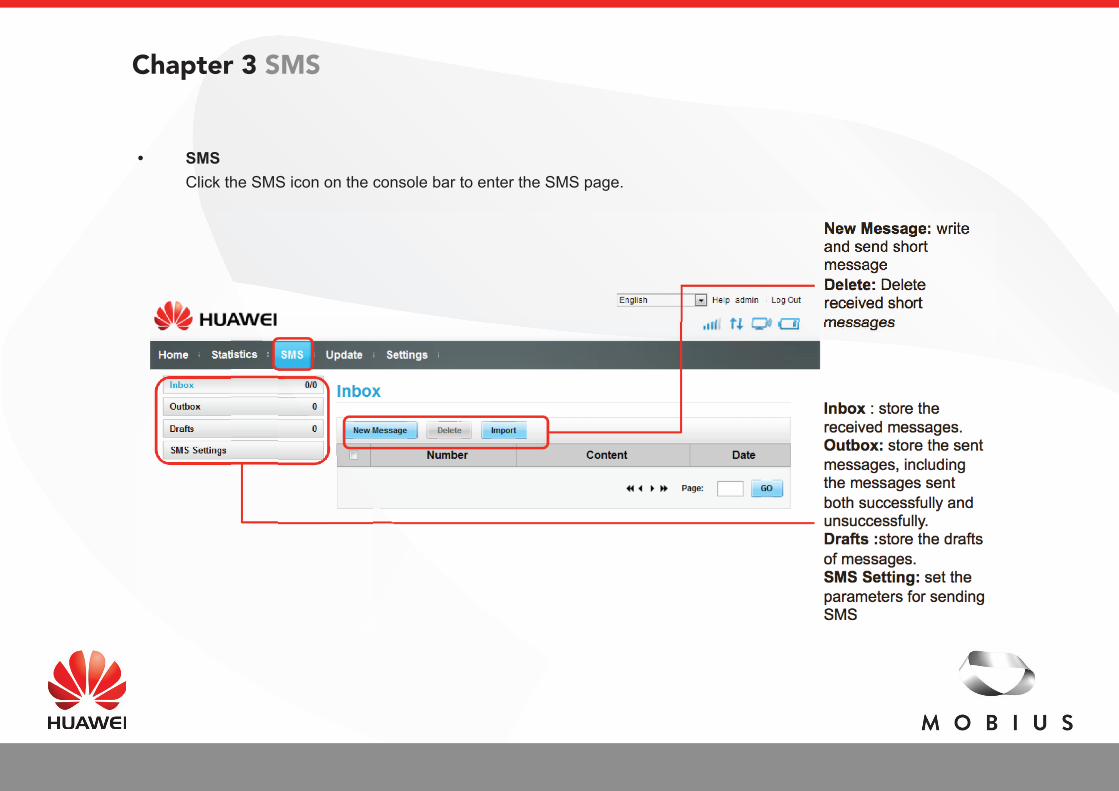
• SMS Click the SMS icon on the console bar to enter the SMS page.

ADVANCE SETTINGS

Chapter 4 Advance Settings
• Use Quick Setup to connect to Internet
Step 1. Confi gure Profi le Settings In this page you could set a profi le to let your E5 connect to Internet. Please click next button to next step when fi nished setting

Chapter 4 Advance Settings
• Use Quick Setup to connect to Internet
Step 2. Confi gure WLAN Setting In this page you could set the name of the SSID and the WiFi key.

Chapter 4 Advance Settings
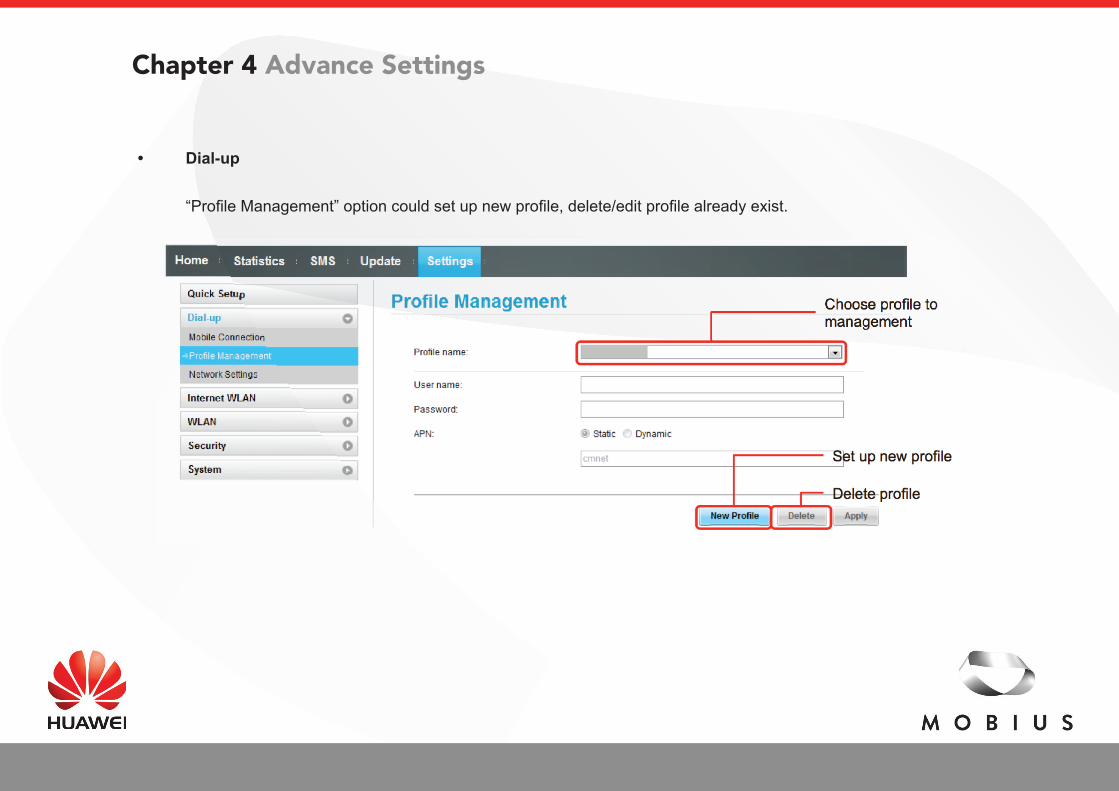
• Dial-up
In “Mobile Connection” option you set the Connection Mode and the MAX Idle Time(available in Auto connection mode) of the Device.
Chapter 4 Advance Settings
• Dial-up
“Profi le Management” option could set up new profi le, delete/edit profi le already exist.

Chapter 4 Advance Settings
• Dial-up
“Network Settings” could set E5330Bs-6’s network parameters. Users could do more confi guration through drop down list.

Chapter 4 Advance Settings
• Internet WLAN
“Internet WLAN ” can connect to the Internet using a wireless local area network (WLAN) to reduce cellular network data usage.

Chapter 4 Advance Settings
• Internet WLAN
The E5330Bs-6 will automatically connects to a WLAN based on the priorities you set.

Chapter 4 Advance Settings
• WLAN
“WLAN Basic Settings” page users could enable/disable E5330Bs-6’s WiFi function, set SSID, select the authentication mode and encryption mode of WiFi also could set or change WiFi key

Chapter 4 Advance Settings
• WLAN
“WLAN Advanced Settings” page users could choose country, channel,etc option.

Chapter 4 Advance Settings
• WLAN
WLAN MAC Filter

Chapter 4 Advance Settings
• DHCP
By default, the E5330Bs-6 has been set up as a DHCP (Dynamic Host Confi guration Protocol ) server, which provides IP addresses from “Start IP Address” toyou have to manually confi gure IP addresses for PCs. “End IP Address” for all PCs that are connecting to the LAN.If you shut down the DHCP server, you must have another DHCP server in the LAN; otherwise,

Chapter 4 Advance Settings
• Security
• Firewall Switch The IP address fi lter function and the WAN port ping function are available only when the fi rewall is enabled. It is advised to keep the fi rewall enabled unless you’re having specifi c issues/running applications that require turning it off.

Chapter 4 Advance Settings
• LAN Filter Used to blocked the packets transmit from certain LAN port to certain WAN port In the example All the UDP and TCP packets from 192.168.8.100:80 to 20.20.20.20:100 are blocked

Chapter 4 Advance Settings
• Virtual Server Suppose that the E5330Bs-6’s IP address is 11.11.11.11, PC A, with IP address as 192.168.8.100, connect to E5330Bs-6 has set up a FTP server, the internet users want to access to the FTP server, and when they enter FTP://11.11.11.11, the PC A will provide the FTP server

Chapter 4 Advance Settings
• Special Application • Confi gure parameters to allow the operating of special applications over the LAN, such as online games, vid eoconferencing, and IP phone
• These settings are intended for advanced users wishing to manage advanced networking functions.
• The Special Applications feature can be used to perform dynamic port forwarding. To access some services, certain applications may need to use specifi c ports through the fi rewall. When an application in the LAN in tends to establish the TCP/UDP connection with a remote service, the fi rewall dynamically opens the required port with this function.

Chapter 4 Advance Settings
• Special Application Example
• Consider a MSN Gaming Zone server that is accessed by the LAN Client using TCP protocol on port 47624. The gaming server responds by connecting the user using TCP on port 2400 when starting gaming sessions. In such a case you must use dynamic port forwarding, since this scenario confl icts with the following default fi rewall settings: • The fi rewall blocks inbound traffi c by default. • The server replies to device´s IP, and the connection is not sent back to the Client, since it is not part of a session.
• In order to solve this you need to defi ne a dynamic port forwarding rule, which allows inbound traffi c on TCP port 2400, only after a LAN Client generated traffi c to TCP port 47624. This will result in accepting the inbound traffi c from the gaming server, and sending it back to the LAN Client which originated the outgoing traffi c to TCP port 47624.

Chapter 4 Advance Settings
• Special Application

Chapter 4 Advance Settings
• DMZ Settings • Enabling the DMZ will allow the nominated PC to be accessed directly from the internet. This will com promise its security - Ensure your PC has the latest patches installed and that you have good, up to date security software (Firewall and Anti-Virus) installed. • No matter what have been sent back from Internet, all the packets will be transferred to the 192.168.8.100 as showed in the following screenshot

Chapter 4 Advance Settings
• SIP ALG Settings • SIP: Session Initiation Protocol ALG: Application Layer Gateway • When SIP ALG function has disabled, users want to use VOIP service based on SIP protocol, the data fl ow send from VOIP software client to VOIP server will be blocked by fi rewall, so VOIP service cannot be used. • When SIP ALG function is enabled the data fl ow from PC to internet could transfer through certain SIP port, users could use VOIP service on PC side.

Chapter 4 Advance Settings
• System Device Information

Chapter 4 Advance Settings
• System Modify Password
Chapter 4 Advance Settings
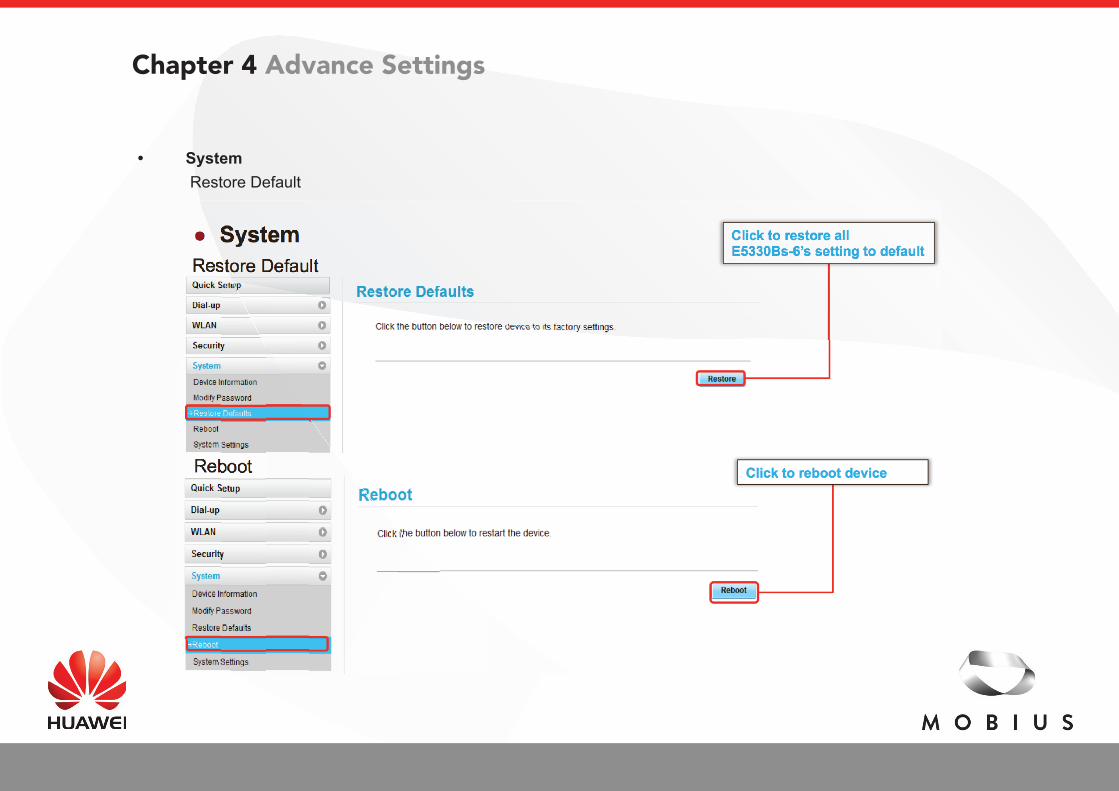
• System Restore Default

Chapter 4 Advance Settings
• System System Settings

FAQ

Chapter 5 FAQ
• How long does it take to charge the battery from fl at? • Mains charging • When not connected to the Mobile Broadband network – will take a maximum of 3 hours. • When connected – will depend on the number of users and the amount of traffi c fl owing, but charging will take slightly longer than 3 hours.
• PC USB trickle charging • When not connected to the Mobile Broadband network (powered off) – will take a maximum of 4 hours. • When connected – will depend on the number of users and the amount of traffi c fl owing. With regular browsing charging will take place at a reduced rate, but if high volume traffi c fl ows through the device then it will not charge and may start discharging.

Chapter 5 FAQ
• Why does the E5330Bs-6 can’t be recognized by my PC?
• Please check that E5330Bs-6 is power on • Please change to another USB port, check whether E5330Bs-6 is recognized in case the hardware problems • Please check if the PC has installed some drivers which are incompatible with E5330Bs-6 (e.g. some data card drivers, virtual CDROM drivers). Please uninstall the software possibly related with device’s driver, then restart the computer • Try to re-plug E5330Bs-6 • Maybe the fi rmware was damaged, please call the Service Provider for further help

Chapter 5 FAQ
• Why does E5330Bs-6’s signal is weak and cannot register to 3G network?
• Please check the network condition, check whether there is network which provided by your operator at the moment. Ensure you are not in some close environment • Please move E5330Bs-6 to windows, try to get better signal • If the network condition is good but still cannot register, please try to reset E5330Bs-6 and try again • Sometimes E5330Bs-6 will be rejected by the operator for some reasons. Please reset E5330Bs-6 and check. If E5330Bs-6 still cannot camp on the network, please contact with your device provider.

Chapter 5 FAQ
• E5330Bs-6 is getting hot when I use it for long periods of time? • This is quite normal. Continual data transmission will make some chipsets in E5330Bs-6 keep emitting heat. This temperature problem will happen under these circumstances: Continual data service, E5330Bs-6 is charging, E5330Bs-6 is charging while data service or the environment temperature is too high. You don’t need to worry about the temperature because we had designed the high temp protection function, that means, when E5330Bs-6 temperature is up to 60ºC, E5330Bs-6 will be powered off automatically to protect itself.
• Can other people use my connection? • No-one can use it without your permission.
• Does the Wi-Fi modem work on Mac or Windows 8 computers? • Yes, Wi-Fi works with most Wi-Fi enabled devices. The dashboard is browser based so works with any operating system.

Chapter 5 FAQ
• Why does Wi-Fi signal always weak? • The Wi-Fi coverage when using battery is not as strong as that with external power charger. So if we want to get strong Wi-Fi signal we should use the USB cable or power charger • Power off the other device or equipment using 2.4GHz frequency band which make interference with Wi-Fi connection (example: Bluetooth device) • Make sure there is no obstacle between your PC and E5330Bs-6 that make the signal weak as well • Change the Wi-Fi change to fi x one other than auto (you can try the available channel one by one)
• What do I do if I forget my WIFI Key or dashboard login password? • Your Wi-Fi modem unique password codes can be found on inside back cover of the modem. If you’ve changed your Wi-Fi password or your Web UI login, you may restore factory defaults and reconfi gure the Mobile WiFi. To restore the factory defaults, press and hold the RESET button until all the indicators are off. All factory default settings are successfully restored.

THE END