MIS Corporation. All Rights Reserved -...
42
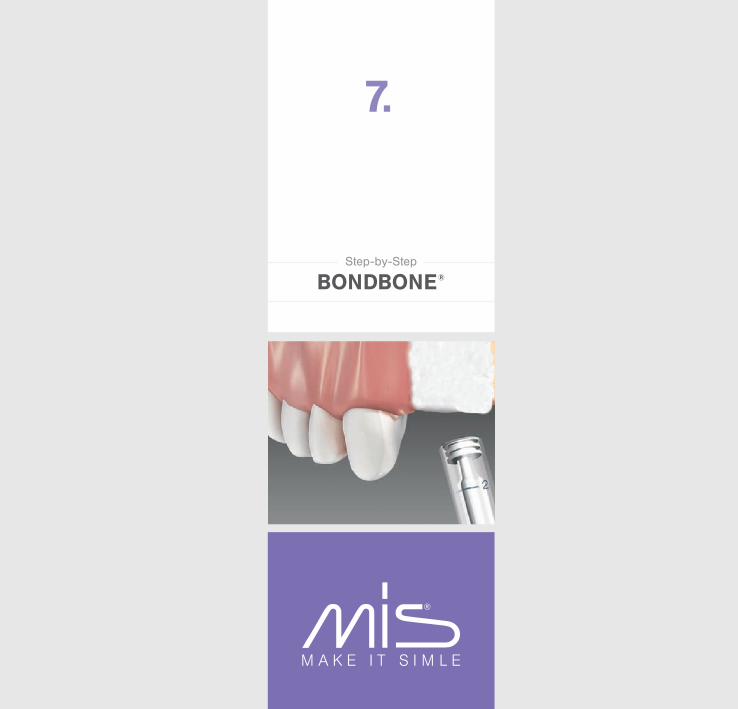
7. ® MAKE IT SIMLE Step-by-Step BONDBONE ®
Transcript of MIS Corporation. All Rights Reserved -...
Step-by-Step
Cemented Bridge
4.
Using Abutments
Internal Hex. Implant System
7.
www.mis-implants.com
®
© MIS Corporation. All Rights Reserved
®
M A K E I T S I M L E
Step-by-Step
BONDBONE®
MIS Quality System complies with international quality
standards: ISO 13485:2003 - Quality Management
System for Medical Devices, ISO 9001: 2008 – Quality
Management System and CE Directive for Medical
Devices 93/42/EEC. MIS products are cleared for
marketing in the USA and CE approved.
MC-PMU10 Rev.1, February 2015
© MIS Corporation. All Rights Reserved.
W A R N I N G : O n l y a l i c e n s e d d e n t i s t s h o u l d u s e t h e s e p r o d u c t s .
Published by MIS, which reserves the right to ameliorate the products described in this manual as well as to revise this publication at any time and without informing any person of such revision or change. All rights reserved. No part of this publication may be reproduced, transcribed, stored in an electronic retrieval system translated into any language or computer language, or be transmitted in any form whatsoever without the written consent of the publisher.
Note: This guide is for educational use only.
BONDBONE® is a novel synthetic bone grafting material, a breakthrough
in the field of dental bone regeneration, that allows easy handling and reduces procedure time. BONDBONE® can be used on its own, or mixed with a variety of other bone grafting materials, to answer the needs for a wide range of augmentation procedures. Visit our website to see more MIS regenerative solutions and download-able materials: www.mis-implants.com
AdvantagesBONDBONE functions as an excellent binder when mixed with other granular augmentation materials. It allows easy handling and prevents particle migration, for more predictable outcomes. The unique porosity of BONDBONE integrates micro-pores, to allow the infiltration of bone growth factors and angiogenesis, and macro-pores, to facilitate cell proliferation. BONDBONE
contains pure calcium sulfate. It completely resorbs leaving behind natural regenerated bone.
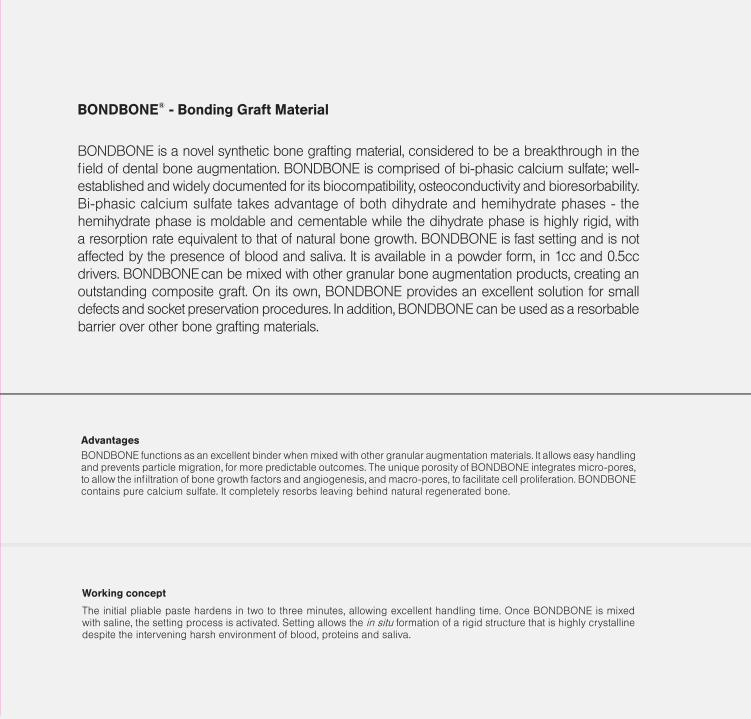
BONDBONE® - Bonding Graft Material
BONDBONE is a novel synthetic bone grafting material, considered to be a breakthrough in the field of dental bone augmentation. BONDBONE is comprised of bi-phasic calcium sulfate; well-established and widely documented for its biocompatibility, osteoconductivity and bioresorbability. Bi-phasic calcium sulfate takes advantage of both dihydrate and hemihydrate phases - the hemihydrate phase is moldable and cementable while the dihydrate phase is highly rigid, with a resorption rate equivalent to that of natural bone growth. BONDBONE is fast setting and is not affected by the presence of blood and saliva. It is available in a powder form, in 1cc and 0.5cc drivers. BONDBONE can be mixed with other granular bone augmentation products, creating an outstanding composite graft. On its own, BONDBONE provides an excellent solution for small defects and socket preservation procedures. In addition, BONDBONE can be used as a resorbable barrier over other bone grafting materials.
Working concept
The initial pliable paste hardens in two to three minutes, allowing excellent handling time. Once BONDBONE is mixed with saline, the setting process is activated. Setting allows the in situ formation of a rigid structure that is highly crystalline despite the intervening harsh environment of blood, proteins and saliva.
BONDBONE - Instructions for Use:
COMPOSITE GRAFT
BONDBONE - Instructions for Use:
STAND-ALONEGRAFT MATERIAL
COMPOSITE GRAFT
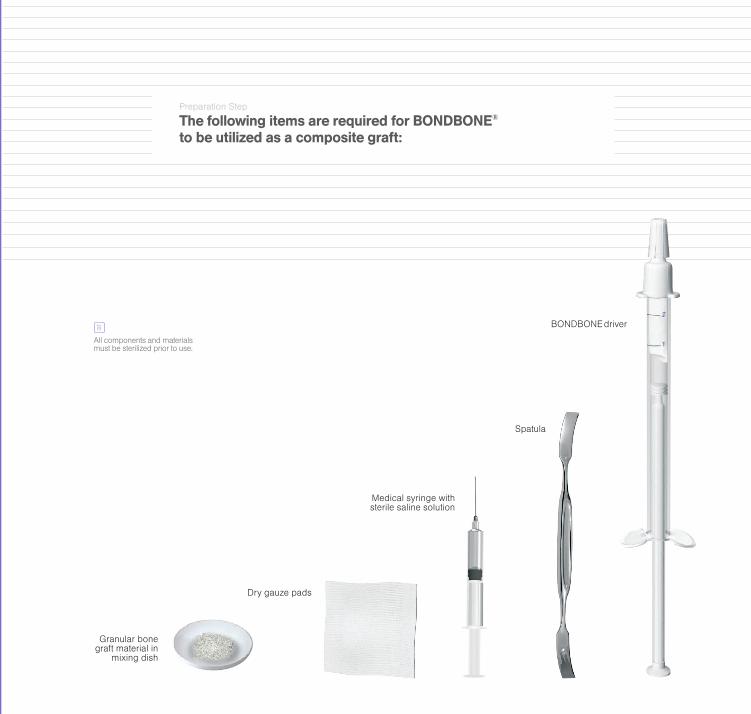
Preparation Step
The following items are required for BONDBONE®
to be utilized as a composite graft:
BONDBONE driver
Granular bone graft material in
mixing dish
Spatula
Dry gauze pads
Medical syringe with sterile saline solution
CO
MPO
SIT
E G
RA
FT
All components and materials must be sterilized prior to use.
B.A.
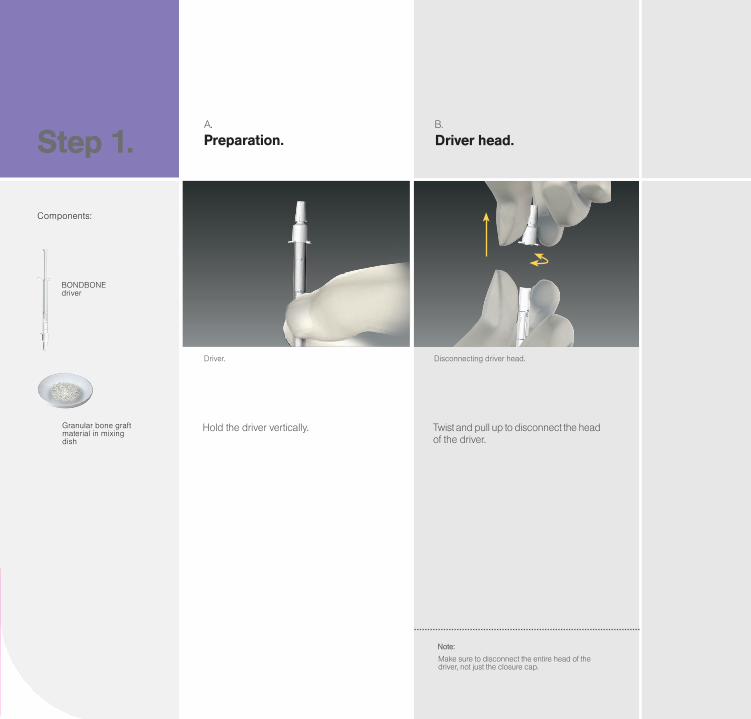
Step 1.
Components:
BONDBONEdriver
Granular bone graft material in mixing dish
Hold the driver vertically.
Driver.
Preparation.
Disconnecting driver head.
Driver head.
Twist and pull up to disconnect the head of the driver.
Make sure to disconnect the entire head of the driver, not just the closure cap.
Note:

C.
The composite blend.
Add BONDBONE to the mix ture by pushing the piston towards the dish. Use a volume ratio of 2 parts BONDBONE to 1 part granules (1cc BONDBONE to 0.5cc granules).
Adding BONDBONE to the mixture.
Make sure that the ratio of BONDBONE to other granules used is 2:1 in volume. In addition, since BONDBONE is always measured in volume units (cc) while other materials may be measured in weight units (grams), make sure you are using the same measuring method.
Note:
Ste
p 1

A. B.
Use a spatula to mix the dry ingredients thoroughly.
Composite blend. The blend.
Mixing.Step 2.
Make sure to mix the blend until completely homogenous.
The composite blend.
Components:
Granular bone graft material in mixing dish
Spatula

Ste
p 2

B.A.
Step 3.
Components:
Medical syringe with sterile saline solution
Granular bone graft material in sterile mixing dish
Spatula
Gradually add saline to completely saturate the blend. Use 0.8cc-1cc sterile saline for each 1.5cc of composite graft (1cc BONDBONE + 0.5cc granules).
Add saline. Mix the blend.
Hydrating. Mixing.
Use a spatula to mix the blend thoroughly to a homogeneous, creamy texture.
First, add 0.8cc saline. Use the remaining 0.2cc afterward, if needed.
Note:

C.
The mixture is ready when a homogeneous, glossy paste is obtained.
A composite blend with a glossy appearance is obtained.
Composite blend.
Ste
p 3
Make sure the material is entirely saturated. Add extra saline gradually, to avoid over-saturating the blend.
Note:
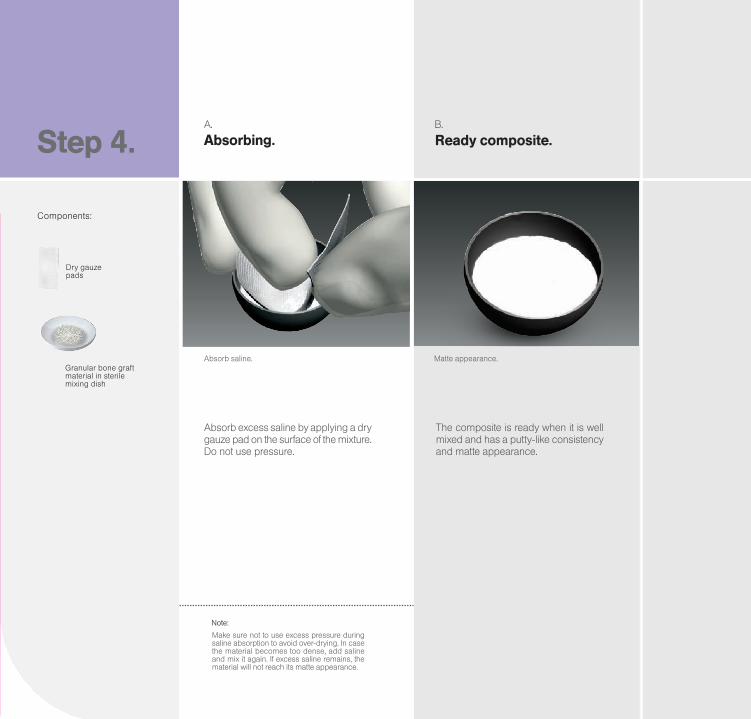
A. B.
Absorb excess saline by applying a dry gauze pad on the surface of the mixture. Do not use pressure.
The composite is ready when it is well mixed and has a putty-like consistency and matte appearance.
Absorb saline. Matte appearance.
Absorbing.Step 4. Ready composite.
Components:
Dry gauze pads
Granular bone graft material in sterile mixing dish
Make sure not to use excess pressure during saline absorption to avoid over-drying. In case the material becomes too dense, add saline and mix it again. If excess saline remains, the material will not reach its matte appearance.
Note:

Ste
p 4

A. B.
Use the empty BONDBONE driver as a delivery vehicle for the composite. Draw the piston to line 1 marked on the driver.
Load the driver.
Preparing driver. Loading driver.Step 5.
Load the driver with the composite putty using a circular motion.
Draw back the piston.
As an alternative placement technique, a spatula may be used to place the composite putty into the grafting site.
Make sure to pull the piston to line 1, otherwise the putty will not reload into the driver.
Note: Note:
Components:
BONDBONE driver
Granular bone graft material in sterile mixing dish

Ste
p 5
A. B.
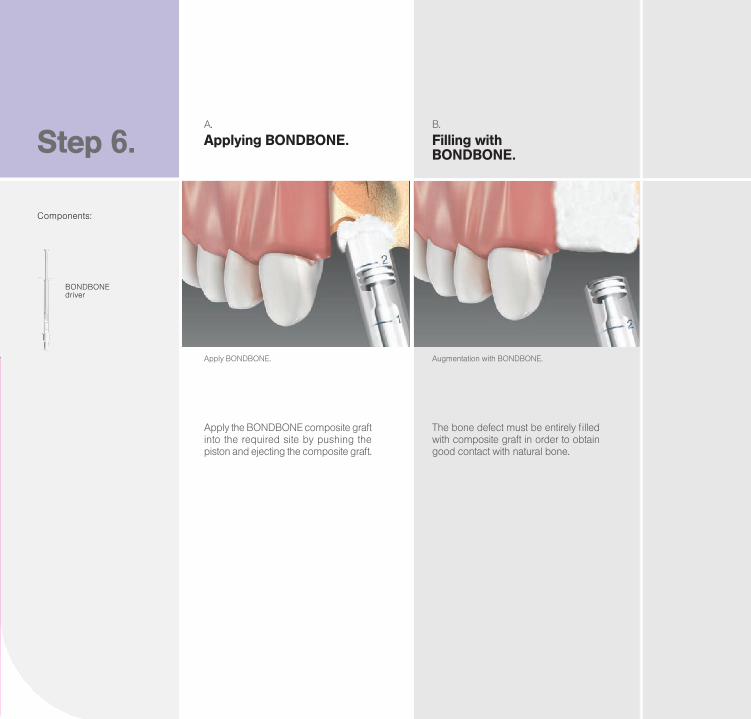
Step 6.
Components:
BONDBONE driver
Apply the BONDBONE composite graft into the required site by pushing the piston and ejecting the composite graft.
The bone defect must be entirely filled with composite graft in order to obtain good contact with natural bone.
Apply BONDBONE. Augmentation with BONDBONE.
Applying BONDBONE. Filling with BONDBONE.

Ste
p 6
A. B.
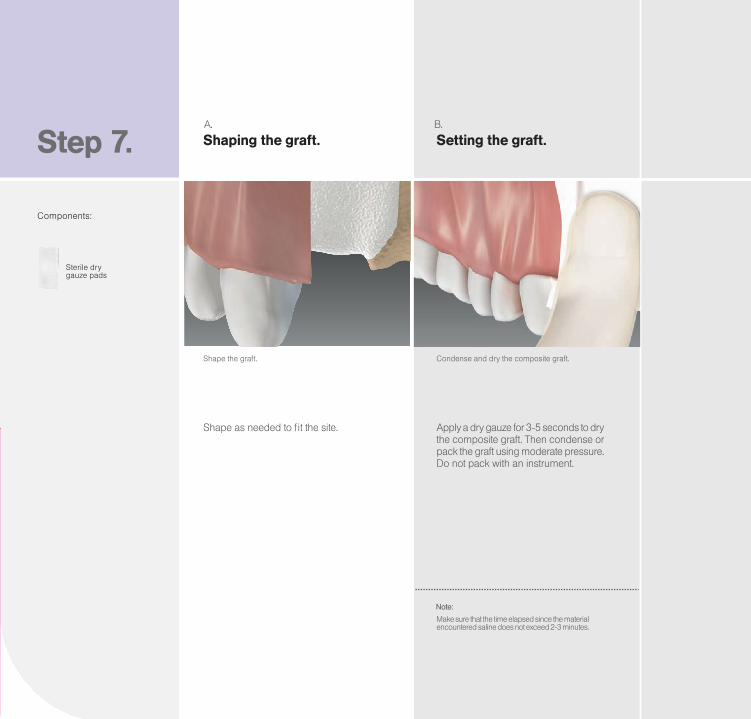
Apply a dry gauze for 3-5 seconds to dry the composite graft. Then condense or pack the graft using moderate pressure. Do not pack with an instrument.
Condense and dry the composite graft.Shape the graft.
Step 7. Setting the graft.Shaping the graft.
Shape as needed to fit the site.
Components:
Sterile dry gauze pads
Make sure that the time elapsed since the material encountered saline does not exceed 2-3 minutes.
Note:

Ste
p 7
A. B.
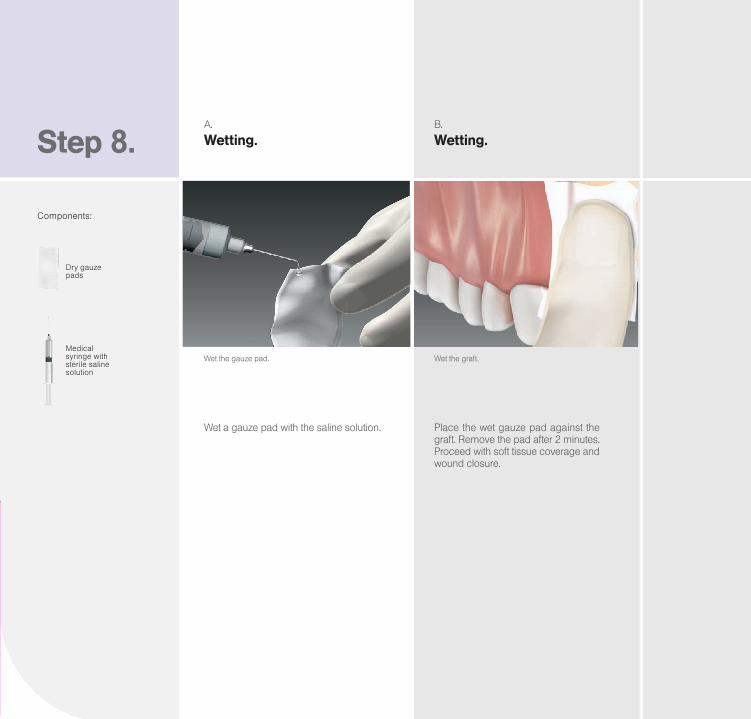
Wet a gauze pad with the saline solution.
Wet the gauze pad. Wet the graft.
Wetting. Wetting.Step 8.
Place the wet gauze pad against the graft. Remove the pad after 2 minutes. Proceed with soft tissue coverage and wound closure.
Components:
Dry gauze pads
Medical syringe with sterile saline solution
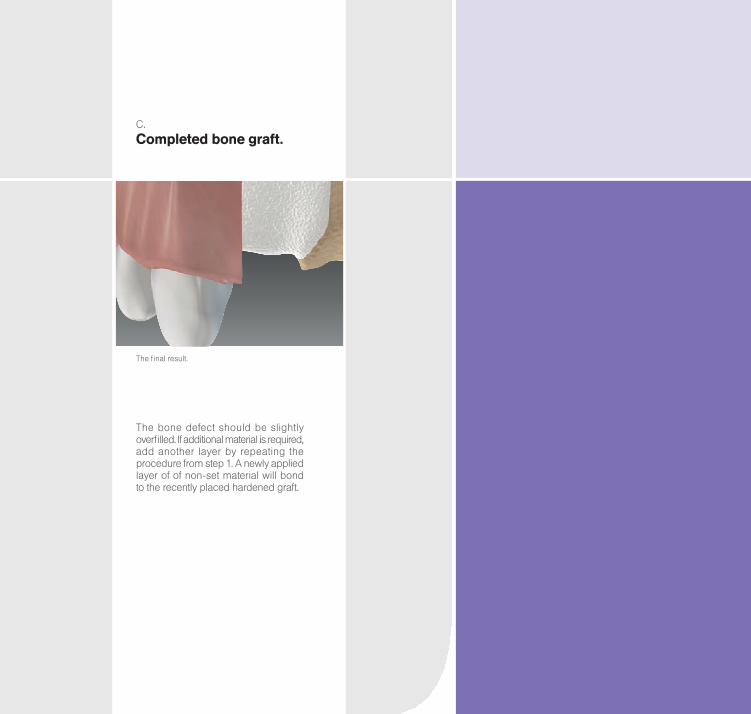
C.
The final result.
Completed bone graft.
The bone defect should be slightly overfilled. If additional material is required,add another layer by repeating the procedure from step 1. A newly applied layer of of non-set material will bond to the recently placed hardened graft.
Ste
p 8

STAND-ALONE GRAFT MATERIAL
STA
ND
-ALO
NE
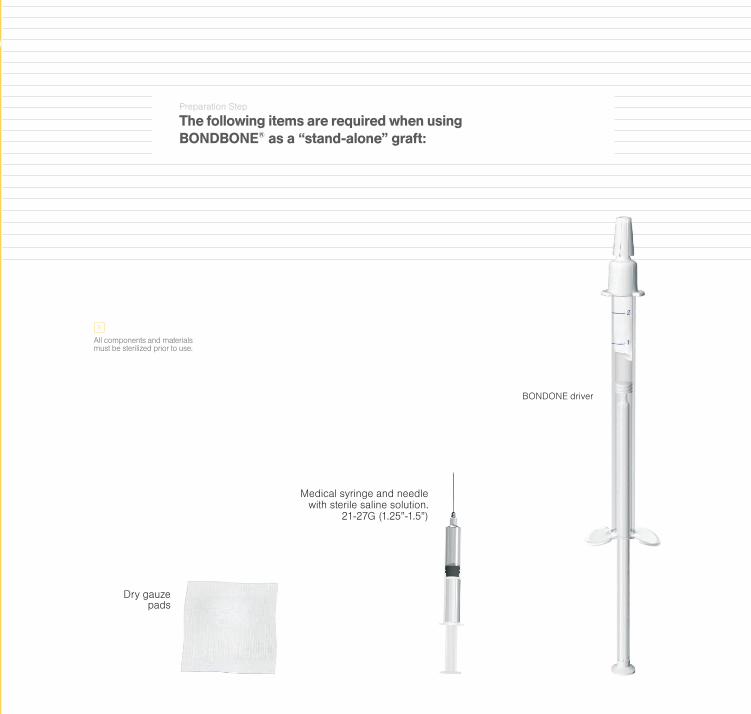
BONDONE driver
Dry gauze pads
Medical syringe and needle with sterile saline solution.
21-27G (1.25”-1.5”)
Preparation Step
The following items are required when using BONDBONE® as a “stand-alone” graft:
All components and materials must be sterilized prior to use.

B.A.
Step 1.
Components:
BONDBONE driver
Push the piston to line 1 marked on the driver.
BONDBONE driver. Twist and pull off the cap.
Preparation. The driver cap.
Twist and pull to remove the outer cap of the driver.
Make sure you have removed the outer cap of the driver and not the entire head.
Note:
Head
Piston
Cap

Ste
p 1
A.
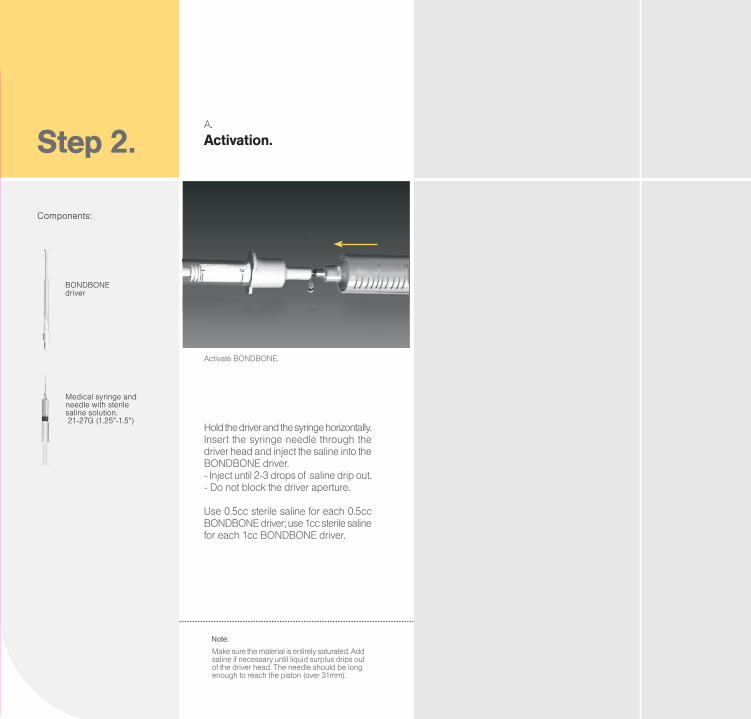
Hold the driver and the syringe horizontally. Insert the syringe needle through the driver head and inject the saline into the BONDBONE driver.- Inject until 2-3 drops of saline drip out.- Do not block the driver aperture.
Use 0.5cc sterile saline for each 0.5cc BONDBONE driver; use 1cc sterile saline for each 1cc BONDBONE driver.
Step 2.
Activate BONDBONE.
Activation.
Components:
Medical syringe and needle with sterile saline solution. 21-27G (1.25”-1.5”)
Make sure the material is entirely saturated. Add saline if necessary until liquid surplus drips out of the driver head. The needle should be longenough to reach the piston (over 31mm).
Note:
BONDBONE driver

Ste
p 2
B.A.
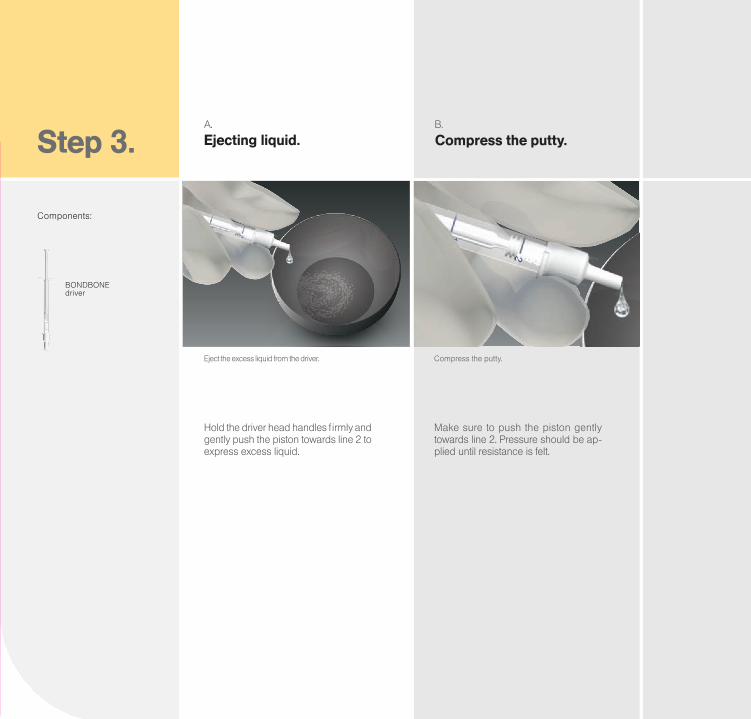
Hold the driver head handles firmly and gently push the piston towards line 2 to express excess liquid.
Eject the excess liquid from the driver. Compress the putty.
Ejecting liquid. Compress the putty.Step 3.
Make sure to push the piston gently towards line 2. Pressure should be ap-plied until resistance is felt.
Components:
BONDBONE driver

C.
Hold the driver horizontally and remove the head with a twisting, pulling movement.
Remove the head.
Removing the driver head.
Ste
p 3

A.
The step is necessary to obtain the optimal viscosity.
Note:
Hold the driver vertically and place the aperture on a dry gauze pad for 3-5 seconds. Do not depress or apply pres-sure to the piston.
Absorbing the excess liquid.
Absorbing.Step 4.
Components:
BONDBONE driver
Dry gauze pads

Ste
p 4
A. B.
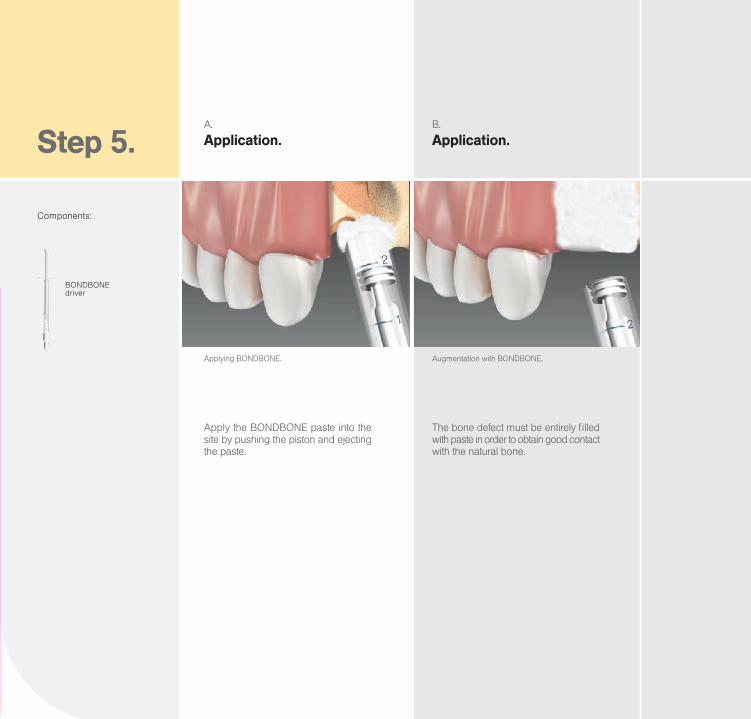
Apply the BONDBONE paste into the site by pushing the piston and ejecting the paste.
The bone defect must be entirely filled with paste in order to obtain good contact with the natural bone.
Applying BONDBONE. Augmentation with BONDBONE.
Application. Application.Step 5.
Components:
BONDBONE driver

Ste
p 5
A. B.
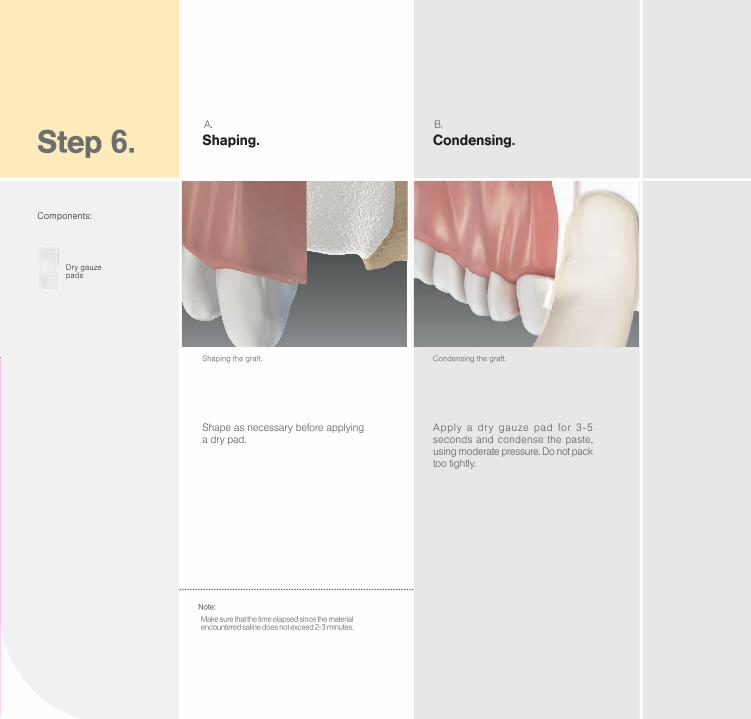
Apply a dry gauze pad for 3-5 seconds and condense the paste, using moderate pressure. Do not pack too tightly.
Condensing the graft.Shaping the graft.
Condensing.
Shape as necessary before applying a dry pad.
Shaping.
Components:
Dry gauze pads
Note:
Make sure that the time elapsed since the material encountered saline does not exceed 2-3 minutes.
Step 6.

Ste
p 6

A. B.
Wet a sterile gauze pad with sterile saline.
Wetting the gauze pad. Wetting the graft.
Wetting.Step 7.
Place the gauze pad on the graf t. Remove the gauze pad after approxi-mately 2 minutes. Proceed with soft tissue coverage and wound closure.
Components:
Dry gauze pads
Sterile dish
Wetting. Do not pack too tightly.

C.
The final result.
Completed bone graft.
The bone defect should be slightly overfilled. If additional grafting material is required, prepare a new BONDBONE mix, and affix a new layer on top of the existing graft.
For additional information and download-able materials, please visit our website: www.mis-implants.com
Ste
p 7


© MIS Corporation. All Rights Reserved.
W A R N I N G : O n l y a l i c e n s e d d e n t i s t s h o u l d u s e t h e s e p r o d u c t s .
Published by MIS, which reserves the right to ameliorate the products described in this manual as well as to revise this publication at any time and without informing any person of such revision or change. All rights reserved. No part of this publication may be reproduced, transcribed, stored in an electronic retrieval system translated into any language or computer language, or be transmitted in any form whatsoever without the written consent of the publisher.
Note: This guide is for educational use only.

Step-by-Step
Cemented Bridge
4.
Using Abutments
Internal Hex. Implant System
7.
www.mis-implants.com
®
© MIS Corporation. All Rights Reserved
®
M A K E I T S I M L E
Step-by-Step
BONDBONE®
MIS Quality System complies with international quality
standards: ISO 13485:2003 - Quality Management
System for Medical Devices, ISO 9001: 2008 – Quality
Management System and CE Directive for Medical
Devices 93/42/EEC. MIS products are cleared for
marketing in the USA and CE approved.
MC-PMU10 Rev.1, February 2015